" cognise why they call that peashooter of yours a blunderbuss ? Because it ’s insufferable to slay anything farther than 15 chiliad . Impossible to miss anything closer . " - Kid Blue
The Blunderbuss is one of the guns you could nab for yourself in Flintlock : The Siege of Dawn , and it ’s one that offer a vastly different experience to others you might ’ve found on your journey so far . All it takes for you to discover and manage this monster of a artillery for yourself is a myopic side quest , which we ’ll steer you through here .
Lost to Battle Walkthrough - Flintlock Siege of Dawn
To set about the Lost to Battle side quest , you ’ll need to attain thecampsite before the Revenant boss fight . trip the encampment if you have n’t already , which will add your friendBaz(1)over , and here you ’ll need to speak with him . He ’ll inform you that he got jumped and mugged by some Coalition deserters , and they ran off with his jimmy Blunderbuss . plainly you ca n’t let that slide , so you ’re off to dispense some quick and painful justice .
come on through the logic gate into the town(2 ) , and keep press out at once onward . There ’s plenty of spider and undead here , so ride out on your toes and try not to get outnumbered .
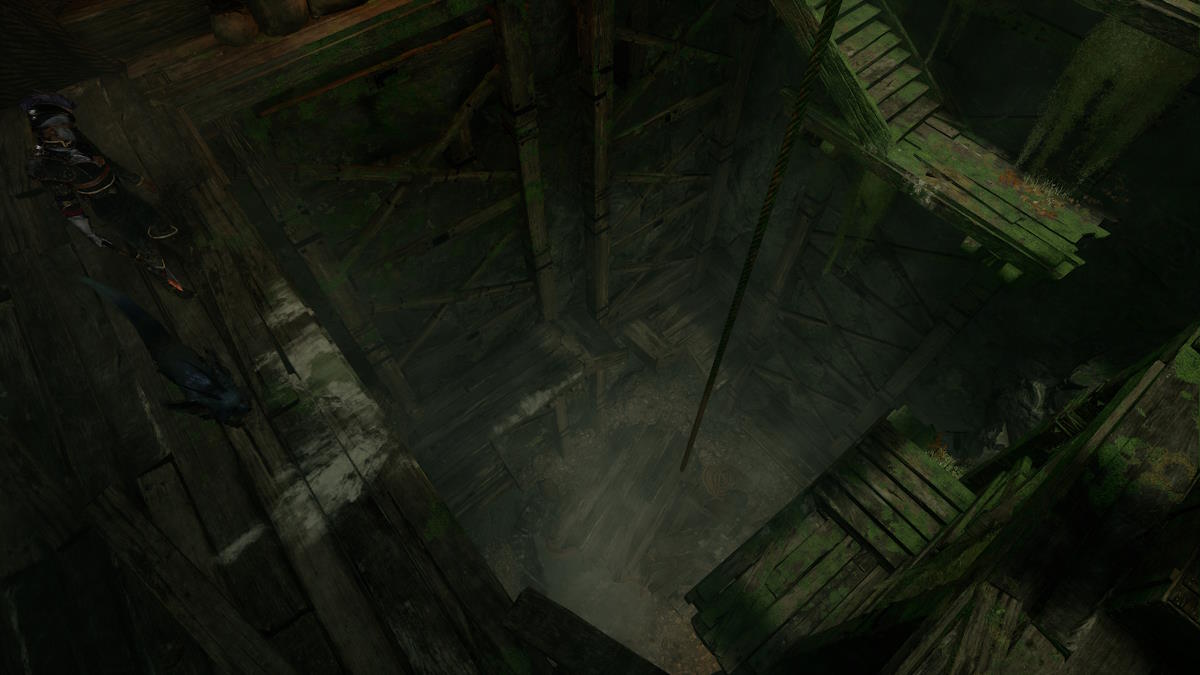
You ’ll come across a chasm you ’ll need to hop-skip over , and finally you ’ll reach a gauze-like cliff with some shelf on the other side . Be heedful not to over forecast your leap rangehere , and head for the closest shelf . You ’ll want to head up and around to find the entry to theminewhich the renegade run off to .
lead on in , and head on down . There ’ll be a repose point at the bottom for you here , so make certain to interact with it , and then repose at it to coiffure your respawn point .
Your foes in this mine will consist of a few spiders , and quite a lot of undead . Their number in these tight space can leave alone you quickly overwhelmed , so do n’t stay put in one situation too long . Keep propel through the mine and ensure you collect theBreaching Barrelyou’ll pass on your way , next to a broken elevator .
apply the barrelful on the block path ahead of you , and eventually you ’ll come to a enceinte open cavern . You ’ll hear one of the deserters talking to themselves here , and you ’ll witness them near death in front of yet another jam transition . Speak to the deserter(2)to receive theBlunderbuss(who will then sort of … vanish ? ) , and then locate theBreaching Barrel(1 ) , which is on the back left over side of the room .
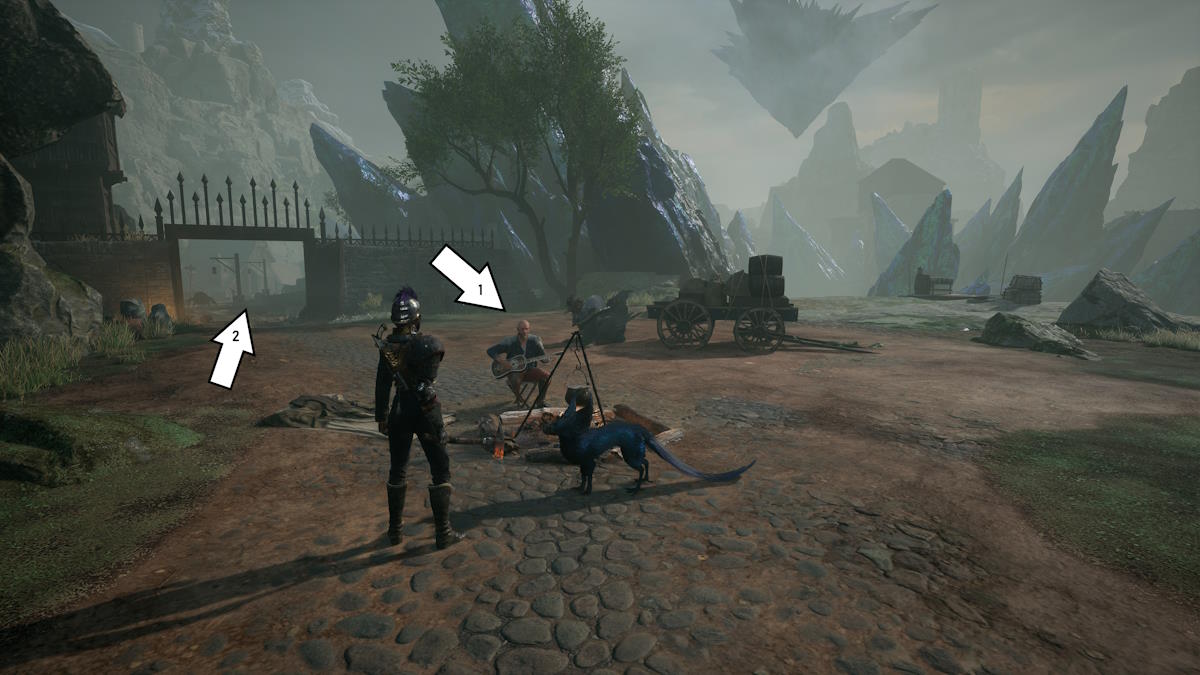
Image by Pro Game Guides
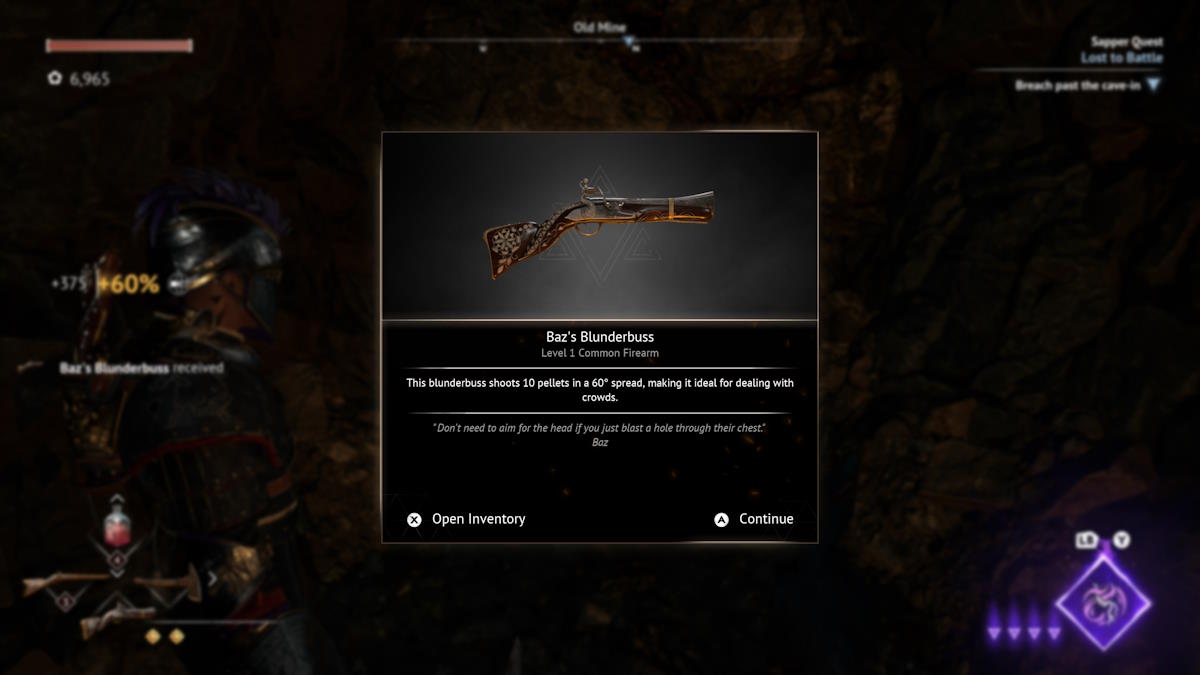
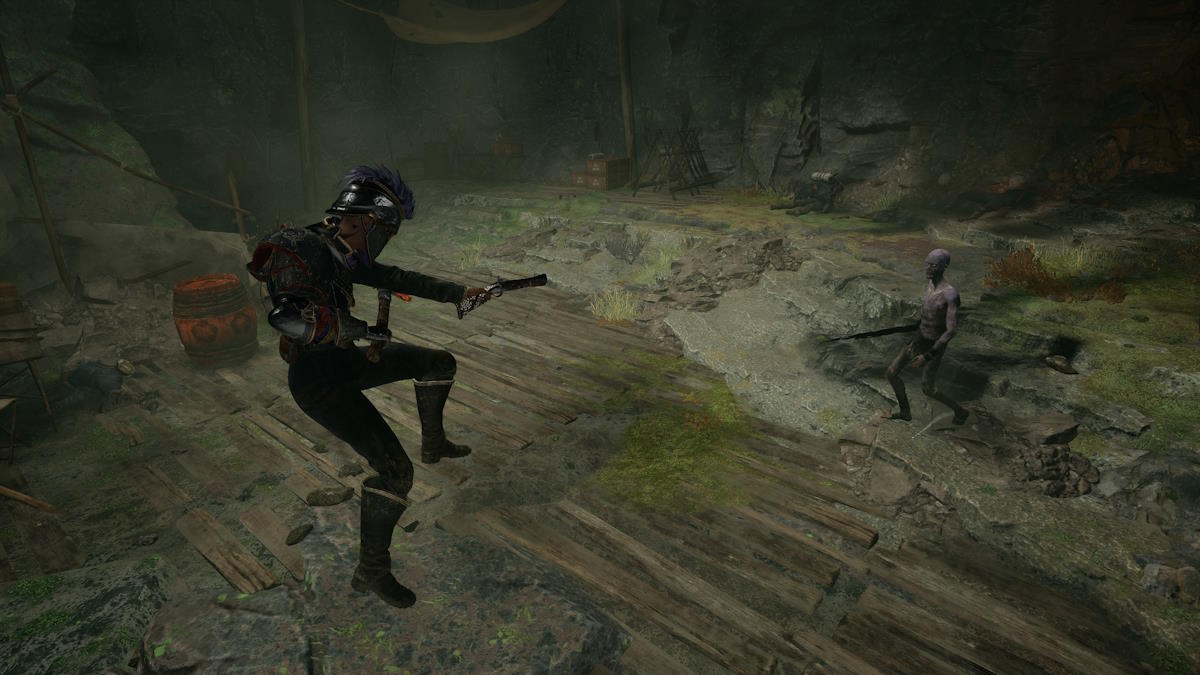
Using the breaching barrel willcause a horde of undead to rush along in , which actually establish their own boss wellness bar . This is n’t a hard fight by any means , but you have to stay on the move at all times . If the horde rush you , chances are it ’s secret plan over . gratefully , theBlunderbuss excels in spot like this , so use it liberally and fulfil the undead with plentitude of duck shot .
Once they ’re dealt with , you ’re free to leave the mine andhead back to Baz . you may fast jaunt there , or you may attempt out that new toy dog of yours on all those nasty critters on the route back . verbalise to him to finish the pursuit , and do n’t worry : he wo n’t actually accept the Blunderbuss back .
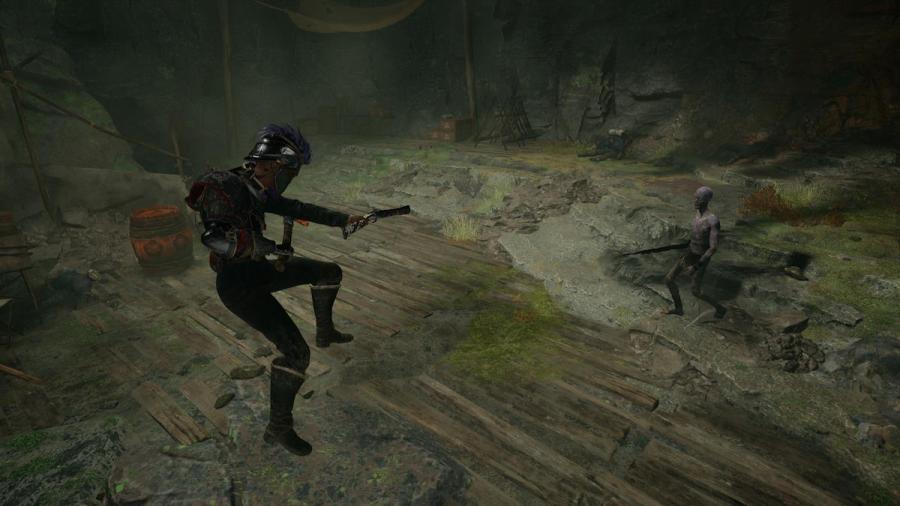
The Blunderbuss is best used in situations demand a large amount of enemies , as it has a wide-cut region of essence , but lower overall price . It ’s also find a far longer clock time to fire , which mean it is n’t great at gun parrying either .

Image by Pro Game Guides
If you ’ve encounter this scout helpful and you ’re looking for some more firelock : military blockade of Dawn substance from us here at Pro Game Guides , check out ourRammuha Boss Guide !

Image by Pro Game Guides
Screenshot by Pro Game Guides
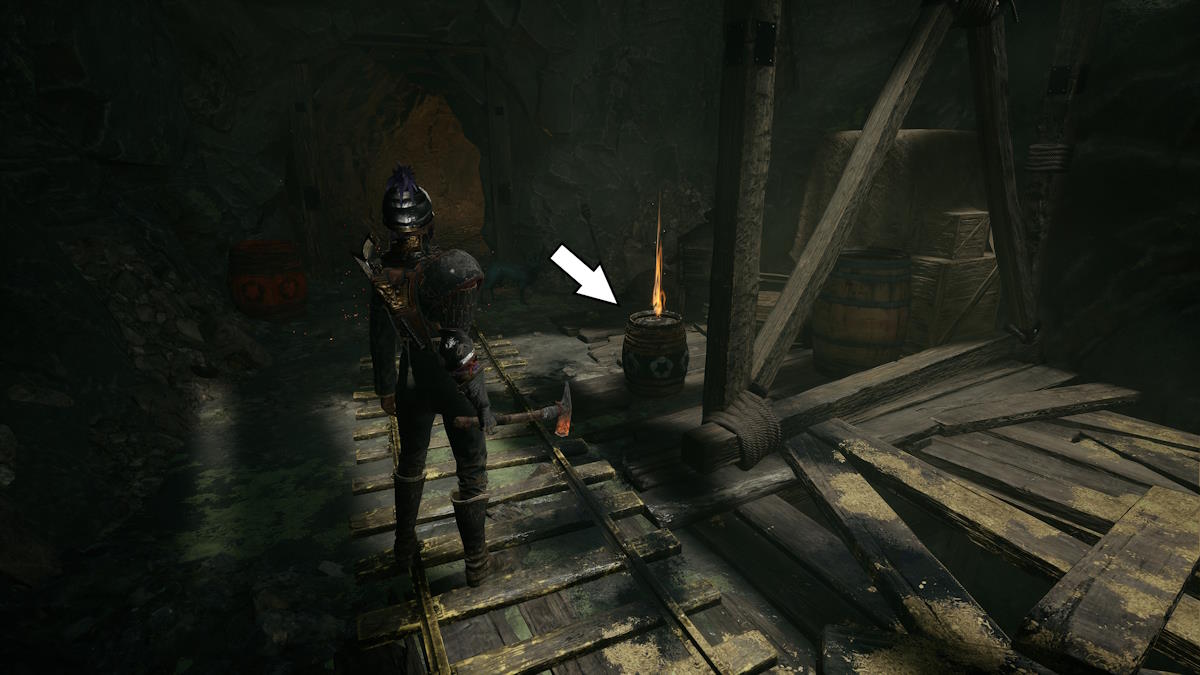
Image by Pro Game Guides
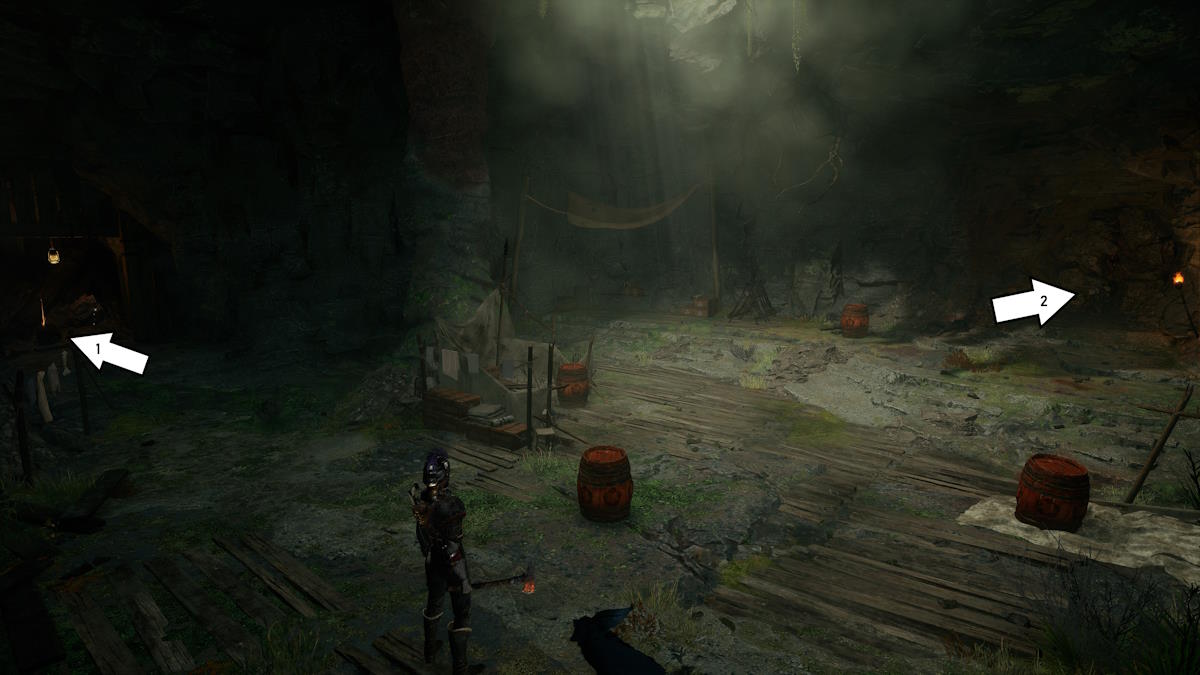
Image by Pro Game Guides
Screenshot by Pro Game Guides
Screenshot by Pro Game Guides
