From Magic World to the Shopping Mall
Tricky door is anescape elbow room puzzle gameavailable devoid on Steam . Tricky Doors provides a massive 20 dissimilar worlds that all give a complex World Wide Web of three - room puzzles . If you ’re retrieve yourself stuck on where to go next , skitter the hint coins and follow this guide alternatively .
Tricky Doors World 1: Magic World complete walkthrough guide
Exploring the witch’s home
As you lade into the first room , you ’ll want to immediately fill up your pockets with a ton of useful items for the route .
The woods outside the cabin
At the bottom of the trap door ’s run , you come across another busy scene . You ’ll be coming back here , but for now there ’s just a few things to get done .
Head forward past the berry bush and you ’ll find the third ' room ' of the world , the riverside . There ’s a lot to get done here , so rent ’s get started .
How to complete the totem puzzle
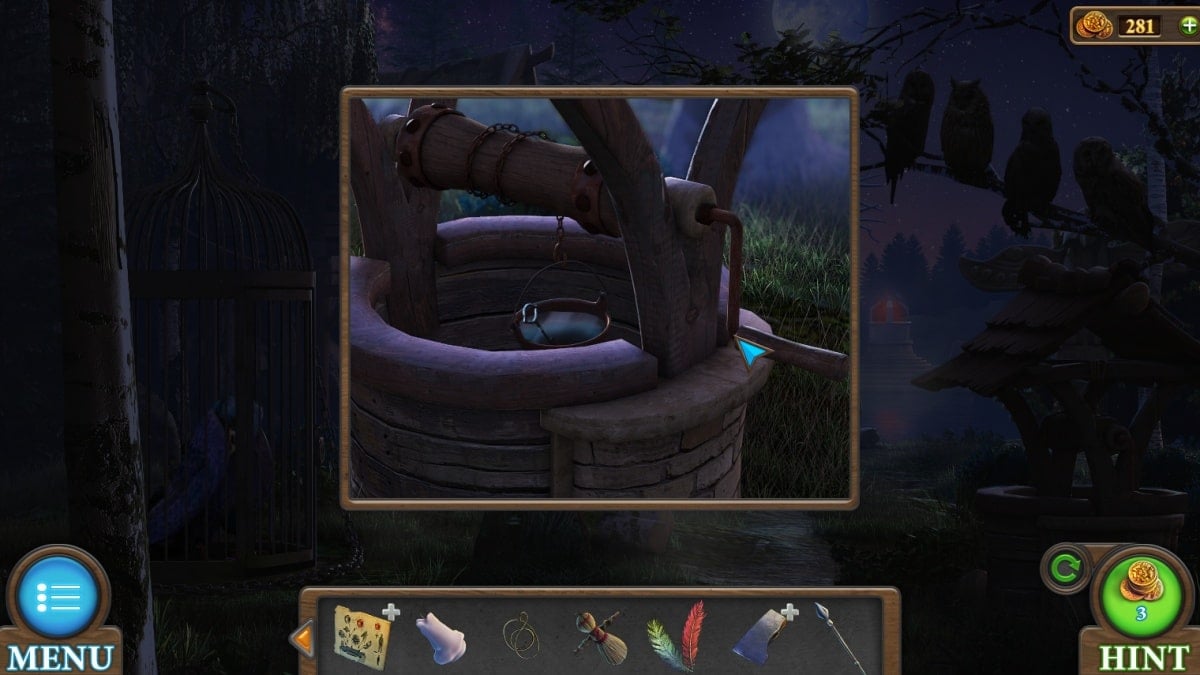
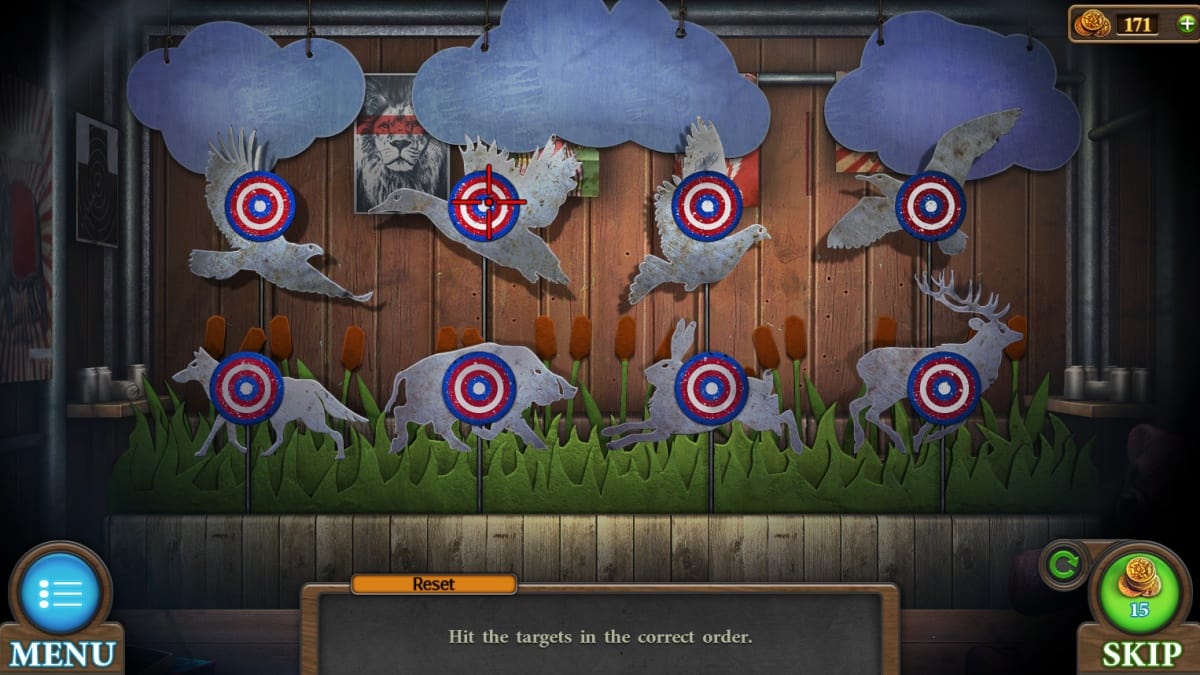
" Tap on the totem ’s oculus in the correct succession . "
The clue for this mystifier is in the owls on the previous screen . Click all four hooter and their optic will light up , evince you the correct order to click the yellowish and ruby-red gems in . For my secret plan , this order was ( as shown above ): red red yellow yellow red scandalmongering yellow red .
Completing this mystifier grants you a quartz .
While you ’re getting your clue from the bird of night , instantly below them you ’ll see a well . Attach the grip and empty caldron . After clicking the hold , you ’ll get a samara out of the water . Do n’t block to return the cauldron , now full of water , to your inventory .
Back inside the treehouse
Now that you ’re back within , it ’s fourth dimension to empty your sack a petty .
How to complete the gem puzzle
" Move the gems so that they settle into the recesses of the equate colour . "
The instruction of every ash gray block is fixed , and they can only move longways . The violent and unripe gem mental block can move both up and down and impart and properly freely . I recommend focusing on one precious stone at a time . By keeping one out of the room , the other has more room to get where it needs to go .
Successfully completing this puzzle grant you the stick and the meshing .
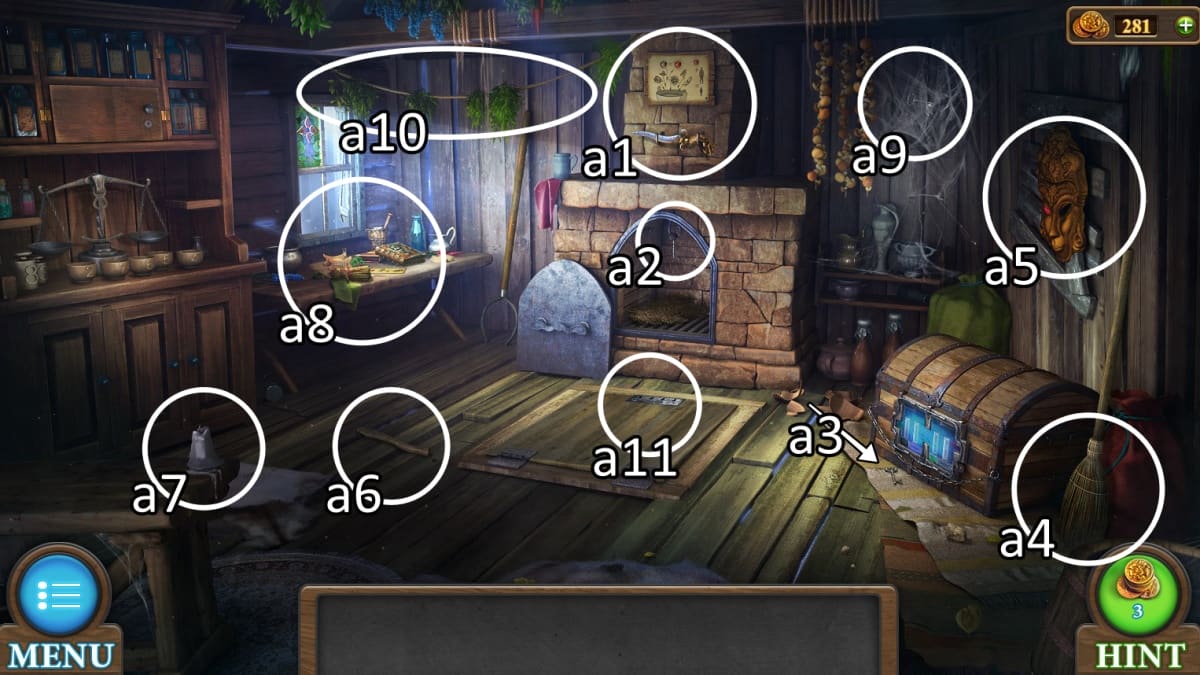
Image by Pro Game Guides
you could immediately open up the stick to add the keep abreast items in order : rope , which turn it into a bow , the arrow , and the feathers to make the pointer fly straight .
Gather the final potion ingredients
Back at the riverside , you now have the means to get the final two pieces to your magic apple recipe .
After refund within , you may contribute the potion factor to your bubbling cauldron and then dip your orchard apple tree to make a magic apple . Approach the table , add the bottle you got from the pectus next to the little ravel , and you may use the wizardly apple on the bottle to shrink down and walk deep down .
Inside the shrunken world of the bottle
This magical world is full of fresh affair to collect , so I hope you did n’t get too attached to all that room in your inventory .
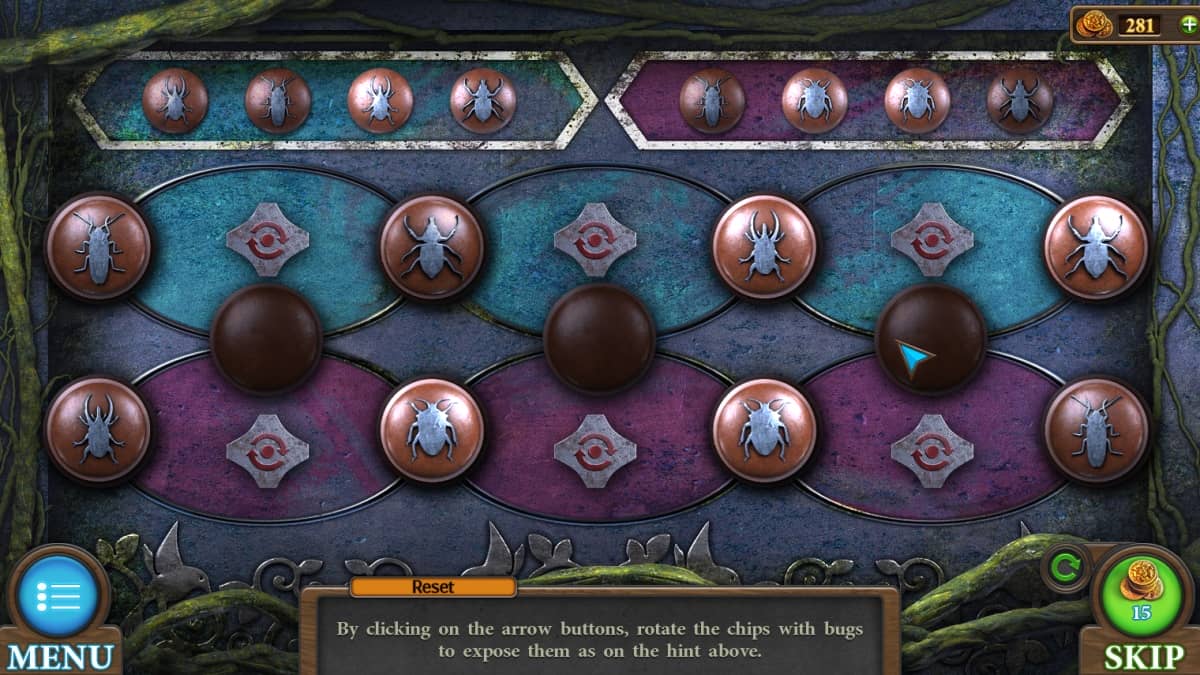
How to complete the bug puzzle
" By clicking on the pointer button , rotate the chips with bug to expose them as on the hint above . "
Along the top is the decree you ’ll want the bugs to be in , with the left-hand one-half being the blue top row , and the veracious one-half being the pink bottom row . Some of the bugs start on the wrong row completely .
Your reward , above the recess , is a note about the eyeball - forge flower of insight and the aureate spatula .
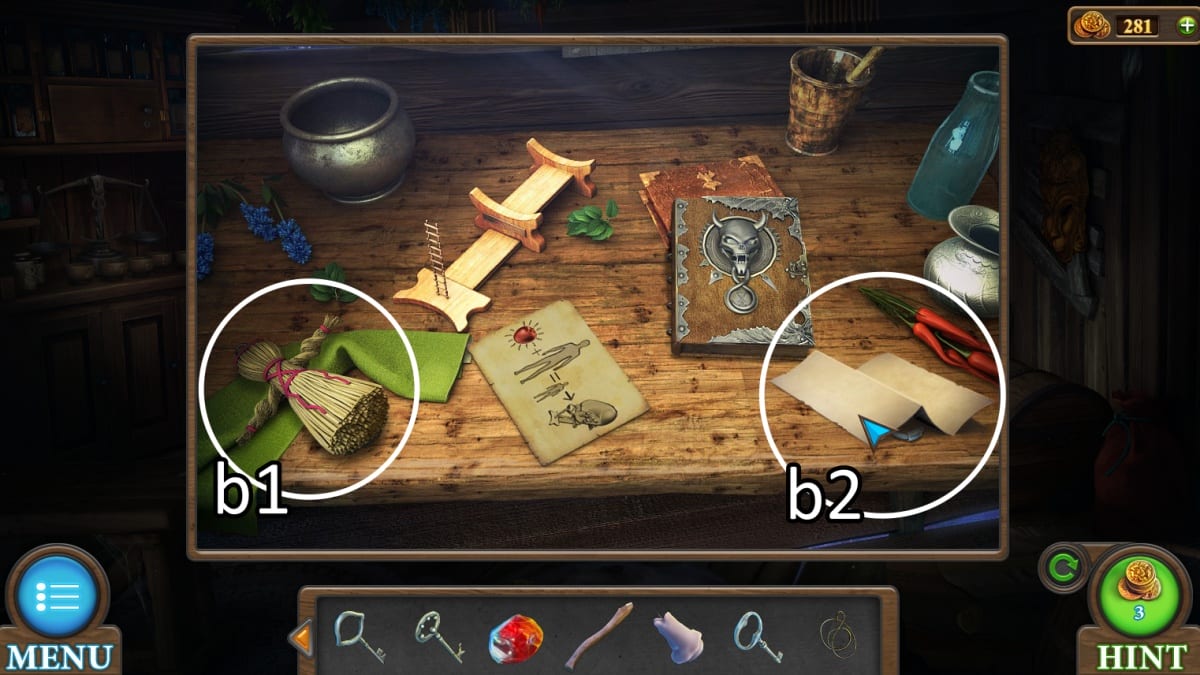
Image by Pro Game Guides
Finding the Magic Ink recipe
you could leave the bottle to grow again , and you still have another recipe to complete . At the table , use your new stamp on the Word with a devil skull on the binding . The Koran contains an ink recipe , a key , and an amulet .
It ’s time to go all the style out to the fiery altar . You now have the mean value to put out the ardour .
" tap the ritual bowl in the required order . "
Image by Pro Game Guides
My answer is pictured on blind , but yours may be dissimilar . Choosing the correct combination puts out the attack .
Use your golden spatula on the wipe out fervency pit , add the bulb , and pick the flower of insight . take back to the cover with the giant fowl cage .
Collecting the ink’s ingredients
One last return to the cabin , and it ’s finally time to address the mystifying numbered bowl on the left side of the room . At the top of the cabinet , apply your key fruit to pick up three empty bottles .
While you ’re looking at the stadium , there ’s a nail on the left over - hired hand side where you may drag the magic ink recipe to see what you need to pull together .
pinkish Strategic Arms Limitation Talks and liquid chlorophyll are already on the shelf , so you ’ll need to gather the dewdrop , flower pollen , and orchidaceous plant fore succus . All of these will be obtained back in the miniature world in the bottle .
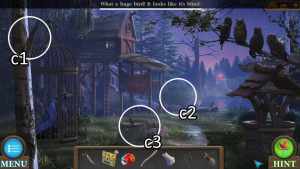
Image by Pro Game Guides
How to complete the magic ink puzzle
" Using stadium and exercising weight for scale leaf , measure out out as many element as indicated in the recipe in each bowl . "
The jar are labeled above by the amount / weight of each that you ’ll need , not the order to complete them in . These are also signal by color in the formula .
To complete this puzzle , you place weights and bowls by embroil them onto each side of the weighing machine . As an instance : To fill a bowl with 5 , you ’ll place the 8 exercising weight on one side , and the 3 weight and the empty 5 bowl on the other side . You ’ll then stream j5 into the 5 bowl . you could utilize the filled bowl the measure the residuum of the recipe .
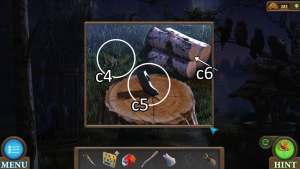
Image by Pro Game Guides
The order I filled them in was :
This create the magic ink which you could now peck up .
Escaping the Magic World
Return to the wizard book on the board one last clock time . With the ink and the bird feather , you’re able to write in the book and finish the stage !
Tricky Doors World 2: Secluded Island complete walkthrough guide
Starting at the docks
The Secluded Island universe is your second challenge in Tricky Doors , with the ultimate goal of fixing up a gravy holder to sail away to rubber . You set out at the docks .
Collect your tools on dry land
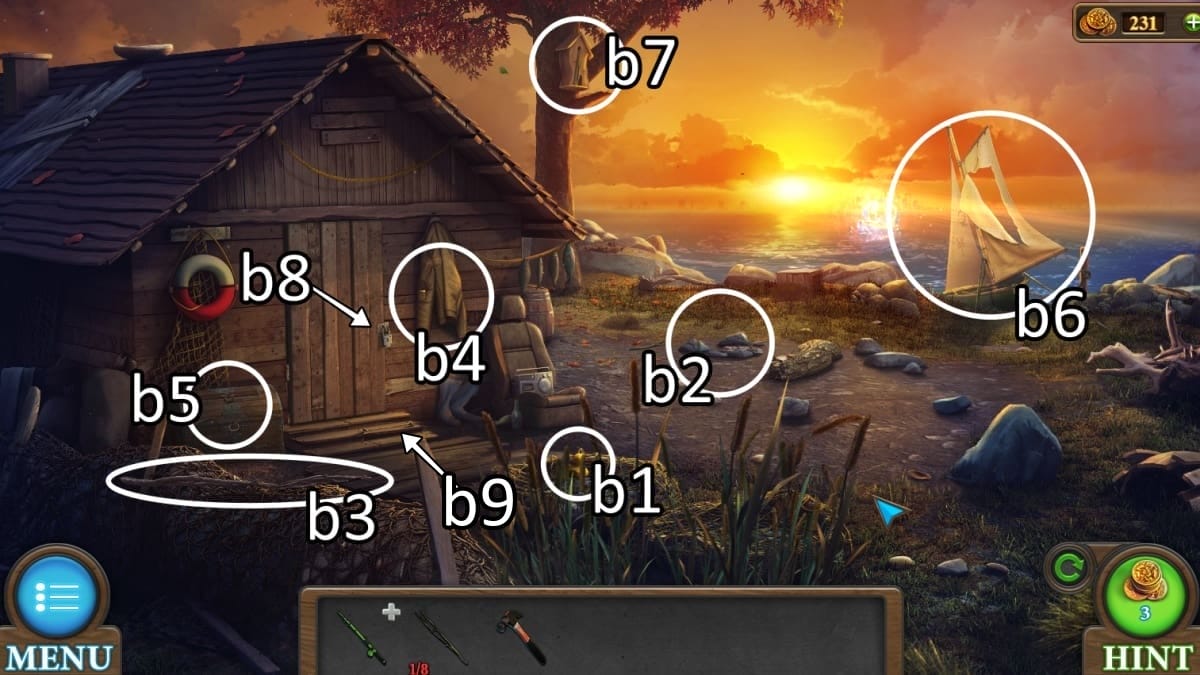
There ’s plenty to do now that you ’re in the second domain of the function , the island ’s out-of-doors .
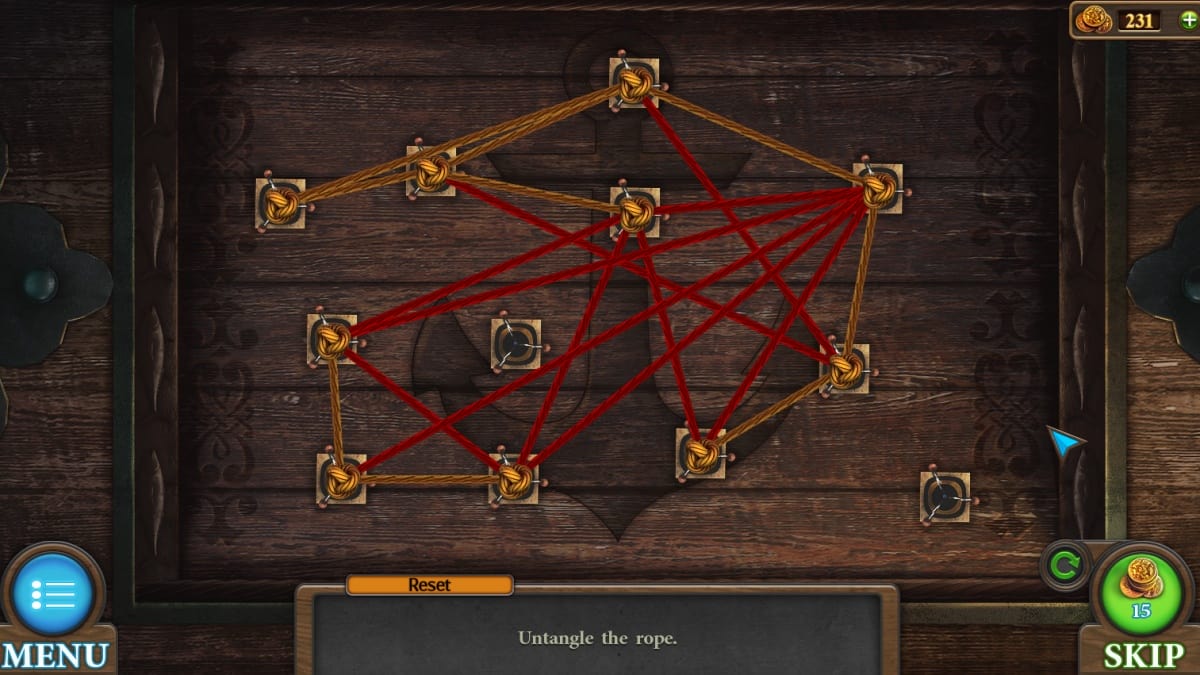
How to complete the rope untangling puzzle
" Untangle the circle . "
The ropes turn prosperous when not pass over over any other roofy . you could move the knots between meat hooks on the circuit board until all of the ropes are fortunate .
Your payoff is a ladder .
Image by Pro Game Guides
Lighting up the dark room
In the darkness of the unbarred room , grab the empty cannister ( c1 ) . Return to the sorrel in the first area to siphon some gasolene from the sauceboat ’s engine . Use the canister on the locomotive and then get rid of both hood , the gasolene will automatically siphon . Back in the dark room , use the gasolene canister and then the lighter on the lamp ( c2 ) .
Your final room has now open up up , so you may prepare for the rest of the creation .
How to complete the tackle box puzzle
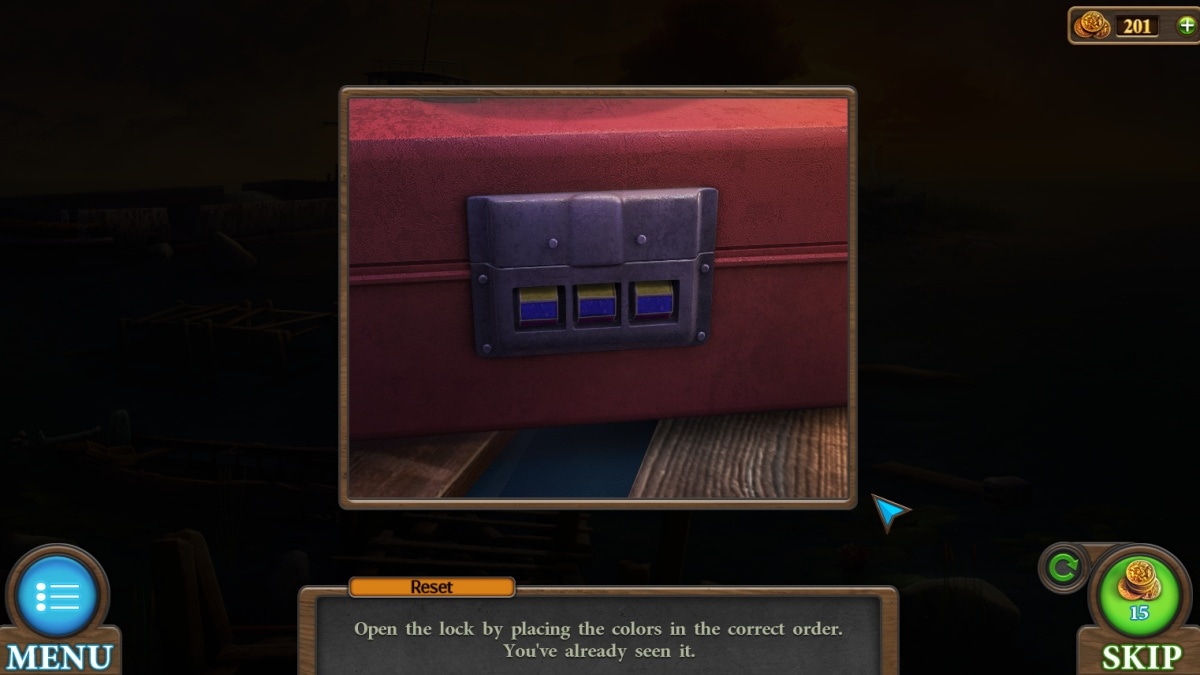
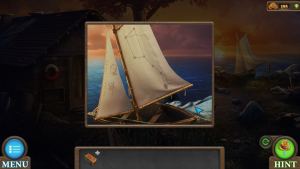
" get to the whorl by placing the color in the correct order . You ’ve already seen it . "
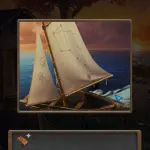
The coloring order of the ship canvass is your clue for which colors to enter on the whorl .
Your reward is a tongue and a hook .
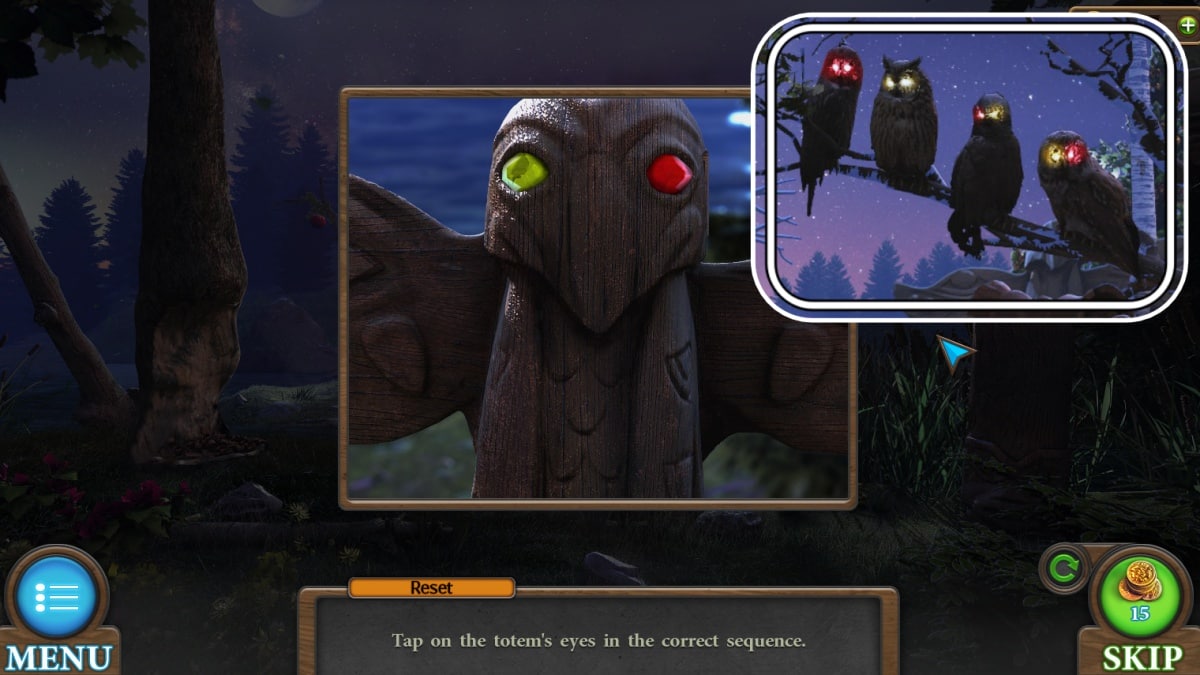
Image by Pro Game Guides
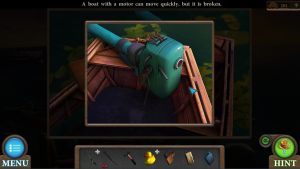
Pull up the fishing pole from your inventory . Add on the sportfishing line and then the hook . practice your fill out fishing pole on the floating tin to pull it nigher , and once you ’ve retrieve it you’re able to dump out a key .
While you ’re here , tap the rubber duck in your armoury and practice your new tongue to prune it in half , extracting a chip .
Unlocking the sewing machine
Just a few more steps to unlock the last pieces to hightail it .
How to complete the sewing machine puzzle
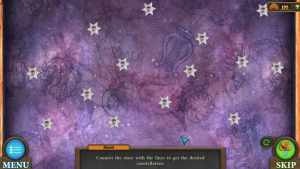
How to complete the constellation box puzzle
Tricky Doors World 3: Locked Apartment complete walkthrough guide
receive to the third world of Tricky Doors , the Locked Apartment . This grade sees you escape an apartment through a service department window .
Lighting up the first room
Now that the lighter is turn on , you have a hefty listing of tasks to complete before ever allow this first room .
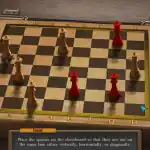
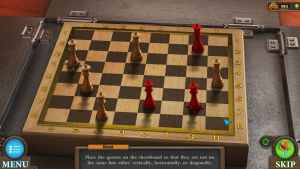
How to complete chess queen puzzle
How to complete colored chips puzzle
Clearing the kitchen
In the kitchen you ’ll be set up a lot of future items :
Head back out to the living room for the next phase .
Getting into the third room
Inside the garage
About half of the elbow room is cut off right now due to the dog guarding it .
How to complete the microwave puzzle
Exploring the rest of the garage
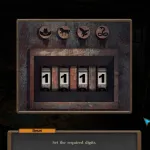
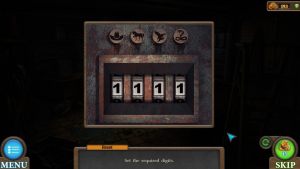
How to complete the cowboy safe puzzle
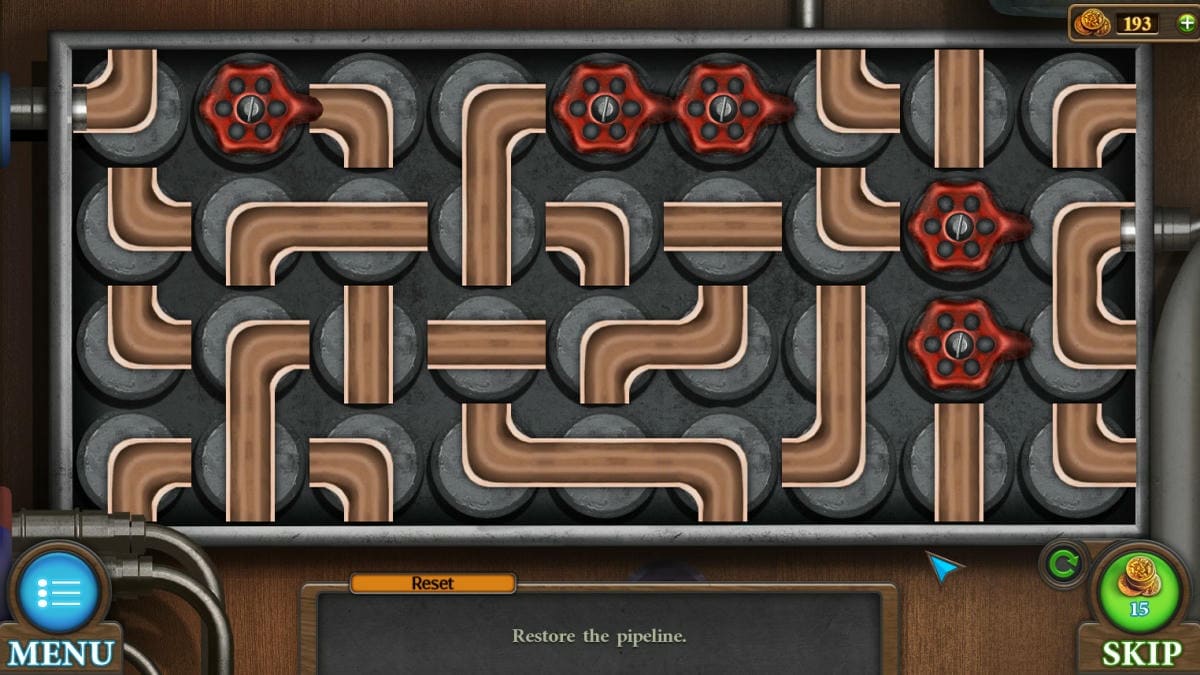
How to complete the sink pipe puzzle
" Restore the grapevine . "
To unlock the sink pipe puzzle , return to the kitchen and count under the sink . enter the panel at the back and replace the pretermit valve with the one you found . dawn the tube pieces to turn them and create one linked tube . You do not take to habituate every piece of pipe , so long as there ’s one continuous pipeline from start to finishing . To complete the puzzle once the connections are made , turn on all the valves .
Your reward is the water being turned back on .
Screenshot by Pro Game Guides
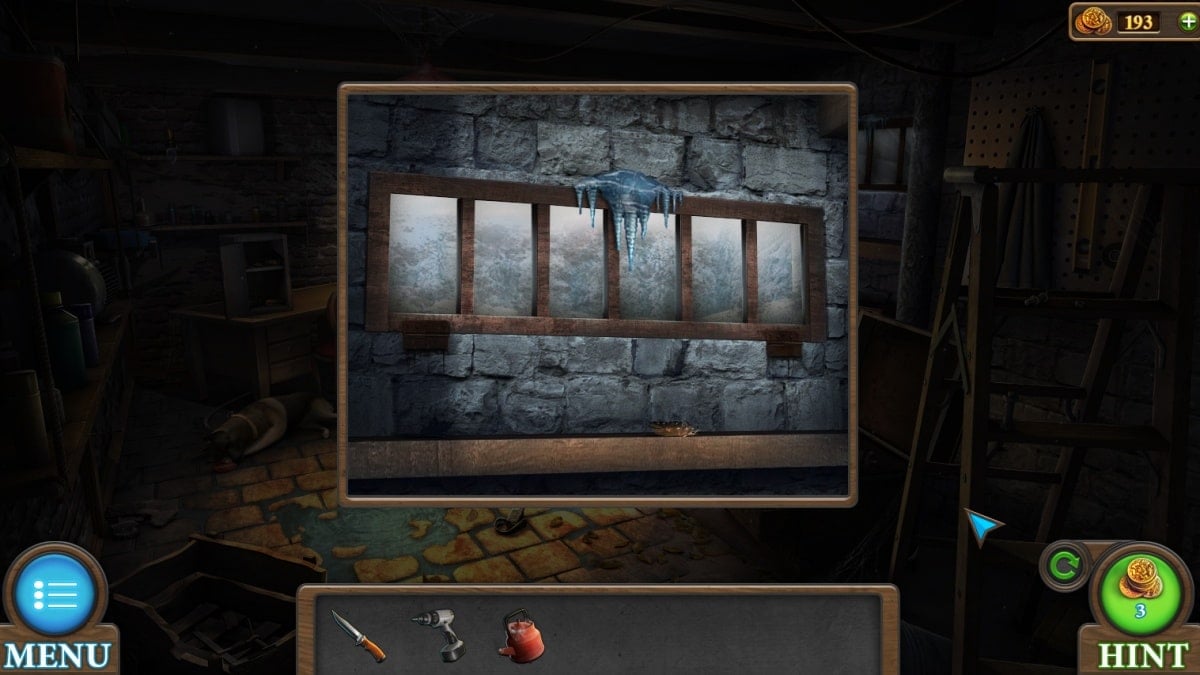
devolve to the service department . Your escape is through the modest window above the washables simple machine . In this order , use your knife to criticise off the ice , the boiling pee to melt the rest and the key to unlock the window and leave .
Tricky Doors World 4: Floating Islands complete walkthrough guide
Today ’s humanity is a solidifying of floating island once inhabited by three crony . Your destination is to escape , as usual . Also , as common , you ’ll start out by lade up your pockets !
Building the first island’s bridge
Gathering at the baker’s island
Your next field contains an oven for the baker and several other utilitarian item .
How to complete the cubes and flowers puzzle
Growing the beanstalk
Across the beanstalk to the third island
After following the giant beanstalk , you ’ll reach the third and last island of the world .
How to complete the dot bridge puzzle
Growing the flour
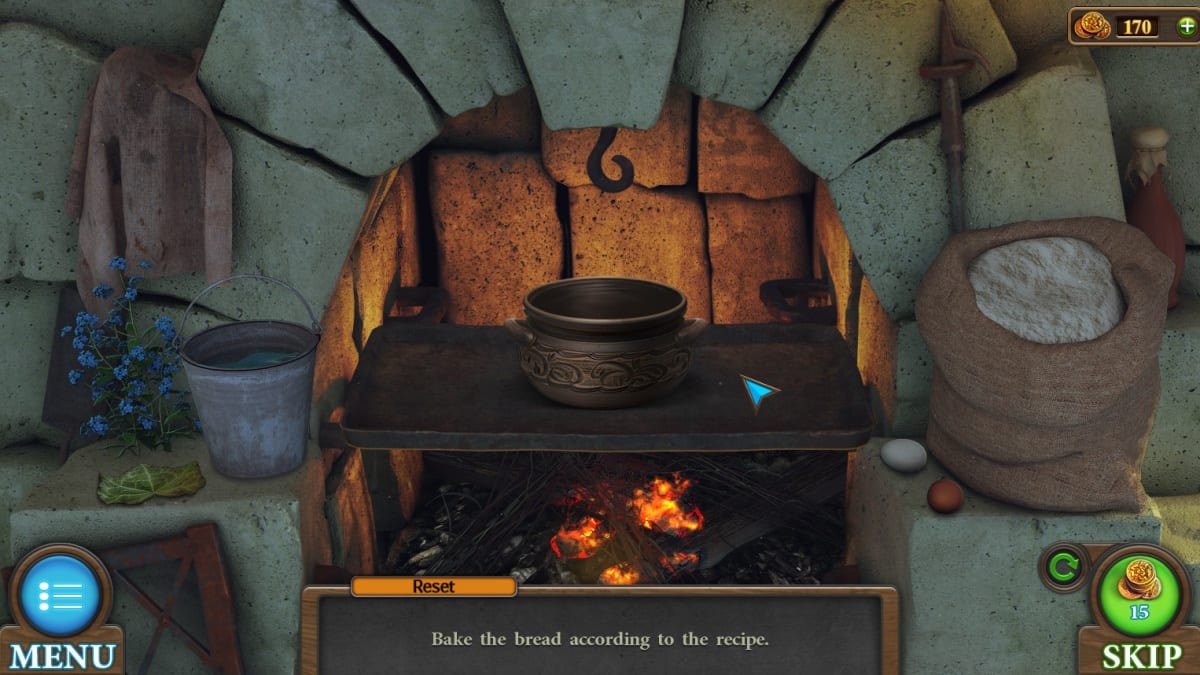
At this spot you have all your ingredients ( bucket of water supply , bean Sir Herbert Beerbohm Tree foliage , down in the mouth bloom , and testis ) except for the flour . It ’s time to answer that .
How to complete the bread baking puzzle
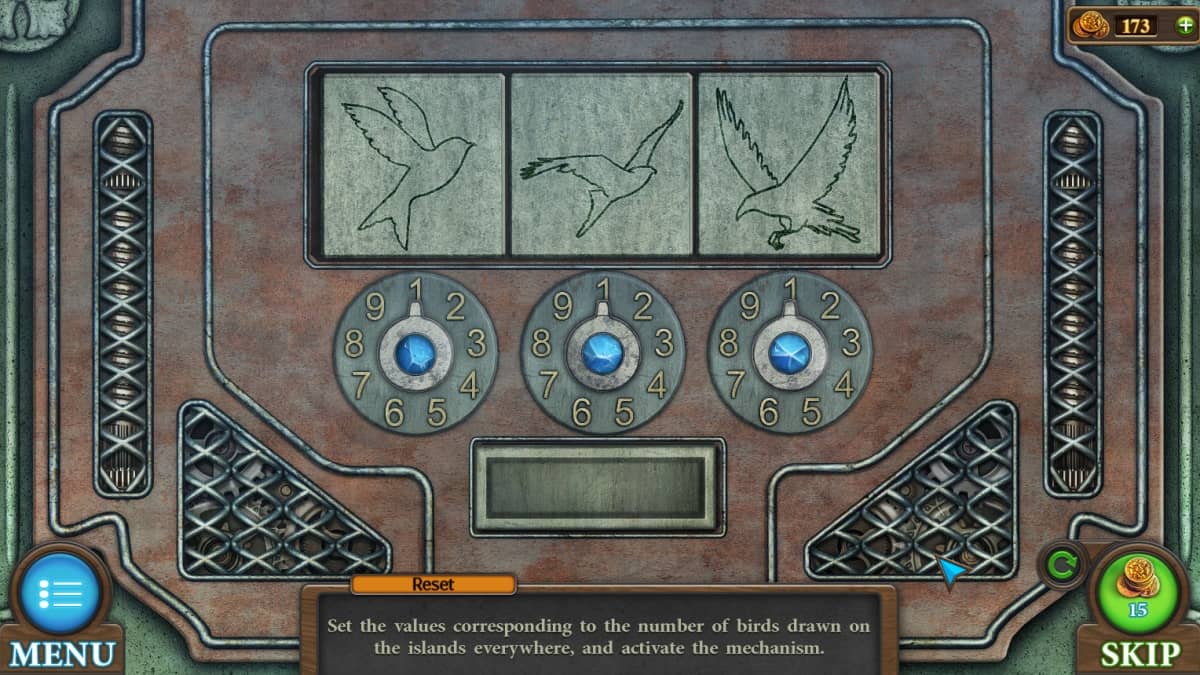
How to complete the bird counting puzzle
Tricky Doors World 5: Amusement Park complete walkthrough guide
In one of our spookier dodgy door worlds , today you find yourself in an abandon entertainment Mungo Park , unadulterated with buffoon and a just - functioning ferris roulette wheel . Your finish is to get at heart and reach the way out .
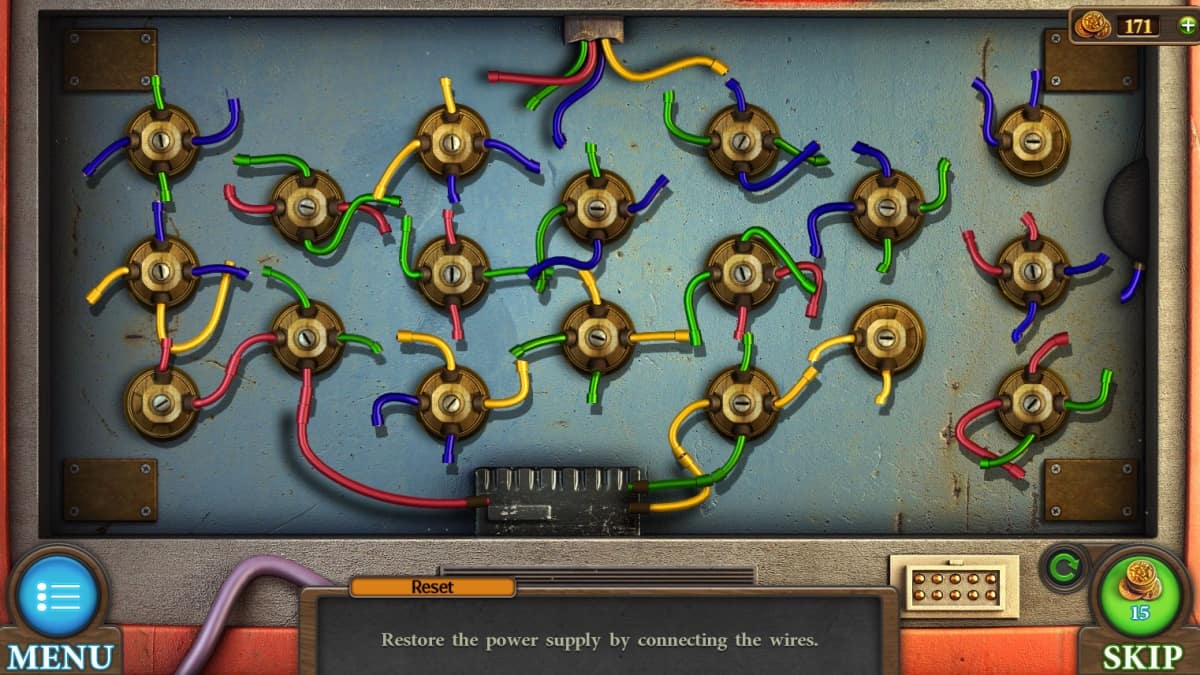
How to complete the Ferris wheel wire puzzle
How to complete the shooting range puzzle
Disarming the second door
Lighting up the last room
With the light on , you’re able to go to collapse this room in earnest .
How to complete the safe button puzzle
How to complete the radio frequency puzzle
How to complete the clown arcade mini-game
How to complete the cryptex puzzle
How to complete the cash register puzzle
How to complete the light up door puzzle
Tricky Doors World 6: Museum complete walkthrough guide
Your task today is to gain the going of this museum , start in the surety authority .
How to complete the lockpick puzzle
Scouring the museum display room
How to complete the radio station puzzle
How to complete the weapons safe puzzle
" Enter the right number . "
How to complete the action figure puzzle
Firing the cannon
Gathering in the gallery
How to complete the cassette history puzzle
" Arrange the cassettes in the right order ( top to bottom , early on to late ) . "
Each tape picture the name of a war . You ask to consecrate these wars from the one that started earliest in history to the most recent .
Your wages is a third pommel .
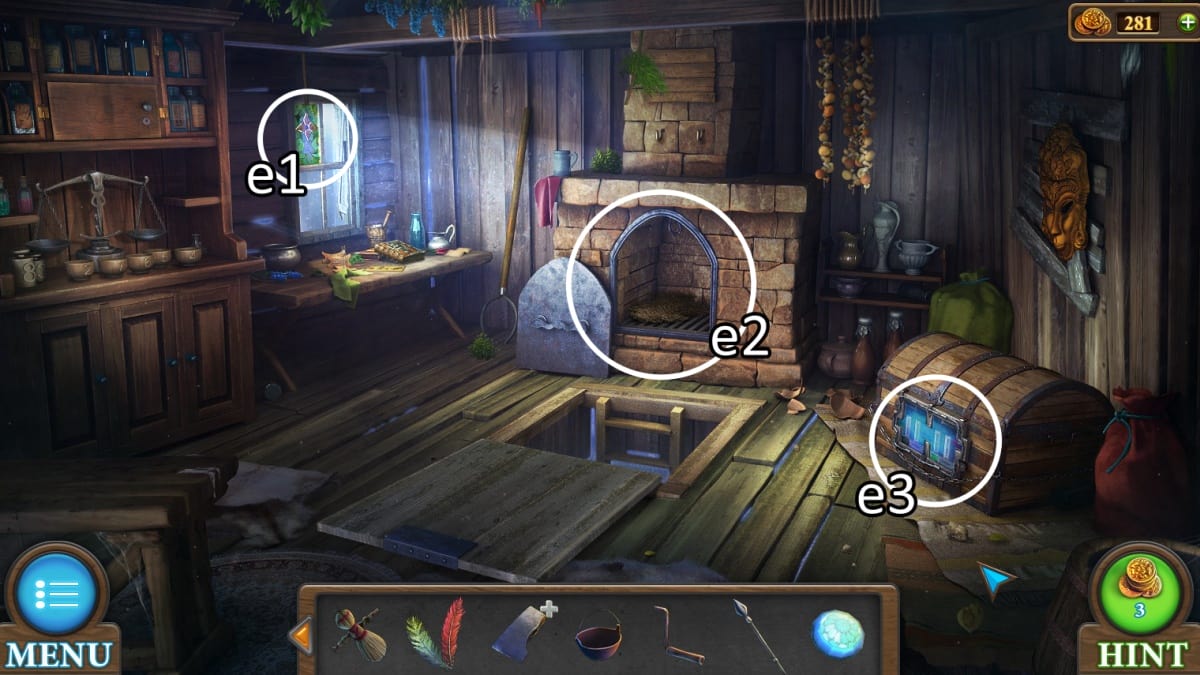
Image by Pro Game Guides
How to complete the scaffolding puzzle
How to complete the statue arrangement puzzle
Finding the final knob
How to complete the symbol knobs puzzle
Tricky Doors World 7: Hospital complete walkthrough guide
This political campaign - down hospital is hold care of a wolfman , so essay not to get too closelipped as you scurry around the room to escape .
How to complete the safe cracking puzzle
How to complete the block key puzzle
How to complete the desk colors puzzle
Exploring the second room
How to complete the sun cell puzzle
Laboring in the lab
How to complete the token pattern puzzle
Making a medicine
In the second room , stick in the flash drive into the laptop on the desk . Now the numbers pool from the lycanthrope ’s patient chart ultimately pay off , as that is the passcode for the laptop . fall into place each number distance until it demonstrate the right bit and then click OK to unlock the laptop and find the medicine recipe .
regress to the cupboard you ’d just unlocked in the last puzzle to pick up the light-green test tube , now that you eff you need it .
Back in the third elbow room , open up the electric refrigerator with your very small key . cull up the syringe and handle , and the over-embellished test tube .
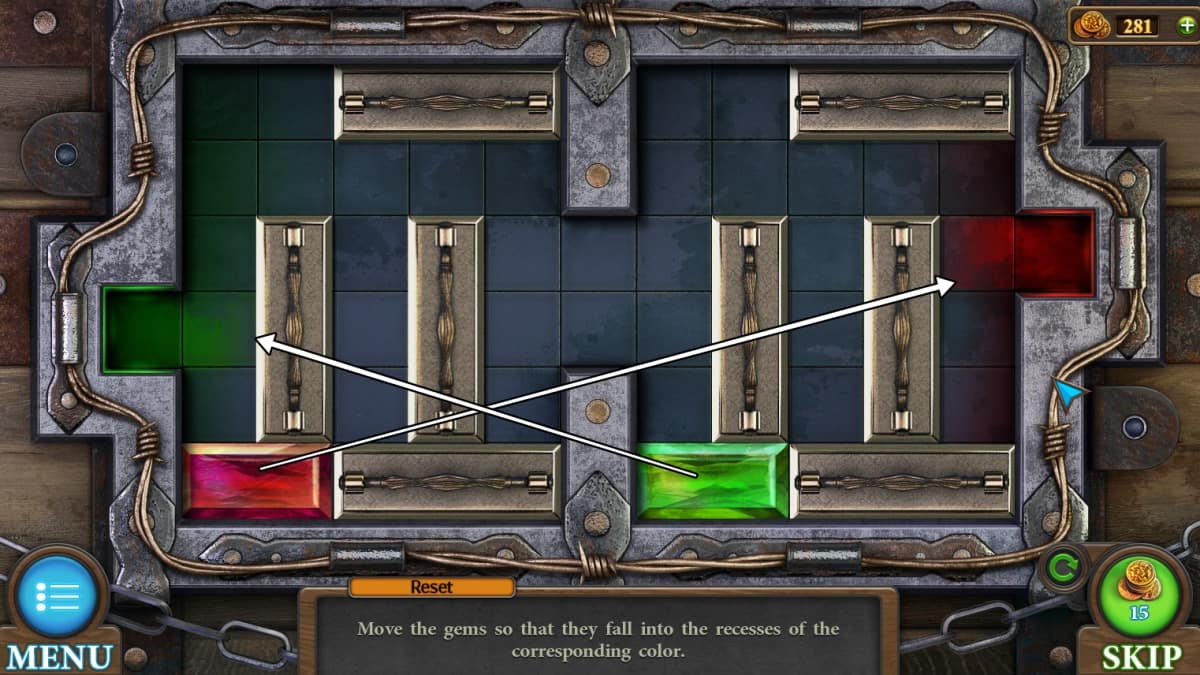
Image by Pro Game Guides
At the skill desk , pick up the ruby trial tube .
At the extractor , place the grip on the machine and insert all three test tubes that you ’ve pile up . call on on the handle and pluck out the light fleeceable test tubing mixing .
You now want to heat up this smorgasbord . Place the vial , the oestrus tablet , and the field glass tubing into the science lab setup . Use the idle to ignite the smorgasbord . Once it has moved over to the second bottle , meet your syringe with medicinal drug .
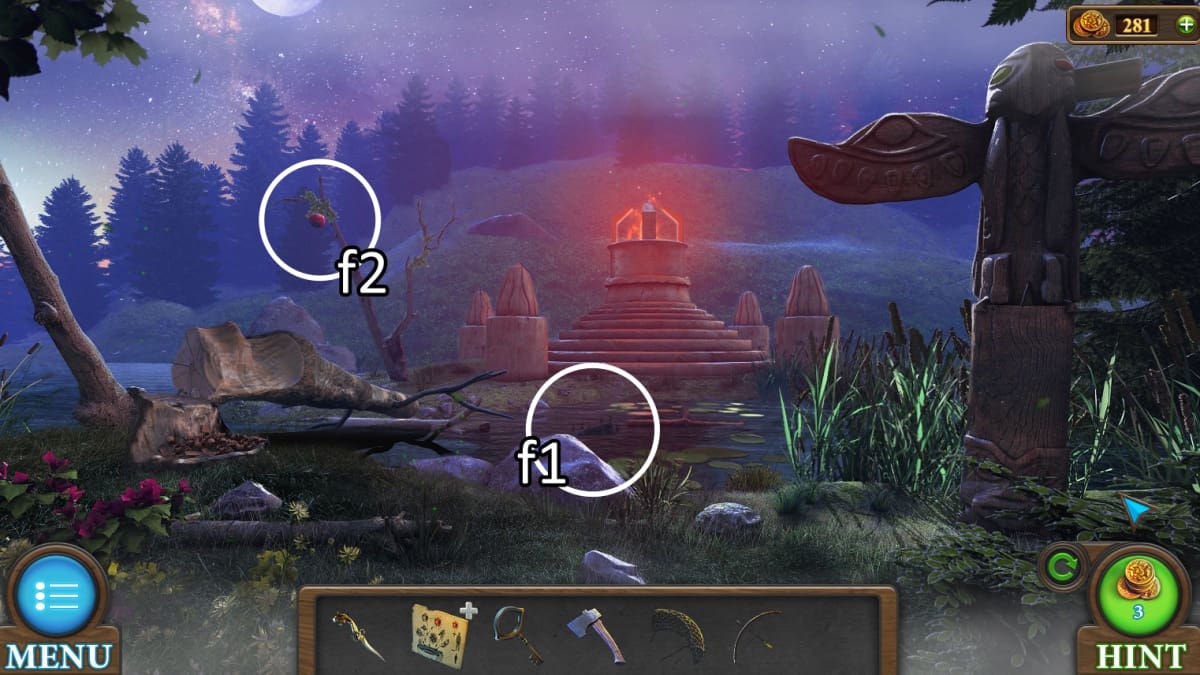
Image by Pro Game Guides
Give the wolfman the medical specialty by using the syringe on its sleeve . This liberate the magnetic samara for your exercise .
Unlocking the final passwords
Using your magnetic paint on the release reveals that there is a missing password . It indicates you need to kvetch over a trash can .
What follows is a serial publication of clues to reach the way out .
By kicking over the trash can , you discover the Word ' Running man . ' The running man over the exit sign has the word ' Stethoscope ' on his pegleg . The stethoscope tell you to moderate the ' Television , ' which in turn says ' Medical history . ' The werewolf ’s medical history has now change to a serial of code .
Screenshot by Pro Game Guides
This may differ in your playthrough .
Only one of these codes is the correct one , so try them until you get away the infirmary .
Tricky Doors World 8: Theater complete walkthrough guide
As the grade start , you recover yourself in a spacious launching way to the theater .
How to complete the green chip puzzle
" Move the green chip to the immature cells . "
Your destination is to move the fleeceable block from the bottom of the teaser to the top . you may move any of the blocks in any direction to slot them into the dissimilar sphere .
When you cease this teaser , the doorway to the stagecoach will open .
Screenshot by Pro Game Guides
Searching the stage
Unlocking the dressing room
Move backstage to get to the next set of tool , and set out a series of small tasks .
How to complete the punch lock puzzle
" While pressing the bars , reset the way of life so that the clenched fist can hit the button . score all the buttons on the right in this path . "
Every bar that you move up or down will move other bars at the same time . They ’ll scoot bolshie if it ca n’t move , which happens when it ’s supposed to bear on another bar either too far up or down to work .
You ’ll ask to do this four times , once for each fist .
Screenshot by Pro Game Guides
Once you finish the lock , you ’ll be able to put down the medical dressing room .
Exploring the dressing room
Armed with the tweezers , yield to the open window in the first room . The final tag is squeeze between the wood panels .
In the coat room to the right of the entranceway , commit down your four tag . Also put down your powder , and utilise the brush to give the powder to the tags . This let on four numbers , each of which corresponds to a color of coat .
36 = Amytal , 35 = purple , 34 = greenish , 38 = red
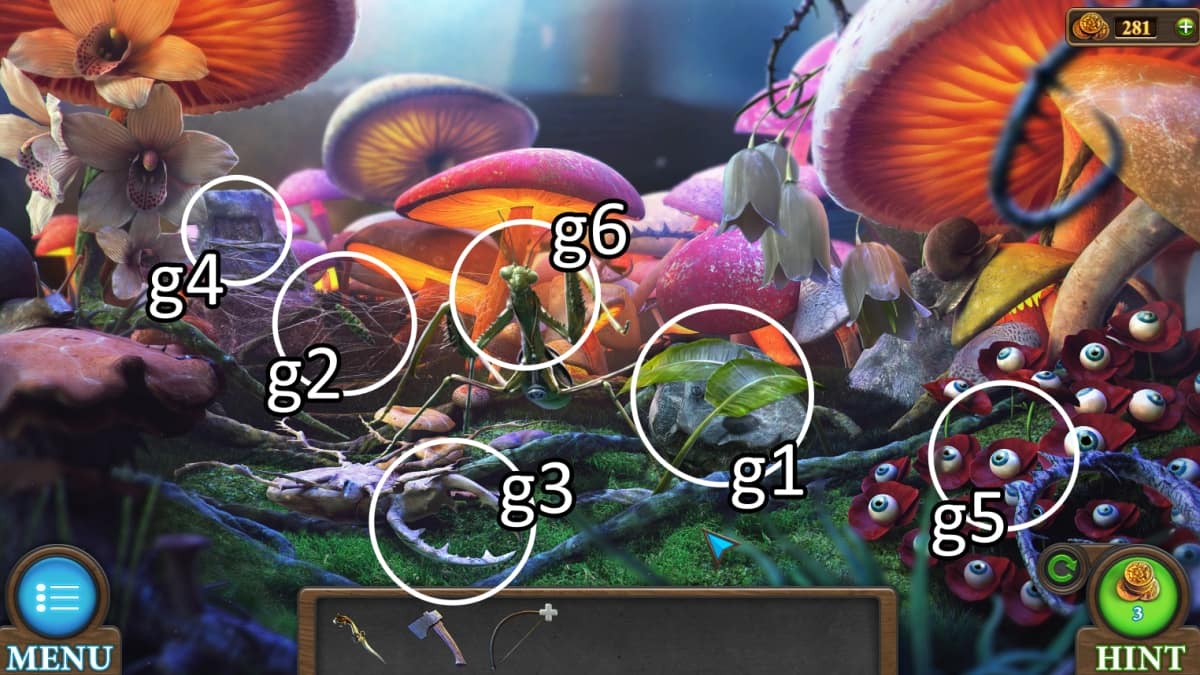
Image by Pro Game Guides
Now you may unlock the make-up dresser draftsman . Place the color in sequential order , and enter light-green , purple , racy , red .
Your reinforcement is a final piano key and a weight .
How to complete the piano keys puzzle
" Pressing the keys , highlight in green the required compounding of squares on the lid . "
Every key you jam lights up the square that are mark on it . If two keys would light up the same speckle , they scrub each other out . Your goal for each panel is to illuminate up the pronounced square .
Your advantage is an flowery key .
Screenshot by Pro Game Guides
How to complete the grandfather clock puzzle
How to complete the flower box puzzle
Opening the briefcase
you’re able to now add the weight unit to the suitcase in the first room , which becomes a compounding lock .
The solution to the combining lock chamber is on the portrait above , 930 . The suitcase contains a lever .
Back in the dressing room , expend your key on the blue dresser . inwardly is a sandbag on the floor of the dresser , and you could open up the hanging shirt to take a second crystalline lens out of a eyeglass in the pocket .
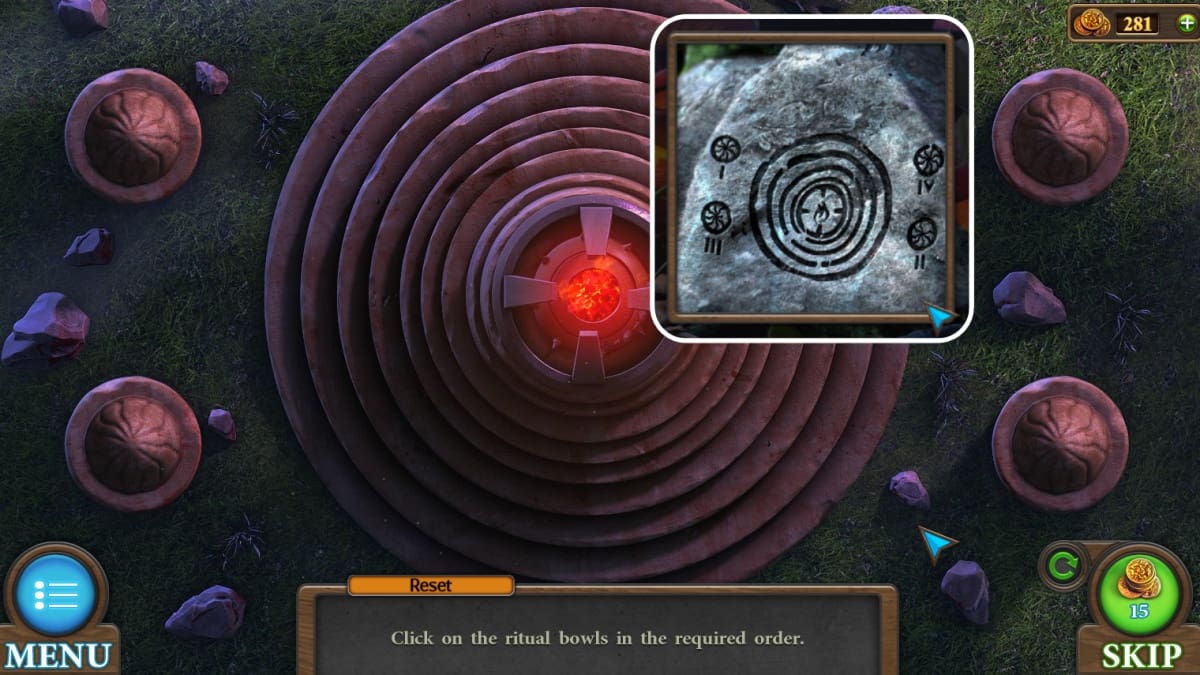
Image by Pro Game Guides
Put the lenses into the opera glasses to fasten them .
How to complete the colored masks puzzle
Tricky Doors World 9: Antique District complete walkthrough guide
As the district street loads in , one of the first thing you ’ll see is a signaling with a big crumb . Throughout this entire reality you ’ll want to take tone of how many rats you see of different colours , so start that reckoning now . Every playthrough ’s stinker colour are different .
How to complete the centerpiece lockbox puzzle
How to complete the door lock puzzle
Use the yellow arrows to pull out the paint in and out and spin around the key around until you find the right combination . You ’ll know it ’s the right combination when the notch on all the pins line up .
Inside the antique shop
Down the manhole cover
How to complete the ball and steam puzzle
How to complete the potion chips puzzle
Your cooled off key belong like a shot into the lock of the shop class that you have n’t seen the inside of yet , underneath the rat mark .
This is a block moving puzzler where you necessitate to position the colored potion in the exact organisation of the hint above . When you finish this , you’re able to plough the hold and step into the magic shop .
Explore the magic shop
How to complete the crystal ball puzzle
Wrapping up outside
How to complete the antique chest puzzle
Click the rotating buttons to move the three elements around that button . Your goal is to make all of the yellow luminance plug into .
Your reward is a 2d vitreous silica and a record for the record player .
impart the record and pick up the acoustic gramophone . Take it across the street to interact with the snake . Once you ’ve played the gramophone , the snake will fall at peace .
Image by Pro Game Guides
In the snake ’s enclosure is a red gem , a wilted flower sprout , and the pinch on how to un - droop the flower .
Place the red jewel into the branch of the horse ’s suit of armor . This opens the knight ’s deal , which is holding another key .
How to complete the potion cabinet puzzle
select the arrows face each other at the bottom to see how the two sides interface , because it is n’t as flat - forward as one on top of the other . One of the boards tip to the side . There is no penalization for gibe how your current alignment is going at any prison term , so check frequently .
Your destination is to satisfy every spot with gemstone . Overlap is okay so long as no time slot is left empty . tap each gemstone to move it and its column partners down one ( looping back up to the top as well ) .
Your reward is the potion cabinet gap , where you may take out another watch crystal and the shining blue potion you ’re looking for .

Screenshot by Pro Game Guides
How to complete the flower pot puzzle
Next to the purple curtain , draw end the flower can label " 5 " and fill it with the wilted flush and the witching potion . This will create the magic flower point , which you could then slot into the grouping of flush pot behind the curtain to unlock the flower flock puzzle .
" stage the pots in the correct topographic point according to the number on the cabinet . "
get through any two potentiometer to swop their space . Your goal is to make everything add up on both the rows and column . I advocate play off up either all of the bottom numbers or all of the side telephone number first , and then trade around within that to find the ultimate answer . The numbers will radiate green when they are satisfied .
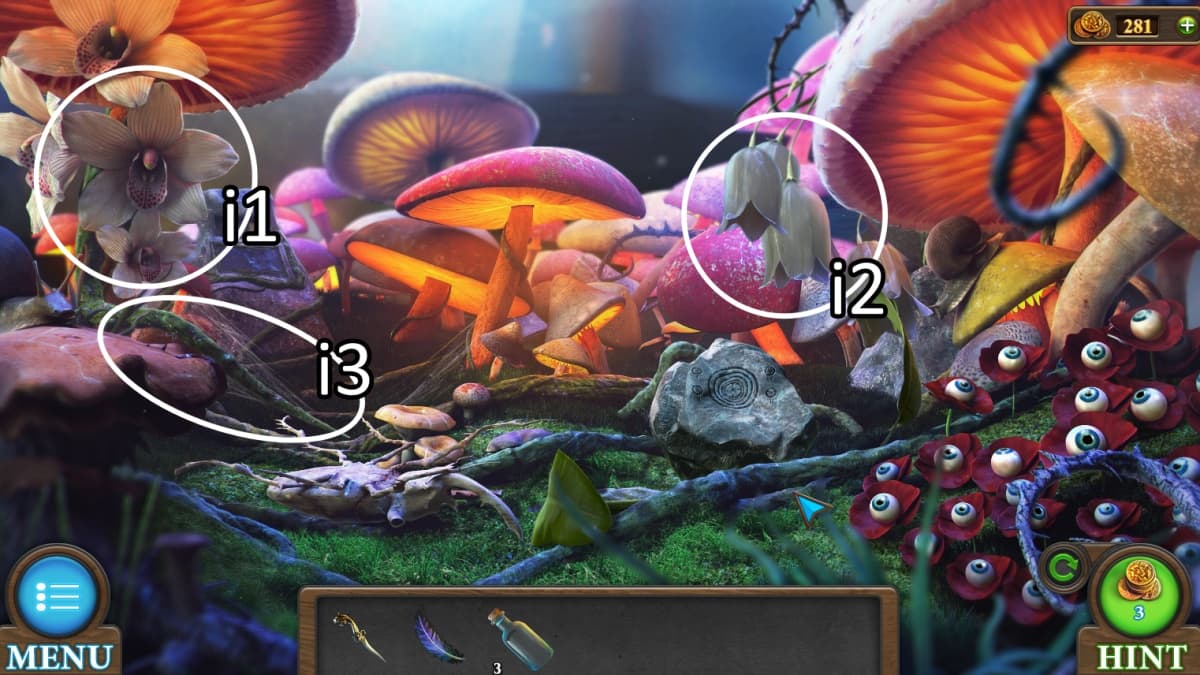
Image by Pro Game Guides
At the end of the teaser , you will get your last crystal and can repay to the easel in the antique shop to paint your way out of the territorial dominion .
How to complete the painting puzzle
If you have n’t already , start by applying the paintbrush , puma ’s palette , and color hint to the picture in the corner of the antique workshop . Then add up in all four crystals to the corners to unlock the house painting puzzle .
This puzzler is a round-eyed paint by numbers . you could use the palette to blend two people of color together by come home them and then chatter the middle of the pallet , and doing the same with the color you want to mix .
fit your people of colour to the clue you ’ve been given . Some tips if you ’re having fuss :

Image by Pro Game Guides
With the painting fetch up , it turns into an exit , and your sentence in the outmoded district is complete !
Tricky Doors World 10: Train complete walkthrough guide
In the somewhat claustrophobic first hallway of this slenderly smaller world , you are task with escaping a train .
How to complete the train chip puzzle
" Move the chip with the symbolization to the correct location . "
Move the chips around the board one at a clock time . They can be moved in any way . Your destination is to move the symbol buffalo chip ( not the train ) down to the lower right corner by getting the other chips out of the way .
I suggest slowly move the symbolisation cow chip down one piece at a time , nudging it through the tray until it ’s reached the bottom .

Screenshot by Pro Game Guides
This unlock the train room .
Rummaging through the room
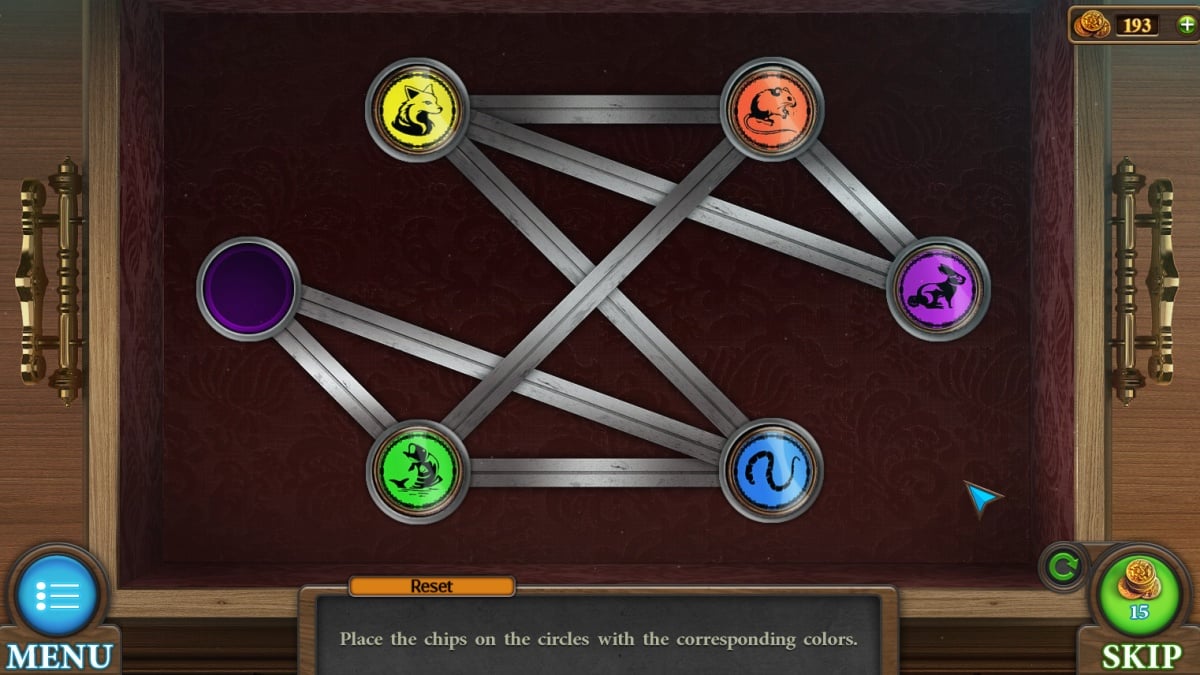
How to complete the colored circles puzzle
" Place the coloured circle in a dustup next to the buttons with the same colour to open up the lock . "
How to complete the spot the difference puzzle
Approach the very oddment of the hallway . Apply your livid rum to your remnant curtain , which you may then practice to clean off the train picture in the wood . After that , use the handle on the empty hole and unlock the pip the deviation puzzle .
" Find 12 differences . "
Your goal is to click things on the right image which do not match the left image . All 12 have been encircle for your ease .
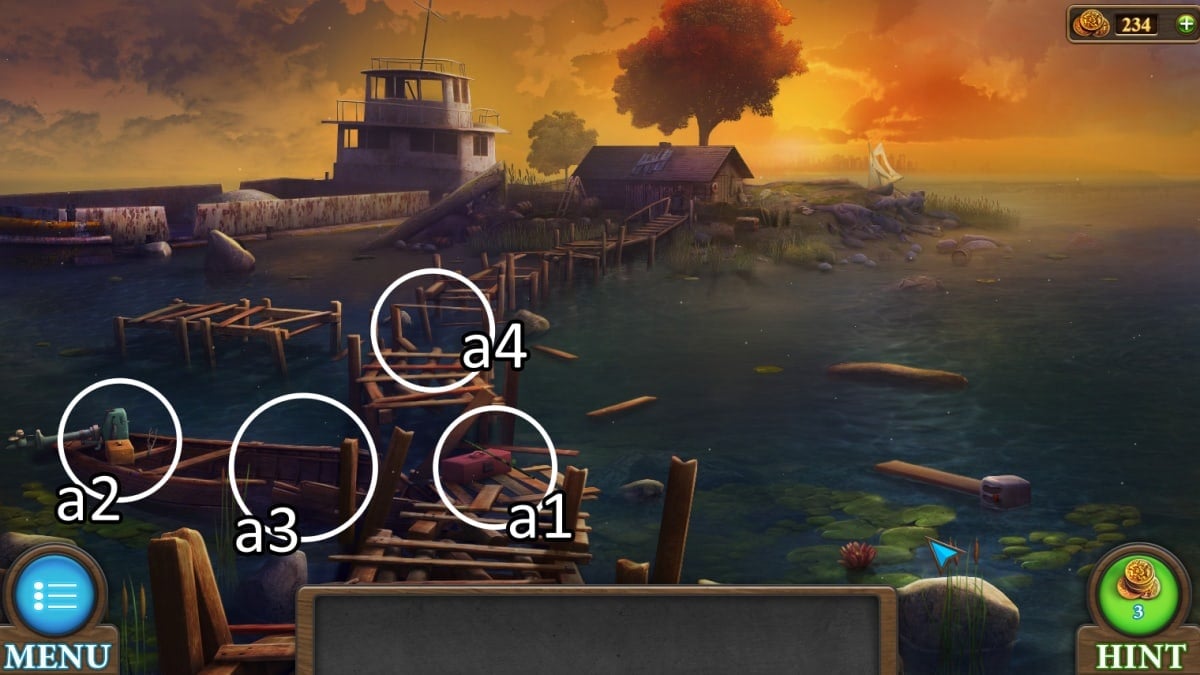
Image by Pro Game Guides
This unlock the engine room .
Prepping the engine room
Unlocking the briefcase
In the personal room , you’re able to return the lit candle to its bearer and burn the paper next to it to unveil a set of number . This is the solution to get into the briefcase on the seat .
Inside the briefcase is a clitoris and a four - way roulette wheel brace . Use your tongue on the gearing seat to also gain the green button .
The four - way wheel brace is your solution to the base hatch , which opens to show a shovel blade . Combine the shovel blade with the balustrade to create a full shovel .
How to complete the chip movement puzzle
" Place the chips by crusade the button so that they fit in the holes at the same time . "
How to complete the button matching puzzle
First go back to the room once more , and use your new key fruit on the remaining locked drawer . Here you ’ll find the button matching puzzle .
" Place the blue buttons in their places next to the corresponding brown buttons . "
How to complete the railroad puzzle
" set up the railway from commencement to coating of the rail . "
Tricky Doors World 11: Circus complete walkthrough guide
Your journey today set out in the center of a with child top circus . All three room are opened from the very kickoff , so we ’ll be starting with a lot of pick - ups . Watch out for clowns !
We ’re going into the left - side elbow room first .
How to complete the key spike puzzle
" Swap the elements in places so that the spikes fit into the channel . "
In the darkness
For now all you could grab is a bottle and one of two buttons .
Head back to the loge with a saw blade stuck in it and add your grip . Cutting receptive this loge will get you the second clit and another shuriken . Now you could return to the left room for a light up clitoris puzzler .
How to complete the light up button puzzle
" unhorse up the correct buttons . "
Scour the dining room
Your chemical chain , gears , and wield will all be attach to the blue twist in the middle circus collapsible shelter .
This unlocks the gear puzzler .
How to complete the gear puzzle
" coiffure all the gear to set the entire chain of mountains in gesture . "
retrovert to the medical dressing room to feed your carrot to the rabbit in the magic chapeau . This lets you get at the first of four chips and gets you a key .
Your headstone goes to the cash register , which unlock a puzzle .
Screenshot by Pro Game Guides
" Place the tokens in the grooves of the correspond colouring . "
How to complete the popcorn puzzle
" weightlift both clitoris in the correct sequence and the take number of time . "
How to complete the tiger cage puzzle
Back in the braggy top , you ’ll be approaching the cage in the center , and place both your tiger and elephant symbols in the rilievo at the bottom . This unlocks the tiger cage teaser .
" Arrange the potato chip so that the cardinal factor glows fleeceable in all five chips . "
How to complete the clown club puzzle
How to complete the table relief puzzle
This puzzle is difficult to find than it is to discharge . In the dining room , there is a tabular array that ’s omit the relief you found from its lower portion . By inserting the ministration , you unlock this puzzler .
" stage the letter of the same vividness in the same decree . "
Finishing your shuriken
How to complete the circus chips puzzle
Approach the final room access in the dressing way , where you ’ll tuck your four potato chip .
" identify large chips in place on the central argumentation next to the same small ace . "
Tricky Doors World 12: Mars complete walkthrough guide
This technical school - heavy world is focalise on get off the aerofoil of Mars .
a1 . Pick up the chip with tools on it . face at the report and take off the paperclip.a2 . First snap up the green item . There will be several point called just ' details ' in the course of this world , I will seek to keep them distinct . While you ’re close to the tool box , enter the tool chip . This unlock the cock box puzzle , detailed below.a3 . Use your new screwdriver on this control board to spread out it up . There ’s a fuse you could utilise your gumshoe gloves to pull out.a4 . Open up this panel with your screwdriver as well . Put in the safety fuse and paperclip on the right side . This unlocks the beam puzzle , detailed below .
How to complete the tool box puzzle
" Set all the luger at the top along the red bloodline . "
Each slipper moves other skidder along with it , and can not move so long as it would move a different slider too far up or down .
Your wages are rubber gloves and a screwdriver .

Image by Pro Game Guides
How to complete the beam puzzle
" Direct the beam from lead off to stop with the aid of mirrors . you may move and rotate mirrors . You need to use all the mirror . "
The instructions on this one are clear enough . There is no penalty for send the ray in the wrong direction , so palpate free to fiddle with each mirror protrude with the first one the radio beam is pointed at .
Once all mirrors have been used , you’re able to move to the next room .
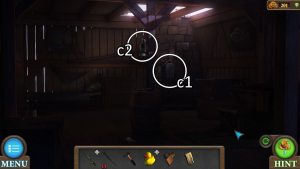
Image by Pro Game Guides
The second room
b1 . There are two different ' item ' items next to the laptop computer , one unripened and one blue.b2 . A green detail is on top of the thorax , and a roll of duct tape next to it.b3 . Use your screwdriver one last time to find the second blue detail.b4 . Take note of the colors of these planets .
The color pattern follows the satellite . penetrate the color in rules of order and then the essence button to launch the closet .
Inside is a tube and a pentagon item .
Screenshot by Pro Game Guides
The blue detail go into the blue crateful on the floor . This unlocks the stone R-2 teaser .
How to complete the stone circle puzzle
" Rotate the 4 circles so that the colored stones would be opposite the stones of the same color . "
The finish is to make the colors equal , blood-red to scarlet , yellow to yellow , etc . Clicking each stone go itself and some others .
Your reinforcement is a wrench and pulverization .
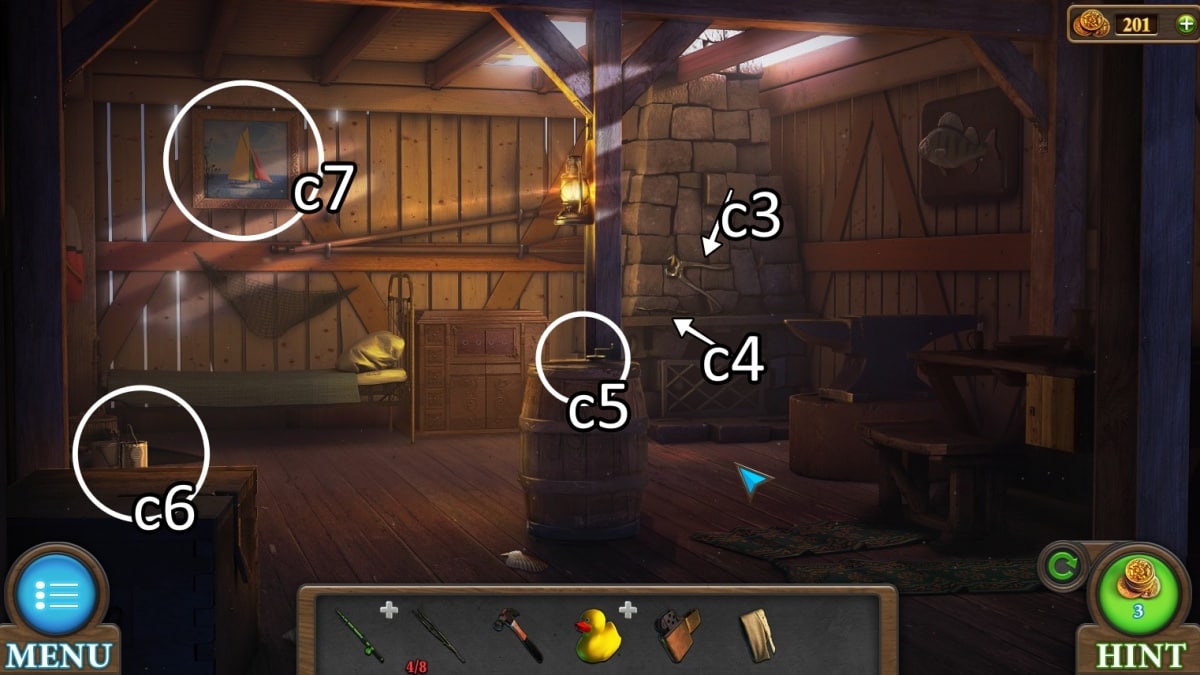
Image by Pro Game Guides
How to complete the pentagon puzzle
border on the side threshold and put in the pentagon detail . This unlocks the pentagon mystifier .
" Move the colored balls to the place of the correspond colouring . "
click the middle three button will rotate the five glob around it . Your finish is to get each ball into the holder of the same colour . I recommend focusing on one coloring at a time and the others will fall into place without any issue .
Screenshot by Pro Game Guides
Your reward are a reducer on the top ledge , and a paintbrush on the bottom .
The other half of this cupboard door can be open up later , so keep it in creative thinker .
Getting the fingerprint
Approach the laptop computer . Use the gunpowder , paintbrush , and at long last duct taping to pick up the fingermark off the laptop computer . Then go to the pod on the right of the first room .
Use the tape fingerprint on the fingerprint electronic scanner of the seedpod . This get to the fuel pod and grants you another dark-green detail and an access card .
How to complete the astronaut access puzzle
" Rearrange the numbers so that the substance in the row and columns would be equal to the numbers on the represent plates . "
The numbers on the edges will get down up depressed when you have the right sum . I again recommend sharpen on one at a prison term . Once you have all three row or columns complete , you may keep those number in their several course / columns to make the other half work .
My answer is listed above . Your reinforcement is access to the astronaut causa , and also the first of two red details on the right of the area .
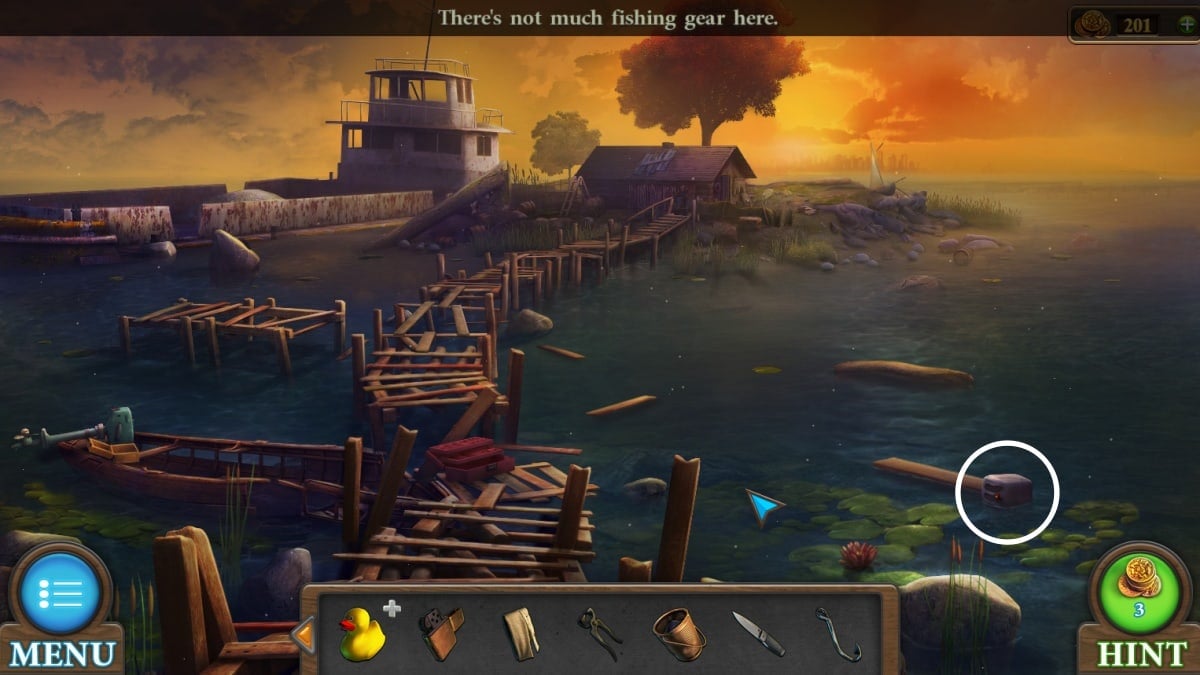
Image by Pro Game Guides
Fixing up the suit
There ’s a rent in the front of the suit . utilize your channel tape measure to fix it up , that ’ll surely work on Mars . Then call on the suit around and open it up to find one last gullible point .
Back underneath one of the pod in the first elbow room , the open control board has an oxygen cooler . habituate your twist on it to collect it .
With the oxygen storage tank in your inventory , add the hose and reducer to it to create an O balloon .
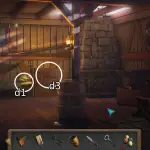
Image by Pro Game Guides
tally your oxygen balloon into the place suit and you’re able to now pick it up to add to your inventory .
This is where you place your 5 green item that you ’ve been amass . This unlocks the irradiation teaser .
" Draw a beam from outset to cease using all guide . "
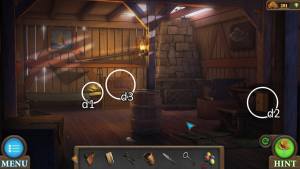
Image by Pro Game Guides
Every dark-green man on the dining table can be sour by clicking on it . you’re able to not move these pieces , only bend them , and apply that to make the beam slay every piece on the board . I ’ve included my solution .
Your payoff is access to Mars ' surface , so long as you ’re wearing your space courtship .
Exploring Mars' surface
c1 . Approach the ship . Click the crimson silver screen to turn them immature and start the ship ’s door , but you ca n’t reach it yet . blame up the solar instrument panel at the foot of the ship.c2 . There ’s a crowbar next to this unfinished ladder.c3 . Pick up the first of five ladder steps.c4 . The second red detail is at the foot here . Head back deep down to make function of the crimson details .
How to complete the red box puzzle
" Move the lily-livered crisp to the holes . "
This teaser appears directly - forward at first , but can be a minuscule tricky . You ’ll necessitate to use both chips together to get one into the upper hole . Because moving a microprocessor chip pushes it all the way until it ’s stopped by a dead death or the other chip , you have to bounce them off each other .
Once your upper microprocessor chip is where it belong , you could move the lower chip into position without any consequence . Your reward is a whole step , a welding gun , and a solar panel .
Screenshot by Pro Game Guides
Collecting the steps
Back in the first room , your crowbar can open up the remaining cupboard door .
Your wrecking bar will also open up this 3D pressman , where you may collect another stone’s throw and the final solar control panel .
With all your solar gore in hand , you ’ll need to put the panels onto their mountain alfresco . Your final step is on the dry land next to it .

Screenshot by Pro Game Guides
Then you’re able to come near the electric battery on the priming coat to put in the new fan sword and turn it on . stop up in your welding tool near the ravel .
With your steps added and your welding tool powered , you may make a ladder . drag out the welding tool onto the run and the ravel will be added to your inventory .
Inside the ship
The ladder is used to enter the ship , where several new thing are unlocked .
d1 . Pick up this cartridge.d2 . come on the yellow box here . The code is listed on the concealment as three element listed on the occasional table . Inside is a key fruit and a tip.d3 . There is a gray contingent on the fascia . Remove the broken steerage wheel .
Back alfresco , the samara goes to the rover , which unlock the rover radiation pattern puzzler .
Screenshot by Pro Game Guides
How to complete the rover pattern puzzle
" Move the chips to the gibe places according to their patterns . "
There is one opened spot on the board at any meter . You ’ll be dislodge the chips around the table , and any one you may slide into that empty slot will go there .
Your end is to twin the design on each inner and taboo circuit .
Screenshot by Pro Game Guides
Your payoff is a second gray detail , and you could pull out the battery on the left over side .
How to complete four symbols puzzle
Bring your gray details inside . On the underside of the desk that hold the laptop you could introduce these details to unlock the four symbol mystifier .
" Move the colored chips and coalesce the symbols to create the same symbolisation as on the plate above on flake of the same color . "
The different brush diagonal on all of these spaces can be combined to create the symbols above your board . This is randomized .
Screenshot by Pro Game Guides
Your reward is a electronic scanner and a solid item .
utilize your electronic scanner to scan the broken steering wheel in the ship .
Still inside the ship , on the left you ’ll find a numbers puzzle that must be touch off by inserting your straight particular .
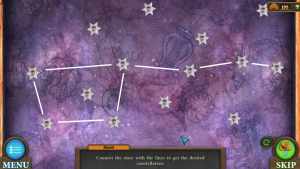
Image by Pro Game Guides
How to complete the mathematics puzzle
" Get the result of all number on the side plates using number and mathematical operations . You need to habituate all numbers . "
you’re able to apply the addition , deduction , etc . as many times as you want . I recommend noting the most coarse routine you ’ll call for to notice and the most plebeian you have usable for purpose , and pick apart out the common single first . This will lead the root for the residue easy to pick out .
Your reward is a hold , which you could immediately use on the trading floor . There is also a set of 5 numbers you ’ll need next .
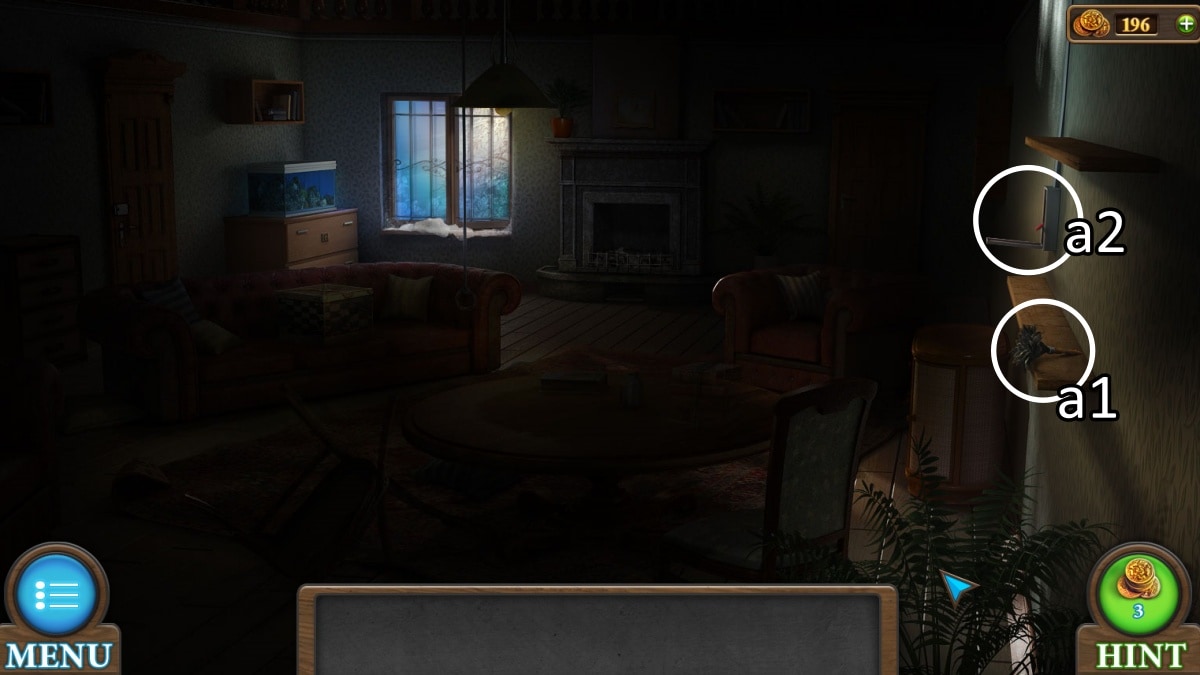
Image by Pro Game Guides
Inside the storey compartment is a place to put your battery and an extra cartridge .
maneuver back inside to the 3D printer . Put the tip and both cartridges onto the pressman . impound your digital scanner with data to the laptop . You ’ll involve the password from behind the helmet in the ship to get into the laptop computer . My computer code was 13874 .
Hit the photographic print push and make a steerage wheel which you could put into the ship .
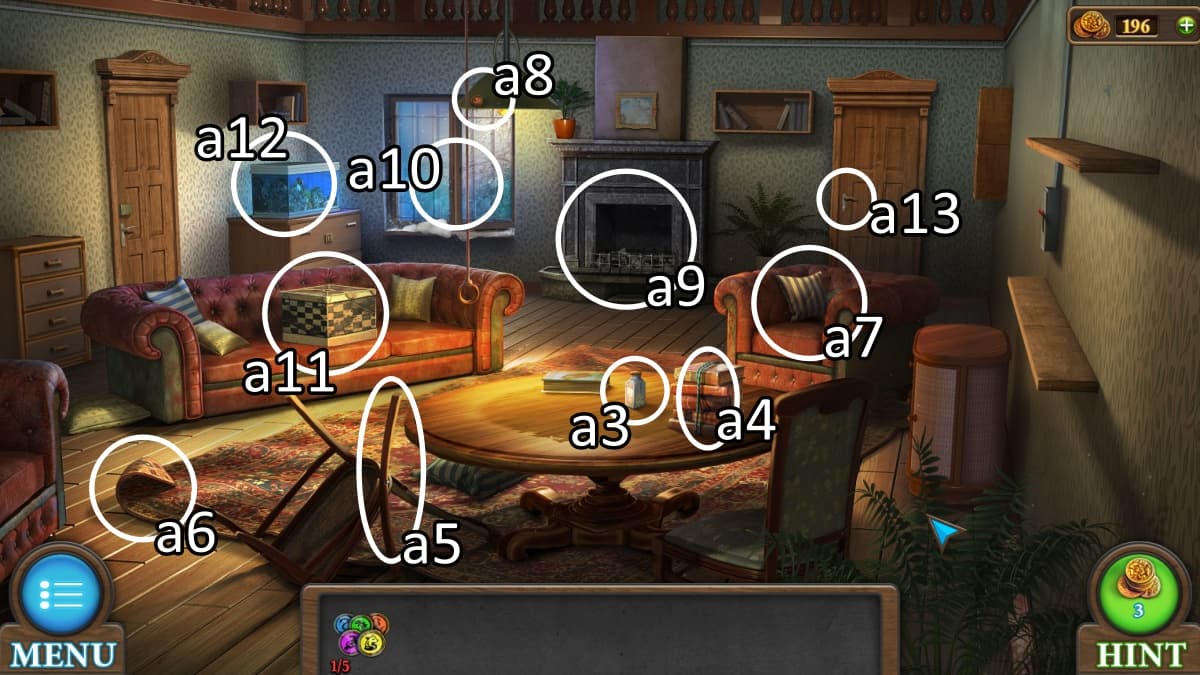
Image by Pro Game Guides
How to complete the frequency puzzle
" Move the 4 sliders at the bottom so that the cut line on the screen would become straight . "
Move the sliders at the bottom until you find which setting on each gives you the straightest bloodline . Keep tamper with these sliders until you ’ve made a whole straight line and gain ground your freedom from Mars .
Tricky Doors World 13: Vampire’s Castle complete walkthrough guide
This spooky world makes its compass point known early on . meter to hound a vampire !
a1 . pluck up the ax from the tree.a2 . Immediately use it on the lengthened branch to hack yourself an aspen stake.a3 . The doorway has a hook hang off of it.a4 . These thorns can be cut down to size with your axe as well , revealing one of two skull statuette and a letter explain what to do with your aspen stake.a5 . Approach this grave and clean up the first of five bones . Pry reach the broken grave to piece up a smooth-spoken coin you ’ll also be collecting five of.a6 . hide next to this puzzle ( which you could not complete yet ) is your second skull figurine.a7 . sneak in your skull into this threshold to unlock the skull room access teaser , detailed below .
How to complete the skull door puzzle
" Move the skulls so that there would be a certain number of them in each pillar . "
You move each row of skull all at once with the yellow buttons on each side . Your finish is to make the number of skull in each column meet the top , which mean you ’ll need to balance the whole add-in at once . I recommend focusing on the course with the most extreme numbers pool , like 1 and 4 , and the 2s and 3s should more easily shine into place .
Your reward is access into the nominal castle .
Screenshot by Pro Game Guides
Exploring the castle
b1 . Underneath the desk hides an vegetable oil dispenser , and next to it is another silver coin . spread the pocketbook and commit out a shock of purifier and a jar of acid.b2 . A torch is lean up against the wall behind this table.b3 . Pick up the bone.b4 . mention the name on this card under the characterisation .
How to complete the grave name puzzle
" Enter the right name . "
You ’ve now see the name that go on the tombstone . chatter each missive until it demonstrate correctly . The letters you ’ll be going through can be random but you ’ll finally be able to import out Black Rose .
Your reward is a note full of additional lore , and a red particular .
Screenshot by Pro Game Guides
Just across the path , your red detail will go into the church door to unlock the church service door teaser .
How to complete the church door puzzle
" Move the chips to the bad circle . "
Your chips move as far as potential in the direction you push them . This mystifier is a simple matter of using one silicon chip to jam off a post so that the other can reach the big circle that ca n’t be make alone . Afterwards your second one can slide into its standard spot .
This unlock the church .
Screenshot by Pro Game Guides
The church is extremely dark . The only thing you could see is a pail of oil next to the entranceway , which you ’ll dip both your blowtorch and your oil dispenser into .
Inside the castle , your crude oil dispenser can now be used to de - corrode the box near the center of the screen . This boxful bear the gear turning puzzle .
How to complete the gear turning puzzle
" Move the pieces to free square so that all gears rotate . "
This is a tile shuffle puzzle where you select a tile next to an empty roofing tile to move into the empty infinite . you may do this to move around the gears until all four bull gears around the edges are plug in and every gear on the instrument panel is in motion !
This unlock the ability to turn the crank on the machine .
Screenshot by Pro Game Guides
Lighting the torch
A chandelier falls as a result of using the crank . you’re able to light your oiled Aaron’s rod on the candles there . check that you go take off that handgrip from the political machine now that you ’re done with it .
Apply your lit torch to the bucket of rock oil in the church to light it up and unlock your third way .
c1 . you could use your purifying jar on the dirty water here . There is also a off-white next to the basin.c2 . These unaffixed stone can be lever up with your ax for another argent coin . Next to them is a attracter you’re able to sweep off and pick up.c3 . apply your acid on this chain to break it down and get it .

Image by Pro Game Guides
you could now attach your hook and chain to the attraction . Back at the well , you’re able to make it functional by lend oneself the handle and magnet chain .
ferment the hold to pull up a alloy boxful , which is rusty . Use your oil dispenser one more time on the boxful which allows it to open , granting you a bright red crystal .
How to complete the red crystal puzzle
Inside the castle , come near the desk near the purse . you’re able to apply your crystal here to unlock the desk draftsman ’s puzzler .
" turn out the circles so that crystal of the same color would be on the occupation near the large crystals . "
You sour each doughnut by clicking and drop behind it . Crucially , not every stone need to be used , you just necessitate the four lines from the large jewel to match them .
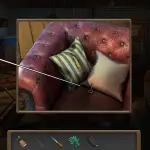
Image by Pro Game Guides
Your payoff is a silvery cross .
In the church , your purified water can now be consecrate . Submerge your cross in the piss , and then your aspen stake . Your aspen interest is now equal to of polish off the vampire for good .
Once you ’ve prod him , he turns to dust and you may now beak up the medallion left behind . Also , there is a bottleful on the arm of his chair which you could drag to the pile of junk to make that factor .
Image by Pro Game Guides
How to complete the medallion mural puzzle
At the back of the church , there ’s a wall painting that can be unlock with the medallion .
" become the circles to restore the pattern . "
By clicking and drag the snub out circles of the wall painting around , you could complete the patterns . I recommend delineate up the blanched lines , which are almost all straight , provide a solid line to severalize if you ’re on the proper trail .
Screenshot by Pro Game Guides
A surreptitious passage opens up behind the mural !
Scouring the tower
d1 . Use the pincers next to the fire to pull out a button.d2 . On the table , you could pick up another clitoris , a syringe , and a bottle of scent .
Downstairs , you ’ll utilise the perfume bottle on the spiderweb in the corner . Arachnophobes watch out , the invigoration is somewhat unpleasant . In return , you get a keystone .
The bottom of the coffin also has a puzzle that you’re able to now access by placing the buttons into the break .

Screenshot by Pro Game Guides
How to complete the coffin puzzle
" Repeat the order of the pictures of the inner circle on the out one . "
The inner circle of symbolisation alternates the two types of skulls immediately , one after the other . This imply you could ignore the internal circle and just focus on getting your out rophy alternating as well .
you’re able to use the two button you tally to either make the outer circle spin , or to swap the two symbols that are presently inside the copper section of the puzzle . Any time you see two of the same symbolization touching , that ’s an area that want to be fixed , so concenter on shifting thing around like that .
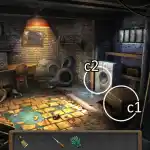
Image by Pro Game Guides
Your advantage is the coffin opening , which evidence you a werewolf . You call for werewolf blood to open up a book , so utilise your syringe on the werewolf now .
Opening the werewolf book
To open up the wolfman Holy Writ , you involve that pedigree you ’ve just garner . The werewolf book is inside the castle , front and plaza . Stab the syringe into the Koran to open it up . You ’ll get a silver coin and a elaborated exlanation of what you ’re missing for the final key .
In full , you ’ll ask the castanets and coin you ’ve been collecting the vampire ashes , an earthen vas to smelt the flatware in , and a mold to pour the memory cache key .
You already have one cay , though , so let ’s go back up to the pillar .
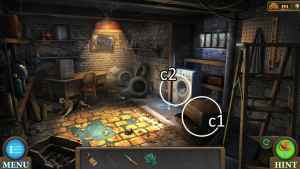
Image by Pro Game Guides
How to complete the tower chest puzzle
Using your key on this chest unlocks a matching secret plan teaser .
" come up all triple of monovular impression . "
This is a secret plan of store with a little wrench . When you uncover two tiles , you ’ll see what they are , and then those two tiles will switch , so you ask to think of where they went to instead of where they are .
Image by Pro Game Guides
In add-on , you really do call for to find triples . discover a pair does nothing . As with many of these puzzles , I advocate focusing on one triplet at a sentence , such as find all the autumn pumpkin , and then bats , etc .
Your payoff for completing the puzzle is your final smooth-spoken coin and a much - needed shovel .
There ’s a freshly - dug lot of dirt here in the memorial park ( large surprise ) . By using your digger on it , you ’ll gain an earthenware jug , a key , and naturally a bone .
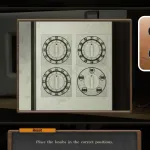
Image by Pro Game Guides
This golden paint goes to the dresser next to the castle entrance , which hold the key ’s stamp , the terminal bone , and a handle for the escape windowpane .
congratulation ! You ’re almost there . pass to the tower and assemble your formula .
Pour the lamia ash onto the fire . pitch in the bones . Put the earthenware on the board in front of the fire , insert the coin into the jug , and at long last get your mold ready . Now you could utilize the pair of tweezers on the jug to dethaw the flatware and make your magic headstone !

Image by Pro Game Guides
While you ’re here , go forward and habituate your handle to enter the window for your capital escape .
How to complete the magic key puzzle
In the vampire ’s castle , there ’s an levy door bearing a intimate symbol . practice your winder on this to unlock the magic primal puzzle .
" Move the chipping to the cells of the correspond colour . "
There are five rotation buttons on this teaser that allow you to move the four chips around them . This will be necessary to get all the chips where they go .
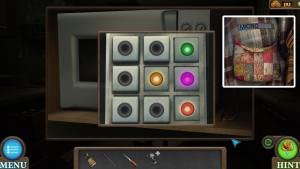
Image by Pro Game Guides
Start from the bottom and work your way up , and you ’ll have this puzzle double-dyed in no clock time .
Your reward is the ruling staff and by now you know what to do . Use your ruling staff on the squash racquet in the pillar , and you ’ll be able to escape the world !
Tricky Doors World 14: Santa’s House complete walkthrough guide
As if in verbatim answer to the previous spooky - theme world , today you ’ll discover yourself take on Santa in his own home for a cheerier escape !
a1 . Zoom in on this professorship to move aside the blanket on top of it . There ’s a figurine stick into the chair , but as luck would have it the firearm of metal also on the chair is perfect for free it.a2 . Take the empty picture off of the wall.a3 . Move aside the presents underneath the desk to piece up a set of matches.a4 . Go before and take that beard.a5 . cart this broom towards the pendant in the heart of the way to get the second figurine.a6 . use the figurines to open up this pectus . This unlocks the reindeer chest puzzler , elaborate below.a7 . you’re able to utilize the Christmas tree winder to open up this room access .
How to complete the reindeer chest puzzle
" Move the non-white small-arm to the places of the corresponding color . "
There is one empty sphere to shift the pieces around . You ’ll need to fill in both side of the puzzler but pushing the colors around . you’re able to see what space they ’re supposed to be on by move the piece that ’s on a space , which is covering a closed chain of people of colour to tally .
you could now get into the chest of drawers . Move the present to uncover the Christmas tree key , and move it again to see the back of the thorax , where four unknown symbols are shroud .
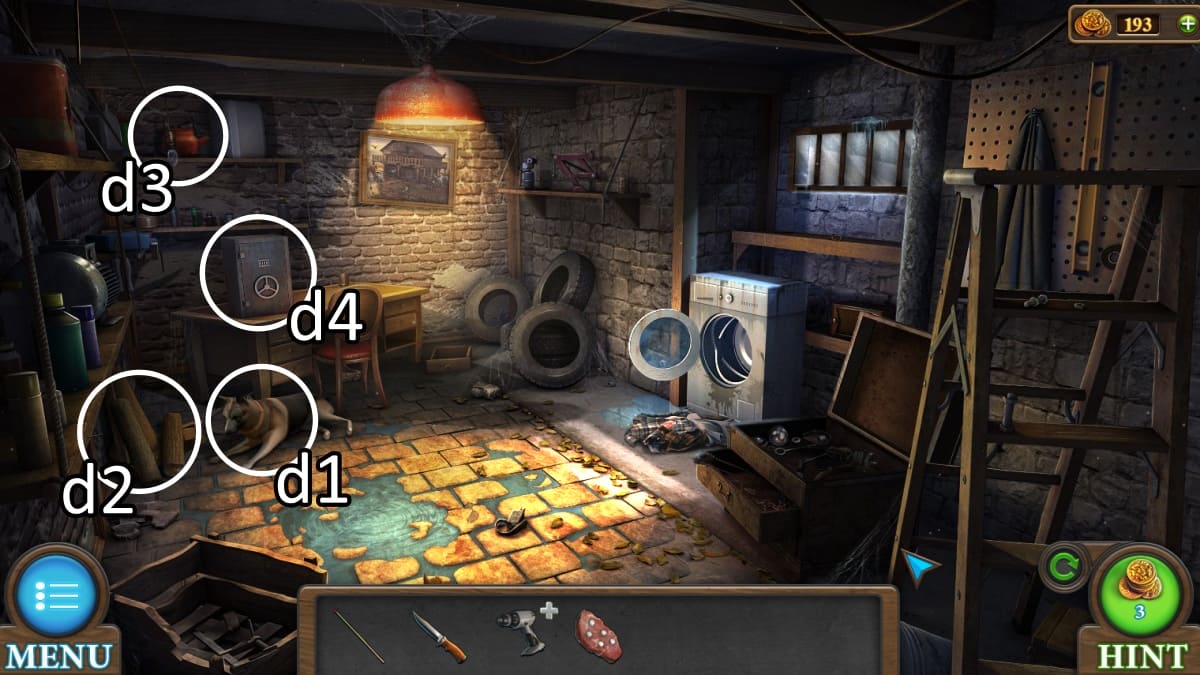
Image by Pro Game Guides
Dashing through the snow
b1 . The first of logarithm of six that you ’ll be picking up to make firewood.b2 . Unfortunately this snowman must be dismantled . Remove its empty cauldron hat , its bulb clitoris , and its firewood arm.b3 . There ’s a man of firewood lean up against the wall . open up up the control board to find a wire along the bottom . You ’ll ask two bulbs to unlock this puzzle later.b4 . Lockpick Santa ’s mailbox with the wire . This gives you the santa ’s letter box mystifier , which is elaborate below.b5 . employ the tree figurine from the postbox to open up up this barn door teaser , also below .
How to complete Santa’s mailbox puzzle
" Move the chips to meet all the cubicle on the right part of the field . "
The snow bunting chip move as set of two or three and must be slotted into the empty slot on right field . Go row by dustup and you ’ll quickly have filled up all the cells .
Inside the mailbox is one of two books , and a carve Sir Herbert Beerbohm Tree statuette .
Screenshot by Pro Game Guides
How to complete the barn door puzzle
" Arrange the chip on the corresponding origin according to their colour and design . "
Going left to right field , you could push the chips as far as you desire , and they ’ll loop around to the other side . Going up and down , however , you could only move so long as there ’s room for the chip shot to go somewhere . The run-in that start at five tall must be made shorter somehow before they can be maneuvered .
Your goal is to make a row each of the snowmen , bells , trees , and snowflakes .
Screenshot by Pro Game Guides
Your reward is access to the reindeer barn .
Inside the reindeer barn
c1 . gain another piece of wood.c2 . And pick up some red boots.c3 . Another piece of firewood.c4 . cull up a carve decor item next to the sick reindeer.c5 . In this orbit you may grab a shovel and some hay .
Go back inside the house to expend your carve decor item on the locked desk .
How to complete the red triangles puzzle
" Rotate the constituent to locate all the scarlet triangles in the center . "
This is a simple puzzle of rotate blocks . All of the blossom details can be click to rotate the colors around them . Your goal is to get all the red triangles into the center . change over the reds around until you ’ve move them where they go .
Your reward is a pair of reddened pants and , after move a present aside , the 2d Scripture you need . This right away lead into a mystifier on the unexpended side of this elbow room , where there ’s a set of books to complete .
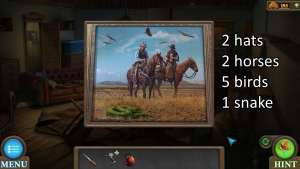
Image by Pro Game Guides
How to complete Santa’s books puzzle
" Swap the books to restore the pattern . "
you could click any two Scripture to swap them around . There is no special trick to this , the pattern starts and ends on some clear swoops you’re able to start out from .
In return you get your second bulb , and a recipe to make medical specialty for that poor sick reindeer .
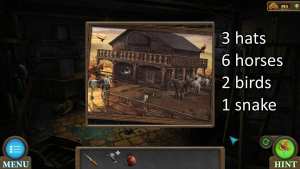
Image by Pro Game Guides
There is no mystifier to the electric-light bulb , just infix them into the panel and the lights in the third building will turn on . Use your shovel to get the snow out of the way , and you’re able to walk aright in .
Working in the workshop
d1 . Pick up some pliers.d2 . Your concluding piece of firewood completes the set.d3 . The tabular array holds a coin and a chocolate-brown bowl.d4 . Up in the attic , pick up your iconic hat and bag.d5 . This run is for you to use.d6 . You ’ll be getting a key soon and do back to this area to unlock the checkers puzzle , detailed below .
In the reindeer barn , utilise your plier to take the wood firearm get on up the carrell . within is a harness and a paint . you could also use the plier on the grindstone in this same room to take off the handle for your own employment .
you may get your cauldron brewing ( and clear your busy stock list some ! ) by going deep down to the hearth . Insert the hay and firewood , and fill the cauldron with water from the gun barrel next to the fireplace . Then insert that cauldron of weewee and apply your matches to get going the ardour .
Screenshot by Pro Game Guides
While this is brewing , you could head alfresco and set up your ravel next to the Christmas tree . wax up it , you could plough around the birdhouse to find some nut , and observe a art object of resin you need , which ca n’t be take off without something crisp .
How to complete the checkers puzzle
Back inside the workshop , you may use your young winder on the back wall lockbox to unlock the chequer flummox .
" Use the chips to jump over each other so that only one chip would remain on the battlefield . "
This is checkers with just one colour . Any chip can jump over any other chip , but instead of being diagonal it is in any fundamental direction , up and down or allow for and right .
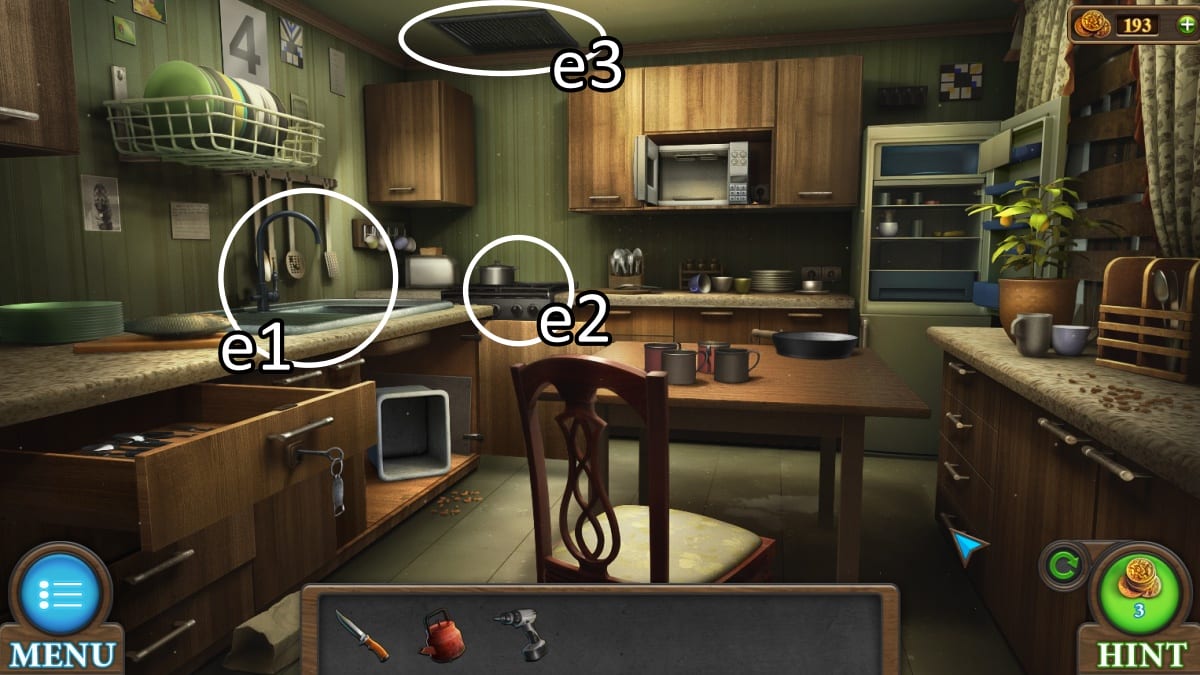
Image by Pro Game Guides
Your goal is to remove the board so there ’s just one chip leave . I recommend starting by make the checker on the far right accessible , and using that one to acquit the rest of the circuit board .
Your payoff is a second coin and a knife .
Now that you have something acute , go back up the ladder to prize off the rosin from the Sir Herbert Beerbohm Tree .
Screenshot by Pro Game Guides
In the shop , you may summate the grip and nuts to the milling machinery on the table to create the ground junky . That ’s two of the three fixings down !
In the reindeer barn , channelize up to the hayloft to put your coin into the chest of drawers there . This unlocks the argument crossing teaser .
How to complete the line crossing puzzle
" unite the blue chips with lines . The number of lines crossing a chip must be adequate to the number written on the chip . "
You draw lines by snap and dragging between two slice . An important item the command pull up stakes out is that you may draw more than one line between the same set of chipping . Because the lines are all straight ( no slanted selection ) , there ’s a limited numeral of pedigree each Saratoga chip on the sharpness can make at all , so I advocate starting with the border and nook like a jigsaw .
Your reward is berries and train of thought .
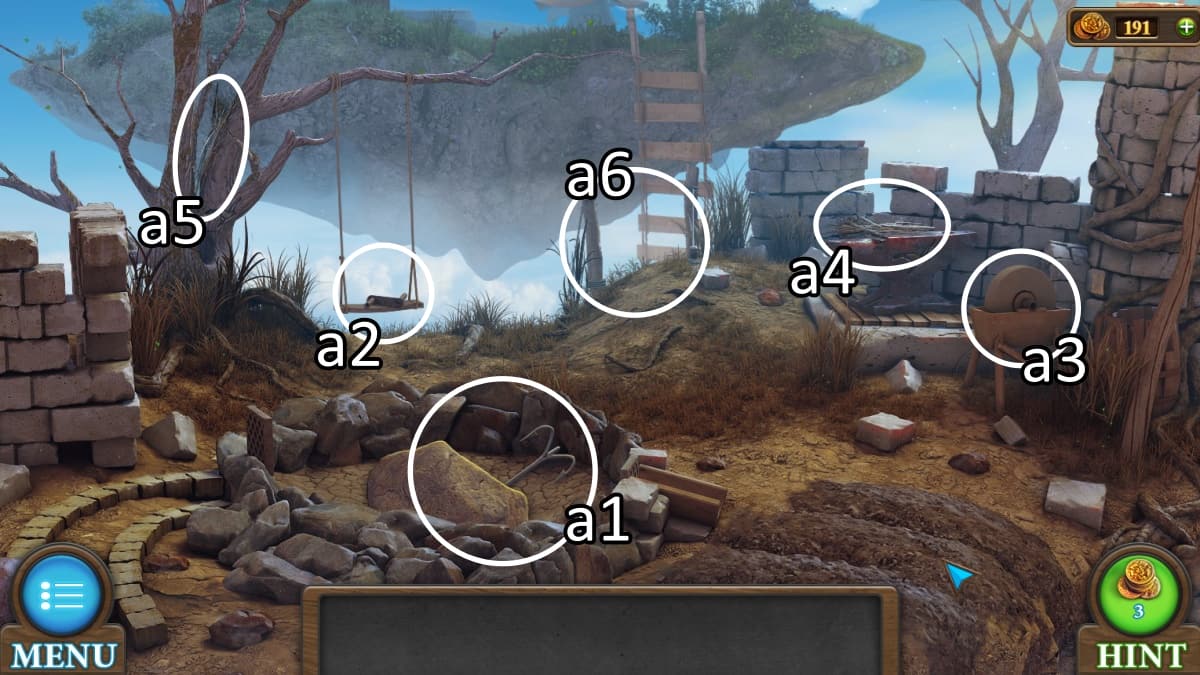
Image by Pro Game Guides
Your berries can also be ground up , let you to start the medicament !
Cooking the medicine
Rather than add the ingredient now to the gage , you ’ll be placing them onto the recipe card you got . That ’s the earth Berry , ground egg , and the resin . This gives you the ingredients item , which can be add to the boiling caldron .
apply your bowl on the resulting mix to gain some medicine . It ’s fourth dimension to cure the Rangifer tarandus .
With the medicine fed to the reindeer , you have accession to the stall , where you’re able to gain one reindeer figurine and see the hint on the kiosk floor . Go deep down to Santa ’s desk to use this clue .

Image by Pro Game Guides
How to complete Santa’s bow puzzle
" Click the symbols in the correct order . "
Your rewards are a second Rangifer tarandus statuette , a sheave , and Santa ’s sweater and gloves .
Dressing the empty picture
recall that empty picture you picked up early on on ? You now have everything you need to fit out it up . Open up the picture in your inventory and apply the various Santa clothes on it .
That ’s the boots , bloomers , jacket , hat , and beard . This afford you the picture , which can be put back where you originally found the portrait to the left wing of the fireplace .
" Set the correct symbols . "
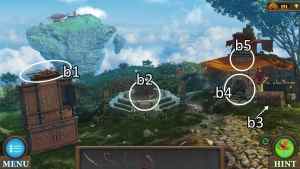
Image by Pro Game Guides
Another puzzle set up in the very first elbow room , your solution to this puzzle is on the back of the chest within the same room . tick each symbolic representation until it matches the tip .
Your reward is a band of veridical Santa clothes .
In your inventory , blame up your harness and practice the tongue and then meander on it to create a belt .
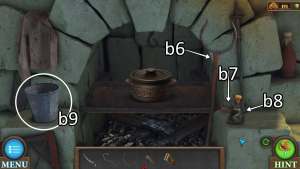
Image by Pro Game Guides
How to complete the reindeer door puzzle
" turn out the circles so that all the images in the roofy rival the centre image . "
There are two agency to know which symbol go where . The center range are a colouring material that fit the I on the rotate part . The spell also have image that equalise the center field piece , such as the scissors get needle , thread , and a sock .
The door to the exterior is now open , but you ’re not just leaving this prison term , you ’re delivering gift ! set your Santa suit on the sleigh and head back to the workshop .

Screenshot by Pro Game Guides
Place your sheave and belt onto the machine to make it go . The green button return you a pile of nowadays to put into your travelling bag .
retort to the sleigh and stretch up the presents . Now you ’re ready to fan out Christmas cheerfulness and complete the level !
Tricky Doors World 15: Wild West complete walkthrough guide
This small township is n’t braggy enough for the one of you . Alone in the heart of the desert , you ’ll be seeking a way to head for the hills .
a1 . On the desk , pick up the corkscrew , pencil , and empty mug.a2 . There ’s a glove hanging off this barrel.a3 . A hammer lie in next to the stove , and you’re able to expend your glove to get to the stove.a2 . issue forth back to the barrel . Use your cock and then corkscrew to open it up , and satiate your empty cup with water.a3 . rain buckets the water onto the fervency to cool down the cay and let you pick it up.a4 . This key goes to the front door and unlocks the symbol building puzzle , detail below .
How to complete the symbol building puzzle
" Rotate the circle to assemble the necessary symbol from the portion . "
Just click and drag on the two blue symbol circle to line up what symbol are underneath the red part in the middle . You ’ll be build each of the symbol in the upper proper corner using two half .
Once you ’ve made three symbolisation , the door opens and you’re able to go outside !
Image by Pro Game Guides
Say hi to the horse
Out on the street , you ’ll immediately see a horse and cart , though the cart is broken . Sadly , the gymnastic horse alone can not get you out of this town .
b1 . Approach the go-cart and pick up a pitchfork and the first of five blades.b2 . A 2d blade.b3 . Behind the till is a headstone .
lead into the bar on the left .
Image by Pro Game Guides
b4 . The only thing you may do in here yet is pick up another Florida key from underneath the cash cash register .
How to complete the vault maze
" Move the chip through the maze to their places . "
You ’ll use the pointer buttons on the side to move one chassis at a clock time through the snarl . The solution is listed above . The green triangle will follow the entire route of the red circle before continuing onto the green line .
Your reinforcement is the vault possible action , which contains a air current water pump diagram , a piano key , and a six-gun .
Screenshot by Pro Game Guides
How to complete the safe drawer puzzle
You ’ll now be expected to know the computer code to the desk drawer with the good dials . This is a tricky one , but you do have the resolution .
On the top of the desk , there ’s three bottle types in a certain decree . Take note of this , then head back into the bar to numerate the numeral of bottles on the back shelf . For me there were 8 black bottle , 8 favorable I , and 6 cherry one , and that ’s the order of my bottles so the solution was 8 - 8 - 6 .
Your reward is a strip of newspaper and memory access to a notebook computer full of names .
Screenshot by Pro Game Guides
You ’ll be read the strip show over to the cherished poster outside of the streak , which is brood in euphony bank bill . Apply the report and then the pencil to the wanted poster and you ’ll compose down the notes .
" recruit the right John Cash register code . "
This immediate payment registry is not set up like normal , and there are multiple of each number , but each push can only be press once .
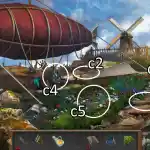
Image by Pro Game Guides
This is another spot where you might not have realized you ’d been given the code . The Christian Bible of names has your resolution , but there ’s no need to figure the codes next to every name .
One of them is for Benjamin King , on the treasured poster outside the prevention . mark the codification next to that name , for me it was FGH 744774 . This is your resolution .
Your reinforcement is a cartridge and a blue arrow .
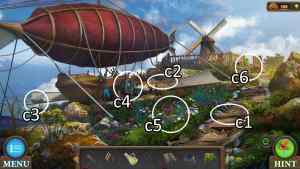
Image by Pro Game Guides
How to complete the stained glass puzzle
You ’ll be taking your arrow to the locked door back outside . This threshold is behind the horse and go-cart . Insert the aristocratic arrow to unlock the stained ice teaser .
" coiffure the parts of the stained glass windowpane so that each part would be connected to other parts of the same colors . "
You rotate the star design using the red arrows on top . You insert the stained deoxyephedrine by clicking on either the small pointer in the middle or the big arrow by the side . There are six multi - coloured arrow each .
Image by Pro Game Guides
Once one of your pointer holders is empty you could then pluck them out of the circle and replace them somewhere else , letting you aline after all are placed .
Inside the barn
c1 . Pick up the wheel for the cart outside.c2 . Use your hammering to pull out the stooped nails from this board . Then take the board as well . you may place the stooped nails on the anvil and use your hammer on them to straighten them out.c3 . A blade.c4 . Use your pitchfork on this pile of hay to unveil the second piano key and another blade.c5 . Take this ladder as well.c6 . Use your queerly - work key on this chest , which will unlock a puzzle .
" Put the chips in their place . "
Your end is to get the circuit and semi - rotary of each color onto their several roofing tile . you may click the silver button all around the board to shift the chips around . The clean roach goes in the very heart .

Screenshot by Pro Game Guides
As always , I urge start with one coloration at a prison term , let you narrow your focussing as you push forward through the teaser .
Your reward is the first of two chip and a valve .
At the water till , you may start to build it up , even though you ca n’t yet turn on the water . Insert the valve on top , and then apply the plank and straightened nails to the front .
Screenshot by Pro Game Guides
you’re able to also place your run next to the saloon entryway to reach the wind vane , which is still miss the blade that you ’re take in . Finally , pop the rack onto the horse ’s cart .
None of these will assume fruit just yet , but you ’re on your way to solving a lot of thing at once .
How to complete the piano key puzzle
Head into the bar to put your two pianissimo keys and the slip of newspaper publisher with music notes on it onto the pianoforte .
" Repeat the melody publish on the clue . "
This puzzle ask you to have international knowledge of take medicine . dread not , I ’ve done the learning so you do n’t have to . The solvent is include on the graphic above .
Screenshot by Pro Game Guides
Your reward is a piston chamber . Use the revolver in your inventory to add together the cylinder and the cartridge and you now have a working revolver .
Hooking up the horse
Going into the barn , there ’s a second whorl that does n’t have a winder on the right side of the area . This rust whorl can be shot with your fresh revolver , which open up the barn door and gives you a harness and your final steel .
Back at the cart , use your hammer on the wooden block keeping the cart in place . The handcart will move back , and you ’ll get to blame up a slow knife .
In the barn there ’s a grindstone you may utilise to taper the knife , and then the tongue can cut the rope near the urine trough .
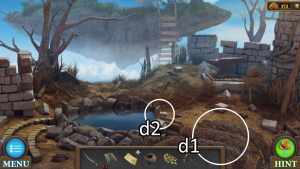
Image by Pro Game Guides
apply your harness on the gymnastic horse , and then seize the rope , and you ’ll get the notice that the horse is athirst . All that work place up the manger and weathervane is finally worth something , as you ’ll add your five blades to the weathervane to start it spinning .
Now you may convince the horse to move by turning on the piddle , which will launch the ambuscade room access .
The trap door contains your second crisp , a set of lucifer , and the balloon basket .
Screenshot by Pro Game Guides
How to complete the card suit puzzle
Insert the chip into this contraption on the bar table to unlock the carte courting puzzle .
" Arrange the cards so that the neighboring sides have the same suits . "
All eight card must be successfully touch base . you could push aside the large suits in the middle of the card , as it ’s only the four corner of each that thing .
Screenshot by Pro Game Guides
Your advantage is a fuel canister and another strangely - shaped key fruit .
How to complete the cell lock puzzle
A queerly - regulate key fruit fits a strangely - form lock chamber . Back in the office you started in , the jail cell can now be opened with this key .
" Remove all personal identification number from the ignition lock . The rotary rotate after each activity . "
Pull the pins in and out of the centre to move the roach one rotation at a metre . Your destination is to get all pin out of the center . You may need to contrive order in pins as much as take them out .
Screenshot by Pro Game Guides
Inside the cell is a circle of burners .
Assemble the hot air balloon
come near the melodic phrase balloon and range down your basketful . Open up the top to pour in the canister of fuel . Add on your burner .
select the basketball hoop to turn it over , and on the balloon to attach it together .
Light the burner with a match , and you could aviate your way out of this small town !
Screenshot by Pro Game Guides
Tricky Doors World 16: Aerodrome complete walkthrough guide
You start your trip today on an abandoned field with an airplane you ’ll be trying to fix up . I hope you ’ve been play Flight Simulator !
a1 . On the left hand of this rapid climb - in , you ’ll line up a key hanging.a2 . Brush aside the bushes until you’re able to regain an pointer . You ’ll be collecting four of these as well.a3 . Pick up a nut from this area , one of four . Use the paint to unlock the red box puzzle , detailed below . With the knife you receive , cut the red straps on the corner below the puzzler area . This grants you a cable.a4 . Jack up the airplane to reveal a 2d arrow.a5 . Attach your hook with your cable and throw it to climb the tower .
" Move the red chip to place them on the flushed personal credit line . "
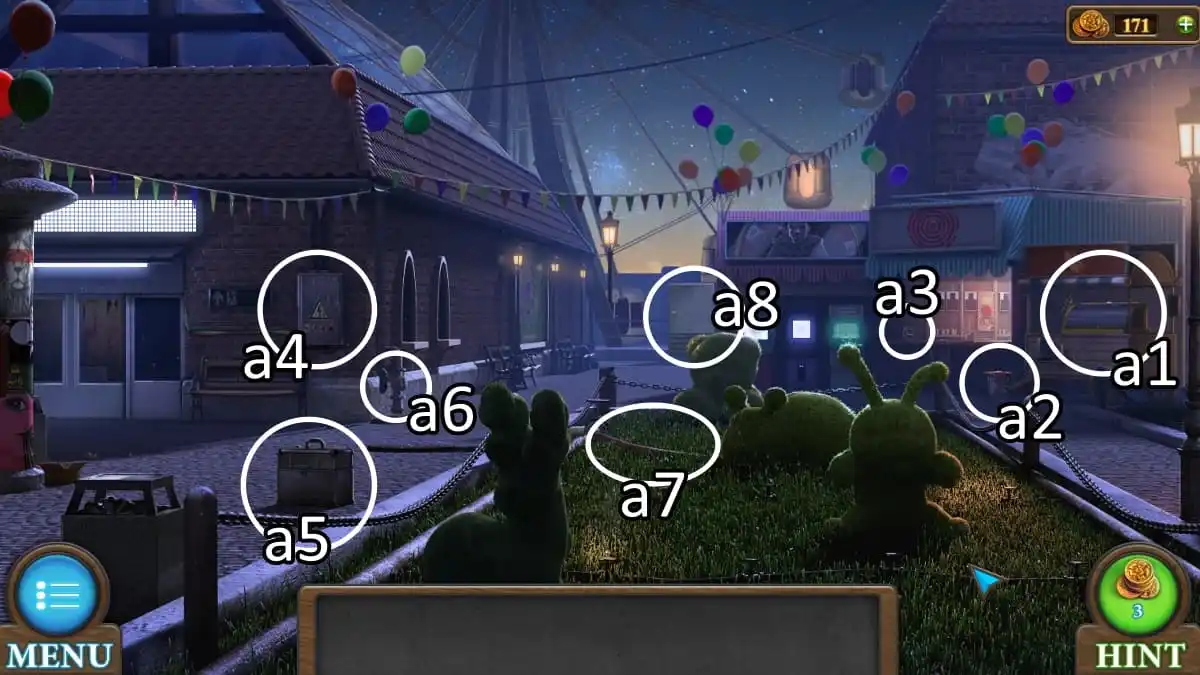
Image by Pro Game Guides
Similar to a puzzler we ’ve seen in retiring worlds , when you move one chip shot up or down , others move with it . you’re able to see which ones are moving even when they ’re stuck at the top because they ’ll be compact and taste to move upward with nowhere to go . This is a good way to guess what you postulate to move down to get your current chip to go up .
Continue this process until all red chip are at the top and the puzzle is complete .
Exploring the control tower
you may move the scallywag , but not yet address it .
b1 . There ’s an pointer here.b2 . find fault up this bucket.b3 . The jacket pocket has a key inside.b4 . Try turning on this grim handle . Nothing materialize , but you do get a few hints on what to do to fix that . There is also a en conceal behind the monitor here .
The back hatching of the planing machine can now be opened , which has a final pointer . you’re able to also drag the rock oil funnel shape into the gas tank for by and by .
Screenshot by Pro Game Guides
How to complete the arrows puzzle
On the far remnant of the runway , the service department can now be opened . Add your four arrows to unlock the arrow puzzle .
" employ the arrows to move the chip around the maze so that both french fries are combined with the desired shape at the same metre . "
You ’ll use the arrows to move the bronze chips around . They both move at the same clip , but if one of them ca n’t move it will stay in place while the other moves . Your goal is to collect all of the gears , which can only be collect in tandem .

Image by Pro Game Guides
Your payoff is the garage door opening .
c1 . open up up this electric panel . There ’s a magnetic keycard and a distich of wire carver inside , both of which have an immediate use , but first we have the electric switching puzzle , elaborate below.c2 . Take note of the painted numbers all around the elbow room . Their color correspond to the barrels set up outside . You ’ll be entering that code into this box to gain a banana and another ballock .
you could now head back to the tower .
Screenshot by Pro Game Guides
Electrical switches puzzle
" Set the correct position of the switches . "
You do n’t ask to care about the blue switches , as only the blood-red 1 matter . The previous hint showing which direction the planes are facing ( up or down ) indicates which violent switching should be flipped up or down themselves .
tug up the grip next to the puzzle to complete it .

Image by Pro Game Guides
Head back into the pillar now that you have some more tools .
d1 . Give your banana to the monkey to invite the tonality it ’s holding.d2 . habituate your conducting wire cutter to get some wires.d3 . The magnetic keycard can be used on this filing cabinet . This will moderate you on a short magpie hunt club .
The filing locker says to check the trash can , which is under the desk . On the bottom of the trash can , there ’s a delineation of the crate down next to the aeroplane . Go down to the crates and witness a number splashed in purple . For me , this was 7 .

Image by Pro Game Guides
Back in the garage , you could zoom in on the purple 7 and find the existent code . For me this was 881465 .
The filing cabinet contains a hand pump and a clinch .
How to complete the truck engine puzzle
" get hold connections on the tiles to work the puzzle . "
Click any two tiles to switch them around . Your goal is to create seven connection of three tile each . Find triad that go together and then order them so two add up into the third , such as a fire hydrant and a hosiery making piddle .
Once all of them are matched , the thug of the truck will toss off and you ’ll be able to pick up a pull . employ your knife on the hose to take in it , and perpetrate out the car assault and battery .
Screenshot by Pro Game Guides
Powering the plane
come out the bombardment into the overt hatch of the plane to give it mogul . You ’ll ask flight of stairs coordinates afterwards .
Get back down to the roulette wheel of the plane , where you ’ll use the wrench to take it off . Now you ’ll have the flat tyre and also reveal a key fruit .
Your key fruit opens the flushed left - side locker in the service department . Inside is a keycard and pry bar .
Image by Pro Game Guides
Take the keycard inside . It will expect you to enter the aircraft keister figure , which is helpfully painted on the side of the planing machine . For me this was 543267 . This nets you the coordinates !
Back in the plane , record the correct trajectory coordinates .
Now you ’ll need to secure the insipid tyre . In the garage , there ’s an aviation car you may sterilise up with the hose , the clinch , and twine the clamp close with your knife . Then you’re able to put down the flat tire and turn on the machine with the red clit . This gives you a fully - functioning wheel .

Image by Pro Game Guides
At the plane , put the bicycle on , put on the four nuts , tighten with a pull , and let down the plane off its gob .
You ’re almost there ! You ’ll still call for fuel and to turn on the lights of the track for safety .
How to complete the fuse box puzzle
At the end of the runway is a fuse box that is shut tight . Use your pry bar cake to open it up , and then put in the wires to make out the circuit . This unlocks a puzzle .
" Rearrange the wires to light all the lights at the top . "
This is a simple puzzle of connecting the lights that are lit to the lights that are unlit with the conducting wire . you’re able to employ any of the four row and even overlap wires , so long as they have different specific holes they ’re run into .
Screenshot by Pro Game Guides
With that done , steer up into the tower to that blue lever that has n’t done anything this whole time and drive it up . We have light !
We have liftoff!
The chicken barrel on the side of the garage contains fuel . Apply the hand pump to the top of the barrel and put down your pail . you may now fill the bucket with fuel , which will go into your planer .
The planer is quick . You ’ve fixed the wheel , fueled up , powered the runway , and entered your coordinates . Now you’re able to fly to exemption .
Tricky Doors World 17: Ship complete walkthrough guide
On a highly decorated ship in the eye of the ocean with no captain , your goal is to find a lifeboat and get outta scheme .
a1 . I go for you enjoy collect lots of one affair , because this is the first handle of a total twelve.a2 . There ’s a yellow chip behind this cannon.a3 . A handle is hiding in the net under this chest , and a strip of cloth to the left.a4 . There ’s a field glass on the railing up here.a5 . whizz in to grab a torch from its holder.a6 . Use your cloth to grab this knife from the mast.a7 . There ’s a second handle here , and you could expend your knife on the sack to open up it up and find the red chip .
With both your microchip in hand , head back to a5 to secure them in for a mystifier .

Image by Pro Game Guides
How to complete the pearl placing puzzle
" Put pearls to all the shell . "
You click a carapace to have it confine around the ivory in front of it . The trick to this mystifier is that every fourth dimension you put a pearl into a shell , all the pearl move one place clockwise . you could not move them when no shells can grab a pearl .
If you get cohere , you’re able to actually snap a closed plate to release its pearl and bear on all pearls forward one measure as well . When you only have one drop lead , try opening the shell it will be in front of next , so that you ’re always closing a shell right after open one , and eventually you will get the last drop where it needs to go !

Image by Pro Game Guides
achiever grants you access to the police chief ’s quarters .
In the captain’s quarters
b1 . wrecking bar spread out this barrel with your knife to pull up out a hold and pick up a scoop of powder . Do n’t manage that bare - handed in real life!b2 . Your quaternary handle is here … b3 . … And your fifth is here!b4 . Insert your handle to this to unlock the handle decor puzzle , elaborated below.b5 . identify your spyglass here . In your inventory , add your fuel to the common mullein , and post the torch onto the barrel to set it on fervor . That ’s how fire works , right?b6 . Grab the hook next to this birdcage .
How to complete the handle decor puzzle
" Place the interior decoration pieces in their places . "
The three grip will rotate whatever part they ’re touching to the next outer space . The sum will rotate four in a square and the two on the side will only trade the two they ’re touching back and forth .
Your goal is to complete the decoration and make it look whole by place the pieces where they go . The side handles can be used to ' deliver ' roofing tile once you know where you want them to go .
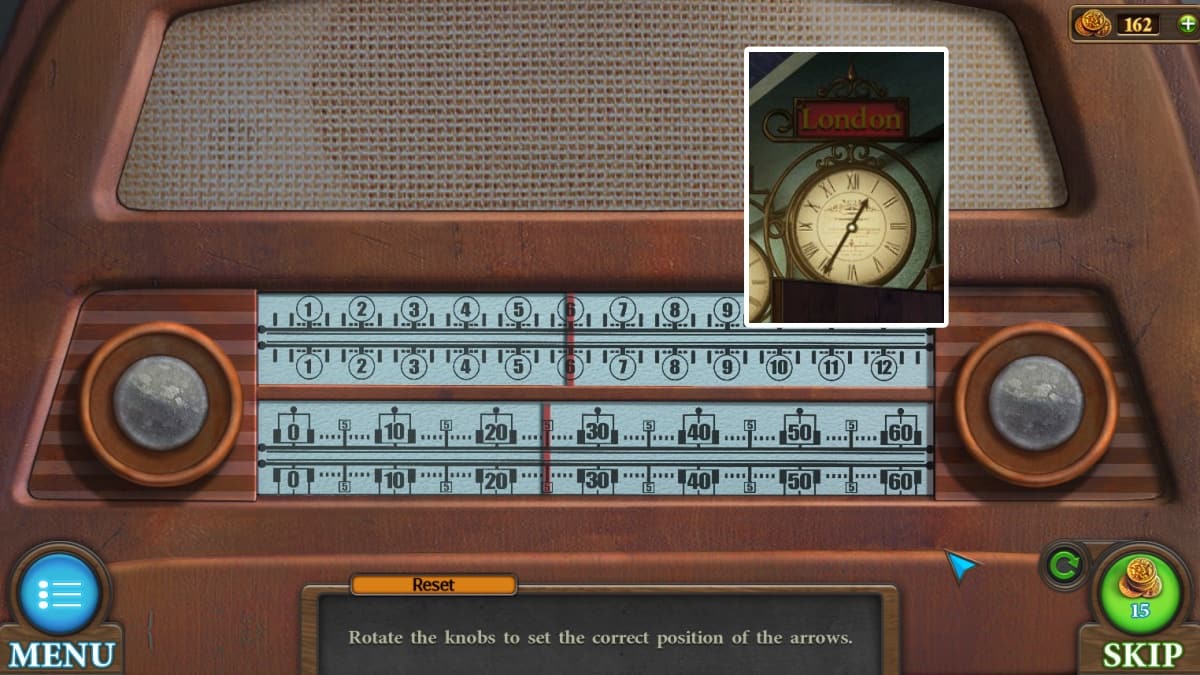
Image by Pro Game Guides
With the cabinet open , you ’ll receive a hold , the first of four gears , and a bottleful of fuel .
While you ’re here , expect at the labels on the remaining bottles , and in what order . I had a banana tree , cultivated carrot , and bee .
How to complete the animal combination lock
" Enter the right combining . "
The bottles on the shelf of the last teaser are our clue for this one . move around the combination interlace to the animal that eat the food number on the bottles .
For me , this was monkey , rabbit , and with bee representing dearest , a bear .
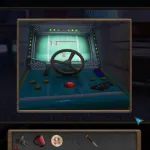
Screenshot by Pro Game Guides
Move aside the textile inside the chest to pick up another handle and a scroll saw .
Your scroll saw can be used on this chain in the maitre d' ’s quarters to gain a concatenation .
Take the chain outside to envelop around the green dresser in the middle of the deck , and then your crotchet to the cannon .
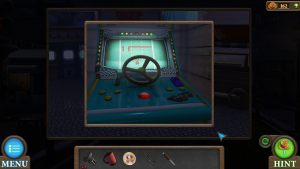
Screenshot by Pro Game Guides
occupy the front of the cannon with gunpowder , pack it down with the ramrod next to the carom , and then expend your burn torch to light the cannon .
The strong recoil of the cannon moves both the shank and the bureau . Under the carom is a geared wheel and a pry bar . Under the chest is a door you could go down .
Below deck
c1 . Use your pry bar on this box to pry it open , find fault up an empty bike and a contingent . While you ’re zoomed in , there ’s a handle on the ripe side.c2 . find fault up a handle.c3 . Another grip ! Also , a bowl of nuts , and on the floor a pink chip.c4 . Move aside this netting to scoot out a chest . This chest has a puzzle you want a suggestion for.c5 . blame up an oar off the ground .
How to complete the bird cage puzzle
Head back up to the raspberry cage to start the bird John Milton Cage Jr. puzzle by inserting the detail you ’ve just found .
" Assemble circles using matching factor . "
you may turn either side of the circle by clicking on the detail in the middle of their wheel . Your goal is to match up the two halves of the same circle and click the middle button to put them together . You ’ll know you ’re successful when but rotary disappear and you ’re bequeath with empty slots .
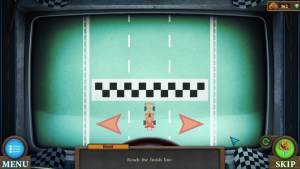
Screenshot by Pro Game Guides
Complete all the circles to finish the puzzler and unlock the hiss cage .
Give the bird your pipe bowl of junkie to distract it . Now you may plunk up a handgrip and the second chip .
How to complete the treasure chest puzzle
Your two chips can finally unlock that weird unripened chest of drawers on pack of cards .
" localise the chip in their places . "
This is another puzzle where you slide the pieces into the same colour / pictorial matter place as is printed on the small-arm itself . There is one free time slot at all time which you ’ll use to slide the other check around by the route shown .
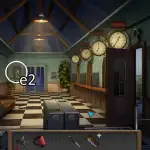
Image by Pro Game Guides
When you finish this mystifier , you ’ll find a circular detail and your last handle .
Open up the empty rack in your armory . bring the detail , and all twelve handle .
Steering the ship
" conduct the ship in the correct direction . "
With your rack added to the ship , it ’s now your task to choose the direction it navigate in . as luck would have it , the chieftain left a helpful map on his desk .
The arrow indicate how many times you need to plow the steering wheel in that counsel , similar to a combination dependable curl . You do not need to click and drag the wheel , only tick on the side you want it to wrick to .
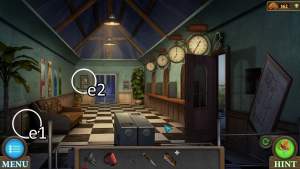
Image by Pro Game Guides
Your reward is a gear wheel and a color drawing off , which will serve as your intimation for the bureau below deck of cards .
How to complete the color chest puzzle
" tap the part of the picture in the order that is shown below . "
Ignore the color of the actual picture exclusively , and depend full on the note that you’re able to repose over the puzzle . The colors of the circles are the x ’s you require to get through .
Once you ’ve click them all in lodge , you ’ll get your final geared wheel .
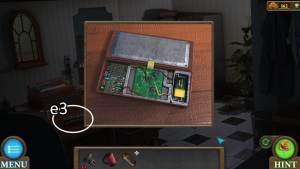
Image by Pro Game Guides
How to complete the gear box puzzle
" grade the gear in position to start the mechanism . "
Your four gears will go into this boxful next to the lifeboat . You ’ll know a gear fits when it start out bend , so I urge starting from the top and run your way down . I ’ve included my resolution . There should be one remnant gear .
Your lifeboat has been frown . Toss down the ladder , add your oar to the sauceboat , and you ’ll be sailing into the apparent horizon .
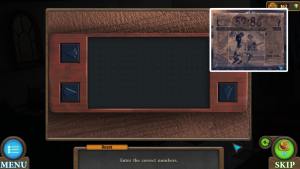
Image by Pro Game Guides
Tricky Doors World 18: Egyptian Pyramid complete walkthrough guide
a1 . Pick up a nursing bottle of oil.a2 . A jug is on the floor.a3 . On the floor next to the brazier , there ’s a metal circle.a4 . Place the metal circle here to unlock the rotating circles puzzle , detailed below .
How to complete rotating circles puzzle
" revolve the circles to place the correct images on them . "
Every lot you rotate will rotate another set on the opposite side . However , that same opposite circle will not rotate the first , it will splay a different roofy .
Fiddle with these eight total rope until both picture are absolutely aligned .
Screenshot by Pro Game Guides
Your reward is a figurine . This statuette goes into the door out .
How to complete the crypt door puzzle
" Move the chips across the airfield on the left to draw the rule shown on the right . "
Your approach pattern will likely be different . Your destination is to make the lights match the pattern drawn on the right field by moving around the chips . Most notably , you may make two lines cross over the same region if you have too many argument to make the pattern you involve .
Once your lines are complete , you open up the second elbow room .
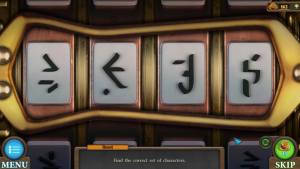
Screenshot by Pro Game Guides
Exploring Ra’s room
b1 . blame up the stick at the base of the statue.b2 . catch this dismal gem.b3 . Jab the pin into the rocks blocking the water supply flow . Grab the red gem that comes out , and put the jug into the weewee to fill it .
How to complete the eye math puzzle
With your water supply , go back to the brazier and pour the water to chill off the eye figurine and pick it up . The eye then goes into this right side rampart recess and unlocks the eye math puzzle .
" prime elements on the playing field so that their sums will be equal to the specified horizontal and vertical note value . "
The meat are in the teal stones . I commend start with the smallest numbers and filling in the gap as you go until every row and pillar is pure .
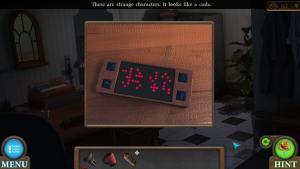
Screenshot by Pro Game Guides
Your advantage is a obelisk , and there is another keyhole behind this that you ca n’t unlock yet .
Got a light?
In the middle of the room , travail your stick into the sarcophagus to bring out the first of three pyramids .
slit your tongue into the fabric on the right side of the second room . Wrap your textile around the stick , then pour on the crude oil . Now that you have a common mullein , you’re able to hold it to one of the modest fires in the first way .
Your Aaron’s rod lights up the third room .
Image by Pro Game Guides
How to complete the blue and red gem puzzles
At the back of the room , you’re able to enter your gemstone into the threshold . I entered the blue gem first .
" Move the chip to go through all the cell of the field . "
The scarab slides across the puzzle until it reaches a natural stopping level . Your goal is to collide with all the spaces , which will exchange color as you go , without overriding any of them .
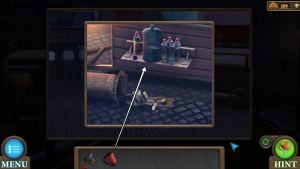
Image by Pro Game Guides
This will recapitulate multiple fourth dimension , and then you’re able to move to the red gem puzzle .
" unite dots of the same colour . join lines should not cross . "
Draw the lines between each coloring material gems and avoid any overlap . I recommend start with the shortest line , as they ’ll be easiest to redraw later if you involve to work around them with one of the longer lines .
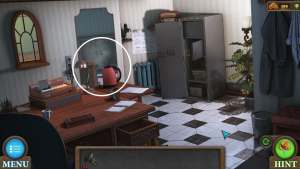
Image by Pro Game Guides
With both your muffin puzzles done , you reach final chamber .
Bastet’s chamber
c1 . There ’s a brushing next to these cat statues.c2 . Use your dagger to pry the gem of Ra out of Bastet ’s chest.c3 . With the stone obtained , you’re able to now take this ravel with you .
The pestiferous moving picture in the first elbow room can be make clean off with the brush you found . This bear the reply to how you ’ll be twist the columns in the hallway .
" Place the correct symbols on the columns . "
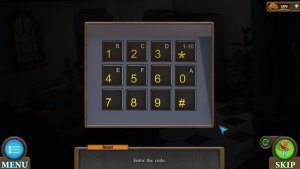
Screenshot by Pro Game Guides
This is only tricky because most of the blocks move another block at the same clock time . While finish one pillar , you have to account for what the other newspaper column is change , until you ’re able to figure out the pattern and get everything line up .
Your reward is both a key fruit and a fundamental part .
The full key go to the wardrobe in the chamber of Bastet , which contains a cat figurine and a cylinder with turn .
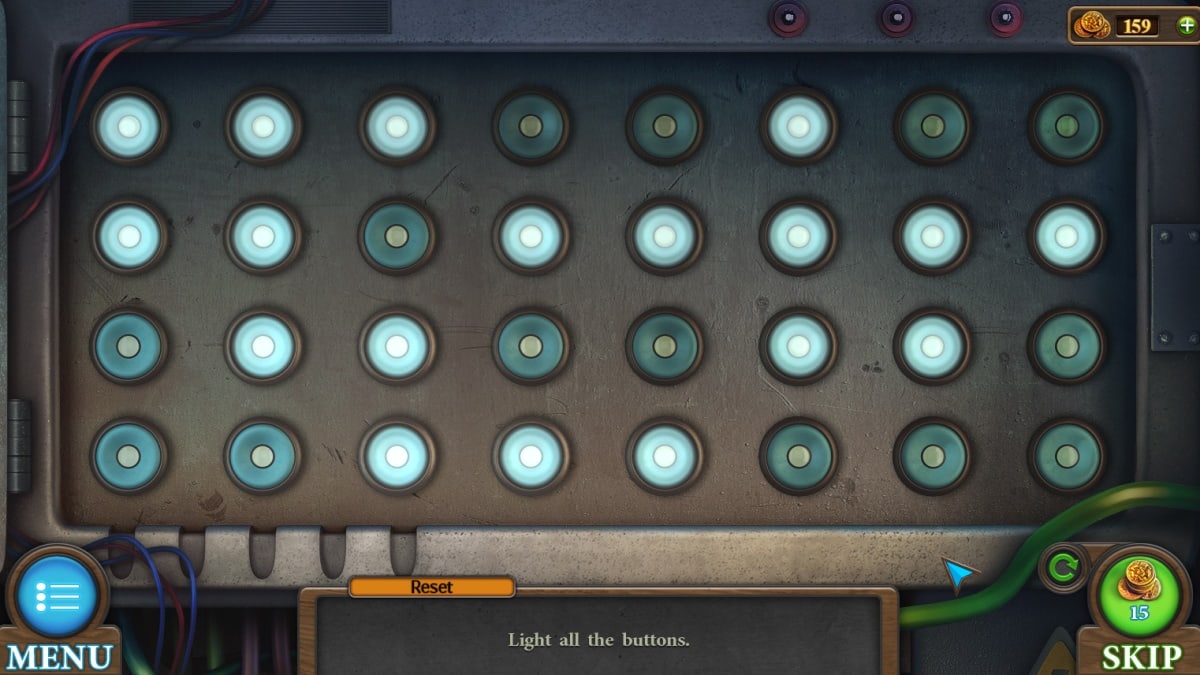
Screenshot by Pro Game Guides
Pleasing the gods
set the guy figurine where one is pretermit and you ’ll receive a second pyramid and a heart . Hopefully not a real one .
In the second room , put down the ladder next to Ra and repay his oculus to him . This turns the mirror on his head . He ’s also carrying a plume , which you should grab now .
By tilt the mirrors on the walls to speculate Ra ’s sunlight , you ’ll unlock the mirrors puzzle .
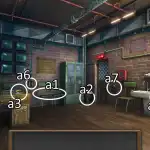
Image by Pro Game Guides
How to complete the mirror puzzle
" expend mirrors and splintering to work the green beam to each crystal . The beam should be uninterrupted . "
The chips are cubes which each have an entrance and an exit for the shaft of light to go through . you may place these freely throughout the puzzle . The mirrors are stuck in place and will bounce any light-green beam guide at them . The crystals are also stuck in position .
Your reward is the final Great Pyramid piece .
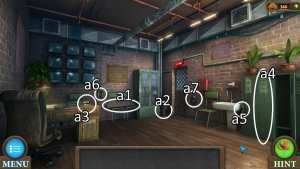
Image by Pro Game Guides
Balancing the scales
Place the heart and feather on Anubis ' scales , in mention to the Egyptian tarradiddle of Anubis count a drained person ’s core against a feathering to determine their eternal fate . He will grant you an Anubis idol .
Place your piece of music of headstone into the muddle on the ripe wall . You will pull out a full key .
This full key goes into the lock under Ra ’s idol in the 2d elbow room , which you may then pick up .
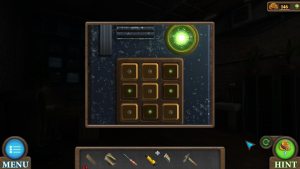
Screenshot by Pro Game Guides
How to complete the three pyramids puzzle
" Move the colored Saratoga chip into place . The chips alter colour of their cells after each move . "
You unlock this puzzle by place the pyramids into the triangle time out in Bastet ’s elbow room .
Chips can only go onto the same coloring of their own crisp , but they get out behind a unlike color in their viewing . you’re able to ' follow ' the microprocessor chip around with each other to create adequate and overlapping paths as you go .

Screenshot by Pro Game Guides
Your reward is a chest of drawers rising from the depths . localize your cylinder into this dresser .
How to complete the cylinder code puzzle
" Enter the right code . "
If you see around the whole level , you will see these images hidden around every room . depend them and enter the sum here to unlock the Bastet idol .
locate all of your perfection into the recesses around the loss , and with their favour you may leave the pyramid .

Image by Pro Game Guides
Tricky Doors World 19: Mayan Pyramid complete walkthrough guide
a1 . Pick up a knife and your first of four stones.a2 . Use your knife on the loge here to earn a rope.a3 . Get up close to the archway to pick up a second pit .
b1 . Pick up the first of four jade figurines.b2 . Grab this stick.b3 . Open up the collapsible shelter to witness a mitt , a water sack , and a bait . Use your knife to thin off a cloth.b4 . Add the hook in your stock-taking to the circle , and use it to hook onto the hollow in this Sir Herbert Beerbohm Tree . Use your glove to get past the scorpion and draw in out a piece of wood.b5 . Cut away the brushing here to get an cubic decimeter - shaped detail.b6 . Take out the Oliver Stone from this totem , and place the piece of wood into its extension to unlock the totem puzzle , detailed below .
" Move the chips to create the correct pattern . "
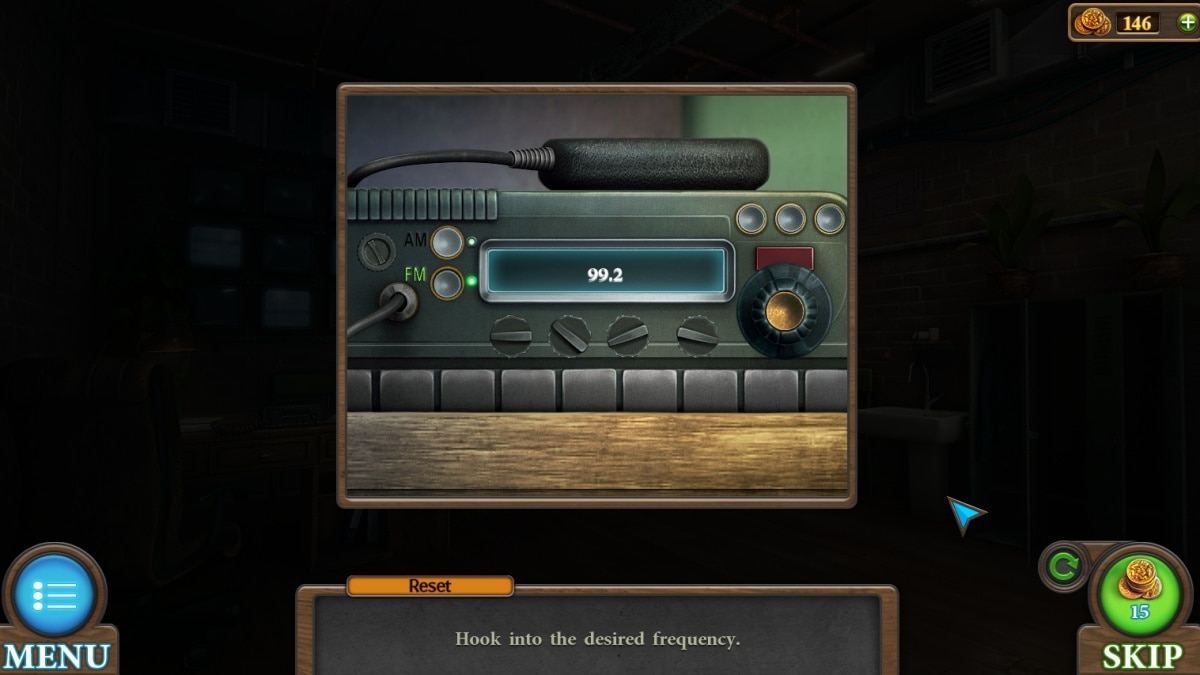
Screenshot by Pro Game Guides
This is two puzzles in one , as the bottom words can only be moved between itself , and the upper two form one grownup picture together .
dawn any two compatible buffalo chip to swap their places , and make a full prototype on both the top and bottom of the puzzle .
Your reward is the 4th gemstone .
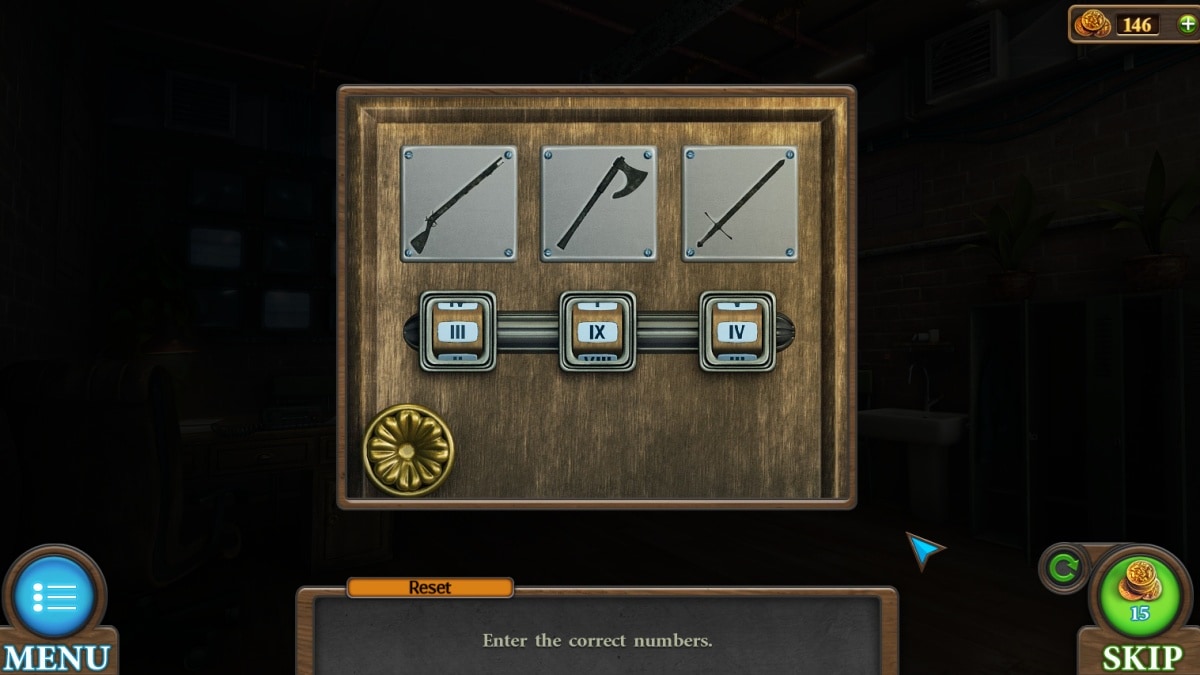
Screenshot by Pro Game Guides
How to complete pyramid door puzzle
Insert the stones at the top of the steps to unlock the next puzzler .
" Rotate the symbols in a circle to put them in their places . "
You ’ll be agree up the symbolic representation of each zodiac sign . If you are n’t sure which symbols go to which zodiac sign , looking up any horoscope can remedy that for you .
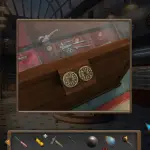
Screenshot by Pro Game Guides
you could use the empty slots on each side to place the privileged roach pieces temporarily . This is how you’re able to change the order of the signs to match what they ’re meant to .
Successful closing opens up the internal Great Pyramid .
Inside the pyramid
c1 . A 2nd hack statuette is inside.c2 . On the remaining side of this chest , there ’s a twosome of tongs.c3 . Pick up the arena .
Use your tongs to take away the snake ’s samara , which go to the chest inside the collapsible shelter .
How to complete the hieroglyphs puzzle
" gather hieroglyphic in the niche . "
Every lot of heiroglyph can be wield individually . If you fall into place the centre release , you ’ll whirl all the piece of that set , place to point them inwards . If you snap the KO’d tintinnabulation , the whole band will shift clockwise . Your goal is to make the same shape from the art object as the middle push button .
You click the center button to make all the pieces go inwards . I advocate for each hieroglyph that you point all the pieces inwards and click the center clitoris to get an idea of where the pointed death of the chassis is , and move that over to the intimate edge .
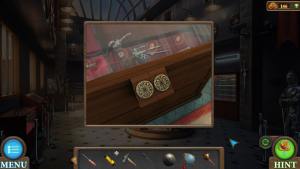
Screenshot by Pro Game Guides
Your reward is a mallet , a straight detail , match , and a readiness of instructions to pay ritual to a fiery serpent .
Making a fire
Now that you have it off you postulate a fire , you’re able to start to pull together the brushwood from around the creation . The localization are circled above .
Pick up the caldron while you ’re inside the pyramid as well . Approach the Hydra and use your knife on the resin on the tree diagram next to it .
How to complete the crystal stencil puzzle
" enjoyment stencils to transfer crystals from one force field to another . meet the area with crystals . "
There are two fields of crystal . When you invest a stencil of any shape onto the study , the crystals ( and vacuous spaces ) number with it over to the other line of business of crystals . Your goal is to make one field entirely gold , and the other entirely ignominious .
Your reward is a cast and a pry legal profession .
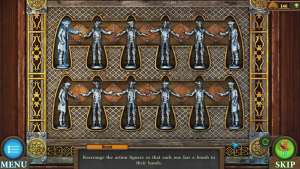
Screenshot by Pro Game Guides
apply your pry bar bar on this thorax to gain a poultice statuette and a shovel vane .
utilise your joystick to the shovel blade . When that break , utilize your tongue to shave it down and make a normal shovel .
The pry bar also gets usage indoors on this elevate expanse of the floor to earn a coffin .
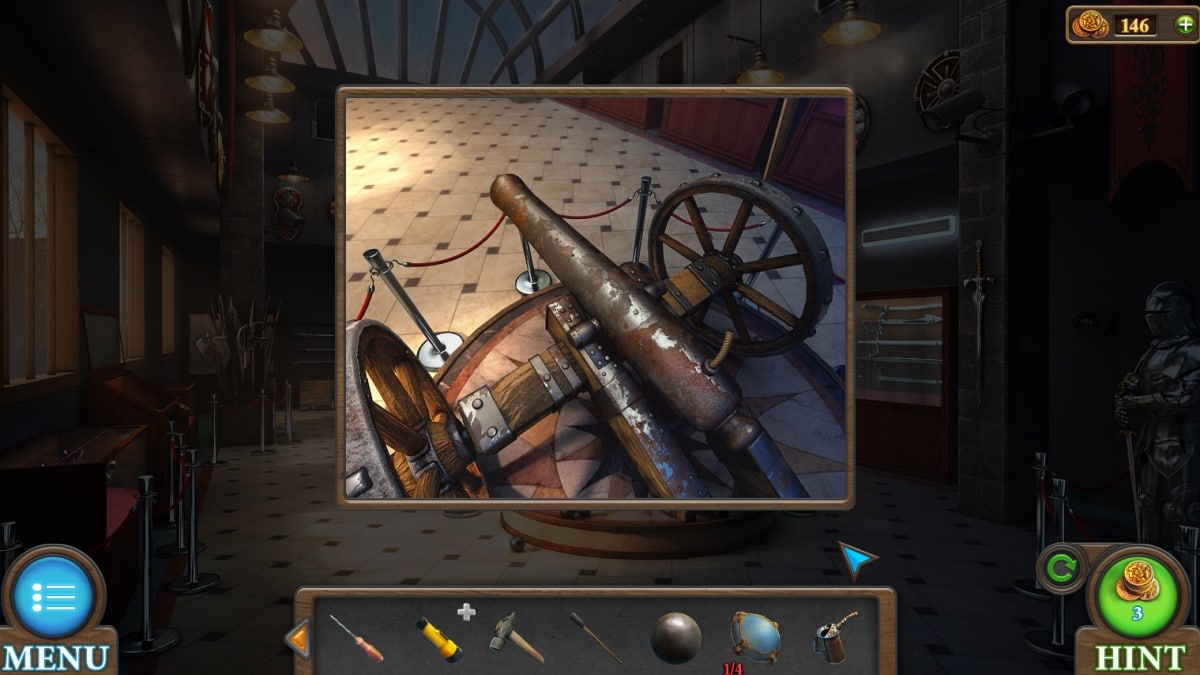
Screenshot by Pro Game Guides
Your new spadeful can be used on this mound of dirt to uncover another loose woman figurine and a seal .
Performing the ritual
Put down your cauldron , brushwood , and resin in this fire pit . Light the fervor .
Per the instructions , you ’ll now utilize your stadium on the resin . Carry this bowl of rosin inside the Pyramids of Egypt to pour it onto the ritual tabular array and light it on fervor .
Take note of the symbols provided .
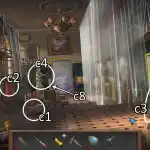
Image by Pro Game Guides
Now we ’re go to create a new hand for the statue . clack on the cast in your stock , and lend oneself in ordering : cloth , plastic figurine , tick to wind , and hammer . Click to pour , and lastly add together water to earn a paw mark .
How to complete mosaic puzzle
Put the paw print onto the statue to unlock the mosaic puzzle .
" Move the mosaic patch to get them into topographic point . "
Every firearm of the mosaic that you may come home will have a unlike set of lines it will move along . Three or more pieces will move all together with every move , so your chore is to set them all into office under those restraint .

Image by Pro Game Guides
All of the mosaic slice are the correct conformation as well as color , so you ’ll have multiple agency of knowing if you ’re good .
Your payoff is a paint , and the concluding jade figurine .
Pull up the jewel casket from your armory . practice the key , and then the cachet , to open up it up . This gives you an emerald .
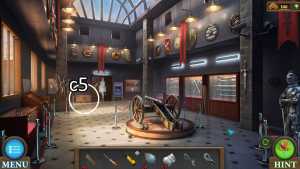
Image by Pro Game Guides
How to complete the jade figurine puzzle
" order the figurines in the right places . "
The fire ritual you did discover the order of these figurines . I have include my solution , yours may be different .
This grants you one of two crystal .
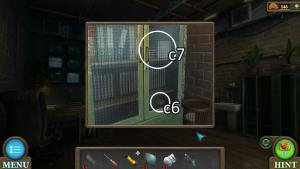
Image by Pro Game Guides
Back alfresco , place the emerald into the centre socket of the defender snake to unlock the snake mouth puzzle .
How to complete the snake mouth puzzle
" Move the ball to the center of the forget me drug . "
The arrow around the bound of the Mexican valium move the corresponding rows of circles . Your goal is to make for the green ball into the center four spaces . you could move them up against the bulwark and keep pushing in that centering to shift the positions around in relation to each other .
Your payoff is the figured detail .
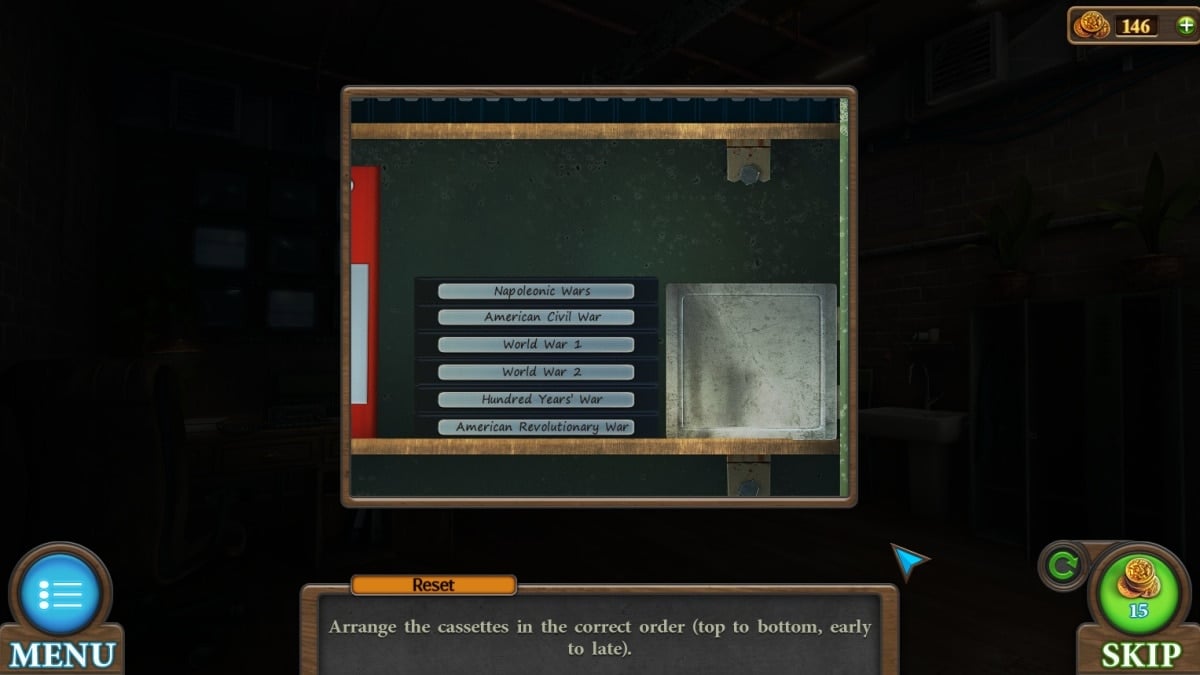
Screenshot by Pro Game Guides
The figured detail goes into the bureau on the left side of the inner pyramid .
" Put both keys back into place . "
When you click the green arrow on one half of the puzzle , the other half will move at the same time . The keys will stop when up against a rampart , so apply this to pose the key around the circuit card and into their gray places .
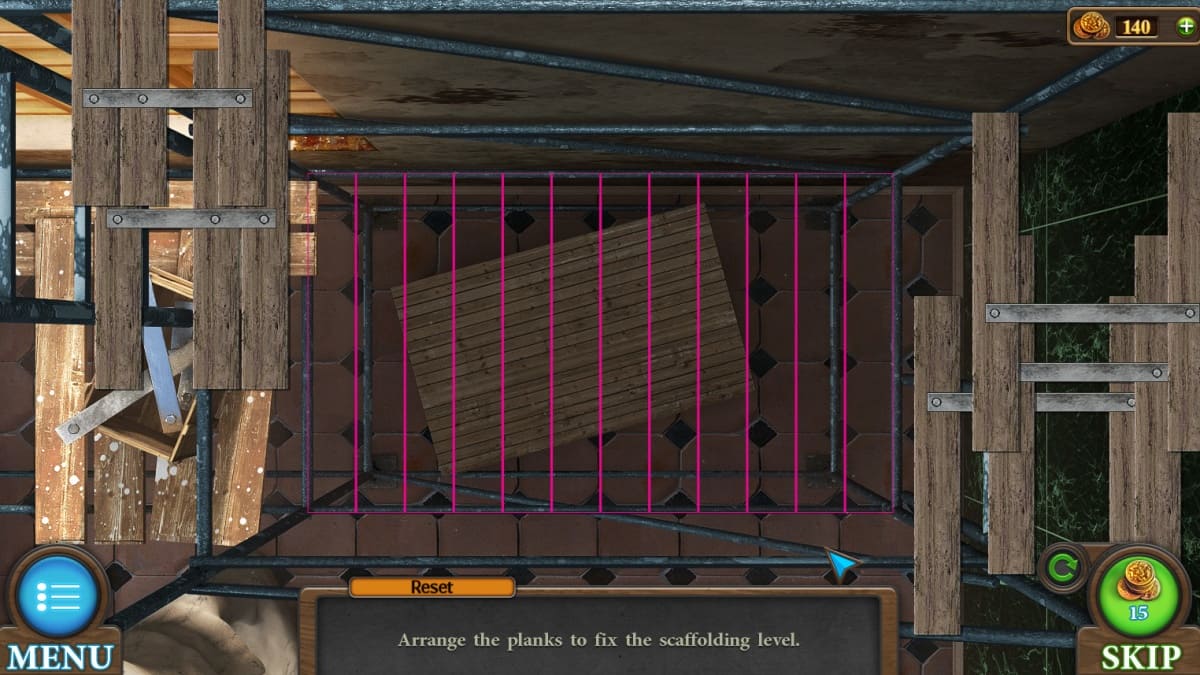
Screenshot by Pro Game Guides
Your payoff is a 2nd crystal .
Placing the crystals
Put the watch glass onto the two tables to unlock the next puzzle .
" Rotate the circles to array the chip with the slots . "
Each band be active itself and another ring . Your goal is to get the amber pieces into the slots of each annulus . You move the rings by clicking and dragging .
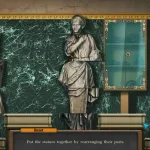
Screenshot by Pro Game Guides
With that , you could successfully leave !
Tricky Doors World 20: Shopping Mall complete walkthrough guide
a1 . blame up this ball.a2 . commence your assemblage of five footstep with this one.a3 . Next to the vending machine is a screwdriver . Unplug the huckster machine and expend the screwdriver to open up the machine ’s control board . There ’s a chip inside.a4 . launch the down arrow panel to put in the chip and unlock the lift puzzle , detailed below .
How to complete the elevator puzzle
" post the chips on the board so that they ordinate with the print track . "
Click and puff the chips over to the left side board and find where they best run along up . you could click chip to rotate them to hear more choice !
you could now go on a lower floor .
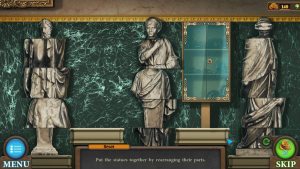
Screenshot by Pro Game Guides
Exploring the garage
b1 . Another bowling lump for your collection.b2 . crop up the hood of this motorcar and use your screwdriver to pull out the battery.b3 . Approach the tool box . There ’s a magnetic key in front of it . The lock seems to cogitate you already get laid the answer … See the tool box puzzle , detailed below.b4 . Do n’t block this hidden step .
" Enter the correct color computer code . "
Upstairs , there ’s a mode store with three mannequins in bright - colored outfit . you may open up this lock by matching the colors with those kit in guild . I have render my solution above , though yours is likely unlike .
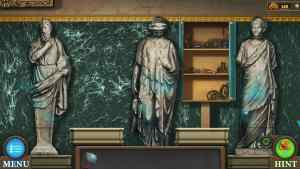
Screenshot by Pro Game Guides
Click each button until it show up as the right colour .
Your advantage are an adjustable twist and a sponge .
How to complete the car battery puzzle
The computer storage cry fashion has a grate in front of it , and we ’d care that grate pass .
attempt to use the magnetic cay on the lock , and fail . Use your screwdriver on the bottom of the board , and pluck the wires up to the railway car battery . This unlocks the railway car battery teaser , detail below .
" Turn on all the igniter . "
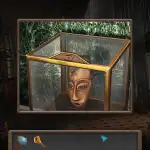
Screenshot by Pro Game Guides
You ’ll be touch base the lights with the alloy pieces between them . Every light that ’s on can connect to other lights to turn them on as well , and so on until the whole board is lit up .
Your reinforcement is that the power is now on , and you could use your magnetic key again . You now have approach to the fashion store .
Inside fashion
c1 . Yet another bowling ball.c2 . catch this ladder.c3 . Use your trusty screwdriver a last time to undo this panel and earn one of three blue details.c4 . Pick up another step.c5 . find fault up a rule obscure to the left of the registry . steer out to the monger machine real fast to sweep this ruler underneath it and gain a round detail.c6 . spread up the panel here to get at the red safety cabinet . It requires that round detail to open up , which grants access to the safety bit mystifier , detailed below .
How to complete the safety chip puzzle
" Rearrange the cow dung into their place . "
you could both move the chips and rotate the center by clicking and dragging . bank the cow dung you are n’t quick for yet into various blank space around you , and put each chip to the left of the shopping mall dress circle in the order they go bottom to top . observe that the man do postulate to be right - side up .
Your reward is a reefer and a second blue item . apply your adjustable twist to also get a valve .
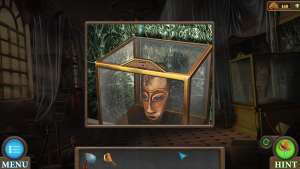
Screenshot by Pro Game Guides
Draining the fountain
In the parking garage , put the valve here and turn it to drain the piss up top .
you’re able to fleece the step out of the fountain , and grab the last footmark off the vending machine if you missed it in the beginning .
Now with your five steps , you may apply them to the escalator ! Walk on up the stairs .
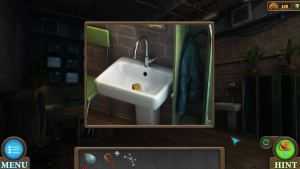
Screenshot by Pro Game Guides
The bowling alley
d1 . One more bowling ball!d2 . Place a bowling lump on the auto . This unlocks the bowling orb puzzle , detailed below . You do this again with every bowling ball until all puzzle are complete . You presently have four , so you’re able to do them now , or wait until you get your twenty percent to play them all at once.d3 . From this game , you’re able to pick up a knife and a rag . You ’ll need electricity to continue.d4 . blame up a headstone and an empty kettle .
How to complete the bowling ball puzzle
" Arrange the ballock so that their numbers in the words corresponds to the number . "
The numbers at the border show how many ball should be in each line and column . Start with the ones that are 0 or 1 to check that you ’re not overcrowding , and hand out the rest of the Lucille Ball where they belong .
This is a multi - part puzzler and requires five unlike bowling balls from around the map to play .
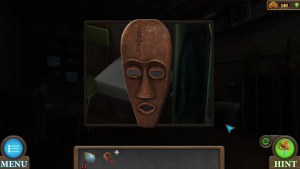
Screenshot by Pro Game Guides
Your advantage will eventually be insulating mag tape .
Tying up loose ends
Cut off the vending machine ’s conducting wire with your knife .
Use the keystone in the garage to get pincers and a handle .
The pincers take in your net particular from the oil , and you could head up into the way shop to unlock the cash register puzzle .
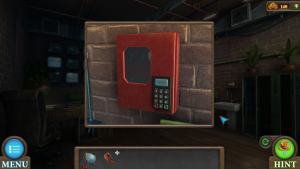
Screenshot by Pro Game Guides
" lead the ball into the yap . "
The ball starts in the very top of the puzzle . This is a gravity puzzle , as every time you move a piece out of the way , the clump will automatically endeavor to fall as far as it can , regardless of where you would really rather it go .
This is a tricky teaser , but if you move slowly and cautiously you could inch your mode towards success .
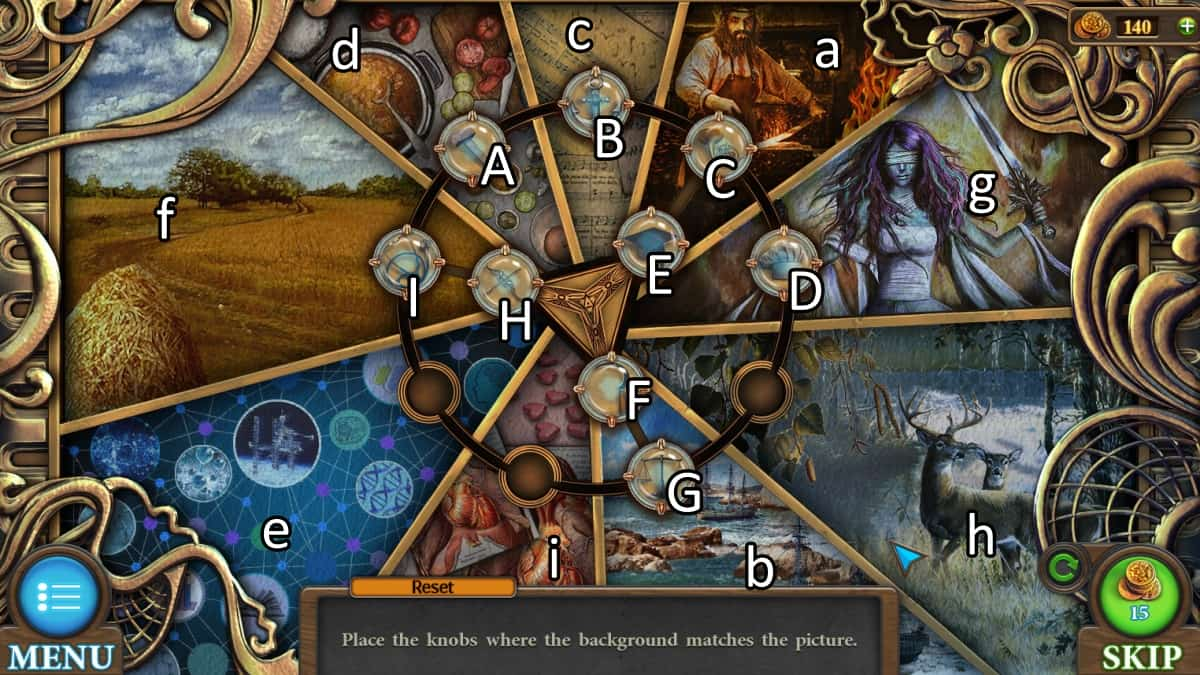
Image by Pro Game Guides
Your reward are the final bowling ball for the puzzle observe above , and the nous of a hammer . you’re able to go before and practice your hold on the hammer immediately , paring it down to size with your knife .
Strength machine warm-up
After you ’re done bowling , apply your plug and insulating tape to the strength machine . Hit it with your cock to receive a key !
While you ’re up here , go ahead and apply the rag week to your joint and dip it into fossil oil . You acknowledge how these torches go by now , even if it ’s an odd spot to ask one .
To dismount your Verbascum thapsus , go back into the style store and ruin the light medulla oblongata with your hammering . The glint will light your torch .
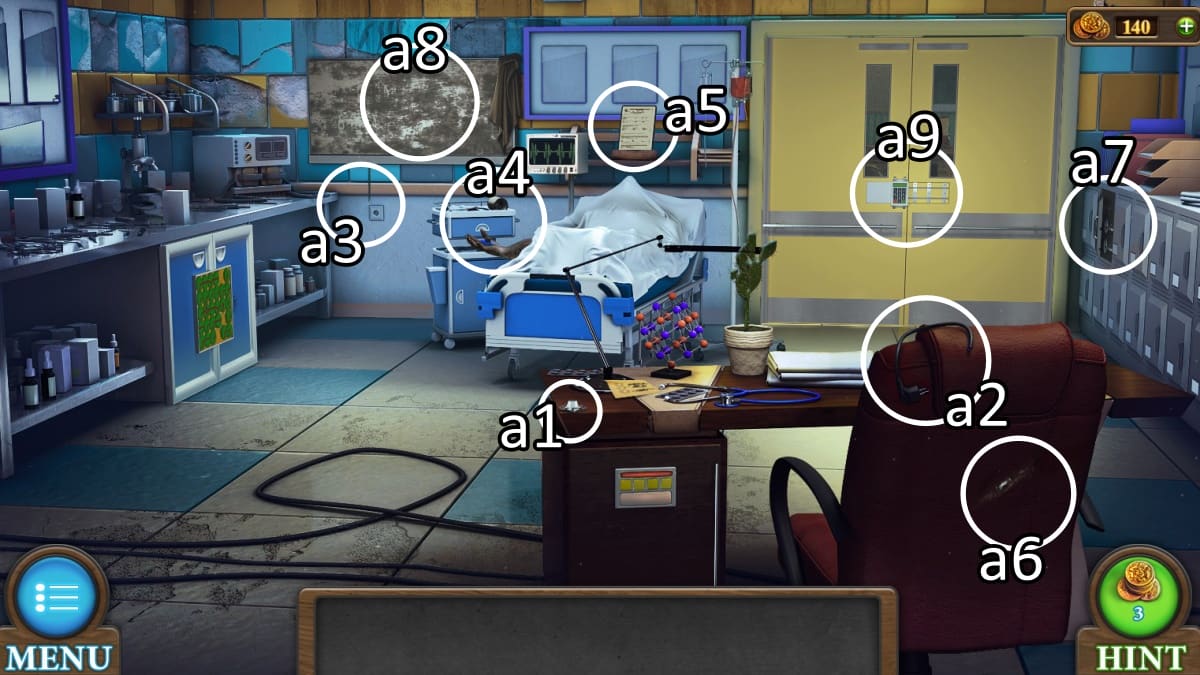
Image by Pro Game Guides
Down in the parking garage , set up your ladder to get up to some rascality . Hold up your torch to the fervour alarm to set off the sprinkler , which you then practice to fill up your kettle .
Put the kettle back where you found it ( next to the fryer ) to moil .
Down in the fashion storehouse , you’re able to steam up the dressing room mirror to discover a six - finger’s breadth codification ! For me , this was 197514 , but yours will in all likelihood be different .
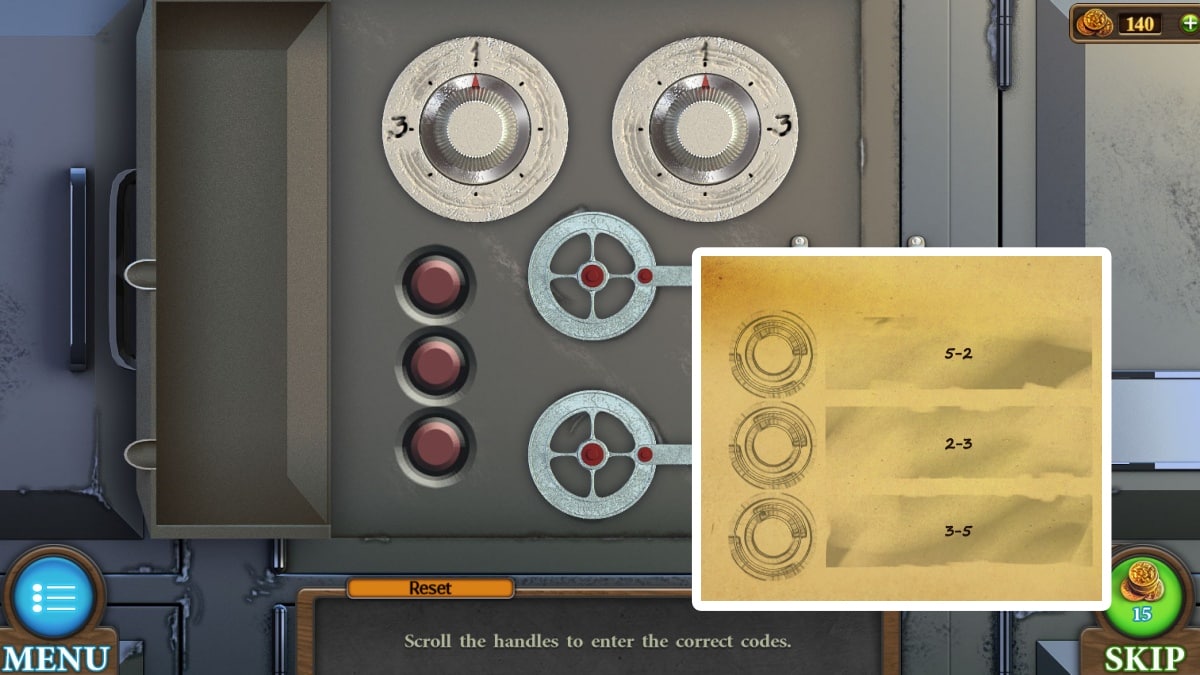
Image by Pro Game Guides
This code and your key get you into the cash cash register , where you piece up another key and .. ' take over ' a note .
Your new key go to the first help kit on a higher floor , found by opening all the locker on the left over side of the bowling alley .
How to complete the first aid kit puzzle
" Rotate the puzzle piece to complete the picture . "
Your goal is to create one pure image by combining all the tile in the puzzle . Clicking between any set of two tile will swap those two tiles , and you ’ll be trade them around until they ’re where you desire them to be .
For your trouble , you get a bottle of rubbing alcohol , which you may hold to your wry sponge .
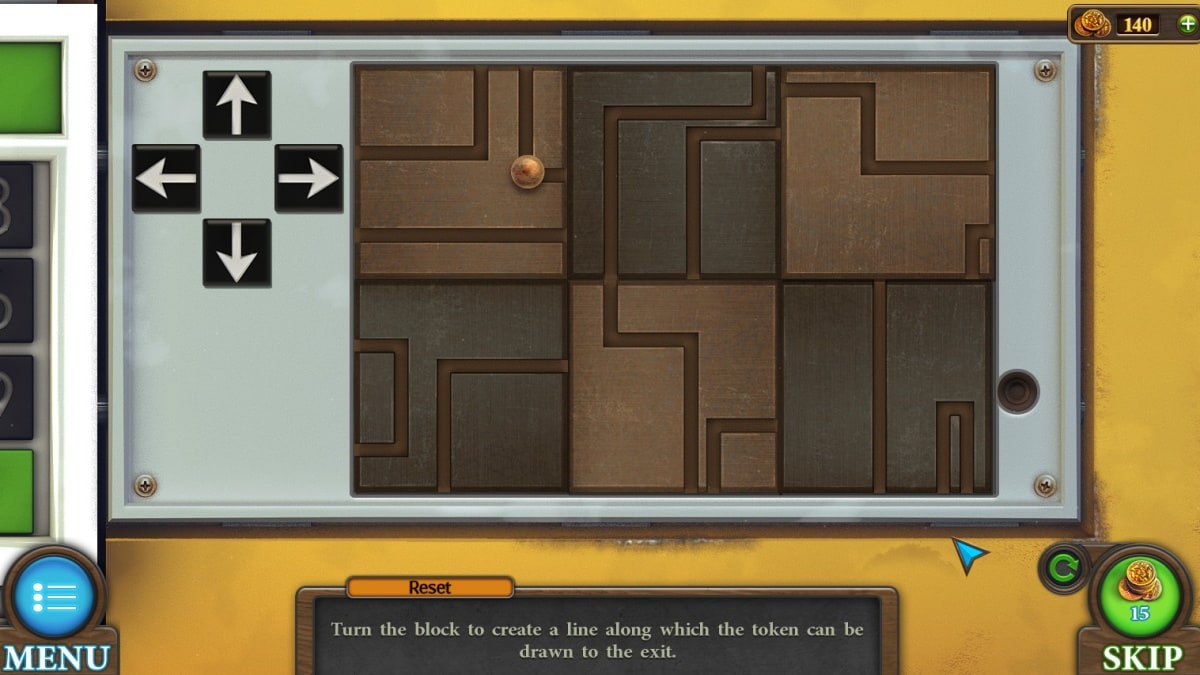
Screenshot by Pro Game Guides
You only take two thing to make your final escape : The money you steal , and the license plate number of the elevator car you ’re impersonating . Use your sponge to clean off the license plateful of the railcar , and approach the ( gratefully still functional ) parking slip auto .
Insert the bill , type in the car ’s plate , and you ’ll receive a parking slip to enter direct to your left .
The garage opens , and you ’re out !
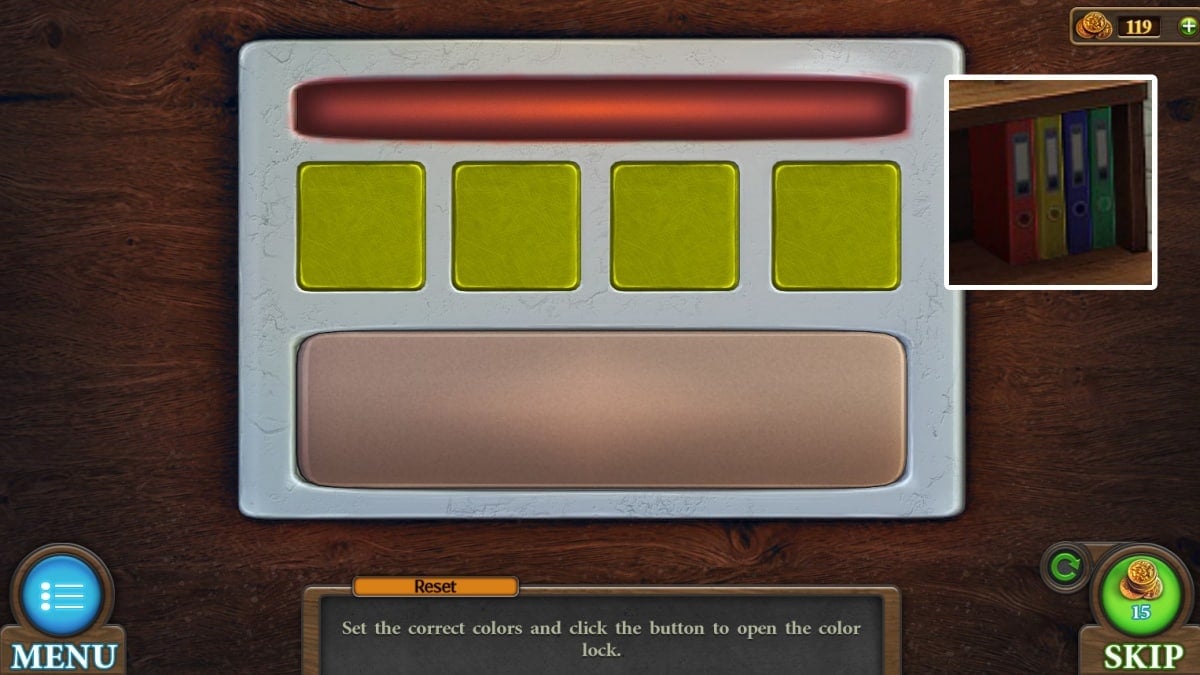
Image by Pro Game Guides
give thanks you so much for playing Tricky Doors for all 20 complex and unequalled levels alongside us .
For moregame walkthroughs , mark outBotany Manor Walkthrough ( All achievements)on Pro Game Guides .
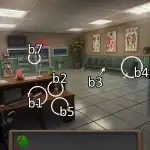
Image by Pro Game Guides
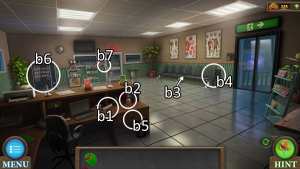
Image by Pro Game Guides
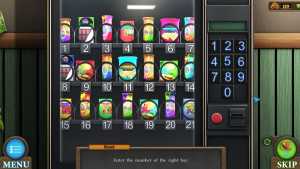
Screenshot by Pro Game Guides
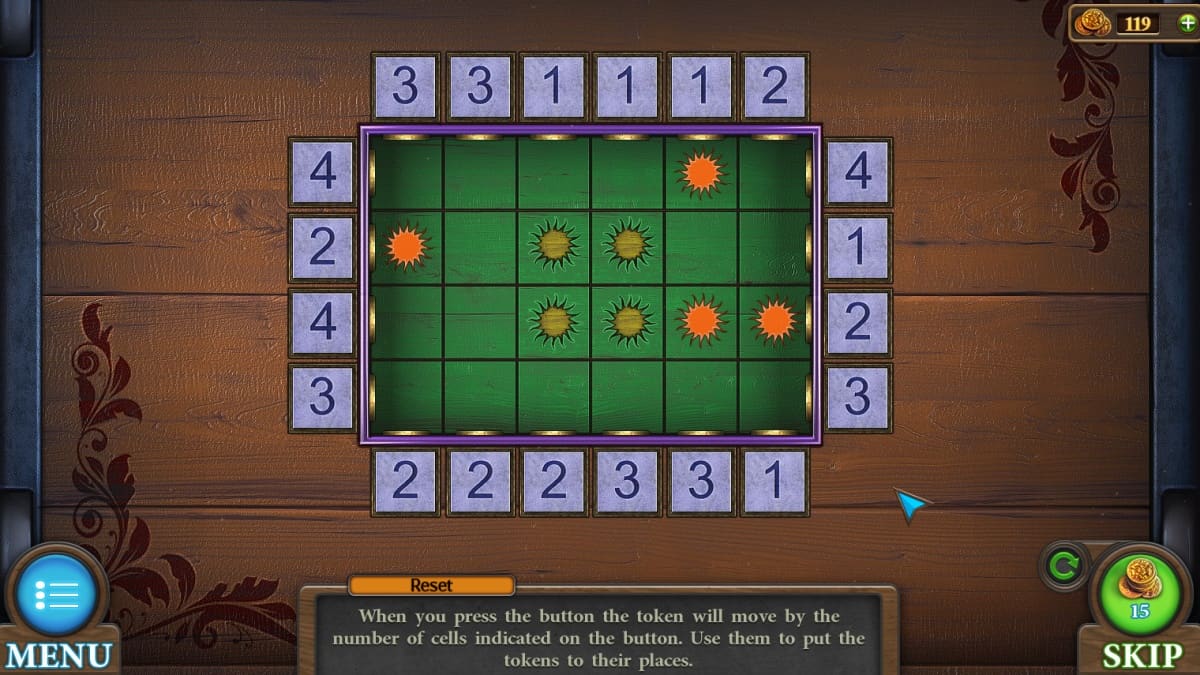
Screenshot by Pro Game Guides
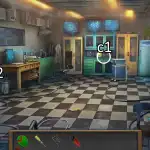
Image by Pro Game Guides
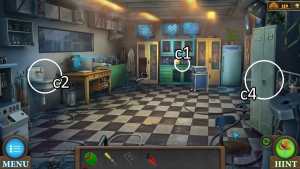
Image by Pro Game Guides
Screenshot by Pro Game Guides
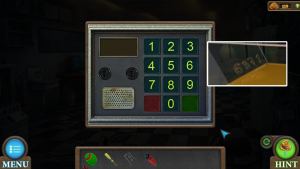
Image by Pro Game Guides
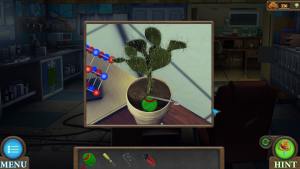
Screenshot by Pro Game Guides
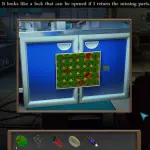
Screenshot by Pro Game Guides
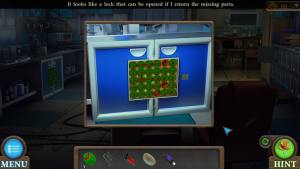
Screenshot by Pro Game Guides
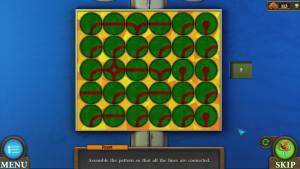
Screenshot by Pro Game Guides
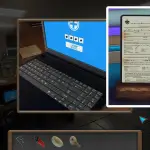
Image by Pro Game Guides
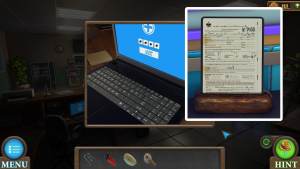
Image by Pro Game Guides

Screenshot by Pro Game Guides
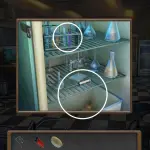
Image by Pro Game Guides
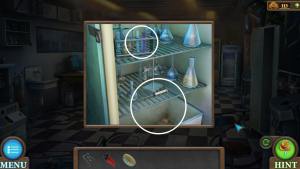
Image by Pro Game Guides
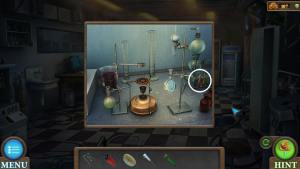
Image by Pro Game Guides
Screenshot by Pro Game Guides

Screenshot by Pro Game Guides
Screenshot by Pro Game Guides
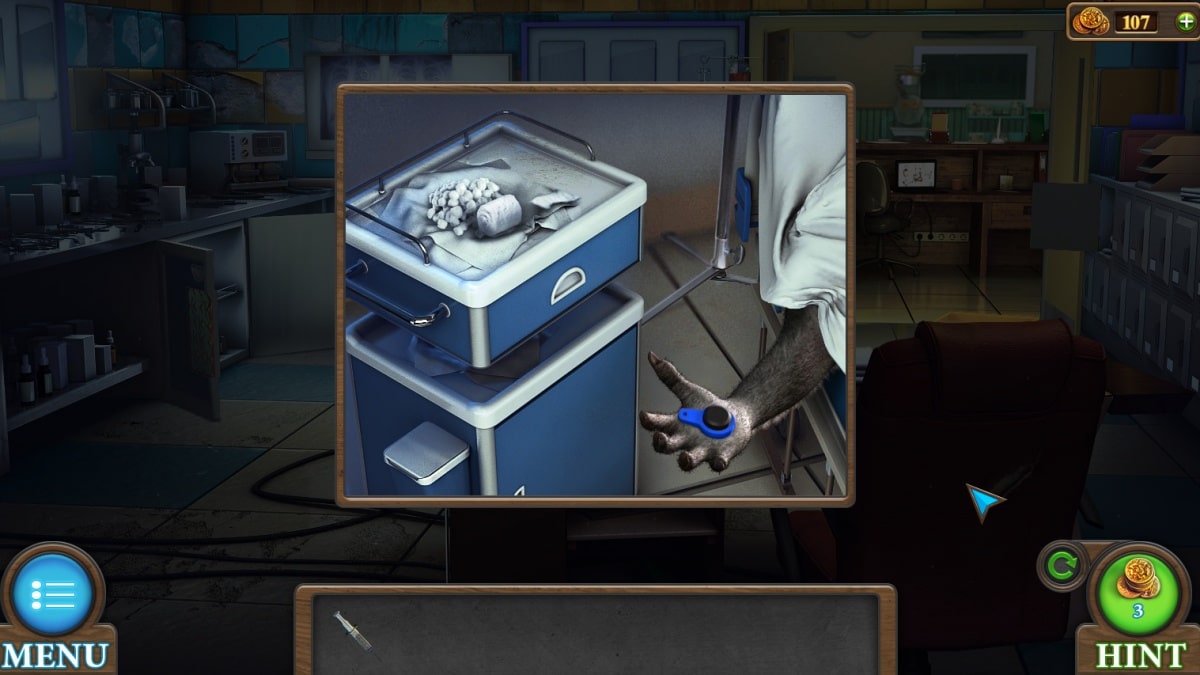
Screenshot by Pro Game Guides
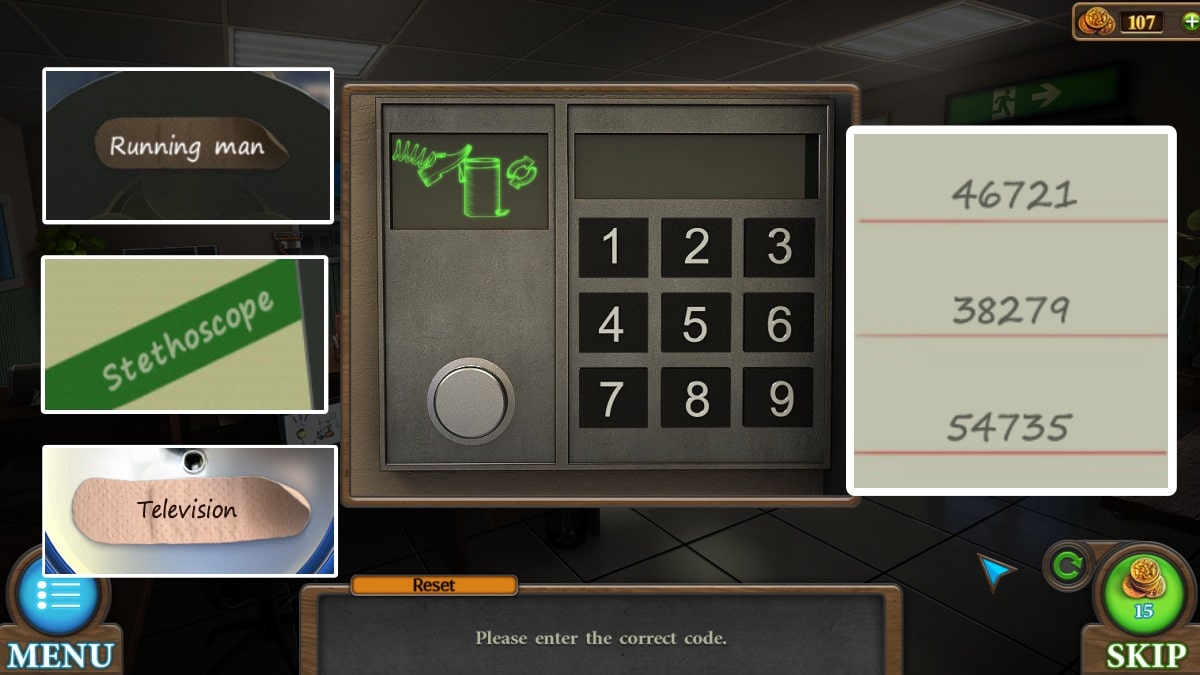
Image by Pro Game Guides

Image by Pro Game Guides
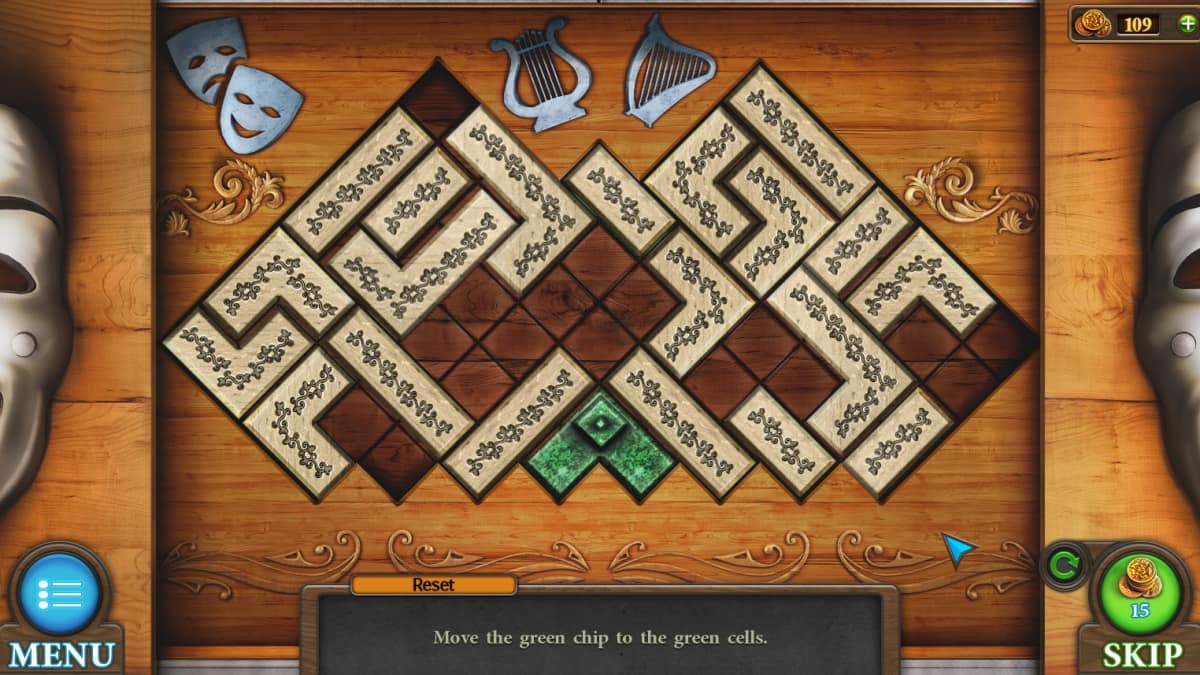
Screenshot by Pro Game Guides
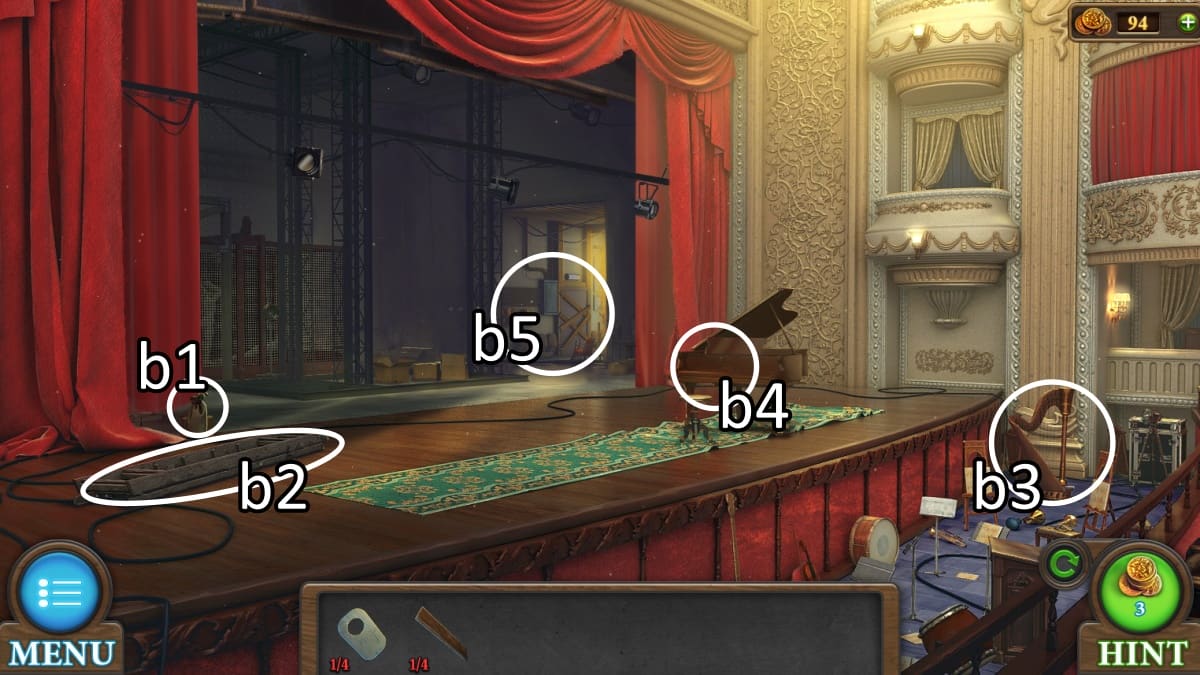
Image by Pro Game Guides
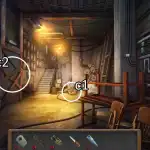
Image by Pro Game Guides
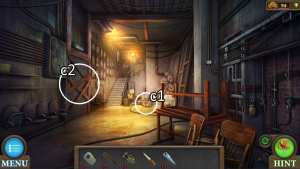
Image by Pro Game Guides
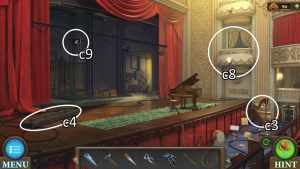
Image by Pro Game Guides
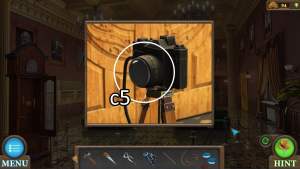
Image by Pro Game Guides
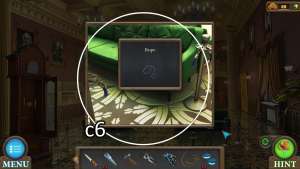
Image by Pro Game Guides
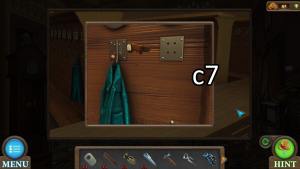
Image by Pro Game Guides
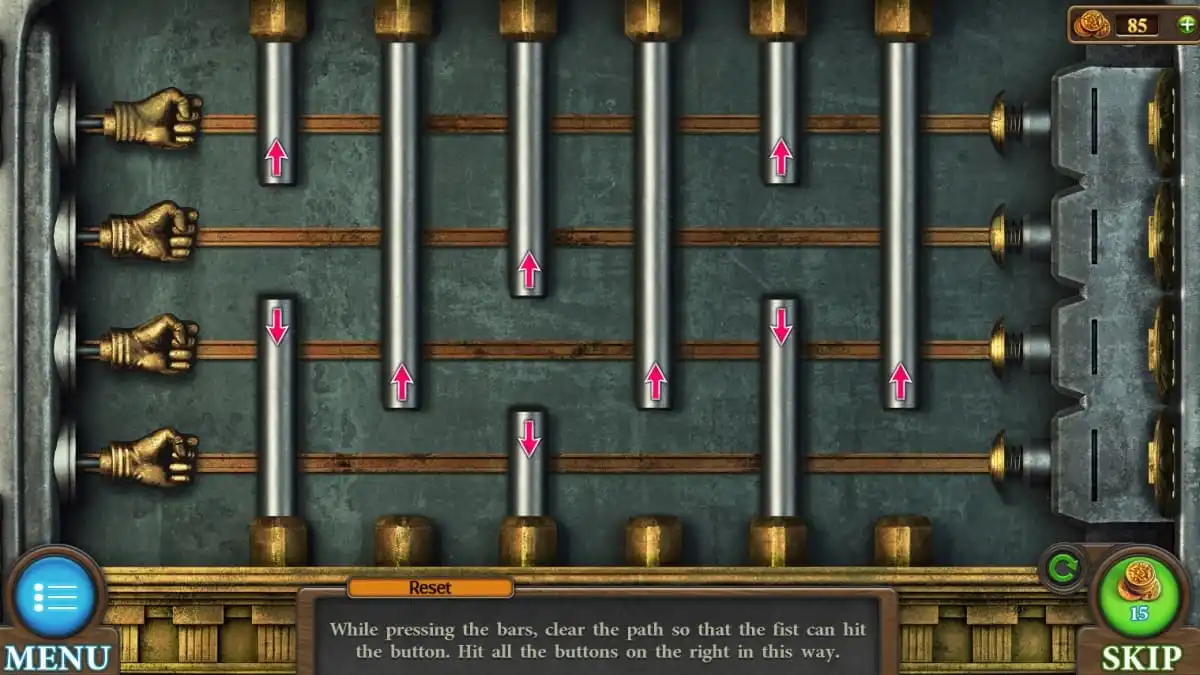
Screenshot by Pro Game Guides
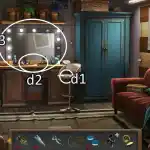
Image by Pro Game Guides
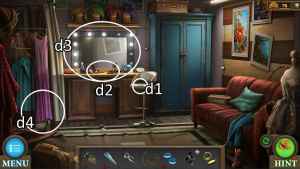
Image by Pro Game Guides
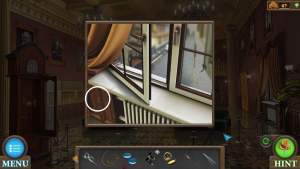
Image by Pro Game Guides
Screenshot by Pro Game Guides
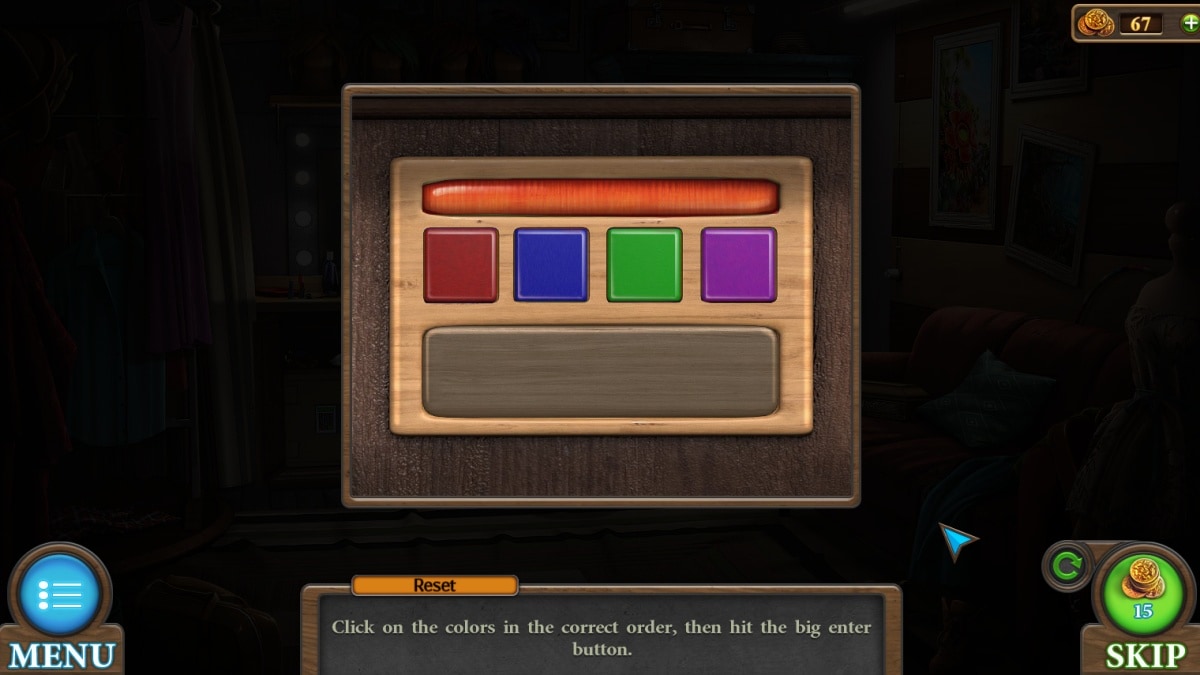
Screenshot by Pro Game Guides

Screenshot by Pro Game Guides
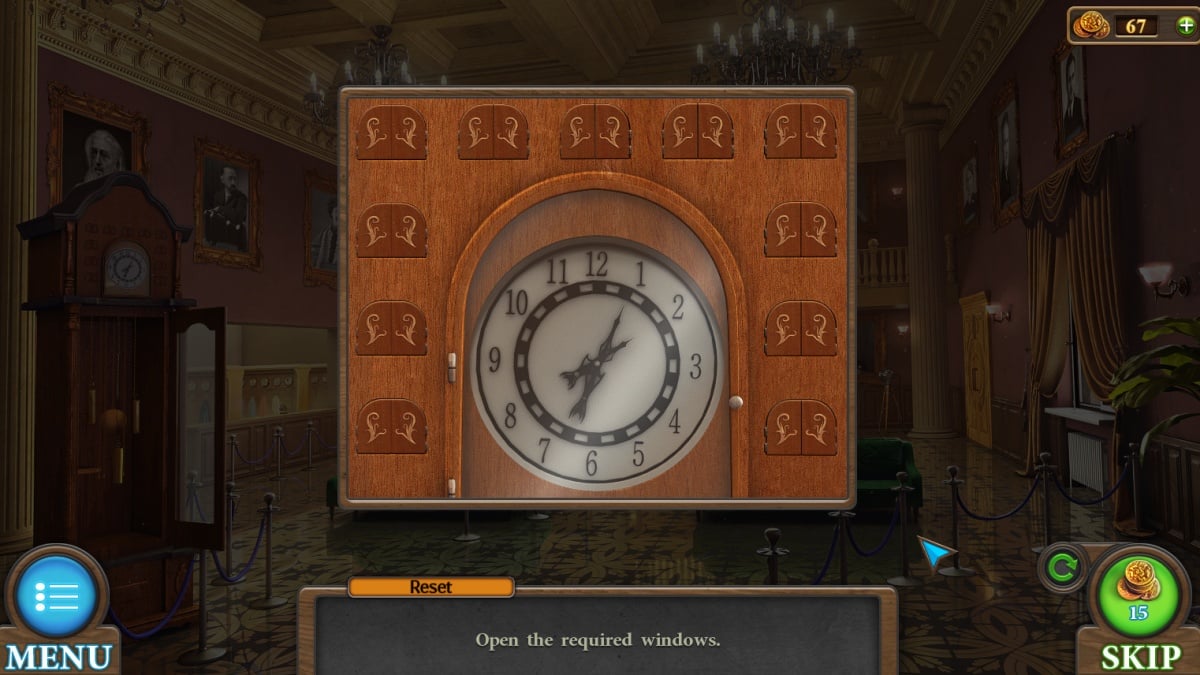
Screenshot by Pro Game Guides
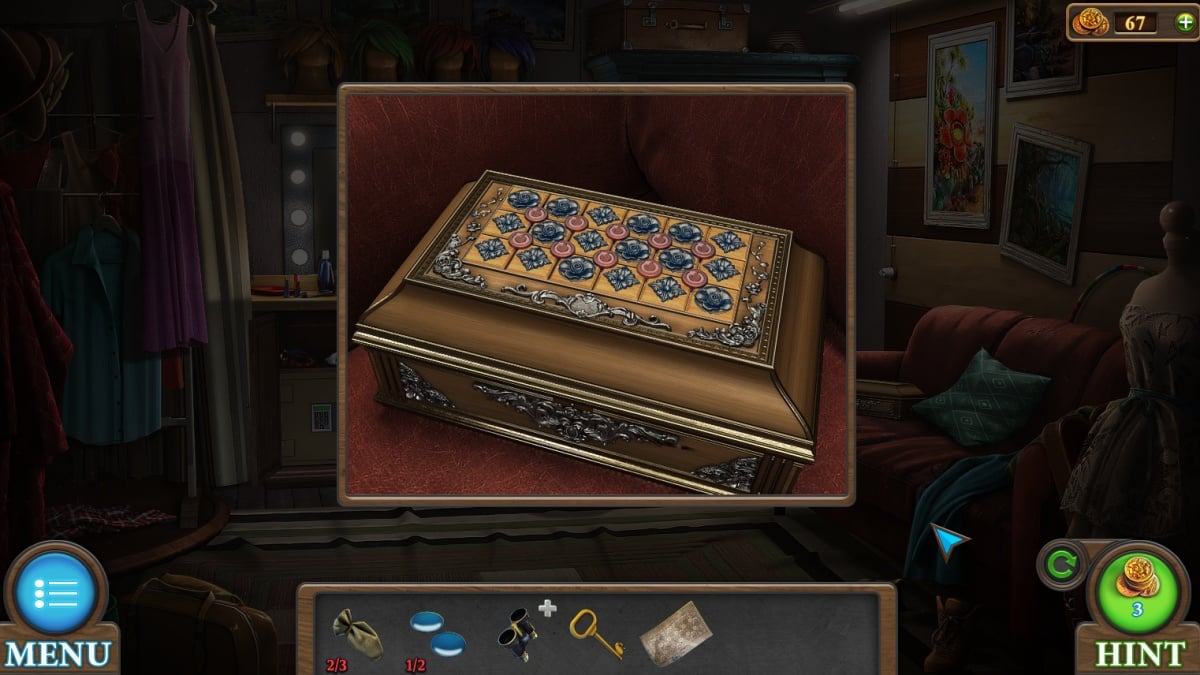
Screenshot by Pro Game Guides
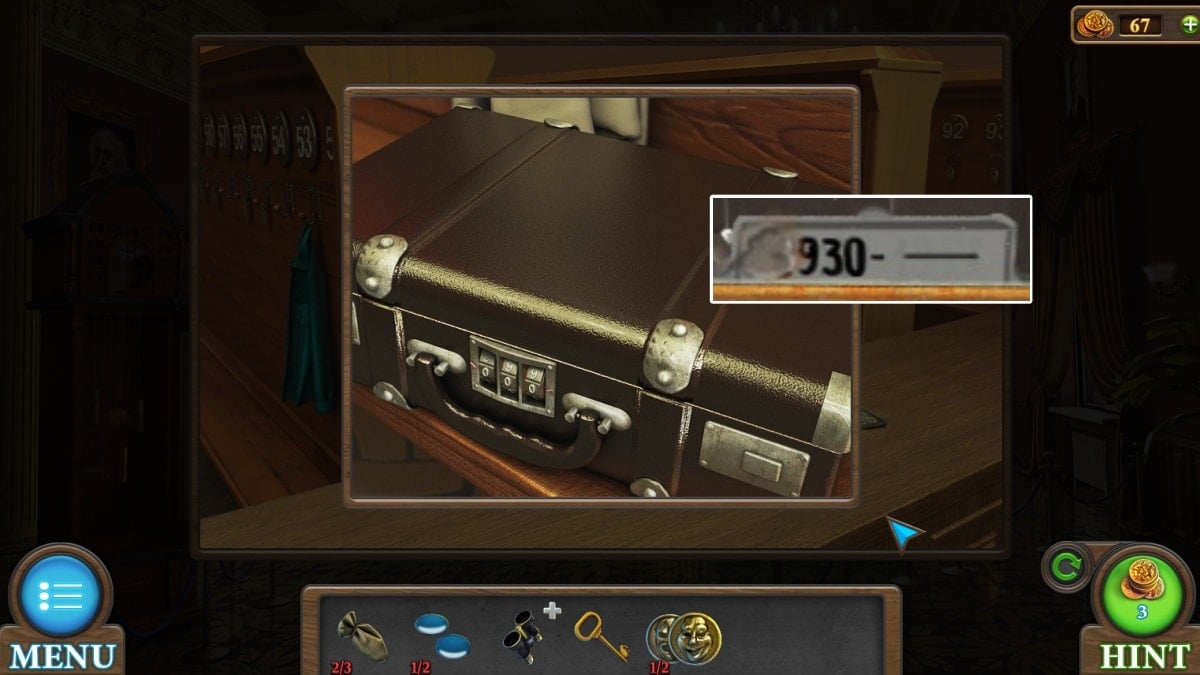
Image by Pro Game Guides
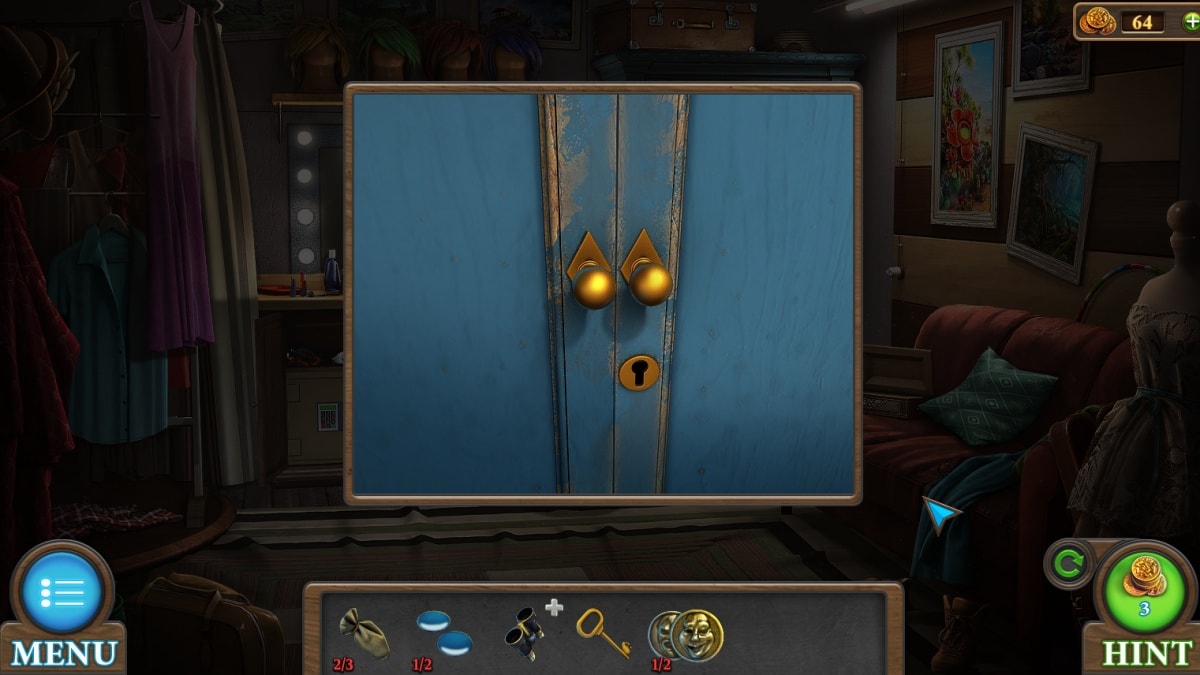
Screenshot by Pro Game Guides
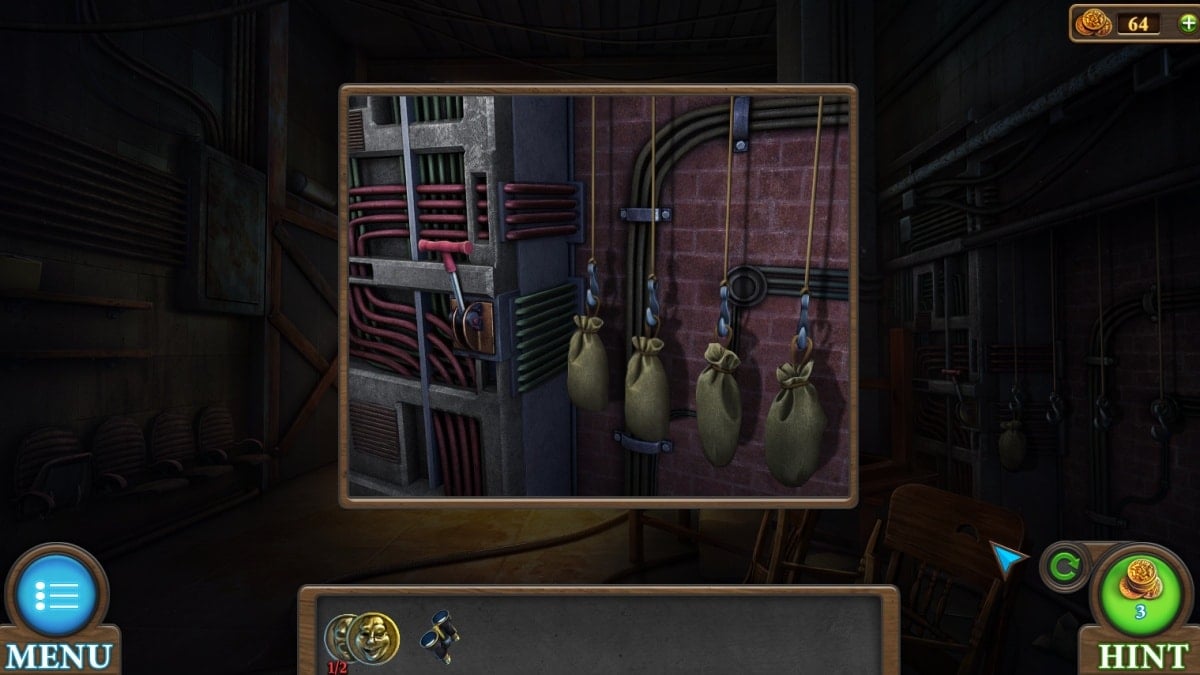
Screenshot by Pro Game Guides
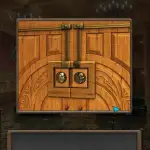
Screenshot by Pro Game Guides
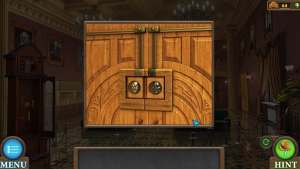
Screenshot by Pro Game Guides
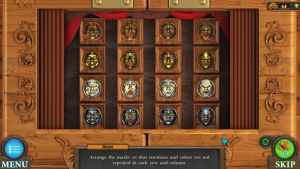
Screenshot by Pro Game Guides
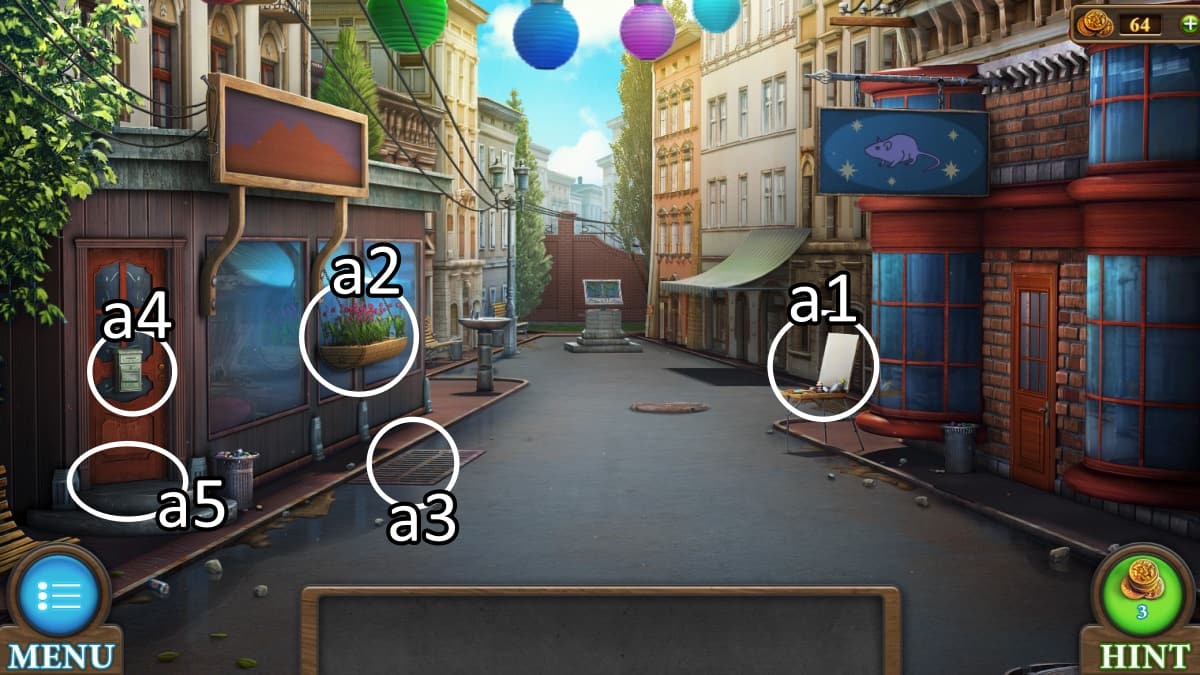
Image by Pro Game Guides
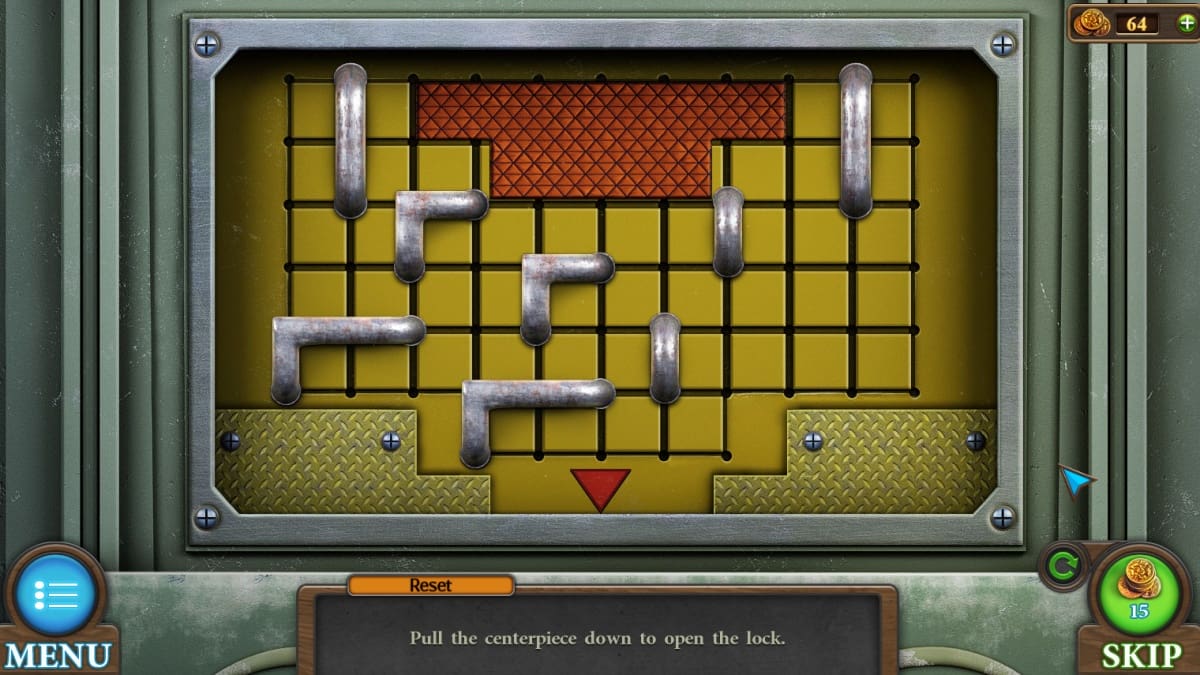
Screenshot by Pro Game Guides
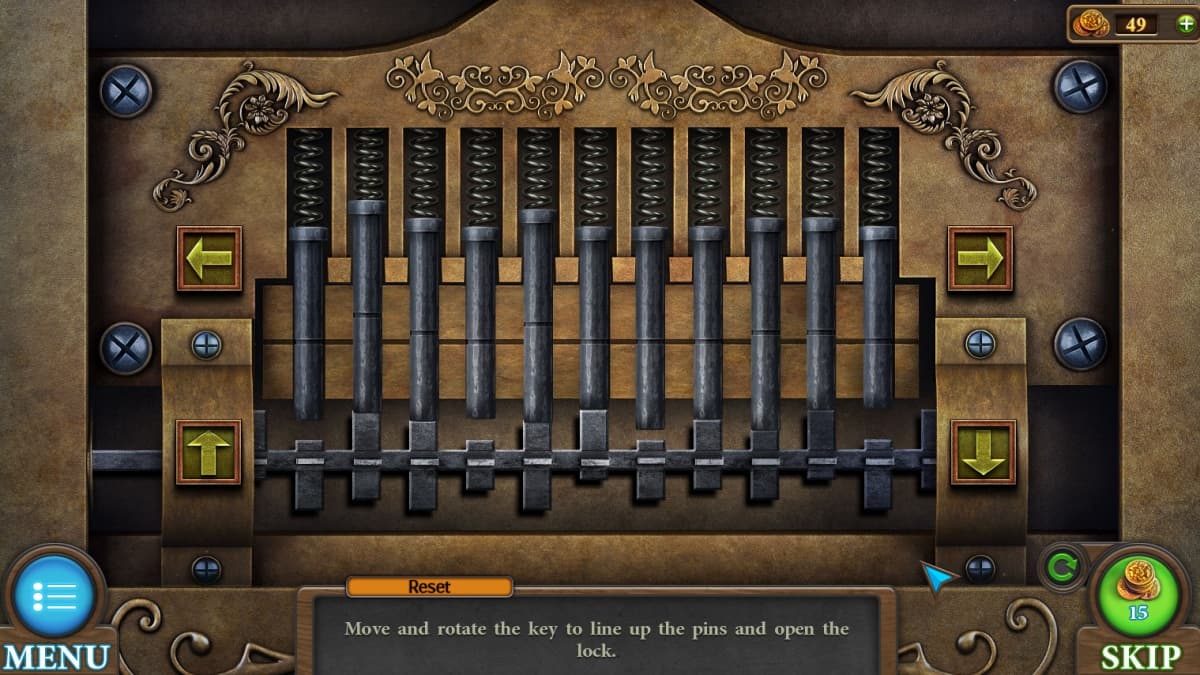
Screenshot by Pro Game Guides
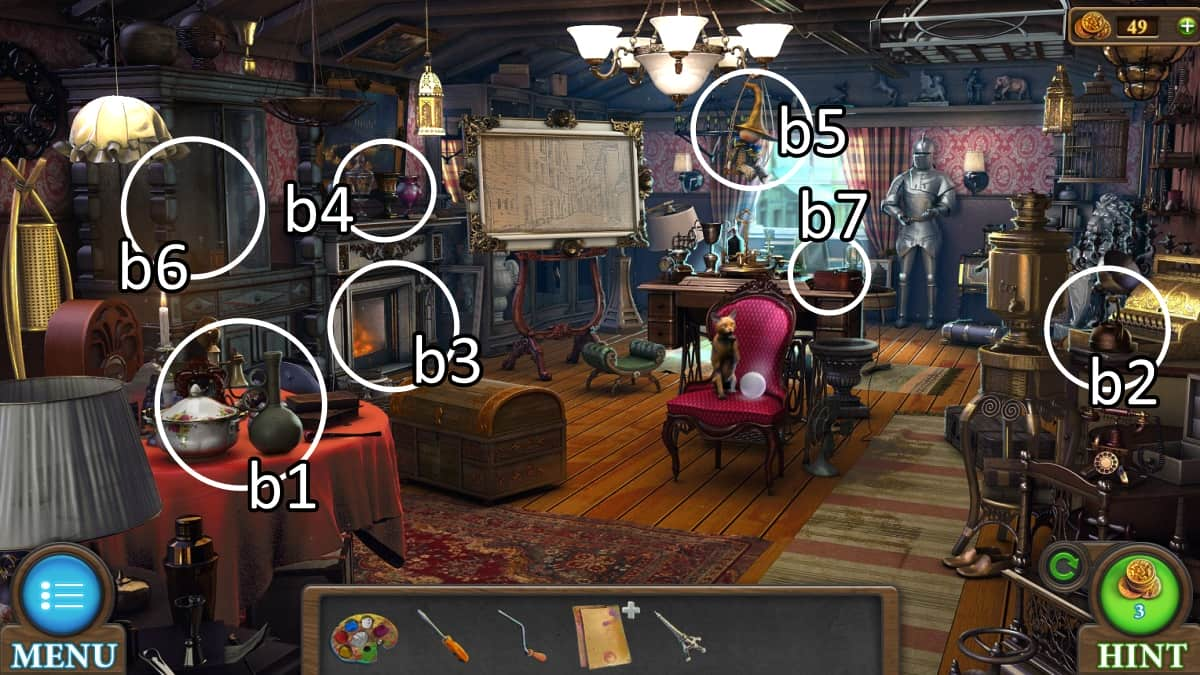
Image by Pro Game Guides
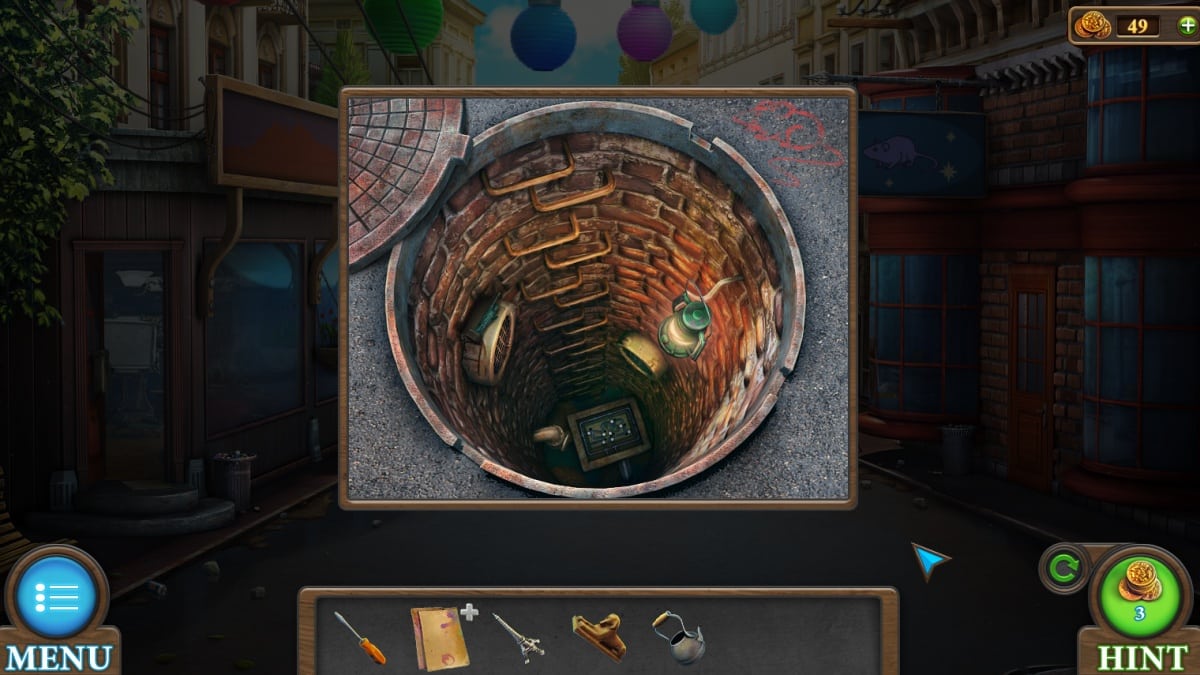
Screenshot by Pro Game Guides

Screenshot by Pro Game Guides
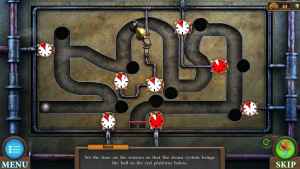
Screenshot by Pro Game Guides
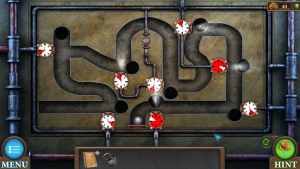
Screenshot by Pro Game Guides
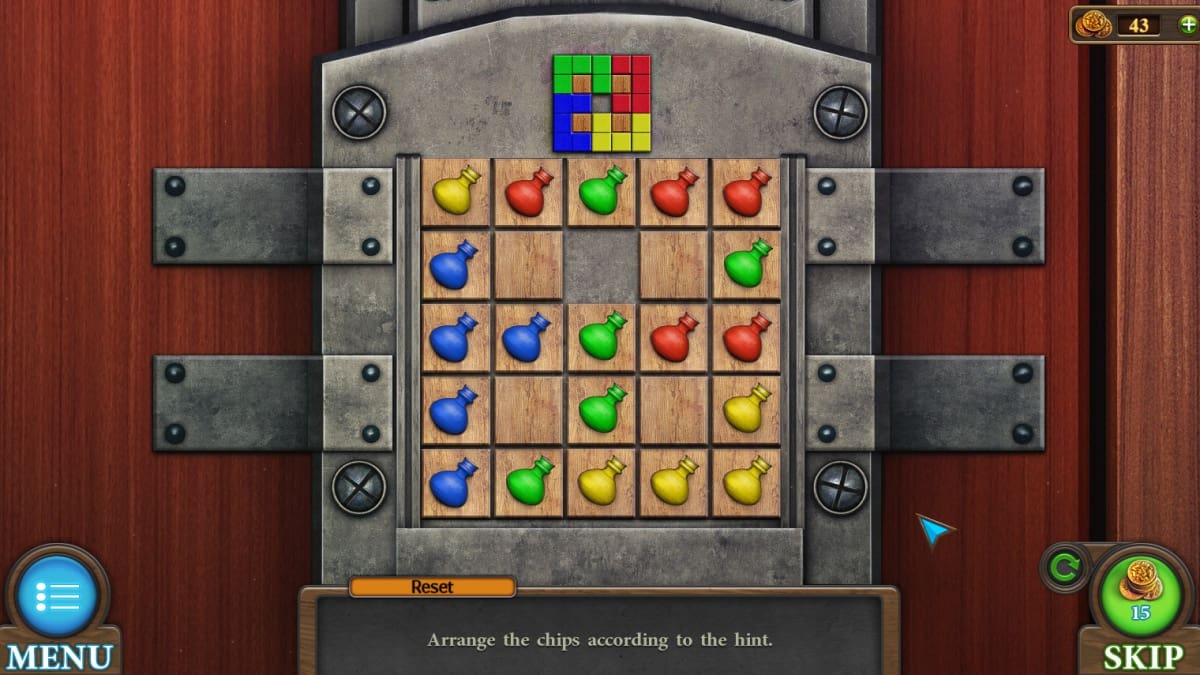
Screenshot by Pro Game Guides
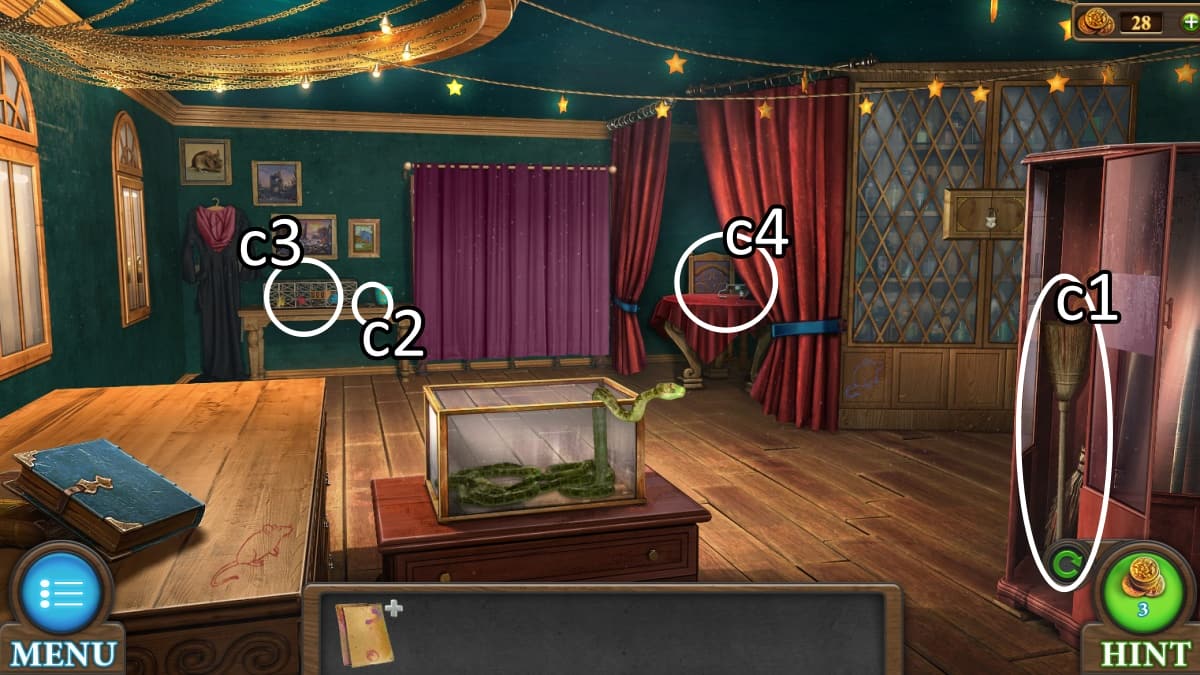
Image by Pro Game Guides
Screenshot by Pro Game Guides
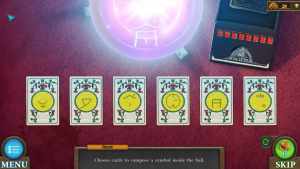
Screenshot by Pro Game Guides
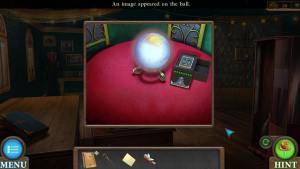
Screenshot by Pro Game Guides
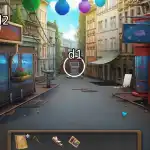
Image by Pro Game Guides
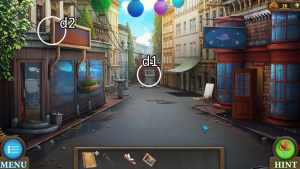
Image by Pro Game Guides
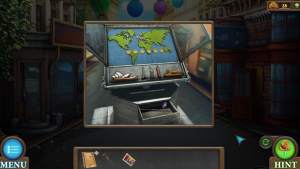
Screenshot by Pro Game Guides
Screenshot by Pro Game Guides

Screenshot by Pro Game Guides
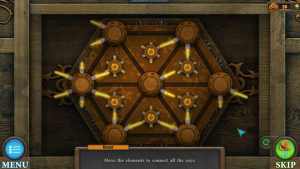
Screenshot by Pro Game Guides
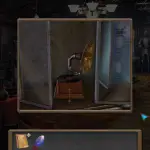
Screenshot by Pro Game Guides
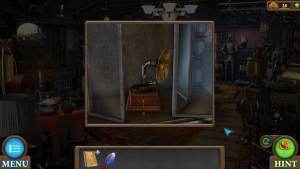
Screenshot by Pro Game Guides
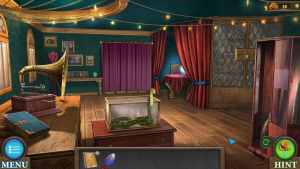
Screenshot by Pro Game Guides
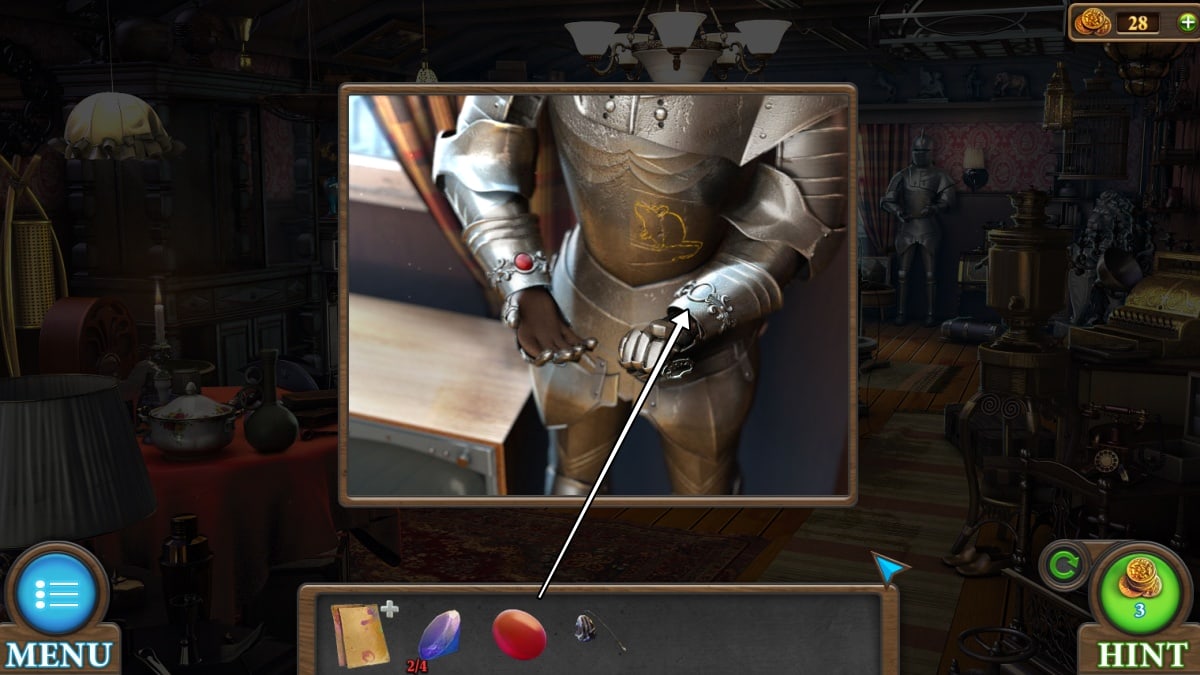
Image by Pro Game Guides
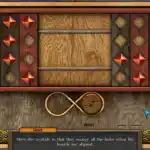
Screenshot by Pro Game Guides
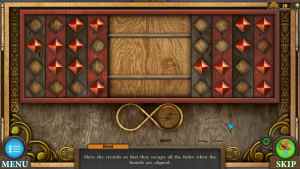
Screenshot by Pro Game Guides
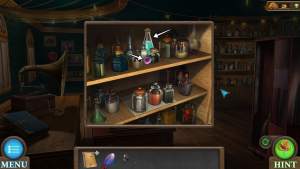
Image by Pro Game Guides
Screenshot by Pro Game Guides
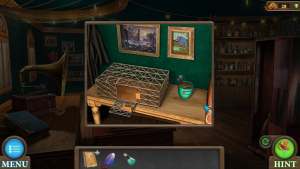
Screenshot by Pro Game Guides
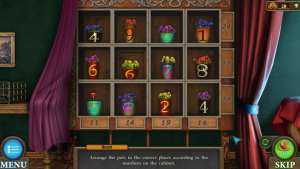
Screenshot by Pro Game Guides
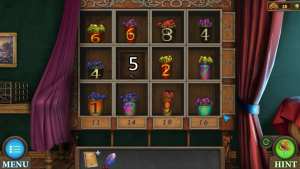
Image by Pro Game Guides
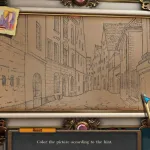
Screenshot by Pro Game Guides
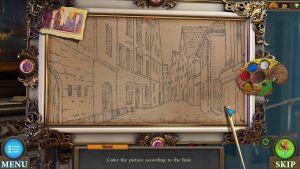
Screenshot by Pro Game Guides
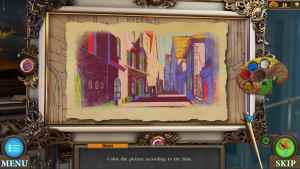
Screenshot by Pro Game Guides

Image by Pro Game Guides
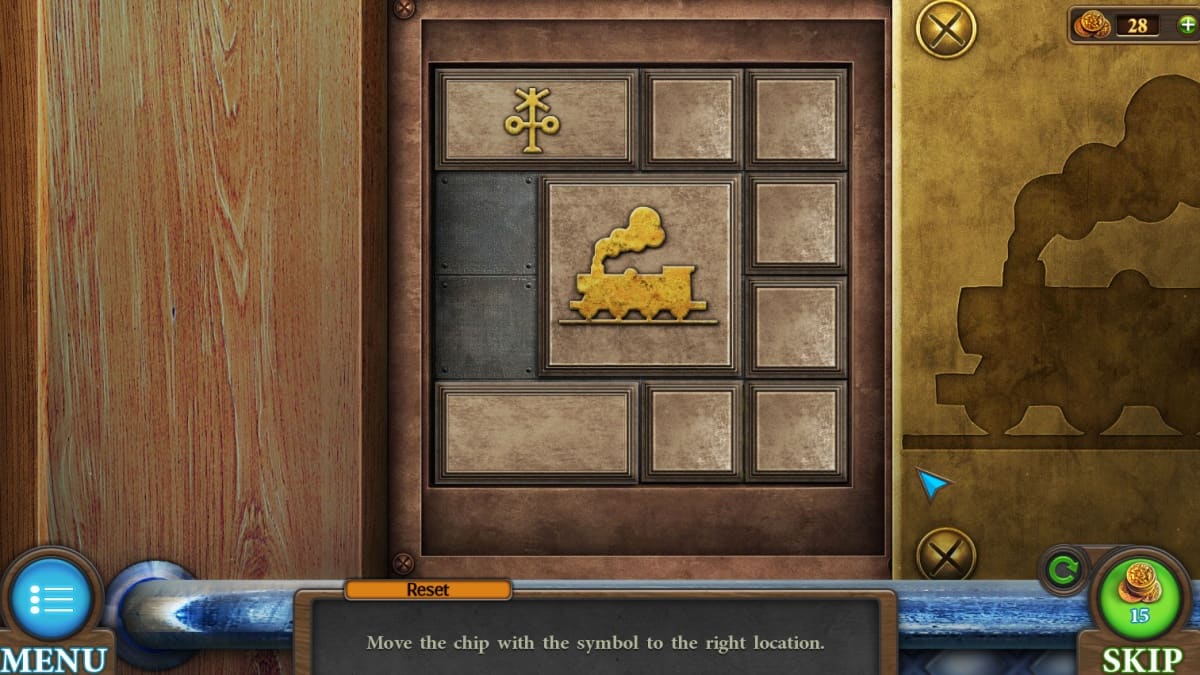
Screenshot by Pro Game Guides
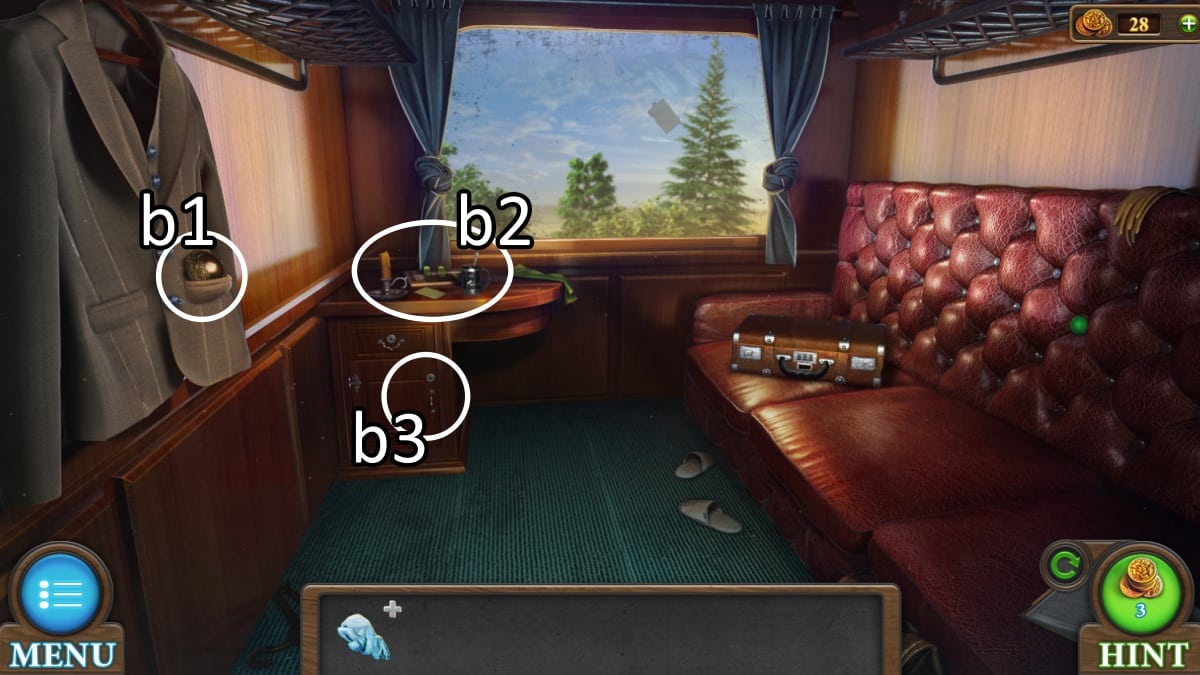
Image by Pro Game Guides
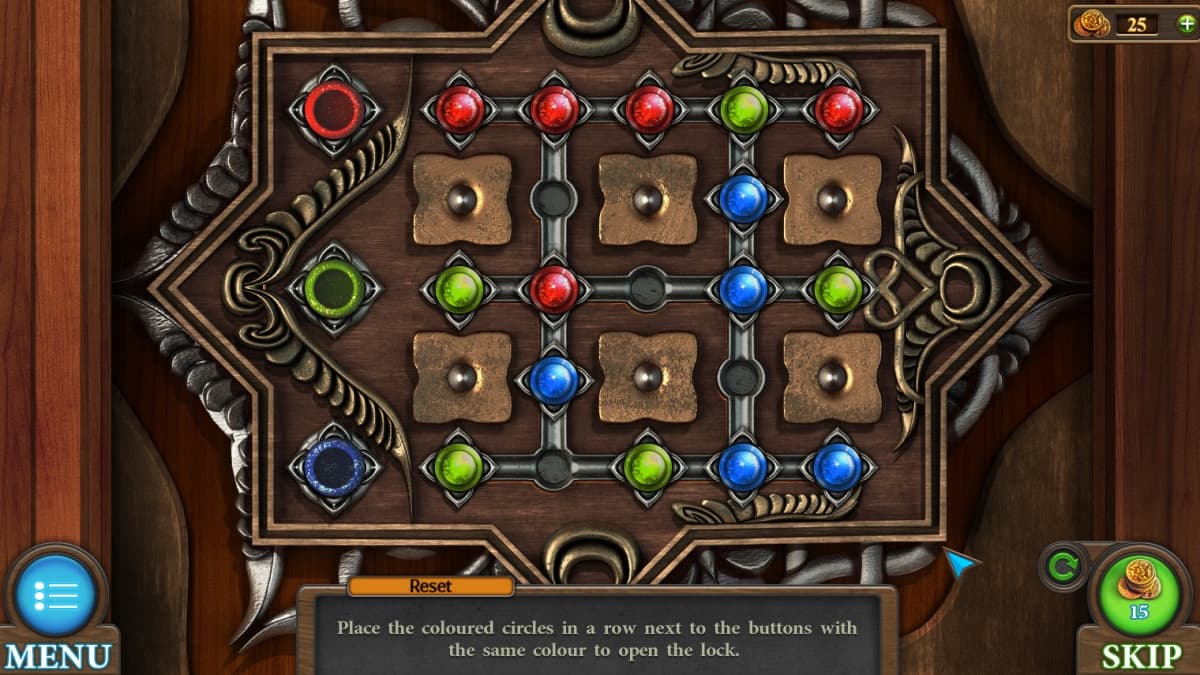
Screenshot by Pro Game Guides

Image by Pro Game Guides
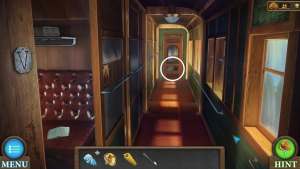
Image by Pro Game Guides
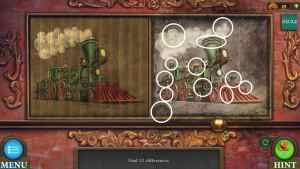
Image by Pro Game Guides
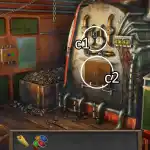
Image by Pro Game Guides
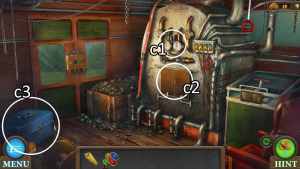
Image by Pro Game Guides
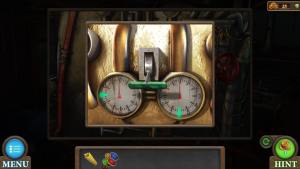
Screenshot by Pro Game Guides
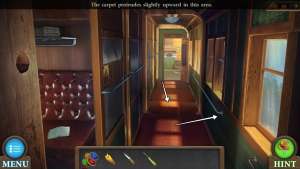
Image by Pro Game Guides
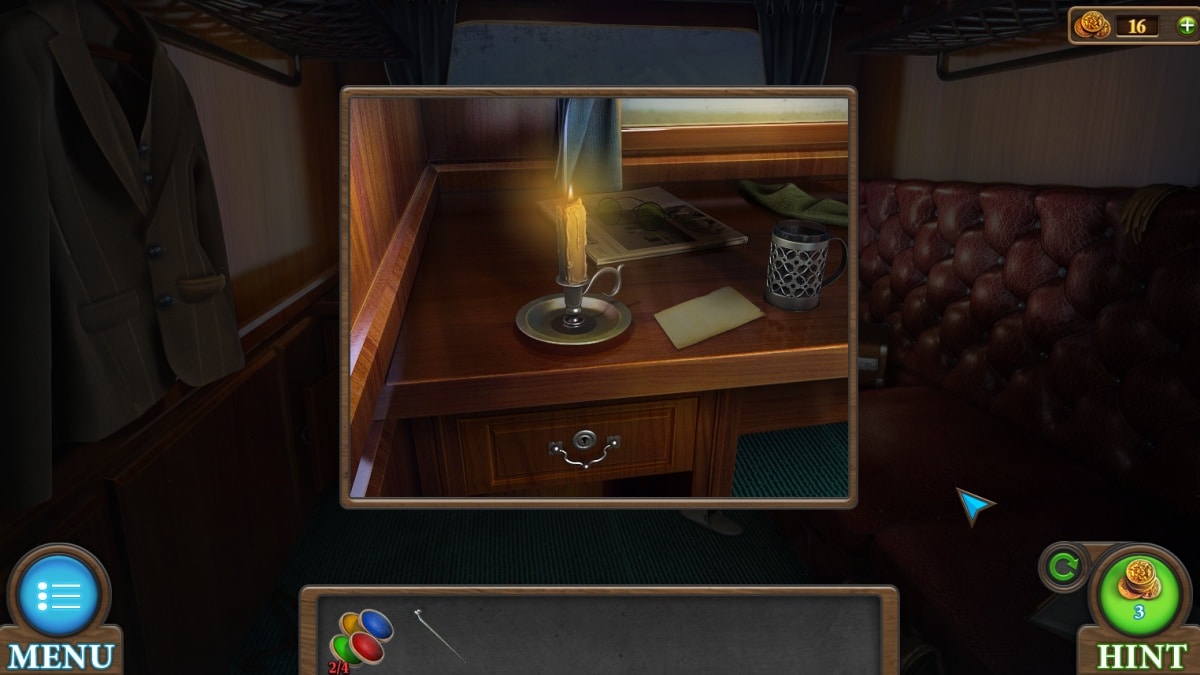
Screenshot by Pro Game Guides
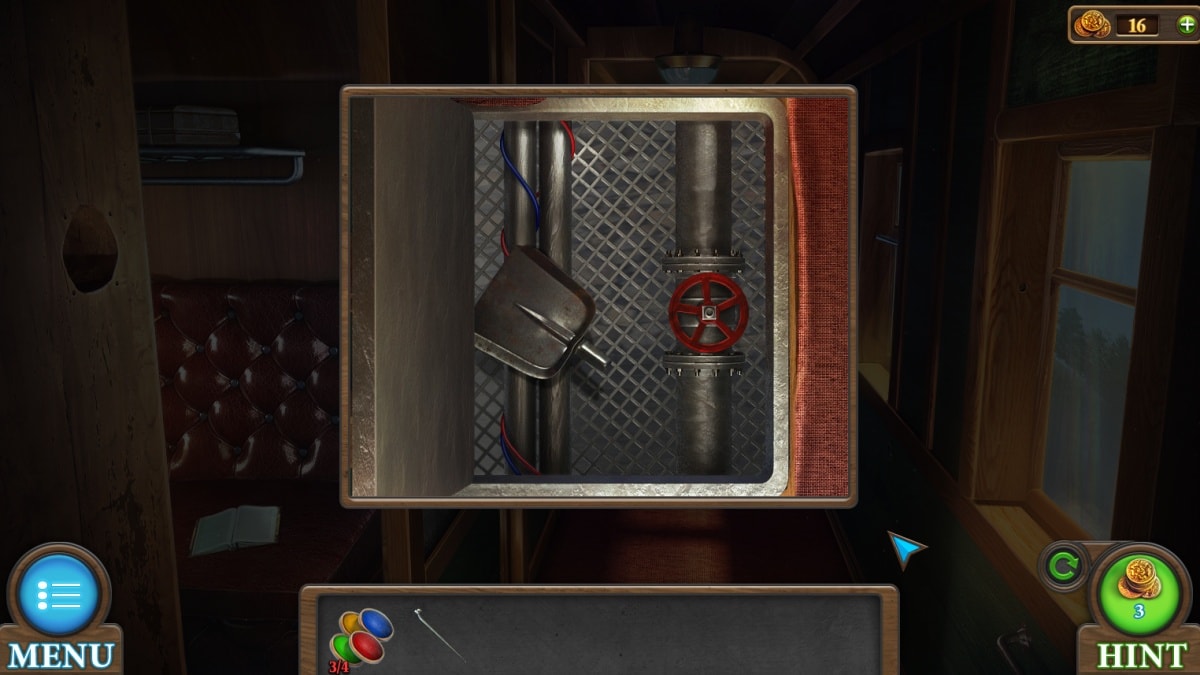
Screenshot by Pro Game Guides
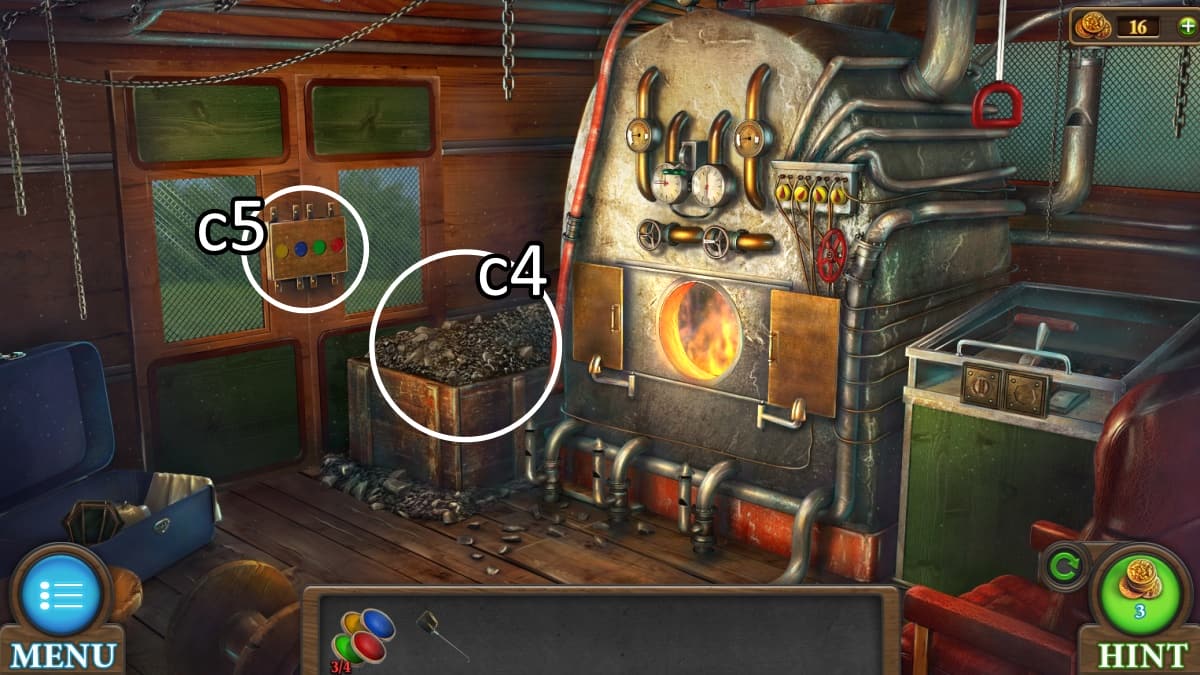
Image by Pro Game Guides
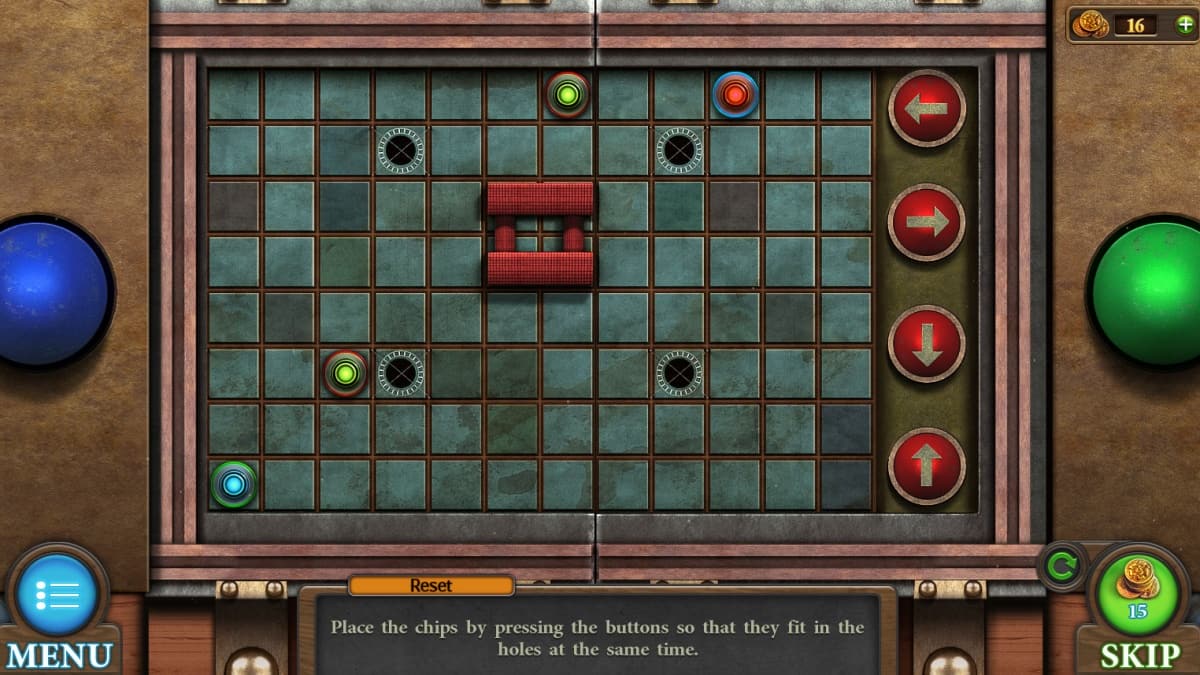
Screenshot by Pro Game Guides
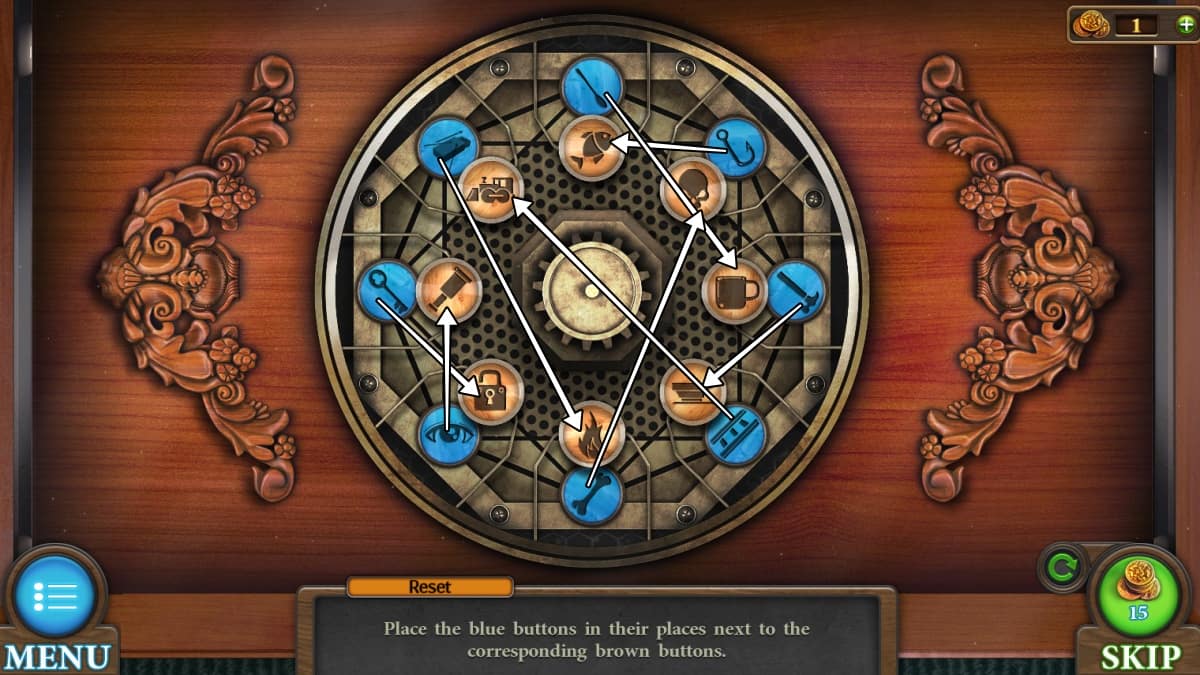
Image by Pro Game Guides
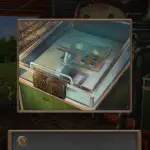
Screenshot by Pro Game Guides

Screenshot by Pro Game Guides

Screenshot by Pro Game Guides
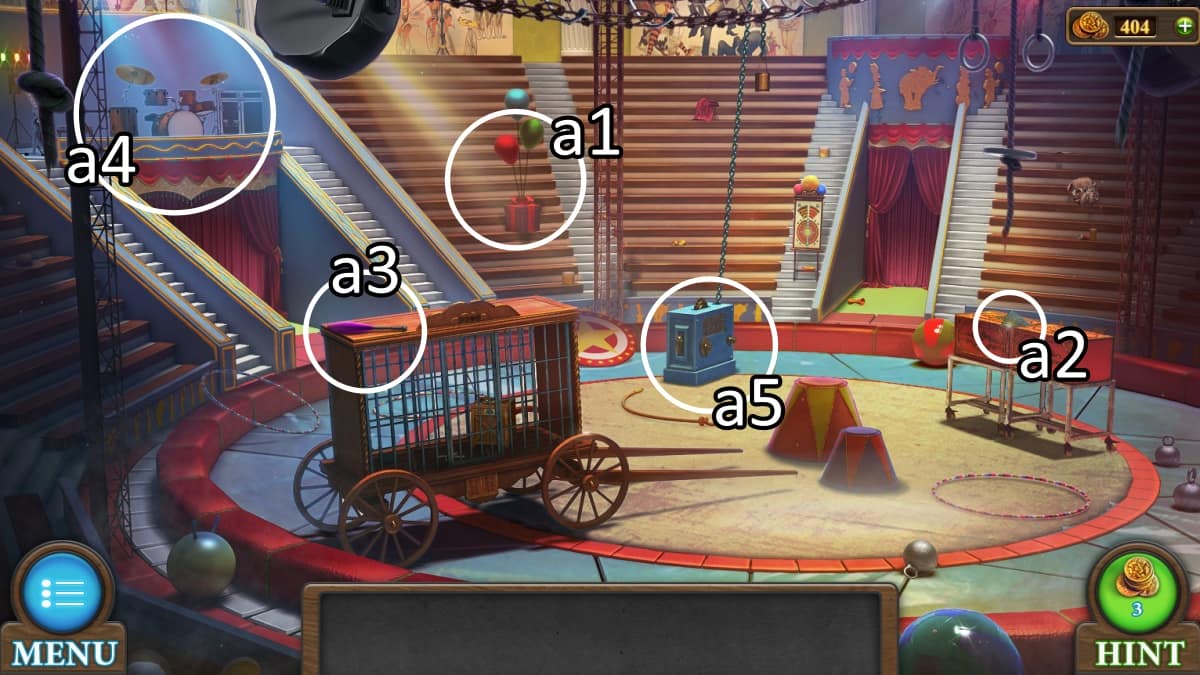
Image by Pro Game Guides
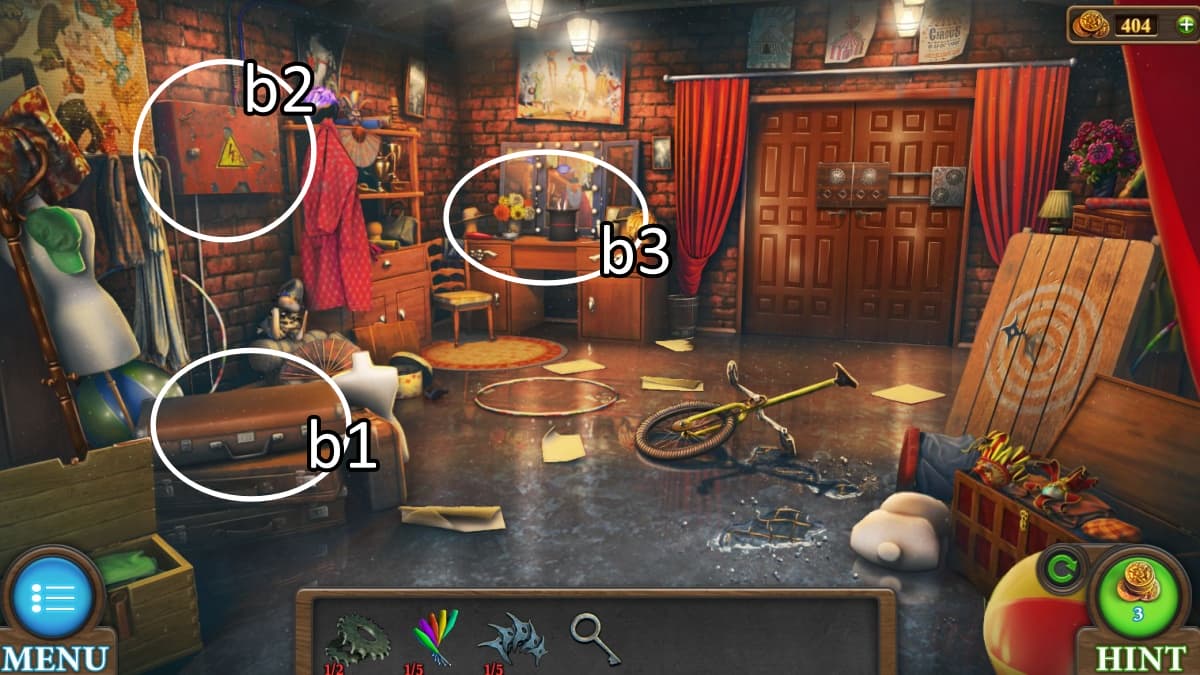
Image by Pro Game Guides

Screenshot by Pro Game Guides
Image by Pro Game Guides
Image by Pro Game Guides
Screenshot by Pro Game Guides
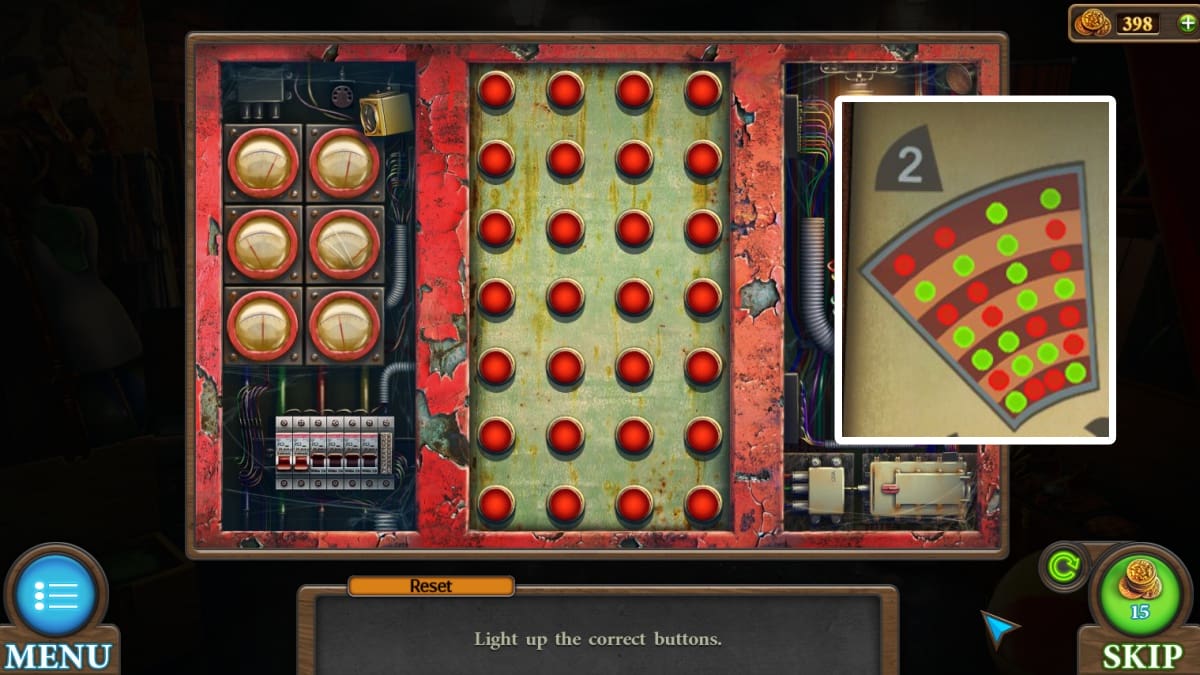
Image by Pro Game Guides
Image by Pro Game Guides
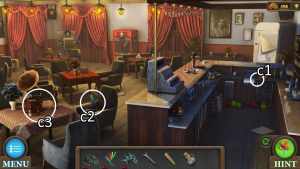
Image by Pro Game Guides
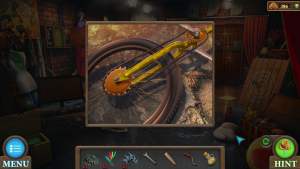
Screenshot by Pro Game Guides
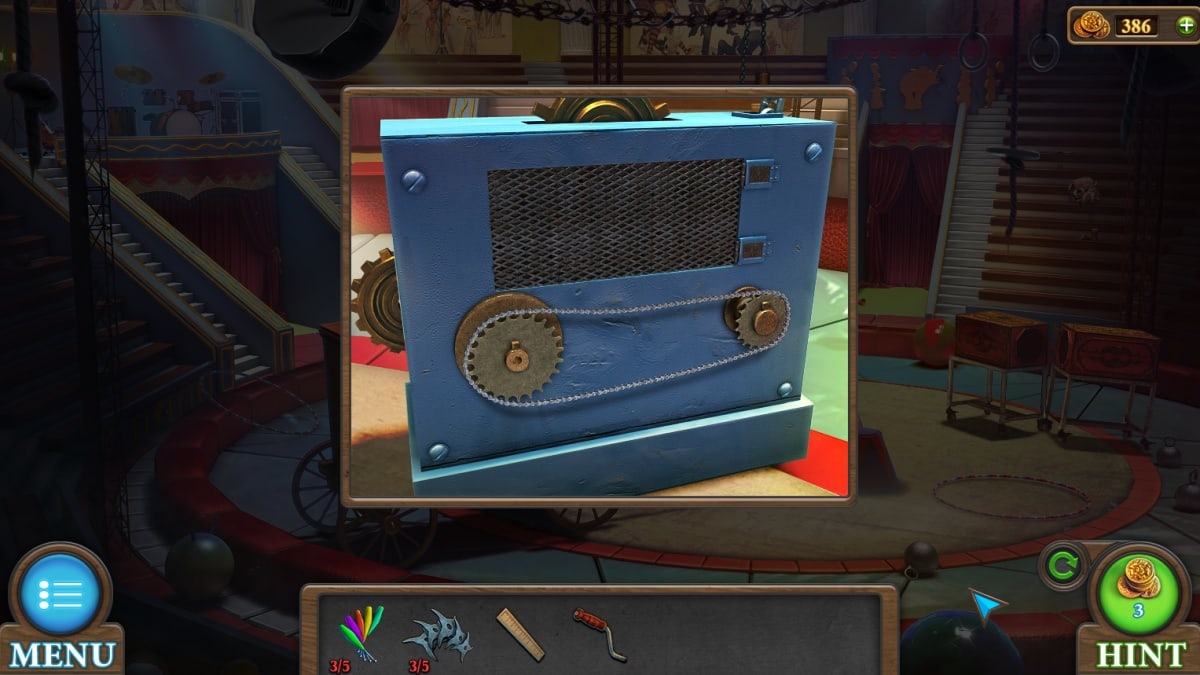
Screenshot by Pro Game Guides
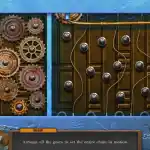
Screenshot by Pro Game Guides
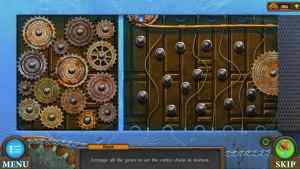
Screenshot by Pro Game Guides
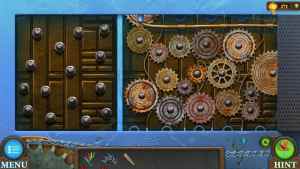
Screenshot by Pro Game Guides
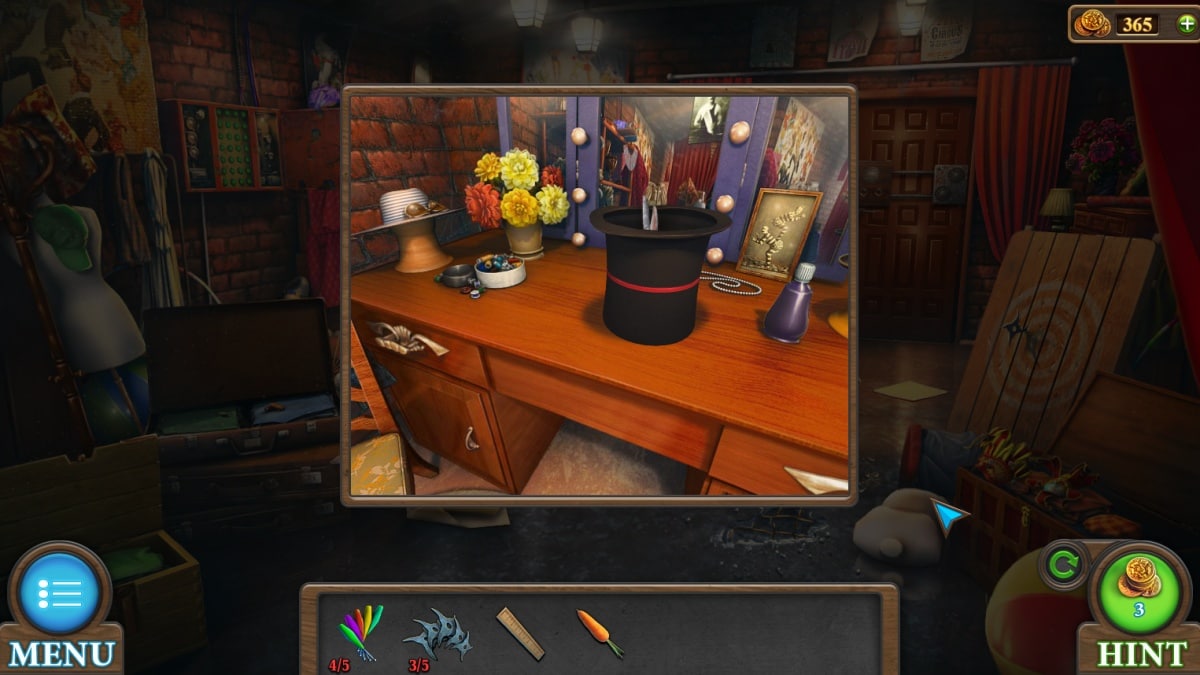
Screenshot by Pro Game Guides
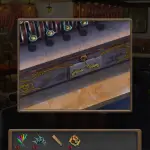
Screenshot by Pro Game Guides
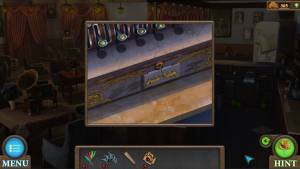
Screenshot by Pro Game Guides
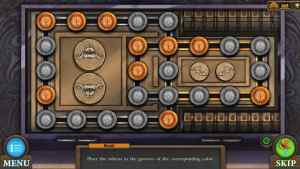
Screenshot by Pro Game Guides

Image by Pro Game Guides
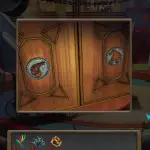
Screenshot by Pro Game Guides
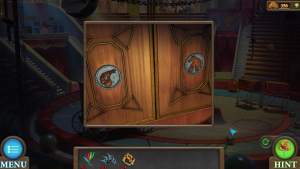
Screenshot by Pro Game Guides
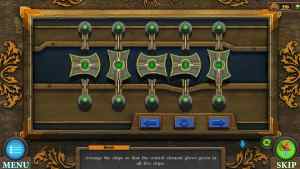
Screenshot by Pro Game Guides

Image by Pro Game Guides
Image by Pro Game Guides
Image by Pro Game Guides
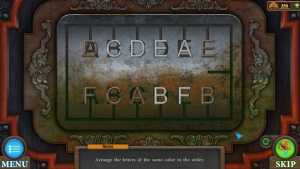
Screenshot by Pro Game Guides
Screenshot by Pro Game Guides
Screenshot by Pro Game Guides
Screenshot by Pro Game Guides
Image by Pro Game Guides
Image by Pro Game Guides
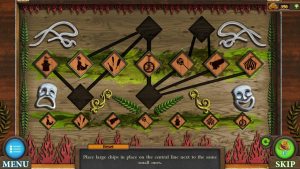
Screenshot by Pro Game Guides
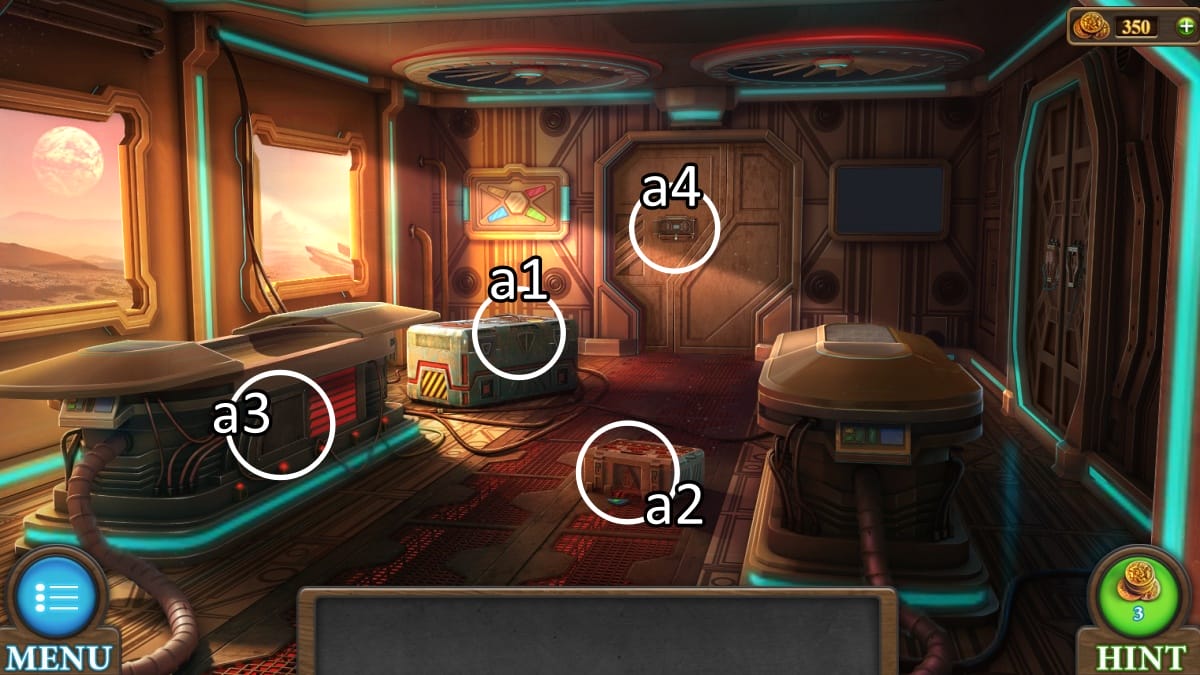
Image by Pro Game Guides
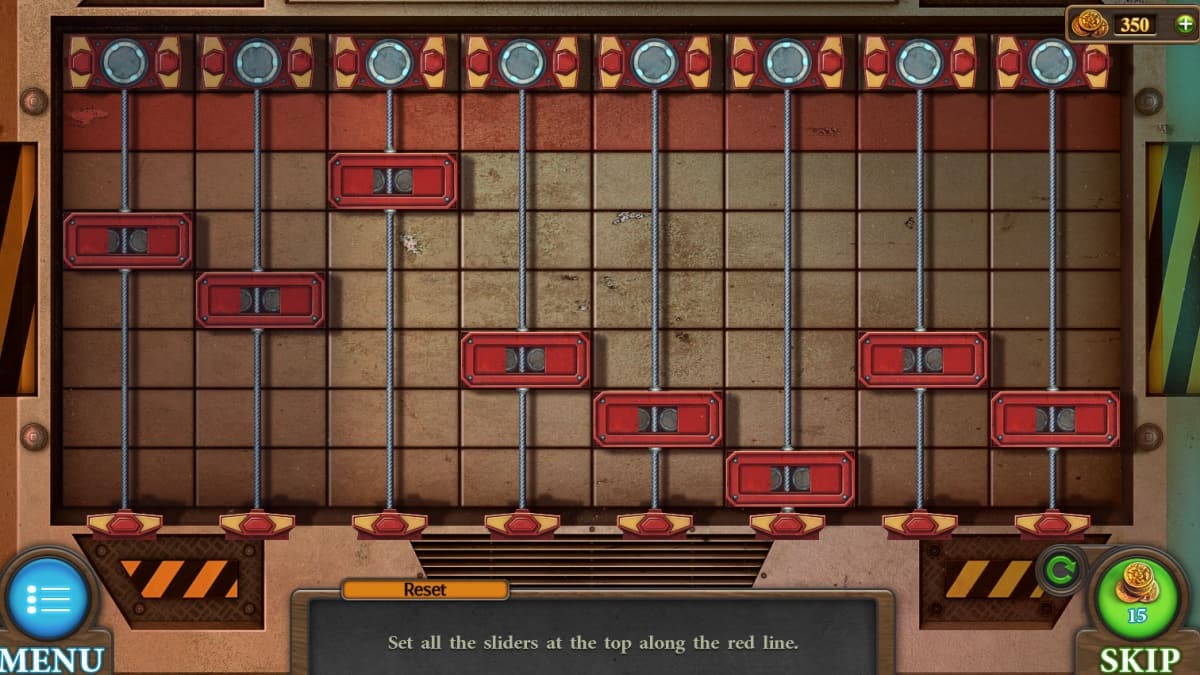
Screenshot by Pro Game Guides
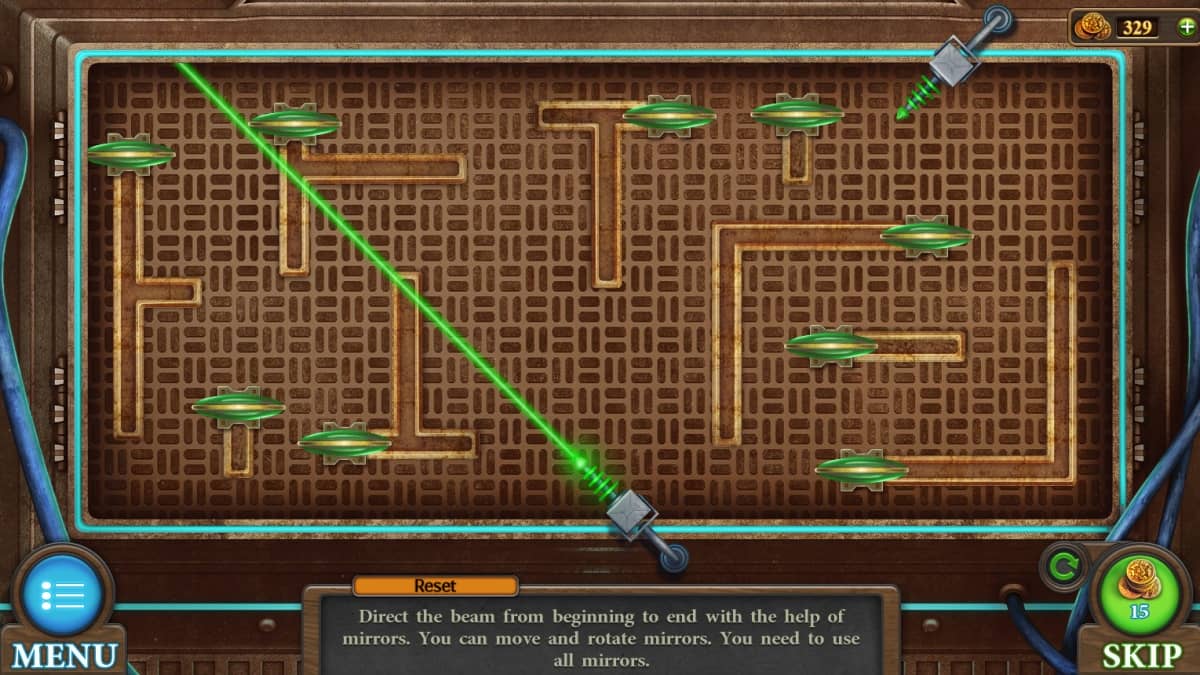
Screenshot by Pro Game Guides
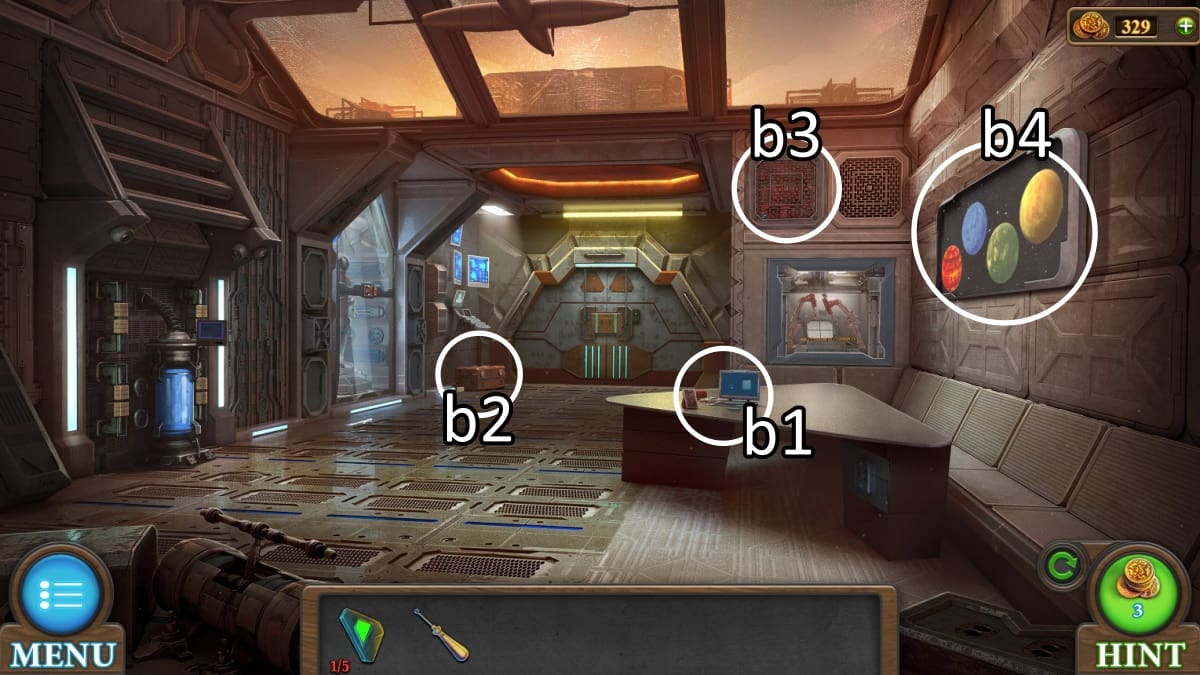
Image by Pro Game Guides
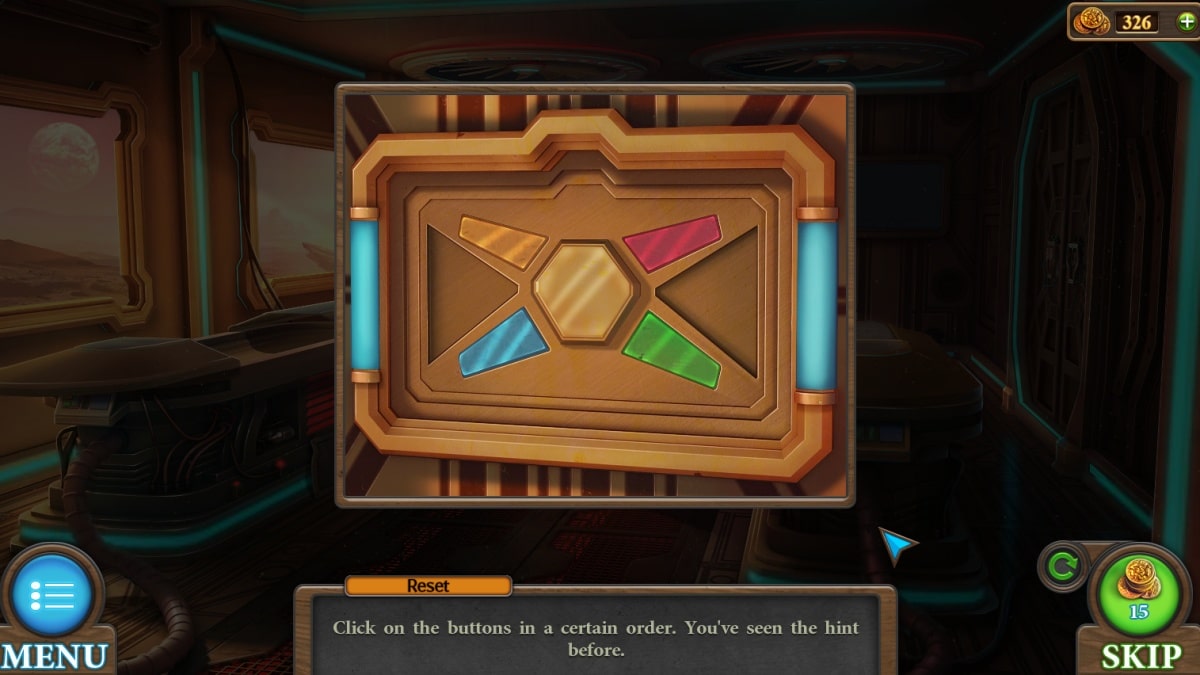
Screenshot by Pro Game Guides
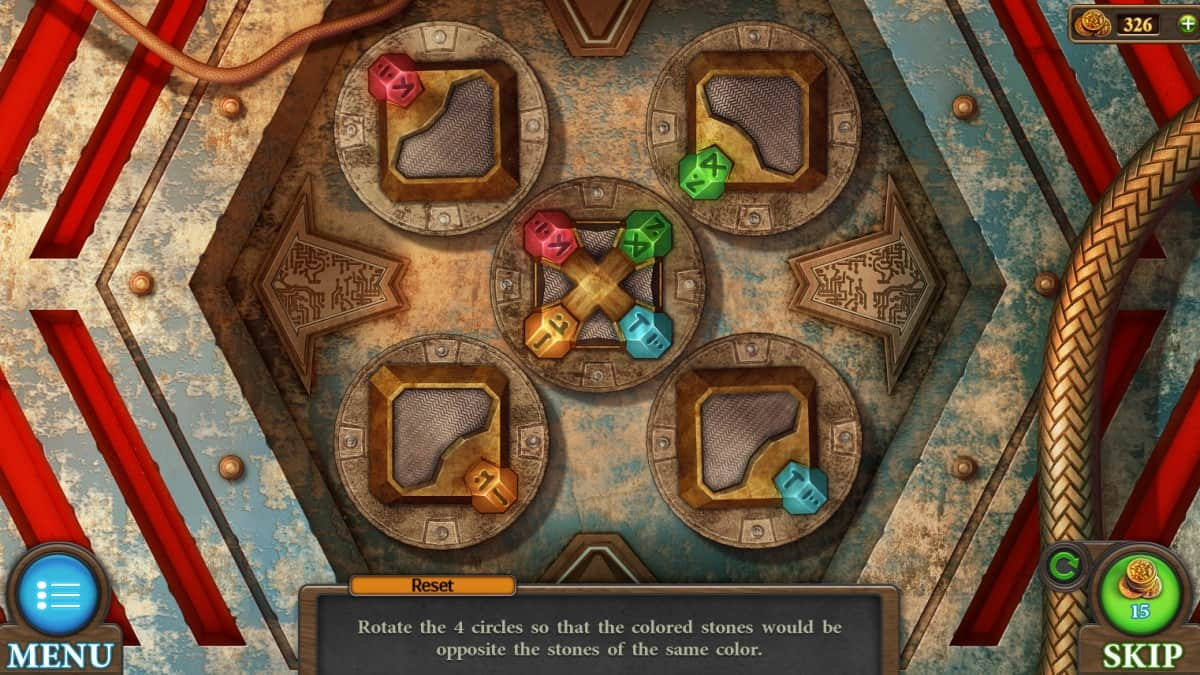
Screenshot by Pro Game Guides
Image by Pro Game Guides
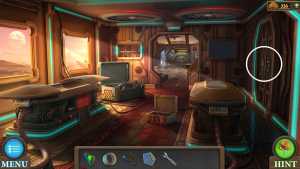
Image by Pro Game Guides
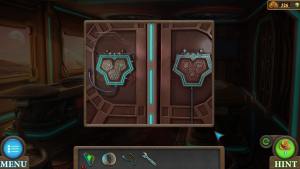
Screenshot by Pro Game Guides
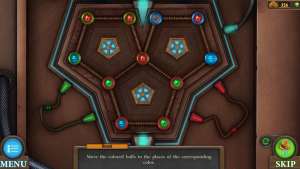
Screenshot by Pro Game Guides

Screenshot by Pro Game Guides
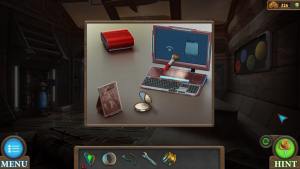
Screenshot by Pro Game Guides
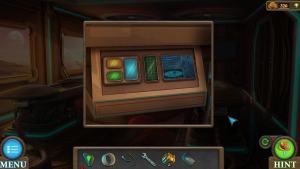
Screenshot by Pro Game Guides
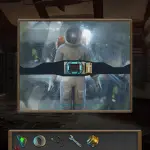
Screenshot by Pro Game Guides
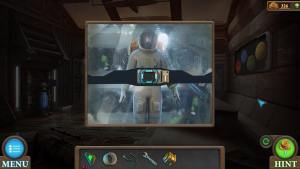
Screenshot by Pro Game Guides
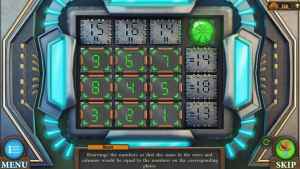
Screenshot by Pro Game Guides
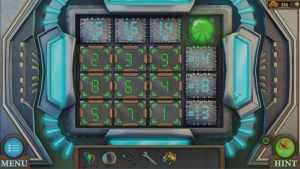
Screenshot by Pro Game Guides
Screenshot by Pro Game Guides
Screenshot by Pro Game Guides
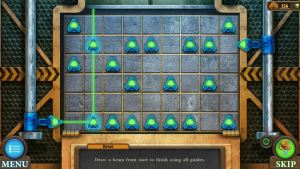
Screenshot by Pro Game Guides
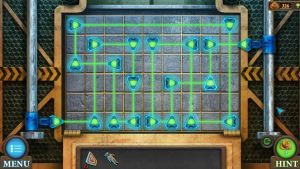
Screenshot by Pro Game Guides
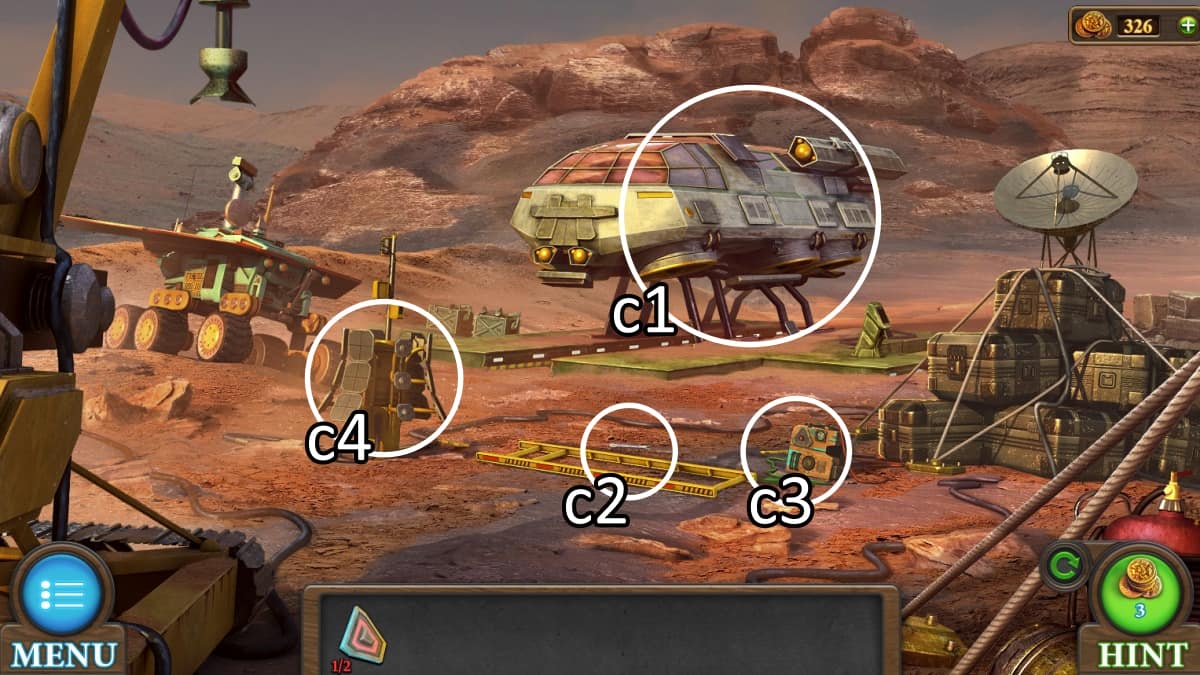
Image by Pro Game Guides
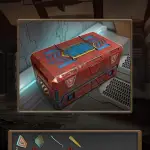
Screenshot by Pro Game Guides
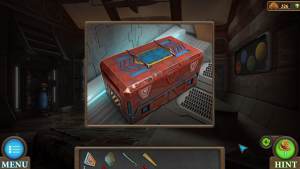
Screenshot by Pro Game Guides

Screenshot by Pro Game Guides
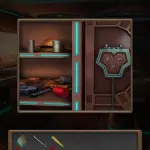
Screenshot by Pro Game Guides
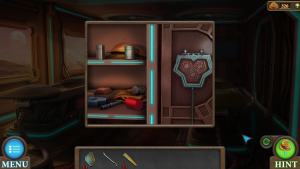
Screenshot by Pro Game Guides
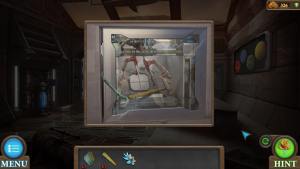
Screenshot by Pro Game Guides
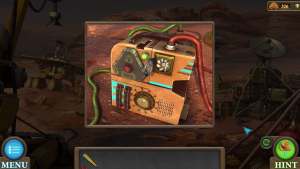
Screenshot by Pro Game Guides
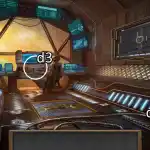
Image by Pro Game Guides
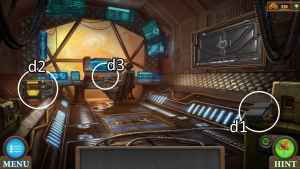
Image by Pro Game Guides
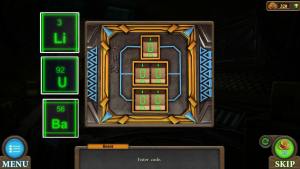
Image by Pro Game Guides
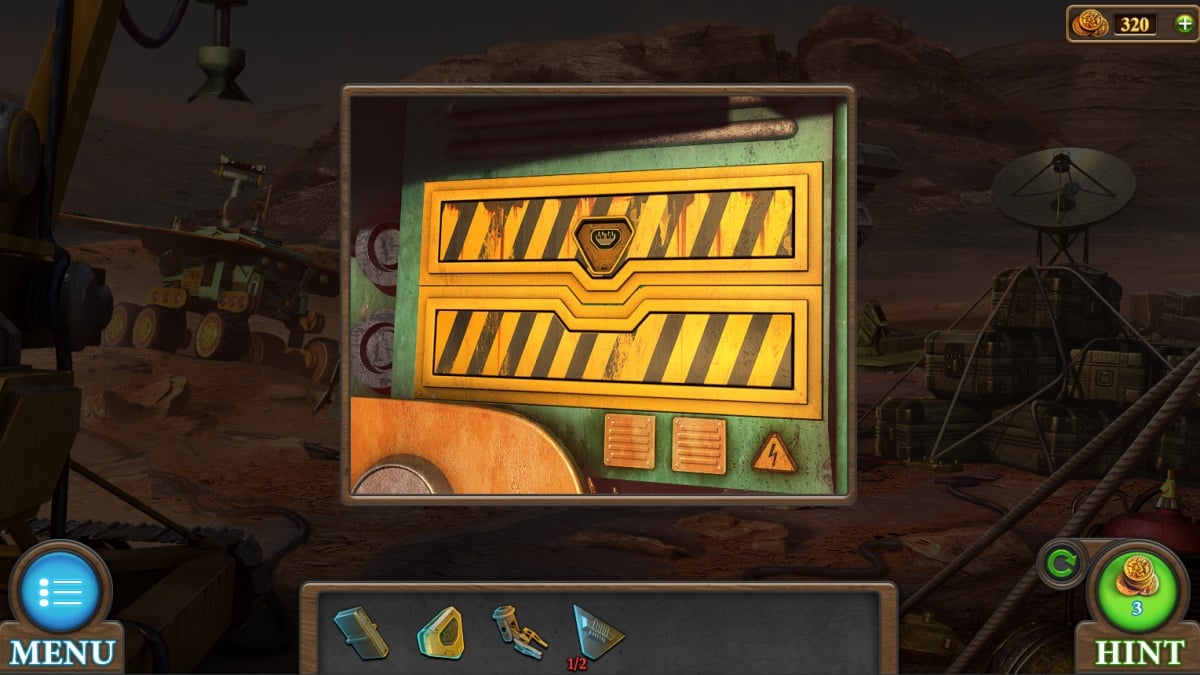
Screenshot by Pro Game Guides

Screenshot by Pro Game Guides
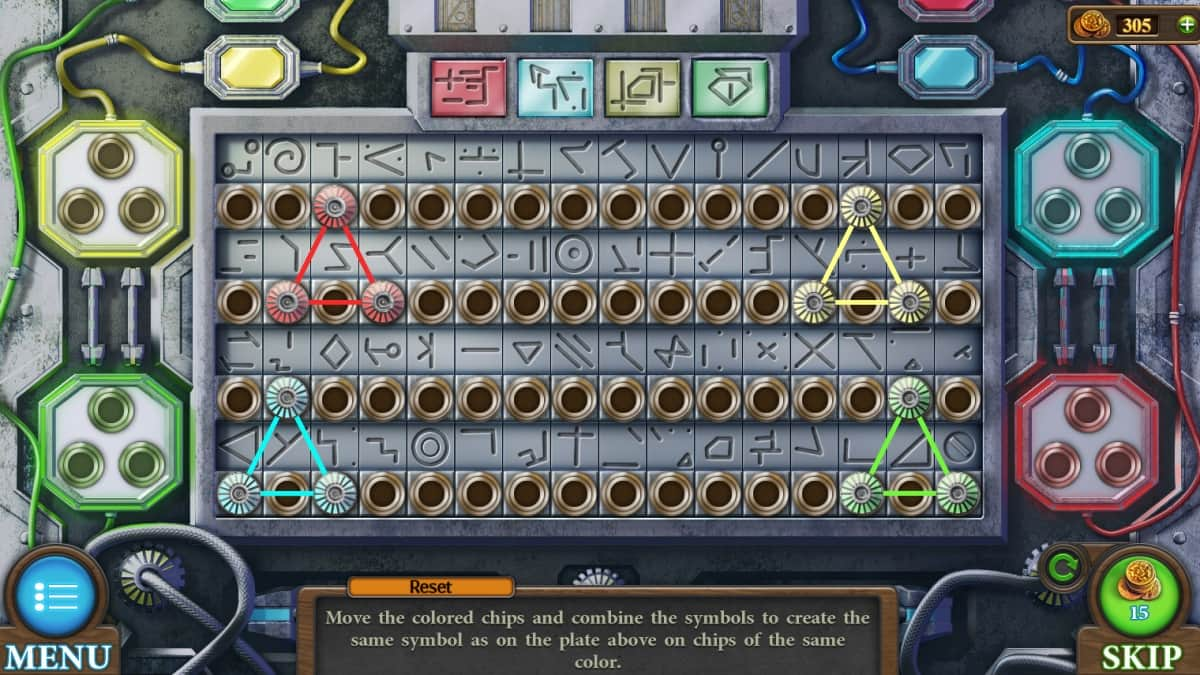
Screenshot by Pro Game Guides
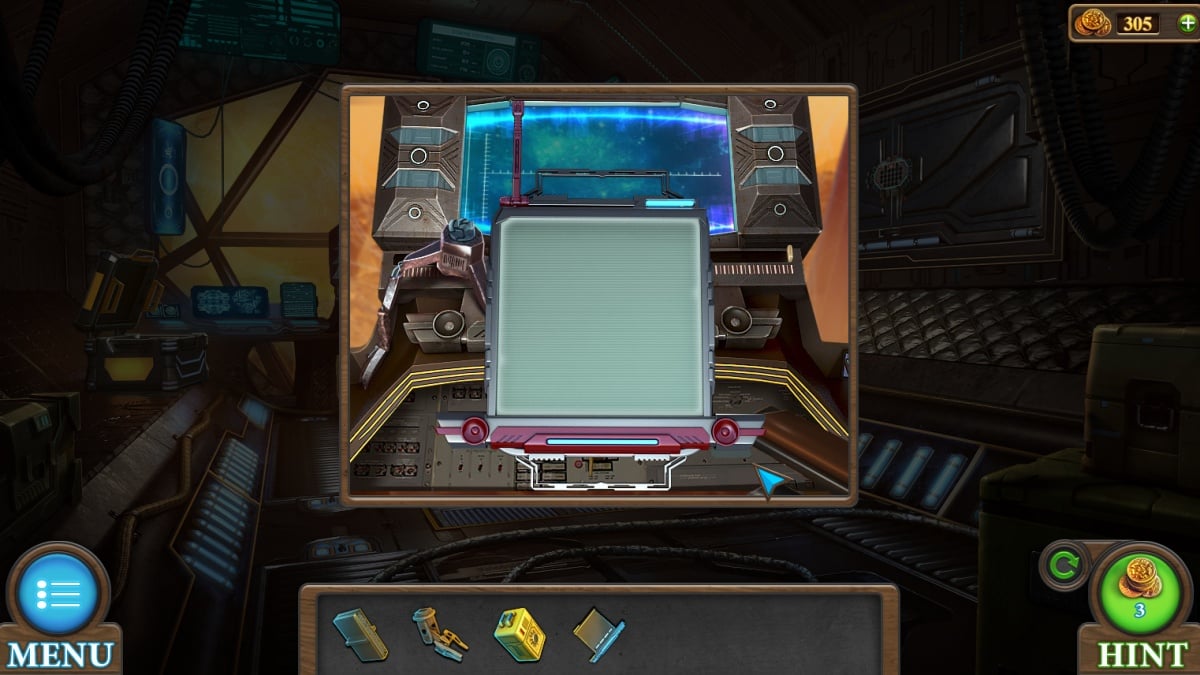
Screenshot by Pro Game Guides
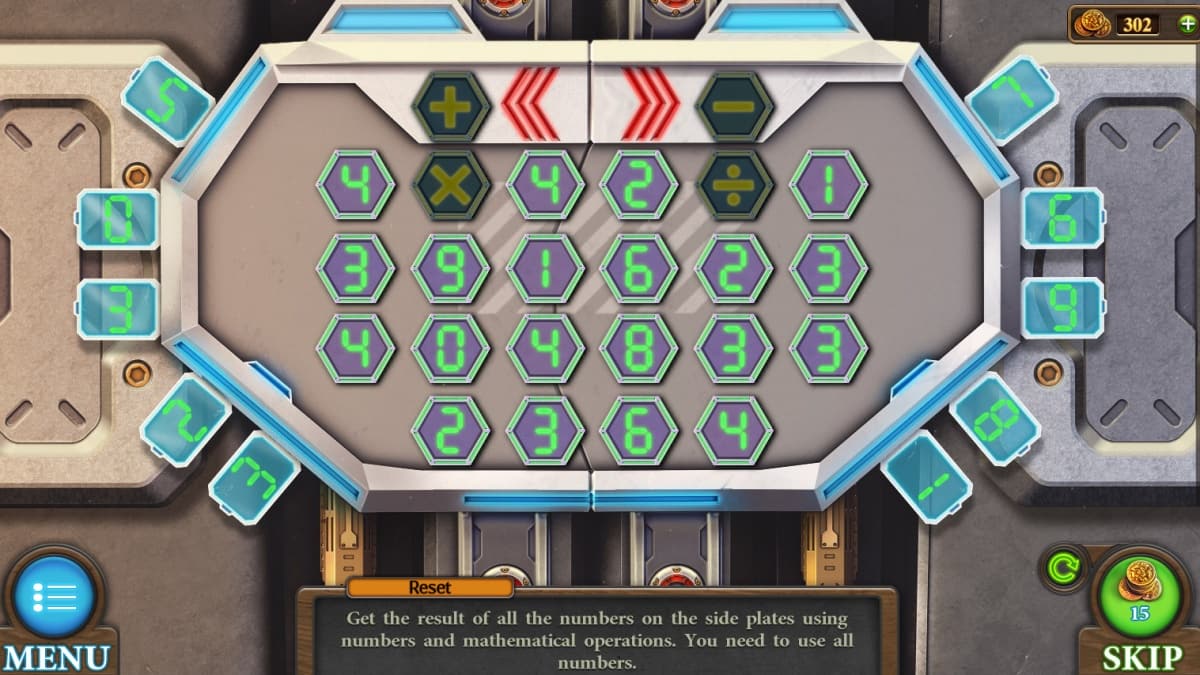
Screenshot by Pro Game Guides

Screenshot by Pro Game Guides
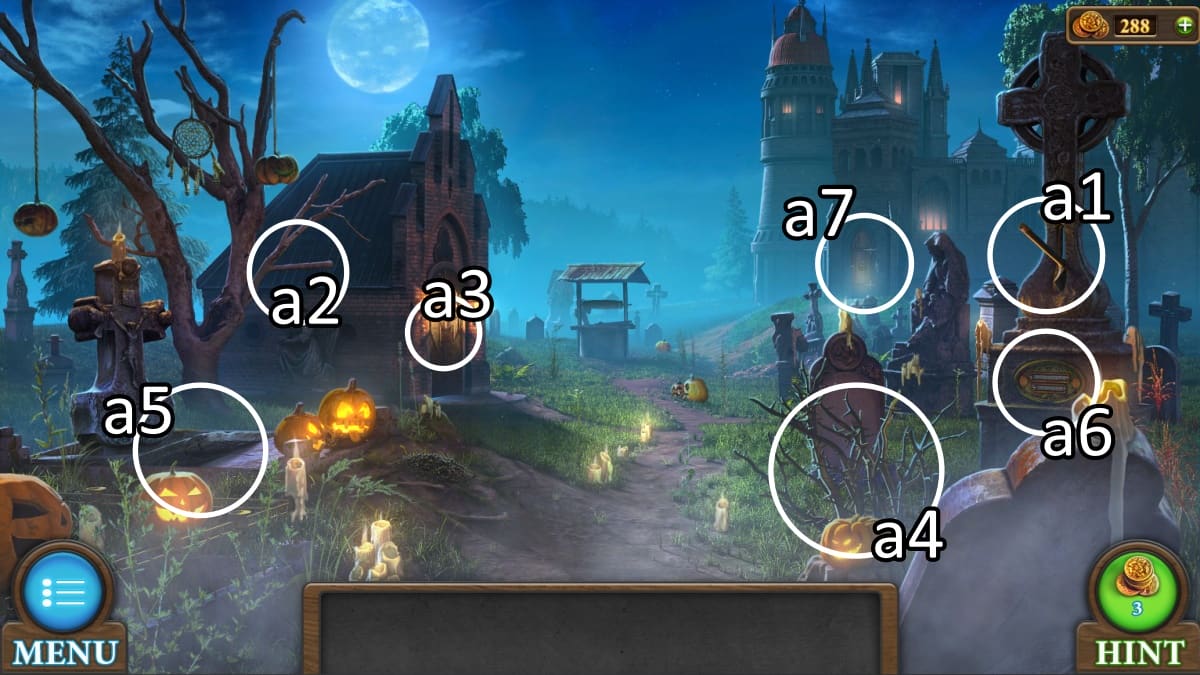
Image by Pro Game Guides
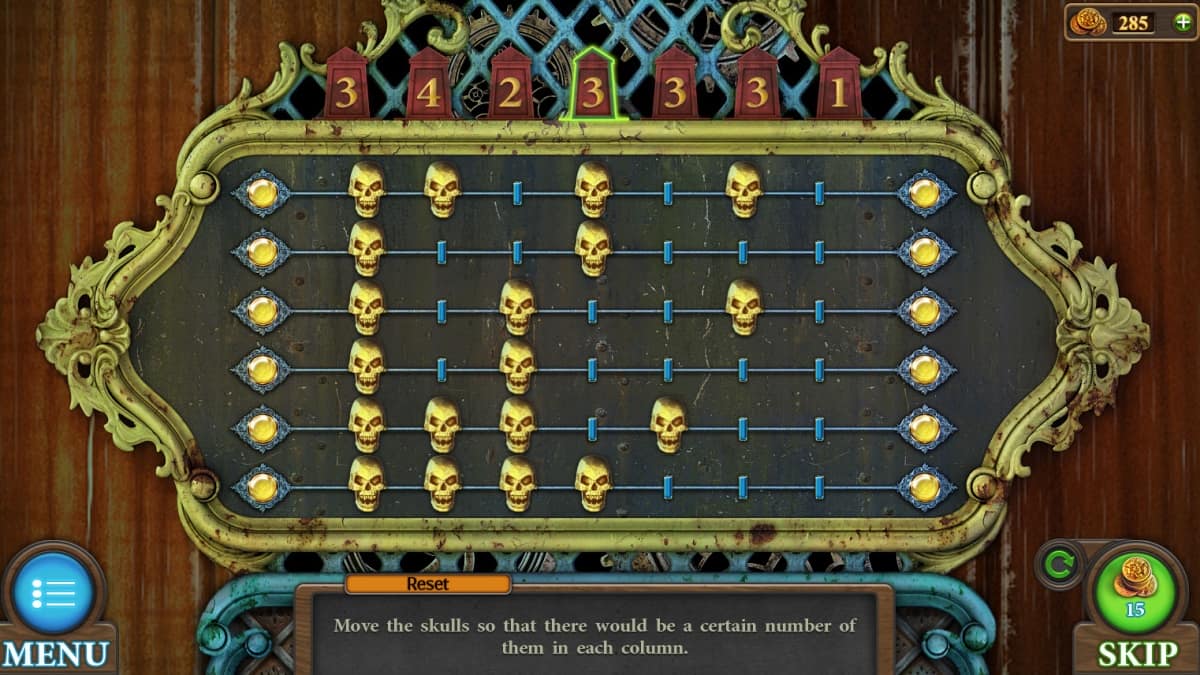
Screenshot by Pro Game Guides
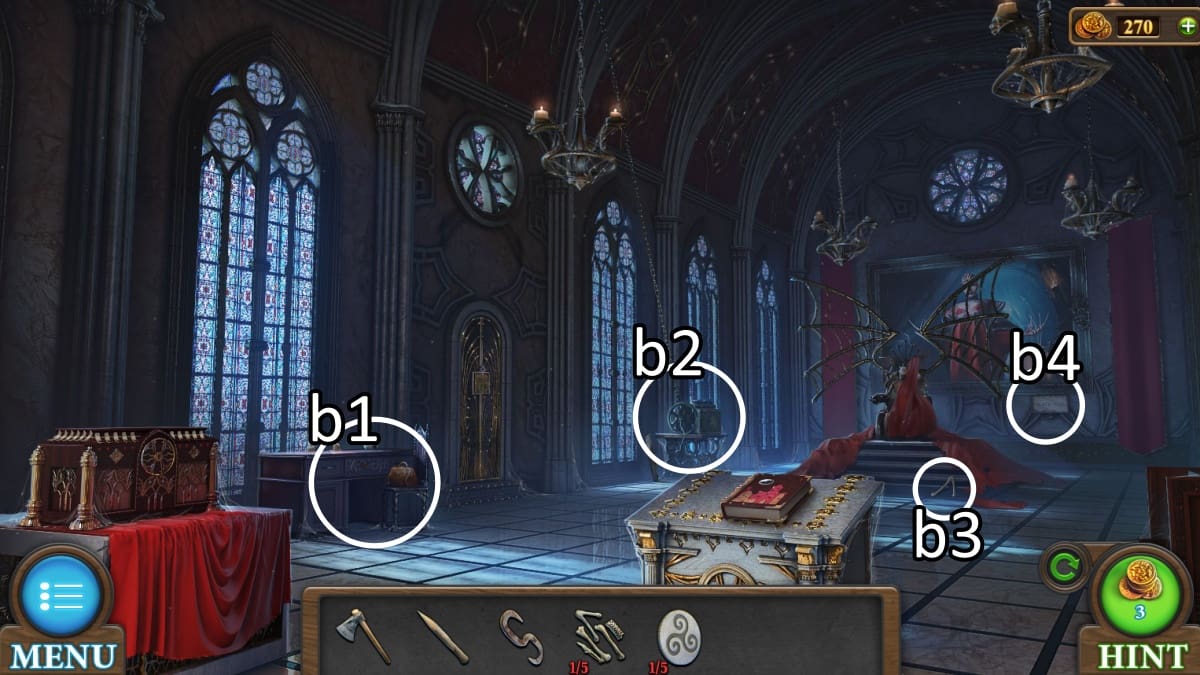
Image by Pro Game Guides

Image by Pro Game Guides
Screenshot by Pro Game Guides

Screenshot by Pro Game Guides

Screenshot by Pro Game Guides
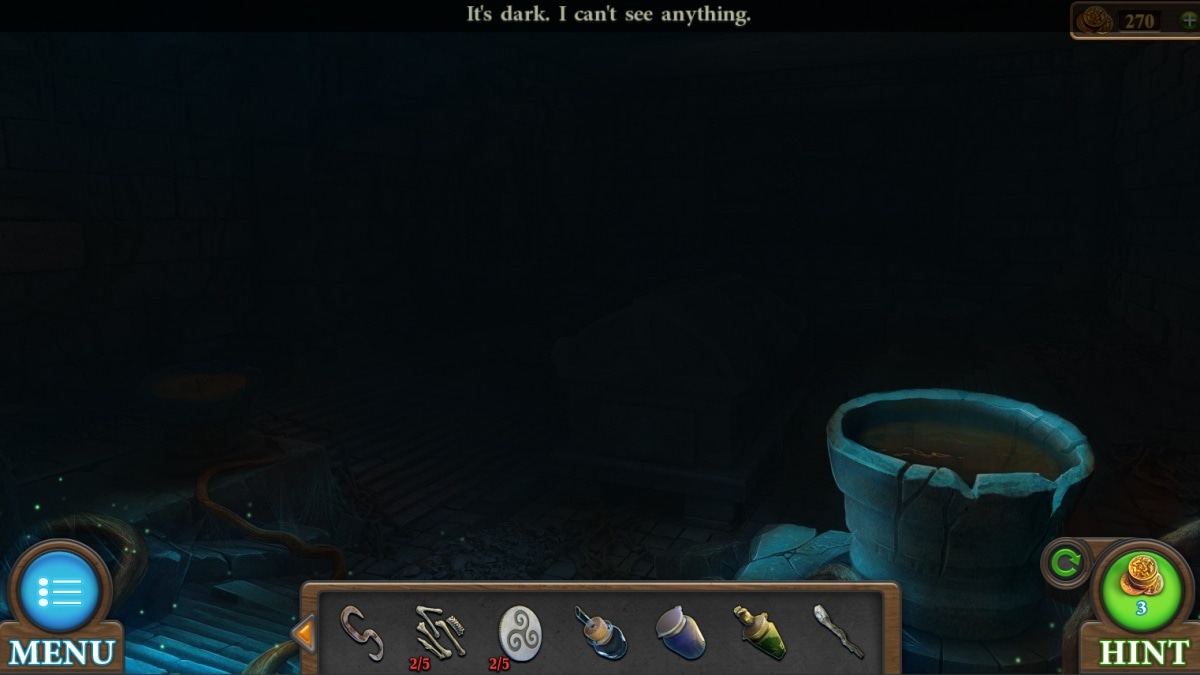
Screenshot by Pro Game Guides
Screenshot by Pro Game Guides
Screenshot by Pro Game Guides
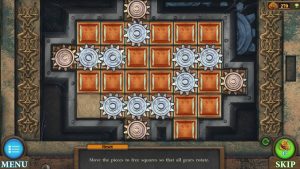
Screenshot by Pro Game Guides
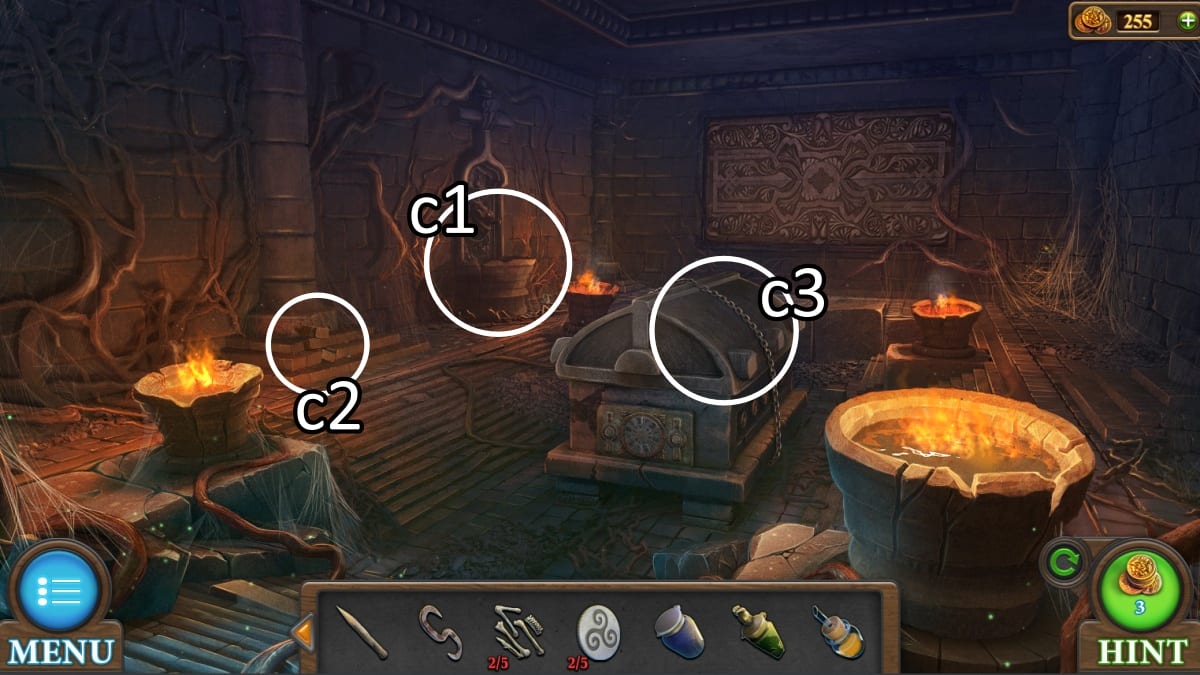
Image by Pro Game Guides
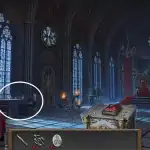
Image by Pro Game Guides
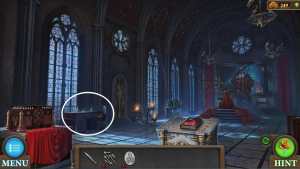
Image by Pro Game Guides
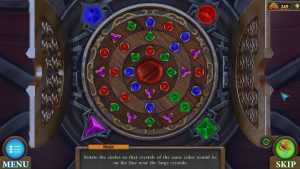
Screenshot by Pro Game Guides
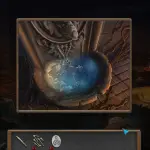
Screenshot by Pro Game Guides
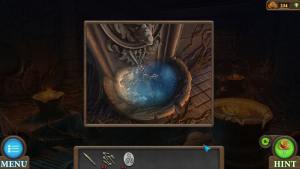
Screenshot by Pro Game Guides
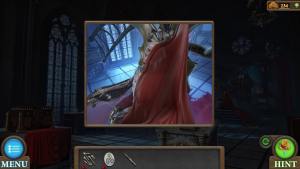
Screenshot by Pro Game Guides
Screenshot by Pro Game Guides
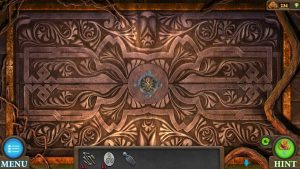
Screenshot by Pro Game Guides
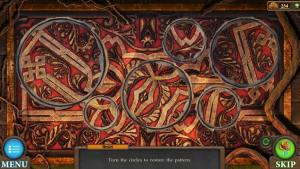
Screenshot by Pro Game Guides
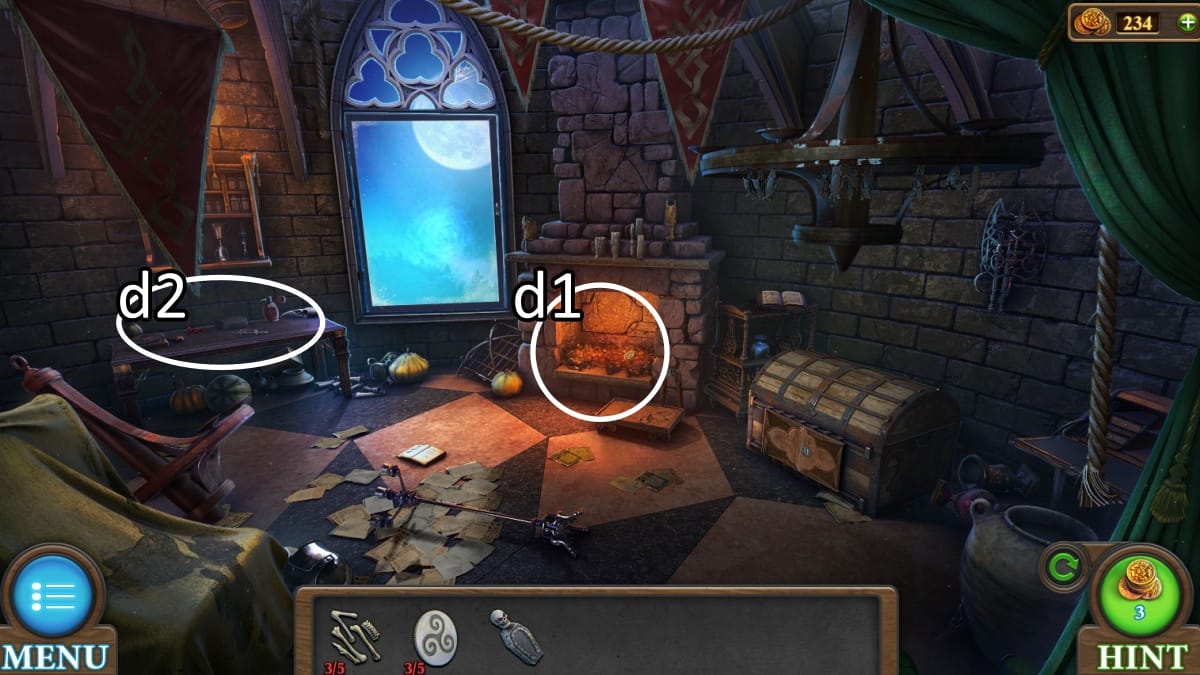
Image by Pro Game Guides
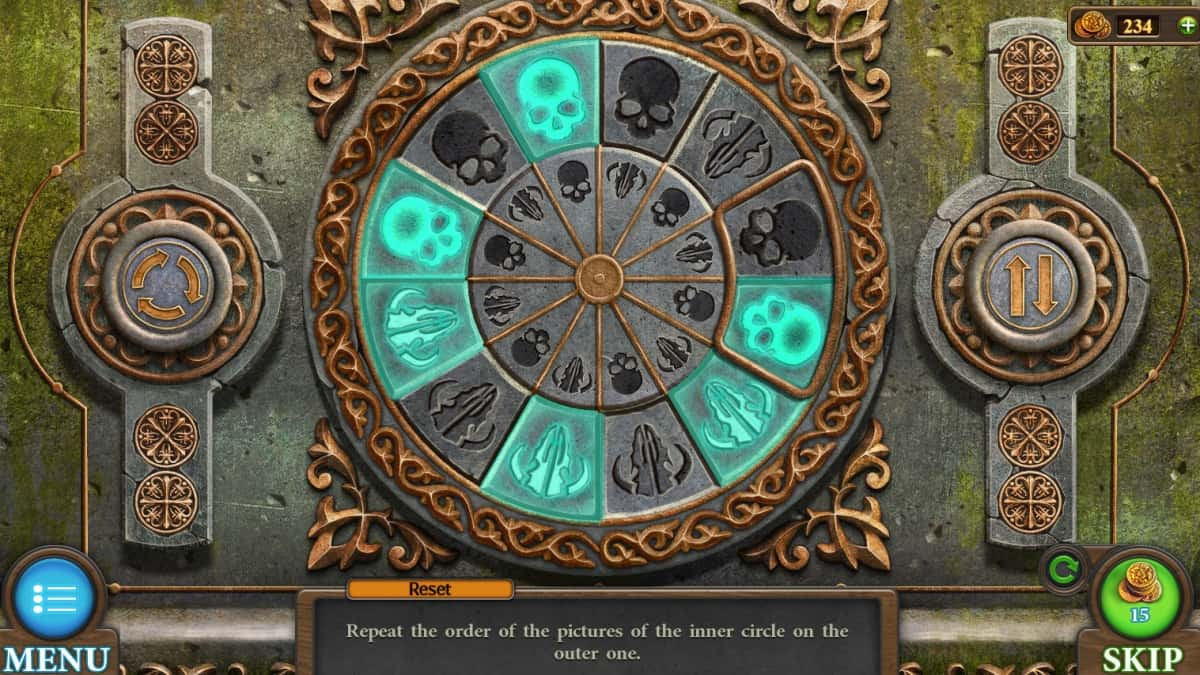
Screenshot by Pro Game Guides
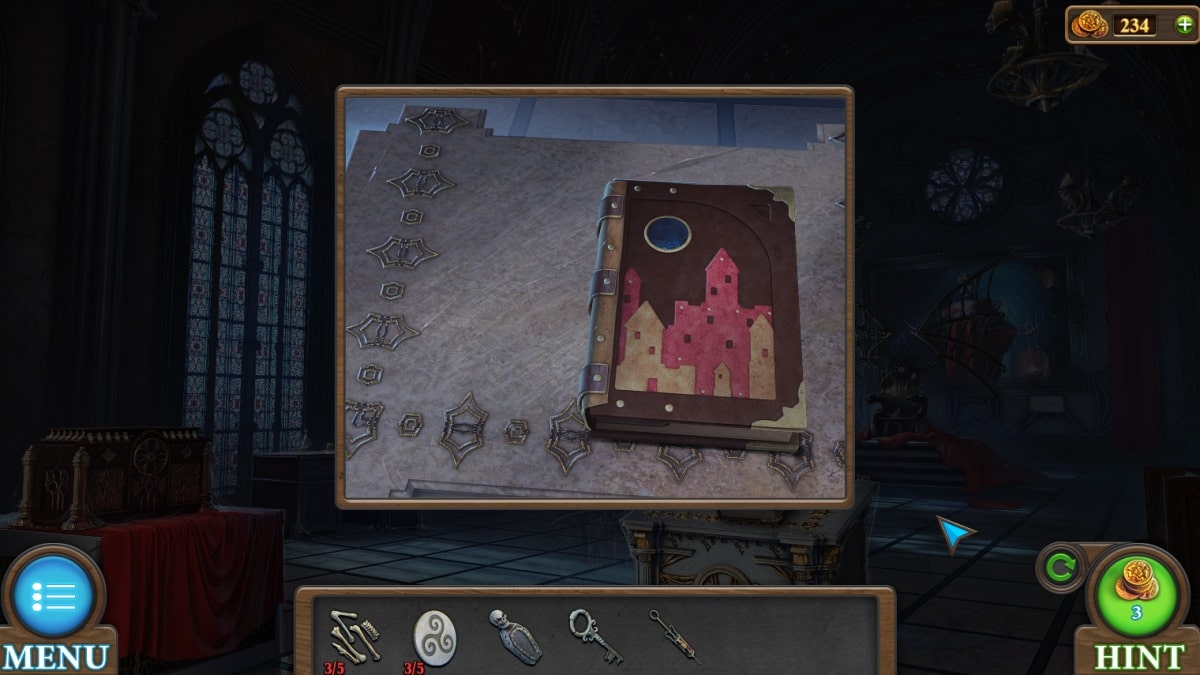
Screenshot by Pro Game Guides
Screenshot by Pro Game Guides
Screenshot by Pro Game Guides
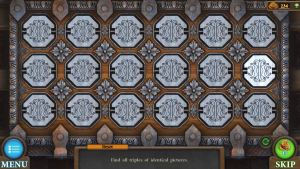
Screenshot by Pro Game Guides
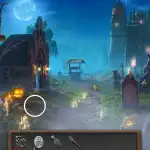
Image by Pro Game Guides
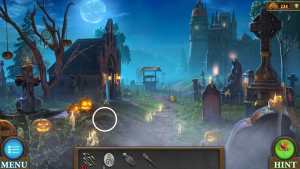
Image by Pro Game Guides
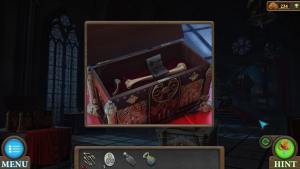
Screenshot by Pro Game Guides

Screenshot by Pro Game Guides
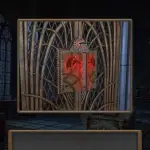
Screenshot by Pro Game Guides
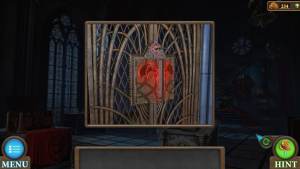
Screenshot by Pro Game Guides
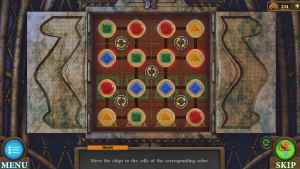
Screenshot by Pro Game Guides
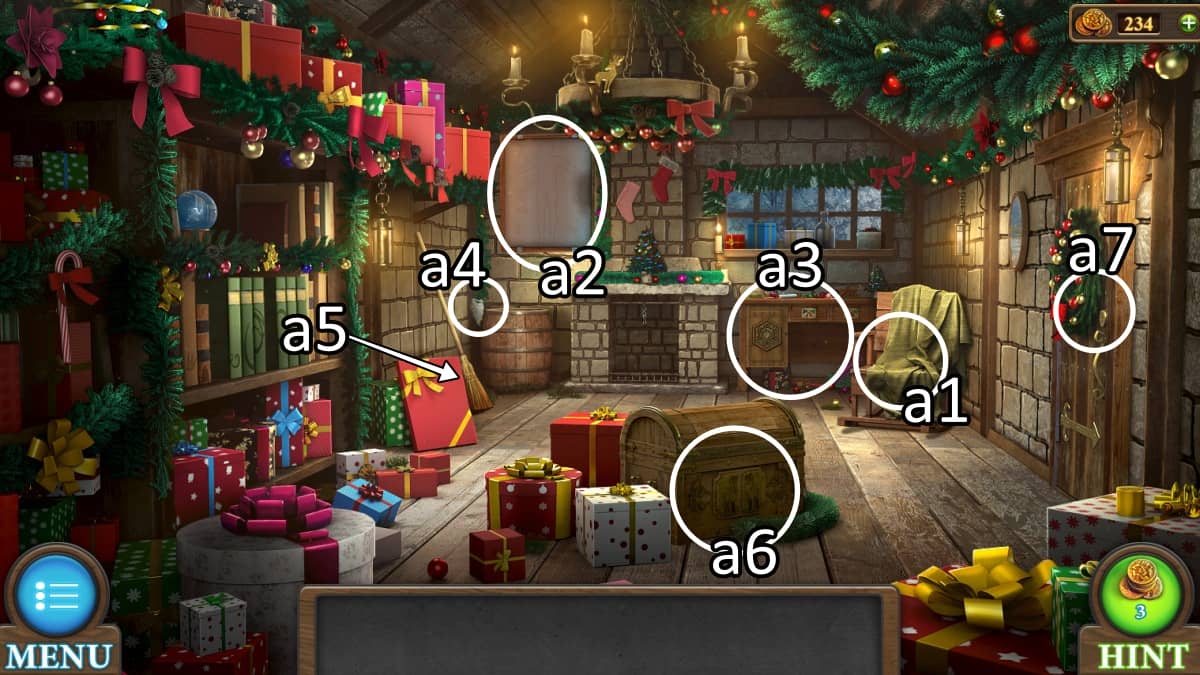
Image by Pro Game Guides
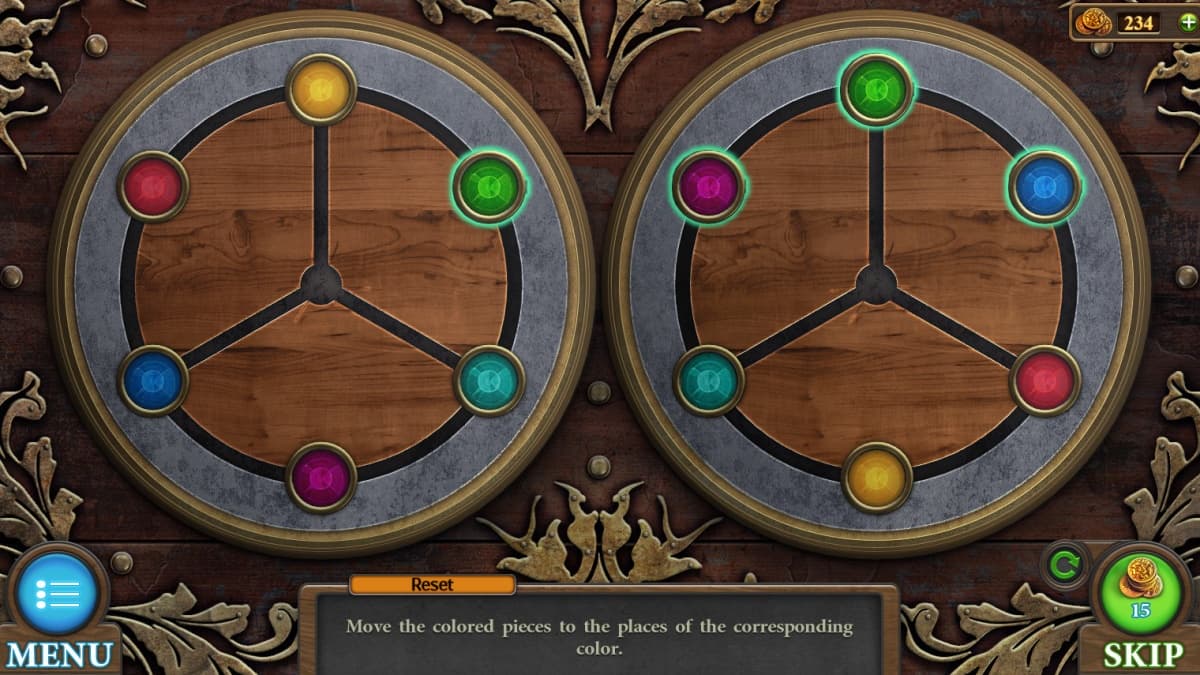
Screenshot by Pro Game Guides
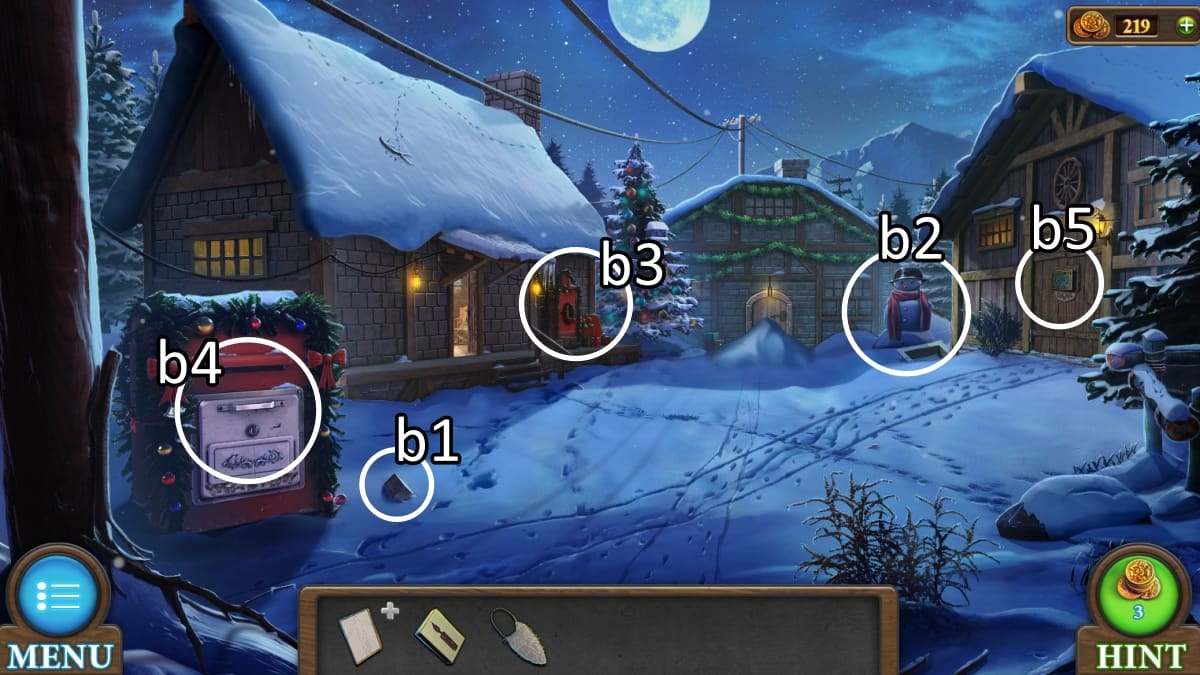
Image by Pro Game Guides

Screenshot by Pro Game Guides
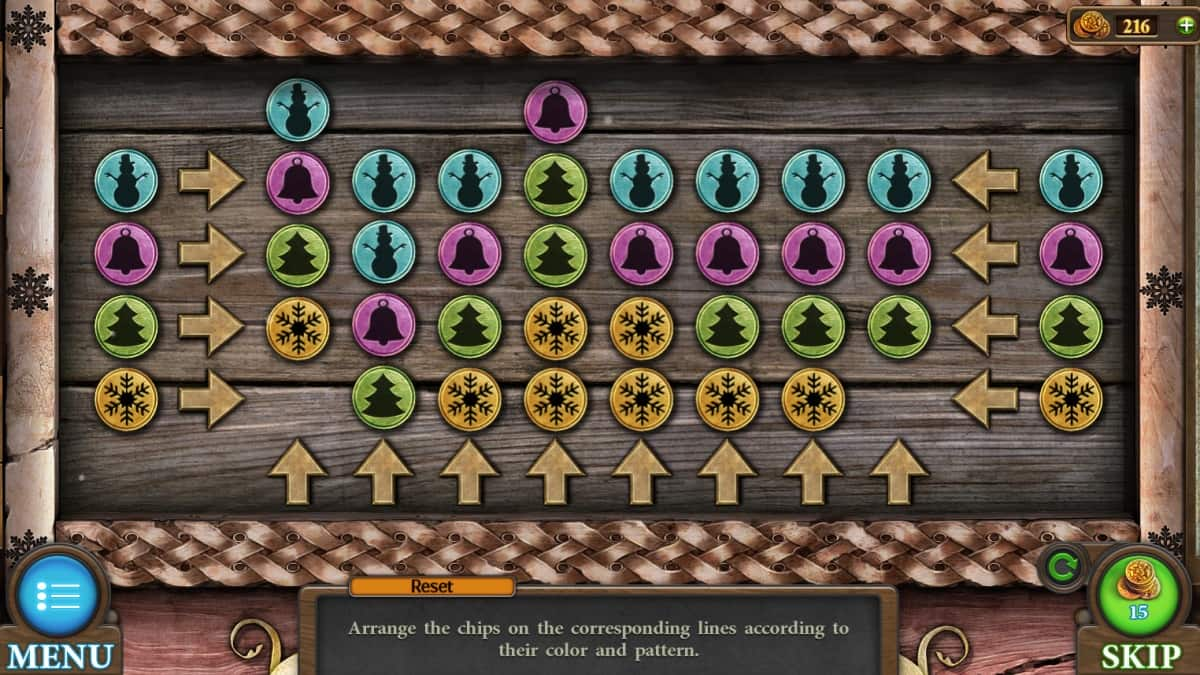
Screenshot by Pro Game Guides
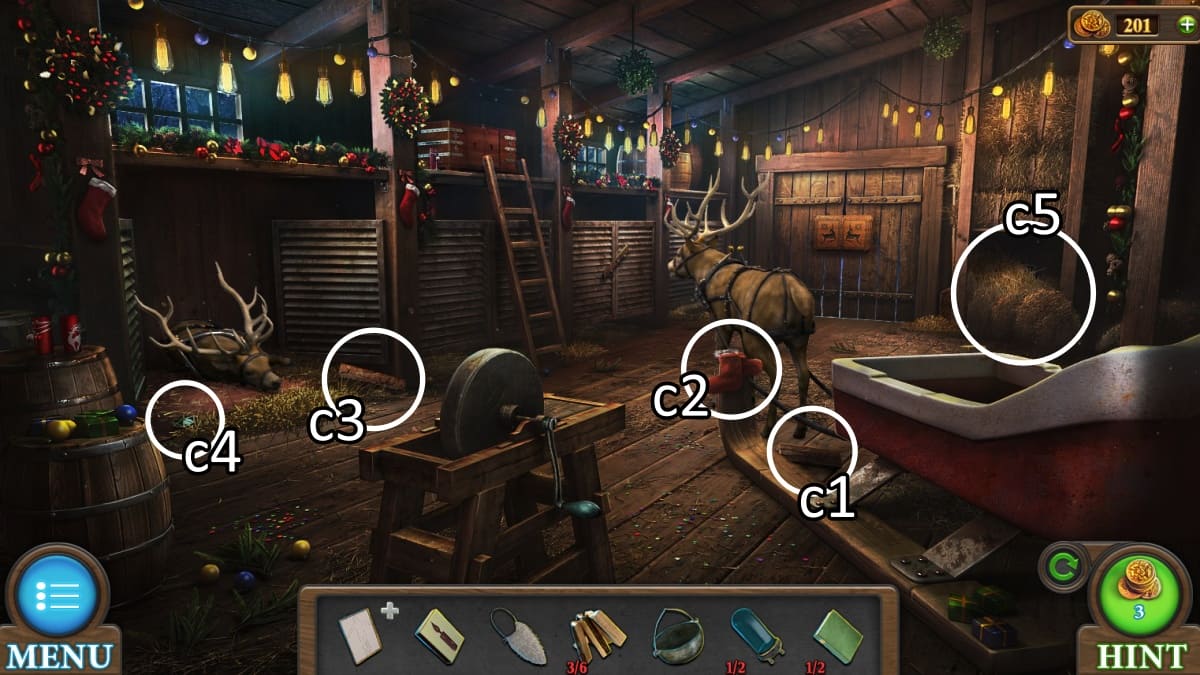
Image by Pro Game Guides
Screenshot by Pro Game Guides
Screenshot by Pro Game Guides
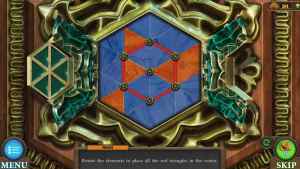
Screenshot by Pro Game Guides
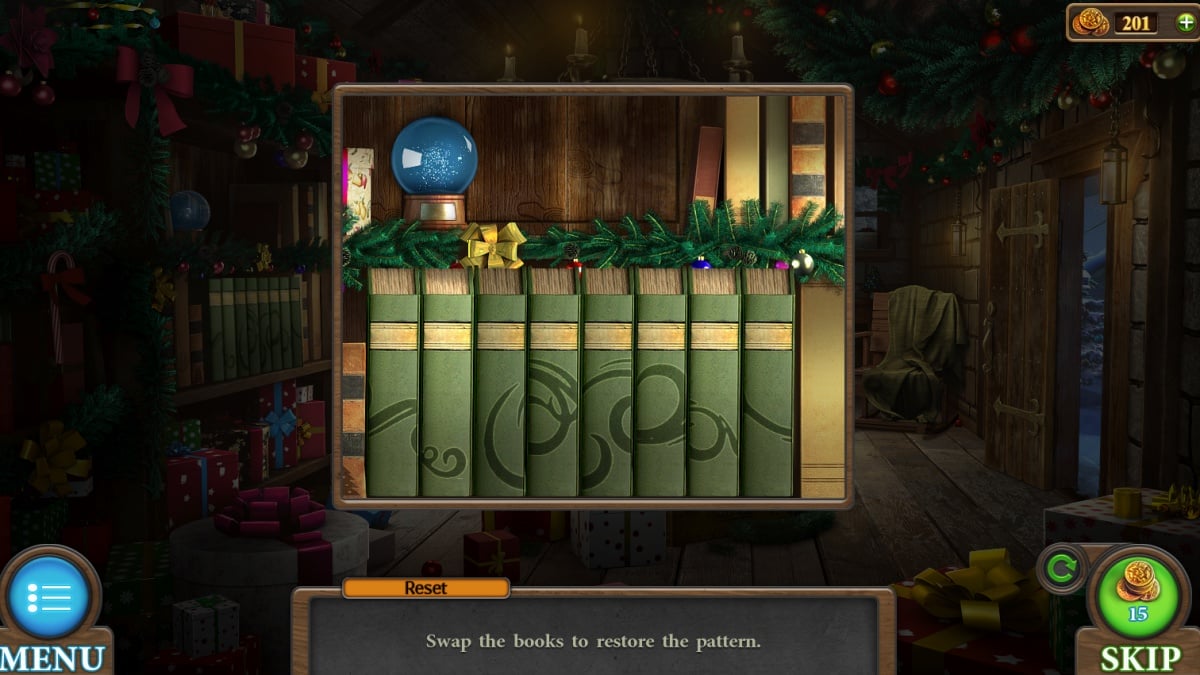
Screenshot by Pro Game Guides
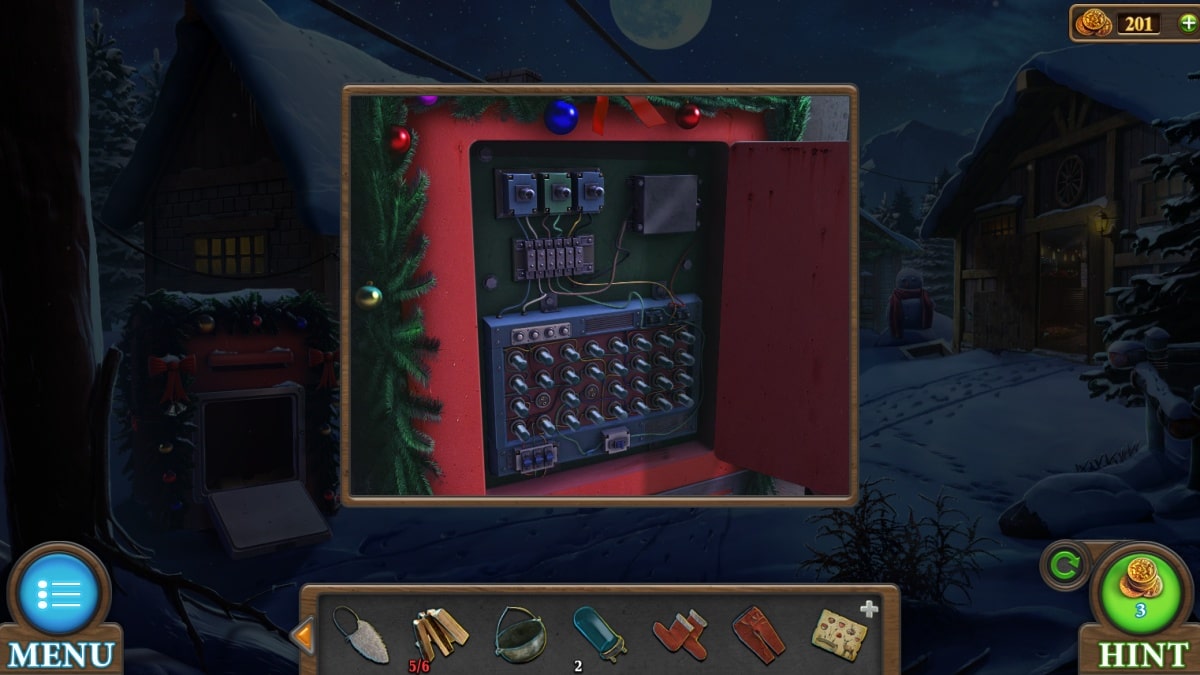
Screenshot by Pro Game Guides
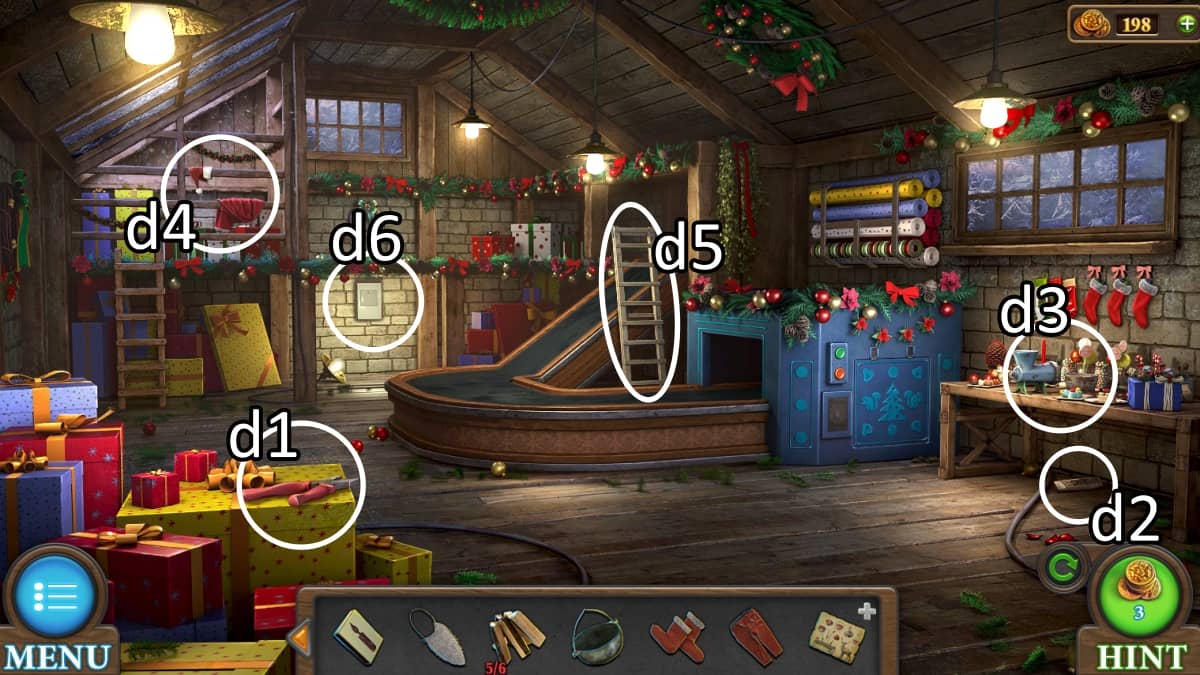
Image by Pro Game Guides
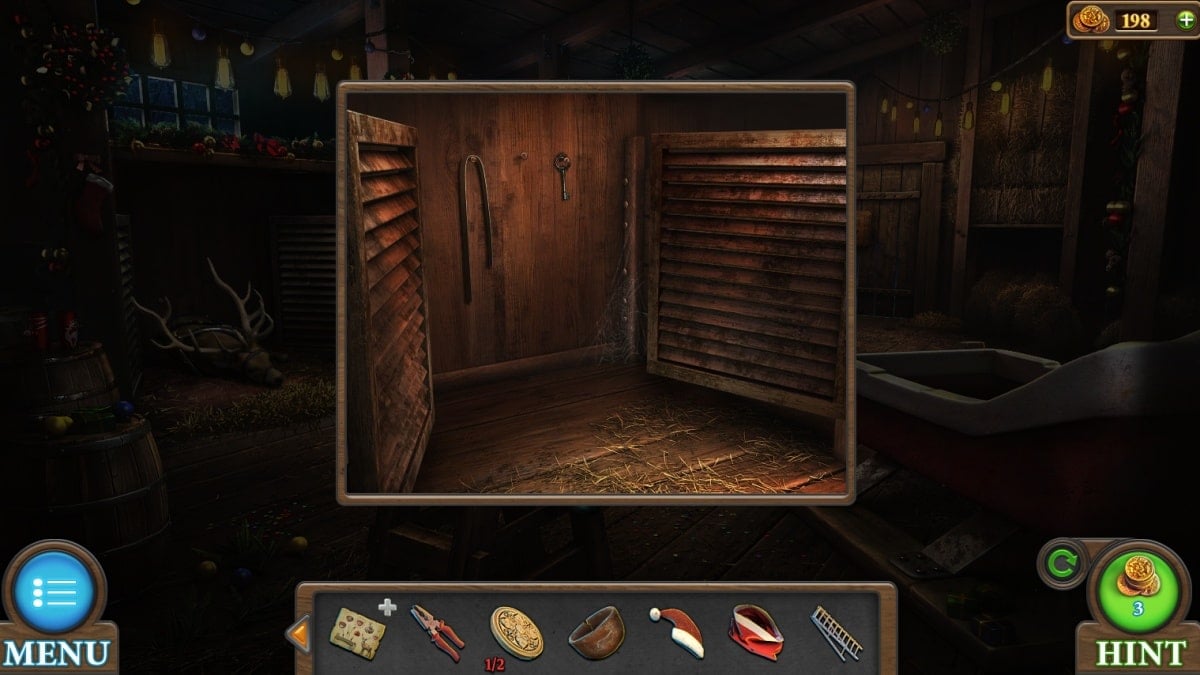
Screenshot by Pro Game Guides
Screenshot by Pro Game Guides
Screenshot by Pro Game Guides
Screenshot by Pro Game Guides
Screenshot by Pro Game Guides
Screenshot by Pro Game Guides
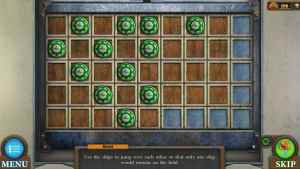
Screenshot by Pro Game Guides
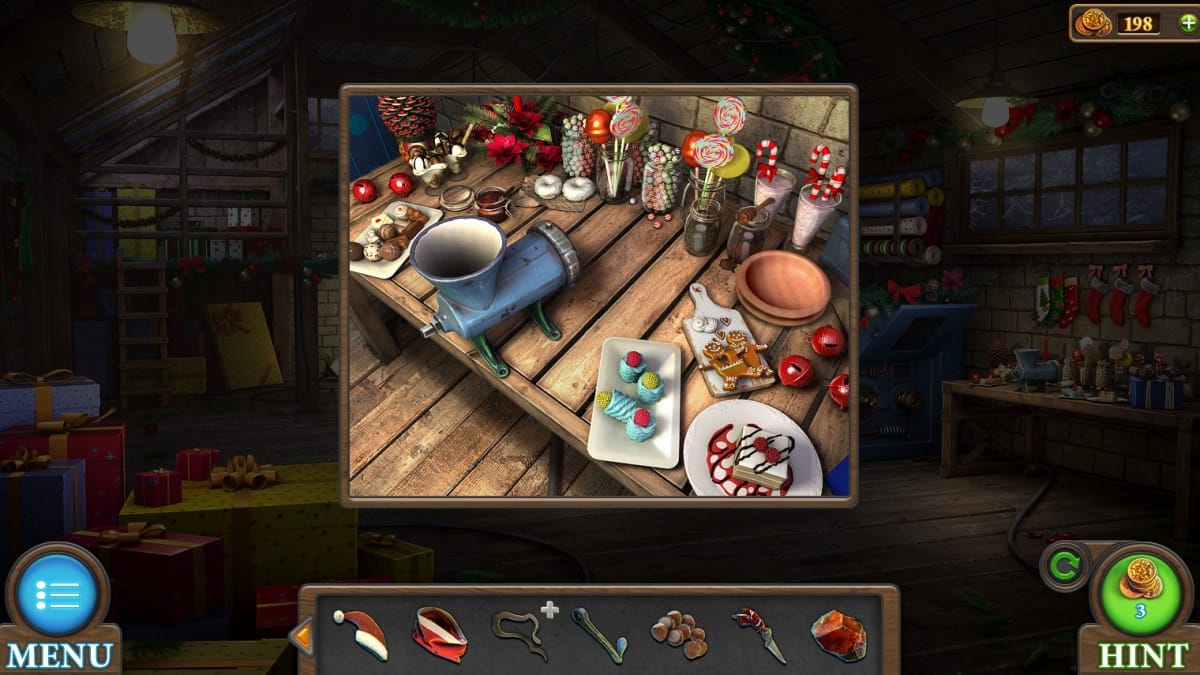
Screenshot by Pro Game Guides
Screenshot by Pro Game Guides
Screenshot by Pro Game Guides
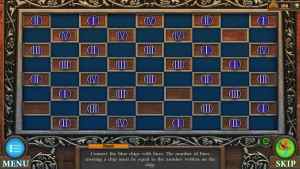
Screenshot by Pro Game Guides

Screenshot by Pro Game Guides
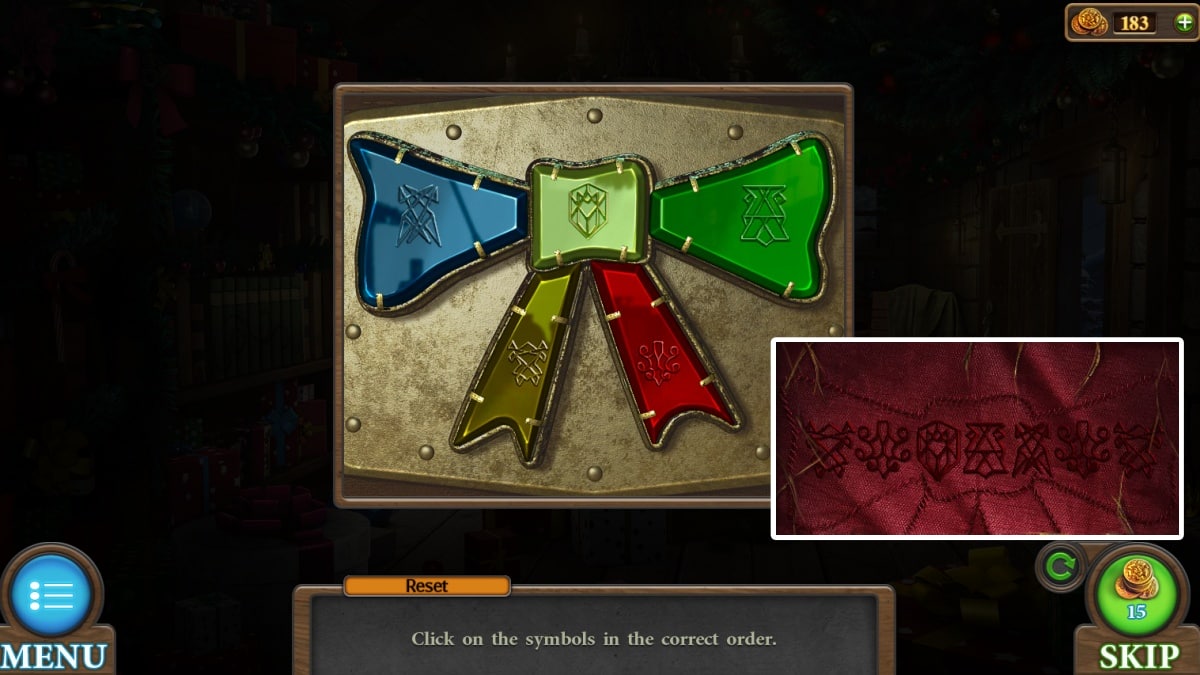
Image by Pro Game Guides
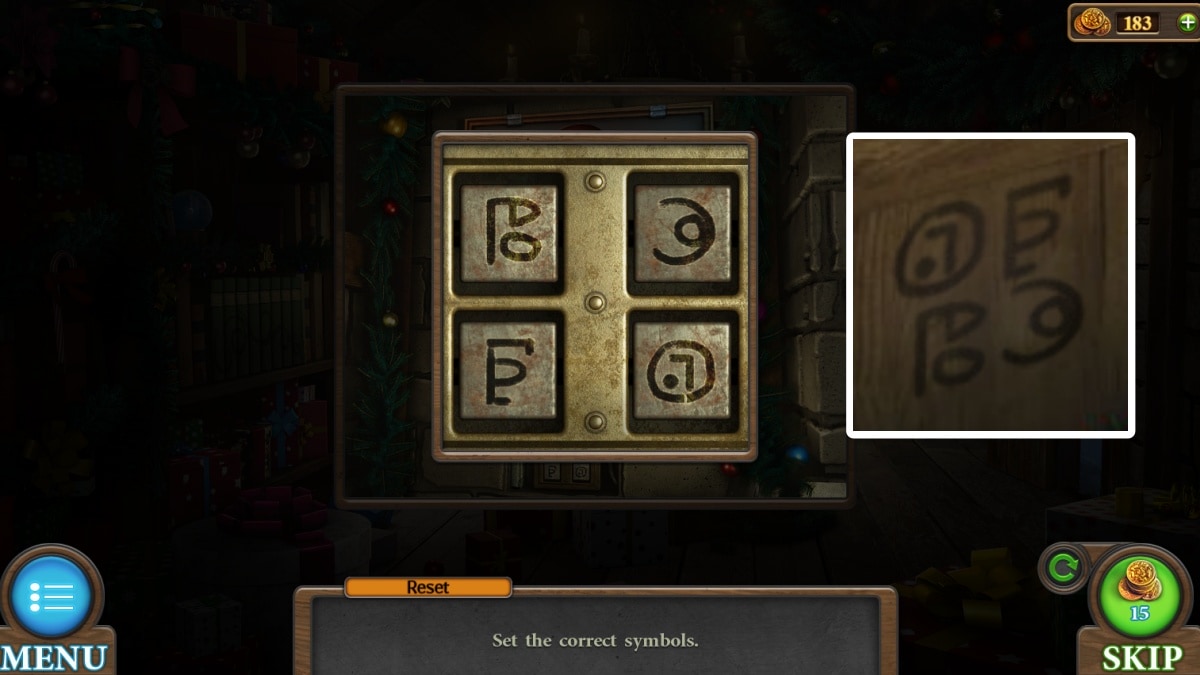
Image by Pro Game Guides
Image by Pro Game Guides
Image by Pro Game Guides
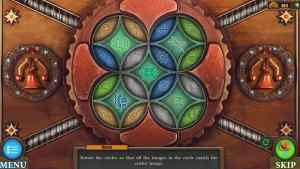
Screenshot by Pro Game Guides
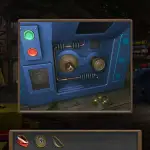
Screenshot by Pro Game Guides

Screenshot by Pro Game Guides
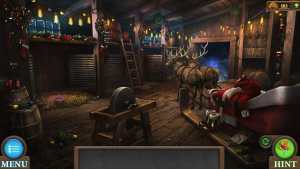
Screenshot by Pro Game Guides
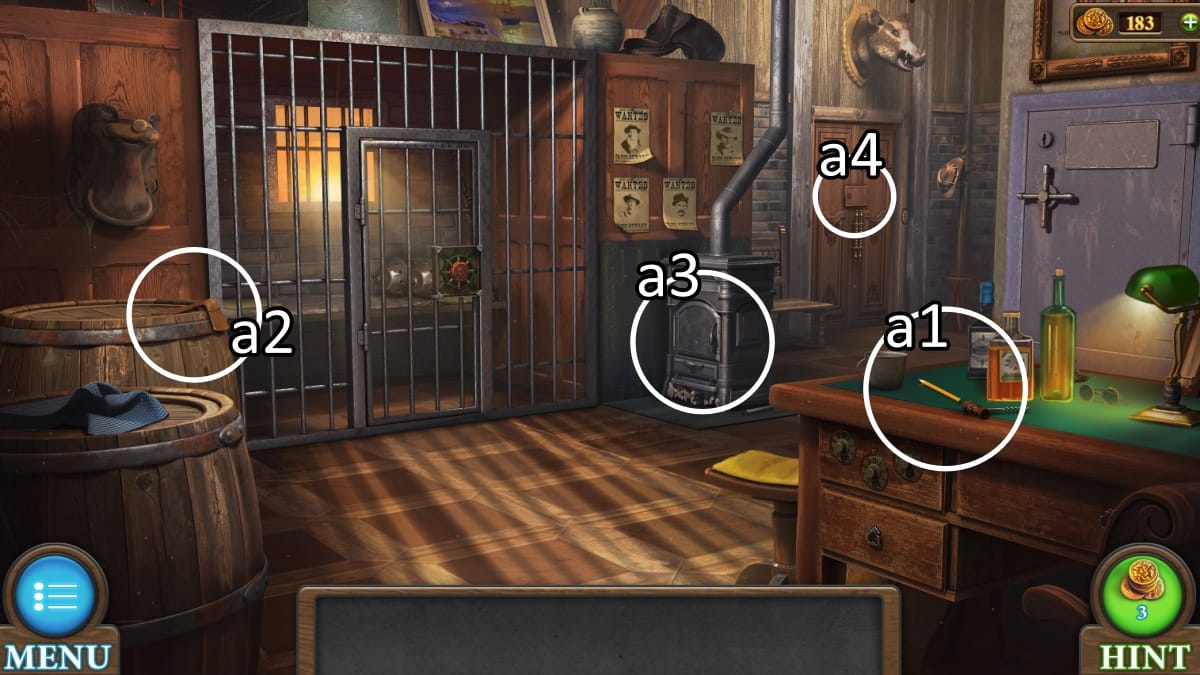
Image by Pro Game Guides
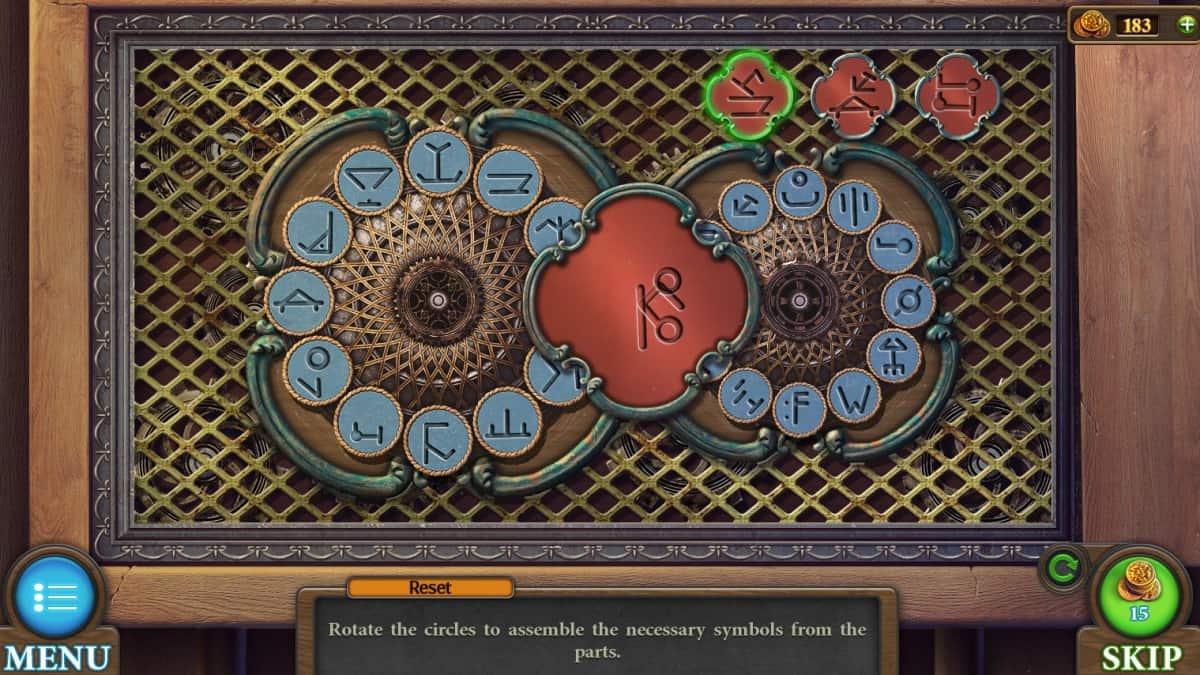
Screenshot by Pro Game Guides
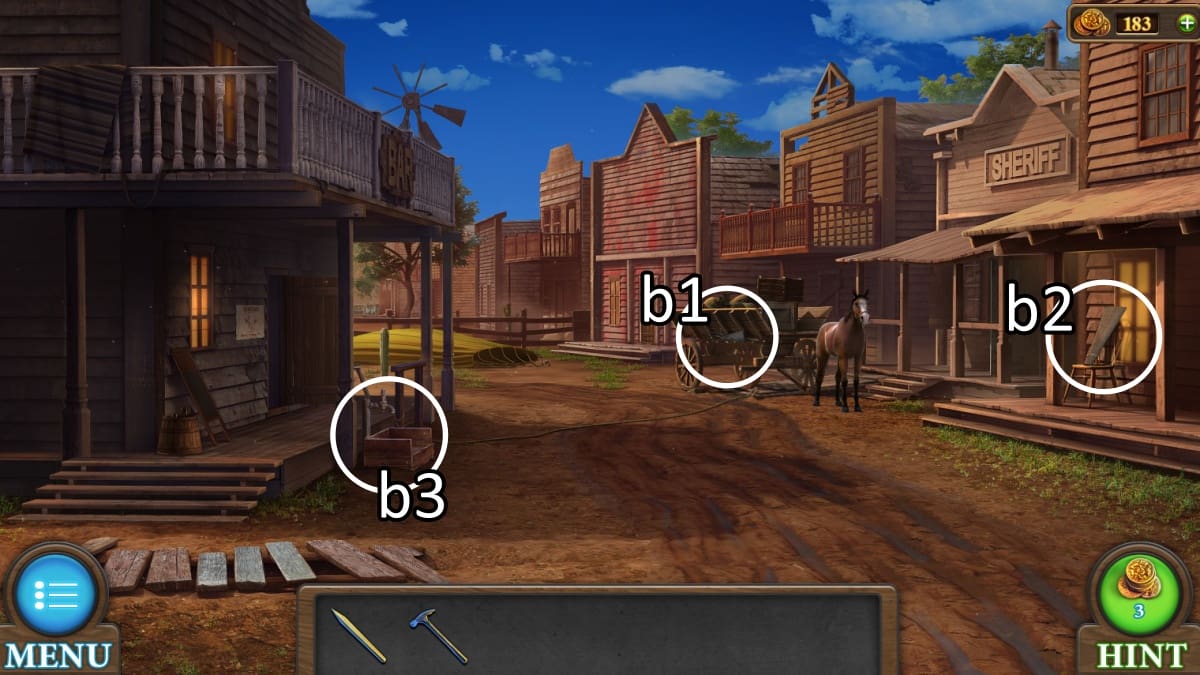
Image by Pro Game Guides
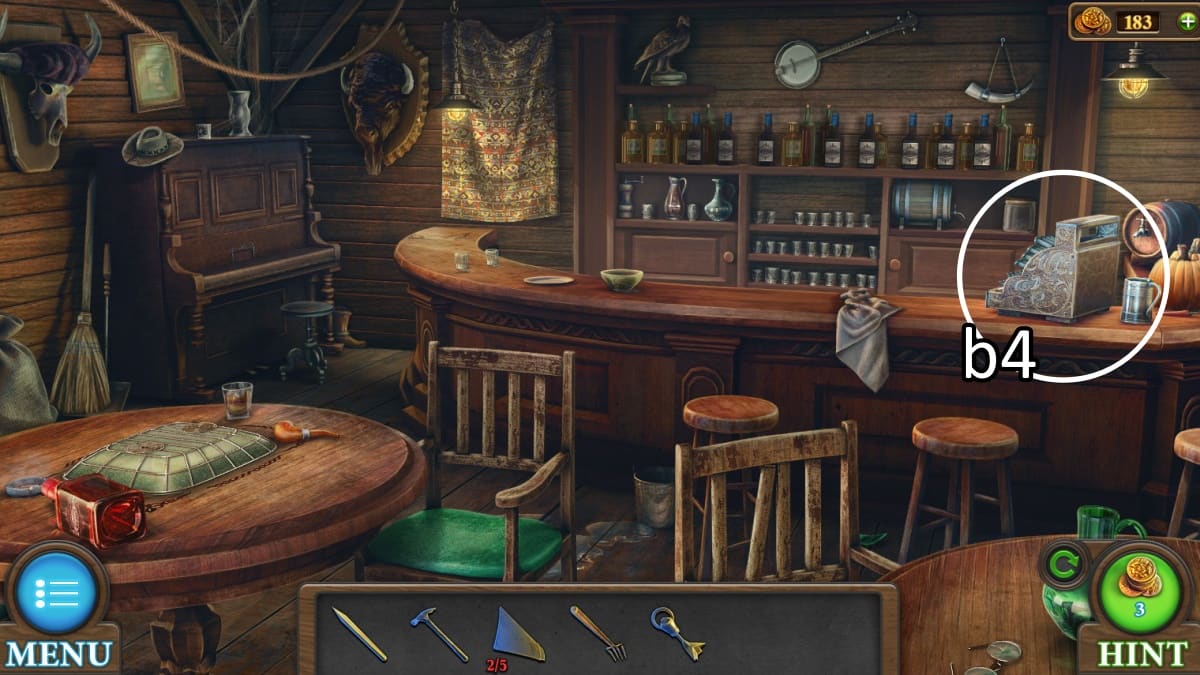
Image by Pro Game Guides
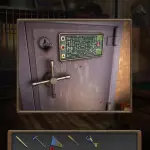
Screenshot by Pro Game Guides
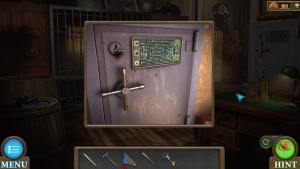
Screenshot by Pro Game Guides
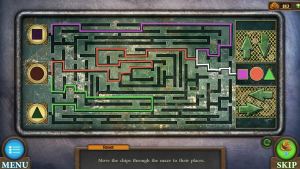
Image by Pro Game Guides
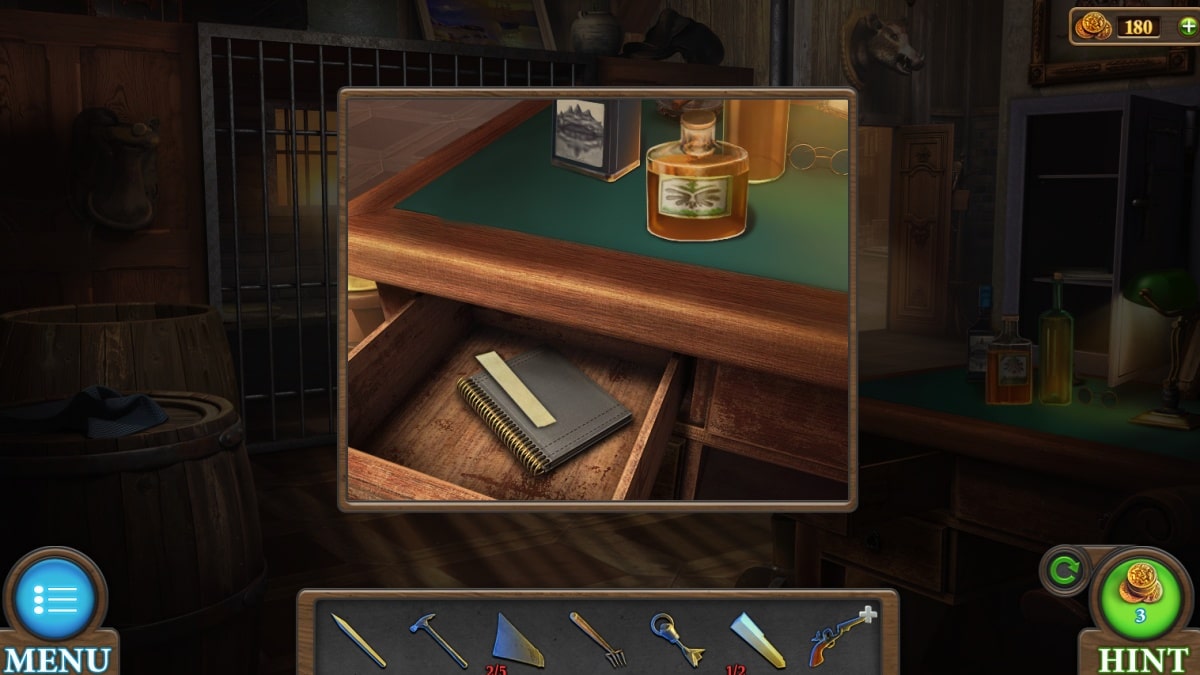
Screenshot by Pro Game Guides
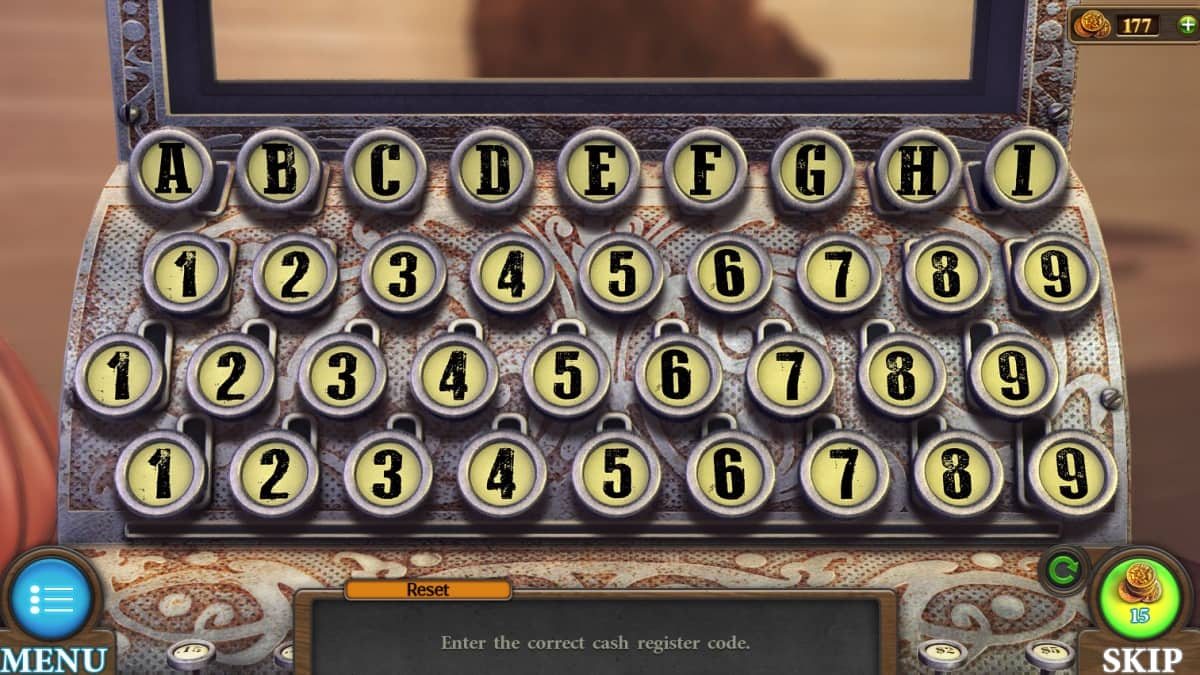
Screenshot by Pro Game Guides
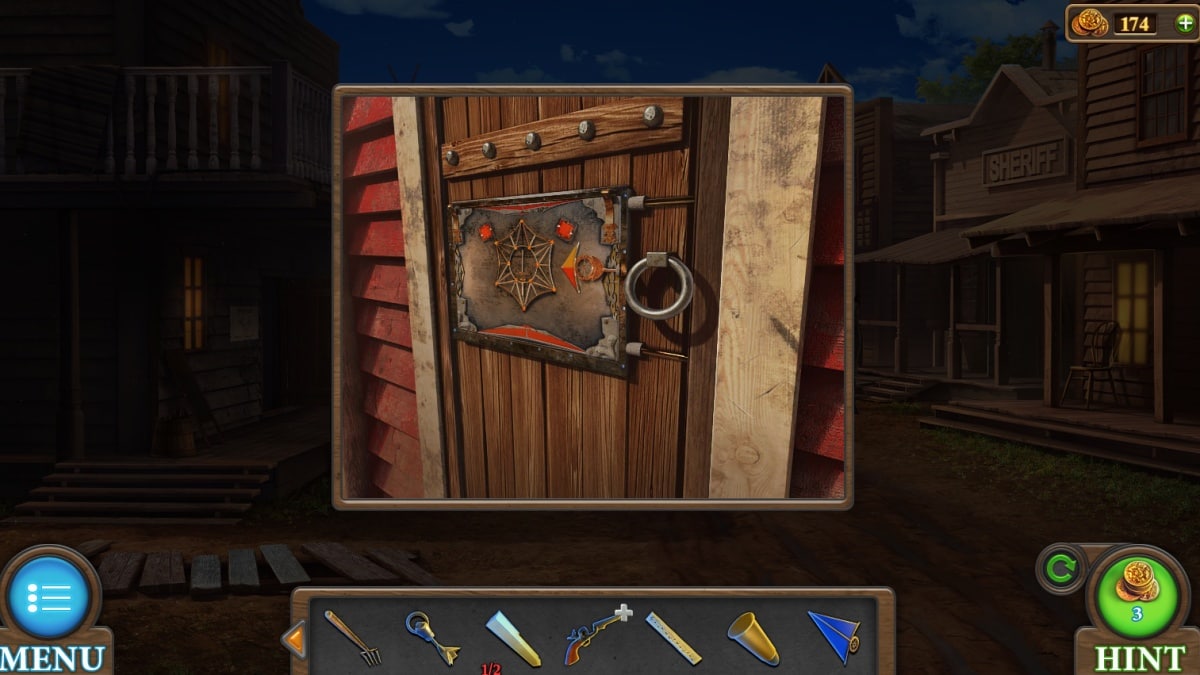
Screenshot by Pro Game Guides
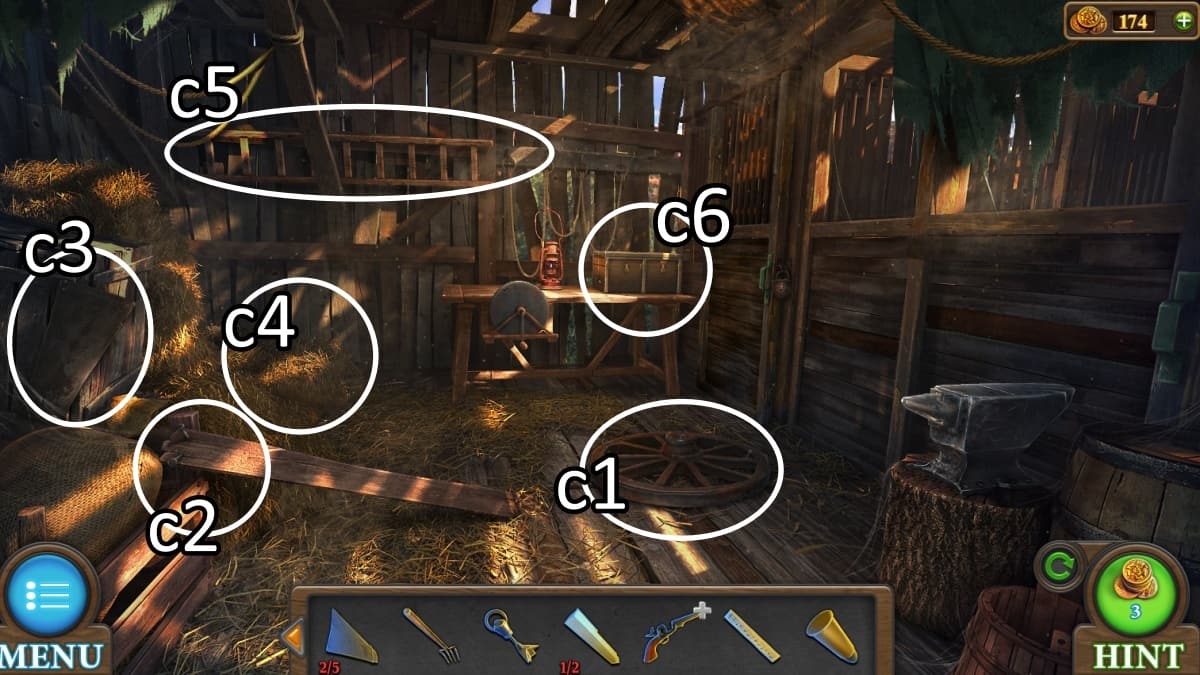
Image by Pro Game Guides

Screenshot by Pro Game Guides
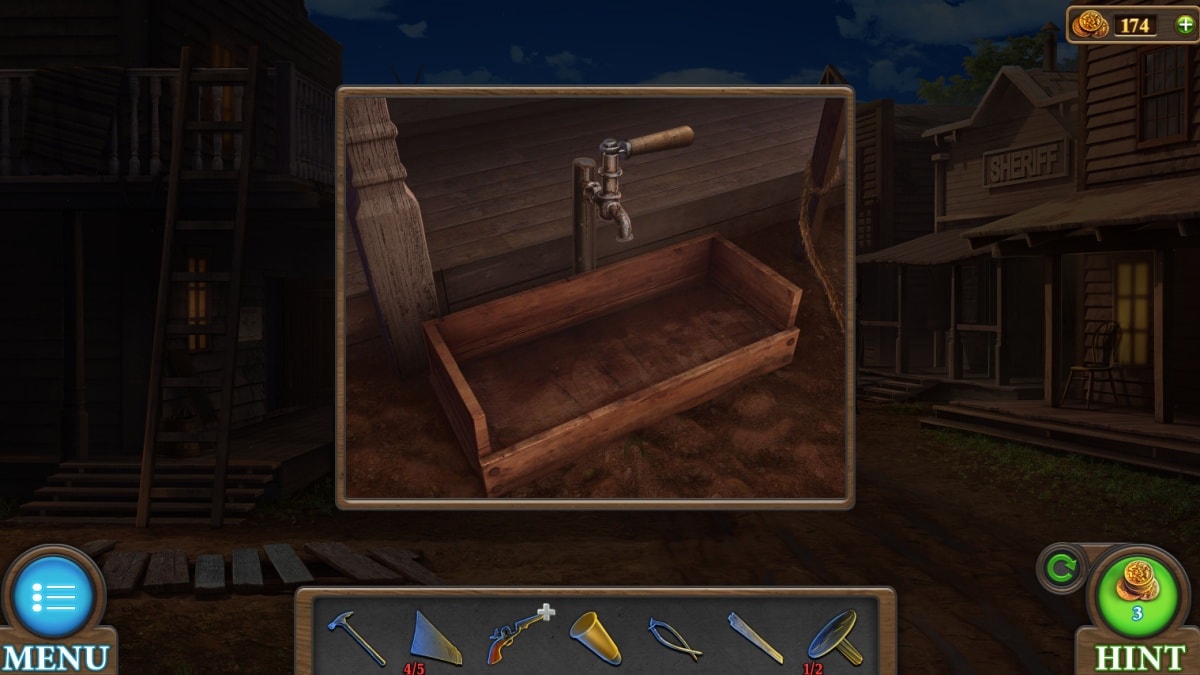
Screenshot by Pro Game Guides
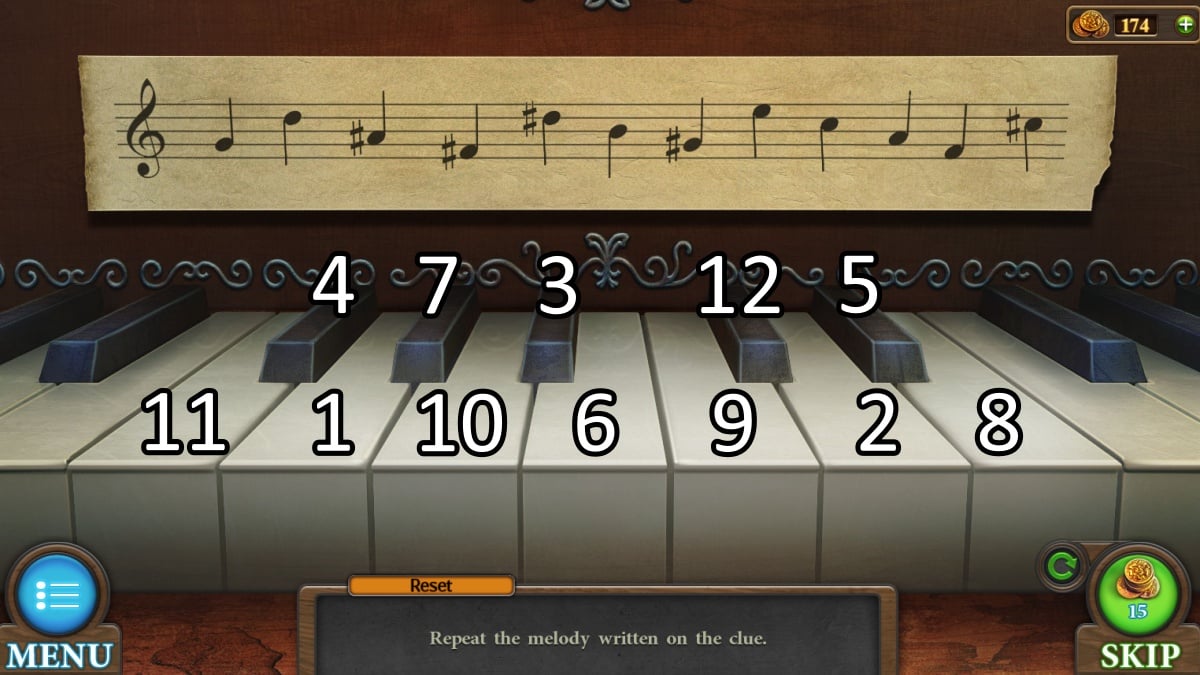
Image by Pro Game Guides
Screenshot by Pro Game Guides
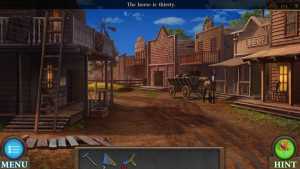
Screenshot by Pro Game Guides
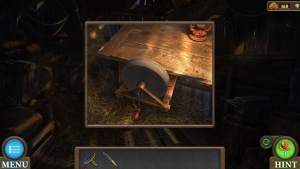
Screenshot by Pro Game Guides
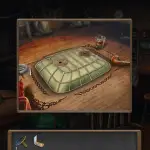
Screenshot by Pro Game Guides
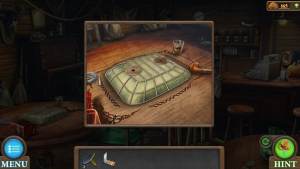
Screenshot by Pro Game Guides
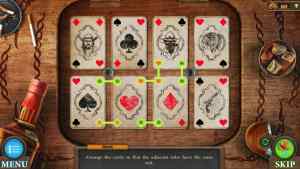
Screenshot by Pro Game Guides
Screenshot by Pro Game Guides
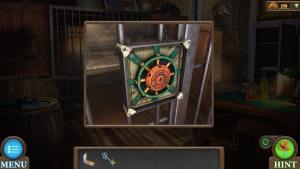
Screenshot by Pro Game Guides
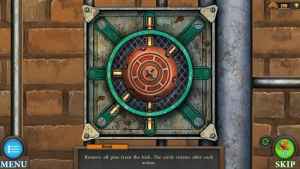
Screenshot by Pro Game Guides

Screenshot by Pro Game Guides
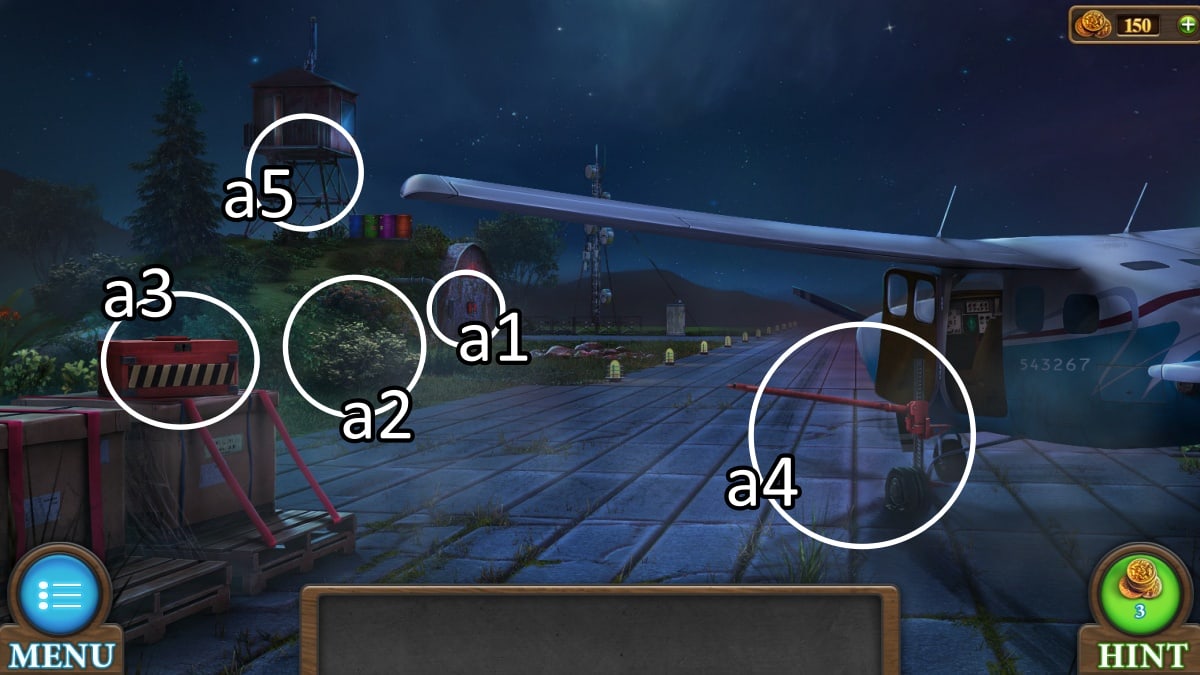
Image by Pro Game Guides
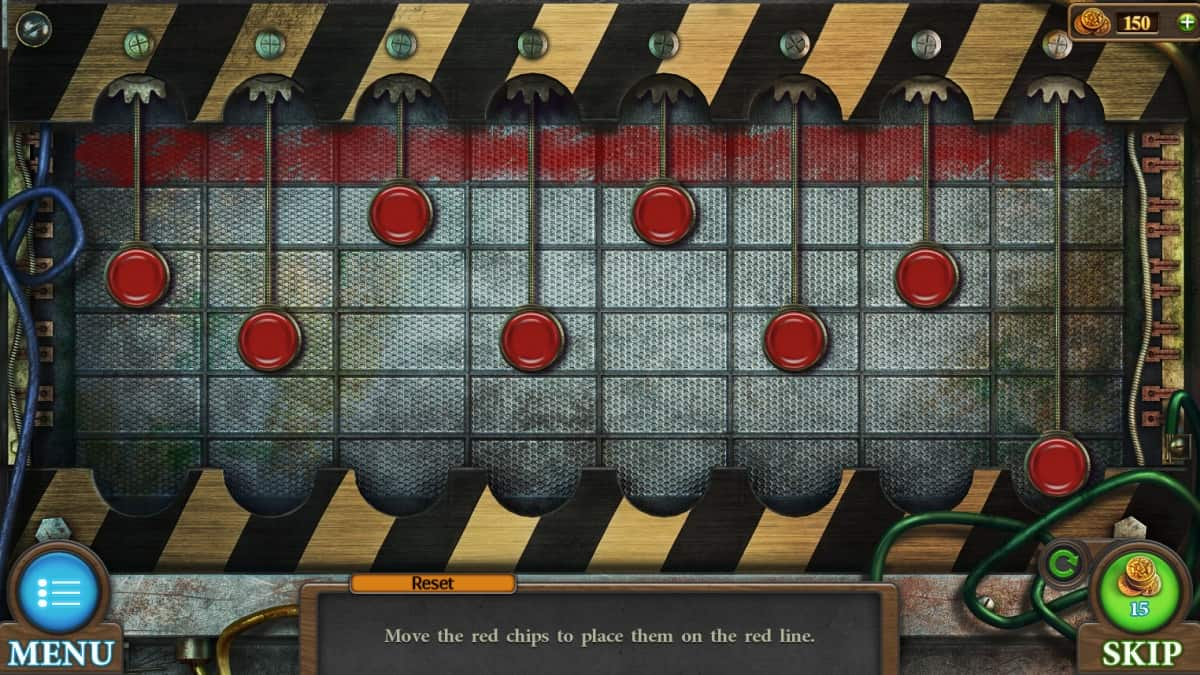
Screenshot by Pro Game Guides
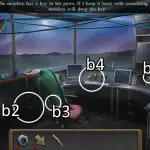
Image by Pro Game Guides
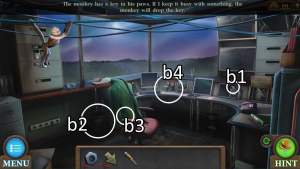
Image by Pro Game Guides
Screenshot by Pro Game Guides
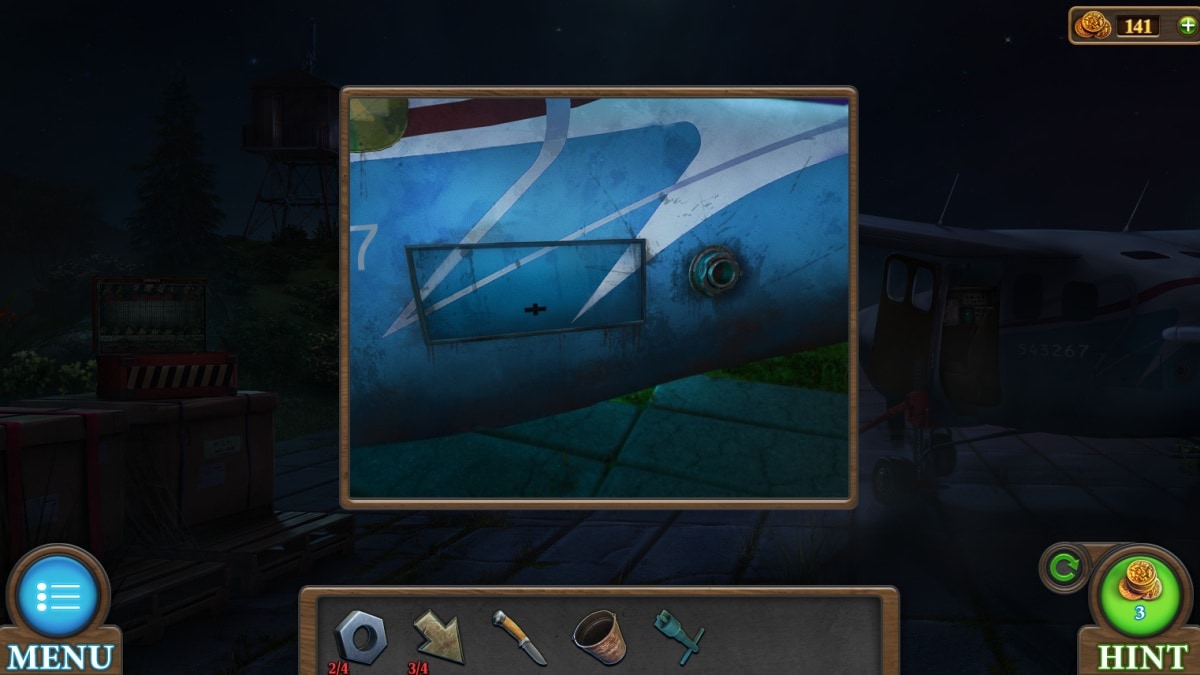
Screenshot by Pro Game Guides

Screenshot by Pro Game Guides

Image by Pro Game Guides
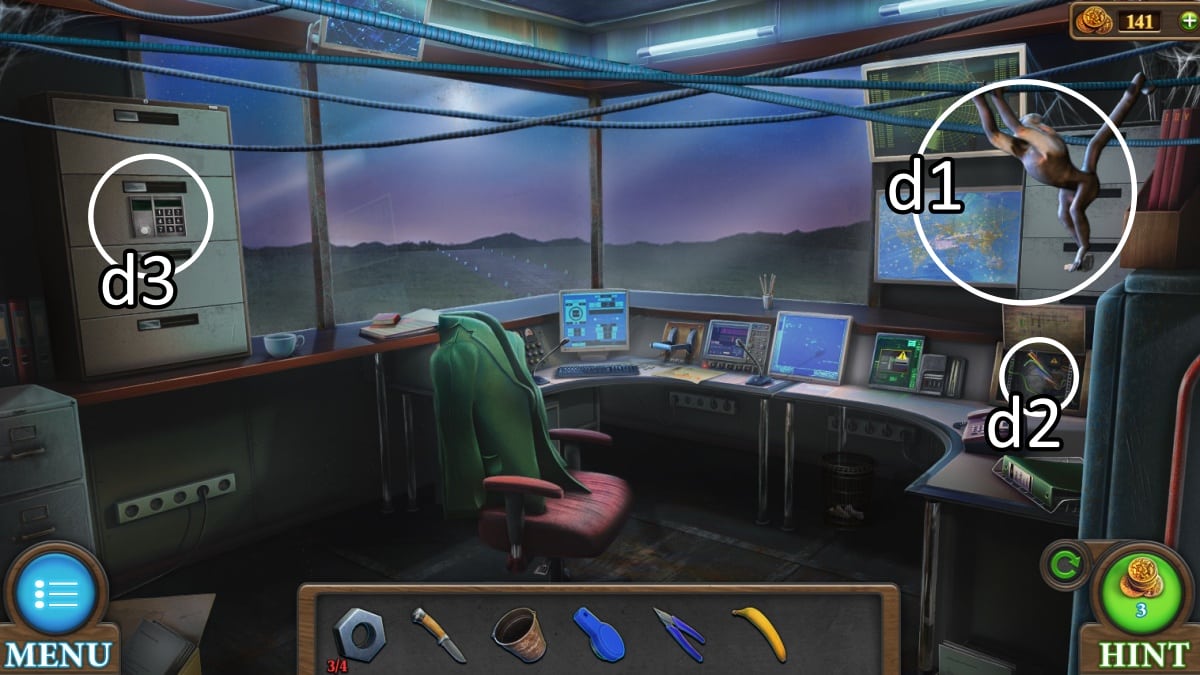
Image by Pro Game Guides
Screenshot by Pro Game Guides
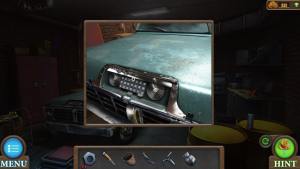
Screenshot by Pro Game Guides
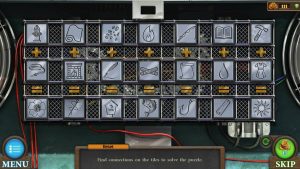
Screenshot by Pro Game Guides

Screenshot by Pro Game Guides
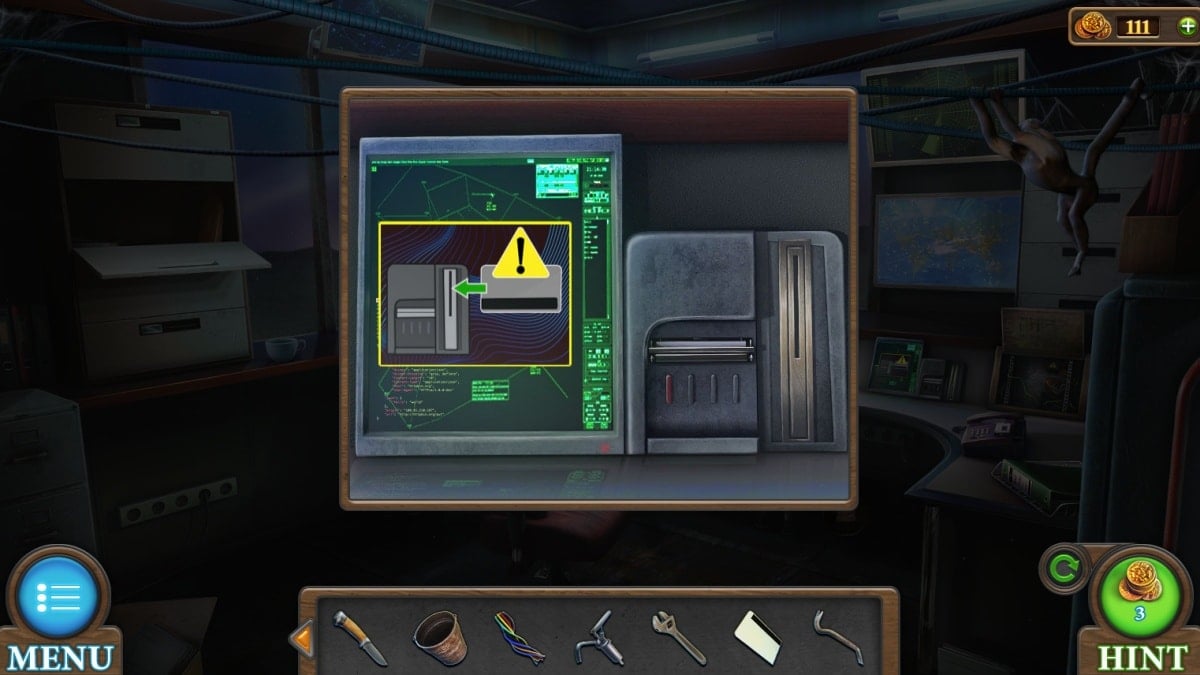
Screenshot by Pro Game Guides
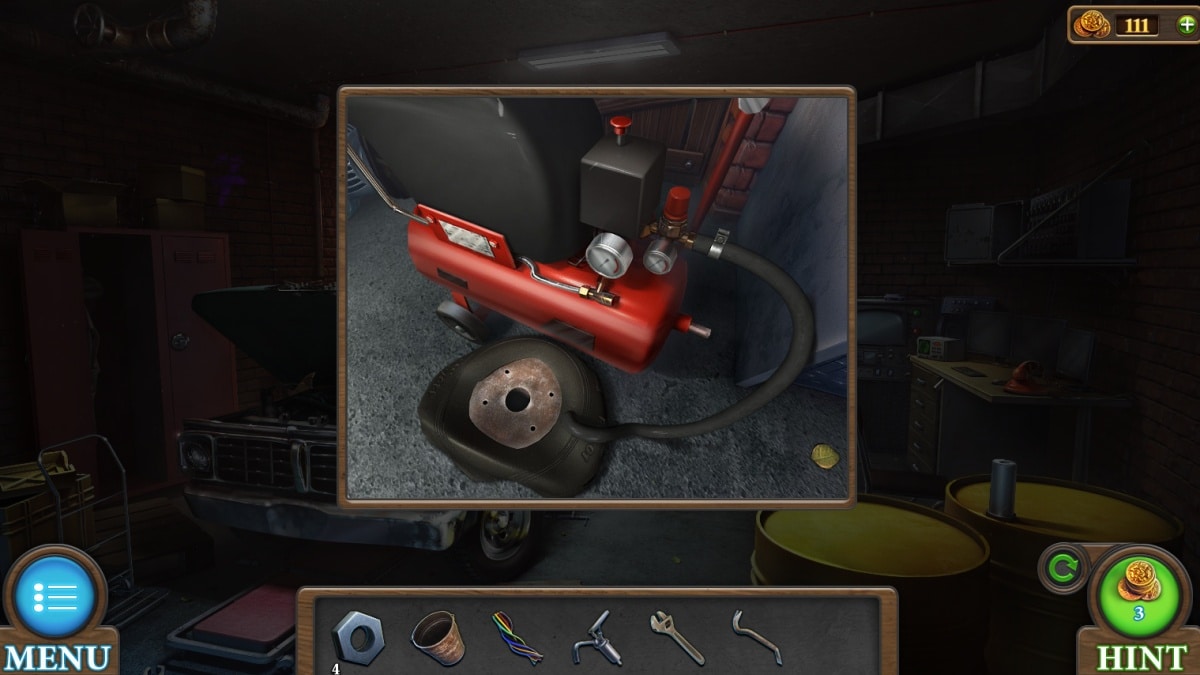
Screenshot by Pro Game Guides
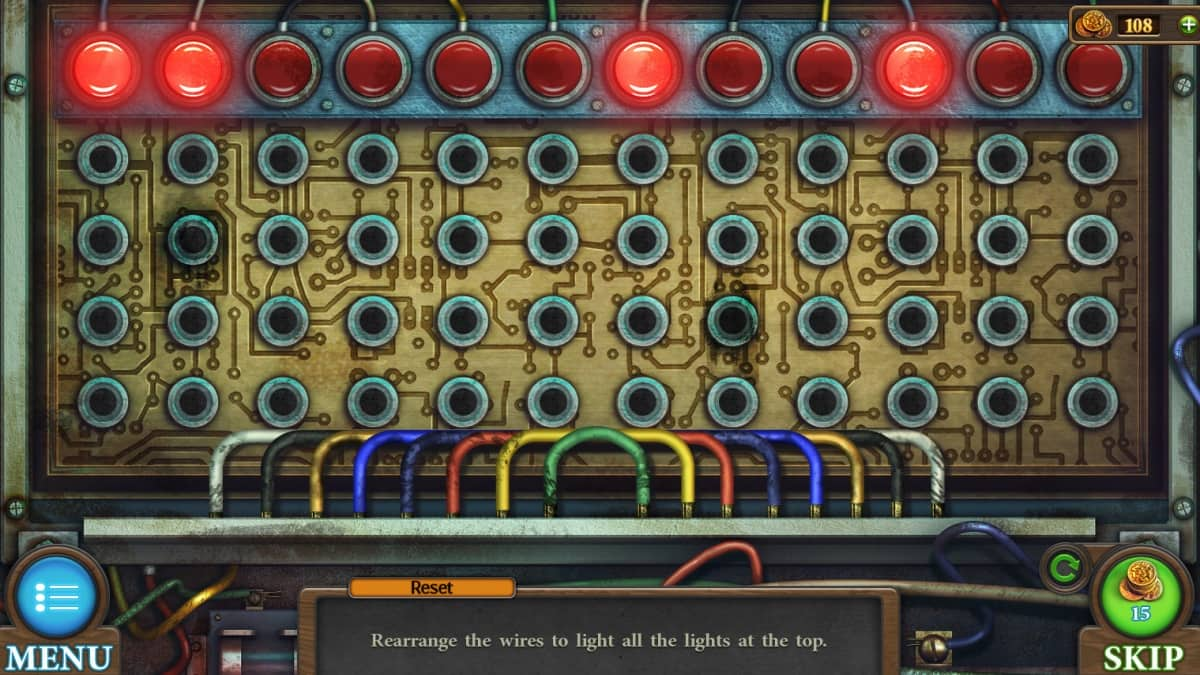
Screenshot by Pro Game Guides
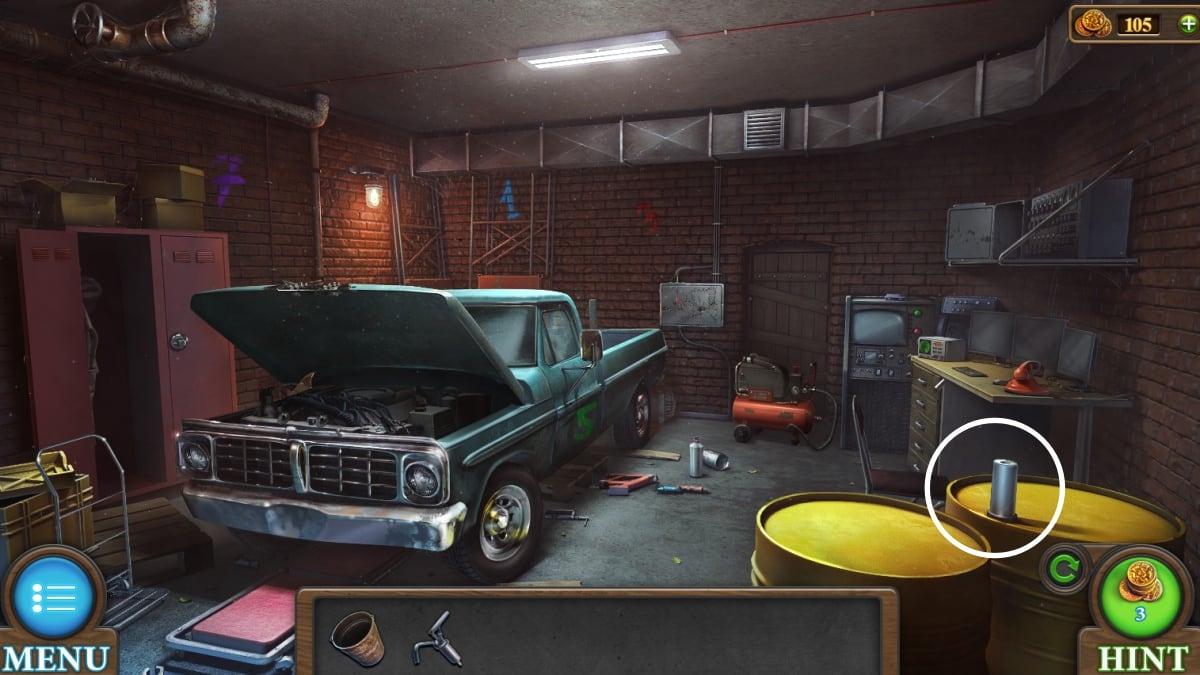
Image by Pro Game Guides
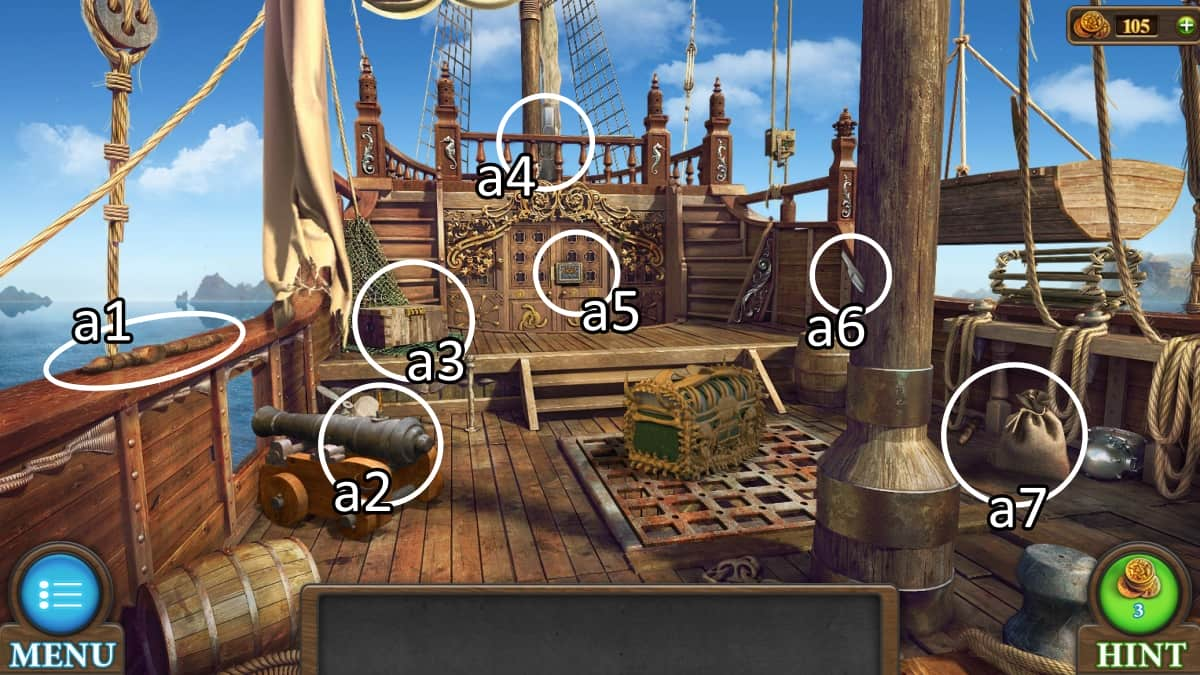
Image by Pro Game Guides
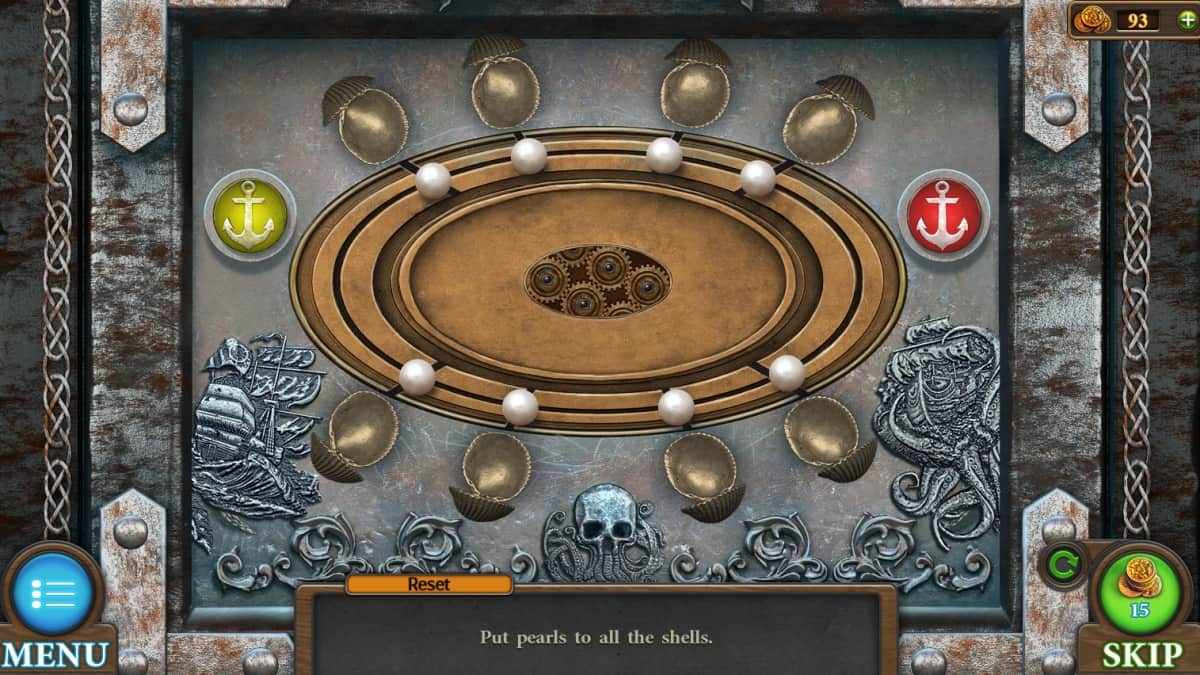
Screenshot by Pro Game Guides
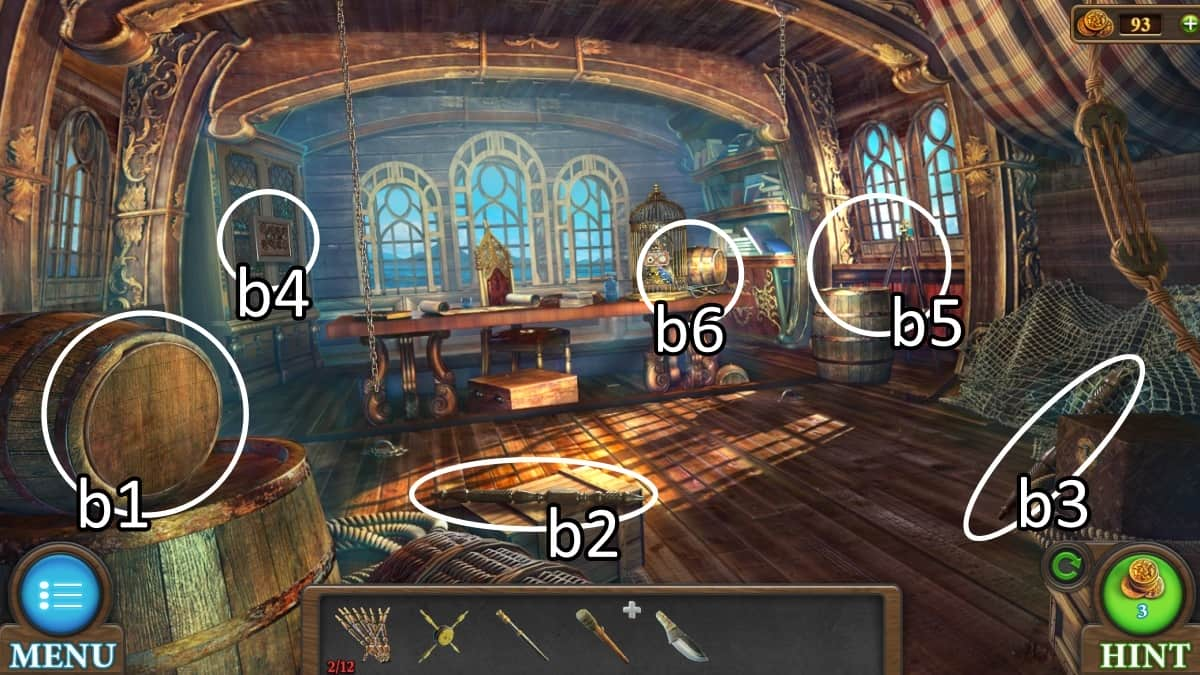
Image by Pro Game Guides

Screenshot by Pro Game Guides
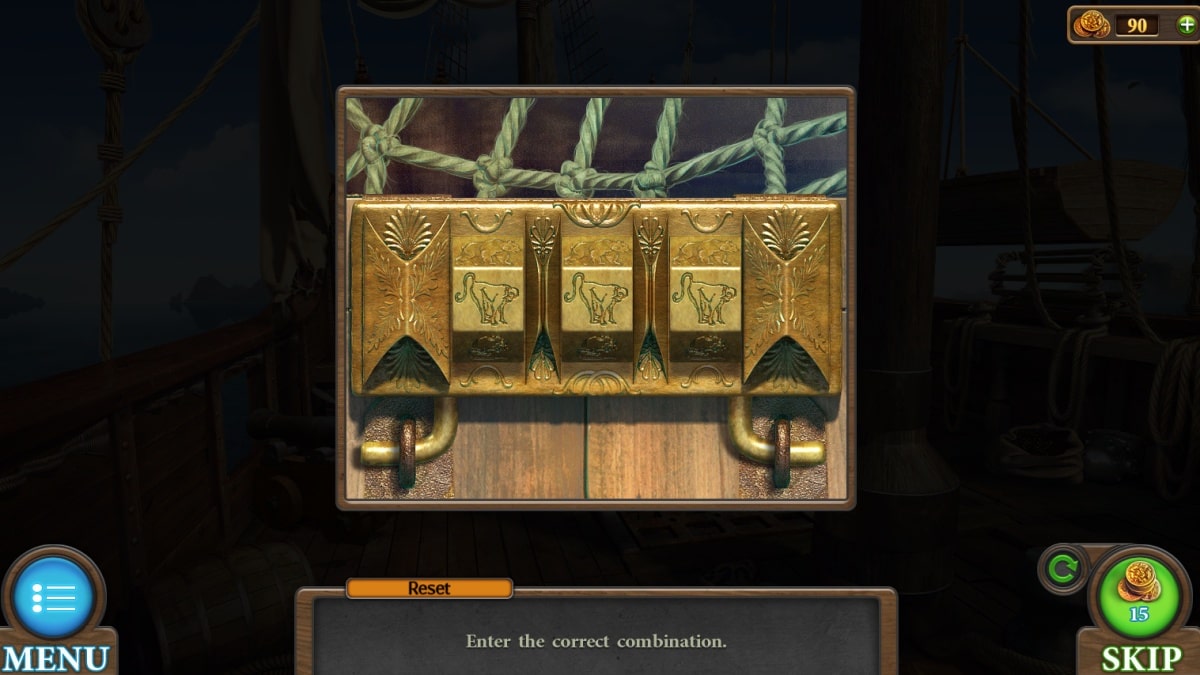
Screenshot by Pro Game Guides
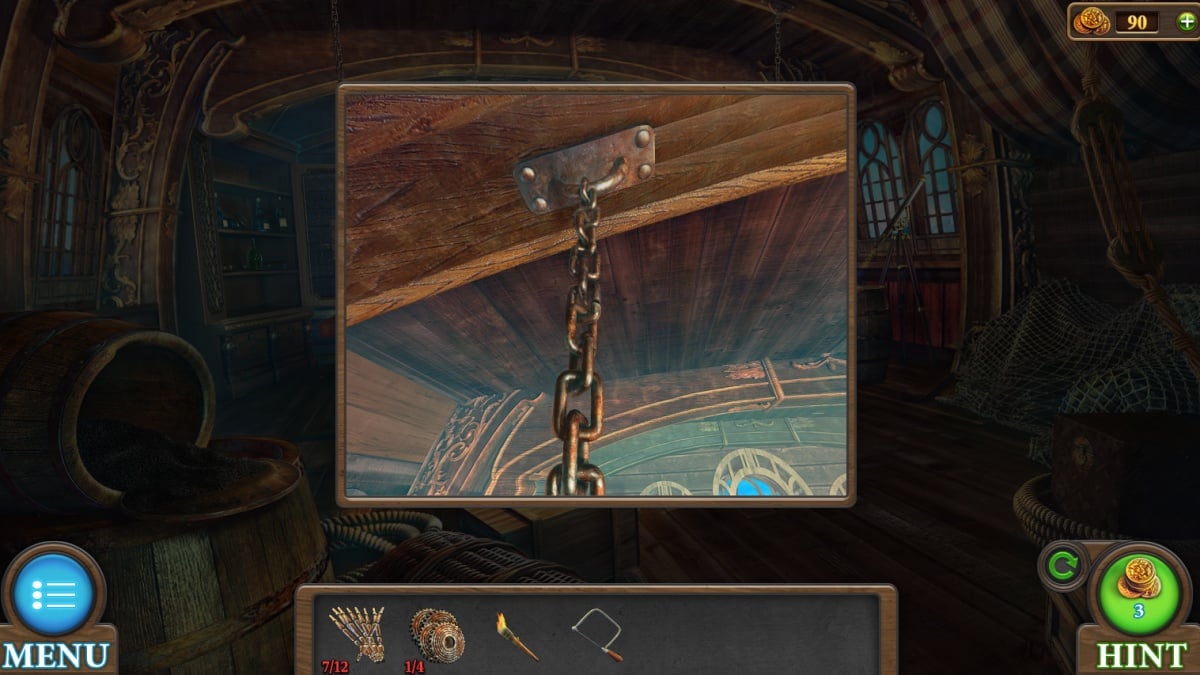
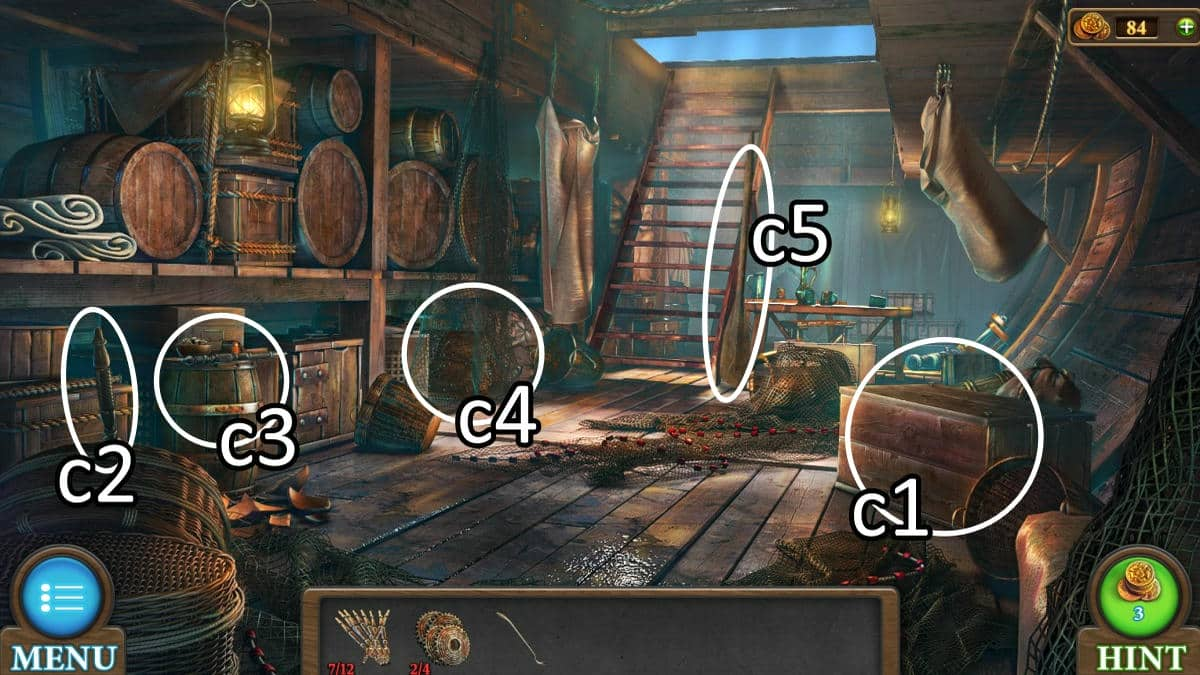
Image by Pro Game Guides
Screenshot by Pro Game Guides
Screenshot by Pro Game Guides

Screenshot by Pro Game Guides
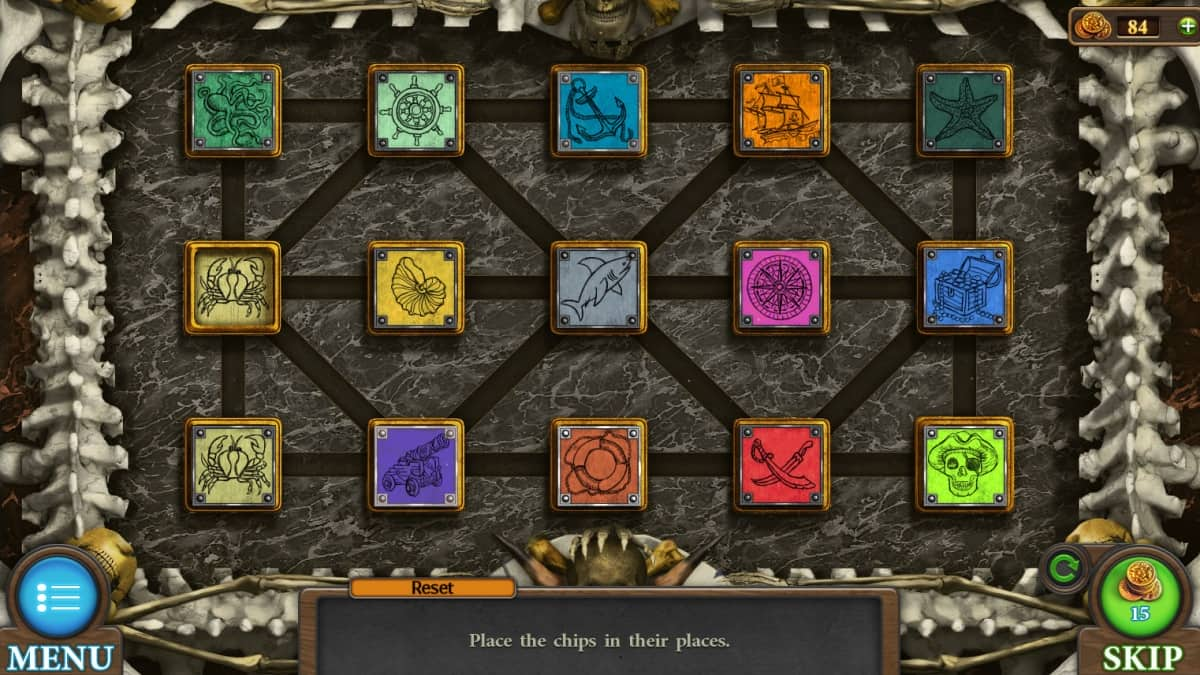
Screenshot by Pro Game Guides
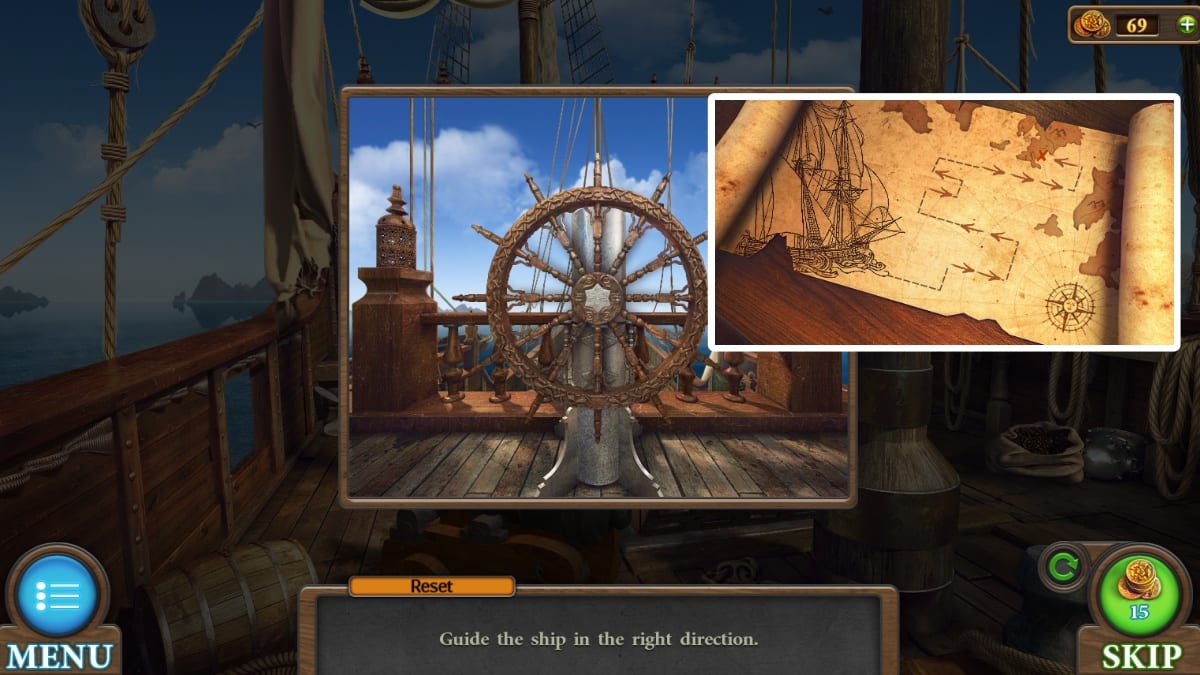
Image by Pro Game Guides
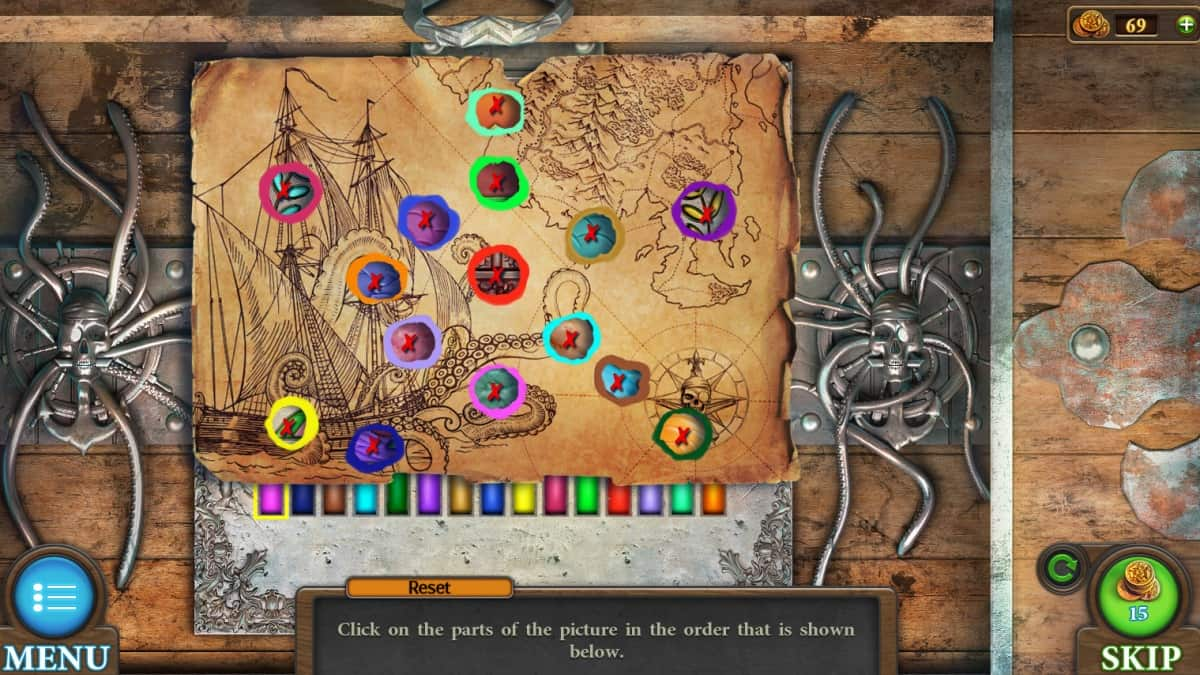
Screenshot by Pro Game Guides
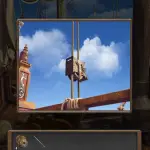
Screenshot by Pro Game Guides
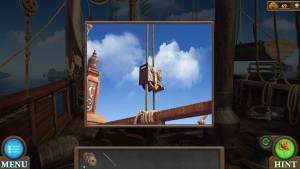
Screenshot by Pro Game Guides
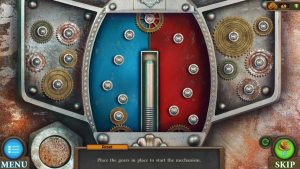
Screenshot by Pro Game Guides
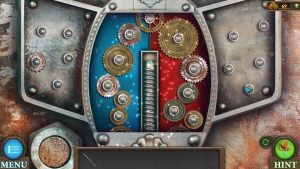
Screenshot by Pro Game Guides

Screenshot by Pro Game Guides
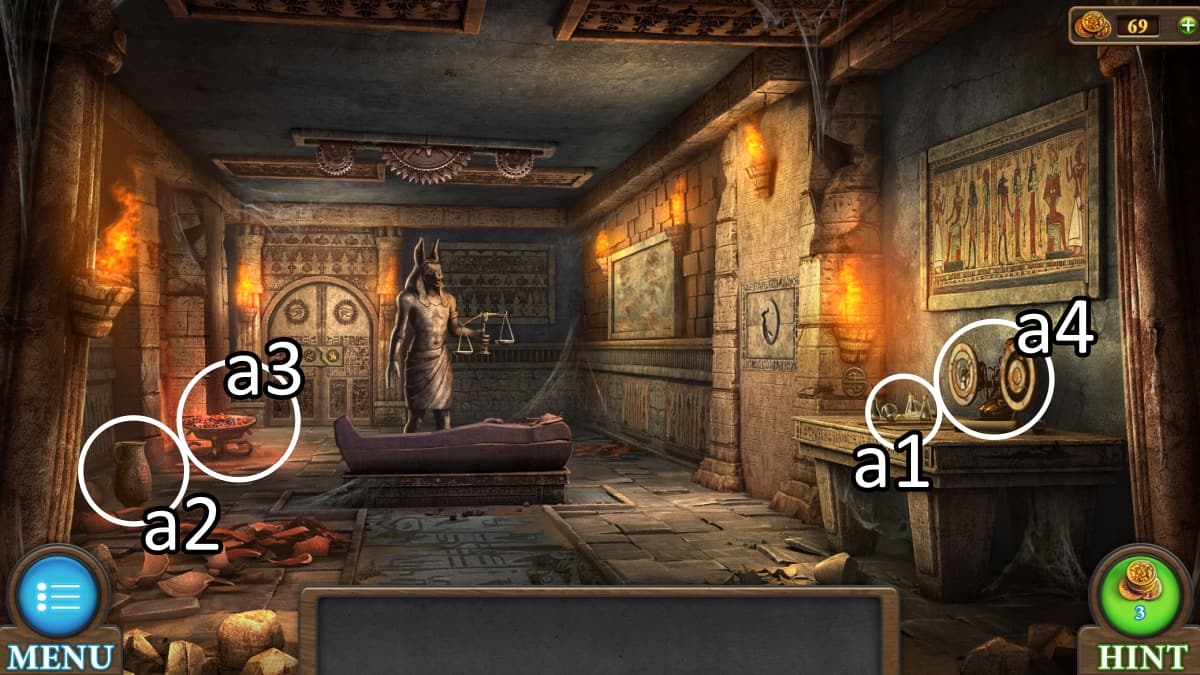
Image by Pro Game Guides
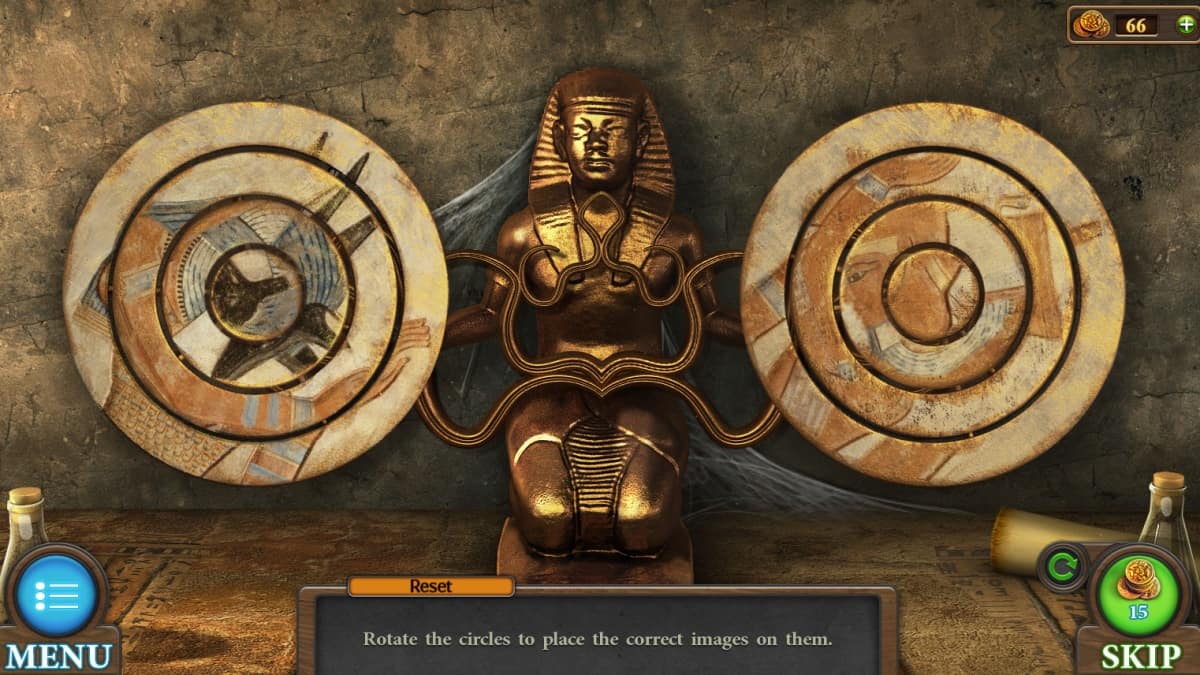
Screenshot by Pro Game Guides
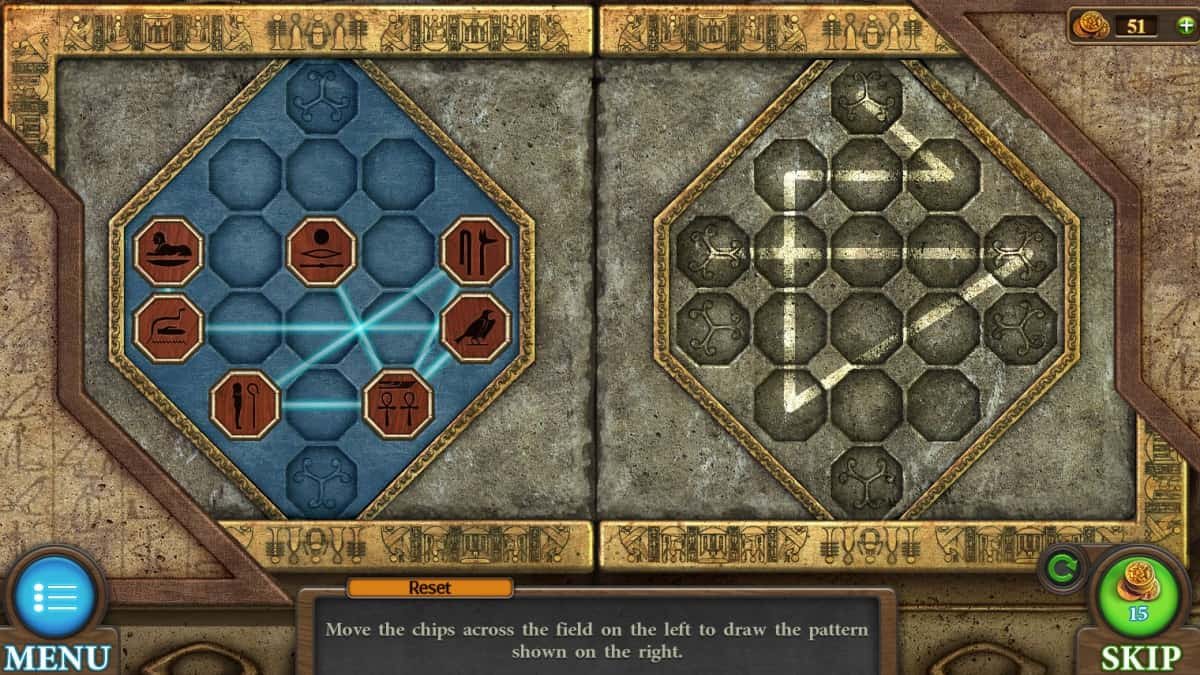
Screenshot by Pro Game Guides

Image by Pro Game Guides
Screenshot by Pro Game Guides
Screenshot by Pro Game Guides
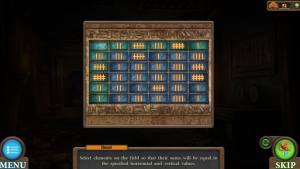
Screenshot by Pro Game Guides
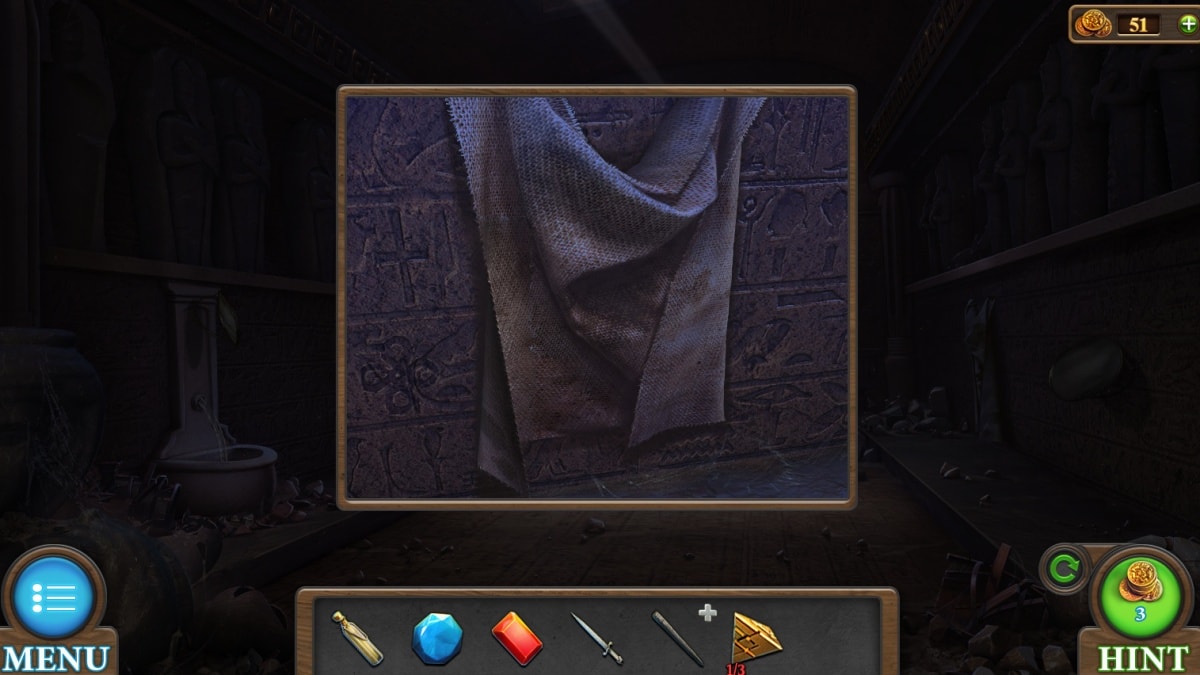
Screenshot by Pro Game Guides
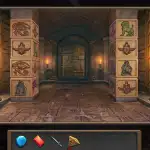
Screenshot by Pro Game Guides
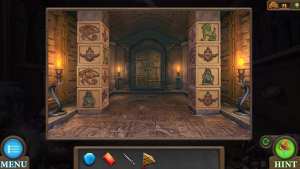
Screenshot by Pro Game Guides
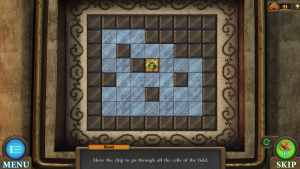
Screenshot by Pro Game Guides
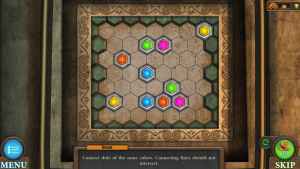
Screenshot by Pro Game Guides
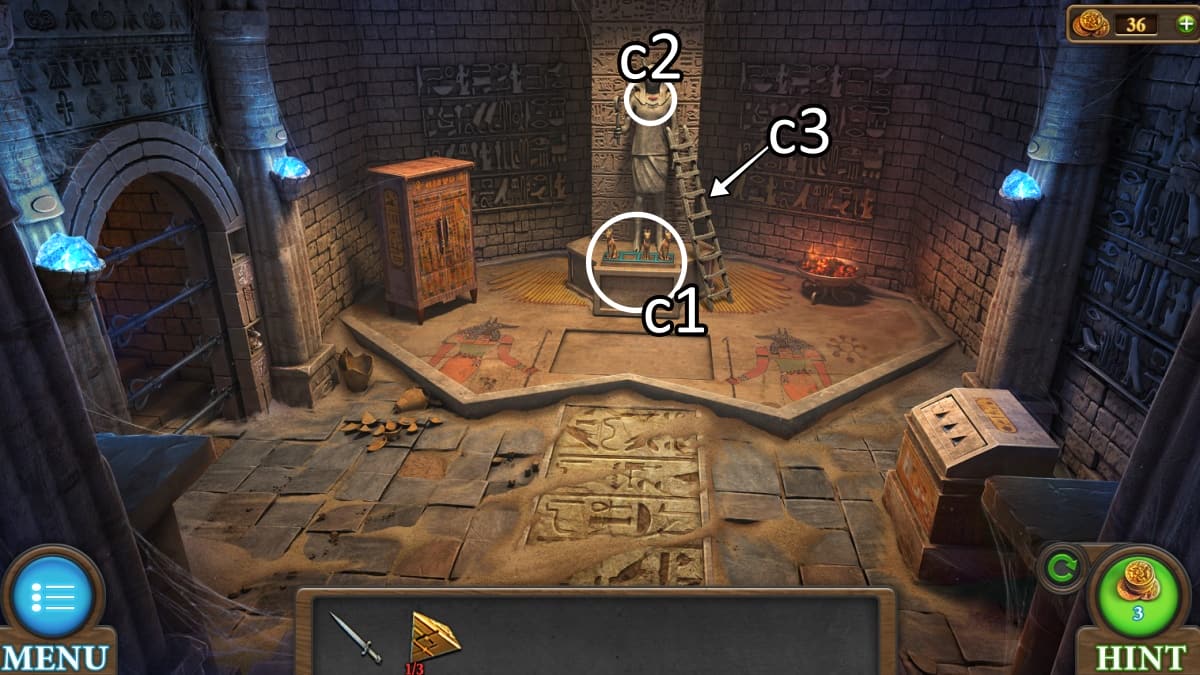
Image by Pro Game Guides
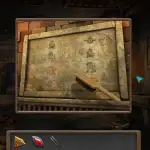
Screenshot by Pro Game Guides

Screenshot by Pro Game Guides
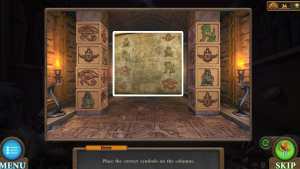
Image by Pro Game Guides
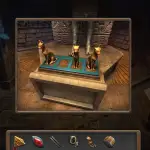
Screenshot by Pro Game Guides
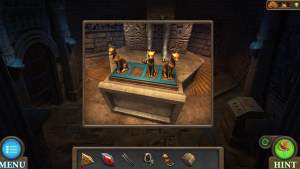
Screenshot by Pro Game Guides
Screenshot by Pro Game Guides
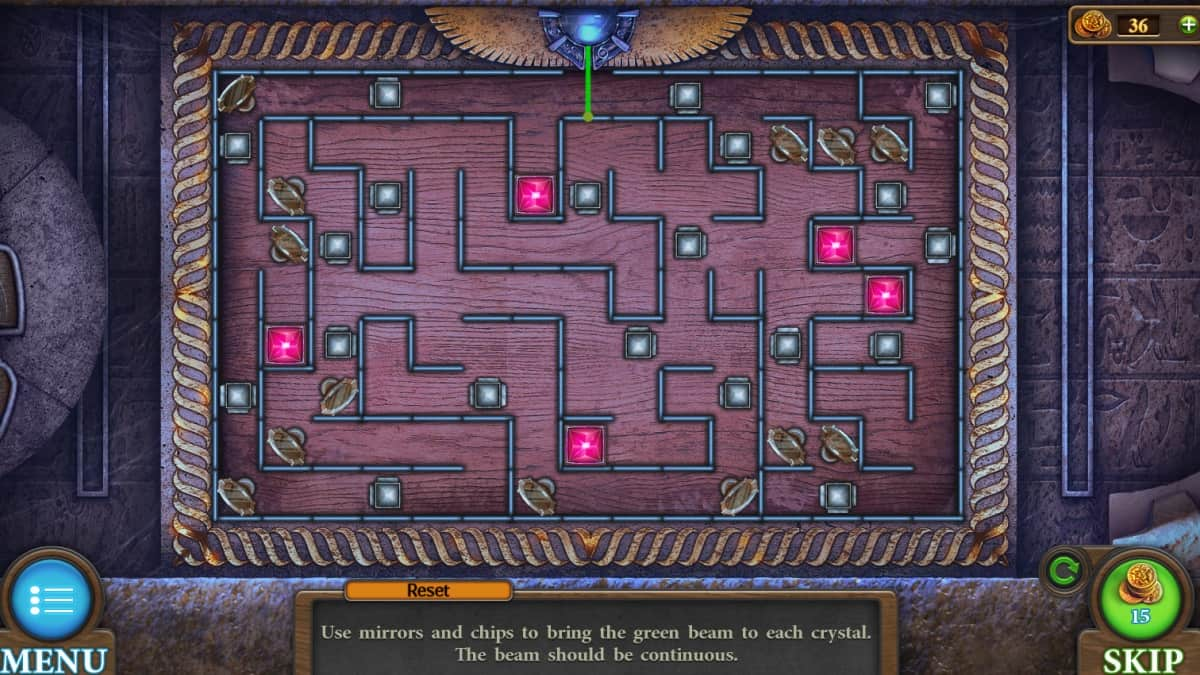
Screenshot by Pro Game Guides
Screenshot by Pro Game Guides
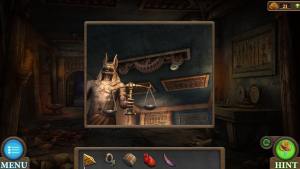
Screenshot by Pro Game Guides
Screenshot by Pro Game Guides
Screenshot by Pro Game Guides
Screenshot by Pro Game Guides
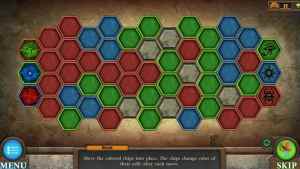
Screenshot by Pro Game Guides
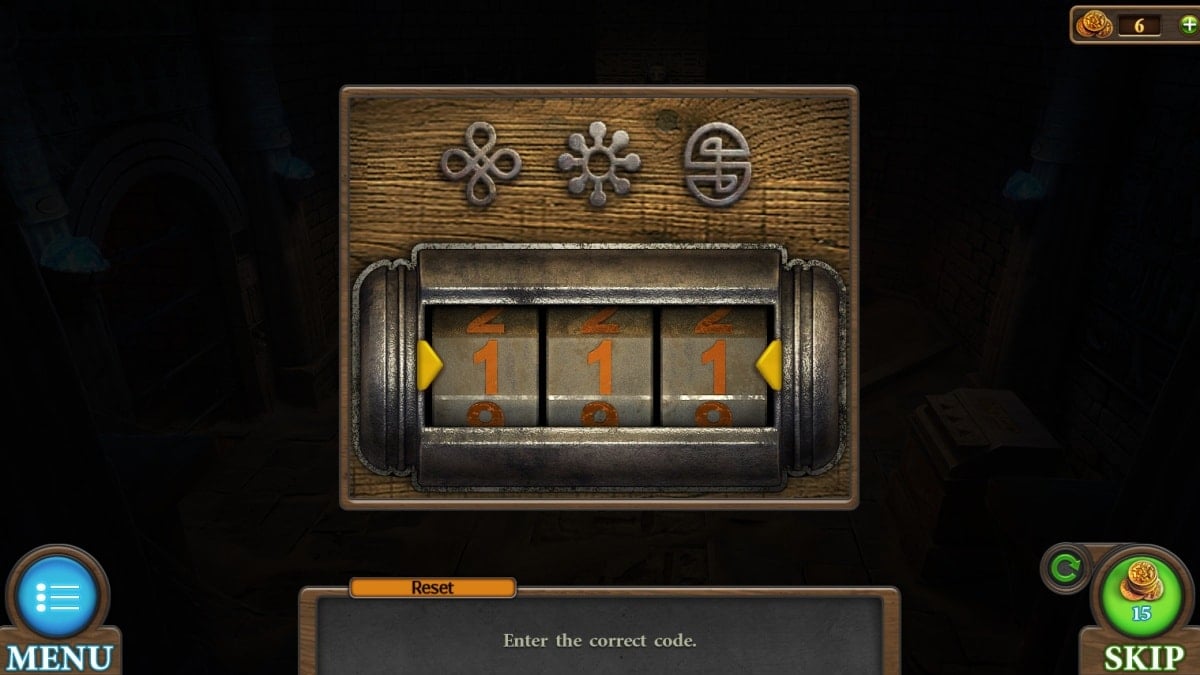
Screenshot by Pro Game Guides
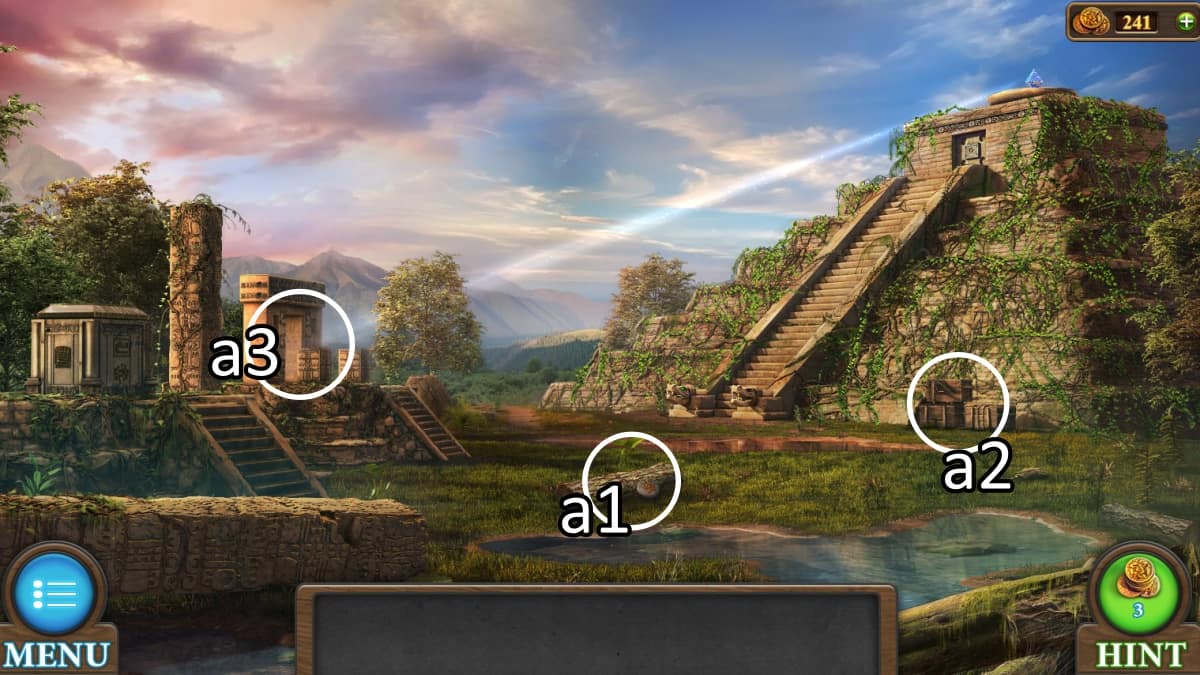
Image by Pro Game Guides
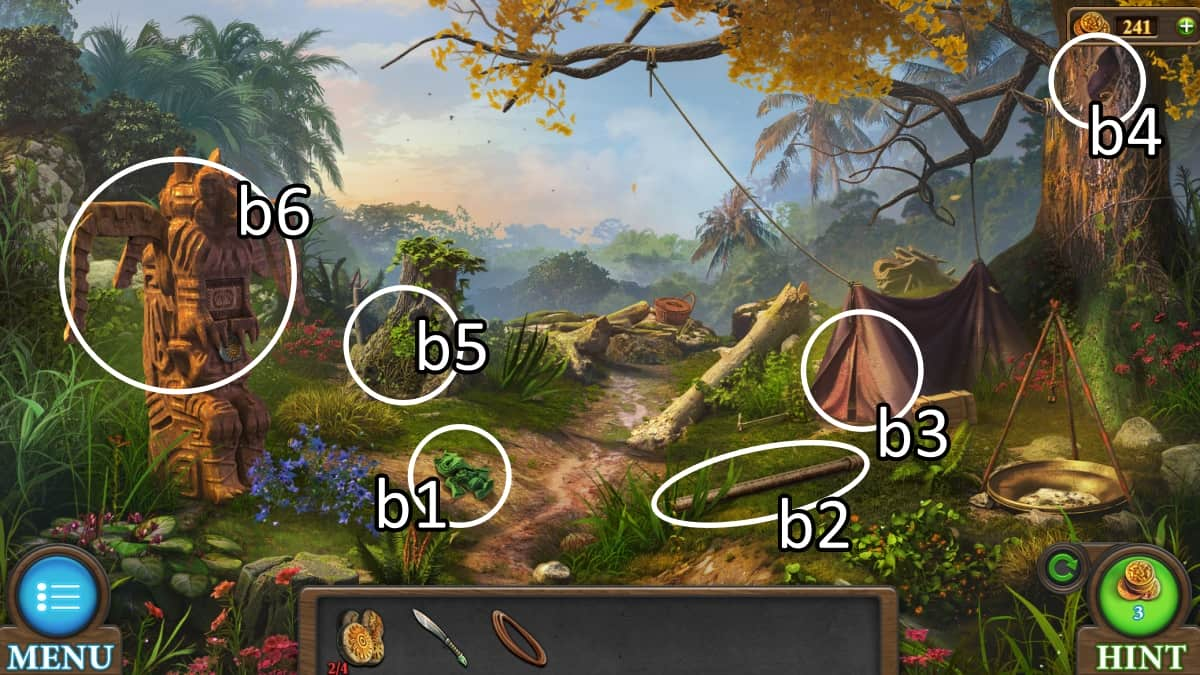
Image by Pro Game Guides
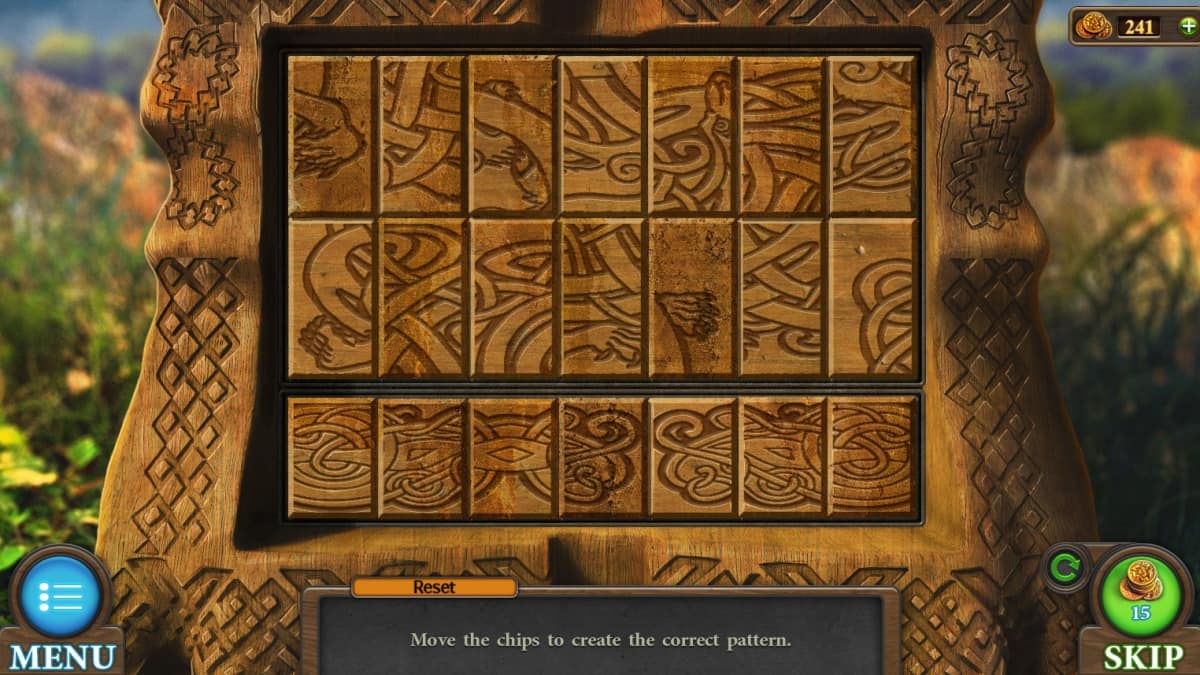
Screenshot by Pro Game Guides
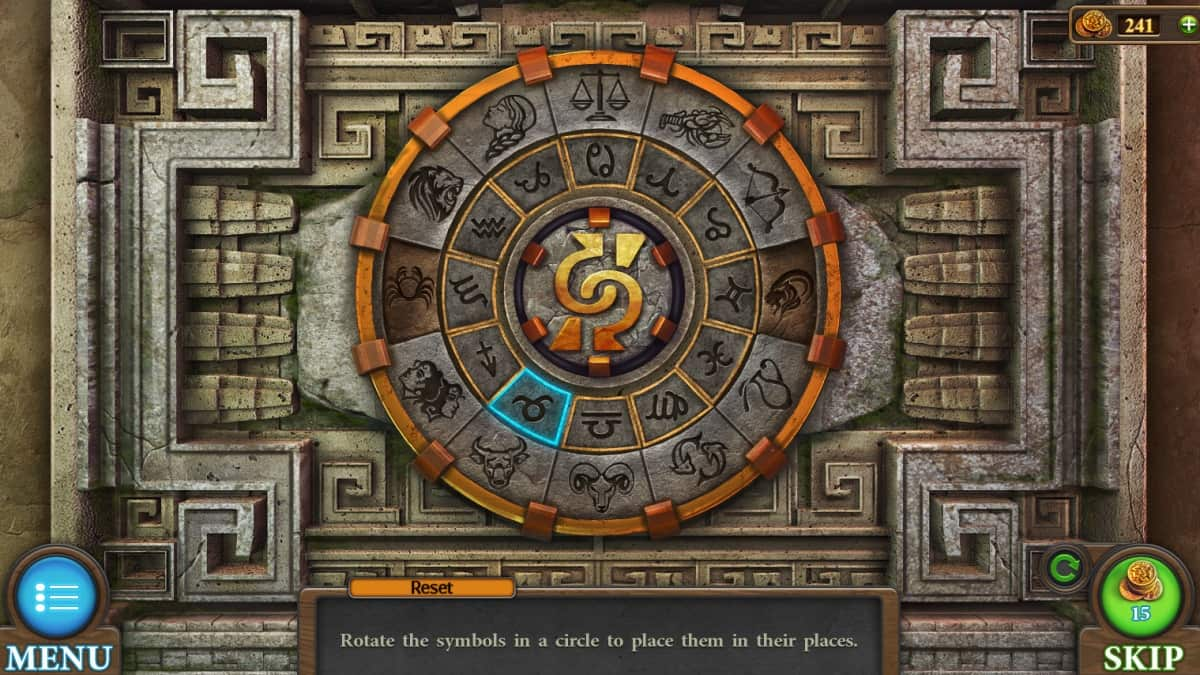
Screenshot by Pro Game Guides
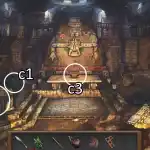
Image by Pro Game Guides
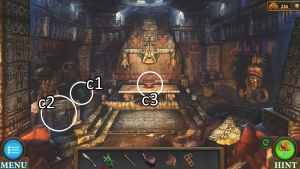
Image by Pro Game Guides
Screenshot by Pro Game Guides
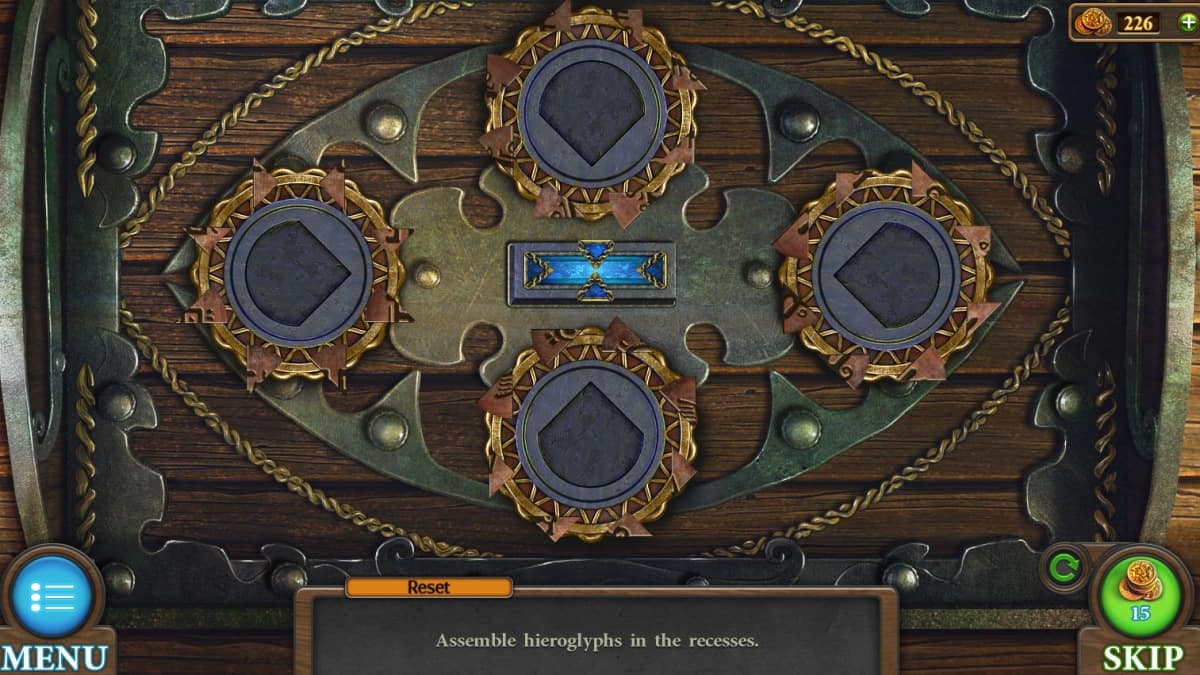
Screenshot by Pro Game Guides
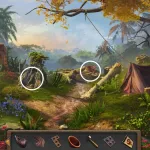
Image by Pro Game Guides

Image by Pro Game Guides
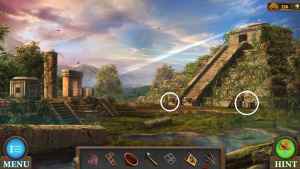
Image by Pro Game Guides
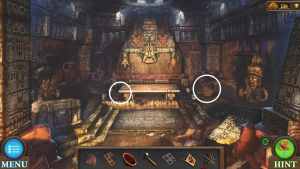
Image by Pro Game Guides
Screenshot by Pro Game Guides

Screenshot by Pro Game Guides
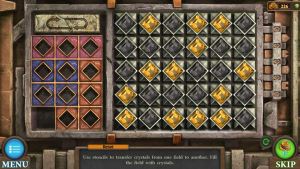
Screenshot by Pro Game Guides
Screenshot by Pro Game Guides
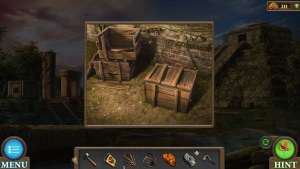
Screenshot by Pro Game Guides
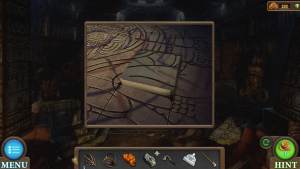
Screenshot by Pro Game Guides
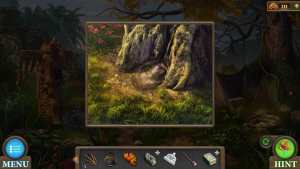
Screenshot by Pro Game Guides

Screenshot by Pro Game Guides
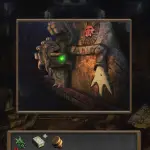
Screenshot by Pro Game Guides
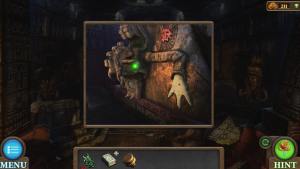
Screenshot by Pro Game Guides
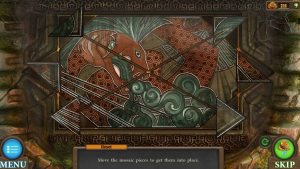
Screenshot by Pro Game Guides
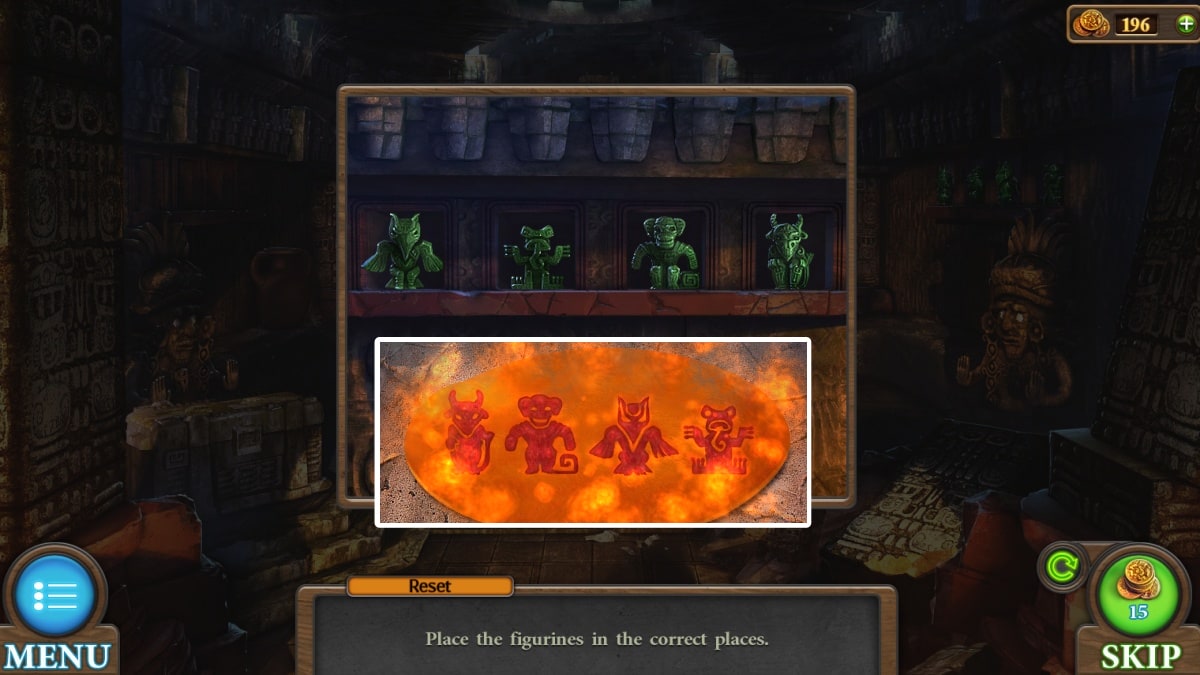
Image by Pro Game Guides
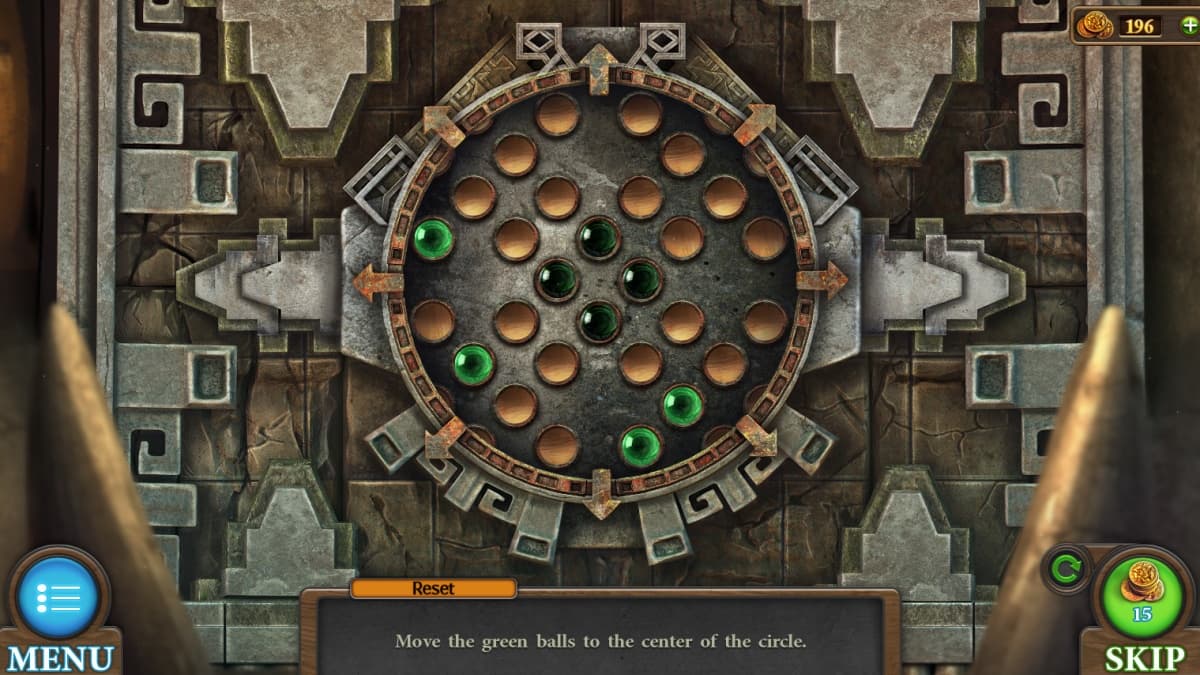
Screenshot by Pro Game Guides
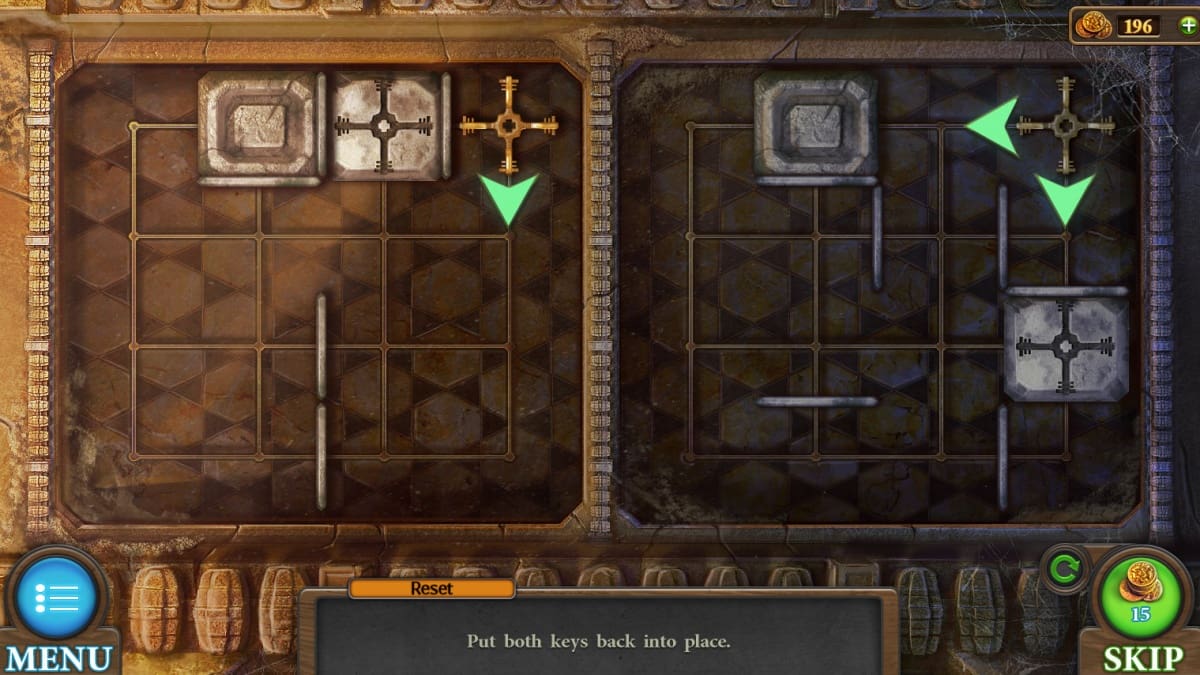
Screenshot by Pro Game Guides

Screenshot by Pro Game Guides
Screenshot by Pro Game Guides
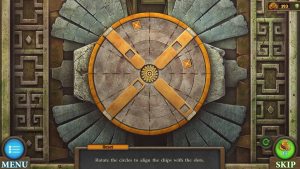
Screenshot by Pro Game Guides
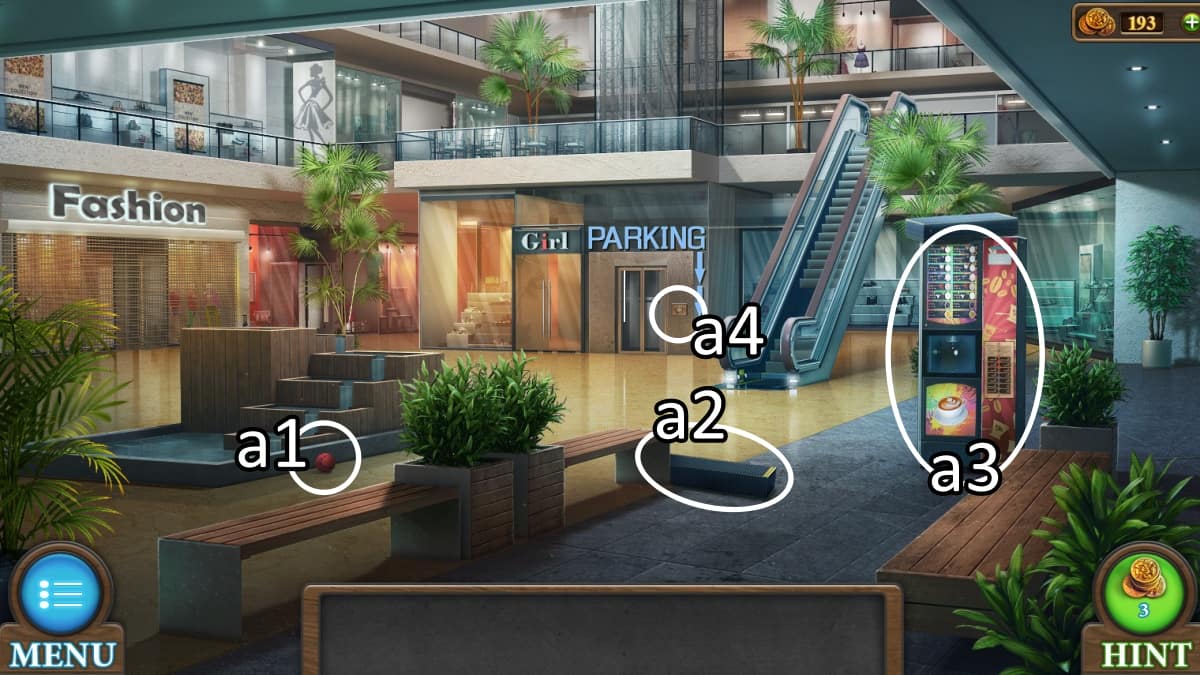
Image by Pro Game Guides
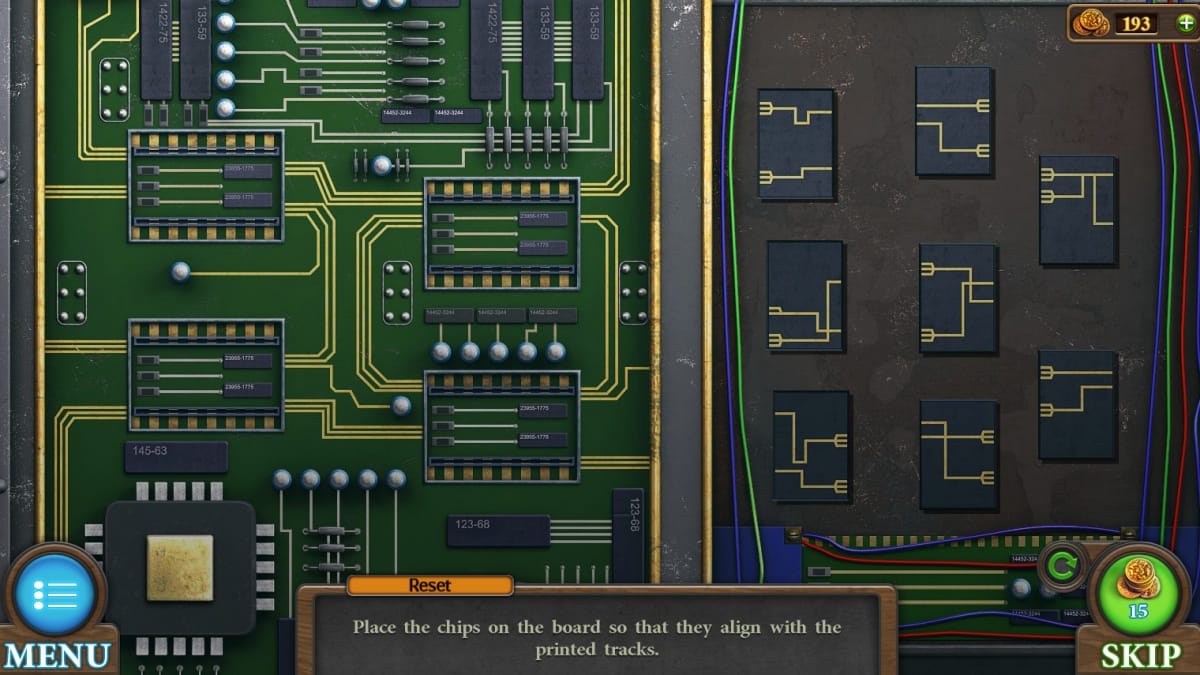
Screenshot by Pro Game Guides
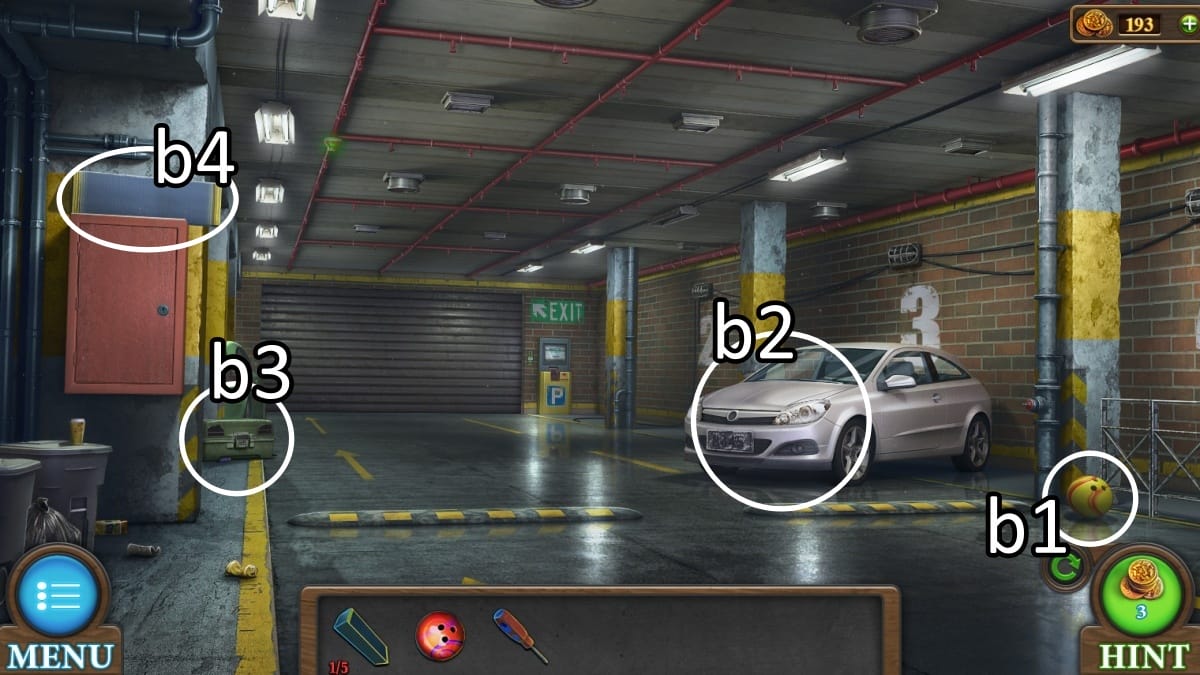
Image by Pro Game Guides
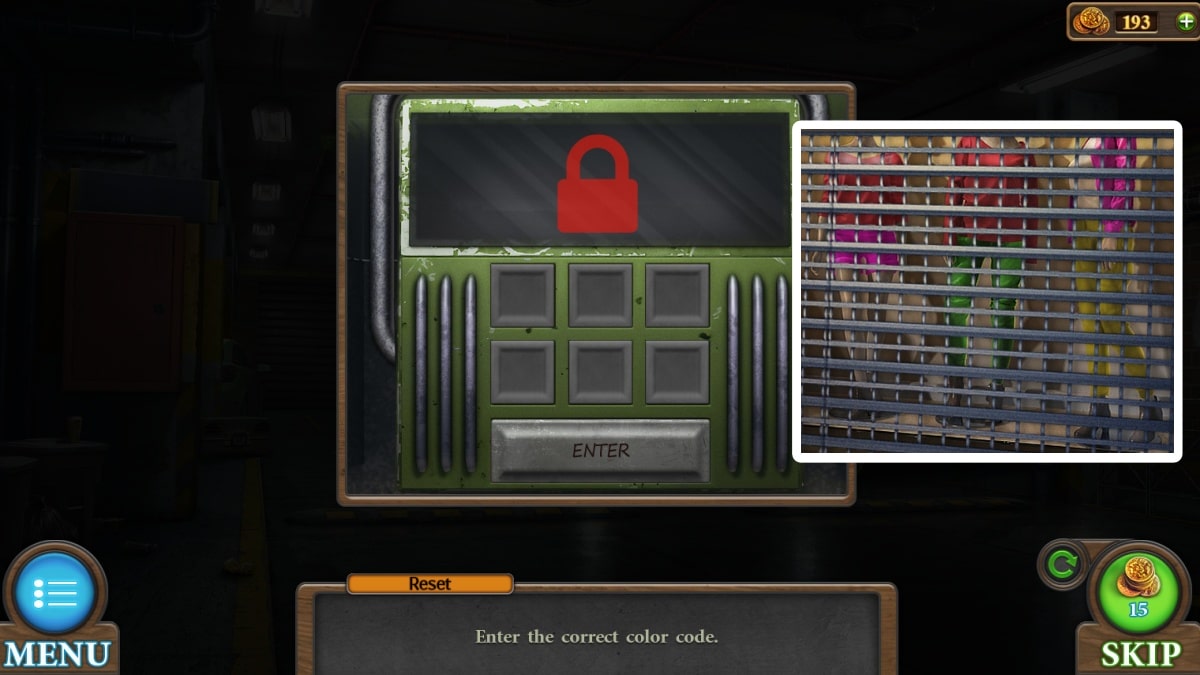
Image by Pro Game Guides

Screenshot by Pro Game Guides
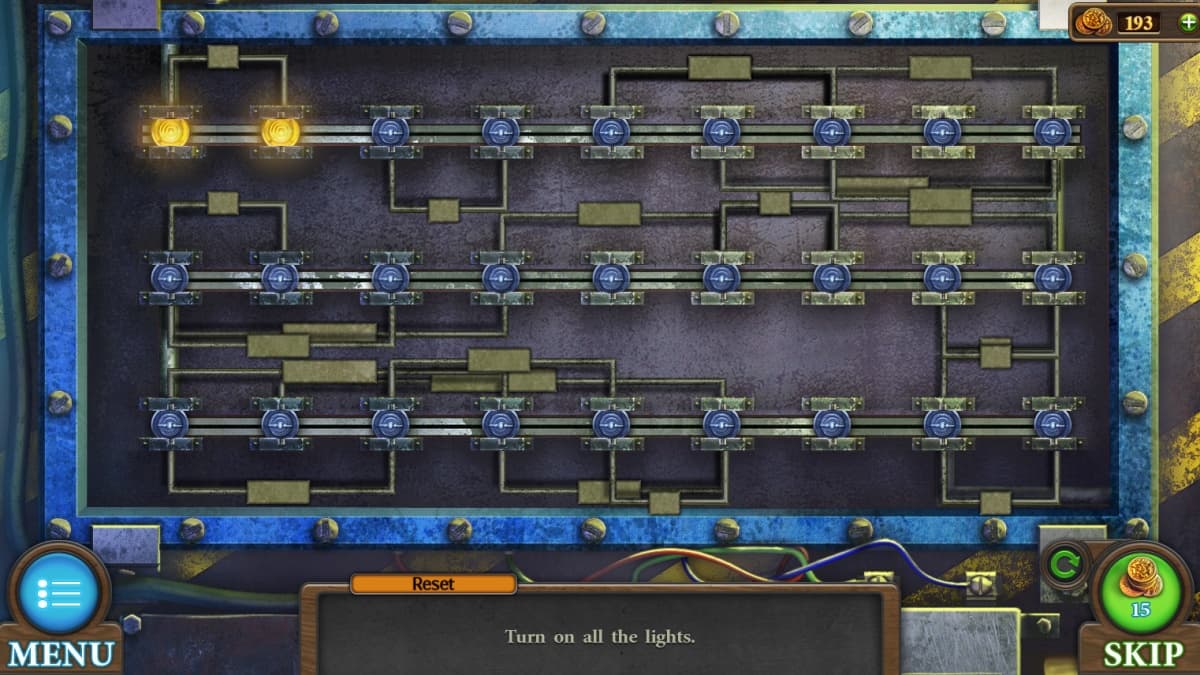
Screenshot by Pro Game Guides
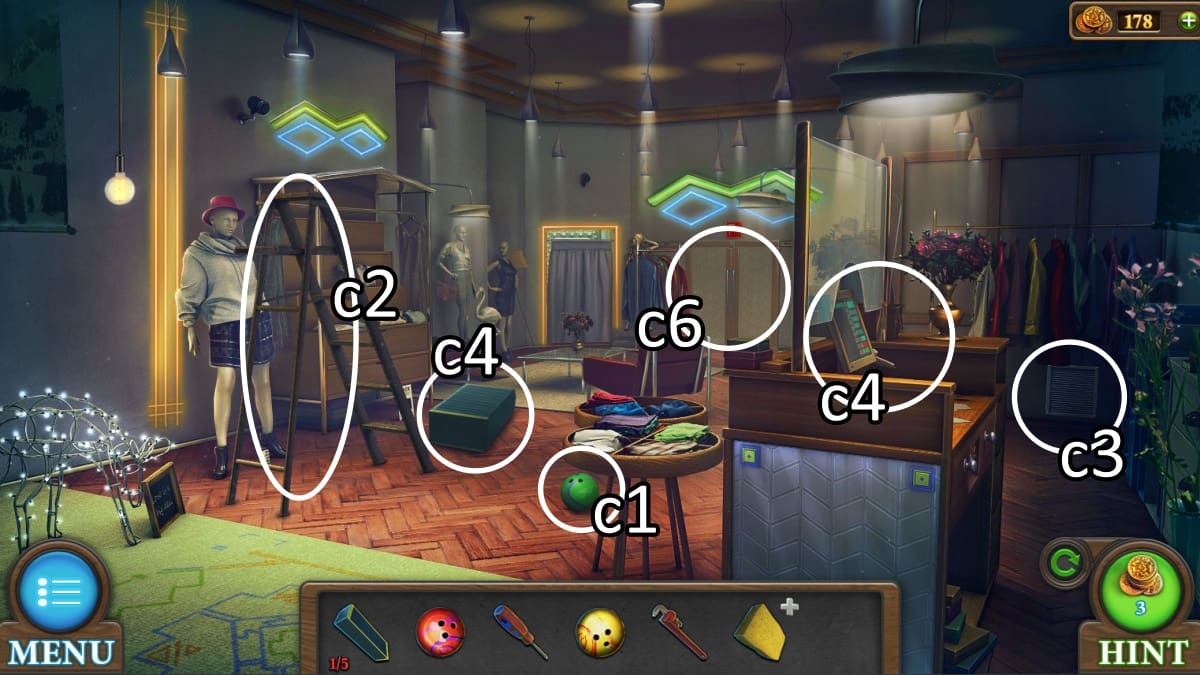
Image by Pro Game Guides
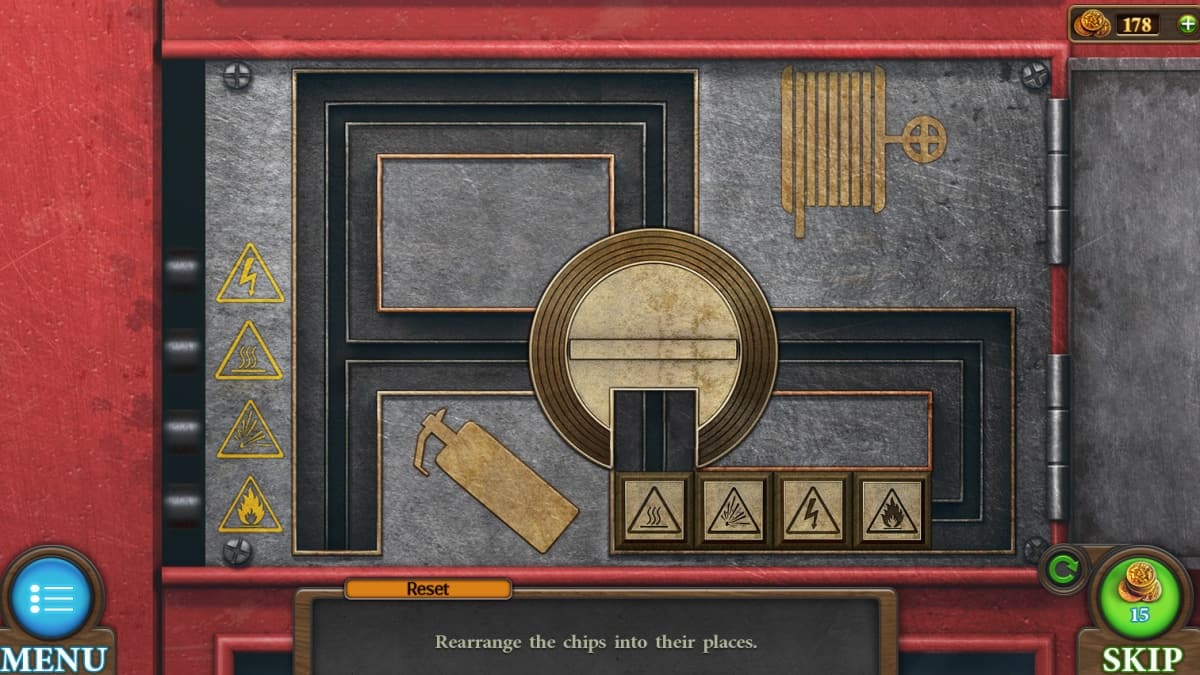
Screenshot by Pro Game Guides
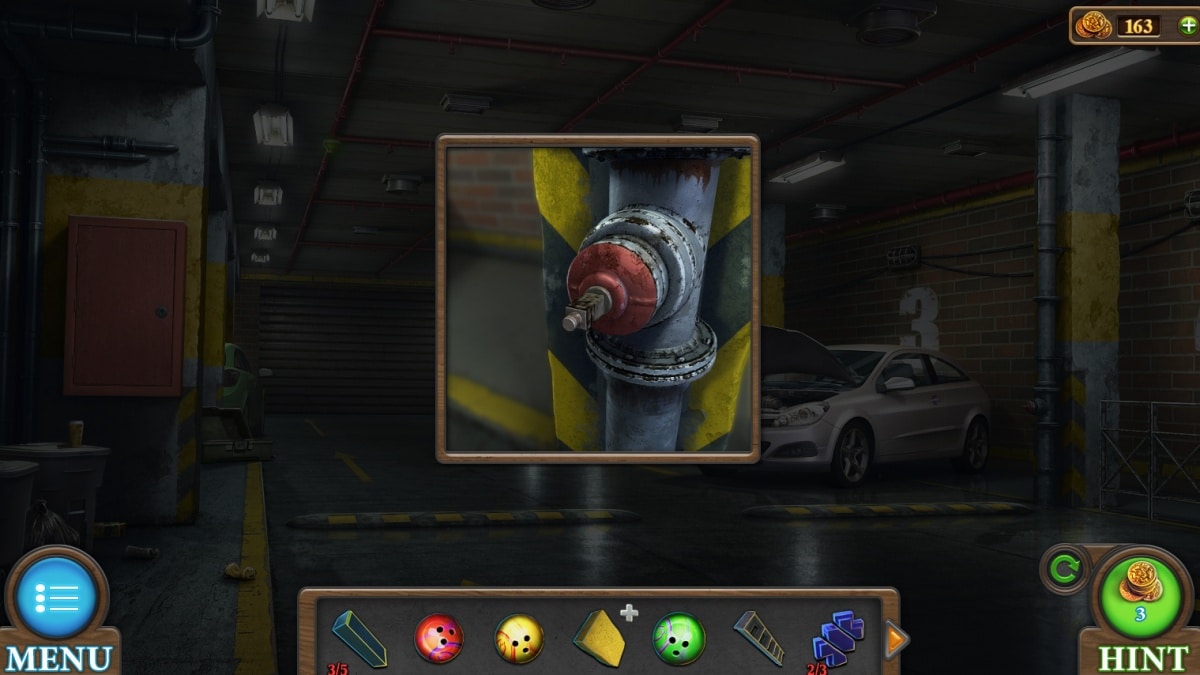
Screenshot by Pro Game Guides
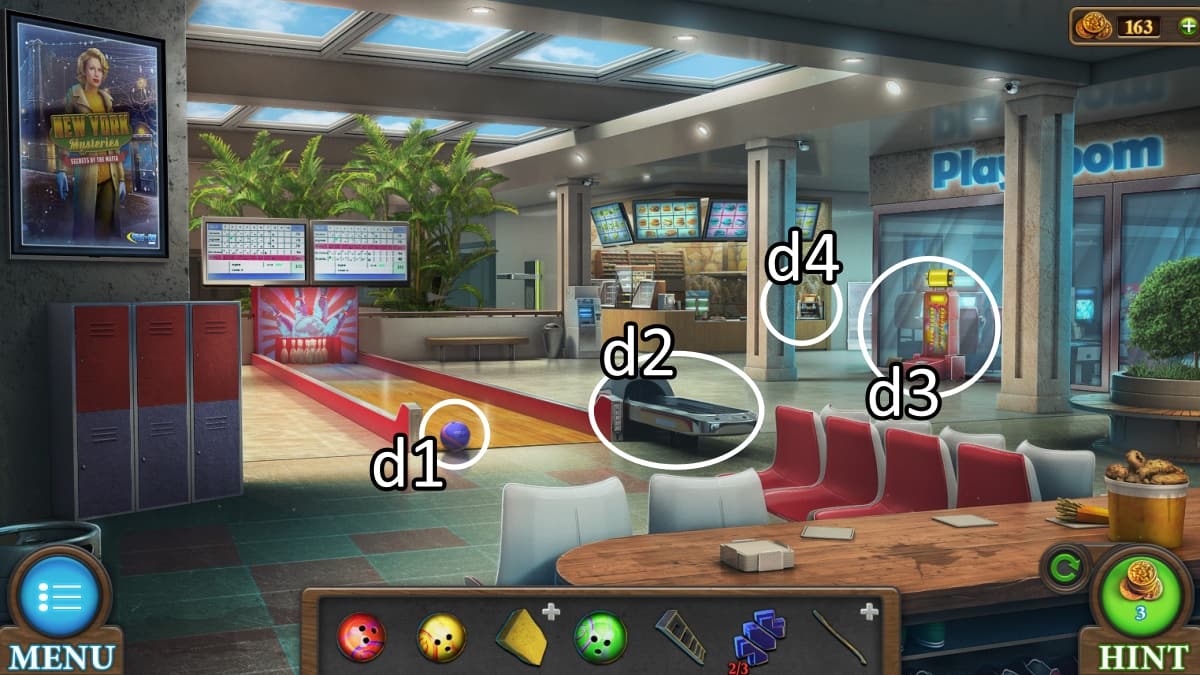
Image by Pro Game Guides
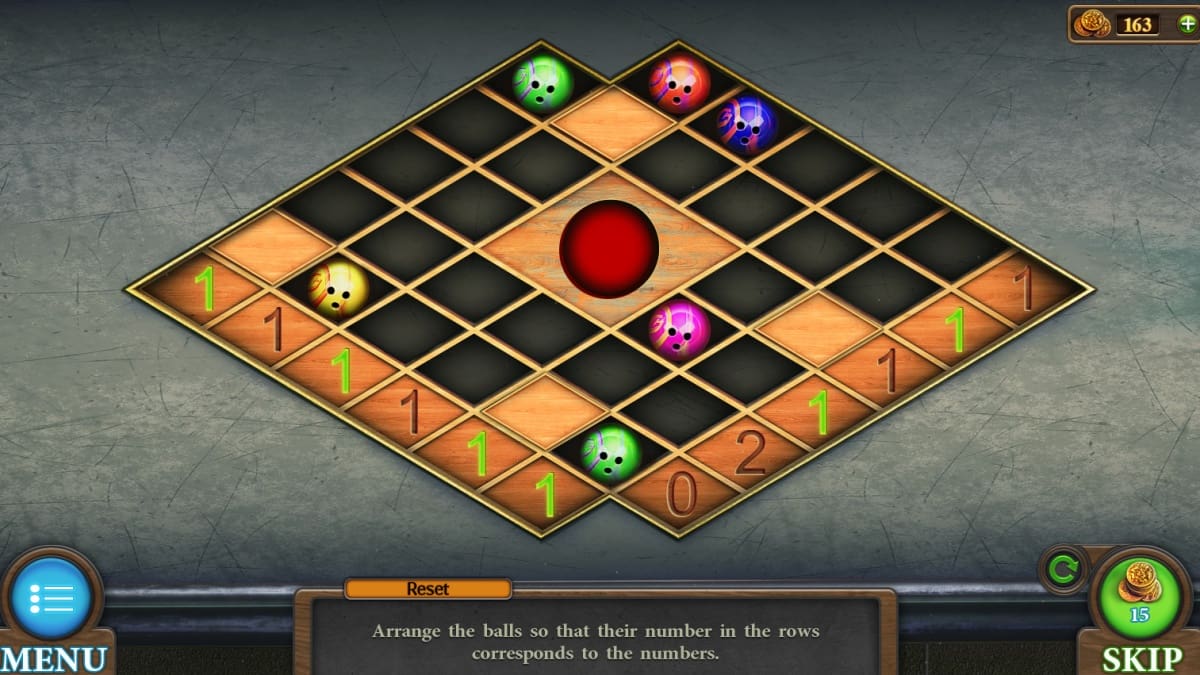
Screenshot by Pro Game Guides
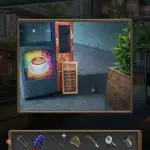
Screenshot by Pro Game Guides
Screenshot by Pro Game Guides

Screenshot by Pro Game Guides
Screenshot by Pro Game Guides
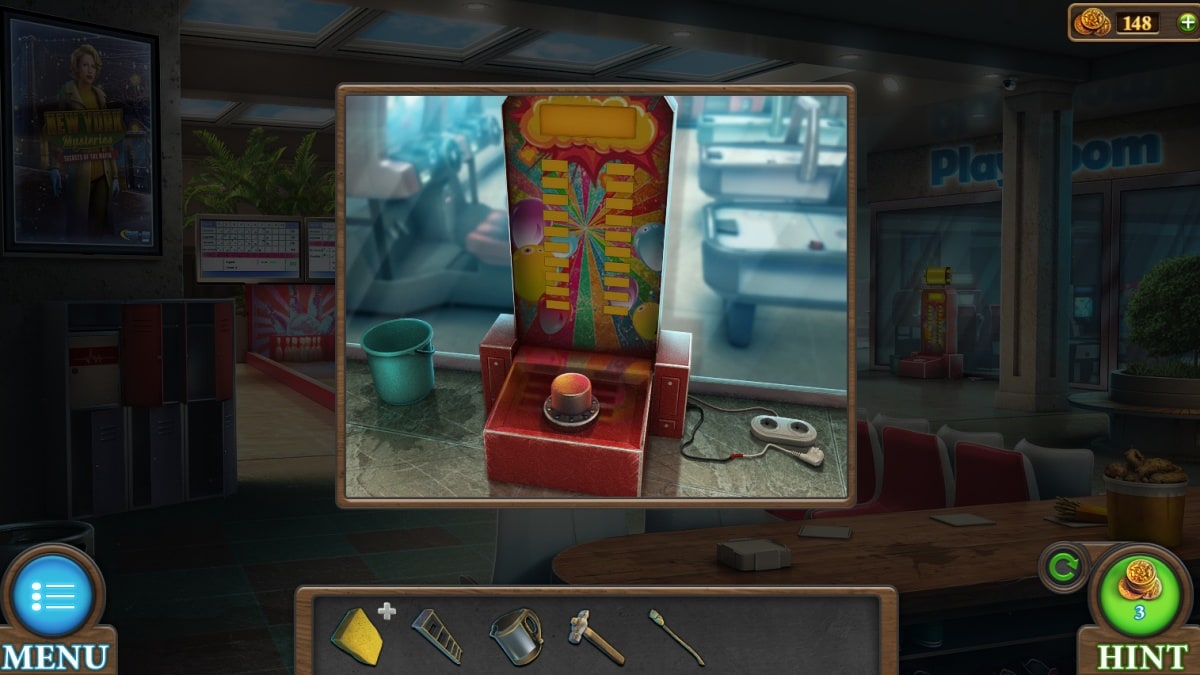
Screenshot by Pro Game Guides
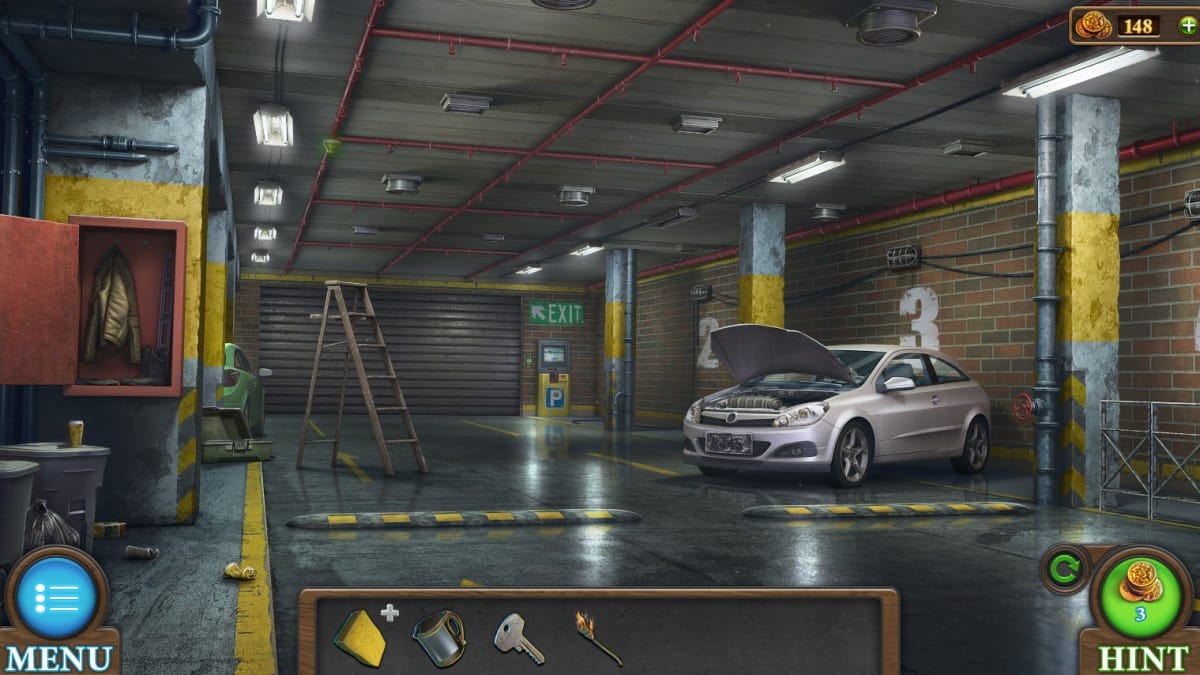
Screenshot by Pro Game Guides
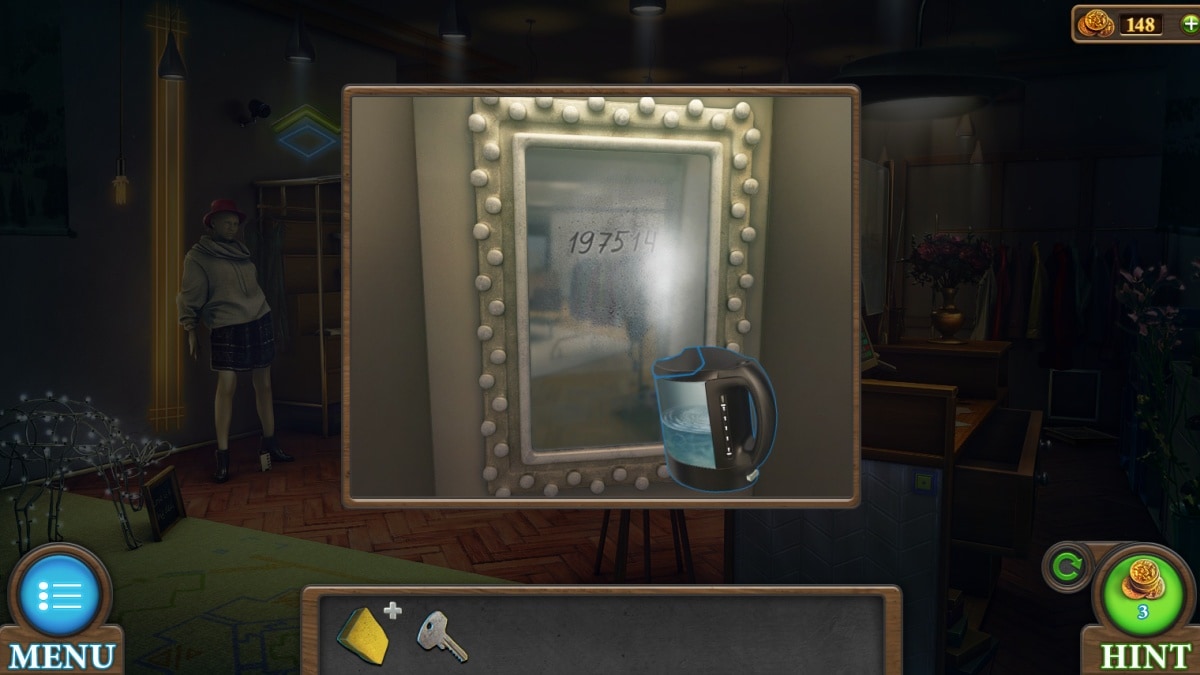
Screenshot by Pro Game Guides

Screenshot by Pro Game Guides

Screenshot by Pro Game Guides
