Uncover the secrets of The Room .
The Room is an indie puzzle plot that challenge your mind with interesting illusions , middling hard puzzles , and mysterious theme of alchemy . If you ’re struggling with any of its puzzles , I ’ll show you how to complete every chapter of The Room in this walkthrough .
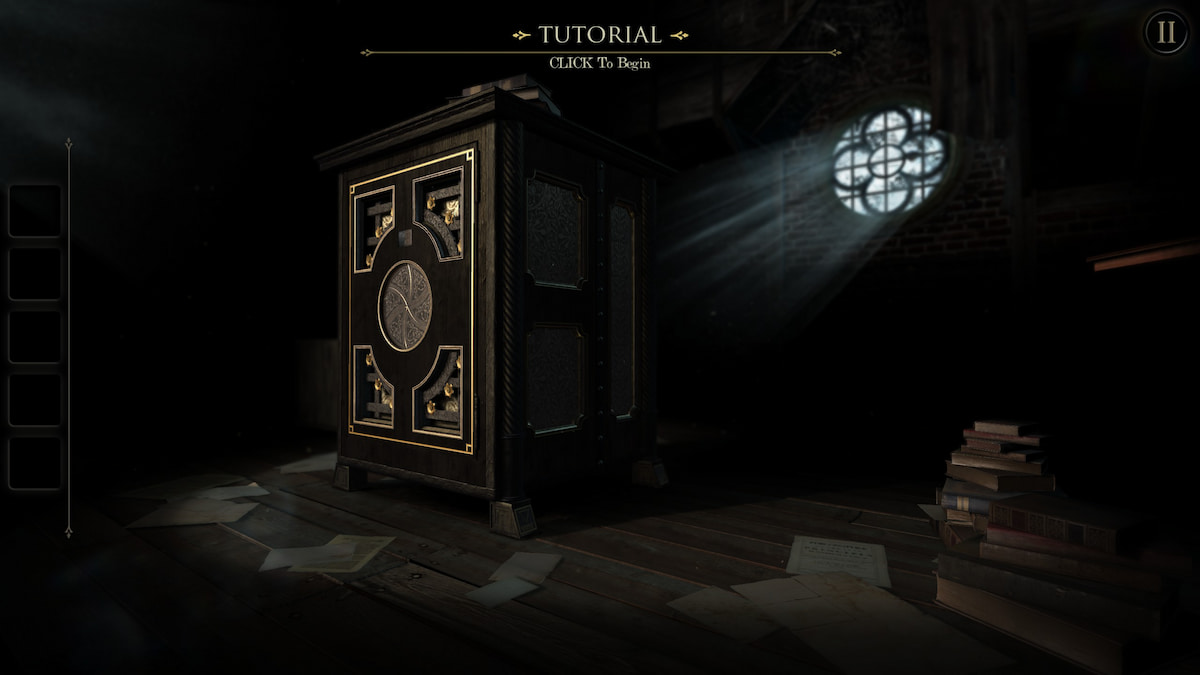
The Room Chapter 1 Walkthrough
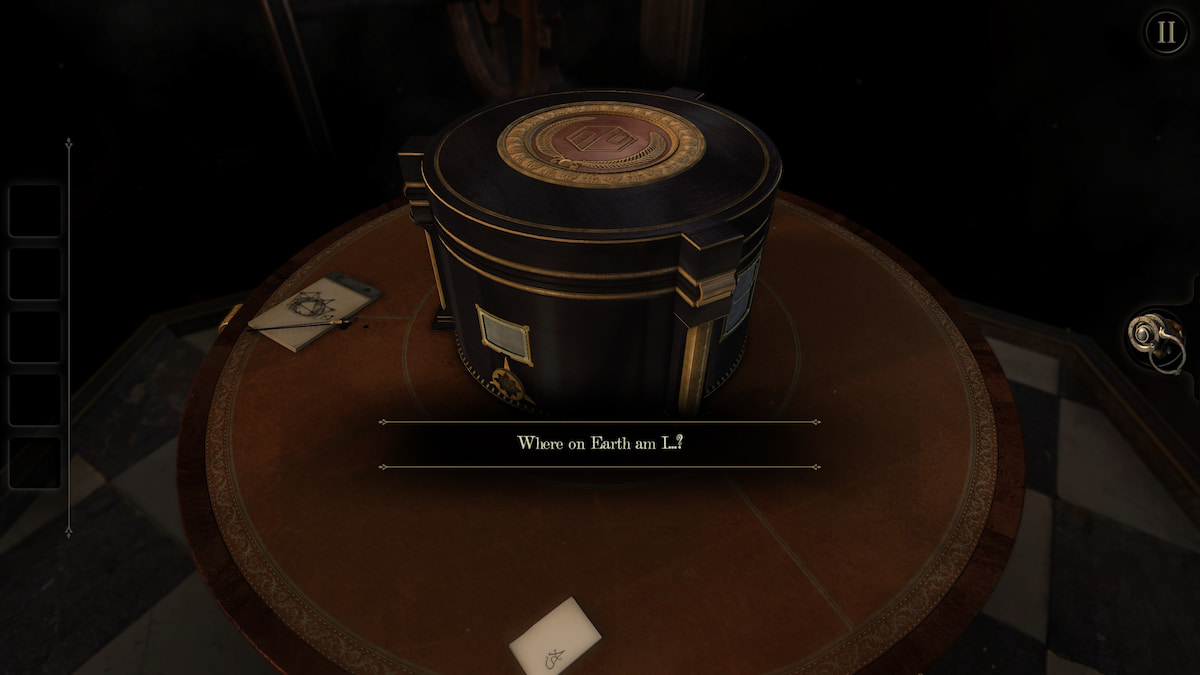
The first chapter of The Room is the tutorial . revolve the camera to the top of the safe to see an envelope . Pull the letter out of the gasbag to get a winder .
Now turn to look at the blood-red shock next to the letter . Rotate its lid to unlock the keyhole , then insert the key into the muddle and launch the shock . Take the eyepiece hide in it .
The jar also contains a distinction with a riddle . The result to the riddle is " fire " , so soar up out on the dependable and find the dialog box at its base that reads " fire " . Zoom in on the gore and press it to get a cay .
Take the key and go to the side of the safe near the cherry-red jounce . There is a small yellow-bellied terrapin visible in the middle . Move the slider to find a uniquely wrought keyhole . launch the key in your inventory and go around its tooth to match this trap , then infix it and twist it to get a pull .
Rotate to the back of the box and see at the metal tag . There is a small screw on the proper side of the tag that can be take away . Place the pull around it and deform it to move the tag end and get a electron lens for the ocular .
With the ocular nail , come back to the front of the box . There is another small slider above the circle in its centre of attention . Move this slipper to reveal the keyhole , then go into your stock list and reshape the key once again . Put the Florida key into the cakehole and turn it to unlock the next puzzle .
Screenshot by Pro Game Guides
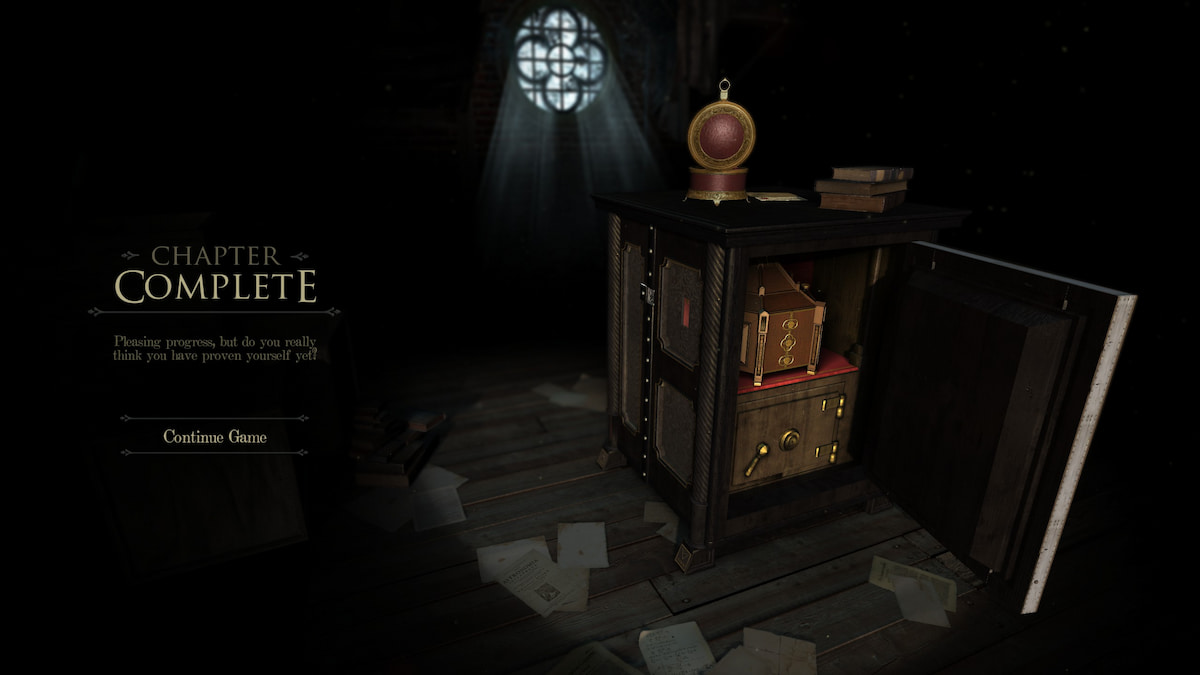
This puzzler consists of a exercise set of spin Au rings . Equip the eyepiece to see a hidden radiation diagram on the rings . circumvolve each ring to complete the pattern . This do the threshold to protrude open .
afford the door fully will end the tutorial , head you to the rest of the game .
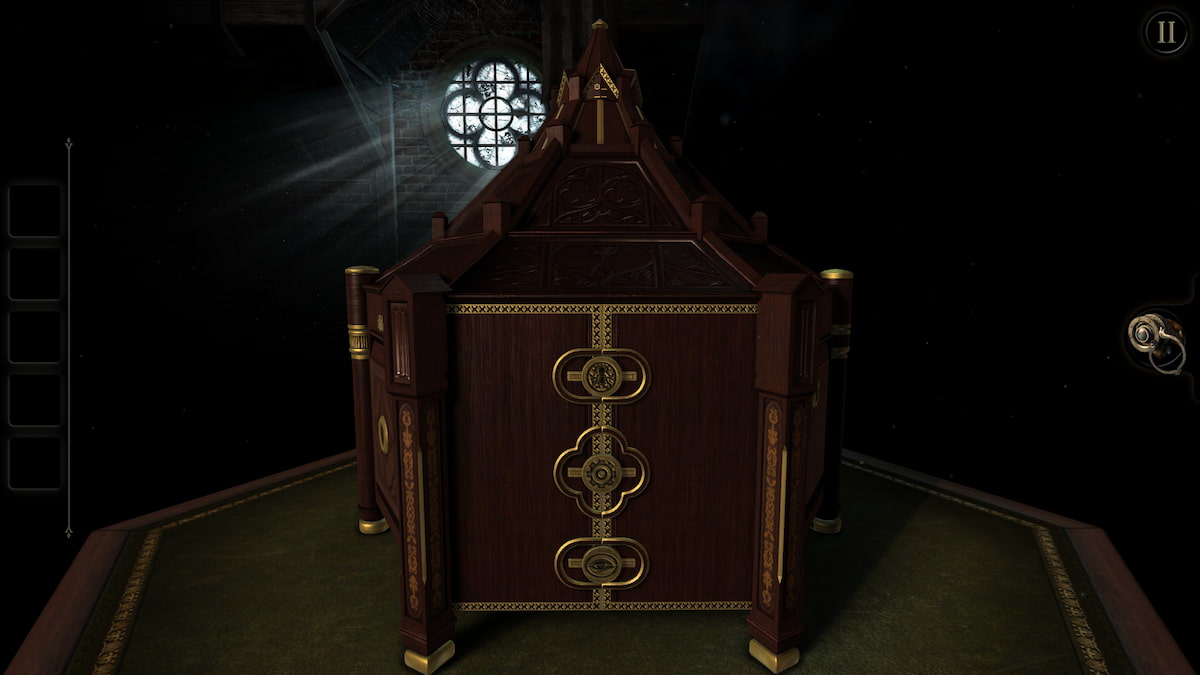
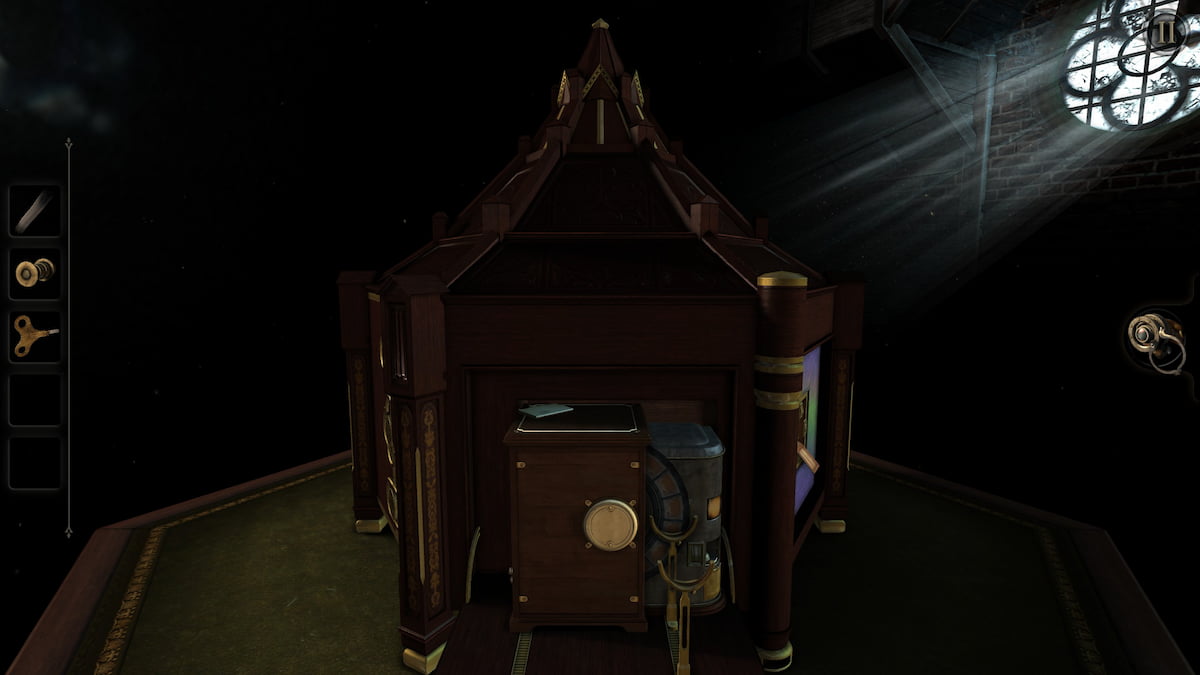
The Room Chapter 2 Walkthrough
After entering the second chapter , you will see a gear on the odd side of the box . Spin it to the left to open up it . You ’ll need to do this a brace of times to unlock the compartment at the top of the pillar full . snaffle the telescope piece from the compartment at the top .
choose the scope piece in your inventory . The outer hoop on it has two arrow promontory while the inner ring has two pointer feathers recruit on it . Rotate the inner closed chain so that the symbols equal up to extend the telescope .
The next secret compartment is on the pillar to the left of the one with the gear . Tap on the mainstay to zoom along into it , then tap on it again to give the compartment . The compartment bear a book and a small symbolic representation you ’ll need for a later mystifier .

Screenshot by Pro Game Guides
start the book from your inventory to view the puzzle on its binding . set about by rotating the top and bottom piece so they no longer connect with the hourglass - shaped piece in the center . Rotate the central piece next to be lay horizontally . This will unlock the while on the right , which can be spun to open up the book . It take a poor message and a paint .
The last gentle out of sight compartment on the box is on the right-hand side . This one is a scrap more hidden because it is on the bottom of the pillar . Spin the mechanics to the left to get a opus of cotton wool .
With these three items gathered , move the camera to front the number teaser . It requires you to find four number and input them in the correct slots around the hearty compartment in the puzzle ’s centre . Tap the lens on the right to fit out it and view the concealed solution for the mystifier . You ’ll take to rotate the camera in a few ways to view the solution accurately .

Screenshot by Pro Game Guides
Take the lens off and move all the tiles so that the act match the number above . When they do , the humble compartment in the core will open , reveal a switch . Pull the electrical switch down to unlock the next teaser .
The flick puzzle unlocked by the number puzzle check multiple parts requiring all of the item in your inventory . There is a note of hand on top of the puzzle , but it has the same substance that was in the rule book antecedently .
get down by looking at the unexpended side of the loge . There is a small compartment on the left corner . intercept it to await closely , then move the door latch to open up the compartment . Insert the key into the golf hole here and twist it clockwise to turn the film car on .

Screenshot by Pro Game Guides
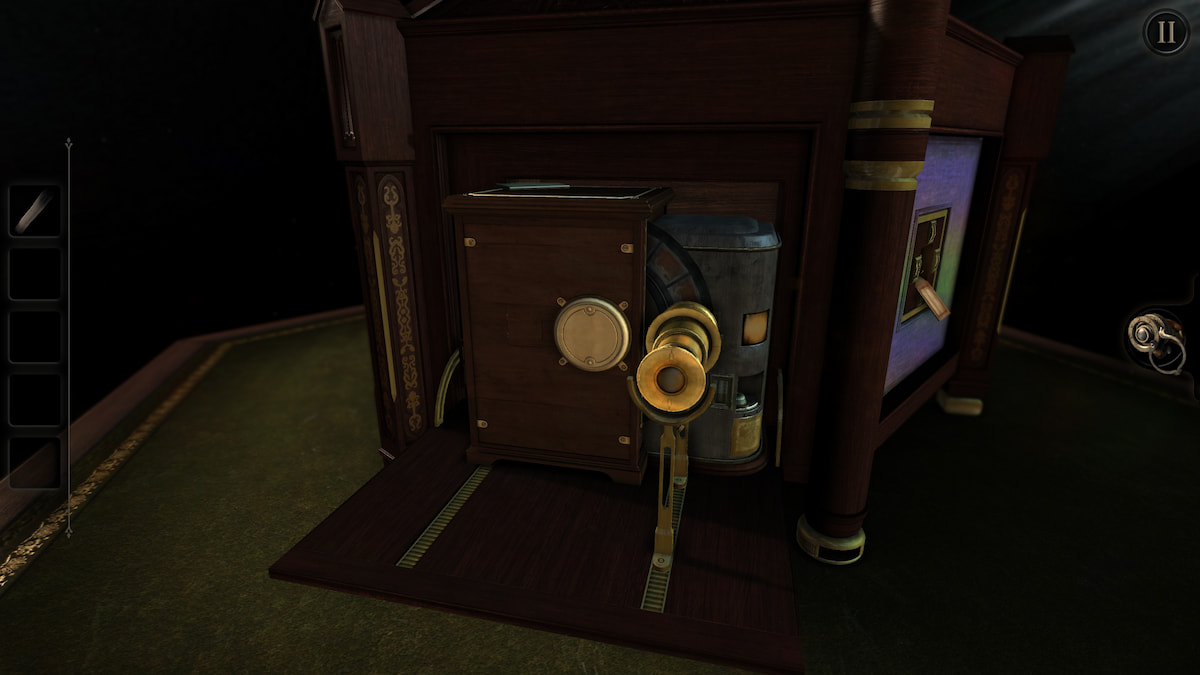
Next , place the telescope in the two handles extending from the machine ’s substructure .
Next , look at the compartment on the right side of the film machine . Place the cotton piece into the hole in the center and circumvolve the gear counterclockwise to perch the cotton . A small lever tumbler will appear after doing this . draw it up through the line it is on to get up the candle to the top , light up up the machine .
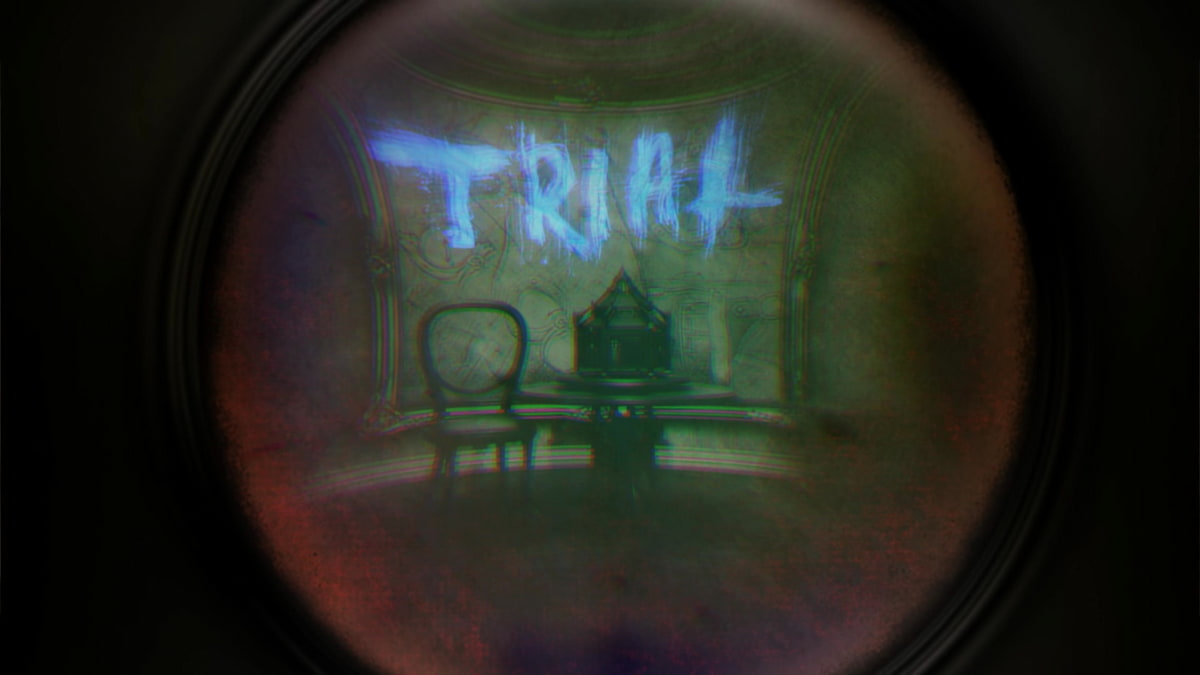
Equip the lens of the eye on the ripe side of the screen and look through the telescope . This will give you the word " Trial " and open up a new compartment in the gist of the celluloid car .

Screenshot by Pro Game Guides
This new compartment contains a puzzler with three rotating halo . Begin by activate the lens on the right side of the screenland . This shows a obscure pattern of a butt ’s head word . Solve it to complete the puzzle and get a lowly wooden piece with the alphabetic character " L " on it .
Take this " L " tile to the roofing tile mystifier on the side of the boxwood . Place the " L " roofing tile into the final slot , then interchange the other four tiles to import the countersign " test " . This unlock one of the seal on the front of the box and extends a new crimson box from the side of the master box .
You ’ll need to puzzle out the symbol puzzle on the other side of the boxful before beginning to fix the puzzles on the red boxwood . To work it , you ’ll take to line up the following clues :

Screenshot by Pro Game Guides
I was ineffectual to find the hint for the final symbolisation , but fortunately , it is easy to guess like the number puzzler was previously . After putting the three symbols into their proper position and guessing the fourth , you ’ll find an branding iron key .
With the iron samara in towage , foreland to the top of the new red boxful . draw in the slider on it to the left to enter the top and reveal a new teaser . It requires you to rotate the platter in the center until the gem on all four orb face up upwards and light up . I recommend start with whichever orb has its muffin closest to the top and continuing from there . They do not need to be lit up in a specific order .
The platform that appear on the right field will have a small slip of newspaper with the " Null " symbol on it . Memorize the symbolization and then fit the electron lens again . You ’ll need to rotate your camera down to turn the pocket-size fragments of black into the void symbol .

Screenshot by Pro Game Guides
Completing the previous puzzle unlocks a keyhole at the base . Place the iron key fruit into this base and twist it to unlock the drawer on the right wing . draw out the handgrip on the drawer to open up it and get a new small key .
Take this paint and insert it into the front of the red box . Twist it to start the metal scale and get a wiz piece . This musical composition can be placed into the star topology - shaped maw at the top of the boxwood , open it up . There is a small note with a new message in front of the star - mold piece . By rotate around the top of the box , you ’ll find part of a telephone dial for a safe . Take this and return to the red box .
Now seem at the secure telephone dial on the left-hand side of the box . Add the dial piece to the circular alloy piece in the center .

Screenshot by Pro Game Guides
To snap the safe , you ’ll ask to spin the dial left and right to hit the six sliders in the right order . When pip aright , the Pseudemys scripta will spread out . When a yellow-bellied terrapin is hit out - of - gild , all the sliders will return to their original land . When numbered from one to six clockwise , hit the yellow-bellied terrapin in the next guild .
If it ’s easier for you to conceive in terms of clockwise and counterclockwise , turning to the right is clockwise while turn leave is counterclockwise .
nail the safe Pseudemys scripta puzzler will unlock a 2d dependable teaser . This one contains two slider next to a row of five numbers . To solve it , you ’ll demand to wear the lenses once again and reckon toward the back of the red box . You ’ll see a 2 and a 5 written in blue ink . come back to the puzzler . Move the first slider next to the 2 and the 2d slider next to the 5 to lick it and get a key .

Screenshot by Pro Game Guides
The new key is used to enter the intricate lock at the front of the red box . Open it in your inventory and splay the pieces until they cope with the keyhole . Do n’t be afraid to mess up as it will create a gloomy outline in your armory that you could view while transforming the key . When the key fit in the hole , twist it to get a circular man with a star - shaped cutout in its centre .
The piece with the star cutout equip in the little jam on the other side of the loge . Inserting it will unlock the second seal on the front of the loge and create a new puzzle where it is rank .
Start with the left side of the fresh mystifier , which contains a series of gear . pull out the luger on the bottom get out toward the left to move one of the modest cogwheel . turn out the lowly handle next to it to fight the skinny yellow-bellied terrapin on the left up , revealing a drawer with four recession curl .

Screenshot by Pro Game Guides
To unlock the draftsman , all four of the locks need to be rotated so that their empty corner is facing the draftsman . This can be done by finding all four button with the matching symbolisation and rotating them so that their grim subdivision is facing the same counseling that the locks ' empty spaces need to be .
When all of the button have been rotated , spread the draftsman to get an pliable dance band and a great sprocket .
Add the large cog to the empty distance on the leftover side of the gears area . plough the grip at the bottom again to get the screwdriver .

Image by Pro Game Guides
Return to the right side of the box where the triangle button is . Use the screwdriver to unscrew all four screw on the corners of the favourable control board . afterwards , you ’ll need to press the push on the ripe side to lay off the geartrain . When stopped in the proper place , you’re able to take hold of a peculiar Francis Scott Key from a secret compartment behind the gear .
The Peculiar Key gibe in a ringlet on one of the upper panels correct of the superstar - themed box . First , look at the keyhole to see how the Peculiar Key need to be shaped . afterwards , select the Peculiar Key in your inventory and move its four tooth around until they match the lock . There should be two teeth on the left side , one tooth on the top , and one tooth on the rightfulness . Opening the curl give you a medium - sized cog .
Take this cog back to the board of cogs on the unexpended side of the loge . Place it on the leftmost empty slot on the panel . Move the slider back to the leftover side so that the bottom gear form a path to the centre slot with your freshly pose gear . Rotate the grip counterclockwise . This will open a compartment at the front of the box giving you another average - sized cog .

Screenshot by Pro Game Guides
catch the Modern sprocket and render to the venire of gears . set out by taking off the cog that you placed to begin with . Next , place each cog in the two rightmost slots . Connect them with the galosh band , then rotate the hold . This will start the gear at the front of the clock . Push the push button on the left to cause the top of the clockface to move , present you a small steel tube .
spread the pipe in your inventory and pull off its top to get a modest key . Next , towboat on the white aim in the tube to get a picture . Take note of the phrase " REV 6:05 " written on the back of the photo .
This key fits the panel on the proper side of the clock box . open it unveil a new Null puzzle , which you’re able to fit out your genus Lens to solve . pop out by pushing the slider with the Null symbol to the center of its line , then equip the lens and rotate the circular piece so that the rail line with the pocket-size black rophy is at the top . You ’ll need to wiggle them around and view them slightly from the left to make the symbol . Solving this gives you a small shield .

Screenshot by Pro Game Guides
With the shield in handwriting , find the gold horse statue at the top of the box . Give him the shield to get a modest blue oval gem .
The blue gemstone go into the empty hole at the bottom of the clock . Once it is place , equip the lens to see the clock ’s invisible hand . This is where you ’ll take the 6:05 intimation from the photo item . Rotate the center dial following the guidance of the pointer on it until the clock reads 6:05 . Doing so successfully completes Chapter 2 .
The Room Chapter 3 Walkthrough
Begin by finding the small metal tag end on the left side of the box . Pull it to the left to unwrap a permutation , then pull the permutation down to spread out a compartment containing a note and an intricate boxwood .
reach the intricate box in your inventory . To solve it , you ’ll need to go through a serial publication of step to get the slider to the end touch on the correct side .
This gives you a small key .

Screenshot by Pro Game Guides
This key goes to the lock next to a dependable dial puzzle on the right side of the box . Twisting the key into the ringlet unlocks the telephone dial . To fully open up the safe , you ’ll need to rotate the telephone dial so it open all of the slider around it in a particular order .
Opening the safe give away a red-faced field glass for examining photos . The boxful beneath it contains a small square peg that needs to be taken .
While at the safe , place the photograph from the previous chapter in front of the red spyglass . Use the electron lens to view the photo through the spyglass , giving you the codeword " Sigil " .

Screenshot by Pro Game Guides
To use the satisfying peg , you first must solve the slider puzzle to the right of the globe at the front of the box .
Place the square peg into the hole to unlock the chest at the front of the box .
The breast has a set of five roofing tile on it that can be flipped to reveal certain varsity letter . Move the tiles so that they import out the parole " Sigil " . This opens the pectus , revealing a royal stone on a hexagonal base .

Image by Pro Game Guides
The royal gem live in the hexagonal expansion slot on the base of the corner . After placing it , a laser beam will be create above it . whirl the gear at the understructure of the beam to the left hand to concentrate it . This will unlock the wooden compartment above it , which check the flywheel .
The flywheel goes in a small indentation in the boxful ’s substructure to the right of the safe puzzler . Placing the flywheel into this steering wheel will unlock the nearby drawer ’s handle , which can be pulled to get a clean deflection gimmick . Additionally , a small pressure home base at the bottom of the left side of the drawer can be pressed to get a hexagonal function while .
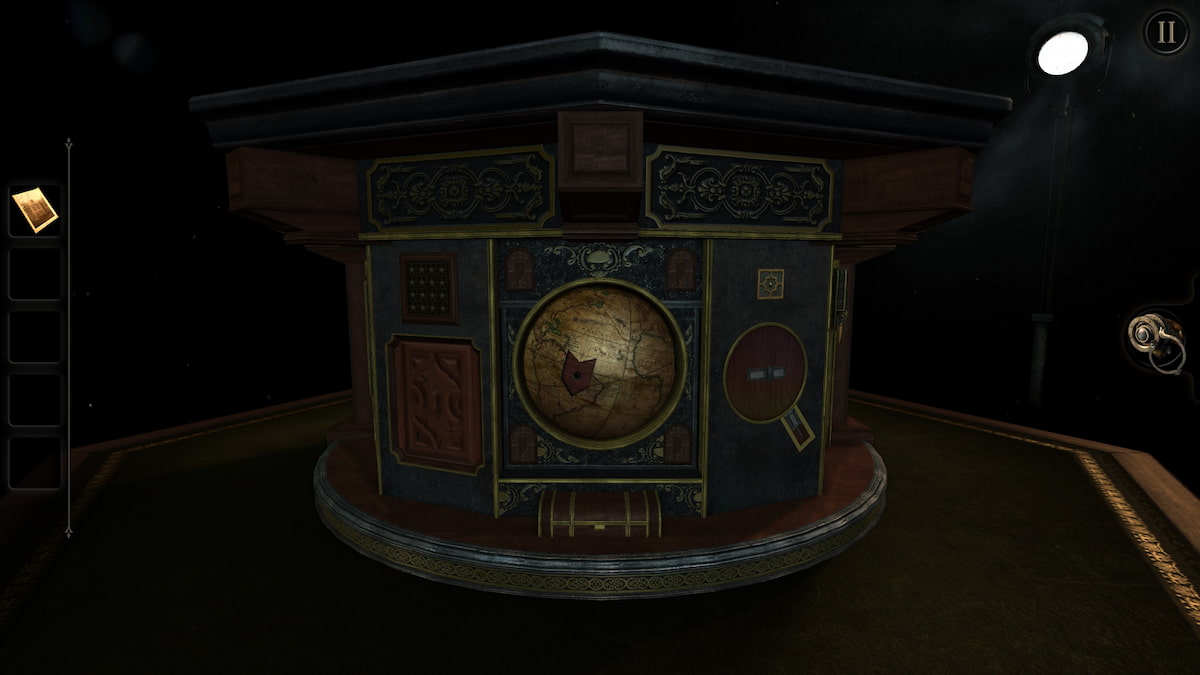
Before we use the light refraction gadget , go ahead and turn to the earth at the front of the box . Rotate the globe until you see a hexagon - form fix toward its bottom . Place the hexagon map man here to get a handle .

Screenshot by Pro Game Guides
Next , we can send the light refraction machine . It goes in the area with the radio beam created by the royal gem . Place it in the holes at the top of this section to reflect light through the box . This will unlock a compartment contain a timekeeper , which is used for two separate puzzles .
First , we ’ll start by weightlift the downhearted right button on the timer . The timer will start straightaway , so you ’ll necessitate to move quick . Move to the right wing to see a compartment containing another timer and squeeze its button . Its timekeeper will set about counting down , so turn left to feel the next timekeeper with one clit and press it as well . Finish this incision by finding the final open boxful and grabbing the maven - shape function piece of music out of it .
Now , we ’ll do the puzzle result from the left clit on the timer . This is reasonably much identical to the previous one . Press the button , then rotate chop-chop around the sides of the box and press the two other timer as they appear . At the end , a compartment containing a brass section key will be feel above the globe .

Screenshot by Pro Game Guides
While here , place the star - shaped while into the ball . This will leaf the arch in the lower good corner , but will not give you anything .
The handle retrieved after using the hexagon map piece is send on the side of the box with the intricate , saw - corresponding compartment . Place the grip into the square gob and splay it to view a circular wooden surface area . Equip the lens of the eye to see past this and start the void teaser . An sluttish way to solve this one is to rotate the central appurtenance so that the circle at the bottom of the void symbol is in the front . Afterward , deform your television camera to view the puzzle from the left to complete the symbolic representation and get a pocket-size intricate cube .
reach the intricate cube in your stock and rotate it to view it from the bottom . The interior rotary can be twisted to create an x - shape , opening the top of the box .

Image by Pro Game Guides
The lock for the intricate square block is to the left wing of the world . Place the opened cube here to unlock the telescope at the top of the table .
The lock beneath the cube requires the brass paint . select the ignition lock to view it more closely , then launch the brass key in your inventory and move its teeth to copy the shape of the lock chamber . Not all of the key ’s teeth will be used to make this normal , so choose the right ones carefully . open this lock give you a littler light refraction machine .
generate to the area with the original light deflexion gadget above the gemstone . Attach the new smaller gimmick to the back of it to send a beam of light of light through the other side of the box . This will unlock a unexampled light - refracting puzzle .

Screenshot by Pro Game Guides
You ’ll ask to utilise your lens to see the beams of light in this puzzler . Begin by moving the left slipper until the lightheaded bounces off of it and polish off the odd wall . Next , pull the left slider down until the light reflects off of its top one-half , hit the three mirrors in the center and stopping at the top of the box . Complete the puzzler by strike the top slider to the left until the beam of light source goes through the hole on the odd side of the box seat . This turns the sky into a series of constellation and gives you a flag - mold single-valued function piece .
Return to the world and rotate it to find the masthead - mould cakehole . Place your function piece in there to go around the low odd arch .
The next puzzle to solve is the 4x4 grid of stars left of the globe . The solution for it is found by expect through the telescope at the top of the box with the constellations and your lens activated . observe down the position of the lights in the squares , then intercept on the principal that are in the same spaces in the puzzle . Once all of the right stars light up , you ’ll be given the final earth piece .

Screenshot by Pro Game Guides
happen the last hole in the globe and introduce the map man . This will lower a handle , which you need to pull .
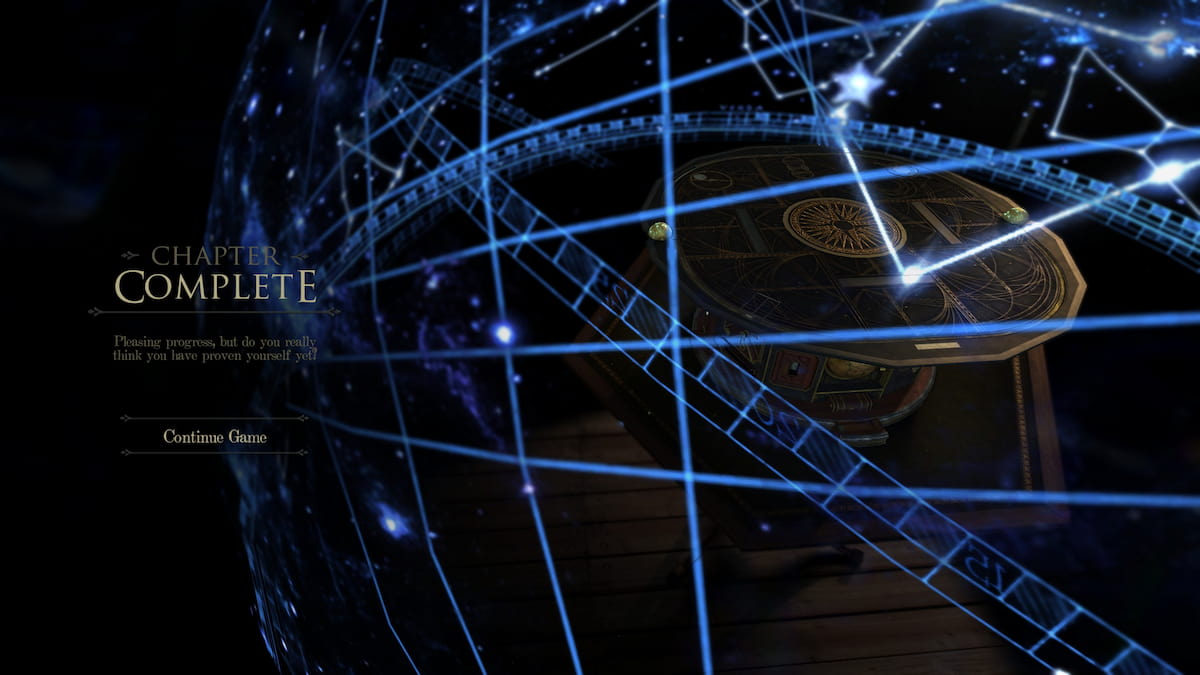
pull the lever causes the tabular array to open up , ending the third chapter of The Room .
The Room Chapter 4 Walkthrough
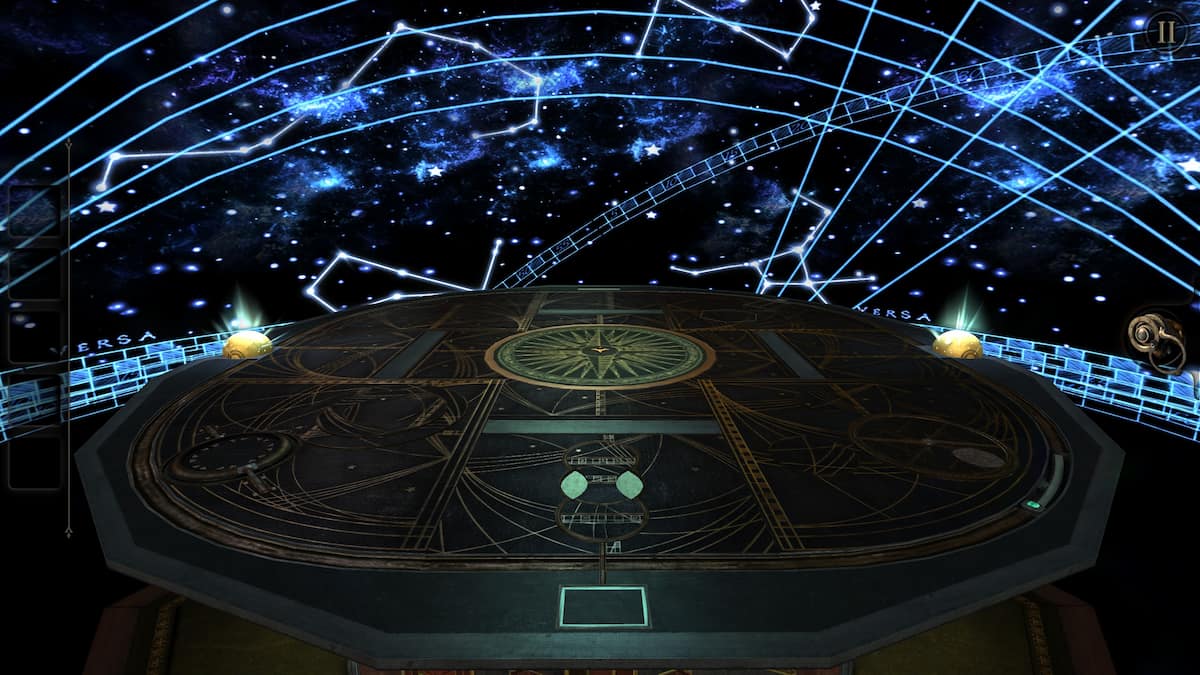
The 4th chapter begins on top of the board from Chapter 3 . Start by finding the vivid blue luger on the table ’s sharpness . Push the slider across its track to get a winding handle .
Take this handle to the part of the table with a small panel . sky the instrument panel over , attach the handle , and spread out it . You ’ll need to twine the grip to rotate the key circuit in the section in front of you until a true line physique through all of the traffic circle .
Completing the blood line precede you to this modest instrument with constellations on it . Press the push on the left to make the steel constellation seem .

Screenshot by Pro Game Guides
you’re able to now move to take on the Null puzzle , which occurs on the instrument panel to the left wing of the previous instrument . Look at it and sour on the genus Lens to see the puzzle . It has a pedestal in the center containing a little brand . go around the blade so that it is close to the lower left side of the circle , then view the fit from the right to make out the mystifier . Doing this successfully gives you a small sticker .
Place this dagger into the central time slot in the table . The table will transmute , revealing a structure consisting of multiple planet . It will also activate a mystifier on the table to the left field of the Null puzzle .
The next puzzle is the panel puzzle that was activated after the dagger was inserted . The pinch for it is found by looking into the jury while using the crystalline lens . Tap the highlighted panels to flip them over , then tap the button in front of the jury to submit the solution . This takes you back to the celestial cat’s-paw . Press the button again to shift the shown constellation to an eye , which will make the major planet spin .

Screenshot by Pro Game Guides
recall to the dialog box and use the lens to attend through it . There will be a new code for the control panel mystifier in the lower left corner of the dialog box . Input that into the board and submit it to block up the planet from moving .
retrovert to the planet to work the new Null symbolic representation puzzle . You ’ll want to move the photographic camera to the right to complete the symbolic representation and get the golden middle amulet .
The amulet belong into the slot across the mesa from the instrument panel . Equip the lense to see four arrow in the eye circle and one pointer pointing toward them . To get the computer code for the next panel puzzle , you ’ll require to connect the outer pointer to each of the inner pointer . After each pointer , apply the lens to look through the dialog box . You ’ll see a building with vary numbers of windows look on the arrows used .

Screenshot by Pro Game Guides
Put this combination into the control panel puzzle and submit it to reveal the power source . knock the unripe stone in the center to add together it to your inventory .
Grabbing the power germ head you back to the heavenly official document . beg the push to alter the constellation once again . afterwards , go to the dialog box and look at it through your lens . It will take you to a new room with a box at its center .
Zoom in on the box to see the symbols on each row . turn out the photographic camera around the box until you see the bottom of the symbol at the base of the back of the corner . Next , splay all three rows on the box until they organize the Null symbol . This opens the top of the box seat , where you will place the superpower source .

Screenshot by Pro Game Guides
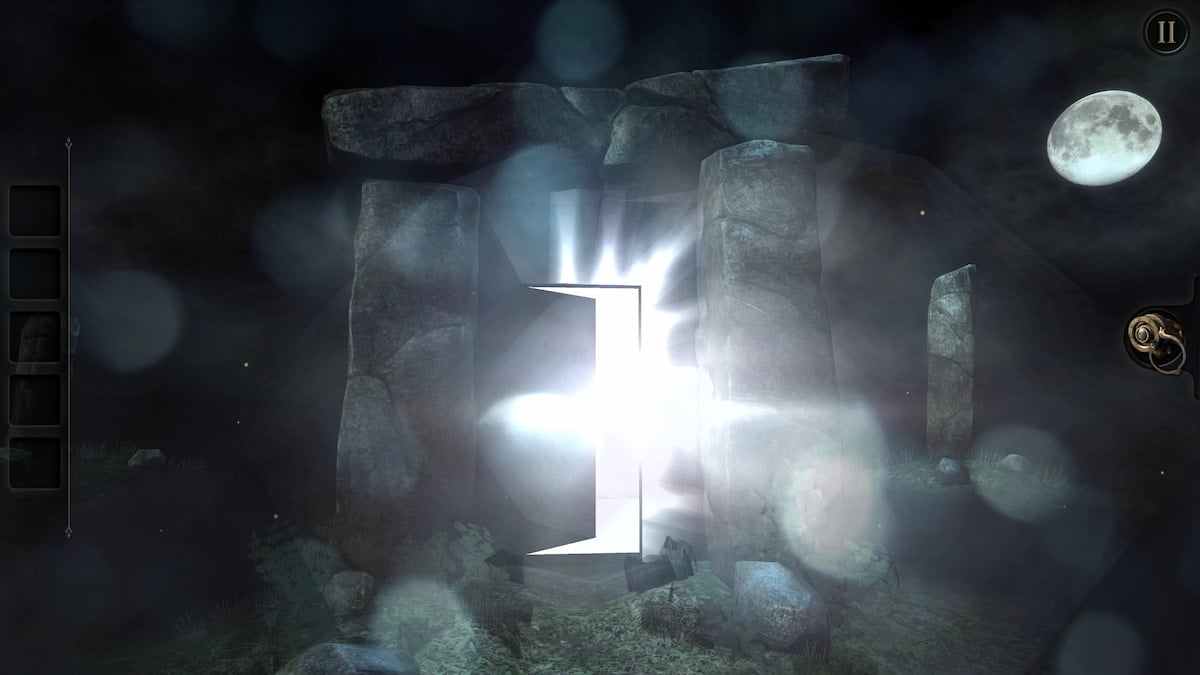
range the power seed creates a glowing doorway that take to the end of chapter 4 .
The Room Chapter 5 Walkthrough
trip your crystalline lens and look around the handle to find a mismatched handprint . Rotate the nerve center of the handprint to form a naturalistic hand to get up a modest platform . There will be a Pseudemys scripta on the side of the weapons platform . Slide it to unlock a drawer with a gear .
There is a slider on the side of the table . Pull it to discover a set of gear mechanism . Place the new gear wheel on top of the lower Triangulum slot and urge the button to unlock the slider puzzle on the left field .
The slider puzzle requires musician to complete it twice . Each time needs players to light up all button and then unlock either the blank or inglorious lock . The footpath for the sinister lock is prove in the image with black routine whilst the pathway to start the ashen pulley has white number . After unlocking both locks , flip the switch to recruit a pillar on the table and get the metal orb .

Screenshot by Pro Game Guides
open up the metal revolve in your inventory . Rotate the metal through the hole on top until there is a small button on top . press out the button and start the orb to get a gear .
The square gear wheel goes in the same area as the previous gear . This sentence , rank it in the top straight time slot then press the button . It will unlock the grip to a drawer containing a handful of tarot cards and a key .
The star Florida key go in the keyhole at the front of the corner . Players will get two items from a compartment on the ripe side of the box seat by sophisticate the key in specific fashion .
Screenshot by Pro Game Guides
The next puzzle is on the side of the mesa with a declamatory slider and a dustup of etched symbol . Pull the prosperous slider down to unlock the puzzler . Before solving it , we ask to travel to the side of the tabular array right of the open door . There are three holes in the mesa , each containing a symbol and between 1 and 3 dots underneath . Jot down the symbols and how many dots are next to them , then riposte to the puzzle . Each of the slider will have dots underneath them . Move the sliders so that they match the symbols with the same bit of back breaker to get a coin .
Turn to the part of the table beneath the star paint placed earlier . localise the metal frame into the hexagonal space and twist it to unlock a piano . The hint for the first forte-piano teaser is found in the note on the table . Press the bespeak key fruit in the midsection of the piano to open a expansion slot beneath it . Put the coin in this expansion slot to lead off the next series of puzzler on the pianissimo .
The next few puzzles ask players to see notes act as on the piano and retroflex them . There are three rounds , each started by pressing the metal button in front of the forte-piano . If any round is failed , all three will need to be repeated . I ’ll line each round below and let in images with the samara numerate to aid you duplicate the played melodic line .
Screenshot by Pro Game Guides
Playing all three melodies right gives you two hold and place the pianoforte away .
Next , turn to the gold panel on the back of the box . Use the paint in your armory to unlock it . The puzzle behind the panel requires you to utilize the mavin Francis Scott Key at the front of the box to splay the dialog box and solve it .
With these panels unresolved , go back to the star key and twist it to face upward . Return to the back panel to see two gold button . Press each of them to reveal a 3 - digit figure puzzler and a compartment comprise glowing tubes .

Image by Pro Game Guides
pop out by looking at the four mental testing tubes in the drawer . Equip the lense to see the pattern on them , then use the slider to rotate them around until you see the code " 573 " . Go to the three - digit secure puzzle and recruit this computer code to extend a panel from the side of the box seat .
Add the two grip to the notches on the front side of the panel . Equip the lens to view a hide cube within the dialog box . watch it from the front bear witness you just the cube while viewing it from the back shows you the block and set of four sliders . The third power in the panel has four notches in random squares throughout it . The goal of this puzzle is to rotate the square block around until each hole is next to a slider so that the luger can be push into it . Filling every hole in the cube with a skidder give you a red precious stone .
The newly unwrap panel contains a slider teaser . Three of the sliders take brightly colored gems . The destination is to get each of these gems to the slot at the bottom so the gems can be pull out from the back of the puzzle . I pop out by gathering all of the gems on the right side of the puzzle while move the blank sliders to the left . Afterward , I pushed the gems one by one into the slot to take them out of the teaser . However , you could do this in whatever style is easiest for you .

Image by Pro Game Guides
change state to the small-scale raised platform next to the round glass windowpane . pose the ruby stone into the empty top right smirch . later on , localize the green gem in the top correct indent , the blue gem in the lower right , and the yellow gem in the lower unexpended slot . Now fit the lens and face through the circular panel toward the gems . They will form a shape , causing the box lid to crack open . Raise it to reveal an intricate slider mystifier .
This slider puzzler is pretty elementary . fight the button in the substance to unlock new path for the slider . As paths are unlocked , push the slider along until it reaches the hole at the end of the track . This will only take about nine pace .
When the luger enters the hole , a shine gem will seem at the nerve centre of the tabular array .

Image by Pro Game Guides
Equip the lens to see a set of offset be adrift above the gem . Rotate the camera around them until they form the Null symbol . This lead to another slider puzzle on top of the table .
This luger puzzle is just as unforesightful and simple as the old one . It can be complete in six step instead of the late nine .
Like before , this causes the jewel in the heart and soul to ignite up .

Screenshot by Pro Game Guides
Equip the lens again to see the floating sticks above the gem . A whitened outline of the Null symbol on the bulwark make water run along these pin up a lot easier . I commend rotating the photographic camera until the diagonal bottom telephone line is in billet , then rotating the geared wheel around the gem until the rest of the symbol is in place . Doing this will take you through flashing sequences , unveiling an overgrown I. F. Stone threshold .
You ’ll pass the end of the game as you enter this door .
desire a new puzzler plot , but are n’t a lover of the box - centric teaser ? Check out ourIsoland 4 Walkthrough – The Anchor of Memoryor ourBotany Manor Walkthrough ( All achievements)here on Pro Game Guides .

Screenshot by Pro Game Guides

Image by Pro Game Guides

Image by Pro Game Guides

Screenshot by Pro Game Guides

Screenshot by Pro Game Guides

Screenshot by Pro Game Guides

Screenshot by Pro Game Guides

Screenshot by Pro Game Guides

Screenshot by Pro Game Guides

Image by Pro Game Guides


Image by Pro Game Guides

Screenshot by Pro Game Guides

Image by Pro Game Guides

Image by Pro Game Guides

Image by Pro Game Guides

Screenshot by Pro Game Guides

Image by Pro Game Guides
Screenshot by Pro Game Guides

Image by Pro Game Guides

Image by Pro Game Guides

Image by Pro Game Guides
Screenshot by Pro Game Guides

Image by Pro Game Guides

Screenshot by Pro Game Guides

Image by Pro Game Guides

Image by Pro Game Guides
Screenshot by Pro Game Guides

Screenshot by Pro Game Guides

Screenshot by Pro Game Guides

Screenshot by Pro Game Guides

Image by Pro Game Guides


Screenshot by Pro Game Guides

Screenshot by Pro Game Guides

Image by Pro Game Guides

Image by Pro Game Guides

Image by Pro Game Guides

Image by Pro Game Guides

Screenshot by Pro Game Guides

Image by Pro Game Guides

Screenshot by Pro Game Guides

Screenshot by Pro Game Guides

Screenshot by Pro Game Guides

Screenshot by Pro Game Guides

Screenshot by Pro Game Guides

Screenshot by Pro Game Guides

Screenshot by Pro Game Guides

Screenshot by Pro Game Guides

Screenshot by Pro Game Guides

Screenshot by Pro Game Guides

Image by Pro Game Guides

Screenshot by Pro Game Guides

Screenshot by Pro Game Guides

Screenshot by Pro Game Guides

Screenshot by Pro Game Guides
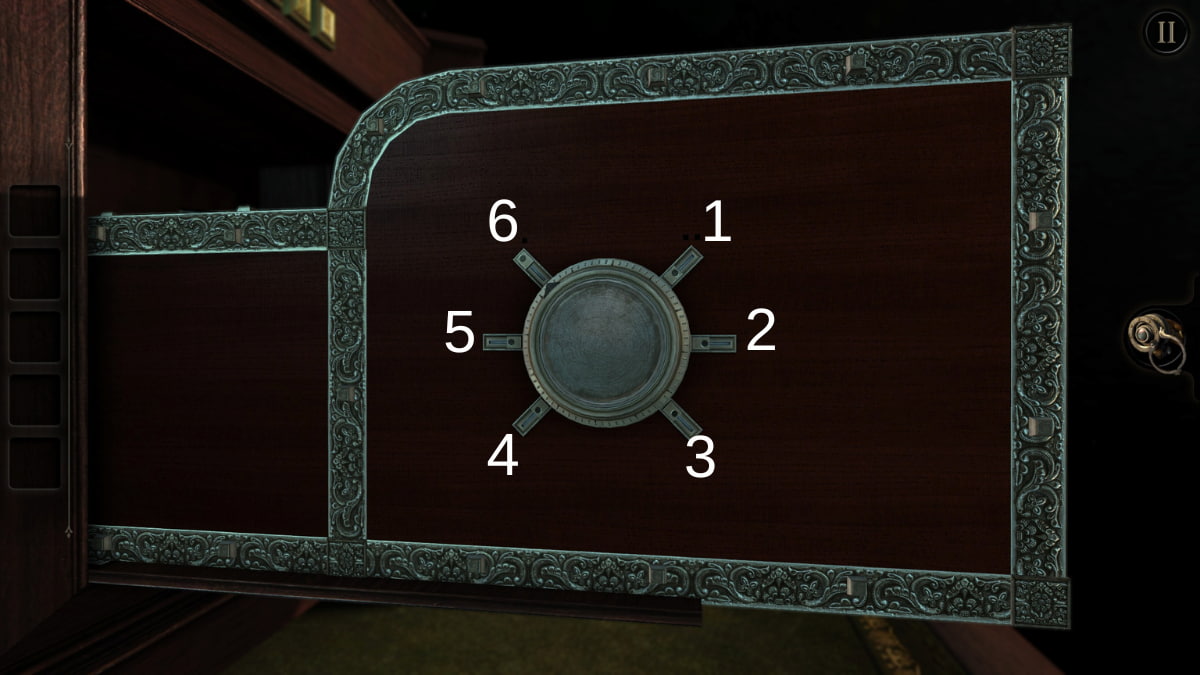
Image by Pro Game Guides

Screenshot by Pro Game Guides

Screenshot by Pro Game Guides

Screenshot by Pro Game Guides

Image by Pro Game Guides

Screenshot by Pro Game Guides

Screenshot by Pro Game Guides

Screenshot by Pro Game Guides

Image by Pro Game Guides

Screenshot by Pro Game Guides

Screenshot by Pro Game Guides

Image by Pro Game Guides

Screenshot by Pro Game Guides

Screenshot by Pro Game Guides

Screenshot by Pro Game Guides

Screenshot by Pro Game Guides

Screenshot by Pro Game Guides

Image by Pro Game Guides


Screenshot by Pro Game Guides


Screenshot by Pro Game Guides

Screenshot by Pro Game Guides

Screenshot by Pro Game Guides

Screenshot by Pro Game Guides

Screenshot by Pro Game Guides

Image by Pro Game Guides

Screenshot by Pro Game Guides

Screenshot by Pro Game Guides

Screenshot by Pro Game Guides

Image by Pro Game Guides

Screenshot by Pro Game Guides

Screenshot by Pro Game Guides

Screenshot by Pro Game Guides

Image by Pro Game Guides

Screenshot by Pro Game Guides

Image by Pro Game Guides

Screenshot by Pro Game Guides

Screenshot by Pro Game Guides

Screenshot by Pro Game Guides

Screenshot by Pro Game Guides

Screenshot by Pro Game Guides

Screenshot by Pro Game Guides

Image by Pro Game Guides

Screenshot by Pro Game Guides

Screenshot by Pro Game Guides

Screenshot by Pro Game Guides

Screenshot by Pro Game Guides

Screenshot by Pro Game Guides

Screenshot by Pro Game Guides

Screenshot by Pro Game Guides

Image by Pro Game Guides

Screenshot by Pro Game Guides

Screenshot by Pro Game Guides

Screenshot by Pro Game Guides

Screenshot by Pro Game Guides
Screenshot by Pro Game Guides

Image by Pro Game Guides

Screenshot by Pro Game Guides

Screenshot by Pro Game Guides

Screenshot by Pro Game Guides

Screenshot by Pro Game Guides

Screenshot by Pro Game Guides

Screenshot by Pro Game Guides

Screenshot by Pro Game Guides


Screenshot by Pro Game Guides

Screenshot by Pro Game Guides

Screenshot by Pro Game Guides

Screenshot by Pro Game Guides

Image by Pro Game Guides

Screenshot by Pro Game Guides

Screenshot by Pro Game Guides

Screenshot by Pro Game Guides

Screenshot by Pro Game Guides

Screenshot by Pro Game Guides

Screenshot by Pro Game Guides

Screenshot by Pro Game Guides

Screenshot by Pro Game Guides

Image by Pro Game Guides

Screenshot by Pro Game Guides

Screenshot by Pro Game Guides

Screenshot by Pro Game Guides

Screenshot by Pro Game Guides

Screenshot by Pro Game Guides

Screenshot by Pro Game Guides

Screenshot by Pro Game Guides

Screenshot by Pro Game Guides

Screenshot by Pro Game Guides

Screenshot by Pro Game Guides

Screenshot by Pro Game Guides

Image by Pro Game Guides

Screenshot by Pro Game Guides

Screenshot by Pro Game Guides

Screenshot by Pro Game Guides

Image by Pro Game Guides

Image by Pro Game Guides

Image by Pro Game Guides

Screenshot by Pro Game Guides

Screenshot by Pro Game Guides

Screenshot by Pro Game Guides

Screenshot by Pro Game Guides

Image by Pro Game Guides

Screenshot by Pro Game Guides

Screenshot by Pro Game Guides

Screenshot by Pro Game Guides

Image by Pro Game Guides

Screenshot by Pro Game Guides

Screenshot by Pro Game Guides

Image by Pro Game Guides

Image by Pro Game Guides

Screenshot by Pro Game Guides

Screenshot by Pro Game Guides

Image by Pro Game Guides

Screenshot by Pro Game Guides

Screenshot by Pro Game Guides

Image by Pro Game Guides

Screenshot by Pro Game Guides

Screenshot by Pro Game Guides

Screenshot by Pro Game Guides

Image by Pro Game Guides

Screenshot by Pro Game Guides

Screenshot by Pro Game Guides

Screenshot by Pro Game Guides

Screenshot by Pro Game Guides

Screenshot by Pro Game Guides

Screenshot by Pro Game Guides

Screenshot by Pro Game Guides

Image by Pro Game Guides

Screenshot by Pro Game Guides

Screenshot by Pro Game Guides

Screenshot by Pro Game Guides

Screenshot by Pro Game Guides

Screenshot by Pro Game Guides

Screenshot by Pro Game Guides

Screenshot by Pro Game Guides

Screenshot by Pro Game Guides

Screenshot by Pro Game Guides

Screenshot by Pro Game Guides

Screenshot by Pro Game Guides

Screenshot by Pro Game Guides

Screenshot by Pro Game Guides

Screenshot by Pro Game Guides

Image by Pro Game Guides

Screenshot by Pro Game Guides

Screenshot by Pro Game Guides

Screenshot by Pro Game Guides

Screenshot by Pro Game Guides

Screenshot by Pro Game Guides

Screenshot by Pro Game Guides
Screenshot by Pro Game Guides
Screenshot by Pro Game Guides

Image by Pro Game Guides

Screenshot by Pro Game Guides

Image by Pro Game Guides

Screenshot by Pro Game Guides

Screenshot by Pro Game Guides

Screenshot by Pro Game Guides

Screenshot by Pro Game Guides

Image by Pro Game Guides

Screenshot by Pro Game Guides

Screenshot by Pro Game Guides

Screenshot by Pro Game Guides

Screenshot by Pro Game Guides

Screenshot by Pro Game Guides

Screenshot by Pro Game Guides

Screenshot by Pro Game Guides

Screenshot by Pro Game Guides

Screenshot by Pro Game Guides

Screenshot by Pro Game Guides

Screenshot by Pro Game Guides

Screenshot by Pro Game Guides

Screenshot by Pro Game Guides

Screenshot by Pro Game Guides

Screenshot by Pro Game Guides

Screenshot by Pro Game Guides

Screenshot by Pro Game Guides

Screenshot by Pro Game Guides

Screenshot by Pro Game Guides

Screenshot by Pro Game Guides

Screenshot by Pro Game Guides
Screenshot by Pro Game Guides
Screenshot by Pro Game Guides

Screenshot by Pro Game Guides

Screenshot by Pro Game Guides

Screenshot by Pro Game Guides

Screenshot by Pro Game Guides

Image by Pro Game Guides

Screenshot by Pro Game Guides

Screenshot by Pro Game Guides

Screenshot by Pro Game Guides

Image by Pro Game Guides

Image by Pro Game Guides

Screenshot by Pro Game Guides

Screenshot by Pro Game Guides

Screenshot by Pro Game Guides

Screenshot by Pro Game Guides

Screenshot by Pro Game Guides

Screenshot by Pro Game Guides

Screenshot by Pro Game Guides

Screenshot by Pro Game Guides

Screenshot by Pro Game Guides

Image by Pro Game Guides

Screenshot by Pro Game Guides

Screenshot by Pro Game Guides

Screenshot by Pro Game Guides

Screenshot by Pro Game Guides

Screenshot by Pro Game Guides

Image by Pro Game Guides

Screenshot by Pro Game Guides

Image by Pro Game Guides

Screenshot by Pro Game Guides

Screenshot by Pro Game Guides

Screenshot by Pro Game Guides

Image by Pro Game Guides

Screenshot by Pro Game Guides

Screenshot by Pro Game Guides

Image by Pro Game Guides

Image by Pro Game Guides

Screenshot by Pro Game Guides

Screenshot by Pro Game Guides

Image by Pro Game Guides

Image by Pro Game Guides

Image by Pro Game Guides

Screenshot by Pro Game Guides

Image by Pro Game Guides

Screenshot by Pro Game Guides

Screenshot by Pro Game Guides

Screenshot by Pro Game Guides

Screenshot by Pro Game Guides

Screenshot by Pro Game Guides

Screenshot by Pro Game Guides

Screenshot by Pro Game Guides

Screenshot by Pro Game Guides

Screenshot by Pro Game Guides

Screenshot by Pro Game Guides

Screenshot by Pro Game Guides

Screenshot by Pro Game Guides

Screenshot by Pro Game Guides

Screenshot by Pro Game Guides

Screenshot by Pro Game Guides

Screenshot by Pro Game Guides

Screenshot by Pro Game Guides

Screenshot by Pro Game Guides

Screenshot by Pro Game Guides

Screenshot by Pro Game Guides

Screenshot by Pro Game Guides

Screenshot by Pro Game Guides

Screenshot by Pro Game Guides

Screenshot by Pro Game Guides

Screenshot by Pro Game Guides

Screenshot by Pro Game Guides

Screenshot by Pro Game Guides

Screenshot by Pro Game Guides

Screenshot by Pro Game Guides

Screenshot by Pro Game Guides

Screenshot by Pro Game Guides

Screenshot by Pro Game Guides

Screenshot by Pro Game Guides


Screenshot by Pro Game Guides

Screenshot by Pro Game Guides

Screenshot by Pro Game Guides

Screenshot by Pro Game Guides

Screenshot by Pro Game Guides

Screenshot by Pro Game Guides

Screenshot by Pro Game Guides

Screenshot by Pro Game Guides

Screenshot by Pro Game Guides

Screenshot by Pro Game Guides

Screenshot by Pro Game Guides

Screenshot by Pro Game Guides

Screenshot by Pro Game Guides

Screenshot by Pro Game Guides

Screenshot by Pro Game Guides

Screenshot by Pro Game Guides

Screenshot by Pro Game Guides

Screenshot by Pro Game Guides

Screenshot by Pro Game Guides

Screenshot by Pro Game Guides

Screenshot by Pro Game Guides

Screenshot by Pro Game Guides

Screenshot by Pro Game Guides

Screenshot by Pro Game Guides

Screenshot by Pro Game Guides

Screenshot by Pro Game Guides
Screenshot by Pro Game Guides
