Purging the dependency .
crook - base tactical RPG King Arthur : Legion IX sees you contribute a team of undead centurions into Avalon . If you ’re working through the The Colony quest , read on for my complete walkthrough and mapping .
King Arthur Legion IX - The Colony Quest Walkthrough
You commence the seeking by being immediately throw into a struggle in Area 1 . You ’ll face10 undead , all of whom are weak and have no special abilities . As long as you keep an eye on their range ( which is weak ) and mark yourselves up with Overwatch rather than leaving yourself vulnerable to assail , you’re able to come out of the engagement totally whole . There areno ranged enemiesandno sum up .
There is no loot in the arena and the only point of pursuit is a Statue of Vesta ( which gives no benefits ) . There is a unmarried going out of the elbow room , so move forward .
Destroy the Totems
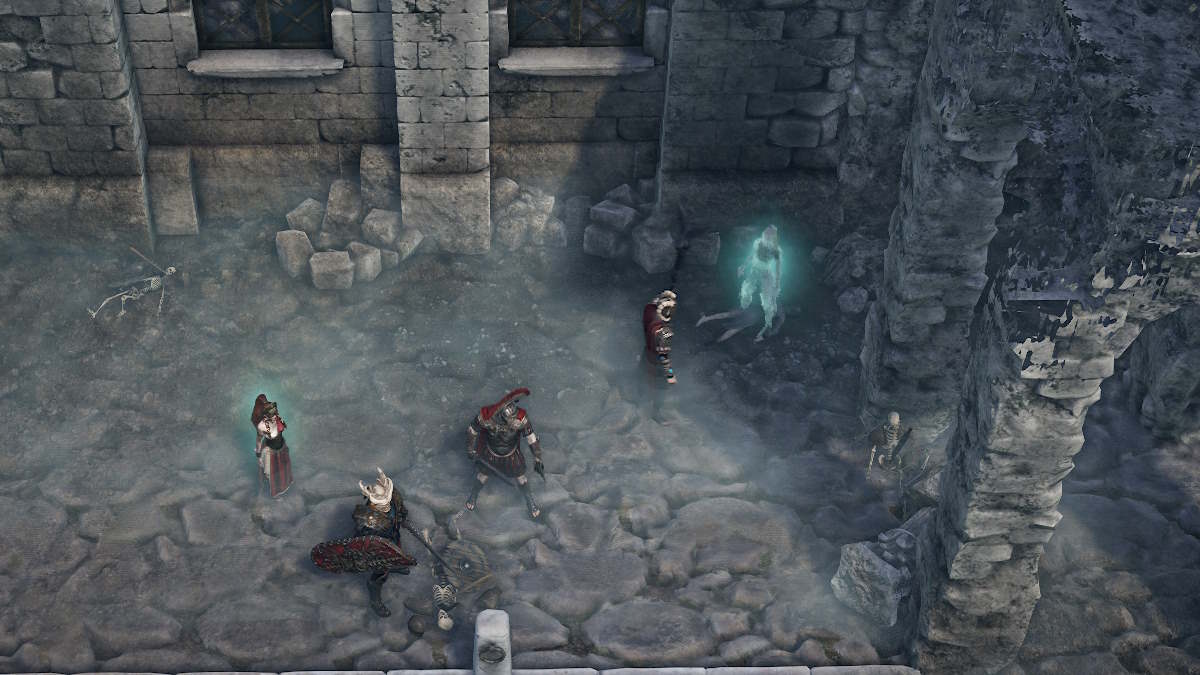
As you go in the next area ( orbit 2 on the mapping above ) you ’ll see a role floating in a blue glow between four totems . Again , you will spark off an unavoidable battle as you enter . The best maneuver here is todestroy the totems as quickly as possible . Each totem can spawn more undead at the final stage of each turn , so the fast you take them out the few summate you ’ll have to dole out with ( the two totems on opposite corners trigger together ) .
If a totem is going to tote up a creature at the end of the bit , ablue pentagramwill seem on the floor next to it the old turn ( see above ) , give you one turn to destroy it beforehand . You will have to clear all the enemies to discharge the conflict , and one is reasonably tough ( aLost Knightwith substantial armour and 20 + vitality ) . Once complete , the blue glow will dissipate andAlbina Virgilawill bring together your party . There will also now be achestto exposed in the area ( marked on your map in honey oil ) .
Exploring the colony
Leave the area south to enter a small court ( surface area 3 ) . There is aRest Spothere but you should n’t call for it yet . There are three Rest Spots in The Colony , but it is best to economize them for later as knotty challenges look .
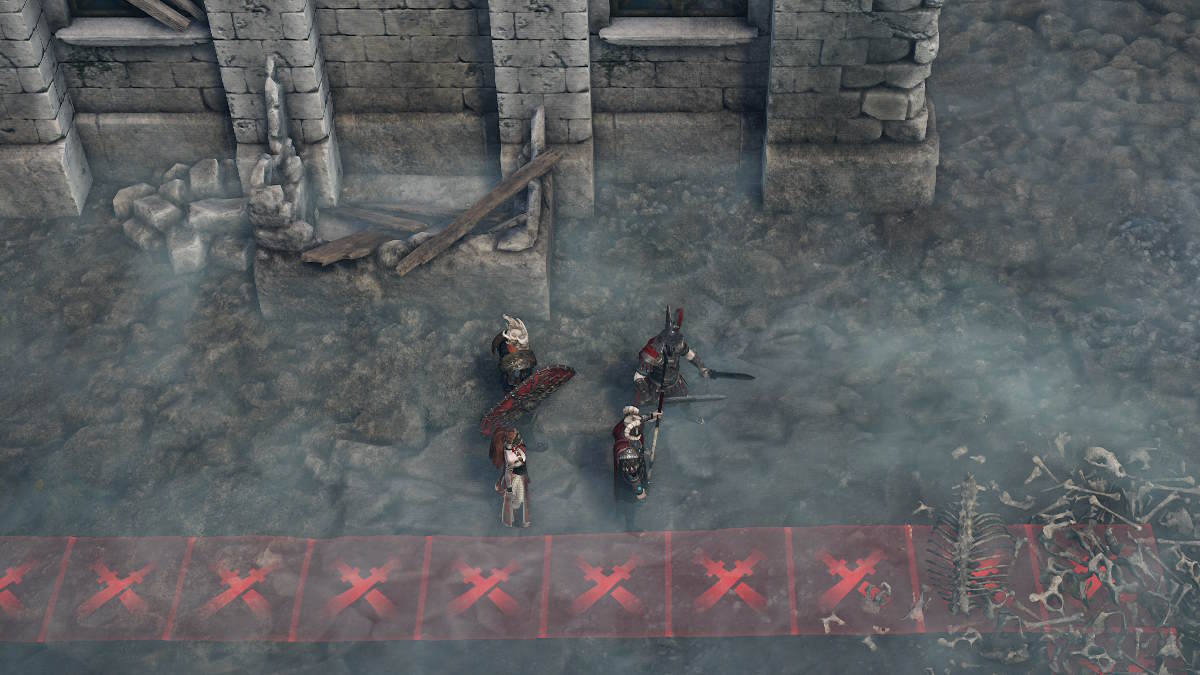
Leave this area south ( to Area 4 ) and you ’ll get a cut shot where Albina explains how to complete this missionary work . Don’t start the commission yet . Instead , after the cut scene , head east along next to the paries , avoiding the red squaresmarked with swords ( see the figure of speech above ) . If you touch them you ’ll begin a battle but they ’re wanton to invalidate .
When you get to the pile of bones ( in the image above ) , lead north to theBathhouse(Area 5 ) . This is another safe field that has the secondRest Spot(down the thin all in - end alley going east ) and also the onlyShrineon the map . This gives one of your unitsLasting Bliss(+25 percent Damage ) until the end of the mission , which is why it ’s best to avoid other struggle until you ’ve got it . I give it toGaius , but it ’s a great boost to any of your social unit .

From here you have three choices . These can be done in any order you choose and onlyReignite the Vista Fire is expect to finish the commission . If you want to complete all three field , which will sack you the most loot chests , I indicate the follow guild :
Once you click onFinish Mission(available any clip after you complete Reignite the Vista flame ) , you will not be able to refund to any of these quest location .
The Marketplace and the Curse
If you leave Area 3 to the Benjamin West you ’ll enter the Marketplace ( Area 7 ) . As you enter , Albina will be cursed with Weakness . This will reduce her damage by 33 percent for the rest period of the missionary station unless you cure it . you may just choose not to enter the Marketplace at all but if you require a full completion including all hoarded wealth chest of drawers , move in the south into the market place ( after catch cursed ) to be attack .
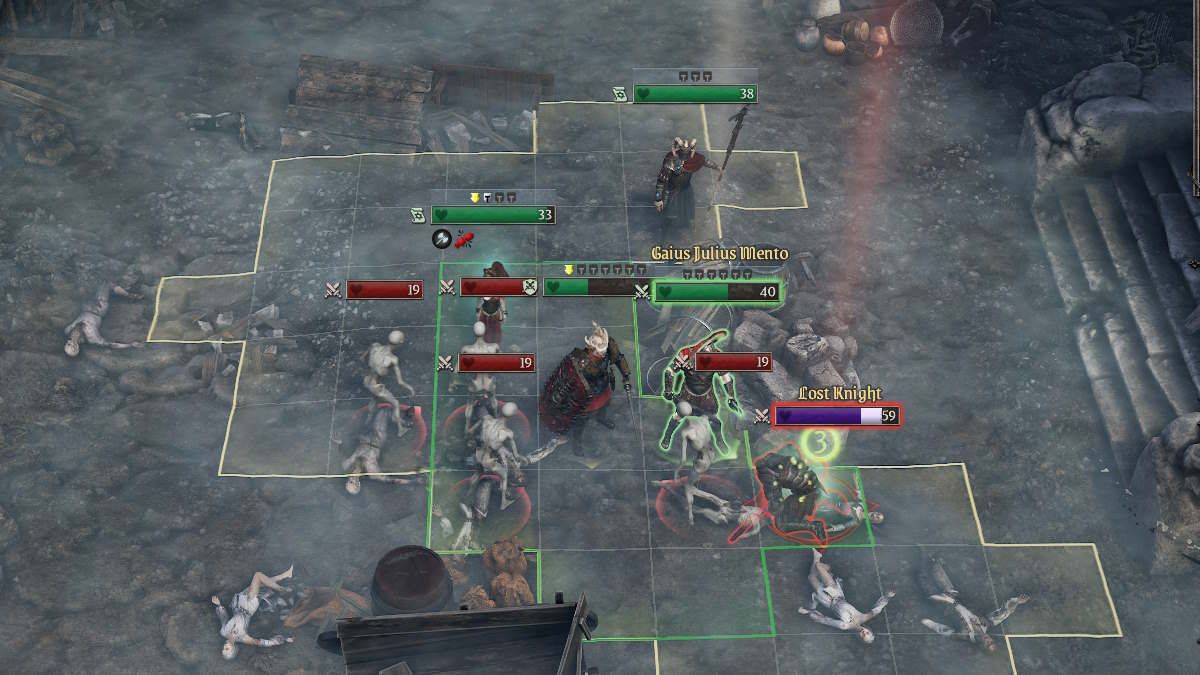
You ’ll commence with a couple of units north of you and many more to the S . Take out the northern units quickly by weakening them with Albina’sFire Strikesand then finish the others off , one each , with your other three social unit . you may now regroup around the rubbish oodles you lead off next to and wait for the rest period to fare to you . There are more than10 additional unitsto the south but no further adds .
All the units only have battle royal attacks and all but one ( theLost Knight ) are weak . The best tactic is to line up Gaius , Octavius , and Albina , with Plutonius behind ( see above ) . This stops any backstab attack on you and circumscribe the number of enemy that can lash out in one turn . observe the Lost Knight need to be killed twice ( the second clock time while it is down , within three turns of its initial death ) . Otherwise , it will reanimate .
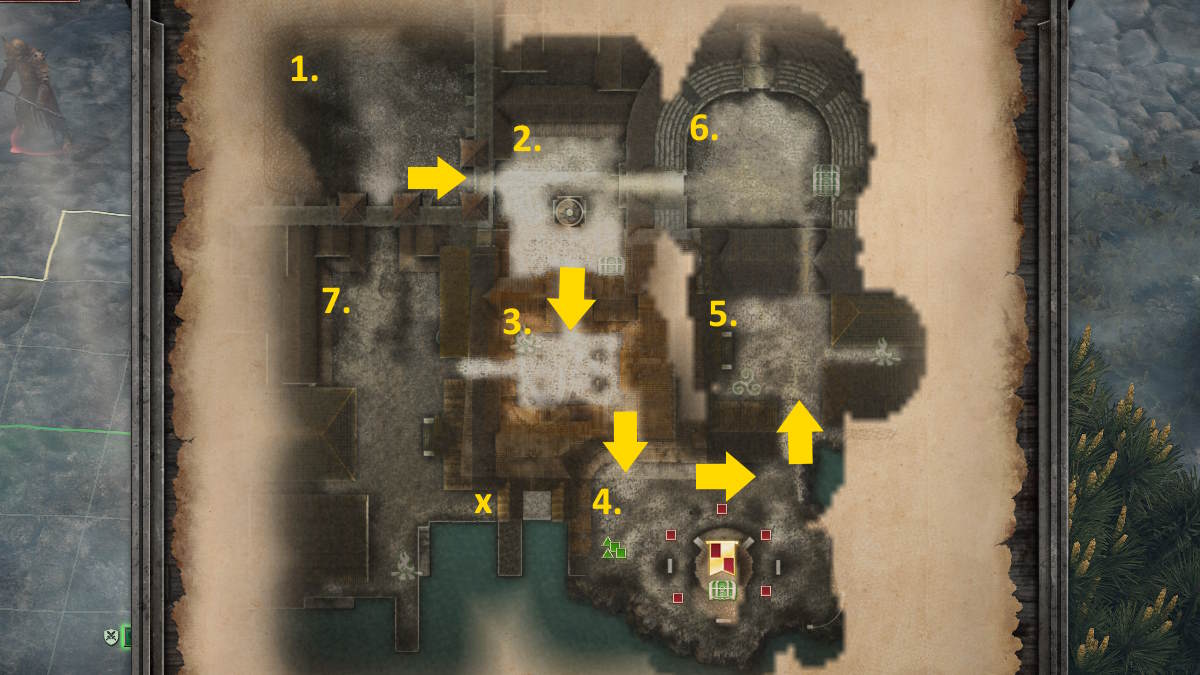
Image by Pro Game Guides
Once you have defeated all the enemy , head in the south through the market place and down the alley in the southeasterly street corner ( marked with an disco biscuit on the map above ) . There you canlift Albina ’s curseby interacting with the glow clay ( see effigy above ) .
The Amphitheater
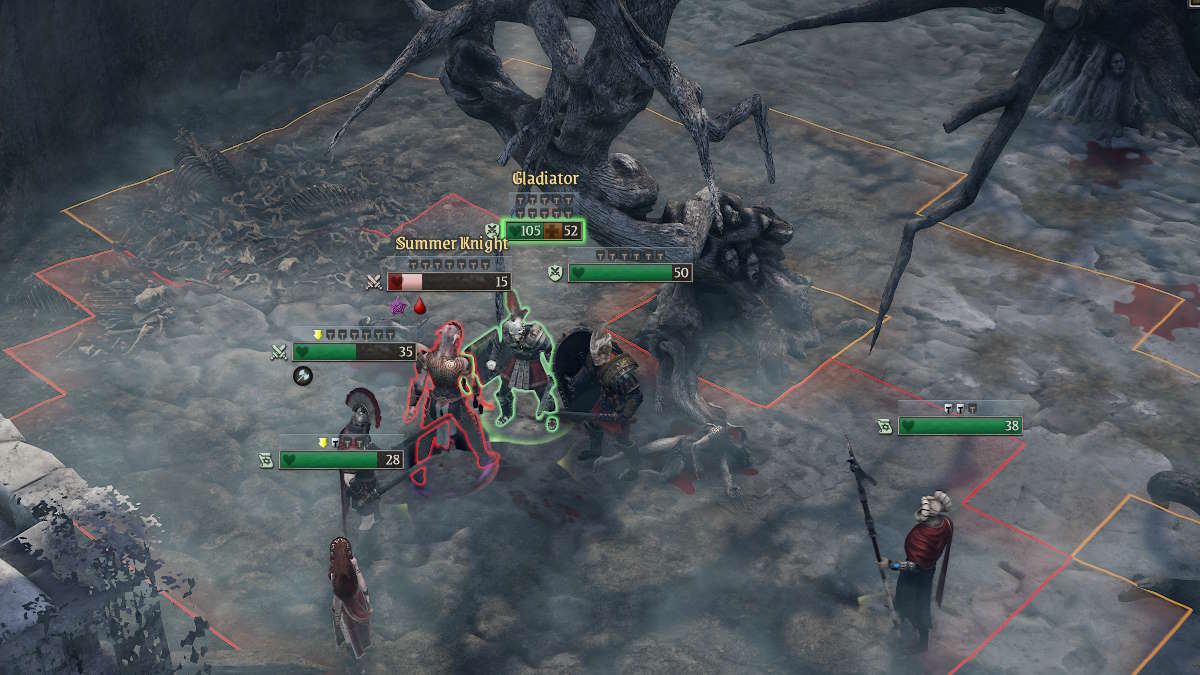
If you leave the bathhouse sphere northward you ’ll go into theAmphitheater(Area 6 ) and speak to its spirit . The flavour will take exception you to take onthree challenges(battles ) . These are completelyoptionalbut each will reward you with a gem chest on completion . you could stop after any challenge , go and utilise Rest Spots , and reelect to proceed at any time during the mission . You must defeat all social unit in each battle but there are no ADD .
you could collect the hoarded wealth chest of drawers for completed battles ( distinguish on the single-valued function in green , on the east side of the sports stadium ) at any time .
Reignite the Vista Fire
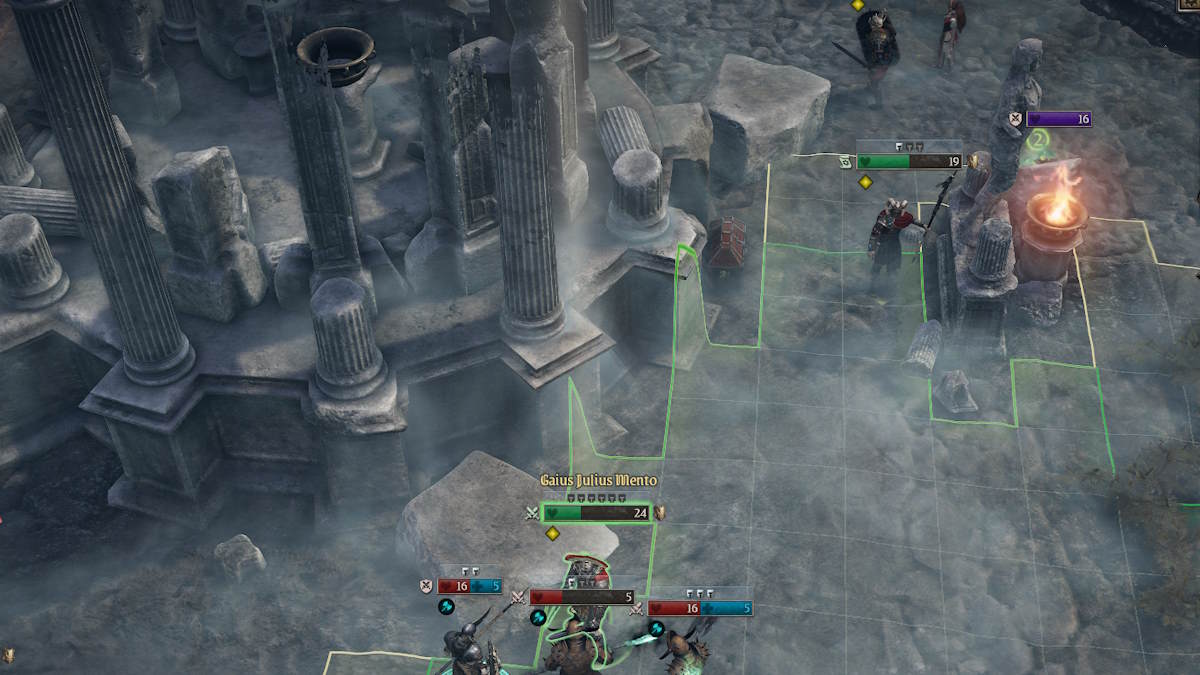
When you ’re quick , recall to Area 4 . As soonas you relate a red brand squarethe battle will begin and that marks your start placement for the battle . perspective is important here so you need tochoose where to commence wisely .
You postulate tolight all five torchesin the struggle surface area to finish the pursuance . Unlike the earlier battle to unblock Albina , as soon as youlight the fifth torch all the remaining enemy will die . Each torch has several pink square next to it and when Albina stands on one of these spaces ( picture above ) , the torch will automatically be light . This does not use any AP butonly Albina can light the torch , so keeping her alive is a victory shape .
tote up will arrive regularlyand this can not be stopped . To make thing worse , undead kill here need to be shoot down twice , or else they will resurrect at full vitality after three turns . When you kill them , they ’ll get apurple wellness calibre . trim down this to zero and they wo n’t come back . I send word you to only do this if you have spare AP and have left one of your units alone as a bait . This battle is a raceso your time is intimately spent moving to the next torch .
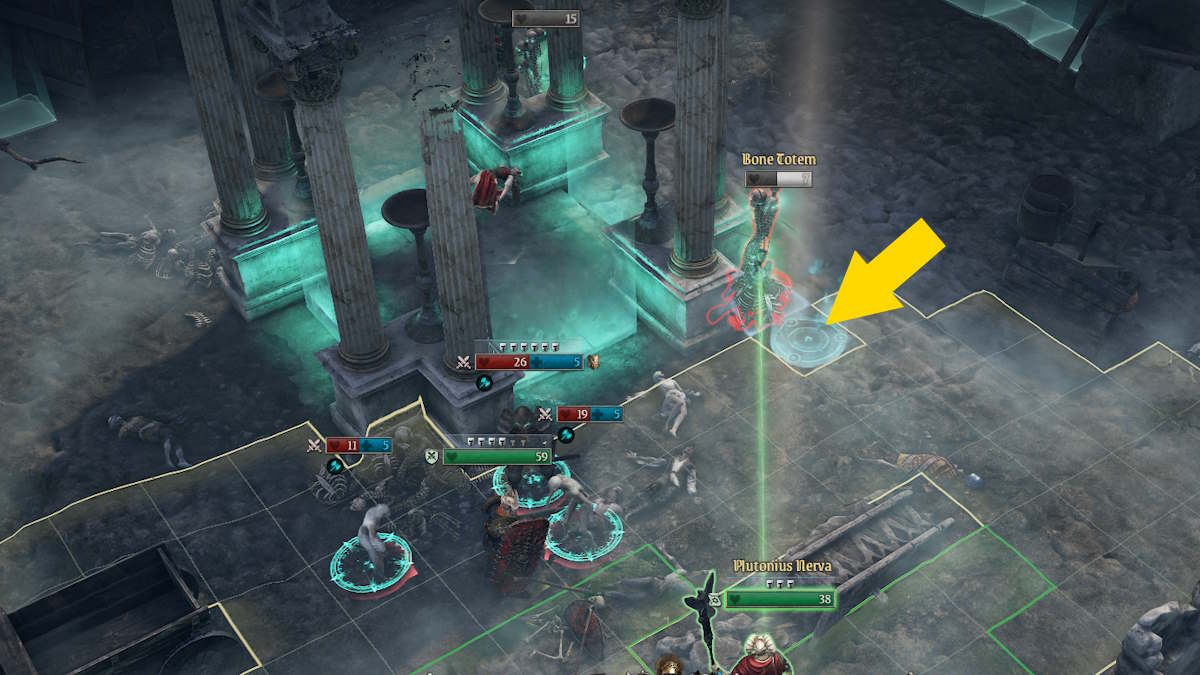
Image by Pro Game Guides
you could see the five flashlight fix on the map above ( strike out as cerise squares in Area 4 ) . There is no right way to do this , as the order you perch the blowlamp does n’t matter and does not impress the adds . start above central northerly torchesallows you to get two very rapidly and then work clockwise around the central structure to get the rest .
The welfare of this approach isthe bestow are slowand will tend to travel along you around the primal construction without really catch you up , as long you work as a squad to take down any units in front of you and keep moving . You also get aMovement Bonuseach time Albina lights a torch . will one building block behind ( see Gaius above ) to slow them down is also a valid tactic . You should be able tolight all the woolly mullein in about six troll .
When Albina light the last torch , any remaining unit will be destroyed . You ’ll see achest marked on your mapjust to the southward of the central flame . Once collected , you could finish the mission . or else , if you ’ve yet to complete the Amphitheater or Marketplace areas , you could optionally do them now .
Screenshot by Pro Game Guides
For more quest information in King Arthur : Legion IX , check outHow to save the trader in The Trader pursuit - King Arthur Legion IX here at Pro Game Guides !
Screenshot by Pro Game Guides
Screenshot by Pro Game Guides
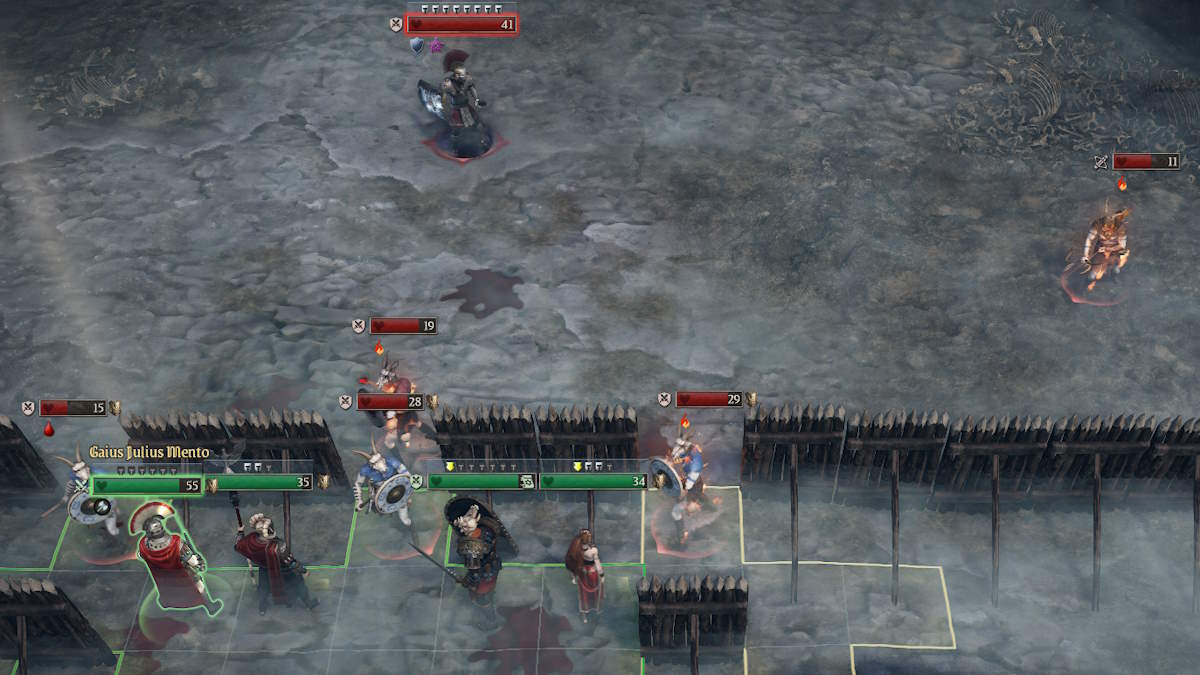
Image by Pro Game Guides
Screenshot by Pro Game Guides
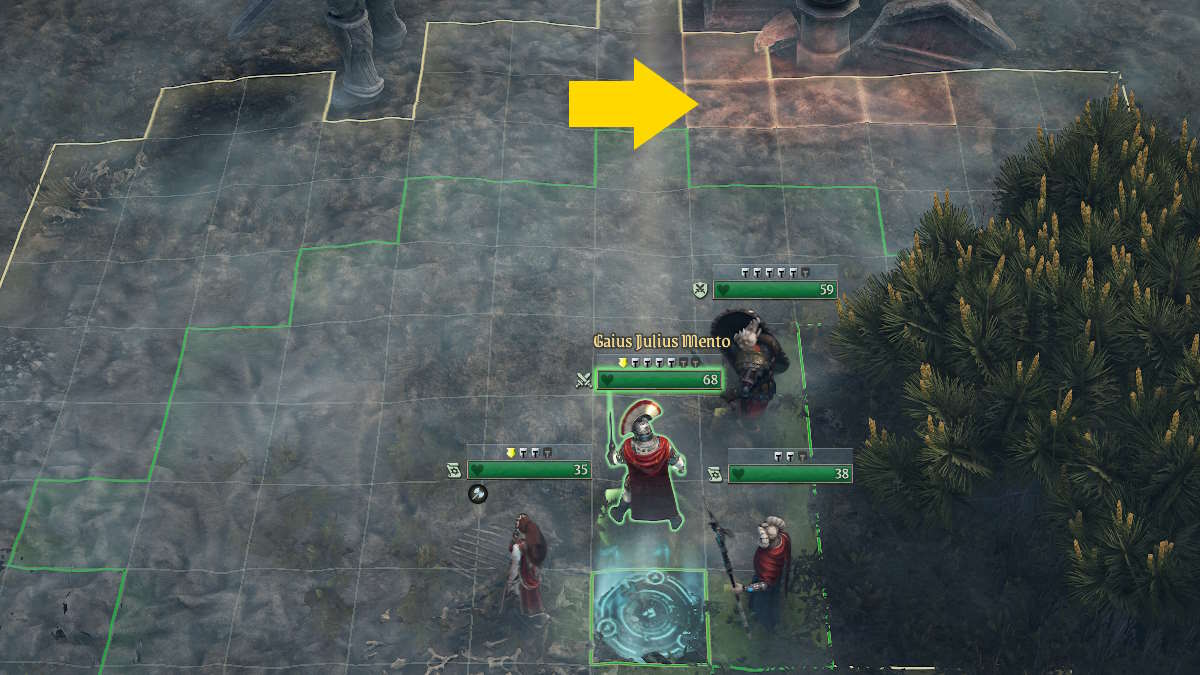
Image by Pro Game Guides
Screenshot by Pro Game Guides
