A murder in the mill , take 5 , and action !
The Casting of Frank Stone is a repugnance biz determine in the world of Dead by Daylight from the developer Supermassive Games . There are burden of choice , several endings , and a clump of collectibles . to get 100 % of this weirdie claim , you ’ll want to utilise our The Casting of Frank Stone walkthrough .
notice : this walkthrough is a body of work in progress and will be updated on a regular basis and promptly until it ’s complete .
The Casting of Frank Stone Walkthrough - All Chapters
so as to finish this one , you will need to find all the collectibles and complete all the 32 achievements in The cast of Frank Stone . This guide is split up by chapter , going over what each different choice will get you , how to get everyone to survive , all the end , and everything else you ’ll demand to complete it .
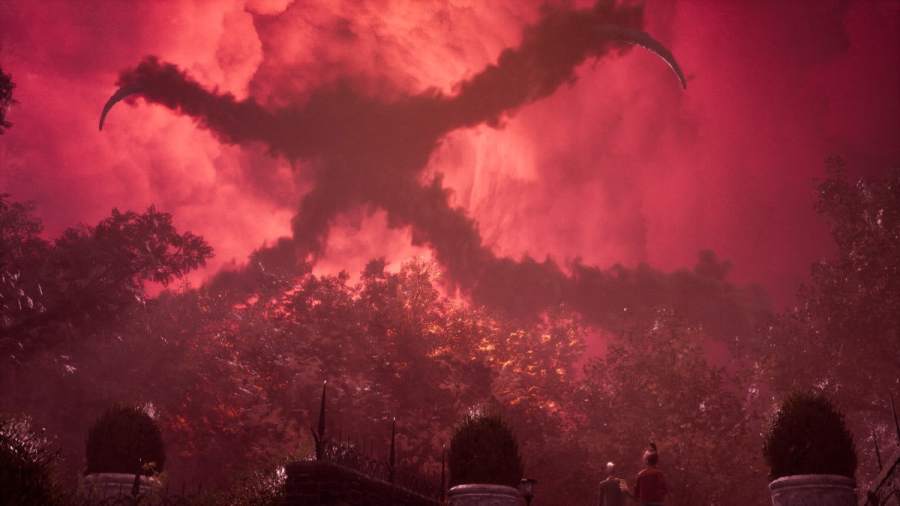
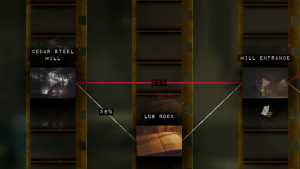
Chapter 1: The Burning Maw
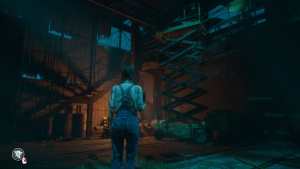
This chapter takes place in 1963 at the pulverization that will be important to the rest of the story . In it , you wager as Sam Green , the police officer who interrupt a serial killer before he can take his last victim .
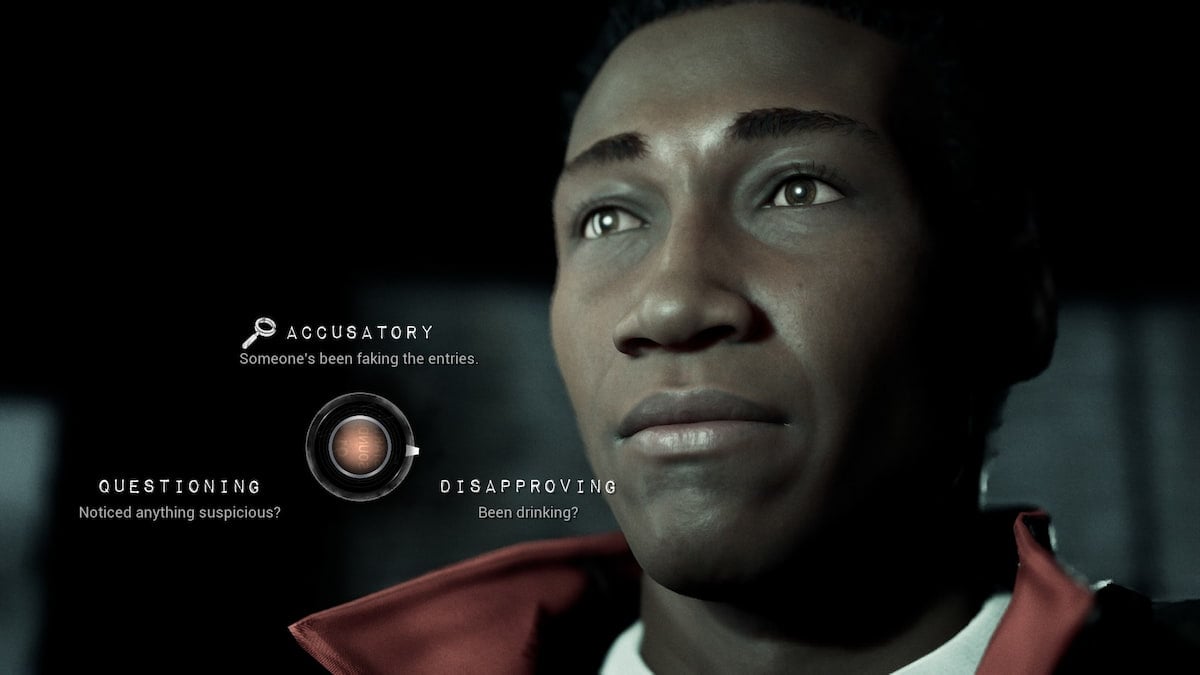
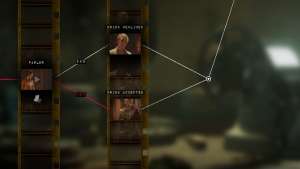
As you draw up the mill , you find Tom , the dark watch . You will have several choices to make while in conversation with him . There are two potential outcomes to the conversation with Tom ; most choices will get you to contend or babble out to Tom about who has looked around , and the others will let you tolook into the logbookand occur up with some insights . Here ’s how to unlock bothsplit pathsfor this scene :
After speaking with Tom , it ’s time to head into the mill itself . There are several payable items here and a couple of itinerary pick for Sam to make .
Screenshot by Pro Game Guides
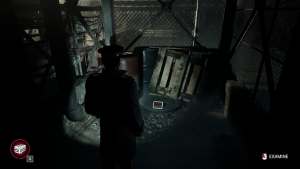
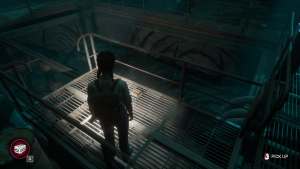
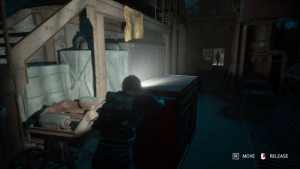
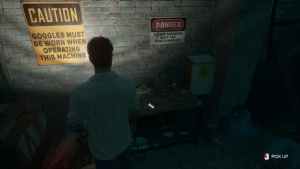
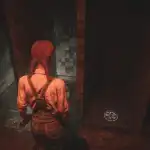
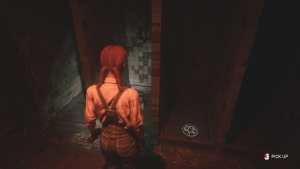
When you first gain restraint of Officer Green , you will be able-bodied to come up the first of twelveTrinketcollectibles . It will be hidden behind the section above . You need to press into the crevasse marked on the screenshot above , then look around inside for a small boxwood on the soil .
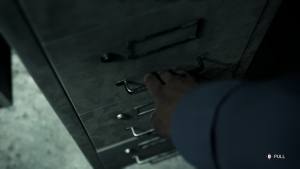
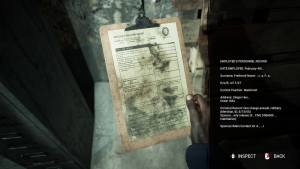
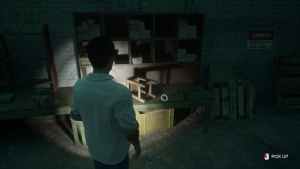
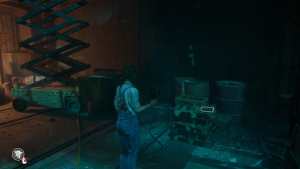
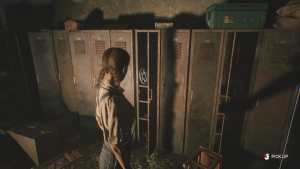
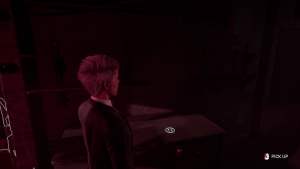
Once inside , you will want to pressure through stack of steel canvas , then through a door . Once you are in the office , you will have afiling cabinetand a sheet ofpaperyou can interact with . If you shake the filing cabinet , a clipboard with Frank Stone’sStaff Filewill return out . This is an importantArtifact , and there will be several more throughout the game .
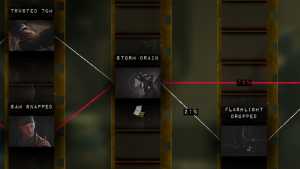
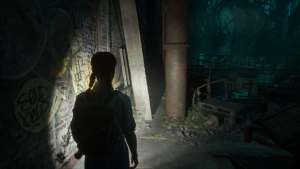
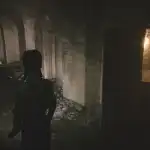
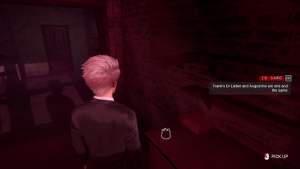
keep on through the warehouse , and you will add up across Tom again as well as Merlin the dog . After leaving the national location , you will come across a grating that Sam wishes to move . This requires the help of acrowbar , which is find by jumping over this section of the fence and grab it .
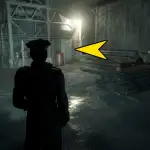
Image by Pro Game Guides
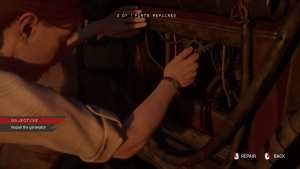
Jump back over to the other side , then click thecrowbaron the grate to open it with a elementary Quick Time Event ( QTE).This QTE will be anothersplit itinerary .
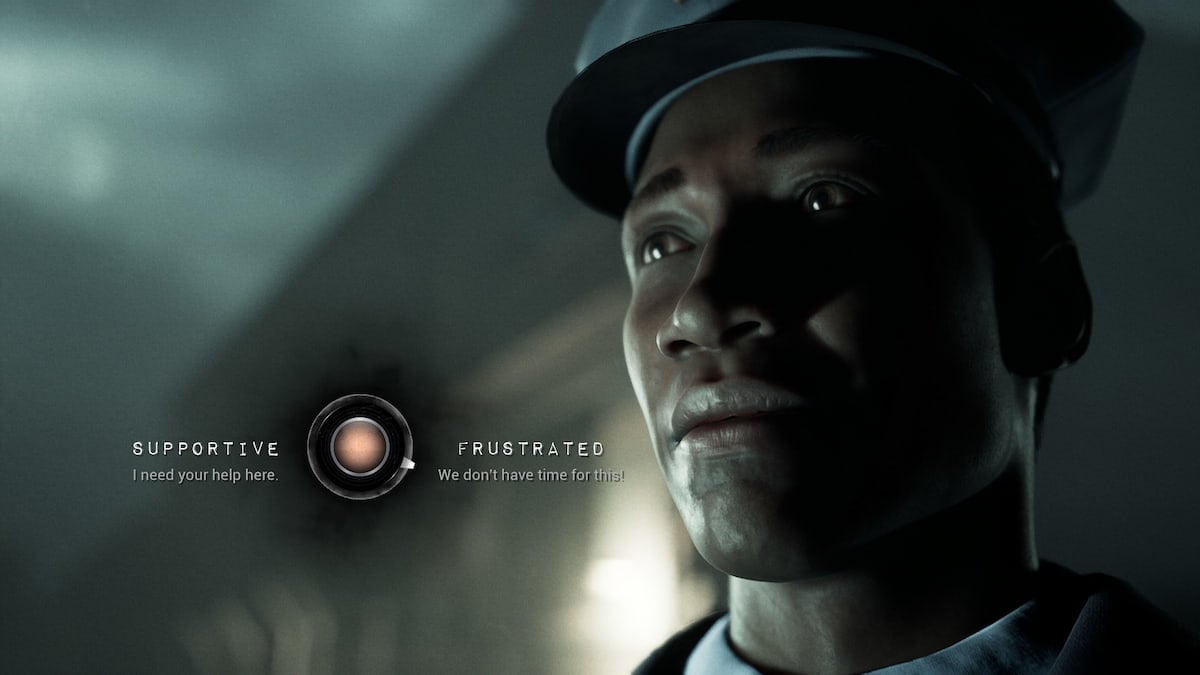
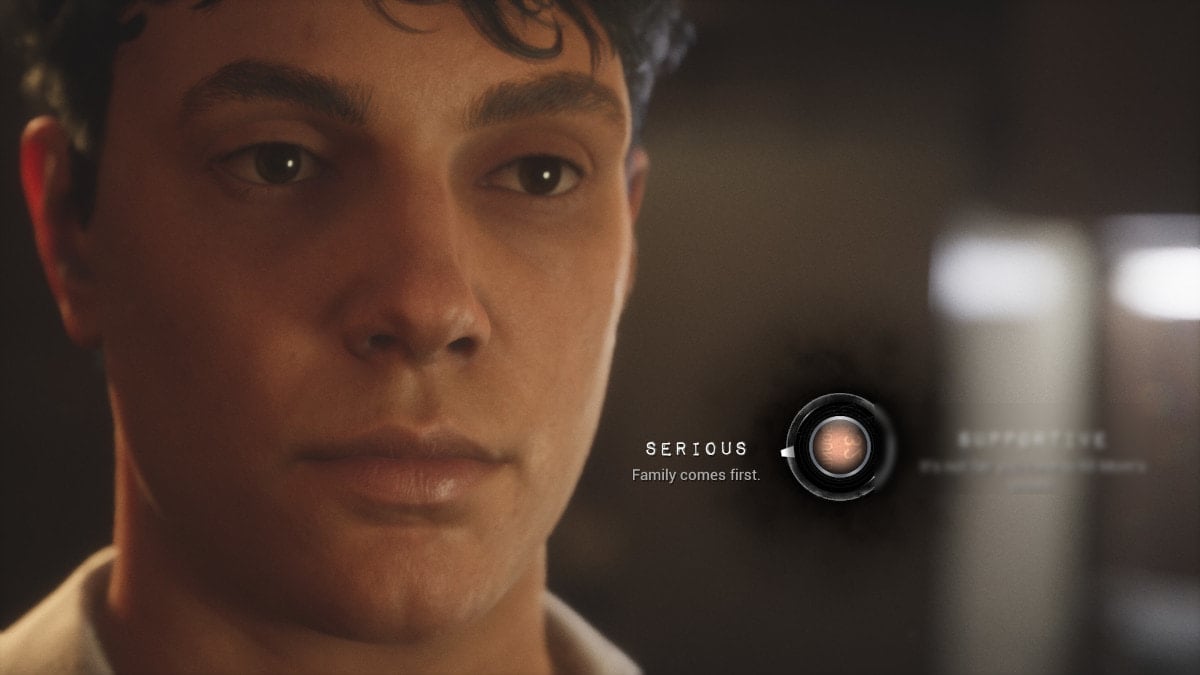
Completing this will begin a duologue with Tom again . you’re able to choose to be genial or signify , creating yet anothersplit path .
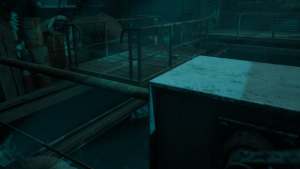
It ’s prison term to mount down into the violent storm drain . The ladder will crack underneath you , making it impossible to return to surface this way . So you have no choice but to head down into the furnace itself .
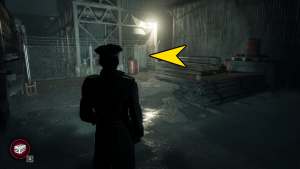
Image by Pro Game Guides
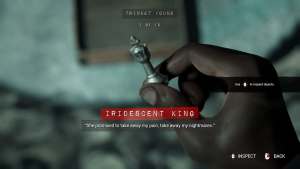
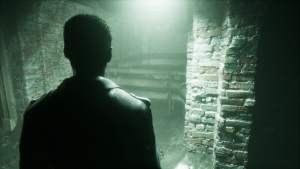
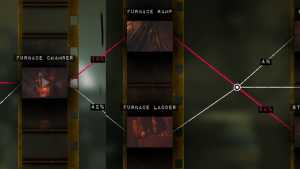
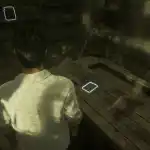
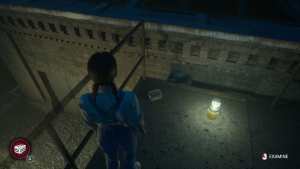
After dropping down into the hush-hush furnace burrow , you will degenerate your hat . You will start this section always facing towards the furnace area , but this trinket will be in the other direction . So turn around from your start posture , then make the first leave down the tunnel . On the proper side wall , there will be an undetermined threshold . Inside this room is another wooden corner on the trading floor with the horseTrinket .
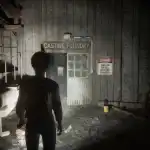
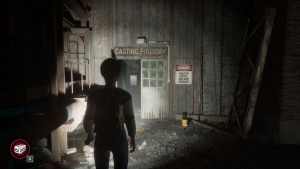
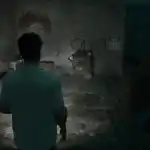
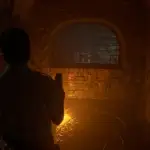
As you channelise towards the furnace from the position you expend down , you will have to turn right into a well - fall burrow mark with a yellow sign that says " Furnace Access . " On the wall next to this planetary house will be asymbolof a crude arm paint on the wall . This is the Champion Artifact 2 . There are really a span of these , but the game only weigh the first one you interact with
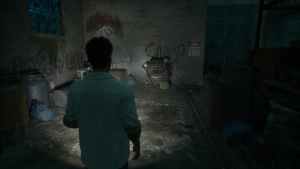
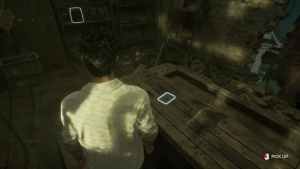
Just before the first emplacement where Sam has to crawl , look to the rightfield . There will be some pipes that are blue enough to jump over ; theHillbilly Rellikwill be on the other side of the pipage on the solid ground . After you finish grovel though the Australian crawl blank , then you will call for to squeeze past a plane section of wall . After that will be anotherQTE ; for this one , you will either :
Screenshot by Pro Game Guides
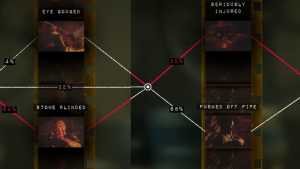
After make it into the furnace and seeing the baby , you will have the choice between taking either the :
Both are triggers for another QTE ; you will fall and face a second QTE if you fail . Either way , you will get up to face another path once you are in fight with Frank Stone .
The next track come with the QTE when you demand to react to getting hang up on the bulwark .
Screenshot by Pro Game Guides
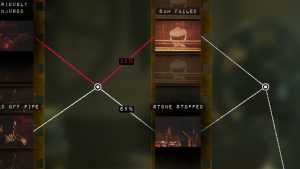
In the final path in Chapter 1 , you could eitherFail to stop Frank Stoneand the babe give out , or you canshoot Frank Stoneand save the infant .
accomplishment -Savior : Sam stopped Frank Stone .
Chapter 2: In the House of Darkness
Chapter 2 takes space in modernistic day England . You are Madi , a young college student who has fix an mystic invite from a charwoman who has asked her to visit her mansion : Gerant Manor .
After a bad incubus , you wake on a plane on the elbow room from Berlin to England . You then end up in a rental machine , drive along a very belittled , out - of - the - way route . You have a choice as you come up on a stranger whose car has a monotonic tyre and is attempt to hitchhike . You havefive secondsto determine to clean her up or not .
Achievement - Fellow Traveller : Madi picked up the hitchhiker .
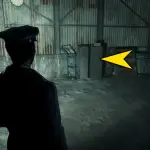
Image by Pro Game Guides
After entering the manor , you will still be controlling Madi . There will be a couple of items you will desire to look at to facilitate you 100 % this part . It ’s a pretty short chapter , so it wo n’t be difficult to get all the possible choices .
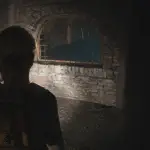
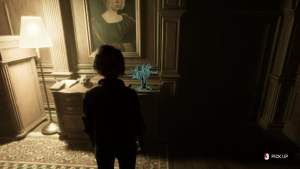
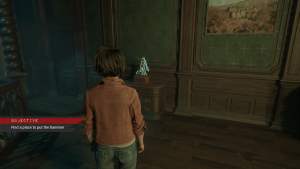
Before exploring the downstairs , head up the step and to the leftfield . There will be an unsecured room access to a session elbow room ; it will hold in a piano to the rightfulness , a few lounge in front of a howl fireplace in the center , and two target on two different table to the left hand by the window . Pick up the letter of the alphabet to get the first Storyteller Artifact .
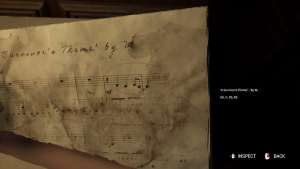
lead on a higher floor from the lobby , and interact with the tables at the top of the first set of steps . There will be some music at the top on a scrap of paper . Look at it , then head into the only room on the top flooring you may go into . within will be a piano;interact with it to play the music from the sheet . A secret passage will open up up , and the Rellik will be in the room at the bottom of the stairs .
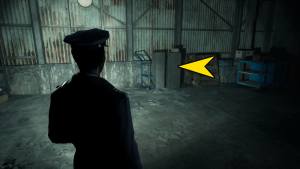
Image by Pro Game Guides
Achievement - Motif : spiel a familiar theme on the piano .
On the bottom level , you’re able to ascertain a hardening of two-fold doors that are unbarred . If you manoeuvre inside , you ’ll fill Stan , another person who has been invited to this manor house .
On a table in the back of the room , there is a written matter of the Epic of Gilgamesh . deep down , you may ascertain notes and highlight . This is another Artifact .
Screenshot by Pro Game Guides
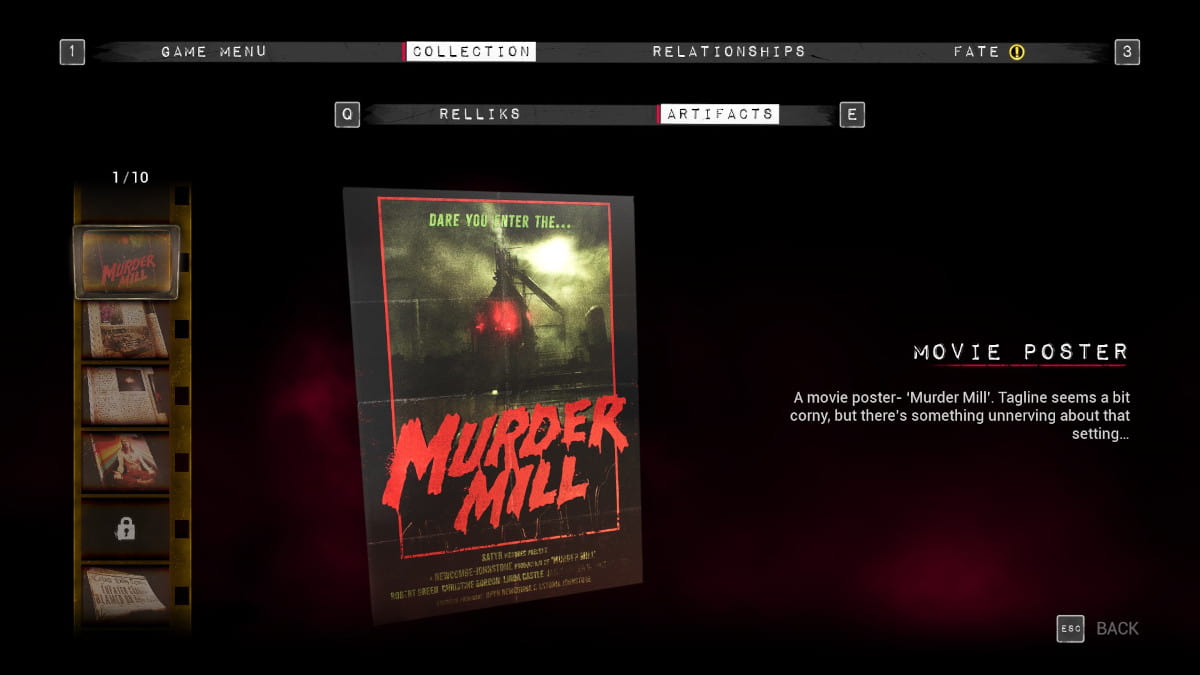
so as to move the plot forrad , you need to open a cabinet on the wall by the door you came in . open up it up will give you the first Murder Mill Artifact . After this , you ’ll get a long cutscene with your host , and she will enquire you if you need a drink . Madi can either become it down or take her up on it .
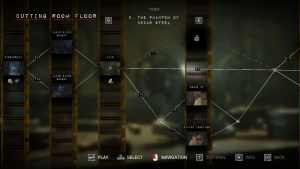
This will get you all of the potential route for Chapter 2 , replete out this section of the Cutting Room Floor .
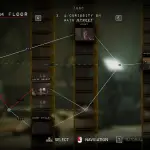
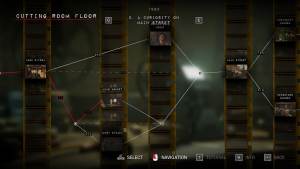
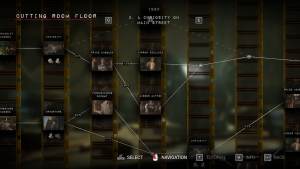
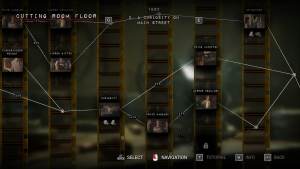
Chapter 3: A Curiosity on Main Street
In Chapter 3 , you are back in 1980 , as a mathematical group of stripling are filming in the empty mill . While filming , you will trifle as Jamie as he is being filmed by his admirer Linda and his lady friend Chris .
You will have a couple of choices or QTEs during filming ( none of which are path in the game ) , then you will have a few more determination to make after Sam Green interrupts your filmmaking .
Achievement - Easy Money : Jaime accept the bribe from Sam .
Screenshot by Pro Game Guides
Back in the Rivera service department , you get to receive up with Bonnie , Jamie ’s sr. sis . You have the option to ask her for money , but only if you are nice to her .
Achievement - Five Finger Discount : Jaime steal money from Bonnie .
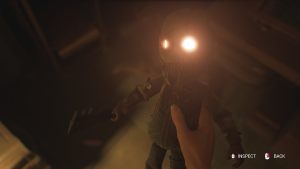
When you are inside the curiosity store , you may recover a Rellik , regardless of whether you go there first or 2d . With your back to the entrance , go all the elbow room to the back of the store on the right side , walking right by the chit out counter , then to the very back . This Rellik will be on the ground in the back right corner of the depot .
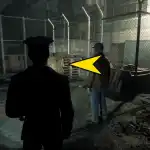
Image by Pro Game Guides
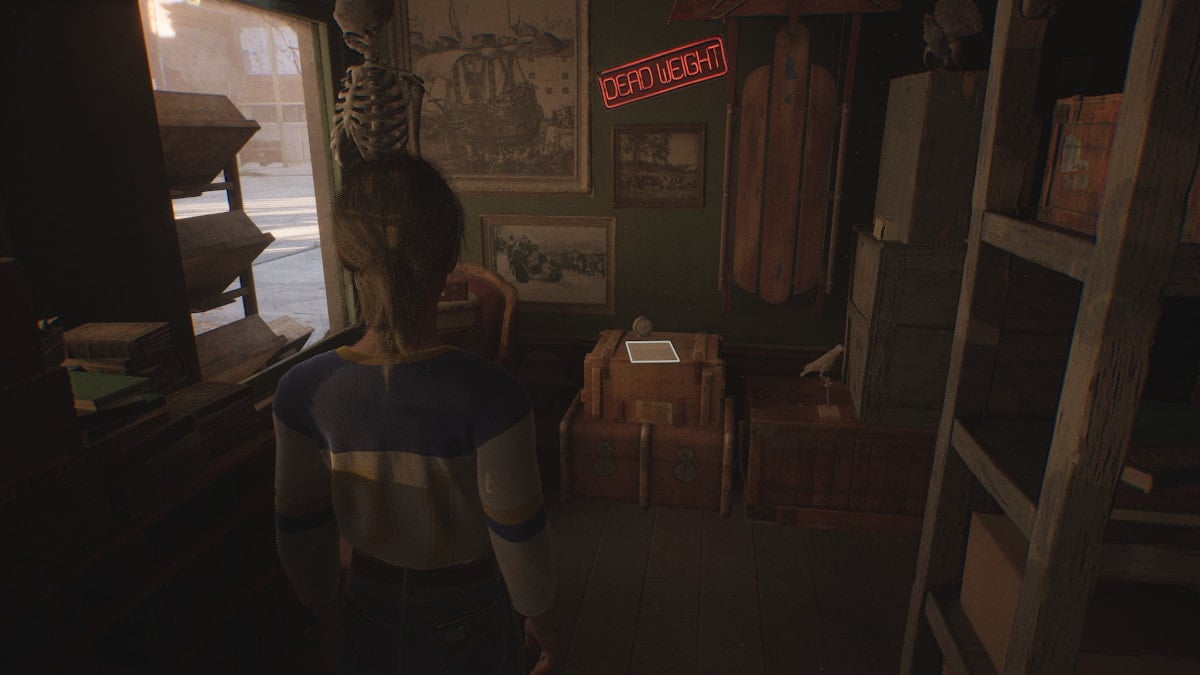
Before leaving the curiosity shop , make certain to look to the left of the front door . Underneath the sign that tell " Dead Weight " near the window , you could obtain a piece of paper on a couple of torso . This letter is a Storyteller Artifact .
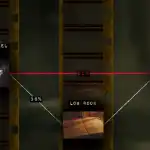
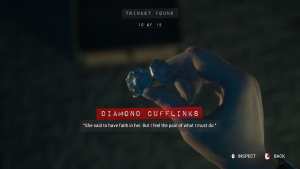
In theDrugstore , you could complete an achievement and blame up another bangle collectible . In ordering to finish the achievement , you involve to play the arcade locker ring Fear Trap in the back of the chemist’s shop until you get high score . It ’s a Space Invaders clone , and you need toscore 5040or more points to get the top spot .
Achievement - 8 minute Hero : get the mellow score on the arcade machine .

Image by Pro Game Guides
In the Drugstore on the soda jerk counter , there is a magazine open to an article about lose movie . This is a Murder Mill Collectible .
After mistreat into the Drugstore , when facing aside from the entrance , head to the gangway furthest to the right field . In this aisle will be a small box seat on the odd side , bottom ledge , about midway down the aisle . In this box , you will find anothertrinket , the Waterlogged Shoe .
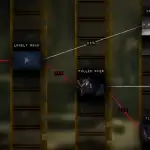
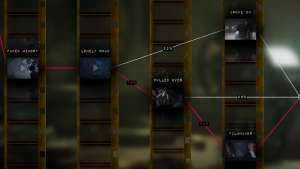
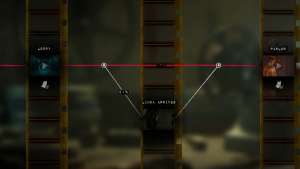
Here are all the possible timelines and choices from Chapter 3 :
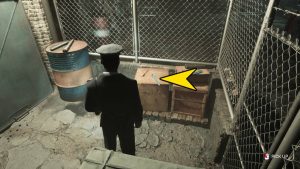
Image by Pro Game Guides
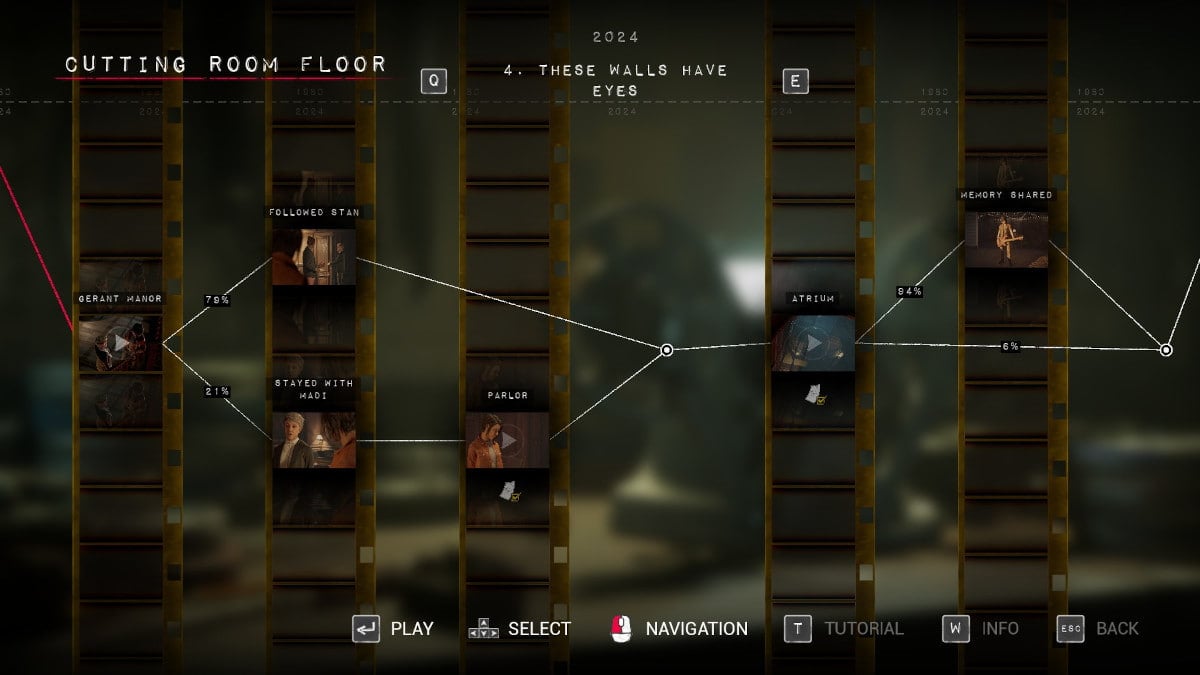
Chapter 4: These Walls Have Eyes
It ’s prison term to catch up with Linda in Gerant Manor . Augustine has left you alone , and you are just sitting around the manor , hold off for something to materialize . Madi is at peace .
If you stay with Madi , you get a 2nd luck at pick up the Epic of Gilgamesh on the side board if you missed it the first time .
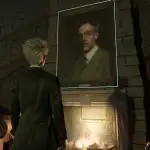
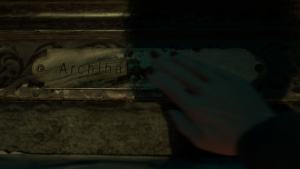
Once you are in the parlor , Stan will sample to convince you to shoot one of your movies in the mansion . After that conversation is over , you will be able to wander around in the stairwell . Interact with the picture over the fireplace , and you may wipe off the nameplate . It ’s actually a button that will spread out a secret door . If you go inside the secret compartment , you could receive a pattern payable at bottom .
Screenshot by Pro Game Guides
In the Atrium , you only have one artifact to look at , and you need to have a conversation with Madi that can change your relationship with her . And that will mark the conclusion of Chapter 4 .
When you go to go up the stairs , Linda will start a conversation with Stan and Madi about where they got their motion-picture show pieces . After that , you’re able to go up the stairs . Walk frontwards on this second level , and there will be a book on a table in the back left of the room . It will be a book about Frank Stone ; piece this up to get the fifth Champion Artifact .
After picking up and looking at the book of account , look at the metal room access to the left wing of the book , then talk with Madi to move onto the next fit . She will ask for a tale of her mom , and you have the pick to evidence her one or not .

Image by Pro Game Guides
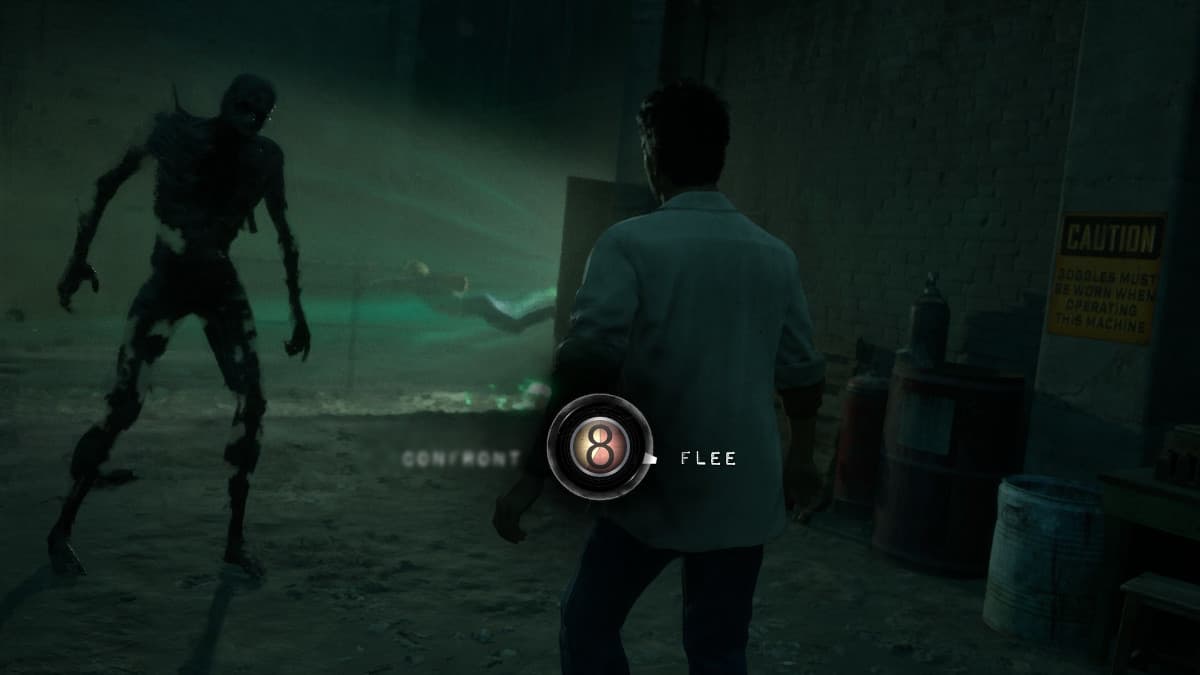
Chapter 5: The Phantom of Cedar Steel
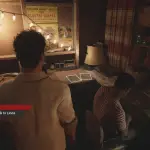
Chapter 5 takes place in 1980 in Jaime ’s garage . Now armed with a new camera , the teens are looking to get back in the mill and embark on shooting again .
During the production meeting , you require to count around the garage ; there will be three crucial artefact to piece up : a tape , an newspaper article , and a al-Qur’an . The tape will give you one of three options ; here are its three path :
Achievement - Lumpkin and Livin ' : Learned that Tom stop imbibe due to Sam ’s kindness .

Image by Pro Game Guides
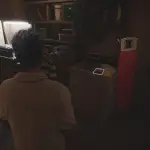
After Robert and Chris finish verbalize about their Frank Stone research , you will get innocent reign of the garage . Interact with the articles on the killing next to Robert on the desk to get this Artifact .
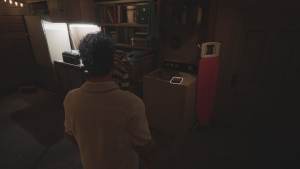
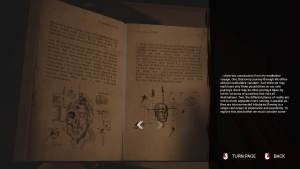
On the opposite side of the garage from where the desk is where Chris is sitting , you could find a record on the washing machine . This book , the Oracle of the Omniverse , give you an insiders look at the multiple worlds that Augustine is jaunt between .
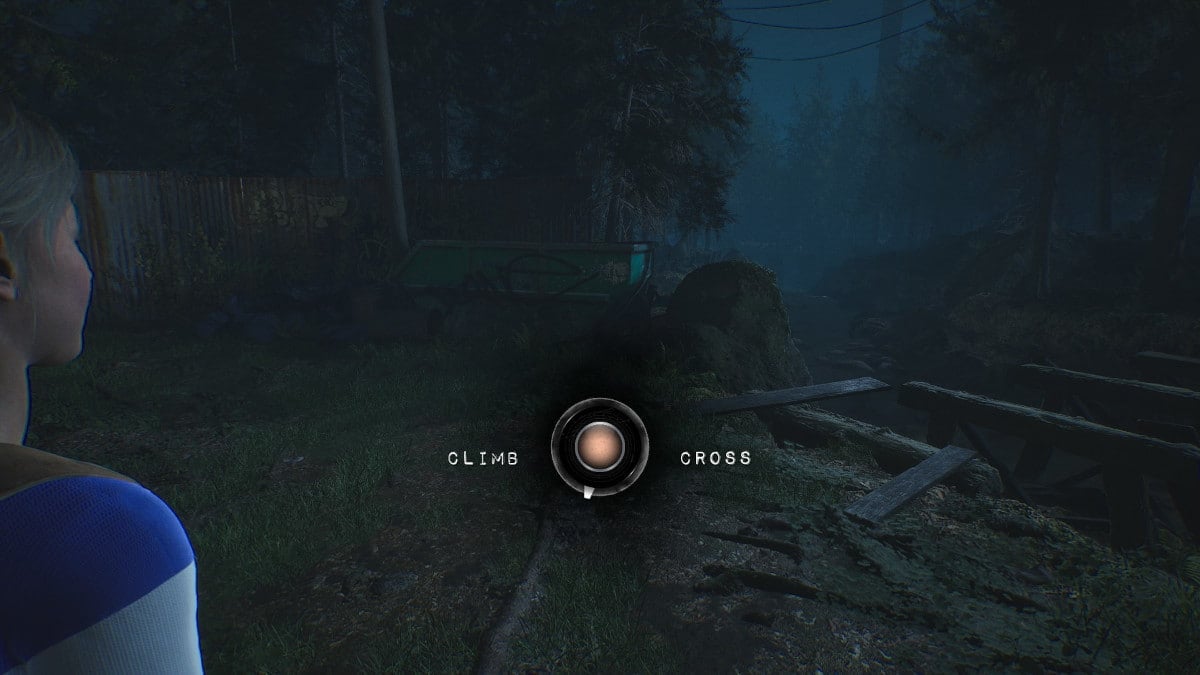
After confab with Linda , then leaving the service department , you ’ll be at the stormdrain . You have to select between climbing up the fence and going closer to Sam ’s patrol , or going the other direction and jumping over the broken bridge to get further from Sam . Both will get you safely into the stormdrain and into the mill .

Image by Pro Game Guides
The loyal route will lead you properly to the Stormdrain and into the Passage to the Mill . There is a trinket you may find along the way .
After jumping over the fencing , there will be a squeeze space to the left field . Keep to the left and follow the rock around until the squeeze prompt pops up . Inside will be a box seat on the ground with a ring inside .
go this way signify you will have to do some balance checks , walk over beams . check that to stay static by pressing left and right when your fiber starts to lessen one means or the other .

Screenshot by Pro Game Guides
After the first balance check , there is another symmetry beam you’re able to select to walk over . On the other side will be a piffling corner with this fallal inside .
Whether you opt to mount or cross , you will terminate up at the stormdrain and head inside . After Robert pass on you some flashlights , you will head into the drain itself . Inside is a rellik for you to pick up and look at .
After walking through the corrode metal door , Robert will say something about being under the mill and needing a way up . You ’ll be in the burrow from the first part of the game again ; twist impart at the first intersection and squeeze through the hole in the wall . On the other side on the floor will be a Rellik Doll .

Image by Pro Game Guides
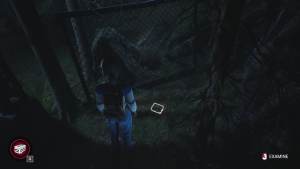
A minuscule past the left you take to get the Rellik above , there will be a grate you could jump through . Go down this hall , through the door at the end , then into a big open way . To the right will be a mesa with a loge on it ; inside the box is akeythat you will need to get thefourth trinketlater on in the game .
After the cutscene with Bonnie in the yard in front of the mill , but before you head into the furnace sleeping accommodation , you will check Linda . Instead of go direct into the furnace chamber , take a few minutes to face around the yard .
In the yard , you could find out the grating that Sam opened with a crowbar in Chapter 1 if you did n’t break it . If you did break it , there will be no crowbar , and you will not be able to get this Trinket . Use the crowbar on the door further back in the yard , and the Oni Mask Trinket will be in a box indoors on the floor between the two ledge . After that , repay Linda ’s friends , and go inside the furnace way .
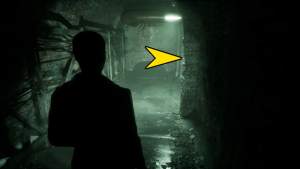
Image by Pro Game Guides
Inside the furnace chamber , you need to make your way down to ground level , then scope out a place to blast the next scene . Take Linda all the way to the back of this elbow room where the double door are , then turn to the right field .
At the back right of the furnace chamber will be a small curing of stairs . If you climb up up them and channelize to the rightfulness , you will find a place where the clinch prompting will seem . On the other side will be acrank grip .
Go back up the ramp to where Frank Stone was killed back in 1963 , and face at the lilliputian platform in the marrow of the fervour orchestra pit where Frank ’s body pop off . There will be a little box there ; to get it , use thecrank handleon the box . It does n’t need power ; you just have to crank up the handle to draw the political program closer to you . Once you may jump across to it , spread up the box to get this trinket .
Screenshot by Pro Game Guides
After Linda and Bonnie leave , you ’ll take control of Chris again . After entering the new room access , manoeuver to the right and look for a rusted threshold in the back right corner of this way ; it ’s further to the right than the Casting Foundry door is . Go inside and elude under the bricks that have offend . The clown dame will be on the left after the dumpster .
If you got the key for the Casting Shed back in the passage earlier in this chapter , you may finally use it here . Once you control Chris again , you , Jamie , and Robert will look for the political machine shop . In the first way you guy end up in , there are some twofold door in the back of the room labeled as the Casting Room . habituate the key fruit on the door .
After you are inside , pull all the giant shelves out as far as they will go . Next , go to the centre of the room where to moveable toolbox is . Move it to where there is a cloth beetle the shelf above your left when you ’re holding the tool chest ’s bar . Climb up onto it once it is in place , then up to the 2nd floor . Take it around to the other side where there will be a balance challenge . Hop across the shelves , and on the last platform where the ladder back down into the main room is , there will be a bauble box .

Screenshot by Pro Game Guides
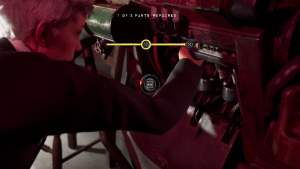
to move on , you ’ll need to get the author working . There are two parts to recover , then you have to pass a few QTE checks for complete it . Interact with Robert in front of the generator , then pick up the two pieces around this room to complete it . The first objet d’art is on the same side of the room as the generator , but nearer to the suspended train car . The 2d is located on the other side of the train car , in the back corner of the room .
While hopping over to the Lair , there will be a quick QTE to catch Robert when he loses his balance . If you go wrong , Robert still live , but Chris catches him alternatively .
Inside the den of Frank Stone , there is a table in the nub . On it is a notebook computer ; this is Frank ’s notebook computer and it is fulfill with some ghastly details .
Screenshot by Pro Game Guides
Interact with the head in a jarful to polish off this section . You will then have two path decisions to make .
When Frank Stone evidence up , you could take flight or you could endeavor to save Chris . There are several result with this scene , and many final stage with Jamie dying .
Whether Jamie populate or die , Chris will still be sucked through the door , and Frank Stone will wander away into the mill , intent on killing all the others .
Screenshot by Pro Game Guides
Chapter 6: Beyond the Gate
In this short chapter , you play as Madi , then Linda . First you need to get inside the intricate logic gate that Augustine has in her home , then you need to seem around at bottom .
manoeuvre up to the next level of the Atrium when Stan unlocks it for you . There will be an Artifact , a Rellik , and a key to find on this upper floor .
On the upper base , you could find a Deed of Sale for the Super 8 camera in the back right of the elbow room on a table by the window .

Screenshot by Pro Game Guides
On the coffee mesa in the gist of the room , you could find a magazine unfastened to an article about Murder Mill . peck it up to get the third Murder Mill Artifact .
Next to one of the rear around the coffee table that hold the Murder Mill reassessment , you could find another Rellik Doll . This one is the Legion ; pick it up to get Rellik number six .
After find fault up those two collectible , look for thekey ; it will be on a small table miss the stairs by the windowpane . This primal unlock a cabinet , located one storey down . Inside the cabinet is an incomplete panorama . If you go down another floor , you may pluck up the tree across the room from the base of the stairs . Put the tree in the diorama to get the tiny power hammer .
Screenshot by Pro Game Guides
On the same base as the cabinet panorama , there is a statue of Hillbilly on a small-scale table by the stairs going down . Give the hammering to this statue , and you will get the last piece of the teaser to open up up the intricate gate to the Reliquary . To open up the room access , you will necessitate to spin the three pieces so that the pictures match the characterization on the three particular you had to interact with to open it .
accomplishment - Open Sesame : puzzle out the gate teaser .
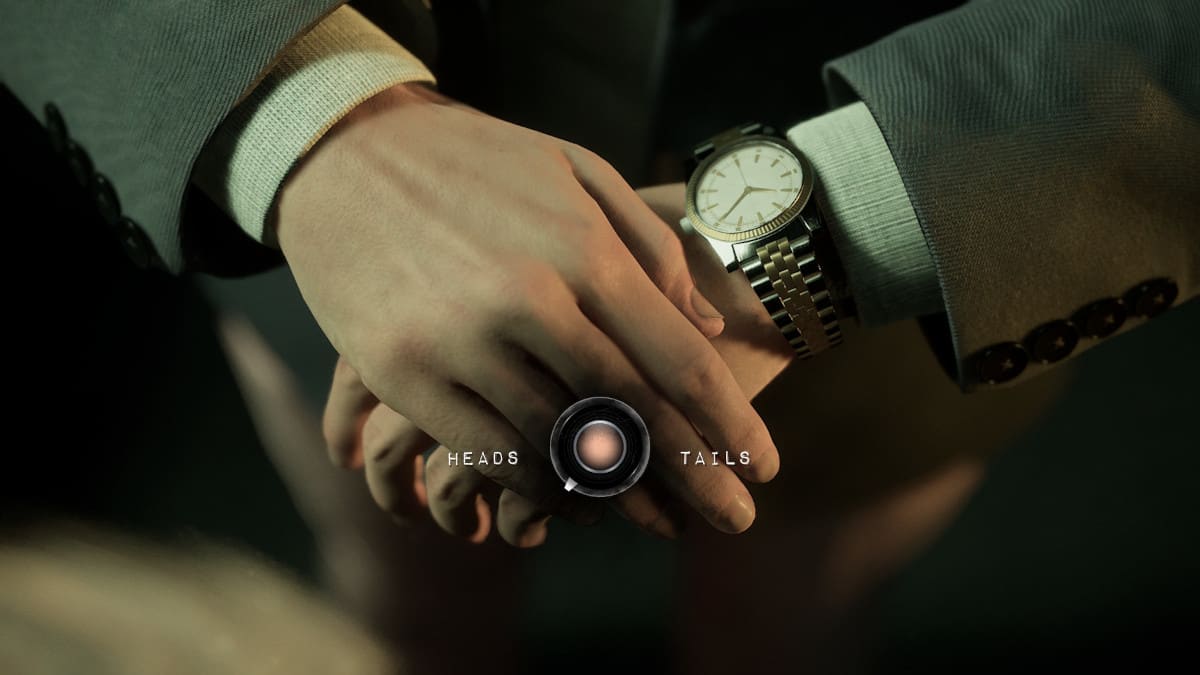
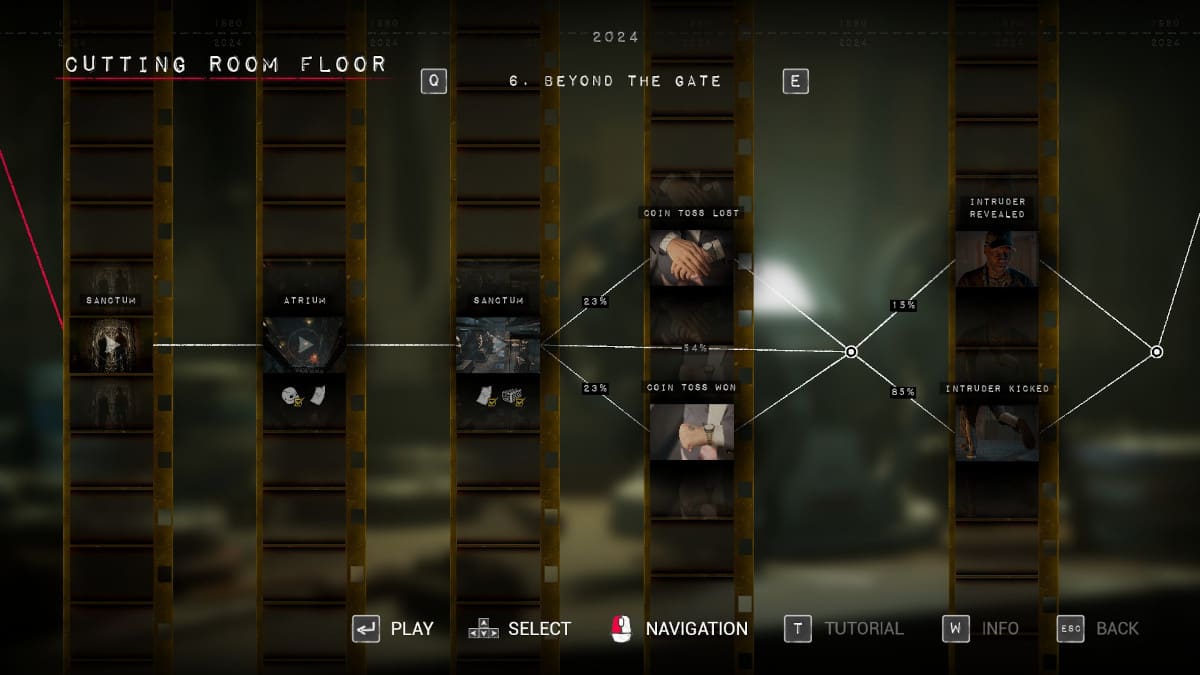
Inside the Sanctum , you will land up this chapter as Linda . The first affair you should do when inside this reliquary is to chat with Stan . You will have the option to offer him you friendly relationship , or you’re able to have a little bet on a coin flip .
Screenshot by Pro Game Guides
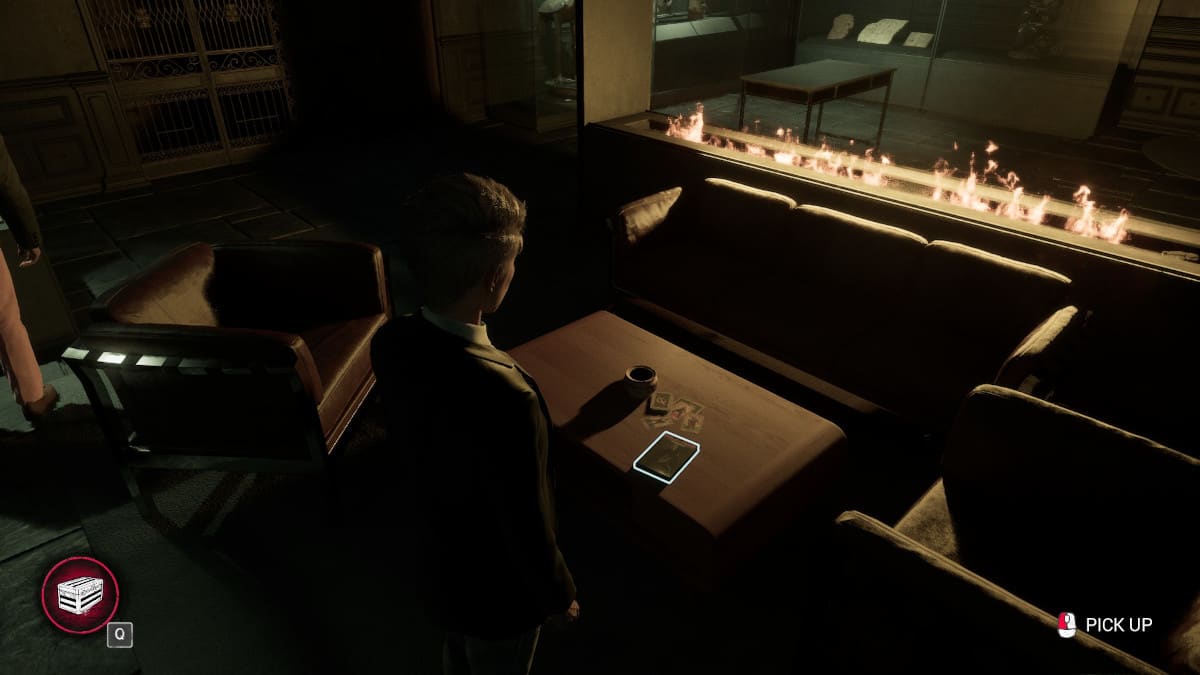
On the coffee tabular array near the fireplace , you may happen a script address Fold of Fear . It ’s a book about a dramatisation and fantastical version of the Frank Stone murder .
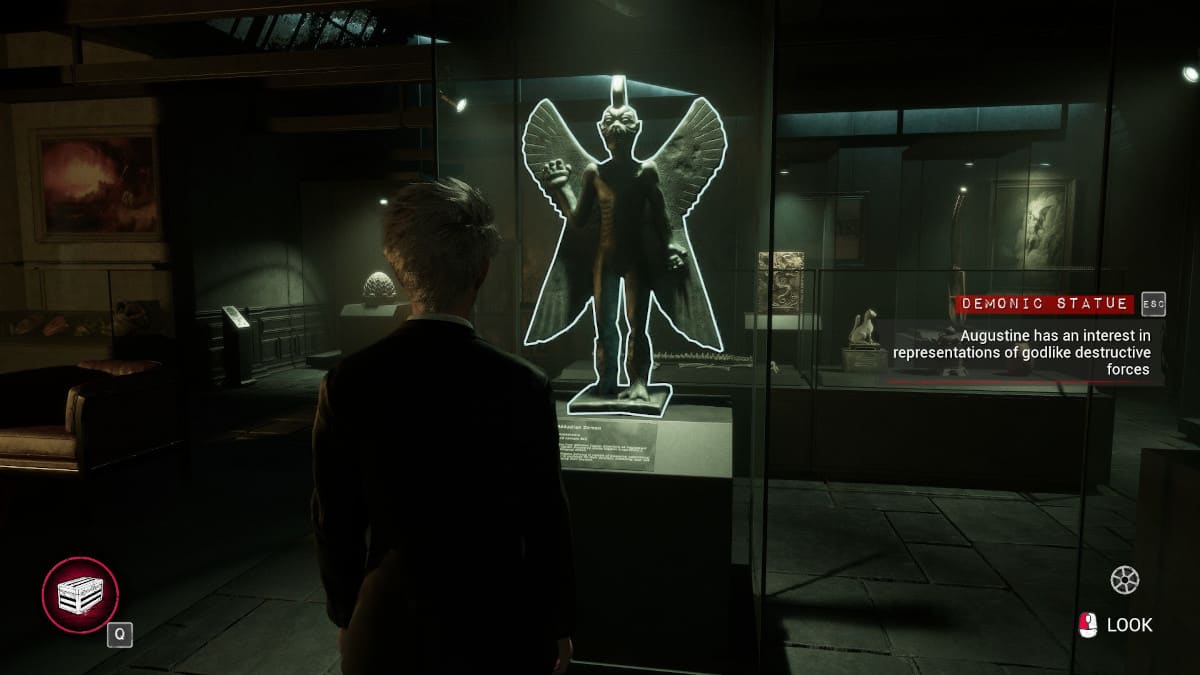
Inside one of the Methedrine example by the shell where Stan is digest when you are talk with him is a demonic statue . Interact with it , then look down at the plaque underneath .
On the correct side of the elbow room , beside the open fireplace , is a interactable object that plays a broadcast of a Murder Mill showing . Push play on it to take hold of this Artifact .
Screenshot by Pro Game Guides
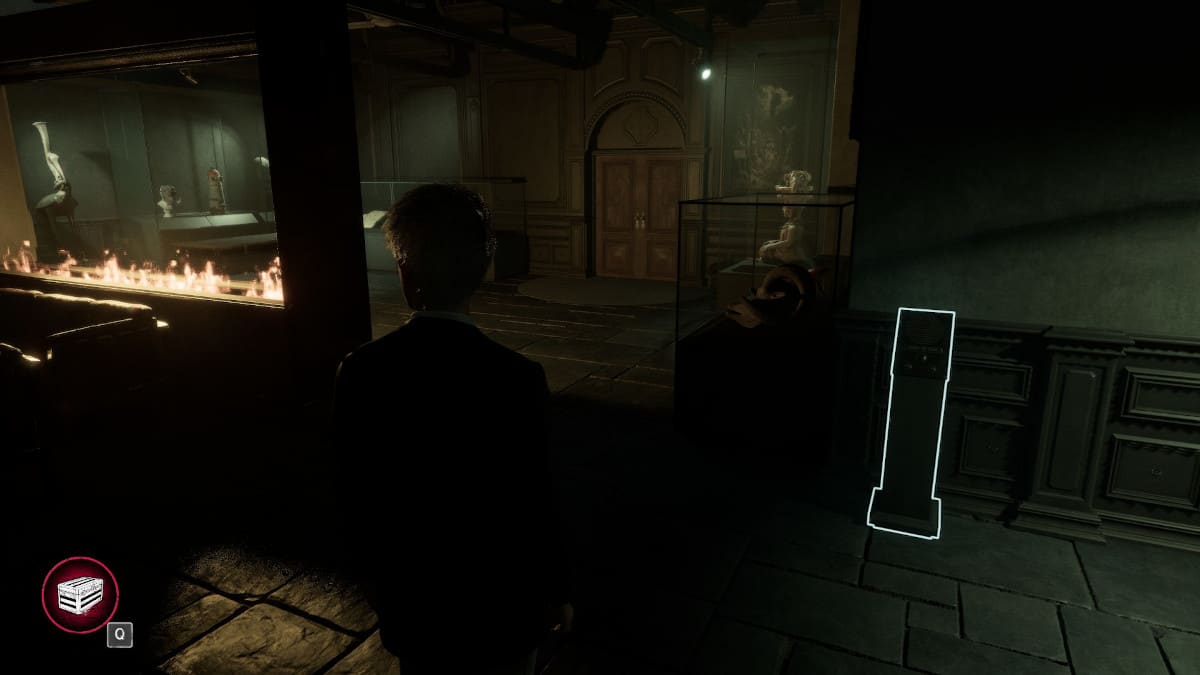
As far from the threshold where you come in as you could get , on the other side of this way , there is a Trinket box on the floor . It is on the far side of the Fireplace , on the right hand of the room .
Make certain this is thelast artefact you go after , as the Chapter will end after you open up the drawer and see it . There is a table on the other side of the hearth , over where Madi is standing . Interact with the table to open up a drawer and discover your old Super 8 , still break , look the same as it was back in 1980 .
Once Sam shows up , you have the option to kick back him or miss with the QTE that pop up . This will be the last route you have influence over in Chapter 6 .
Screenshot by Pro Game Guides
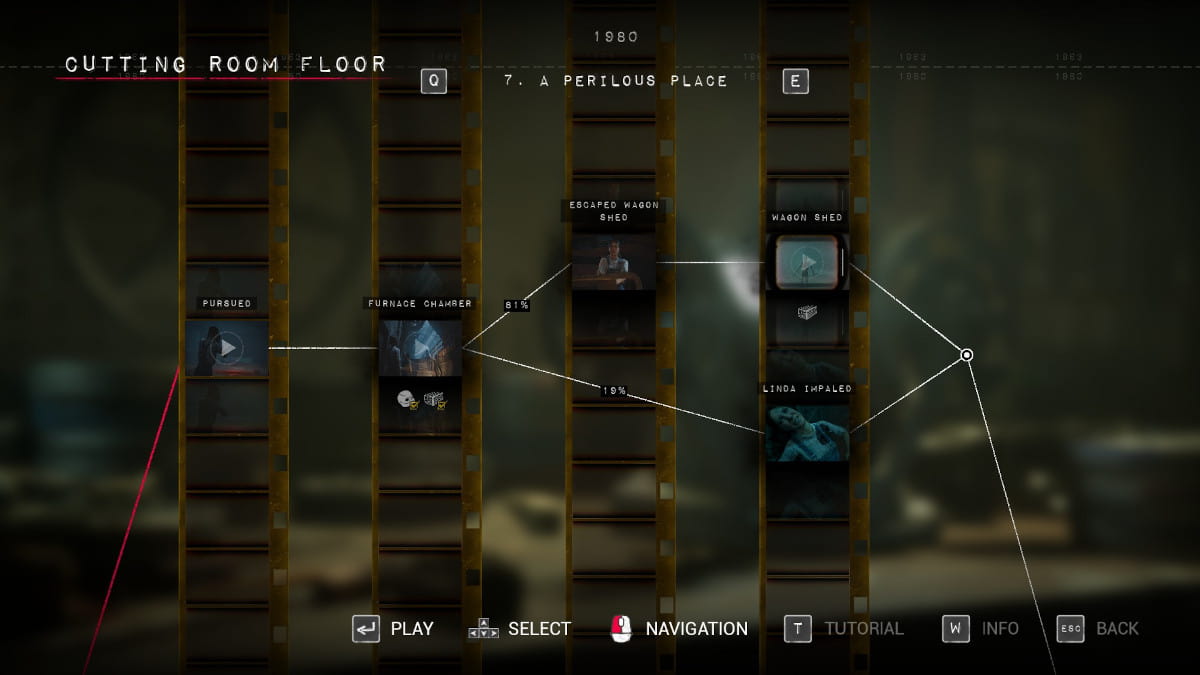
Chapter 7: A Perilous Place
In chapter 7 , you take control of Linda back in 1980 . You have the option to peck up the Rat trinket and the Clown Rellik if you missed them before . After picking up the photographic camera , you will gather Jamie ( or Jamie ’s body if he ’s drained ) and Bonnie back outside the building again . When Frank Stone shows up , you will have two way useable to you .
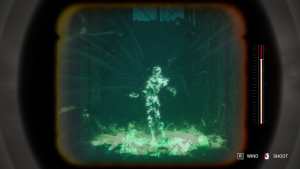
Like the previous source you had to fix in Chapter 5 , you need to find a absent part and put it into the generator with some QTEs . First , you demand to interact with the forklift , then comply the cord around to the generator . Interact with the generator to make you need a part . The part will be in a small box decent next to the aerodynamic lift you are trying to power . get it back to the author , and overhaul the QTEs . During this whole segment , Frank Stone will be following you , and you will need to keep stopping and film him when he gets tight to you .
Achievement - Camera Shy : Warded off the Killer with the 8 mm camera .
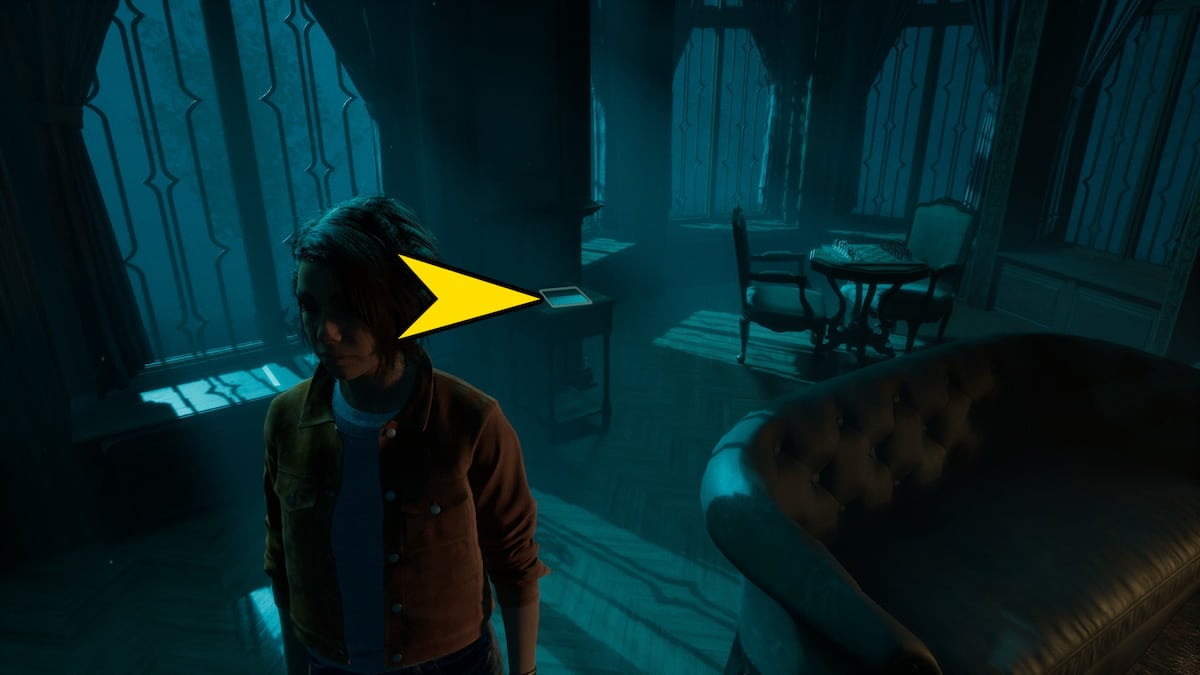
Image by Pro Game Guides
After you pass all the QTEs and you leave the building , there is a remainder subdivision correctly outside on the stairs . Go over this balance wheel beam , and the trinket will be on the other side .
There is only one split path in Chapter 7 ; you either pass the QTEs and cinematography or you fail . It ’s salutary to check that you get out so you could pick up the trinket .
Chapter 8: Mystery Manor
The eighth chapter will throw back and forth between the modernistic day and 1980 . You begin controlling Linda in 2024 , and you have to utter with Sam about what is travel on . After that , you will control Madi again .
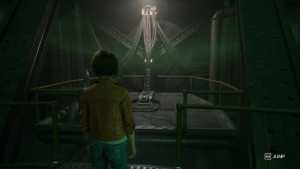
Once you get control of Madi during this chapter , you will be tag after Stan in a hallway that keep changing shape . After you have wandered back and forth for a while , you will come across a curing of green , glowing steps .
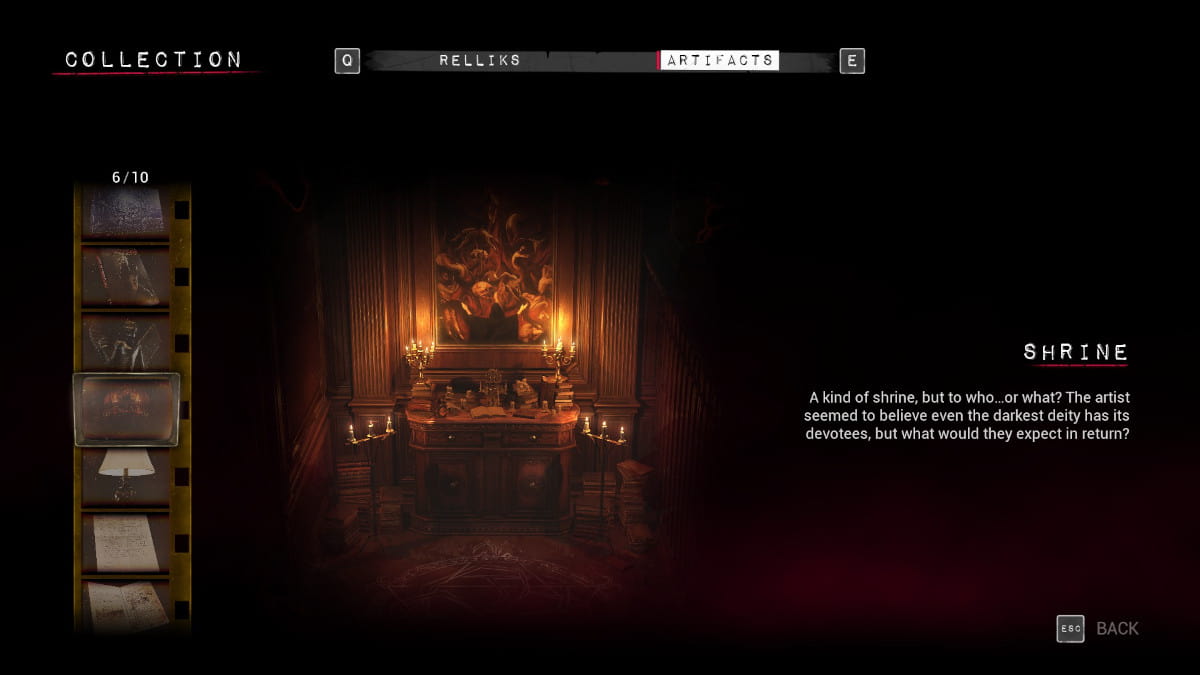
Before descending down the stairway to the horologium , reckon down the hallway to your left field . This has a shrine ; if you interact with it , it will give you a Storyteller artefact . After you have interact with it , head down the green - lit steps and into the horologium .
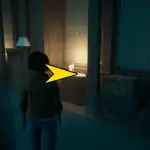
Image by Pro Game Guides
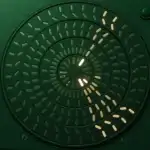
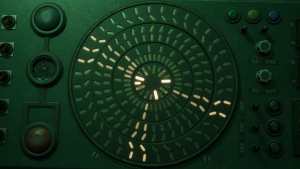
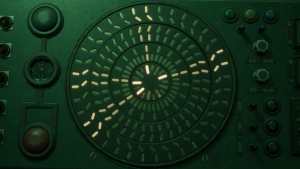
Once inwardly , you will have to solve a couple of puzzles to move on . In the center of the elbow room , in front of the rings , is a control panel . It has a clump of concentric R-2 , and you want to line up the fire up lines in each . The outer roundabout is static , but the other three inner it can move to get everything in complete ordination . Once all the rings are trace up , it will transmit tycoon to one of the three levers in the room .
Once you have control of Linda , Sam will conk . You have the option to do nothing or slip something from him . Each of these is a different tale path .
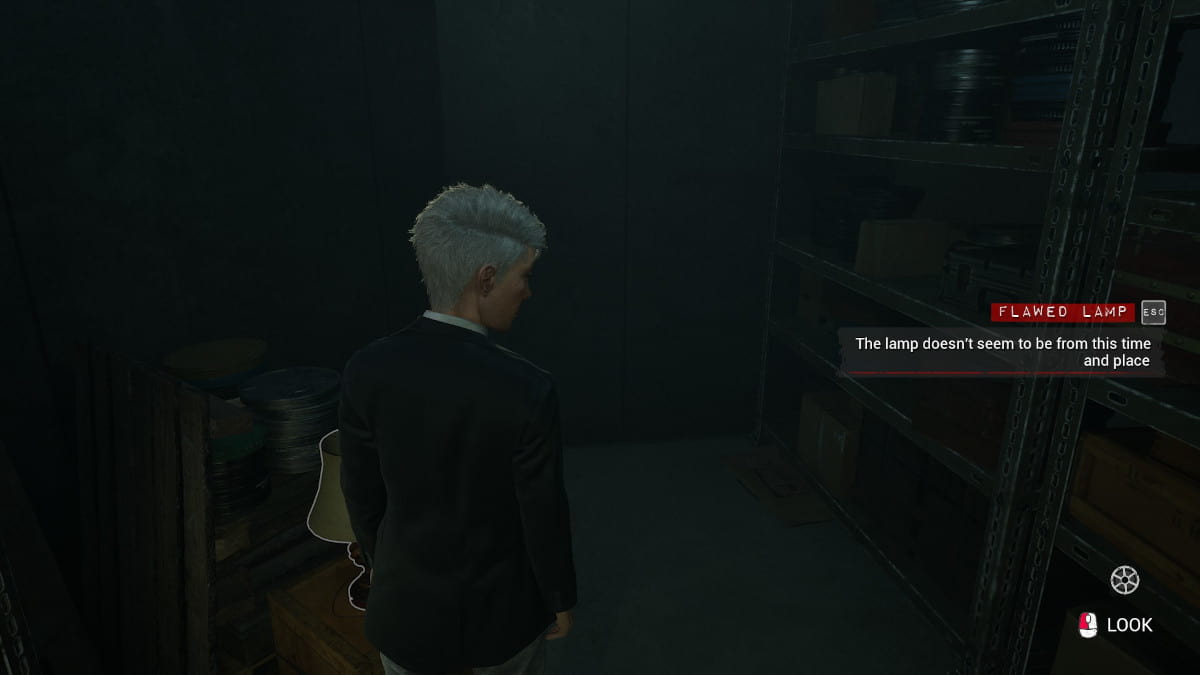
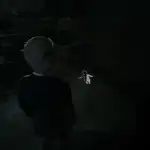
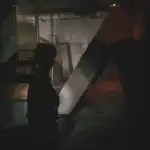
After you lose track of Sam , you will wander the hallways until you find a door with an odd green brightness level behind it . at bottom are a whole lot of films and celluloid paraphernalia . Search around here to find a crew of Artifacts and collectible .

Image by Pro Game Guides
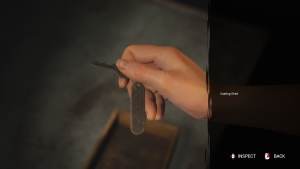
If you choose to take the journal from Sam during the scene where Sam has passed out , then you go by the QTE to take it , you will keep a letter that is tuck inside the diary . This letter is from Logan Chen , and it face like this Chen soul is serve Sam out .
This artefact is located in the very back right field of the film way , on the correct side of the photographic film - watcher .
The bastard airscrew weapon is on the right side of the room , near the front where you enter .
Screenshot by Pro Game Guides
This doll is on the left side of the room in the middle between two ledge . It ’s on the background at the end of one of the aisles .
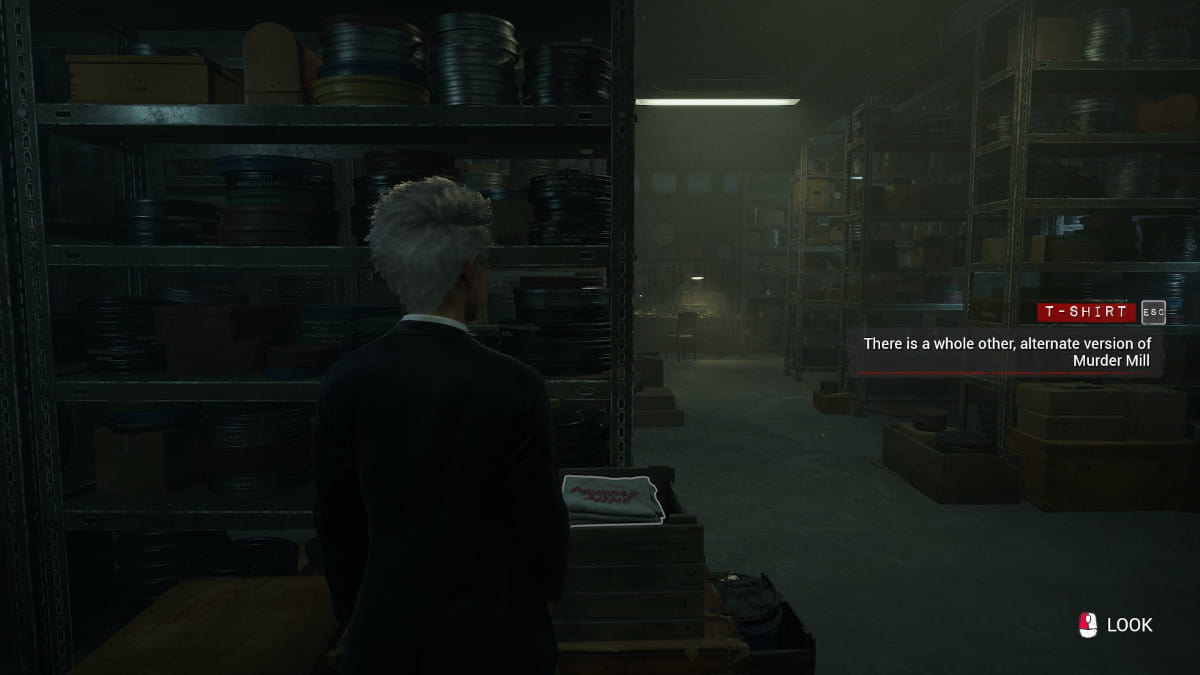
The t - shirt is on one of the first shelves on the left side , sort of near the door where you put down .
to move on , you need to check the film viewer at the back of this room . This is another Murder Mill artefact : an substitute scene where Bonnie was exchange Chris .

Image by Pro Game Guides
Achievement - Murder Mill : Collected all Murder Mill artifacts .
Once Chris is in 2024 , this chapter will end . There are only a handful of different choice for this chapter , and here are screenshots of the whole timeline for it .
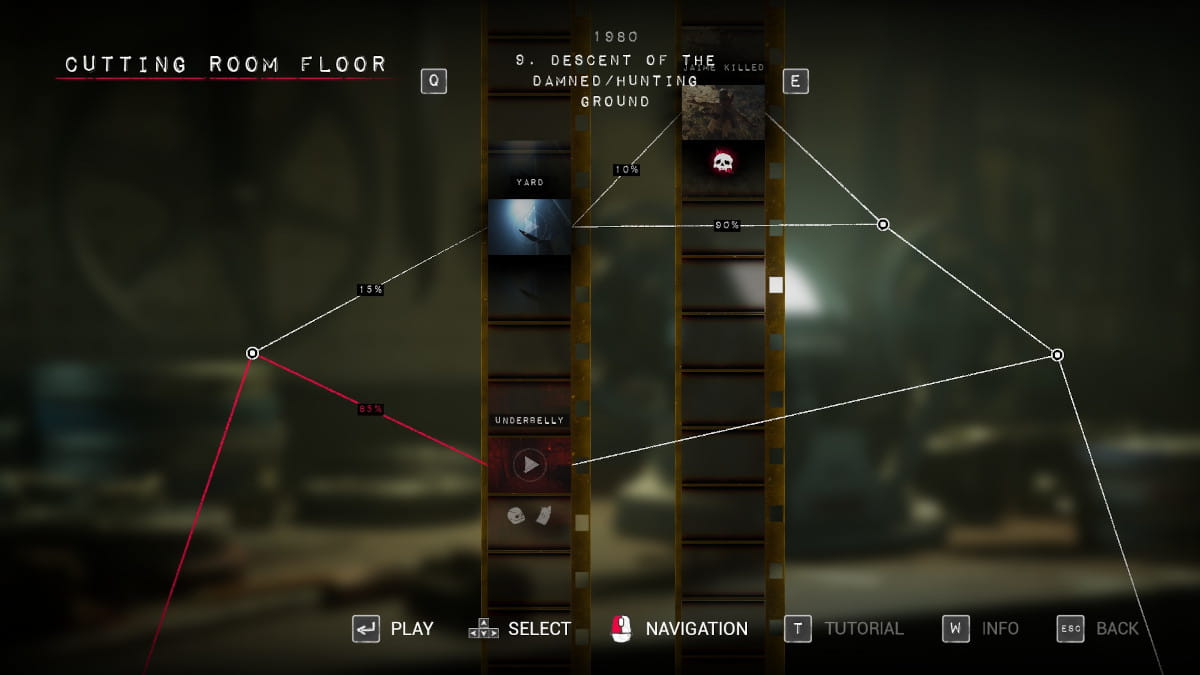
Chapter 9: Decent of the Damned / Hunting Ground
There are two possible gens for Chapter 9 , depending on whether you lam Frank Stone or Linda is string up on a hook somewhere . If you did come after , you ’ll find yourself in the secret contribution of the mill .
After Jamie ( if he ’s alive ) and Bonnie save(s ) you , you will find yourself in the M . You will need to run from Frank Stone , climbing onto a platform to avoid him .
You ’ll play through this part as Linda by herself . There is a fast puzzle in this segment as well as a yoke of Artifacts and a Rellik .

Screenshot by Pro Game Guides
Before solving the steam teaser , you’re able to grab this Artifact . After leaving the privy , you will be in a locker - elbow room - case area . Turn to your rightfulness as presently as you are inner , and there will be two lockers angle on one another . you may crawl underneath them ; after standing back up , turn around and await to your right field . There is a filing storage locker there , and you may unfold one of the drawers . It has akeyinside .
Crawl back through to the start spot , then follow the path of the way around to a squeeze play item . After the liquidity crisis point , you may find Frank Stone ’s locker ; it will be the only locker you may interact with . Unlock it with the key fruit you plunk up to incur Grandmother ’s Letter inside .
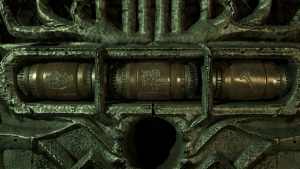
There are two lever you have to find ; one is located in one of the lockers next to Frank Stone ’s storage locker , and the other is in the john in one of the stalls . Put them back into the two boilers in the boiler elbow room to shut off the steam and move to the next part of this level .
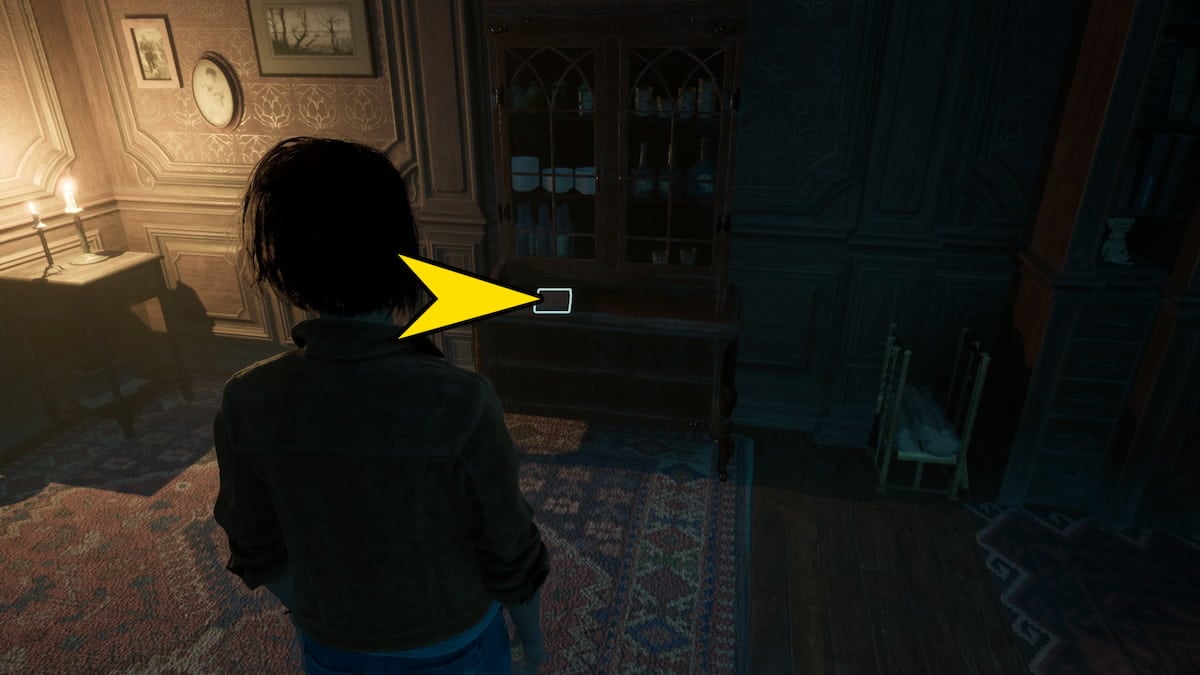
Image by Pro Game Guides
After the longsighted crawling section where Linda complains about pie-eyed spaces , you will find yourself in a series of underground rooms . If you keep bet along the path for offshoots to the right , one of these rooms will haveMerlin ’s Collarinside . Pick it up to take in an accomplishment .
Achievement - Bad Dog : Found Merlin ’s collar .
When you get to the two threshold on the right side of the hallway , only one will be unlocked . Go inside and cringe around to the other , locked door . Inside , you may ascertain a sheet of metal across another hide blank to your left ; move it to find Frank ’s hideaway . There is a cage inside that he hold open victims in before he kill them . Inside this coop is a Rellik Doll .
Screenshot by Pro Game Guides
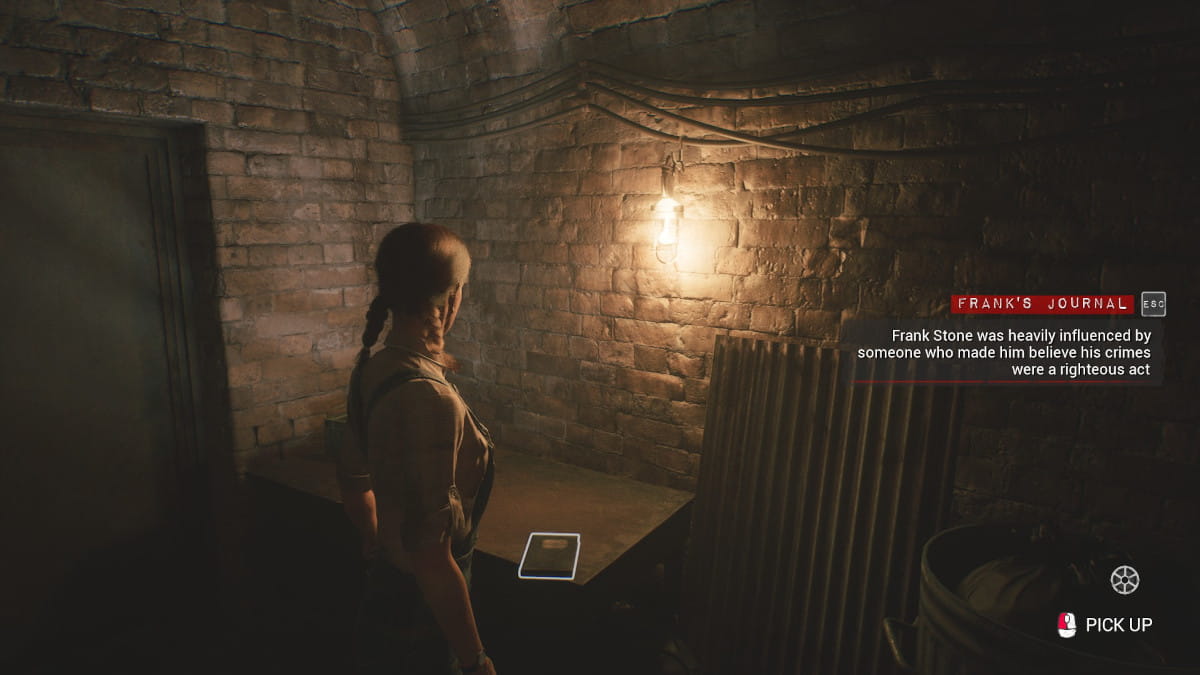
While you are still in Frank ’s Hideout , you could find his daybook . It is right next to locked door that you may exit out of .
This is a pretty scant chapter no matter which variant you get , so there are n’t a fate of fork paths here .
Chapter 10: In the House of Madness
In this lilliputian chapter , you act as Chris ; she has found herself in 2024 , and she is confused as to how she has come there . There are several paths in this chapter , but most have to be localize up in former chapter .
After a abbreviated conversation with the outlast fiber , you will have the choice to return to 1980 , or you will be able to stay put in 2024 .
There is only really one choice you have to make in Chapter 10 , and that ’s recall to 1980 or staying in 2024 .
Screenshot by Pro Game Guides
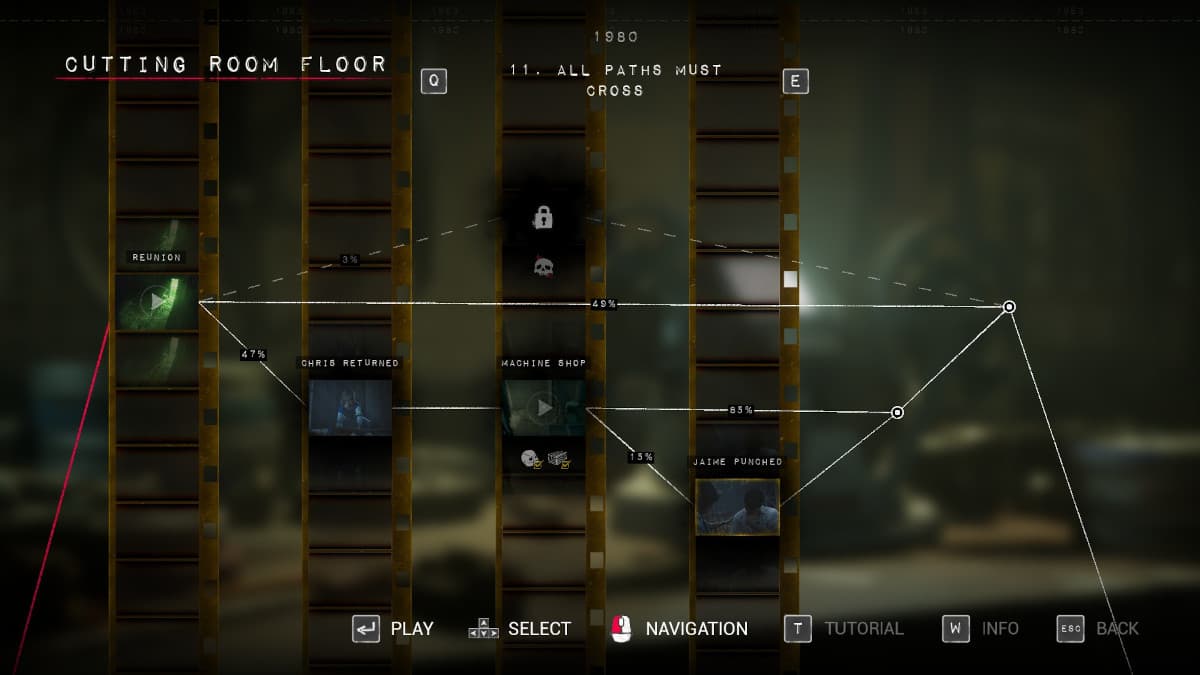
Chapter 11: All Paths Must Cross
Chapter 11 is also a super myopic chapter , so you may get through it quickly . First , Chris will either return safely from 1980 or she wo n’t , then she will have a confrontation with her friends .
You do n’t get a whole lot of selection in Chapter 11 , but you do get to pick whether to not you select to give Jamie a surprisal right to the face .
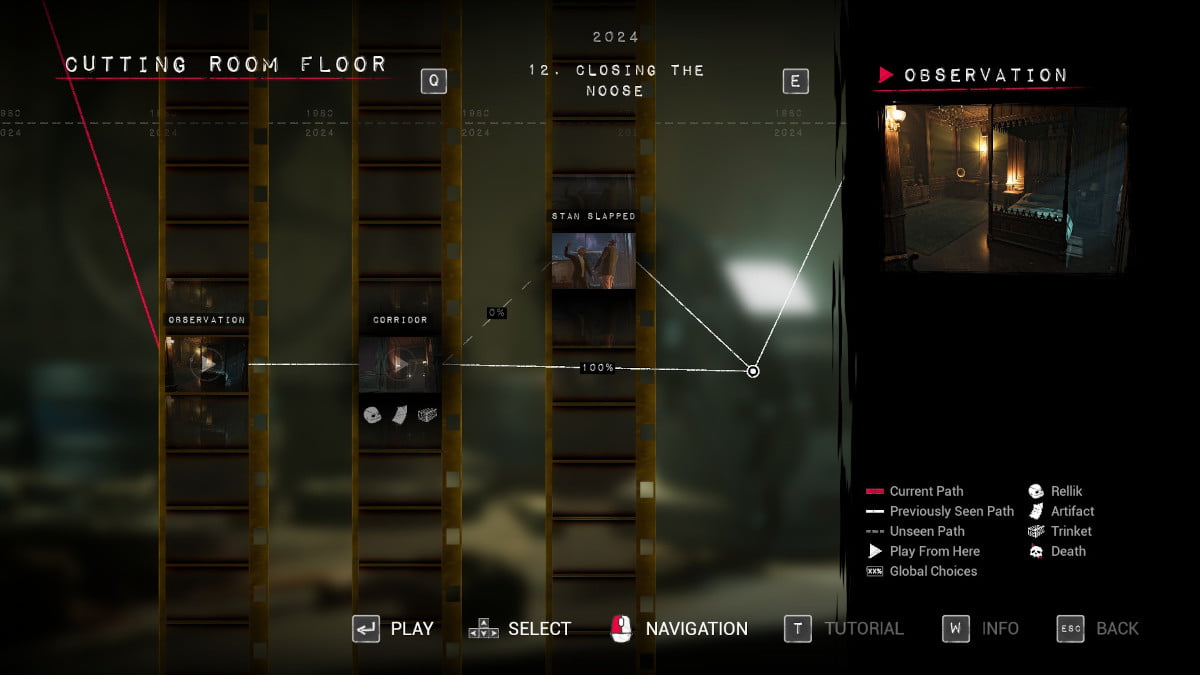
Chapter 12: Closing the Noose
Depending on whether Madi is live or not , this is either the shortest of all the chapter , or it can be a picayune routine longer . First , you will research the manor house with Madi ( and Stan is he ’s awake ) , and you could determine some collectibles . Then you will find yourself in a movie theatre to watch out the motion picture that ’s been on everyone ’s mind .
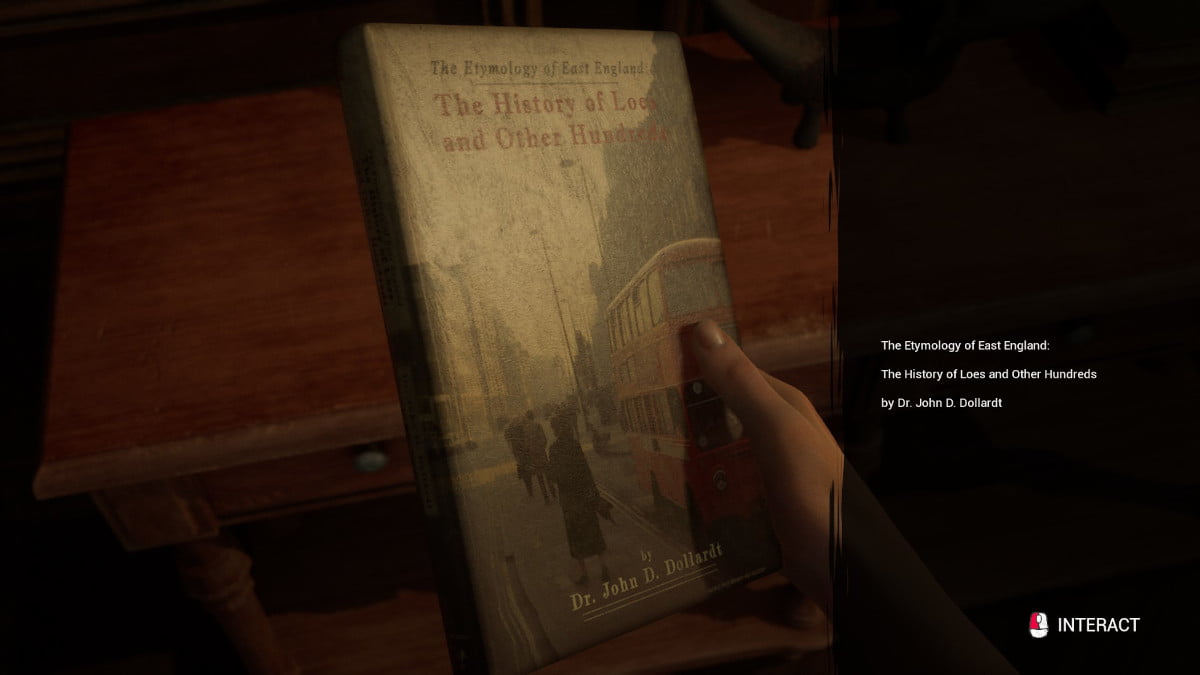
The book about the etymology of East England shout " The History of Loes and Other Hundreds " that turn back the key to the medicine corner has a page from a Grimoire inside . This is another artifact for the Storyteller .
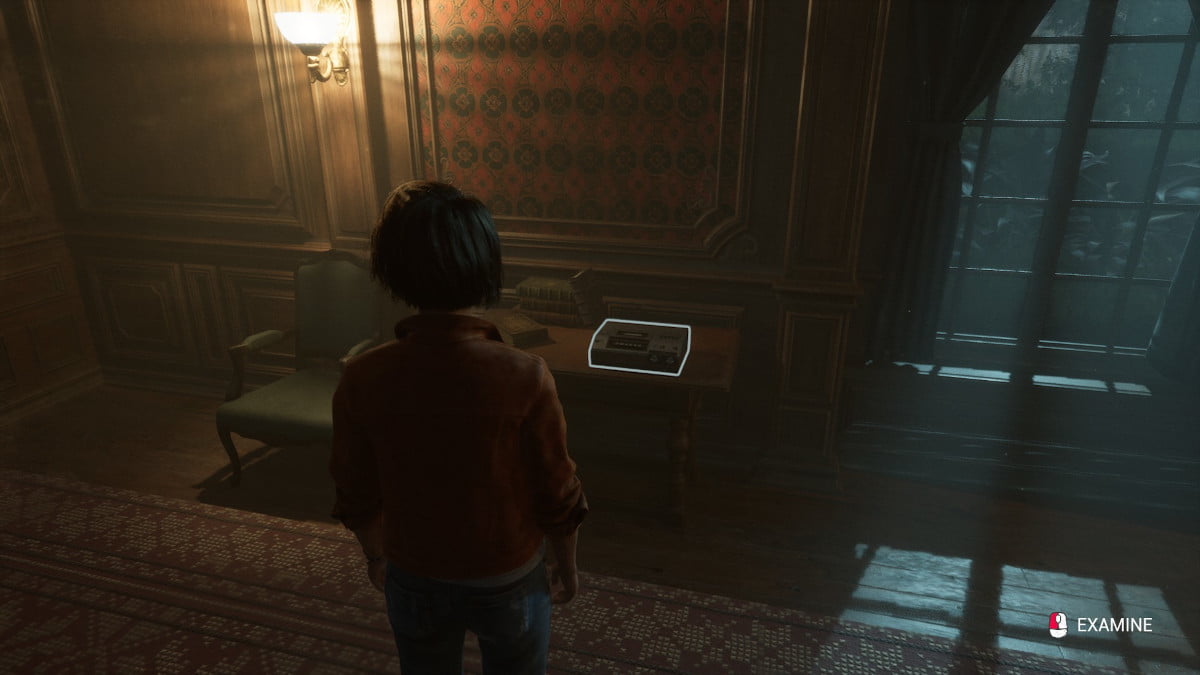
After going through the secret passage , you could turn left into the hallway . wait for the cassette musician on the left on a tabular array . Interact with it and press play to get this artefact .
Screenshot by Pro Game Guides
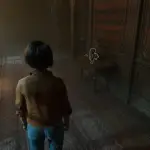
The Twins are on a board a small bit further down the same hallway about on a board .
At the end of the same hallway , on the right side in a nook on a small table on the right side of the hall , you’re able to find a small box . It has this bangle inside .
You only really have one choice in Chapter 12 , and that is only if Stan is alert and Madi is beat . If you meet these conditions , you will have the option to slap Stan in the brass when you make for as Linda . He kind of deserve it , so go ahead and give it to him good .
Screenshot by Pro Game Guides
Chapter 13: Murder Mill
In this 2d - to - last - chapter , you have a yoke of different option for how it can go . You will control Linda in 1980 , who will be wielding the tv camera against Frank Stone .
Next , you ’ll be in 2024 , and you have the choice to solace Madi if she is still alive . You will be playing this part as Linda .
Then , the engagement against Frank Stone back in 1980 will play out again . You will bring this section as Sam Green , and you will have a couple of collectibles to observe down in the stormdrain .
Screenshot by Pro Game Guides
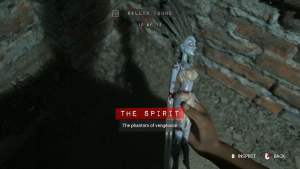
After your first confrontation as Sam with Frank Stone , you will need to look for a round off along that track where you met him . This twist off hold a Rellik skirt of the Spirit .
If you follow path 2 , 3 , 4 , or 5 , you have two branching path you could get before the final confrontation with Stone .
Achievement - Escape Artist : Freed Jaime from the hook . Achievement - Memento Mori : Jaime ’s jaw was removed by Frank Stone .
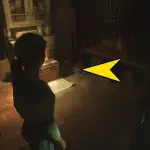
Image by Pro Game Guides
Once you are in the last Stand with Frank Stone , you will have a plethora of branching paths to choose from , depending on who is still alive and who is not .
Chapter 14: The Massacre at Gerant Manor
There is a bunch hold up on in this chapter or very little , depending on which character are still alert . There will be a couple of switches between 2024 and what ’s go on back in 1980 . First , you ’ll be in 2024 , and you will be keep an eye on Murder Mill as a group .
After Frank Stone breaks free of the film , he will attack whoever is closest . This might be Stan , Linda , or someone else , and Sam can also sacrifice himself in this scene .
In this scene , depending on who has Sam ’s gun , you could also choose to sprout Frank or Madi to help save up Madi .
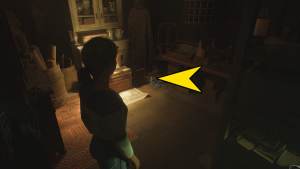
Image by Pro Game Guides
accomplishment - Phagocytosis : Madi was mesmerise and absorbed by Frank Stone . Achievement - Friendly Fire : Sam shot Madi .
Before going into the room with the author to power up the lift , you may go past the generator threshold and go mighty down the next mansion house . There will be a novelty a couple of steps into this hallway on the left on top of a piffling board .
Achievement - Plunderer ’s Instinct : Collected all Trinkets .
Screenshot by Pro Game Guides
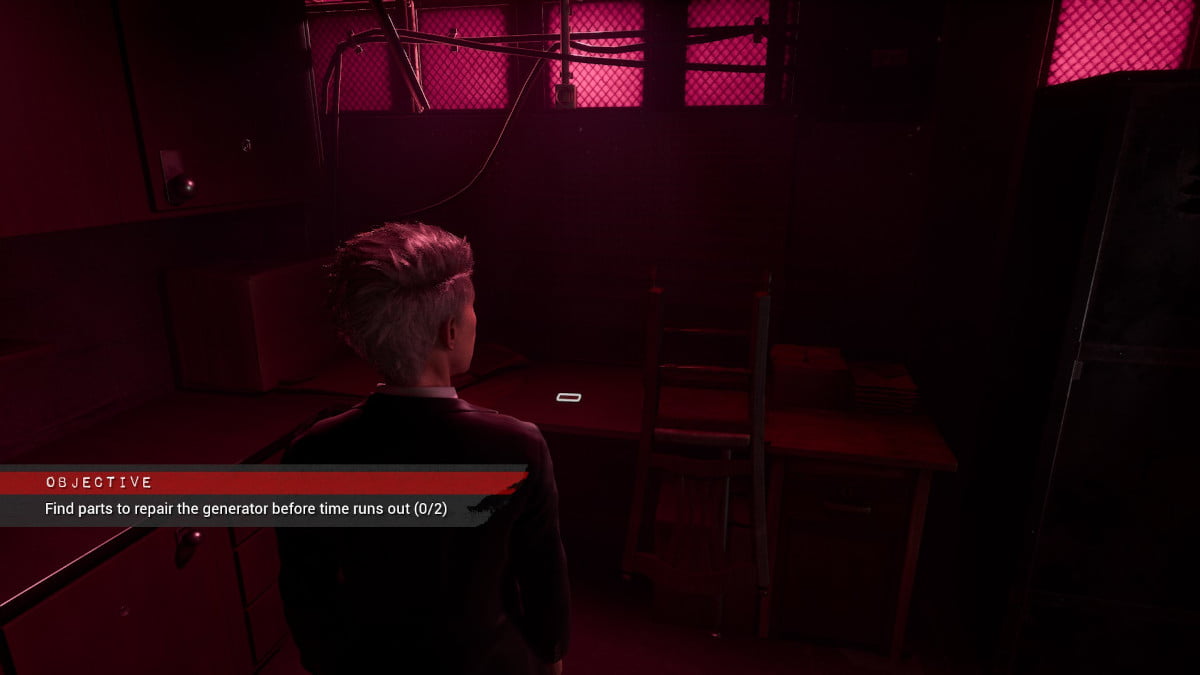
There are two parts to doctor this generator ; you are limit on time , but you still have time to look around , so do n’t panic . The first piece will be on the mesa near the ID card , and the second will be on the board against the bulwark right next to the author itself .
Achievement - Tinkerer : Repaired all generators .
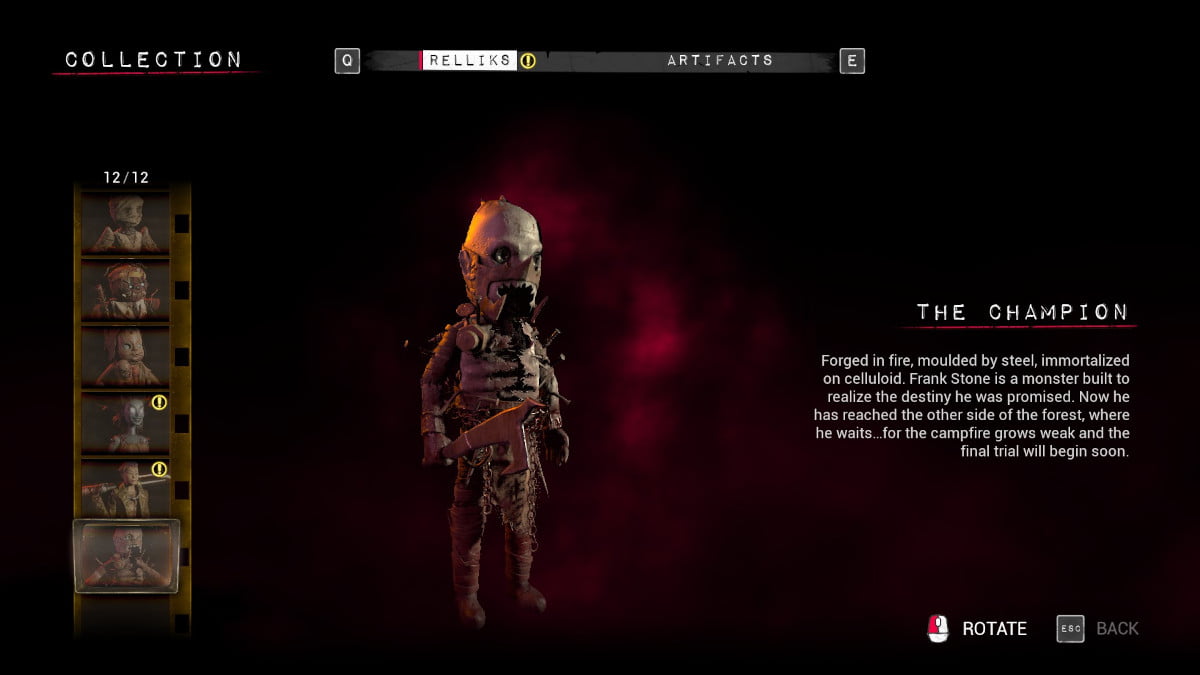
In the room with the last author , you’re able to find an ID carte that is a collectible . This is the final artifact for the Champion .
Screenshot by Pro Game Guides
Achievement - The Champion : Collected all The Champion artifacts .
If Madi is idle and Linda is alone in this section , if you ride the lift down , you could choose to shoot Augustine if you have Sam ’s gun .
accomplishment - Nothing Personal : Shot Augustine .
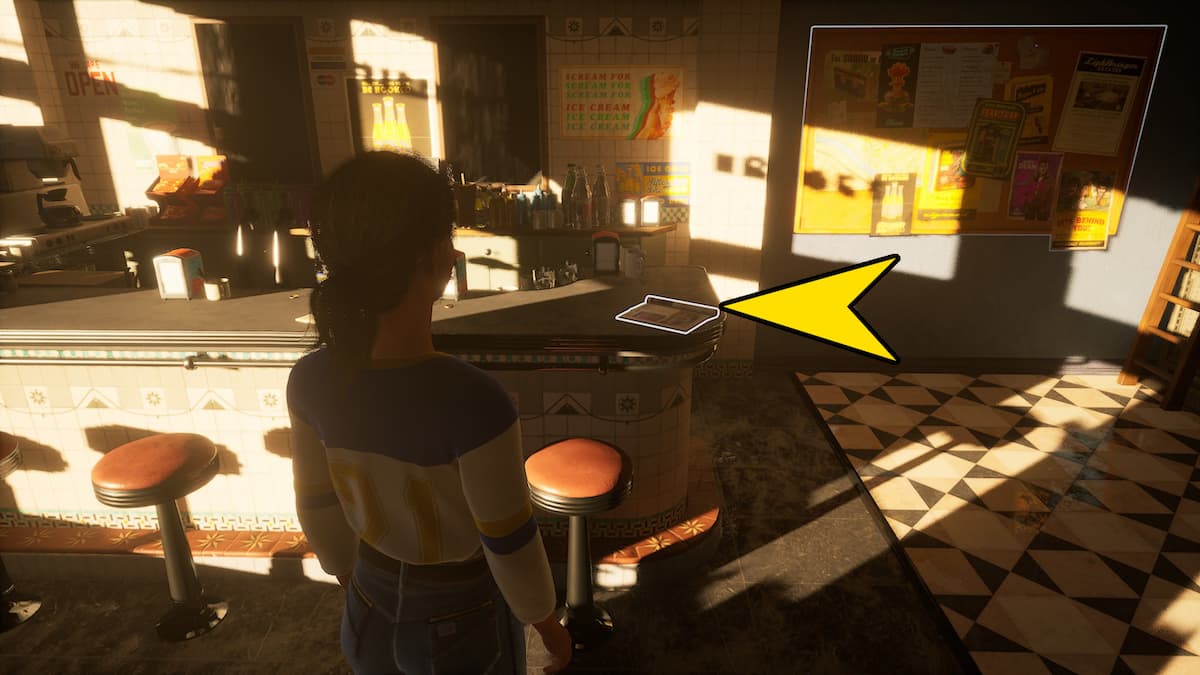
Image by Pro Game Guides
Before lead into the area with the bonfire , you could find Augustine ’s Ring on a tree pulpit .
Achievement - The fibber : Collected all The Storyteller artifacts . Achievement - That Belongs in a Museum : Collected all Artifacts .
The Trickster is located near the very end , where the balefire is . Before squeezing into the glade where the balefire is , turn to the right field , and there will be a long path with a door at the end . You will find this Rellik on the ground on the other side of the door .
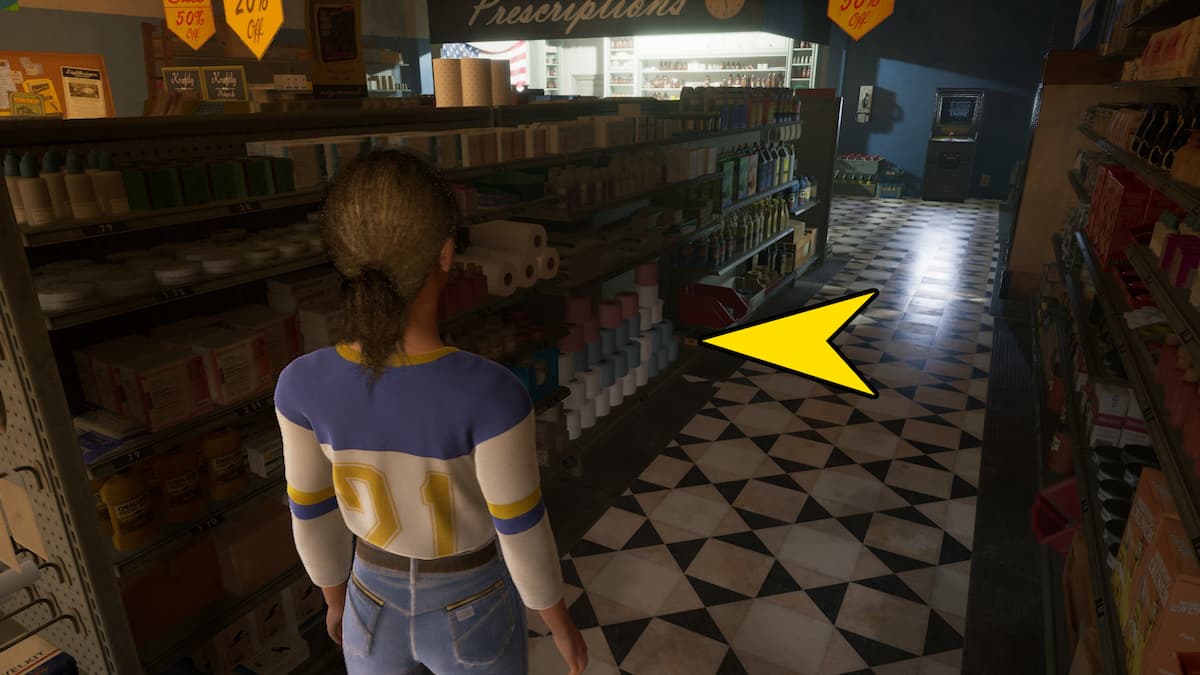
Image by Pro Game Guides
There are a bunch of endings for The Casting of Frank Stone , each terminate slimly unlike depending on who has make it in 2024 . Here is a brief description of what each ending calculate like in this repulsion rubric .
Achievement - The Campfire : make out the news report . Achievement - Merciless Killer : Madison , Jaime , Chris , Sam , and Linda were killed . Achievement - Entity displease : Everyone survived .
At the very end of the net cutscene , you will automatically get this final Rellik . All you have to do is watch the after - credits scene all the way through .
Screenshot by Pro Game Guides
Achievement - Plangonologist : Collected all Relliks . accomplishment - All Seeing : unlock every branch in the Cutting Room Floor
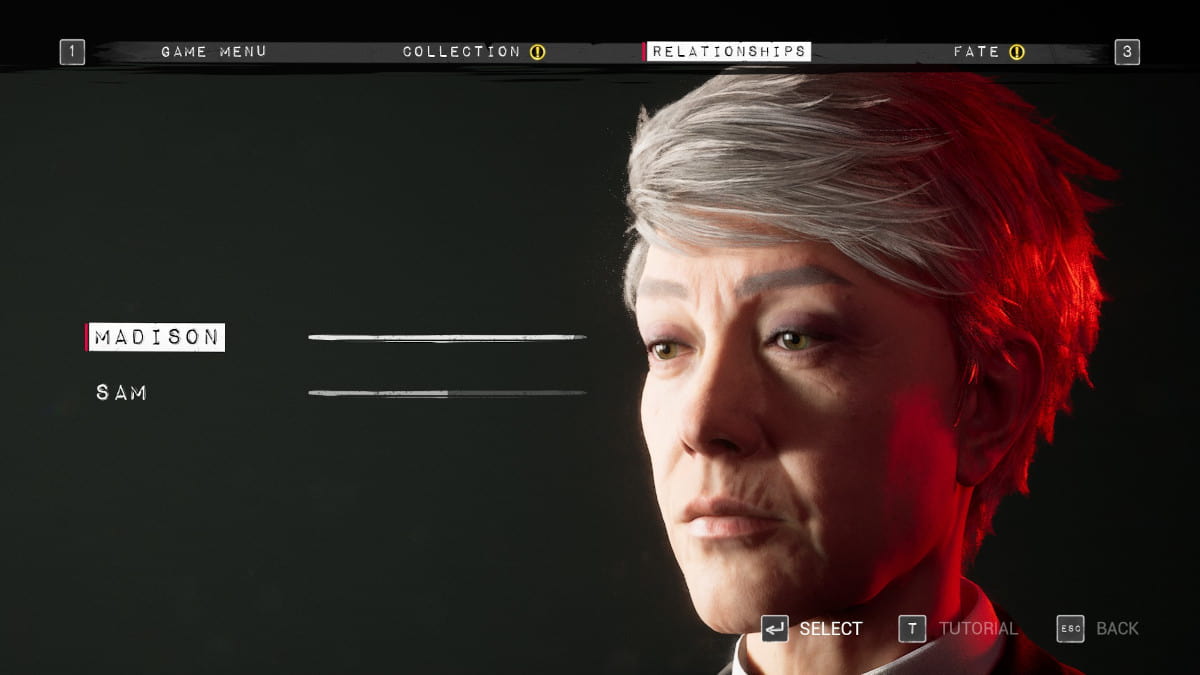
Relationship choices in The Casting of Frank Stone
In The cast of Frank Stone , almost all choices you make will change your human relationship with the mass around you . If you desire to max out your human relationship with someone in order of magnitude to get the accomplishment , here are all the choices and how they effectuate your characters ' feelings .
Achievement - Power of Two : Maximized Jaime and Chris ' relationship .
All Achievements in The Casting of Frank Stone
Below you ’ll find a lean of every achievement in the biz . I have also included them throughout the walkthrough above .
For more Supermassive Games information , check outWhat is House of Ashes Based On?on Pro Game Guides .
Screenshot by Pro Game Guides
Screenshot by Pro Game Guides
Screenshot by Pro Game Guides
Screenshot by Pro Game Guides

Screenshot by Pro Game Guides
Screenshot by Pro Game Guides

Screenshot by Pro Game Guides
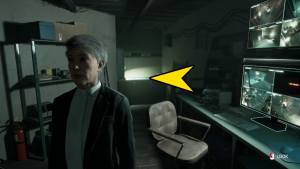
Image by Pro Game Guides
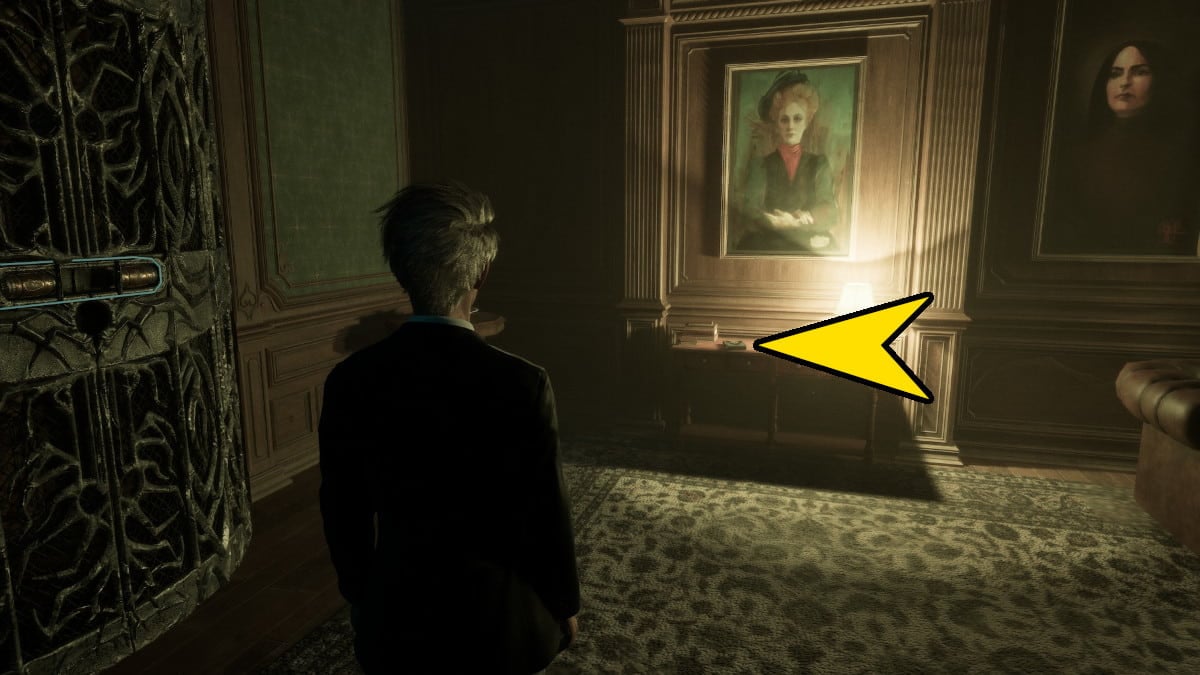
Image by Pro Game Guides
Screenshot by Pro Game Guides
Screenshot by Pro Game Guides

Screenshot by Pro Game Guides

Screenshot by Pro Game Guides
Screenshot by Pro Game Guides
Screenshot by Pro Game Guides
Screenshot by Pro Game Guides
Screenshot by Pro Game Guides
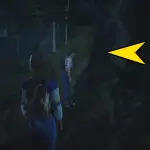
Image by Pro Game Guides

Image by Pro Game Guides
Screenshot by Pro Game Guides
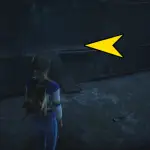
Image by Pro Game Guides
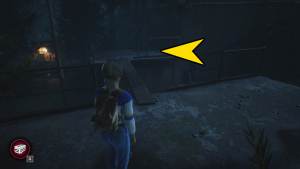
Image by Pro Game Guides

Screenshot by Pro Game Guides
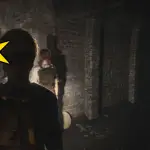
Image by Pro Game Guides

Image by Pro Game Guides

Screenshot by Pro Game Guides
Screenshot by Pro Game Guides

Screenshot by Pro Game Guides

Screenshot by Pro Game Guides
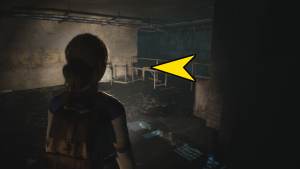
Image by Pro Game Guides
Screenshot by Pro Game Guides
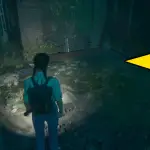
Image by Pro Game Guides
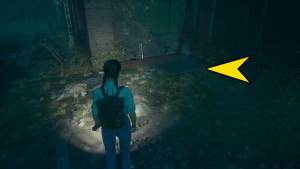
Image by Pro Game Guides

Screenshot by Pro Game Guides
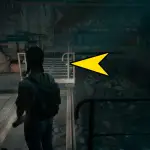
Image by Pro Game Guides
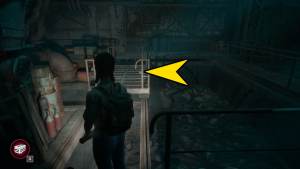
Image by Pro Game Guides
Screenshot by Pro Game Guides

Image by Pro Game Guides
Screenshot by Pro Game Guides
Screenshot by Pro Game Guides

Screenshot by Pro Game Guides
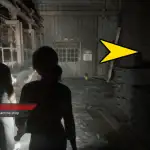
Image by Pro Game Guides

Image by Pro Game Guides

Screenshot by Pro Game Guides

Screenshot by Pro Game Guides

Screenshot by Pro Game Guides
Screenshot by Pro Game Guides
Screenshot by Pro Game Guides
Screenshot by Pro Game Guides

Screenshot by Pro Game Guides
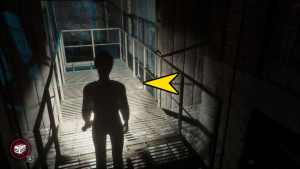
Image by Pro Game Guides

Screenshot by Pro Game Guides
Screenshot by Pro Game Guides
Screenshot by Pro Game Guides
Screenshot by Pro Game Guides
Screenshot by Pro Game Guides
Screenshot by Pro Game Guides
Screenshot by Pro Game Guides

Screenshot by Pro Game Guides
Screenshot by Pro Game Guides
Screenshot by Pro Game Guides
Screenshot by Pro Game Guides
Screenshot by Pro Game Guides
Screenshot by Pro Game Guides

Screenshot by Pro Game Guides
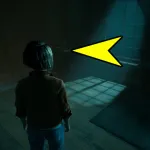
Image by Pro Game Guide

Image by Pro Game Guide

Screenshot by Pro Game Guide
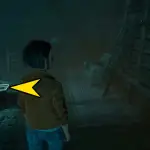
Image by Pro Game Guides

Image by Pro Game Guides

Screenshot by Pro Game Guides
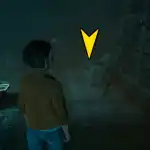
Image by Pro Game Guides

Image by Pro Game Guides

Screenshot by Pro Game Guides
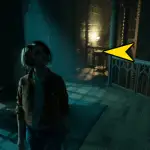
Image by Pro Game Guides
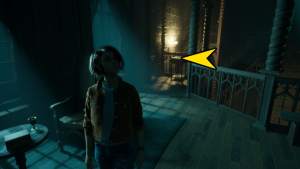
Image by Pro Game Guides

Screenshot by Pro Game Guides
Screenshot by Pro Game Guides

Screenshot by Pro Game Guides
Screenshot by Pro Game Guides

Screenshot by Pro Game Guides

Image by Pro Game Guides

Image by Pro Game Guides

Image by Pro Game Guides
Screenshot by Pro Game Guides
Screenshot by Pro Game Guides
Screenshot by Pro Game Guides
Screenshot by Pro Game Guides
Screenshot by Pro Game Guides
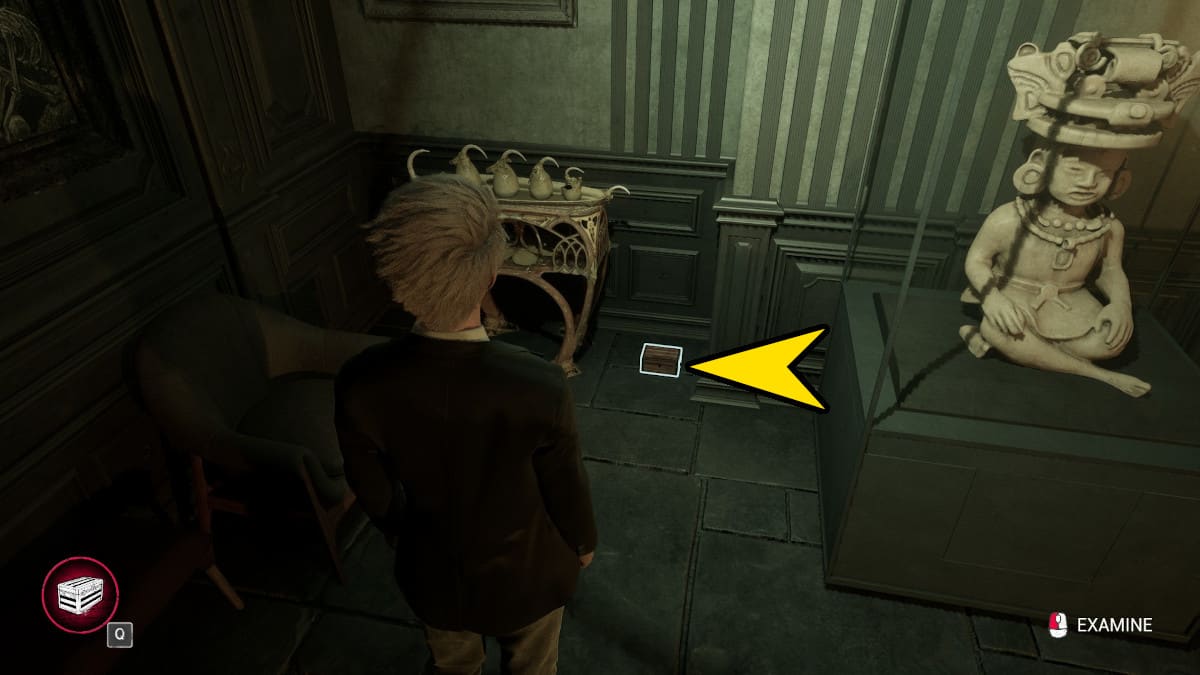
Image by Pro Game Guides
Image by Pro Game Guides

Image by Pro Game Guides

Screenshot by Pro Game Guides
Screenshot by Pro Game Guides

Screenshot by Pro Game Guides
Screenshot by Pro Game Guides

Screenshot by Pro Game Guides
Screenshot by Pro Game Guides
Screenshot by Pro Game Guides
Screenshot by Pro Game Guides
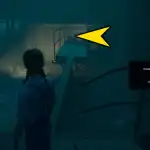
Image by Pro Game Guides
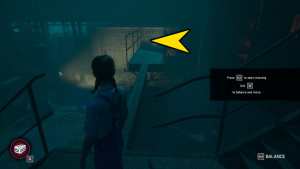
Image by Pro Game Guides
Screenshot by Pro Game Guides
Screenshot by Pro Game Guides
Screenshot by Pro Game Guides
Screenshot by Pro Game Guides
Screenshot by Pro Game Guides

Screenshot by Pro Game Guides
Screenshot by Pro Game Guides
Screenshot by Pro Game Guides
Screenshot by Pro Game Guides
Screenshot by Pro Game Guides

Screenshot by Pro Game Guides
Screenshot by Pro Game Guides

Screenshot by Pro Game Guides

Screenshot by Pro Game Guides
Screenshot by Pro Game Guides
Screenshot by Pro Game Guides

Screenshot by Pro Game Guides
Screenshot by Pro Game Guides
Screenshot by Pro Game Guides

Screenshot by Pro Game Guides

Screenshot by Pro Game Guides

Screenshot by Pro Game Guides

Screenshot by Pro Game Guides
Screenshot by Pro Game Guides
Screenshot by Pro Game Guides
Screenshot by Pro Game Guides
Screenshot by Pro Game Guides

Screenshot by Pro Game Guides

Screenshot by Pro Game Guides
Screenshot by Pro Game Guides
Screenshot by Pro Game Guides

Screenshot by Pro Game Guides
Screenshot by Pro Game Guides
Screenshot by Pro Game Guides
Screenshot by Pro Game Guides
Screenshot by Pro Game Guides
Screenshot by Pro Game Guides
Screenshot by Pro Game Guides

Screenshot by Pro Game Guides

Screenshot by Pro Game Guides
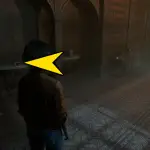
Image by Pro Game Guides

Image by Pro Game Guides

Screenshot by Pro Game Guides
Screenshot by Pro Game Guides
Screenshot by Pro Game Guides

Screenshot by Pro Game Guides

Screenshot by Pro Game Guides
Screenshot by Pro Game Guides

Screenshot by Pro Game Guides
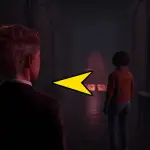
Image by Pro Game Guides
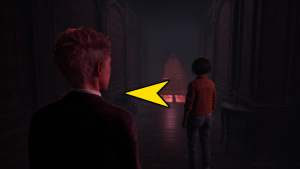
Image by Pro Game Guides

Screenshot by Pro Game Guides

Screenshot by Pro Game Guides
Screenshot by Pro Game Guides
Screenshot by Pro Game Guides
Screenshot by Pro Game Guides
Screenshot by Pro Game Guides
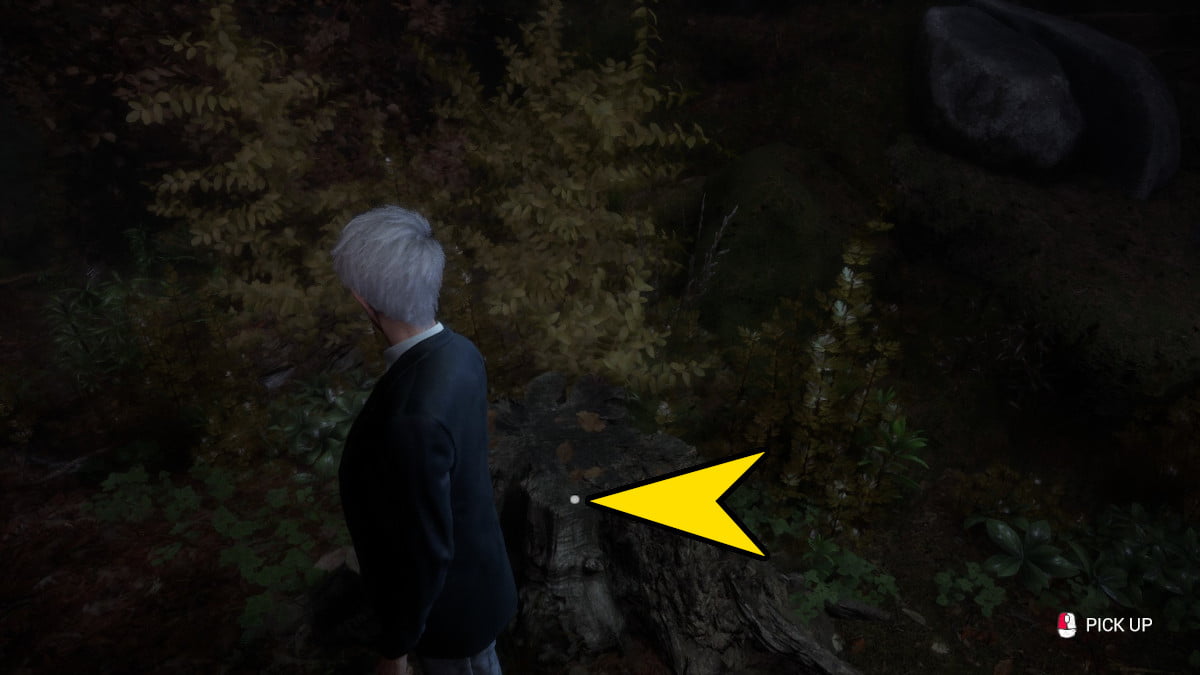
Image by Pro Game Guides
Screenshot by Pro Game Guides

Screenshot by Pro Game Guides

Screenshot by Pro Game Guides
Screenshot by Pro Game Guides
Screenshot by Pro Game Guides
Screenshot by Pro Game Guides
