Philosophy and puzzles ; the complete jazz band !
I ’ve savour the original secret plan , but I ’m exceedingly aroused that we get new message with the DLC . If you are struggling to get through a layer , look into out our full Talos Principle 2 : Road to Elysium walkthrough .
All Talos Principle 2: Road to Elysium levels guide
The Talos Principle 2 Road to Elysium DLC incorporate three episode : Orpheus Ascending , Isle of the Blessed , and Into the Abyss . Each chapter has plenty of mystifier and secrets to solve , and we ’ll avail you with them in this full template .
Orpheus Ascending
In the Orpheus Ascending installment , your goal is to amass all fragments of Sarabhai and work them back to life history .
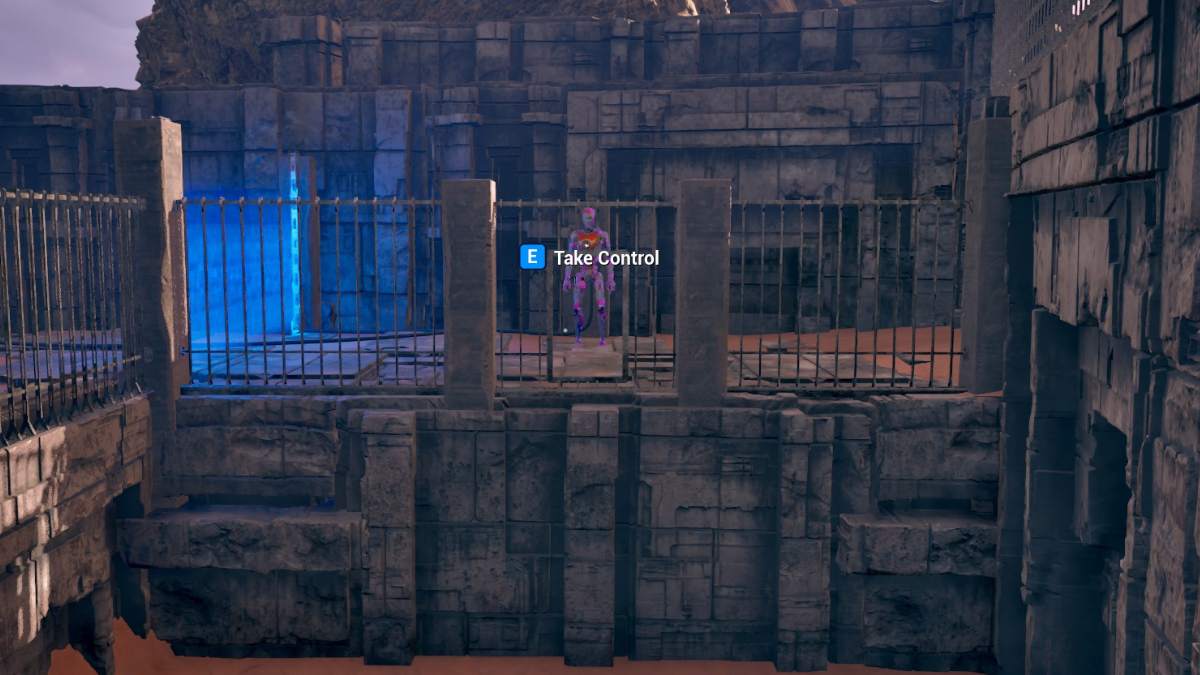
Head through the barrier and into the area of the puzzle . You ’ll see an Inverter that you will expend to open up up the blue barrier and get the Sarabhai sherd . You take to top a way of life for the blue laser to get to theBlue receiver . In ordering to do so , you have to :
To solve the Crossing the River Puzzle in the Orpheus Ascending DLC , you ’ll have to use the two connectors to get the optical maser to the low Receiver .

Using the first Connector like this intersects with all of the lasers and give way you a cleared path to the second Connector .
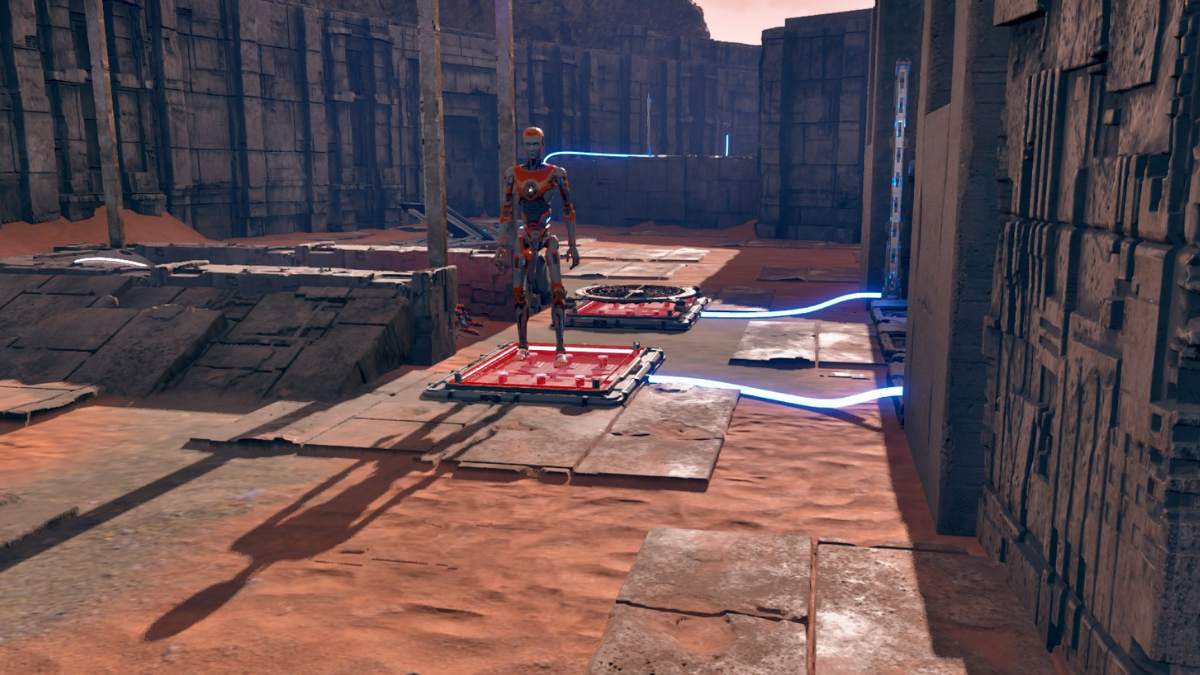
In the Sequence Puzzle area , you ’ll find an Accumulator and a Connector , which you may use to find the root . This one might seem complicated because of the two dissimilar colored laser , but it ’s actually quite wide-eyed .
There are two Connectors in the Vastness puzzle , which you will use to solve it . One of them is behind a downcast roadblock , so you have to unlock it first .

Image by Pro Game Guides
The Chain teaser in the Talos Principle Orpheus Ascending DLC is pretty uncomplicated . All you have to cognize is where to strike with the laser .
it ’s just as the name of the puzzle says : you need to establish an equilibrium between the blue and cerise optical maser . There are two Connectors and two Accumulators which you need to use . There needs to be the sameexact identification number of pointsthat a optical maser goes through on both side .
On the red side , there are alreadyfourimmovable connexion . However , on the blue side , there are onlytwo . That intend that the two Connectors you could move are both rifle to go on the juicy side

Screenshot by Pro Game Guides
For this puzzle , it ’s of import to figure out which Receivers to hit on the nose . There are four Connectors for each of the four section .
For the Concatenation teaser , you will follow a similar train of thought as in the Equilibrium teaser . There are two connection lock behind a purple barrier , and one is n’t . First , lease ’s take care of the violent side .
The red side is dewy-eyed , but the blue side gets more complicated .

Screenshot by Pro Game Guides
If you ’re like me and get lost about how to get the Hexahedron that is way up in the line with no other items , do n’t care . It ’s well-heeled to leave that1kcan also block lasers with hisbody .
The blue and blood-red optical maser intersect , with only one gain it through . The two pressure plates only launch the gates to help the laser reach their respective Receivers . With all of that selective information in judgement , let ’s begin .
The tenth puzzle of the DLC utilizes the same strategy as the one before , using 1k ’s body to switch the laser in different directions .

Image by Pro Game Guides
for activate the Receiver at the end , you will need to reset the course with the two Inverters .
watch the Switchboard puzzle can be very overwhelming for the first prison term , but it ’s all about simple laser location ( no penury to overcomplicate it ) . There are two Connectors that will serve you reach the result .
This one is similar to the Equilibrium puzzle , where you have to get the exact number of points for each laser . The red laser has six points , while the blue only has two . That means you have to total all three available Connectors to the dispirited side .

Image by Pro Game Guides
interchangeable to the Domino Effect puzzle , here you have to reckon out which Receivers to hit in the row .
Much like the name of the puzzle suggest , you are supposed to control the flow rate of the optical maser with the six Hexahedrons .
The point of this puzzle is to cancel out some of the lasers with different colors . It seems a bit overwhelming , but it is quite simple .

Image by Pro Game Guides
Once you get all of the fragments from the blue puzzles , you ’ll set off theHeart of Annubispuzzle . you may see it as a yellowish marker on your map , but it ’s locate at the juncture that lead to all of the different mystifier . Step into the imperial beam and climb up up the steps to reach the puzzle .
Your finish is to trip all Receivers on the walls ( two of each color ) of the heart of Annubis . There are two Connectors that you will use to achieve this . There are also only reddened and green Emitters for this puzzle .
Once you have it complete , head into thepurple beamagain to get hold of the last fragment of Sarabhai . However , once you are back down , there arethree additional(optional ) icteric puzzles you may nail to find more fragments .

Image by Pro Game Guides
The first xanthous mystifier you ’ll encounter is Hysterisis . There are two Connectors and two Receivers , along with a pole in the middle that continue moving . You have to utilize this toswitchwhich laser and receiver are dynamic .
As thepole move , it will keep disrupting each of the optical maser . All you have to do is look for the switching in front of both blue paries , and you ’ll discover the fragment .
When it come to the Clockwork puzzle , you will need to set it up so that each blue roadblock goes down one by one in a clockwork direction . This can happen when all three color laser beams cross . The timing of it also wo n’t let for the fans to power up , so you may easily pass through .

Image by Pro Game Guides
The final yellow teaser of the Orpheus Ascending Talos Principle 2 DLC is the stone’s throw by Step puzzle . You ’ll employ the consistency block mechanic here .
Once you have collected it , head back outside and take to go back to the real world , thus complete the Orpheus Ascending episode of the Road to Elysium Talos Principle 2 DLC .
Isle of the Blessed - Green Island
There are a pot of blue gates stuff your way in this teaser , but that ’s where the Activator and Jammer derive in .
We are bulge off strong in the Isle of the Blessed first puzzle . There are
You may have just brought the Accumulator in , but now you have to count on out how to get it back outside . Lucky for you , we have it all pen out .

Image by Pro Game Guides
Now that you have the Hexahedron , it ’s time to get the Inverter ( which you’re able to find in the corner ) to the other side .
The Jammer is the big key in the Theodorian Knot puzzle for the Talos Principle 2 DLC .
This part is the trickiest in the Theodorian Knot mystifier . You have to make certain that your optical maser do n’t interact with each other .

Image by Pro Game Guides
This teaser is disunite into two subdivision , but fortunately you have a body in each of them that you’re able to go between .
You ’ll be doing a fortune of back - and - forth in this surgical incision . Take it slow so you do n’t get confused ( like I do ) .
Isle of the Blessed - Red Puzzles
When you ’re done research the Green surface area , head to the red section of the Isle of the Blessed DLC instalment .
If you expect at this mystifier and tried to figure out how you ’re going to attain anything , do n’t worry . you may mount on the walls in this one .
Now , there ’s lead to be a bit of back and forth to get the Jammer where you want it .

Image by Pro Game Guides
Isle of the Blessed - Blue Puzzles
After the fleeceable and ruby , it ’s fourth dimension for you and Yaqut to complete the blue island and its puzzles .
Into the Abyss
The beach episode of Talos Principle was fun , but Into the Abyss is as it sounds , a harrowing exploration of Athena ’s memories .
If you are concerned in more puzzle games with a deeply philosophical tale , control outHow to get through the turn over rooms and solve the furnace teaser in INDIKAon Pro Game Guides .

Screenshot by Pro Game Guides

Image by Pro Game Guides

Screenshot by Pro Game Guides

Image by Pro Game Guides

Image by Pro Game Guides

Image by Pro Game Guides

Image by Pro Game Guides

Screenshot by Pro Game Guides

Image by Pro Game Guides

Screenshot by Pro Game Guides

Screenshot by Pro Game Guides

Screenshot by Pro Game Guides

Screenshot by Pro Game Guides

Screenshot by Pro Game Guides

Image by Pro Game Guides

Image by Pro Game Guides

Image by Pro Game Guides

Image by Pro Game Guides

Screenshot by Pro Game Guides

Image by Pro Game Guides

Screenshot by Pro Game Guides

Image by Pro Game Guides

Image by Pro Game Guides

Screenshot by Pro Game Guides

Screenshot by Pro Game Guides

Image by Pro Game Guides

Screenshot by Pro Game Guides

Image by Pro Game Guides

Image by Pro Game Guides

Image by Pro Game Guides

Screenshot by Pro Game Guides

Image by Pro Game Guides

Image by Pro Game Guides

Image by Pro Game Guides

Screenshot by Pro Game Guides

Image by Pro Game Guides

Screenshot by Pro Game Guides

Screenshot by Pro Game Guides

Screenshot by Pro Game Guides

Image by Pro Game Guides

Image by Pro Game Guides

Screenshot by Pro Game Guides

Image by Pro Game Guides

Image by Pro Game Guides

Image by Pro Game Guides

Screenshot by Pro Game Guides

Image by Pro Game Guides

Screenshot by Pro Game Guides

Image by Pro Game Guides

Screenshot by Pro Game Guides

Screenshot by Pro Game Guides

Image by Pro Game Guides

Image by Pro Game Guides

Image by Pro Game Guides

Image by Pro Game Guides

Image by Pro Game Guides

Screenshot by Pro Game Guides

Image by Pro Game Guides

Image by Pro Game Guides

Image by Pro Game Guides

Image by Pro Game Guides

Image by Pro Game Guides

Image by Pro Game Guides

Image by Pro Game Guides

Image by Pro Game Guides

Image by Pro Game Guides

Image by Pro Game Guides

Screenshot by Pro Game Guides

Screenshot by Pro Game Guides

Screenshot by Pro Game Guides

Screenshot by Pro Game Guides

Image by Pro Game Guides

Image by Pro Game Guides

Image by Pro Game Guides

Image by Pro Game Guides

Image by Pro Game Guides

Image by Pro Game Guides

Image by Pro Game Guides

Image by Pro Game Guides

Image by Pro Game Guides

Image by Pro Game Guides

Image by Pro Game Guides

Image by Pro Game Guides

Screenshot by Pro Game Guides

Image by Pro Game Guides

Image by Pro Game Guides

Image by Pro Game Guides

Image by Pro Game Guides

Screenshot by Pro Game Guides

Screenshot by Pro Game Guides

Image by Pro Game Guides

Image by Pro Game Guides

Image by Pro Game Guides

Image by Pro Game Guides

Image by Pro Game Guides

Image by Pro Game Guides

Image by Pro Game Guides

Image by Pro Game Guides

Image by Pro Game Guides

Image by Pro Game Guides

Image by Pro Game Guides

Image by Pro Game Guides

Image by Pro Game Guides

Screenshot by Pro Game Guides

Image by Pro Game Guides

Image by Pro Game Guides

Image by Pro Game Guides

Image by Pro Game Guides

Image by Pro Game Guides

Screenshot by Pro Game Guides

Screenshot by Pro Game Guides

Screenshot by Pro Game Guides

Image by Pro Game Guides

Screenshot by Pro Game Guides

Image by Pro Game Guides

Image by Pro Game Guides

Image by Pro Game Guides

Screenshot by Pro Game Guides

Screenshot by Pro Game Guides

Image by Pro Game Guides

Screenshot by Pro Game Guides

Screenshot by Pro Game Guides

Image by Pro Game Guides

Image by Pro Game Guides

Image by Pro Game Guides

Screenshot by Pro Game Guides

Screenshot by Pro Game Guides

Screenshot by Pro Game Guides

Image by Pro Game Guides

Screenshot by Pro Game Guides

Screenshot by Pro Game Guides

Screenshot by Pro Game Guides

Image by Pro Game Guides

Screenshot by Pro Game Guides

Image by Pro Game Guides

Image by Pro Game Guides

Image by Pro Game Guides

Image by Pro Game Guides

Screenshot by Pro Game Guides

Image by Pro Game Guides

Image by Pro Game Guides

Image by Pro Game Guides

Screenshot by Pro Game Guides

Image by Pro Game Guides

Screenshot by Pro Game Guides

Screenshot by Pro Game Guides

Screenshot by Pro Game Guides

Screenshot by Pro Game Guides

Screenshot by Pro Game Guides

Screenshot by Pro Game Guides

Screenshot by Pro Game Guides

Image by Pro Game Guides

Image by Pro Game Guides

Image by Pro Game Guides

Image by Pro Game Guides

Screenshot by Pro Game Guides

Image by Pro Game Guides

Image by Pro Game Guides

Screenshot by Pro Game Guides

Image by Pro Game Guides

Screenshot by Pro Game Guides

Image by Pro Game Guides

Image by Pro Game Guides

Image by Pro Game Guides

Image by Pro Game Guides

Screenshot by Pro Game Guides

Screenshot by Pro Game Guides

Image by Pro Game Guides

Image by Pro Game Guides

Screenshot by Pro Game Guides

Image by Pro Game Guides

Screenshot by Pro Game Guides

Screenshot by Pro Game Guides

Screenshot by Pro Game Guides

Screenshot by Pro Game Guides

Screenshot by Pro Game Guides

Screenshot by Pro Game Guides

Image by Pro Game Guides
![]()
Image by Pro Game Guides
![]()
Screenshot by Pro Game Guides
![]()
Screenshot by Pro Game Guides
![]()
Screenshot by Pro Game Guides
![]()
Image by Pro Game Guides
![]()
Image by Pro Game Guides
![]()
Image by Pro Game Guides

Screenshot by Pro Game Guides

Image by Pro Game Guides

Image by Pro Game Guides

Image by Pro Game Guides

Image by Pro Game Guides

Screenshot by Pro Game Guides

Image by Pro Game Guides

Image by Pro Game Guides

Screenshot by Pro Game Guides

Image by Pro Game Guides

Screenshot by Pro Game Guides

Image by Pro Game Guides

Image by Pro Game Guides

Image by Pro Game Guides

Image by Pro Game Guides

Image by Pro Game Guides

Screenshot by Pro Game Guides

Screenshot by Pro Game Guides

Image by Pro Game Guides

Image by Pro Game Guides

Image by Pro Game Guides

Image by Pro Game Guides

Screenshot by Pro Game Guides

Screenshot by Pro Game Guides

Image by Pro Game Guides

Image by Pro Game Guides

Image by Pro Game Guides

Image by Pro Game Guides

Image by Pro Game Guides

Image by Pro Game Guides

Image by Pro Game Guides

Image by Pro Game Guides

Image by Pro Game Guides

Image by Pro Game Guides

Image by Pro Game Guides

Image by Pro Game Guides

Image by Pro Game Guides

Screenshot by Pro Game Guides

Screenshot by Pro Game Guides

Image by Pro Game Guides

Screenshot by Pro Game Guides

Image by Pro Game Guides

Image by Pro Game Guides

Screenshot by Pro Game Guides

Screenshot by Pro Game Guides

Image by Pro Game Guides

Screenshot by Pro Game Guides

Screenshot by Pro Game Guides

Image by Pro Game Guides

Image by Pro Game Guides

Image by Pro Game Guides

Screenshot by Pro Game Guides

Image by Pro Game Guides

Image by Pro Game Guides

Image by Pro Game Guides

Image by Pro Game Guides

Screenshot by Pro Game Guides

Image by Pro Game Guides

Image by Pro Game Guides

Image by Pro Game Guides

Image by Pro Game Guides

Image by Pro Game Guides

Screenshot by Pro Game Guides

Screenshot by Pro Game Guides

Screenshot by Pro Game Guides

Image by Pro Game Guides

Image by Pro Game Guides

Image by Pro Game Guides

Image by Pro Game Guides

Image by Pro Game Guides

Screenshot by Pro Game Guides

Image by Pro Game Guides

Screenshot by Pro Game Guides

Image by Pro Game Guides

Screenshot by Pro Game Guides

Screenshot by Pro Game Guides

Image by Pro Game Guides

Image by Pro Game Guides

Image by Pro Game Guides

Screenshot by Pro Game Guides

Image by Pro Game Guides

Screenshot by Pro Game Guides

Image by Pro Game Guides

Image by Pro Game Guides

Image by Pro Game Guides

Screenshot by Pro Game Guides

Image by Pro Game Guides

Screenshot by Pro Game Guides

Image by Pro Game Guides

Image by Pro Game Guides

Screenshot by Pro Game Guides

Image by Pro Game Guides

Image by Pro Game Guides

Screenshot by Pro Game Guides

Image by Pro Game Guides

Screenshot by Pro Game Guides

Image by Pro Game Guides

Image by Pro Game Guides

Image by Pro Game Guides

Image by Pro Game Guides

Screenshot by Pro Game Guides

Image by Pro Game Guides

Screenshot by Pro Game Guides

Screenshot by Pro Game Guides

Screenshot by Pro Game Guides

Image by Pro Game Guides

Image by Pro Game Guides

Image by Pro Game Guides

Image by Pro Game Guides

Image by Pro Game Guides

Screenshot by Pro Game Guides

Screenshot by Pro Game Guides

Image by Pro Game Guides

Image by Pro Game Guides

Screenshot by Pro Game Guides

Screenshot by Pro Game Guides

Image by Pro Game Guides

Screenshot by Pro Game Guides

Image by Pro Game Guides

Image by Pro Game Guides

Screenshot by Pro Game Guides

Screenshot by Pro Game Guides

Screenshot by Pro Game Guides

Screenshot by Pro Game Guides

Screenshot by Pro Game Guides

Screenshot by Pro Game Guides

Screenshot by Pro Game Guides

Screenshot by Pro Game Guides

Screenshot by Pro Game Guides

Screenshot by Pro Game Guides

Screenshot by Pro Game Guides

Screenshot by Pro Game Guides

Screenshot by Pro Game Guides

Screenshot by Pro Game Guides

Screenshot by Pro Game Guides

Screenshot by Pro Game Guides

Screenshot by Pro Game Guides

Screenshot by Pro Game Guides

Image by Pro Game Guides

Image by Pro Game Guides

Image by Pro Game Guides

Image by Pro Game Guides

Image by Pro Game Guides

Image by Pro Game Guides

Image by Pro Game Guides

Image by Pro Game Guides

Image by Pro Game Guides

Image by Pro Game Guides

Image by Pro Game Guides

Image by Pro Game Guides

Image by Pro Game Guides

Image by Pro Game Guides

Image by Pro Game Guides

Screenshot by Pro Game Guides

Image by Pro Game Guides

Image by Pro Game Guides

Image by Pro Game Guides

Image by Pro Game Guides

Image by Pro Game Guides

Screenshot by Pro Game Guides

Image by Pro Game Guides

Screenshot by Pro Game Guides

Image by Pro Game Guides

Screenshot by Pro Game Guides

Image by Pro Game Guides

Image by Pro Game Guides

Image by Pro Game Guides

Image by Pro Game Guides

Screenshot by Pro Game Guides

Screenshot by Pro Game Guides

Image by Pro Game Guides

Image by Pro Game Guides

Screenshot by Pro Game Guides

Image by Pro Game Guides

Image by Pro Game Guides

Screenshot by Pro Game Guides

Screenshot by Pro Game Guides

Image by Pro Game Guides

Image by Pro Game Guides

Image by Pro Game Guides

Screenshot by Pro Game Guides

Image by Pro Game Guides

Image by Pro Game Guides

Image by Pro Game Guides

Image by Pro Game Guides

Image by Pro Game Guides

Image by Pro Game Guides

Image by Pro Game Guides

Screenshot by Pro Game Guides

Image by Pro Game Guides

Image by Pro Game Guides

Image by Pro Game Guides

Screenshot by Pro Game Guides

Screenshot by Pro Game Guides

Image by Pro Game Guides

Screenshot by Pro Game Guides

Image by Pro Game Guides

Screenshot by Pro Game Guides

Screenshot by Pro Game Guides

Image by Pro Game Guides

Image by Pro Game Guides

Image by Pro Game Guides

Screenshot by Pro Game Guides

Screenshot by Pro Game Guides
Screenshot by Pro Game Guides
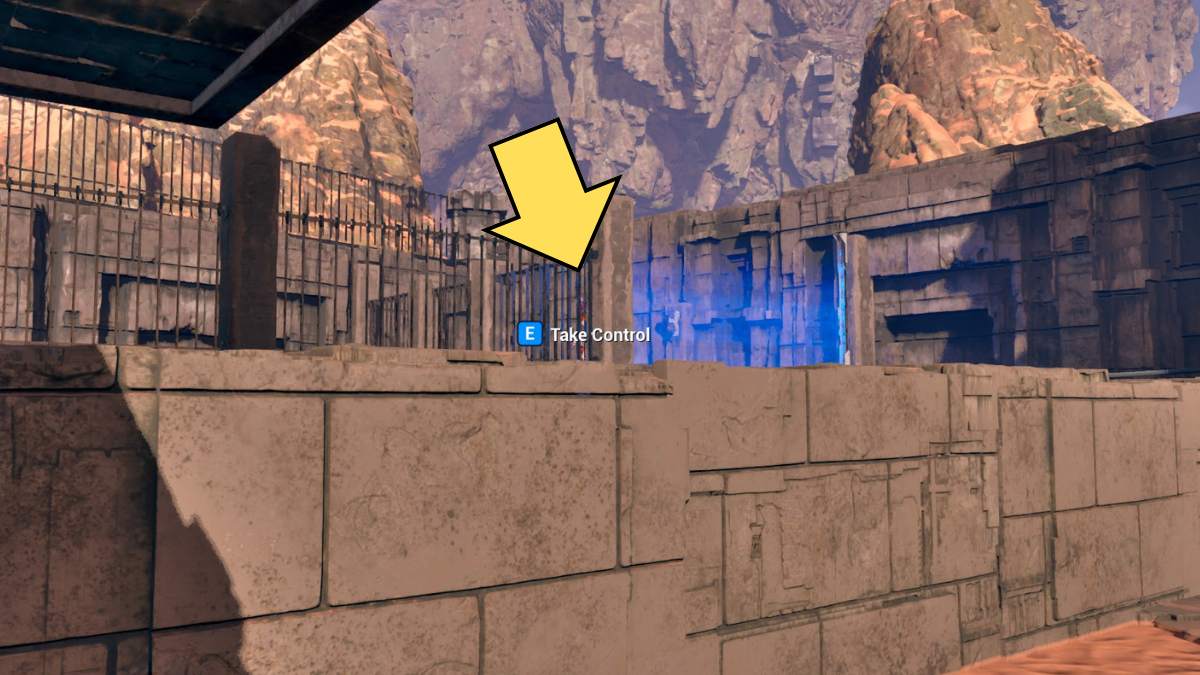
Image by Pro Game Guides
Screenshot by Pro Game Guides
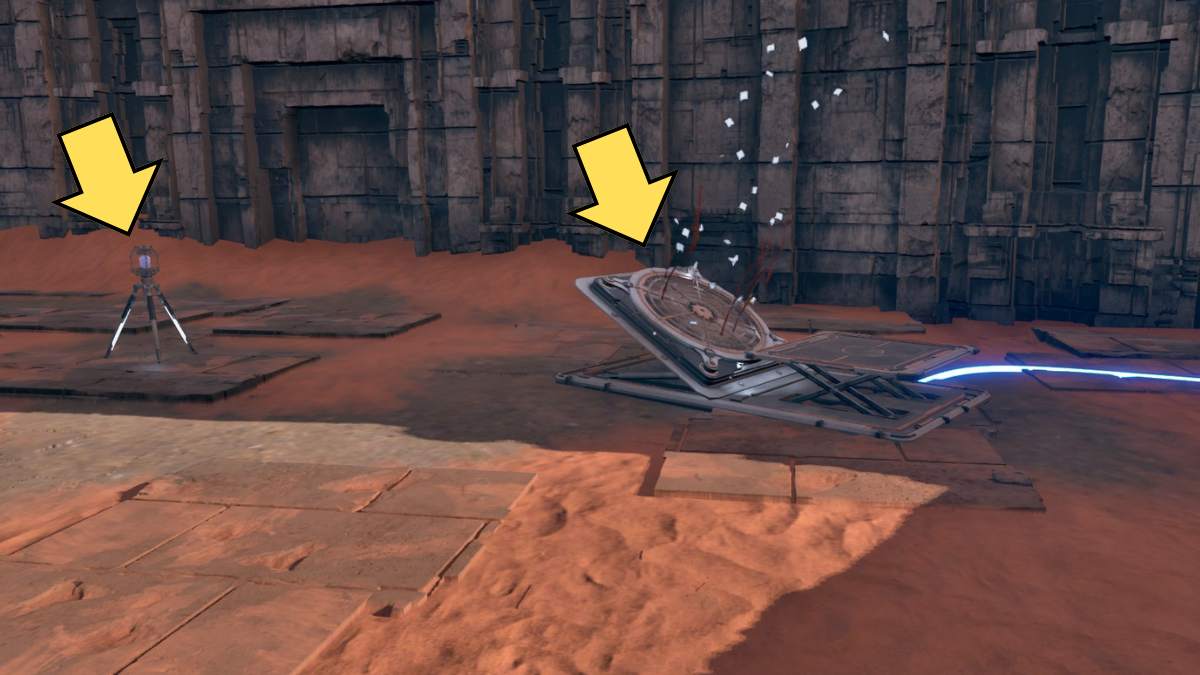
Image by Pro Game Guides
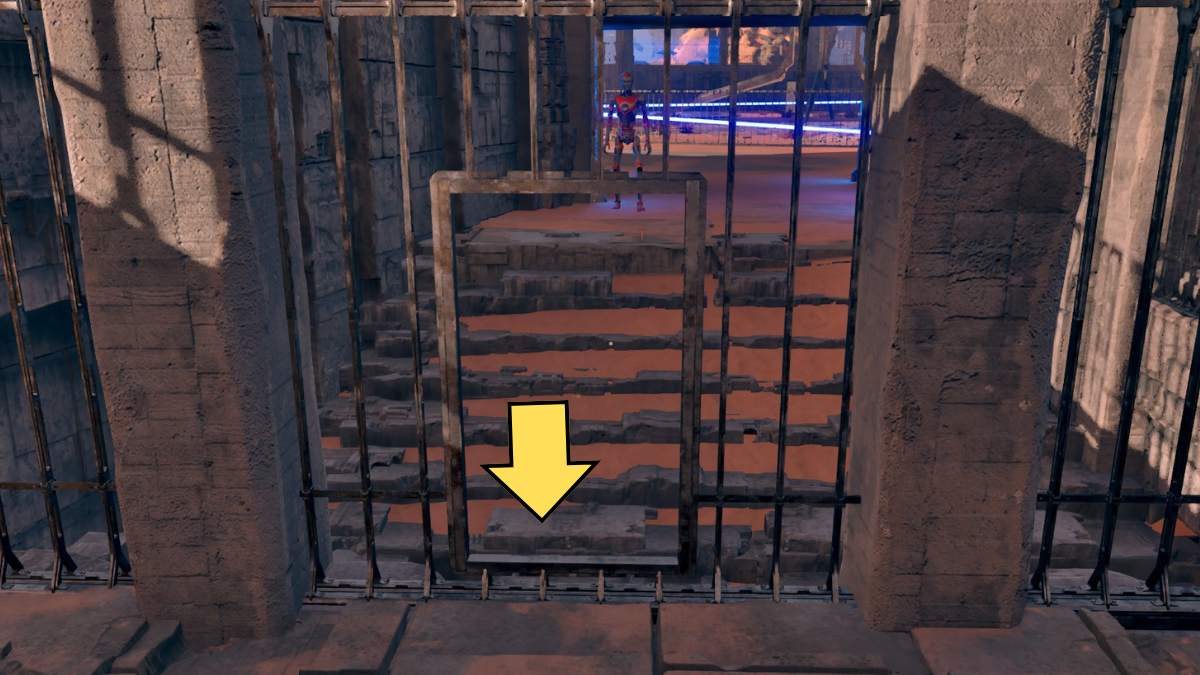
Image by Pro Game Guides

Image by Pro Game Guides

Image by Pro Game Guides

Image by Pro Game Guides

Screenshot by Pro Game Guides

Screenshot by Pro Game Guides

Image by Pro Game Guides

Screenshot by Pro Game Guides

Image by Pro Game Guides

Image by Pro Game Guides

Image by Pro Game Guides

Image by Pro Game Guides

Screenshot by Pro Game Guides

Screenshot by Pro Game Guides

Image by Pro Game Guides

Image by Pro Game Guides

Image by Pro Game Guides

Image by Pro Game Guides

Image by Pro Game Guides

Image by Pro Game Guides

Screenshot by Pro Game Guides

Screenshot by Pro Game Guides

Screenshot by Pro Game Guides

Screenshot by Pro Game Guides

Screenshot by Pro Game Guides

Screenshot by Pro Game Guides

Image by Pro Game Guides

Screenshot by Pro Game Guides

Screenshot by Pro Game Guides

Screenshot by Pro Game Guides

Screenshot by Pro Game Guides

Screenshot by Pro Game Guides

Screenshot by Pro Game Guides

Screenshot by Pro Game Guides


Screenshot by Pro Game Guides

Image by Pro Game Guides

Image by Pro Game Guides

Screenshot by Pro Game Guides

Screenshot by Pro Game Guides

Image by Pro Game Guides

Screenshot by Pro Game Guides

Screenshot by Pro Game Guides

Image by Pro Game Guides

Screenshot by Pro Game Guides

Image by Pro Game Guides

Image by Pro Game Guides

Image by Pro Game Guides

Image by Pro Game Guides

Image by Pro Game Guides

Image by Pro Game Guides

Image by Pro Game Guides

Screenshot by Pro Game Guides
