Bunny windfall !
Sweet Dreams tells the tale of Arlo , a youthful tyke immobilise in his dreams and who needs to wake up up ! It ’s a classic point - and - click adventure full of hidden physical object to ascertain and tricky puzzles to solve and you ’ll find the walkthrough of Chapter 4 below .
Adventure Escape Mysteries Sweet Dreams walkthrough, Chapter 4
This templet and walkthrough is for Chapter 4 of Sweet Dreams , which set out when our zep make it through the door in the sky but are faced with several broken portals . If you ’re not currently on Chapter 4 , do n’t worry ! Click through to mySweet Dreams walkthrough hub pageto find connexion to scout for all of the other chapters .
The portal room
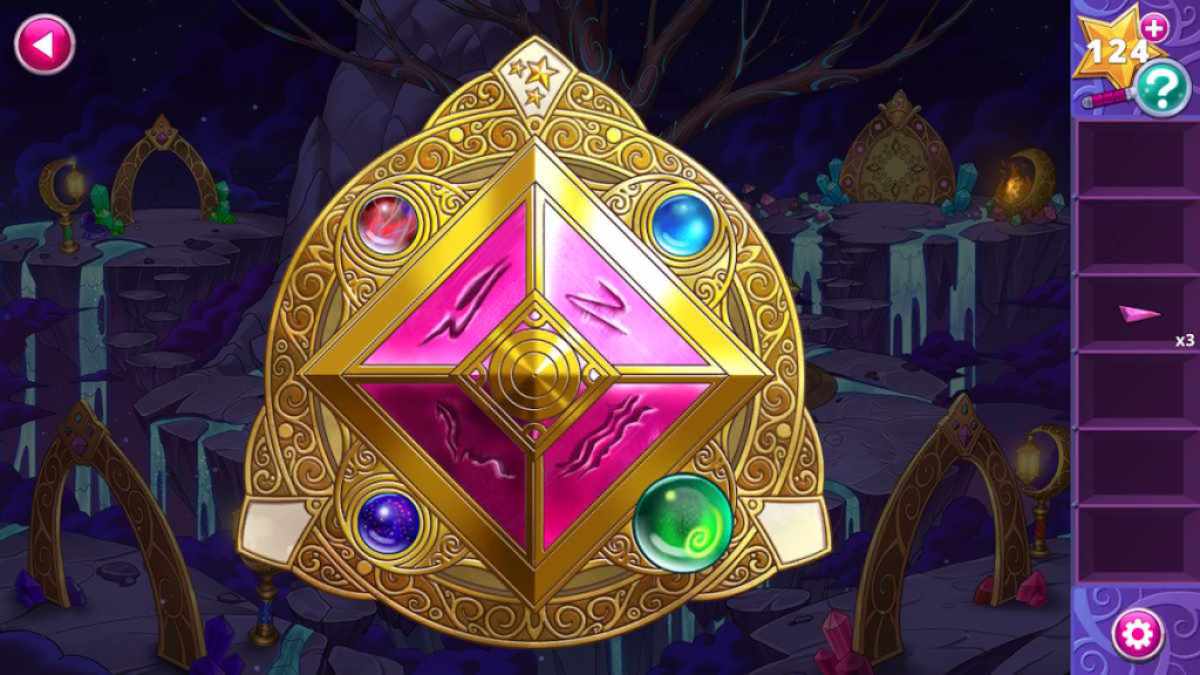
Pick upthree Pedestal Rings(a1 - 3 ) , then get a close - up of the door ( a4 ) and take afourth Pedestal Ring , plus anOrbfrom the blossom on the left in the same ending - up . choose the pedestal ( a5 ) for a faithful - up , move the rocks off it , and take theCrystal Fragment .
wait at the red-faced portal ( a6 ) to notice afifth Pedestal Ring , the blueish ( a7 ) for asecond Crystal Fragment , and the green ( a8 ) for athird Crystal Fragment(it ’s in the grey box on the left in the conclusion - up ) . take the pedestal once more , add two of the footstall rings , and notice the symbolisation are green leave . Also , take down there are three star are the top of the stand .
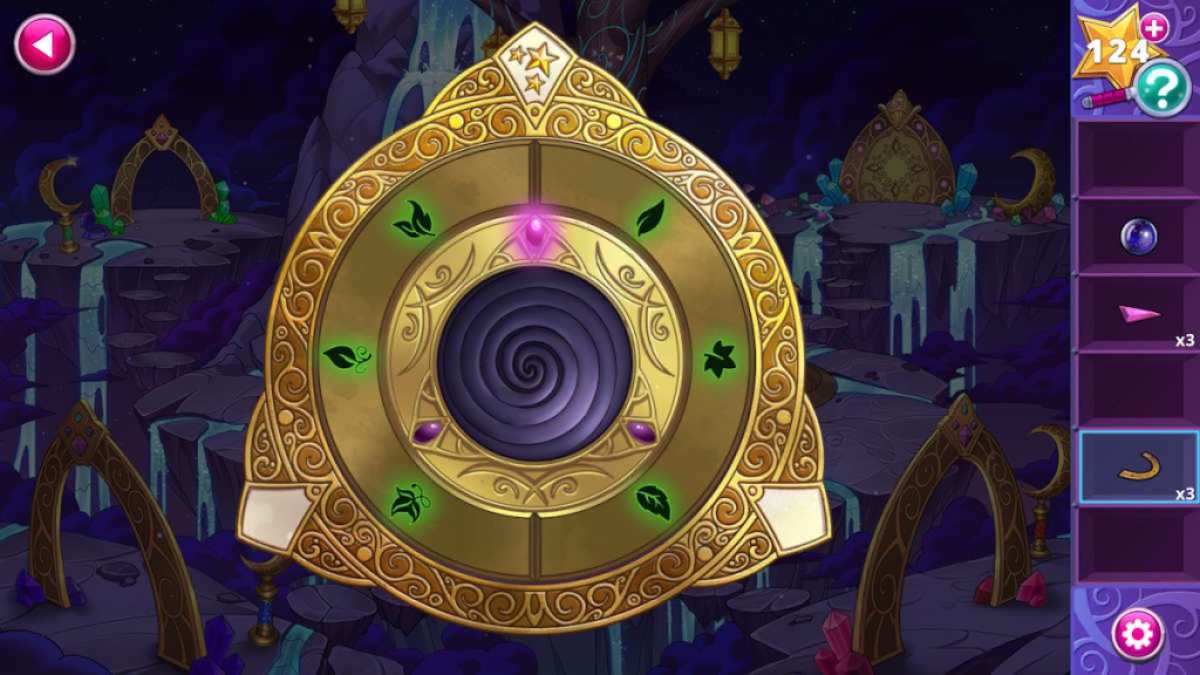
Now look at the three sets of cutting on the tree ( a9 ) and note the position and shape of the leaves in each one . Copy these shapes and position on the stand ( see above ) and it will open up , lowering the Sir Herbert Beerbohm Tree . Take theBranchthat declension ( a10 ) and use it to collect thethree Lanterns(a11 ) .

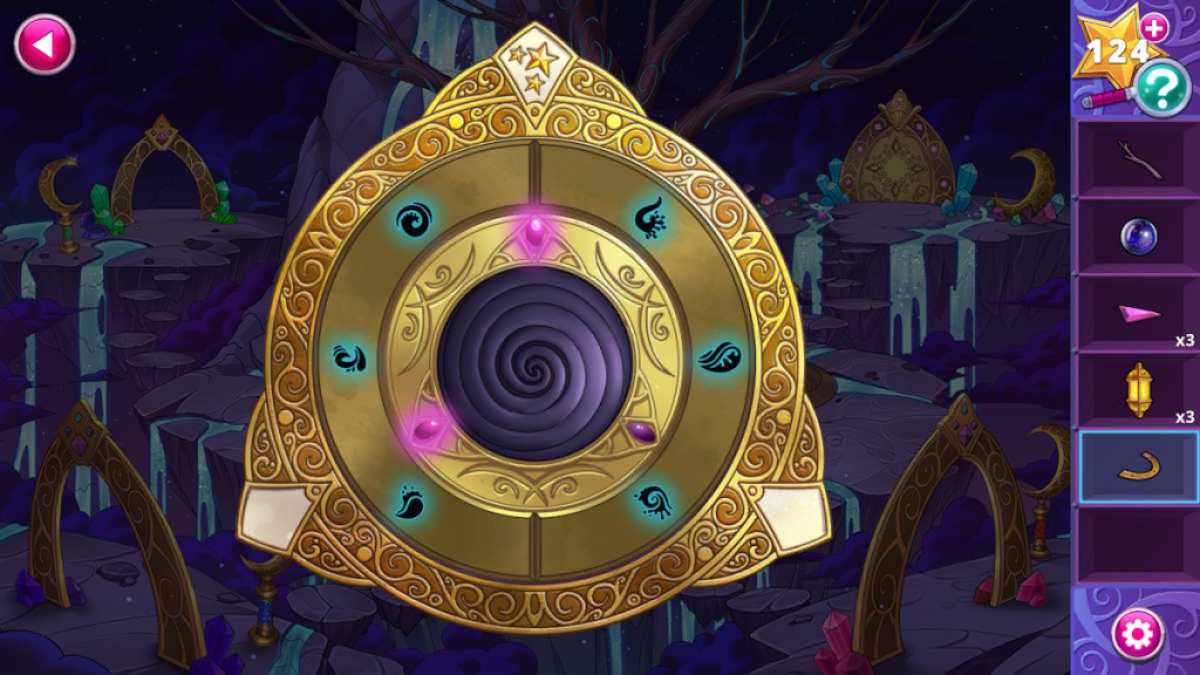
Add two more pedestal mob to the pedestal ( a5 ) and repeat the symbol - wiz - Sir Herbert Beerbohm Tree process with the blue wave pattern ( see above ) . This stops the falls , allowing you to collect asixth Pedestal Ringfrom the cliff behind the Sir Herbert Beerbohm Tree .
Related : Vanishing Act walkthrough ( Adventure Escape Mysteries )
Lighting the torches
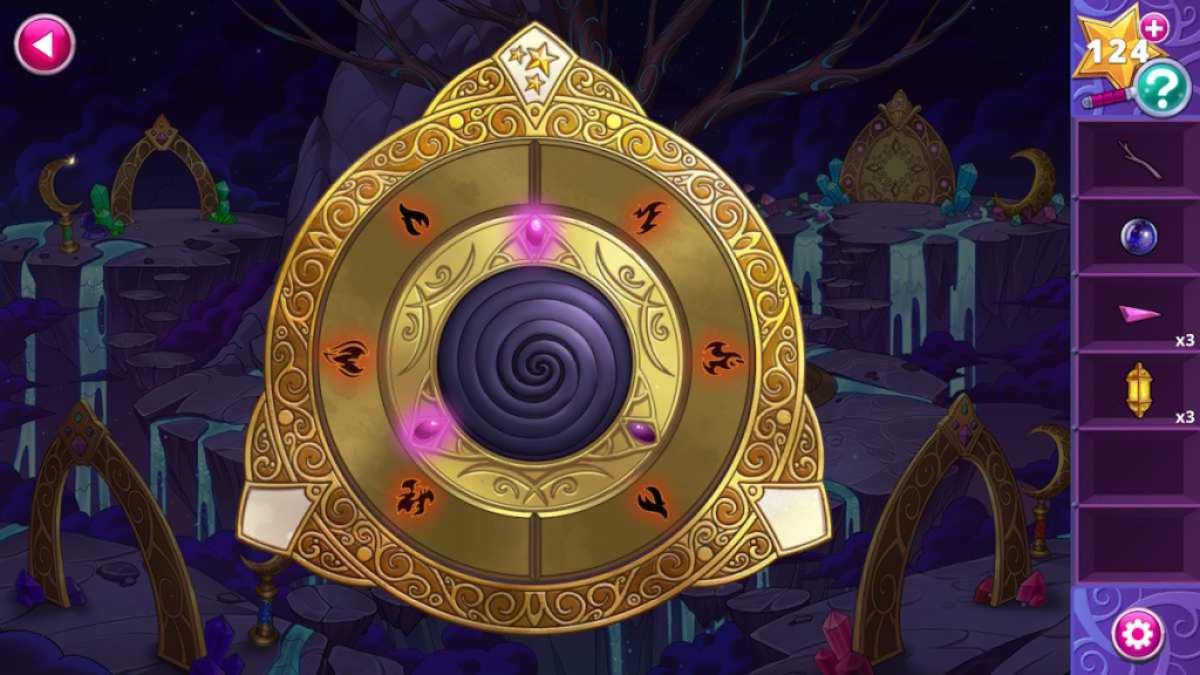
reduplicate the pedestal anchor ring process one more time , this time with cerise symbolisation ( see above , where just the bottom - depart symbol needs to be clicked once to make out the puzzle ) . This will light a fire near the room access ( a3 ) , so use the branch on it to get aLit Branch . Now fall a torch in each of the three portal ( a6 , a7 , and a8 ) , light them with the lit ramification , and take anOrbfrom each .
Select the gold and pinkish physical object that has risen from the pedestal ( a5 ) , tot up the four orb , and position them in the right spots . You get this data by looking at each room access and portal , noting the semblance of the crystals by them and the shape of the swarm above each . See above for the correct location .
Take afourth Crystal Fragmentfrom the prime that ’s now in the pool at the base of the tree , then pick out the door ( a4 ) and add the four fragments . Head through the green hepatic portal vein .
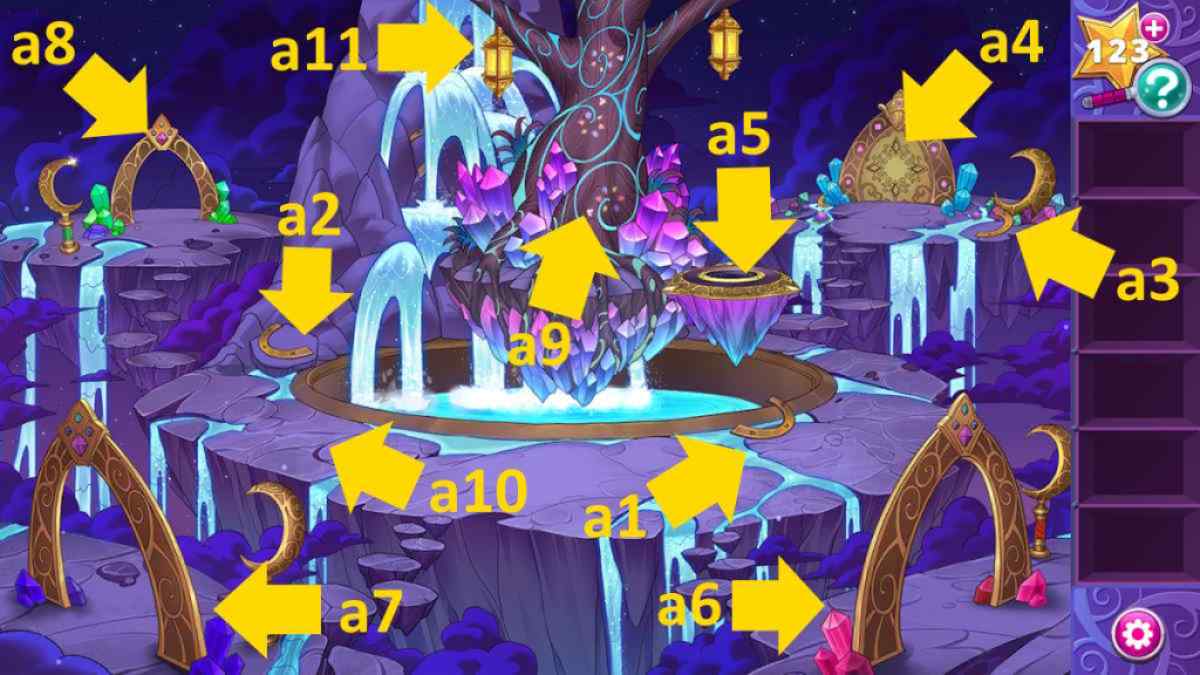
Image by Pro Game Guides
The green portal
For the bunny mystifier , you require tofollow the trail of channelize ears(I’ve score them all above ) .
Click the top bunny ( b1 ) and note the symbols it blows with the bubbles ( 3 pith , 2 stars , 1 whirl , 4 moons ) . Now click the ladder ( b2 ) and go up .
Take theCup(c1 ) and use it to get someRainbow Juice(c2 ) . Use the succus to mend the teeter-totter ( c3 ) , then get through the seesaw again to get theHourglass . Now use the juice on the jocund - go - round ( c4 ) , click it again to reel it , and take theKeychainthat downfall .
Screenshot by Pro Game Guides
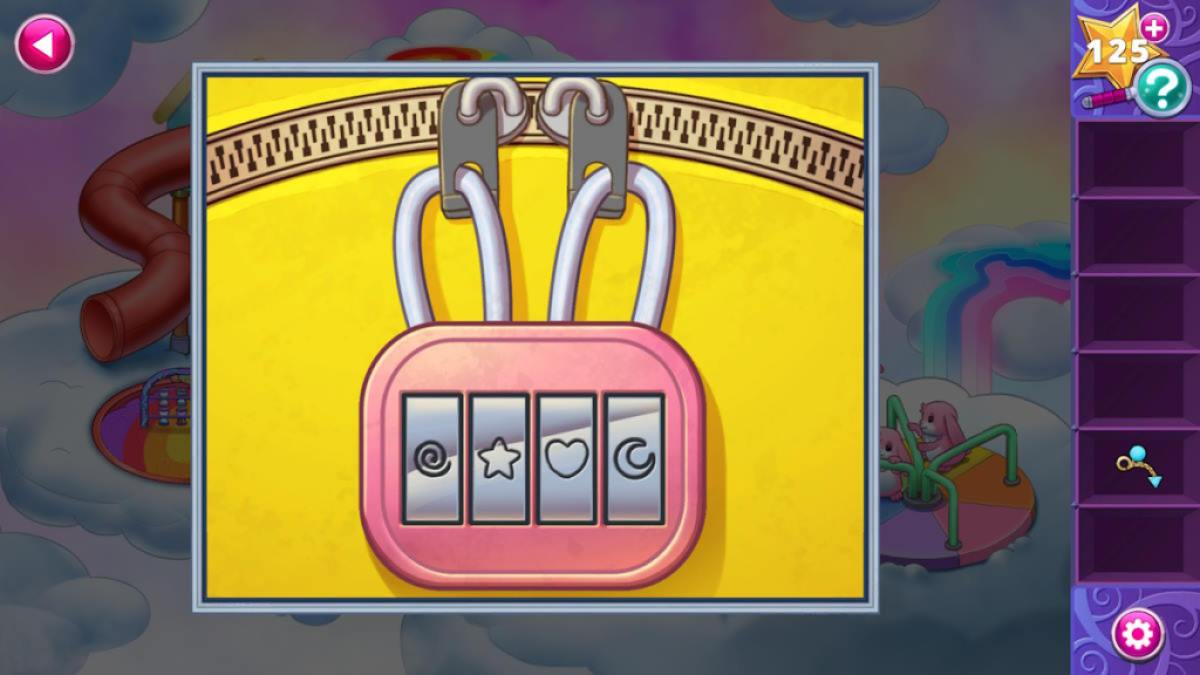
pick out the backpack ( c5 ) and set the symbols using the house of cards codification from earlier ( from remaining : swirl , star , center , moon- see above ) . Take theJump Ropefrom the backpack . dawn the bunny on the red swoop ( c6 ) and take theCoinit pearl at the bottom .
concern : Scary Horror 2 – Chapter 1 Walkthrough
Go down ( c7 ) and apply the coin to operate the mechanical hulk ( b3 ) and welcome asecond Hourglass . Use the jump roach to ready the swings ( b4 ) , and then take athird Hourglassfrom the swarm above once the swings flip over .
Screenshot by Pro Game Guides
Go back up and impart the hourglasses to the political machine ( c8 ) to start a colour separation puzzle . Click the hourglass in the next order :
Rescue Revi
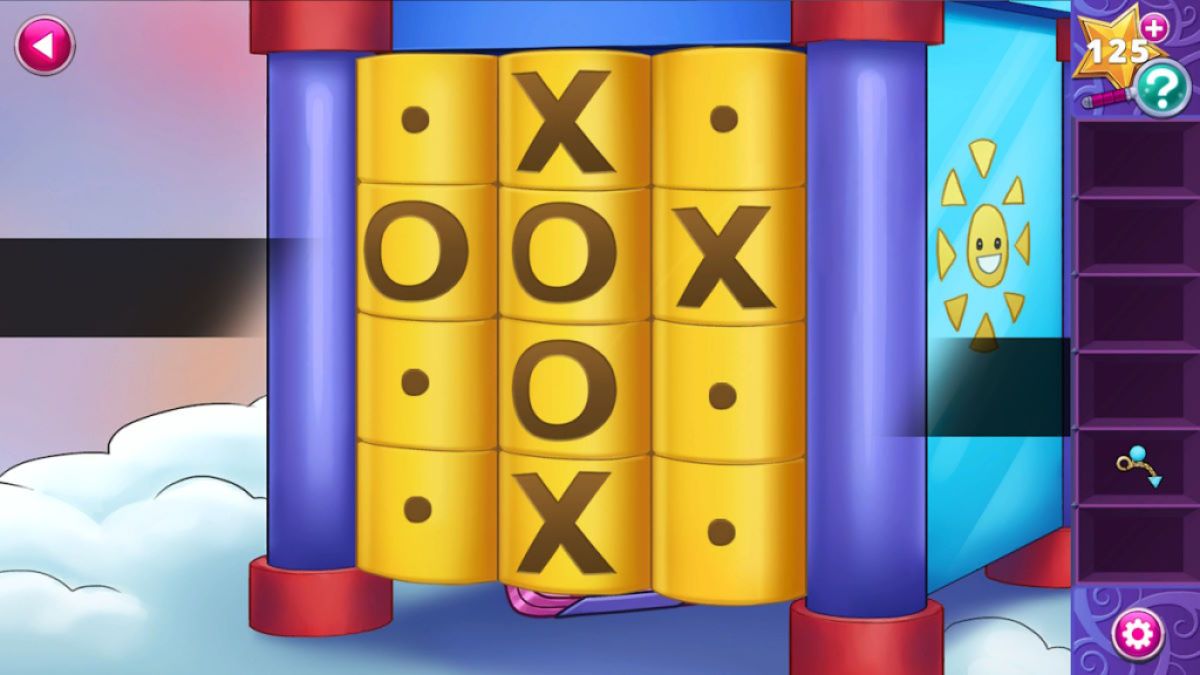
This make a rainbow span , so go back down and take Revi ( b5 ) to get her to slue down and join you . Go up again and talk to the monitor ( c9 ) , then take theChalkby the hourglass puzzle ( c8 ) . Give the crank to the hopscotch bunny girl ( b6 ) , and then note how the symbolization draw up with the sun(X , OOX , O , X , in a cross form ) .
Go up once more and select the 0 and crosses puzzle next to the monitoring gadget ( c9 ) . switch over the symbols to equalise the hopscotch pattern ( see above ) . Use the keychain to open up the lunchbox you find behind the mystifier and take theSandwich And Apple . mouth to the monitor with the sandwich and apple selected and the monitor will take you to the lunch way .
To make a successful set of trades for the cupcake , select the following board in order :
Screenshot by Pro Game Guides
Once you ’re done you ’ll get aCupcake . Give it to the monitor ( c9 ) and they ’ll give you theCrystal . advert it to move back to the portal bedroom , tot the lechatelierite to the door ( a4 ) , and you’llcomplete the chapter .
To continue on the escapade with us here at Pro Game Guides , snap through to mySweet Dreams walkthrough Chapter 5 - Adventure Escape Mysteries !
Screenshot by Pro Game Guides

Image by Pro Game Guides
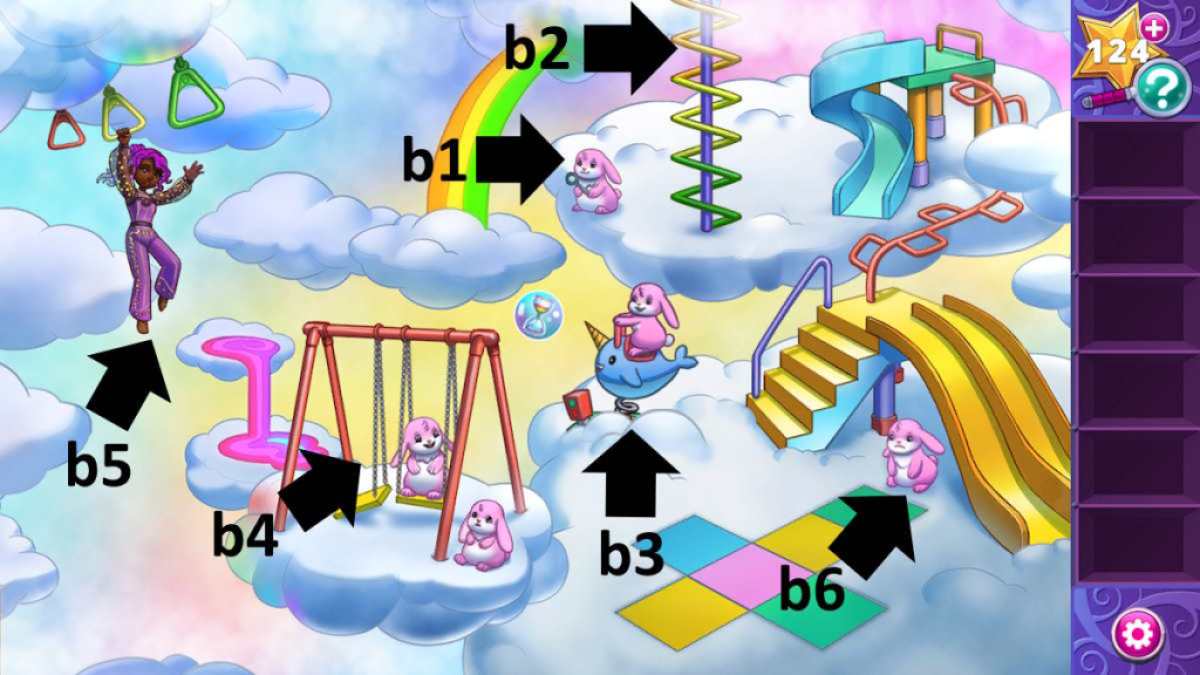
Image by Pro Game Guides
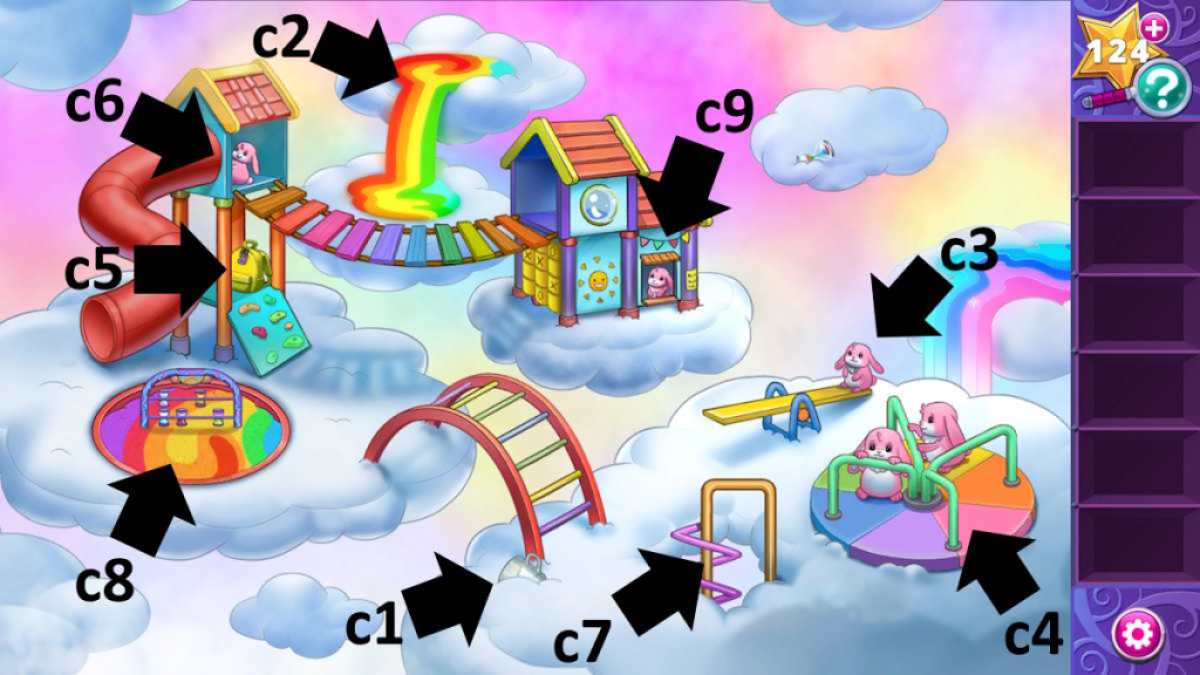
Image by Pro Game Guides
Screenshot by Pro Game Guides
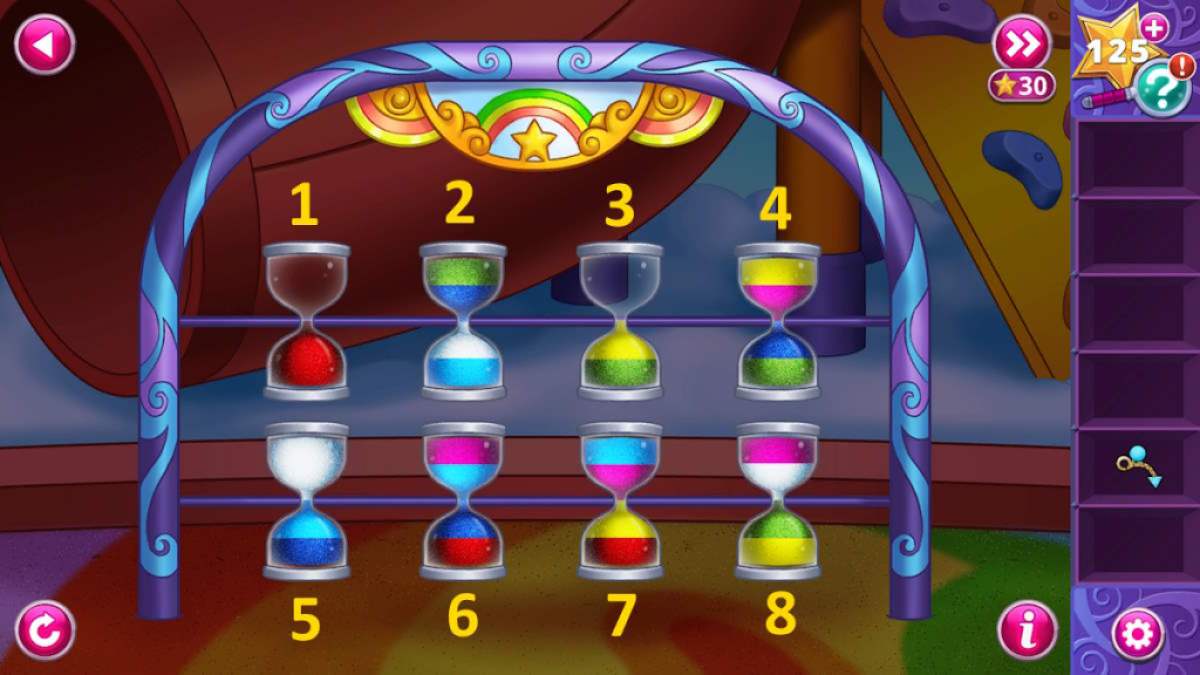
Image by Pro Game Guides
Screenshot by Pro Game Guides
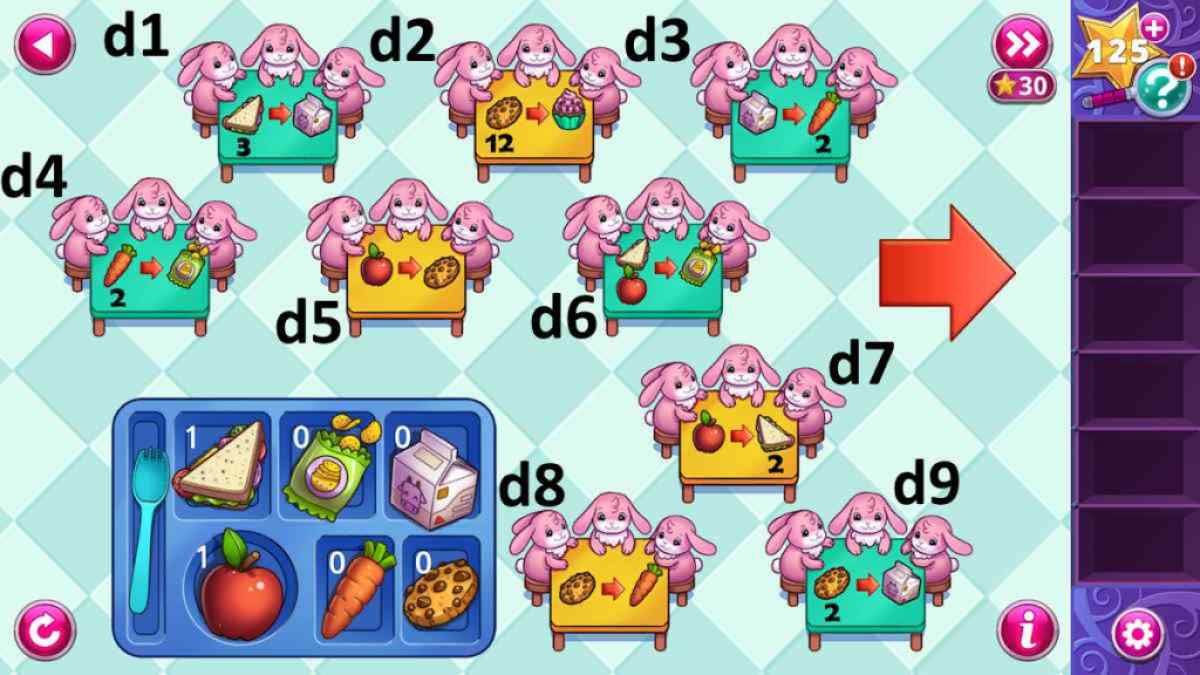
Image by Pro Game Guides
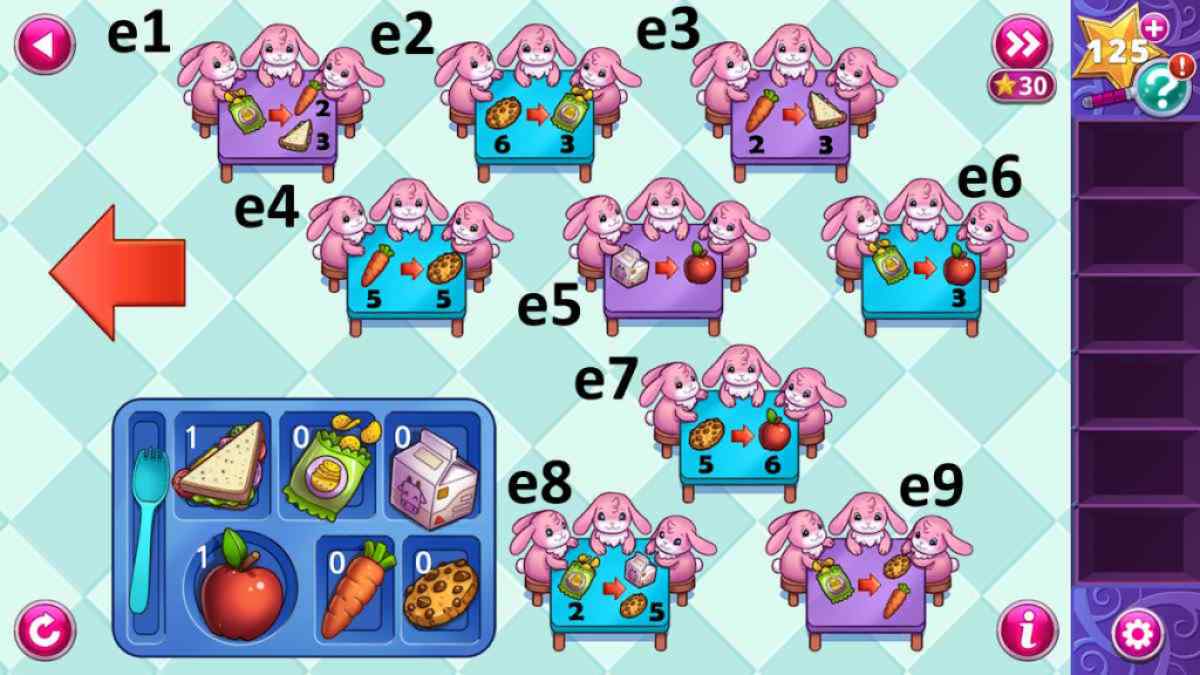
Image by Pro Game Guides
