This townsfolk is full of monsters , how can you just sit there and not follow our guide ? !
Silent Hill 2 Remake is Bloober Team ’s pure reimagining of the original repulsion chef-d’oeuvre , and there are plenty of familiar and unexampled secret and terrors to uncover during James ' journey through the abysm of Silent Hill . Here ’s our in - depth walkthrough to facilitate you with the game ’s many objectives , puzzles , and other inscrutable secret .
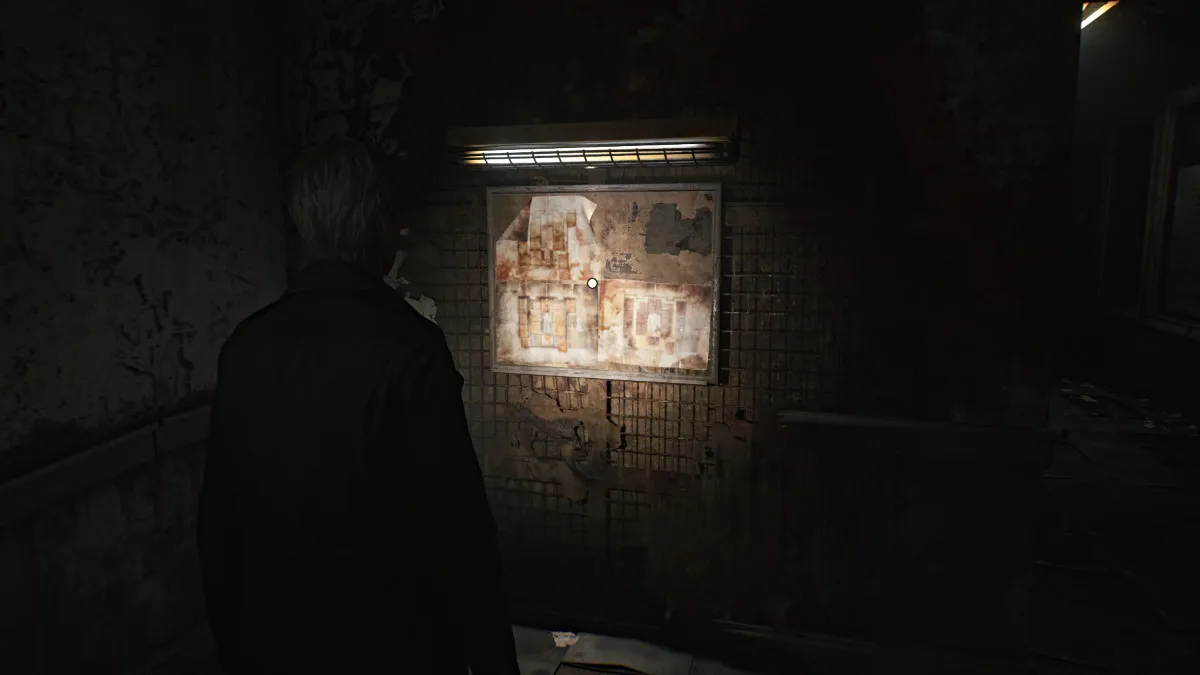
Silent Hill 2 Remake Walkthrough - Observation Area & the Cemetery
The following walkthrough is done with both types of difficulty ( i.e. - Combat and Puzzles ) position toStandard , so if you ’re playing a different difficultness there may be a divergence in the location and/or handiness of sure items such as wellness drink and ammunition . Solutions for puzzles may vary as well .
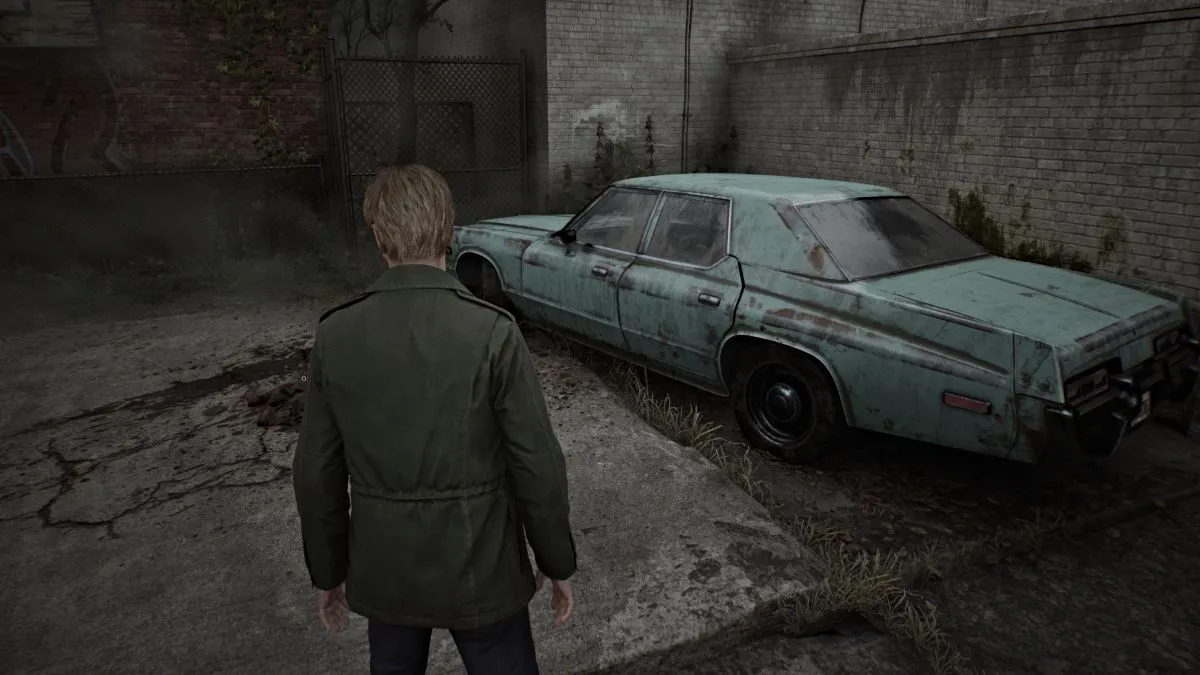
After the iconic possibility cutscene , get your bearings with James ' movement and fundamental interaction , and grab your firstMapfrom the gadget driver ’s backside in his machine .
While exploring the Observation Area , if you attempt to go down the route in the opposite commission from Silent Hill , you could chop-chop unlock the ' No Turning Back ' achievement .

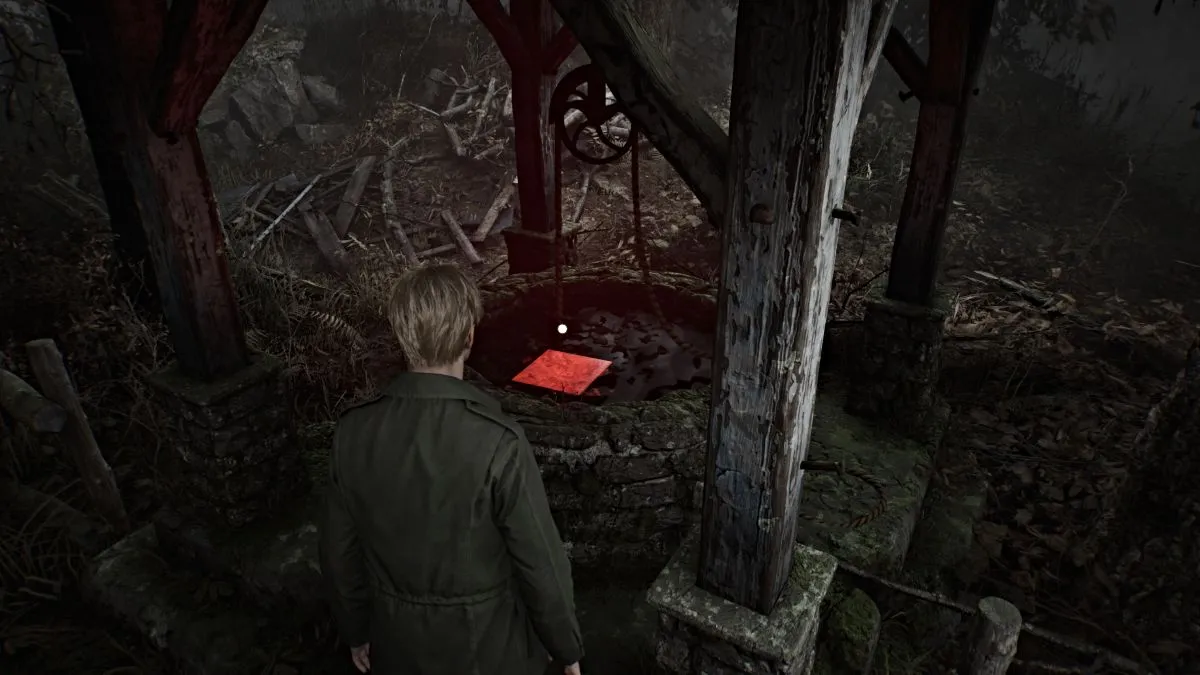
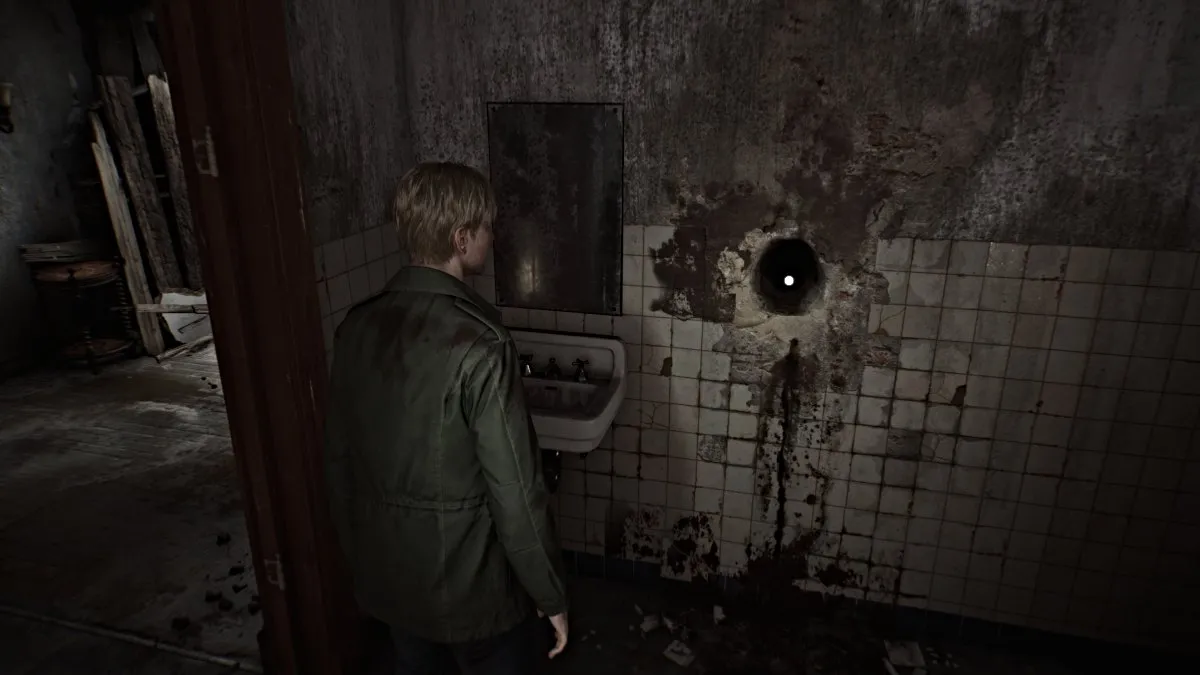
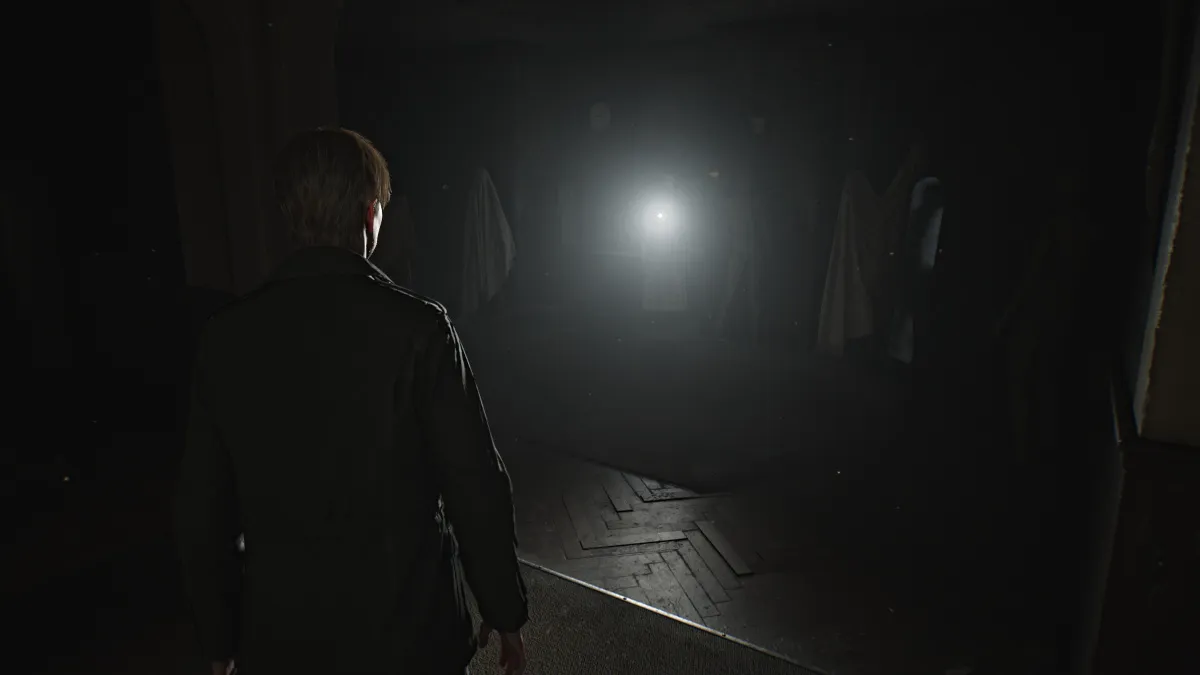
Go down the step at the far end of the Observation Area and start your long , fog - occupy pass towards Silent Hill . At one head you ’ll add up across a well with a red igniter utter from it . Go up to it ; inside is a brilliant red second power that signifies your first Manual Save Point ( we ’ll bring up to them from now on as"Red Save Points " ) . Find and use as many of these as potential during your playthrough .
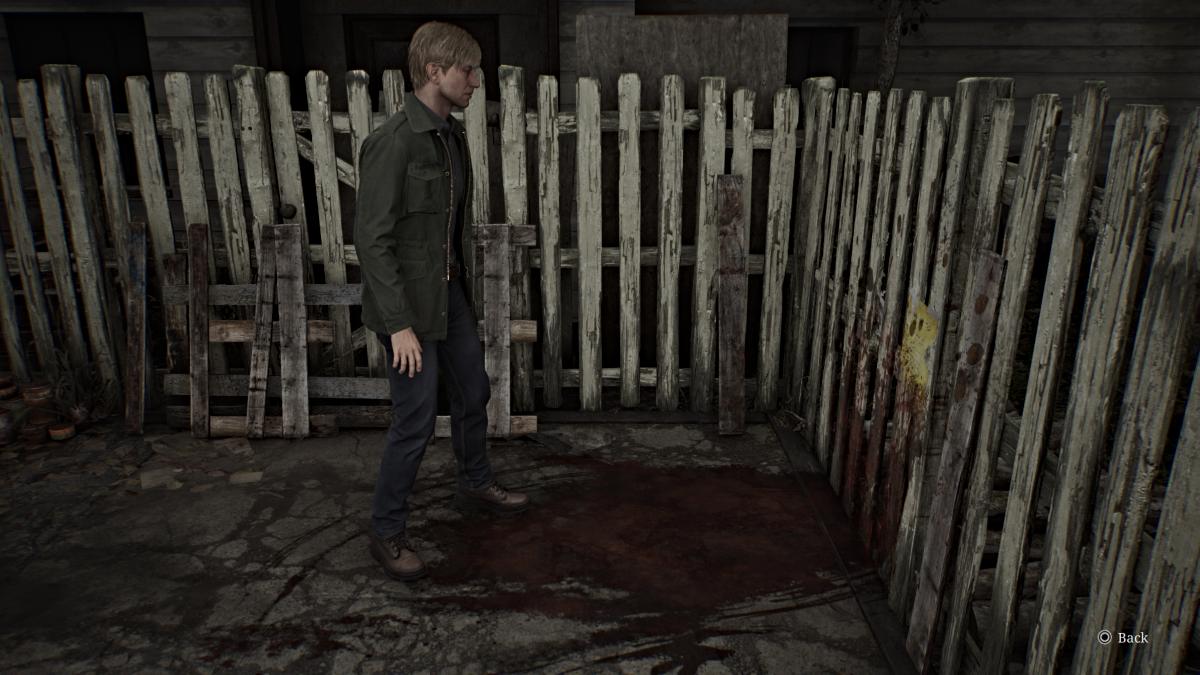
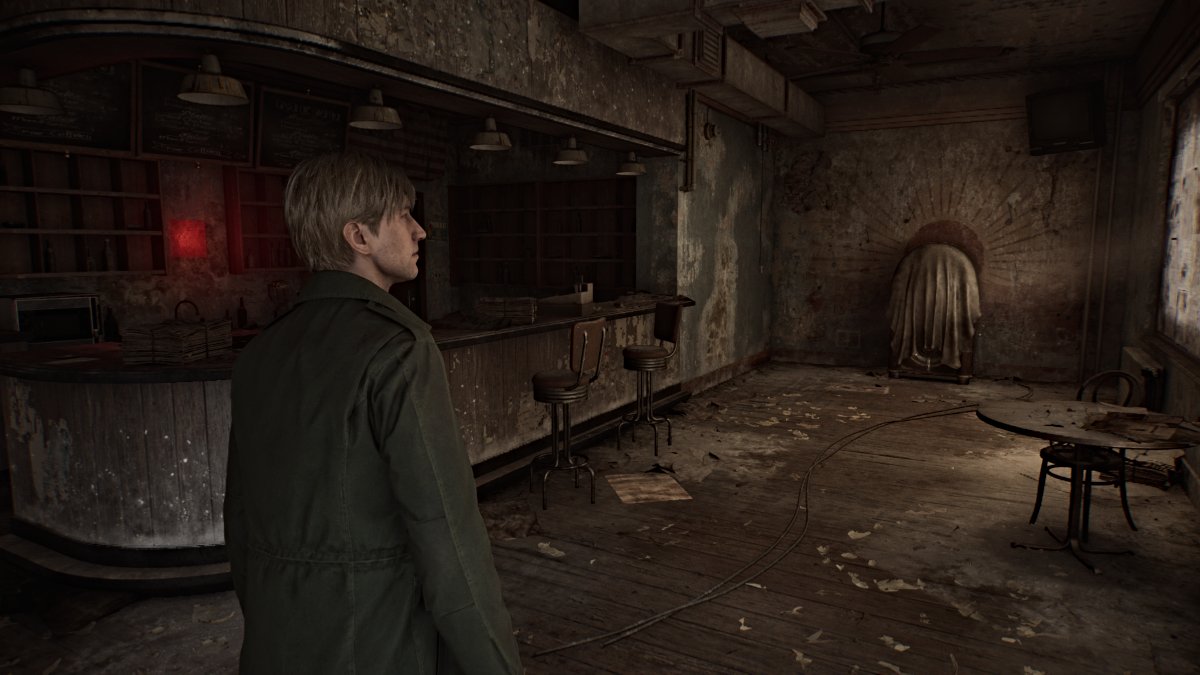
bear on along the principal course until you reach a church with a cemetery , where you first meetAngela Orosco . She lay claim to be looking for her mother along with her beginner and blood brother , but reveal little else . After the cutscene , feel free to explore the domain , but know there are no items to pick up here . you may also speak to Angela a few more times for more unique dialog if you require .
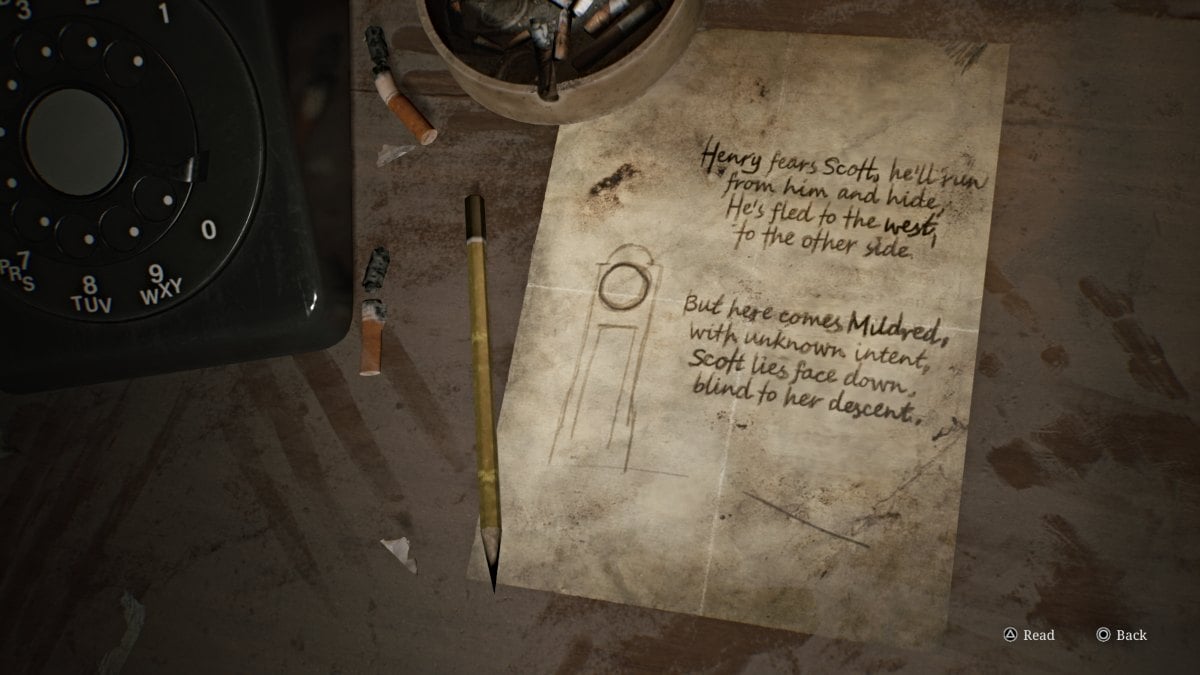
If playing New Game Plus , you may discover theCrimson Ceremonybook ( image above ) at a grave accent near the pond in the cemetery . This token is required for the ' Rebirth ' conclusion .
Screenshot by Pro Game Guides
Silent Hill Ranch
Leave the cemetery and keep walking along the same chief path , which takes you through the Silent Hill Ranch area .
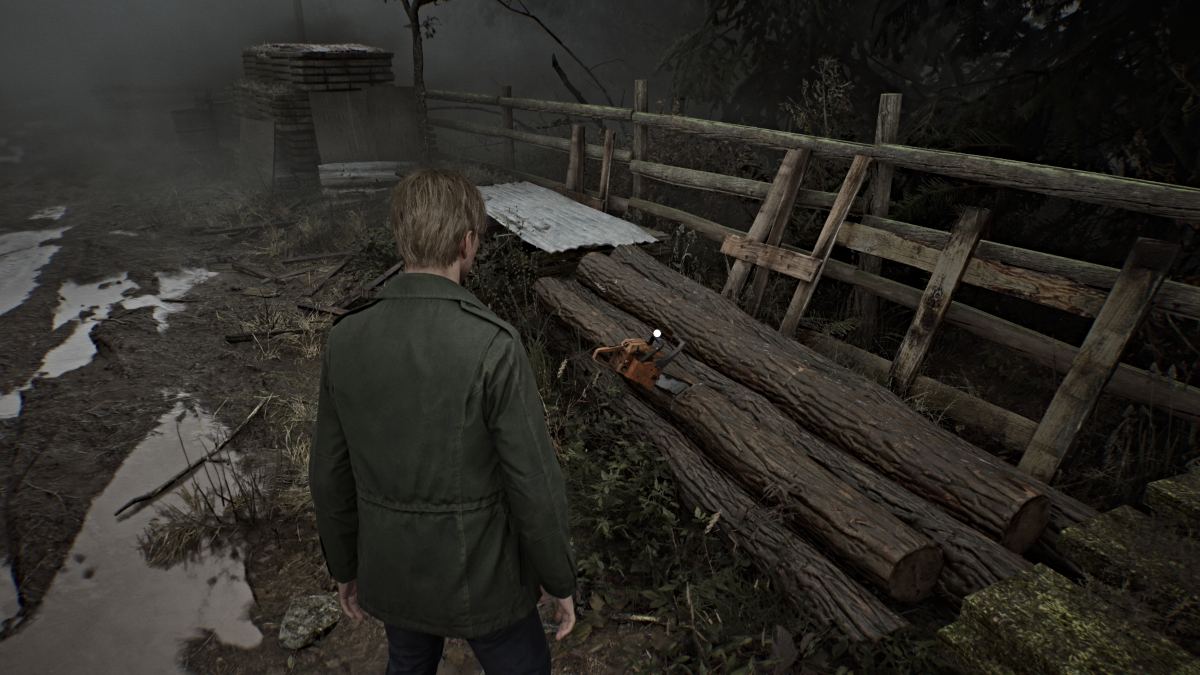
After completing the game at least once , a particular Chainsaw weapon will spawn here near the white pickup truck filled with tree log , and you’re able to unlock the’Lumberjack ' achievementwith it as well .
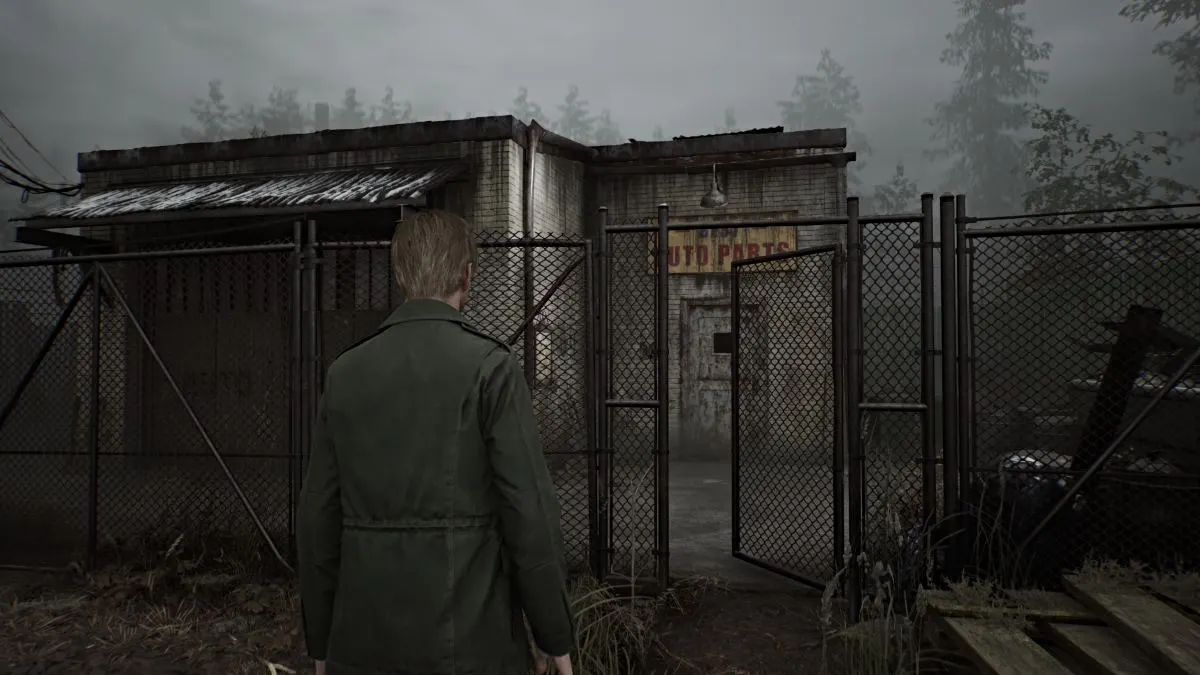
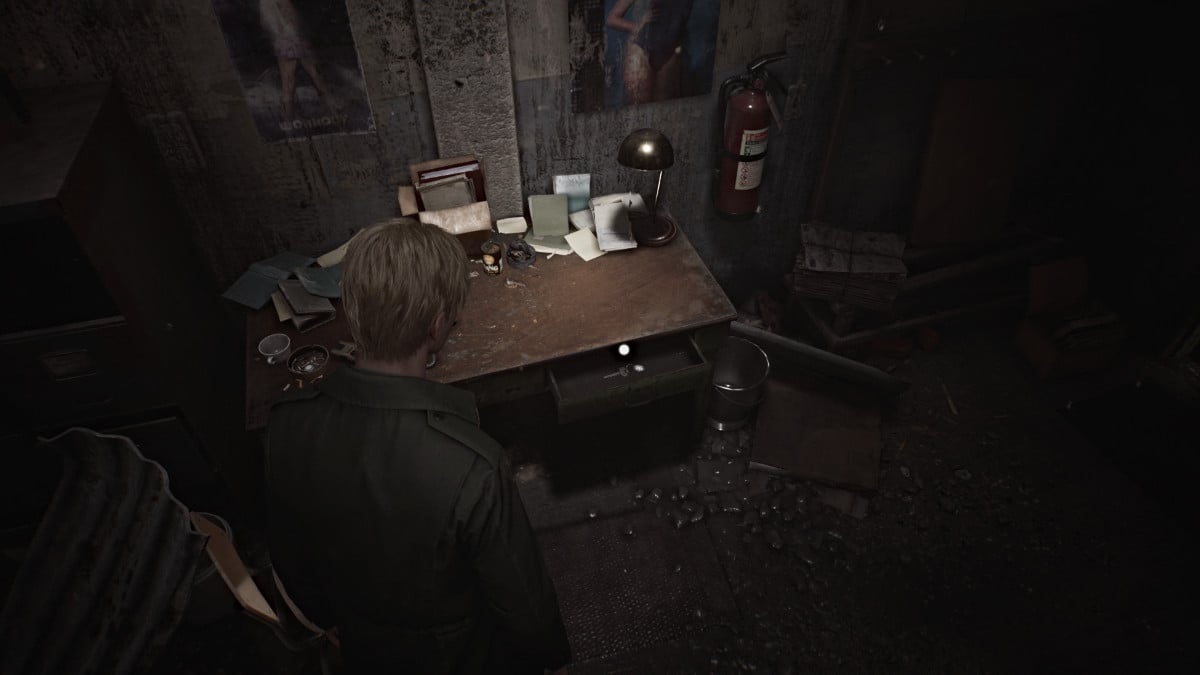
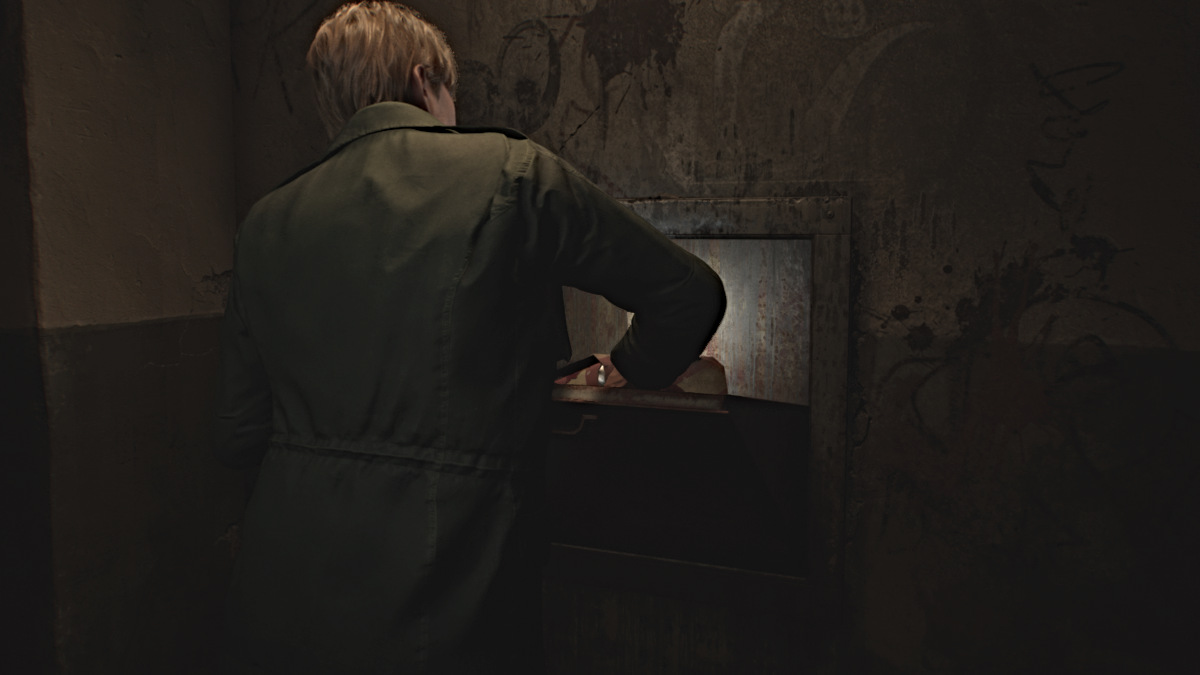
keep on until you touch a large barricade in the road with a small door on it that ’s locked . Look for a smallAuto Parts Shopnearby on your left with its gate assailable . Enter the premises and go left around the building where you could alternate through an clear windowpane . Look for a lit - up desk inwardly , and inside the drawer will bethe Auto Parts Keythat unlocks the door outside close up your way .
Keep following the route straight until you amount up to a familiar ( if you played the original ) dapple under an overpass that ’s filled with fencing material and upset boards . While you ca n’t enter it , you may interact with the spotlight as it ’s aGlimpse of the Pasteaster egg .
Getting all Glimpses of the Past in a single playthrough will get you the ' Echoes ' accomplishment .
Hang a left under an undecided area of the flyover and through the gate ahead , which will take you to Witse Road ( per your map ) and into the town of Silent Hill .
Screenshot by Pro Game Guides
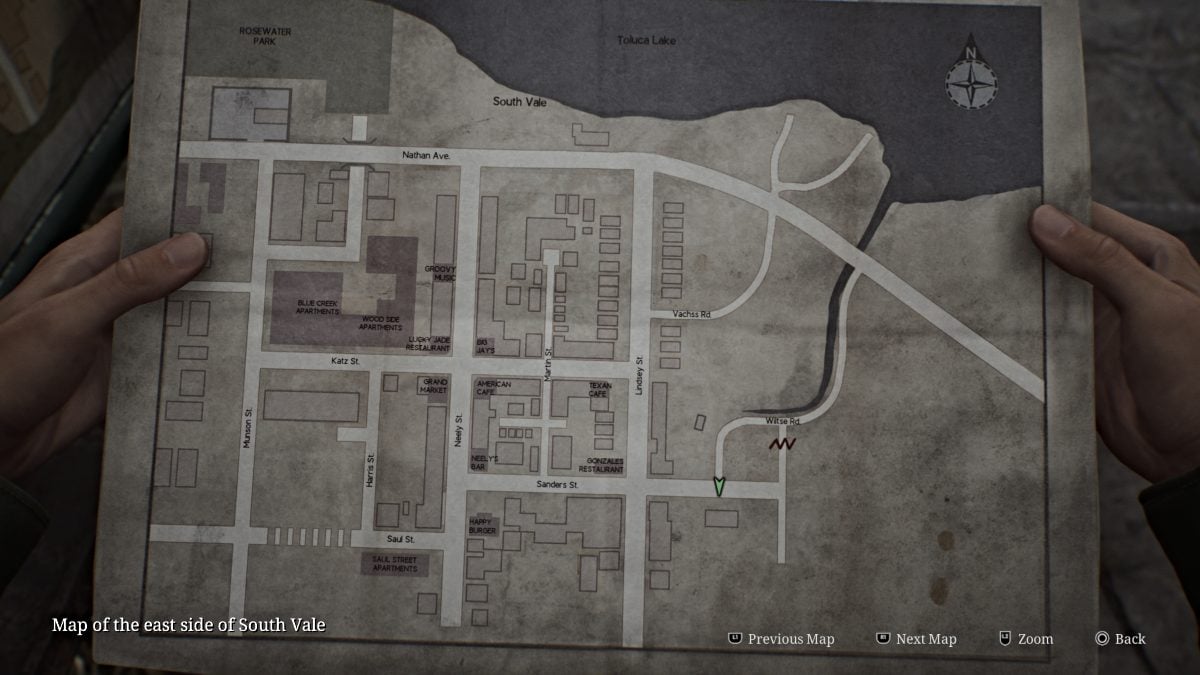
Silent Hill 2 Remake East South Vale Walkthrough
Upon reaching Sanders Street , a cutscene will play where James finds another , more enlarge mathematical function of the townsfolk sitting beneath a star sign . This countenance you to reckon at both the west and east side of the town map and all major landmarks from overhead .
significant Note : As you search the streets , James will passively draw unique point of note on his map , such as shoes that are blocked off ( for example - streets , buildings , door ) , save points , orphic shortcut you may take , sure objective , etc . Explore as much as possible , especially while it ’s daytime , so that you replete your map with these mark and get a full understanding of everywhere you may and ca n’t go ( yet ) .
First off , go into the nearbyFlower Shopand pick up theFlower Shop Message(memo ) off the front counter .
Screenshot by Pro Game Guides
Memosare notes / clew that James will pick up ( rather than just read them ) and place in his armory . Collecting all memos in a single playthrough will get you the ' Archivist ' achievement .
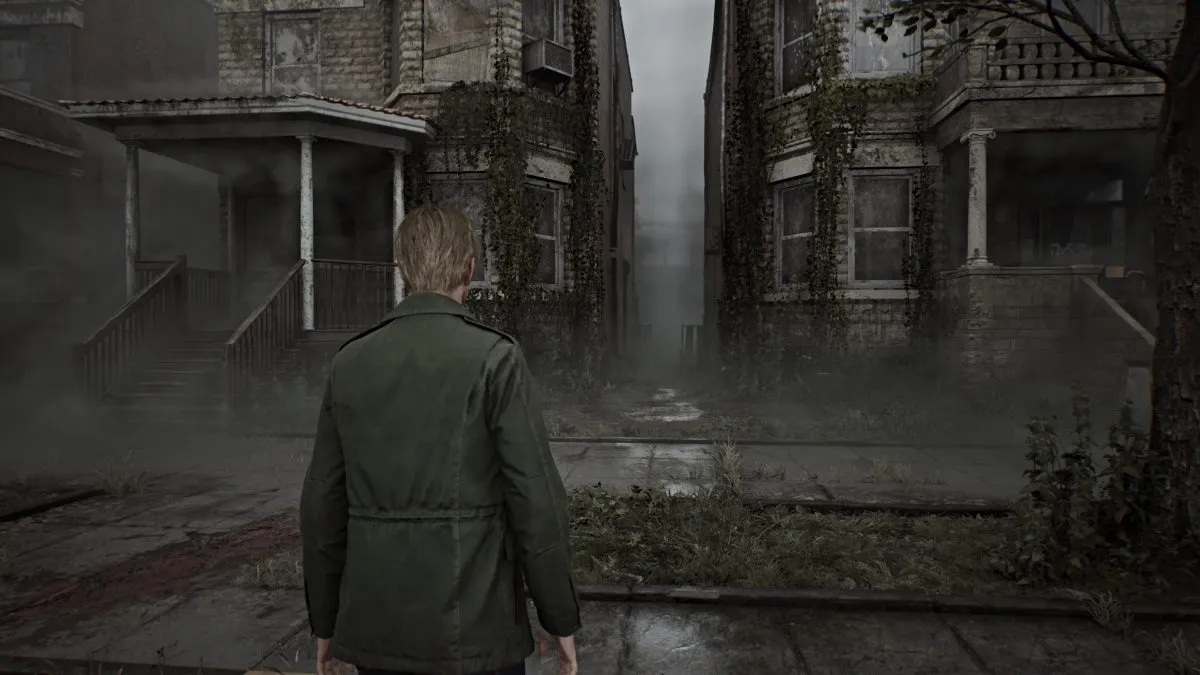
asunder from a blood stain on the floor nearby that James can look at , there ’s nothing else to find oneself inside so head back out and down Sanders Street until you see a much bigger descent trail that leads north up Lindsey Street . All other paths are block off by huge barricade for now , so just follow the track .
Another cutscene give away a foreign form walking in the space ahead of James , and you ’ll desire to follow it . Keep straight and the line of descent spatters will lead you to an eery detour off the left side of the route between two building ( seen above ) .

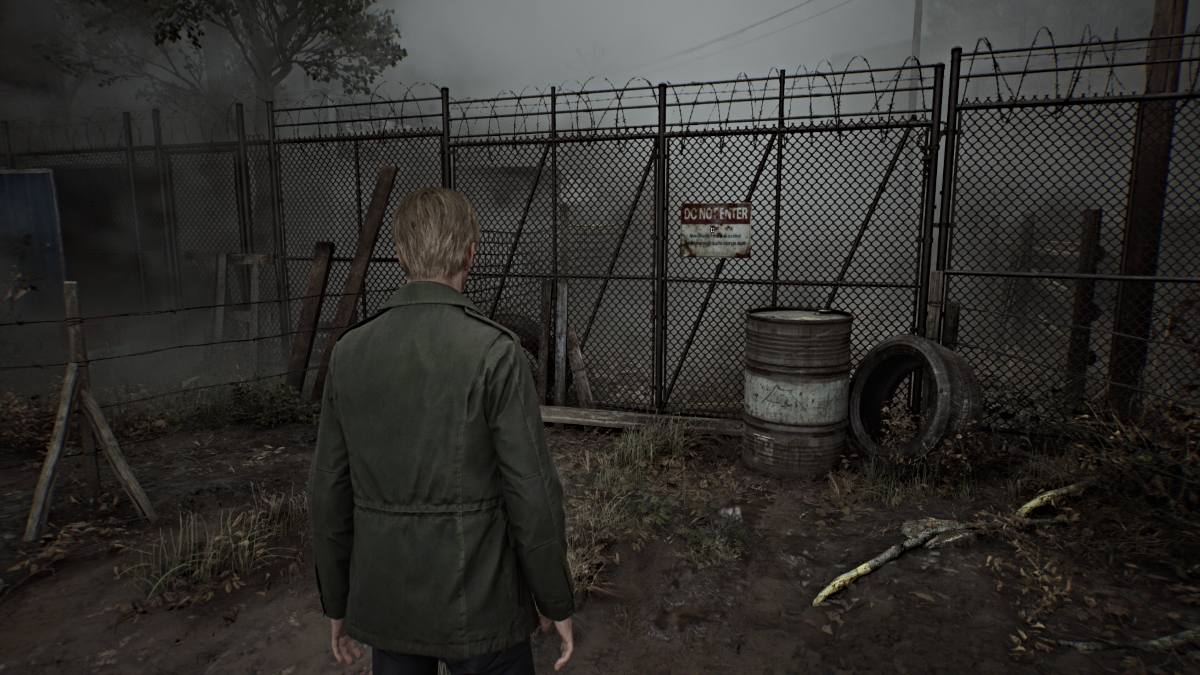
Before you go through the bowling alley , pin and run down Vachss Road until you extend to a ' Do Not Enter ' gate . Interact with it to get anotherGlimpse of the Past .
Now , go through the alleyway and keep abreast the unknown noise through the back alley area until you reach a garage with a wiped out trap at the bottom of the door . Crawl through it to accede the household .
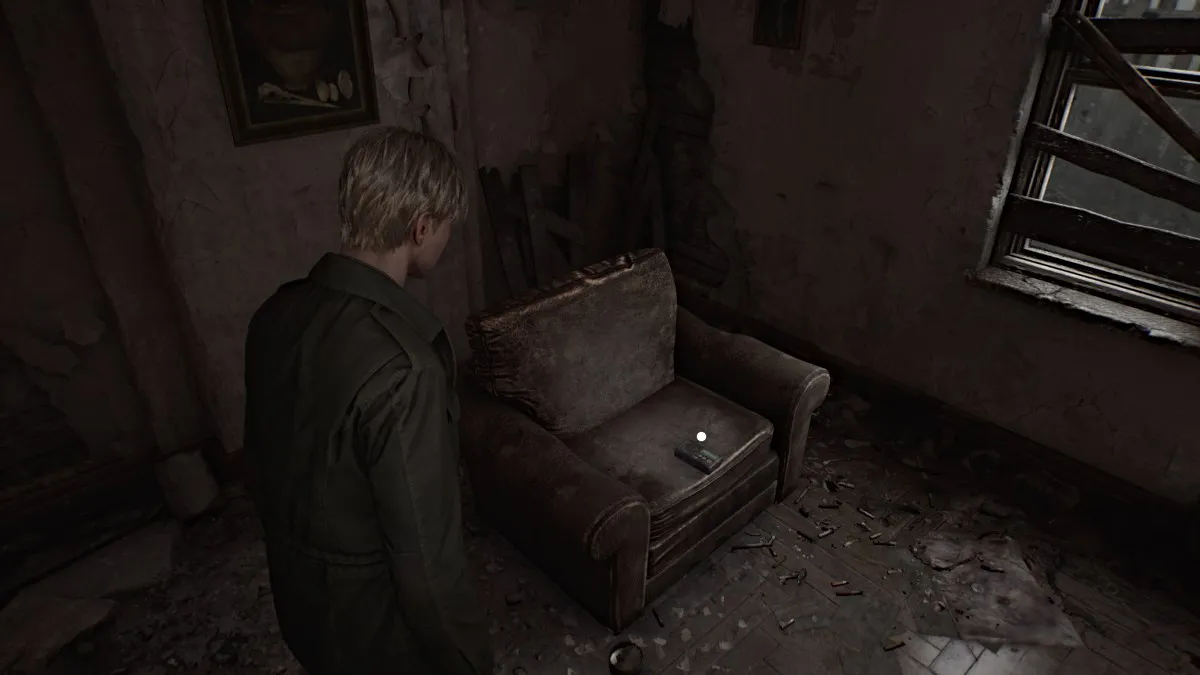
Getting the Radio and Wooden Plank
take hold of it , and a cutscene will ensue where James confront the same fig from before , which turns out to be a behemoth ( jazz as aLying Figure ) .
To get the ' Radio Silence ' accomplishment , you need to keep your radio set turned off for the entire game . you’re able to toggle this setting from your stock-taking .
This is your first innovation to the biz ’s combat organization , which grant you to bothAttackandDodge(using the appropriate buttons ) . habituate theWooden PlankJames grabs from the window to nation blows on the Lying Figure while watch out for its physical and window pane attacks . Keep pressure on it until it go down on the ground and expend the same Attack button to stump it until all in .

Screenshot by Pro Game Guides
keep on through the home until you find a wear col in a wall to slip through . launch the first aid kit on the desk to your right field for aSyringe(strong wellness particular ) and then break the window open air straight ahead with your plank to escape the sign . After a cutscene , you could preserve on from Martin Street .
At the northmost point on Martin Street you ’ll find anotherGlimpse of the Pastnear a ashen picket fence ( find out below ) .
Now bunk south and interact with the bloodied corpse on the pavement before to pick up aMatchbookfromNeely ’s saloon , one of your next destinations . Also , pick up theMartin Street Notea few feet ahead of the stiff .
Screenshot by Pro Game Guides
If play New Game Plus , you’re able to go to the Jewelry Store two doors north of Big Jay ’s and smash the presentation window on the left side to incur theBlue jewel . This token is required for the UFO termination .
you could also go into the Pet Palace stock straightaway next to Big Jay ’s , and in the back room you ’ll find theBroken Key Part ( Paw)sitting on a table . This point is need for the Dog ending .
Big Jay’s Cafe
Several monsters will now be active in various places around Silent Hill , so be sure to watch your back , nibble your battles , and apply your wellness items wisely .
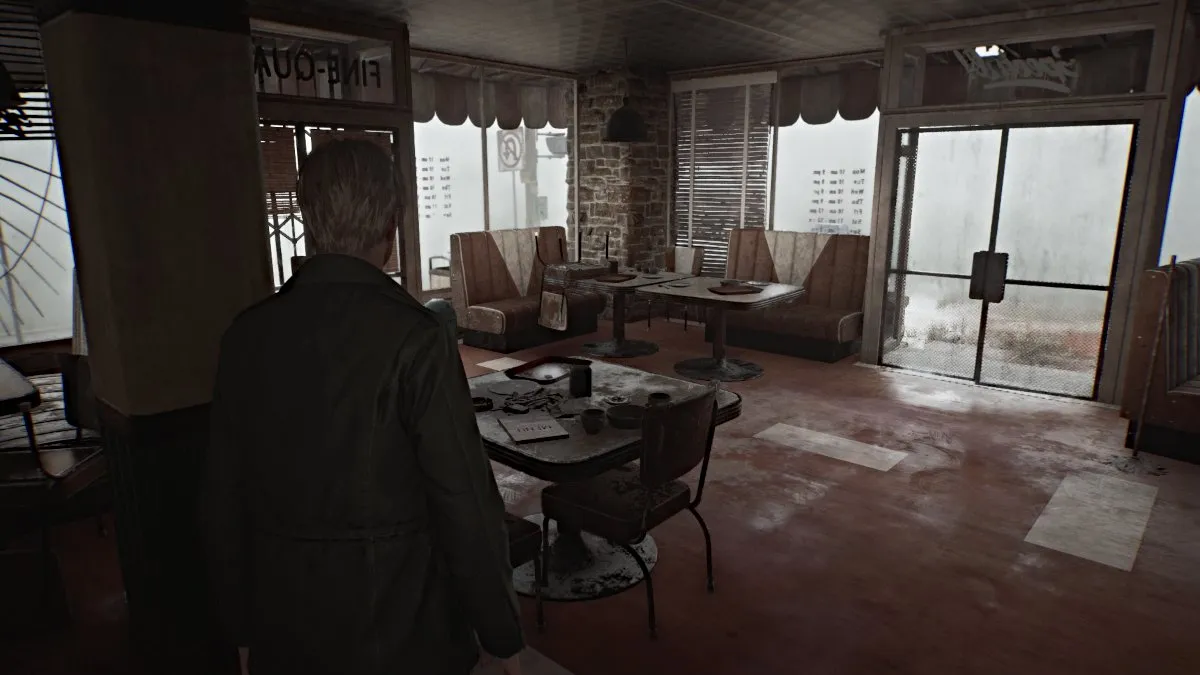
carry on along Katz St until you find the back room access toBig Jay ’s cafe . Go inside and be deliberate of the Lying Figure tarry at bottom . manage with it and head to the front of the cafe to findBig Jay ’s Noteon one of the table . AHealth Drinkwill be on another mesa in the booth area . Leave the coffeehouse ’s front entrance onto Neely Street .
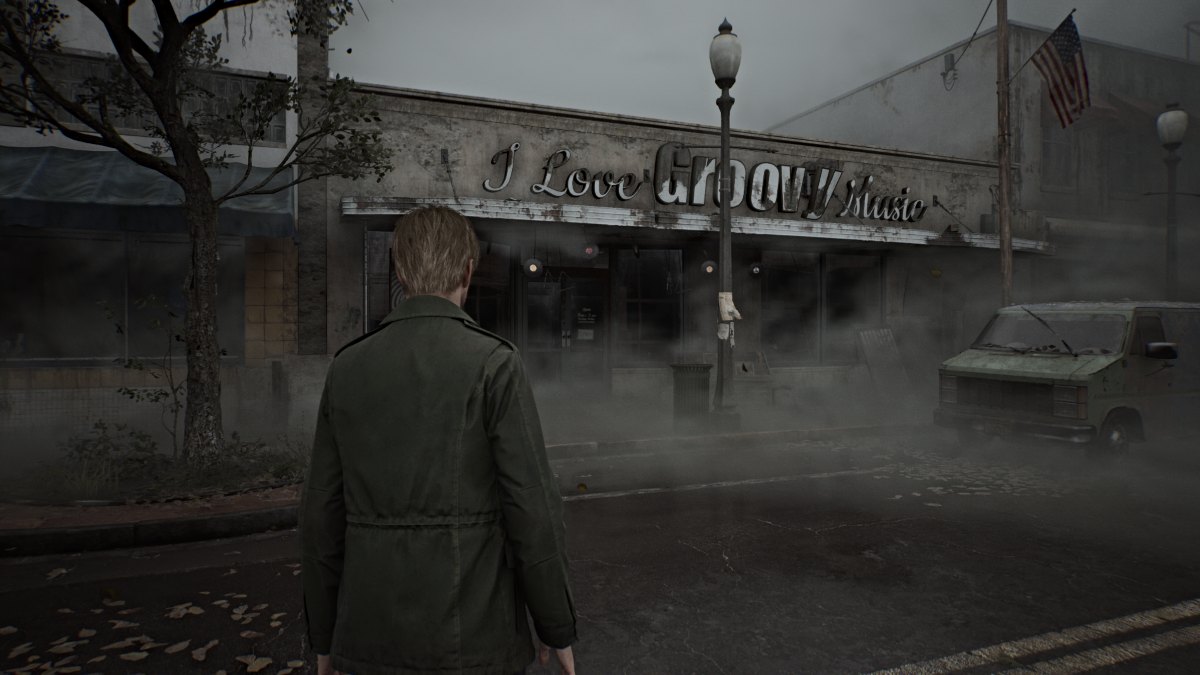
I Love Groovy Music Shop
First , go north on Neely and founder the windows of the nearby police force auto for your first batch ofHandgun heater , which will come in handy later . When you reach theI Love Groovy Music Shop(easy to spot by the wind chimes ) , first roundabout way to the skittle alley opposite it for aHealth Drinkon a tabular array .
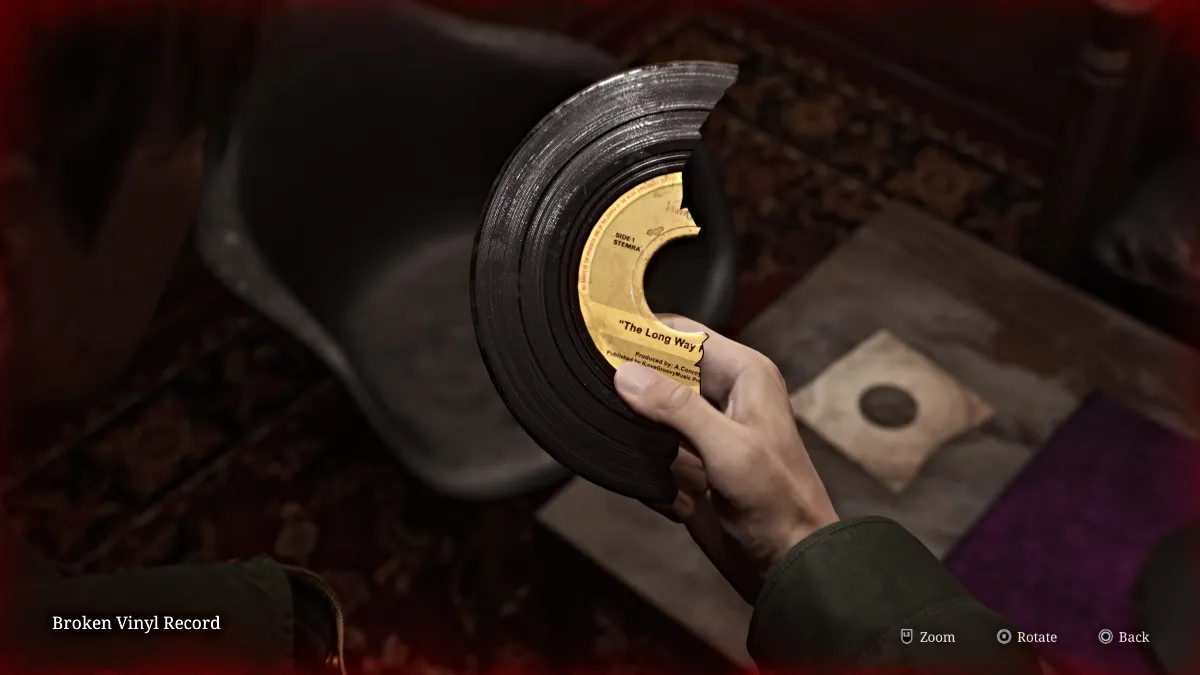
turn back to the Music Shop and go inside , where two lie image will be waiting . Do your best to deal with them one at a clip , as you only have a plank to defend yourself with right now . Once done , gather theRecord Store Notefrom the counter and then head to the back and crush one of the bragging windows to go into the platter room . On the gloomy table in the sum will beVinyl Glueand aBroken Vinyl Record .
Neely’s Bar
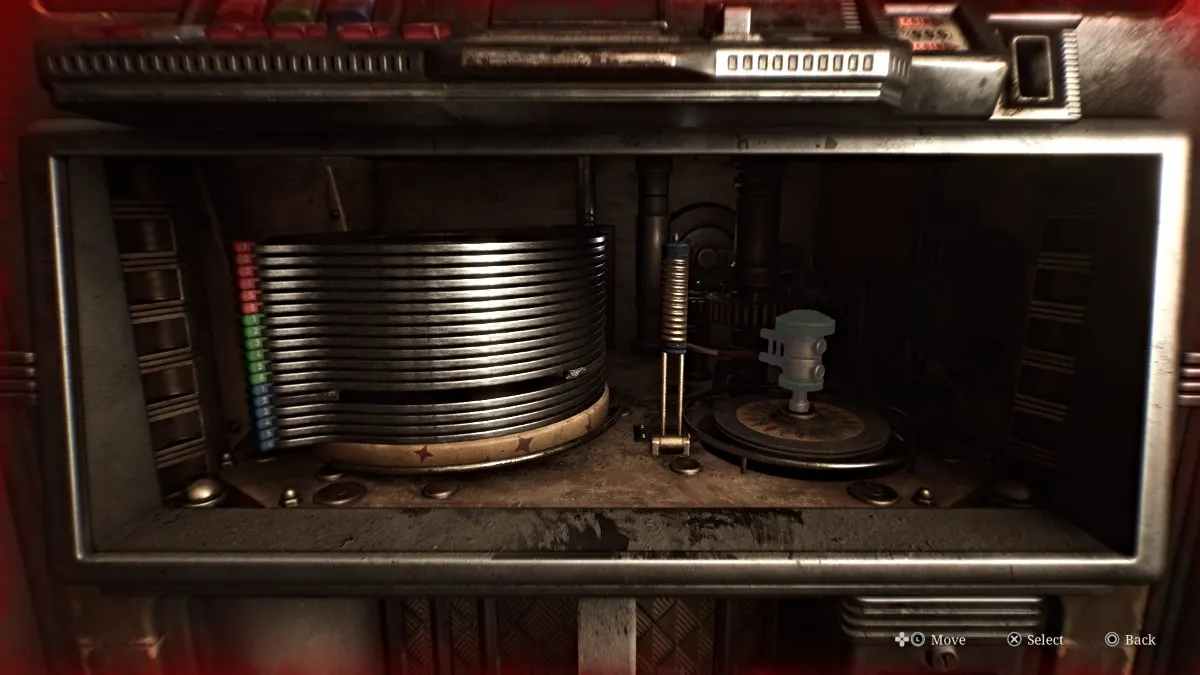
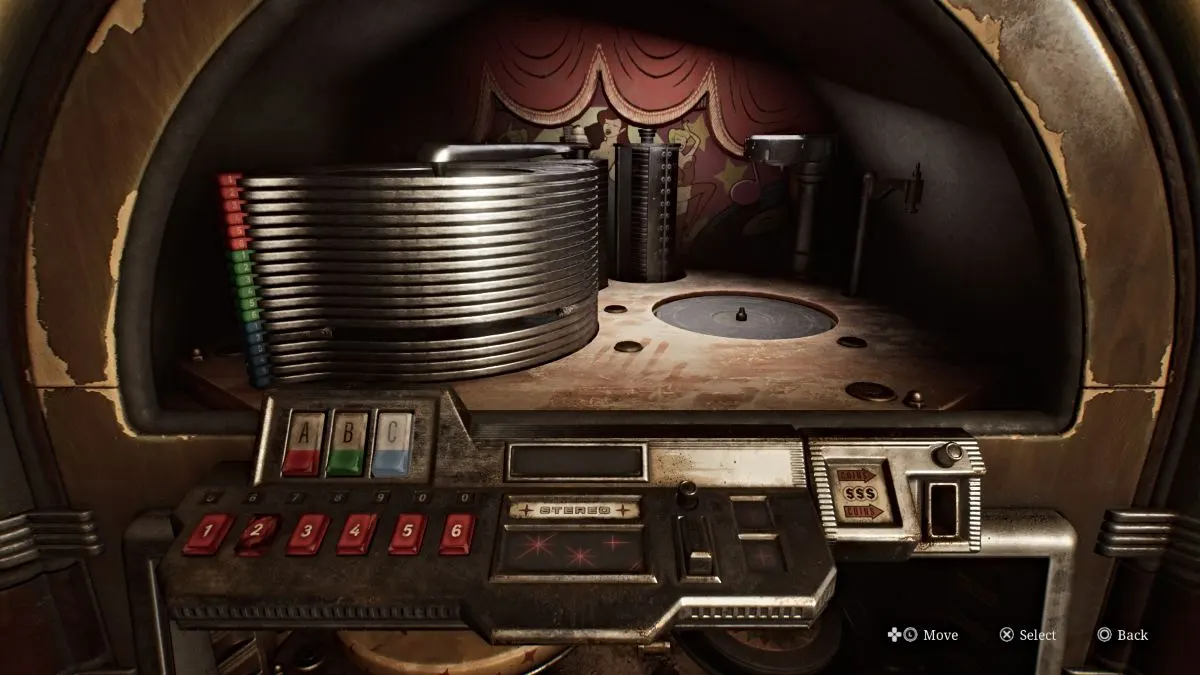
Leave the shop and finally make your path towardsNeely ’s Bar . Inside it will be anotherRed Save Pointon the paries to your left , Neely ’s Bar Noteon the counter , and a locked doorway that requires aspecial headstone . On one of the window is an unsettling message that reads"There was a HOLE here . It ’s work now . " . By the back wall is a broken nickelodeon which serves as the game ’s first puzzler .
Broken Jukebox Puzzle
Inside it is half of a broken vinyl record book sit on a track expect to be played . Interact with it to remove it from the machine , tally it to your inventory . Now , use the Vinyl Glue and the other half of the Broken Vinyl Record to immix both pieces . This will give you theGlued Vinyl Record , titled"The Long Way Home " .
Next , you involve to prepare the political machine to dally the record , and there arethree partsinside that you could move that are coloredblue , red , and green . Your first goal is to link up the reddened part to the unripe part so that it can move back and out of the way of the bluish part , which you need to fight down .
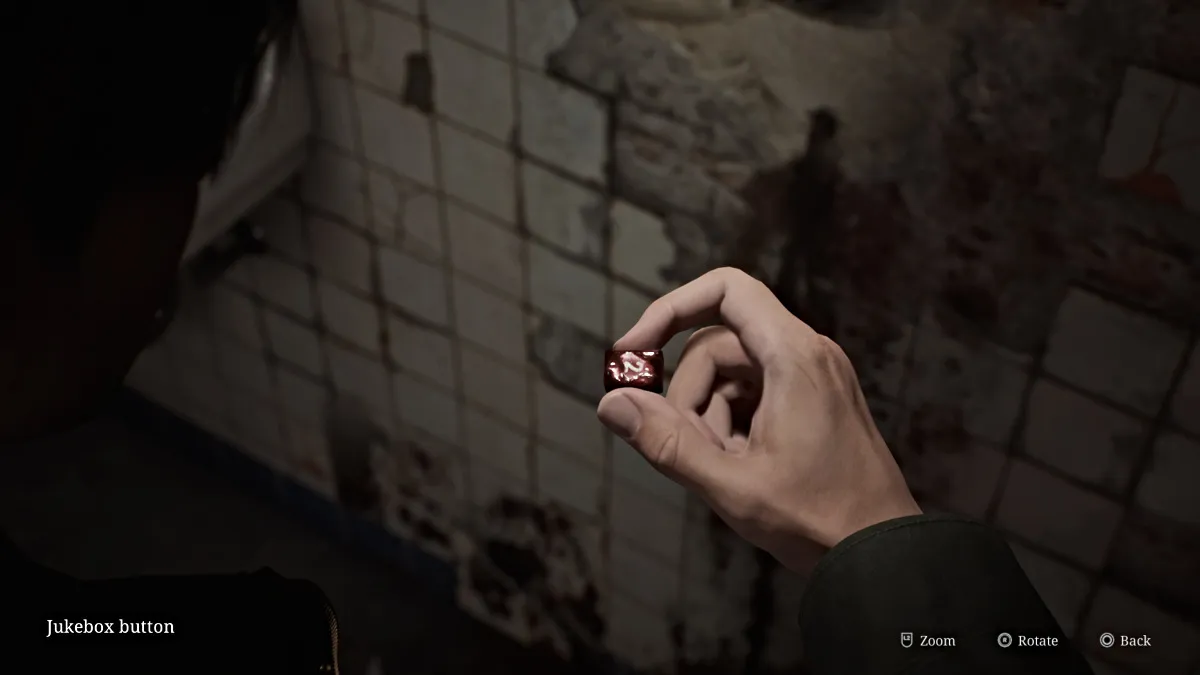
Once you ’ve done that , press thegreen partuntil it pushes out the track for you to place the Glued Vinyl Record on . The track mechanism will then lift up , where you need to press the correct button to play the book . However , the'2 ' buttonyou need is lose and you needa Coinas well . So leave the jukebox for now .
Screenshot by Pro Game Guides
TheNeely ’s Bar Noteindicates that a man ran off with the button and half the book ( which you already fixed ) and that he live inApartment 9onSaul Streetby the drugstore . TheSaul Street Apartmentswill be circle on your single-valued function .
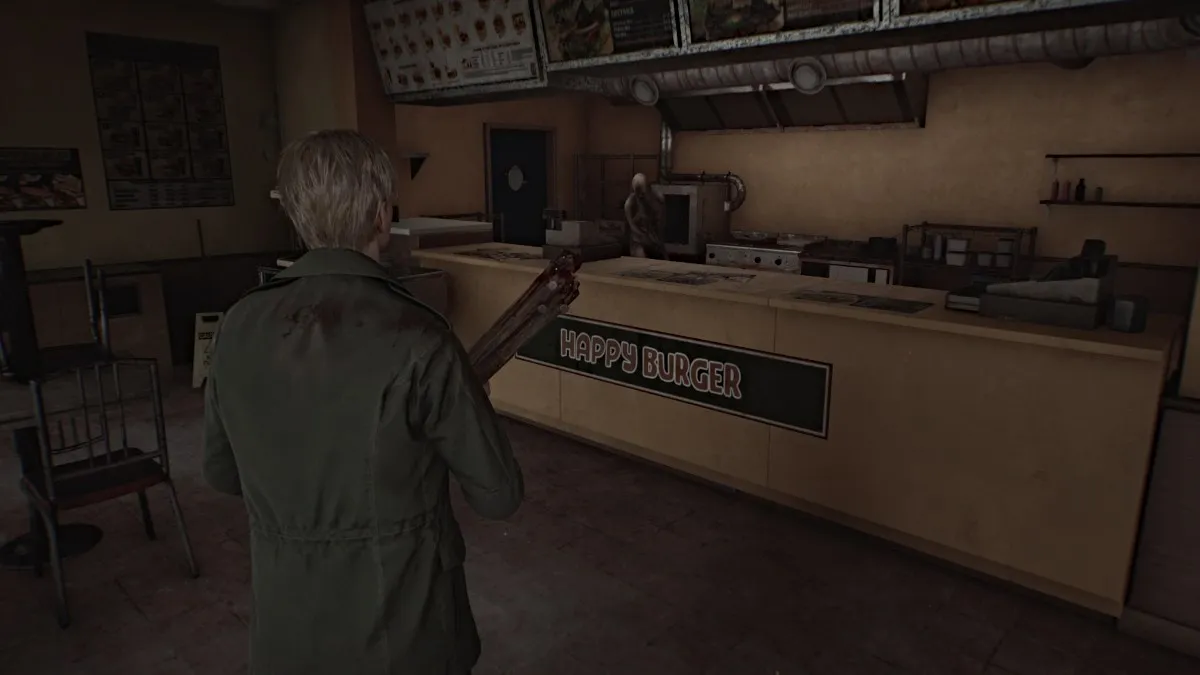
Happy Burger
Make your way towards theSaul Street Apartments . you could check outHappy Burgeralong the manner if you want , but it ’s got three Lying Figures lurking in and around it . All that ’s inside is aHealth Drink(on the board right next to the windowpane you jump through ) and aSyringe(kitchen area ) that ’s guard by one of the monsters .
Unless you think yourself confident enough to fight down or carry past it , we otherwise urge just grabbing theHealth Drinkfor now and continuing .
Saul Street Apartments
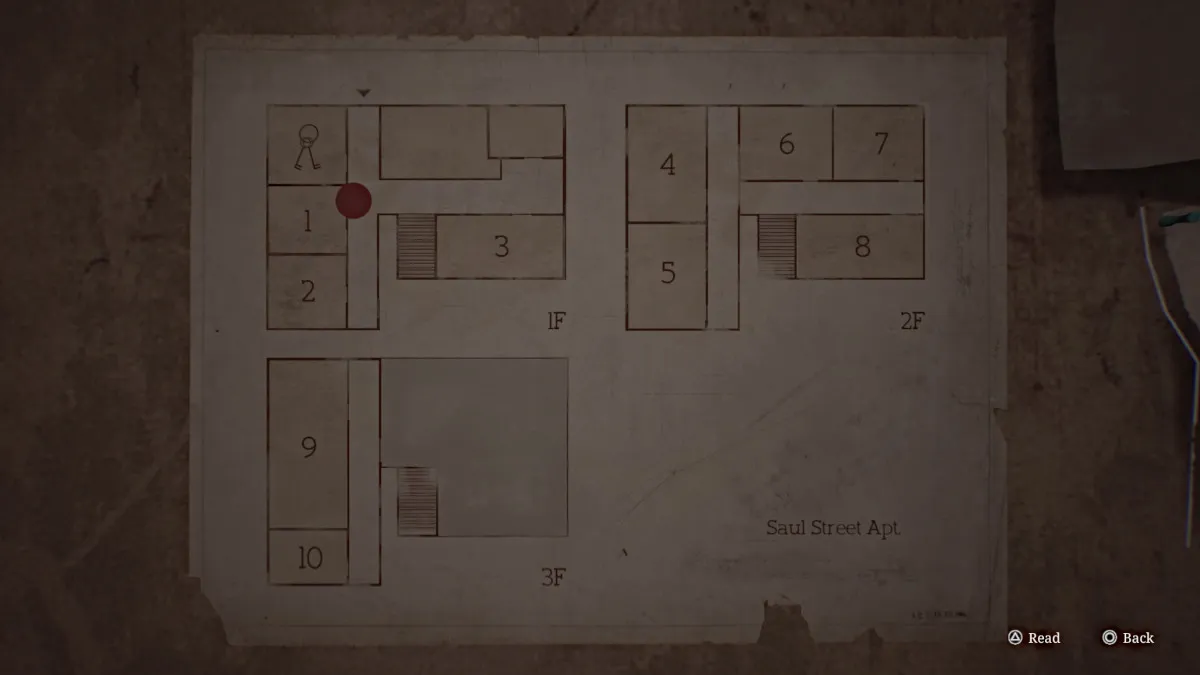
Enter theSaul Street Apartmentsand make note of the office right away to your right . The door to it is put away , but you may still get in by going further down the entrance hall to the next doorway on the right ( Apartment 1 ) , where you may push a chest out of the direction . Inside the situation , you ’ll find theApartment 5 Keyand aSmall Noteabout a passing water in there as well . Also , make a note of the building mapping on the wall in the hall ( seen below ) to find your way to the good flat .
Before you manoeuvre there though , make a left wing past the stairwell and go through the cracked door on your leftover and diametrical Apartment 3 , which leads intoGreen Pharmacy . ASyringewill be in a first assistance kit on a tabular array to your right as you enter .
Now backtrack to the stairwell that direct to the 2nd story of apartments and go right until you see a crawl space next toApartment 7 . Go through it and inside you ’ll find theTenant ’s Note . Go back through the crawlspace or the threshold you’re able to unlock and now head for Apartment 5 . utilise the key to get in and appear for a gap in a wall that leads you over toApartment 4 . During a cutscene , the noise James causes will cause a disturbance on the third floor above , inApartment 9where you need to get to . Fun .
Screenshot by Pro Game Guides
There are no items to pick up here so go through the next wall opening that lead to the other side of the hall blocked by debris . Go through the undecided window to the balcony and go up the fire escape stairs until you find another undefendable window on the far right at the top . As soon as you jump through the ardour escape breaks , so no going back .
Go across to the room access next to the bathroom , and a cutscene will play where James attempts to spread the room access only to find it chained shut , a horrible odor from within , and his hand from the doorhandle stained with a grim substance . Now , go into the bath next to it where there will be a large trap in the bulwark ( get word above ) . Interact with it to ' search ' it ( lovely sound included ) until James deplume outthe missing ' 2 ' button for the nickelodeon .
Now head out onto the roof through the nearby room access and you ’ll see a ladder ahead of you .
Screenshot by Pro Game Guides
If you ’re playing New Game Plus and you want to get the UFO conclusion , when you hear unusual noise on the roof , go into your stock list and inspect the Blue Gem . Once it flash , you may move on .
The door to your right leads to another indoor stairwell , but it ’s completely destroy so that is n’t an selection . Go down the run and you ’ll cease up in the construction ’s shabu area . release through the door that was locked from the other side .
you’re able to retain down Saul Street , and on the left will be a Motor Home behind an open gate . A lie down human body near it will approach you , so deal with it and then go inside . seize theMotor Home Noteand aHealth Drink , then theSaul Street Noteon the earth when you leave that tells you,“They can be kill . Just ensure they stay down " .
Screenshot by Pro Game Guides
Also , be certain to grab theOld Map(another memo ) lying on the street near the Motor Home as well .
Grand Market
You still need the Coin to play the platter in the nickelodeon , so do n’t head back to Neely ’s Bar yet . First , go past it up Neely Street until you find an open alleyway with a back doorway toGrand securities industry . You need a computer code to unlock the door , and theCode Notefound near a truck on Sanders Street will give you a hint .
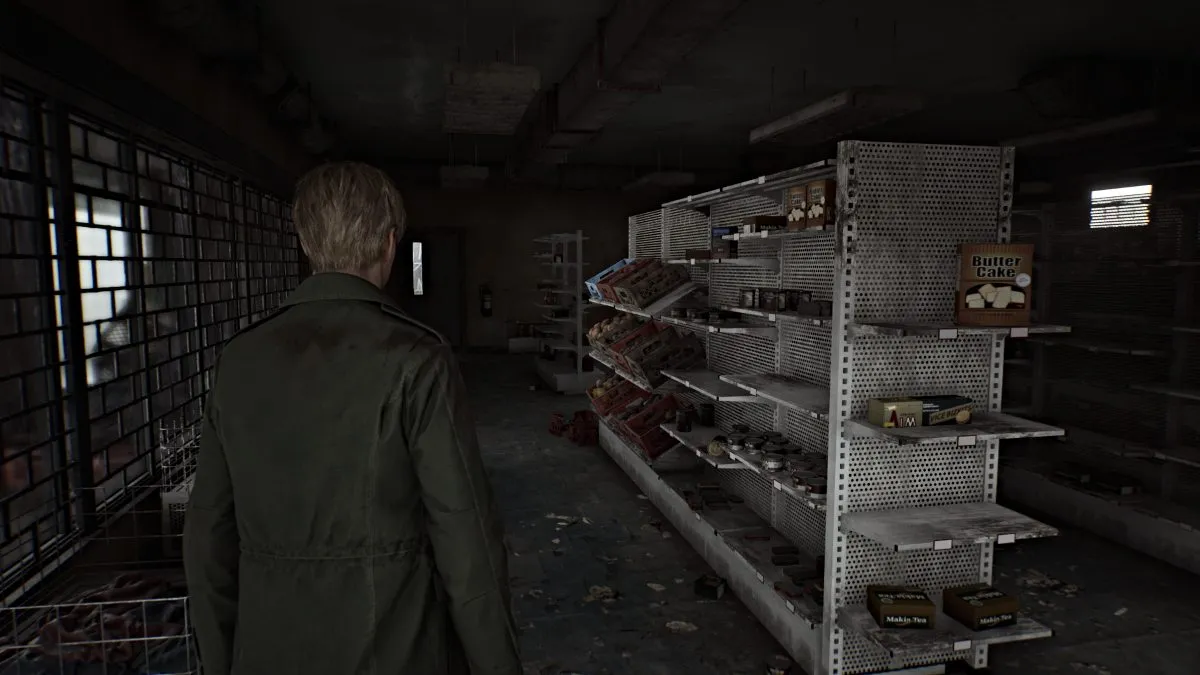
Essentially , the person who last attempted it got up to the routine ' 4439 ' and felt they were " so tight now " . That mean you may punch the subsequent numbers in until you get it right , but to save you clip , the code is'4444'(Standard Puzzle difficulty ) . Inside , you ’ll recover a whoppingfour Health Drinksandtwo boxes of Handgun ammo , so the pit stop is well deserving it .
Texan Cafe
Make a right ontoKatz Streetand carry all the way down toTexan Cafeat the far end , by the large barricade . Go through the unsecured side room access to the registry behind the comeback . apply the key already inside the register and the clitoris at the bottom to launch the drawer and retrieve aNeely ’s Bar Coin . Watch out for the Lying Figure that ambush you afterward .
Now it ’s time to head back to Neely ’s taproom , but before you do , make certain you ’ve grabbed theSanders Street Notefrom the corpse lying near a grown rig motortruck halfway down on Sanders Street .
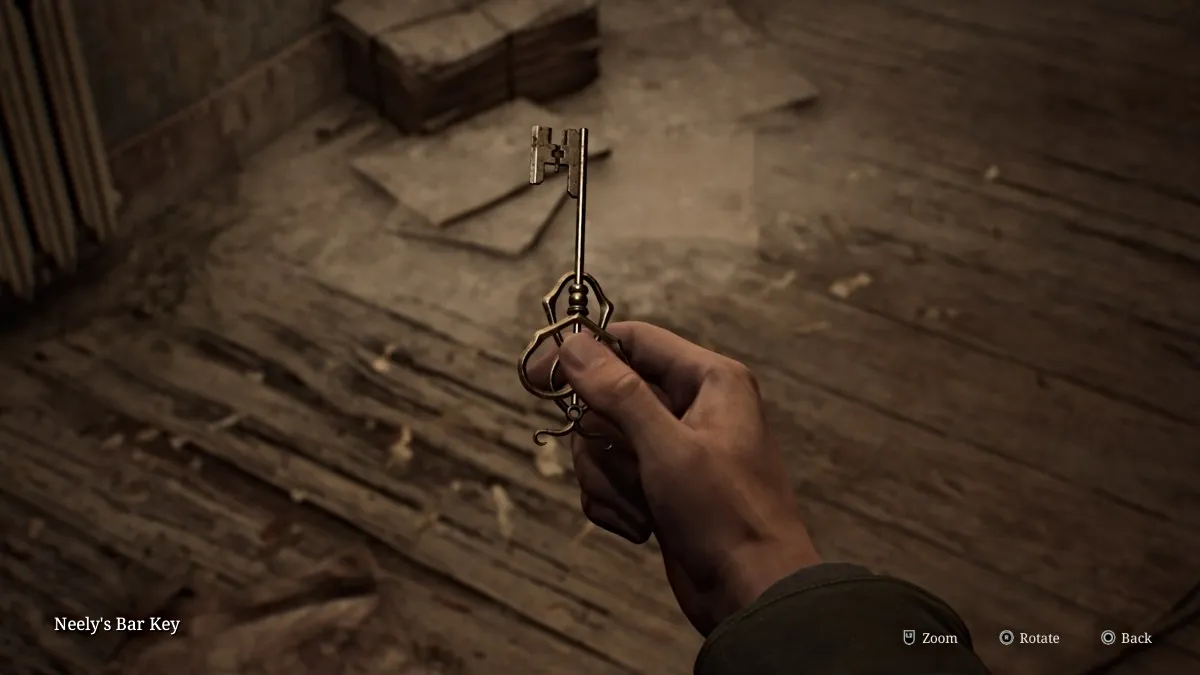
Insert theNeely ’s Bar Coininto the jukebox and press the’C ' and ' 2 ' buttonsto finally play the track record . A familiar tune bid while James experiences a disjointed flashback . After finishing ( or breaking rather ) , the jukebox skewer out theNeely ’s Bar Key , which you’re able to habituate on the nearby locked door .
Screenshot by Pro Game Guides
Go through the door and straight off await to your right . A crawlspace can be seen high up on the rampart , and you ’ll need to apply the cart blocking the way to reach it . Push it towards the wall , then climb up and through .
Grab theHealth Drinkfrom the first aid cabinet on the wall and then go into the next room and peck up theBack RoomLetterfrom the desk , indicating that you require to witness a gullible - blue car with a plate ending in ' 06 ' finish by . Leave out the back door which lead to another back alley area full of cars .
The only car in the area that has something in it is the bright green car to your right hand at the intersection with Martin Street . AHealth Drinkwill be ride in the number one wood ’s seat . turn back and keep going directly towards the query mark on your function that James drew . Go through the barricade door and the abandoned green - drab elevator car will be to your right field , with a bundle of blooming clothes next to it .
Screenshot by Pro Game Guides
Interact with it and James will pull theWood Side Apartments Keyfrom it before being ambushed by multiple Lying Figures . You ca n’t struggle them all so await for an escapism through a nearby bowling alley ( the door you came through will be locked so do n’t try ) . The bowling alley will bring you back to Katz Street , which is also full of lie Figures now that you ask to avoid to preserve your health .
First , turn tail west all the way down Katz Street until you reach the immense roadblock . Grab theBarrier Notememo lying on the ground , and look for a gap in the barrier where you may see a idiom written in blood ( understand below ) for anotherGlimpse of the Past .
Now backtrack until you see the incoming to the Wood Side Apartments on your left . Before you go in , fly the coop to the dumpster to the rightfield of the ingress ( learn above ) and interact with it for one moreGlimpse of the Past . Grab theTexan Cafe Flyermemo off the nearby add-in and then utilise the Florida key to go inside .
Screenshot by Pro Game Guides
Silent Hill 2 Remake Wood Side Apartments Walkthrough
channelize into the anteroom and grab the apartment edifice function from the bulletin dining table on the bulwark . It will show you the layout forWood Side Apartments 1F-3F , and you could cycle through each floor using the appropriate button . Next , go into the lobby role and use theRed Save Pointto your left . Go into the room beyond it and spread the cabinet to your immediate rightfulness forHandgun Ammo .
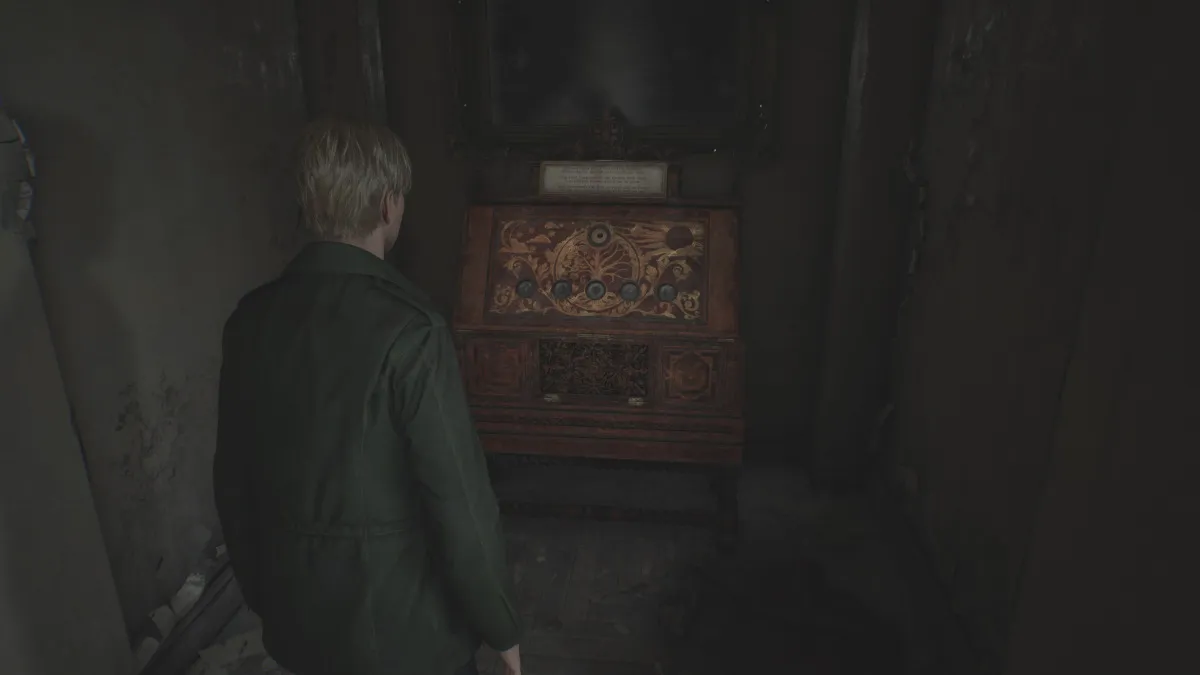
Under a sheet on the other side of the elbow room , James will uncover a strange console that serves as the next puzzle for you to solve . You ’ll need to witness exceptional coins to place in the indentations , so we ’ll hail back to it later .
Check the janitorial bath to the rightfield of the office for moreHandgun ammunition . The other doors on that side are locked for now , so head back to the left side of the floor . Go towards the back left where a shelf full of document binder is and grab theAdministration Notememo from it , which talks about gunshot coming fromApartment 217 . Also , grab anotherHealth Drinkfrom model under the steps .
Screenshot by Pro Game Guides
All other door on the first floor are lock , so for now head up the stairs to 2F.
Woodside Apartments (Floor 2) - Flashlight
Much of the second floor is currently unprocurable , except for the apartments to your right . The doorway toApartment 202is widely open , so go inside . An unusually burnished lightness can be escort in the living way , and it turns out to be a mannequin wearing Mary ’s outfit , with aFlashlighttucked into it . Before you take it , first go over to the kitchen area and grab aHealth Drinkfrom one of the cabinets .
Now go over and lay claim the Flashlight , which will be very beneficial going forward . A new type of goliath hiding behind it called aMannequinwill ambuscade you , so after the brief QTE expend your plank to take it down . While it does n’t spit pane like the Lying anatomy do , its physical hit are brutal so be careful . They also choose stoolpigeon attacks and can even trick your radio set sometimes by staying still .
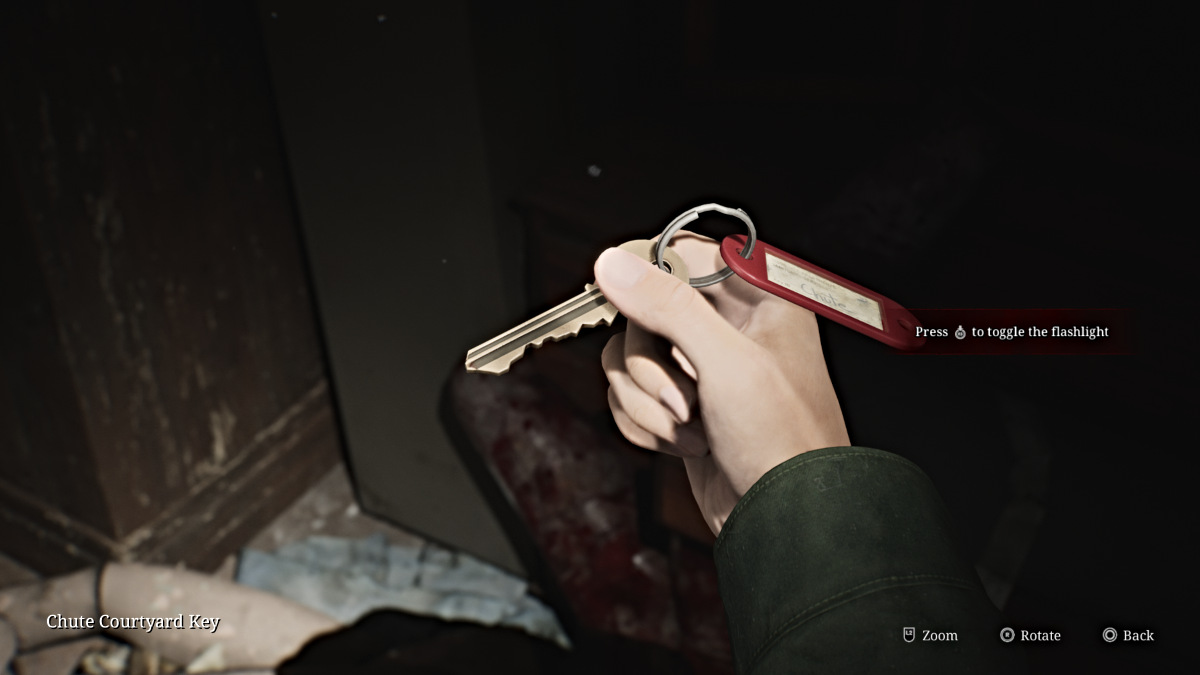
Afterward , snap up theChute Courtyard Keyfrom the nearby dresser and then will the flat .
Screenshot by Pro Game Guides
carry up the stairs past the third level ( presently locked ) until you reach a deadened end . MoreHandgun Ammowill be on a small board here . Run all the manner back down to the first floor .
Wood Side Apartments - Chute Courtyard and a Strange Girl
Use theChute Courtyard Keyon the door to the left field of the janitorial lavatory , which will take you outside to an inner court where the building ’s main methamphetamine hydrochloride chute is . observe an open window to the right hand of the parachute and pull the nearby go-cart towards it to climb through intoApartment 112 .
In the room immediately to the left-hand , findHandgun Ammoin a dresser draftsman . On a table in the kitchen to the right field is a local tidings clause about the convict murderer Walter Sullivan . Leave the flat and go right down the hall toApartment 109 .
A Mannequin will be hiding underneath the tabular array in the living room , so organize to fight it . Afterward , grabHandgun Ammofrom the nearby bedroom and then leave the apartment . Continue down the hallway around to unlock a threshold on your right that leads out to the opposite side of the Chute Courtyard . Then continue forward to see a key on the ground blank out by some bars . Interact with it to cue a cutscene .
Screenshot by Pro Game Guides
After the untried missy give up the headstone and runs off , take the shortcut through the court back to the lobby area . You ’ll detect that both side of the first floor are now fully accessible and full of demon , so tread cautiously . Head down the correct side first , since that ’s where you postulate to get the samara from .
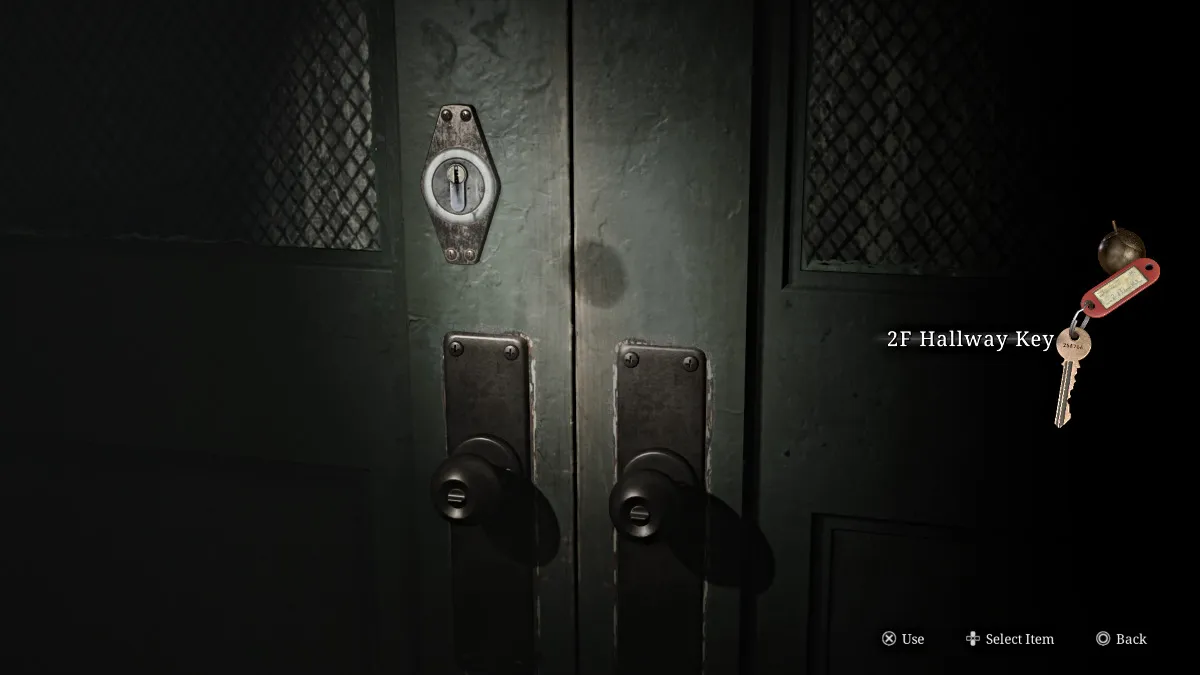
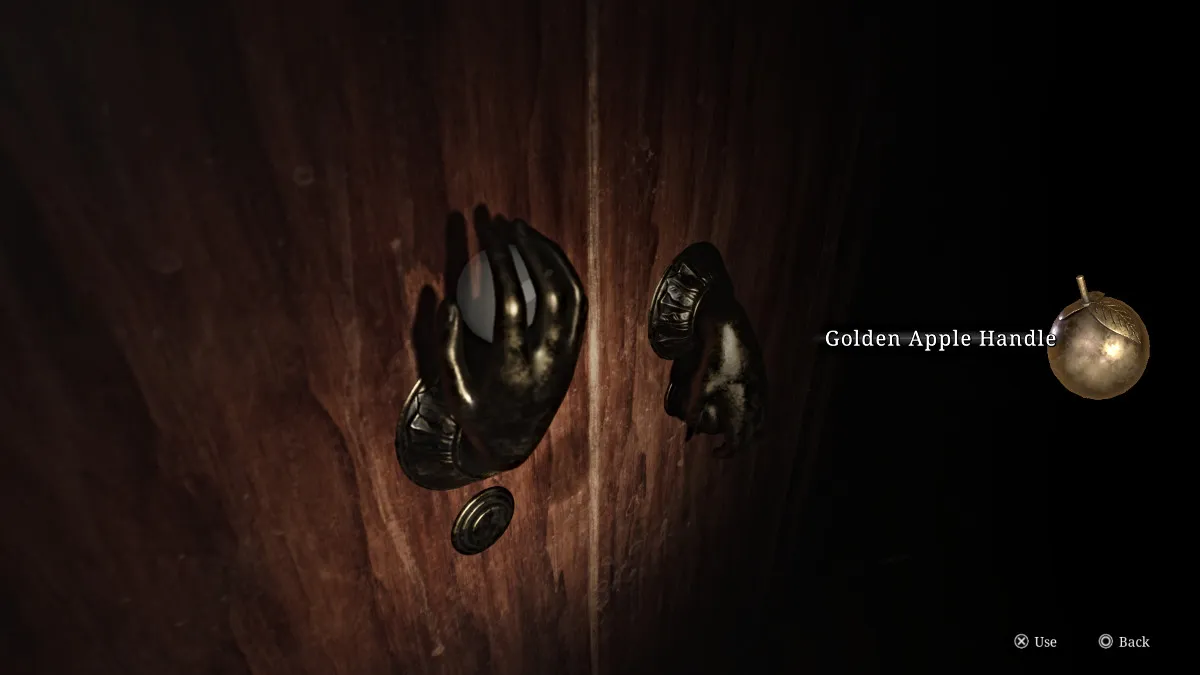
Stop byApartment 108and go to the enceinte press in the bedroom fitted with foreign , deal - shaped handle ( seen above ) . Interact with the left hand so it turns downwardly and knocks off theGolden Apple Handle . Take it and leave the flat . Continue down the hall to claim the2F Hallway Keyby the bars . Quickly tend intoApartment 107opposite it and catch aHealth Drinkfrom the bedroom ’s dresser then leave .
The door toApartment 106is now open with a lie Figure blocking your way of life . overcome it and track down into the apartment to grab someHandgun Ammofrom a cabinet in the living room . Continue back towards the left side of the building .
Screenshot by Pro Game Guides
After shell out with more Lying figure , enterApartment 102and go pick up aStrange Photositting near a TV labeled"Valentine ’s 24-hour interval " .
Wood Side Apartments (Floor 2) - Handgun and Meeting Pyramid Head
point back up to the second story with your new key and unlock the green two-fold doors to your left , making the eternal sleep of the flooring accessible . As you go down the hallway , a gap in a windowpane on your left discover a baby rig model in an empty swimming pool outside the building . You ’ll want to remember that .
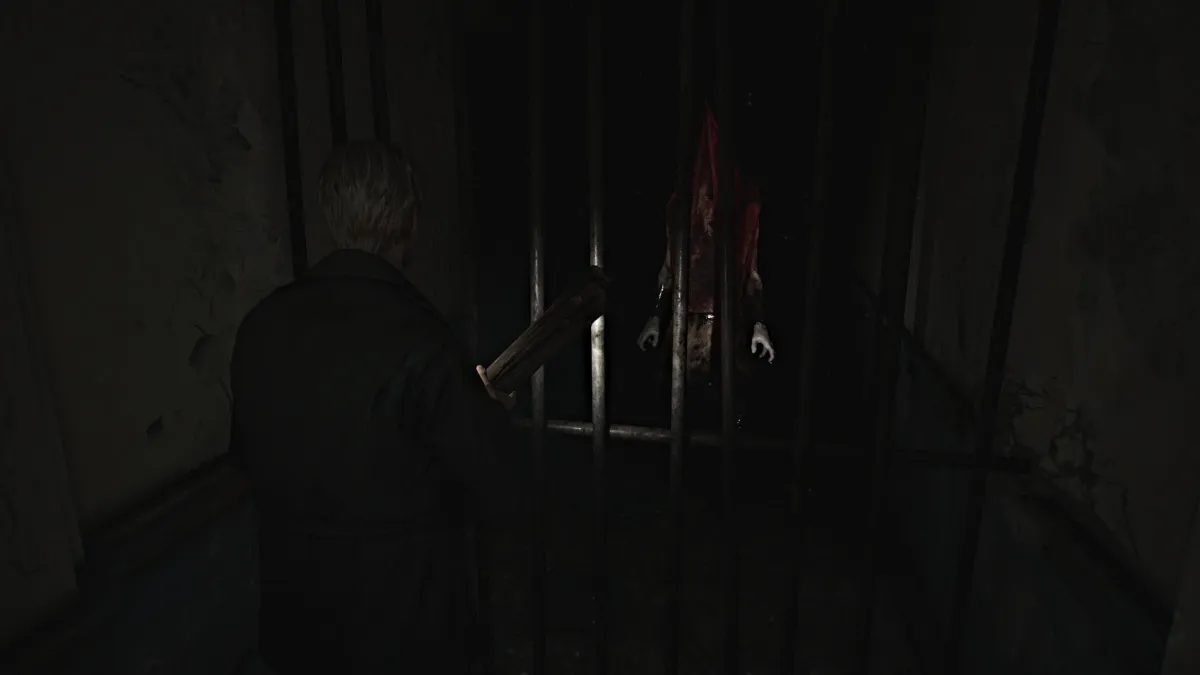
extend down the student residence and make a right until you see something crimson glowing in the distance . Approach it , and it sour out to be none other thanPyramid Head , staring at James from behind another set of streak . As unsettling as it is , he does n’t do anything ( for now ) , so backtrack a chip toApartment 213 .
Inside there , seem for anotherGlimpse of the Pastspot on the bedroom wall ( see above ) , then go to a crack in the wall near the kitchen that conduct to the other side of the hallway blocked by a low door . Make your way toApartment 217at the conclusion .
Screenshot by Pro Game Guides
Go inside to see a sustenance room full of bullet holes and shell casings , with a blood-red shopping go-cart in the middle . Look inside it and you ’re reward with aHandgun , your 2nd weapon so far . Also , as you ’d expect , the apartment isfull of Handgun Ammoto claim so check everywhere . If you ’ve been persevering about collecting ammo up to now you should have at least 20 rounds or so .
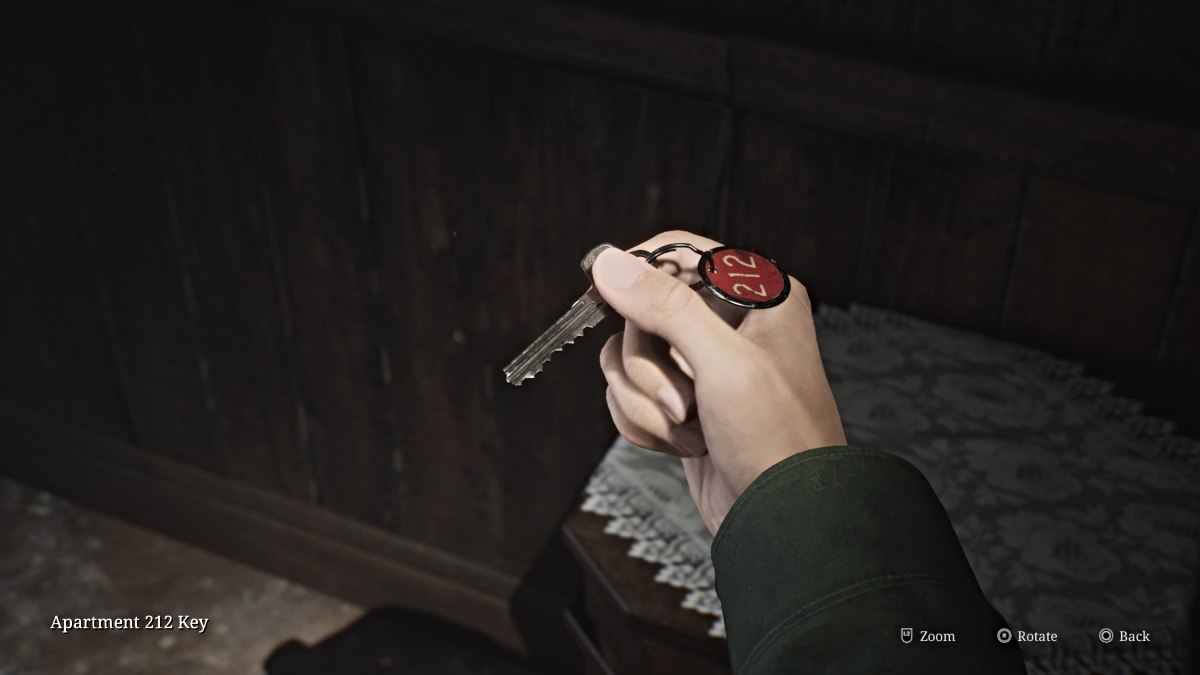
allow the flat and go back through the paries gap into 213 , where a mysterious trope cover and soaked in blood is sitting in front of a unchanging television receiver . Interact with it for a brief cutscene , then grab theApartment 212 Keyfrom the nearby dresser . bequeath the apartment and you ’ll remark Pyramid Head is gone . Use the cay to insert the other apartment .
Grab aHealth Drinkfrom the kitchen inside , then head through the open threshold to the balcony . Go across it to the flat on the other side , where you ’ll feel a Mannequin along with someHandgun Ammoin the undetermined electric refrigerator . Leave the apartment and head down the hall and around to the southeast side of the floor . Along the way , go out on another balcony and pull the nearby lever to lower the fire escape to the ground grade for another shortcut .
Screenshot by Pro Game Guides
Wood Side Apartments (Floor 2) - Safe Puzzle and North Staircase
Go intoApartment 207where you ’ll find a lie build , a Mannequin hiding in the bath , andHandgun Ammo .
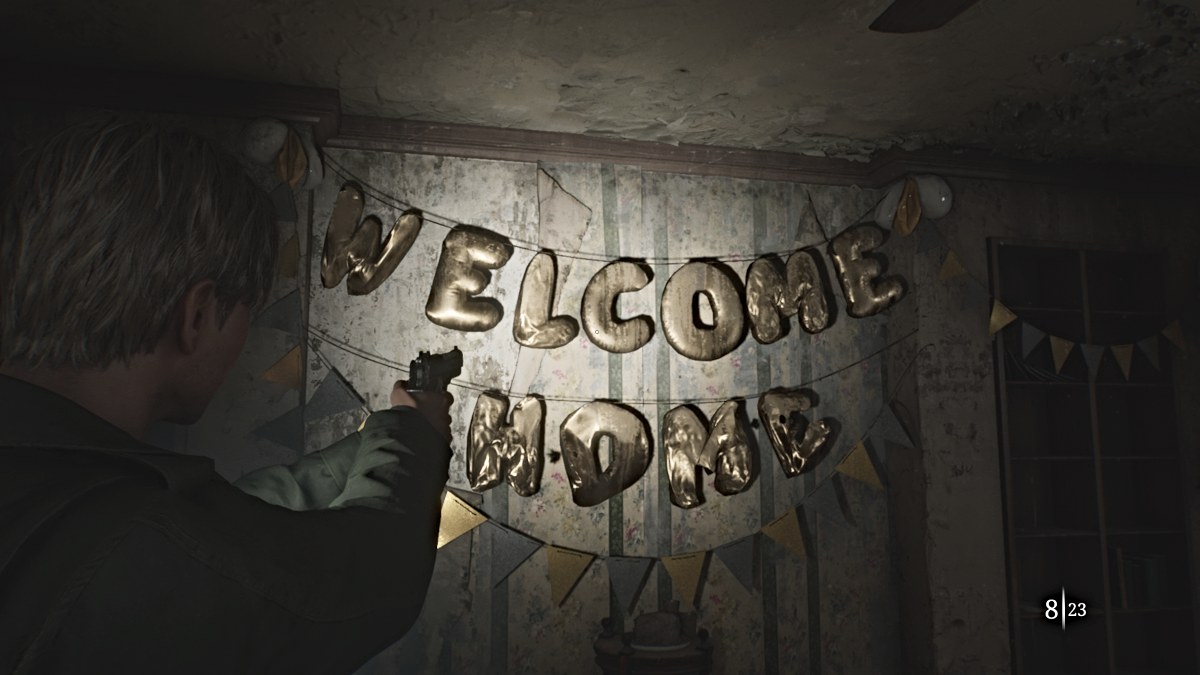
In flat 207 you’re able to unlock the ' Let ’s NOT Party ! ' hidden accomplishment by shooting every balloon in the " Welcome Home " sign with your Handgun . It ’s extremely recommended to recharge your last save afterward , to refill the bullet you used , or on New Game Plus once you have the Chainsaw to trust on .
205 is obstruct from the balcony so head back up to the hallway and toApartment 208instead .
Screenshot by Pro Game Guides
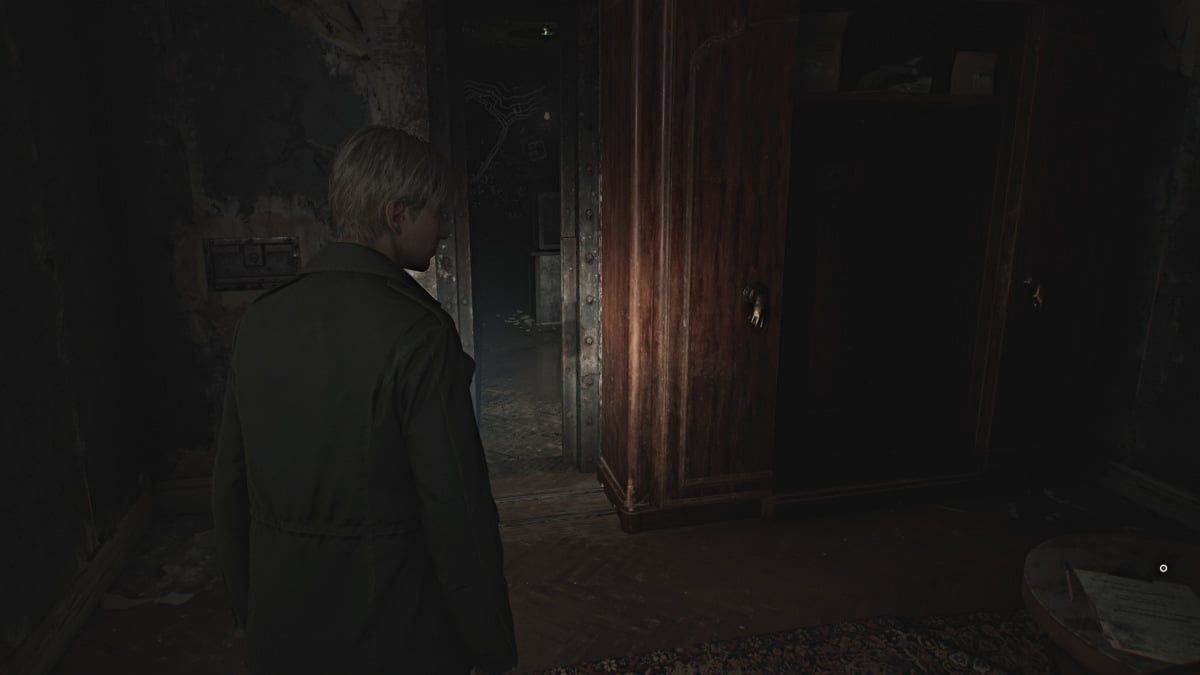
Inside you ’ll find another grand press with gilded hired man . Walk up to it and use theGolden Apple Handleyou obtained originally on it to unlock the wardrobe . Go to its left field and interact to push it over and unwrap a cloak-and-dagger room with written material on the wall and a locked safe in the center . As soon as you accede , the threshold will varnish behind you .
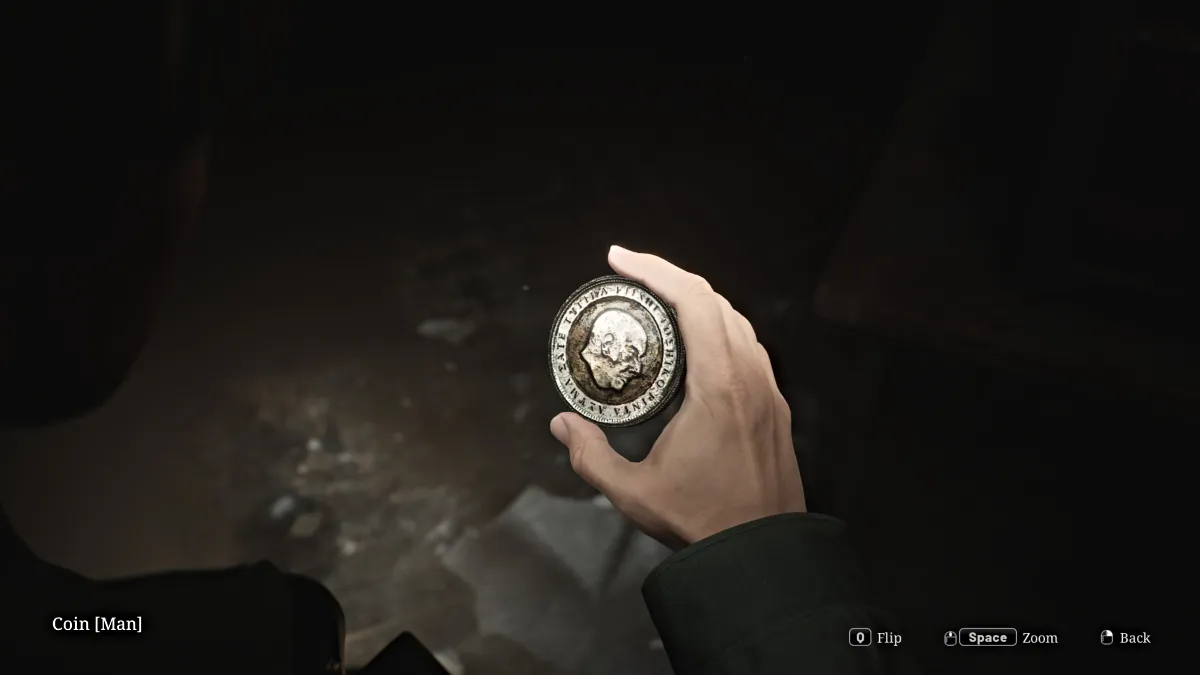
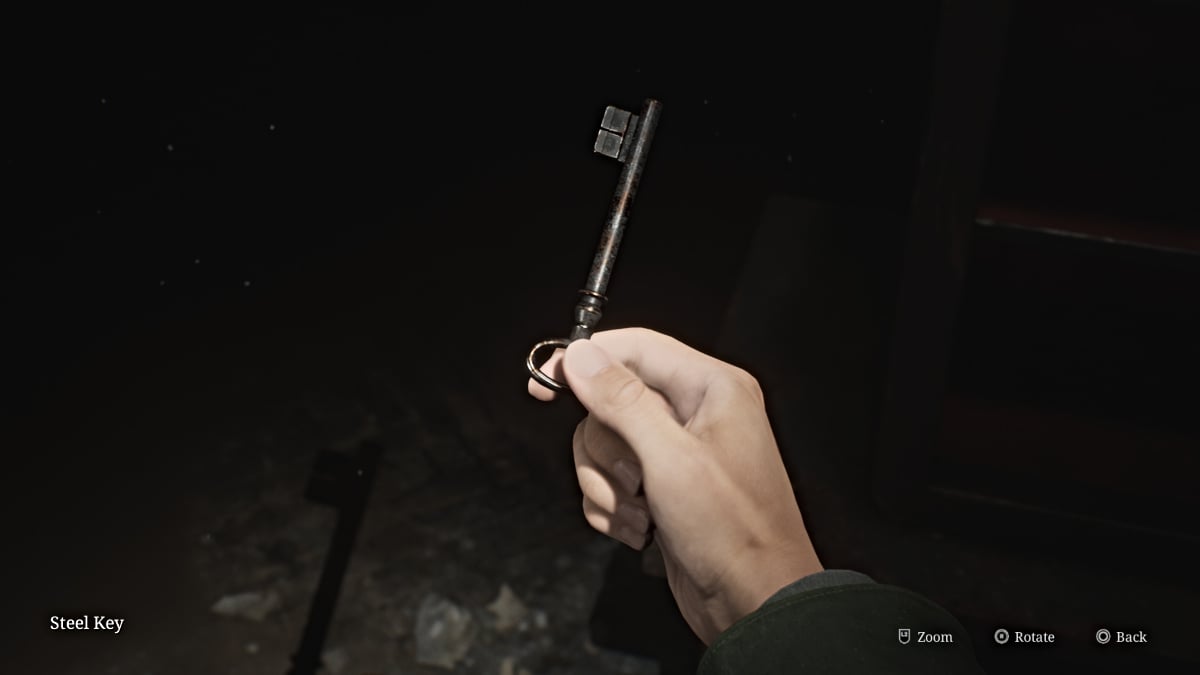
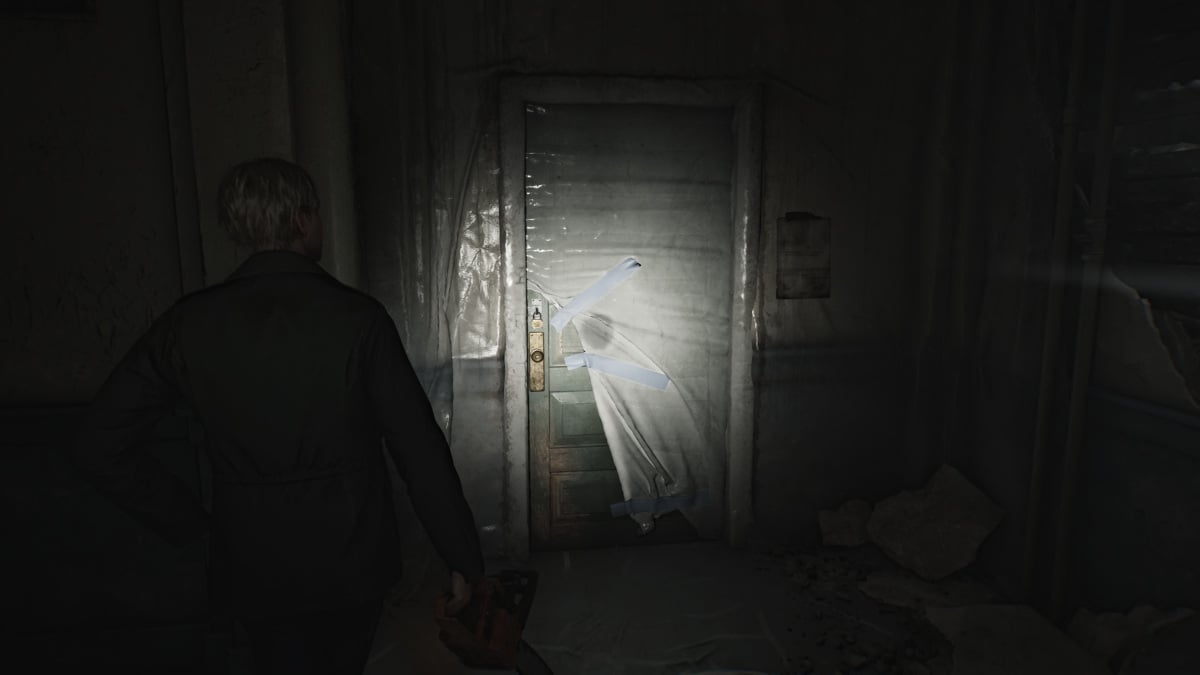
To open up the safe , you require to put in the correct combination , and the only pinch you get is from the written passage on the paries near where you came in . The correct combination ( Standard Puzzle difficultness ) is’right 13 ' , ' left 7 , then ' right 11 ' . The secure will unfold , revealing theMan Coin(for the Coin puzzle downstairs ) and aSteel Keyto use on the doorway on the other side of the way ( with white lame attract on it ) .
Escape the room and you ’ll be back in the hall where the doorway toApartment 205is now widely open . Go inside where you ’ll find some Bug devil along with aHealth Drinkin a medicine tin , Handgun Ammoin the kitchen , and the2F Small Staircase Keysitting on the death chair in the middle of the elbow room .
Screenshot by Pro Game Guides
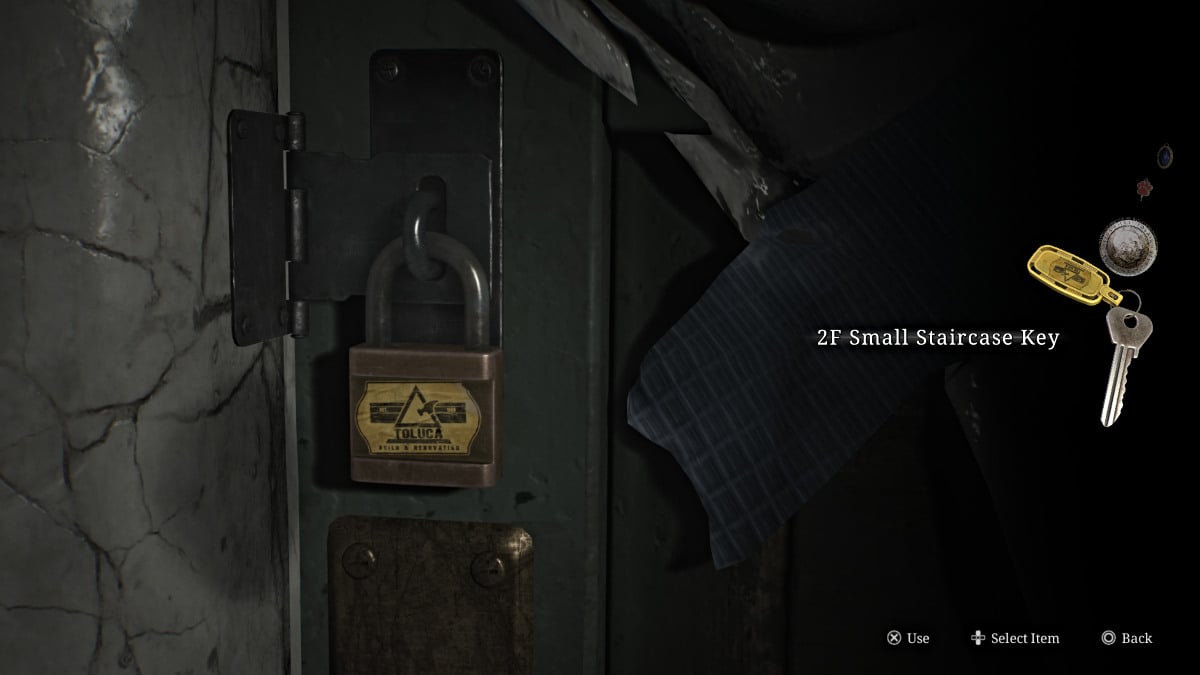
With that in mitt , channelise all the direction back to the stairway on the north side of the floor that ’s covered in plastic . habituate the2F Small Staircase Keyon it to in conclusion access it . Use theRed Save Pointinside then head up to the third flooring .
Wood Side Apartments (Floor 3 and 1) - Canned Juice, the Woman Coin, and Meeting Eddie
Once on the third floor , go directly down the hall first to take someHandgun Ammositting on an armchair at the bushed end . Then double back and head right until you get hold of another dead end and a paries gap that leads you intoApartment 311(seen below ) . Watch out for two Mannequins waiting to ambush you nearby .
Make your way through and cross over intoApartment 309 , then briefly back into the hall and through another interruption toApartment 310 . This apartment is split in one-half , so ensure to check both sides . The side at the far end of the hallway will have theStrange Notefor you to pick up off a desk and someHandgun Ammoin a first aid container .
Watch for more ambushing Mannequins and use the balcony to spoil over intoApartment 312 , where you ’ll find aSyringein a first aid kit , aHealth Drink , and theSinister Notememo hanging on a rampart .
Screenshot by Pro Game Guides
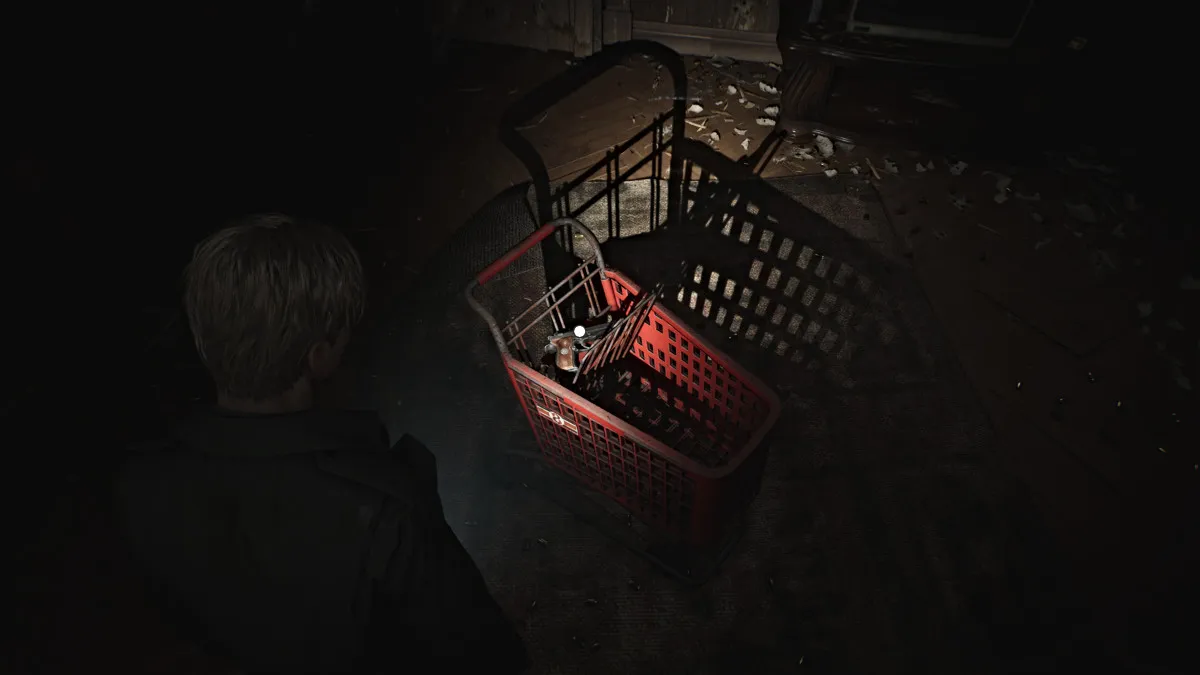
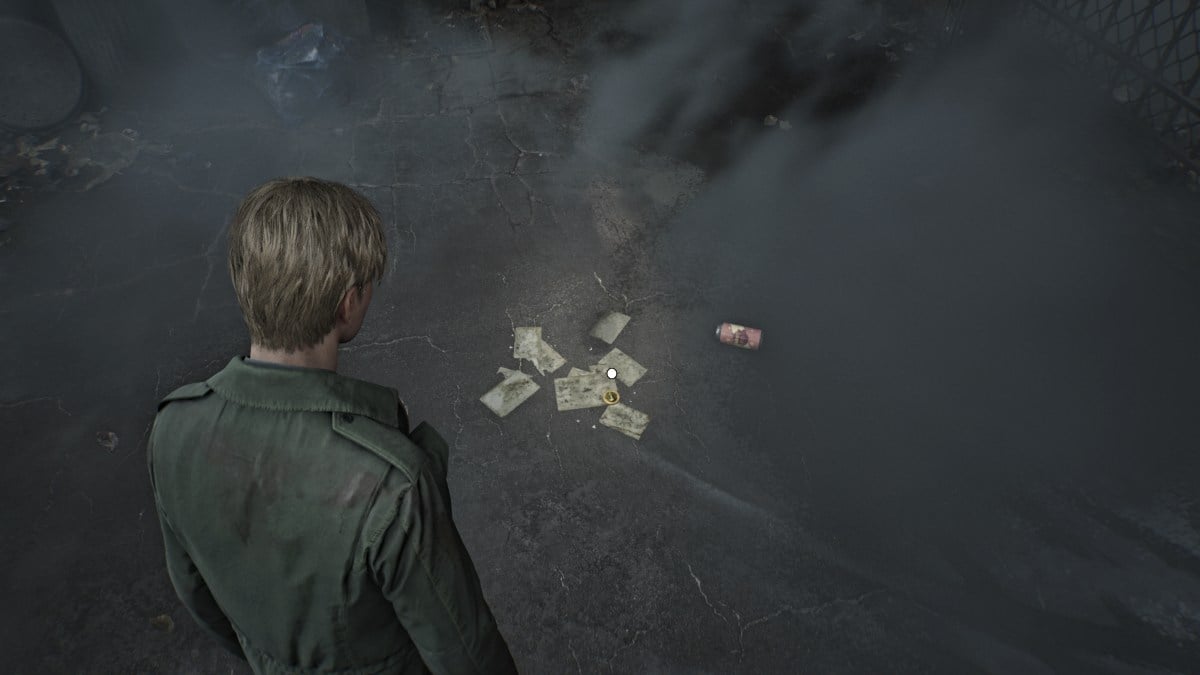
On the left side of the apartment , there is a crawlspace with black residue . front crawl through it and you ’ll egress in theLaundry Room . snaffle theCanned Juicepack from the tabular array and take it over to the nearby chute to drop it in . The weight will make a bunch of trash to fall through into theChute Courtyard , including anotherCoin . Grab moreHandgun Ammositting on a washing machine on your way out .
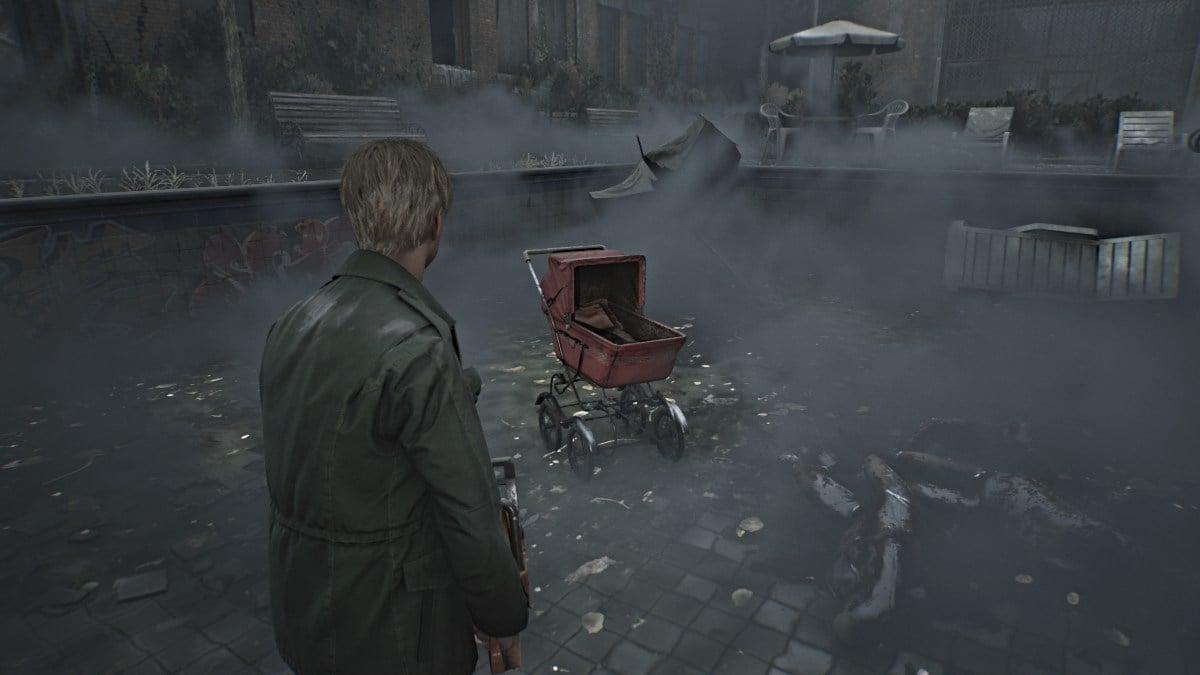
Approach it and a cutscene plays precede James toEddie Dombrowski , who seems queerly nervous and distinctly unwell . He seems unquiet to leave the town and asks James to come along , who politely refuses . After the cutscene , research the flat for item and before going to the pool area , which is fawn with lie design so you ’ll need to pilot it carefully .
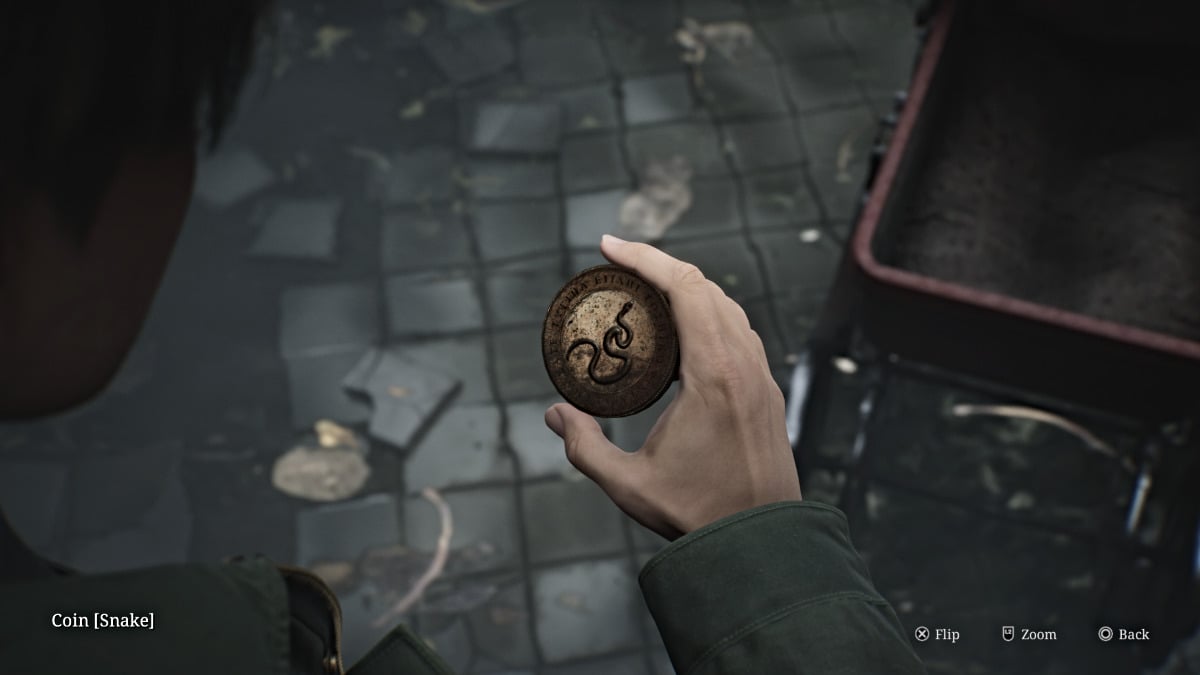
Kill only what you must and make your way to thebaby carriagein the pool which contains theSnake Coin .
miss the field back the way you came and out of the apartment , then channelize for the three-fold doors that lead back to the Chute Courtyard .
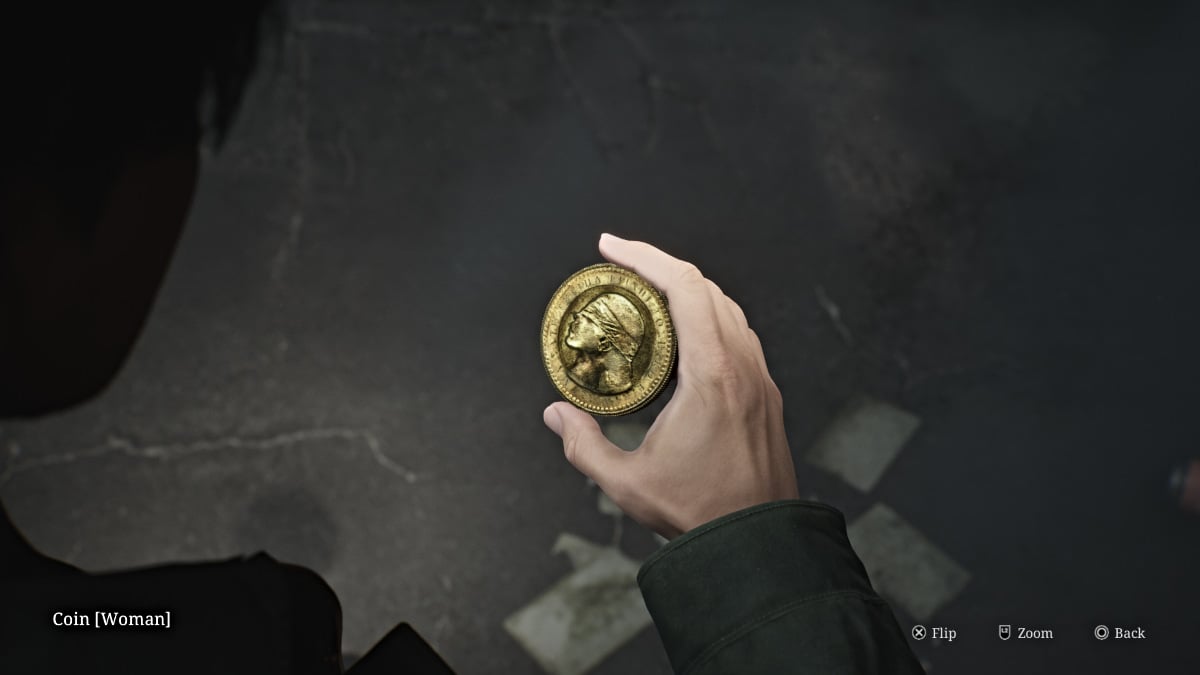
Carefully search the ground for theWoman Coin , which will be lying near one of the juice fundament ( seen above ) . Now you have all the necessary coins , so make your way back to thelobby officeto in conclusion complete the puzzler .
Wood Side Apartments (Floor 1) - Coin Puzzle
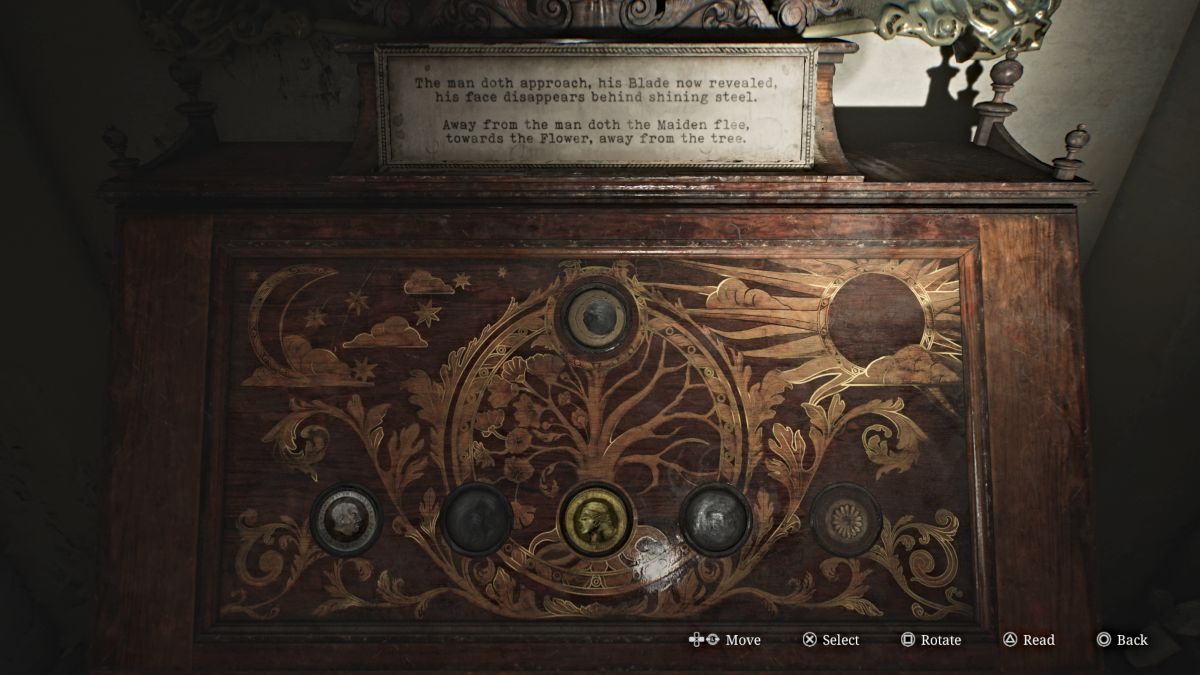
To give the ornate cabinet in the lobby federal agency , you need to place three coins ( and their variants ) into the correct slots according to the poem indicated above , which will change as you complete each tone . Here is the full solution to the puzzle ( Standard Difficulty ) , with steps heel in parliamentary procedure :
With that , the puzzle has one last step , which require you topick which coin to " blame”(Man , Woman , or Snake ) . While there ’s no incorrect answer , your choice will affect theendingyou get . You will also get theApartment 201Key for your efforts .
Wood Side Apartments (Floor 2) - A Close Call with Pyramid Head and the Otherworld
Use themain lobby staircaseto go back up to thesecond floor , and turn right to direct intoApartment 201 . Explore until you come across aHandkerchiefon a writing desk , which will cue an infamous cutscene with Pyramid Head and some Mannequins .
After he leaves , go back to the desk and collect theHandkerchief , then draw near thebright scarlet dooron the other side for another cutscene where James must literally cut through from one building to another . While it ’s technically theBlue Creek Apartments , it ’s a edition that ’s trapped in theOtherworld .
Silent Hill 2 Remake Blue Creek Apartments Walkthrough
In the Otherworld , an otherwise normal environment appear significantly different ; more dilapidated , corrode , and often strip down to a grimy , industrial frame . Get your bearing as you do n’t have access to a mathematical function yet , and go through the nearby blue door . GrabHandgun Ammofrom the armchair to your right , then top dog result and follow the hall until you do get a single-valued function ofBlue Creek Apts 2F-3F.
stay on down the hallway until you come to what look likea breakable wall . Use your Wooden Plank to break it down and slip through . CollectHandgun Ammofrom a nearby drawer and make your way of life carefully to the other side of the flat . Take care of the monster and get moreHandgun Ammofrom the kitchen domain before exiting to the hallway .
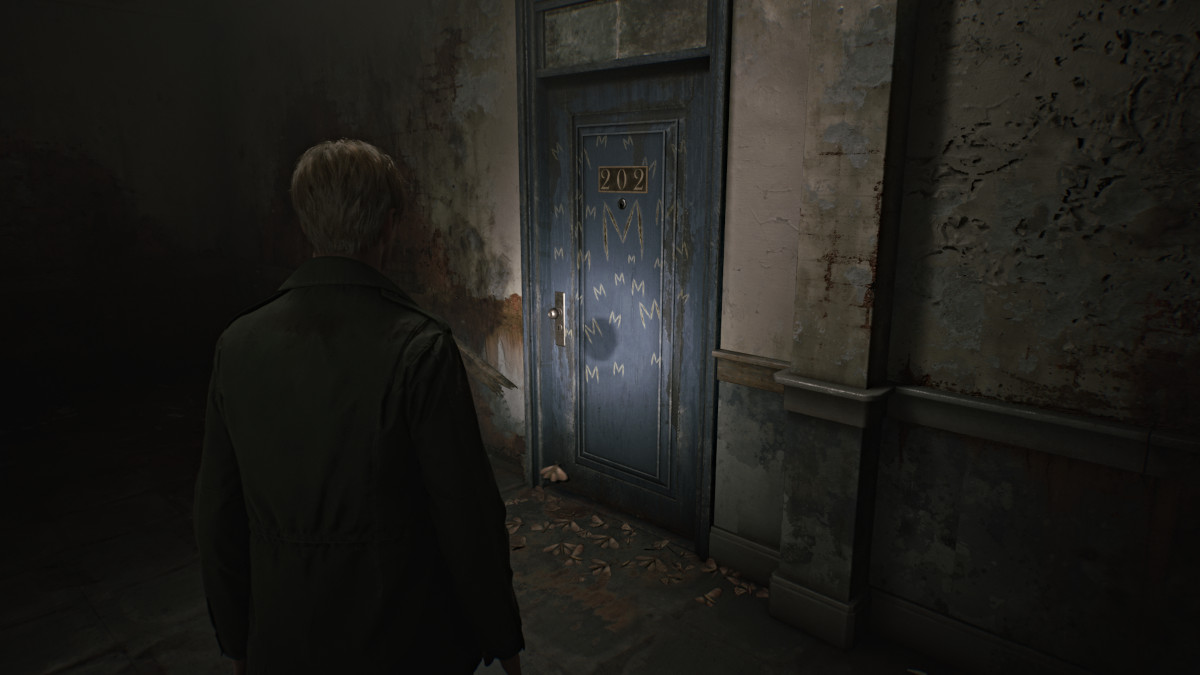
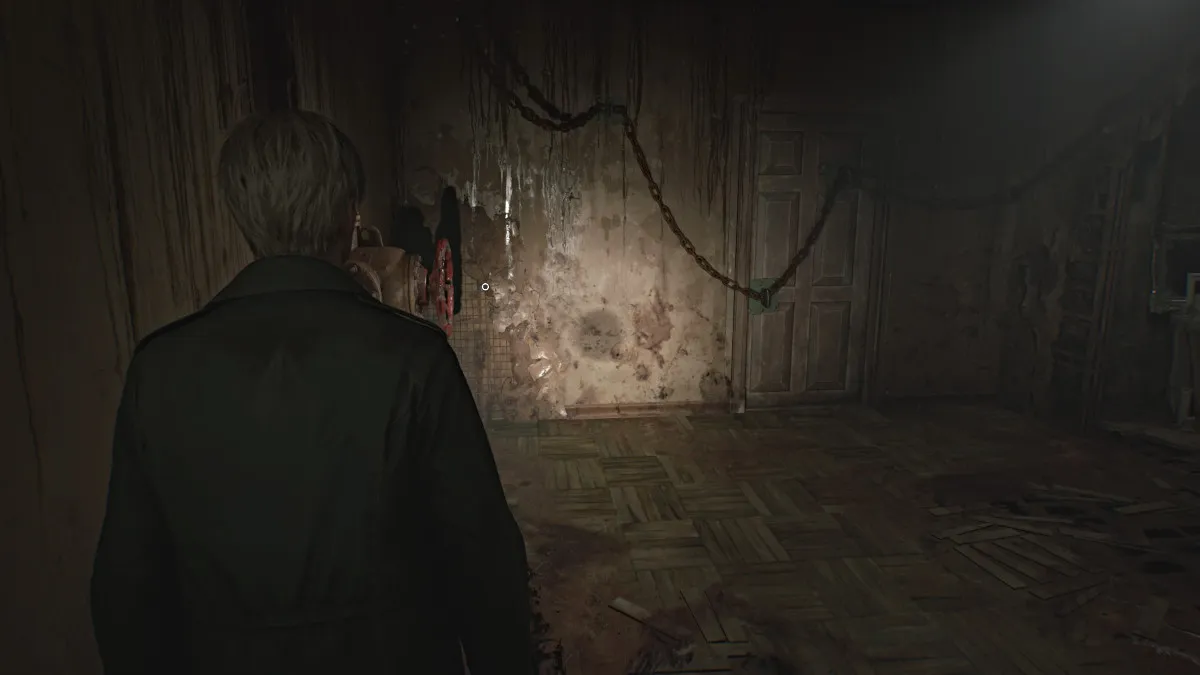
At one distributor point you ’ll hand the risque door toApartment 202 , which has ' M ' etch repeatedly into it and several dead moths in front of it . You ’ll recall to it after .
Screenshot by Pro Game Guides
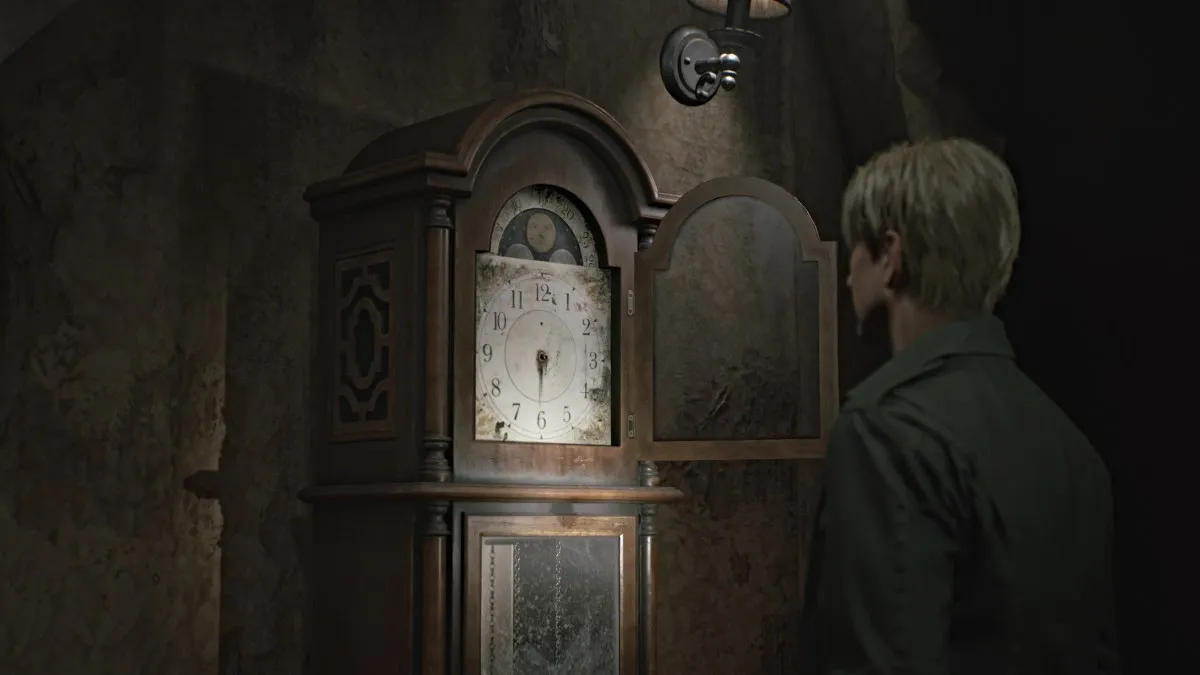
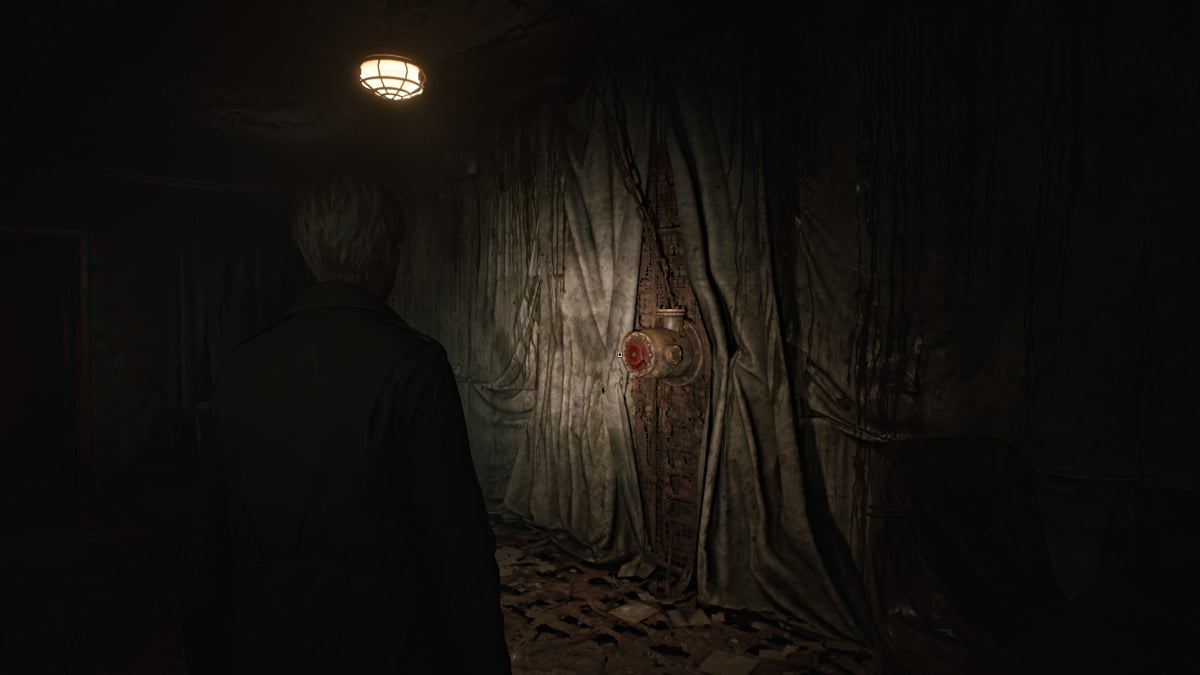
For now , go intoApartment 212 , where you ’ll find aRed Save Pointand aGrandfather Clockthat ’s really a puzzle . To complete it , however , you ’ll require tofind the absent Hour , Minute , and 2nd hands first .
There ’s also a handwritten note on the table opposite the clock that provides some mite about what directions those hands need to be placed in .
Blue Creek Apartments (Floor 2 and 3) - Cranks, a Clock Puzzle, and a Radio
Go out to the balcony , where there ’s a proverbial fork in the route . To the right is anorange door with a big ' H ' scratched on it , but you ca n’t open it yet . Instead , go left and intoApartment 203 . Grab theSyringeinside the kitchen and break down the bulwark there to get into205 .
Collect theHandgun Ammofrom the baby crib on the other side and make your way through until you reach another open window to another balcony . Grab moreHandgun Ammofrom the nearby toilet before you go . Take the stairwell up to thethird floorand climb up through the crawl space to land inApartment 303 .
First , go through to the kitchen area , where there ’s another breakable rampart . Past that , you ’ll hit theUtility Roomwhere you ’ll findHandgun Ammoand aHealth Drink .

Screenshot by Pro Game Guides
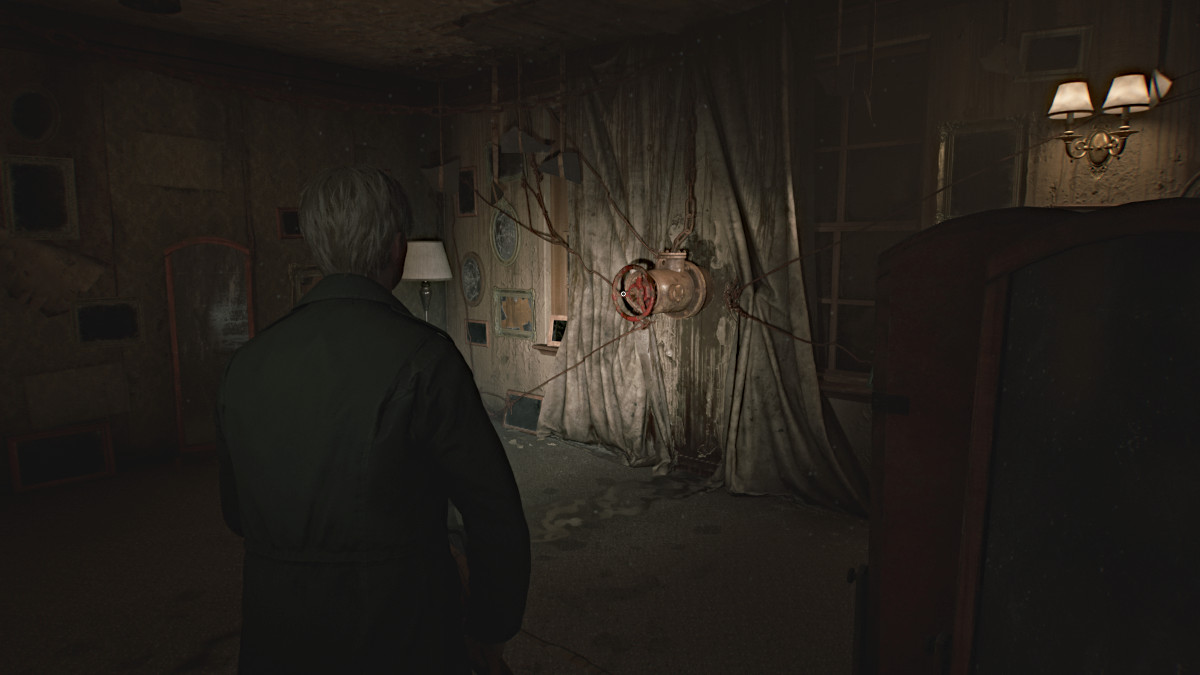
Go out to the hall and toApartment 307where you ’ll see a largeRadiocaged to the ceiling playing music . After foregather moreHandgun Ammogo to the elbow room on the right with aRed Crankon the wall that’smissing a valve .
First , go through the other door in the room which will take you to another balcony and back intoApartment 305.The window will seal behind you , and you involve to breach give the chain door nearby using the otherRed Crankon the paries ( seen above ) . Two consist figure will quickly attack , so dispose of them . Make certain to snap up theApartment 306 Keyfrom the table before you leave .
Make your means around toApartment 306and explore and roll up all theHandgun AmmoandHealth Drinksyou can . In the bread and butter way , you ’ll see anotherRed Crank .
Screenshot by Pro Game Guides
Turn it to pry unfold the door across the elbow room , and call back theValvethat wear off after . Now head up back toApartment 307and apply the Valve on the paries crank to bring down the caged Radio .
come near it after to hold theHour Handfor the Grandfather Clock . With that , head back down the attack escape ( use the lever on the wall to lower the stair to the second floor ) toApartment 212and place the Hour Hand in the Clock to set out the first Clock Puzzle .
In this typesetter’s case , turn the Hour Hand to ' 9’on the clock , and theorange ' H ' doornearby will in conclusion unlock . Make your way over to the ' heat content ' door via the balcony and it will take you into Apartment 210 . Inside , you ’ll notice there ’s very much a bird theme with everything . A small " teetertotter " ( as James shout it ) in the life way need abird - shaped objectto weigh it down , and a locked door nearby expect a key for its razz - shaped lock chamber .
Screenshot by Pro Game Guides
Go over to the kitchen , grab theHandgun Ammofrom the counter , and break down the wall nearby to enter the lavatory . Go within and the only searchable area is ( of course ) the gutter full of … well , " sludge " . ' Search ' it until James pull out theMinute Handfor the clock .
However , upon doing so the environs around James dead changes and you ’ll postulate to come up a different way out . Leave the bathroom and take hold of thePigeon Figurinefrom the nearby ledge ( seen below ) . After apportion with the lie Figure that charges in ( remember they explode after buy the farm in the Otherworld ) , place thePigeon Figureon theleft side of the seesaw . Now you take to find the other flesh to balance it .
allow for and go down the hall toApartment 209 , where you ’ll on the spur of the moment hear some strange whispering ( reversion to the original ) . Go through the bedroom to get to the bathroom and unwrap the shower door inwardly to incur theMalformed Figurine Part(seen below ) .
Screenshot by Pro Game Guides
Be careful of a Lying form on your way out , grabHandgun Ammofrom the dead end to your remaining and now channelize down toApartment 211 . you may enter via the impoverished rampart or the real door , and aHealth Drinkwill be model near the door .
Go inside and deal with the two Mannequins trying to get the drop cloth on you . In that same room on the rightfulness you ’ll note a strange phantasma on the back wall . Look around and theWooden Swan Head(seen above ) will be hanging from a string near a illumination . Take it and then combine it in your inventory with theMalformed Figurine Partto make theSwan Figurine . Grab moreHandgun Ammofrom the kitchen on your room out and manoeuvre back to Apartment 210 .
Place theSwan Figurineon the dandle board and adjust to the second one-armed bandit from the center to balance the seesaw . The Mrs. Henry Wood fulcrum will shatter , revealing theWinged Key . Take it and use it on the nearby locked threshold . Go indoors and you ’ll see a gaping muddle in the storey that you ’ll need to stick out down . This bring you to thefirst floorof Blue Creek Apartments .
Screenshot by Pro Game Guides
Blue Creek Apartments (Floor 1 and 2) - Angela’s Lament and Unlocking the M Room
start the map and you ’ll find yourself in Apartment 110 on the first trading floor . Make your way through and you ’ll come across anotherGlimpse of the Past(seen above ) , which is the coin puzzle console from the original game . Continue on and go through the col in the wall as the entrance door is lock . Head north up the hallway , and you ’ll notice that the environment looks dissimilar on that side , less break down .
Go inside the much cleaner - lookingApartment 109and through the white door in advance . A cutscene will fiddle with Angela , who seems more baffled than before .
As the cutscene ends and she leave the knife behind , James will take it for his inventory ( seen above ) .
Screenshot by Pro Game Guides
Be mindful , Angela ’s Knife is a fundamental item , NOT a weapon you could use . Also be careful of looking at it too often , asdoing so greatly influences theendingyou get .
Take theKey of Resiliencethat ’s also on the table and then depart the apartment . utilise theKey of Resilienceon thesouthmost doorthat leads to a foyer surface area anddouble doors engrave with the letter ' S'(seen below ) . It ’s operate , however , so you ’ll need to find out another way .
Go past the hall intoApartment 101 , gather theHandgun AmmoandSyringefrom there , and use it to bypass a barrier in the hall , and it leads to theStairwell Room . Go inside , where a Mannequin will scupper you . Kill it , so that you’re able to get the"Together incessantly " picture ( Strange Photo)from it .
Screenshot by Pro Game Guides
Go up the steps ( no , he ’s not waiting for you in there ) and through the room access back to the second floor . Head back to theClock Room(212 ) since you have theMinute Handand place it in the clock . Turn it to ' 2 ' and hit ' take on ' to solve the next part of the mystifier . This will unlockthe ' M ' Roomon the 2nd floor that you derive across a while ago .
Blue Creek Apartments (Floor 2) - Moth Puzzle and Finishing the Clock Puzzle
manoeuver down the hall to theM Room(orApartment 202 ) and go inside for another puzzle . The integral place is filled with moth , and you ’ll detect various displays of moth taxidermy around the main room . Behind the armchair is another room access chain shut with a big combining put away that you need to solve to demote it off .
basically , to get the correct combination you call for to take count of all the moths displayed in the entire flat ( including the obscure ones behind the breakable wall ) and the symbols on their wings . You factor those into the emblematic math problems next to the lock , and once solved you ’ll have the numbers .
To save you sentence , however , the correct code for the whorl ( Standard Difficulty ) is373 . Once done , go inside where you ’ll see another incredibly inviting hole in a wall for James to stick his hired hand in . ' lookup ' it enough time and you ’ll retrieveThe Second Handfor the clock . Leave the flat later .
Screenshot by Pro Game Guides
Return to theClock Roomand spot theSecond Handinside the clock . To complete the third and final part of the teaser , turn it to ' 3’and this will unlock the ominous ‘S Room’back on the first trading floor . Before you leave the Clock Room , check that to grab theHandgun Ammofrom the neighboring room and the " How the time flies"Strange Photo .
Also verify to explore anywhere else that you require to in the Blue Creek Apartments before progressing , asthe S Room is the item of no return for this domain .
If you ’re ready , take the second floor ’s west - side stairwell down to the first floor . Along the way you could notice fresh gash in the floors and walls , indicating someone with a huge sword has been stalking the area . Go back to the foyer region where the S Room is , take a deep breath and go at bottom .
Screenshot by Pro Game Guides
Blue Creek Apartments (Floor 1) - How to beat Pyramid Head
The S Room is home to none other thanPyramid Headhimself , who has been lurking and waiting for your reaching . As soon as he turn to front you , the fight begins .
Rather , it ’s your fighting to stay alive long enough because as you ’ll quickly realize , Pyramid Head takes short to damage at all . The only weapon system you want to use here is yourHandgunbecause keep your distance from him is the top priority . If you attempt a melee attempt , one swing of his Great Knife will either gravely damage or shoot down you in a flash .
gratefully , the room is litter with box of Handgun Ammo , so make use of those while incessantly making lot around the way . Keep firing bullets into him ( avoid his helmet ) and at one level he ’ll become more fast-growing while the way begins to flood .
Screenshot by Pro Game Guides
cover the same scheme until finally , temptress start blaring and Pyramid Head immediately stops his attack . A cutscene will show him leaving , ending the fight altogether . Once you have control , three-fold - check the way for any Handgun Ammo you might have missed and then go out the same door , which will take you straight out of doors , back onto the street of townsfolk , the Otherworld now go .
Fun Fact : If you go back into the building , the exit country will have switch back into its original residential aesthetic , like nothing ever happened .
Silent Hill 2 Remake West South Vale Walkthrough
Hit theRed Save Pointright outside after the conflict to salve your progress , then moderate the car next to it for aHealth Drink . Check your map and you ’ll now find yourself in theWest South Valearea of Silent Hill . You ’ll see thatRosewater Parkup north is circled , intend that ’s your next main objective .
twist the corner and tally the green car on your right forHandgun Ammoin the equipment driver ’s seat . Keep going and another cutscene will bring where James runs into the untried female child from before ( name Laura but she does n’t reveal it until later ) . She seem to be holding a varsity letter but refuses to tell James what it is , say that he " did n’t eff Mary anyway " and taking off again . The cutscene ends with James baffled that someone else is here for Mary also .
Rosewater Park
Continue on through the tunnel that takes you straight into Rosewater Park . Take thefirst left towards the workbench domain , where you could find aSyringenext to a jacket . Then , take the small bridge circuit across which then diverge . Take the right way of life and follow it , as there will be someHandgun Ammoto salvage on that side .
Keep conk out straight and underneath the ' Rosewater Park ' sign , which bring you to a pier area by Toluca Lake .
If you ’re take on New Game Plus and want to achieve the UFO ending , inspect the Blue Gem for the second time at Rosewater Park ’s pier once you hear the same audio cue stick as before .
Screenshot by Pro Game Guides
Take the long central path across to a gazebo , where you ’ll see a distaff trope in the fog .
A cutscene reveals it ’s a cleaning woman who eerily resembles Mary , but with a noticeably more follow here seem . She reveals herself asMaria .
As James grow visibly disappointed and confused , Maria offer to take him to another potential " special topographic point " Mary might be at . Despite his preference to go alone , Maria importune on coming with him with " all the monsters around " . He reluctantly gibe and now your journey includes Maria as your companion .
Circle down and around the left side of the commons , where you ’ll determine the " So far from home " Strange Photo in a sit area , a bit moreHandgun Ammoon a chess tabular array and aHealth Drinkin apublic restroom area . Leave Rosewater Park out the due west exit and onto Nathan Avenue .
Jack’s Inn
Maria enjoin James to cut throughJack ’s Innto get to their destination , so head there across the street . Head into the motel bureau first , which can be access from the door on the back side . There ’s asmall dependable beneath the counterthat requires a codification to be open . Grab theReception Desk Notefrom the bulletin board , which hints atRoom 107 . You ’ll find it at the elevated building towards the back of the motel , but you ’ll need to fall apart the windowpane in Room 108 to get there .
Once in , break down the wall connected to Room 107 , and in the bedroom you ’ll find theToolbox Memo , which give you the following enigma :
By doing the appropriate math , you ’ll get the code0451 . As you quick to leave the room , Maria will pester you with an rig she regain in the closet , asking if it would seem good on her .
Screenshot by Pro Game Guides
The rig Maria bear witness just so happens to be her kit from the original Silent Hill 2 game , so it make for a nice easter bollock .
Go back to the motel government agency , apply the code , and inside the good you ’ll find theGate Key . You do n’t get much time to reckon at it though , as a Mannequin short ambushes Maria . One barb will take it down .
Octanis Fuels
After using theRed Save Pointsitting on the trunk of a automobile , now is the time to explore other places in the area before persist in the story , as you wo n’t be able-bodied to return for a while and it will be nighttime ( and more unsafe ) when you do .
If you ’re playing New Game Plus , before you go anywhere else , go to the diminished row of house directly behind Jack ’s Inn . In one of the backyards you ’ll find the Broken Key Part ( Bone ) near a dog house . Now you may aggregate both parts to repair the key and use it later .
From where you enter Jack ’s Inn , headleft down Nathan Avenueuntil you reachOctanis Fuels . Upon arriving , Maria will say you ’re going the wrong way and be aware that cut her advice andletting her get snipe by monsters throughout the game will influence yourending .
Screenshot by Pro Game Guides
Go around to the back of Octanis Fuels where you ’ll finda car lifted by a garage seaman . Walk up and take theGarage Jack Leverfrom it , but the noise will arouse up several monsters in the mental process . Take care of the Lying figure and Bugs that come guide .
Pete’s Bowl-O-Rama
Also while you ’re over there , head across Carroll Street toPete ’s Bowl - O - Ramaand go search inside . While in the original biz you ’d stumble across Eddie and Laura here , that is n’t the case in the remaking . The place is completely empty but you may see aRed Save Point , some spareHandgun AmmoandHealth Drinkslying around , along with a about - eaten pizza pie near the bowling lanes .
Interact with it to get anotherGlimpse of the Past , and James will remark " This space is full of monsters , how can someone sit here and feed pizza pie ? " . It ’s a fun nod to one of the most iconic scenes from the original game , and Eddie may very well have still been here .
If you ’re playing New Game Plus and desire to get the ' Bliss ' close , count for a safe behind the shoe rental counter , sitting in one of the cubby maw . The code to open up it is1887and inside you ’ll find the Rusted Key .
Screenshot by Pro Game Guides
Car Park (outside Rosewater Park)
pass on Pete ’s when you ’re quick and lead all the way back down Nathan Avenue towards Rosewater Park . Be aware of the monsters now scatter along the street . Once you ’re back , go specifically intothe Car Park just outside Rosewater Park . One of the parked cars inside it will have someHandgun Ammo , so smash and grab .
take to the woods around to the back of the service department in the Car Park , where you ’ll seea logic gate being agree open by a garage Jack-tar , albeit missing its lever tumbler . Use the one you salvaged and you ’ll be able to open up the gate up in full . Inside you ’ll find a treasure trove of helpful items , let in :
With that , you ’ll have covered much of everything you ’ll need to search in the area for now . So manoeuvre back through the parking lot of Jack ’s Inn , use theRed Save Pointthere again , and use theGate Keyyou acquired sooner to unlock the west side logic gate and get access to the rest of West South Vale .
Screenshot by Pro Game Guides
Baldwin Mansion
If you detour to the left first you ’ll come across theBaldwin Mansion , a prominent placement from the original game ’s side storyBorn From a Wish . alas , its doors are locked and Maria will refuse to even go into the courtyard , saying that while she feel like she ’s been there before , it seems to be a " bad memory " .
If you ’re playing New Game Plus and want to get the ' Rebirth ' ending , while you ’re at the Baldwin Mansion look for the White Chrism sitting on a table in the porch area .
Steel Pipe Weapon Upgrade
With that , headsouth down Munson Street then cling a right at Katz Streetsince another grandiloquent roadblock is in your way . Eventually , a cutscene will reveal that the route terminate with another huge gap in the ground , and Maria insists on finding another way . James senses something and finds an alley shortcut close by just as monster initiate to cloud and the fog riles up again , similar to before .
After getting through the alley logic gate , James barricades it with his wooden plank to keep monsters out , his only melee weapon on the face of it fall behind . However , he turns and come up aSteel Pipesticking out of a smoking cable car to make purpose of or else , generate you an rise in the summons .
utilize your new melee weapon to stand off the lusus naturae onward of you and make a path through the back alleys and yard towardHeaven ’s Night . find fault up all theHandgun Ammothat you’re able to along the path .
Screenshot by Pro Game Guides
If you feel comfortable doing so , this is a groovy opportunity to torture up some serious battle royal kills for the’Blunt Force Trauma ' accomplishment . Just keep an eye on Maria while you do so .
Heaven’s Night
Eventually , Maria will direct you to a disruption in a fence to escape through . Take it , and after a brief cutscene , you ’ll find yourself correct behindHeaven ’s Night . Head to the building ’s back doorway , and despite it being interlace Maria will open it for you . Explore the kitchen and dressing room area for item , let in the " Ready to kill it!“Strange Photo .
later , go through the open door and around the wing area ( more items here ) until you reach out the front dining area and ginmill . A lengthy cutscene will playact out with Maria seek to lure James to relax and for them to drop some time there , for one intellect or another . She insist this was n’t the " special plaza " she was referring to , that it was merely a cutoff .
Ultimately , he decides it ’s better to keep moving and Maria leads him out the front door and to the genuine " peculiar place " she mean .
Screenshot by Pro Game Guides
Fun Fact : On the fashion out the front doorway of Heaven ’s Night , if you look at the " Kiss " atomic number 10 augury in the top good corner , in the mirror beside it the sign reads " demented " in scattered letters . A clever acknowledgment to the game ’s overarching theme of sickness .
Moonlight Grove
Maria guides James into a place he ’s never been in Silent Hill ( and fresh to the remake ) calledMoonlight Park . They get in a small courtyard where a statue of a adult female stands , and during a length cutscene Maria tell James about the enamoring yet tragic story behind her .
Meanwhile , the tarradiddle distinctly affects James , who starts to lose hope that he ’ll bump Mary given the context . Maria solace him and take a firm stand they ’ll keep looking , and suddenly a nearby scream alerts them .
Reverie Theater
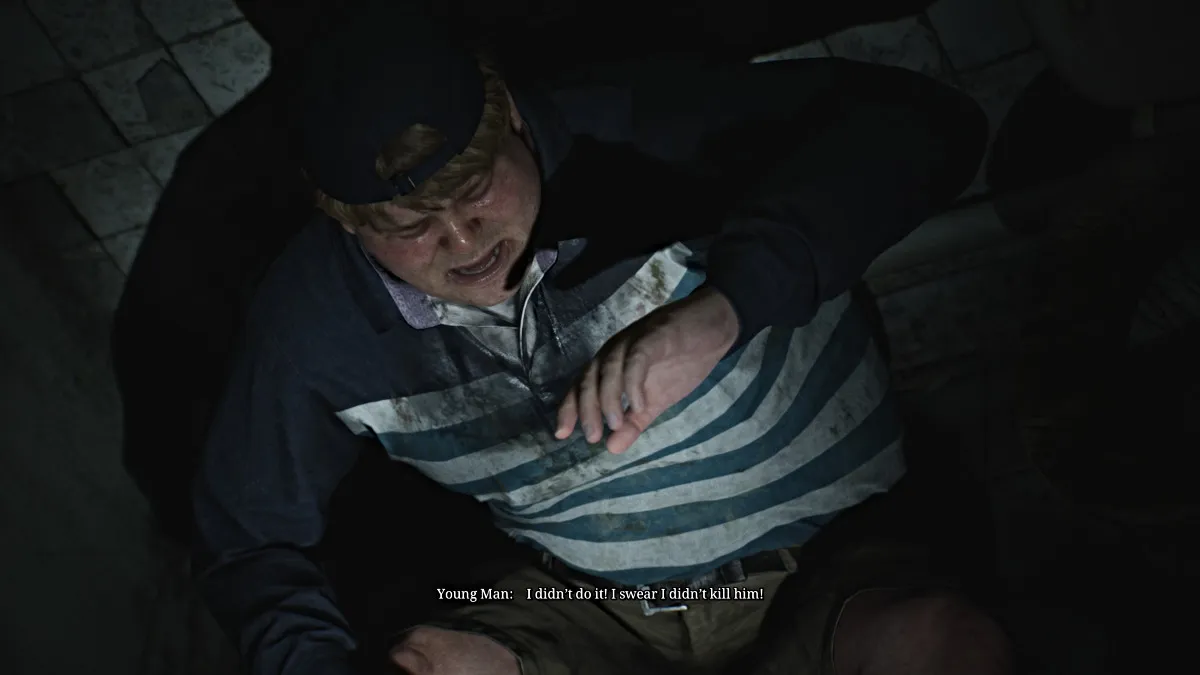
Once in spite of appearance , you ’ll presently learn the voices of none other thanEddie and Laura , who are plain watch over a movie together and Eddie tantalize Laura for screaming ( the one you heard earlier ) .
Look around and interact with the nearby locker to move it out of the way of a door , which have a ruckus . Laura gets spooked and run away off while Eddie stays . Go through the room access and around the corner to your left to go into the theater , where another cutscene will act out with Eddie .
After it ’s over , go through the doors on the far left side to the next theater room , where Laura will prank James by become on the projector . head up up through the back door to the hallway and then up a nearby stairwell . Make your way through the projection room and back through the elbow room full of flick reels . Squeeze through a gap between two shelves and James will blob Laura in the next projection room who range off again .

Screenshot by Pro Game Guides
Go through the second projection elbow room and out through the back doors , and continue chasing her all the agency out the theater ’s front room access . cavity halt bothlobby bathroomsfor moreHandgun Ammobefore you go .
draw outdoors and Maria will say they can still overhear her . Go left down the street and around the recession , and another cutscene will discover Laura run intoBrookhaven Hospital , the next major localization in the game .
Silent Hill 2 Remake Brookhaven Hospital Walkthrough
Brookhaven Hospital (Floor 1) - Map and Basement Key
EnterBrookhaven Hospitaland directly sour right on into theentry office staff . You ’ll notice an open gun locker where a Shotgun used to be , hinting that it ’s likely still in the hospital somewhere . Grab your first stack ofShotgun Shellsfrom the nearby desk .
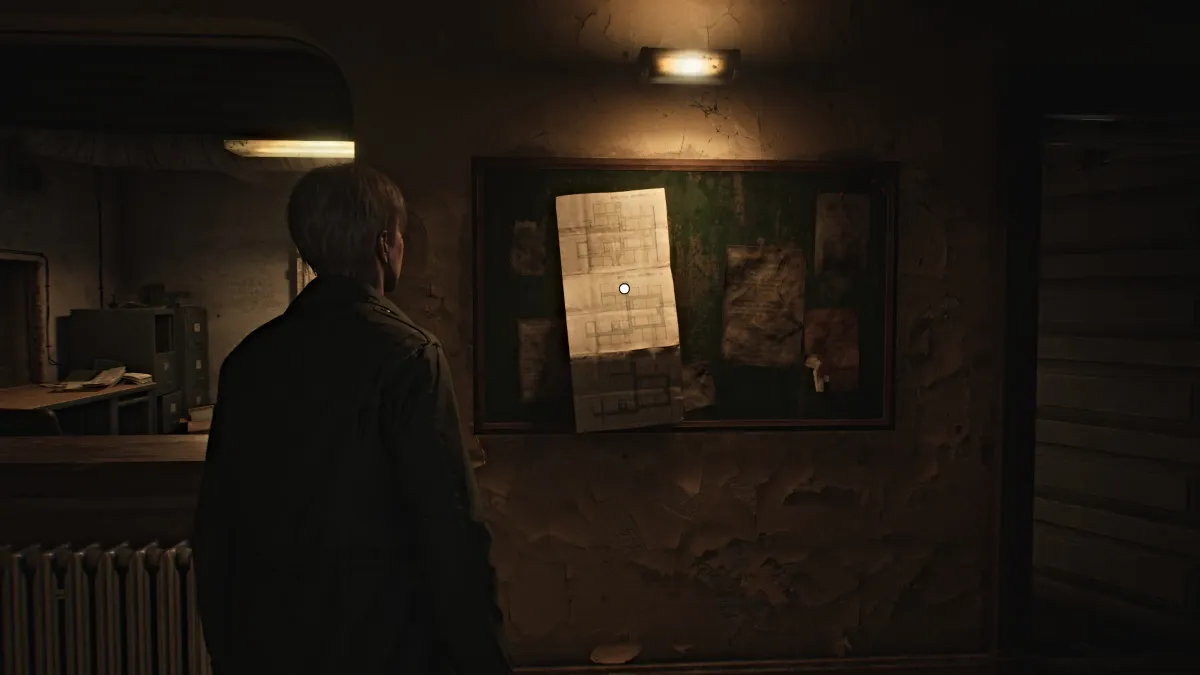
Go through the next set of door and melt down over to grab theBrookhaven Hospital Map 1F-3Ffrom the powder store stand under the bulletin display panel . Go leave to Reception Office and grab theKey Locker Notethat mentions apadlock combinationandExamination Room 3 . There’sHandgun Ammoon a desk as well .
twist and go into the way behind where wind through an open window blows some documents around . expend theRed Save Pointand then make note of thekey safe on the wall(seen above ) with the antecedently mentioned padlock . The right combination ( Standard trouble ) is724 , but you could still lead toExamination Room 3to get theNurse ’s Memofor closing sake , along with aSyringeandShotgun shell . With the boxful open , retrieve theBasement Key .
Screenshot by Pro Game Guides
Most other routes on the first storey are put away for now , sohead for the stairs on the east side . A cutscene will show Laura draw on the walls before distinguish James and run away , again . If you surveil her up to the 2d floor , you ’ll find the door locked for now , sohead back down instead to the Basement level , since you have the key . GrabHandgun Ammofrom a draftsman beneath the stairs at the bottom , then head through the doors .
Brookhaven Hospital (Basement) - Restart the Generator
Straight ahead you ’ll get hold aMap for the Brookhaven Hospital Basement . Get your bearings , then head north to thePump Room , where you ’ll findHandgun Ammoon a container to your right hand . Continue through to the Generator Room , where you ’ll see a vast generator that ’s currently without power . A red funnel shape over the tank indicate it needsFuel .
Go over into theBoiler Roomarea ( comprise of two rooms ) and take in out for ambushing Mannequins . Grab someHandgun Ammoby the back wall and then go into thesecond Boiler Roomwhere you ’ll bump anEmpty Fuel Canin the back box .
Leave the Boiler Room and go over toLaundry Storage , where there’sa handcartthat needs pushing . Your terminus for it is thehigh crawl space straight beforehand in the next room(Laundry Room ) . Another Mannequin will ambush you on the way in , so you may want to take care of that first . snap up moreHandgun Ammofrom the arena as well .
Screenshot by Pro Game Guides
climb up into theStorage Room , where you ’ll find moreHandgun Ammo , aSyringe , and a large fuel tank where you canfill your Empty Fuel Can . Once done , make your direction back to theGenerator Room . Fill the generator with the fuel you pull together and then turn it on , which will restore power to theElevator .
On your way there , turn back in theTech Roomfor someHandgun AmmoandShotgun Shells . Take the elevator up to the second storey , and a cutscene will wager once you get there .
Brookhaven Hospital (Floor 2) - Maria Rests and the Director’s Office
While James notices it ’s now dark and raining outside , Maria strangely ducks into a nearby upkeep room . James asks her what ’s wrong and she insists she ’s just tired and decide to check and rest , take some medicine and lying down . James opts to cover looking for Laura and sound out he ’ll be back .
point out of the elbow room and go intoRoom C3 , where there ’s aRed Save Pointand aHealth Drink . TheRestroomnext to it has someHandgun Ammo , as well asRoom C2across the agency . The double door near the Director ’s Office are locked for now , so run back up to thenorth hallwayand through those doorway , where your first encounter with theBubble Head Nurseswill be .
Like Mannequins , Bubble Head Nurses are quick and can dodge your flak , so be thrifty . On top of that , they maintain weapons of their own such as pipe and knives , they can attack repeatedly and can cover earth very rapidly , so they ’re unquestionably one of the most redoubtable monsters in the game . And they ’re all over the hospital , so utilise your ammunition sagely .
Screenshot by Pro Game Guides
go on down the antechamber until you reach the open area between the Nurses ' Station and Room L3 . utilise the crawlspace to get intoRoom L3 , where you ’ll ascertain Handgun Ammo , Shotgun Shells , a Health Drink , and the " Her Drawings"Strange Photoover in theObservation Room .
Backtrack until you’re able to turn go away and take a crosscut down the center hall towards theDirector ’s Office . Along the direction , give up in theLaundry Roomfor anotherGlimpse of the Pastin a trashcan ( seen above ) and someShotgun cuticle .
Take another left hand to first go intoRoom C1 , where you’re able to take a sauceboat poster off the wall to reveal a ruby eye draw in rakehell and theInterview Transcript . Unlock the double doors you could n’t open before , then go across the hall to theShower Room , which hasHandgun Ammoand a Mannequin waiting to pounce . Use it to reachRoom L2 , where you may findShotgun Shells , Handgun Ammo , aHealth Drink , and two more colossus .
Screenshot by Pro Game Guides
ultimately , go into theDirector ’s Officewhere you ’ll chance aRed Save Point , a locked room access , an audio transcription , and Evaluation Cards for Patients # 50 , # 90 , and # 130 . Also , behind a ruby drape you ’ll find a secure with unusual symbols , though one of them is miss .
On top of all that , there ’s a mannequin branch prop on the desk dig the key for the aforementioned locked door . To get it , the weapon system ask three patient watchband placed on it .
gratefully , theEvaluation Cardsyou plunk up give you some tip about where to find them along with the missing symbolic representation home for the safe . Check your map then leave behind the federal agency .
Screenshot by Pro Game Guides
Brookhaven Hospital (Floor 2 and 1) - A Shotgun, Room L1, and Medical Records
After allot with another Bubble Nurse , clean up someHandgun Ammofrom both theRestroomacross the Marguerite Radclyffe Hall and fromRoom M5 . Further down the hall , Room M1will haveShotgun Shellsand anotherGlimpse of the Pastto unlock .
Goup the west hallwayand you ’ll notice that the door toRoom L1 , where one of the noted patients was moved to , is locked from that side . Go into theWomen ’s Locker Roomwhere you ’ll find the missingShotgun(yoink ) , along with moreShotgun eggshell , Handgun Ammo , aHealth Drink , and aBent Needlefrom the stuffed bear on the chair .
verify to use your Shotgun wisely , as shells are punishing to come by . With that , head up out and carry on up the hall to theNurse ’s Lounge . Inside , you ’ll find theL1 Room Keyand a Bubble Nurse guarding it . After claiming it , lead back to Room L1 and speculation inside . The room is big with an uncomfortable amount of clutter , and some strange noises coming from the small room further in .
Screenshot by Pro Game Guides
There ’s a high crawl infinite you may use to get into it , and a energy go-cart on the right flock of the elbow room to reach out it . Grab the pushcart , roll it over underneath the front crawl infinite , and chute deep down . Despite the noises , the room is empty save for a note about the young girl admitted .
exit the elbow room and check theUtility Roomacross the Granville Stanley Hall , where " something " scat through the jam in the bulwark . No other choice but to keep abreast it , of course . After slipping down through the walls , you ’ll presently find yourself back on the first level , in an unmarked room . The one doorway in front of you is operate , so go through the crawlspace next to it which take you to theMedical Records Room .
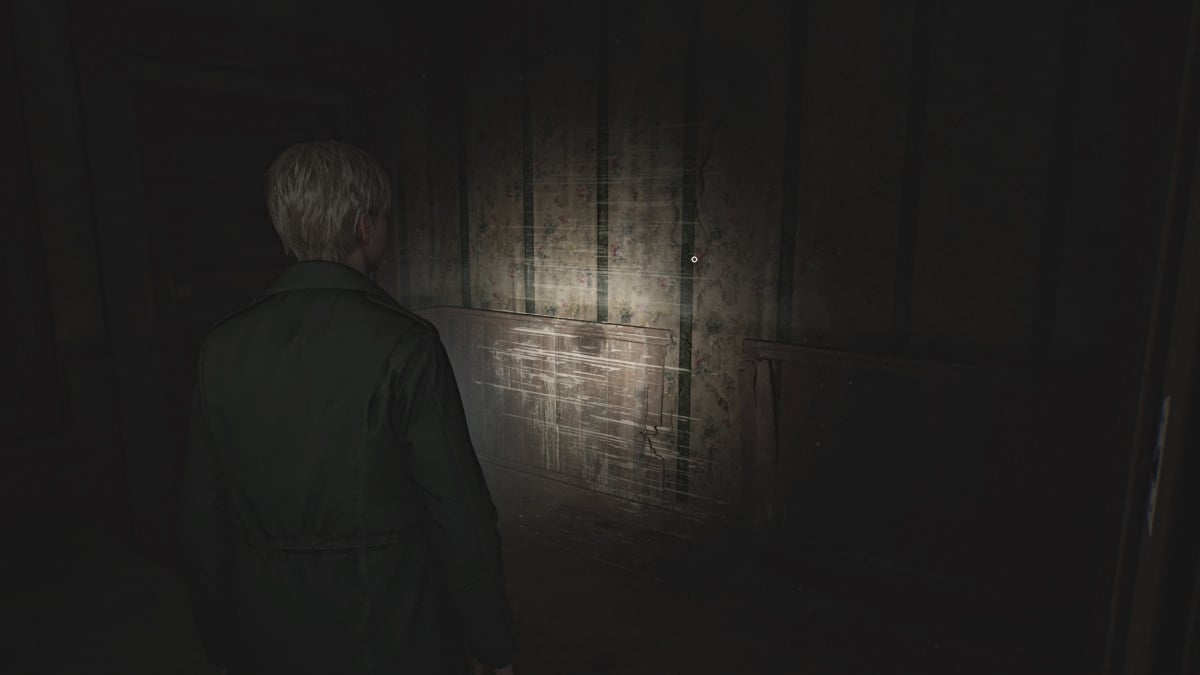
Pick up theScribbled Notefrom the level in front of you , and on the far back left side you ’ll find anotherGlimpse of the Past(seen below ) .
Screenshot by Pro Game Guides
Now lead mightily where you ’ll see something sit under a sheet ( seen above ) , and it turn out to be aMarked Bracelet , the first of three that you require . This draw the attention of a Mannequin , so deal with it afterward .
Brookhaven Hospital (Floor 2 and 3) - Nurse’s Office, the Filthy Bracelet, and a Very Brief Reunion With Laura
Make your way back up to the second storey , whether it ’s via the restored elevator or the east steps . you could choose to shake off off your Marked Bracelet at the Director ’s Office or guard onto it for now .
Also , if you ’re looking to get the ' Maria ' ending for your playthrough , check that to see to it on Maria in Room C5 often while running around . If you want the ' Leave ' or ' In Water ' end , do n’t check on her .
Either means , next you ’ll require to channelise up to theNurse ’s Office , which has akeypad lock . To save you time , the correct codification ( Standard difficulty ) is3578 . Before you go in , quickly contain theStorage Roomnext to it for someShotgun eggshell .
Screenshot by Pro Game Guides
Grab theStaff Memofrom thewindow of the Nurse ’s Office , then inside you ’ll findHandgun Ammoin the first room , and in theTreatment Roombeyond it … bugs , everywhere . gratefully they ’re the kind that ca n’t hurt you . Look in thethird bath on the rightand pickaxe up theMoldy Lithographfrom it . Before you leave , snap up theTreatment Room Noteas well .
Go out the next threshold which brings you to the west stairwell . Go up to the third floor and you ’ll pick up what sound like a young young woman hum and more lottery on the rampart . Laurais clearly nearby , and it reverse out she ’s in theRestricted Areaof the floor blocked by a huge metal threshold . spread the view windowpane to see Laura on the other side . Once again , she runs off before James can get a parole in .
For now , head over toRoom D1 , which has a combination interlace on it . Normally you require to figure out the computer code using the twoRadiographsyou discovery on the screen in theX - Ray Room .

Screenshot by Pro Game Guides
To avail spare you time , however , the right code ( Standard difficultness ) is04 ( right ) , 37 ( left ) , 12 ( right hand ) . Once inside , interact with the patient bed and James will undress back the blanket to discover the gory stay of the second patient role and theFilthy Bracelet .
After that , explore the other nearby rooms for moreHandgun AmmoaHealth Drink . Smash the windowpane to get intoExam Room 5and claim the1F Inner Ward Keyfrom the desk .
Brookhaven Hospital (Floor 1) - The Inner Ward, the Garden, and the Pool
With nowhere else to go on Floor 3 or above for now , point back down to the first floor with your newInner Ward Key . Take the east stairs down and you ’ll notice that the doorway toExamination Room 1is now receptive . Go in spite of appearance and deal with the Mannequin so you could claim someHandgun Ammoand the " At least she was there"Strange Photo .
Continue down the hallway while watching out for the Bubble Nurses mold to block your way of life . Go up the center hallway and use theInner Ward Keyto ultimately get entree to the rest of the floor . First learn out theDoctor ’s Officeto your right forHandgun Ammoand theKeypad Combination Note .
Next , go and check theDayroomwhere you ’ll find moreHandgun Ammoand a Bubble Nurse mess about . After it ’s dead , use the gap in the left wall to cross over to thePharmacy . deep down there you ’ll happen moreHandgun Ammo , and a unknown capable pipe in the floor near the sinks , with bright unripe residue seeping from it . There ’s something stuck inside it , and you ’ll ask the right instrument to get it out . fortuitously you already have one-half of it ( the Bent Needle ) .
Screenshot by Pro Game Guides
For now , turn and acknowledge the open windowpane that leads out to theGardenarea . Jump through it and start exploring , but be careful as it ’s crawling with monsters ( mostly Lying Figures ) . Go to the summerhouse on the left side and use the crawl space on the back side to get into it . Deal with the Mannequin deep down , then grab theHandgun AmmoandSyringe .
If you ’re spiel New Game Plus and want to get the ' Bliss ' ending , there will also be a Small Chest inside the gazebo . utilise the Rusted Key you got from Pete ’s Bowl - group O - Rama to unlock it and remember the feeding bottle of White Claudia indoors .
Make your way to the right side of the garden , grab theShotgun Shellson a wooden tabular array , then introduce theGreenhouse . catch moreHandgun Ammofrom a drawer , then apply the open window to scotch into thePoolarea .
Screenshot by Pro Game Guides
What you need to get is inside the pool , but regrettably , it ’s fill up with some very nasty water and even James has terminal point and wo n’t go in . On the other side of the pool , you ’ll see a door latch doorway in the floor that postulate a key to open . This gives you entree to the pool ’s pump scheme , which will allow you to drain it , so you need to find that key .
Go on into theShower Room , look at with another Mannequin in one of the carrel , then go accumulate theHandgun Ammo , Shotgun Shells , and a bobbin ofMedical Tube(seen above ) sitting in one of the sinks . Backtrack through the Garden surface area to the Pharmacy .
Once there , go into your stock-taking andcombine the Bent Needle with the Medical Tube . Go over to the pipe drain and apply your young tool to angle out the stuck objective , which turns out to be theMaintenance Keyfor the puddle .
Screenshot by Pro Game Guides
With that , lead back to the pool again and use the Maintenance Key on the latch door to get at the pump and drain the puddle completely . Go down into it and smash the tile where the leak eye is to obtain theBloodstained Bracelet , the third and last one you ask .
We advocate just bum - rushing your way back to the Pharmacy , as many of the monsters you killed in the Garden earlier , including the ones in the pool , will revive and attack and you do n’t want to neutralise valued ammunition and wellness on that .
Brookhaven Hospital (Floor 1 and 2) - The Kitchen and Director’s Room
Before you maneuver back up the stairs to the Director ’s Room , you first want to end exploring the rest of the Inner Ward on the west side . Make your way past the Pharmacy and unlock the logic gate to the northwesterly stairwell . Next , head inside theKitchen , where you’re able to get hold a bottle ofMold Removersitting near the oven , you’re able to employ this toclean up the Moldy Lithographyou obtained earlier if you still need the code to the combo lock on Floor 3 .
There ’s lilliputian else to find aside from someHandgun Ammoin the smallRestroomopposite the Kitchen , andShotgun Shellsin the nearbyCafeteriaarea . Once you ’re done exploring , point back upstairs to the Director ’s Room .
Place the remainder of the watchband you obtained on the mannequin arm , at which item you then ask to set up them in the correct orderliness and ' Rotate ' them so that the right exercise set of number are facing out . The correct rules of order ( received difficultness ) from top to bottom is theBloodstained Bracelet , the Marked Bracelet , and the Filthy Braceletwith the numeral : 92 , 45 , 71 line up top to bottom .
Screenshot by Pro Game Guides
Once done , the hand will spread out for you to take theDirector ’s Storage Room Key . Go and use it on the nearby locked door and point inside . There you ’ll witness the missingSafe Buttonon a desk and on the shelf across from it , another puzzle .
In this compositor’s case , you demand to put the nine book so their spines match up and form the image of a fire - breathing lion ( as seen above ) . It may seem like there ’s no reward subsequently , but in fact the rules of order of the symbols at the bottom is a clue for what you need to perforate into the Director ’s Safe . Your other clew is the set of numbers racket from the bracelets .
Brookhaven Hospital (Floor 2) - Director’s Safe Puzzle
With that , go over to the safe , place the missing push button you find into it , and use both your clues to figure out the correct symbol combination . fundamentally , ' 92 - 45 - 71 ' from the watch bracelet is the numeral order of the compounding , and you need to equate that to the symbolization ordering from the Scripture puzzler , all to form a secret writing of form .
Once the right combination is done ( seen above ) , the safe will open and inside you may find theRooftop Keyand theSafe Note , which gives some prefiguration about the key take James where he needs to go , and that " pain " will be involve , yay .
With that , go back and use theRed Save Pointand start your journey up to the cap of Brookhaven .
Screenshot by Pro Game Guides
Brookhaven Hospital (Roof and Floor 3) - Pyramid Head Ambush and Laura Plays Tricks
Once you arrive on the roof , first hang a right onto the nearby metal catwalk that hasShotgun Shellssitting at the remnant of it . Then go back to where you were and instead go straight , until you find an entry to another metal catwalk that takes you around the left side of the roof .
At the last of it , you ’ll ascertain anotherGlimpse of the Past(seen above ) which happen to be the spot where James was squeeze off the cap by Pyramid Head in the original secret plan . However , that does n’t seem to be the typeface here .
Now , go and investigate the chicken double doors that lead back at heart . In what looks like the top of a wooden lift , you ’ll find thePage From a Diaryon the storey . Pick it up , and as you endeavor to go back through the doors , Pyramid Headwill suddenly come out and grab James by the pharynx . This fourth dimension , he squeeze James down through the calamus , transmit him back to the third floor .
Screenshot by Pro Game Guides
After James collects himself , you ’ll notice that you landed properly on the opposite side of the huge ' Restricted Area ' logic gate where Laura was last seen . First go investigate theHydrotherapy Room , where you ’ll findShotgun Shells , aHealth Drink , and aSyringe . Next , when check the padded way , inRoom 13you’ll rule anotherGlimpse of the Pastcovered in ancestry .
Continue on before and through the next set of sensationalistic doors . Soon a cutscene will show James at long last finding Laura in a room playing with teddy bears . He pleads for her to stop run away and tell him how she knows about Mary . Laura seems hesitant to say much , but admits that she and Mary were champion and that they gather at the hospital " last year " .
In confusion , James lashes out and scream Laura a liar , who like a shot grows cold again and decides to play a thaumaturgy on him . She baits him to another way nearby with the promise of another varsity letter from Mary . The noise riles up a different sort of colossus from within the wall , and now it ’s time for another Bos combat .
Screenshot by Pro Game Guides
Brookhaven Hospital (Floor 3) - How to beat Flesh Lips
As the 2nd boss fight in the game , Flesh Lipsis as dangerous as it is disturbing to look at . encase in a alloy batting cage hang from the roof , Flesh Lips will start the engagement by fundamentally playing peep - a - boo with James , bolt down out from random places in the roof . Again , keeping your length is a big antecedency .
While you may use both your Handgun and Shotgun to deal legal injury , Shotgun is kingin this fight as you ’ll soon realize . commence by shoot its legs ( shoot the John Cage wo n’t do anything ) , and make bill of theShotgun Shellsscattered around the room for your use .
The more damage you deal to it , its cage will start to come apart , allow you to protrude damaging the eubstance within as well . finally , this will cause Flesh Lips to take on a dissimilar shape , using the metal bars from its cage like wanderer legs to chase you around the room .
Screenshot by Pro Game Guides
cope damage as fast as you may , as this boss hits like a motortruck and you may find yourself quaff Health Drinks faster than you may wink . now and then it will emit a cry attack that , while terrifying , just do to stun you for a second .
Eventually , Flesh Lips will collapse stagnant and James will go over to assess the terms . on the spur of the moment , a second Flesh Lips monster will look and capture James , dragging him through the ceiling and into an ominous cutscene that eventually lands us back in the Otherworld .
Brookhaven Hospital (Floor 1 and 2) - The Otherworld Returns and the Lock Box Puzzle
After being dropped off near the hospital ’s garden field , get your bearings and discipline your mathematical function . You ’ll remark that all of your marking have been wiped sportsmanlike and that Brookhaven ’s edition of the Otherworld spans every floor , let in the Basement . So you ’ve pose a batch of research forrader of you .
Start off by going through theDayroomand picking up someammothere along with aSyringeand theEvaluation Card , Patient # 3141from the wheelchair in the middle of the room . lead out into the vestibule and use theRed Save Pointto your unexpended .
Much of the first floor is blockade off right now by large gaping hole in the trading floor and locked door , soyouronly path is to the lift . comment that it’smissing the push for the Basement level , and you ’ll necessitate to get it to make there . For now head to the second story .
Screenshot by Pro Game Guides
Once there , head right , and near theNurse ’s Office , you ’ll see something model on top of a crate , chained and covered up ( with a convenientRed Save Pointbehind it ) . Uncover it to get hold a lock box varnish with two numerical locks and a keyhole , meaning you ’ll needtwo codes to unlock it , as well as a headstone .
While we can provide you with the correct codes for the locks to facilitate save you some legwork , before you could use those you call for to discover the primal first . To do that , you call for to get to the third floor .
First , investigate the nearbyNurse ’s Officefor item and watch out for the Bubble Nurses who now manage tongue instead of pipes . You ’ll find bothHandgun AmmoandShotgun Shellshere , as well as aHealth Drink . traverse your way over to theTreatment Room , and then take the crawlspace at the south wall into theWomen ’s Locker Room . In there , you ’ll find aSyringeand moreShotgun cuticle .
Circle around the hallway to the northwest stairwell , which you may take up to the third floor .
Brookhaven Hospital (Floor 3 and 1) - The Instrument of Force, the Key of Bliss, and the Lapis Eye Key
Once there , first mind into theX - Ray Roomand pick upThe Procedurememo from the operating table . Over inExam Room 4you’ll line up a manikin ( no , not the monster ) in a surgical chair with its mitt in front of its facial expression ( visit above ) . pluck up theInstrument of Forcefrom the tray nearby . This is one of two tools you ’ll need to get what ’s hiding inside the manakin .
Make your fashion throughExam Room 5and watch for another Bubble Nurse and Lying Figure in the hall . Grab someHandgun Ammofrom the desk tucked in the corner nearRoom D3 . Go in there next forShotgun Shellsand a Mannequin that sneaks off to ambush you from around the next niche . administer with it and retrieve theHealth Drinkfrom that corner .
Backtrack toRoom D2and smash the paries on the north side to get in . practice it to cross over toRoom D1 , where you ’ll find a ladder you demand to mount down . This brings you down into the Kitchen on the first floor . Grab someHandgun Ammofrom the Pantry surface area and brush off the back room behind it , as you ’ll only find a Mannequin in there . search the nearbyRestroomsif you want for moreHandgun Ammoand aShotgun Shell .
Screenshot by Pro Game Guides
Head down the south side of the Kitchen and around to theCafeteria . Deal with two Bubble Nurses and a Mannequin there then retrieve theHandgun Ammoon the halfway tabular array . maneuver into theStorageandMedical Recordsrooms next , where you ’ll feel moreHandgun Ammo , Shotgun Shells , and aHealth Drink .
err through the wall quip near the back into an unmarked room , and on the wall to your right you ’ll see a conversant bridge player wall painting ( seen above ) , and above it in a cranny , theKey of Bliss , the other tool you need . Take it and make your agency back up the ladder in the Kitchen .
Head back to your mannequin champion in the surgical chair inExam Room 4 . Use theInstrument of Forceto break dance the right-hand branch off , push the left branch away , and then utilize theKey of Blissto savagely lobotomize theLapis Eye Keyfrom the eye socket . This is the key you require for the safe box .
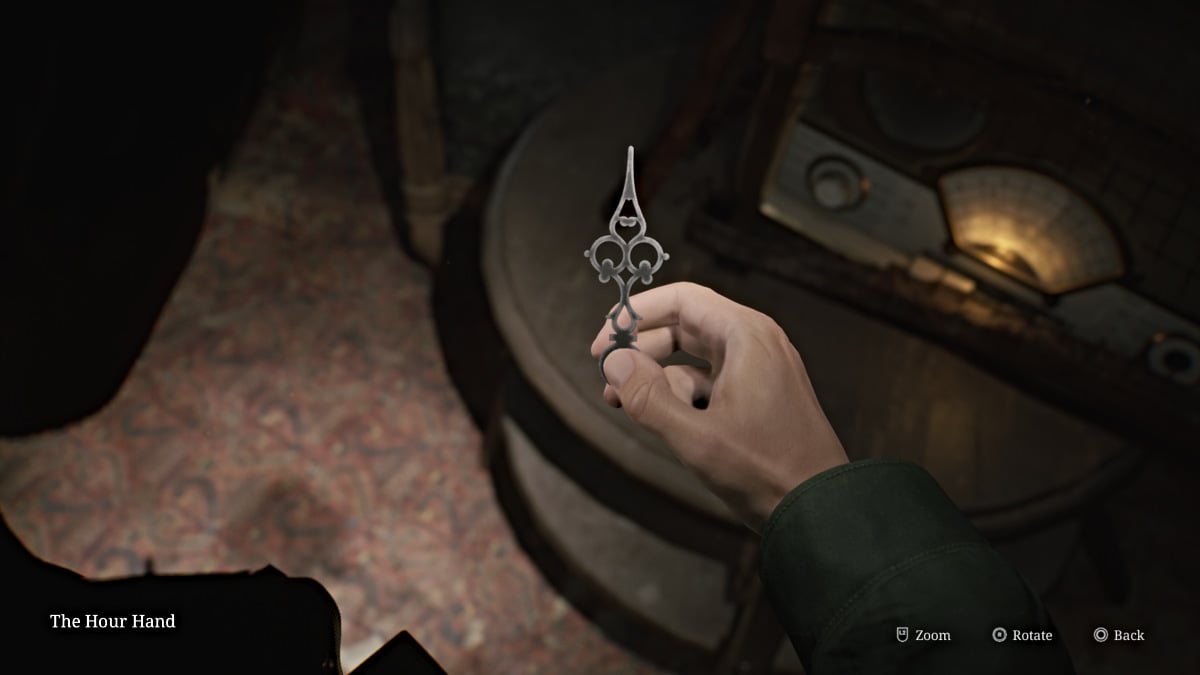
Screenshot by Pro Game Guides
With that done , make your way back down to the second floor via the stairwell .
Brookhaven Hospital (Floor 2) - Completing the Lock Box Puzzle and the Trick or Treat Quiz
Head back to the chained boxful on the second level , and first apply theRed Save Pointbehind it . expend theLapis Eye Keyyou just get on the box . This leaves the two numerical locks for you to check . fortuitously , we ’ve scram both of those codes figured out for you to save meter .
If you ’re require to collect all of the memos in the plot for the achievement , however , you should still visitRoom M2on the 2d level for theCalendar Page , which provides the steer for the combination shut away .
Once open , a cutscene will play where it ’s expose that nothing is in the box , which leaves James deject . However , a curtain nearby of a sudden flow to divulge a strange room access with a fond statue of a woman on it . James approach it and finds the’-1 ' Elevator Buttonin its mouth , allowing you to practice the elevator to reach theBasement .
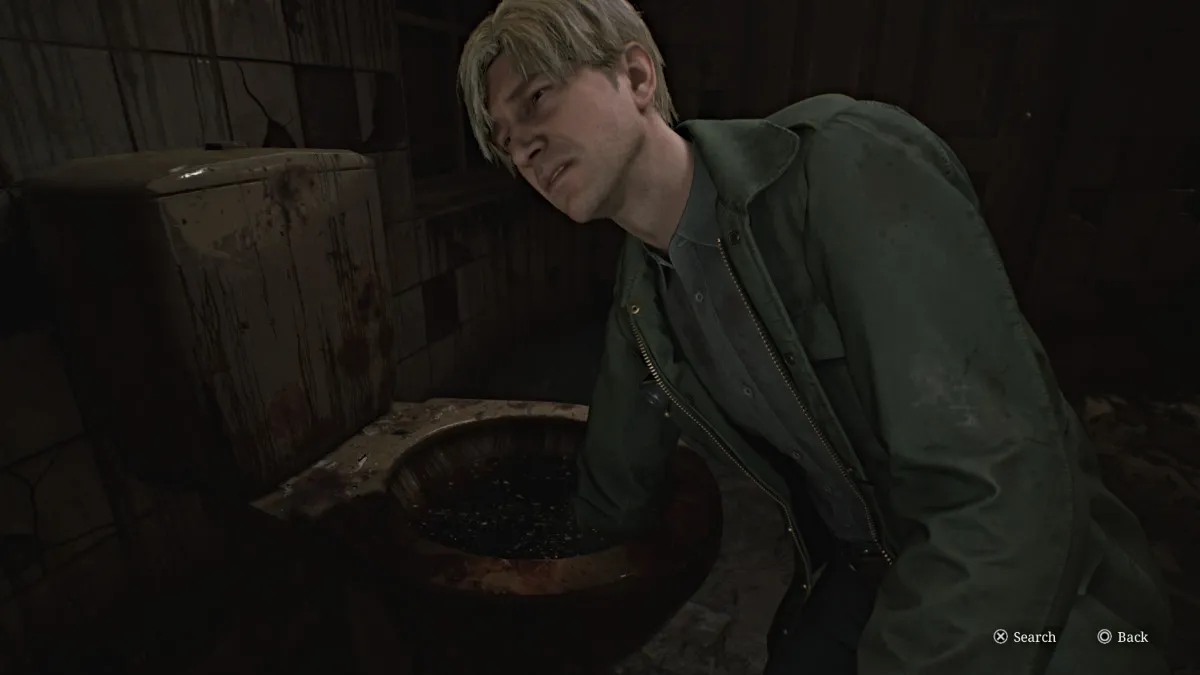
Screenshot by Pro Game Guides
To afford theLady of the Door , you need to find thetwo rings missing from both her hands(seen above ) . To find one of them , the Basement is conveniently your next destination . Head to the Elevator and use the-1 Buttonto fixture and take it down to the gut of Brookhaven .
However , along the way , a mysterious voice will come over the wireless system and reenact aTrick or Treatgame show just for James . It recites three quiz questions related to Silent Hill and its history that you ’ll need the correct answers to when the time come up . So that you have them ready to hand , here are the right answers :
Brookhaven Hospital (Basement and Floor 1) - Copper Ring, Lead Ring, and Maria Returns
Soon you ’ll arrive in the Basement , and the right path is blocked so you ’ll necessitate to voyage around on the left side of the floor . Check theKitchen Disposal Roomfor someHandgun AmmoandShotgun Shellsthen go through theMaintenance Roomto get to theGenerator Room . From there , forefront in the south intoLaundry Storagewhere you’re able to findHandgun Ammothen further into theLaundry RoomandStorage Roomwhich has aHealth Drink .
You ’ll get out on the other side of the huge spread in the floor , so you’re able to continue down and around . The ease of the hallway is blocked , but a gap in the wall nearby will take you into the firstBoiler way . intersect into thesecond Boiler Room , deal with the Bubble Nurse patrolling the area , and then usethe high crawl space on the right sideto make it out to the other side of the east hall .
Your options are still very limited , so just go flat ahead through the next wall crack into thePump Room . Sitting on a table to your right field is theCopper Ring(seen below ) , the first of two that you need . As soon as you grab it a cutscene showsMariasuddenly appearing from the shadow , on the face of it better than in the first place .
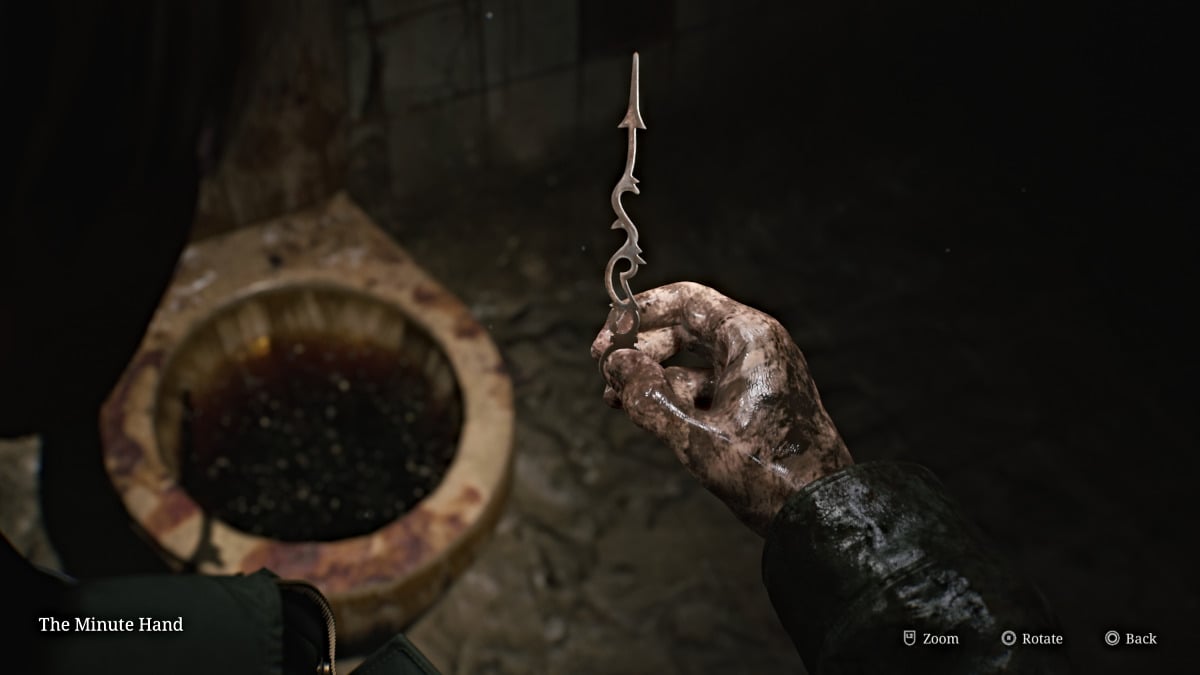
Screenshot by Pro Game Guides
James almost mistakes her for Mary , which of course does n’t sit well with Maria . The conversation instead turns to Laura , with whom Maria feel a foreign joining that she ca n’t explain and just insists on finding her . With that , Maria returns as your familiar .
go forward through the Pump Room and back out into the hallway . The Tech Room is blocked , so the only fashion forward isback up to the first floor . Make your way up through the room on the eastern United States side , starting withExam Room 2 . Cross intoExam Room 3where you’re able to observe aSyringe , then issue back into the hall .
The room itself is mostly empty except for a prominent fridge that ’s been topple over . James find himself unable to open up it alone and Maria loosen him for it before offering to help with a hint of exasperation . They manage to open it together and upon glint inside Maria finds aLead Ring . It just so happens to be the other gang you need for the Lady of the Door .

Screenshot by Pro Game Guides
Cross through theLocker Roomto your left and pick up theDissociated Notein there before continuing to the central hall . Use theRed Save Pointnearby before guide in the direction of the elevator . Before taking it though , maneuver over to thePharmacy , where you ’ll rule an ornate box sit on the parry .
This is the " prize box " for the Trick or Treat quiz you incur originally , and you need to expend the buttons on the top of it to punch in the correct answers . As mentioned originally , the correct order is : 2,3,1 .
If you punch them in correctly , you ’ll receive a gracious reward of5 x Shotgun Shells and 2 x Syringes . If you put the answers in wrong , you ’ll get pain instead , to put it softly . When you ’re ready , take the elevator back to the second floor .
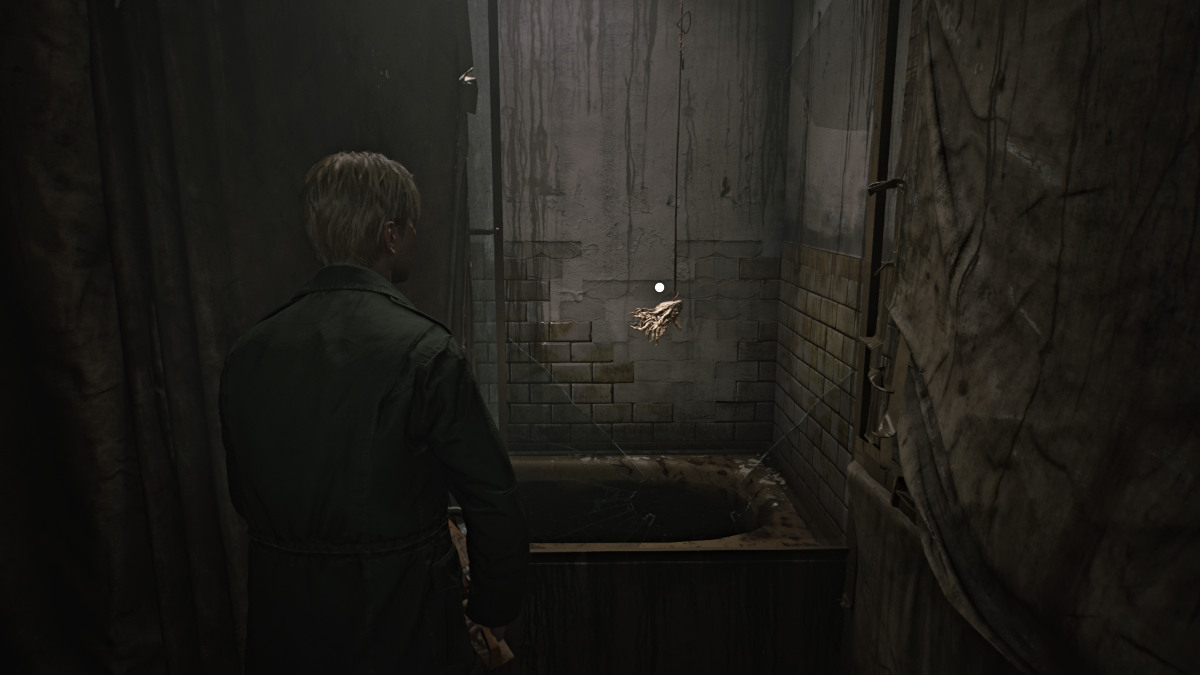
Screenshot by Pro Game Guides
Brookhaven Hospital (Floor 2 and ???) - Maria Meets Her Fate and James Escapes the Hospital
Once you ’re there , use theRed Save Pointthen go over to the Lady of the Door and place both band on both hand . A cutscene play as the door opens and James steps through , but Maria seems almost panic-stricken to espouse .
The route behind the door leads down a twisting stairwell . Pick up theOminous Noteon the mode down that reads,“It is done . Sick no more . “Keep go down and there will be anotherRed Save Pointfor you to practice if you have n’t already . Continue down the pace and soon your map will be inaccessible , hinting that you ’ve gone somewhere else entirely .
At the very bottom , go through the door and watch over the path through the winding hall . At a sure item , however , a cutscene triggers and James suddenly spotsPyramid Headapproaching them , a spear in hand this time .
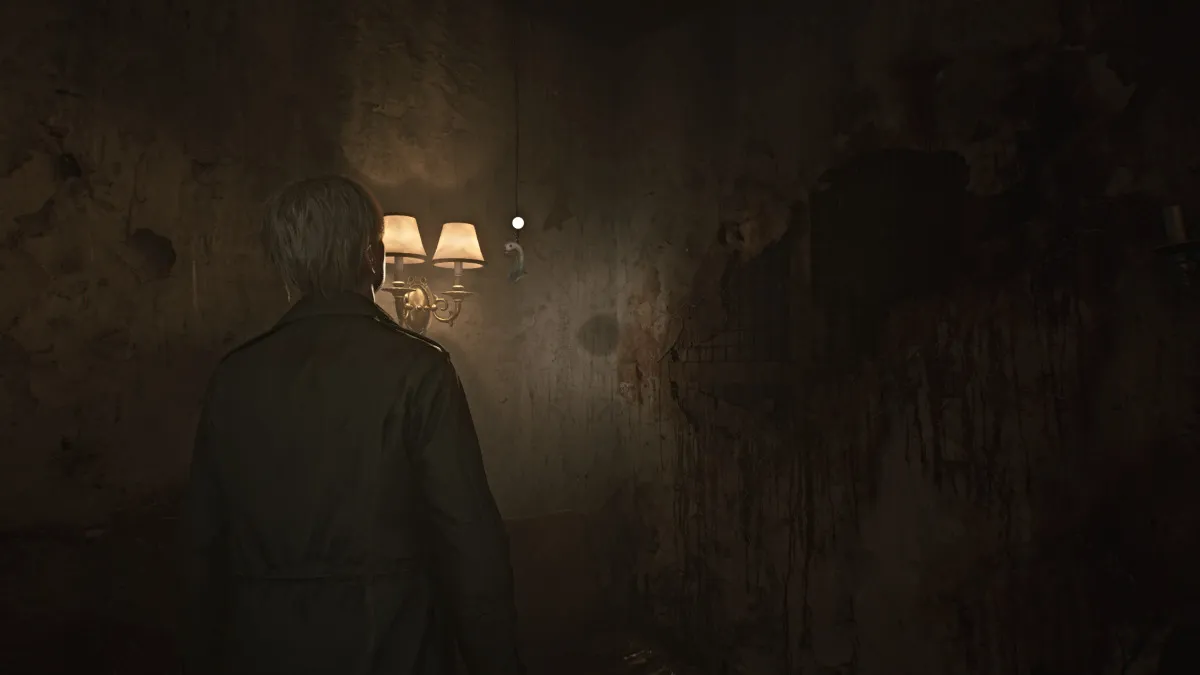
Screenshot by Pro Game Guides
As soon as you find controlhit and hold your ' dash ' buttonas Pyramid Head will be moving much faster this meter , determined to trance both of you . elude the obstacles that fall in your way and holes in the flooring and keep going until you reach an elevator ahead .
James gets in first but the elevator tries to thrust itself shut as Maria tries to get in . However , Pyramid Head catch up and impales Maria with his spear , kill her straight off as the elevator shuts closed .
Soon the elevator open , bringing you back to the first floor . The music calm air and the threat is go , and no behemoth are present . Make your elbow room across to theReception Office , and on the desk by the assailable window is theHospital Entrance Key . James sees Laura run off down the street into the duskiness .
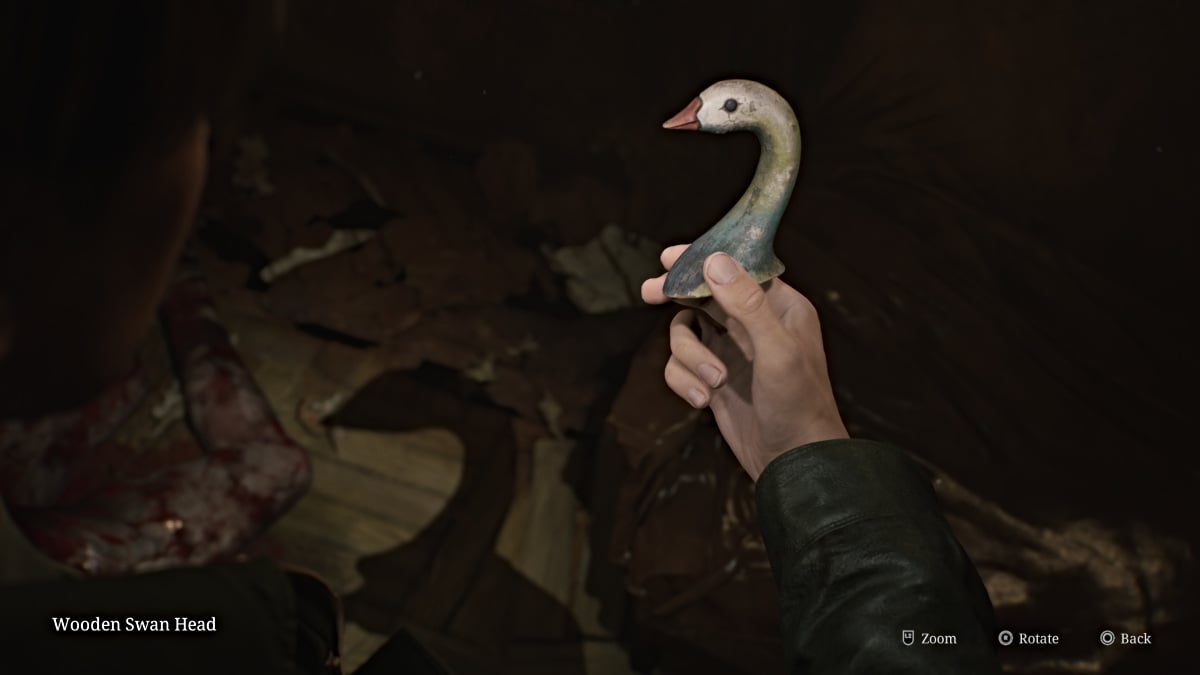
Screenshot by Pro Game Guides
For now , make your way out of Brookhaven and into the tempestuous dark .
Silent Hill 2 Remake West South Vale (Night) Walkthrough
Unfortunately , the Otherworld has now spilled out onto the streets and brought the monsters from the hospital with it , so trample carefully . Before you manoeuver direct to the story ’s next objective you may attempt to do some exploring in the area for items .
There is n’t much to the left as the entire street is nothing but a chasm in that charge . There is a nearby wrecked ambulance that has aHealth DrinkandSyringelying near it , if you palpate up to dealing with the Bubble Nurses guard it .
manoeuvre down the street to the right wing and you could find someHandgun AmmoandShotgun Shellsinside cars . Go through the door beyond a barricade near Heaven ’s Night and you could get more ammo in a nearby service department shed . Go all the elbow room to the far good end of the street behind Heaven ’s Nightwhere you ’ll see another shed area . On the proper wall inside it you ’ll find a breakable office , so deplume it down and slew through .
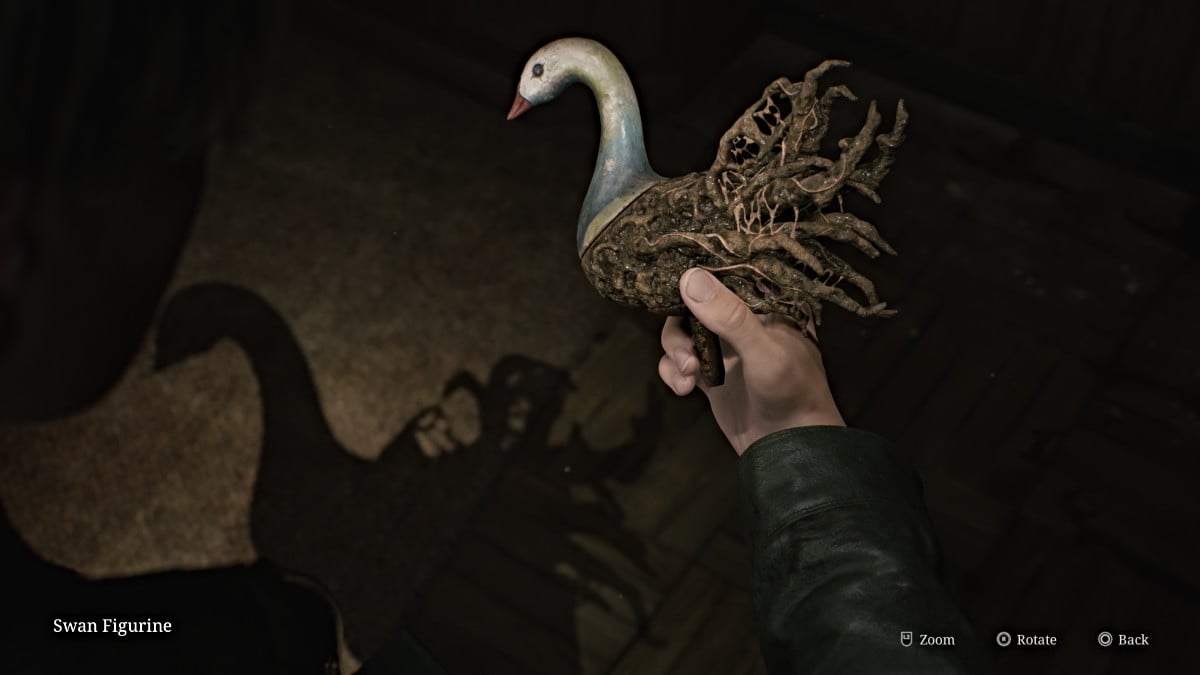
Screenshot by Pro Game Guides
Enter the Garage and snap up theSyringeandHandgun Ammo , then use theRed Save Pointon the rampart . manoeuvre out and you ’ll catch Laura just beyond a gate ahead . Deal with the Bubble Nurse and Mannequin in your way first , then run to the far right corner where the threshold you used to get into Heaven ’s Night is . SomeHandgun Ammowill be on the ground there .
Lakeside Diner
Backtrack to grab the go-cart and push it in front of the gate , so you may jump over it . Soon you ’ll discover yourself onRendell Streetand near theLakeside Diner . First , grabHandgun Ammositting on the tyre of a truck nearby then head towards the diner , then more on the front deck of a house on the left hand .
look at with the Bubble Nurses in your elbow room and then grab aHealth Drinkfrom one of the cars park near the dining car . Head within and venture behind the parry for someHandgun AmmoandShotgun Shells . Deal with more monsters in your way and utilise the twofold logic gate doors on the other side to leave .
Maneuver between the schooling bus and big rig truck , and you ’ll notice moreHandgun Ammositting on the bed of a pickup andShotgun Shellson a cask behind it . Pass through the logic gate back onto Rendell Street and head east . Be sure to check the front porch of the houses and cars you legislate for more items .
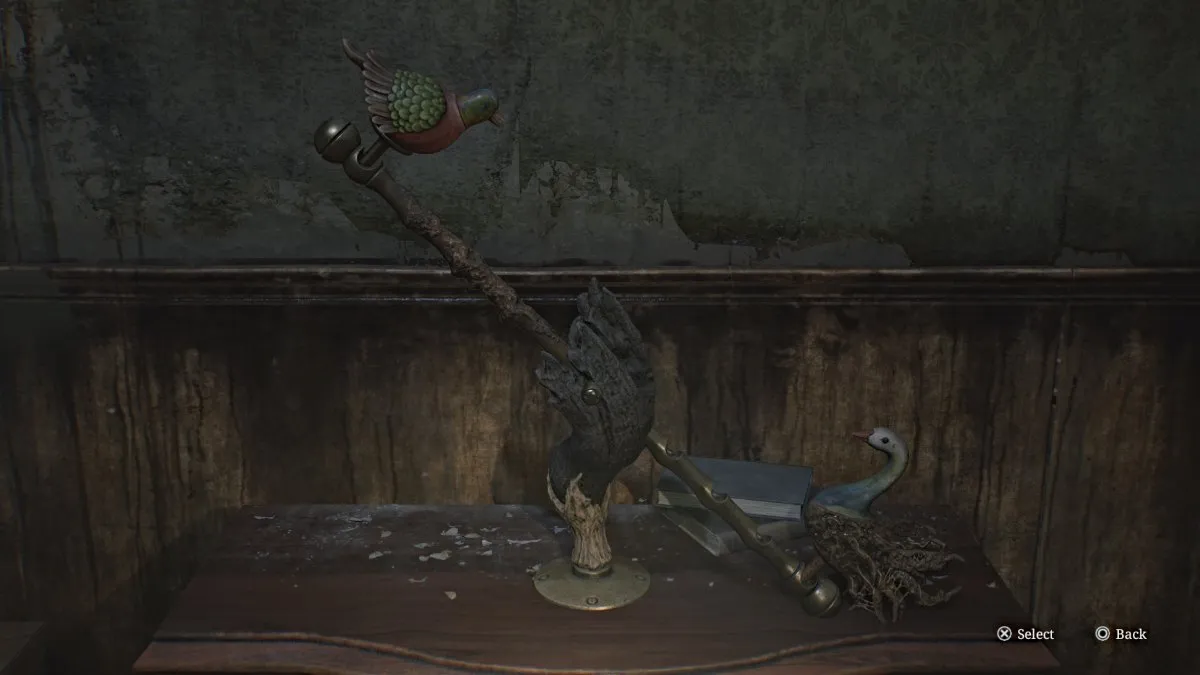
Screenshot by Pro Game Guides
presently you ’ll reachMunson Street , but there ’s nowhere to go but south towards the edge of your map . You ’ll catch another glance of Laura as she runs through a large gate , so follow her through . Cross the prospicient and dark alloy catwalk until you reach the other side .
Silent Hill 2 Remake East South Vale (Night) Walkthrough
Now you ’re back on the east side of town onSaul Street . Go into the Motor Home to your right wing , where you ’ll find aRed Save Point , Handgun Ammo , and theNote on a Mapwhich has an ominously foreshadowing written substance and a clue about where to go next for a " letter and a twist " .
As you go further down the street , there will be a high crawlspace you’re able to mount up and through to enter a storage warehouse . Navigate through it , pick up more ammo and deal with monsters along the way until you reach a breakable rampart at the back of it . Slip through and extend on until you reach the other side of the chasm onNeely Street .
This will bring you facial expression - to - face withNeely ’s Baronce again . Go inside and you ’ll see the nickelodeon is on , but rather than dally music it sound like breathing . A threatening content on the rampart behind it paint a picture that if he wants to see Mary " he should just die " but that he " might be going to a unlike place than Mary " when he does .

Screenshot by Pro Game Guides
Go over to the parry to collect anotherGlimpse of the Past , then behind it for someammoand aRed Save Point . Go to the doorway on the leftfield that ’s somewhat heart-to-heart and grab aHealth Drinkon your way out the back of the taproom .
The Laundromat and a Phone Call
Go through the back alley area , take hold of someHandgun Ammofrom a nearby car , aHealth Drinkon the ground near the chasm in front of you , and make your room around the corner to the back ofa Laundromat . There will be a in high spirits crawl space for you to go up up through .
Once inside , you ’ll try a phone reverberance somewhere nearby . Smash and grab the nearbyHealth Drinkand deal with the two Bubble Nurses that come near you through the wall crack cocaine . Go through the crack yourself afterward , make your way through the front of the launderette , and pass over through the open window on the right field to the street .
Turn left and you ’ll discover it ’s a payphone tintinnabulation . take the air over and respond it , but no one is on the other line . After James hang up the phone , a part of paper drops in the change slot . It reveals yet another message that implies that " the Florida key is in the park , at the feet of the praying cleaning woman " , and that " the wrench will open up the gate " . With that , beak up theWrenchsitting under the telephone .
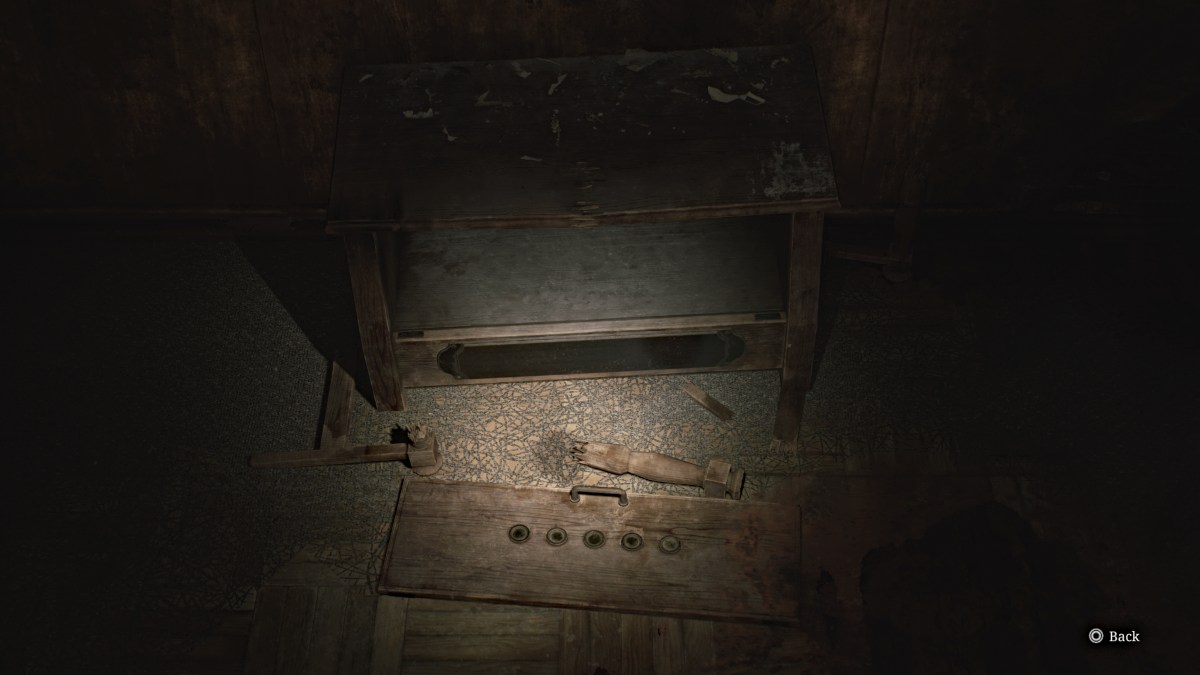
Screenshot by Pro Game Guides
Now you ’ll want to head back Frederick North toRosewater Parkto line up what you need . Head to Neely Street and run northward until you reach a marvellous barricade with a door . maneuver through and you ’ll bump another immense gate ahead . Use yourWrenchto open it and pass through .
You ’ll find yourself go over another metal catwalk , but this sentence a fresh monster called aMandarinis grovel beneath it . Even though it ’s beneath the grate , it can still attack you if too near , so keep your aloofness and keep persist until you hit the final stage of the tunnel . Beyond that , you ’ll find yourself back in the same tunnel you used to enter Rosewater Park .
After the cutscene , interact with the praying woman statue and James will dig up a alloy tin that contains theHistorical Society Key . TheHistorical Societyis locatedfurther west on Nathan Avenue , so leave the park and make your manner there .
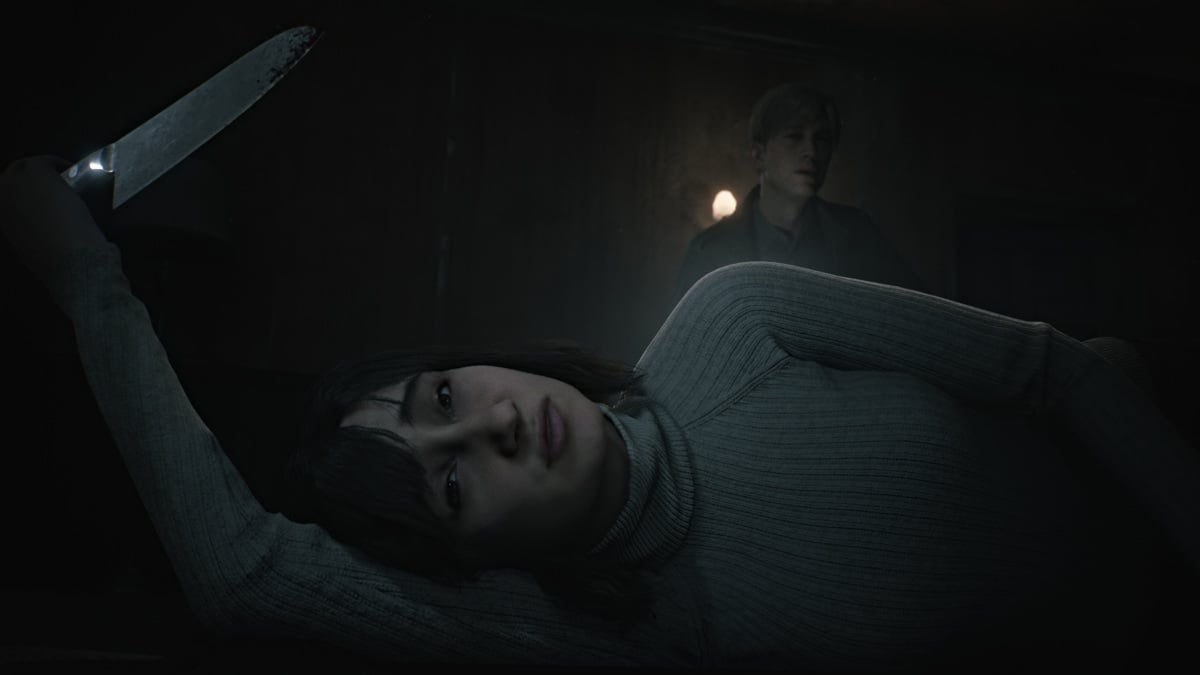
Screenshot by Pro Game Guides
Historical Society
The journey along Nathan Avenue to theSilent Hill Historical Societyis a sombre and muted one , as there are no monsters anywhere on the road . Soon enough you ’ll see the building lit up in the fog to your right . Use theHistorical Society Keyand head inside . Use theRed Save Pointnear the entrance .
As you search , it ’s definitely hard to drop the portrait flat ahead that depicts Pyramid Head himself . Make your way toward the back of the museum and there will be a strange non-white tunnel in the wall for you to enter . You wo n’t be returning to the surface of Silent Hill for a while beyond this point .
The staircase you take down through the tunnel is very , very foresighted , and the remote audio of fogsignal play along your declension . That is a reference to the Little Baroness steamboat that sink in Toluca Lake X earlier , of which there ’s a photo in the Historical Society .
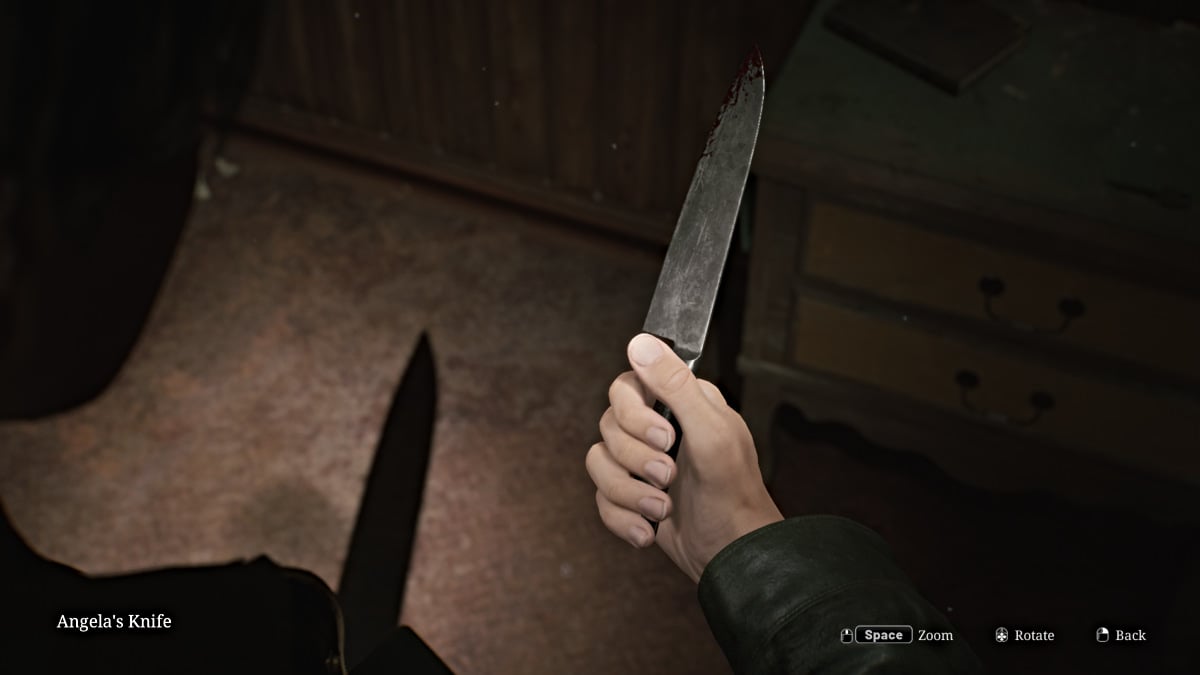
Screenshot by Pro Game Guides
This staircase seemingly take you deep beneath the lake , but when you finally cross through a door at the bottom , you ’ll find yourself inToluca Prison .
Silent Hill 2 Remake Toluca Prison Walkthrough
Grab theSyringefrom a first aid kit on the table in the pocket-size room you pass through , then continue on through the next door . You do n’t have a single-valued function of this domain yet , so keep an centre on your environs . The door to your right is locked , sohead left down the Charles Francis Hall . The path will diverge , andleft is a beat end so go right .
You ’ll soon see another threshold , so go through it . Inside , you ’ll encounter nowhere to go but a large morose hole in the floor , drive you to go deeper . Interact with it double and James will hesitantly take the dip .
Upon reaching the bottom , you ’ll find yourself in what calculate like a well with no seeable way out . There is a agency out , however , and you just need tofind the right spot on the paries to break through . Keep trying different spots until one lets you out and has a room access on the other side .
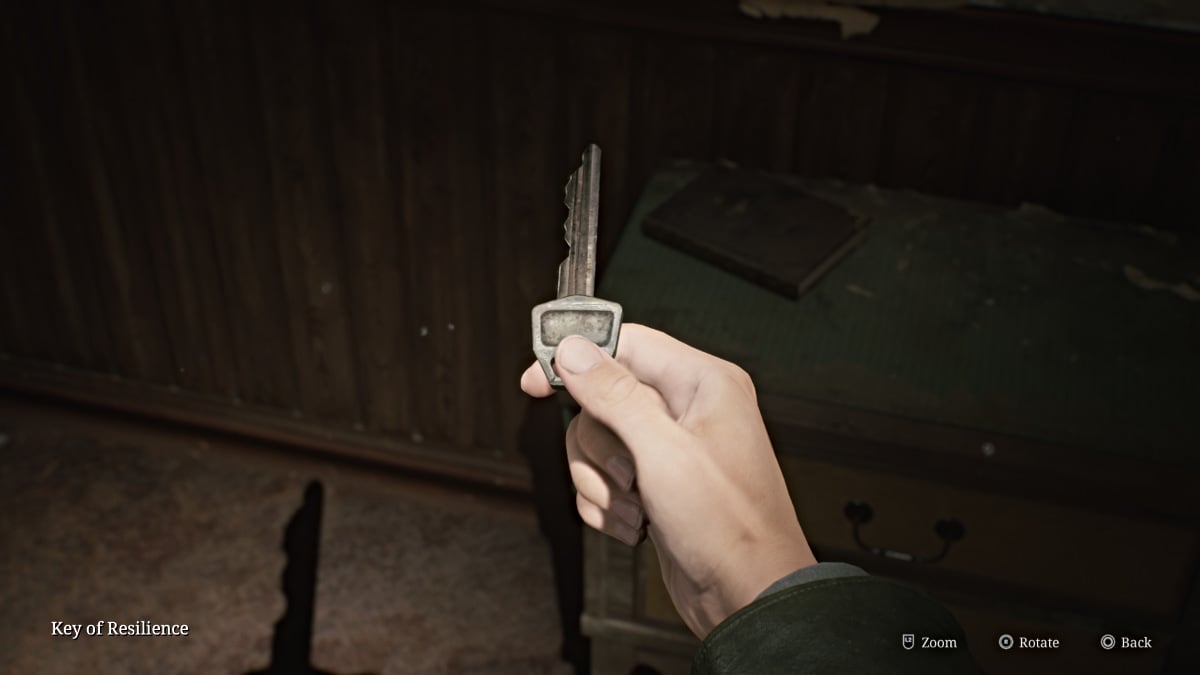
Screenshot by Pro Game Guides
You ’re now in what seems to be a glut area of the prison house , mold like a maze . Go right and then twist pass on when you’re able to and head directly towards the room access forward of you . Deal with the Lying Figure that blocks your fashion and you ’ll then see that there are two doors . The one in front of you is locked , sotake the right room access .
Bug Room Puzzle (Keypad Answers)
Down the hall ahead is what looks like another deep hole , but is block off by a locked prison gate . turn back a bit and go through the door on your right hand , where on the floor you ’ll come up theSpiral Writing Key .
After pick it up , however , the sparkle will keep out off and then bend back on to reveal the room suddenly covered in bugs who will bite James occasionally , causing damage .
To escape the room you demand touse the keypad(seen above ) and reckon out the correct code , which is arandom combination of the number 2 , 3 , and 9(the only ace not covered in blood).The result for every playthrough , regardless of trouble , is entirely random , so it ’s an anxious test of trial and error . To help you out , here are all of the possible combinations for you to work through :
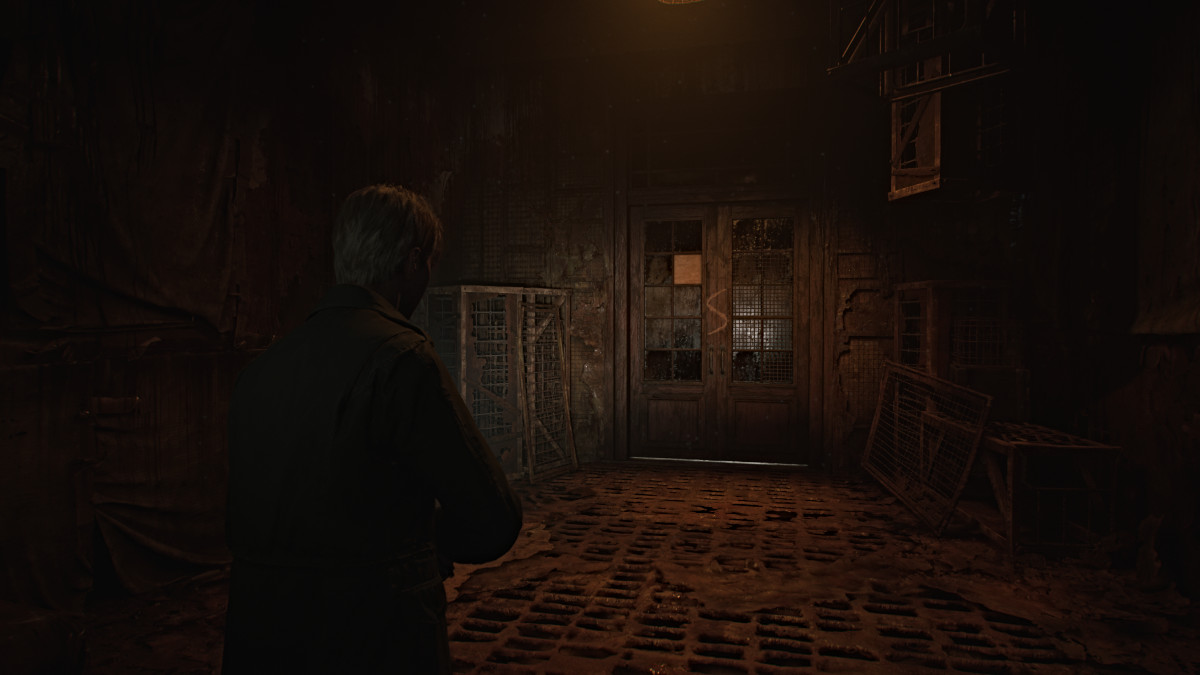
Screenshot by Pro Game Guides
Once you break out , go back over to the locked prison gate and use theSpiral Writing Keyon it , revealing the next maw for you to alternate down . Interact twice to jump further into the abyss .
Toluca Prison (Floor 1) - Eddie Returns, the Armory, and the Yard
After your next fall , you ’ll land in theCanteenroom of the prison house . Grab aHealth Drinkfrom the food line at the back of the elbow room , then explore the right side of the room to find aGlimpse of the Paston one of the tables . When you ’re ready , come near the organic structure under the bright lightness hump over a table , recently kill .
Eddie appears from the vestige , mention that kill a person " ai n’t no big deal " . James tries to understand Eddie ’s logical thinking for what happened until it becomes clear that Eddie killed them for how they " expect at him " . Eddie gets defensive when James reprimands him before opting to go off on his own .
The Armory and The Church
Once he ’s go , go through the same doors and onwards you ’ll find the prison’sArmory . After using theRed Save Point , on the back bulwark , you may finally grab amap of the entire prison .
There ’s alsoHandgun Ammo , aSyringe , Rifle Ammo , and aHunting Rifle weapon , though it ’s presently locked in a locker . You ’ll want to find the key for it , and thankfully there ’s a hint in the nearbyGun Cabinet Notice .
For now , start research the surrounding areas such as theChurchto the left of the Armory . Inside you ’ll find an object calledThe Heaviest Weightup at the pulpit . Over in theVestryyou can find aSyringe .
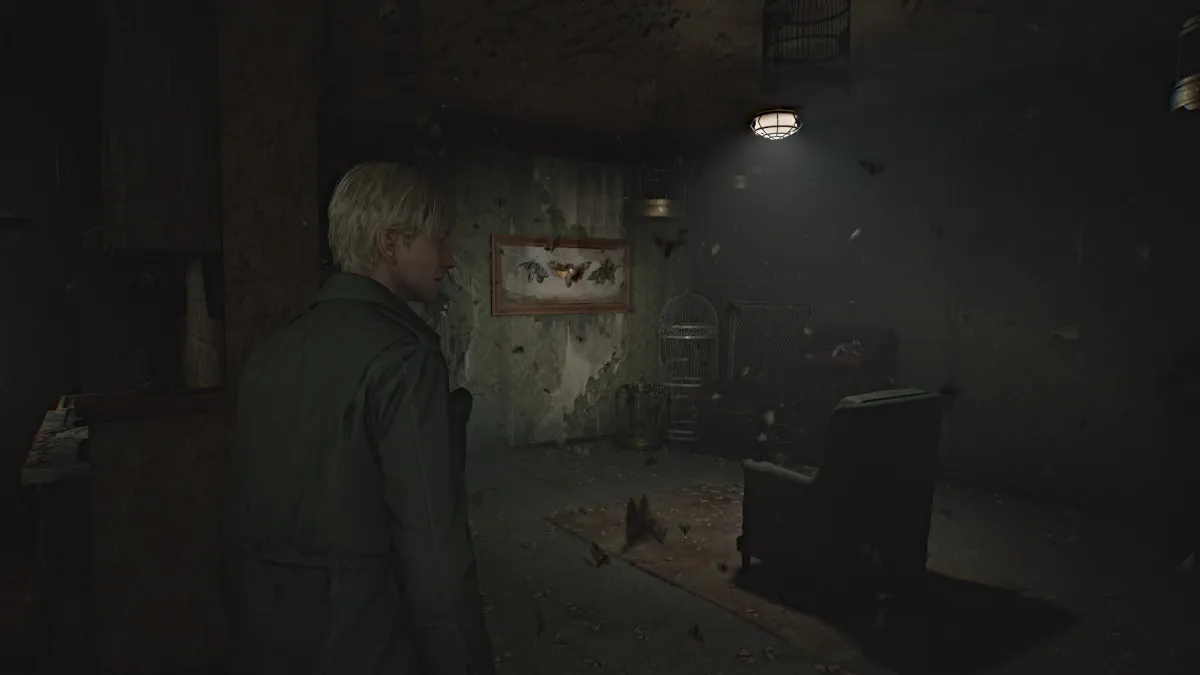
Screenshot by Pro Game Guides
Cell Block A and B
manoeuver next through the threefold doors toBlock AandBlock B. To your right as you enter , you ’ll notice a door with aHornless Oxportraiton it . Meanwhile , over in Block B is a doorway with anEyelessBoar portrait , the far end ofBlock Ais a doorway with aHeadless Serpent , and the room access to theBasementhas aWingless Dove .
The levers on the wall can give you some temporary light in the stoppage , as even with the flashlight it ’s uncomfortably grim . However , it will also send Mannequins scurrying up bulwark to the roof . Yep , you now have " Spider Mannequins " to carry on with .
InCell A3you’ll findRifle Ammoand aGlimpse of the Pastin the form of a shrine . InCell A5will beHandgun Ammo . Over inCell A7there ’s a crawlspace that takes you toCell B1 , which has a Health Drink and a hiding Mannequin . CellB3has a breakable wall that rent you cross toCell A9andA8 , which hasShotgun Shellsand another Mannequin .
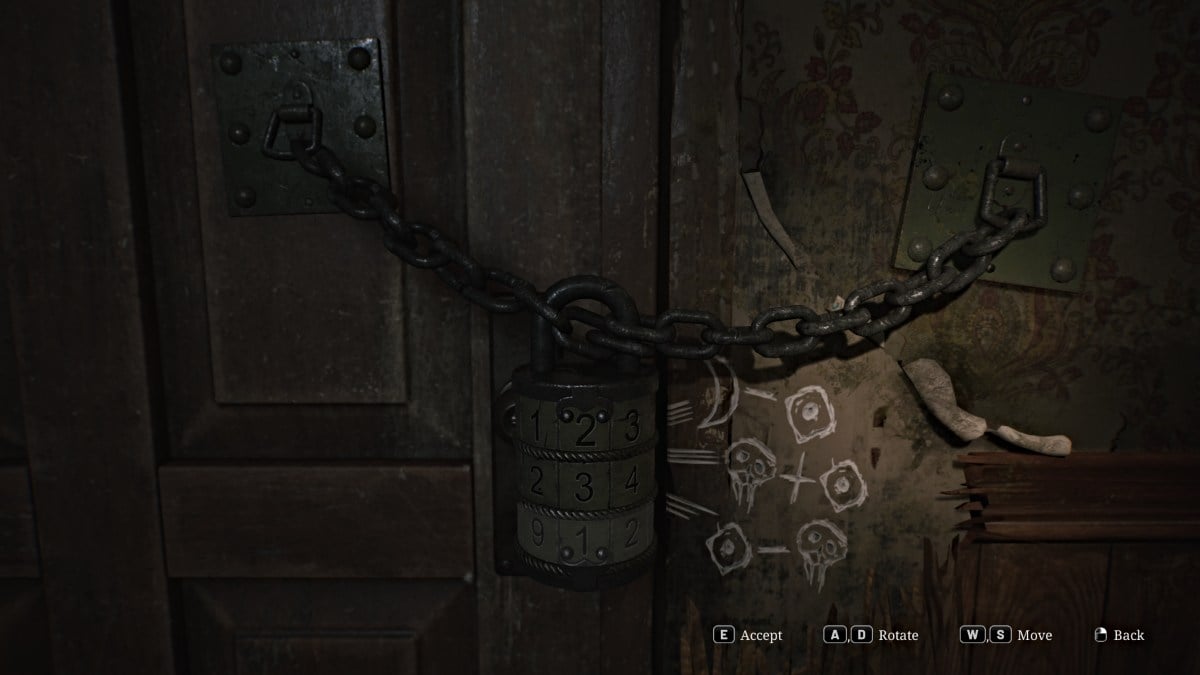
Screenshot by Pro Game Guides
The Yard
After search both blockage , head east down the hallway to theYard , and apply theRed Save Pointto your left . This area is unbearably dingy , but to keep your … bearing ( aha ) , just tend flat beforehand . You ’ll get a line a unusual galloping haphazardness circling around you , but sleep reassure there are no monsters in this surface area .
You ’ll soon see something out front of you with a covering over it . Interact to extract it off , revealing a statue with a ordered series contraption at its radix . This is where you putThe Heaviest Weightto exercise , as you call for to use it with the smaller exercising weight already available .
Place the smaller weight on the left scale , and the Heaviest Weight on the good scale , which will tip the arrow above it to theSerpentsymbol . This means theSerpent Doorwithin the prison has been unlocked . Head back inside .
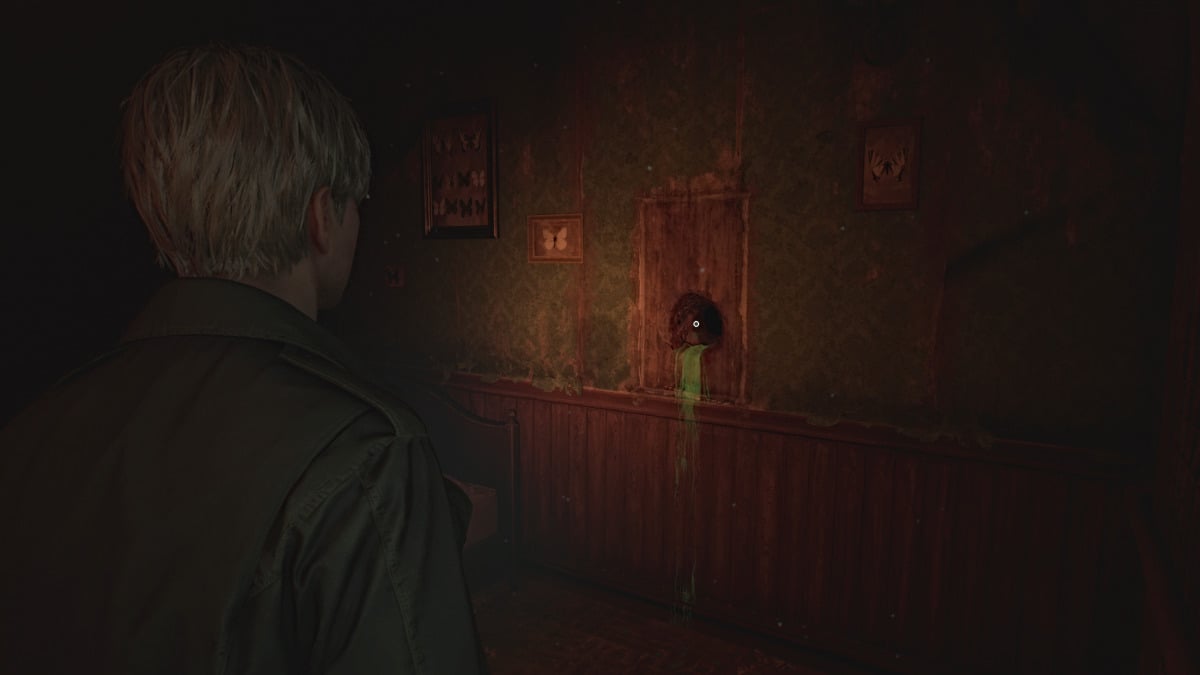
Screenshot by Pro Game Guides
Toluca Prison (Floor 1) - Headless Serpent Section
TheSerpent Dooris over at the far closing of Block A , to your left after yield from the Yard . channelize through it and you ’ll pass by a lit elbow room with an galvanizing chair in it .
accede theGuardroom , where you may ascertain aSyringe , Shotgun Shells , and another wall lever tumbler you may use to alight your way while keep on the wanderer grovel Mannequins at bay .
Make your way down the block , and inCell E4you can seize theFamily Photo(memo ) . Further on , the room next to the Death Chamber has someHandgun Ammo . Now make your style across to the other side of the block , which has much mellow ceilings crawling with spider Mannequins . Do your good to keep the luminance on as you search and conduct with them when they jump back down to attack .
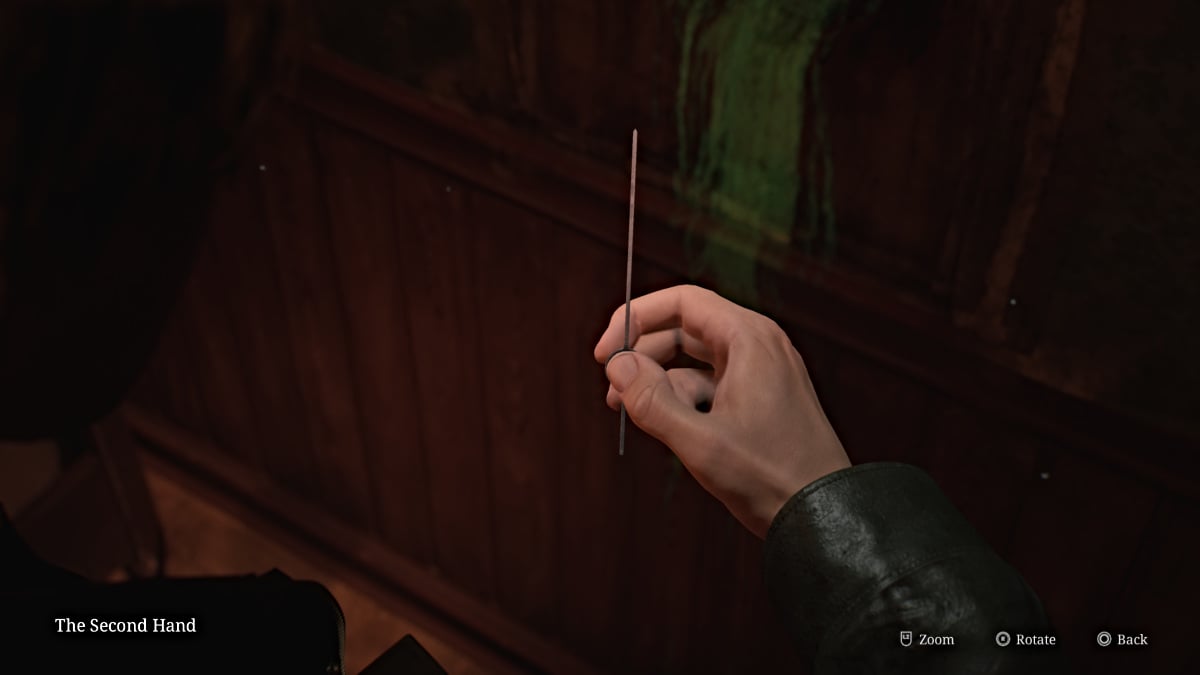
Screenshot by Pro Game Guides
Investigate the room on the northeasterly side , let in theWitness Roomwhere you ’ll find , Handgun Ammo , aRed Save Point , and the simple machine used to operate the electric electric chair . Interact with it and you ’ll see a force calibre along with a sequence of switch and the lever tumbler to tear when ready .
The instruction note that you do n’t want to fox the lever when the office is in the Bolshevik , but that ’s actually exactly what you want to do . You’ll involve to press the switches in the right decree to where they ’re all turned on at once , send off the power to maximum . Once you have , take out the lever which will overload the king organisation and mechanically unlock all cell doors in the surface area .
This entail you may now enter theDeath Chamberand title theMedium Weightsitting on the electrical professorship . Now you need to focus on making it through the residuum of the block alive , as the warning signal have bother up all monsters in the orbit , and you’re able to no longer expend the lights . The path you come in in is stop so exit via the Death Chamber .
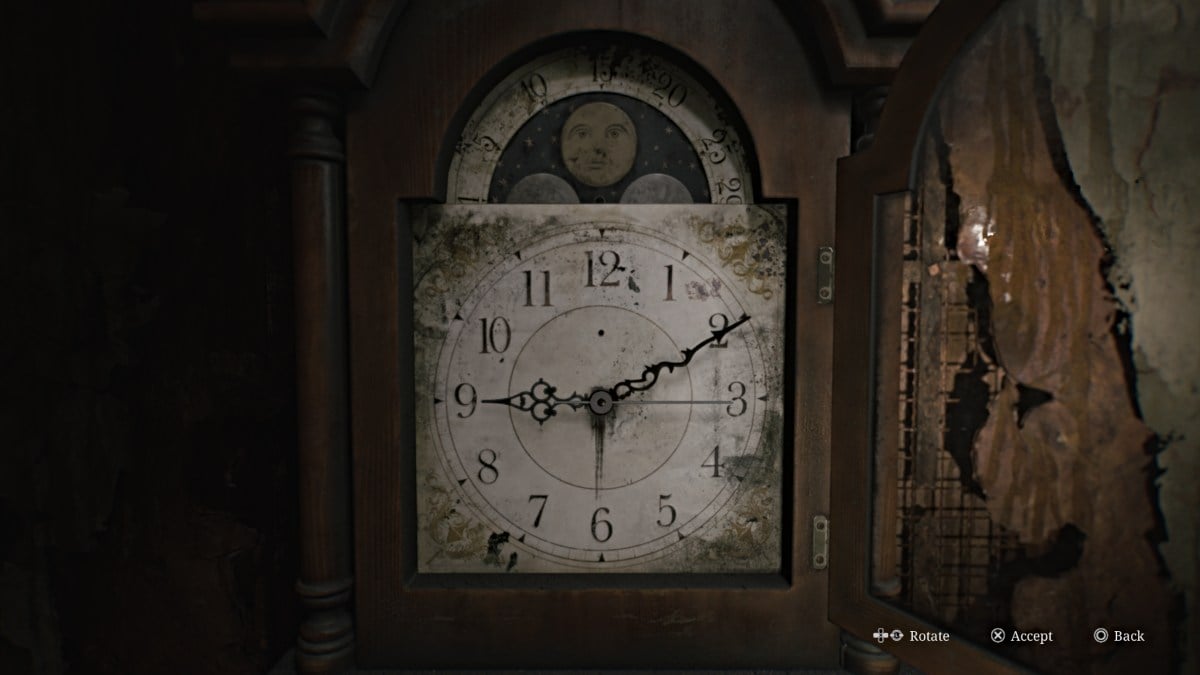
Screenshot by Pro Game Guides
Explore the open cellular telephone to find moreHandgun Ammo , Shotgun Shells , and aHealth Drink . InCell E1near the start of the block is a breakable rampart , so bash it down to get to the other side of the block . you may find several moreShotgun Shellsin the cell on this side . When quick , go intoCell E10and skid through the wall gap into theWitness Checkpointarea .
Pick up theHandgun AmmoandHealth Drinkyou find here , as well as theArmory Keyhanging in a cabinet on the wall . This will provide you to go and claim theHunting Rifle . lead back to the Armory and do just that , then use the Red Save Point before heading back to the Scales of Justice statue in the Yard .
Toluca Prison (Floor 1 and 2) - Hornless Ox Section
Once you pass to the statue in theYard , your next objective is toplace the pocket-size and Heaviest Weight on the left scale , and your newly acquired Medium Weight on the correct shell . Upon doing so , theHornless Ox Door(seen above ) near the ingress to the entire blocking will unlock .
Head back and through the new door then up the steps to the 2nd floor of the prison . This area is absolutely fawn with wanderer Mannequins , so keep your wits about you as you progress through . Go down the first row of cubicle on the rightfield and useCell C2to cross intoC3.Cell C4has a crawl space butrequires a key to be unsecured . Grab theHealth DrinkfromCell C5then lead to theGuardroomon the correct side .
Inside you ’ll encounter theBlock D Keyin a desk draftsman along with aRed Save Point , someHandgun Ammo , and a prison guard ’s notes aboutsomething important in Cell D5 . Start make your agency to the other side of the block . employ the breakable rampart to get intoCell C6for aHealth Drinkand aSyringe . Continue down the walkway and use theBlock D Keyon the doorway ahead to get into D Block .
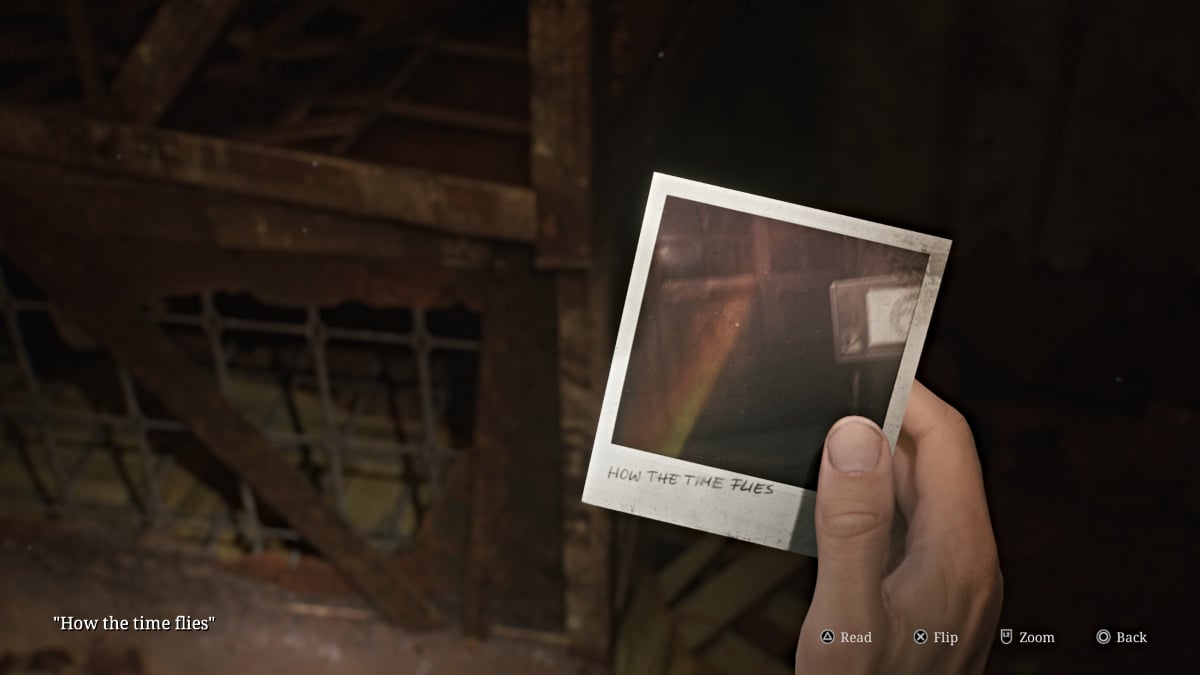
Screenshot by Pro Game Guides
Keep the light on as you make your way of life around toCell D5 , which is a padded elbow room . Inside a first aid outfit box you ’ll find theShiv Key , and theThreatening Noteon the rampart that says " we could both apply a bath " . With that , head back across to the C Block and apply theShiv KeyonCell C4 .
Slip through the crawlspace and grab theParanoid Noteoff the pipe . Slip between the pipes on the left-hand side , then down through another crawl space .
This convey you to theToilets Room , where you may detect someHandgun Ammoon a bench and aHealth Drinkin a carrell . Head over to theShowersarea next and deal with theBubble Nursepatrolling the center of the area . Make banknote of all the remains scatter everywhere too , because they wo n’t be still for farseeing .
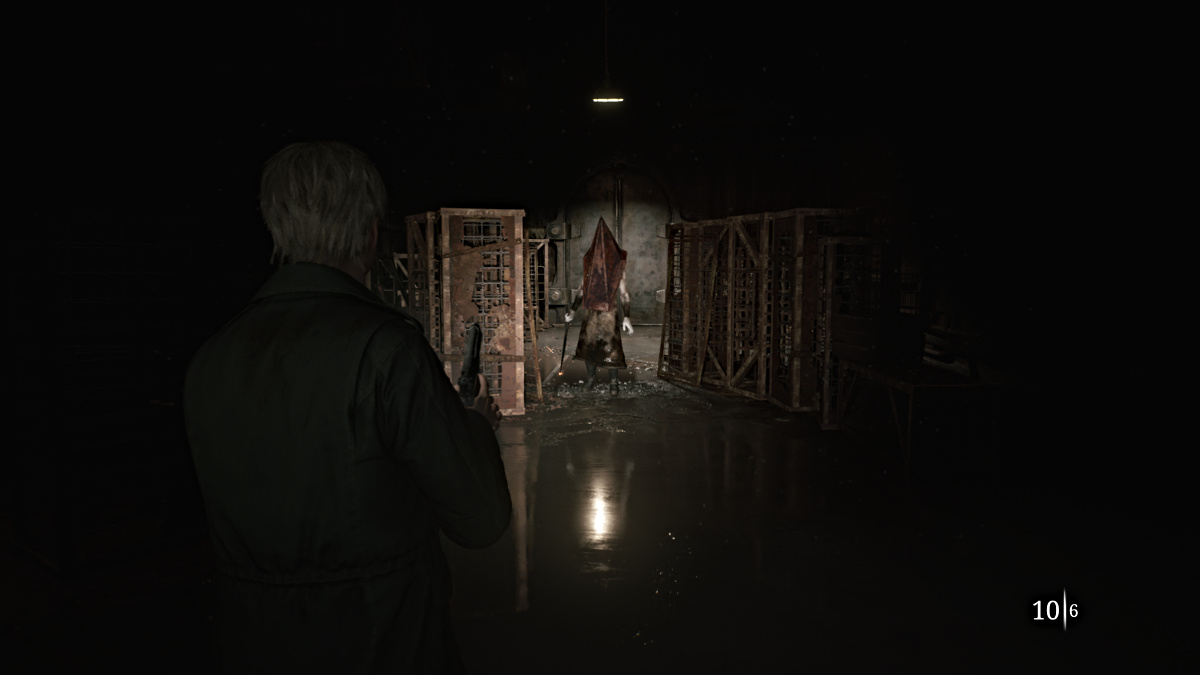
Screenshot by Pro Game Guides
Venture up the right side of the room , where you ’ll find another tablet - shape Glimpse of the Past on the floor .
steer towards the back and underneath the rotating sports fan you ’ll find a strange " drapery " bodily structure with a jam in the wall that obviously you ’ll involve to have James get his hand in . Interact with it and you ’ll obtain theHeavy Weight(seen above ) .
This will rile up several goliath in both suite and rather than fight them all , lowlife upsurge back to the crawl space in the Toilets Room and escape through . Make your way all the direction back through the mental block and out the Ox Door .
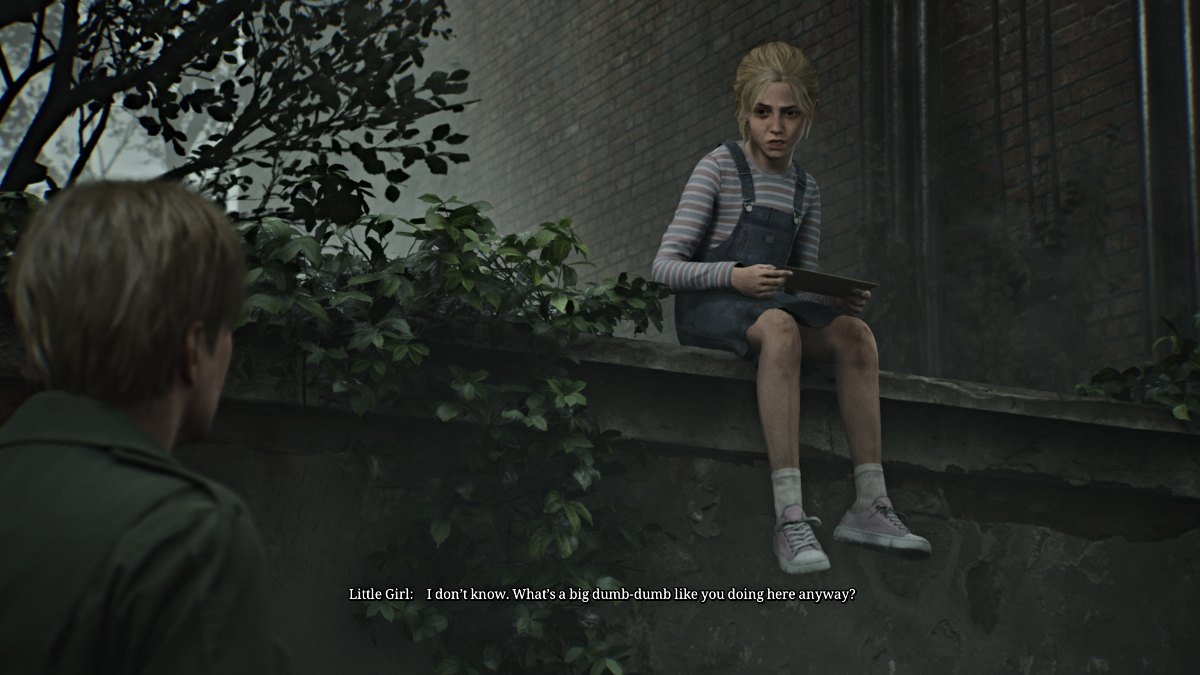
Screenshot by Pro Game Guides
Toluca Prison (Floor 1 and 3) - Eyeless Boar Section
Once again , head back to theYardto complete the next step of the Scales of Justice . This time , place all of the weights you have on the right scale , except for the low system of weights which you ’ll put on the left-hand graduated table . This will unlock theEyeless Boar Doornext which lead to the Administrative Section of the prison . Head back in spite of appearance and directly ahead to that room access , which will be on your right .
Head inside and take the hallway around theWarehouseroom , which you could access from the doorway on the left side . In there , you ’ll find a couple of monsters along with some ammo and the " Old Man ’s always prepared"Strange Photo .
Now make your way to theVisitation Room , and grab thePrisoner ’s Notefrom station 7 before turn back tostation 5where you could jump through to the other side .
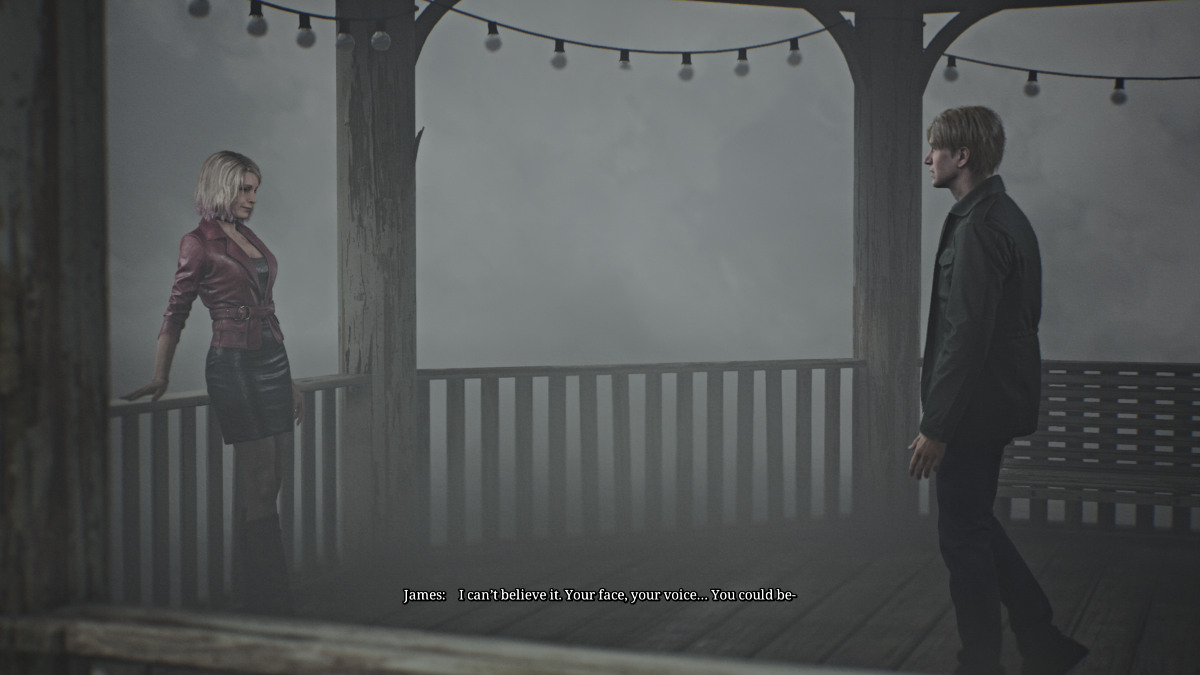
Screenshot by Pro Game Guides
Grab theShotgun Shellsfromstation 7before moving on towards theBreak Room . On the way there , stop in theWomen ’s Restroomfor aHealth Drinkand a surprisal in the last stall , then theMen ’s Restroomfor aRed Save Point .
Cut through theBreak Room , grab theHandgun Ammothat ’s in there , then head up north to theInfirmary . As expected , there are a few Bubble Nurses to deal with in there , so fight your way through them to the very back room of the Infirmary . There you ’ll findShotgun Shells , aHealth Drink , and theUpper Floor Key .
Backtrack on the other side of the Break Room to encounter anotherGlimpse of the Paston the trading floor in front of you , consisting of a horseshoe and a melted wax figurine .
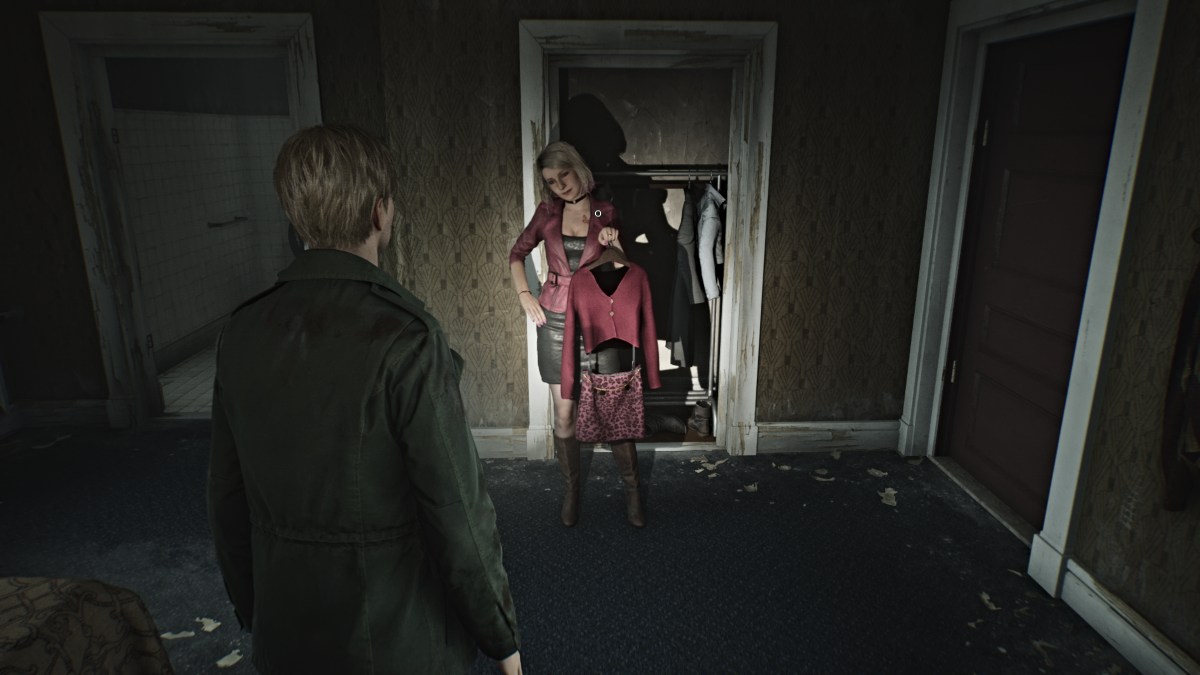
Screenshot by Pro Game Guides
incline back over to the Restrooms and employ theUpper Floor Keyon thelocked logic gate near the Men ’s Restroom(by the wall that articulate " glean What You Sow " ) . Take the stairs all the way up to theWarden ’s Officeon the third floor , use theRed Save Pointin the nearby entrepot elbow room , and snap up theHandgun Ammothere as well .
Go back into the office where there ’s a typewriter on the desk . The paper define in it has the word " tired of " typed interminably , and all you need to do is typecast repeatedly ( any keys ) until the desk drawer underneath open . Inside you’re able to claim theLight Weight . Now you postulate to make your way back to theYardonce again for the next step .
Toluca Prison (Floor 1 and Basement) - Wingless Dove Section
Once you ’re back at the Scales of Justice , this time you ’ll want toplace every weight on the left ordered series , except for the Medium Weight which you put over on the correct scale . This will open up theWingless Dove Door , which leads to theBasement level . Head back inside and immediately turn left to feel the door down a trajectory of stair .
Once deep down , pop out exploring the abject half of the cubicle auction block and when you look insideCell F6you’ll notice the last free weight you call for sit down on a sheet . For now , go over toCell F9and bash through the breakable paries to get toF10 , where there ’s a ladder you could take up to unlock one of the door on the first base .
Head back down and make your way through all the sneaky Mannequins toCell F14and catch the HealthDrinkthere . InF16you’ll notice pile of books and glyph painted on the wall . If you wait long enough , you ’ll get a line an otherworldly voice chant something .
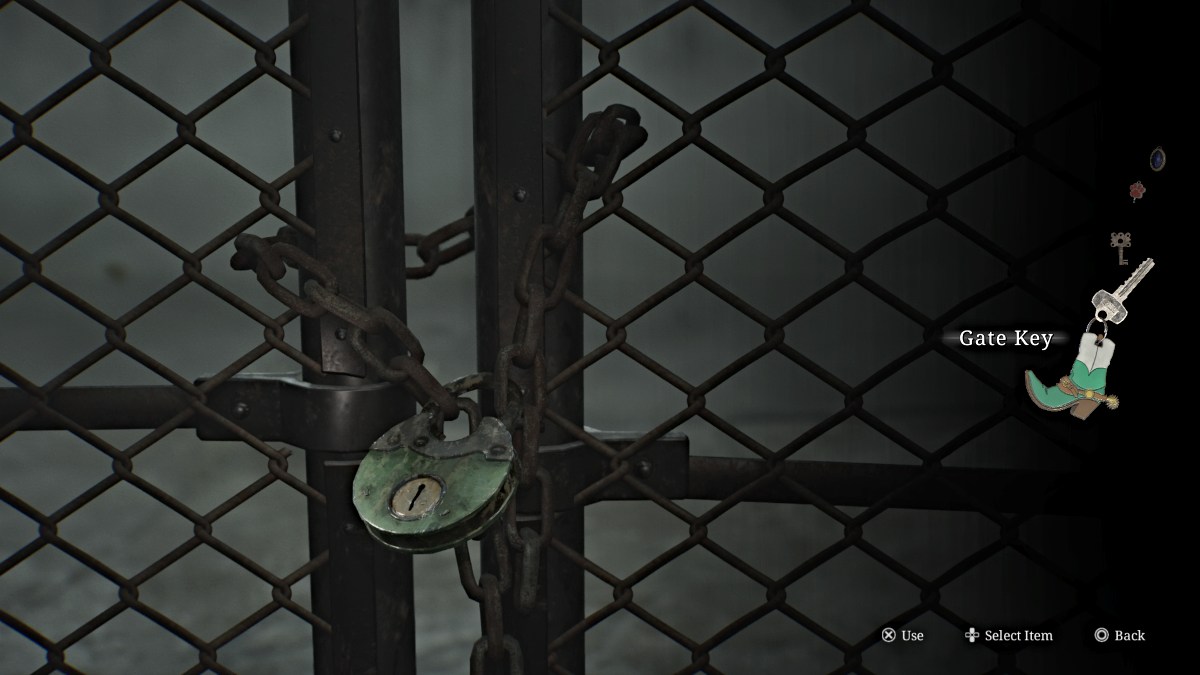
Screenshot by Pro Game Guides
Use the crawl space on the other side of the hall to get into the next room . snap up theShotgun Shellsfrom the desk , and look at the annotation on the wall that mentions a prisoner being go toCell F6 , where the exercising weight you need is . Go over to the button panel where there are options light for Cells F5 and F6 .
Press F6 and head over to exact theLightest Weightfrom inside the cell along with theConfessionmemo . The door will slam shut temporarily for a courteous jumpscare but you ’ll be able to impart soon enough . call back to apply the ravel in Cell F10 to get out since the entrance is caved in .
Time to head back to the Scales of Justice for the final time .
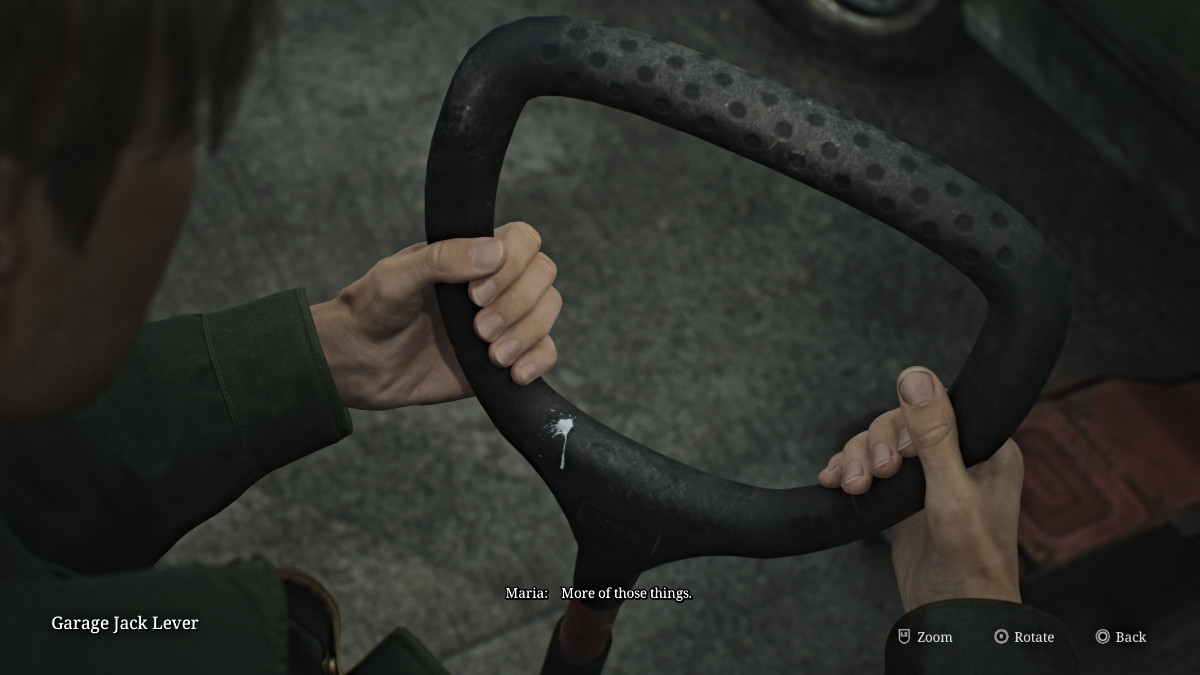
Toluca Prison (Floor 1) - Finding Balance and the Gallows Puzzle
Head back out into theYard , where it ’s now rain down somehow ( being that you ’re supposedly mile underground ) . Go over to the Scales of Justice and this time , do the pursual to perfectly balance the scale :
Putting all the scale back in their respective slots underneath the scale first can help you calculate out which weight is which if you ’re throw difficulty . Once the weight is balanced and the arrow centers on the sword symbol , something will fall out of the statue ’s deal and it ’s theExecution Lever . This is what you ’ll take for the next puzzle in advance .
Gallows Puzzle (All Possible Solutions)
For theGallows Puzzle , place theExecution Leverin the expansion slot on the platform between both rowing of Gallows . The slab in front of you will open to break six criminals and their Sin , and six slates depicting justification for those sins .
You ’ll need to sort out which slates go with which enactment regarding the sins of various criminals , and some passageway can be different depending on your playthrough and difficultness . At the goal , you ’ll need to choose which criminal was " justify " in their actions , or acting in self - defense .
This is arguably the most difficult puzzle in the entire game , but to help you match up the slates with the correct passage , here are the possible answers for each .
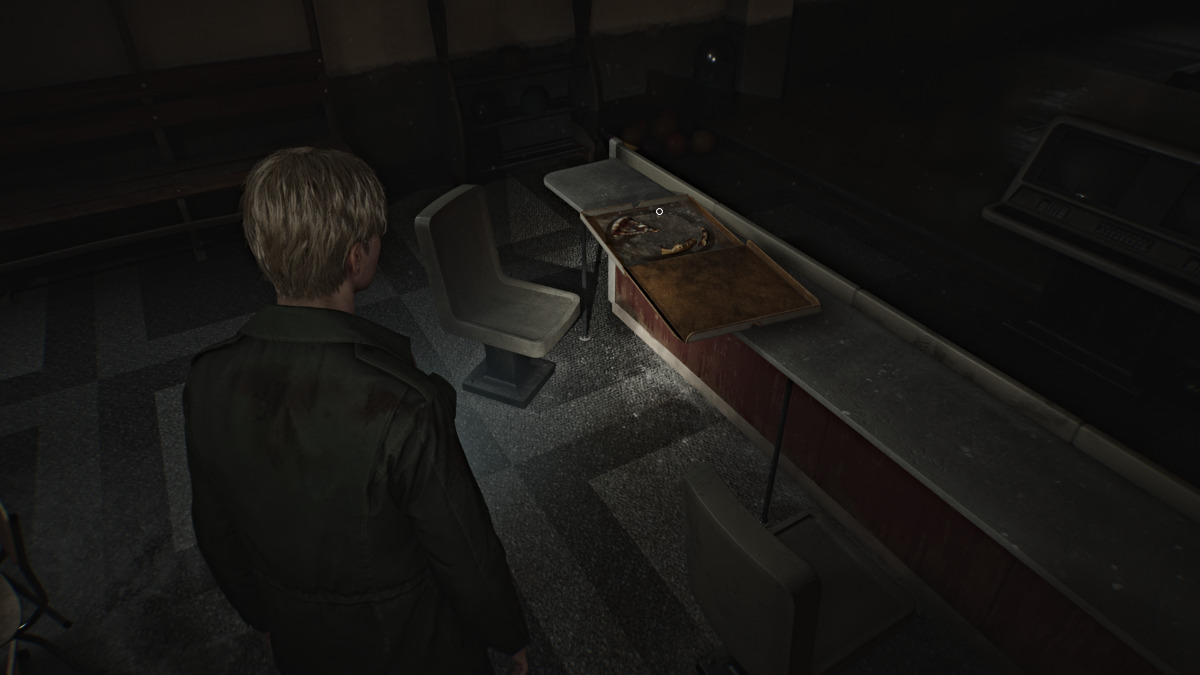
For the passage(s ) that hasAnswer # 1as their choice , that will be the one you want to choose as innocent or " justified " . More than one passage may indicate innocence based on this , and you ask to decide which one best describes ego - defence or defence of another ( such as a child ) .
When you ’ve made your choice , go over to the represent noose and perpetrate it down .
If you guessed correctly , you ’ll fall down through the chopine and land insideThe Labyrinth . If you guess incorrectly , you ’ll alternatively diminish into a room with several teras you ’ll need to run through and make your path back up to the Gallows and sample again .
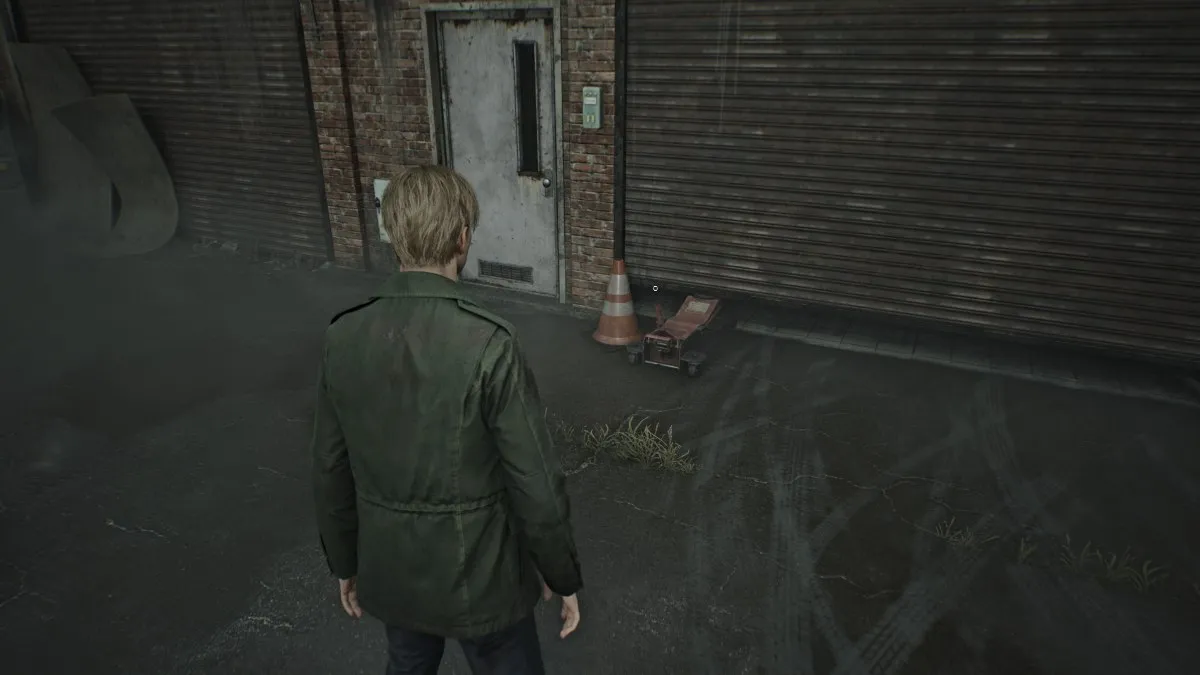
Screenshot by Pro Game Guides
Silent Hill 2 Remake Labyrinth Walkthrough
After successfully finish the Gallows Puzzle , ahead of you will be not one but two more monumental holes to jump into , place you to a astuteness clearly beyond reality . Afterward , you ’ll take a mineshaft elevator down to a floor with aRed Save Point . Use it and enter through the room access beforehand .
Suddenly , Angela ’s shriek can be see from behind the doorway ahead , alluding to a conflict with her father . Go inside , grab theHealth DrinkandShotgun Shellsfrom the kitchen field , then take a deep breathing space and go through the dreary door on the left field , where you ’ll see one of two more door . The one in front of you is likely the bedroom of Angela ’s chum .
Go to the one on the left , where you ’ll find Angela cowering inside . Before James can calculate out what ’s wrong , a much larger monster called theAbstract Daddysuddenly approach and slams him through a wall . Take a deep breath and prepare for one of the most thought-provoking and emotionally devastating fights in the game .
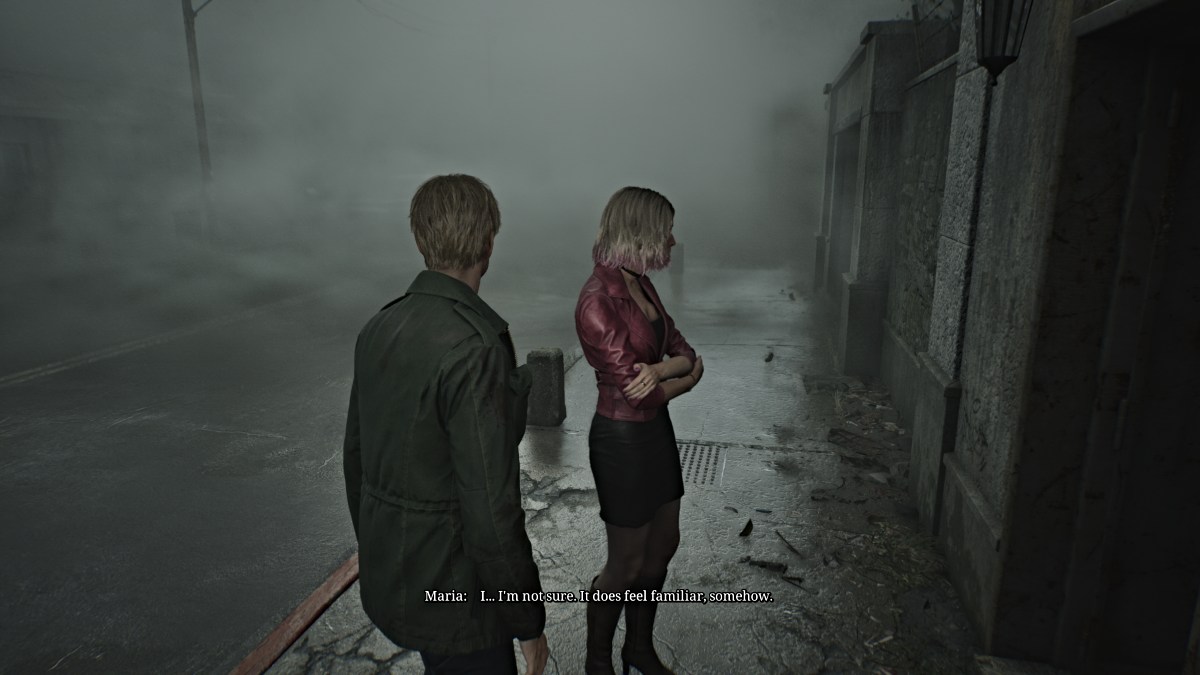
Screenshot by Pro Game Guides
The Labyrinth - How to beat Abstract Daddy
If it was n’t already obvious , Abstract Daddyis the disturbing manifestation of Angela ’s intense trauma from being sexually abused by her father as a child , and its physical form is think to body forth that . It makes it one of the most intense and consequential engagement in the game .
The fight begins with Abstract Daddy confronting you in the hallway , and once again , maintain your distance from him is imperative . If he manage to charge and grab you , he can deal significant damage in each instance , so be sure to keep your wellness topped off .
You may initially think you ’re fighting him in tight quarter , but the " arena " has suddenly study the form of a apparently endless maze within Angela ’s home . This allows you to land hits on Abstract Daddy while constantly keep your aloofness . prioritise yourHunting RifleandShotgunfor conduct scathe , and time your shot well because he has an harebrained amount of health .
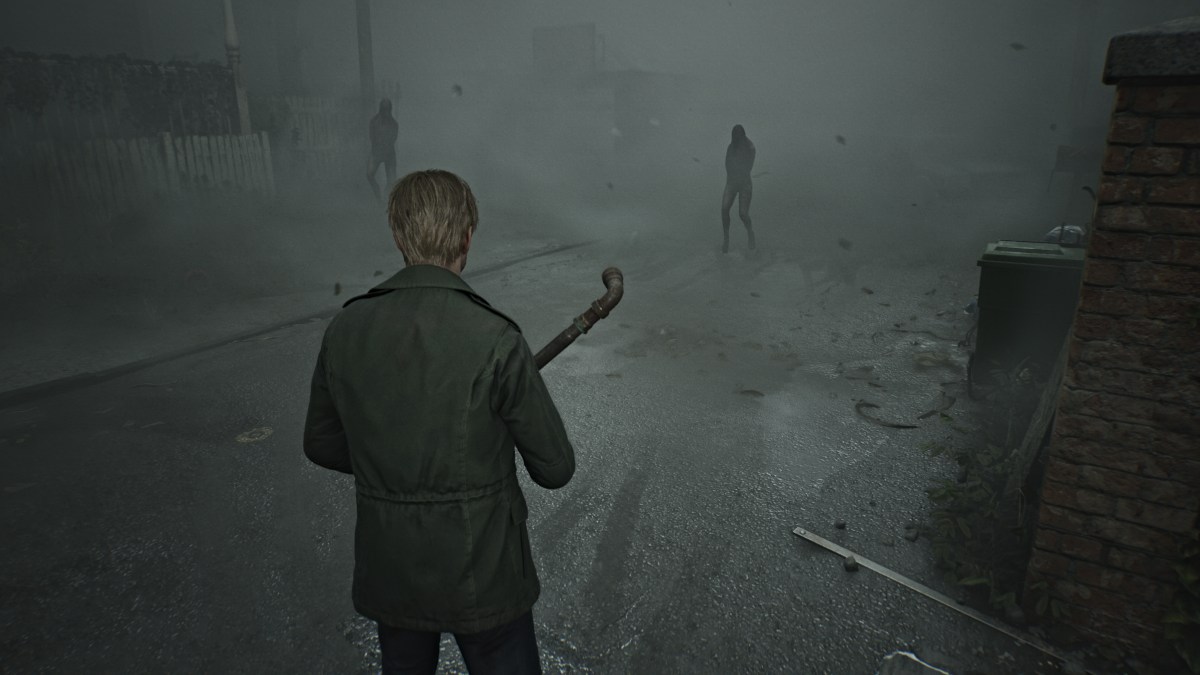
Screenshot by Pro Game Guides
At certain junctions when you ’ve apportion enough damage , Abstract Daddy will go away briefly , allowing you time to convalesce and reload your weapons . verify to explore everywhere you could for extra ammo and health . As you journey through the maze , you ’ll see Angela take flight in terror herself , and occasionally a scratchy recording of her male parent will play , further infer his verbal abuse .
The fight hap over multiple stage , and at least three times you ’ll want to touch off the next one by encounter a static TV and smashing it with your pipe . The further into the fight you go , the more the environment changes into something closer to the Otherworld , and the walls turn … well , " heavy " .
Eventually , you ’ll arrive at the last stage of the competitiveness in a widely - open area . By this point , you ’ve likely exhausted most of your ammo if not your health stores as well , so make use of the items spread out around the room . Keep deal damage , and Abstract Daddy ’s attacks will step by step slacken down and become well-to-do to dodge . shortly enough , he ’ll go down and a cutscene will comply .
Screenshot by Pro Game Guides
Angela near in fad and slams a TV on top of the Abstract Daddy , down it . The surround has also return to the elbow room it was before the conflict began . James endeavor to solace Angela though to fiddling issue , and the two argue over his possessiveness of Mary and how he treated her while she was demented .
Soon enough , Angela will retrograde and now you ’re destitute to research the rest of the Labyrinth .
Labyrinth Center - Maria Resurrected
Important Note : The Labyrinth is a place technically outside of reality , and thus does not have a preset map for you to rely on like other location in the biz . Instead , James will hand - draw a map from scratch as you search different areas , so be extra mindful of your surroundings .
After you move on from " Angela ’s flat " , you ’ll soon receive yourself in a strange , maze - like country , and in front of you a barrier made of what looks like monsters from Silent Hill . If you endeavor to cross through it , James will feel nauseous and back off , so you need to find a fashion to remove it . James will call it the"Strange Wall"on your map .
For now , head in good order and habituate theRed Save Pointalong the agency . Go all the path across ( the room access to your right is locked ) and down the stairwell and through the threshold in front . On the other side is something , or rather someone , that James unquestionably did n’t expect to see .
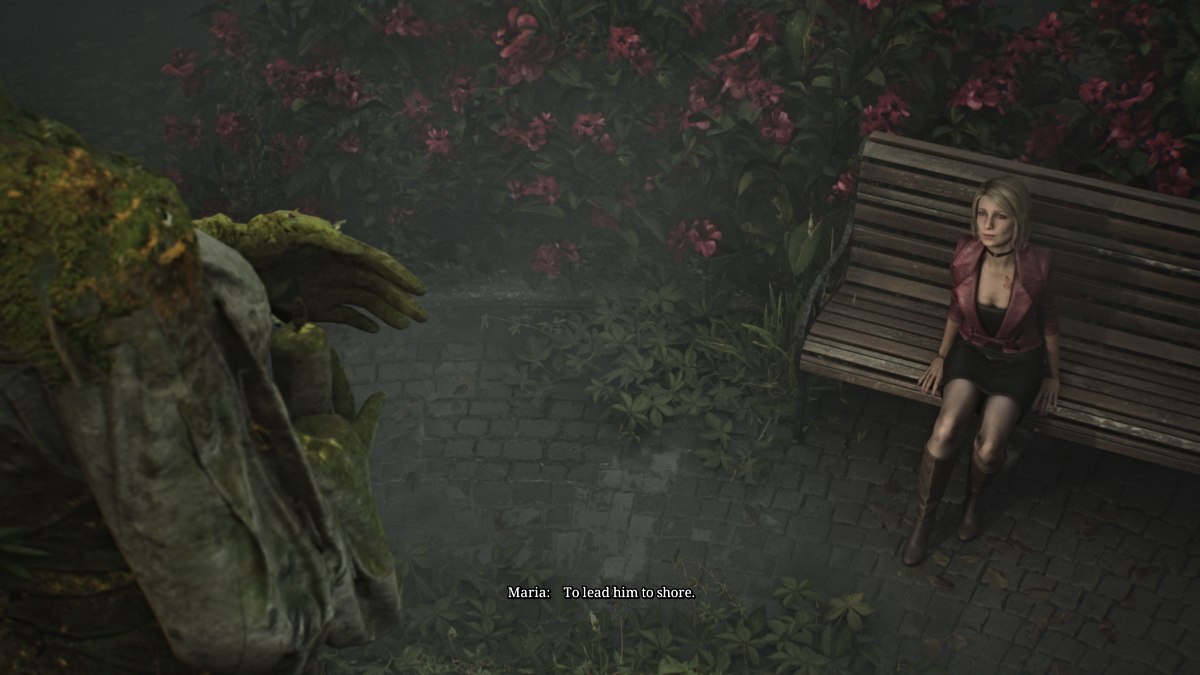
Screenshot by Pro Game Guides
Maria is " alive " and well , sitting in a cell , and have words James for seeming to think she had been killed by Pyramid Head " in that long hall " . She laugh and muses about how he was " always so forgetful " . She eerily fathom like Mary , which James notices and acknowledgment . However , she rebuffs that she ’s not " his Mary " , and insists that she ’s all he involve since she ’s " real " .
grapple with the spot , James starts to walk aside and says with some hesitation that he ’ll find out a agency to get her out of the cell .
Fun Fact : If you re - inscribe the room immediately after the cutscene , Maria will be hum the " Promise " theme from the Silent Hill 2 soundtrack to herself . A hospital bottom can now be clearly seen behind her as well .
Screenshot by Pro Game Guides
Labyrinth Center - Rotating Cube Puzzle
Head back up the stairs to the itinerary you walked before , and now you ’ll rule theRotating Cube Puzzlecontraption in the center field of it , along with what count like an entire building in the chasm next to you . The rotating cube features unlike faces on each side , along with different symbol .
Depending on how you turn it , the building in front of you will rotate as well and reveal new way of life and three other main areas for you to search . Those areas let in : the Rotten Area , the Desolate Area , andthe Ruined Area .
This puzzle wait on as the focal point of the Labyrinth , and your goal here is to habituate it to access each of those different areas one by one . For prosperous reference , here are the symbolic representation required for each field :
Screenshot by Pro Game Guides
So for now , you ’ll want to start with accessingthe Rotten Area . plough the block in the right counselling , then go into the building and take the stairs that lead up to the course on the left side . Go down the hallway and at the ending there will be three door , for each of the three areas . Go through theGreen Dooron your left to enter the Rotten Area .
Labyrinth - Rotten Area
You ’ll start in a hallway completely hatch in bugs , so move through cautiously and determine out for where the floor switch to metal grates , asMandarinswill be loaf beneath . Remember that all of your maps for the Labyrinth are hand - drawn , so you have to learn the area as you go .
After that first metallic element grate path , turn left and notice someHandgun Ammoon a dresser ( which you ’re probably starved for after Abstract Daddy ) at a bushed end . Backtrack to the main hallway and continue on until you see a threshold ahead . Go through it and you ’ll enter a elbow room with aSuspended Cagehigh up , three other different doors , and aRed Save Point .
To convey down theSuspended Cageyou’ll take something to cut down its tether , so for now head through the door to your left .
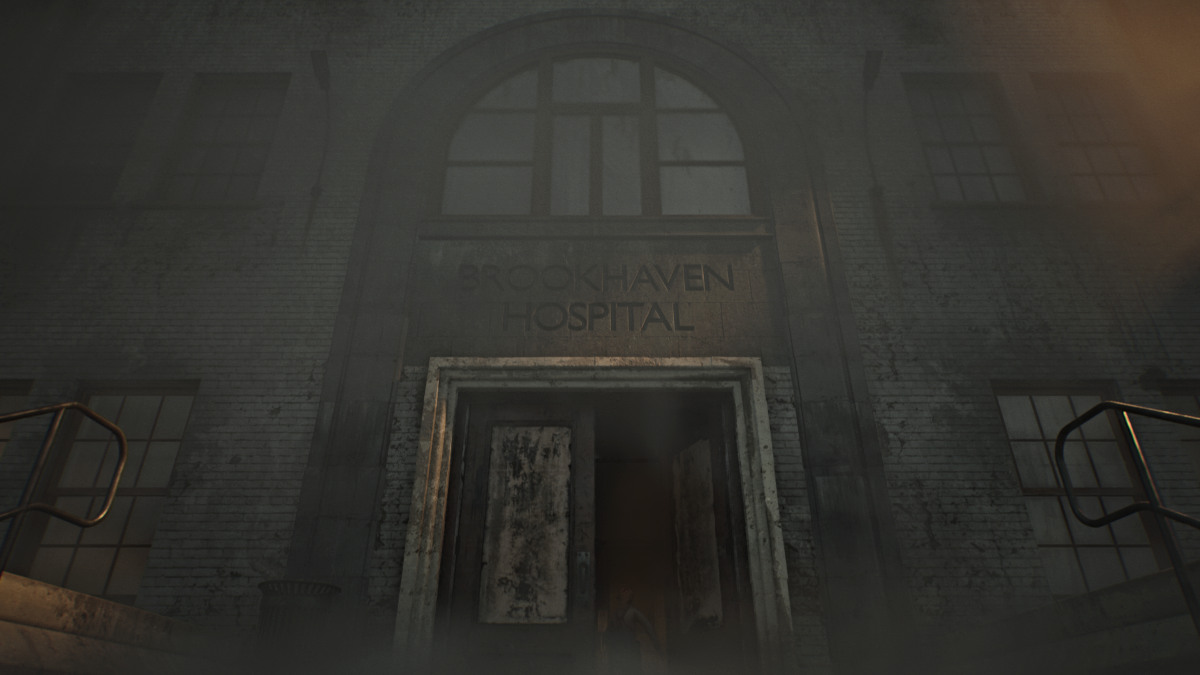
Screenshot by Pro Game Guides
Lighter Gas
Go down the hallway , grabRifle Ammofrom a small storage locker on your right , and persist in directly to the open door at the end . Be extra deliberate here as not only are there bugs everywhere , but the flooring of the total main hallway country is metal grating , so Mandarins will be patrolling .
Keep your aloofness from them ( these seem to be invincible so do n’t waste your ammo ) and make your way down the dorm until you pass on the second left . Take it and follow the next hallway until you find another door . Inside the floor will be normal , so you get a breathing time . look at with a couple of Mannequins lurking there and claim aSyringeandHandgun Ammo .
Take thepushcartin the room over to the high crawlspace near the door , and mount up and through to the next way over . Inside you ’ll comment the electric refrigerator in the kitchen sway nonstop . draw near it and through all the lovely goo that pour out from it , James will chance a humble can ofLighter Gas . seize theHandgun AmmoandHealth Drinknearby as well .
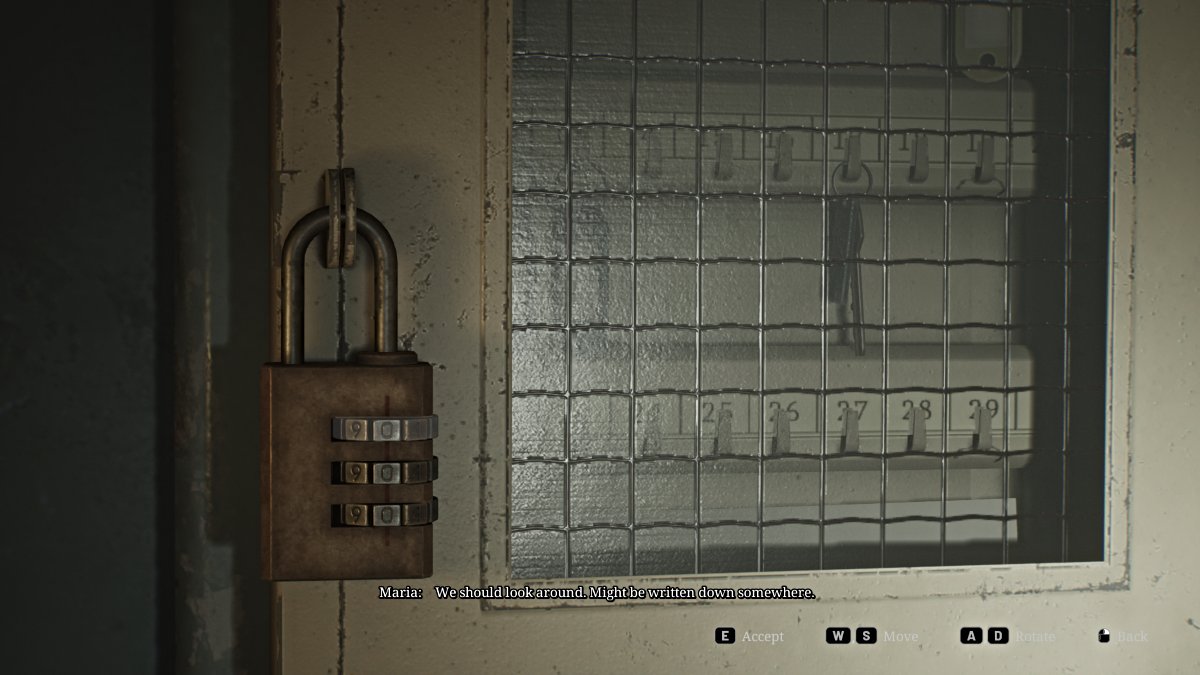
Screenshot by Pro Game Guides
Carefully make your way back out into the chief hallway and bum speed your way of life back to the Suspended Cage Room .
Lighter Wick and Iron Key
Now take the room access to the south and sprint across the grated hall all the way south until you’re able to leapfrog over a box and find a lot of twofold door ahead of you . Go through them and grab aHealth Drinkon your way through the next door onwards . observe out for a Mannequin in the shadow and grabShotgun Shellsfrom a small storage locker .
In the next room you ’ll discover a seam that ’s been savagely part in half ( could venture a conjecture who did that ) and on the paries behind it a hole oozing descent . James knows the deal by now , so go over and interact with it until you perpetrate out theLighter Wick .
Now , before you go back to the suspend Cage room , exit through the door beyond the sleeping room , and run down the hallway until you could turn right and follow the path to another room access . Go through and inside is just one huge room with a desk right in the essence . Deal with the Bubble Nurse patrolling it and then check the draftsman to arrogate theIron Key .
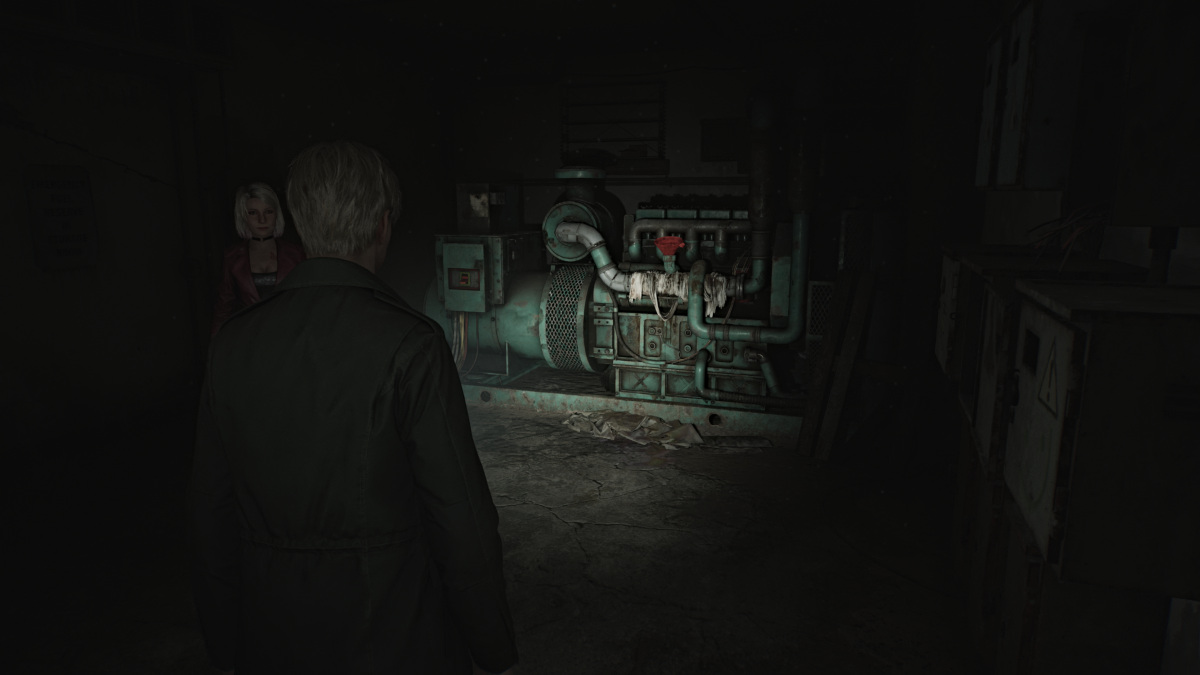
Screenshot by Pro Game Guides
Broken Lighter
Now make your way back to the Suspended Cage Room and go back through the first door you went through where you found a locked threshold want a keystone . Use theIron Keyto unlock it and you ’ll find a bathroom deep down . Interact with the nearby bathtub and James will quickly learn that the liquidness bubble inside it is too acidic for him to touch . This means you call for to enfeeble it somehow .
Go through the nearby gap in the wall and follow the narrow hall all the way down until you reach a bug - filled way with a red-faced crosspatch . Turn it until the pipe burst and the tub breaks heart-to-heart , drain all of the bad material out so you could reach your prize . Return to it to claim theBroken Lighter .
rejoin to the suspend Cage room and combine theBroken Lighter with the Lighter Gas and the Lighter Wickto make an actualLighter . utilise it on the lead holding up the cage and soon the integral matter will strike and break through the floor , leaving a large hole behind , perfect for you to jump through . habituate the nearbyRed Save Pointand then do just that .
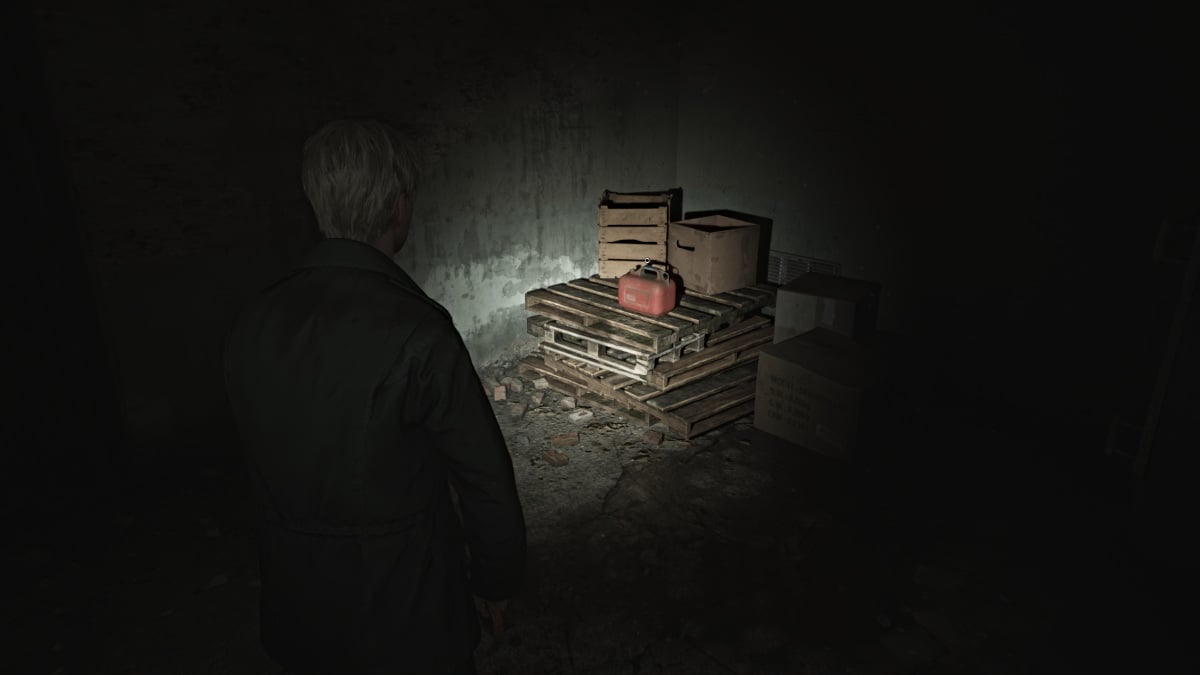
Screenshot by Pro Game Guides
This bring you back to the Labyrinth Center with the Rotating Cube Puzzle , and now it ’s time to move on to the next area . wrick the block to the appropriate direction ( as seen in the table above ) to unlock theDesolate Areanext . Run through the building and back up to the unexpended - side path , and this time take the door straight in advance .
Labyrinth - Desolate Area and the Handcuffed Gate
Upon inscribe theDesolate Area , use the nearbyRed Save Pointand make greenback of the locked door to your right , and the ladder to your left . retain directly ahead and find the second doorway on your right hand and go through it . There will be a wall pass by a closet for you to take to the room conterminous , where you ’ll find someRifle Ammo , Shotgun Ammo , and a Mannequin hiding behind a bookshelf .
double back to the small bedroom where you find aHealth DrinkandLadder II . Go down it to reach theFlooded Level , and survey the itinerary until you find a muddle you could peek throughto see a key(which you will need ) .
Keep going and you ’ll see that the door to that way is put away . Make your waysouthuntil you findLadder Iand rise up , where onward of you will be theHandcuffed Gate(seen above ) . You ’ll need a certain winder you already saw to unlock it , but for now , go through the door to your left .
Screenshot by Pro Game Guides
Labyrinth - Desolate Area, Pyramid Head’s Lair, and the Wirecutters
Go through the next hall on the right , full of bugs of course , and suddenlyPyramid Headwill seem and start give chase . This is not a boss conflict , you ’re simply in his domain now and need to avoid him at all cost while completing your objectives .
running left when Pyramid Head chases you here , and go past the ladder until you find a yoke of double doors , where his lair is . This will also give you theInner Sanctumachievement / trophy .
Go upLadder Vand pursue the recollective hallway up until you may plow depart , but quickly go right for some Handgun Ammo in a dresser at the dead final stage . Backtrack and go left through the wide loose door to the room where you may remove a curing ofWirecuttersfrom a low fuse box .
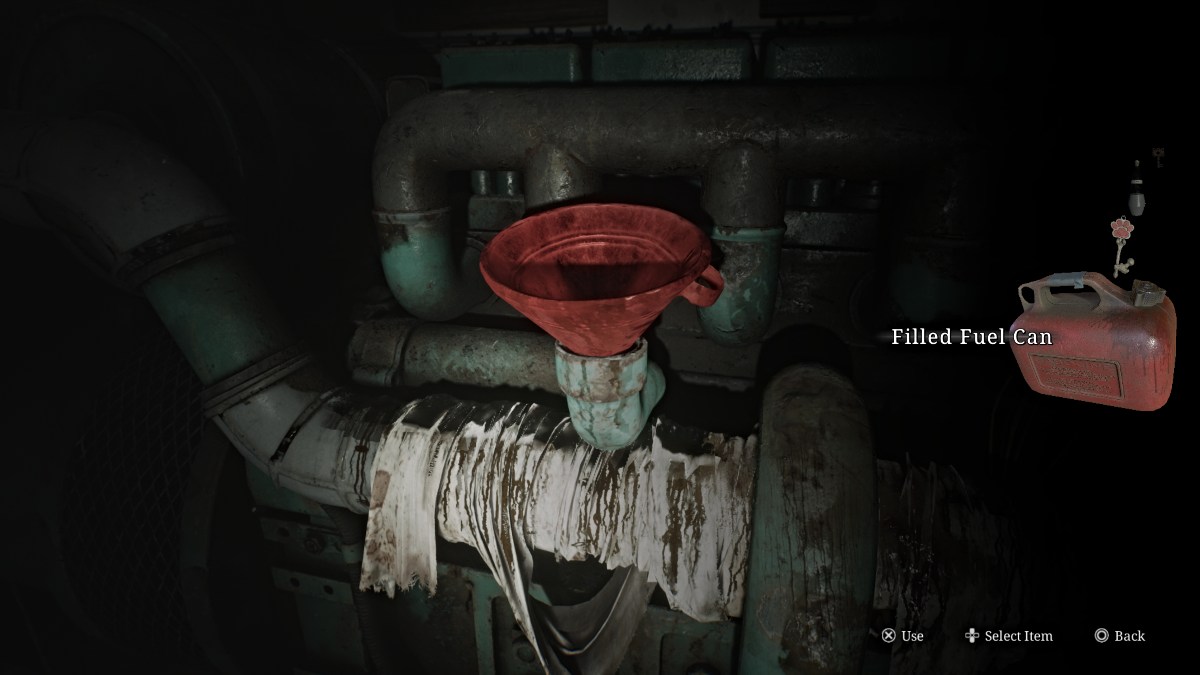
Screenshot by Pro Game Guides
As beguiling as it might be , do NOT take the south corridor past the electrical fuse boxas that will bring you back to the tunnel with the crawl space that caved in after passing through , meaning you ’ll have to backtrack much further around the single-valued function .
alternatively , go back downLadder Vto the orbit where Pyramid Head was , but he ’ll no longer be there . or else , you ’ll have to deal with Mandarins and other monsters in your way .
For some extra items and aStrange Photoyou can make your manner to and up the ladder you initially passed while elude Pyramid Head . Otherwise , head back to the burrow with the barrier ofWiresand use theWirecuttersto get through . Go down the next ladder onward , and snaffle a nearbyHealth Drinkbefore dropping down another hole that brings you back to theRotating Cube Puzzleonce more .
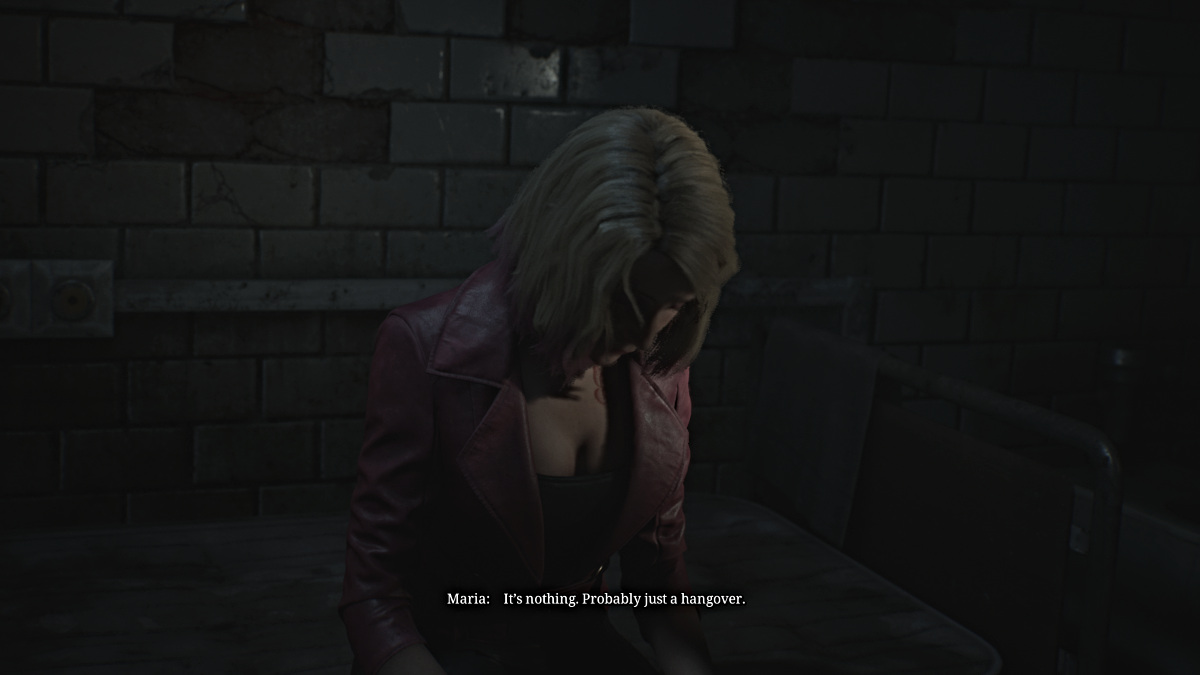
Screenshot by Pro Game Guides
Be sure to habituate theRed Save Pointnearby to spare all your recent forward motion . Now it ’s clip to turn the cube in the appropriate charge for theRuined Area . think , the symbol is anupside - down triangle with a crossbreeding underneath . traverse through the building and up the path to where you’re able to now take the red door to the right hand .
Labyrinth - Ruined Area
TheRuined Areaof the Labyrinth is quite different from the other area in that it ’s essentially a monster gauntlet . You ’ll enroll different areas where you need to defeat various monster to progress forward . Make certain to gather all of the ammo and health detail in the domain first , then go interact with there d doorway at the backfor the alarum to go off and the monsters to follow alive .
In the first two areas , it ’ll be mostly regular monster such as Lying Figures , Mannequins , and Bubble Nurses . The third country will be full of glitch and you ’ll take to pop Mandarins grovel beneath the floors . The Shotgun and Hunting Rifle are expert for those .
At the goal of it all , you ’ll get a graciousRed Save Point , which we recommend because soon after you ’ll run into Pyramid Head yet again . He ’ll give pursuit and you call for to run in the other direction until you accomplish a conversant - looking barrier made of fiend . This metre , however , you ’re able to get through before Pyramid Head catches you . Continue on into the next room , where you ’ll see Maria at last , but it seems it ’s too previous once again .
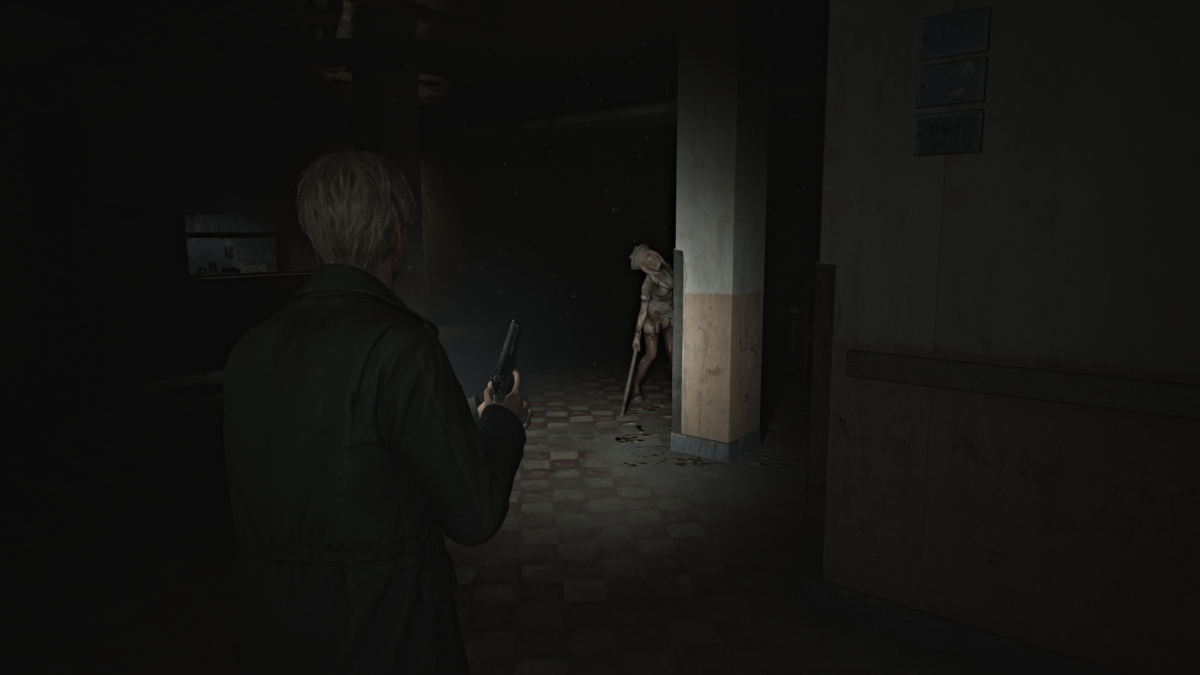
Screenshot by Pro Game Guides
James find himself overcome with heartbreak at the sight of Maria clearly dead and murdered ( likely by the same culprit ) , and him ineffectual to help her in time . belike a alike brokenheartedness to the expiration of Mary , he whispers her name and leaves , powerless to do anything else .
Once you leave the room , head up the stairs to where the Rotating Cube Puzzle normally is , but now it ’s been brutally destroyed , and among the rubble is theGreat Knife , Pyramid Head ’s main weapon system .
Interact with the Great Knife and James will pry it loose , allowing you to maintain it , sort of . Drag it left toward theStrange Barrierand you ’ll now be able-bodied to pass through it . Drag the Great Knife all the way until you ’re completely through the roadblock with a ladder ahead of you . you’re able to now drop it and keep on ( sorry , you ca n’t keep it in your stock this time ) .
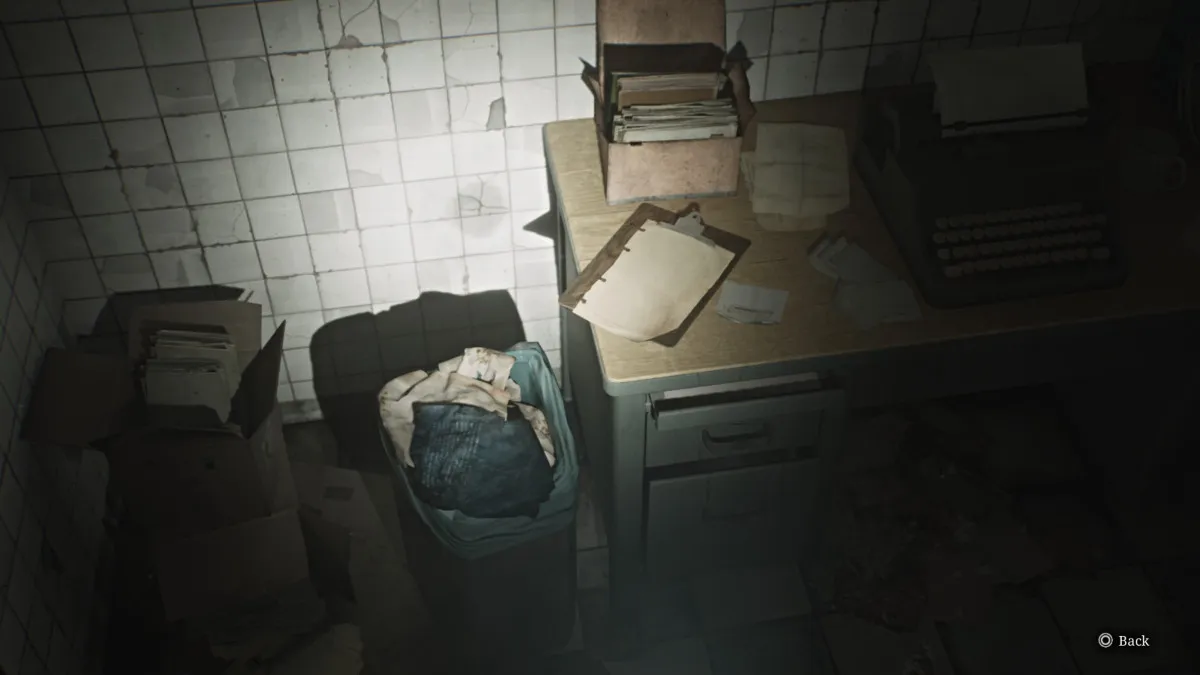
Screenshot by Pro Game Guides
Labyrinth - James' Grave and Eddie’s Reckoning
After climb the ladder , follow the hallway until you could rise back down another ladder , which leads you to a pocket-sized burial site country . you may salvage someShotgun Shellsand aHealth Drinkhere . Among the gravestones you ’ll find three that are of particular importance : Angela Orosco , Eddie Dombrowski , and James Sunderland .
Clearly having lost himself , Eddie claims the corpse in front of him has been following him the whole time , laughing and insulting him . He then accuses James of doing the same , and that Silent Hill called them both because they ’re " not like other people " . Determined to penalize James the same way , he squeeze him to the nub deep-freeze for a fight .
Grab theHealth Drinkson both sides of the room , make indisputable your gun are reloaded , and then follow Eddie through the same door .
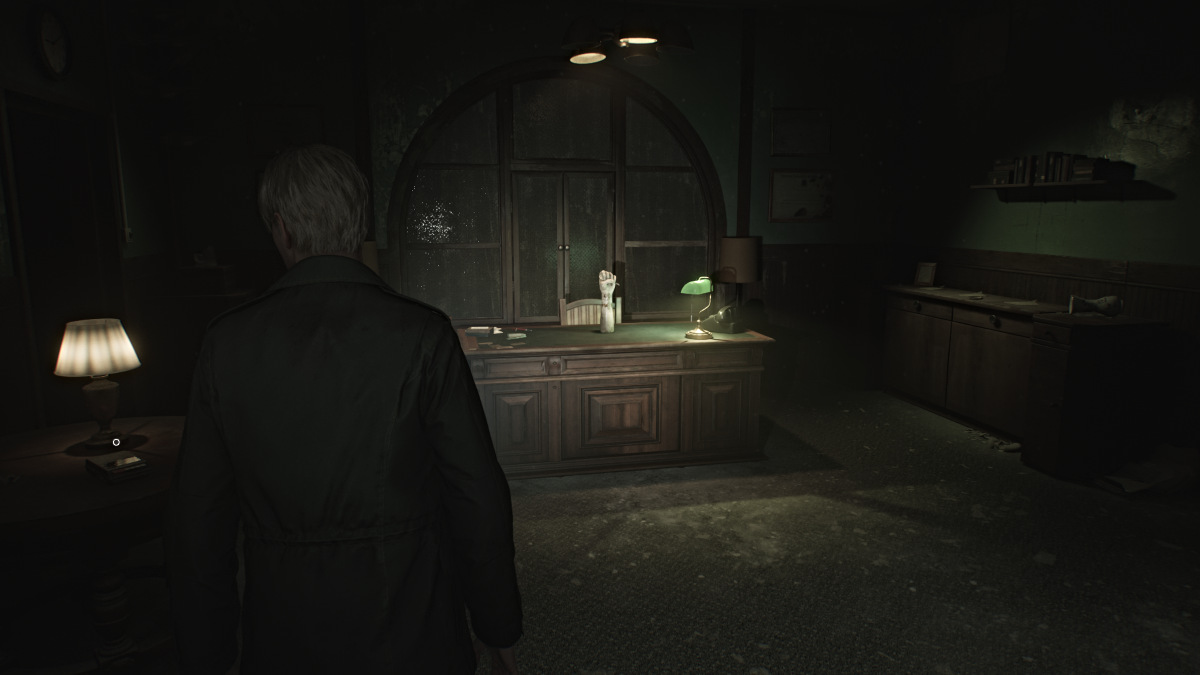
Screenshot by Pro Game Guides
Labyrinth - How to beat Eddie
Make your way into the freezer and Eddie will officially charter you in a fight , and you ’ll require to annul getting shot by him as much as potential because even just one stab from his accelerator hurtsa mint .
Use the hang sacks of meat for cover as Eddie band around for sneak attacks . Do your best to keep him in your sights , or at least a sensation of where he is , at all times . There will be some extraShotgun Shellsscattered around the walls of the room .
Shoot him enough times and he ’ll germinate a gas pipe that occupy the room with fog , making it harder to spot where he is . Do your best to keep your back to a bulwark while waiting for him to draw near . After a few more shot , the conveyors of meat will pop to go around , and you ’ll ask to be wary of being caught in the open .
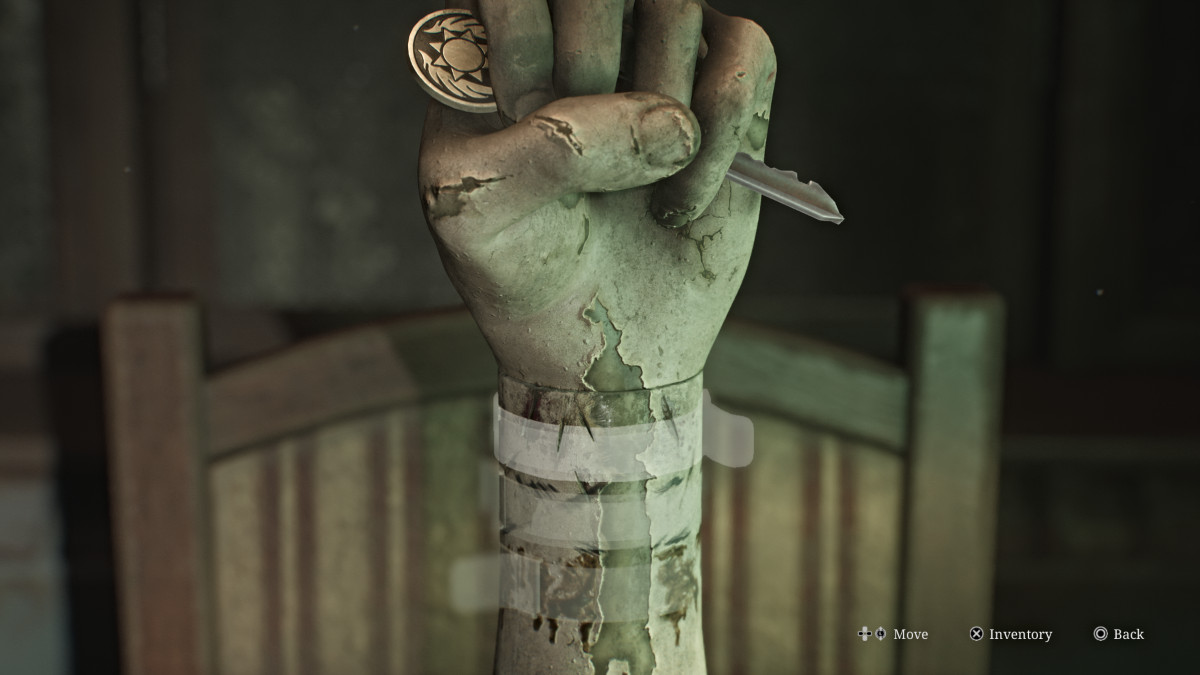
Screenshot by Pro Game Guides
Be extra vigilant as Eddie will get more strong-growing now with more gunshot and will essay to mouse behind you for a pistol lash . Keep damaging him as much as possible and shortly he ’ll succumb to his wounds and collapse , dead .
There ’s nothing exit to do , so find the black doubled doorway and open them to regain your way out . Go through one more door , and you ’ll find yourself somehow back outside at the edge of Toluca Lake .
How to use the Boat to cross Toluca Lake
With all that James has experienced so far , it ’s now time to go to the one other " special place " Mary could be , which is theLakeview Hotel . To get there though , you ’ll need to get across Toluca Lake , think you ’ll need a sauceboat of some variety . take the air down the pier after using theRed Save Pointand a minuscule rowboat will be waiting for you .
After James climb in and start up rowing , you ’ll shortly need to take over yourself . you could control both oars separately ( to turn if you slue off - course ) with the appropriate controls or together at the same metre to row straight .
To get theScourge of Toluca Lake prize / achievment , simply unwarranted in the boat for 10 minutes before you row your way to the Lakeview Hotel .
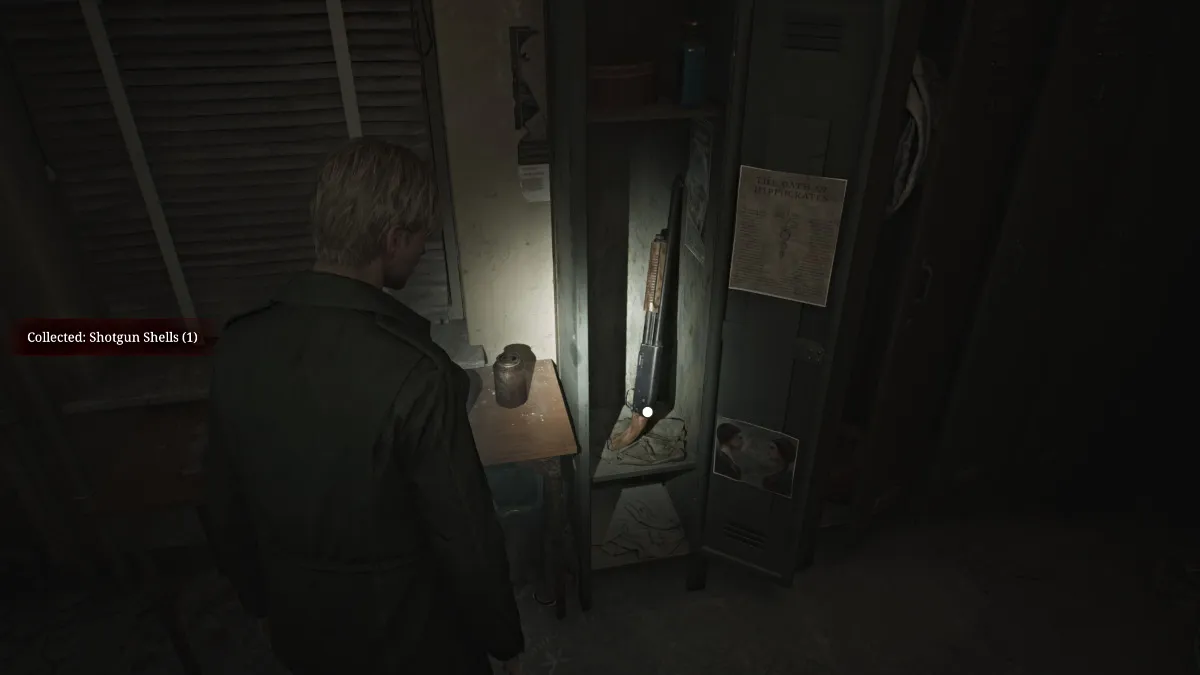
Screenshot by Pro Game Guides
Your destination is to follow the light in the distance , which is come from Lakeview Hotel . As you get close , the light will mature heavy and brighter , so follow it until James reaches the wharf in front of the hotel .
Silent Hill 2 Remake Lakeview Hotel Walkthrough
Lakeview Hotel - Garden Entrance
After another abbreviated cutscene , you ’ll discover yourself at the Lakeview wharf . Go immediately to your right where you should spot theLakeview Hotel Garden Mapposted on a wall . Take it to get a feel at where you are , which is the monumental front entrance to the hotel .
If you ’re playing New Game Plus and want to get the UFO ending , you should hear the UFO audio discriminative stimulus as you approach the map . Inspect your Blue Gem once again until it sparkles .
For now , head up the primal step and compass north in the counsel of the garden area . Go up the next readiness of stairs and head left to find someHandgun Ammoin a gazebo . Now run to the far right side and on a small-scale work bench will be theRotten Apple . Take it and make your elbow room up the east side of the garden . Inside the Fish Fountain , you ’ll retrieve aGlimpse of the Pastin the form of a broken music box .
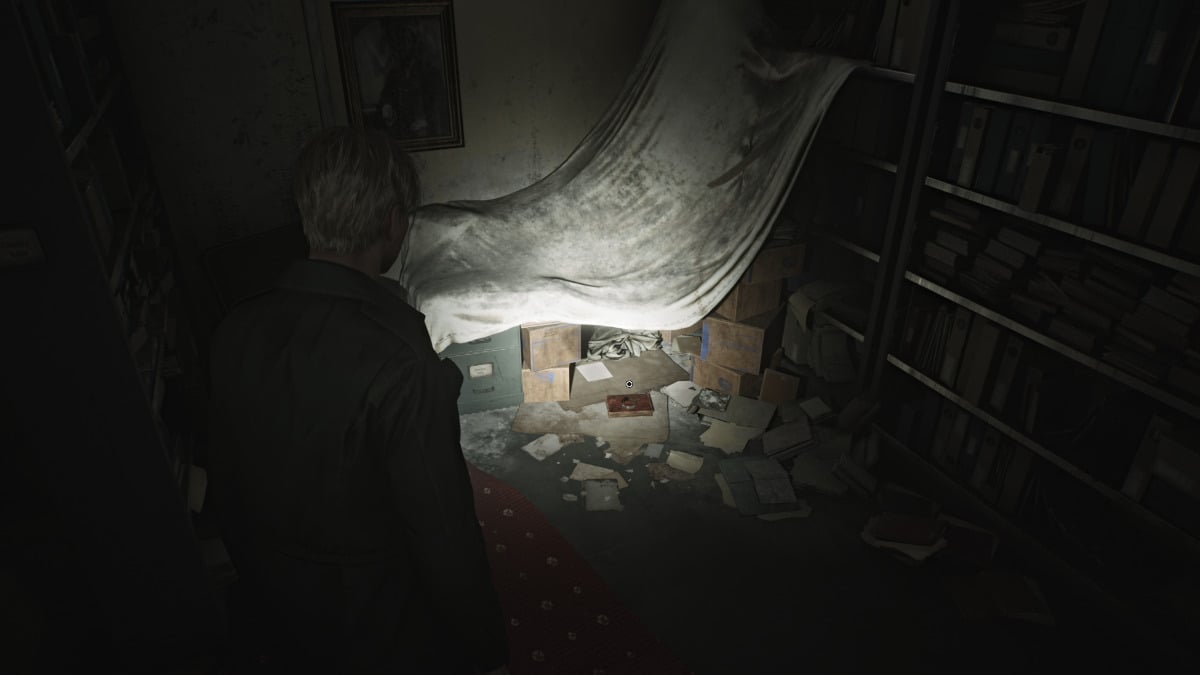
Screenshot by Pro Game Guides
There ’s nothing else of note outdoors for now , so direct to the hotel ’s entrance where you ’ll hear a pianissimo being played inside .
Lakeview Hotel (Floor 1) - Check-In, the Music Box, and Cafe Toluca
Go through the double doors and point right to collect theLakeview Hotel 1F-3F Map , which also shows a map for the Venus Tears Bar in the Basement . Now , circulate around to the front of the antechamber , where you ’ll see a large and ornateMusic Box(seen above ) that requires a special samara to open it .
Backtrack a bit and go inside theCheck - In Roomon the right to find aRed Save Point , a keyring that bear both theRoom 312 Keyand theOrnamental Key , and theReceptionist Memothat observe the videotape James and Mary leave now being kept in theEmployee Section of the first floor .
Go check out the far right side of the lobby for someHandgun Ammoand headway intoCafe Toluca . Grab aHealth Drinkfrom one of the tables , then go behind the bar to get hold theRoom 102 Keyat the far ending . Go around the corner to find a breakable spot in the bulwark , letting you through to the Lost and Found Room . There you ’ll discover moreHandgun Ammoand theLost and Found Note .
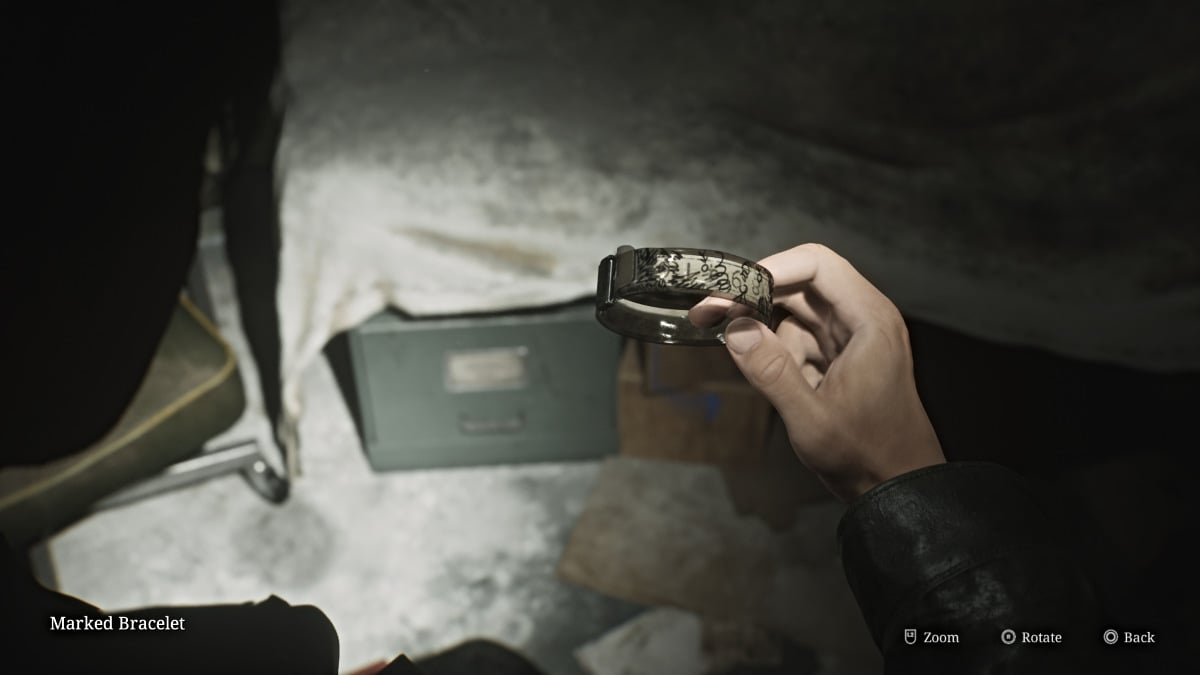
Screenshot by Pro Game Guides
If you ’re playing New Game Plus and want to get the Rebirth ending , the Lost Memories book is found in here as well .
Go back to the Music Box machine and use theOrnamental Keyto open it . Inside you ’ll see thatthree figurinesare required to play the medicine reels . For now , head down the left side of the third house and through the candid door on the left , where the forte-piano tunes are coming from .
Laura’s Truth About Mary
While attend around in theLake Shore Restaurant , James gets startled by Laura blot out near the forte-piano . The two of them sing about Mary and how they both require to happen her for very interchangeable reasons . In a letter from Mary turn to to Laura , it ’s revealed that Mary cared profoundly for her and even hint at borrowing , if thing had been different and she was n’t sick .
After James read the letter which ends with Mary wishing Laura a happy eighth natal day , he asks her how sometime she is . Laura reveals that she turned eight " last week " . That would stand for that James ' timeline of events has wholly crumbled , as Mary did n’t die three years ago after all , or even last yr . If that letter is literal , then Mary died only day ago .
Before James realizes that , however , Laura read that there was a 2nd letter for James . She pass on the gasbag to him , but somehow it ’s empty . For now , she runs off to look for it .

Screenshot by Pro Game Guides
Lakeview Hotel (Floor 1) - The Sunrise Wing Key
After leaving the Restaurant , play along Laura to the hotel room on theeast side of the trading floor . As presently as you go through the living room doors , however , you ’ll see that freak are consist in the halls . Deal with the unity in your way and check the small storage locker outside Room 101 for someHandgun Ammo . There ’s nothing of notation in that room , so go toRoom 102 .
employ the key to get in , and inside you ’ll find a decent treasure trove of useful items , including aSyringe , Health Drink , Shotgun Ammo , andRifle Ammo .
leave behind the room , and right across from the door , there’sa crawlspace that lead into Room 103 . Slip through and grab theHealth Drinkfrom the bedside board before heading out to the terrace . To the right , you ’ll notice that you may go all the fashion across to the other side . Every other room along the fashion is operate from the terrace side , except forRoom 106at the very end .
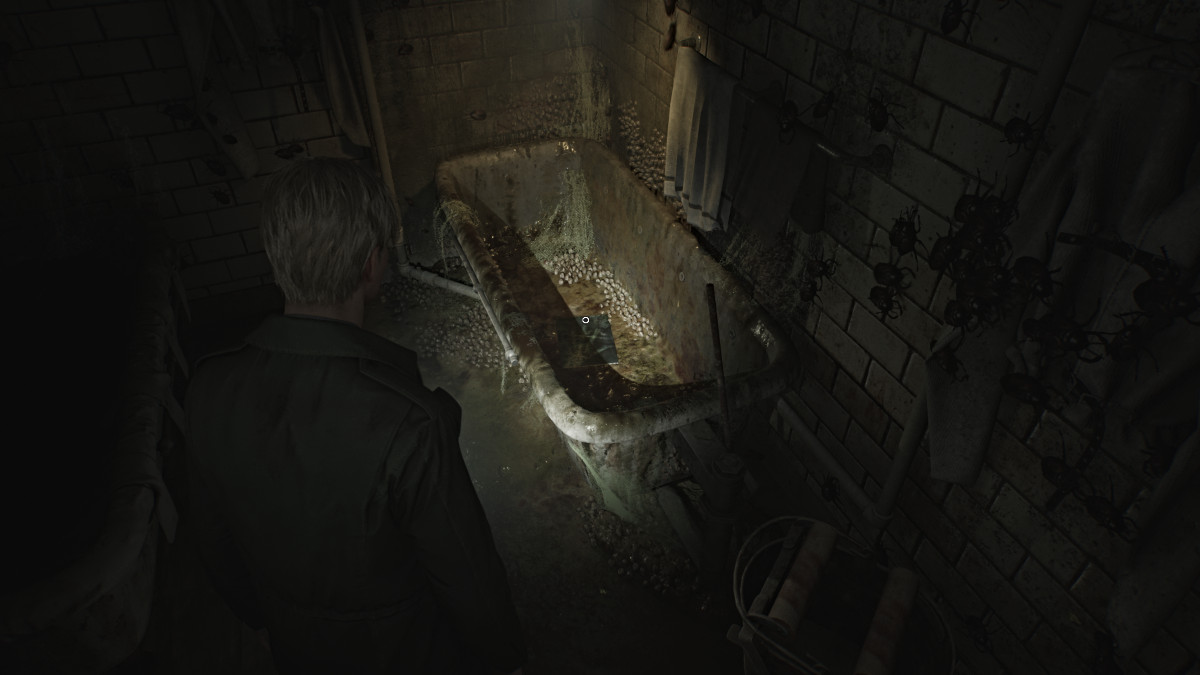
Screenshot by Pro Game Guides
Go inside and tally the bedside table for someHandgun Ammo , then go out into the hallway . A match of Mannequins will ambush you in the dark , so take aid of them first . Go checkRoom 104 , the only other accessible room on that side for the"aftermath … " Strange Photoand someRifle Ammo .
way 107at the far south end requires a key to get in , so for now check theUtility Roomnearby . Inside there ’s someHandgun Ammoand theSunrise Wing Key , which unlocks an country of the 2d story . later on , go unlock the door nearby that precede back to the front entrance area , if you want .
For now , make your mode back to the lobby and up to the hotel ’s second base .

Screenshot by Pro Game Guides
Lakeview Hotel (Floor 2) - Sunrise Wing, a Ripe Apple, and Room 202 Key
Upon attain the second trading floor , you ’ll detect that the west half of the floor is locked off . So for now , go to the eastern United States side , which fall out to be theSunrise Wingwhere you may use the key you just flummox . Head inside and observe out for more endearing spider Mannequins cower the rampart and ceiling .
Before you investigate the Reading Room , duck into theCloakroomon your left wing , which gift you access to theHallroom next doorway . Go in there and snap up theRoom 202 Keyfrom a sofa on the left side , then deal with a couplet of Mannequins to get to the back of the room where you ’ll get theRipe Apple(yum ) .
The terrace is accessible and leads to the west side of the floor , but have got off on that for now .
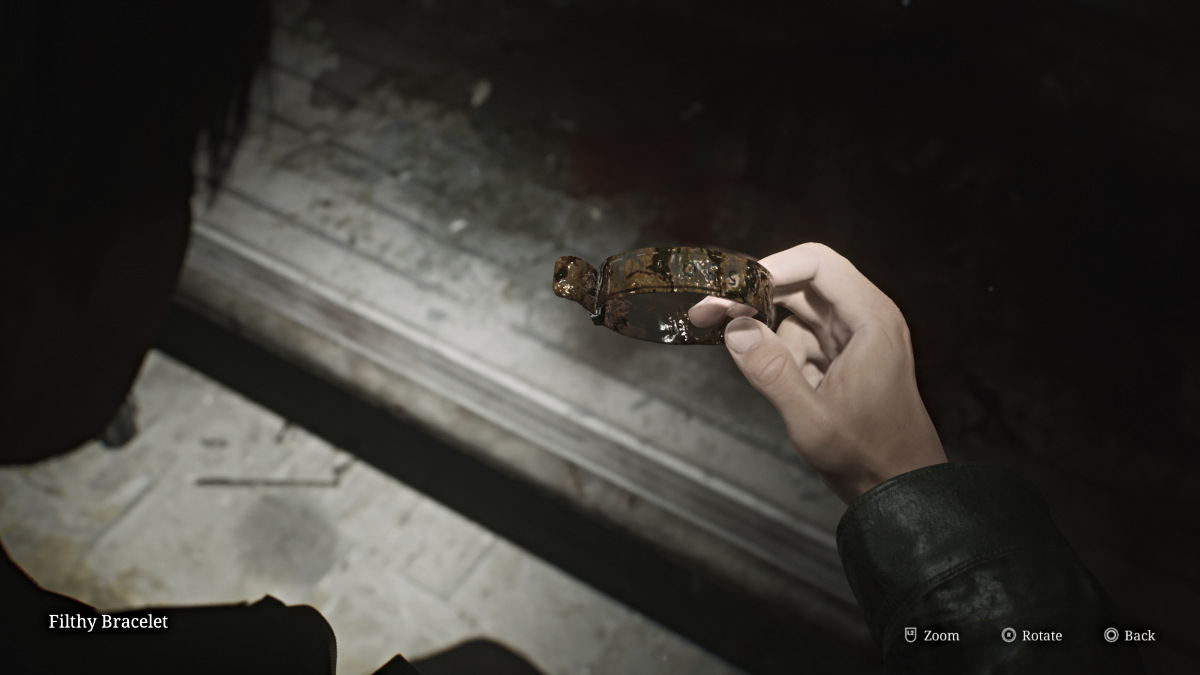
Screenshot by Pro Game Guides
Reading Room Book Puzzle
Now head into theReading Roomon your right , which James has mark on the single-valued function . Inside will be aRed Save Pointalong with four books you’re able to beak up , including :
You ’ll require toplace these books in the right spots on the nearby bookshelfwith a bronze allegory commemorate with two spears . discover that the pricker of each book has a different amber symbol , including anEagle , Angel , Lion , and a Bull .
Next , look at the huge picture on the paired paries , and you ’ll discover that it contains all of the aforementioned symbol as painted subjects . Two are in the background signal while the other two are in the foreground . Based on that , the books ask to go on the shelf in the undermentioned order :
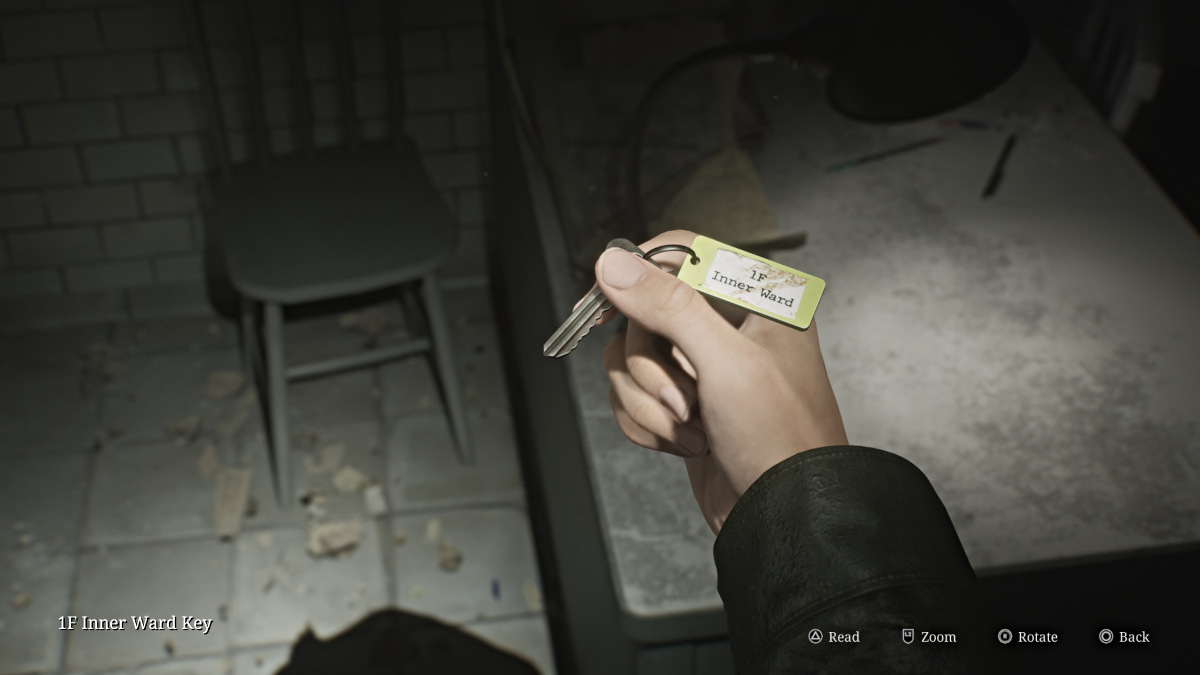
Screenshot by Pro Game Guides
Briefcase Code and Employee Elevator Key
Once done , the bookshelf will skid back to reveal a secret elbow room that also connects to Room 205 . Go at bottom where you ’ll find a series ofPhotos ( # 1 - 3)in the room along with aBriefcasethat requires a alphabetic character - free-base combining to open .
Normally , to figure out the code you would need to replace the broken wanton bulb in the nearby Vanity Mirror with a newfangled one . To do that you need to find the Paint Can ( Room 318 ) , the Can Opener ( go down Holy Scripture in Lake Shore Restaurant ) , and the new Lightbulb ( locked bequeath side of Garden region ; apply Boltcutters to access ) .
However , if you ’d rather save prison term , the correct combining ( Standard Difficulty ) is"DEED DONE " . So input " human activity " on the left compounding lock and " DONE " on the right one . Inside the Briefcase will be theEmployee Elevator Key .
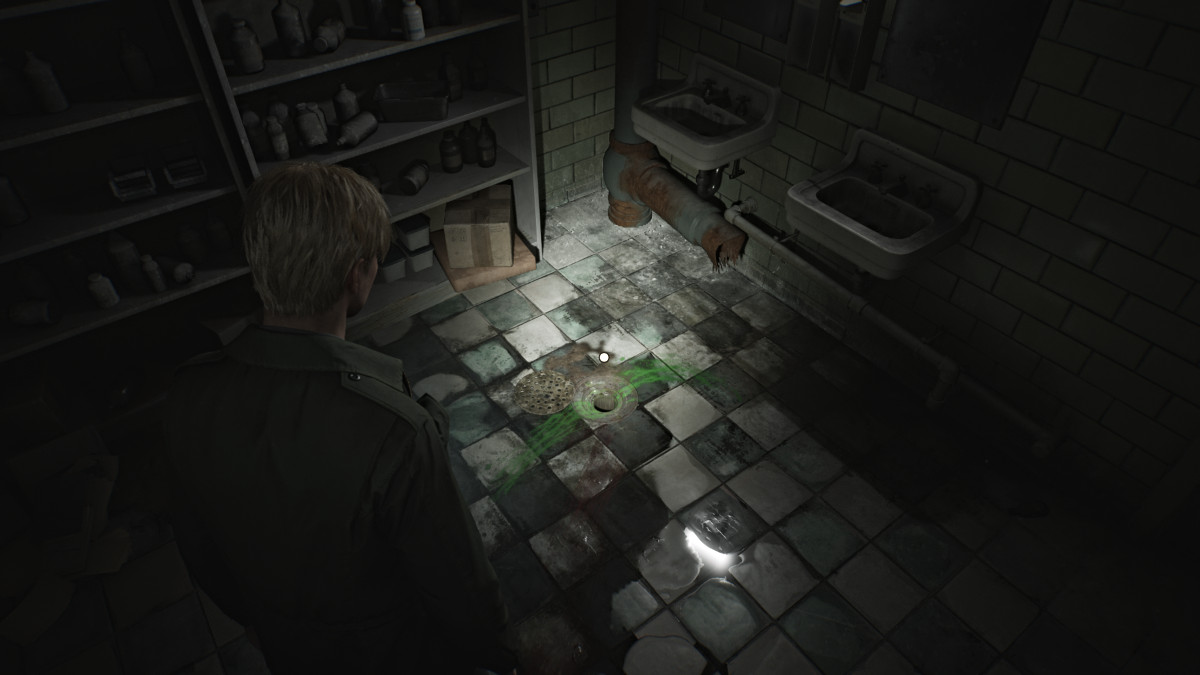
Screenshot by Pro Game Guides
Up top , only Room 209 is accessible but has nothing valuable ( only a Mannequin to jumpscare you ) . manoeuvre south and intoRoom 206 , where you may use a crawl space to enter207and arrogate someRifle Ammo . Double back out to the G. Stanley Hall andRoom 204will have aHealth DrinkandHandgun Ammofor the taking .
Room 202 - Mirror Puzzle and Snow White Figurine
Finally , go toRoom 202and utilise the key you got to enter . Inside you ’ll find an baleful elbow room with a small mesa and a disk on top of it . On the paries behind it is a impoverished mirror with Word inside written in profligate . “Mirror , Mirror , on the wall , Who ’s the sweetest of them all , Peel away the shiny skin , See the rotting material body within . "
On the trading floor beneath the mirror arefive broken shards . Asixth one can be found in the bedroomon the opposite side ; take hold of it before you start the teaser . When quick , you first need to place either theRipe AppleorRotten Appleon the platter . For the sake of completing the puzzle , your choice does n’t matter .
Choosing the Ripe Apple work the " Maria " terminate , while choosing the Rotten Apple influences the " Leave " stop .
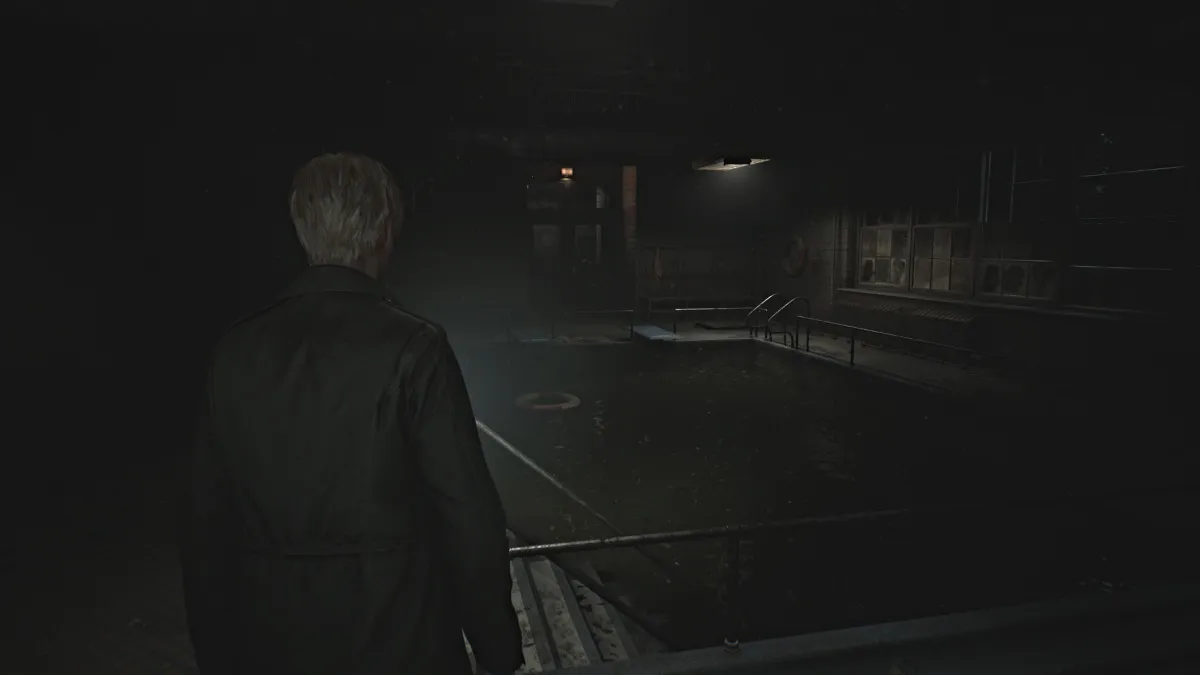
Screenshot by Pro Game Guides
Next , you ’ll be required toplace each of the broken shards on the floor back into the mirror in the correct speckle . The last one will be the one you take from the sleeping accommodation .
Once done , the mirror will straighten out and you ’ll then require to head toRoom 201next room access to claim your reward , theSnow White Figurine .
Lakeview Hotel (Floor 2) - Sunset Wing
Now make your way back through all of the wanderer Mannequins to theCloakroom , and rationalise through theHallroom to the extended terrace outside . Use it to reach theNurse ’s Officeon the left over side of the story , where you ’ll line up a Bubble Nurse and a medical record sit around on a desk with the initial " M.S.S " . Mary ’s perhaps ?
Go out to the hall and unlock the three-fold door to your left to make the Sunset Wing on the west side accessible . Go straight and around the recess to get someShotgun Shellsfrom a drawer . Bypass theEmployee Elevator Roomfor now ( for a specific rationality ) and research the rest of the elbow room on the trading floor first .
take note that the third floor is accessible from this side . Grab someShotgun Shellsfrom the drawer near Room 214 . Go straight up the hall to the window at the far north goal , where a Mannequin will be hiding and someRifle Ammoon a table . Double back and turn in good order to find moreRifle Ammoat the remnant of that hall .
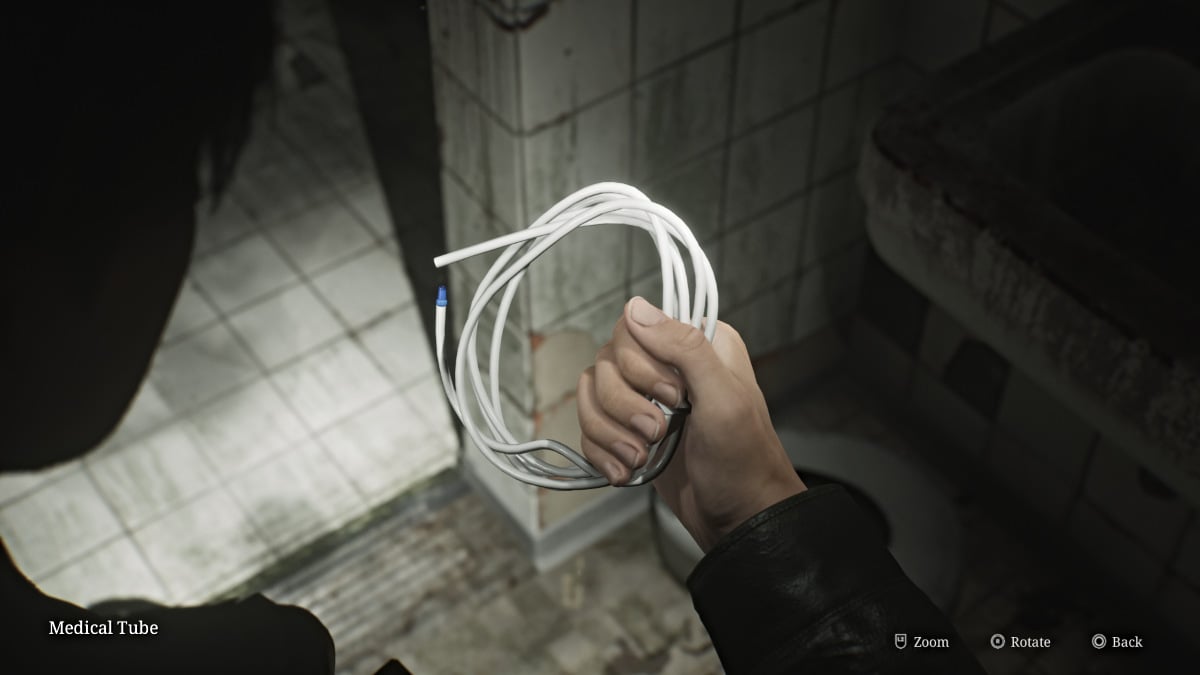
Screenshot by Pro Game Guides
InsideRoom 212you’ll find anotherGlimpse of the Pastin an heart-to-heart briefcase . Leave and now head up to the third floor .
Lakeview Hotel (Floor 3) - Conference Room and Boltcutters
Go up the stairs to the third floor and first head into theConference Roomin front of you . Go across the way and pick up theCleaning Staff Note WithRoom 107 Keyoff the hearth . Now interact with the fireplace itself , and you ’ll noticeone of the Music Box Figurines is stuck inside it . You ’ll need something to unlock the fireplace first .
For now , run back out into the hallway , and you ’ll notice double doors lock by an iron logic gate . If you approach it , Mary ’s voice will suddenly scream for James , surprising him . You ’ll necessitate a key to entree that part of the trading floor , however . For now , go check into theUtility Roomaround the corner , where you ’ll findHandgun Ammo , Shotgun Ammo , and a set ofBoltcutters(used to unlock the extraneous Garden ’s left over side ) .
Double back around the hall to where you see a smart red ' Exit ' sign . This will take you outside and down a stairwell(grab the ammunition from the table on the way down)to the 2d trading floor , into thesoutheast corneryou could n’t access before .
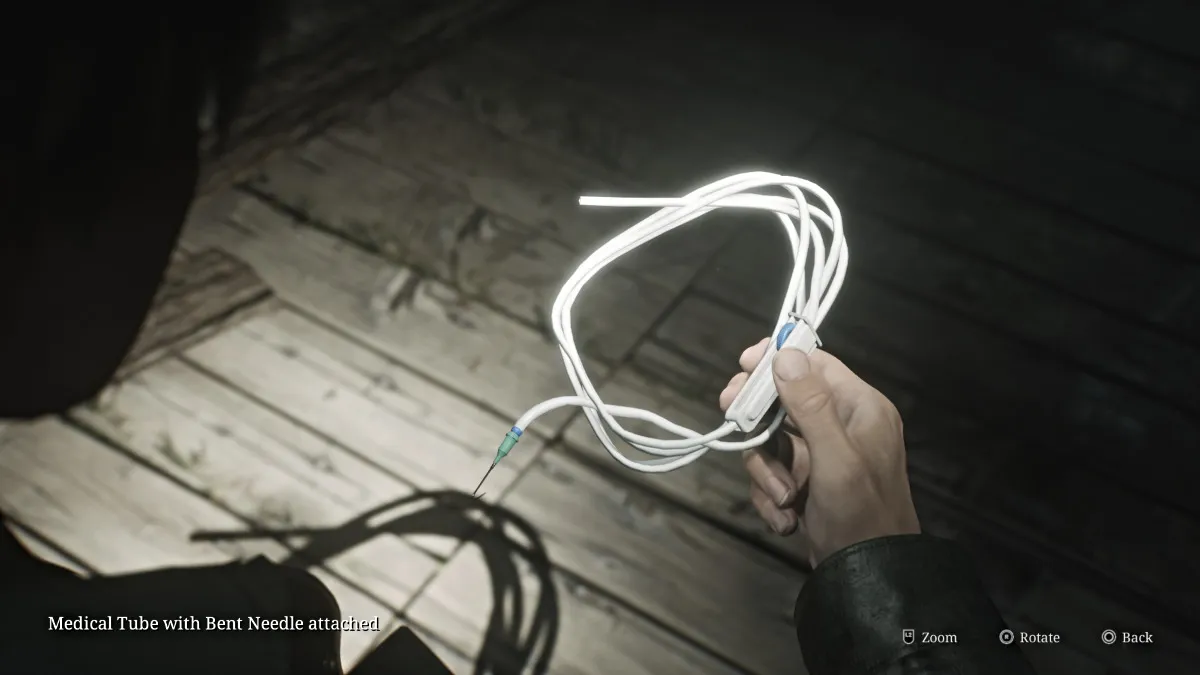
Screenshot by Pro Game Guides
Lakeview Hotel (Floor 2 and 1) - Bird Room, Room 107, and the Fireplace Key
First go intoRoom 215 , where you ’ll find a breakable rampart that will take you to214 . Unlock the door in there , and you now have a handy crosscut to the other side of the Sunset Wing .
Now double back toRoom 217 , a way full of bird John Milton Cage Jr. where the terrace door will blow unresolved , making another path for you . catch the ammo from the suitcase on the bed and go look outside , where you ’ll see another red book lying on the chalk ceiling across the way . utilise your Handgun to shoot the crack glass home plate underneath it , so it fall into theLake Shore Restaurantbelow .
Use your new shortcut and head all the way back down to the first trading floor and to the eatery , where the book will be lie on top of a box . Interact with it , and it will open to uncover theCan Opener(for the Paint Can , if you ’re uncovering the briefcase computer code yourself ) . Take it and then head toRoom 107 , now that you have the key for it .
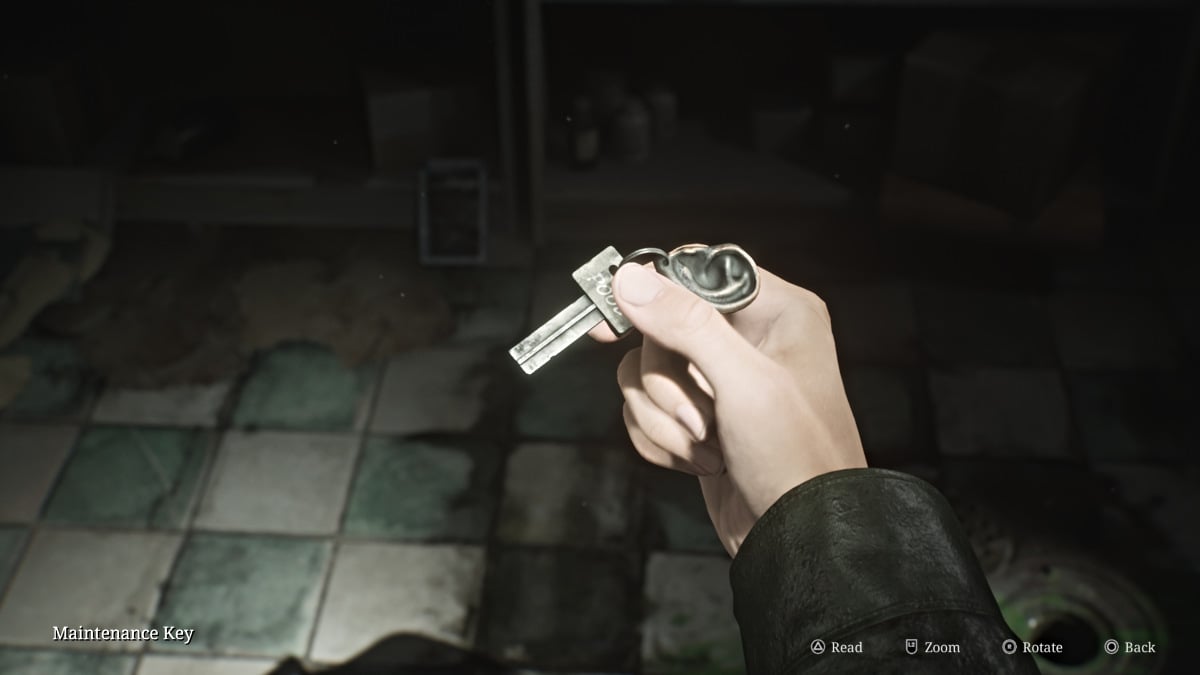
Screenshot by Pro Game Guides
Unlock it and go inside . First , pick up theCleaning Staff Note # 3from the nearby table , then aHealth Drinkfrom the can , and then channelize alfresco to the terrace domain .
sour out that this guide to theeast side of the Garden areathat you could n’t access ab initio . GrabShotgun Shellsfrom the table near the threshold then begin explore the area . consider with the monsters patrolling the grounds and make your way to the summerhouse in the back corner . Inspect the upset cleansing pail and you ’ll get theFireplace Key .
Now you may head back up to the third floor to put that key to practiced employment .
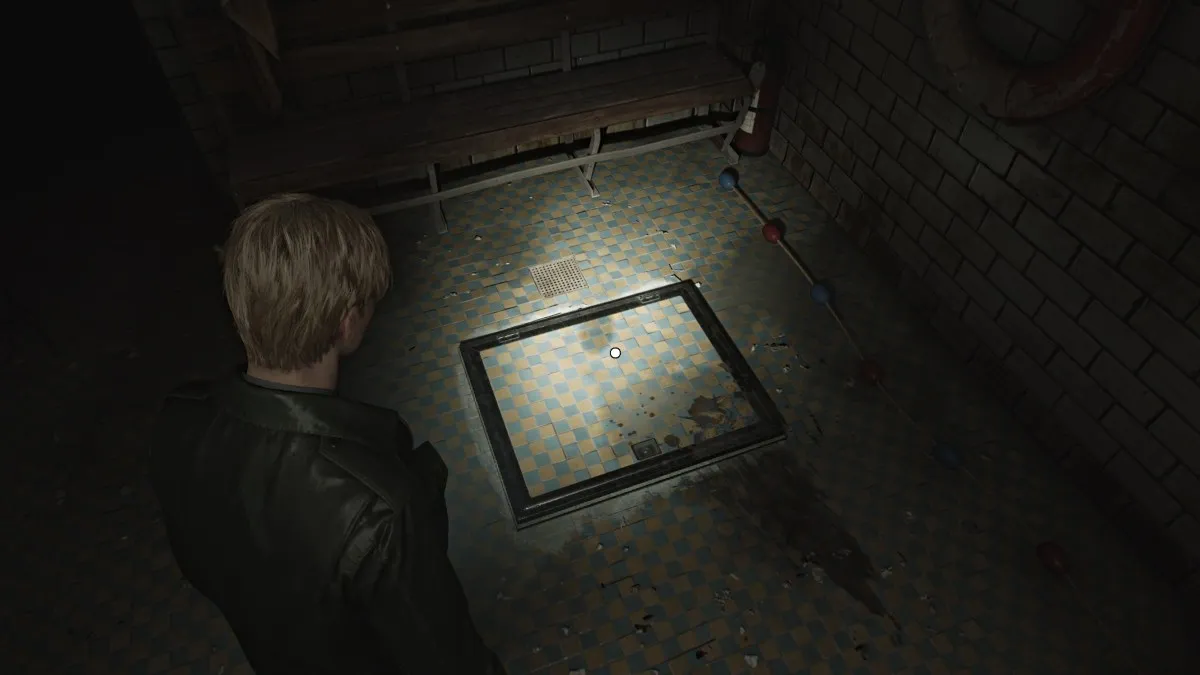
Screenshot by Pro Game Guides
Lakeview Hotel (Floor 3) - Cinderella Figurine and Red Paint
Make your elbow room back up to the third floor of the hotel ( observe that some wall and window are starting to shrivel ) and go into theConference Room . Run over to the fireplace and employ theFireplace Keyto unlock it and call back theCinderella Figurine .
A cutscene follow that shows a hugeMandarinenemy bristle through the side of the way and round James . While it may look like it at first , this is n’t a boss battle . Just unload someShotgun Shells(or whatever you have ) into it until it dies .
Go into the side way the monster came from and catch aHealth Drinkandammofrom the phone table , then rick your care to the shelf ahead . Push it out of the way to unwrap a breakable rampart . stone-broke through it to get intoRoom 317 . The wall behind you will collapse , so the only way forrad is outside .
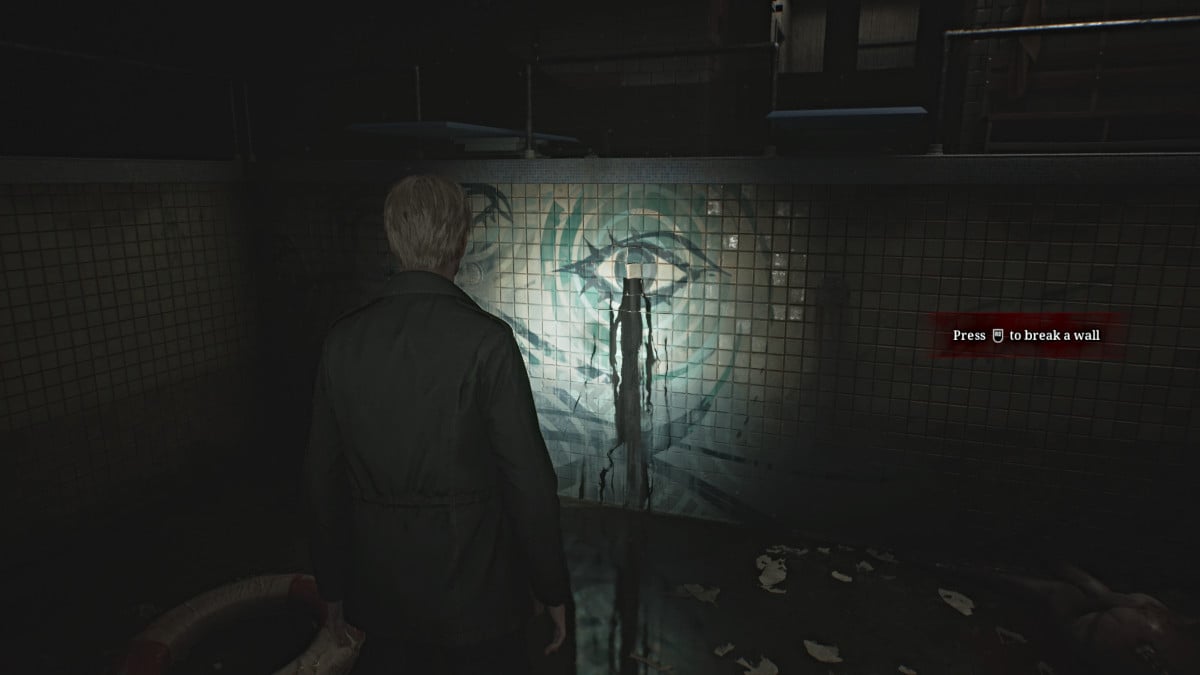
Screenshot by Pro Game Guides
Hop across the crushed fence to the terrace ofRoom 318and go inside to see what seem like a ruinous fix of blood on every Earth’s surface , but it wrench out to be red paint . There ’s an unopenedPaint Canfor you to lay claim , and you could combine it with theCan Openerto open it . You just need aLightbulbto dip in the blusher itself , which is at the Pisces statue in the Garden area .
you could take all those items back to Room 205 behind the Reading Room and habituate them on the Vanity Mirror to reveal the aforementioned code .
Lakeview Hotel (Floor 2 and 1) - Employee Section and Break Room Safe
Once you ’ve taken care of everything mentioned up to this point , it ’s now time to head back to theEmployee Elevator Roomon the second level . If you attempt to go into the elevator at once , you ’ll notice a loud alarm go off , intend there ’s too much weight present .
In other words , you ’re going to need to offload everything you ’re take . Your weapon , your healing item , your flashlight , your central items , everything .
Use theRed Save Pointinside , and then interact with the nearby cabinet . Inside , you ’ll see containers for each case of token you ’re transport . Start ditch everything you have into them , however , you ’re strangely admit to keepyour exposure of Mary , her letter(which if you look is now queerly blank),her handkerchief , and Angela ’s Knife .
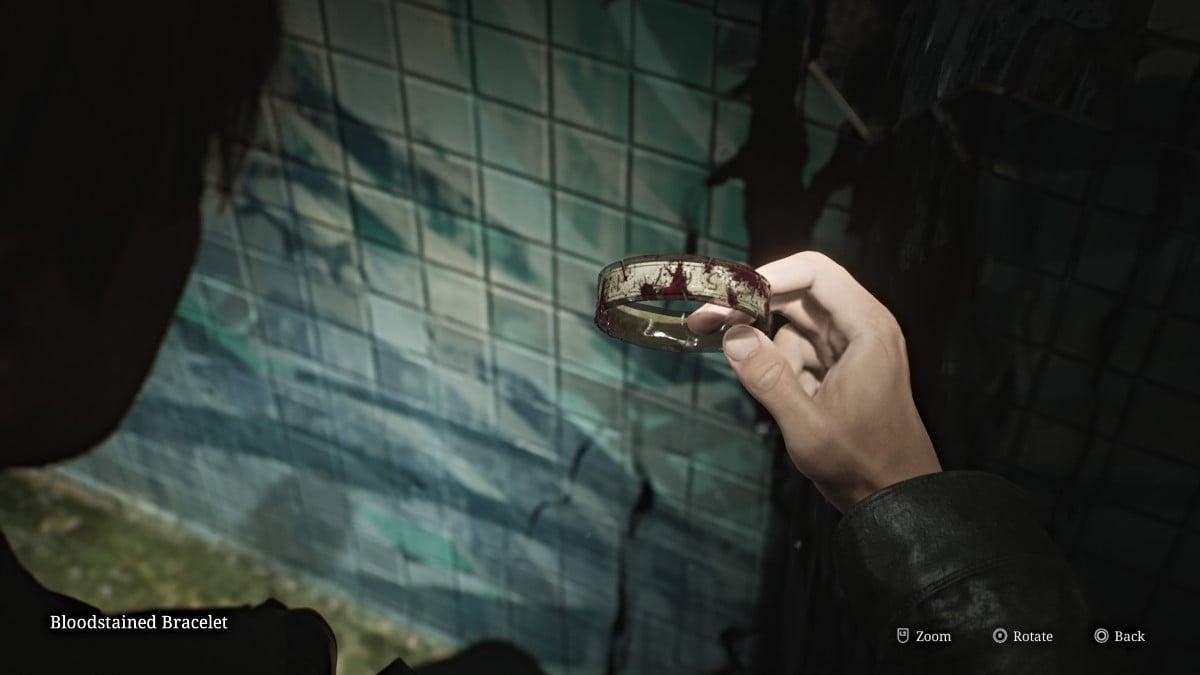
Screenshot by Pro Game Guides
Now you’re able to enter the elevator and take it to thefirst base , the only place you’re able to go . Be forewarned , there areMandarinspatrolling these country , and you will need to do your best to sneak around and avoid them since you have no means of kill them . If you take the air quietly and keep your distance , they wo n’t detect you .
Jump into theBreak Roomacross the hall in front of you first , and catch themap for the Employee Sectionof the hotel(since you had to leave alone your other function behind ) . Now go to theBreak Room Safeon the other side of the room .
The good want a computer keyboard codification to unlock it , and normally to figure it out you would need to clear theGem Box Puzzlelocated in theManager ’s Officeand chance all of the gems around the floor to do so .
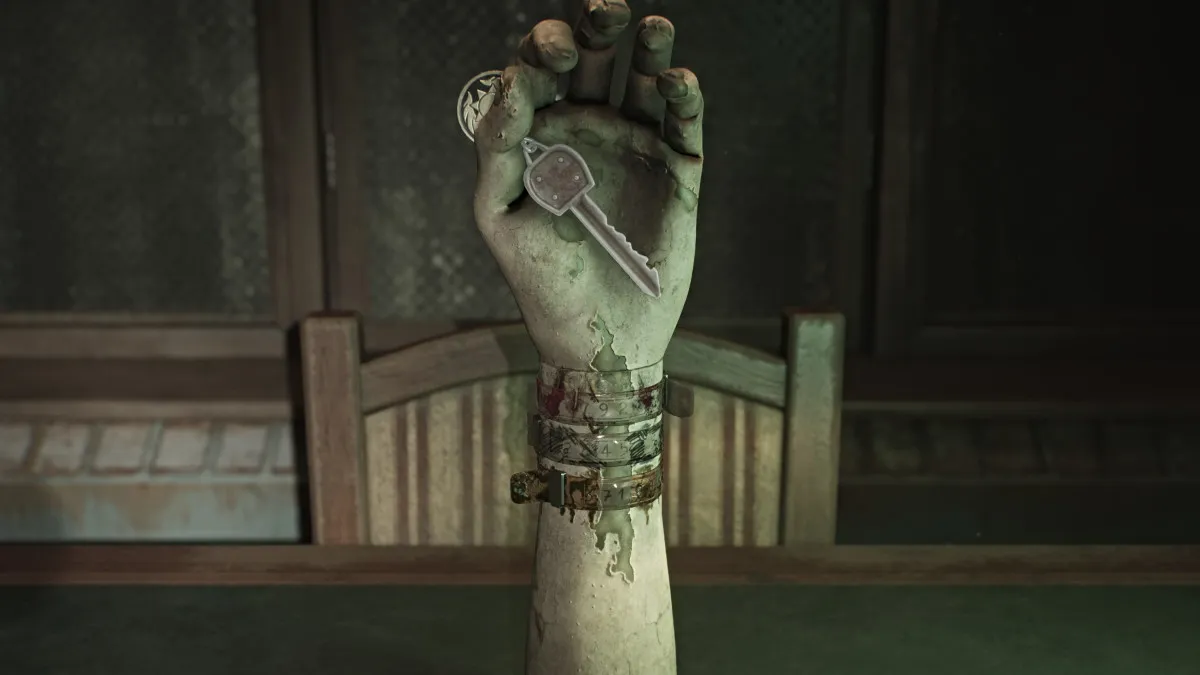
Screenshot by Pro Game Guides
However , since this area is especially grave , we have the code for you to help salve both time and your health . The correct computer code for the Break Room Safe is 7414.Inside you ’ll find theVideo TapeandBasement Key , which will countenance you to go to the Basement level of the Employee Section .
Tiptoe past the Mandarins and unlock the door to the stairwell that will take you down there .
Lakeview Hotel (Employee Basement) - Little Mermaid Figurine, Venus Tears Bar Key
Upon extend to the Basement tier , check your map and cautiously make your manner in the south to theMaintenance Roomfirst , avoiding the one patrolling Mandarin as you go . Once there , beak up the bluePump Valvesitting on a board .
conk the room via the gap in the wall to save yourself metre on the Mandarin ’s patrol route ( we recommend dock it and then shortcutting up the centre once it ’s passed back around ) and now head for theLiquor Storage Room .
Go in spite of appearance , slide through another gap in the paries on the leftover side ( wait for the Mandarin to glide by before you do ) , and use the Pump Valve to cut off pressure from a nearby steam valve that ’s blocking access to theBoiler Room . Once done , go into the Boiler Room and grab theVenus Tears Bar Keyhanging on a pipe by the boiler .
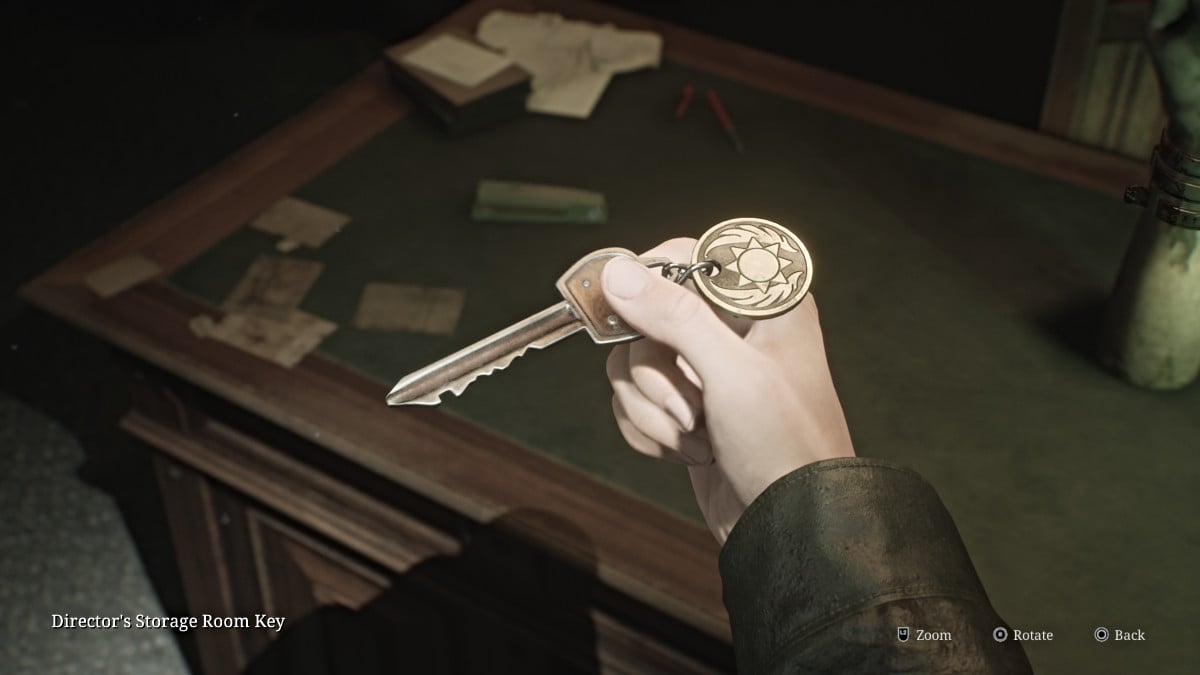
Screenshot by Pro Game Guides
exit the way and snaffle yourPump Valvebecause you ’ll need it one more time . Use the key to unlock the door to your left field to theVenus Tears Bar Kitchenand go in . There will be one more upchuck steam pipe that you need to depressurize , so use the Pump Valve nearby to do so .
Go through the next door to the taproom itself , where you ’ll find a broken jukebox underneath a shattered marine museum that ’s inundate the room . Grab the"Better leave … " Strange Photobehind the bar , then go over and pick up theLittle Mermaid Figurineoff the base , then utilise theRed Save Pointnearby .
Leave the Venus Tears Bar through the front entrance and now make your way back up to the second floor to quicklyreclaim your items from the Employee Elevator Room . Once that ’s done , steer back down to the first floor where theMusic Boxis , now that you have everything you need .
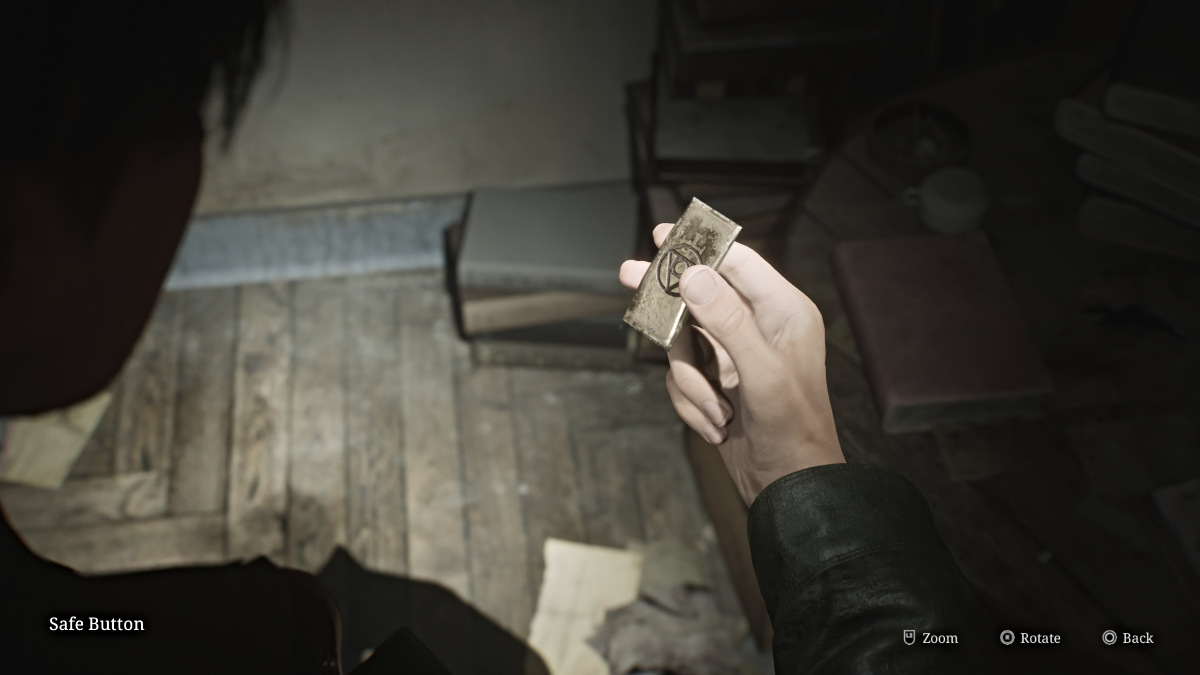
Screenshot by Pro Game Guides
Lakeview Hotel (Floor 1) - Music Box Puzzle and 3F Corridor Key
Approach the Music Box and look inside to place the three statuette you ’ve collect in their respective spot . Your goal is to send those figurines along the right track etched into the disc to their correct doors .
To do that , you need to revolve the discs inside the simple machine until they shape the correct paths to the right threshold . The solution for all three figurines is :
Once you ’ve aligned the path , crusade the push button at the bottom right and the automobile will prepare the chronological sequence . However , there ’s one more measure to complete .
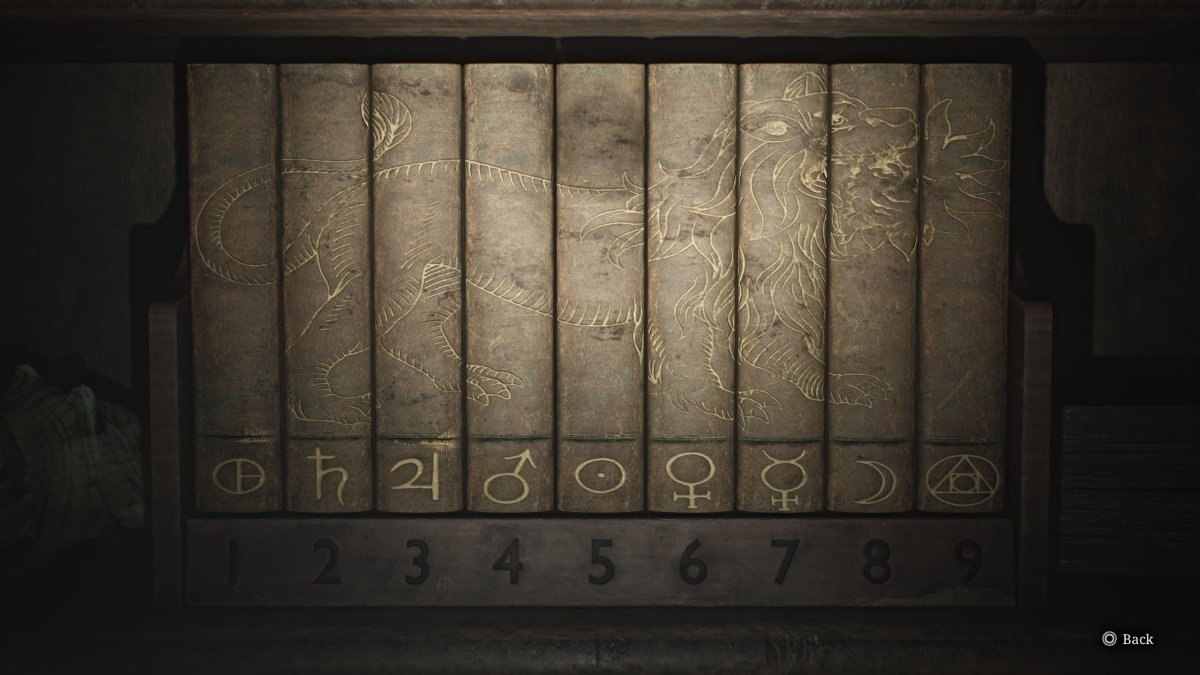
Screenshot by Pro Game Guides
you’re able to now watch the poems for the several princess on the facade of the motorcar , and there is a key above each passage ( seen below ) . Your destination here is to change by reversal each headstone the correct number of fourth dimension , harmonise to the number mentioned in each passage .
For Snow White , turn her key seven time . For Little Mermaid , turn her key five times . Finally , for Cinderella , turn her key one time .
Once you do , a familiar tune will run for James and he ’ll receive the3F Corridor Key . This will unlock the gate hallway on the third storey , where you heard Mary ’s voice .
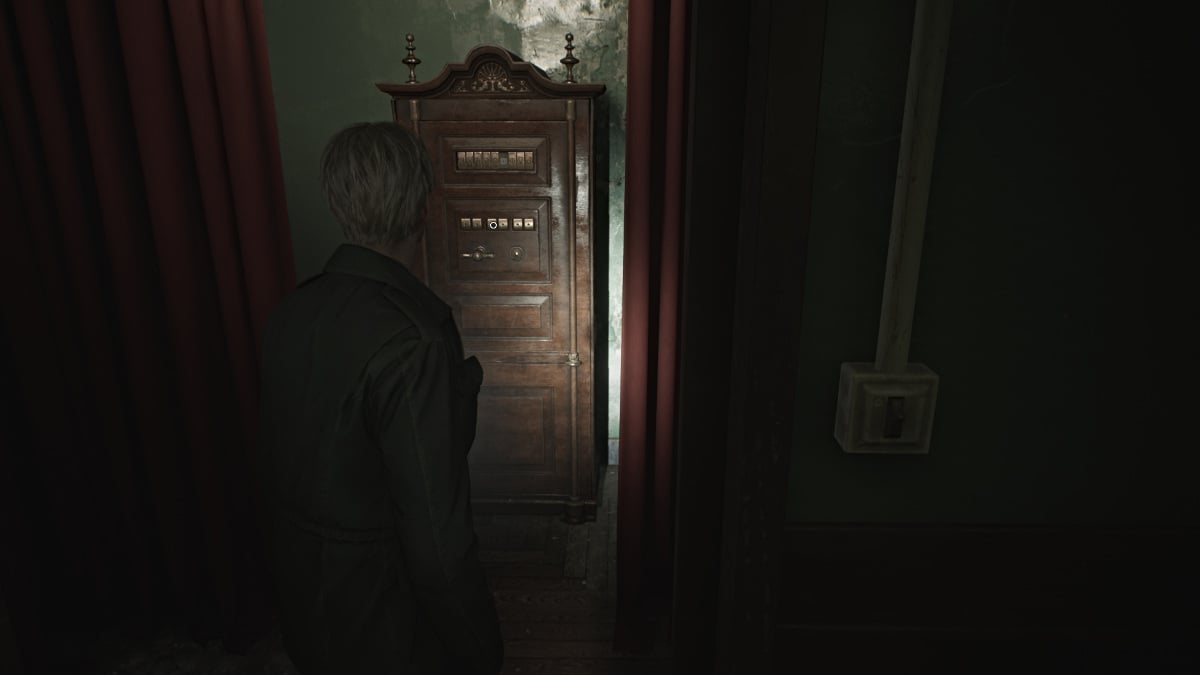
Screenshot by Pro Game Guides
It ’s now time to face the music , literally ?
Lakeview Hotel (Floor 3) - Room 312
Go all the way up to the third storey and use the3F Corridor Keyon the gate . Go down the hall to the last room on the right hand and practice theRoom 312 Keyto enter .
As you ’ll recall , this is the room where James and Mary delay during their last visit to Silent Hill . Despite his presumptuousness , Mary does n’t seem to be here either , but there ’s a TV with a videocassette recorder for your consumption . Go over and put theVideo Tapeyou got from the Basement inside the VCR .
During the cutscene , the mag tape begins with the terminal moments of their sojourn to the town , and Mary asking James to bring them back one day . At one item she cough , and the tape recording devolves into a pile of static and unstable images . However , among them a episode play of James approaching Mary in her bed and short suffocate her with a pillow , revealing that he actually defeat her .
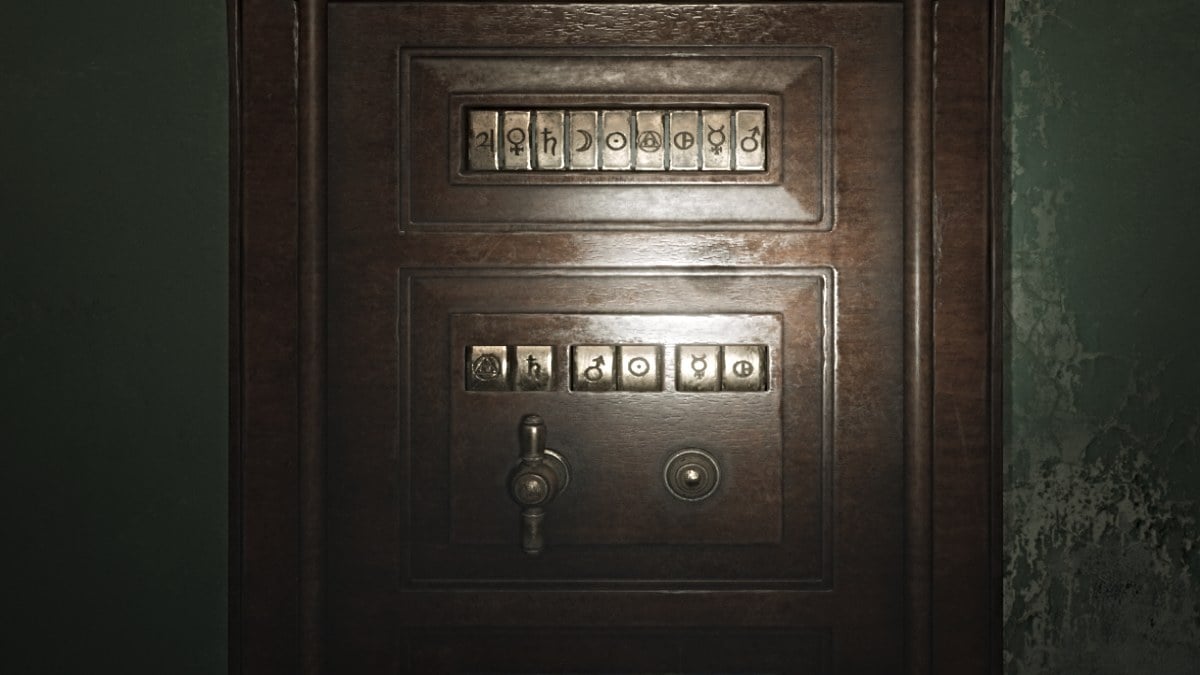
Correct Combination - Screenshot by Pro Game Guides
James sits in silence , at last faced with the actual the true that he ’s subconsciously denied this entire clip , to the point of believing Mary was stagnant for three years yet really still active ( in fact it was only days , thanks to Laura ’s information ) .
After an emotional scene with Laura , the room transforms , though not into the usual rendering of the Otherworld . or else , everything in the elbow room is burnt and drenched in body of water , as if in the aftermath of a fire . Mary ’s articulation suddenly calls out to James on his radio receiver .
Once you have ascendence , will the elbow room .
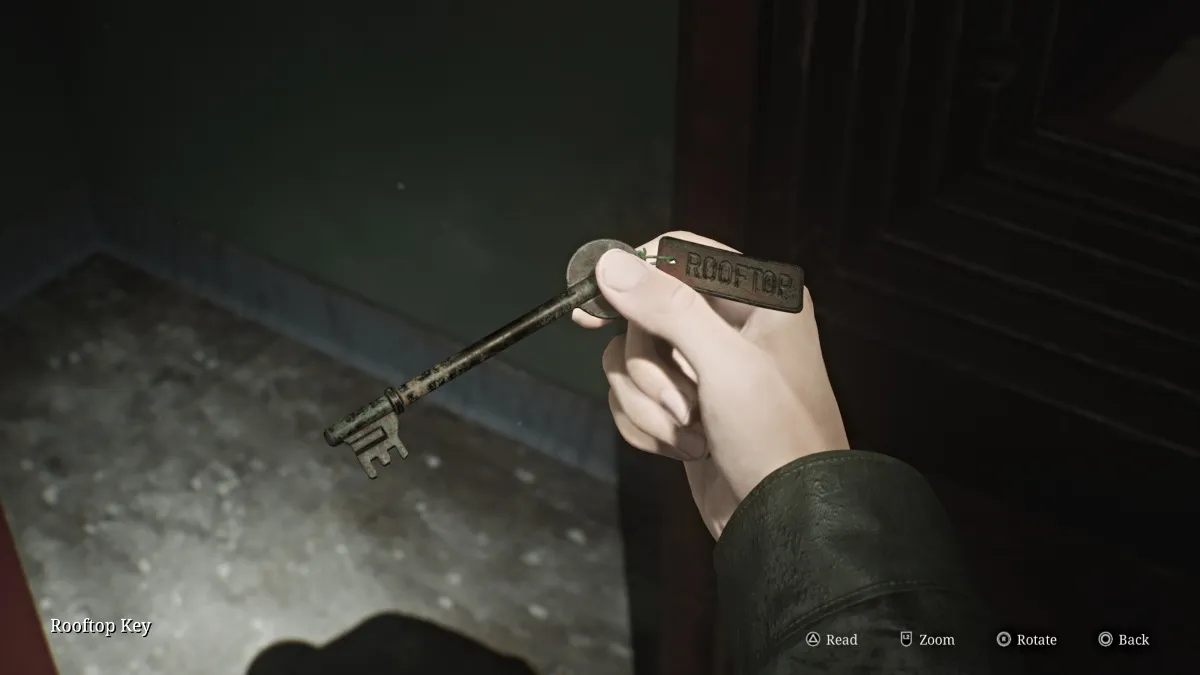
Screenshot by Pro Game Guides
Lakeview Hotel (Otherworld) - Make it to the Elevator
With the accuracy now known , the rest of the hotel appears to also be burnt , soaked , and fall apart . Go intoRoom 314and grabHandgun Ammofrom the bedside tabular array , then go into the lav and through the wall gap to the hall . There ’s moreHandgun Ammoinside a mesa drawer to your right wing .
Also , be cognisant that there are NO monsters in Lakeview ’s Otherworld , so you’re able to trip freely without stimulate to occupy .
The only manner forth is to the south down the anteroom , so head that way and duck through the debris . You ’ll notice there ’s a eminent crawlspace to your left as you perish . Go down the Marguerite Radclyffe Hall and to the left wing where there ’s a pushcart for you to apply . front crawl into the room in the lead first where there ’s an minatory message scratch on the wall and aSyringeon a board .
Screenshot by Pro Game Guides
Take the go-cart down the hall to the crawlspace , but it rapidly collapse through the floor , ruin that plan . or else , start down the hole that ’s been made , bringing you to the second floor . Go down the hall and grab aHealth DrinkfromRoom 207before going into the nearbyRestroom .
Use it to cross over into theReading Room , and you ’ll find aGlimpse of the Past(seen above ) sit on a nearby couch . Use theRed Save Pointthen leave the room through the double doors . Go across to the Cloakroom and into the Hall . In the back unexpended corner , you ’ll see the litElevatorthrough a kettle of fish in the rampart , which you need to get to .
Lakeview Hotel (Otherworld) - Angela’s End and a Final Judgment
Once you exit the elevator , make your way through the flood to theVenus Tears Bar . Use theRed Save Pointbehind the ginmill and then head through the kitchen area and then toLiquor Storage . catch theRifle Ammothat ’s in there and then practice the gamey crawl space in the wall beside the locked door to get out .
Ahead of you will be a threshold that ’s glow strangely vivid from the other side . Head over and go inside , where a cutscene will run with Angela standing on a igneous stairwell .
This serves as Angela ’s final farewell as she move up the stairs , her circumstances unknown but hinted . James leave to continue on .

Screenshot by Pro Game Guides
Make your agency through the quietus of the Basement , where you ’ll notice there are now some devil butthey will not attack James . They ’re wholly passive , so just leave them be andsave your ammunition . Go into the Manager ’s Office , cross into the TV Room , and follow a hall that leads off the map .
Continue until you derive across a set ofnine Red Save Points . The game plainly insists that you save here , so do so . With that , take a deep breathing time and go through the double doors in front .
Inside is a on the face of it dark and empty room , but abruptly Mary … or rather , Maria ’s vox yells for James . Once again she ’s " alive " but book wrapped now by two Pyramid Heads . Despite James ' pleas , they proceed to stab Maria dead once again , and he yells in frustration .
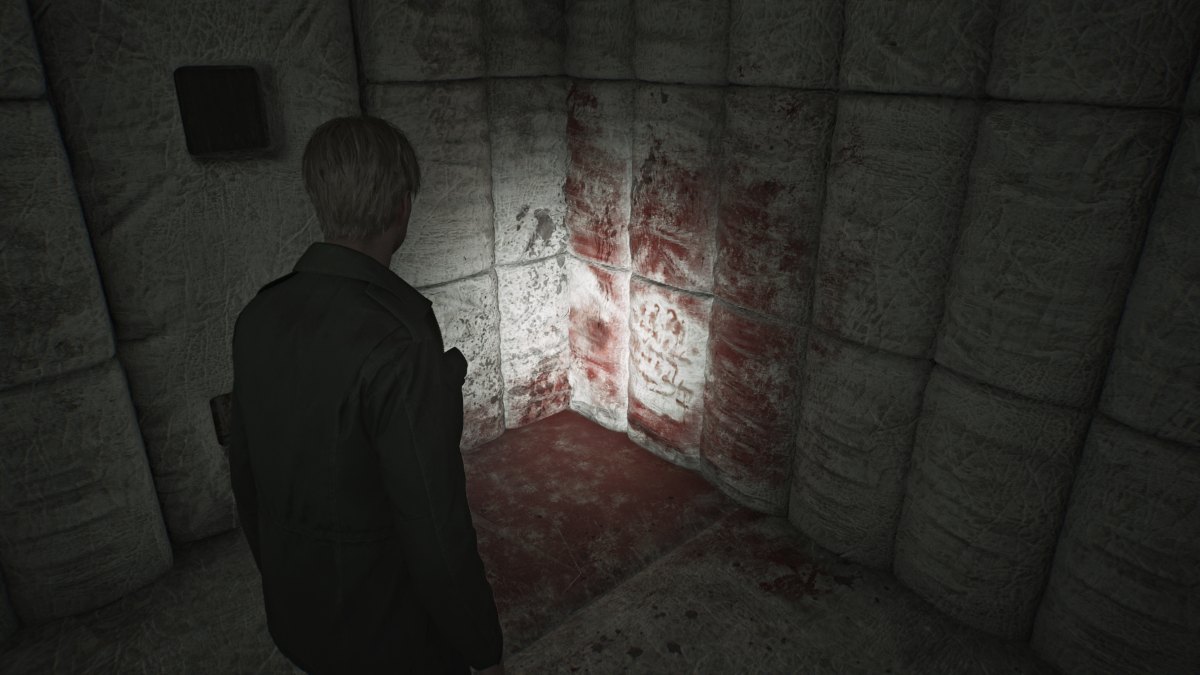
Screenshot by Pro Game Guides
He ultimately makes his confession of needing Maria , an alluring apparition of his deceased wife , to soothe his pain and at the same time punish him for what he ’s done . That punishment has clearly been dealt , and James declares , " I do n’t necessitate you anymore " , likely referring to both Maria and Pyramid Head .
With that , they both approach James with spears in hand , ready to essay that contract .
How to beat Pyramid Head
As soon as James say , " I ’m ready " , the battle begin . Both Pyramid Heads will quickly advance toward you with their spears , and your goal here is to share as much wrong as potential to both of them . You ’ll require every bullet you ’ve produce , and if you need more , there are plenty of ammo boxes and Health Drinks scattered around the room .
Starting with theHunting Rifleis optimal , as it has the salutary scope with the most damage dealt . After that , you caninterchange between the Handgun and Shotgun as ask . Keep your distance as they ’ll both attempt various lunge and stabbing attacks with their spears . Kite them around the room while unloading as many shots as potential , and eventually , a cutscene will trigger .
Both Pyramid Heads will go to the centre of the room and ceremoniously spike themselves with their own shaft . Their judgment has been made , so their presence is no longer involve .
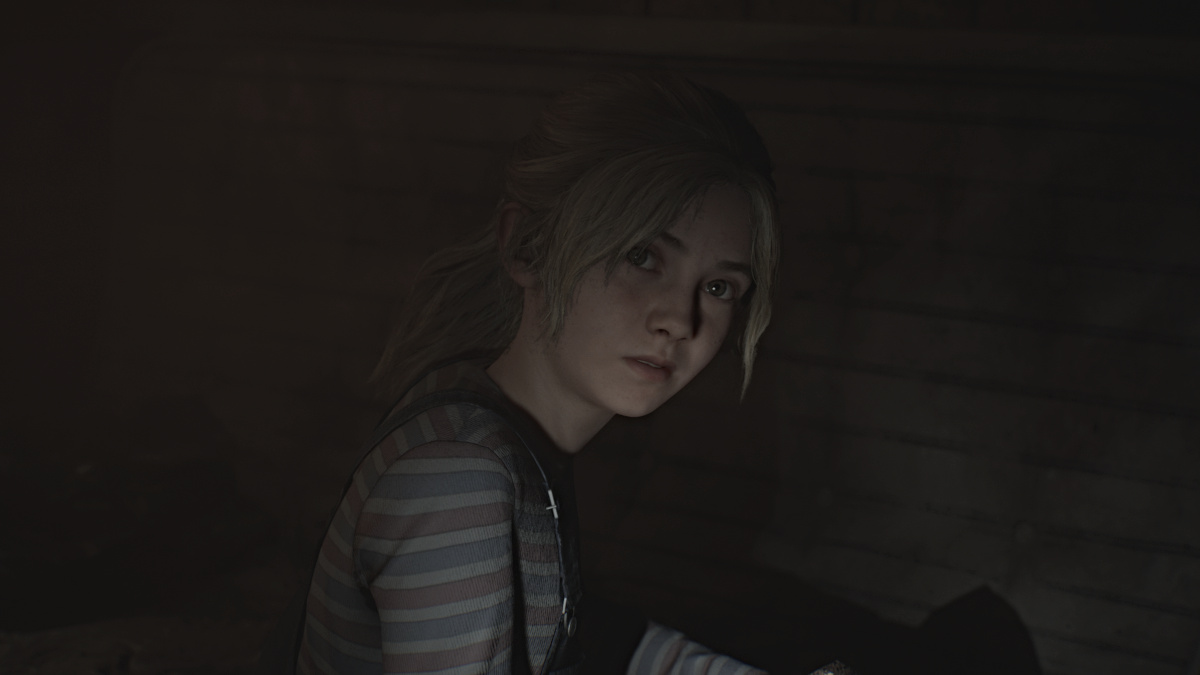
Screenshot by Pro Game Guides
come on them and take theScarlet EggandRust - colored Eggfrom their hands . apply these to unlock the doorway that moderate out .
The " testis door " you prefer to take the air through can affect the ending . If you take the Scarlet Egg , it can influence the " Maria " terminate . The Rust - Colored Egg will regulate the " In Water " terminate .
You ’ll arrive back outside on a metal walkway , where there are several more ammo cartridge to foot up , along with a Syringe and the"SHAPE FORCES THE judgement " Strange Photoat the back right quoin .
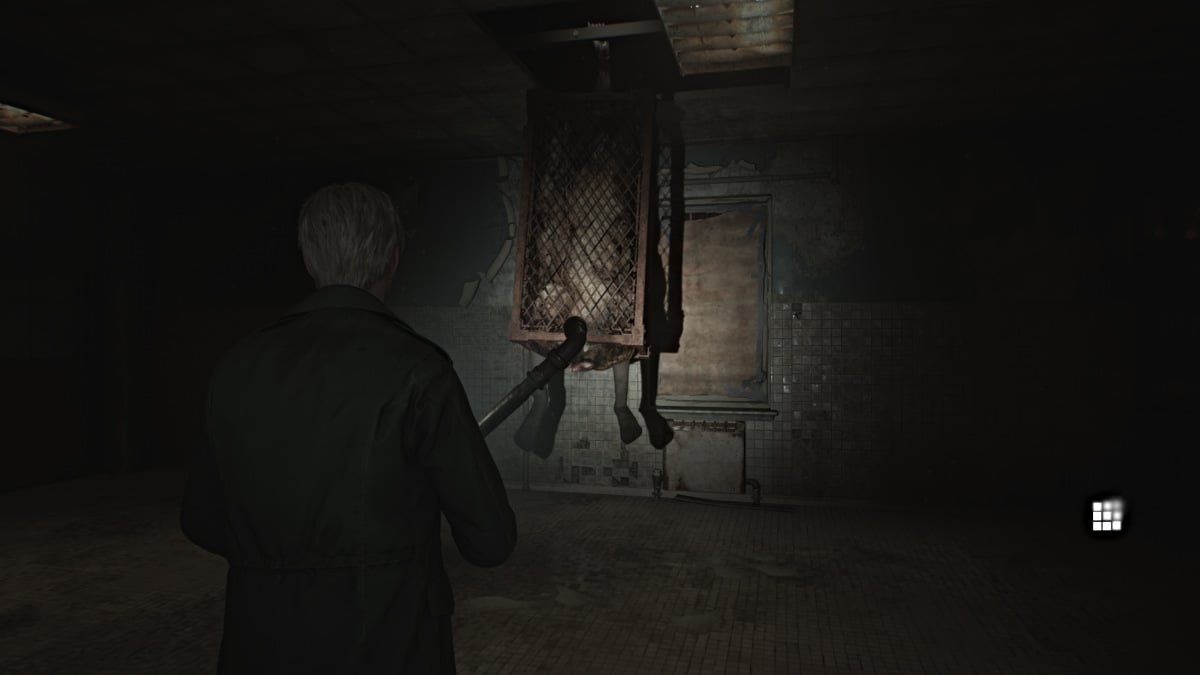
Screenshot by Pro Game Guides
Reload all your weapon , top off your health , and head all the way up the step until you strain the top of the edifice . From here , a cutscene with Mary will dally that ’s influenced by your decisions up to that point in the plot . How you treated Maria , whether you looked at certain items often , whether you preserve your health high-pitched or dispirited , etc . They will all affect the subsequent ending as well .
How to beat Mary and Ending
Once Mary ( or Maria ) succumbs to her turmoil and transform into a atrocious version of herself , you ’ll be forced to fight her to ultimately convey peace or at least some sort of conclusiveness .
Like the Flesh Lips hirer much in the beginning in the plot , she ’ll be incase in a float cage , and you ’ll need to keep your distance and deal damage , preferably with either yourHunting Rifle or Handgun . She also uses flocks of moths to furrow and treat ranged damage to James , while also using a tentacle appendage to manage brutal stabbing attacks .
Once you handle enough damage , the John Milton Cage Jr. surrounding Mary will morph into something akin to a wanderer , also alike to Flesh Lips ' 2d flesh . She ’ll force James down into a dingy passage surface area right underneath the alloy platform , and you ’ll demand to do harm whenever she appears from above .

Screenshot by Pro Game Guides
The last phase angle of the fight will collapse the intact area , and you ’ll need to keep shoot while dodging her charge and golf shot attack with her metal " leg " . Her attacks hit hard , so be certain to continue crown off as much as potential . This is the terminal boss of the biz , so make utilization of everything you have .
Eventually , her John Cage will collapse , leaving her unable to move and maunder James ' name . Go over and spud one last time to end the fight .
Afterward , your designate ending will flirt out , again count on your actions up to now . extolment !
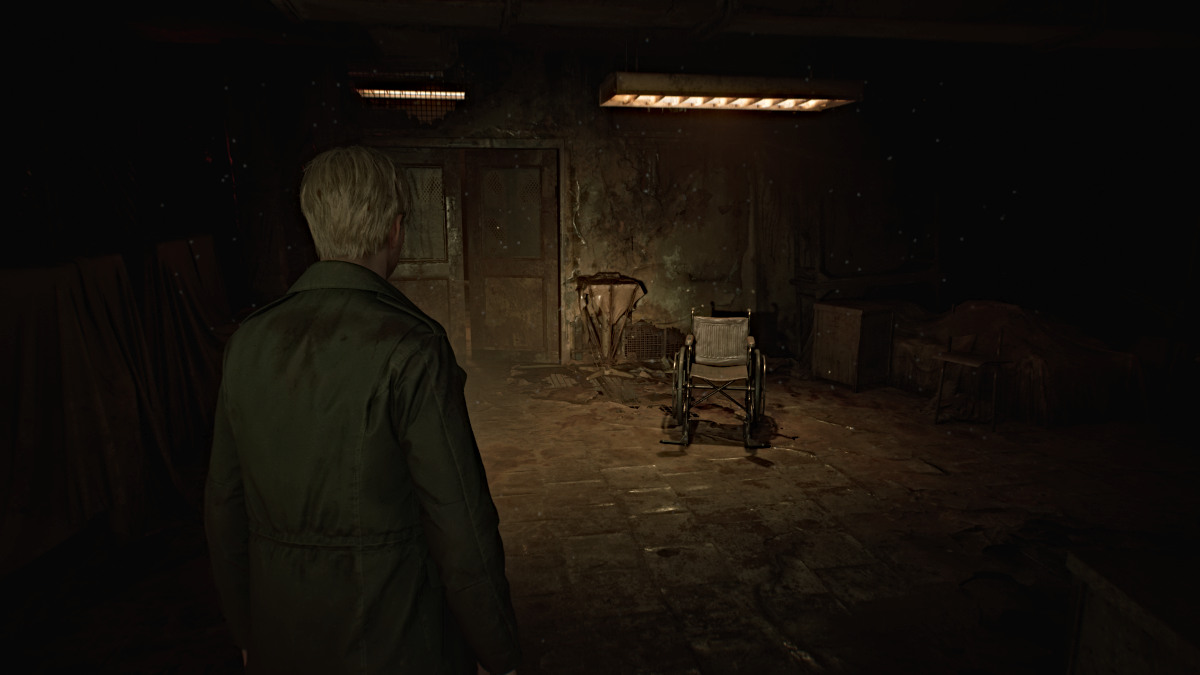
Silent Hill 2 Remake Walkthrough - All Achievements/Trophies
Below we ’ve list all 43 unlockable achievements / trophies in Silent Hill 2 Remake , including 31 hidden ones . Unlocking all of them will require multiple playthroughs .
All Silent Hill 2 Remake Endings (Walkthrough)
There are a total ofeight potential endingsin Silent Hill 2 Remake , and each has its own requirements to be unlatched . Only three specific endings ( " will " , " Maria " , and " In Water " ) can be hold during your first playthrough , while the rest can be unlock during New Game Plus .
Ending 1 - Leave
This is the " Best " ending for Silent Hill 2 Remake , as the story terminate with James leaving Silent Hill with Laura in towage , having received pardon from Mary and realizing that he ’s permit to move on . He and Laura leave Silent Hill together , and it ’s assumed that James adopts her as his girl , since Mary was n’t able to .
requirement for this termination :
get under one’s skin this ending also unlock the’Making Peace ' accomplishment .
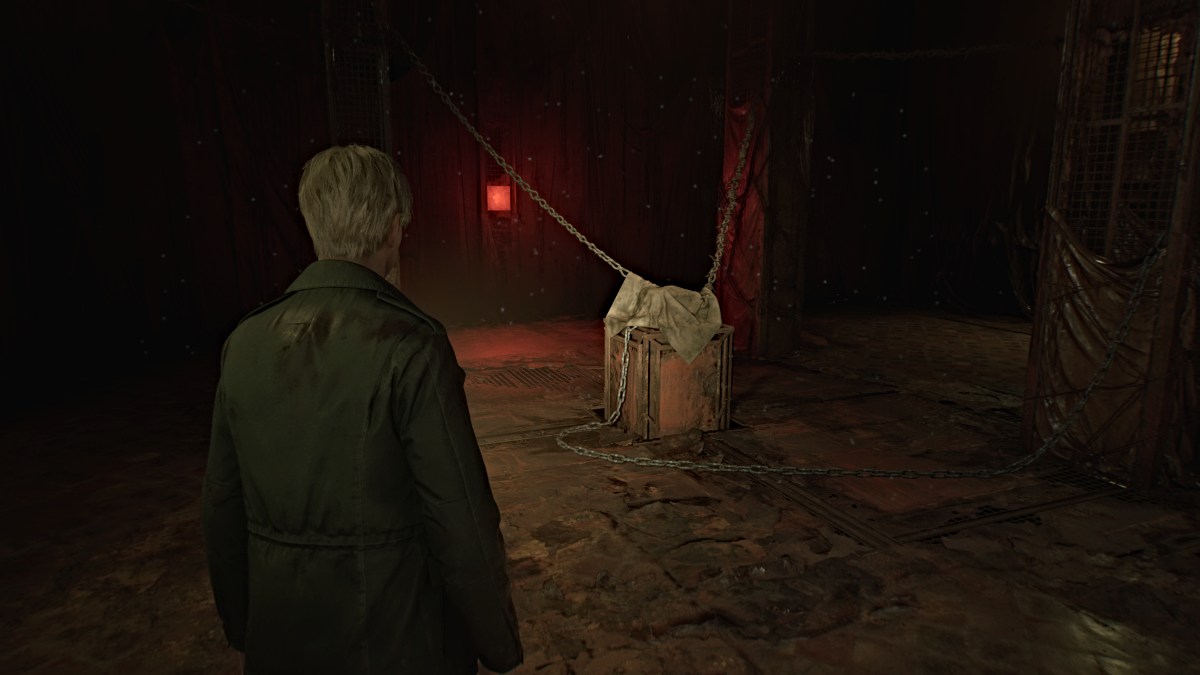
Screenshot by Pro Game Guides
Ending 2 - Maria
This is the designated " Bad " ending , as James alternatively pass on Silent Hill with Maria , having choose her over Mary . At one point , Maria let out a coughing fit and James pretend get at , differentiate her to do something about it . He ’s discover nothing from his journeying and Maria is likely doomed to succumb to the same illness that took Mary , the bike commence all over again .
Getting this ending also unlocks the’Vicious Circle ' achievement .
Ending 3 - In Water
Debatably another " spoiled " ending , this is utterly the most tragic ending in Silent Hill 2 Remake . After everything , James finds himself ineffectual to move on from Mary ’s expiry and confess that he simply ca n’t live without her in his life . James drives his car into the depths of Toluca Lake in an attempt to reunite with Mary in death .
have this ending also unlock the’Only Way Out ' achievement .
Ending 4 - Rebirth
In this end , after obtaining all the necessary ritual items James lead Mary ’s body and rows out to the island in the heart of Toluca Lake , where an erstwhile Christian church is locate . While its history is enshroud in mystery , James is determined to revive Mary using a unusual ritual there , and we never bang if it in reality works .
Getting this ending also unlocks the’Defy Even last ' achievement .
Ending 5 - Dog
This is one of the biz ’s two comical conclusion , and plausibly its most ill-famed . It has James open up a room access at the Lakeview Hotel to reveal a Shiba Inu dog name Mira sitting at a crowing reckoner console , controlling everything that ’s hap in Silent Hill up to that point .
Getting this terminate also unlock the’The Goodest Boi ' achievement .
Ending 6 - UFO
The second funny ending , award as a silent film sequence , also takes position at the Lakeview Hotel and sees extraterrestrial in reality chitchat James along with a uproarious cameo of a character from the original game .
Getting this ending also unlock the’Tinfoil Hat ' achievement .
Ending 7 - Stillness
This is the first of two new endings added in Silent Hill 2 Remake , and it acts as a sort of enlargement of the " In Water " ending . As James carry that he merely ca n’t live without Mary , in this version she appears next to him in the car , soothing him with her touch and phonation .
James postulate if she ’ll hold off for him , and Mary insist that she ’s " always been waitress for him " . The scene ends there , likely meaning that James choose to subsist or else .
Ending 8 - Bliss
This is the second of two new endings sum in Silent Hill 2 Remake , and it basically deliver the tape shot in the Lakeview Hotel much other than . Instead of the tape showing Mary ’s visible symptoms of sickness and her dying , James stays behind the camera in their hotel way and finally puts it down as they continue pack . He promises to bestow her back to Silent Hill , and the tape finish .
In the nowadays , James is no longer sitting in the professorship , ostensibly gone . It alludes that because of the change in upshot on the taping , Mary was never unbalanced and thus was never toss off , meaning that the events of Silent Hill 2 , at least for James , never encounter .
Be certain to assure out all of our latest play guide and word for the Silent Hill franchise here at Pro Game Guides , such asSilent Hill the Short Message walkthrough .
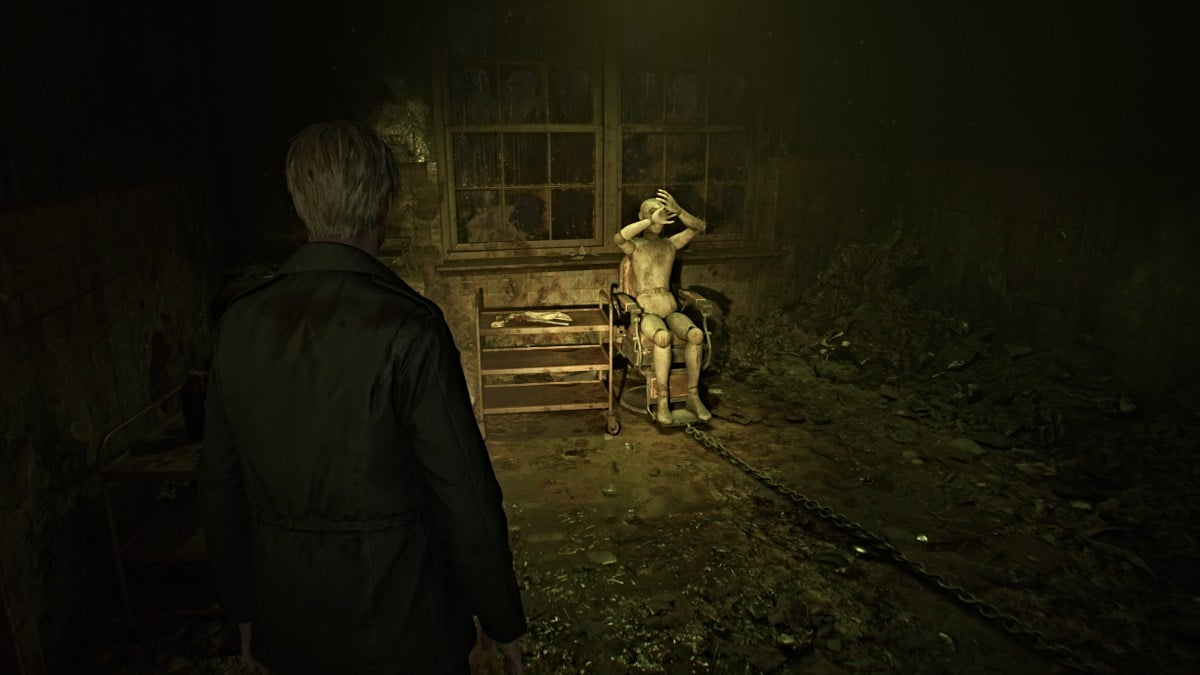
Screenshot by Pro Game Guides
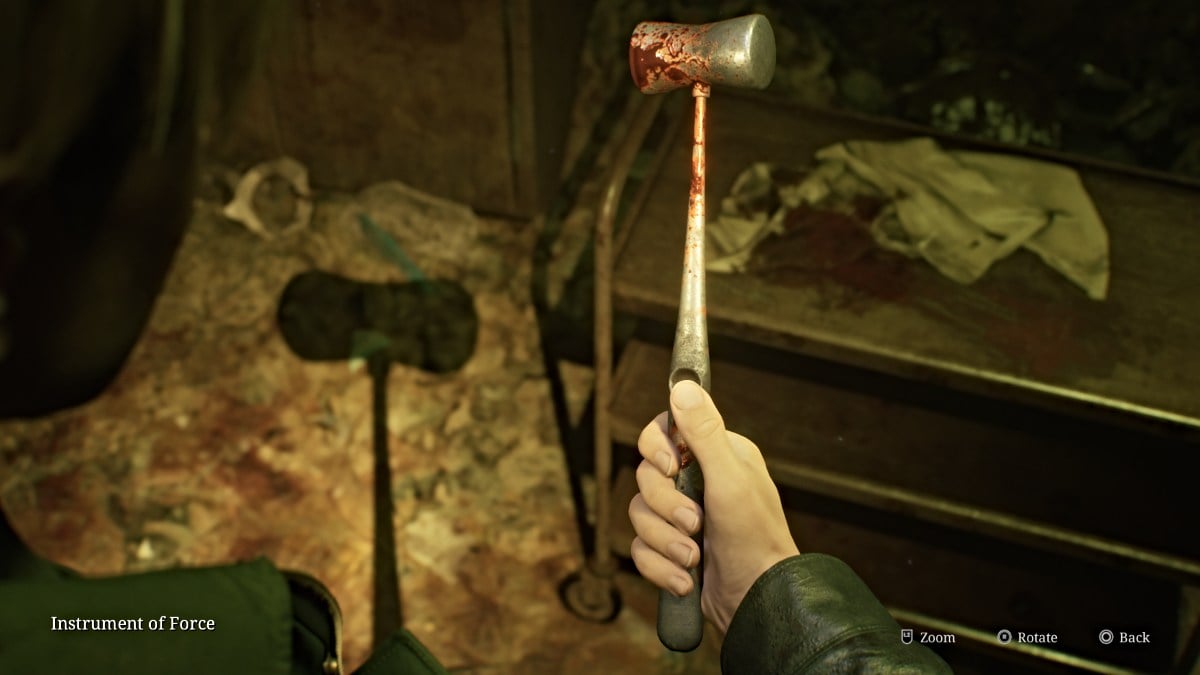
Screenshot by Pro Game Guides
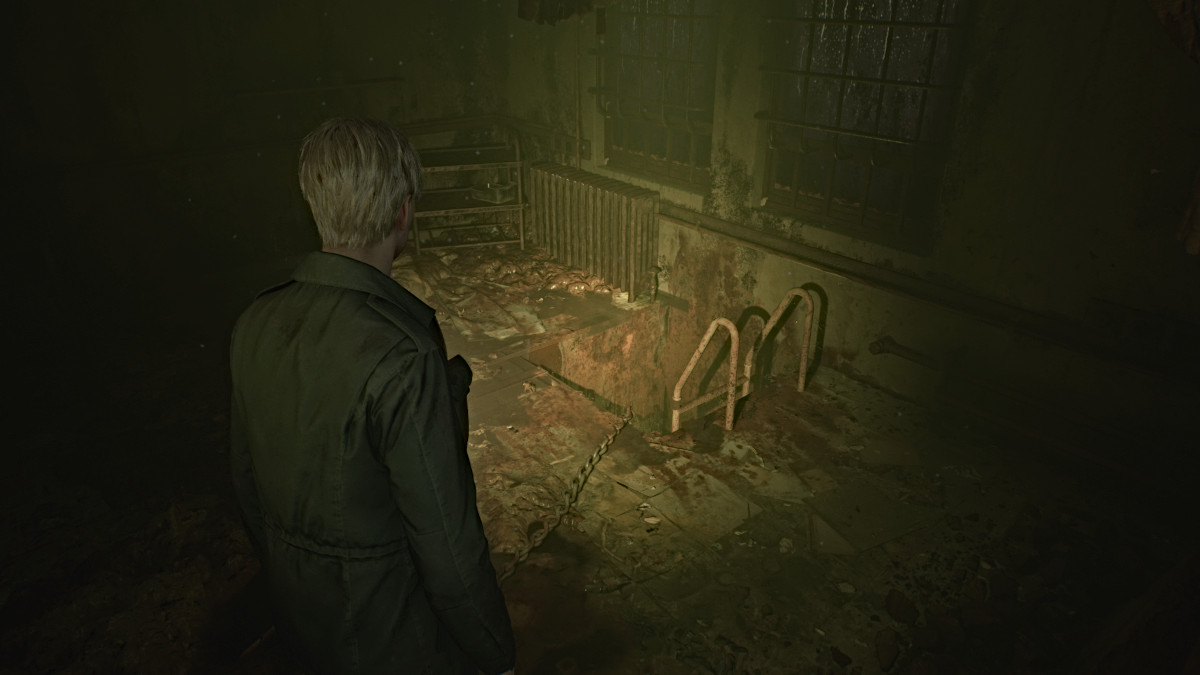
Screenshot by Pro Game Guides
Screenshot by Pro Game Guides
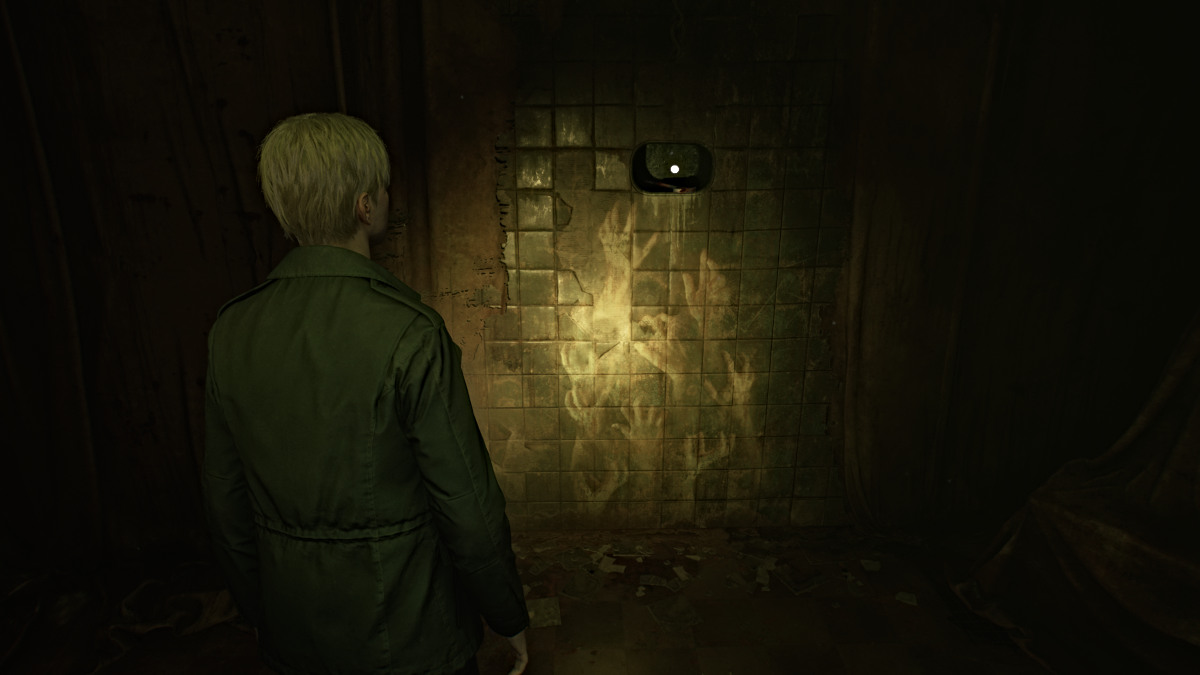
Screenshot by Pro Game Guides
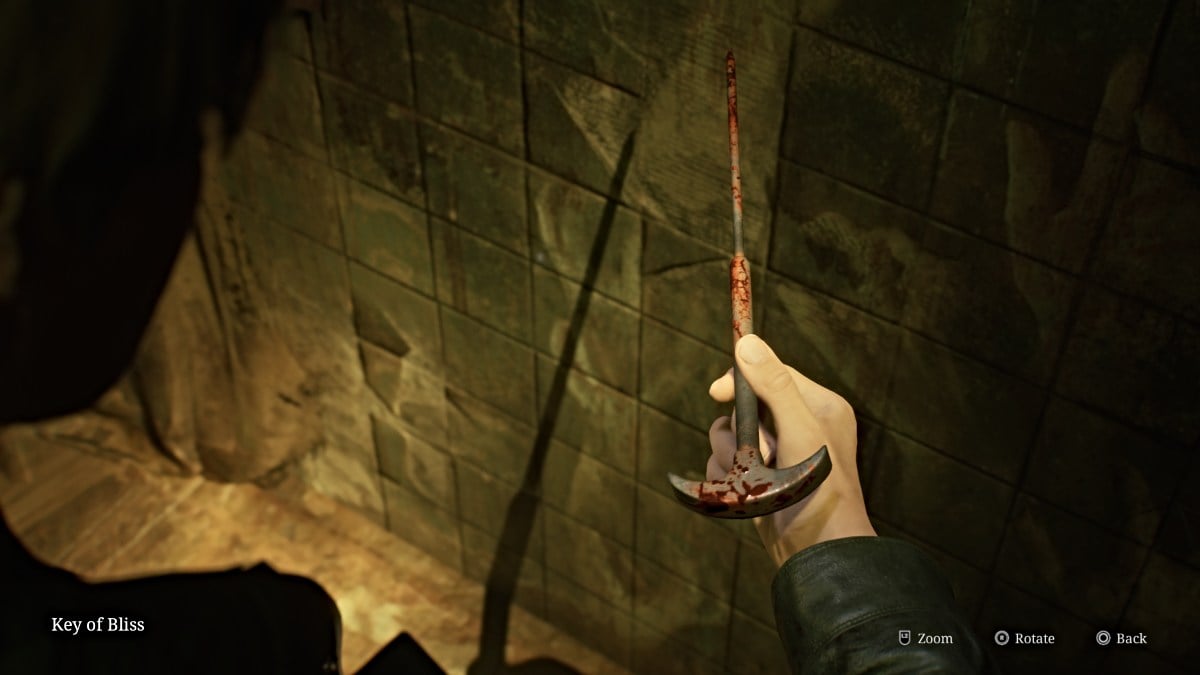
Screenshot by Pro Game Guides

Screenshot by Pro Game Guides

Screenshot by Pro Game Guides
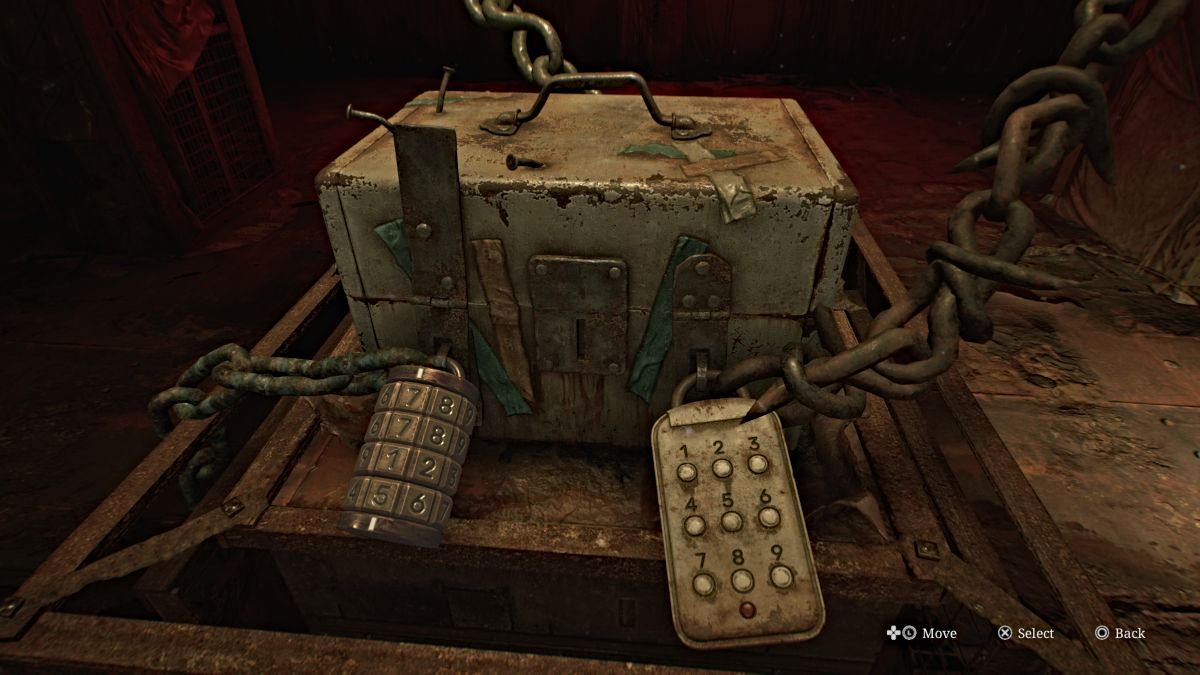
Screenshot by Pro Game Guides

Screenshot by Pro Game Guides
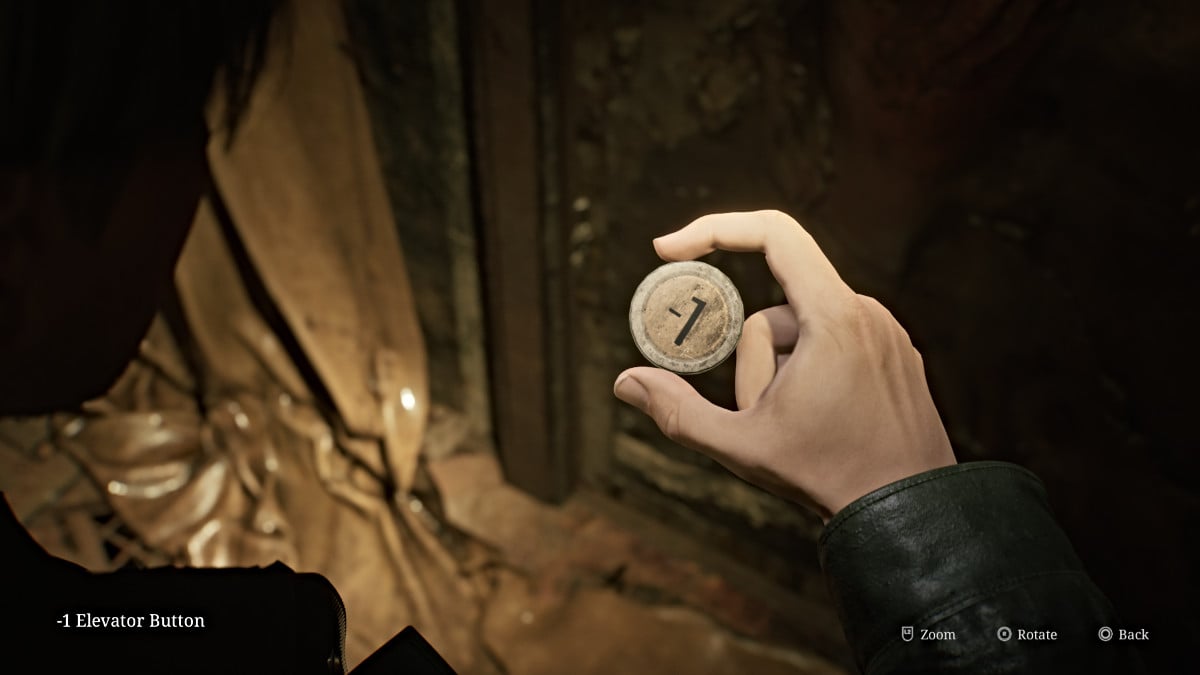
Screenshot by Pro Game Guides
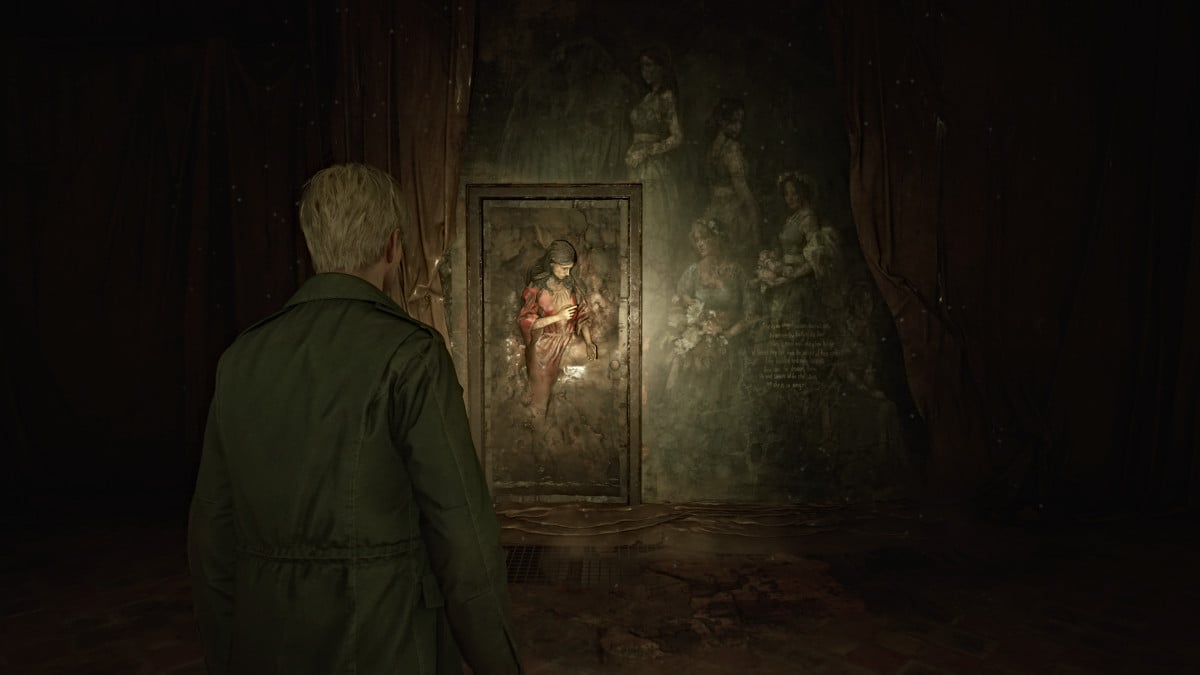
Screenshot by Pro Game Guides
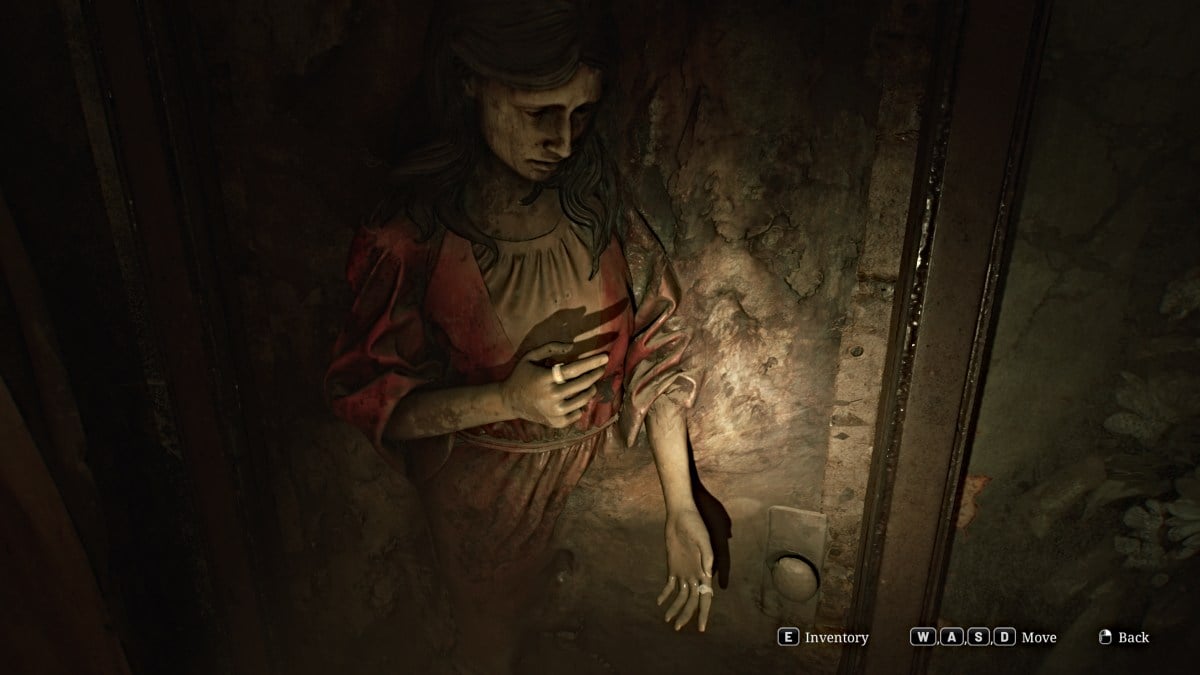
Screenshot by Pro Game Guides
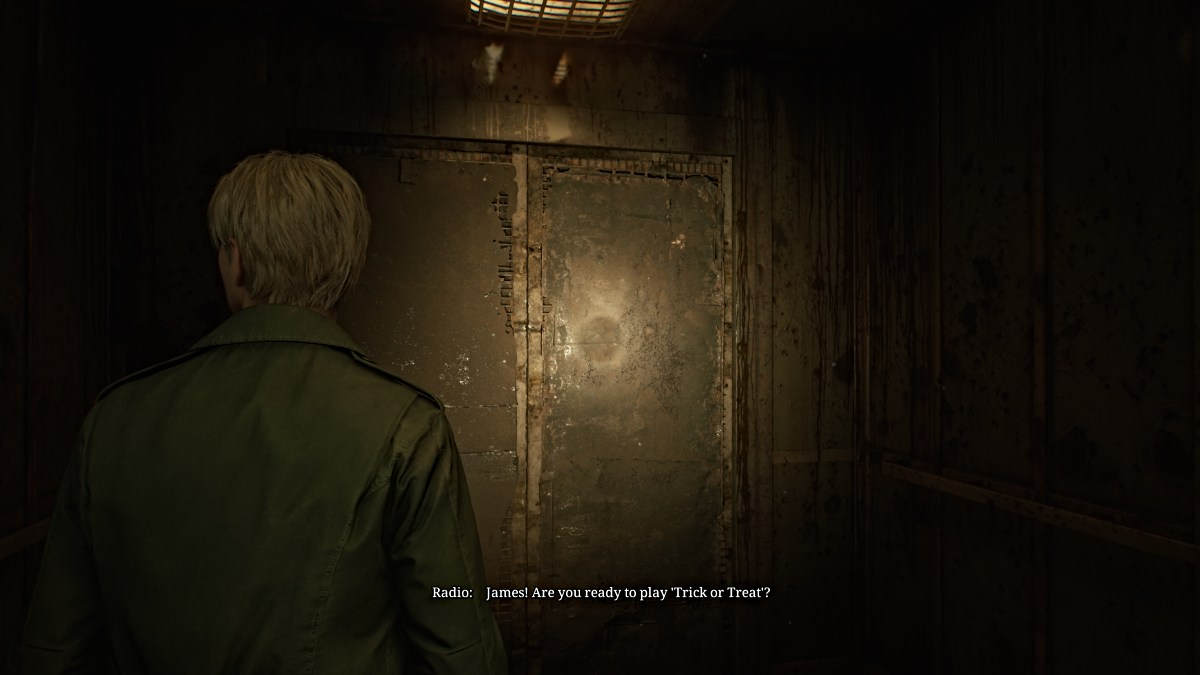
Screenshot by Pro Game Guides

Screenshot by Pro Game Guides

Screenshot by Pro Game Guides

Screenshot by Pro Game Guides
Screenshot by Pro Game Guides
Screenshot by Pro Game Guides
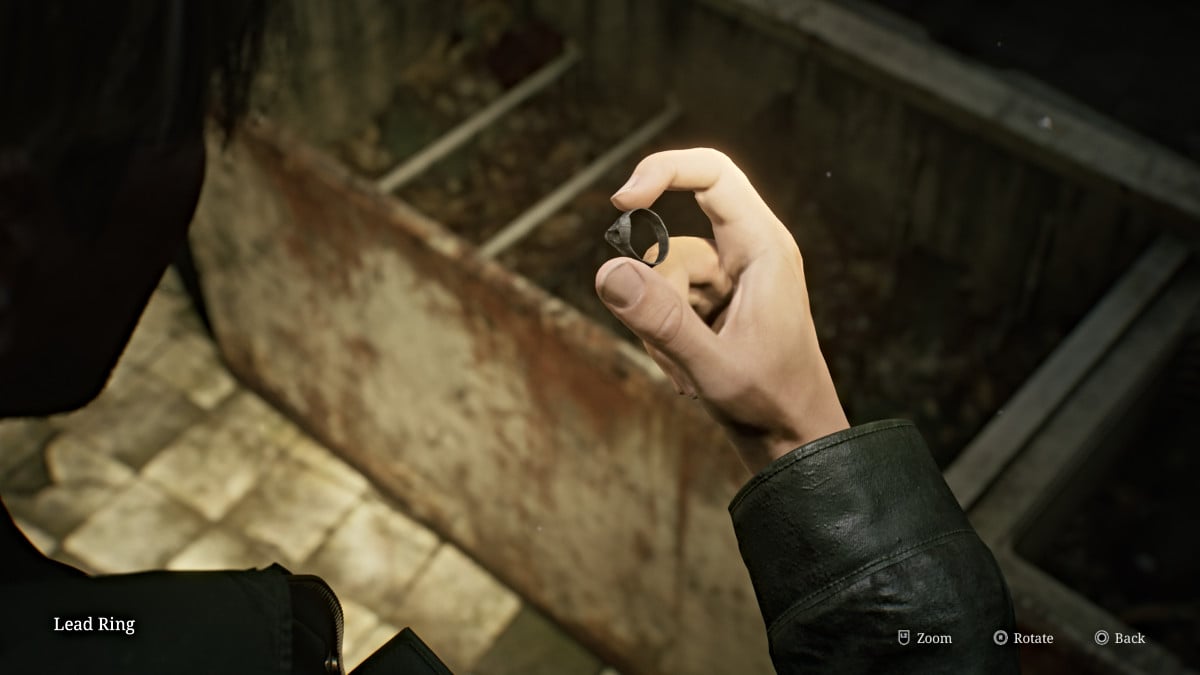
Screenshot by Pro Game Guides
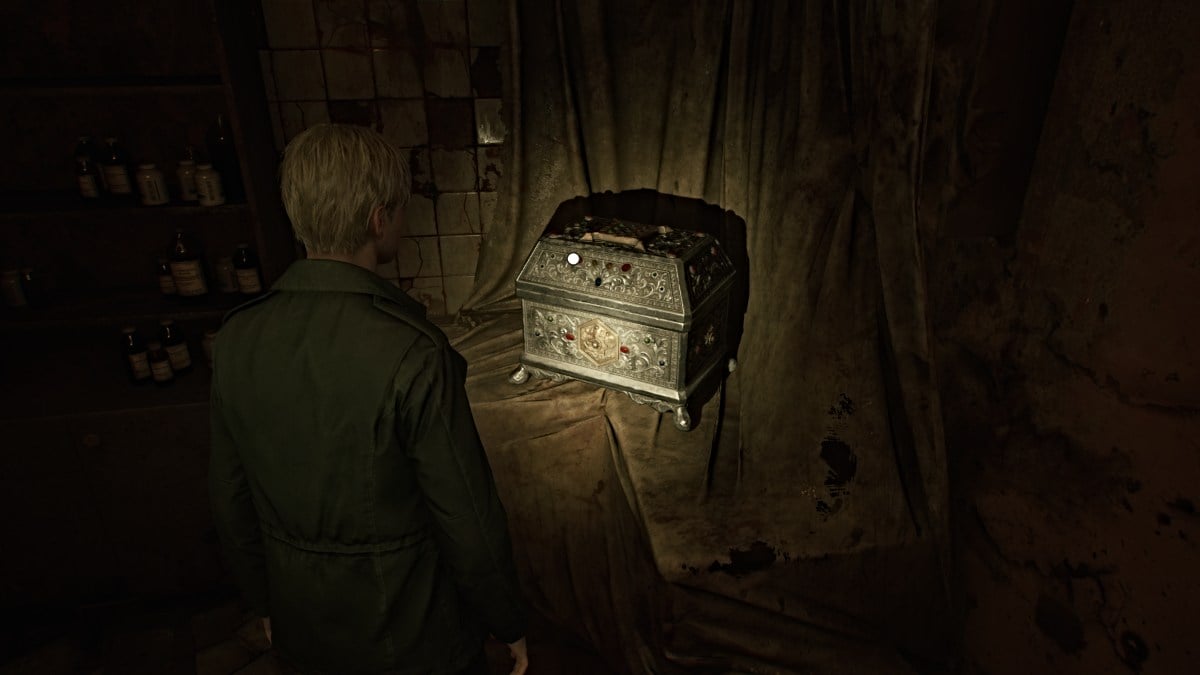
Screenshot by Pro Game Guides
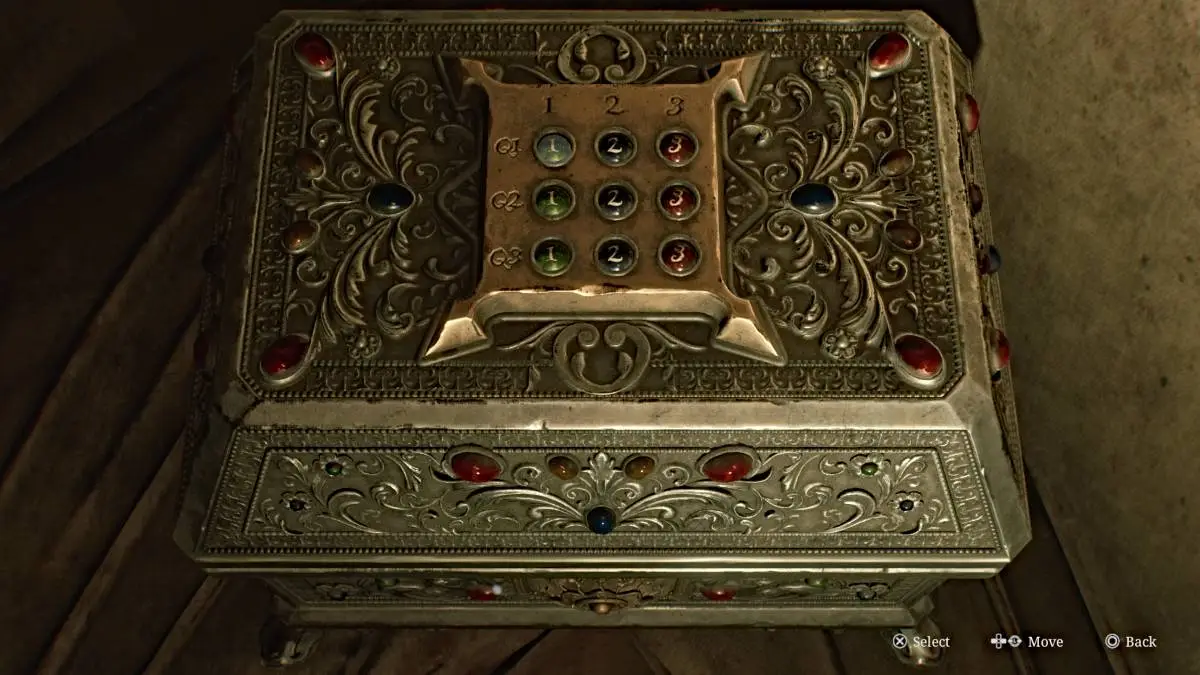
Screenshot by Pro Game Guides
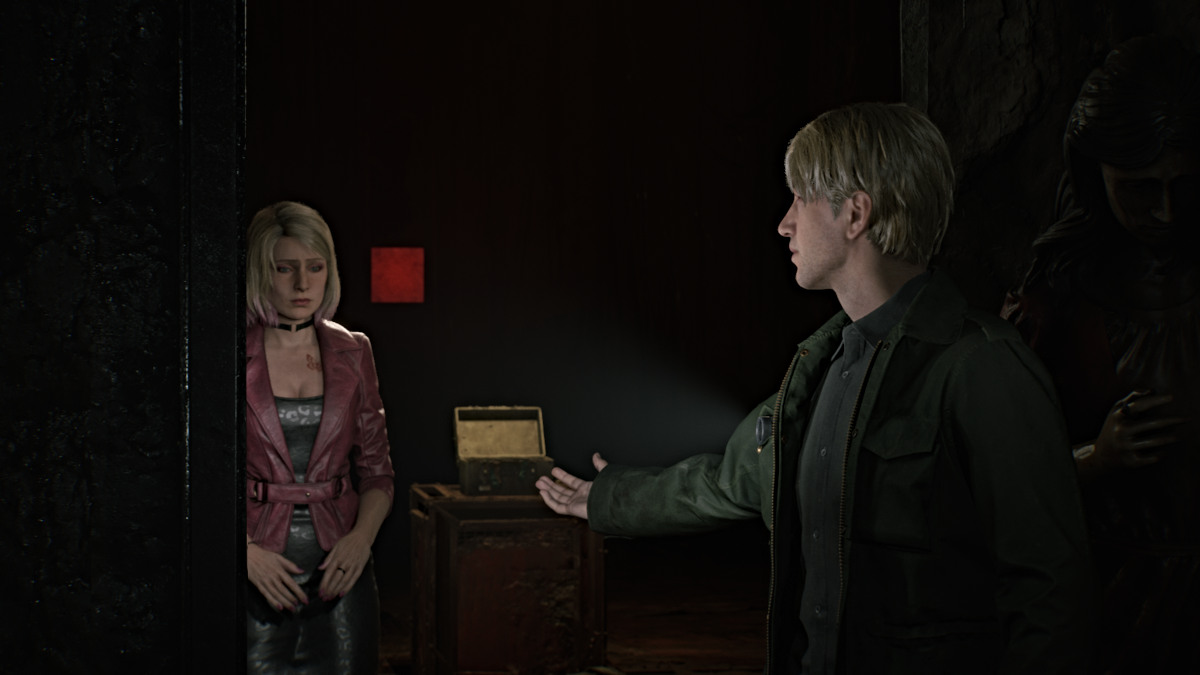
Screenshot by Pro Game Guides

Screenshot by Pro Game Guides
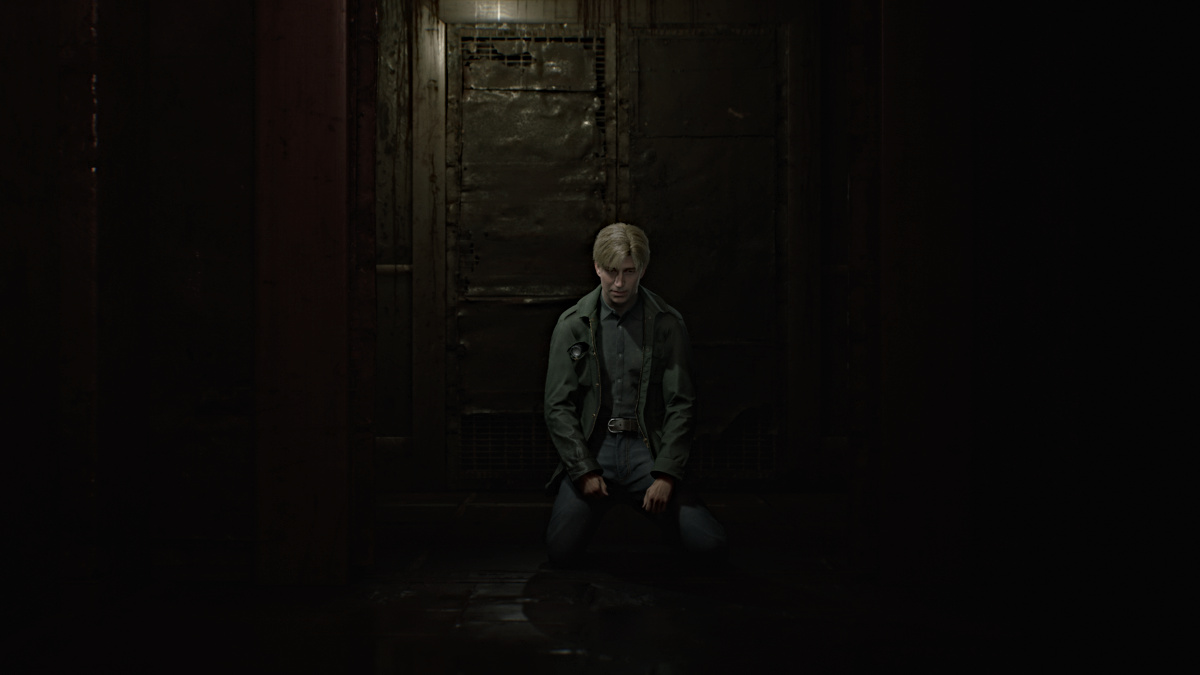
Screenshot by Pro Game Guides

Screenshot by Pro Game Guides
Screenshot by Pro Game Guides
Screenshot by Pro Game Guides
Screenshot by Pro Game Guides
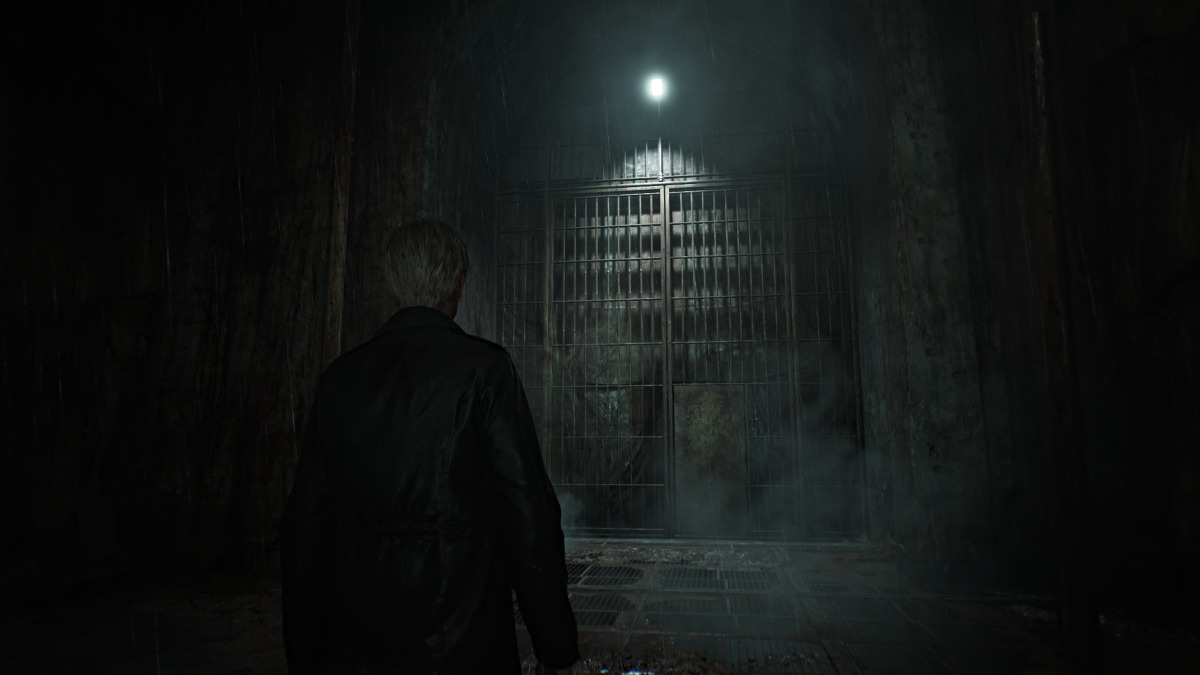
Screenshot by Pro Game Guides
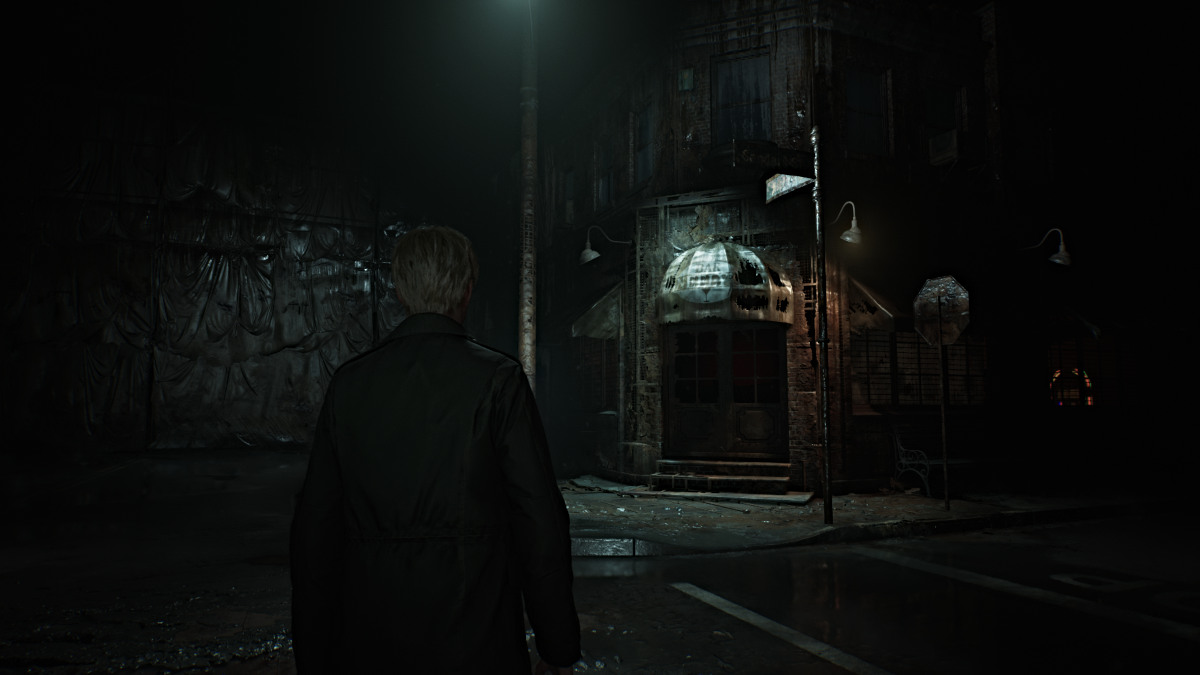
Screenshot by Pro Game Guides
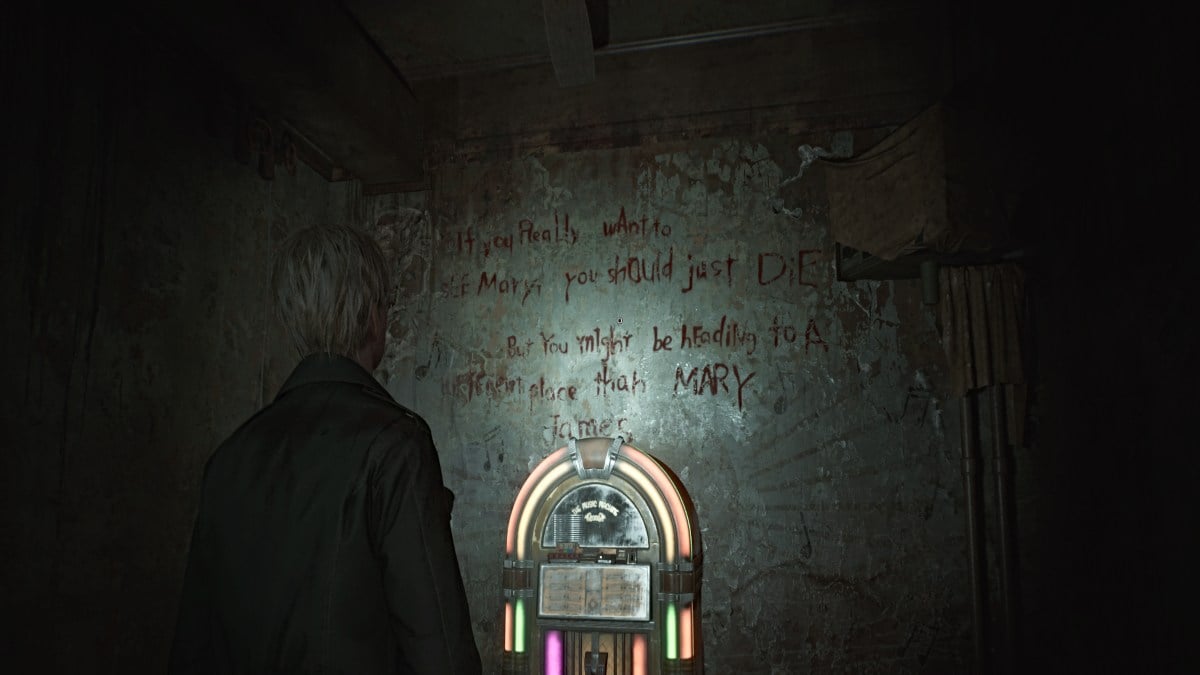
Screenshot by Pro Game Guides
Screenshot by Pro Game Guides
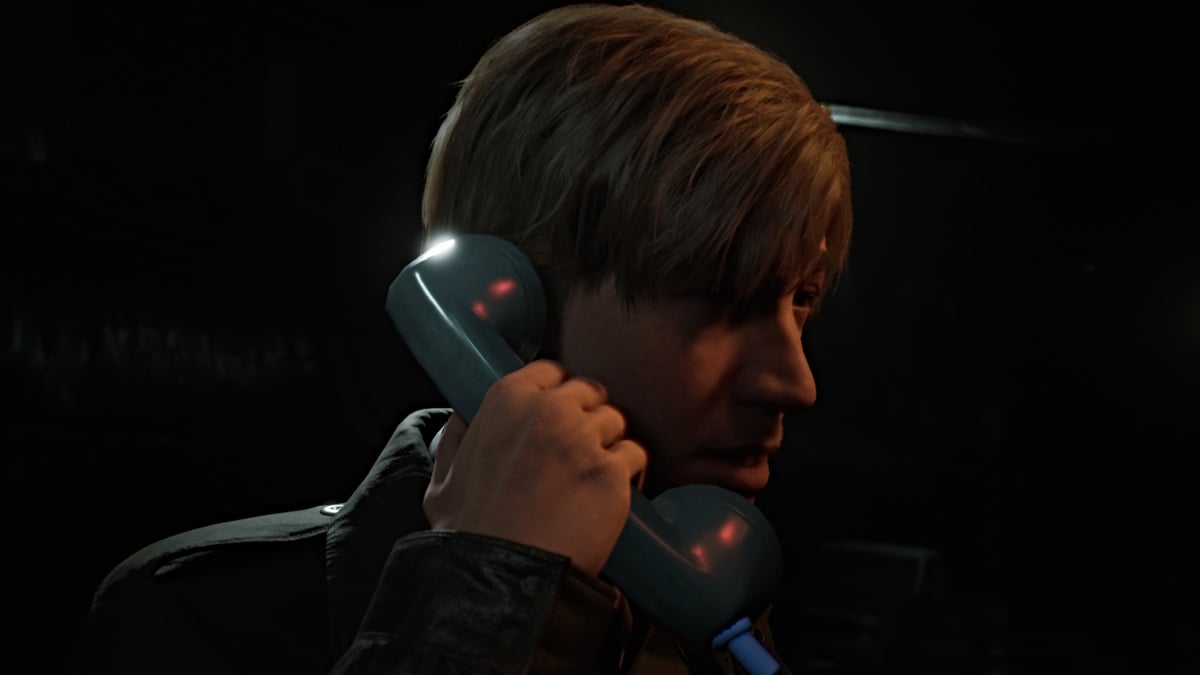
Screenshot by Pro Game Guides
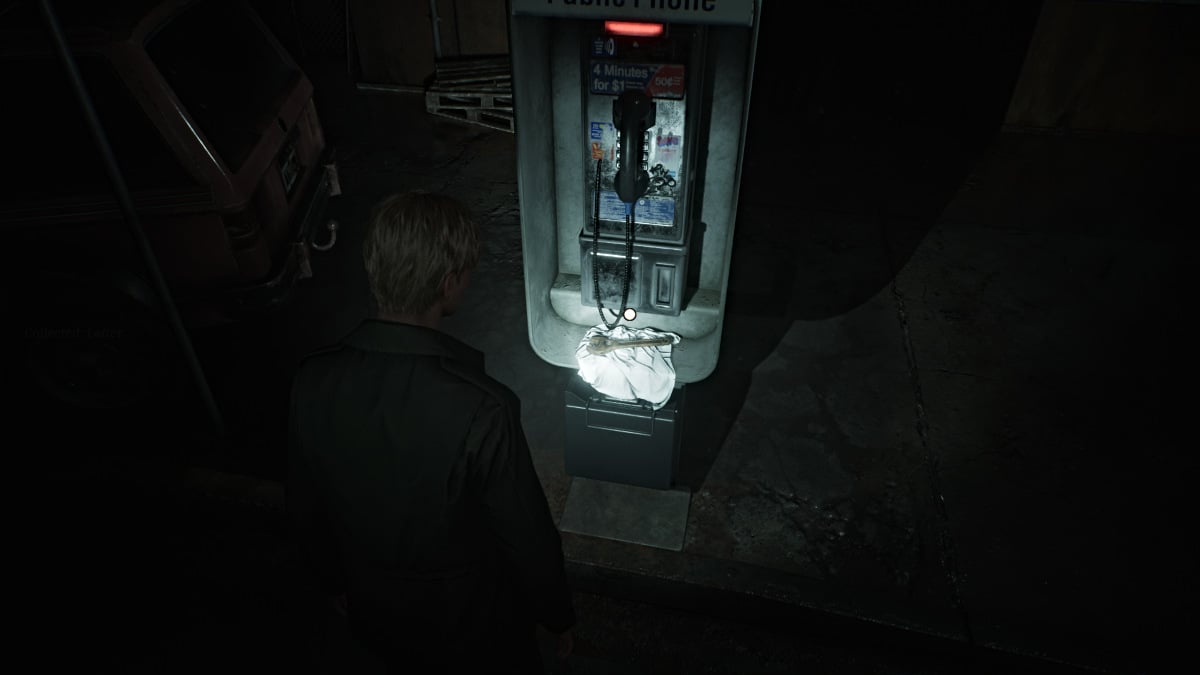
Screenshot by Pro Game Guides
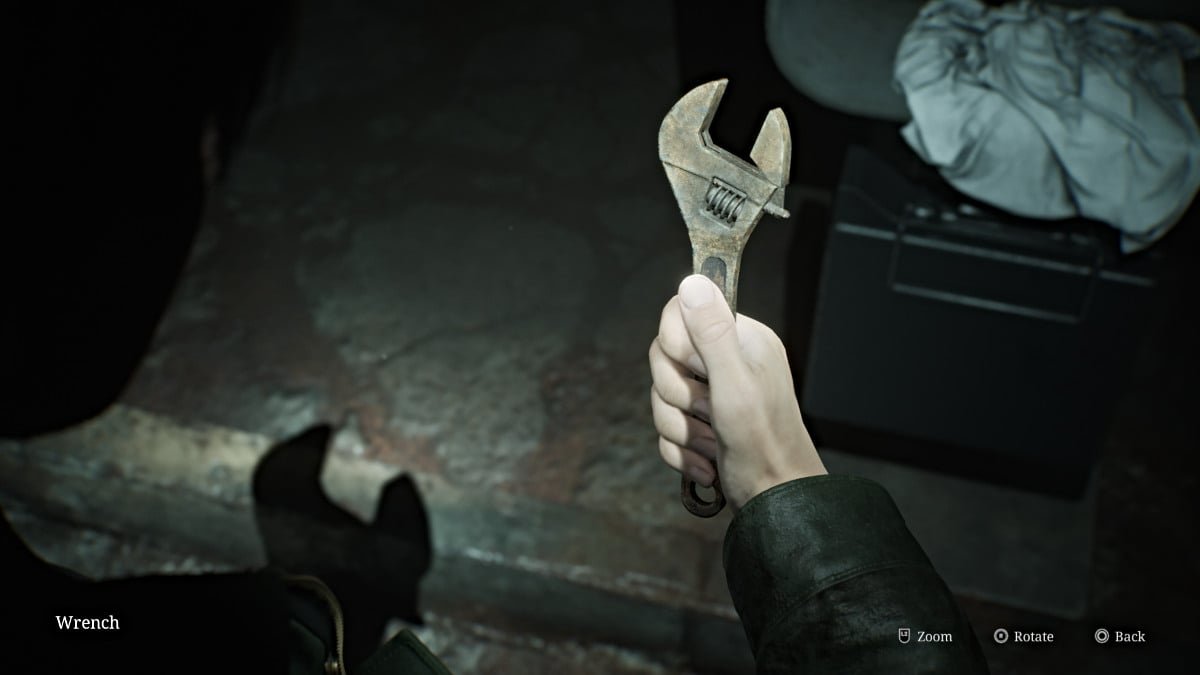
Screenshot by Pro Game Guides
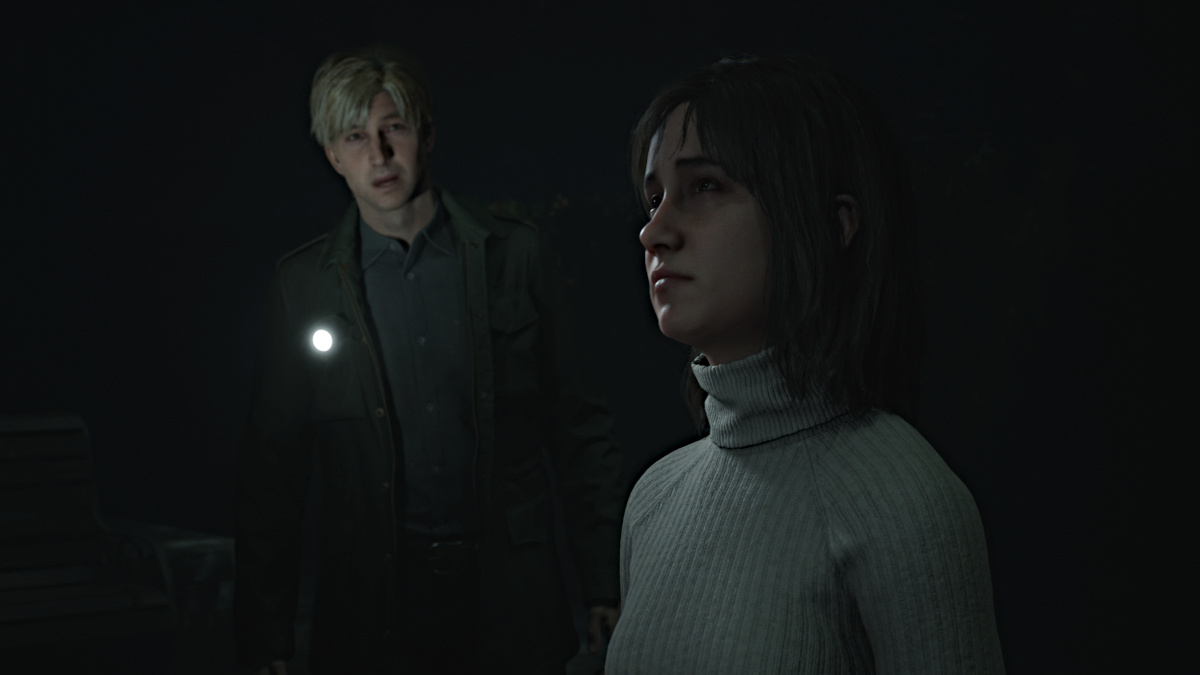
Screenshot by Pro Game Guides
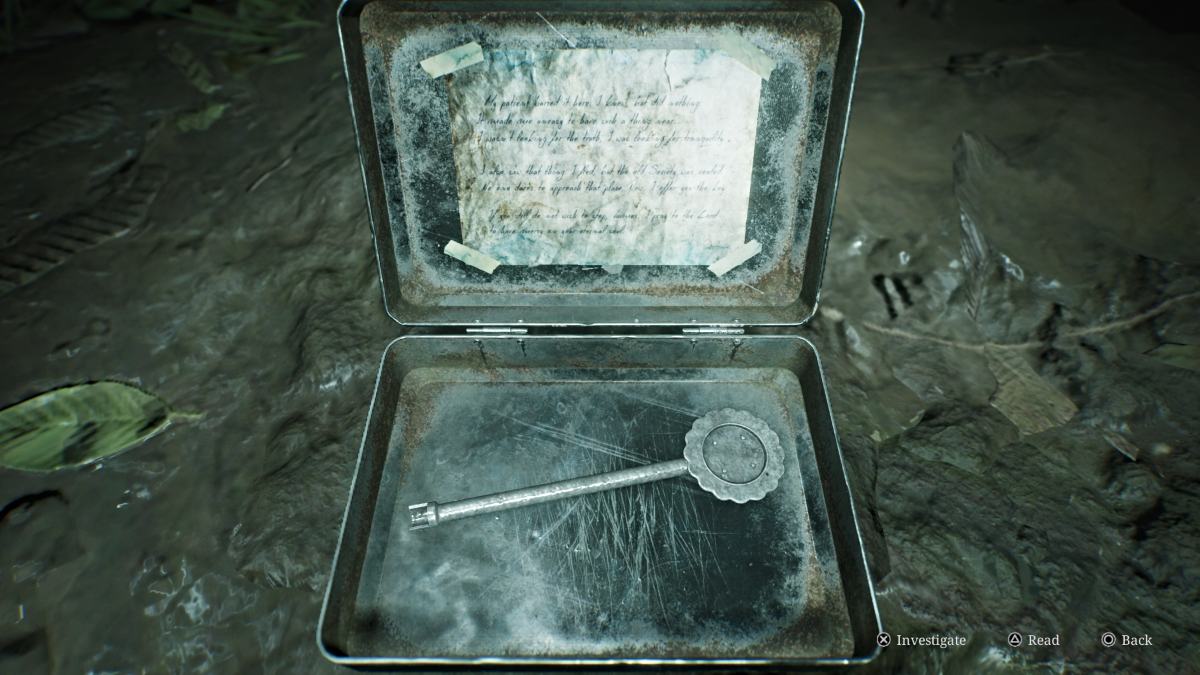
Screenshot by Pro Game Guides
Screenshot by Pro Game Guides
Screenshot by Pro Game Guides
Screenshot by Pro Game Guides
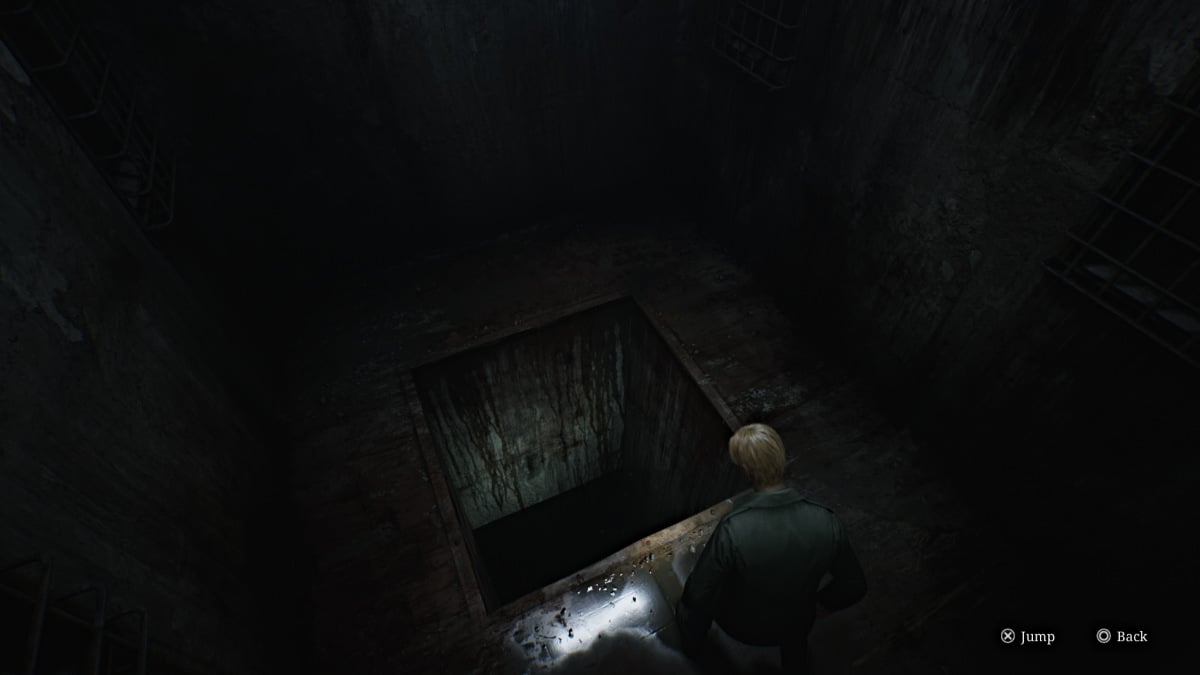
Screenshot by Pro Game Guides
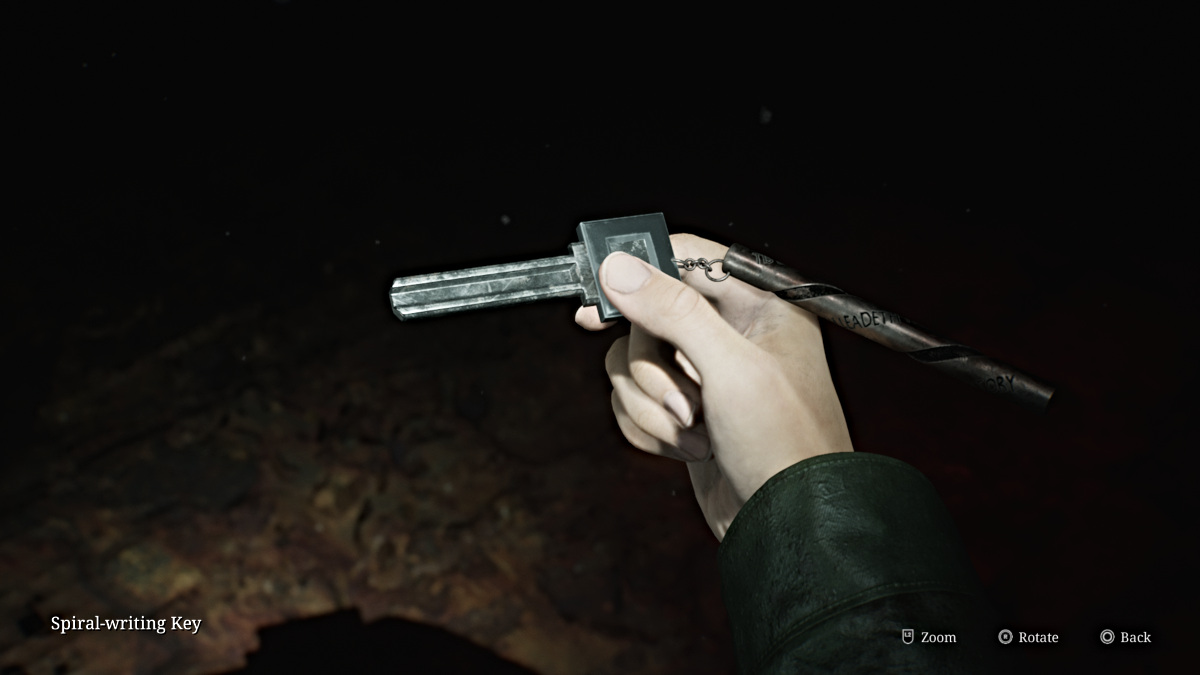
Screenshot by Pro Game Guides
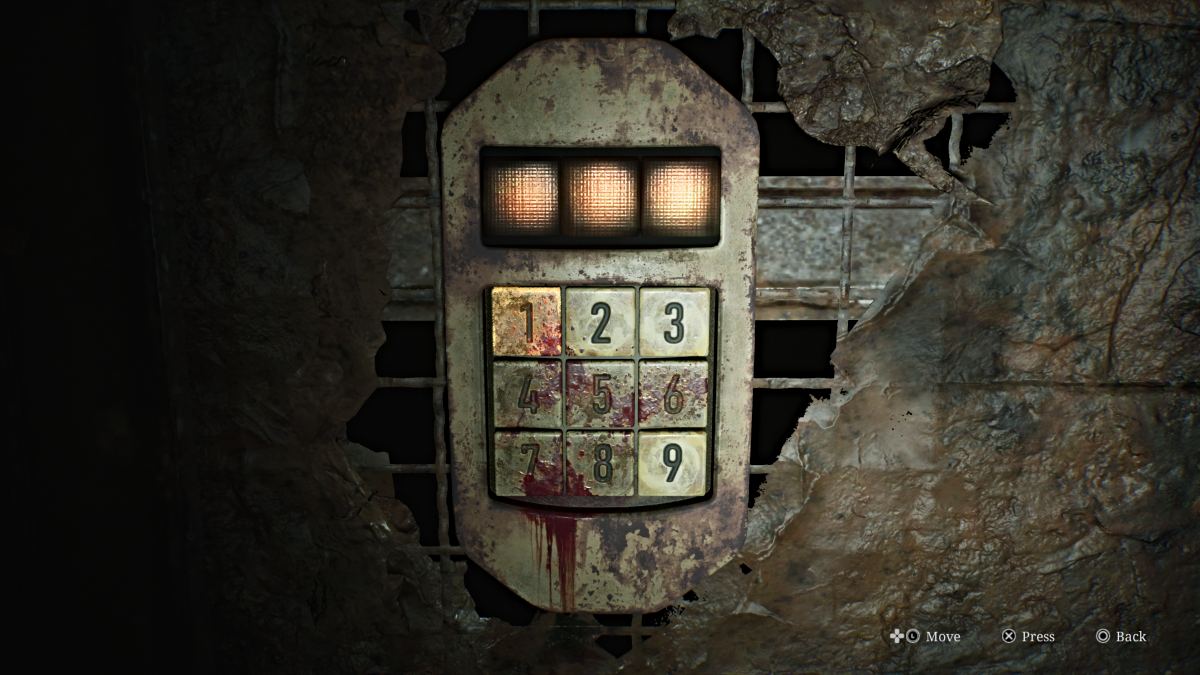
Screenshot by Pro Game Guides
Screenshot by Pro Game Guides
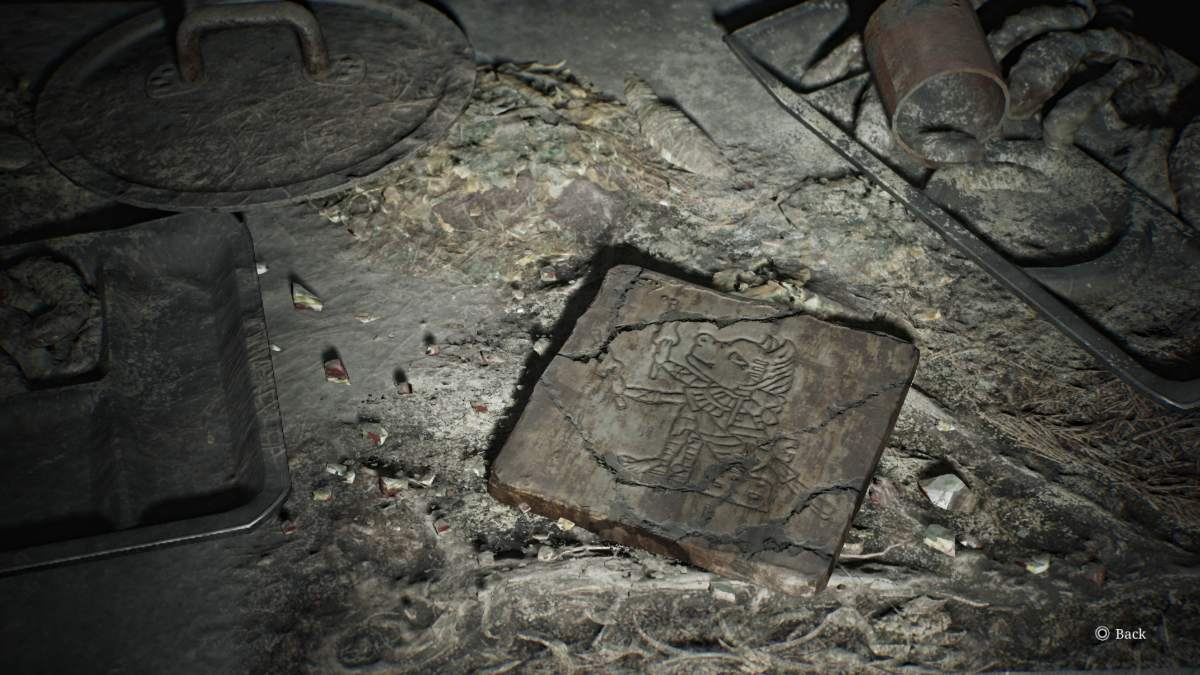
Screenshot by Pro Game Guides
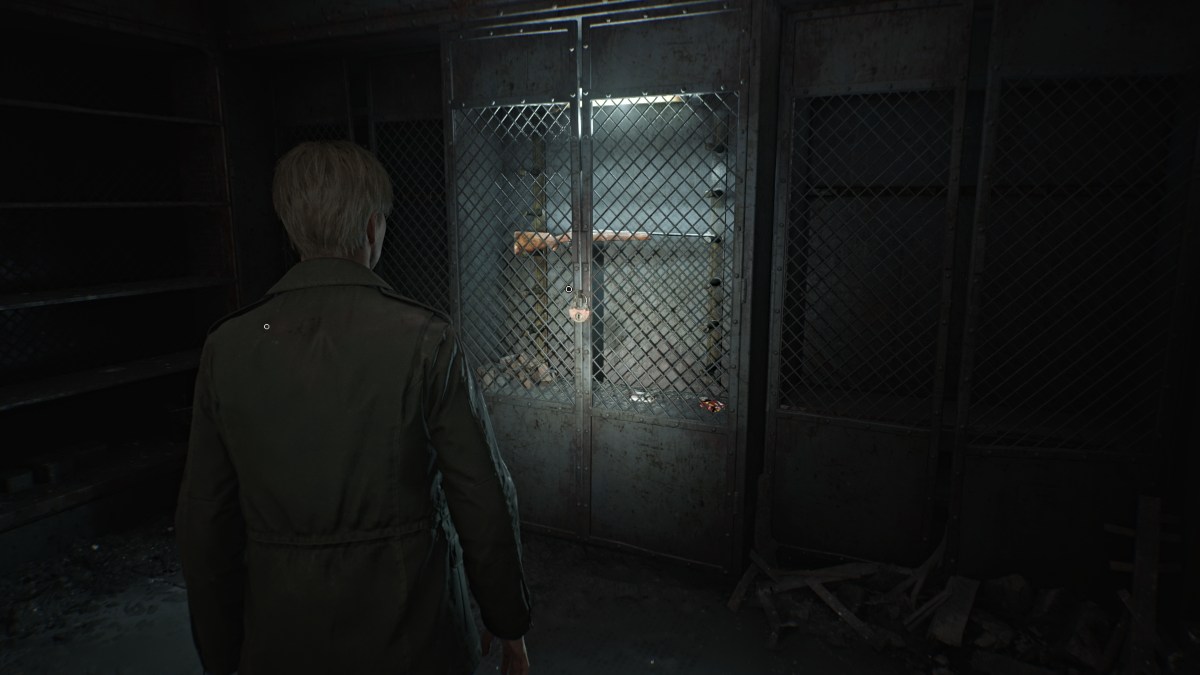
Screenshot by Pro Game Guides

Screenshot by Pro Game Guides
Screenshot by Pro Game Guides
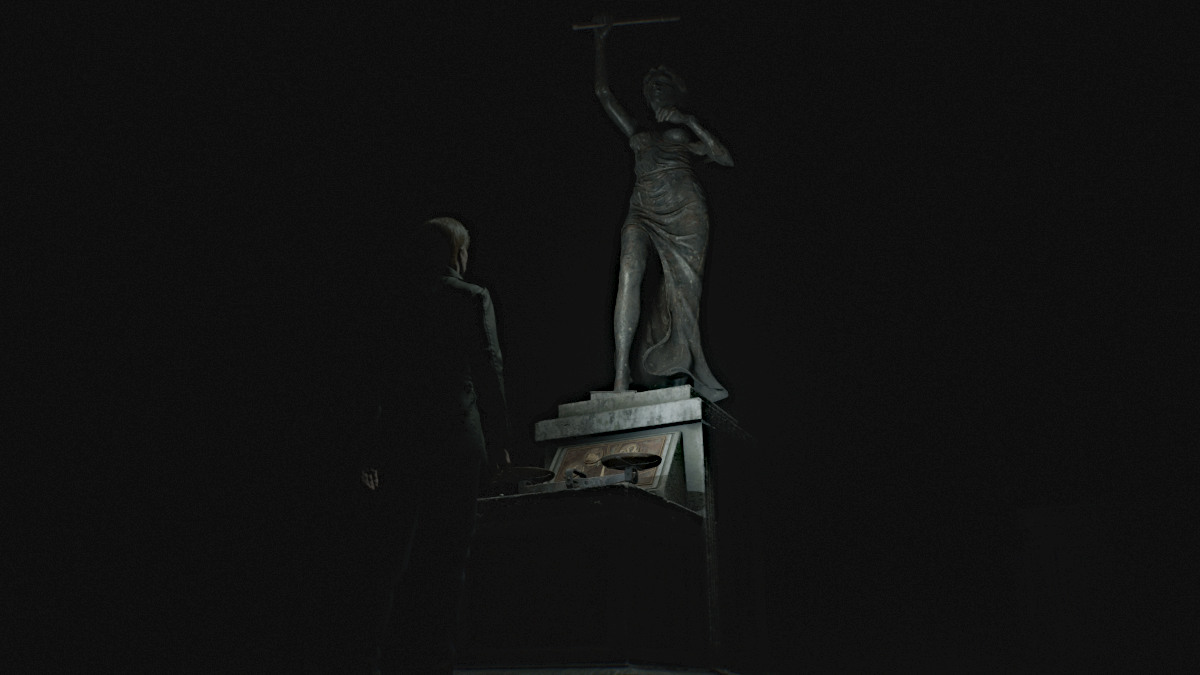
Screenshot by Pro Game Guides
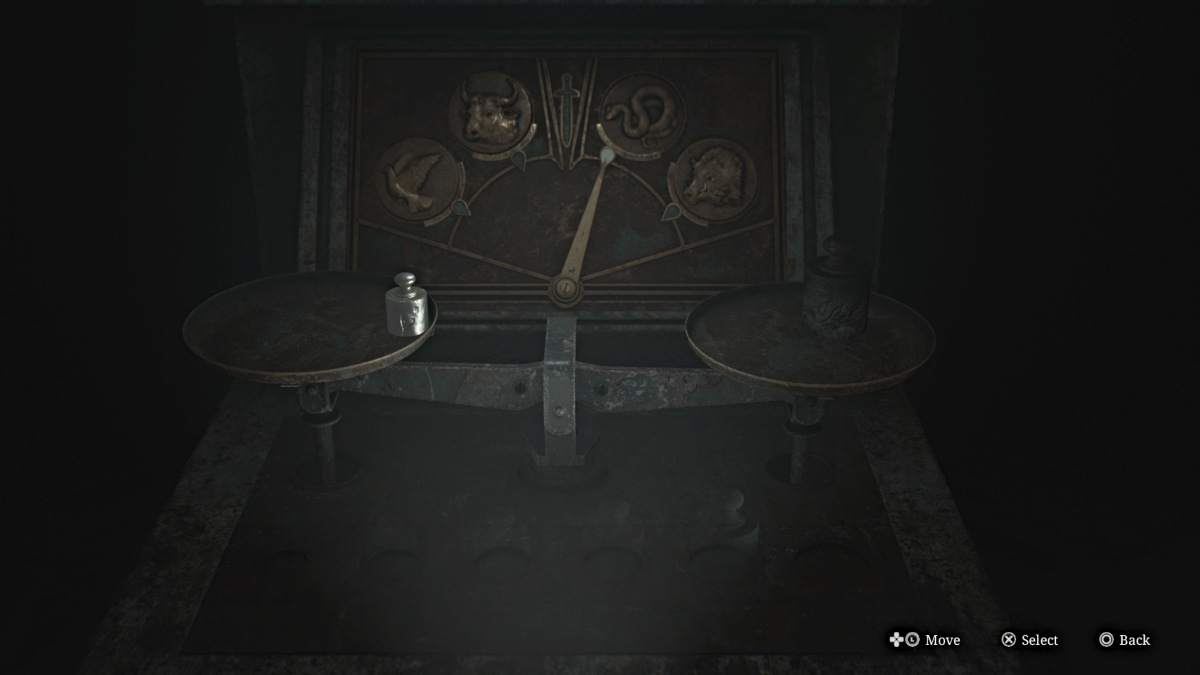
Screenshot by Pro Game Guides
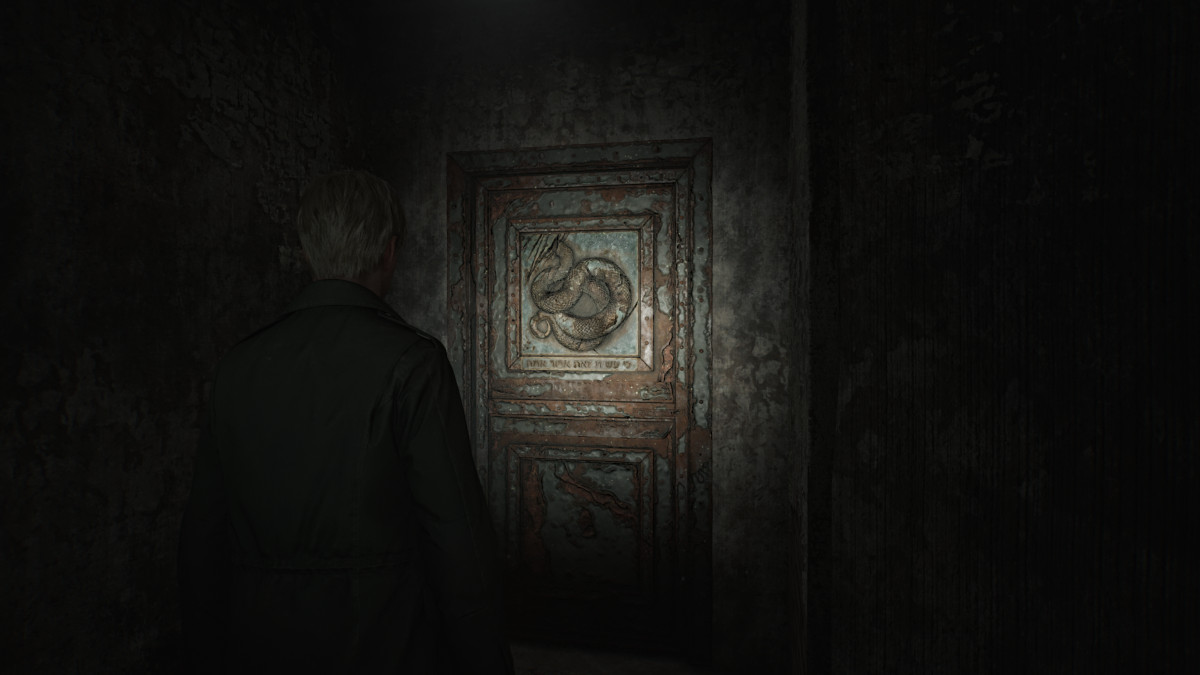
Screenshot by Pro Game Guides

Screenshot by Pro Game Guides

Screenshot by Pro Game Guides
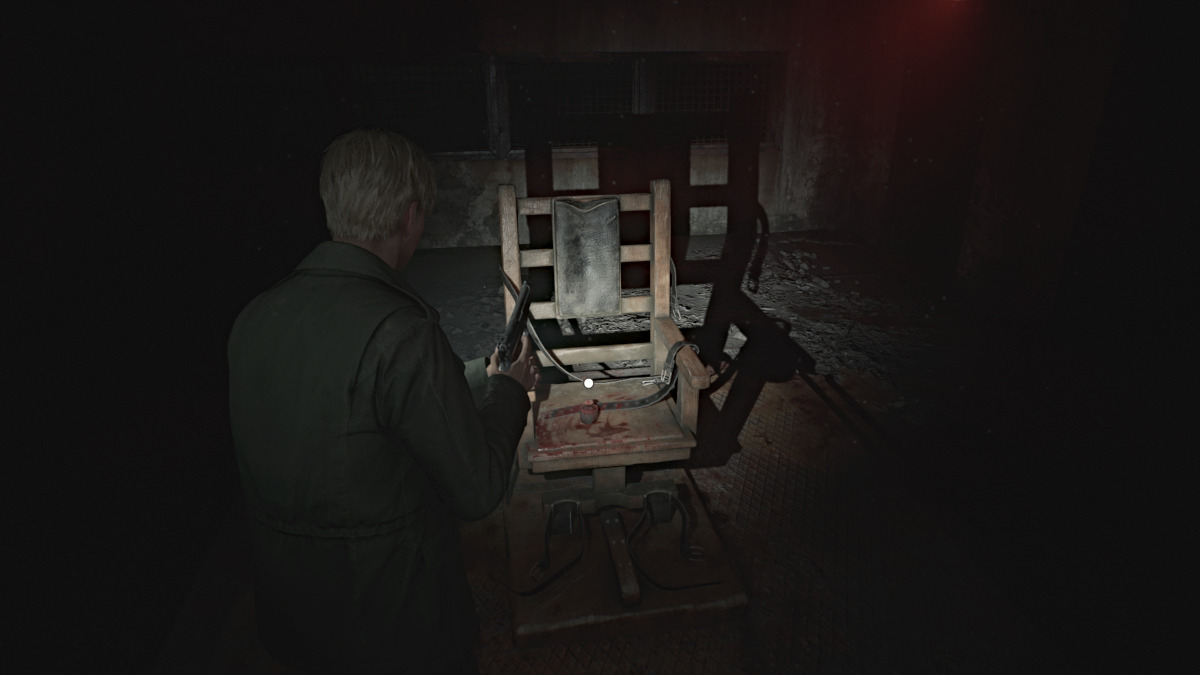
Screenshot by Pro Game Guides
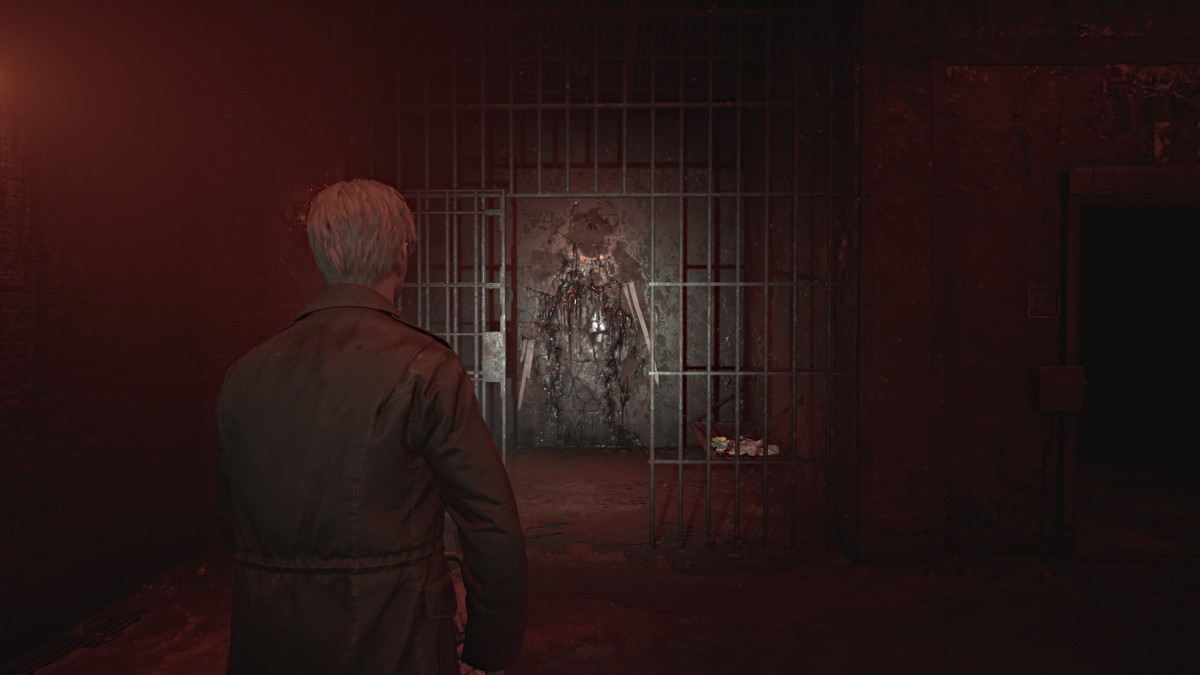
Screenshot by Pro Game Guides
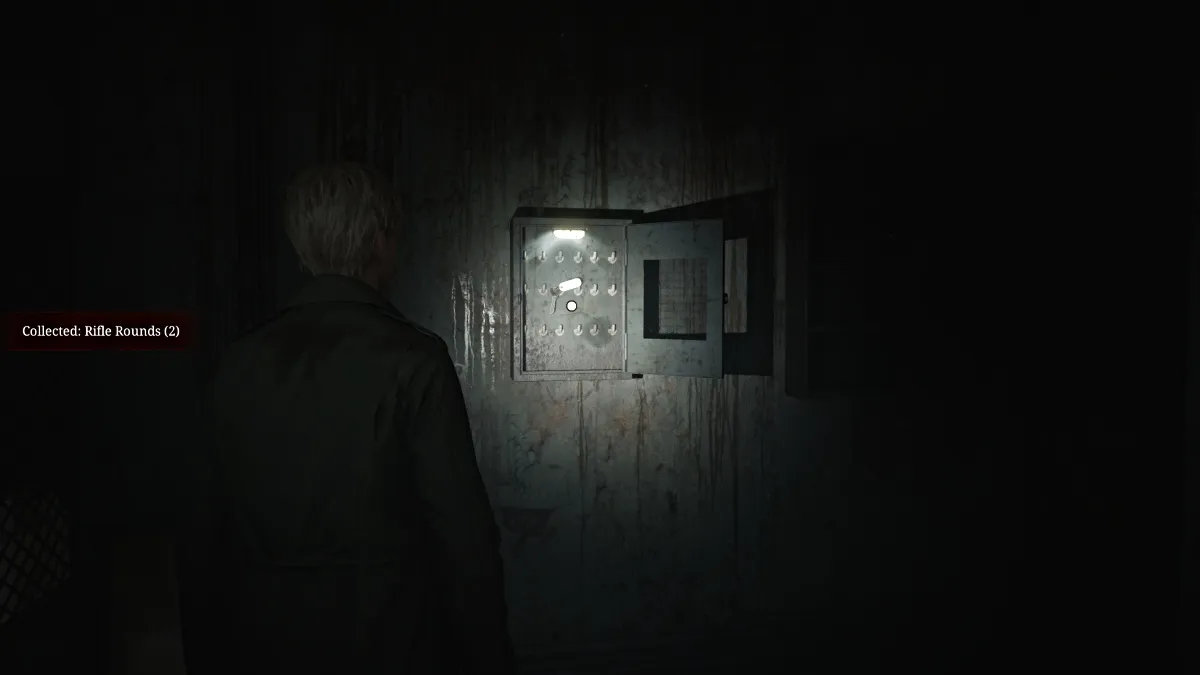
Screenshot by Pro Game Guides
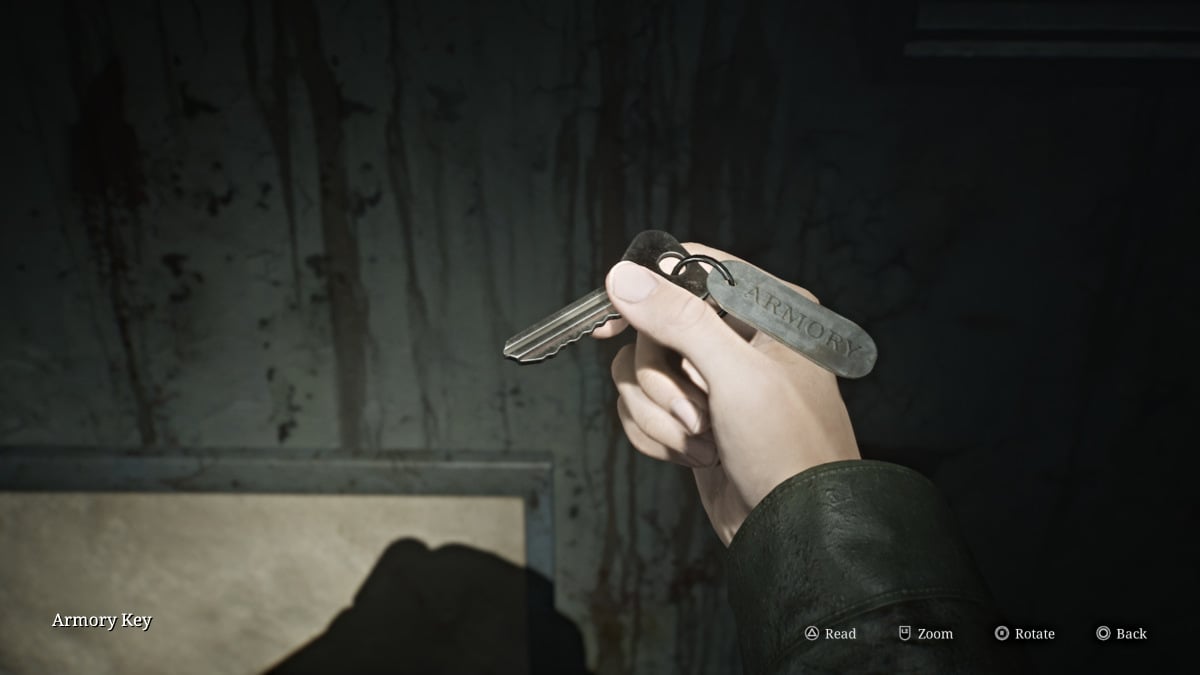
Screenshot by Pro Game Guides
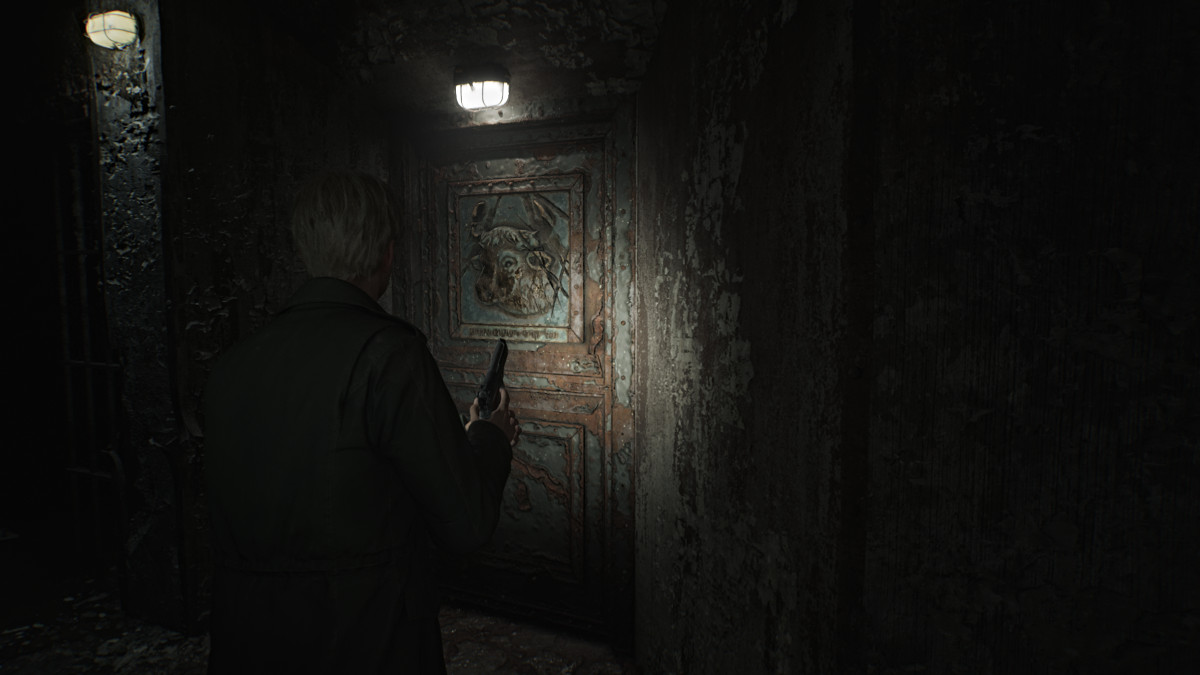
Screenshot by Pro Game Guides
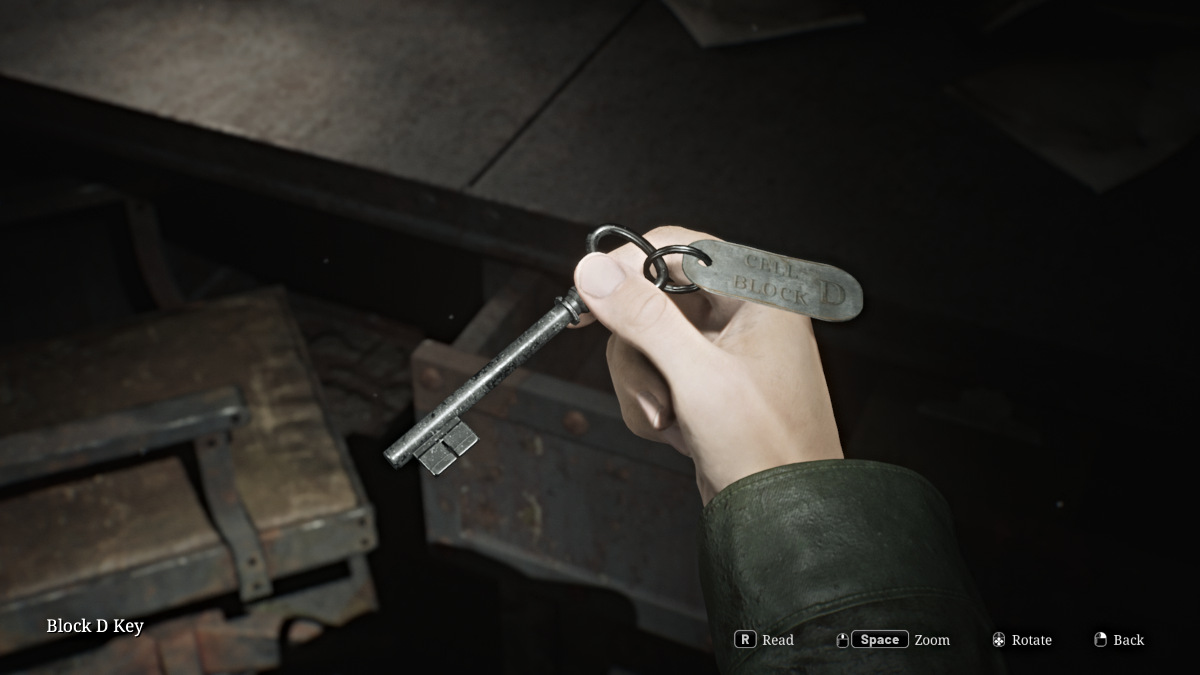
Screenshot by Pro Game Guides
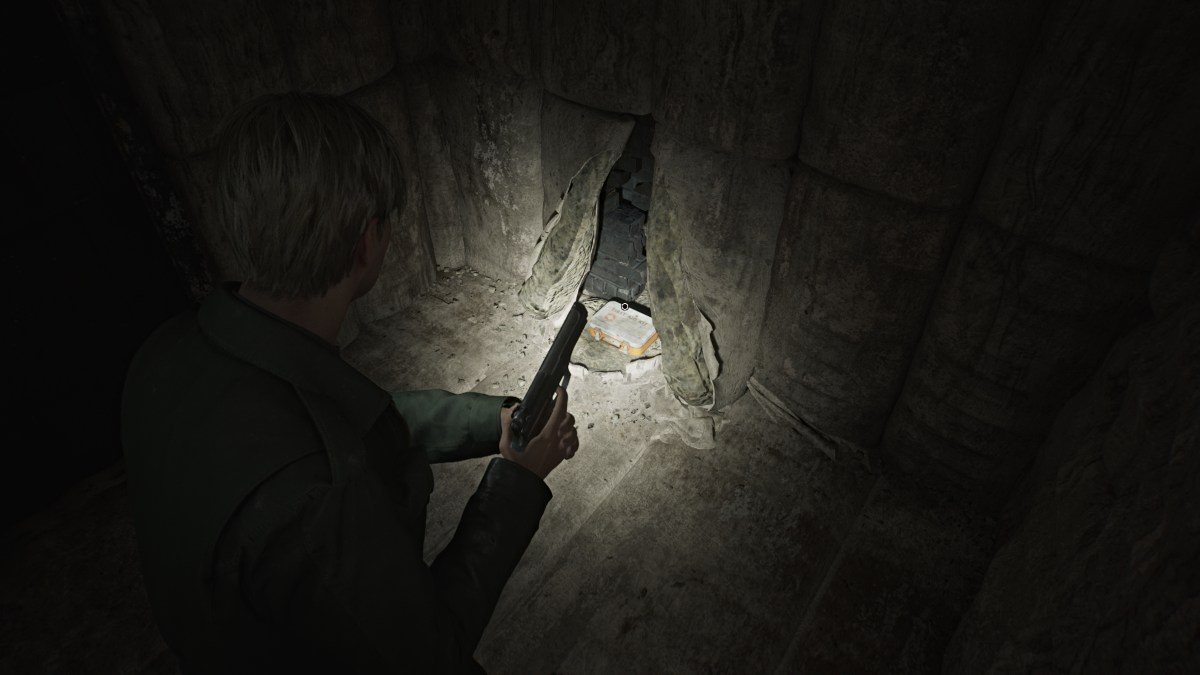
Screenshot by Pro Game Guides
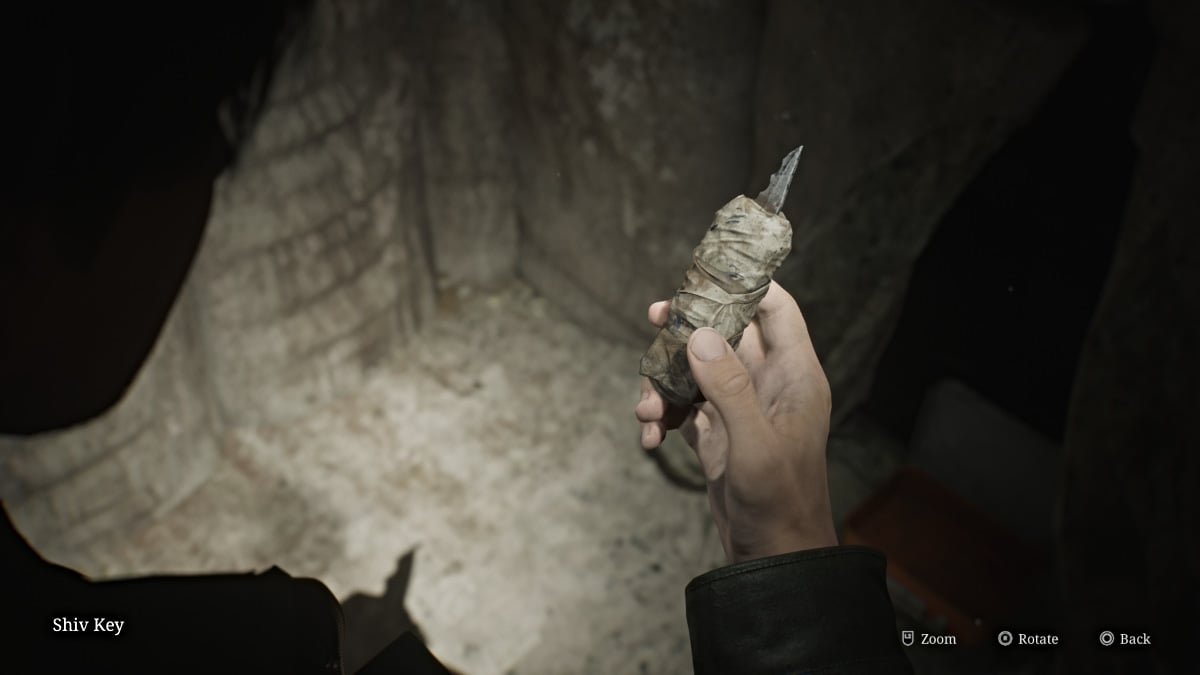
Screenshot by Pro Game Guides
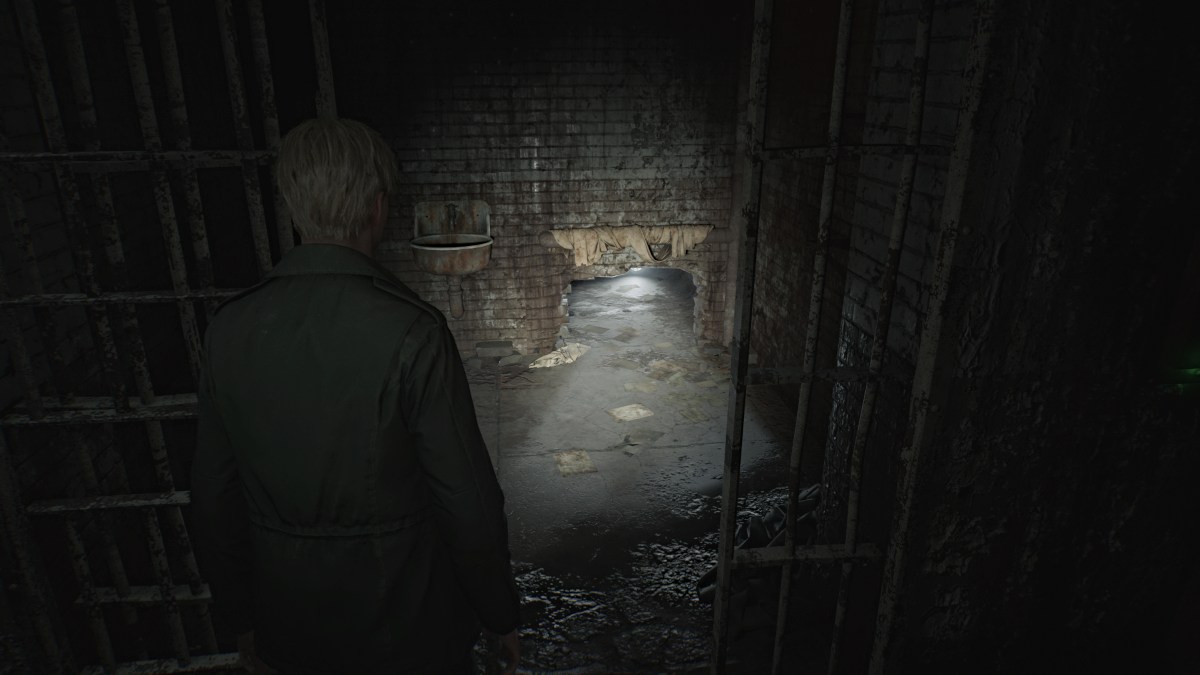
Screenshot by Pro Game Guides
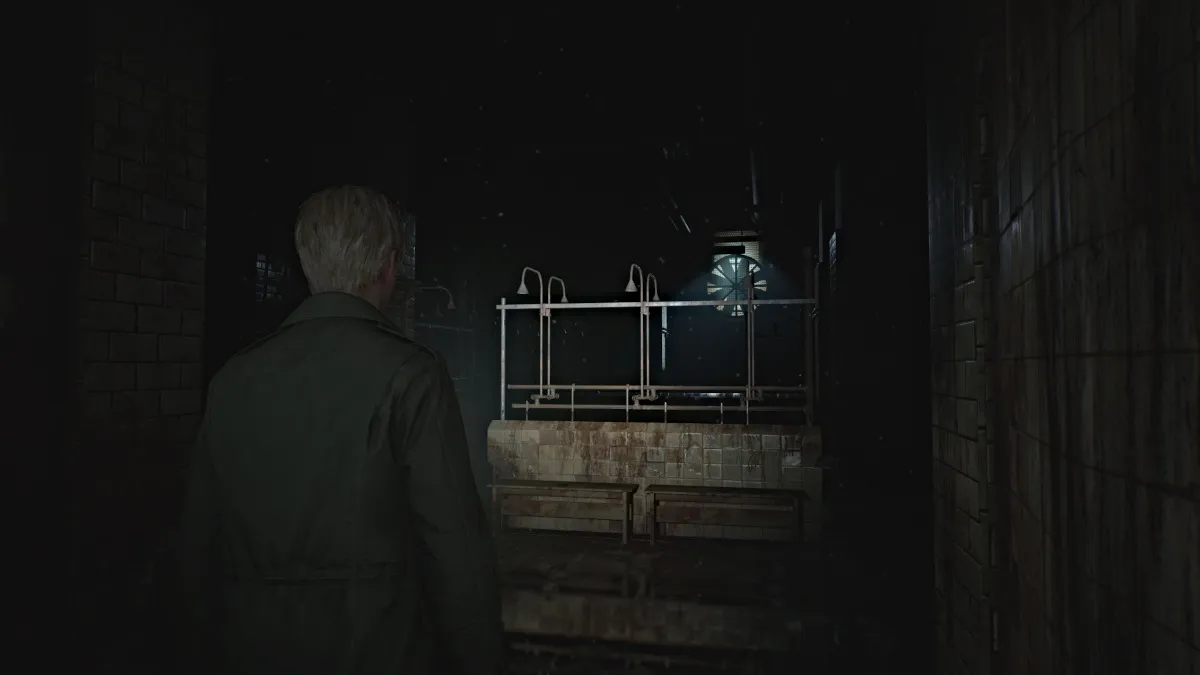
Screenshot by Pro Game Guides
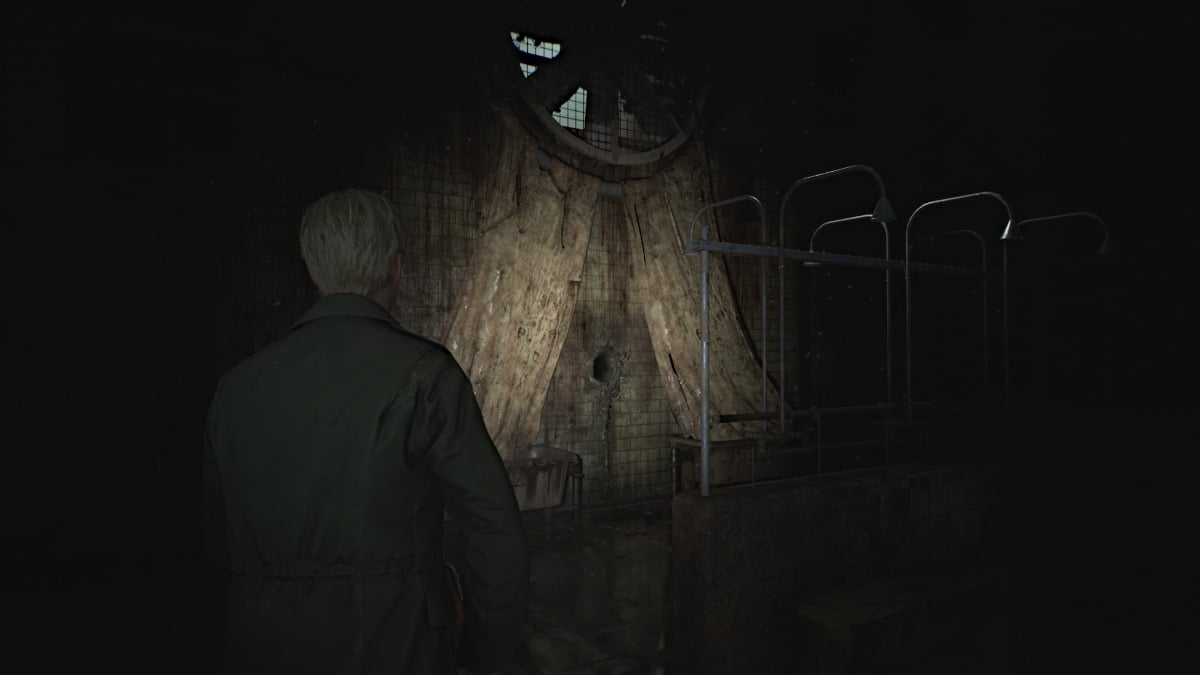
Screenshot by Pro Game Guides
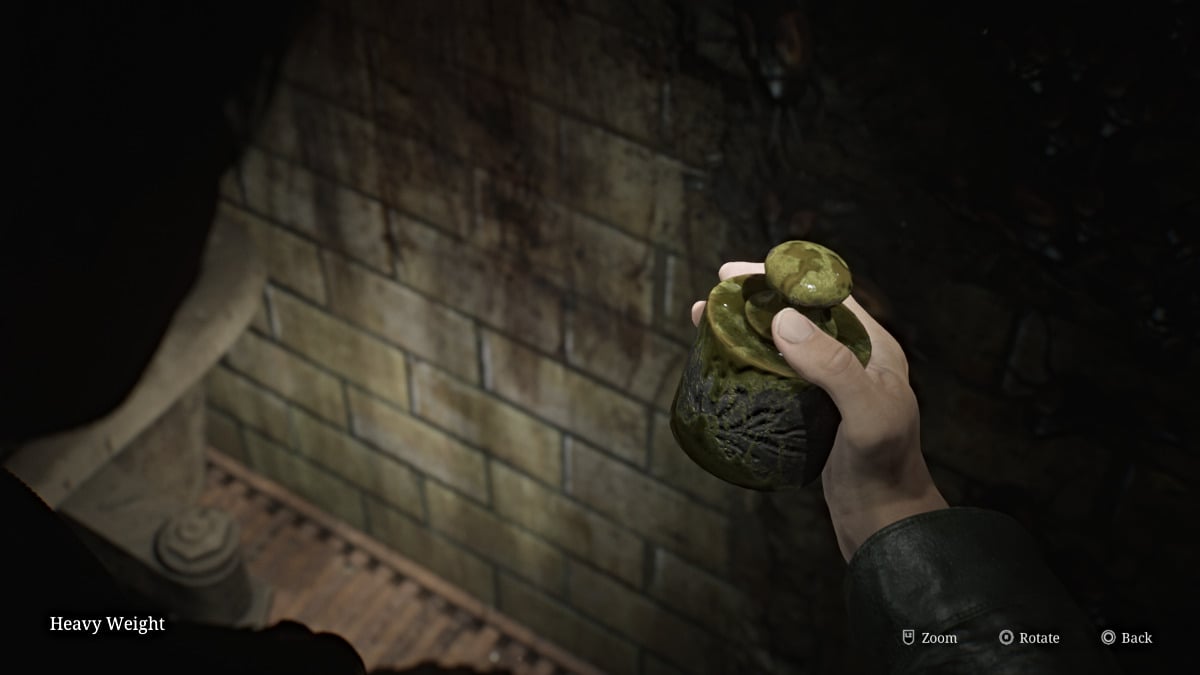
Screenshot by Pro Game Guides
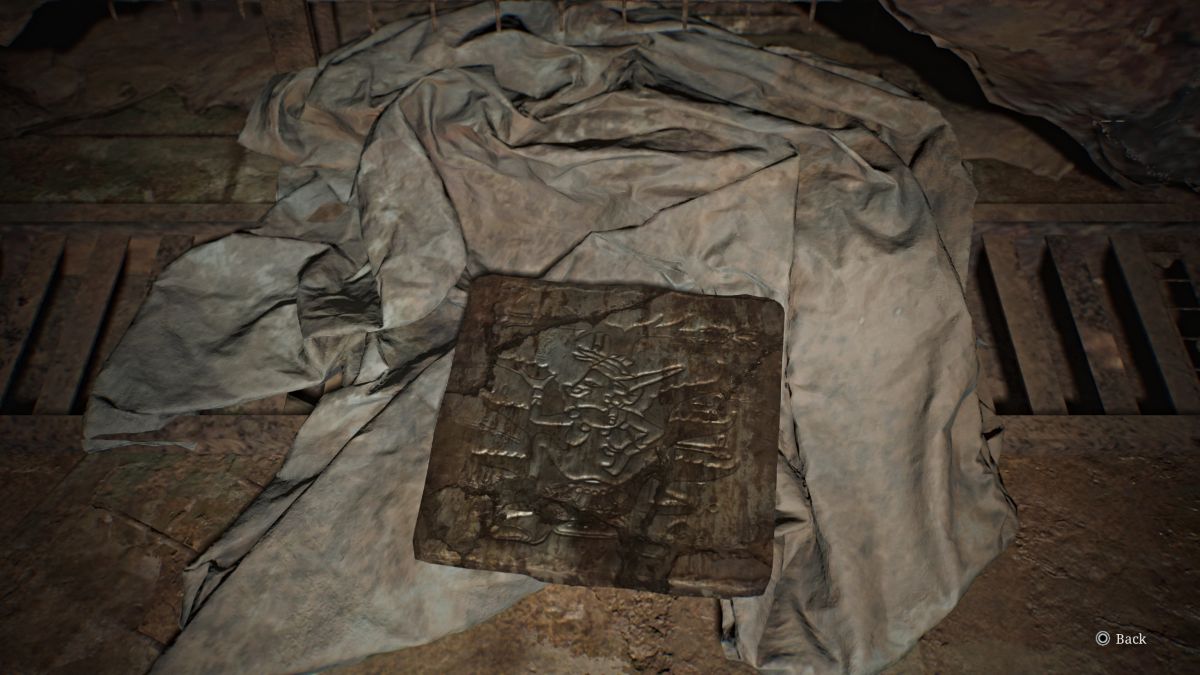
Screenshot by Pro Game Guides
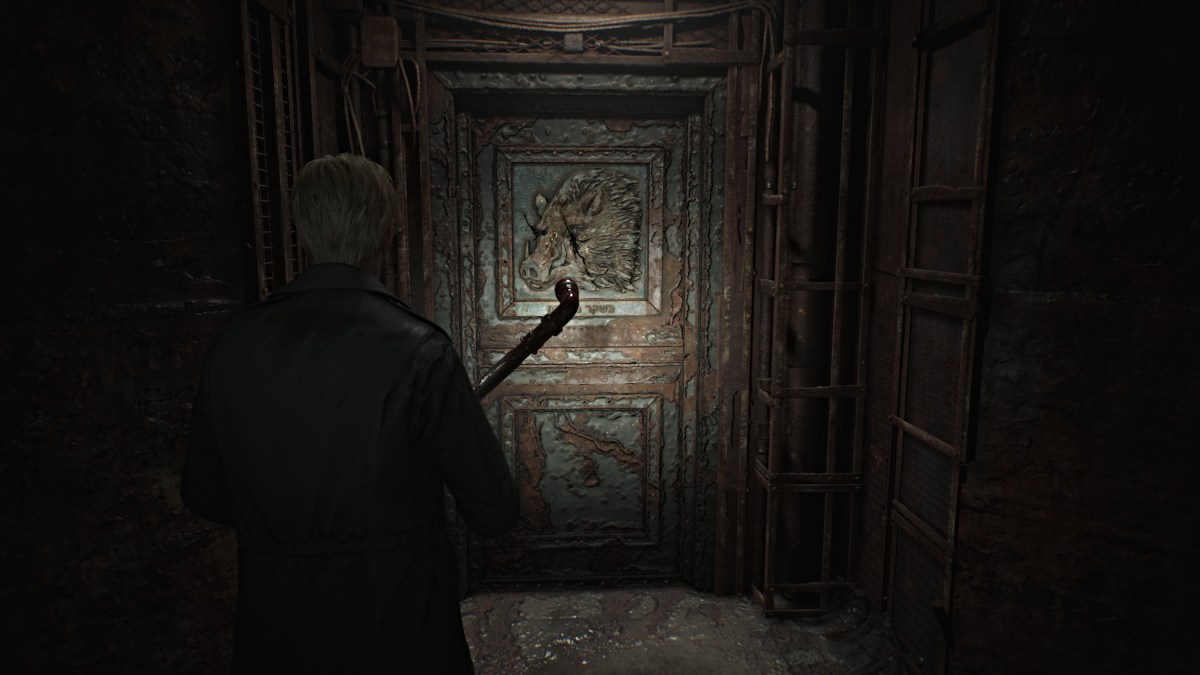
Screenshot by Pro Game Guides
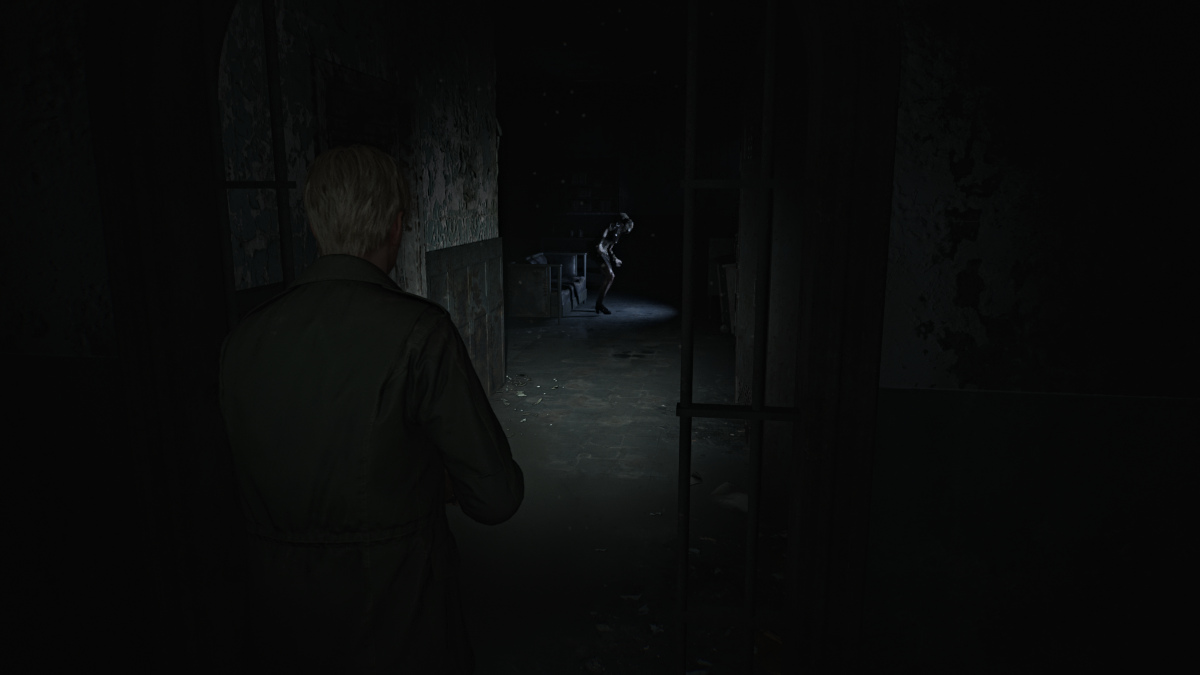
Screenshot by Pro Game Guides
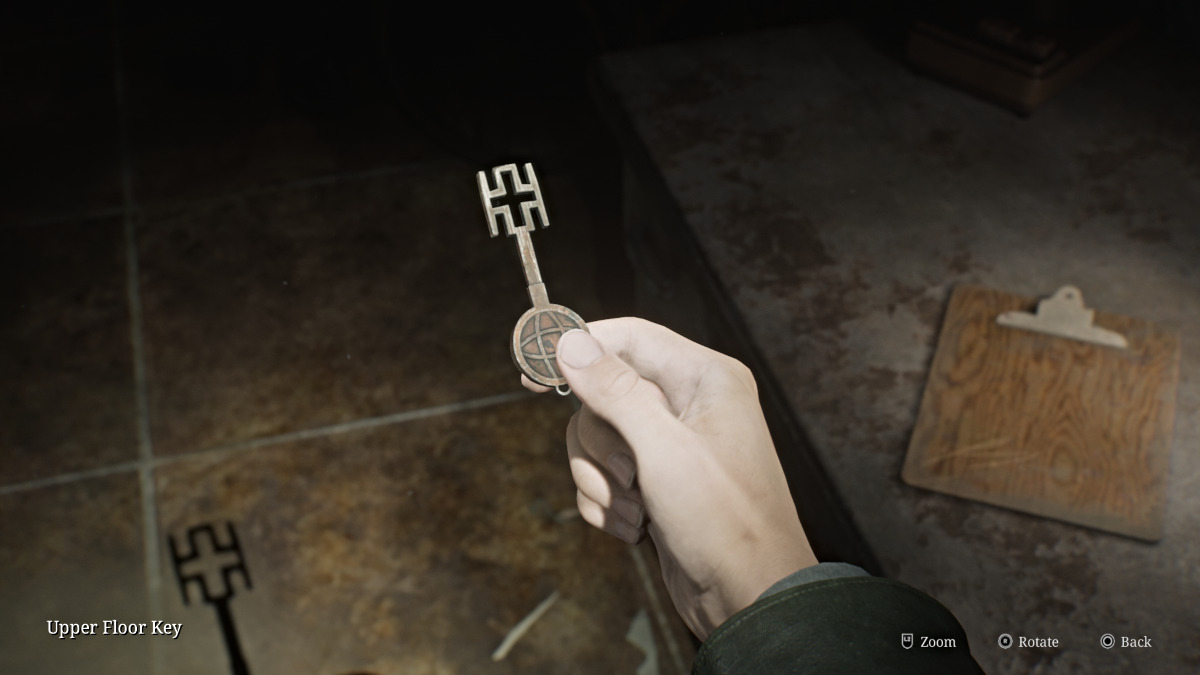
Screenshot by Pro Game Guides
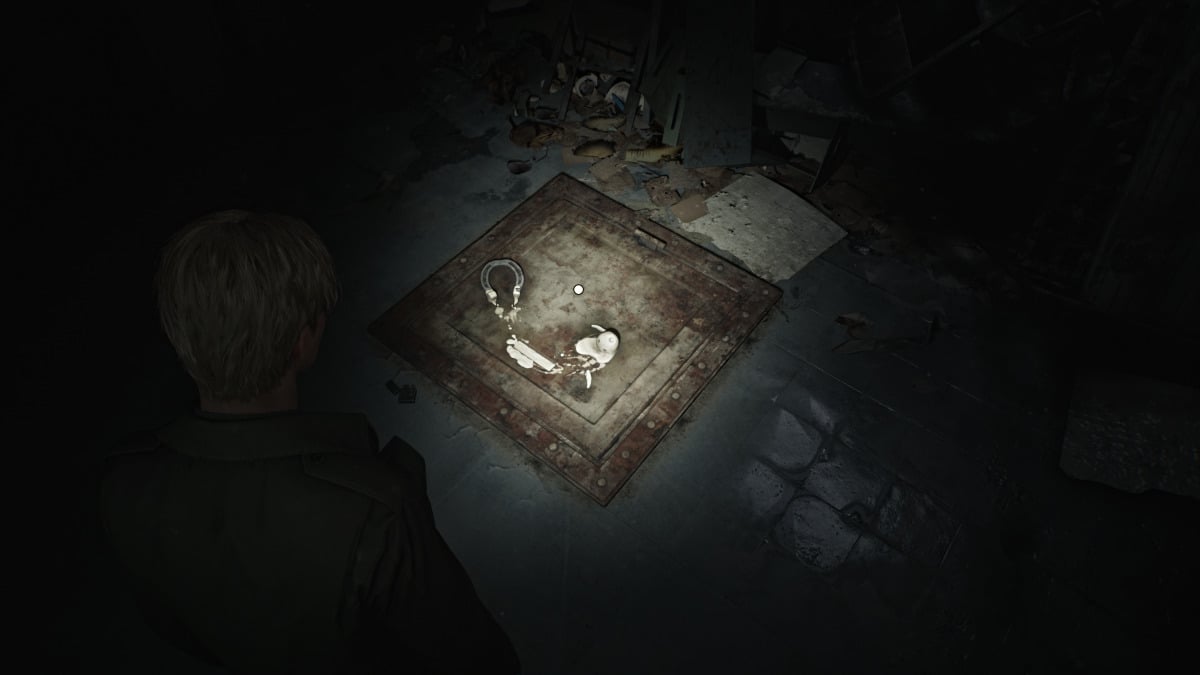
Screenshot by Pro Game Guides
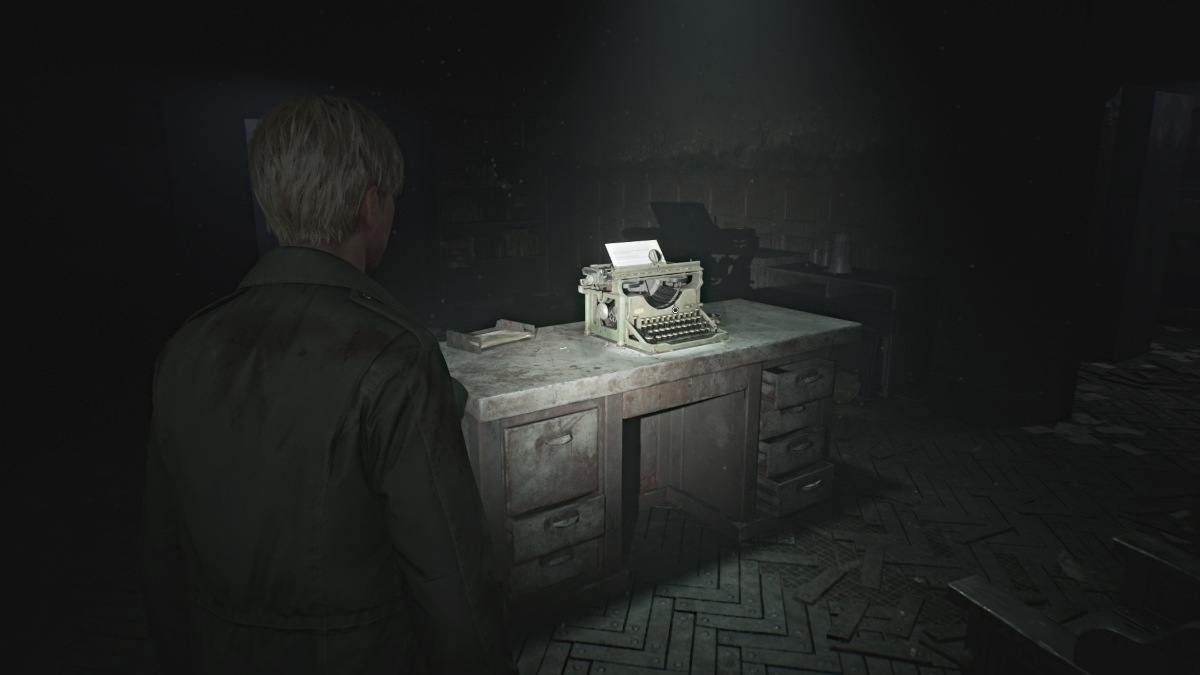
Screenshot by Pro Game Guides

Screenshot by Pro Game Guides
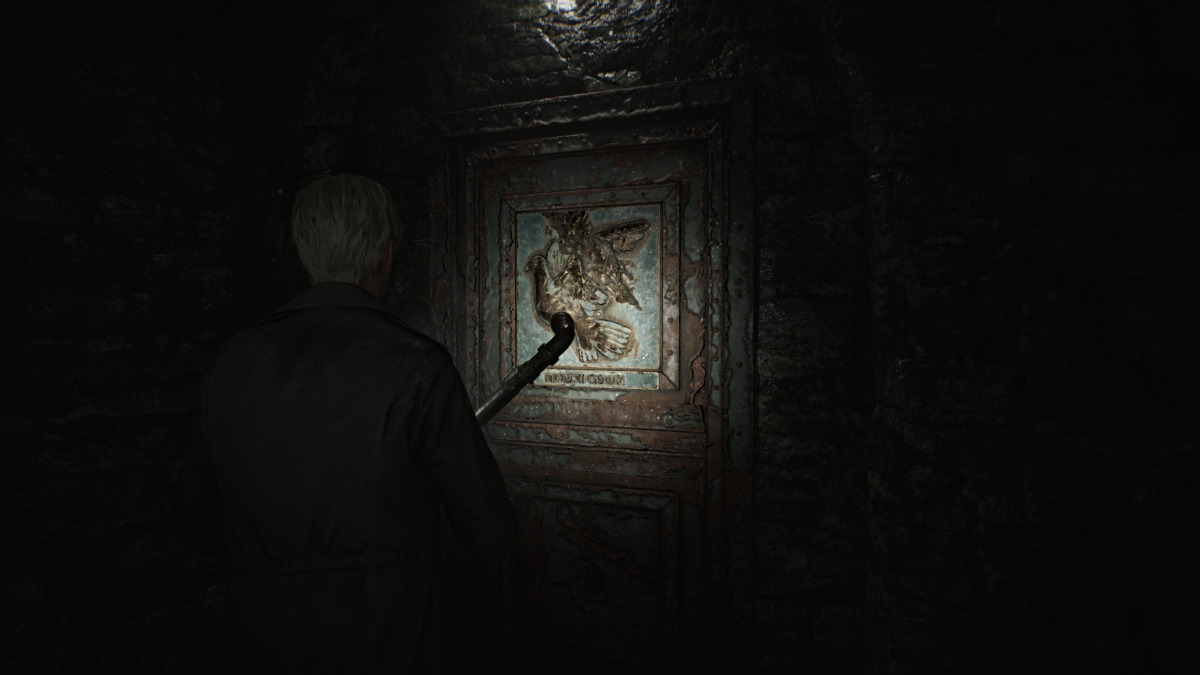
Screenshot by Pro Game Guides
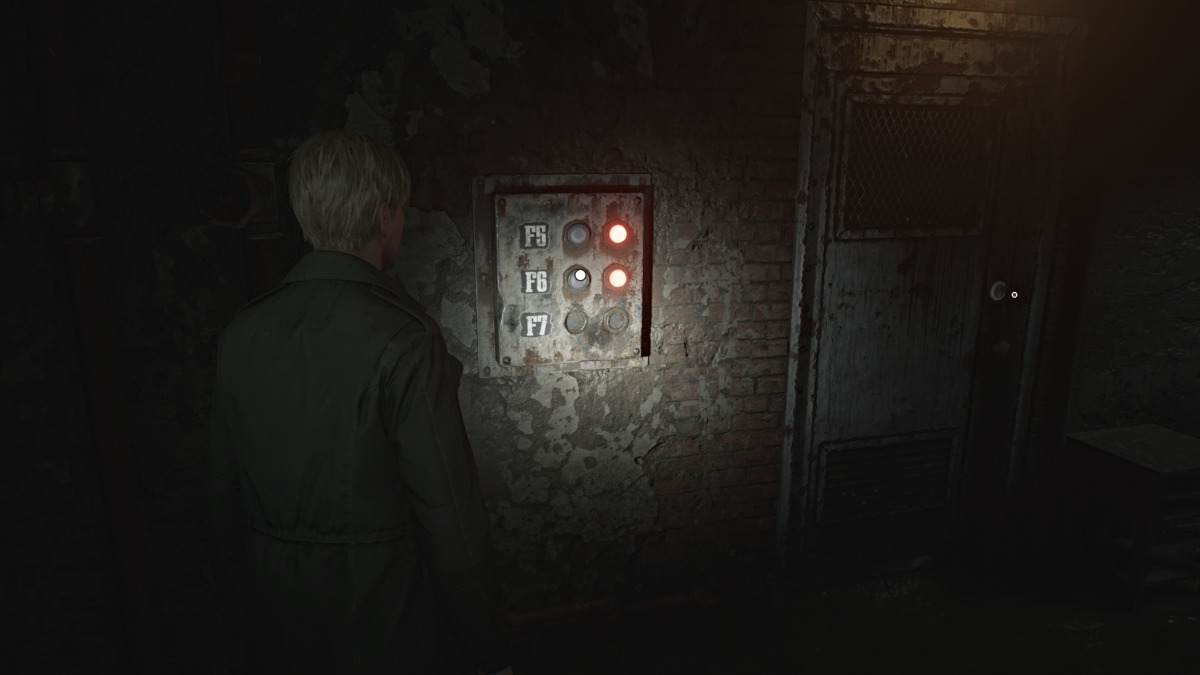
Screenshot by Pro Game Guides
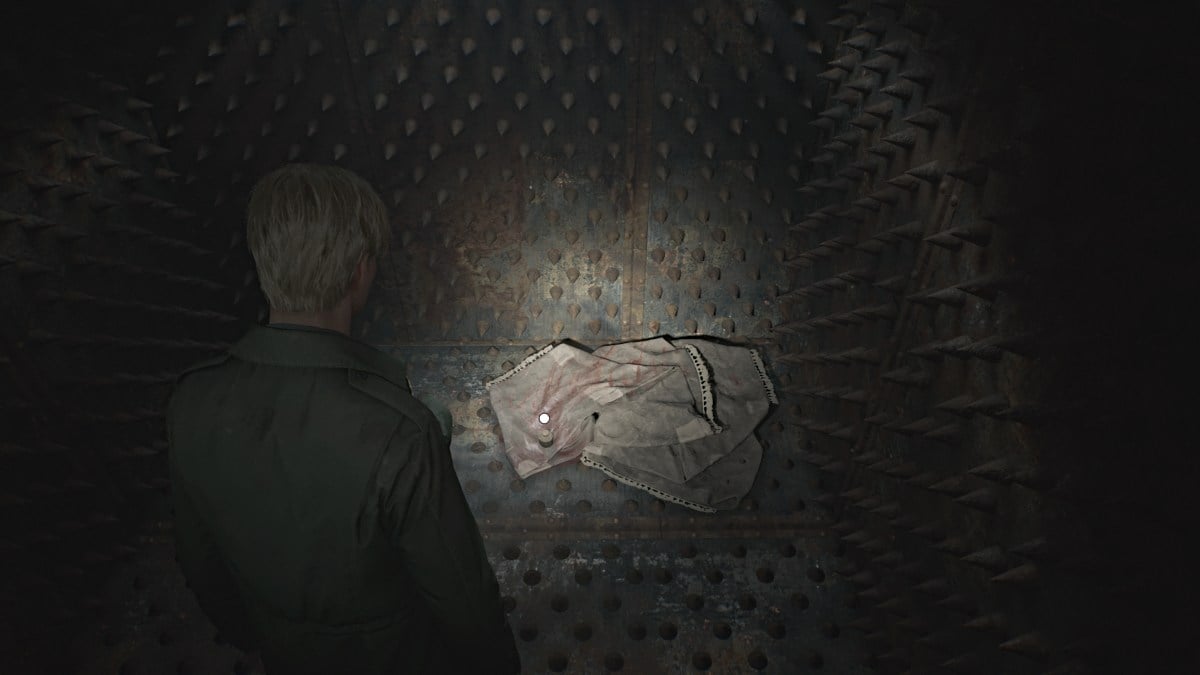
Screenshot by Pro Game Guides
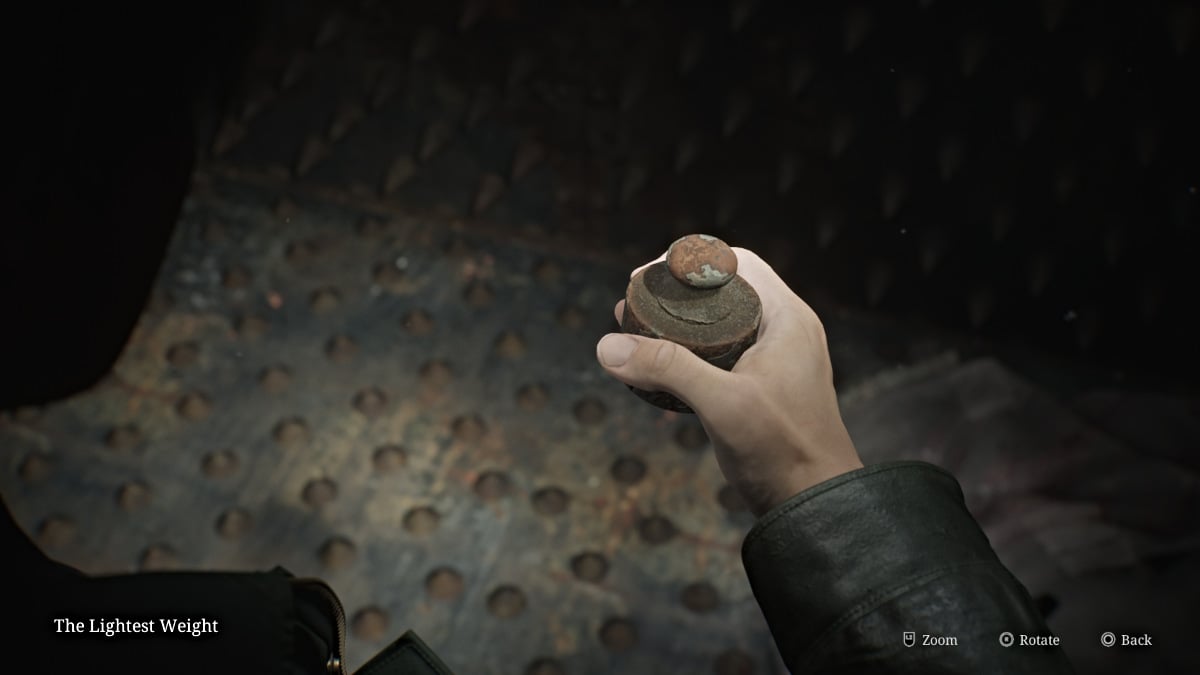
Screenshot by Pro Game Guides
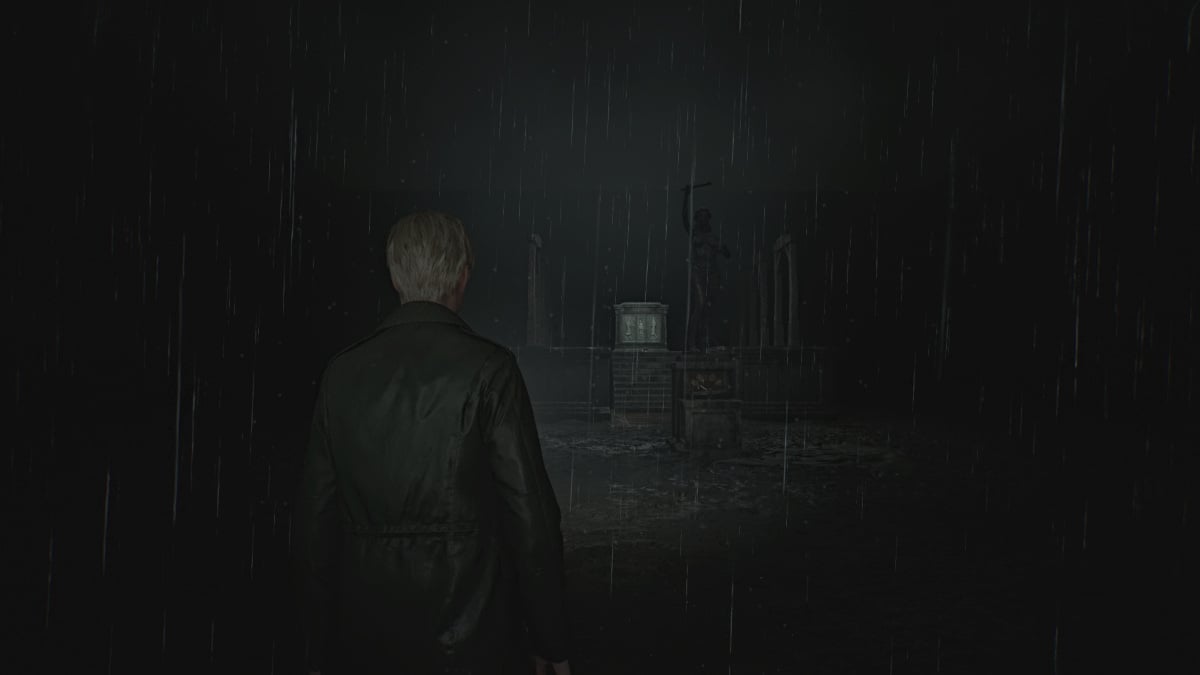
Screenshot by Pro Game Guides
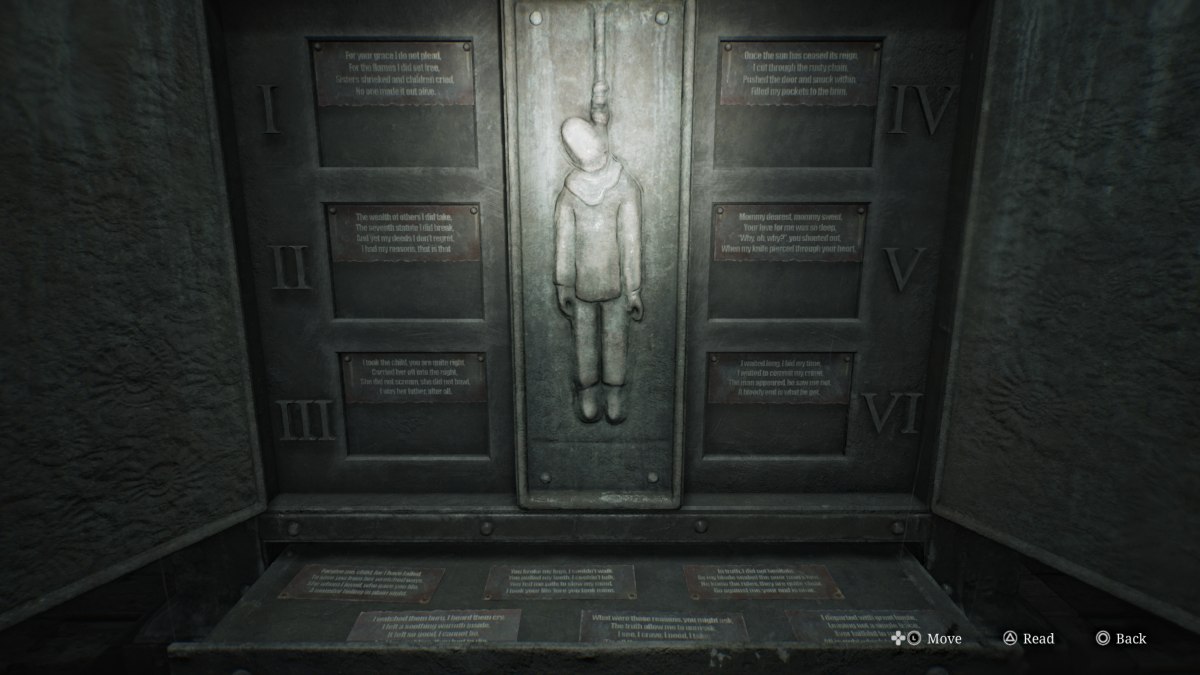
Screenshot by Pro Game Guides

Screenshot by Pro Game Guides
Screenshot by Pro Game Guides
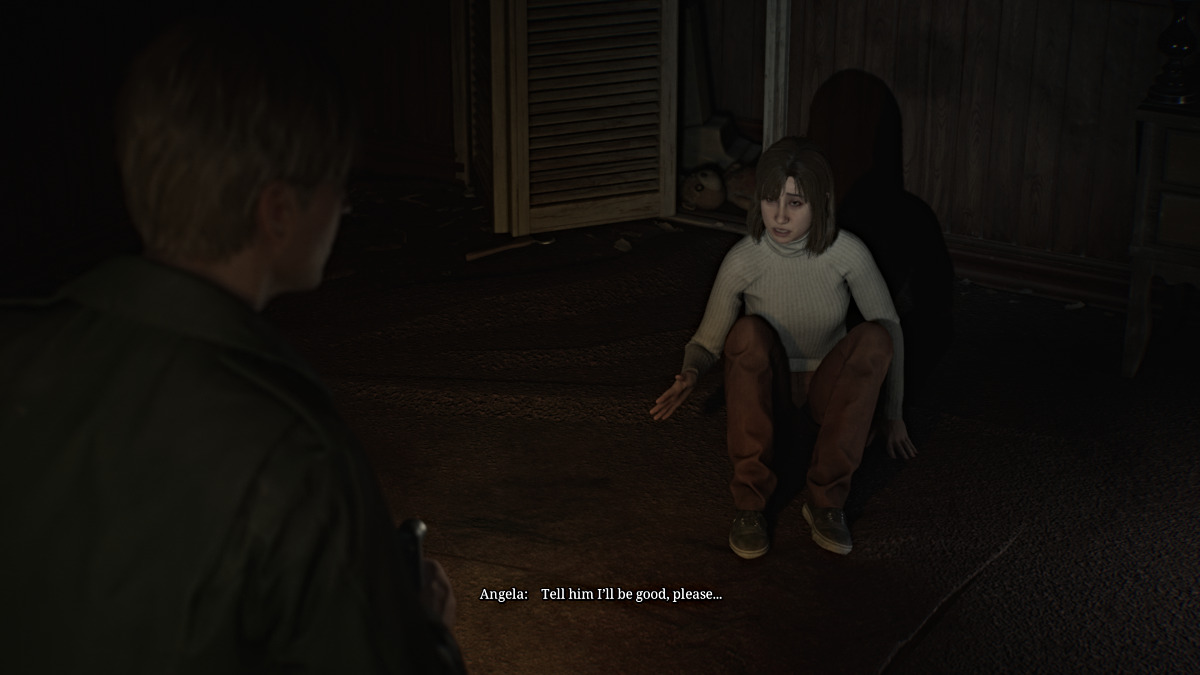
Screenshot by Pro Game Guides
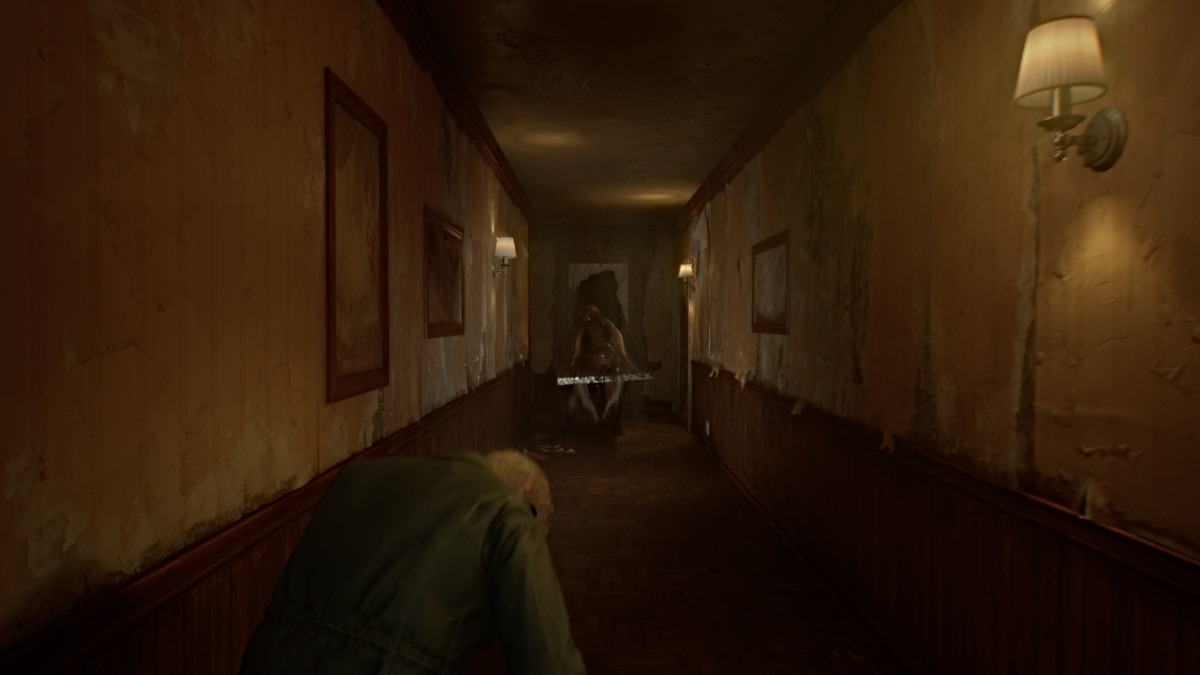
Screenshot by Pro Game Guides
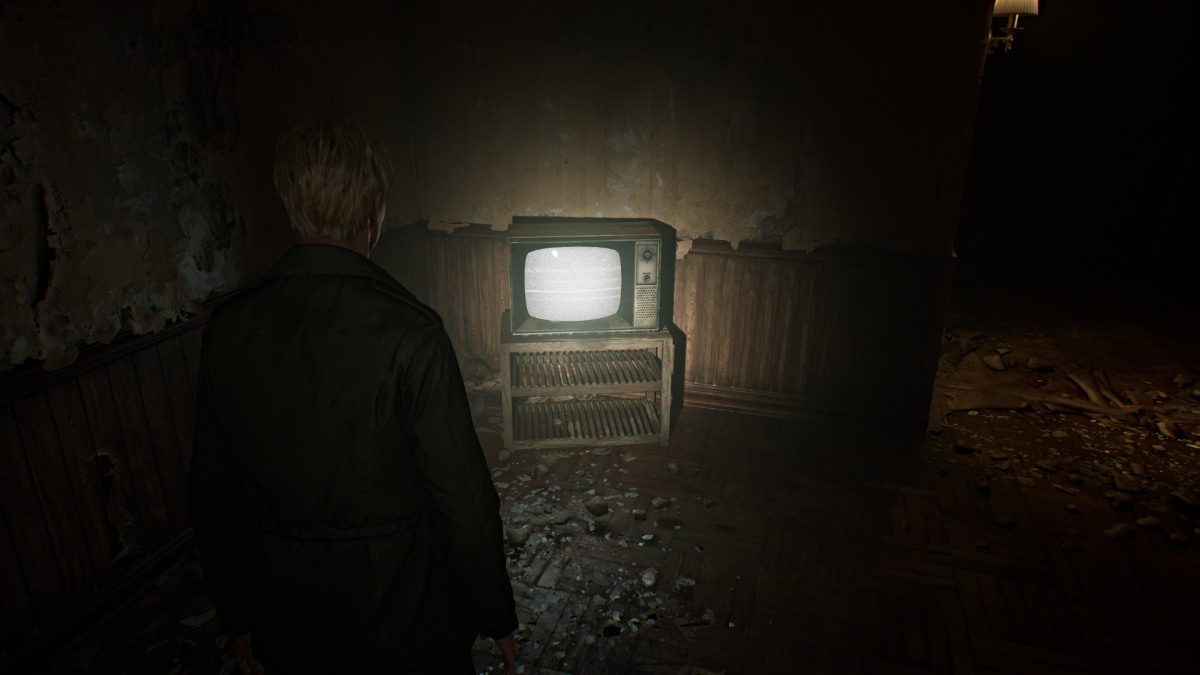
Screenshot by Pro Game Guides
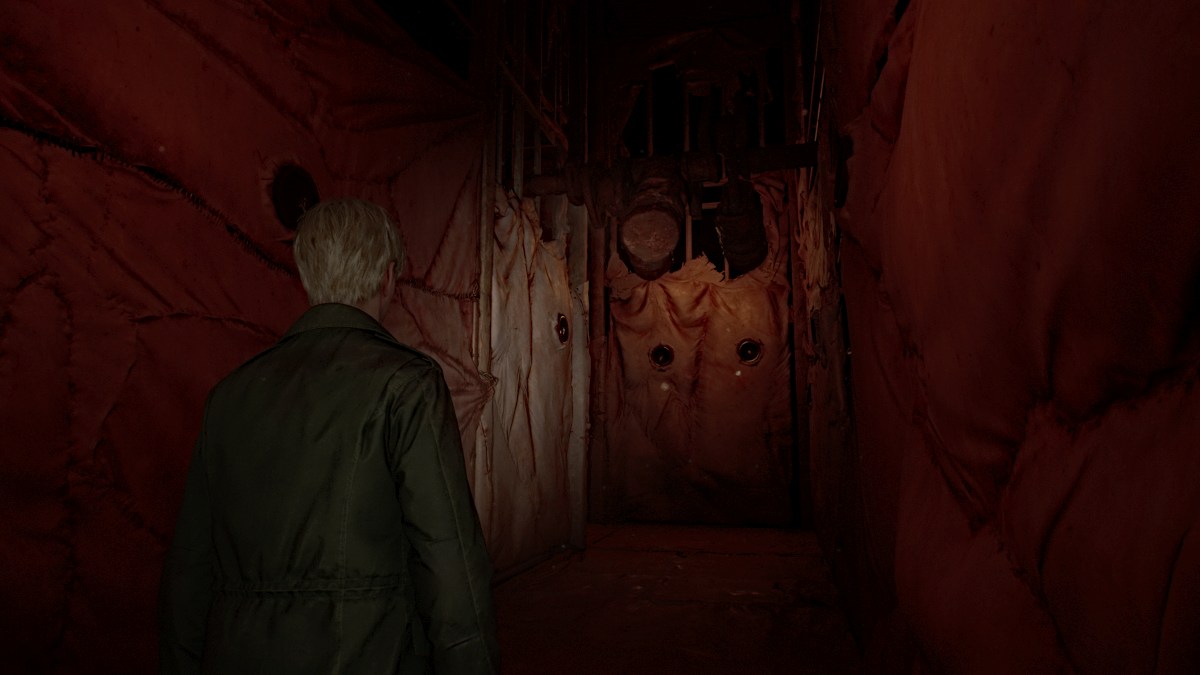
Screenshot by Pro Game Guides

Screenshot by Pro Game Guides
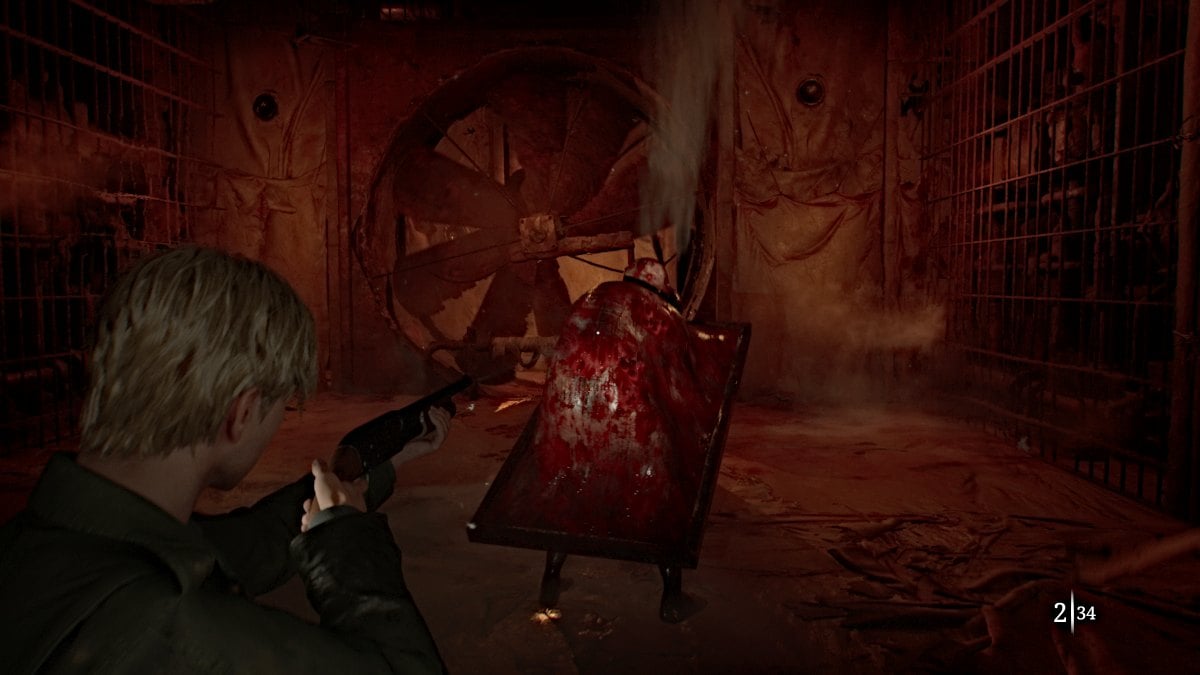
Screenshot by Pro Game Guides
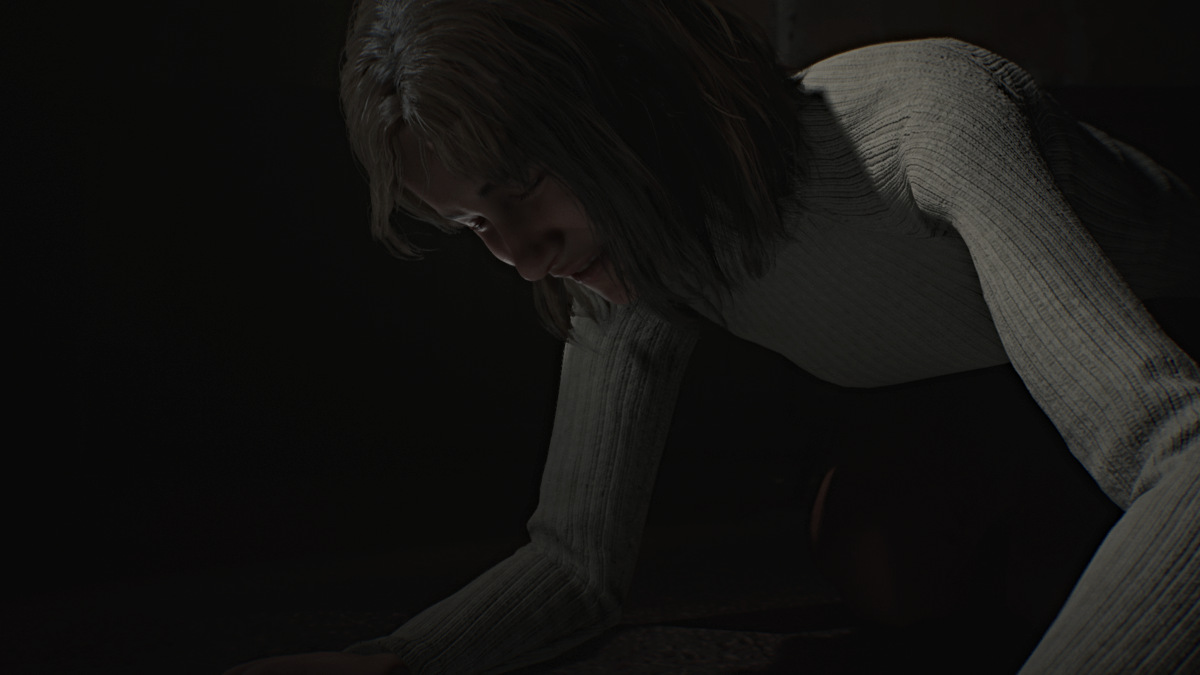
Screenshot by Pro Game Guides
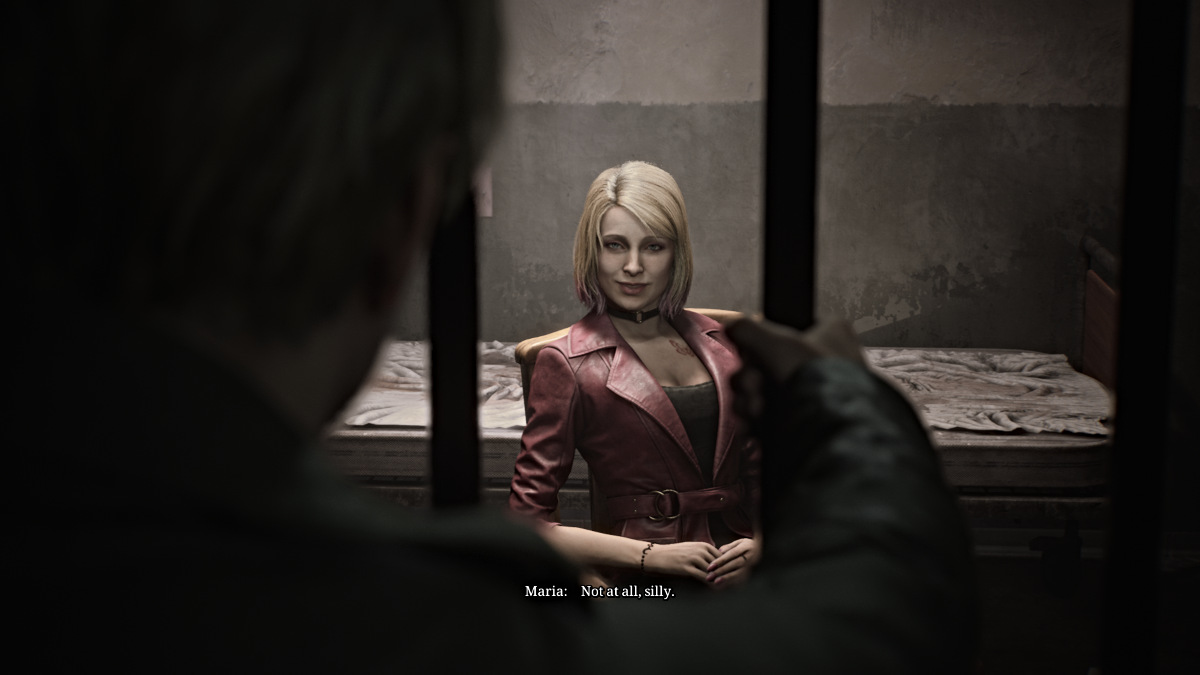
Screenshot by Pro Game Guides

Screenshot by Pro Game Guides
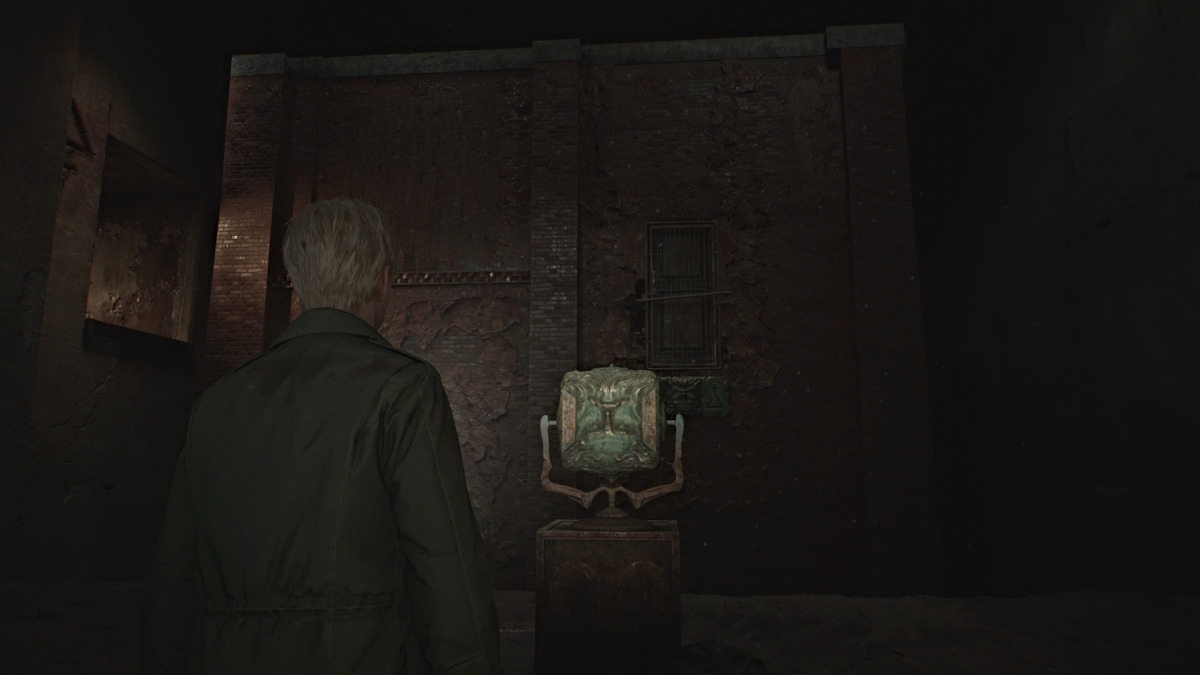
Screenshot by Pro Game Guides
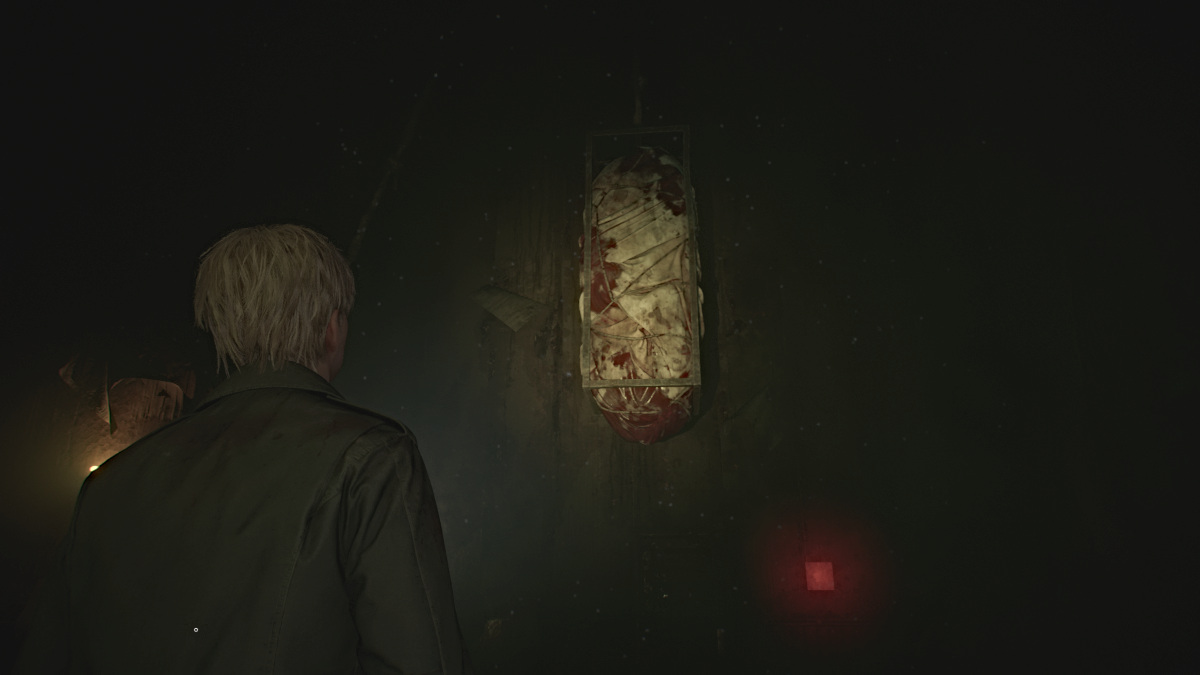
Screenshot by Pro Game Guides
Screenshot by Pro Game Guides
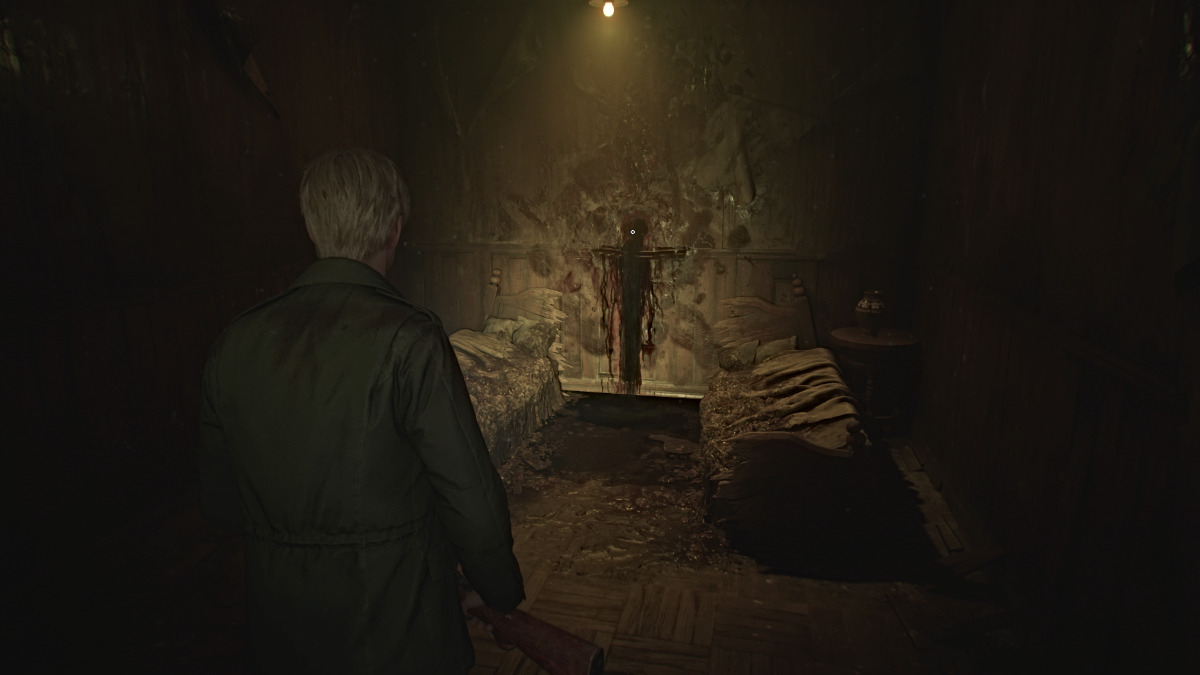
Screenshot by Pro Game Guides
Screenshot by Pro Game Guides

Screenshot by Pro Game Guides
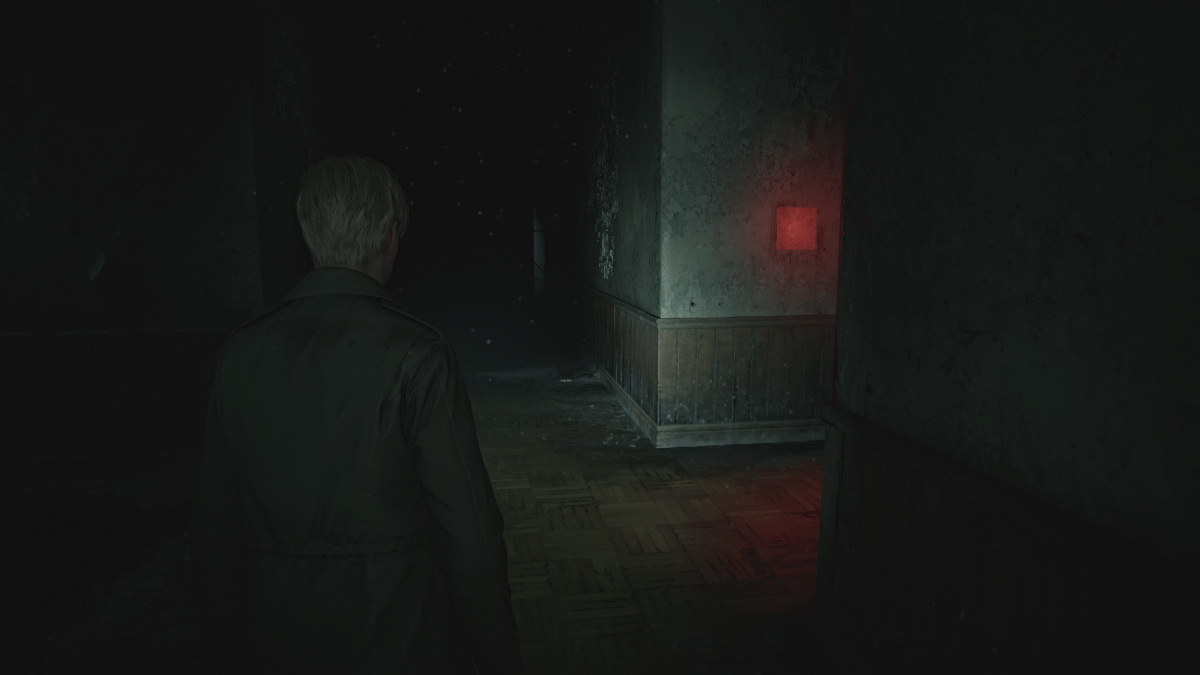
Screenshot by Pro Game Guides

Screenshot by Pro Game Guides

Screenshot by Pro Game Guides
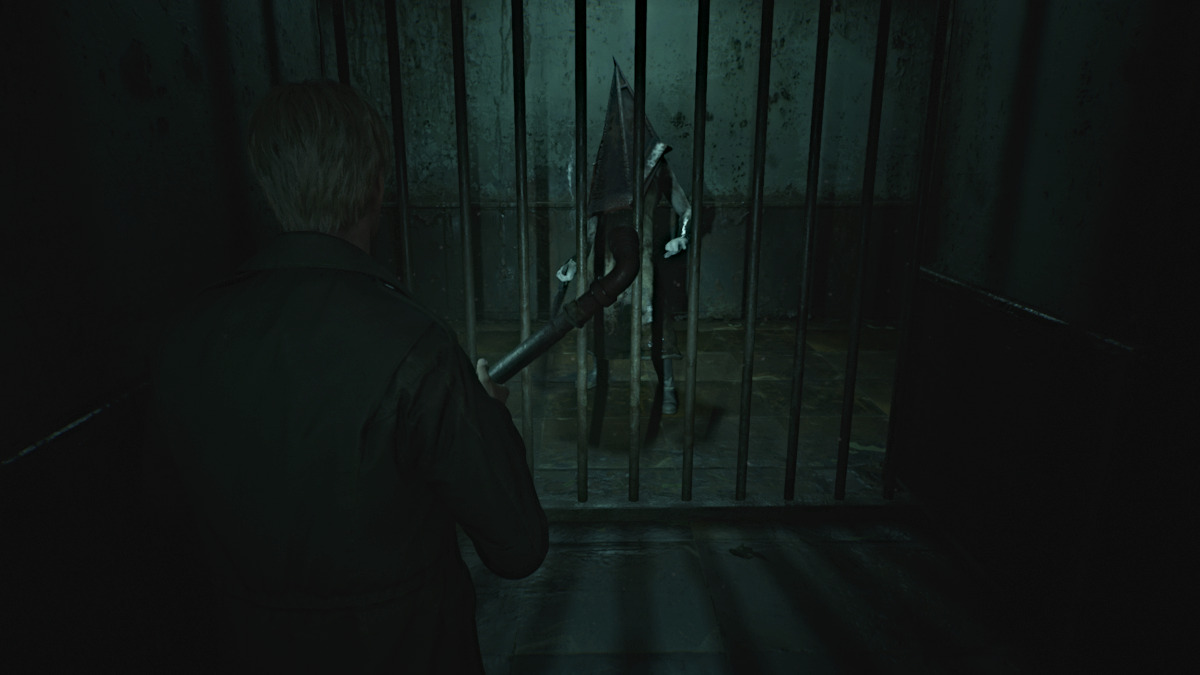
Screenshot by Pro Game Guides
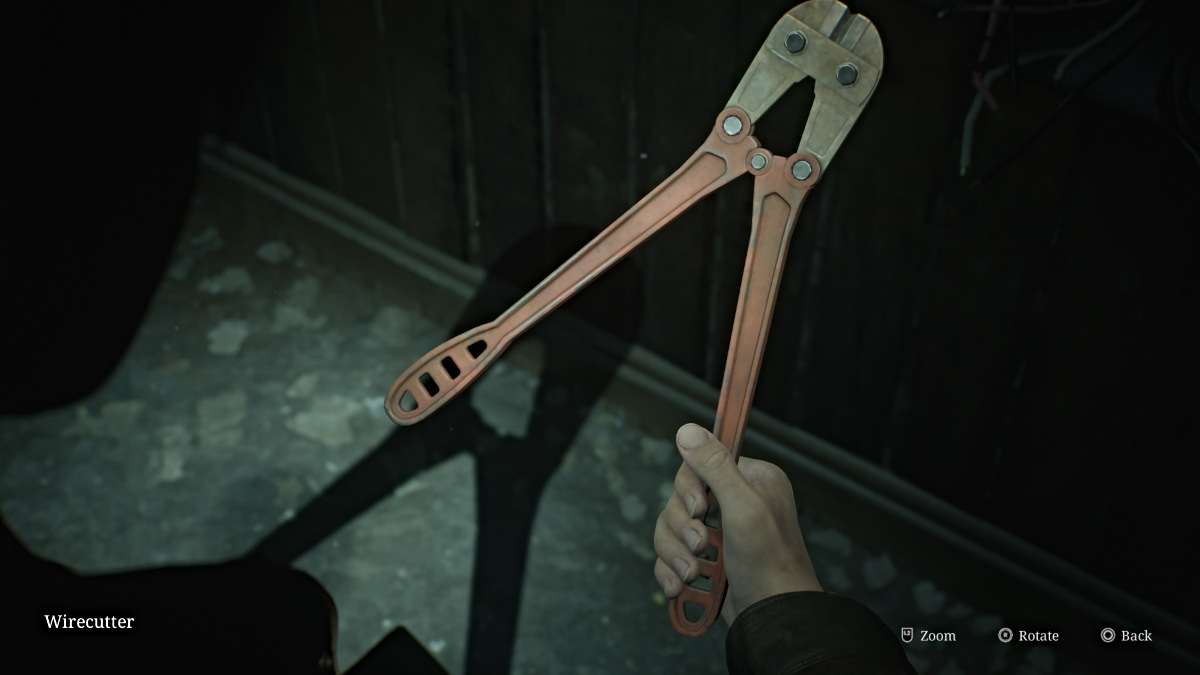
Screenshot by Pro Game Guides

Screenshot by Pro Game Guides
Screenshot by Pro Game Guides
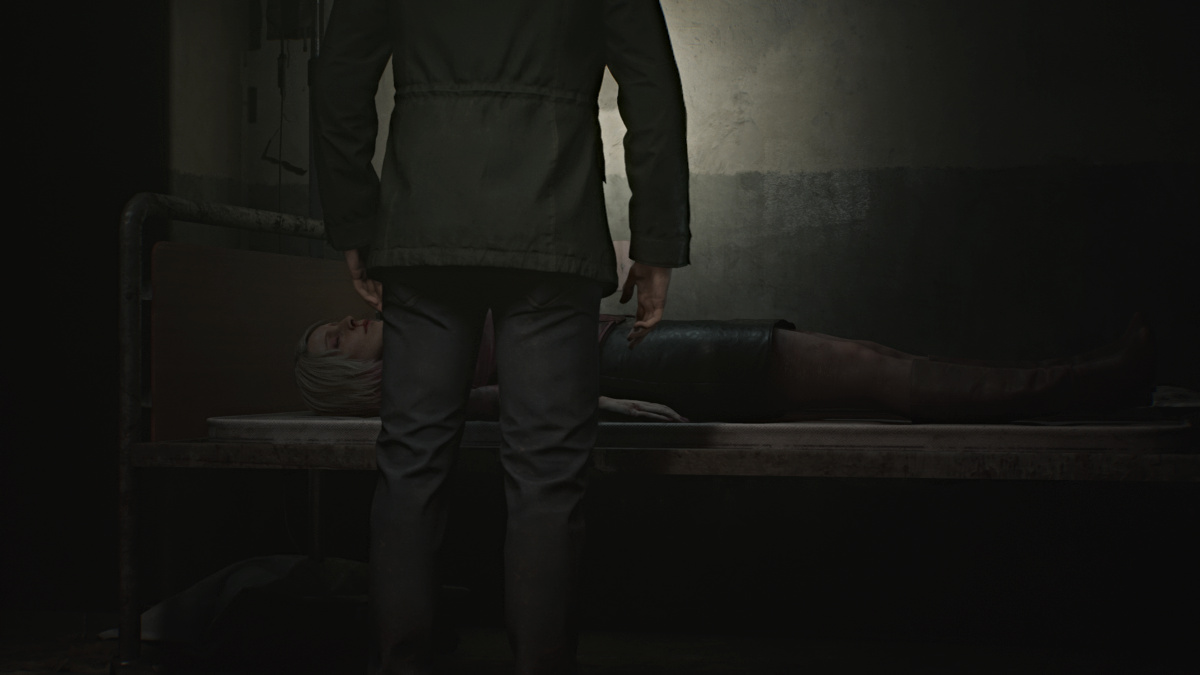
Screenshot by Pro Game Guides
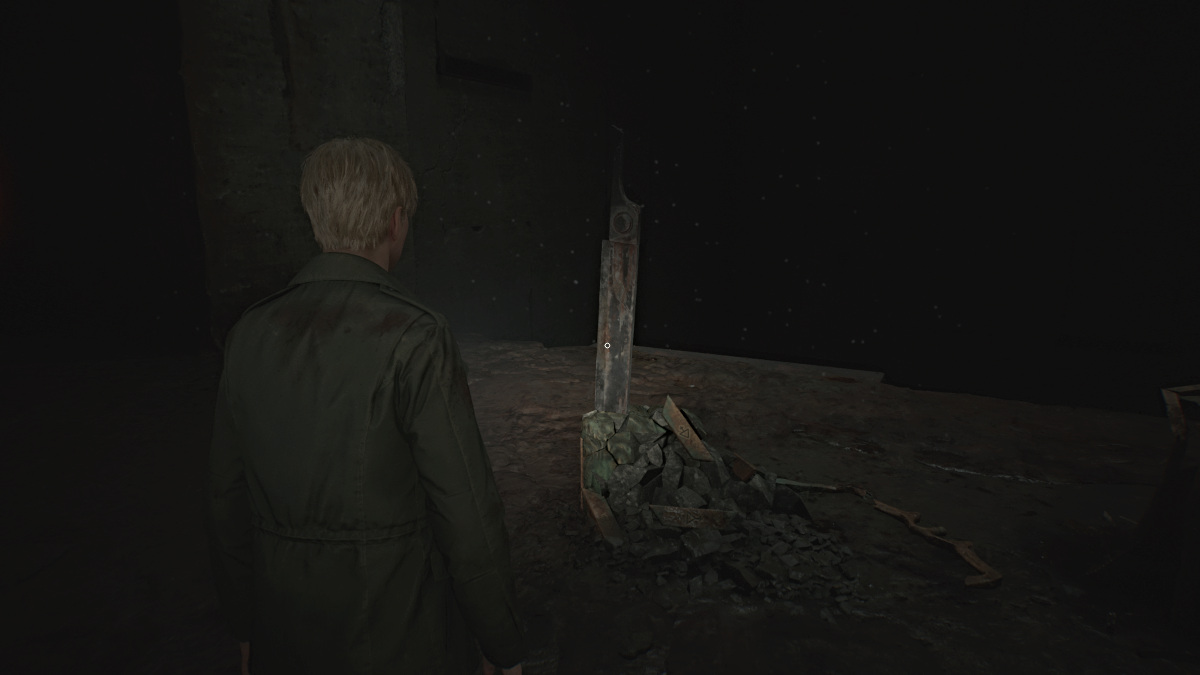
Screenshot by Pro Game Guides
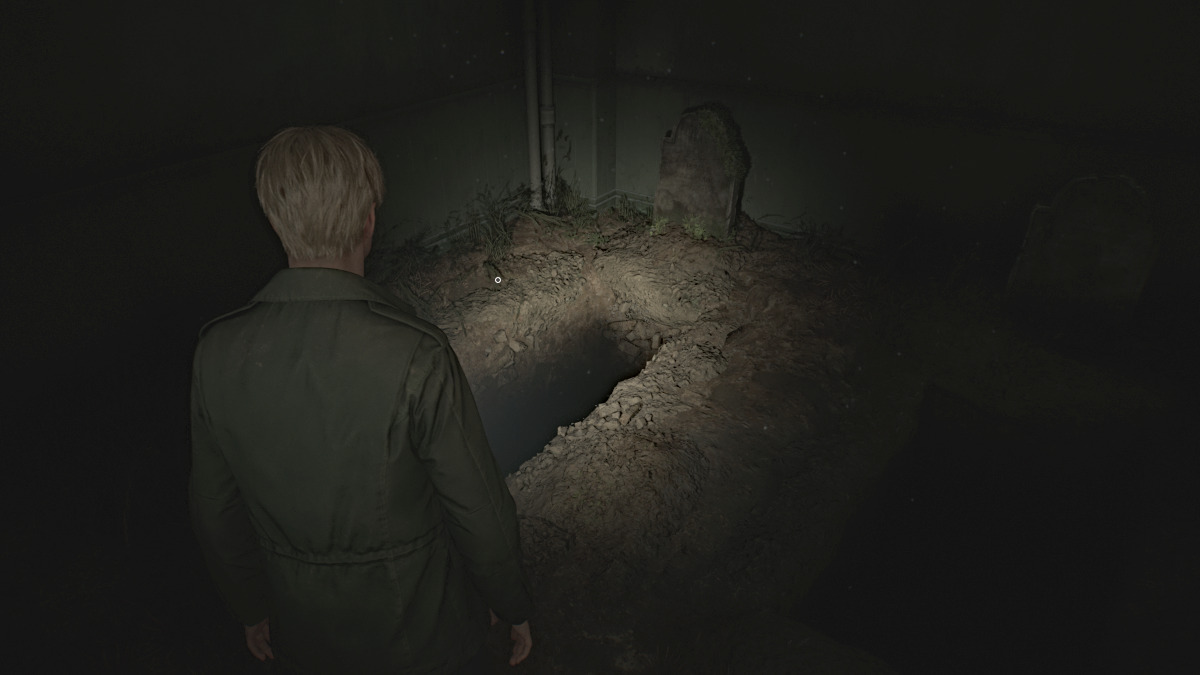
Screenshot by Pro Game Guides
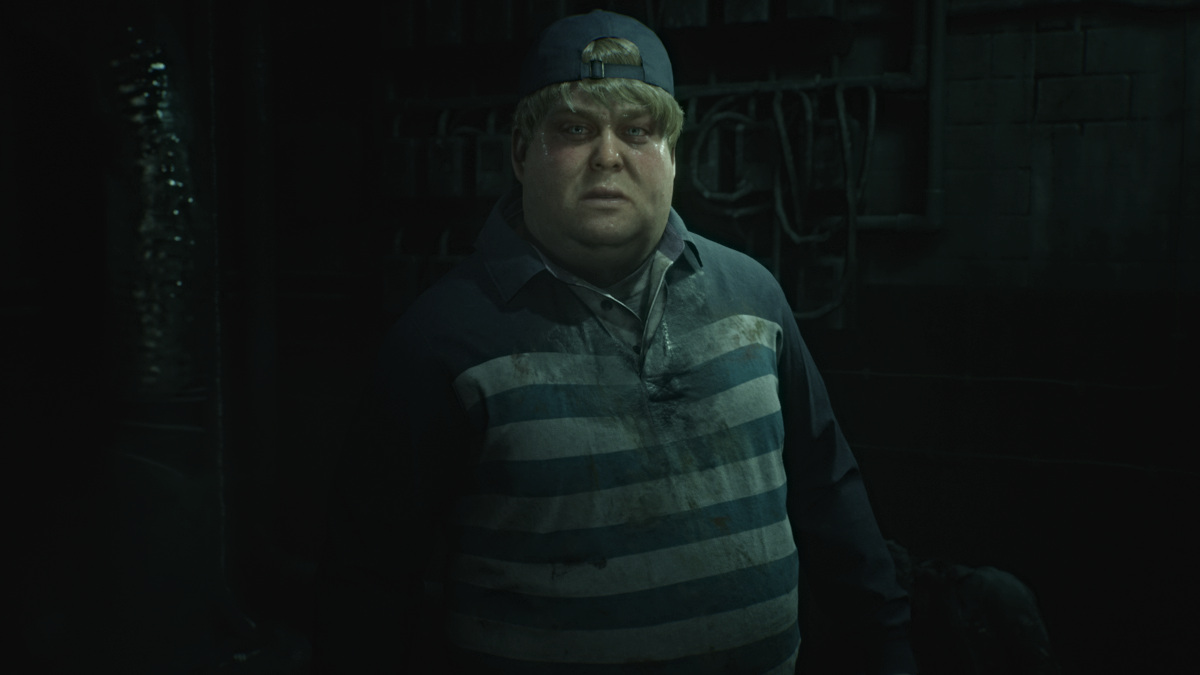
Screenshot by Pro Game Guides
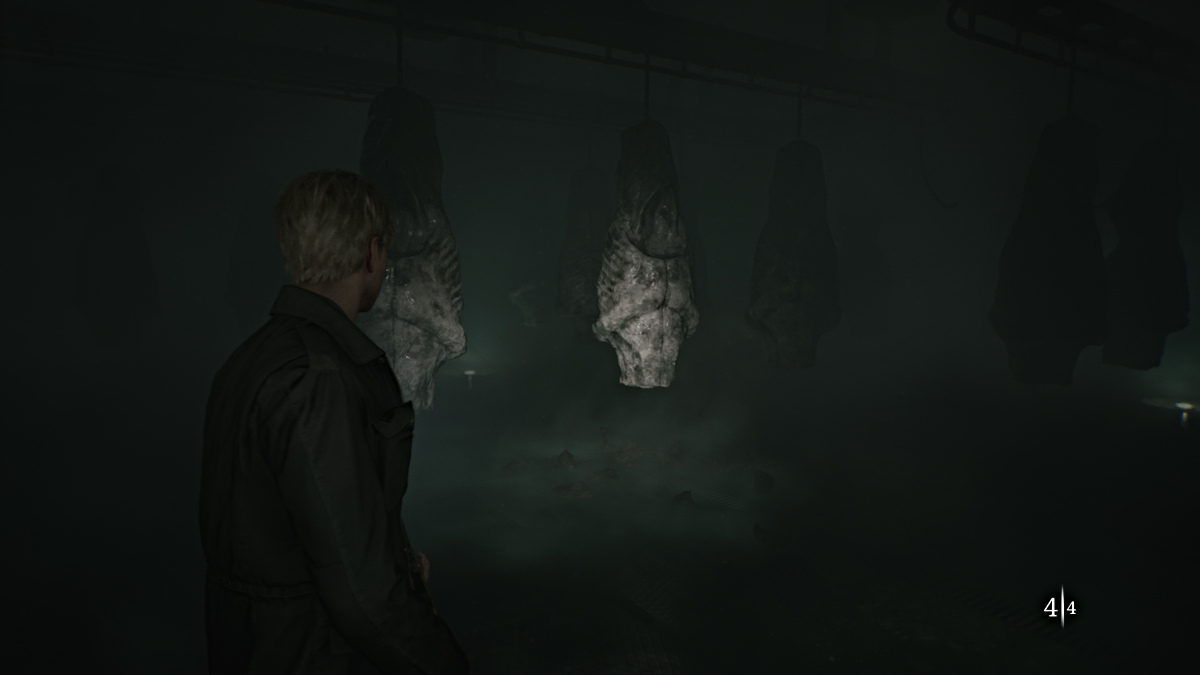
Screenshot by Pro Game Guides
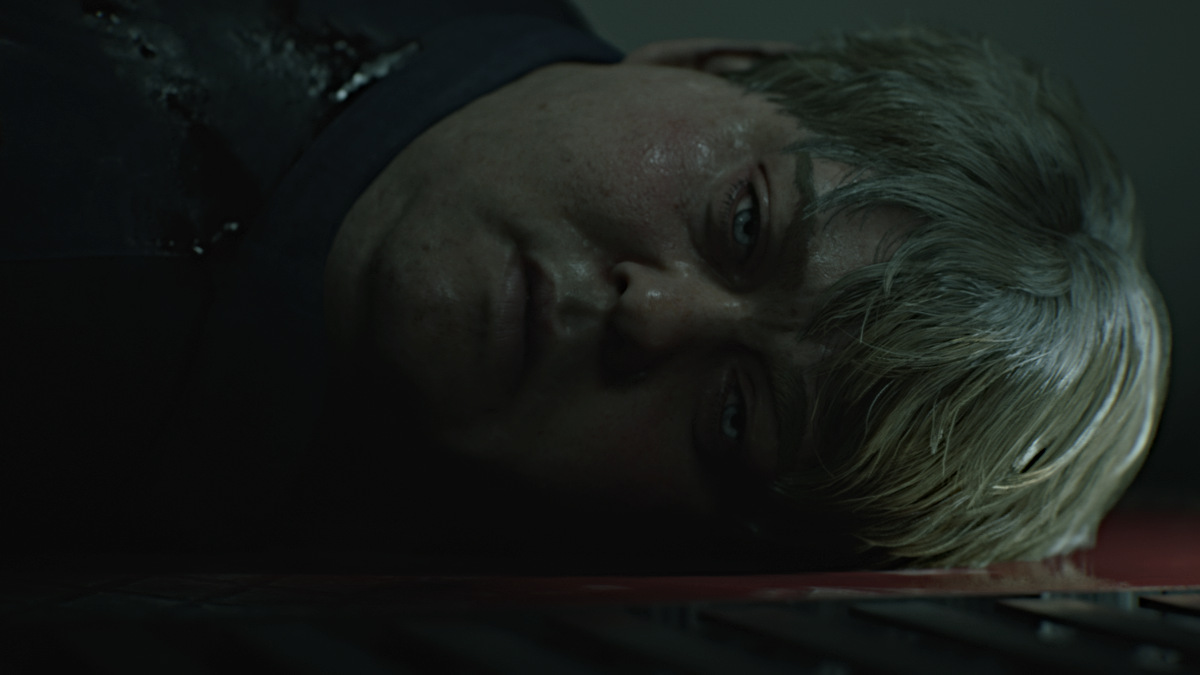
Screenshot by Pro Game Guides
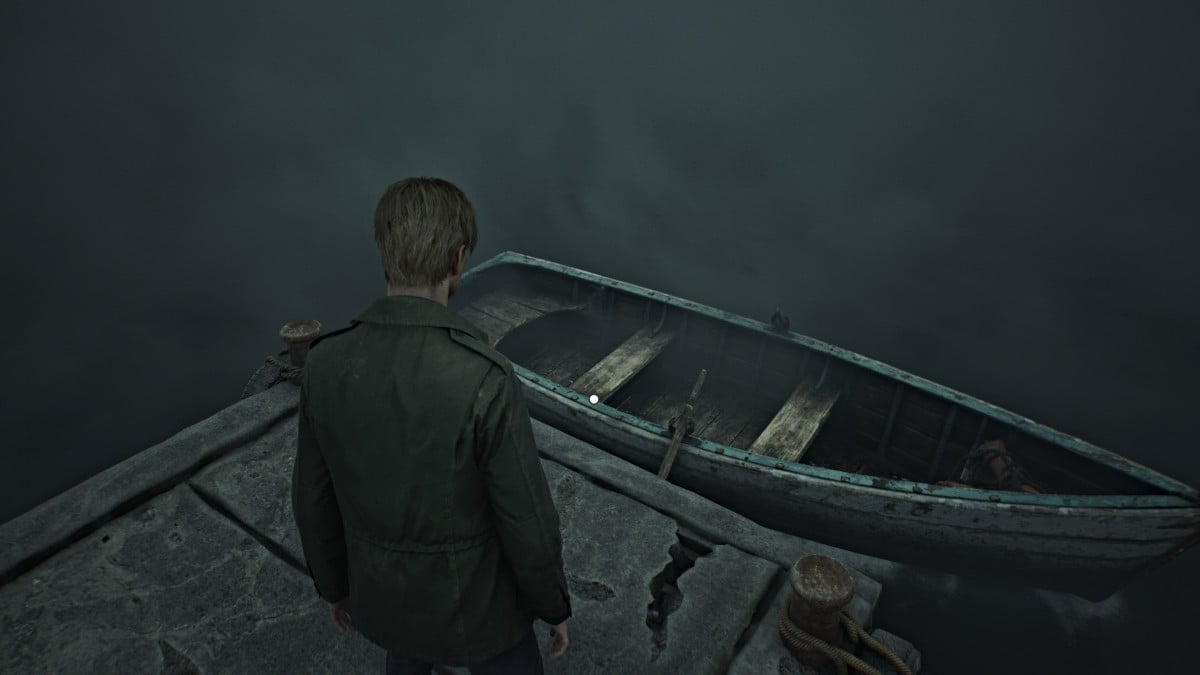
Screenshot by Pro Game Guides
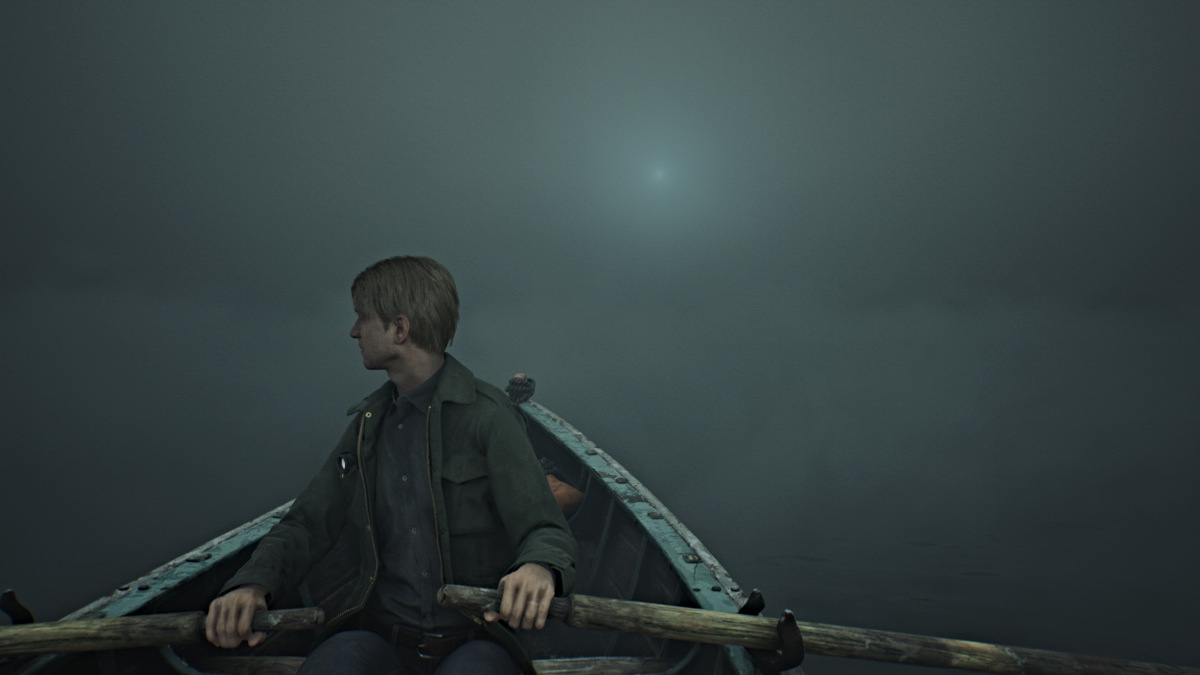
Screenshot by Pro Game Guides
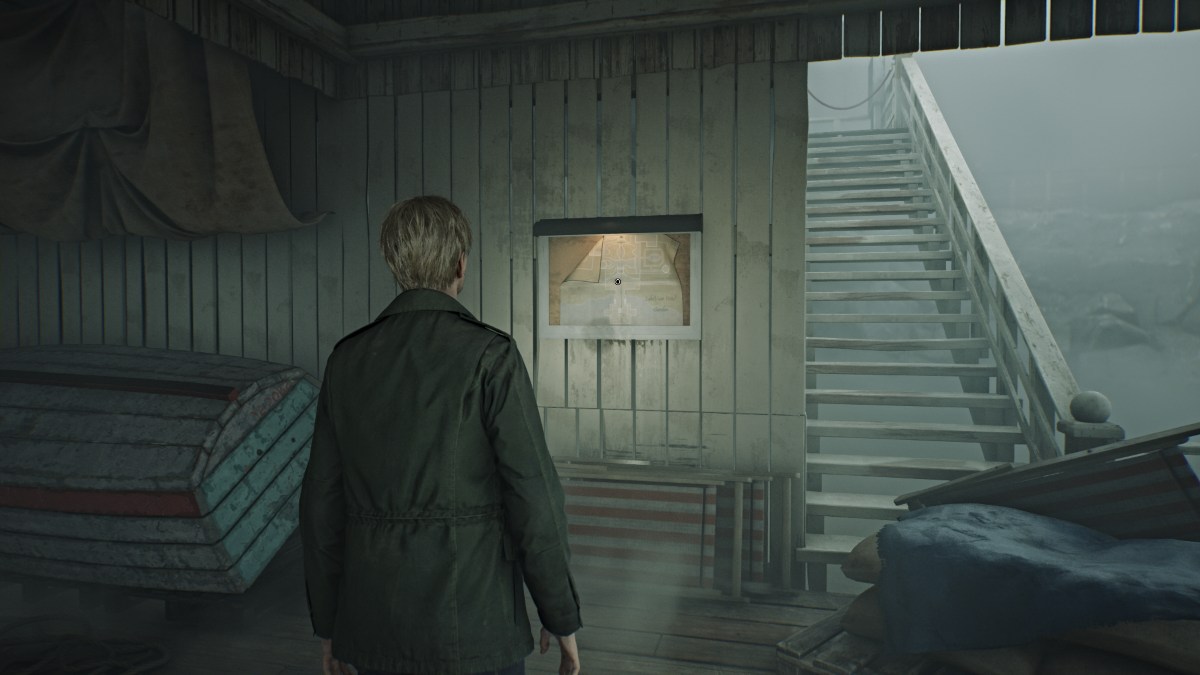
Screenshot by Pro Game Guides
Screenshot by Pro Game Guides
Screenshot by Pro Game Guides
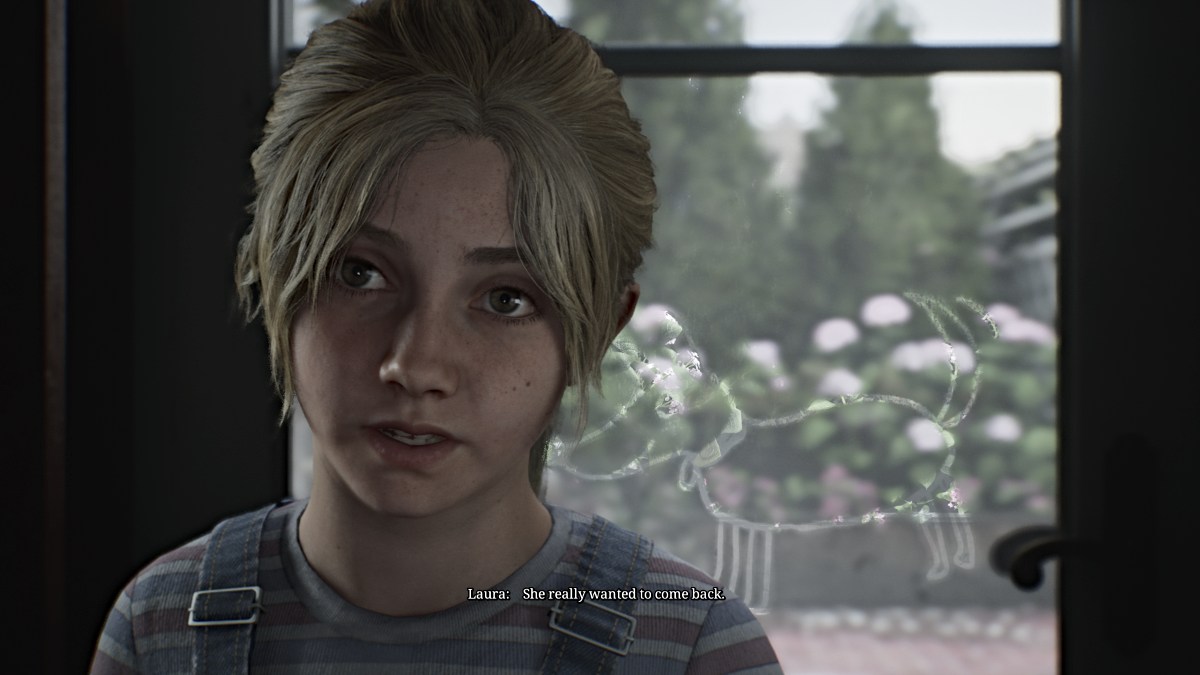
Screenshot by Pro Game Guides
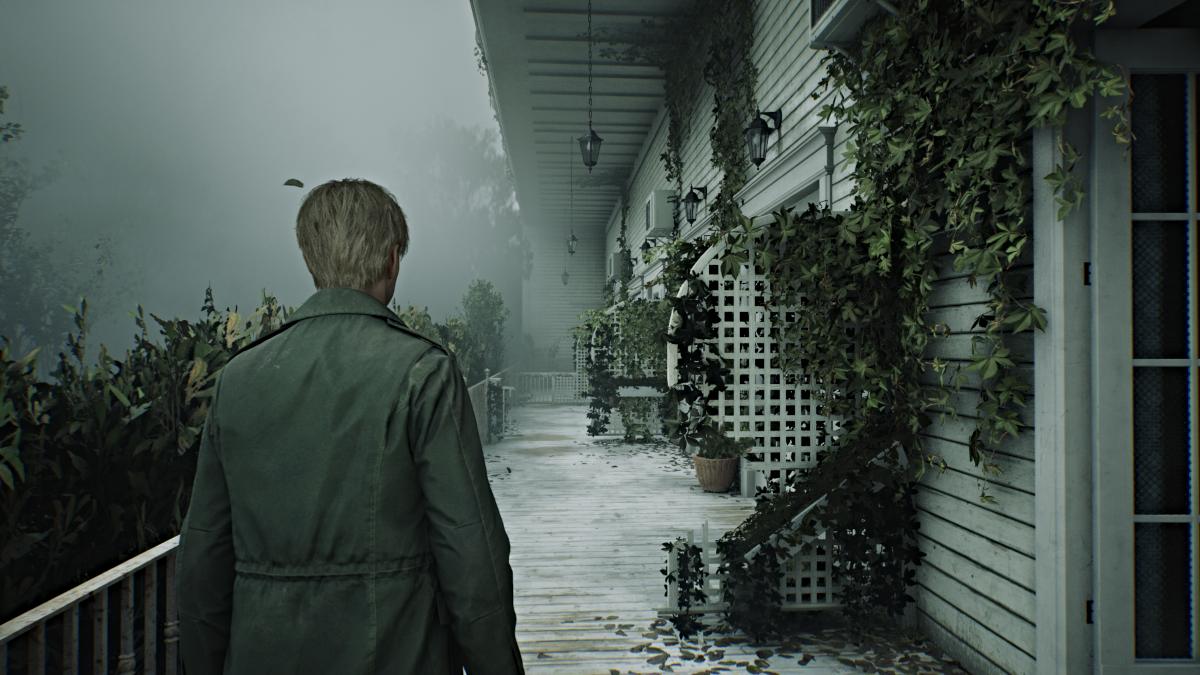
Screenshot by Pro Game Guides
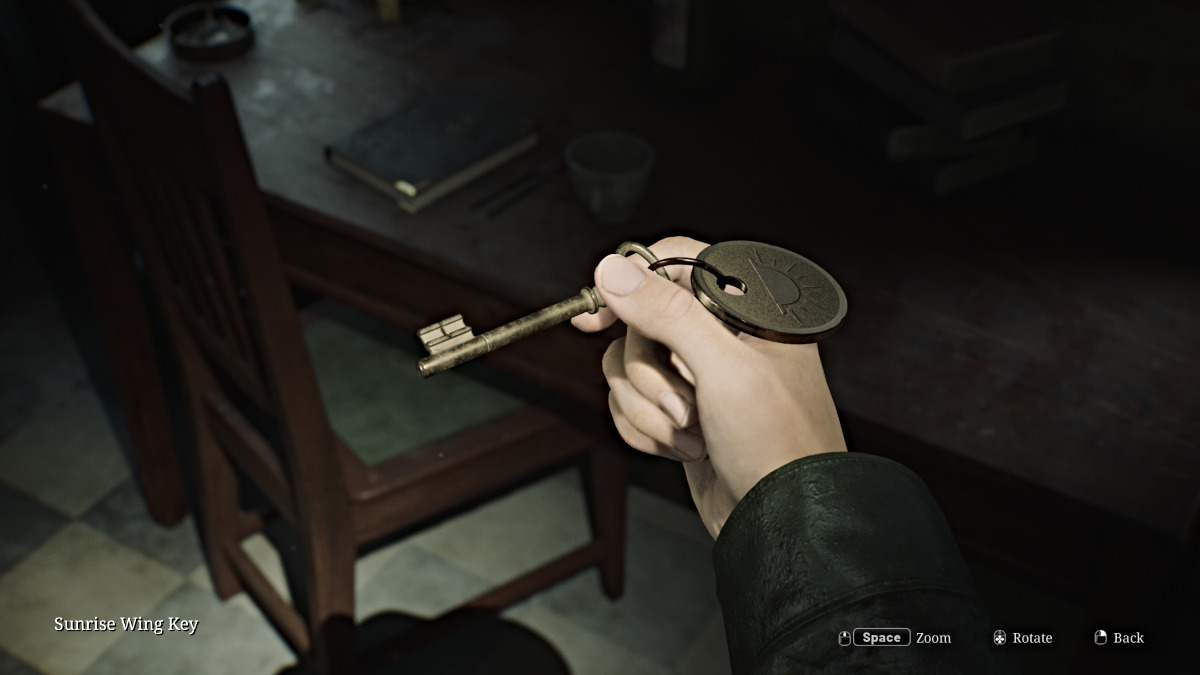
Screenshot by Pro Game Guides
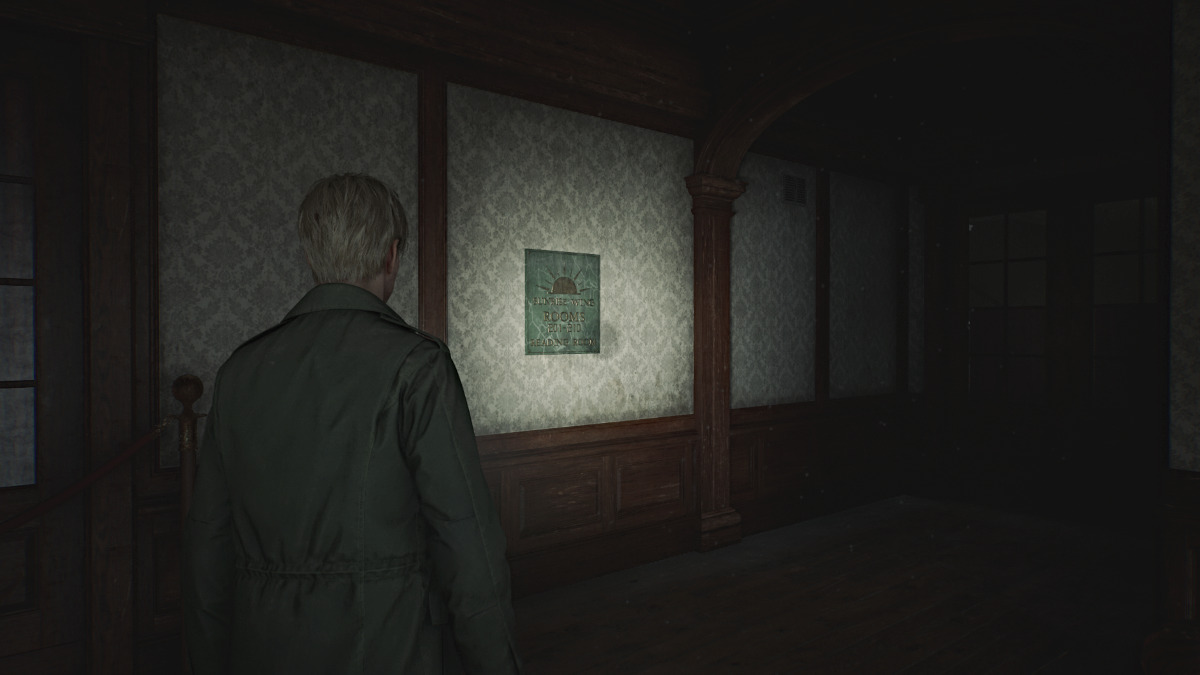
Screenshot by Pro Game Guides
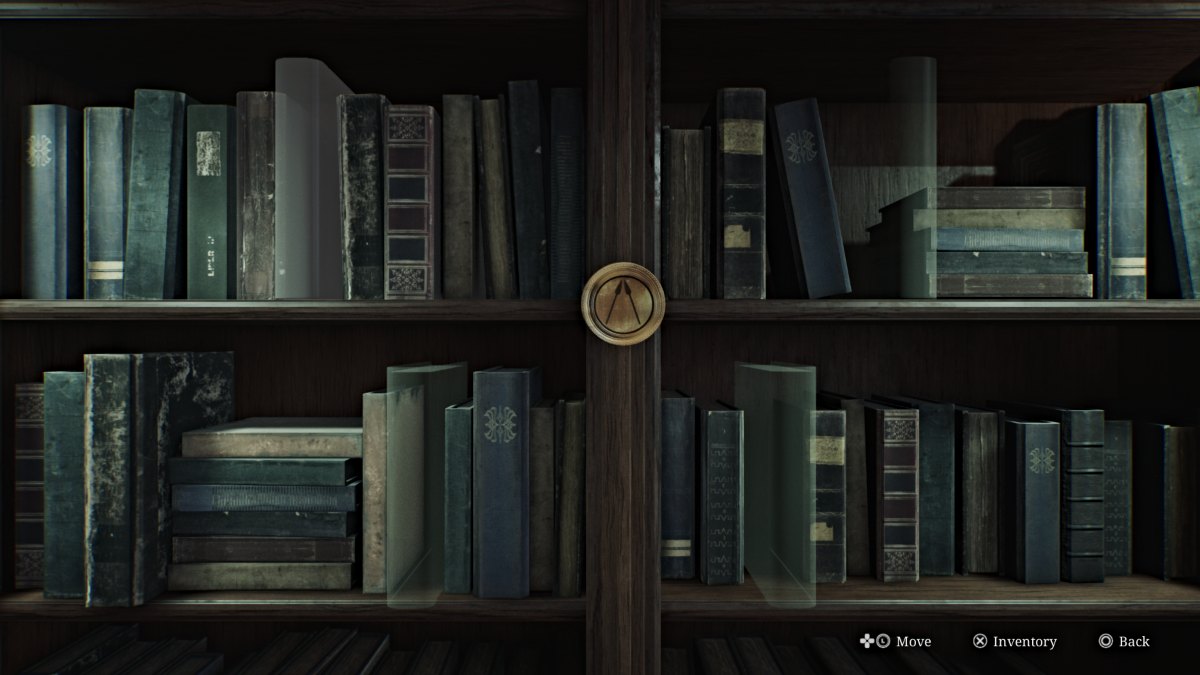
Screenshot by Pro Game Guides
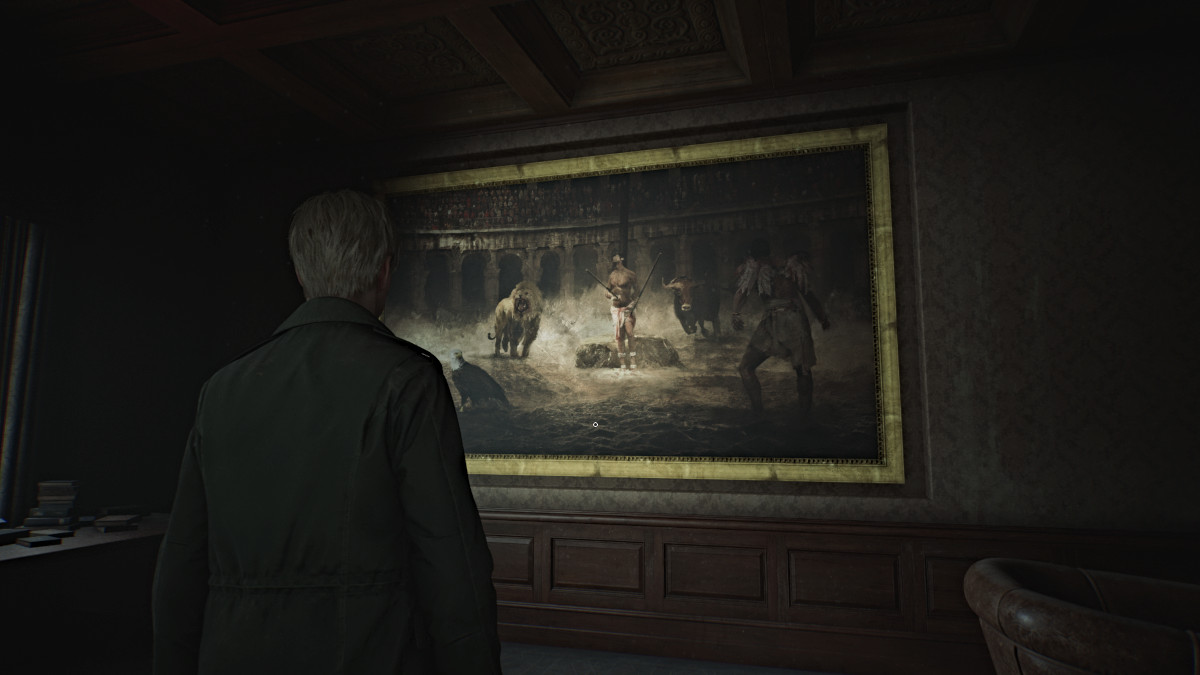
Screenshot by Pro Game Guides
Screenshot by Pro Game Guides
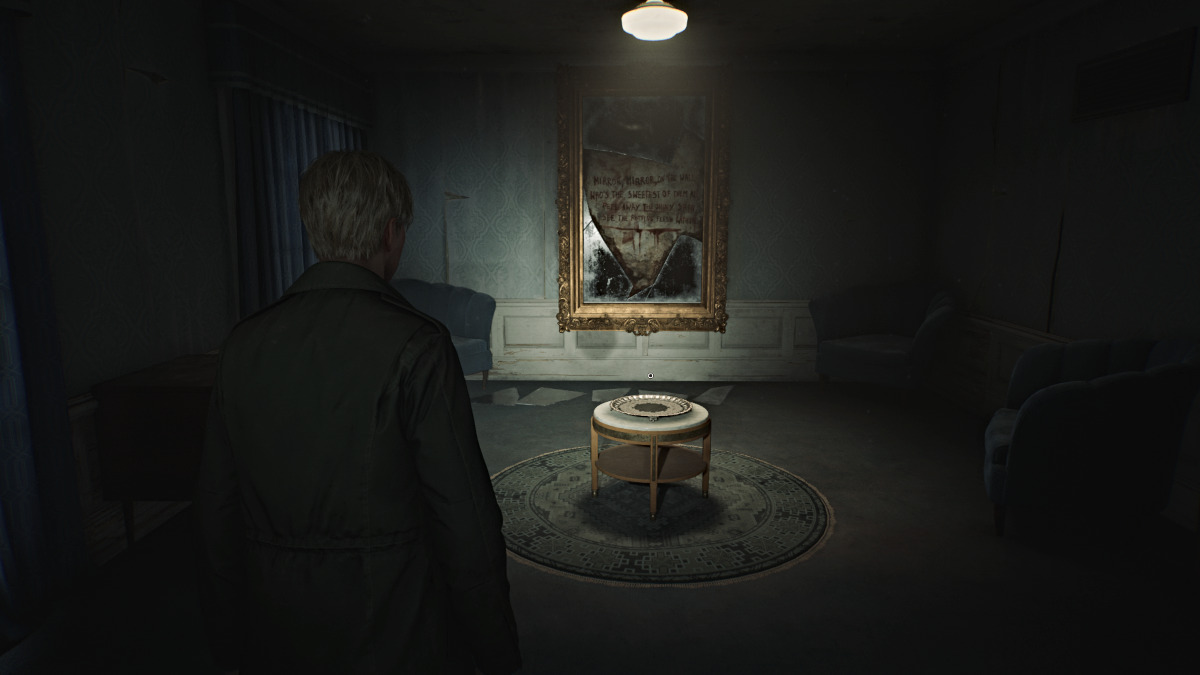
Screenshot by Pro Game Guides
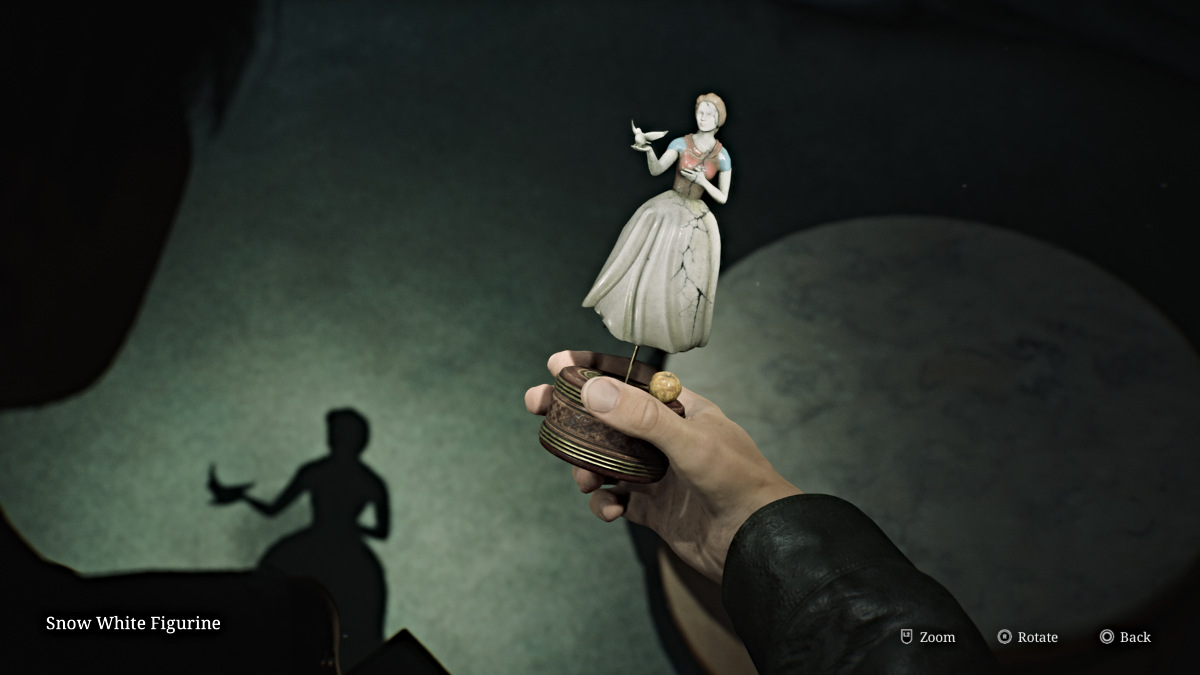
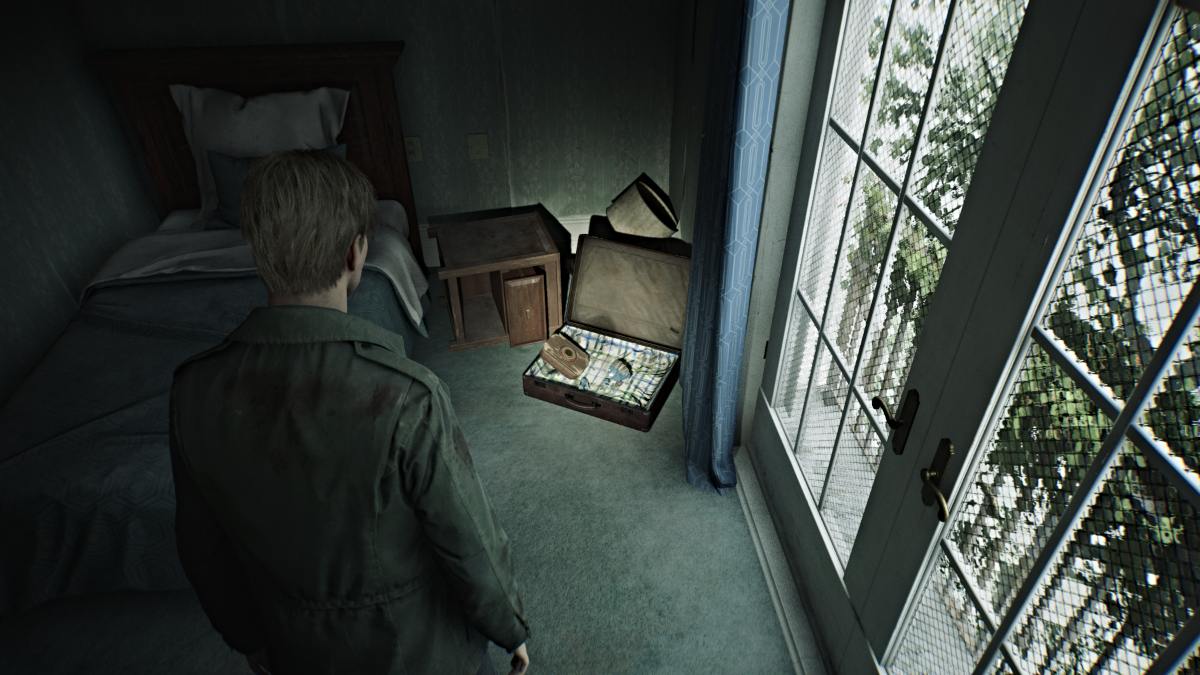
Screenshot by Pro Game Guides
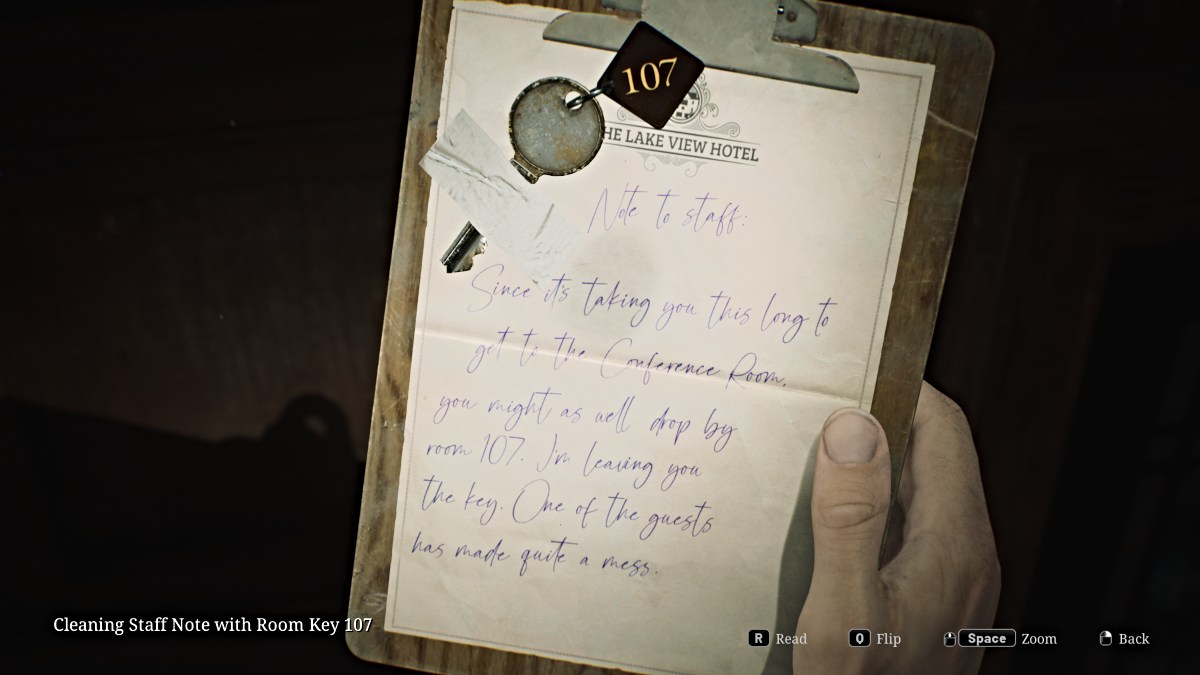
Screenshot by Pro Game Guides
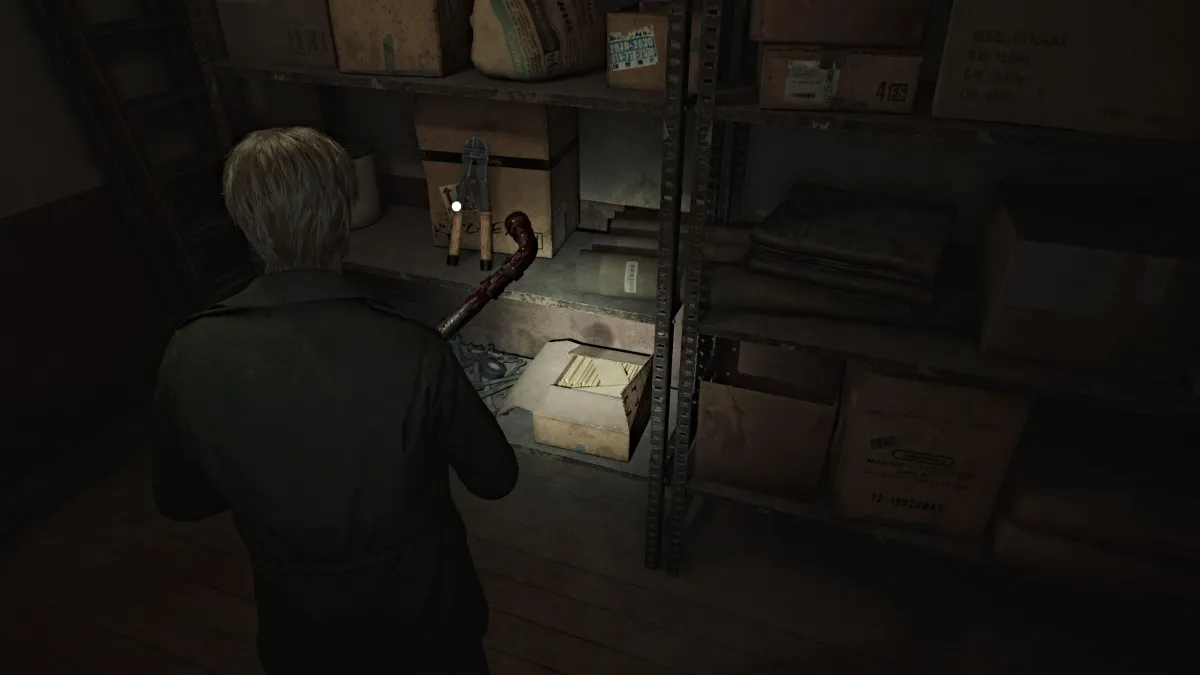
Screenshot by Pro Game Guides
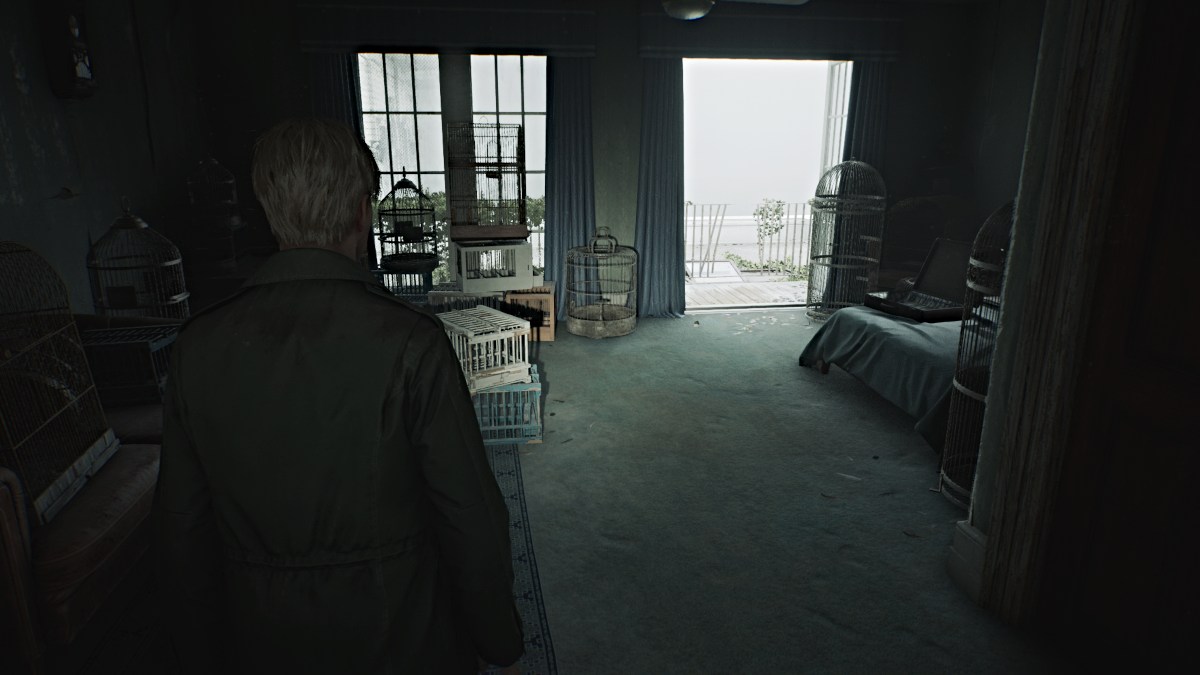
Screenshot by Pro Game Guides

Screenshot by Pro Game Guides

Screenshot by Pro Game Guides
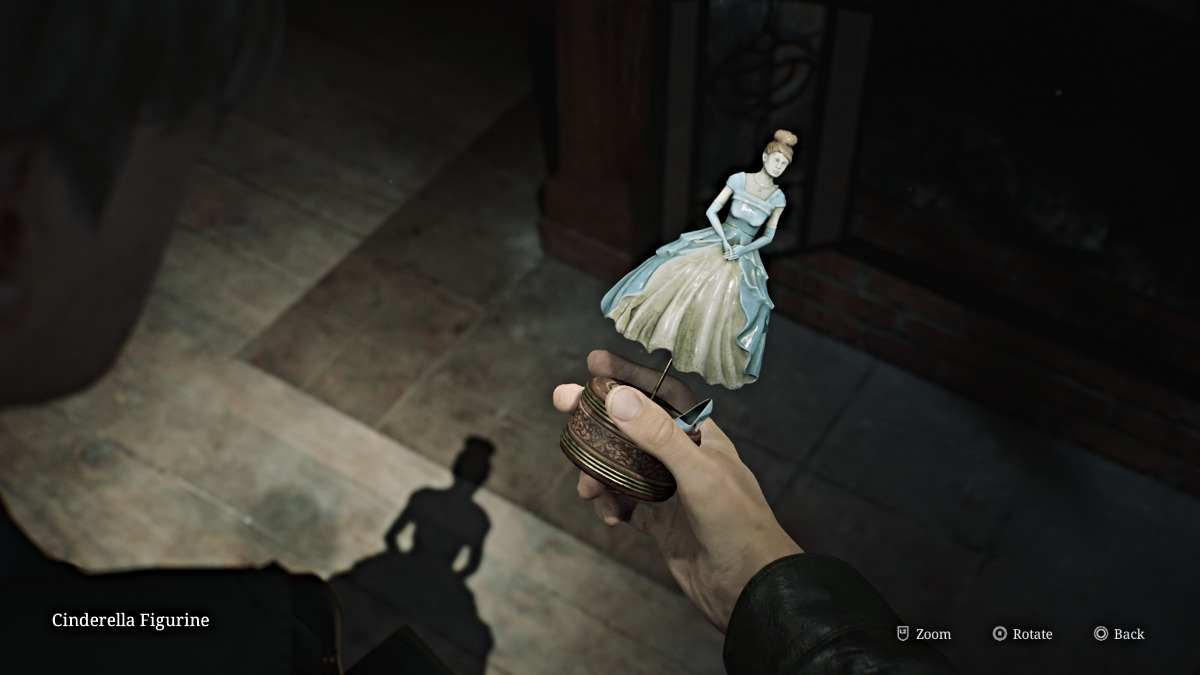
Screenshot by Pro Game Guides
Screenshot by Pro Game Guides
Screenshot by Pro Game Guides

Screenshot by Pro Game Guides

Screenshot by Pro Game Guides
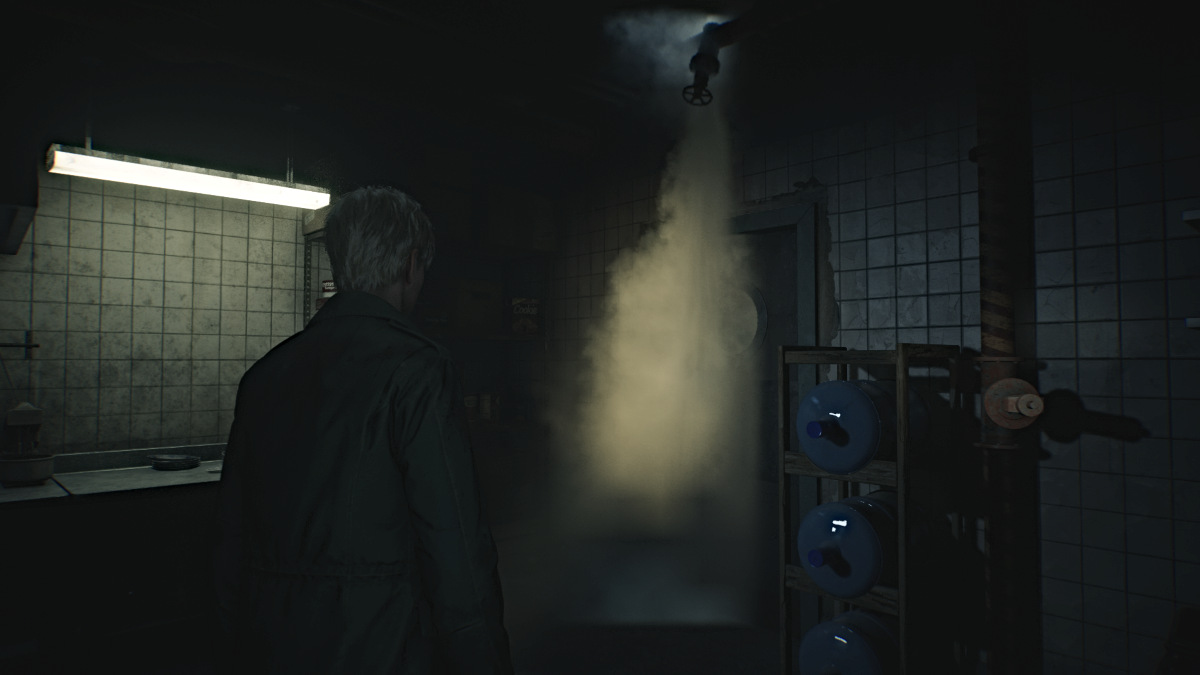
Screenshot by Pro Game Guides
Screenshot by Pro Game Guides
Screenshot by Pro Game Guides
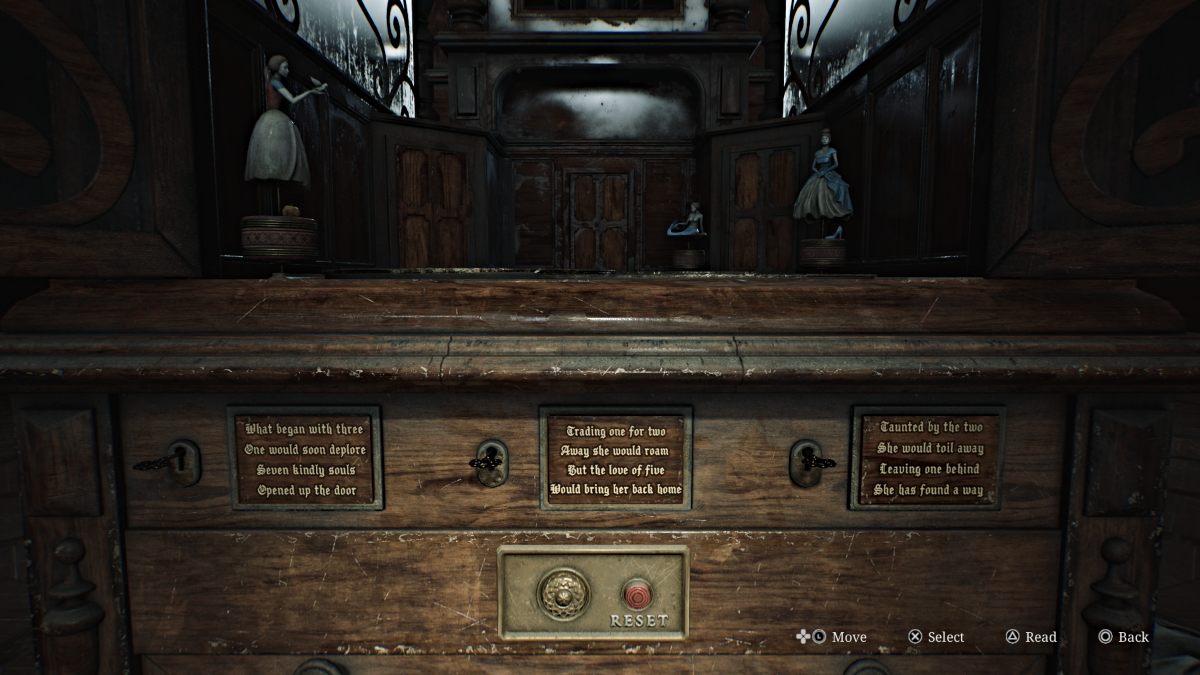
Screenshot by Pro Game Guides
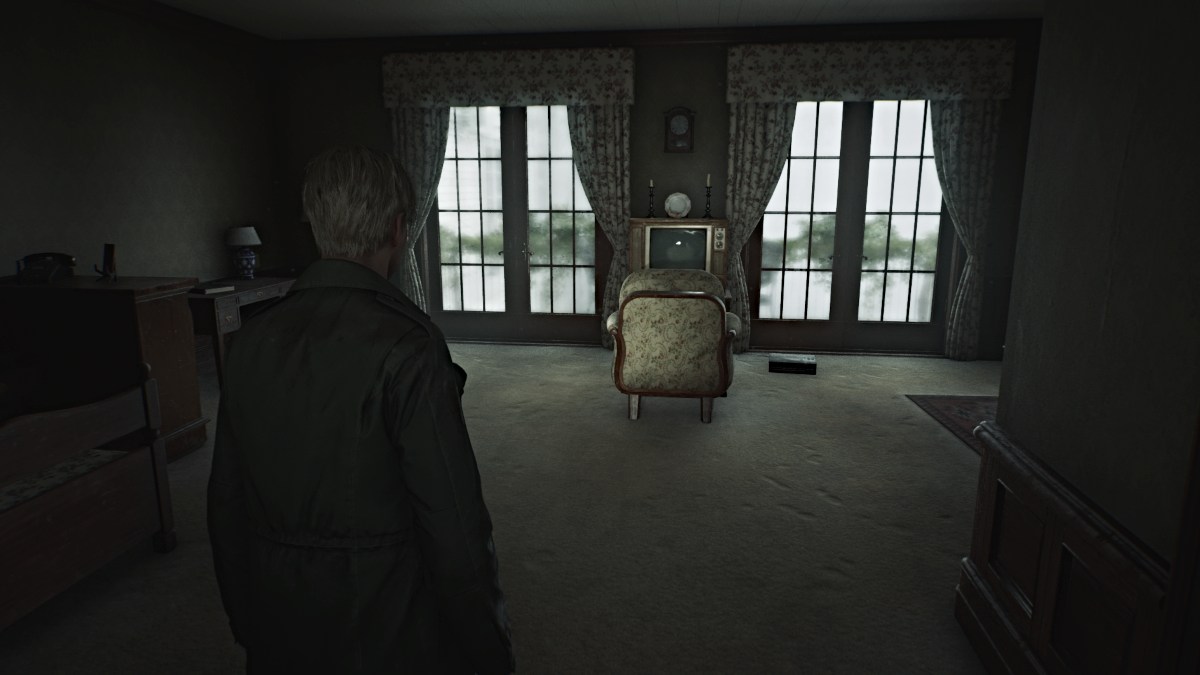
Screenshot by Pro Game Guides
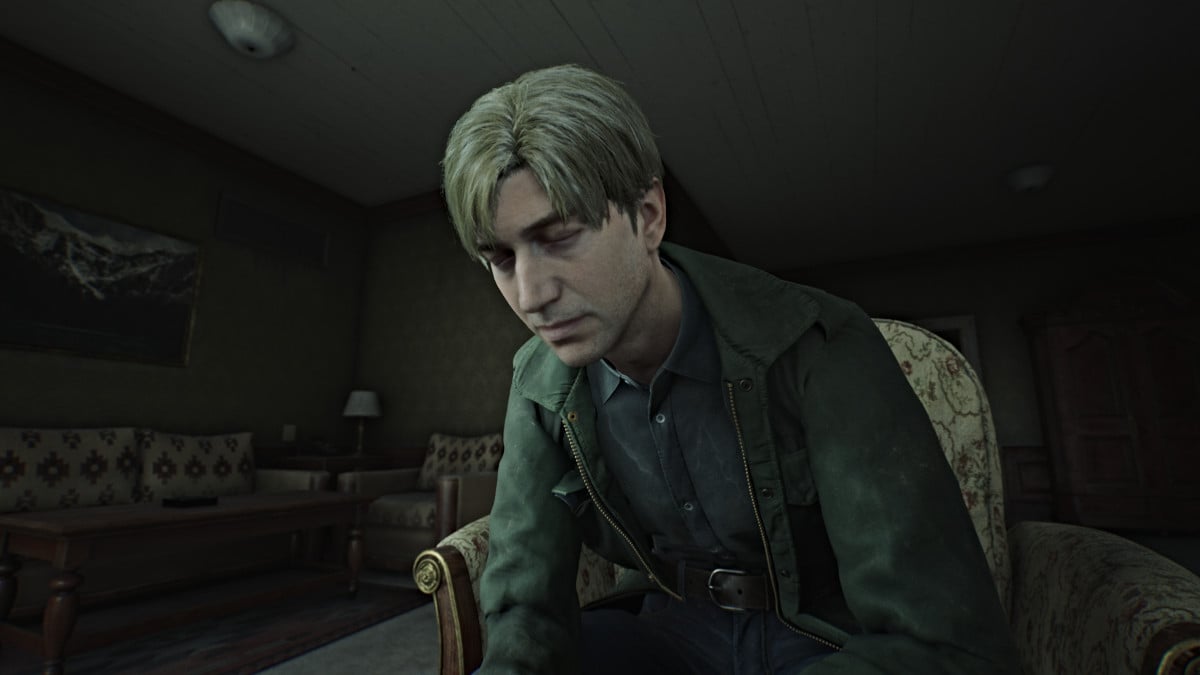
Screenshot by Pro Game Guides
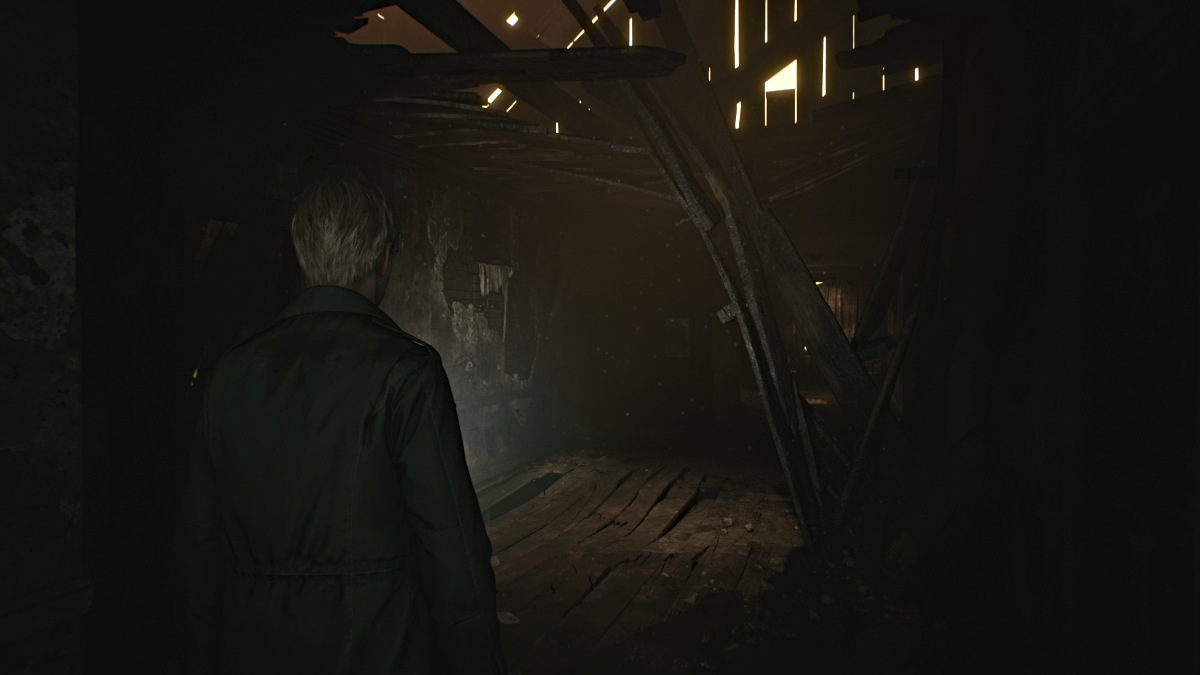
Screenshot by Pro Game Guides
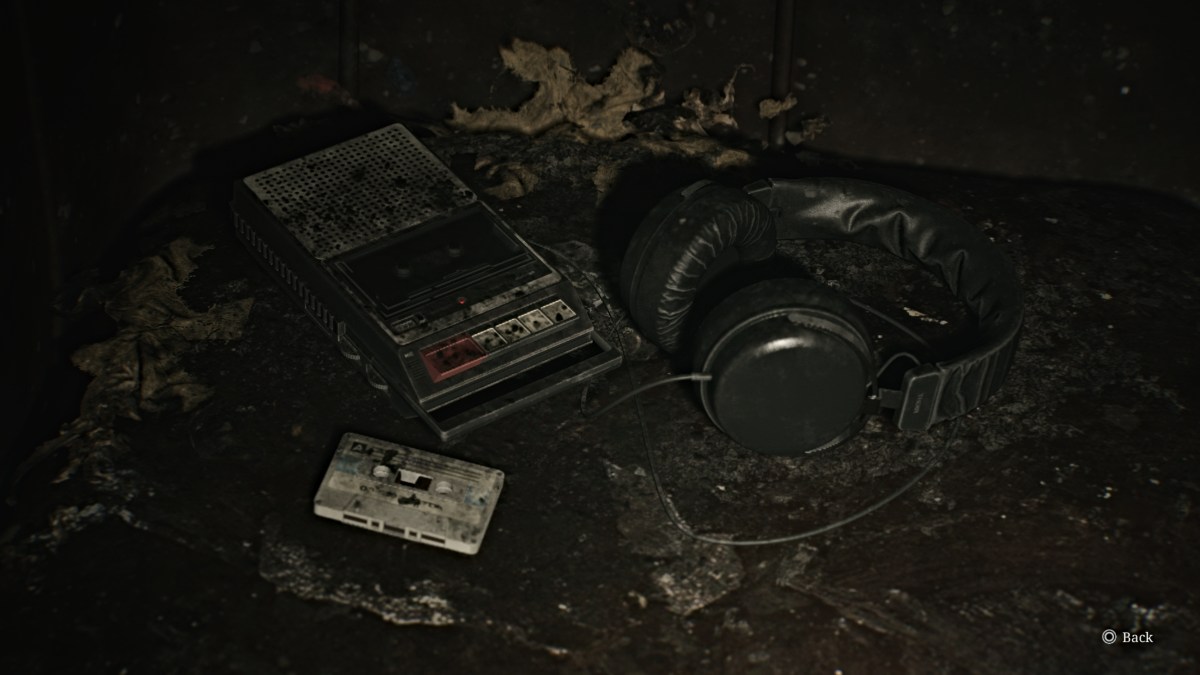
Screenshot by Pro Game Guides
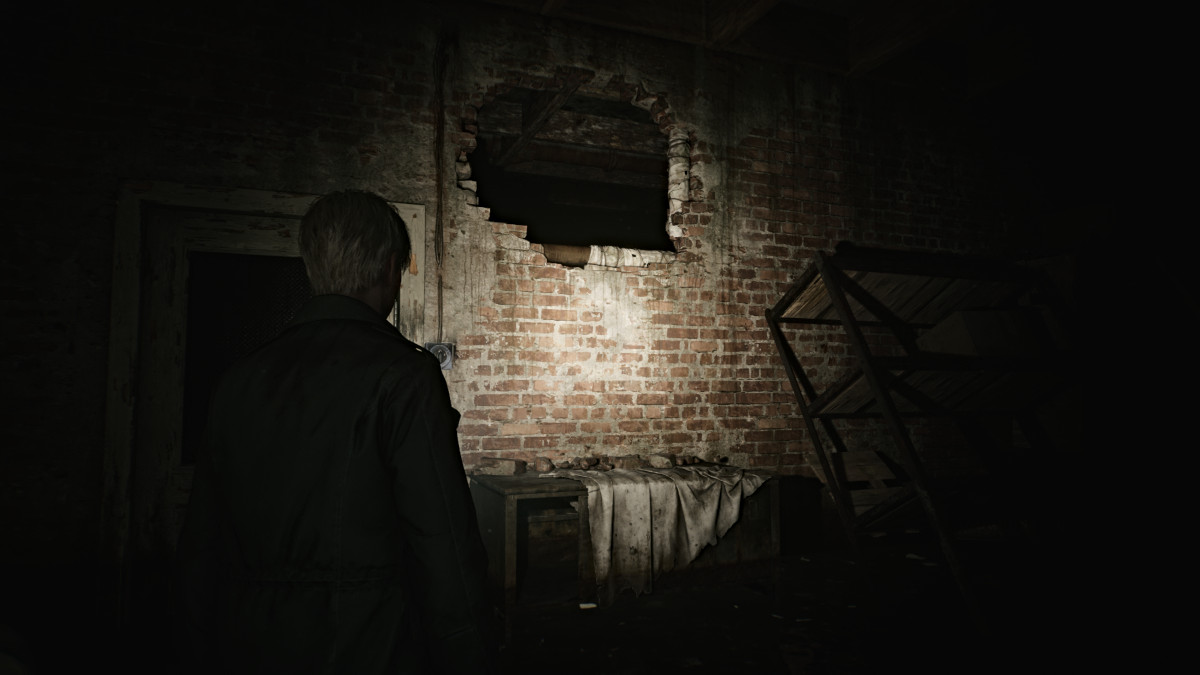
Screenshot by Pro Game Guides
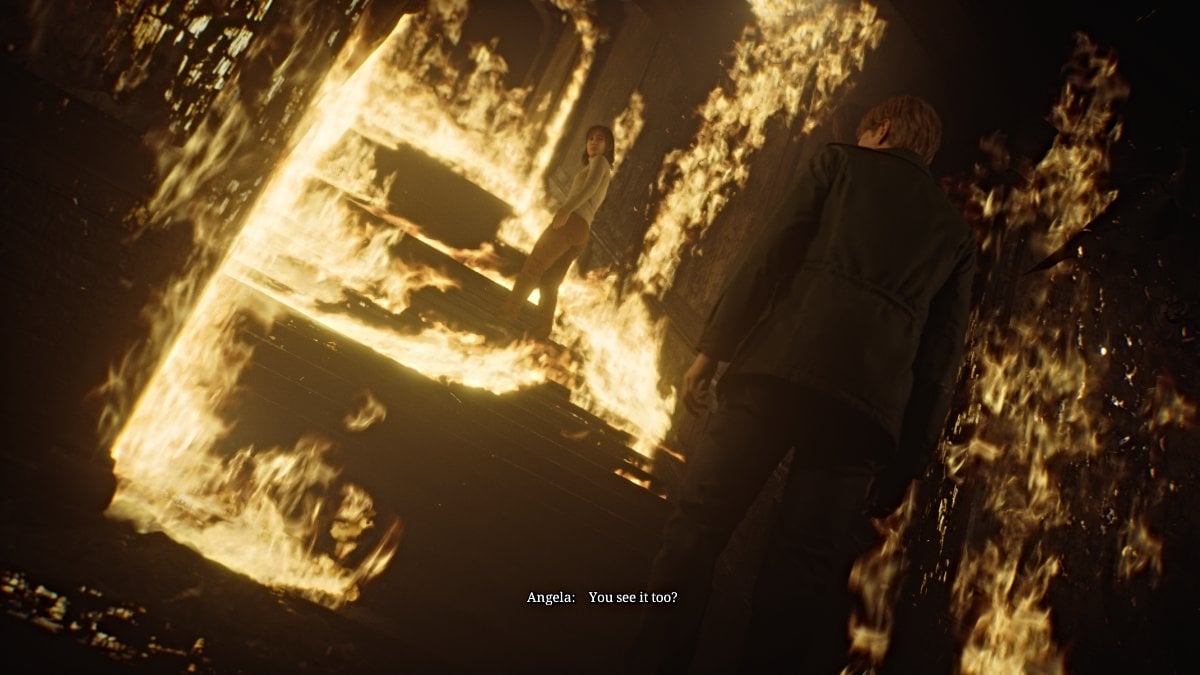
Screenshot by Pro Game Guides
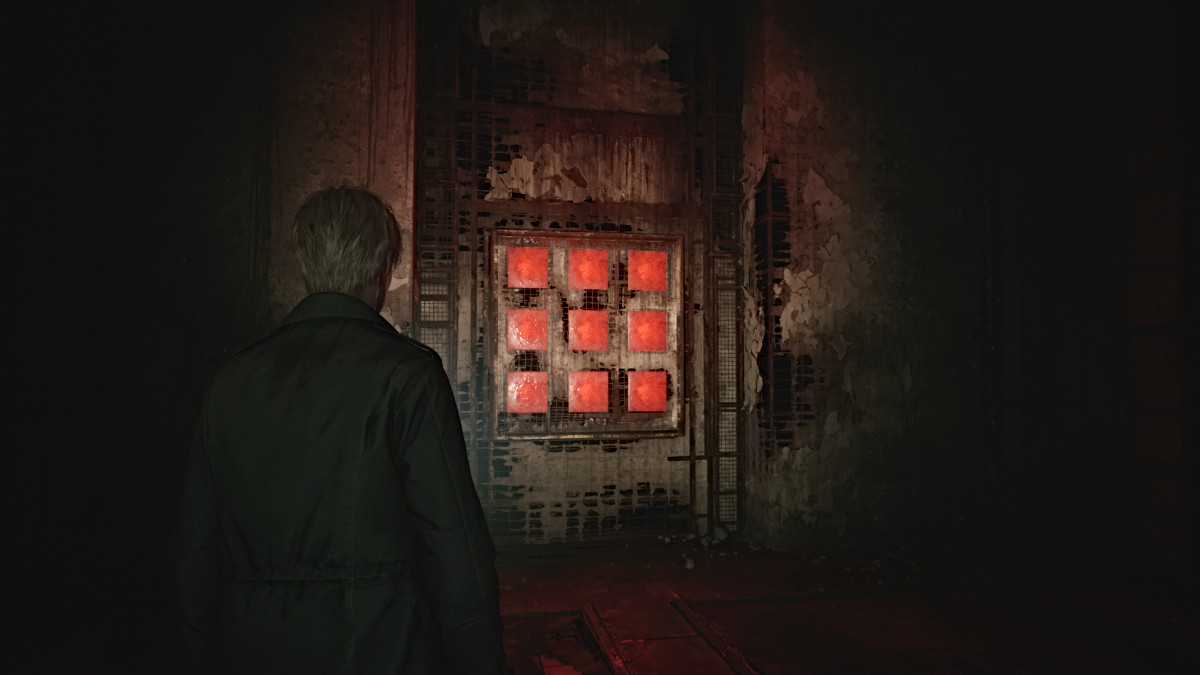
Screenshot by Pro Game Guides
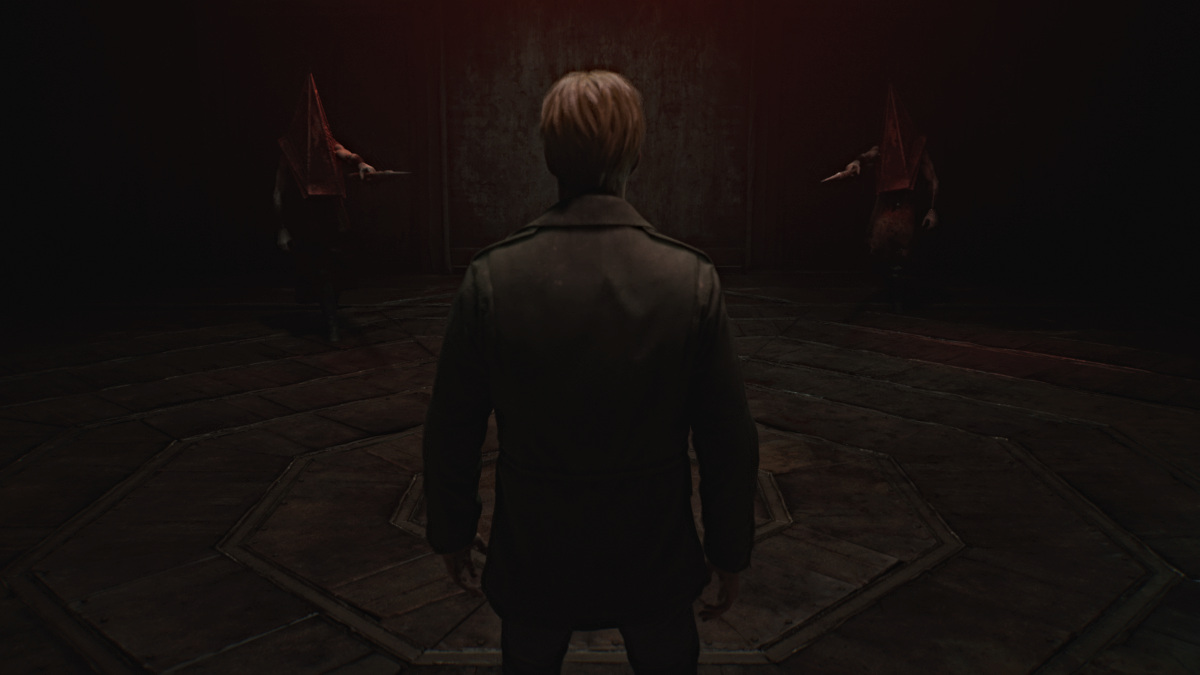
Screenshot by Pro Game Guides
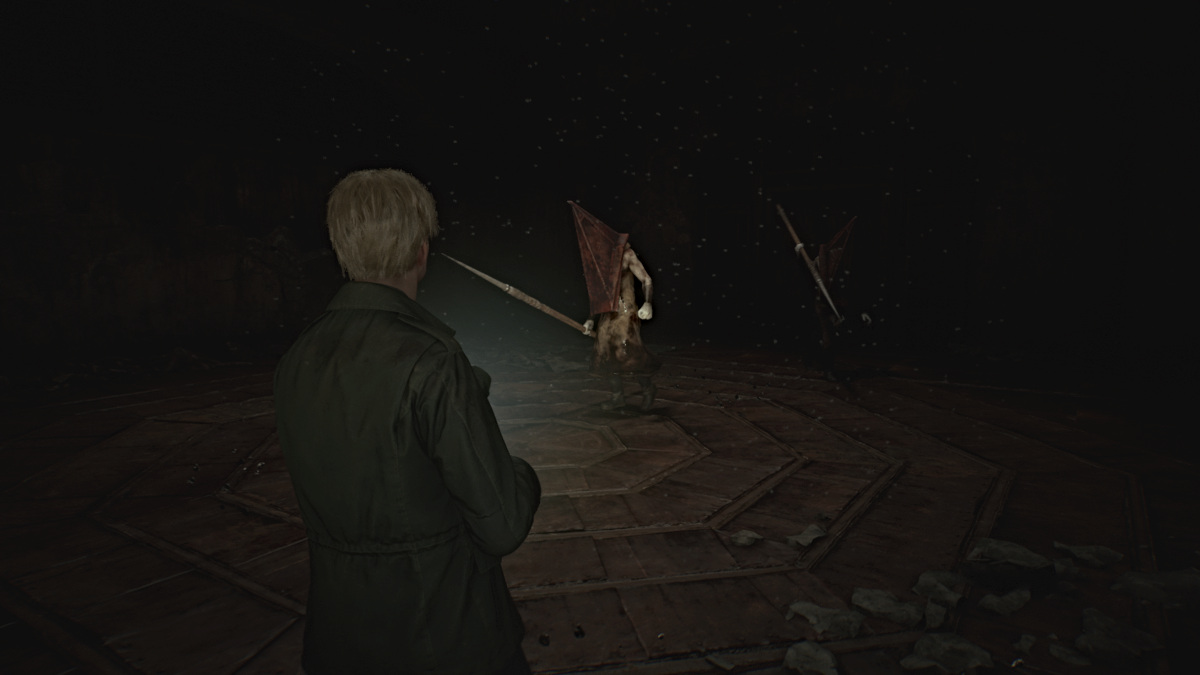
Screenshot by Pro Game Guides

Screenshot by Pro Game Guides
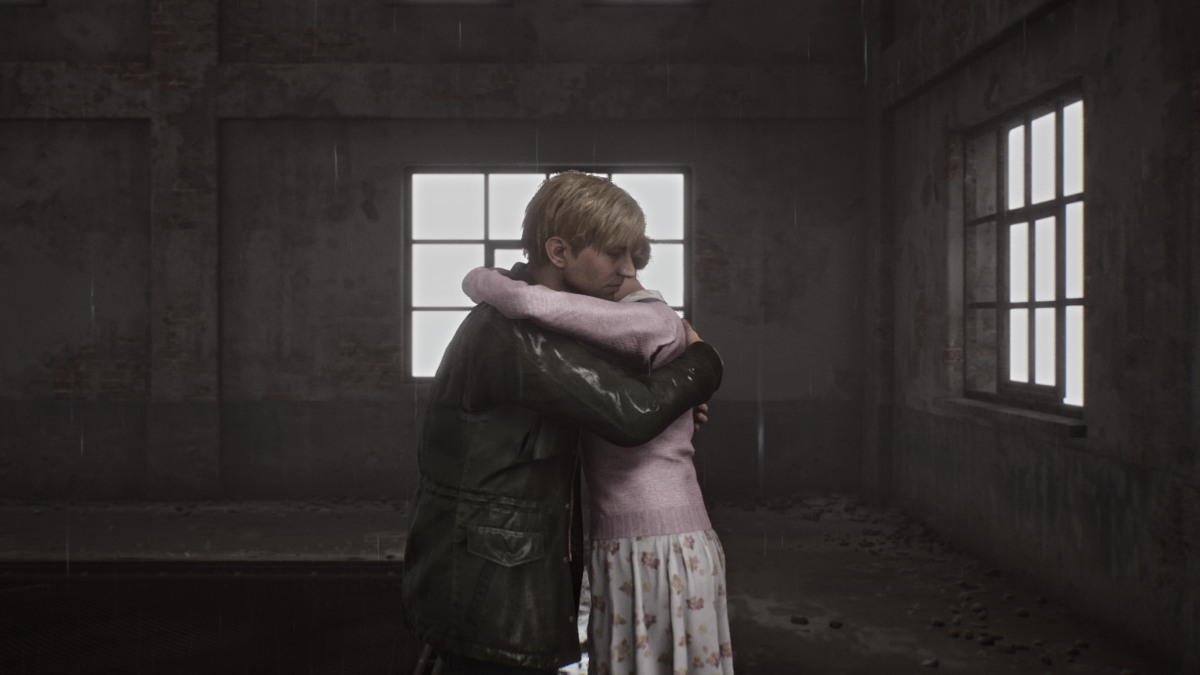
Screenshot by Pro Game Guides
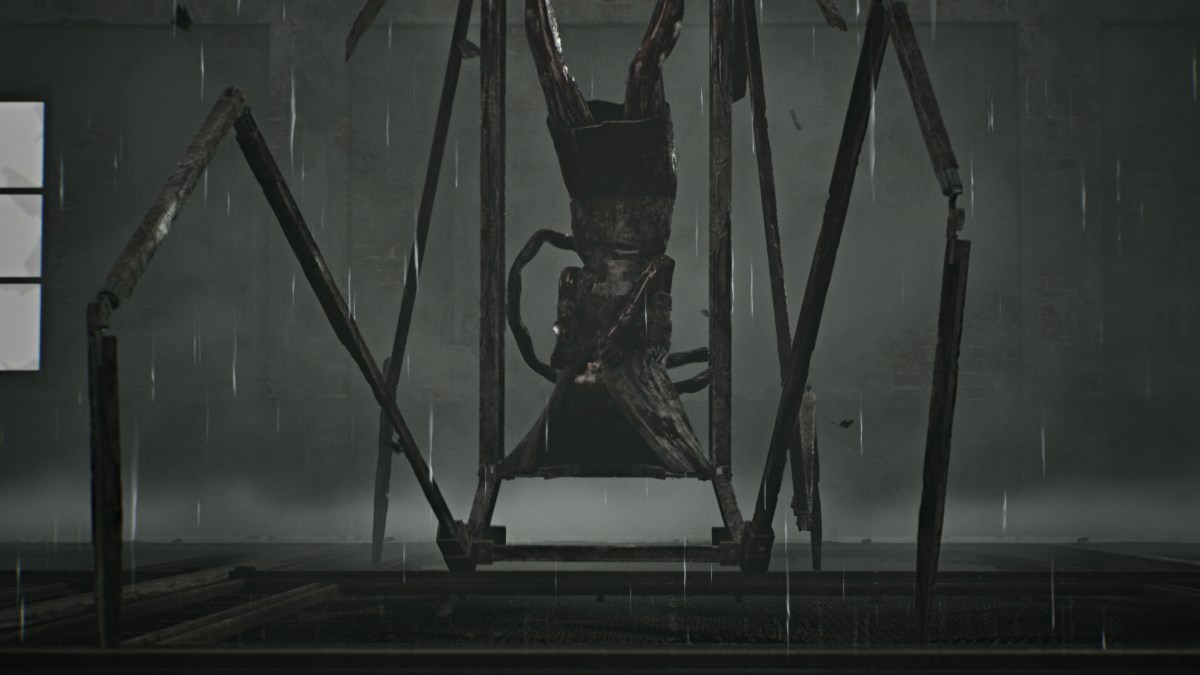
Screenshot by Pro Game Guides
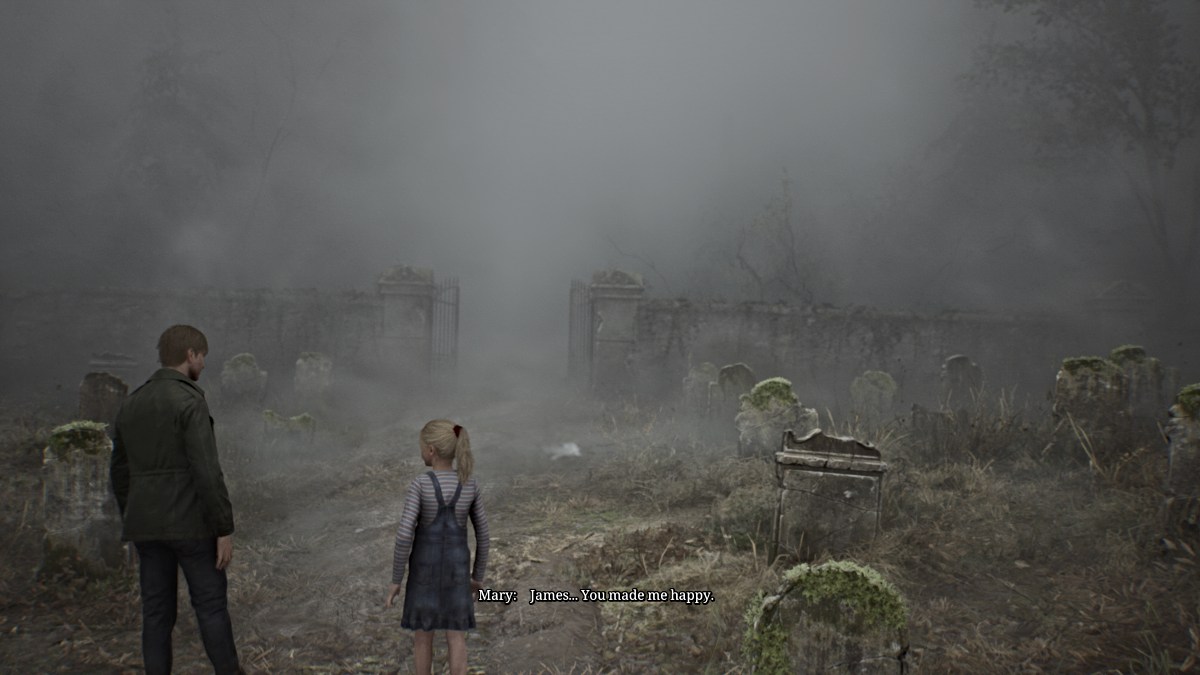
Screenshot by Pro Game Guides
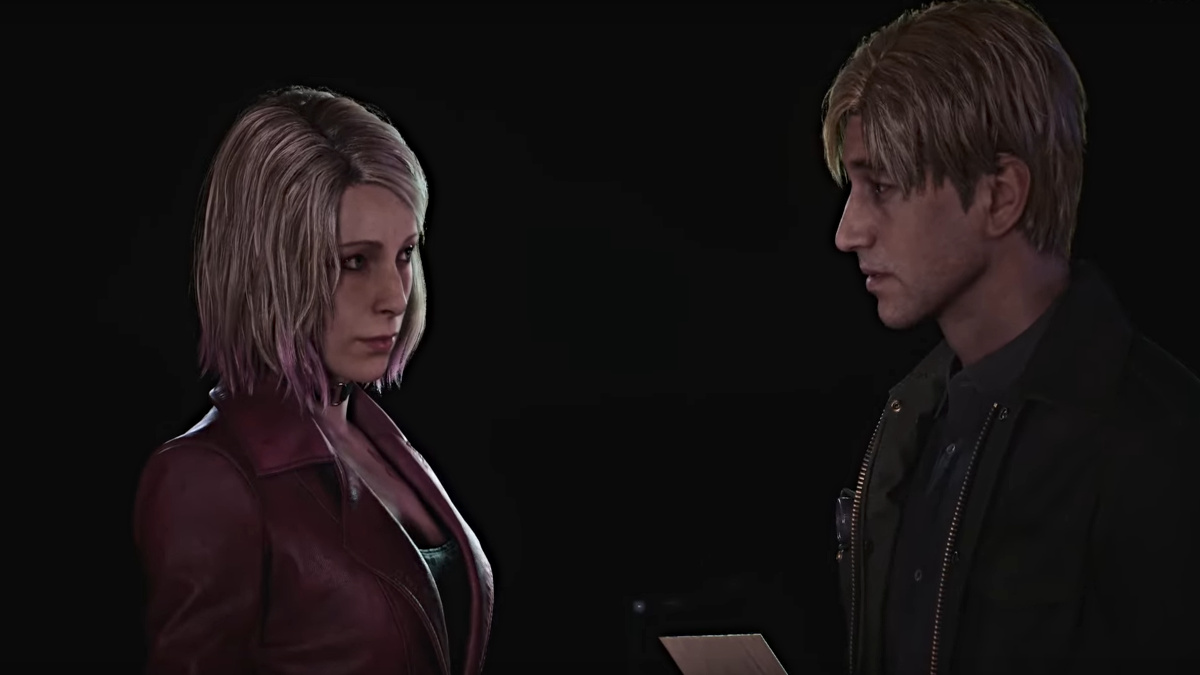
Screenshot by Pro Game Guides
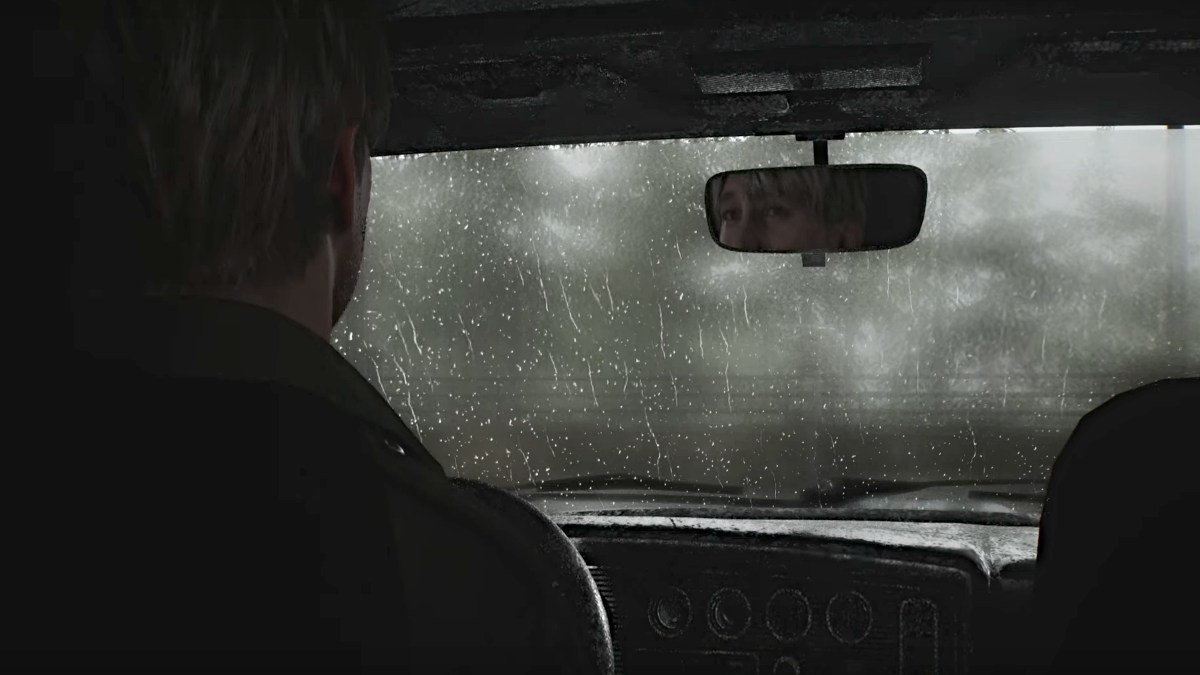
Screenshot by Pro Game Guides
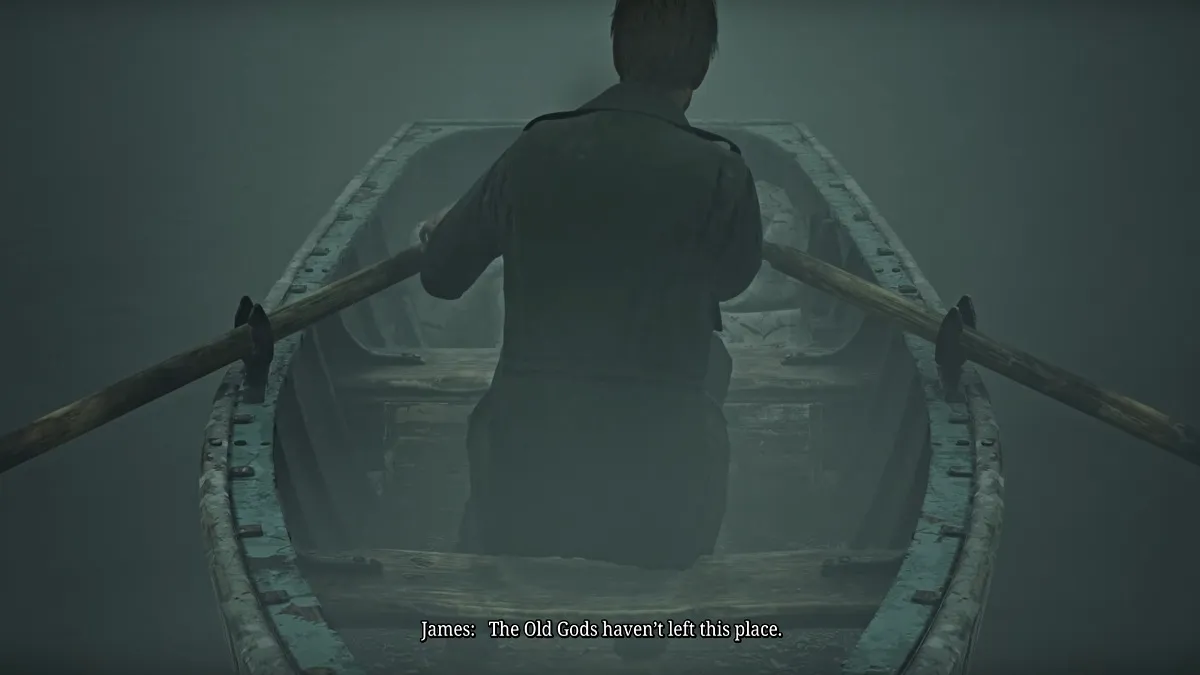
Screenshot by Pro Game Guides
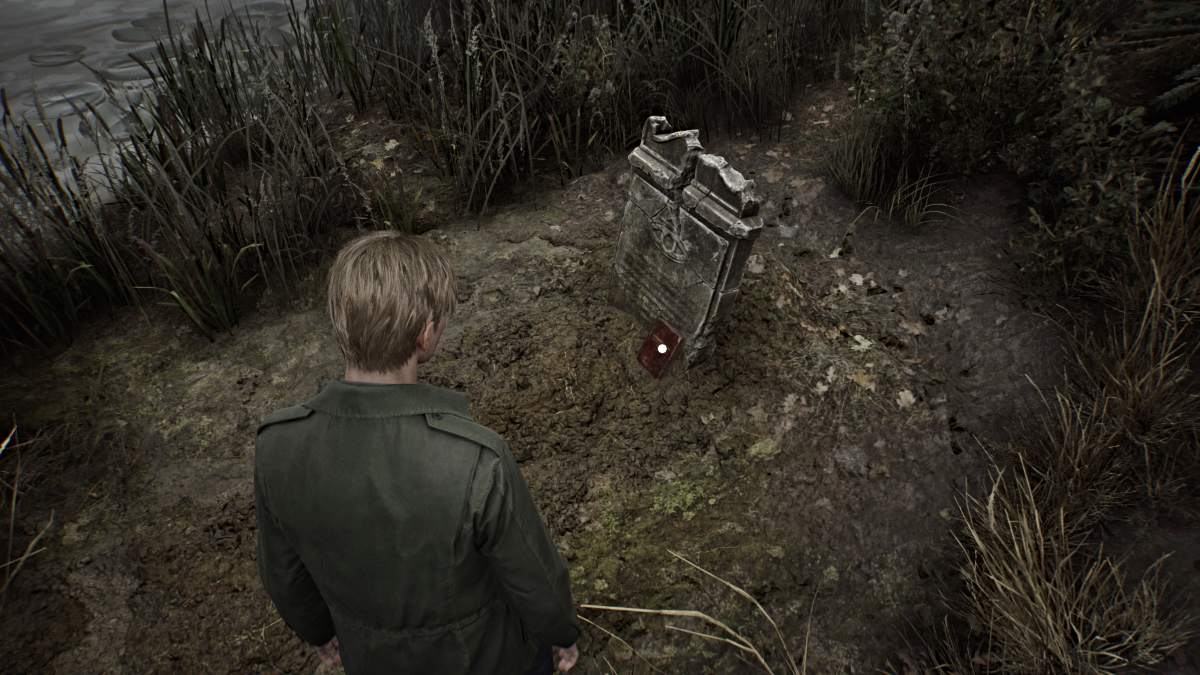
Crimson Ceremony book - Screenshot by Pro Game Guides
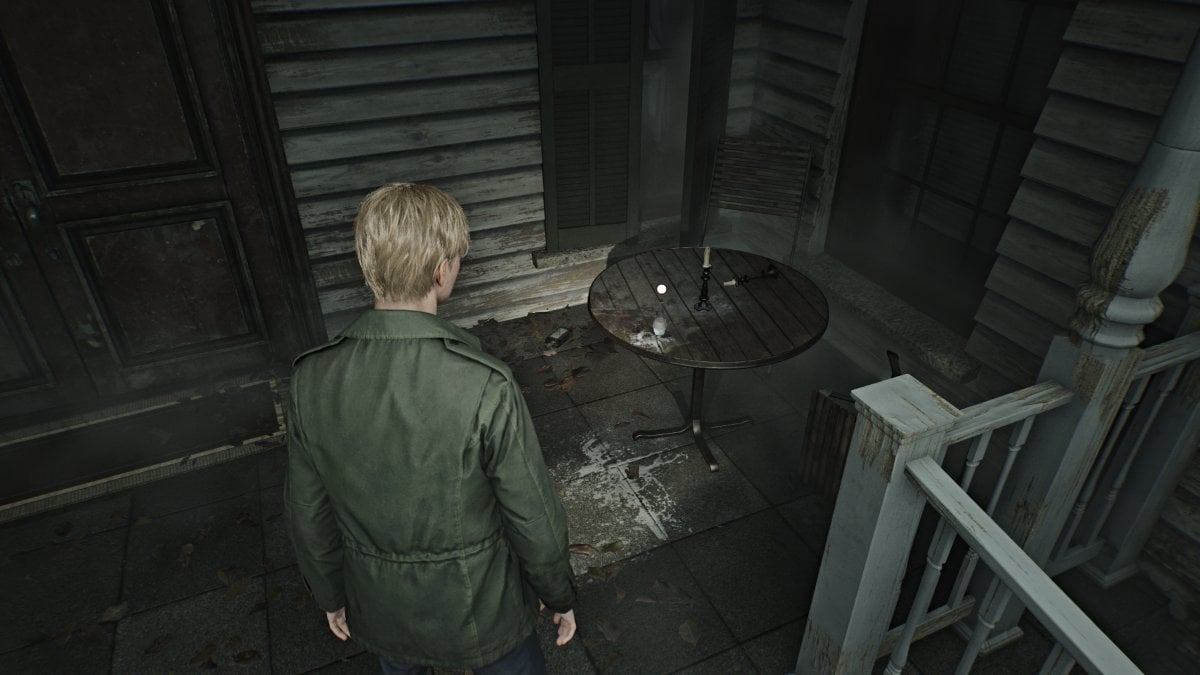
White Chrism - Screenshot by Pro Game Guides
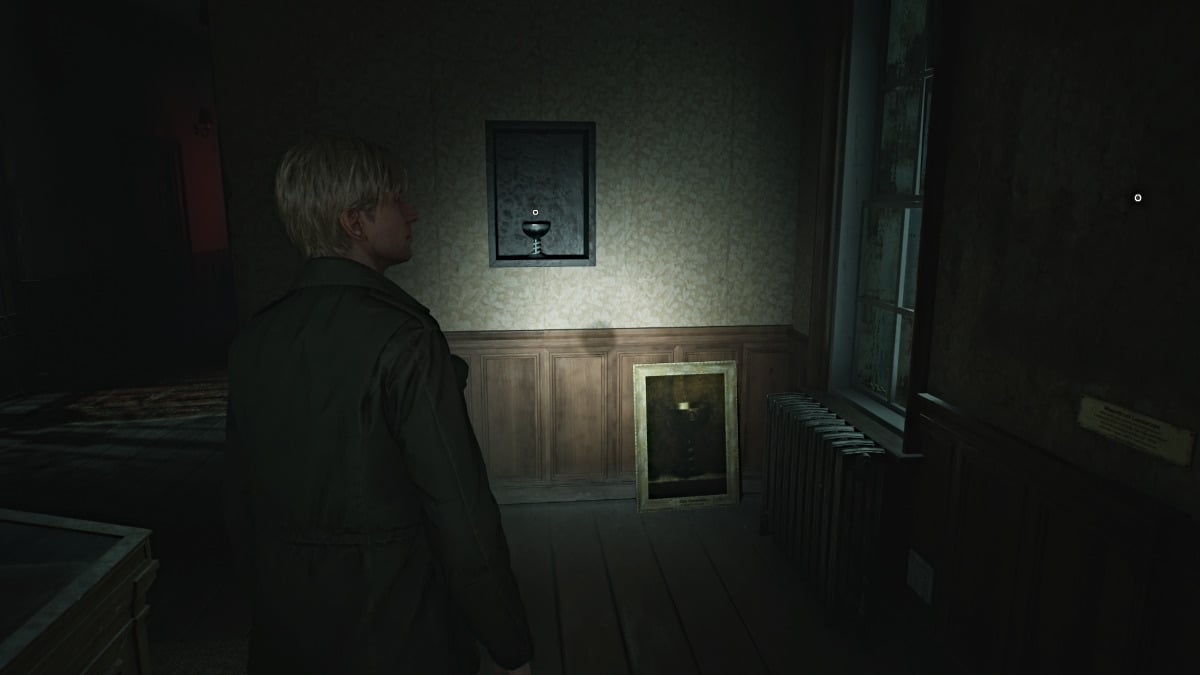
Obsidian Goblet - Screenshot by Pro Game Guides
Lost Memories book - Screenshot by Pro Game Guides
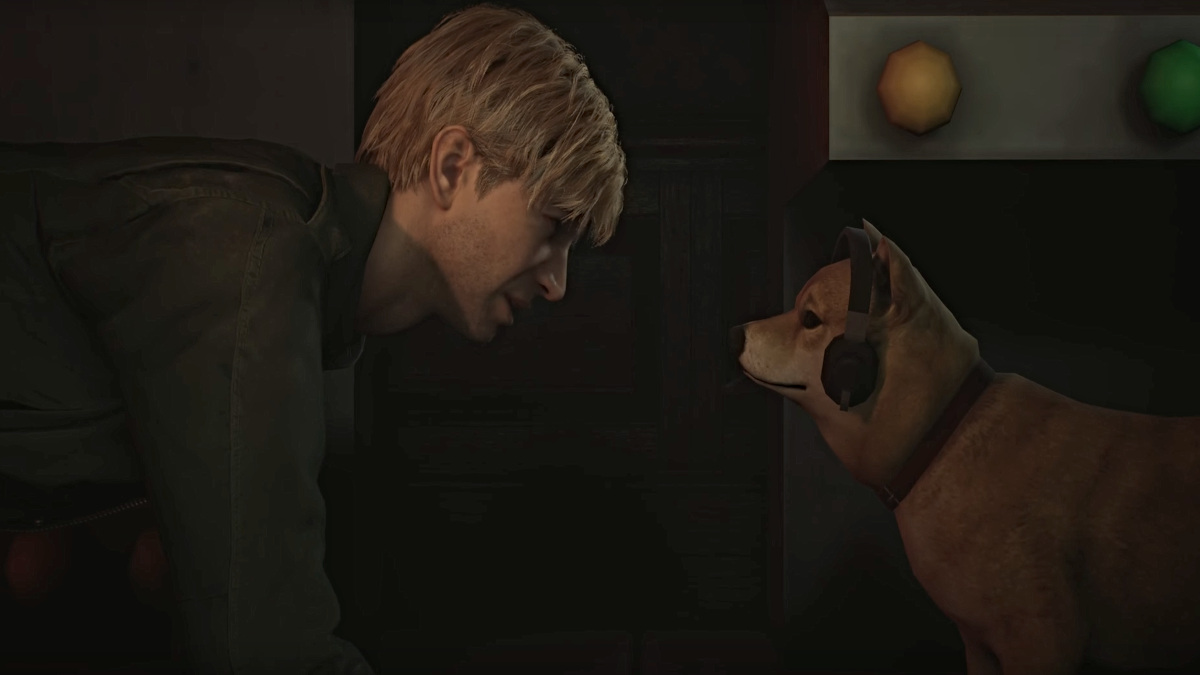
Screenshot by Pro Game Guides

Screenshot by Pro Game Guides
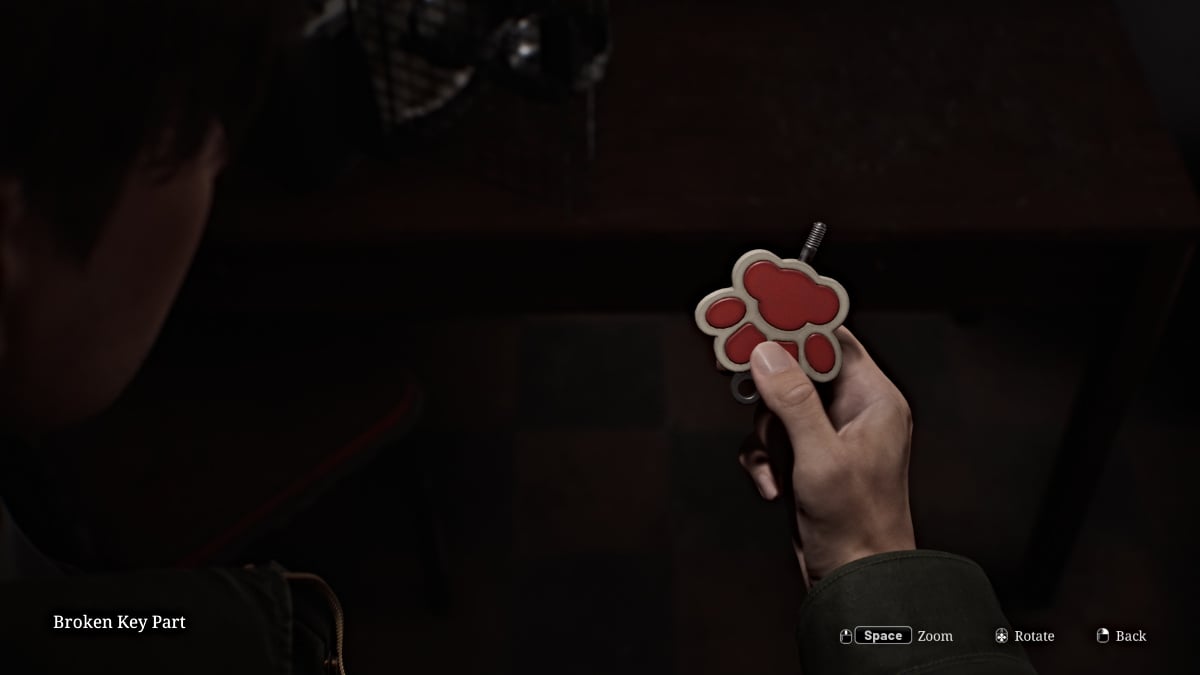
Screenshot by Pro Game Guides
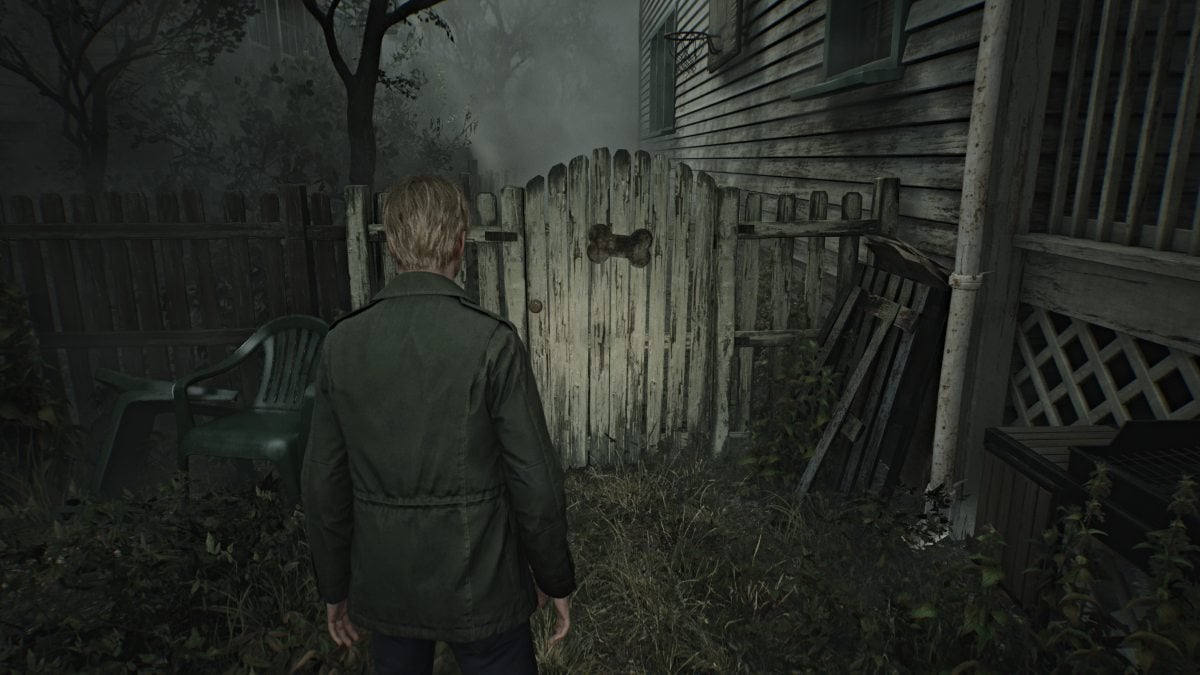
Fence with bone symbol - Screenshot by Pro Game Guides
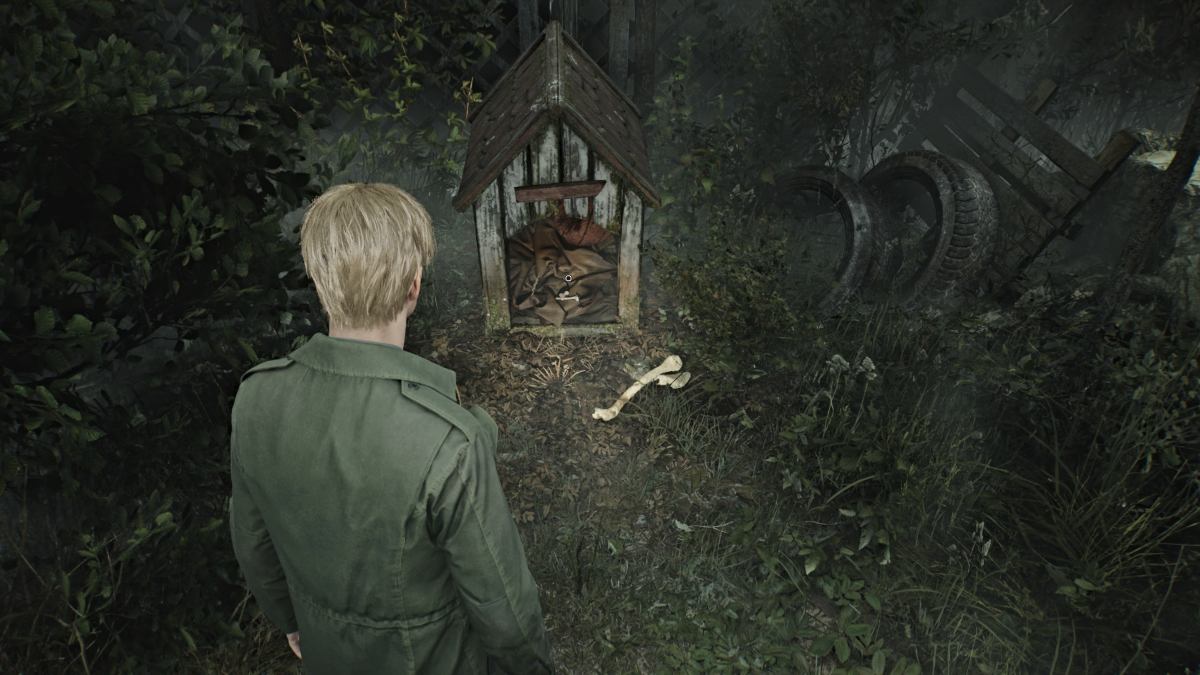
Dog house w/ second key part - Screenshot by Pro Game Guides
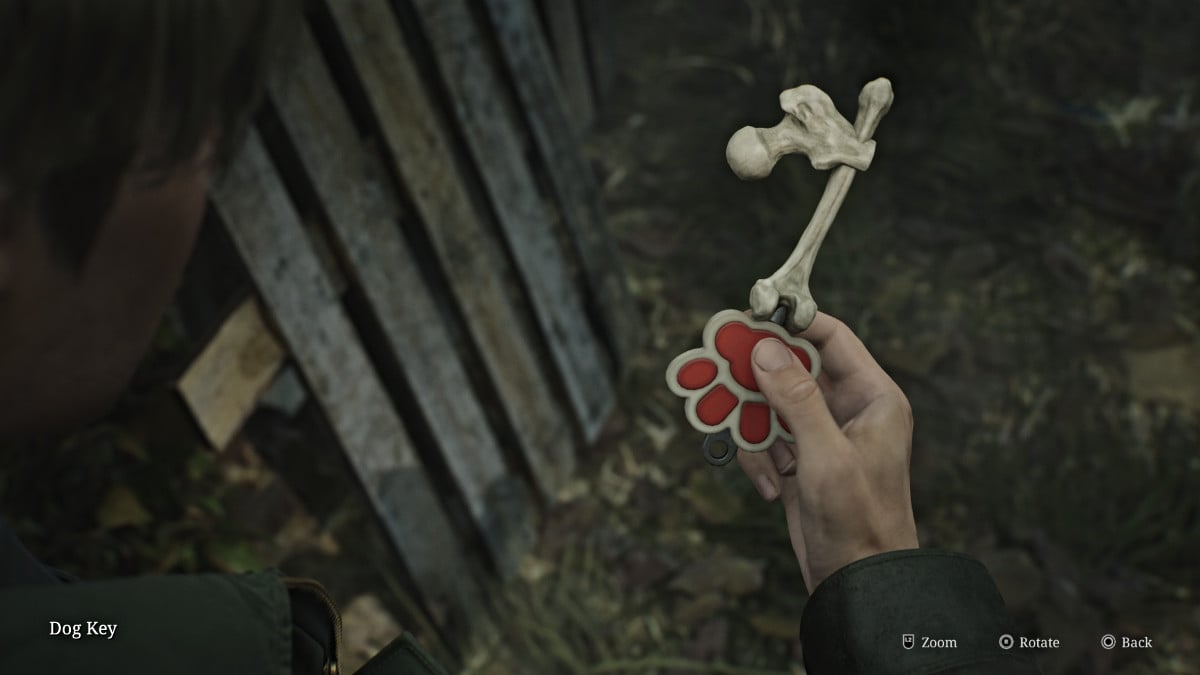
Screenshot by Pro Game Guides

Screenshot by Pro Game Guides
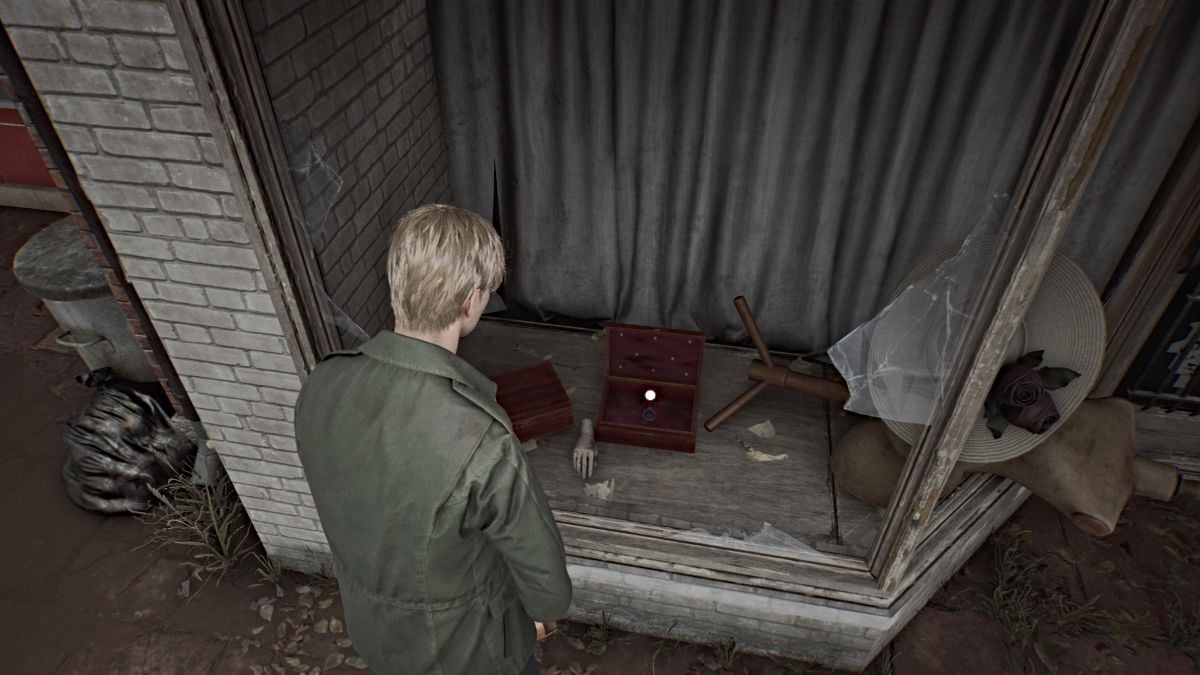
Screenshot by Pro Game Guides
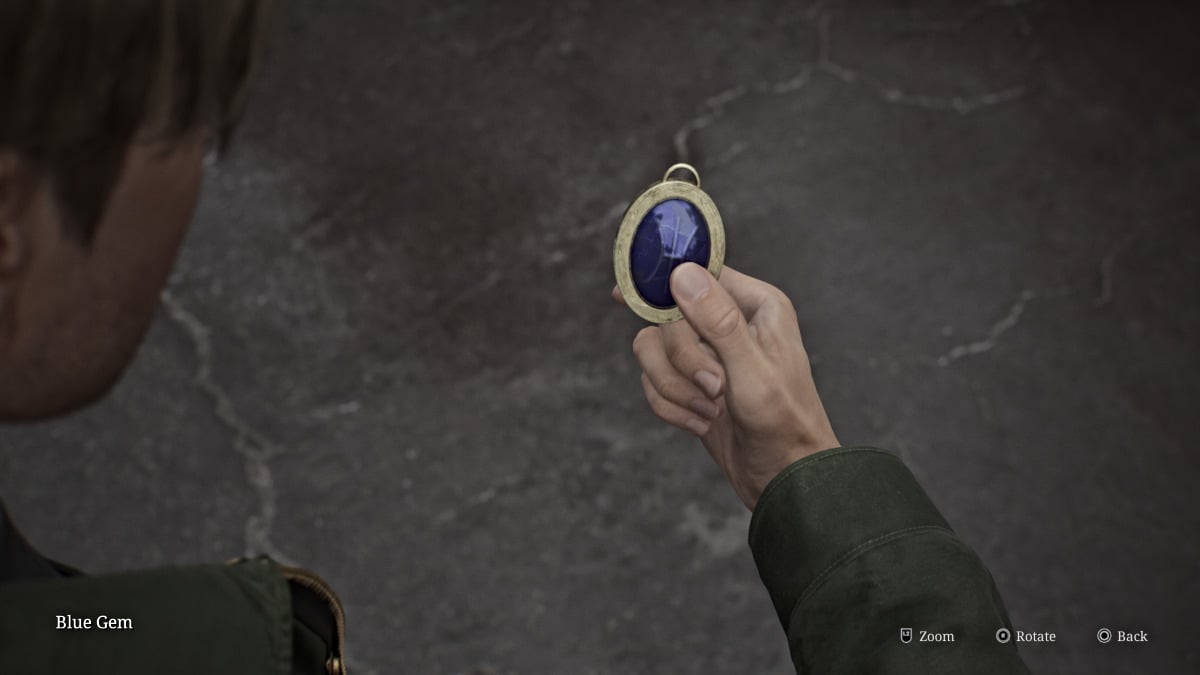
Screenshot by Pro Game Guides
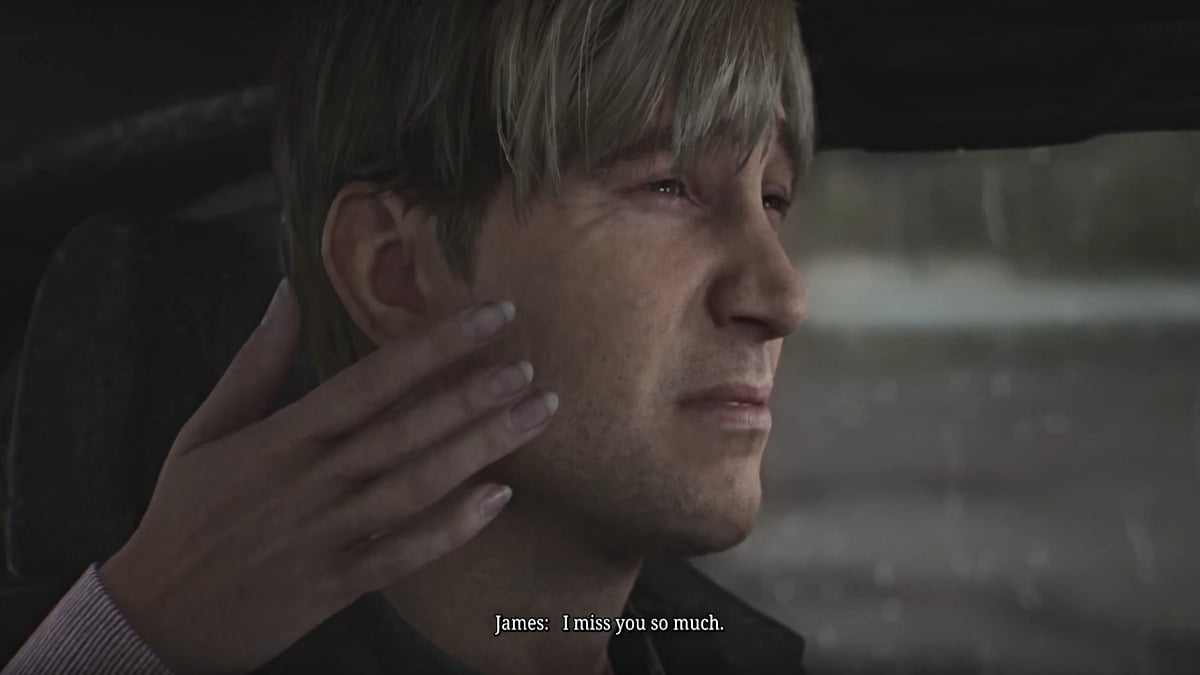
Screenshot by Pro Game Guides
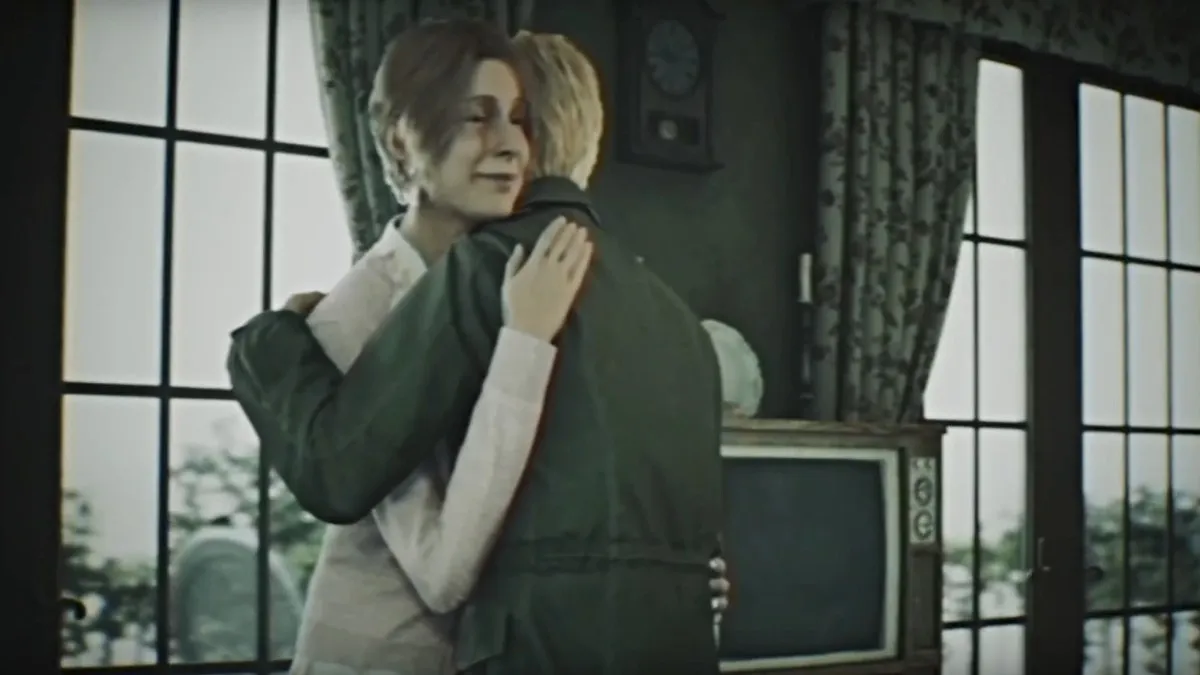
Screenshot by Pro Game Guides
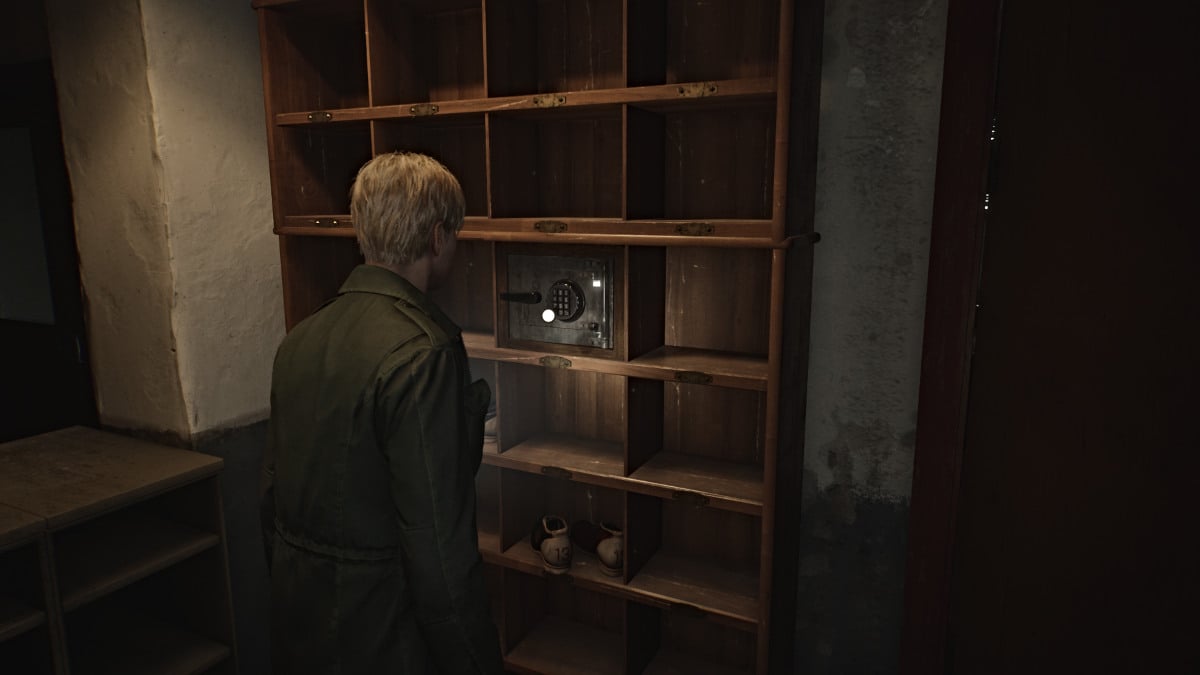
Screenshot by Pro Game Guides
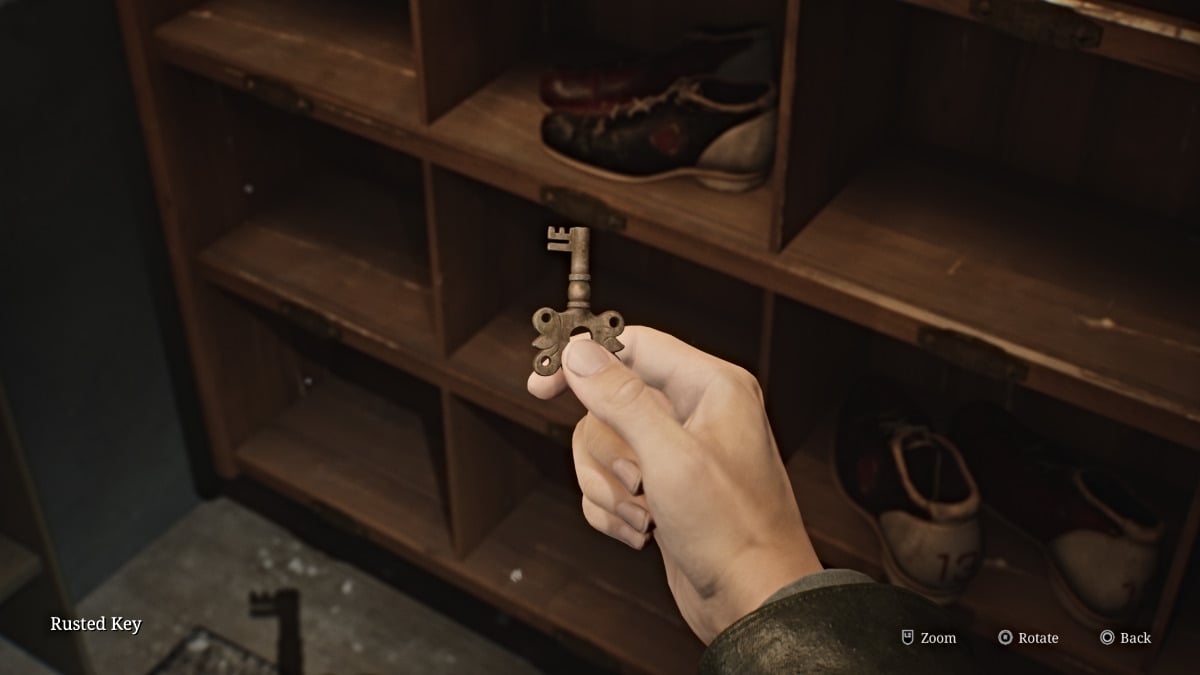
Screenshot by Pro Game Guides
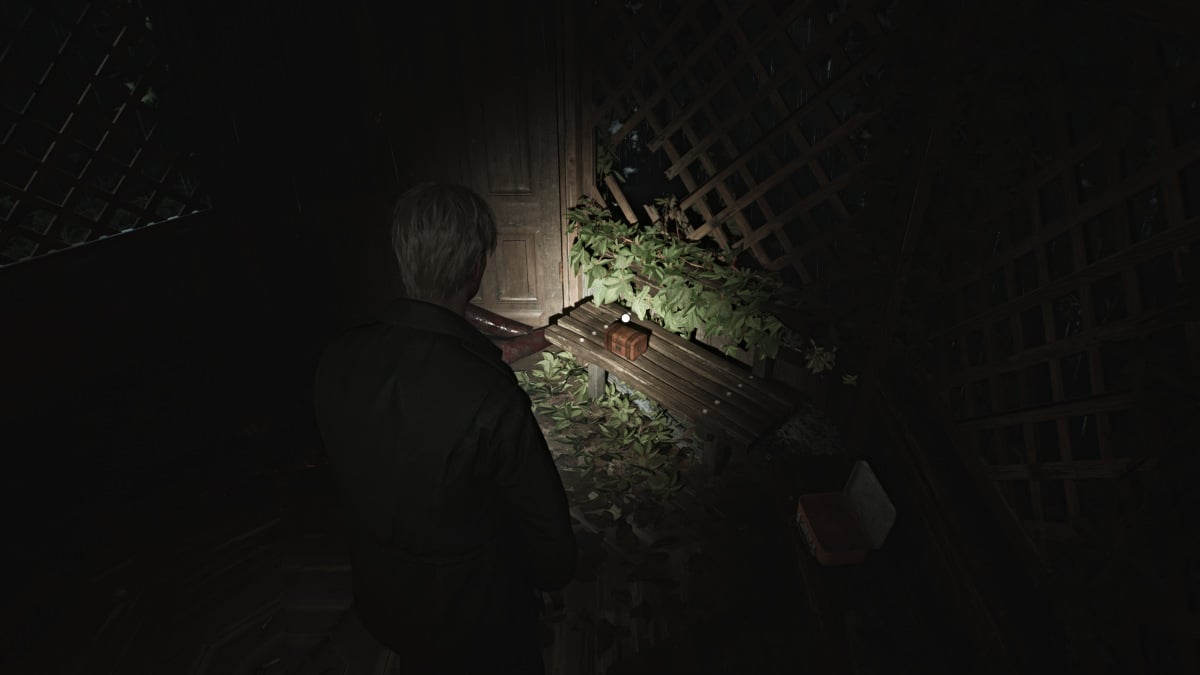
Screenshot by Pro Game Guides

Screenshot by Pro Game Guides
