Time to 100 % the game !
There are n’t that many games that I enjoy completing , but there ’s nothing more merriment than discovering all of the secrets of Senua ’s world . If you want to get everything , check out out the full Senua ’s Saga : Hellblade II walkthrough below .
Full Walkthrough of Senua’s Saga: Hellblade 2 (with Secret Ending)
Chapter 1 Reykjanesta - Senua’s Saga: Hellblade II
Once the cutscene ends , interact with the first I. F. Stone ledge to climb and start Senua ’s journey . This part is very analog , all you have to do is keep going . When you’reclimbing , check that to keep prevail the clitoris to move , as Senua will stop unless you are ( a car-mechanic I ’ve enjoyed very much in the game ) .
Once you get word the voice from the past ( Senua ’s father ) , she will be able-bodied to move more freely so you canstart die hard . There is n’t anything payable here just yet , so do n’t accent about it .
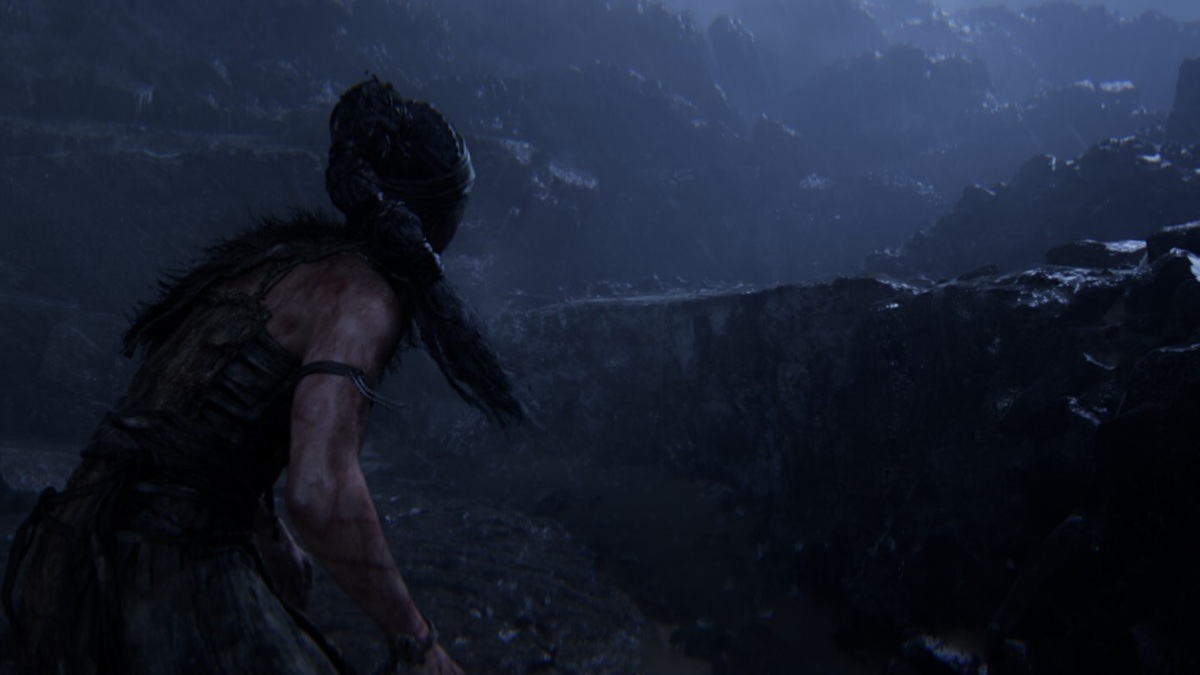
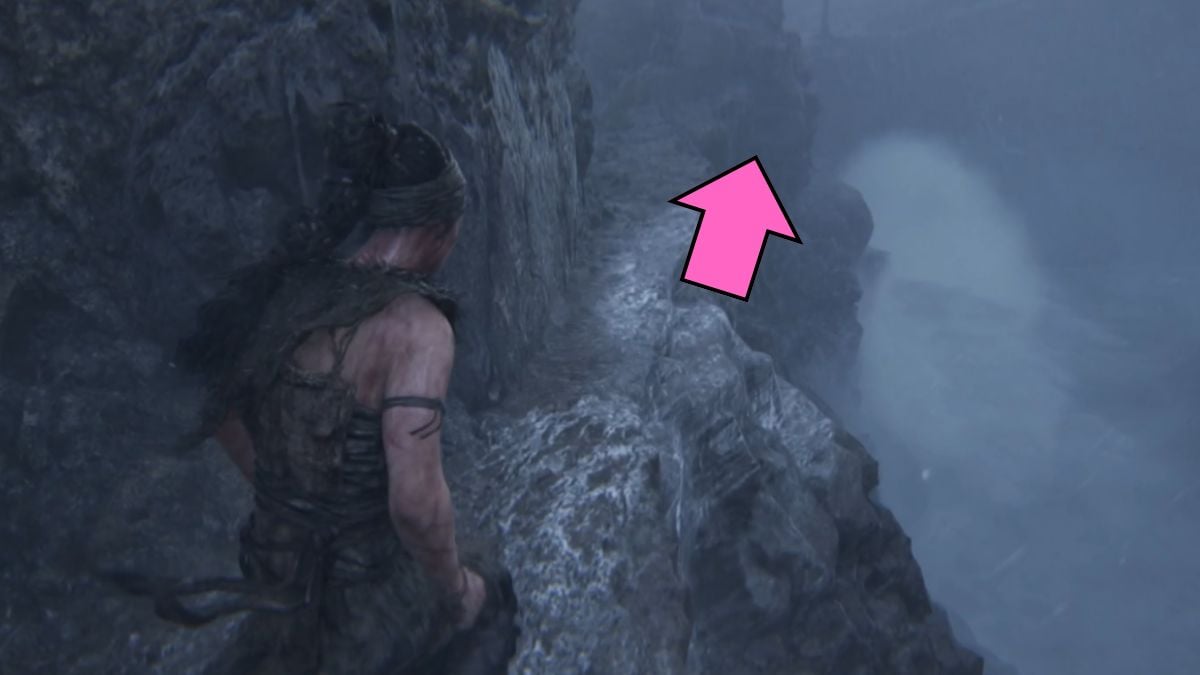
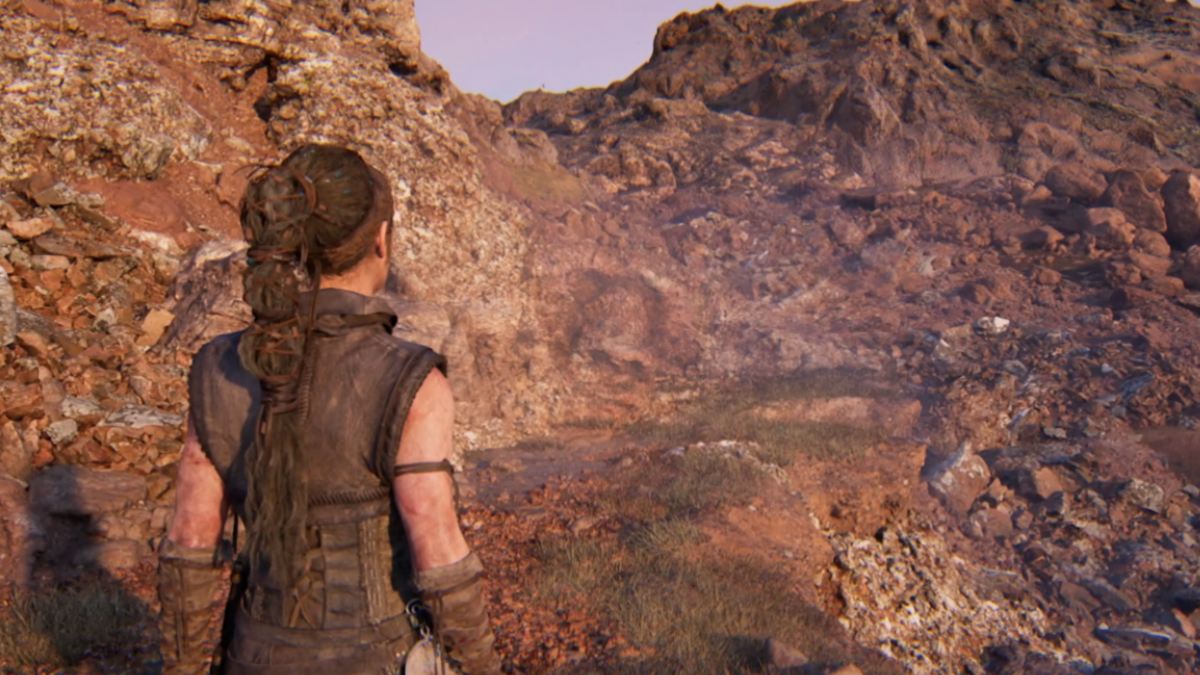
You ’ll strive a drop and you ’ll have to walk on the tinyledge to the leftin order to cross above the ocean , all while hear to your founding father seek to convince you that the sea wants you back . Not today !

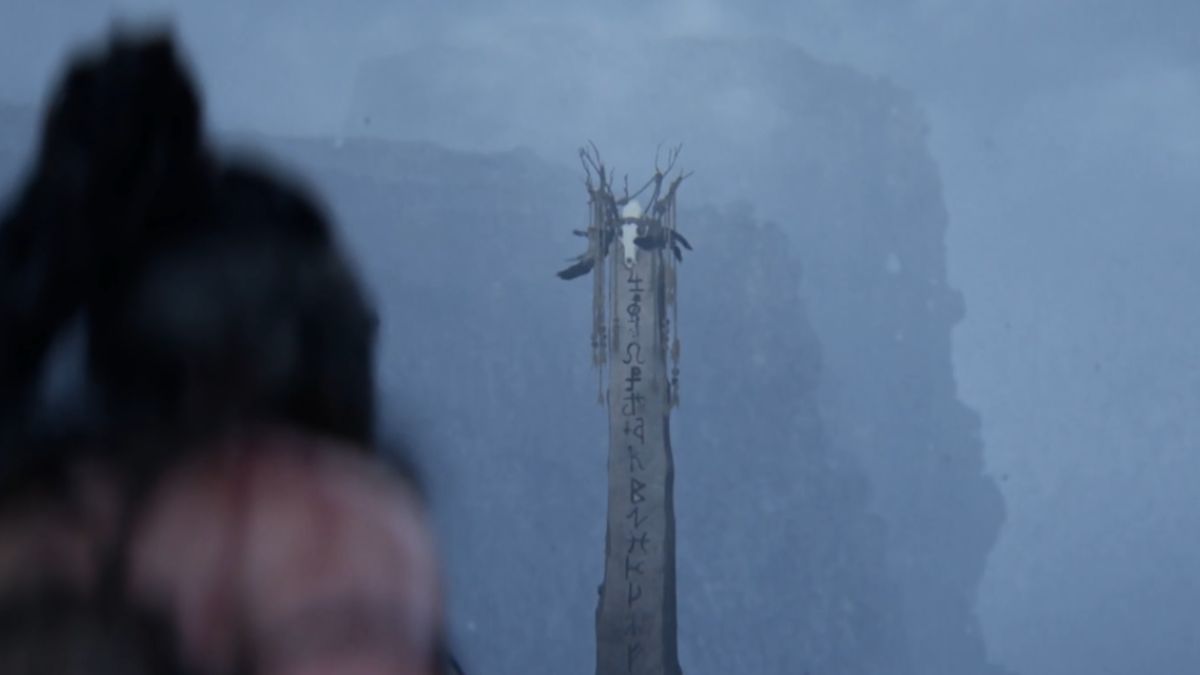
Keep heading down and you ’ll run into thefirst Lorestoneon the right . Get close and focus on it to hear stories from Druth about this newfangled land . verify you hoard all of the I. F. Stone to reveal particular lore at the end of the game .
After the stone , go down the path to the left wing . You ’ll run into one ofthe slaveholder . The Furies will tell you to follow him . Once you get close , they will secern you to block so he does n’t see you . When he attacks a cleaning woman , go running but you wo n’t be able to preserve her . Another somebody to weigh down on Senua .
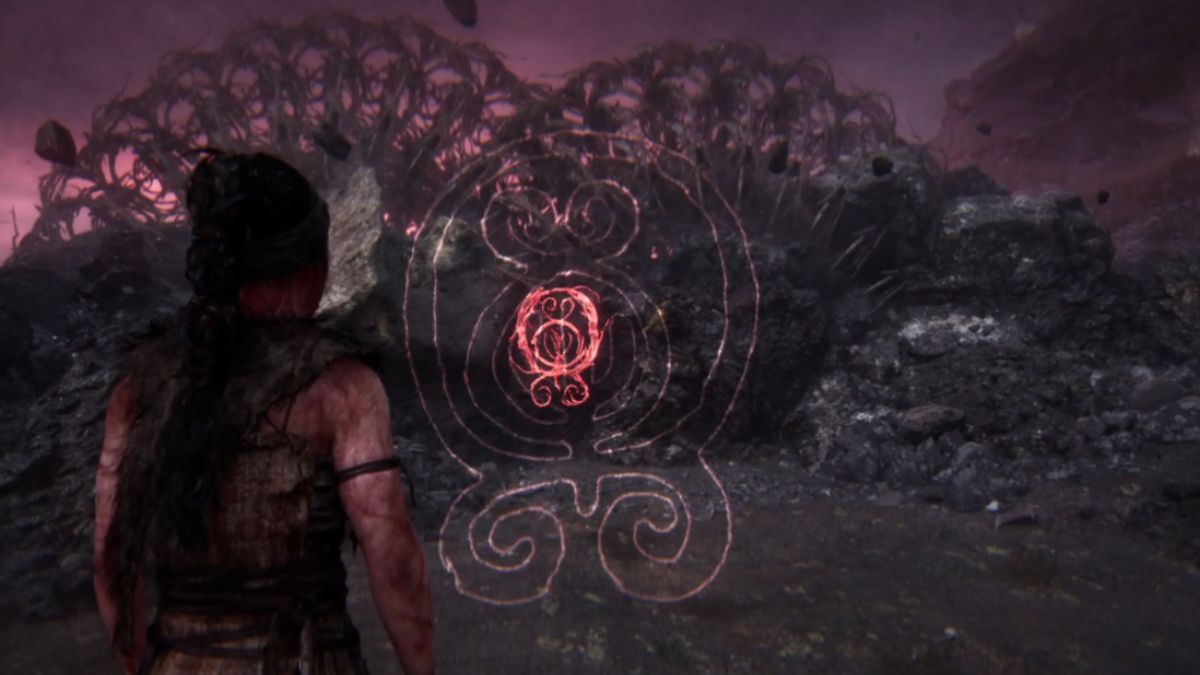
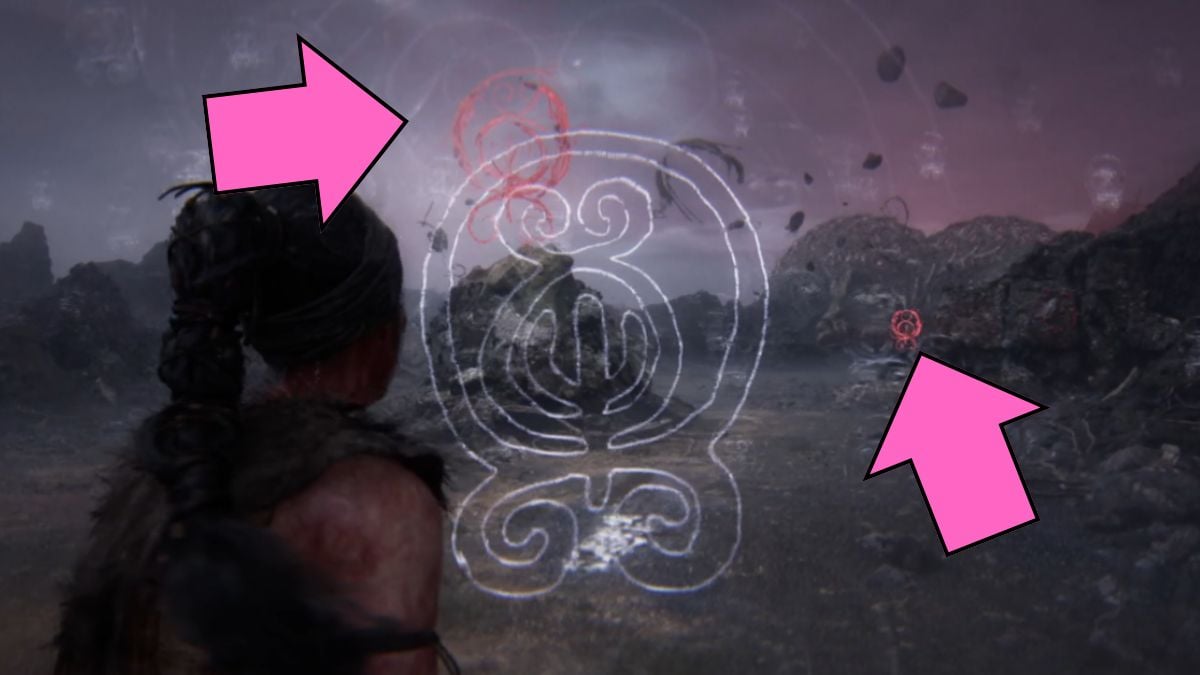
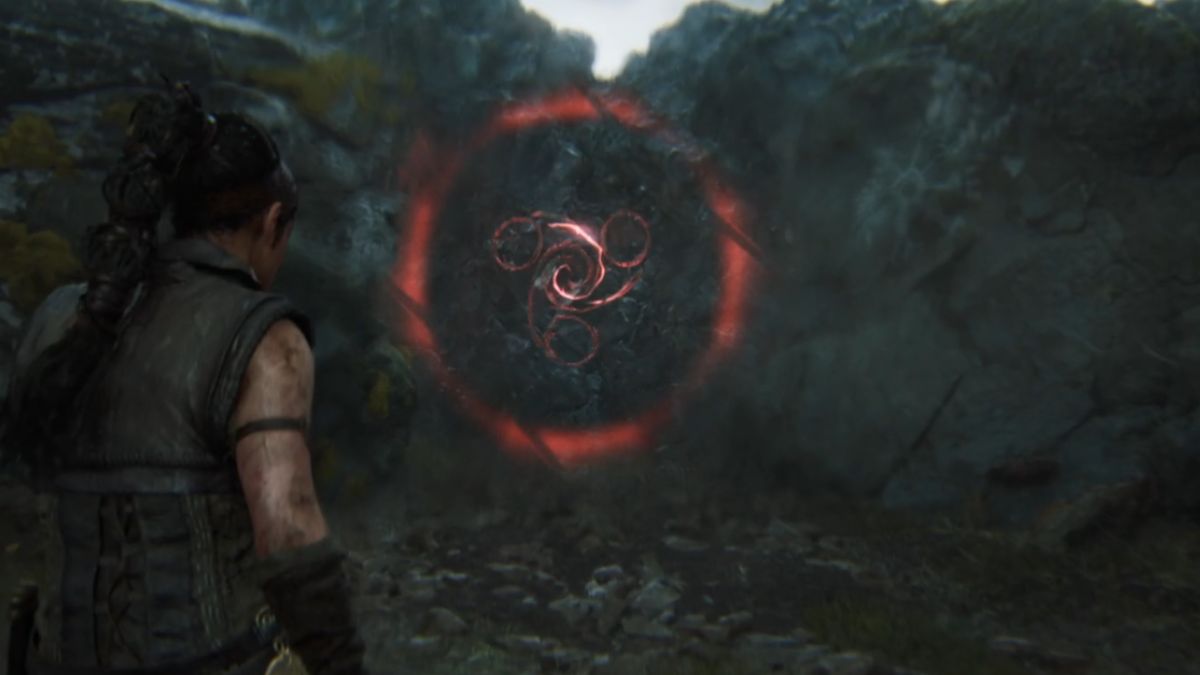
channelise back to thestone in the middleof the clearing . mighty above it , you ’ll find the correct formula . focalize on it to murder the rune doorway . Once you do , coerce through the Lucy Stone pass and make your way to the shore .
Screenshot by Pro Game Guides
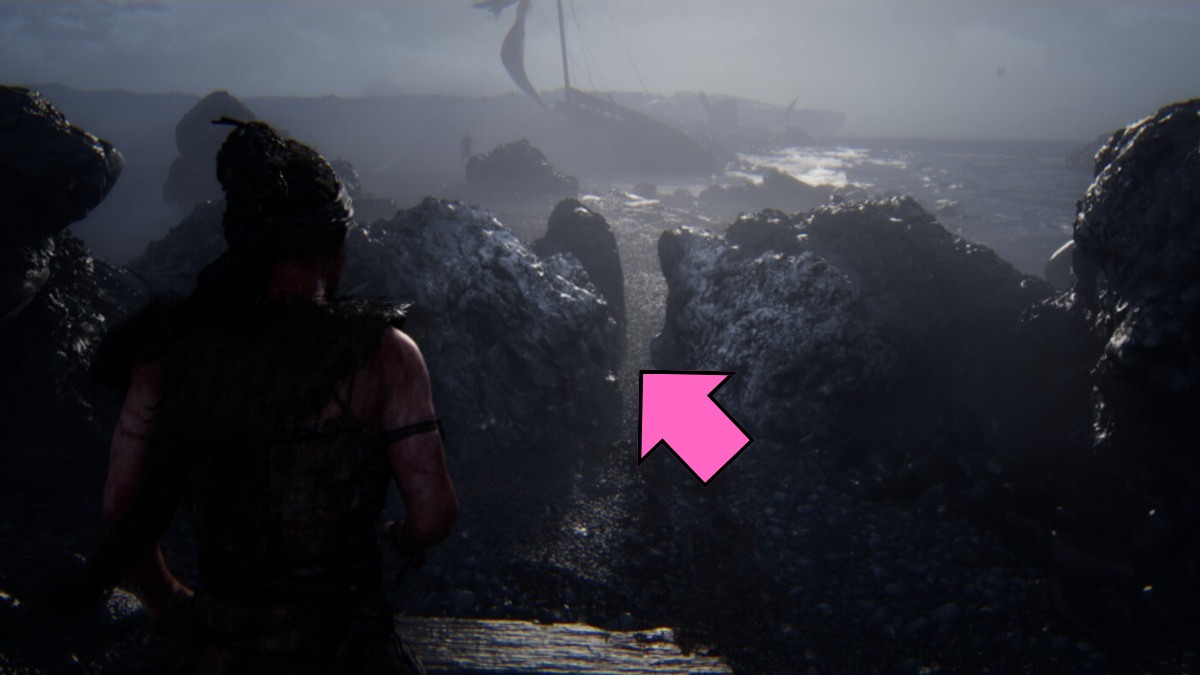
You ’ll have a somewhat clear route on the beach until you reach acrack between two stonesthat you have to squeeze through . You ’ll getattackedby a slaver right as you legislate through , but you wo n’t have to crusade just yet ; Senua will just bolt down him .
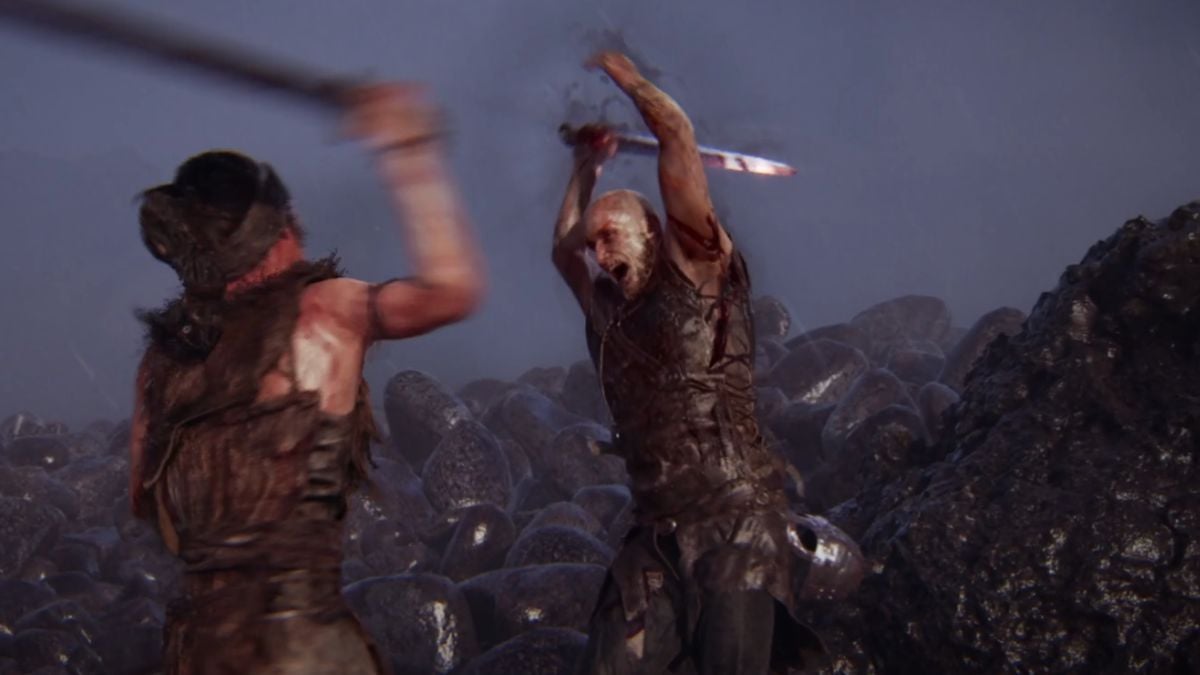
However , as you keep go , you ’ll encounter a second slaver ; this time you ’ll have to fight . There are several thing to keep in judgement in this section as you keep fighting three slavers :
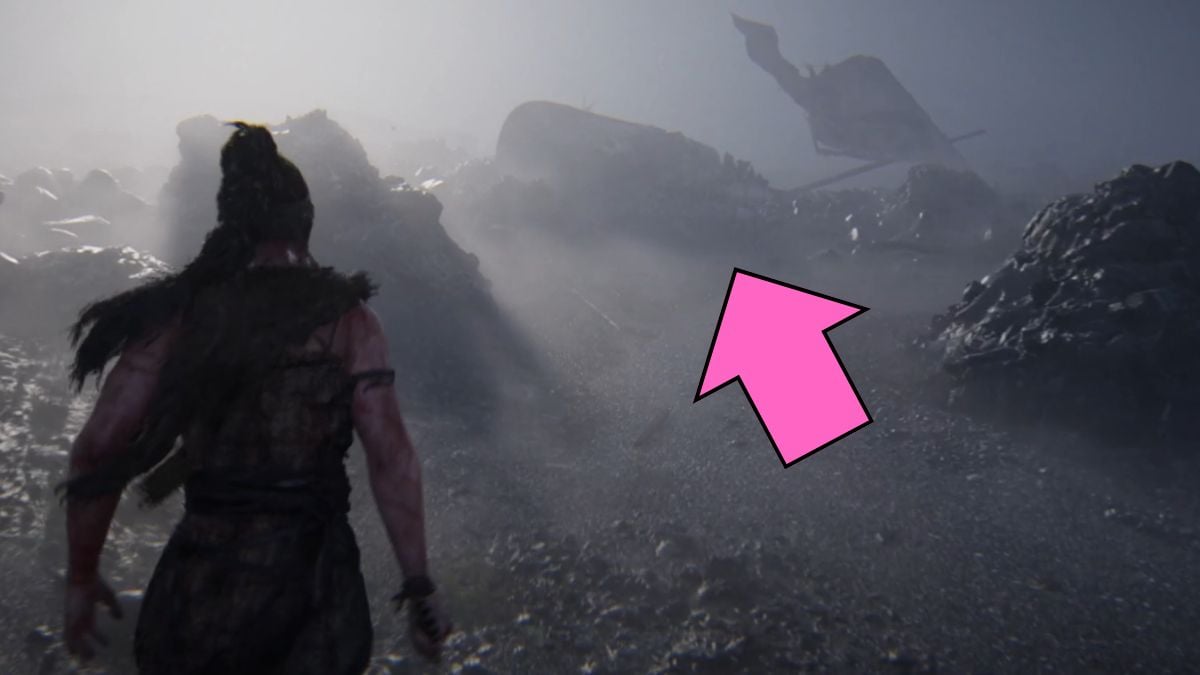
Once you finish off the third slaver , go to thecapsized ship . There are n’t any survivor , but you still need to crawl through . Hold the clit to move onward as well as to interact when there is anobstacleyou need to push out of the way .
Screenshot by Pro Game Guides
As you keep going , you ’ll get attack bytwo more slavers(individually ) . They lovechaining two attacks , so keep that in mind when dodging or blocking .
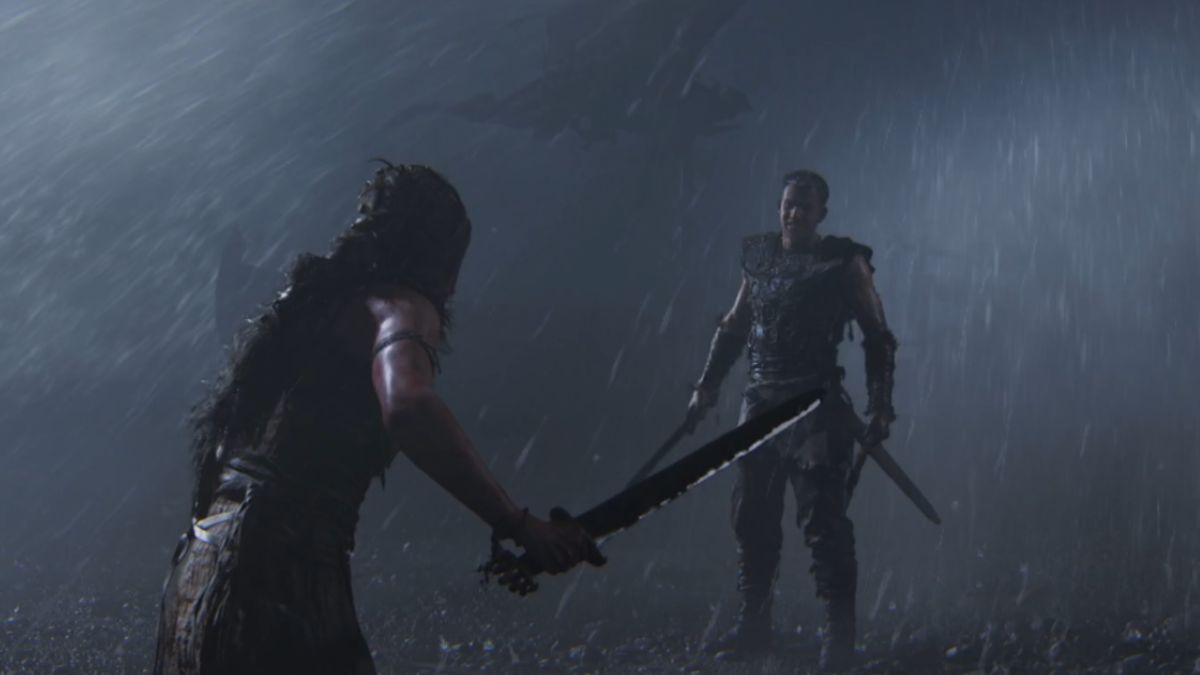
After you fight off a hallucination , theSlavemasterwill find you . You need to fight him in society to help your hoi polloi . He will keepknocking you down , but that ’s part of the game ( and not because you are really tough at fighting , as I keep consoling myself ) .
Senua will get the better of him but decide not to pop him once she sees the rot take over the Slaver ’s body . or else , she forces him to take her to where the striver ( her mass ) are .
Screenshot by Pro Game Guides
Chapter 2 Freyslaug - Senua’s Saga: Hellblade II
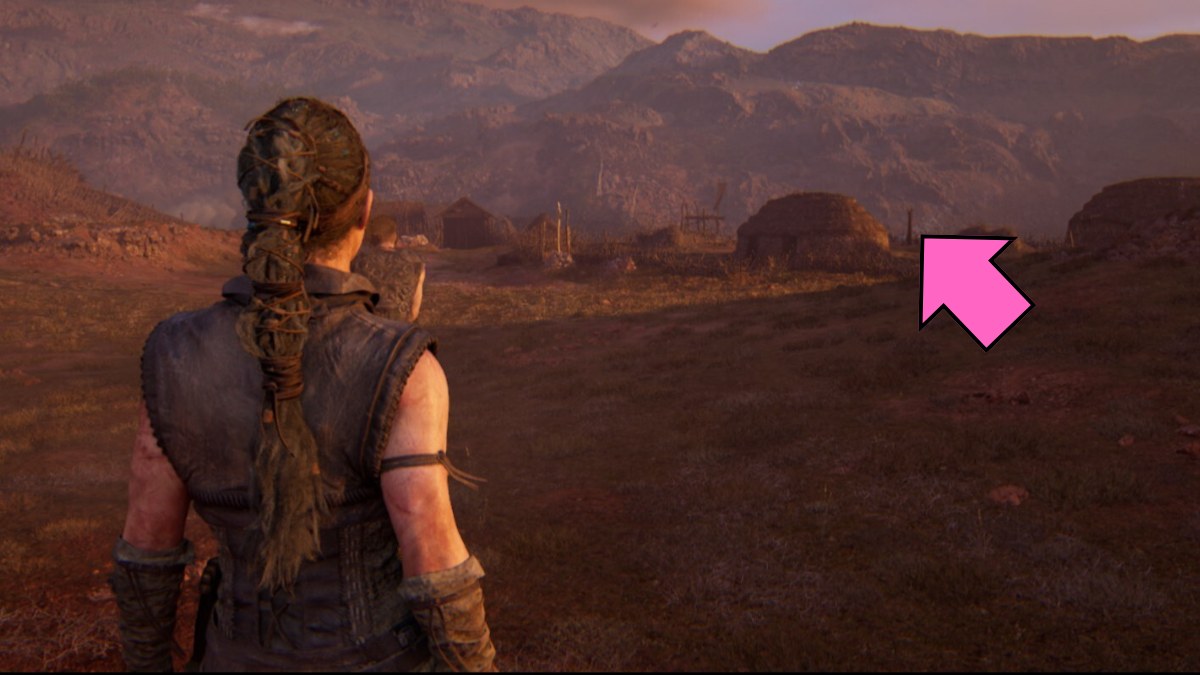
As you are forcing Thorgestr to take the air , you will see acouple of hutsto the right wing of you . There is aLorestoneright behind them , so lead that way . Once you get it , keep walk .
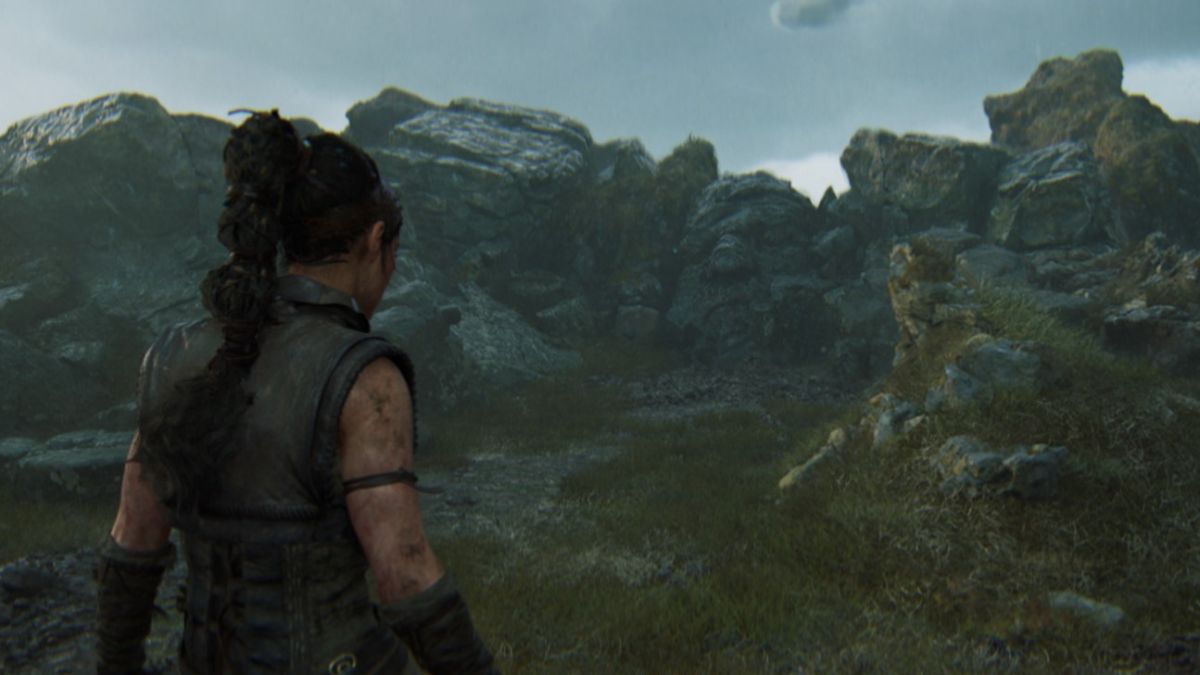
The route to enter the Freyslaug is destroyed , so you ’ll have to headto the rightinstead . You ’ll sink through mounds of graves until you attain the other entrance .
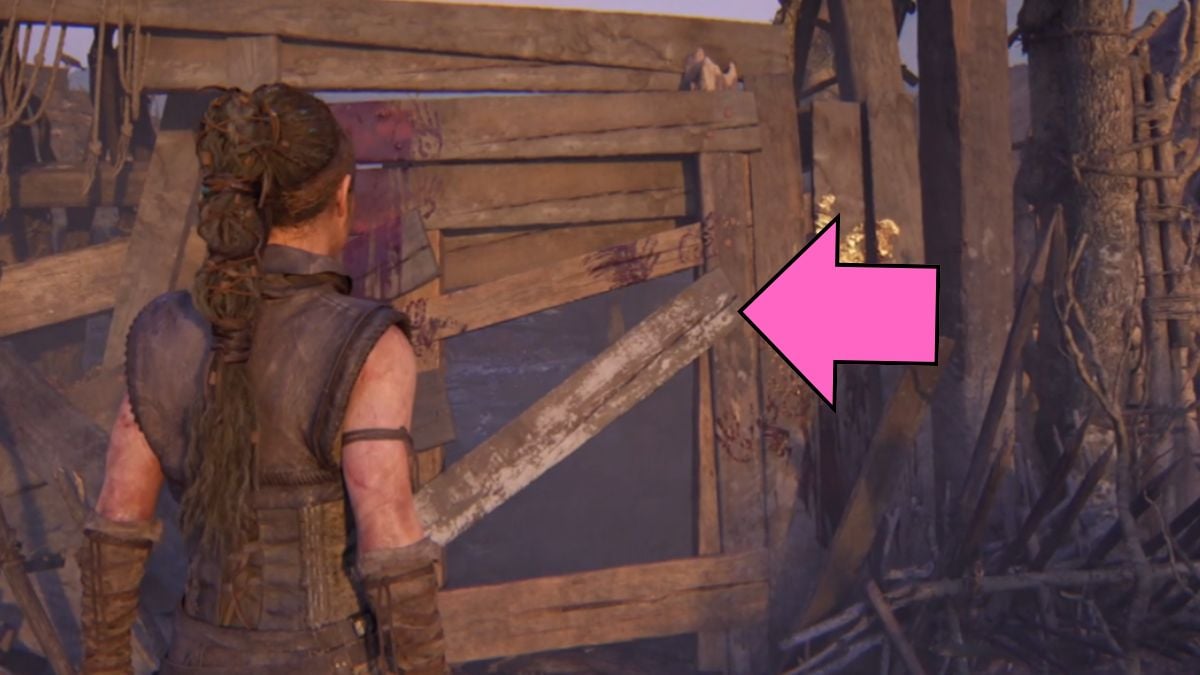
border on the resolution entrance andinteract with the plankto take it off and enter the small town . Everything is cover in blood .
Screenshot by Pro Game Guides
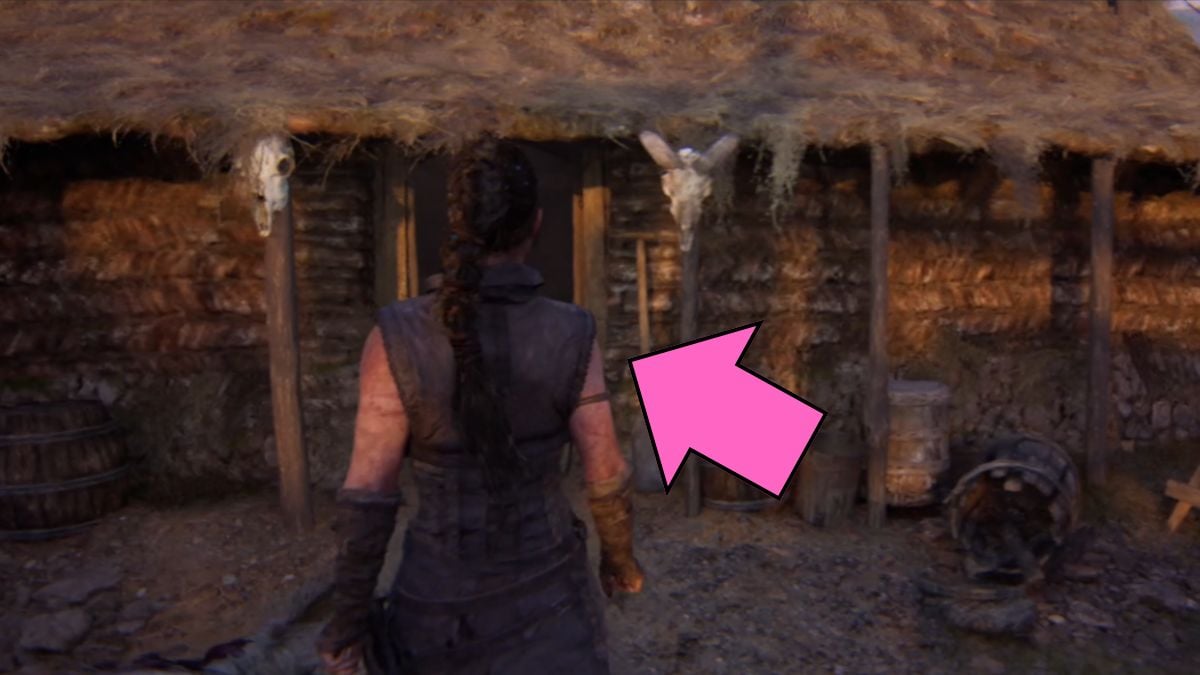
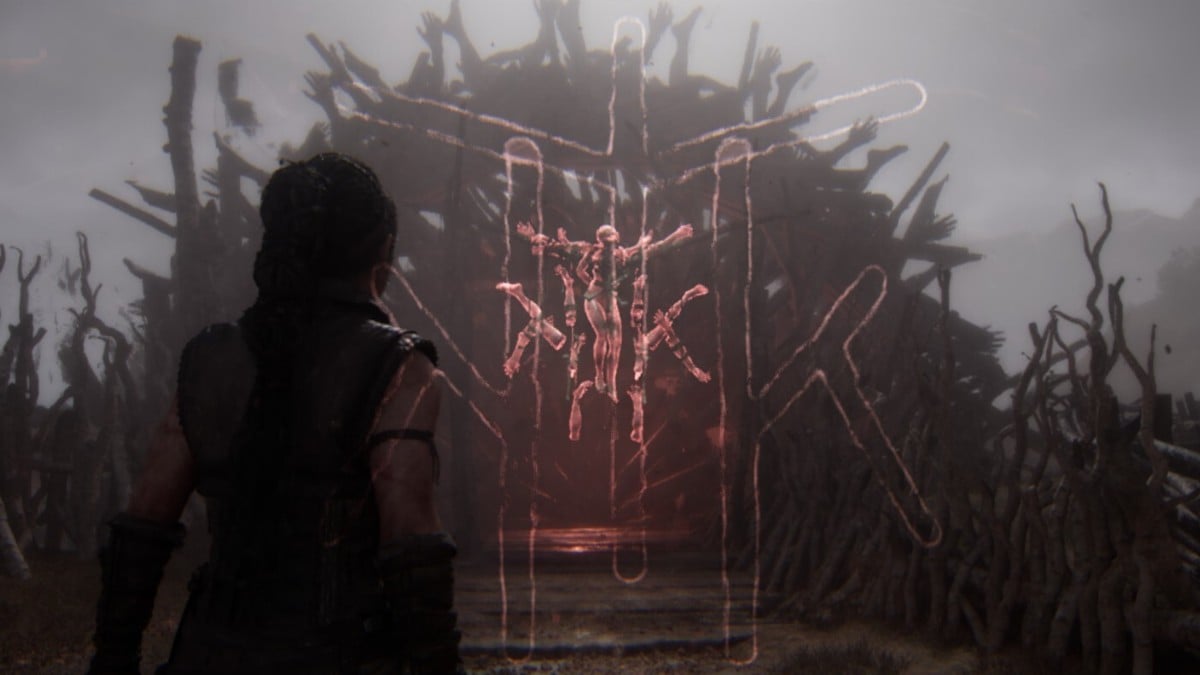
Enter thehouse to the leftso that you may pass off through its other room access and further into the village . Keep going down the main course until it gets barricade off by arune door . This time , you have to get three disjoined division of the rule .
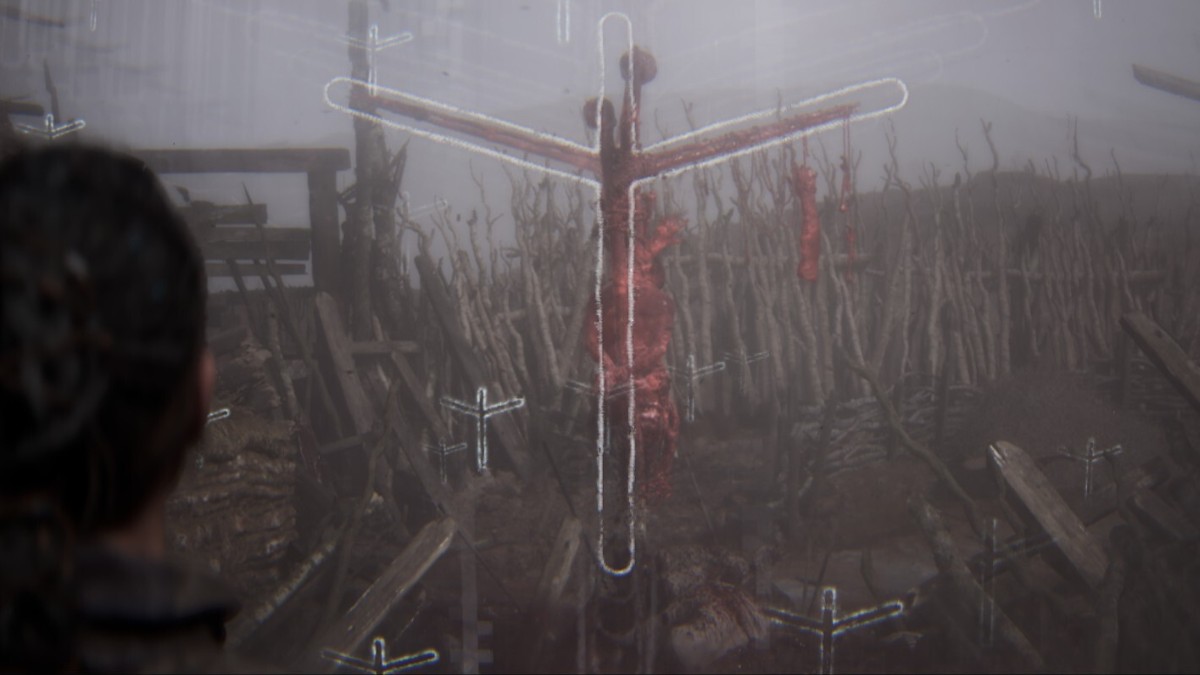
For thefirst one , head all the waydown the pathand back to the one someone who ’s been impaled . This is your first pattern .
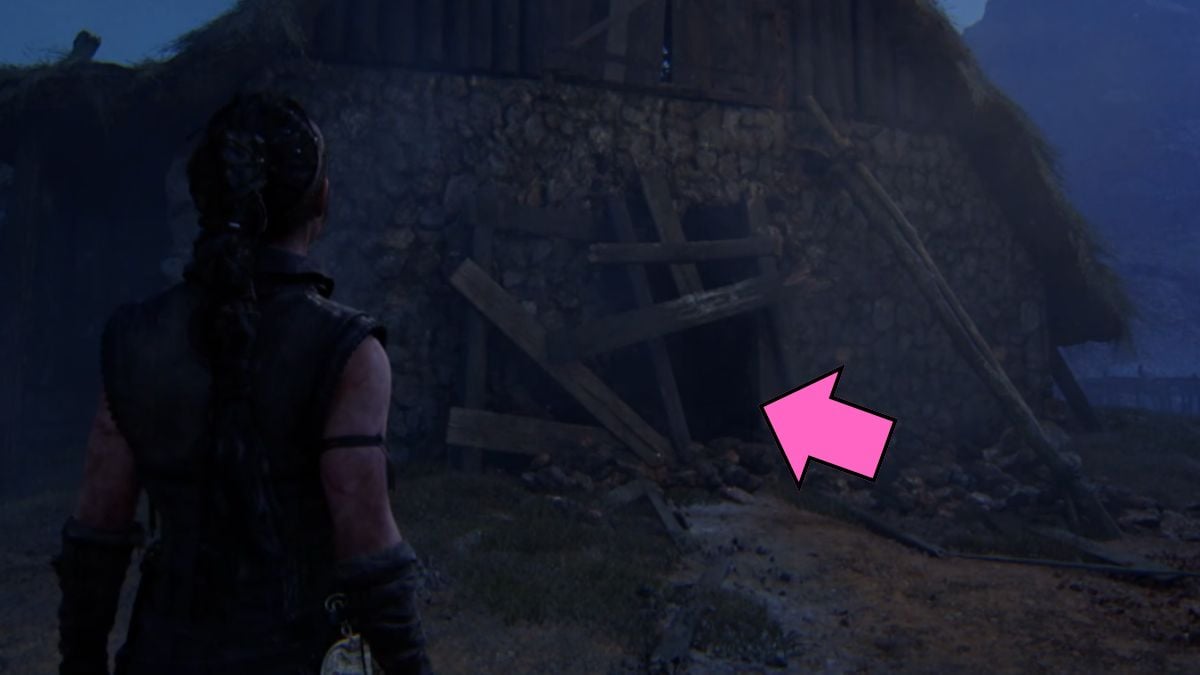
Now , run back all the fashion to therune doorand head around thelast household to the left . You ’ll discover an hatchway in the wall to go through . Enter and then go up upthe ladderfor the second rule . You ’ll find thesecond patternin the sticks to the left .
Screenshot by Pro Game Guides
For thethird pattern , go into the firm where the mother and thebaby are screaming . There is another door you could exit through to a backyard orbit . climb up to the house on thehill to the leftand go through thehole in the rampart . Keep goingrightuntil you get to the ledge overlooking the area . You ’ll observe thelast patternin the crashing stick there . leap out down from this route and return to the symbolisation .
There will befour creaturesthat snipe you in your memory . you could keep strike them , but they wo n’t kick the bucket . The only way to wipe out them is through yourmirror onslaught . Hit them until you accuse up the mirror , then apply it to get rid of the four enemies . This will bring you back to your Greenwich Village . Keep walk until the cutscene end and you are back in Freyslaug .
Make your way across the bridgework and to the next area . It was a short night for me so it take me a while to find which way of life to go . At theside of the house , there is a crack you’re able to squeeze through and go in . cash in one’s chips through the home and through the door on the right .
Screenshot by Pro Game Guides
Once you exit it , go immediately down the path to theleft of the theatre . You will find a crawl space underneath some Grant Wood in the contend - up area . creep underand you ’ll reach thesecond Lorestoneof the chapter .
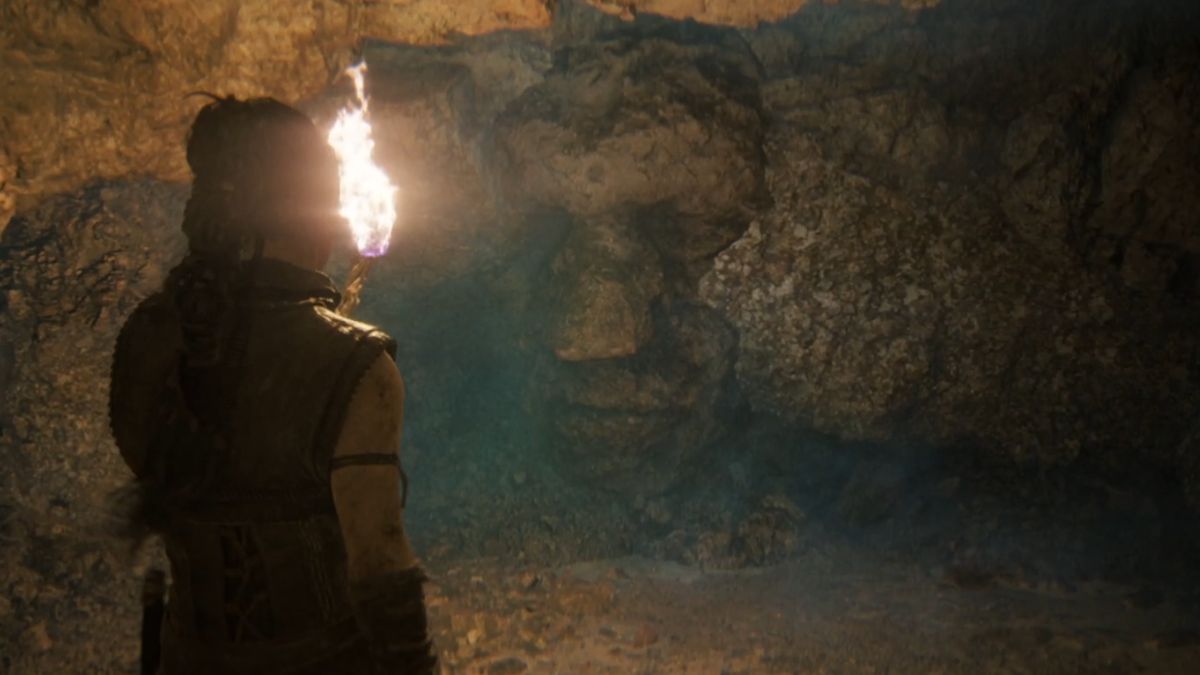
Now , head towards the torch , and you ’ll see another secret of Hellblade II : hidden faces in stone . This one is to the right field of the lit torch . When you focus on it , you disclose a secret path to thetree of life , agree to the Furies , that will also reveal lore to you . Once you have listened to it , steer down thewooden pathtowards the fervid sky and the Draugar observance .
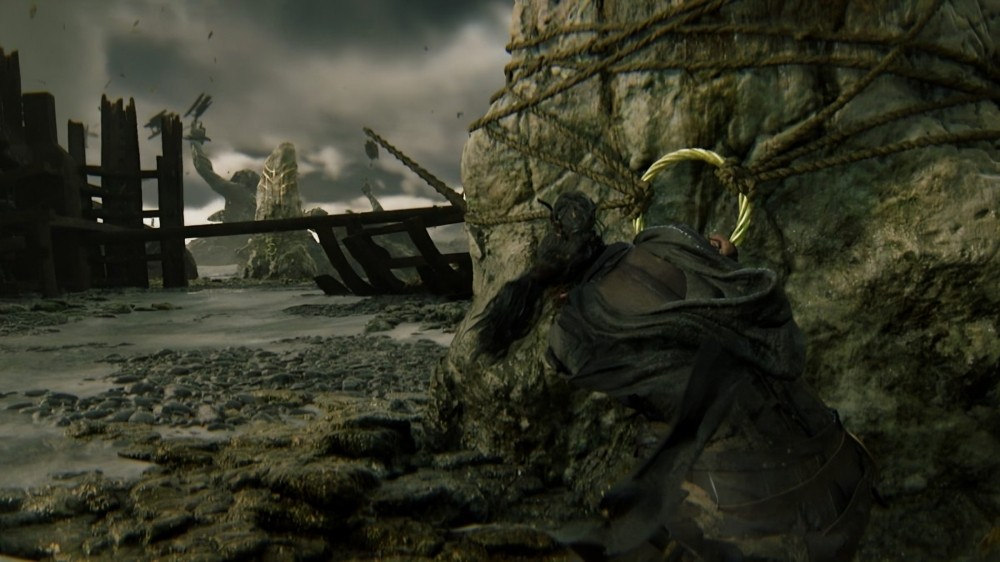
When the cutscene ends , you ’ll have to go lento through the Draugar Ceremony so that they do n’t notice you . go up upthe track until you see the stranger tied up in the middle of it . You have to save him .
Screenshot by Pro Game Guides
guide to the left andacross the ledgeas the Furies panic about you being see to it . Drop downcloser to the ceremony . Do n’t worry , the Draugar ca n’t really see you ; I walked right past a Draugar killing a mortal and did not trigger anything . It was quite a uproarious scene with Senua sneaking by as if she is hidden and not in plain sight .
go up up theladderthat is behind you . Go to the rocks andcross the Harlan F. Stone fenceto reach thethird Lorestone . When you have the stone , go back down the ladder andto the left , squeeze through the wooden structure .
Sneak until you reach awooden paththat you have to crawl under . Keep moving and ignore everything happening above you . You ’ll reachthe strangeronce you grovel out , but the Draugar as well .
Screenshot by Pro Game Guides
There will befour types of Draugarattacking you during the conflict :
Keep in mind the same strategy as before : dodge when theattack is ruddy ; parry when theweapon is glowing . These enemies willchain two to three attacksnow , which is something to keep in mind . Dodgeuntil you figure out their pattern , then take them out . Make certain touse the mirrorfor a fleet oddment . If you are down , the mirror will also get you up quicker .
After you shoot down all Draugar enemies , you ’ll save the alien , Fargrim . You ’ll take the air with him as he explains what encounter to the lands . When you get to thebroken wooden itinerary , guide to the left wing or else of follow him . You ’ll find ahidden facein the stone and the tree at the last of the way here . Once you grab it , go back to following Fargrimr .
Screenshot by Pro Game Guides
When you hand astick with black fabrictied around it , Fargrimr will go right , so you shouldgo leftfirst . You ’ll ascertain the fourth andlast Lorestoneof this chapter . After you grab it , run back up and keep following your newfangled usher . You ’ll give the slave owner , and the three of you will head towards Fargrimr ’s village .
Chapter 3 Raudholar - Senua’s Saga: Hellblade 2
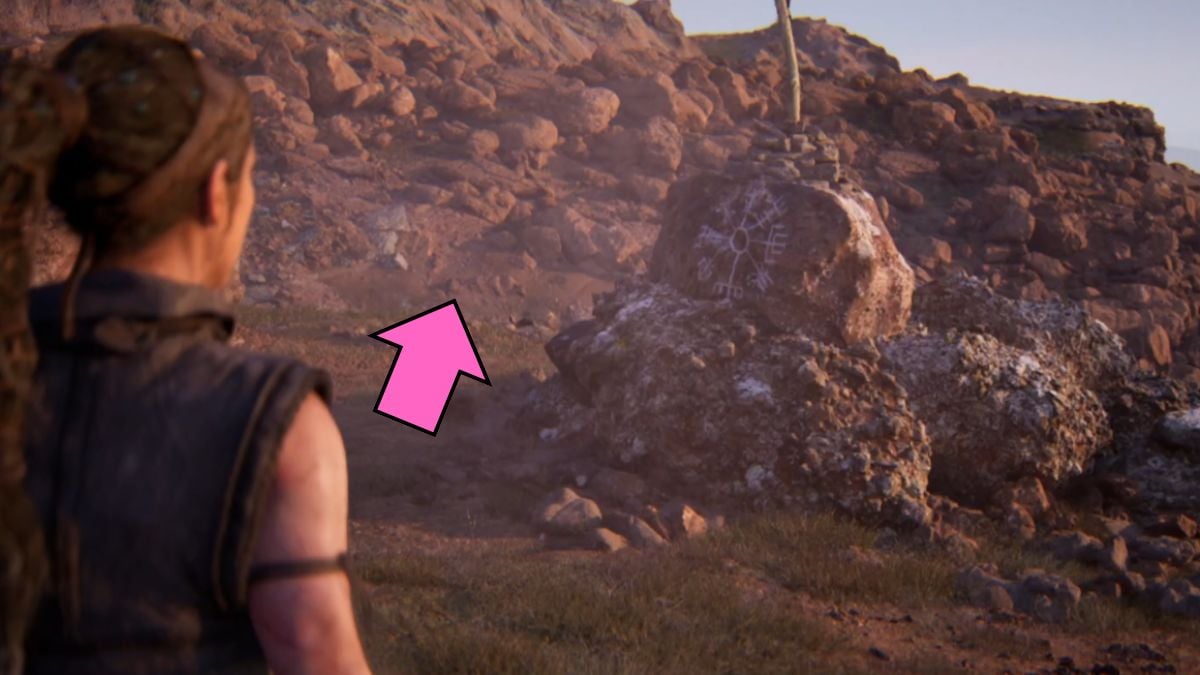
Keep walking on the mound , following Thorgerst and Fargrimr . When you reacha stone with a stick and a calamitous clotharound it , there are secrets around . draw close thecrack in the groundand you ’ll have the spokesperson spill to you about them .
Go down this path until you reach thehidden facein stone and the first cheek of the chapter . Rightacross the faceis the firstLorestoneof the chapter as well , so verify to grab them both .
When you accumulate all the detail on the left side , check that to go to theright sideof the path as well . Keep going until you reach anotherhidden facein the stone . I originally missed this one because I did n’t look so many collectibles to be in one area .
Screenshot by Pro Game Guides
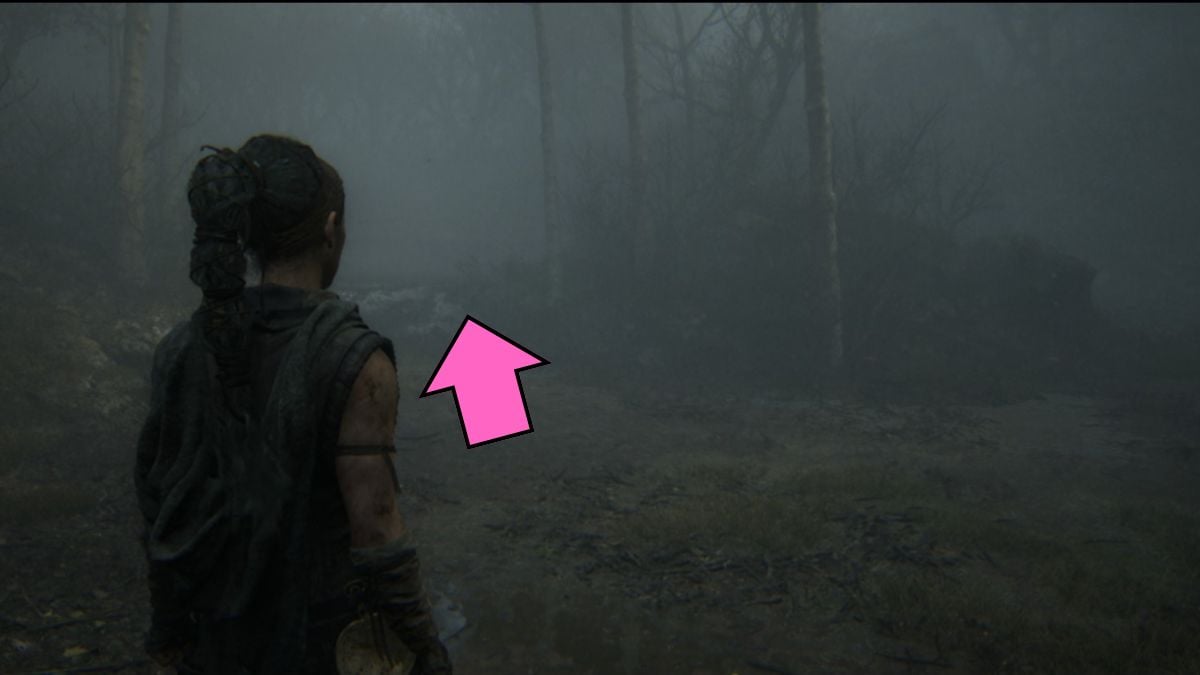
However , Illtauga is coming so you necessitate to run . If you stop , she will get you so you have to keep going . The path in advance will keep getting blocked , so make certain you are keeping an optic on where to go .
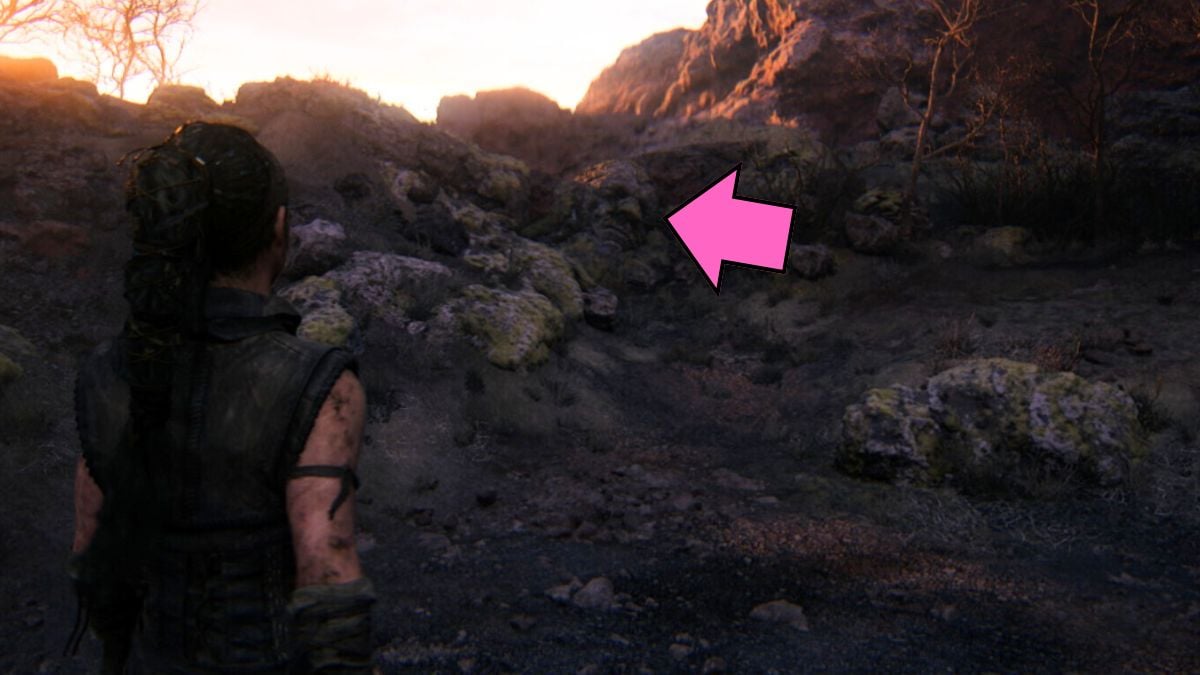
Once you climb up the hill , Senua ’s Padre starts pester her andteleports youto a new area which is pretty dark and can get confusing . Godown the pathuntil you see the shadow of Senua ’s father . This is the only meter in this division when you cango towards the red glowand not die .
The path in front of you will be stop , sohead to the rightinstead through a go between two rock . Head forward until youreach a blowtorch . snap up itand direct to the right to omit down in the previous section . Go to theblocked - off path , which will sort out now that you have a brightness .
Screenshot by Pro Game Guides
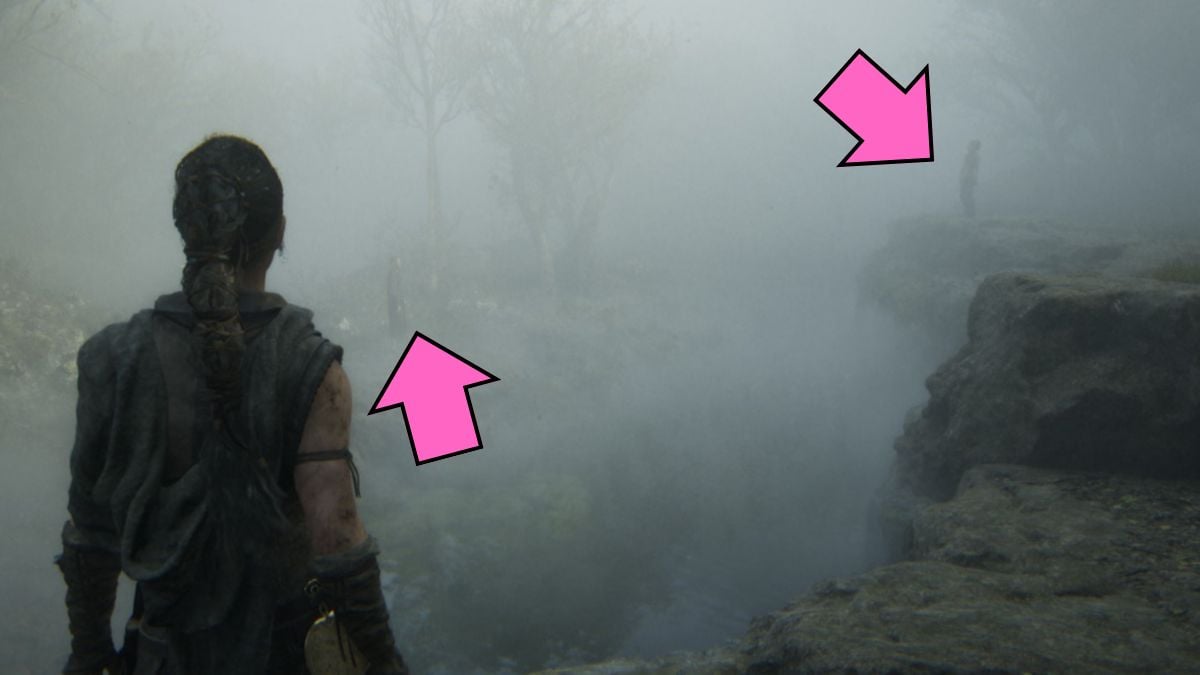
In the following part , you ’ll encounterthree paths . At the conclusion of the left and right path , you ’ll run into Senua ’s founder . If you keep go , you will die . Instead , channelise down themiddle track , which does n’t have her father loaf in the shadows .
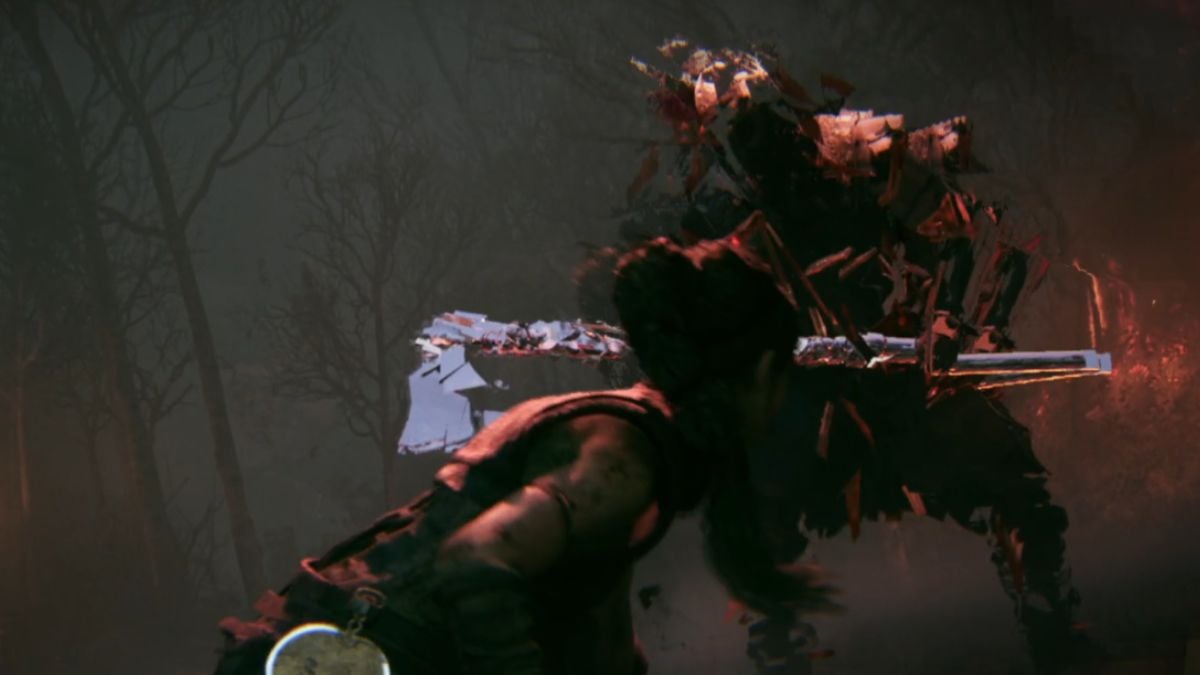
Drop down into the clearing , and you ’ll get attack by the shadowy enemies your Padre creates . think , you may only kill them with the mirror attacks . Thesword creaturehas a long range so I suggestblockingas many of his attacks . Theaxe creature , on the other hand , can summon spikes by stomp on the flat coat , so the good maneuver against him isdodge .
Once you dispose of the enemies , pick up the light and head down themiddle itinerary again , as it is the only safe one . Keep going until the luminance gets wipe out . Do n’t be scared ; all you have to do is move onward , and you ’ll get through anew lighter . However , that also meansnew vestige foeman .
Screenshot by Pro Game Guides
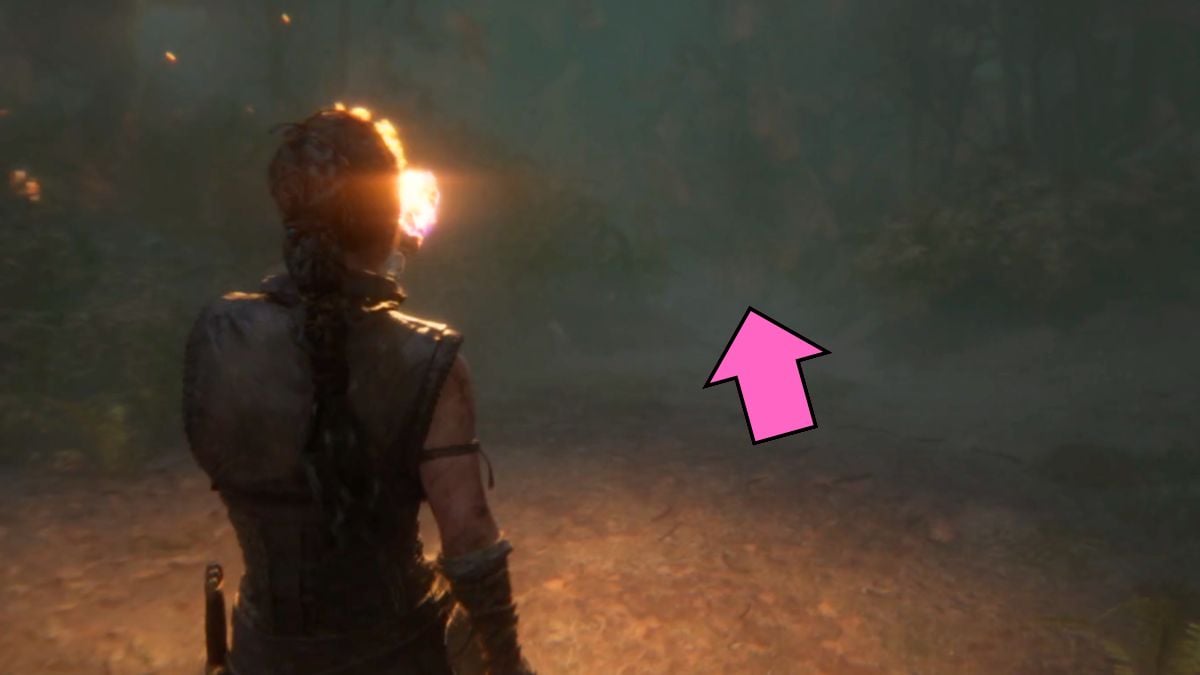
Pick up the torch again and point down the middle path . come near the funeral pyre and catch Senua as she unloosen herself from her father ’s torture .
Back on the Hill , Fargrimr explains to Senua that there are Hiddenfolk with powers that could put down the giant Illtauga . Before heading down to ascertain them , firstexplorethe Alfred Hawthorne .
Head tothe rightand past the hole you climb up from . Go up the hill until you reachtwo people talkingabout outsiders . Near them is aLorestonethat you need to snap up . Keep going to the right and send packing down next to the wooden path . That ’s where you involve to go .
Screenshot by Pro Game Guides
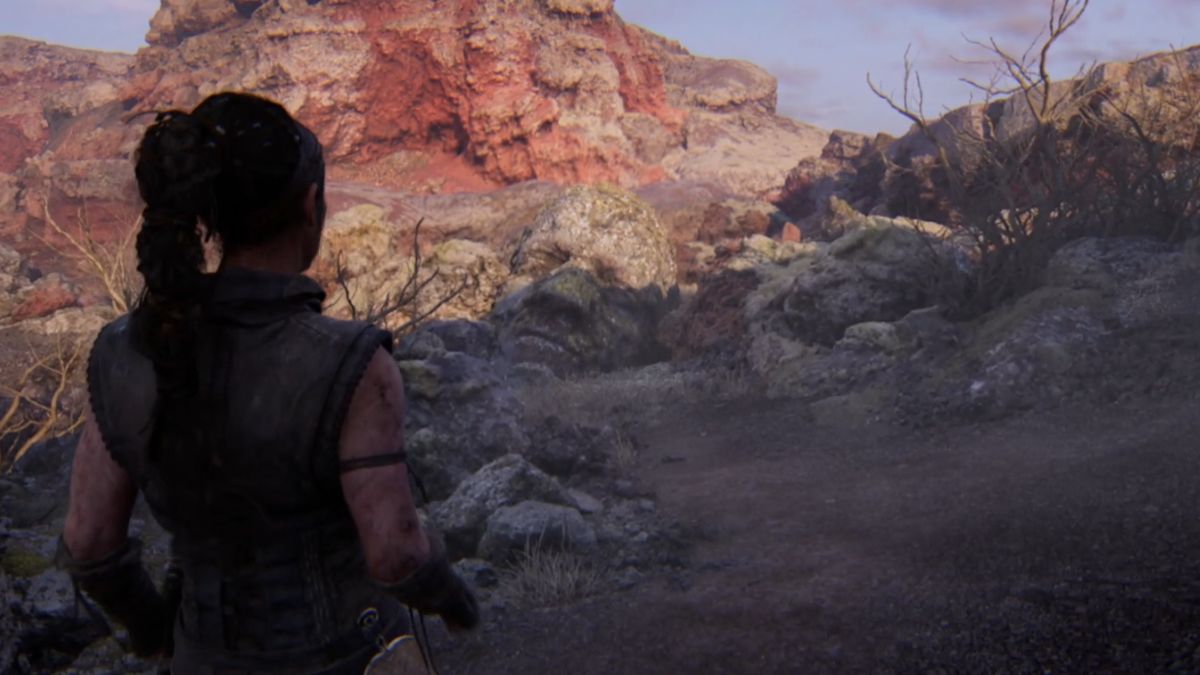
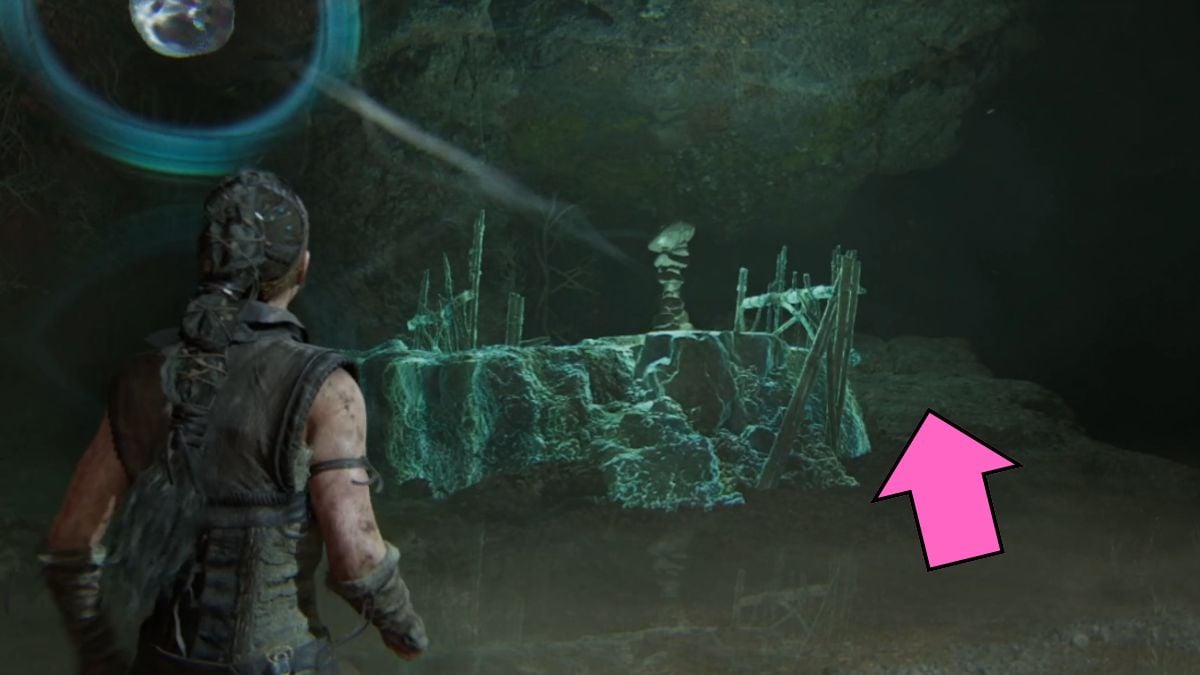
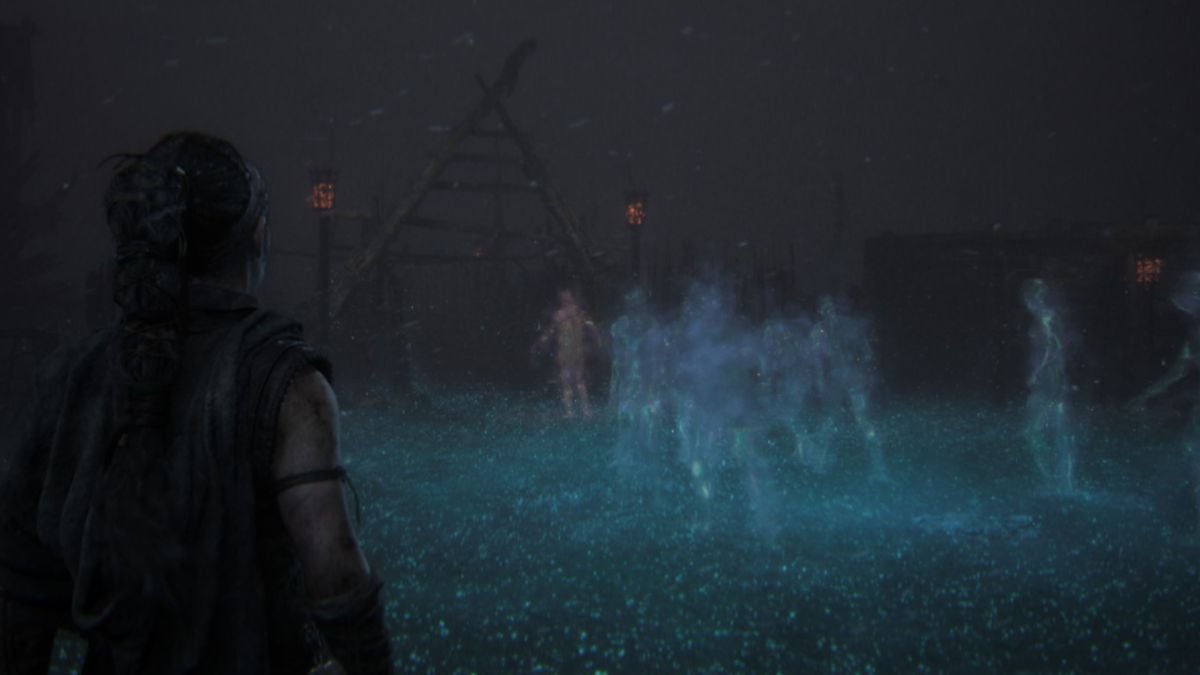
Luckily , it is still sunlight , so Illtauga hides . Go down the path until you reach ahidden facein stone on the left side . Once you collect it , point back up to the itinerary , and you ’ll arrive at thefirst testfrom the Hiddenfolk . You need to finda Harlan F. Stone offeringand localise it on the platform in the center .
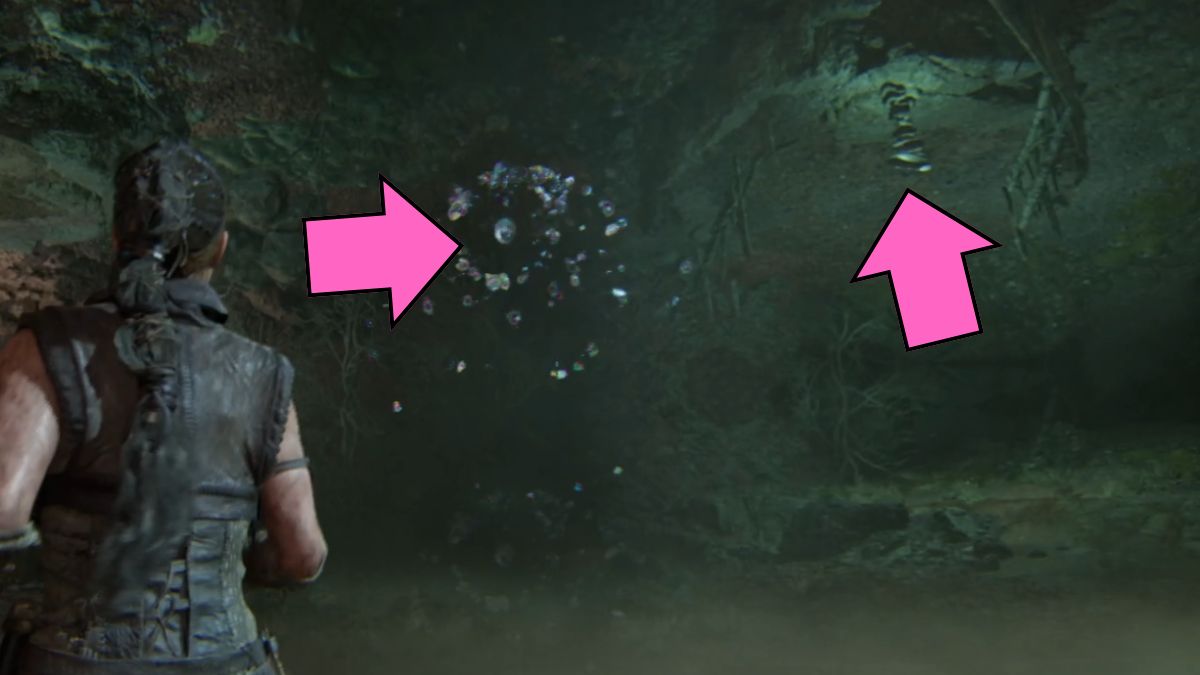
Go up thepath to the leftand catch the offering stone . The world will become mirror , but all you have to do is goback to the platformand put the Isidor Feinstein Stone inside the fix . This will bring upa 2nd platformthat you involve to get hold a stone for .
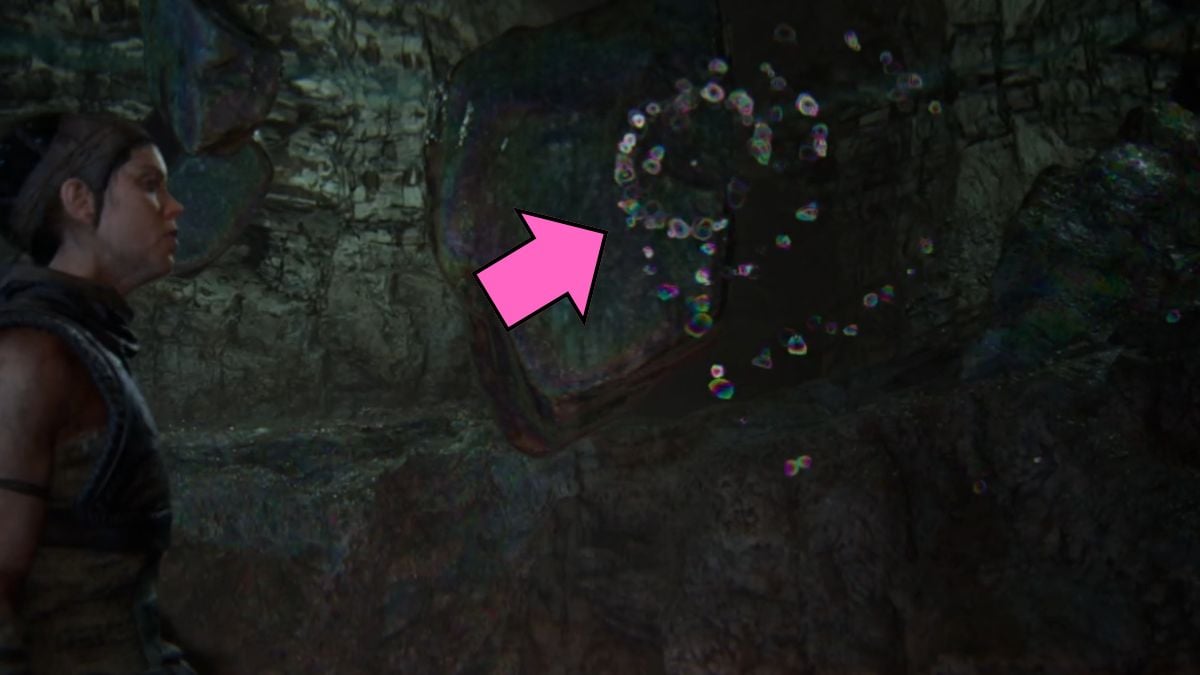
You ’ll seebubblesfloating in the air behind the platform . pore on them , and the sway in front of you will flick up to the ceiling , creating a new path for you . This is a shop mechanic you ’ll be using a lot throughout the Hiddenfolk trial .
Screenshot by Pro Game Guides
Go down the revealed path until you reach thesecond stone . Jump down to the political platform area , put the stone in its shoes , and the reality will retort to its former state . Thepath to the rightis now open , so go that way .
On the young path , you ’ll encounter ahidden face to the right hand . center on it to unwrap the privy tree of biography with its stories . Keep belong and you ’ll reach a new area that hides a Lorestone .
Go until you see astone step with white painton it . go up up and passthrough the crackin the stones . You ’ll see theLorestoneto the right . Collect it and jump down so that you’re able to make your way underneath thestone arch . You ’ll meet thesecond taskfrom the Hiddenfolk here .

Screenshot by Pro Game Guides
The mechanic is the same . Find thestone offeringto place it on the platform in the middle . The first stone is on thehill to the right wing . Grab it and place it on the platform .
When you put the stone on the platform , you’llactivate the bubbles . Focus on them to reveal anew pathto the right , which you could go up up to . The 2d stone is on the ceiling ; focus on thesame bubblesagain to put everything how it was and you’re able to grab thesecond stone oblation . set off the bubble the third fourth dimension so that you’re able to leap down from this area .
There is asecond readiness of bubblesto the right hand . focalise on them and then goup the pathand across the bridge to thethird set of bubbles . This will put down thethird rock offeringon the ground , but you ca n’t reach it . Head back down so that you may set off thesecond solidification of bubblesagain . The path to the third offering will reveal itself and you’re able to get it now . This will complete the 2nd task .

Screenshot by Pro Game Guides
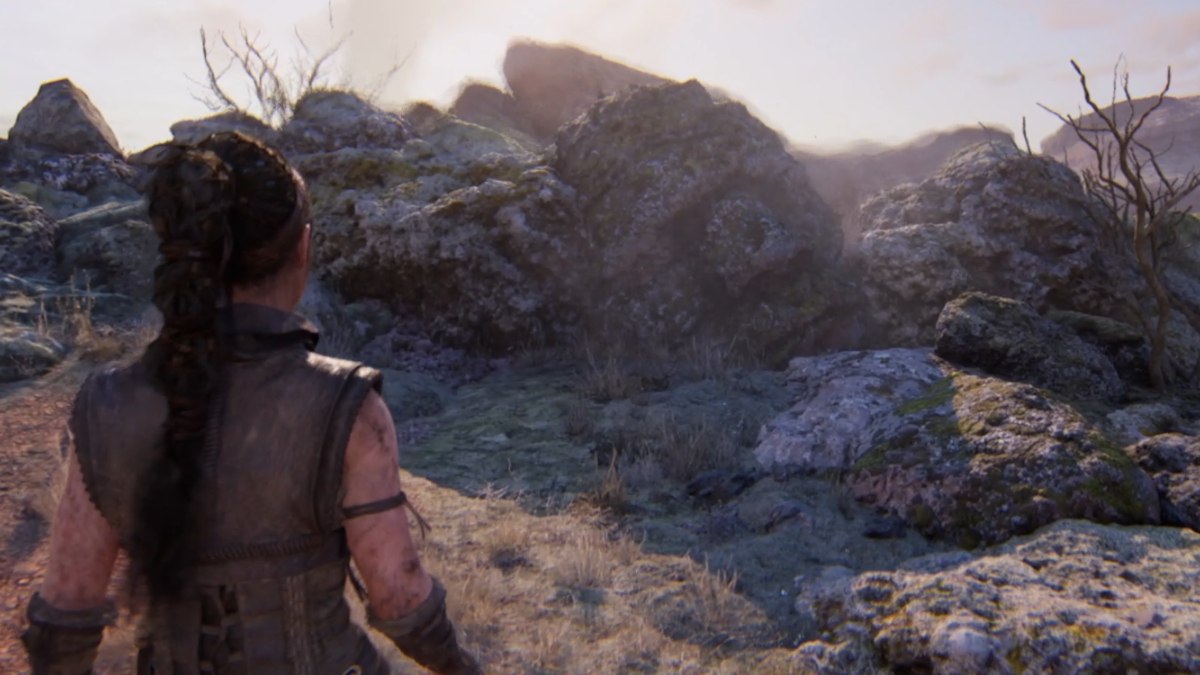
lead through the newly open up - up course . As you keep going , you ’ll see some ledge withwhite streaks of paint . Climb up until you gain a out of sight case and the life tree diagram .
There ’s also aLorestoneacross the way , but it ’s not easy to reach . Keep going until you see asmall pathheading up between rock . Once you roll up it , go back to your original path .
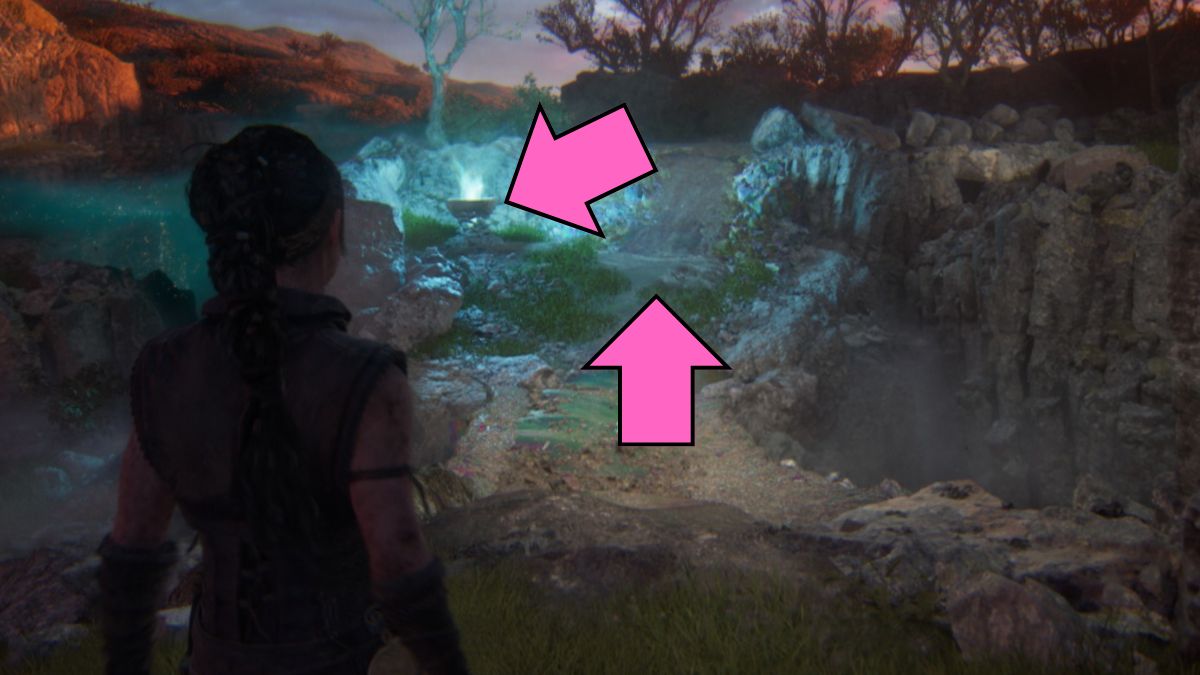
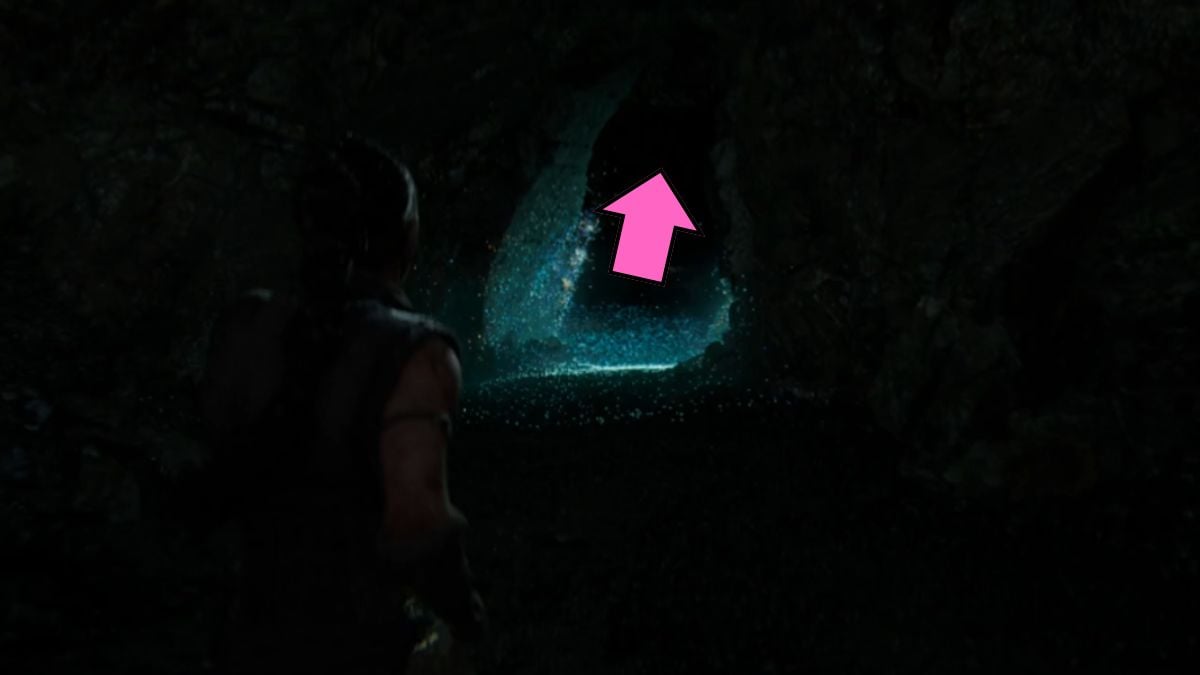
You ’ll find asmall stone archto the right . There is a grown cave entering forward but go to the right first . Here you will find anotherLorestone . guide back and thenenter the cave . You ’ll go out into a beautiful area where you will do the third test .

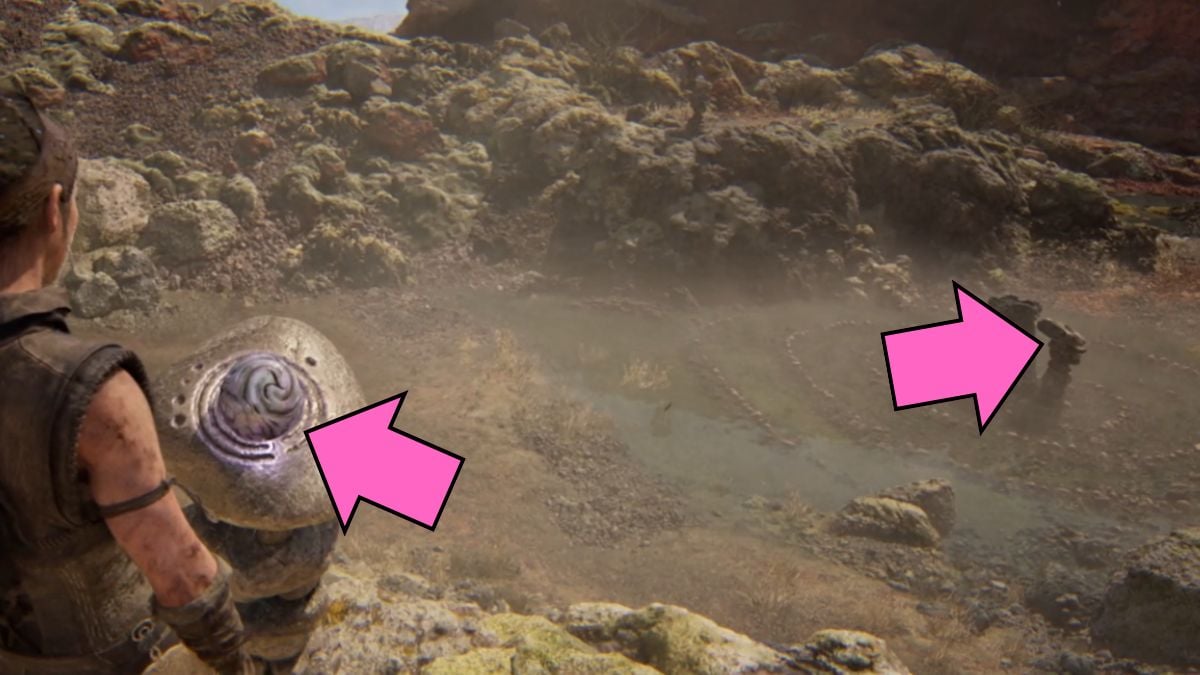
Next to the lake , you ’ll find the platform to start the third test . Thefirst Lucy Stone offeringis to the rightfulness above the lake . By find fault it up , you ’ll enter the mirror mankind where you will be locate all of the other offerings . Go down and localise the first stone .
Go and activate thefirst set of bubblesto root for down the 2nd stone offering to the right . Go up and take hold of it . Now , it gets a little more complicated .
There aretwo set of bubblesbehind you . First , go all the style back and wax up to a platform to reach thefarther house of cards circle . Once you activate it , you will get attack by theDraugaragain . When you vote out them , go back to finding the third I. F. Stone .

On the last bubble set , verify that theplatform is up on the cap . For the 2nd one , you necessitate to crusade theplatform down , which will produce a way of life you may mount up .
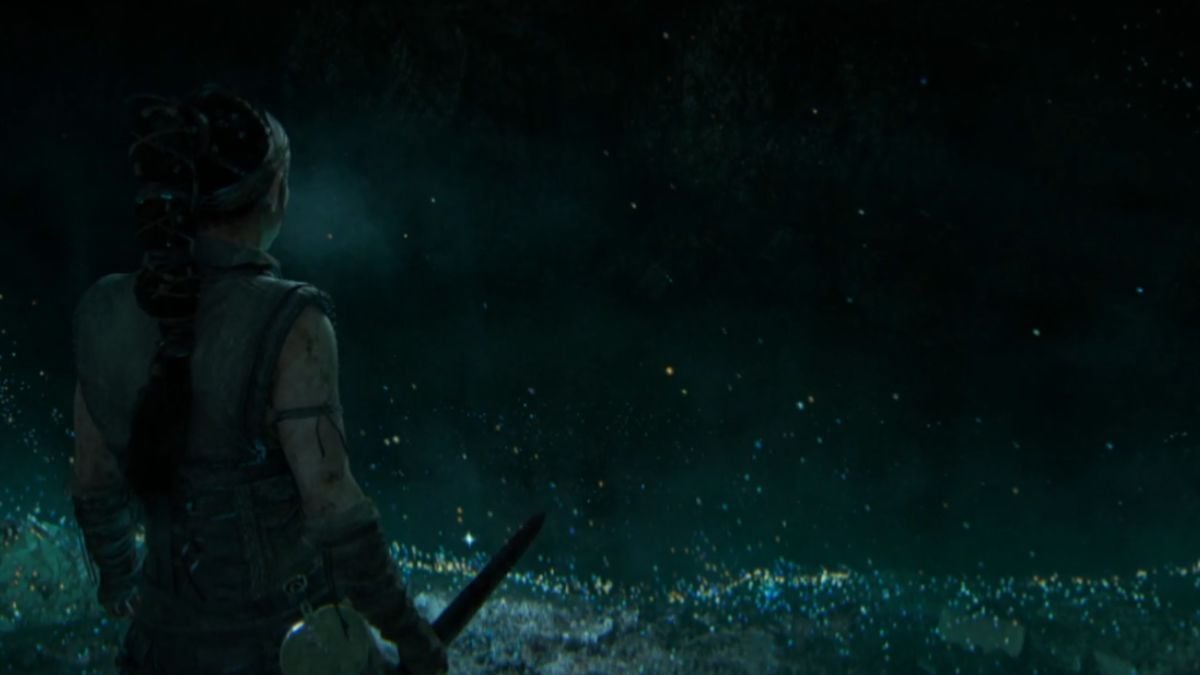
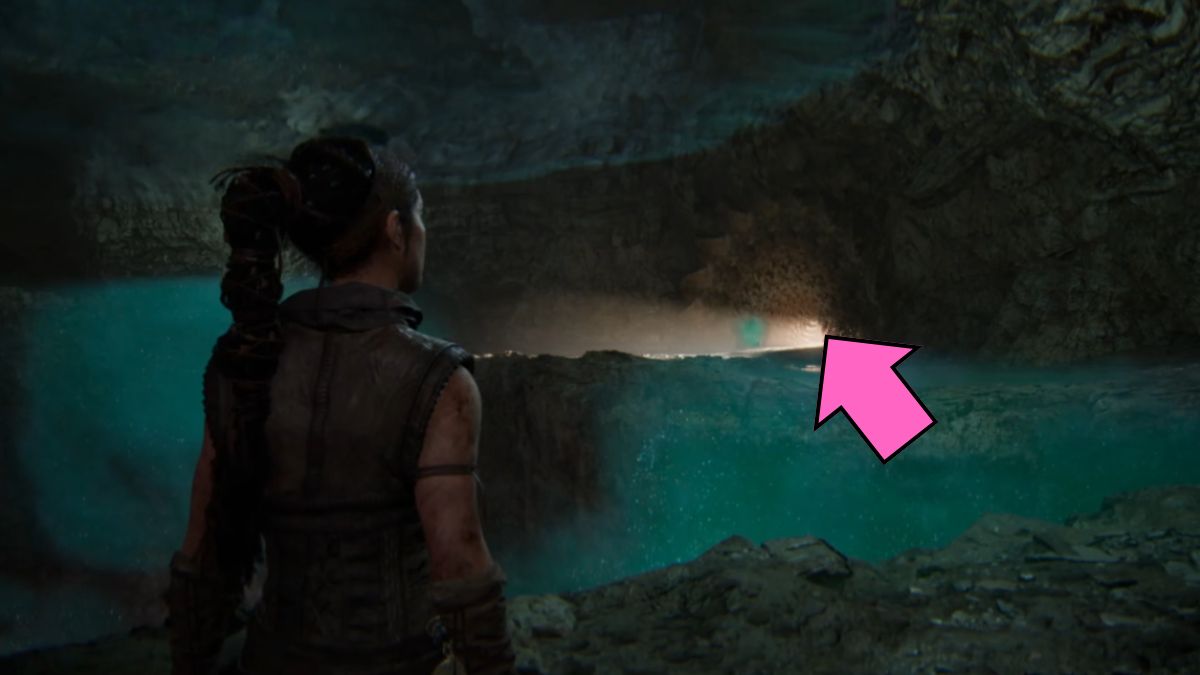
At the end of this path , you will find aLorestoneup on the ceiling . Thethird offeringis up on the roof here as well , so you need to concentre on thebubblesthat are lifting the platform . Jump down and place the offering to put the world back to how it was . This willmove the H2O , opening up a new way into the caves and the darkness .
Chapter 4 Huldufolk - Senua’s Saga: Hellblade II
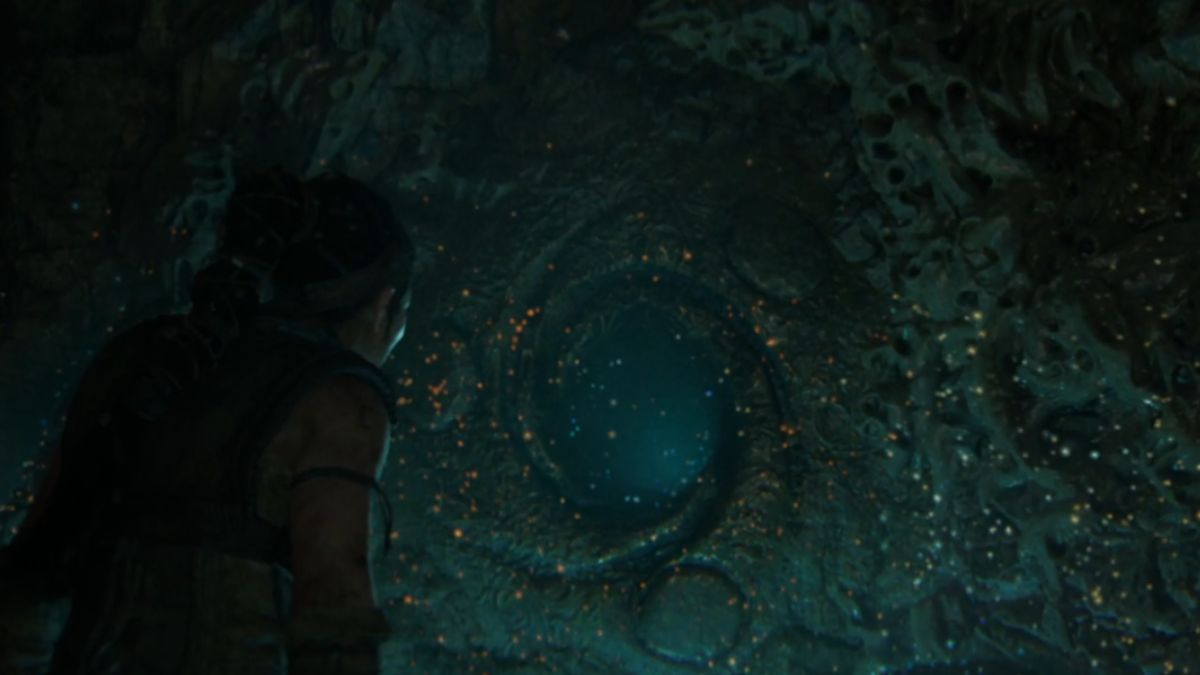
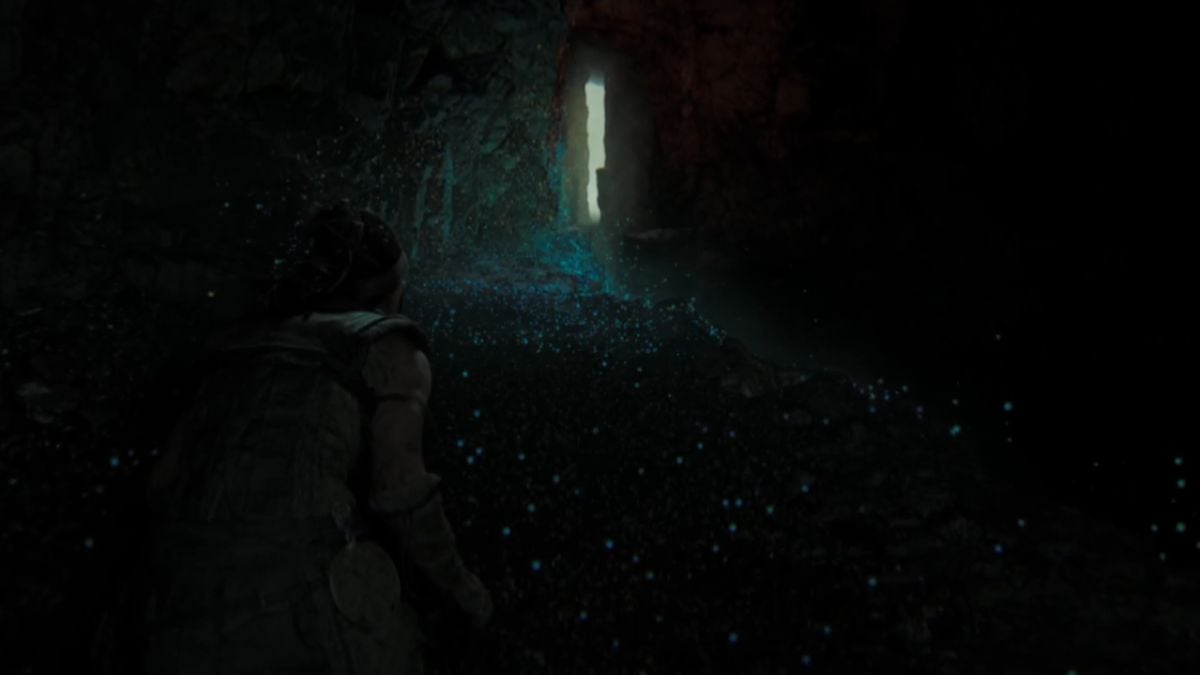
When you jump off down and start hunching over in the caves , you will see ahidden faceon a way of life to theleft . Focus on it to garner the living tree and then you’re able to make your means to the right .
Despite my best hopes , you have to keep going further into the dark . dangle into a puddle and you ’ll see awooden shieldto your right hand . There is a way of life next to it that leads to aLorestone . Climb up to reach it , then go back to the cave with the shield .
You ’ll get into a room with seemingly no exit . However , there is a plaza where you canlight a flaming . When you do , a raw itinerary will be revealed to you . mount up that way and through the hole in the wall .
Screenshot by Pro Game Guides
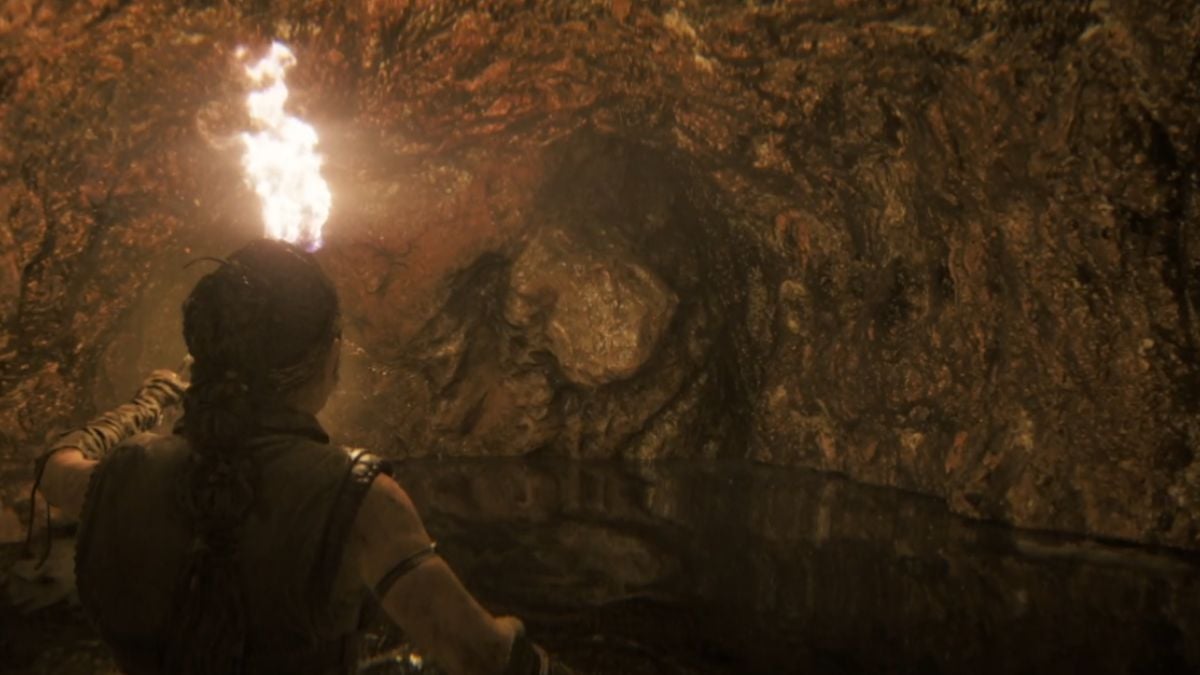
In the next elbow room , astone blocks your wayand an already lit fire . You have toextinguishit to uncover the path . To the right wing , there is ahidden pathin the shadow , which you should apply to reach the fire .
Once you extinguish it , first check up on out thewall behind you . There will now be astone facethere that you may focus on and collect the tree diagram of life . When you grab it , go back down and through the new way of life .
You ’ll touch adark cakehole , and you involve to jump down , as it ’s the only style . When you are down , first pass to theleftto grab ahidden nerve . After you do , you could make your way to the right . You ’ll have to dive under the pee cursorily , and the fury will start freaking out . There is something in the H2O , and you do n’t require to stay in it for too long .

Screenshot by Pro Game Guides
sink through a glitter route and keep going until you may climb out of the water to the ledge on the rightfield .
In the new way , you ’ll see a seat where you could light the fire , a torch , and a glisten handing over . Do n’t go through the passage ! There iswater fall , and it will extinguish your light . Instead , go through the crack in the wall to the left . This will lead you up so that you canlight the fervidness .
Now , there is anew pathyou can climb up . Christ Within the torchyou get on the bulwark then expend down into the area with the ardor pit . Extinguish the fireso that the glisten path is let on again . This clip , even when your flaming is extinguished , you could relight it by heading to the left and finding thetorch .

Screenshot by Pro Game Guides
You ’ll take on aLorestoneon the other side of a hole . It ’s easy to miss , but there is a path that connect the two drop side . chute down and quickly reach the Lorestone , then keep heading further into the cave .
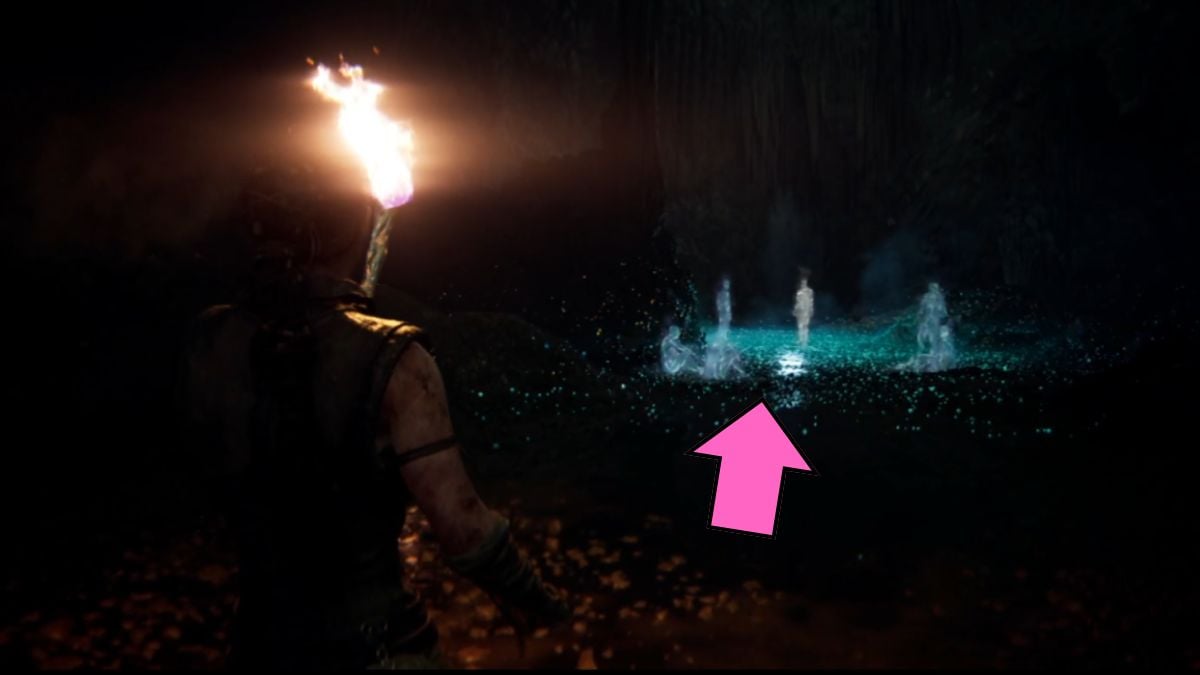
To progress , you must jump into thewateragain . Climb to the other side of the fire and make your way toextinguish it . A path will open up on the wall in the water . clock time to wash away your wearing apparel again ! You ’ll see the shadowy physique of everyone Senua could n’t save , but theycan’t touch youso long as you have the luminance .
Once you make it through the water supply , climb up onto the platform . You ’ll have to go througha waterfallto get to the other side . Luckily , there is atorch to the left , which you’re able to utilise to relight the firing . You ’ll just have to queer over the darkness and the shadows reaching for you . Now , jump down and back into thewater ; your goal is to reach the chopine across the way .

Screenshot by Pro Game Guides
In this second section , you ’ll have to go through awaterfall dooragain . Run to theleftand toa second waterfall doorway . You ’ll see atorchhere that you may use . break away to therightand then through a passing on the left to relight your fire .
Do n’t fawn back through the jam . Instead , stay on the same platform so that you canlight another great mullein . This is enough to get you through the water , even without your flannel mullein being lit . When you go back , your fire will be extinguished , so stay in the light of the torch .
scarper to thelast torchand light your fire on it . After you do , manoeuvre back into the H2O . Your light will depart quiver , and you ’ll see anotherwaterfallthat will extinguish your flame . Runthrough it and keep running to the political platform so that the shadows do n’t get you . Keep going until you reach abeautiful outside areathat should n’t be possible so inscrutable .

Screenshot by Pro Game Guides
Pick up the torch from the rightfulness . You ’ll ask it to open up different path and proceed to the next section . First , easy thefire pitright in front of you so that the glittering figure can make its agency to the cave .
Now , you should head down the way of life tothe rightuntil you reach alit flack . Extinguish it so it reveals a path in the stone next to it . Go through it , and you ’ll find another blast that you should extinguish . Now , you have asecond pathin the same Oliver Stone .
Go through it andrelight the first firethat will close up the first route . Then go back andrelight the 2nd fervency , and you ’ll get a path up to thecircle golf hole in the wall . Give the fervency to the glowy figure . It will run down and light a new way for you .

Screenshot by Pro Game Guides
Even without the ardor , you could still make your room out of here . Go to thethird fire pitandextinguish it . This will open up aholefor you to get out . Go across the route that the glittering name activated for you . Then , snuff out thefourth fire nether region .
This will let on a small cave that you should go into andto the right . Now you ’ll be next to theleft circle holein the paries and the glittering digit will send you back the fervidness . front crawl through the cave again until you canrelight the fourth fire pit .
go up up the path to thefifth fire pitand light it . Go to the platform to the left-hand andjump down . Now , head to thefirst lightyou lit up andextinguishit . You ’ll break apathin the paries behind it which you need to get through .

Head through the transit and climb up until you reach thethird circle windowin the wall . Put your woolly mullein inside and the glittering figure will light the fire you just extinguish and make you apathback into the swarthiness .
You are back in the caves butwithout your lightnow . fortunately , there are a bunch oftiny gleam lightsthat you need tofollownow . As you keep going , you ’ll get assail but even moreDraugar . push them off , and the world will once again go from ominous red to glittering darkness .
Keep perish through the cave until youreach a cliff . You ’ll get attacked by one Draugar at the top which Senua will defeat on her own . Once youjump down , you ’ll go intobattlewith more Draugar .

Screenshot by Pro Game Guides
If you conceive two attacks are enough , think again . When you are crawling througha crack in the bulwark , you ’ll get dragged by even more Draugar . Fight them off and get back to squeezing through the fling . Keep going until you reach a circular windowpane in the wall .
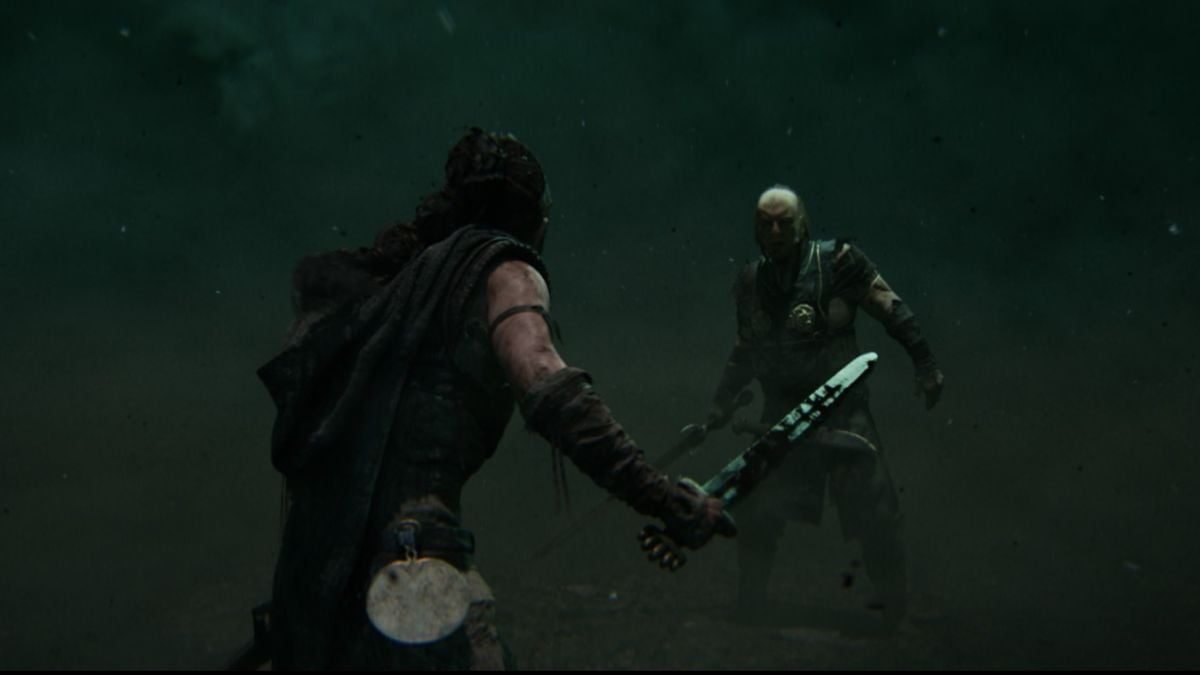
The voice on the other remnant is solicit Senua to give them the sword . While she waffle , she ends up making the decision to give the other individual her sword , leaving herself vulnerable .
Keep movingandstay in the luminance . You ’ll see a crew of Draugar get fire up up by the reddened light , but they wo n’t assault you . Move until you reach a broken bridge . you may bound down and go a unlike room that will conduct you to wobble over a cliff .

Screenshot by Pro Game Guides
When you see thebright white light , you are almost there . accommodate the forward clitoris as Senua makes her way across the dangerous edge to the light .
After you make it into the light , keep an eye out for ahidden facein pit . you may find it across from the floating rocks to the left hand .
Keep run until you reach a passage with ablue lightshining in the distance . Do n’t go there just yet . Instead , go to the rightand you ’ll find aLorestone . When you hoard it , you may go through the other enactment .

Screenshot by Pro Game Guides
Drop downinto a new country with the glowy figure going through a passage across from you . That ’s where you need to be .
Head through the first glittery area to the left until you reach thebubble exercise set . Focus on it to spread up a raw area . When youhit the wall , look at thebubble in the middleand leaf the way again .
Keep going until you reach asecond bubble set . This will activate the passage in front of you . Now you have to goall the way back , using the house of cards to toss the world up and down so that you’re able to make your way through .

Screenshot by Pro Game Guides
creeping into the passage . Make certain to hold the forward-moving button , or Senua will stop . When you make it through , you ’ll start a cutscene about the Hiddenfolk . When you arouse up , justfollow the gleam lightsto line up out the story about Illtauga .
Once you finish the story of Illtauga , you will getattacked by the Draugar . Now we will see the other side of the orbitual windowpane when Senua gave away her sword . She actually make it to her succeeding ego . After you fight your way back to the light , Senua willfind Illtauga ’s babyas well as her real name , Ingunn .
With Fargrimr , make your wayout of the cavesand into the Christ Within . Your plan now is tosummon Illtaugalike the Draugar and take charge of her .
Screenshot by Pro Game Guides
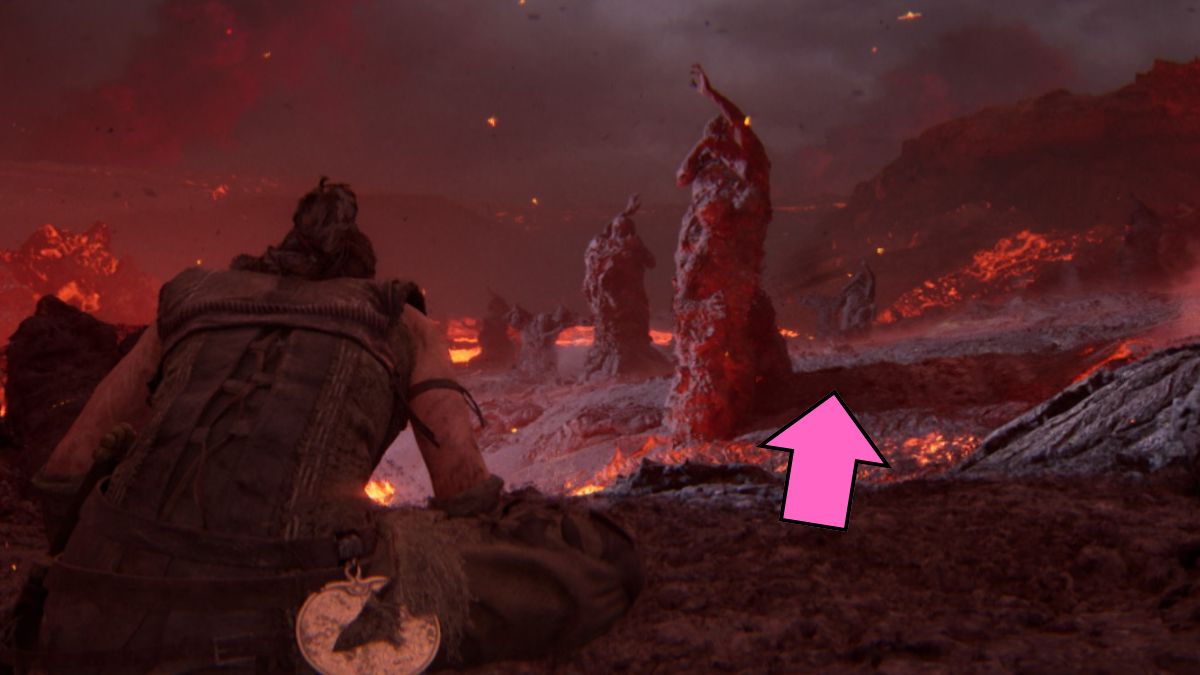
You ’ll find yourself in thefire kingdom of Illtauga . You have to breakthree of her chainsin ordering to unfreeze her and defeat the giant . Be measured as she will be aggress you with firing every stone’s throw of the way . Listen to the euphony and you ’ll get thepattern of her attacksquickly .
After she attacks , you need to run to the alreadydead bodiesthat have turned to gem and hide in their shadow . As soon as the blast starts , you are respectable to start running . You do n’t have to wait until it to the full cease .
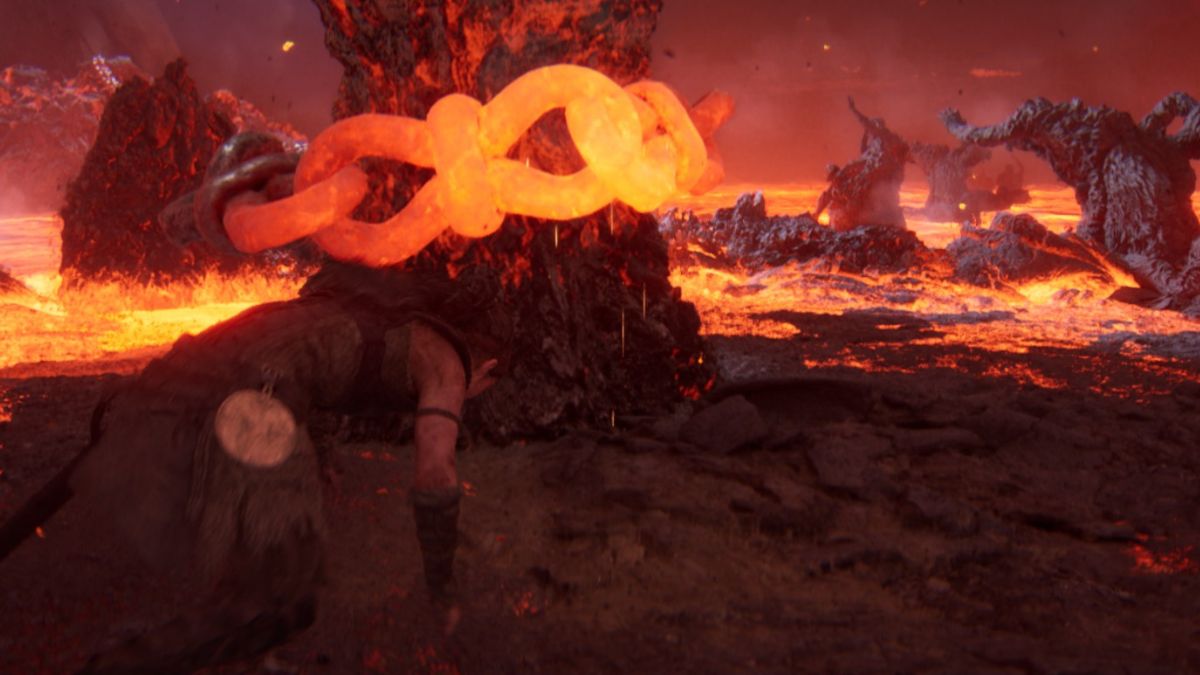
Thefirst chainisn’t that difficult to reach , as the attacks are still comparatively ho-hum . However , once you break off it , she willspeed upher approach , so you should speed up , too . On top of that , she will now alsobreak your binding . So the bit it breaks , you have to be turn tail to the next one .
Screenshot by Pro Game Guides
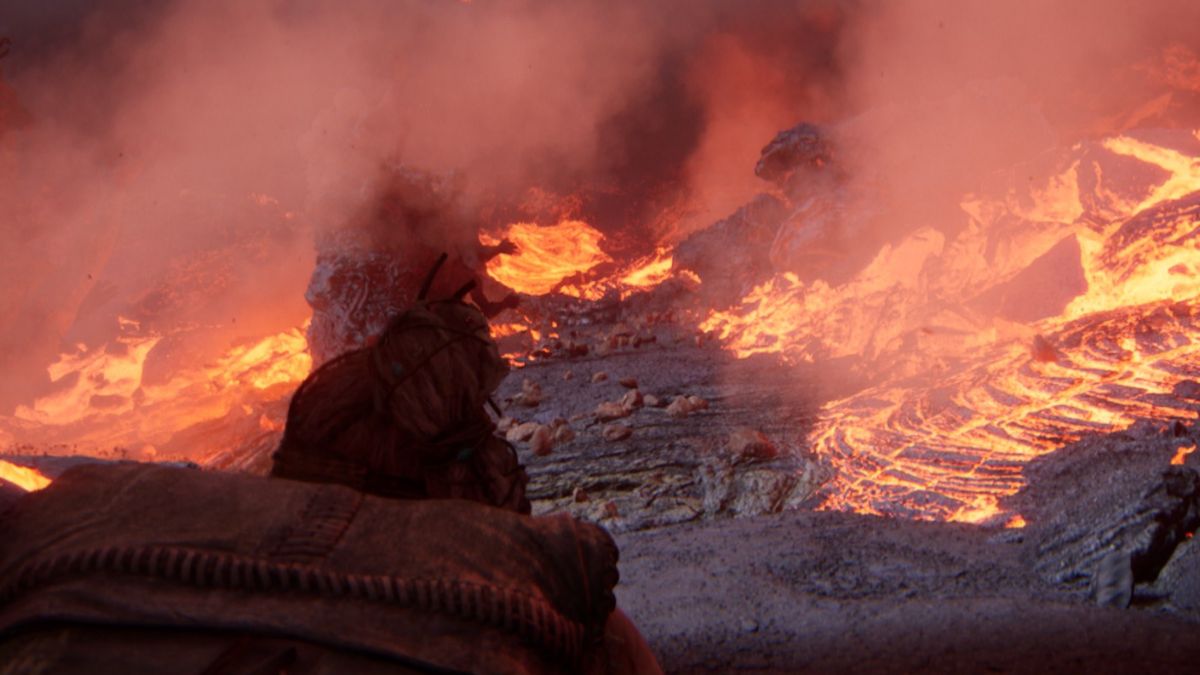
In the third section , you ’ll have to take the air around the shelf of a lava pit while Illtauga looks from above ( very creepy ) . Once you pass that , you ’ll now also have to dodge her attacks as well as parachuting obstruction .
In the last section , you will just have to run while invalidate her tone-beginning . If you stop , you will cut up , so keep running until you reach her final chain and break Ingunn complimentary .
Chapter 5 Bardarvik - Senua’s Saga: Hellblade II
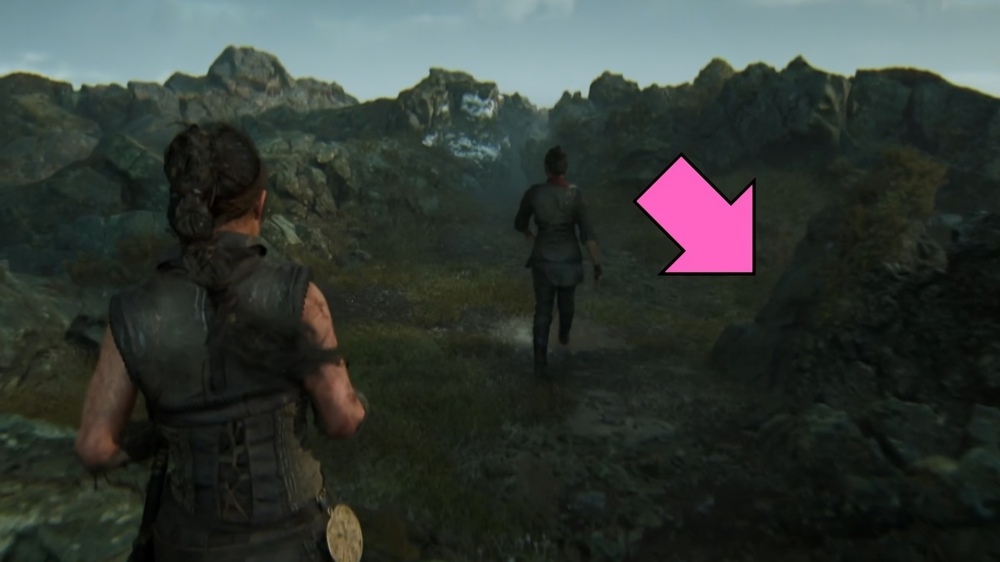
To get to the Lorestone , keep heading down the course until you reach a course going to the right . Head down this way to see the traditional knowledge , then go back to the main track . Keep go until you get ambushed by Astridr and her men .
Keep move along the way of life until you jump over some stone and arrive at a clarification . To the right hand , you could see aLorestonein the length . However , to gain it , you have to go down the itinerary even further to the right and then crawl through a passage .
You ’ll keep walk until theDraugar attackyou and Astridr abandon you to crusade them . These will include the regularfour typesof enemies ( including the annoying Firebreather ) , so it should n’t be too hard to defeat them after all of the practice throughout the secret plan .

Screenshot by Pro Game Guides
head up down the path until you reach arune door mystifier . It bear mechanics from both the Hiddenfolk and the regular rune practice , which is why I had lots of fun doing it . You need to find three parts of a radiation diagram in the yellow rouge on the Rock around you .
First , touch off thebubblethat has appear . Now , you could go through thenewly revealed pathand discover thefirst patternof the rune on the rocks .
Once you get that one , keep go down this path until you reach thesecond house of cards . Activate it and manoeuver up towards the theater . You ’ll line up thesecond patternhere .

Screenshot by Pro Game Guides
Now , channelise back to the clarification and put theworld to normalwith the house of cards . You ’ll now have apath upthe hill , which is a great vantage point for you to find the third andlast rune formula .
Before you go too far , there is ahidden face on the top of the cliff to the right . Do n’t lack it so that you ’ll unlock all of the supernumerary in the game .
Keep go down until you reach arune door puzzle . It requires three piece to unlock . First , focus on thebubblethat is float above the sea . After you do , gobehind the boatright next to the runic letter door and pass through the sparkle . Now , focalise on the bubbleagain to bring stonestepsto the left which you’re able to climb .

Screenshot by Pro Game Guides
go up up and go all the waydown the pathuntil you get through anotherbubble . Activate it and thenretrace your steps . You ’ll see that a rock-and-roll is now missing and you have the gross path to findthe first patternof the rune . you may regain it in theship polesto the right out at ocean .
Head back to the primary area and touch off the main bubble above the sea again . Then climb back to theplatformyou originally came from , butgo left . When youreach a rock , activate thebubbleagain and you may go through . You ’ll find thesecond patternhere out at ocean .
Keep followingthis itinerary . Jump down into a new area but do n’t get back onto the other platform . Instead , go through theglittering paththat has asecret crawl spacebehind it . Here , you ’ll observe both aLorestoneand ahidden face .

Screenshot by Pro Game Guides
Next , climb back up onto another political program to the right . You ’ll come across ahole , but there is abubbleabove the sway to the right hand . Activate it to make a way of life . Another rock will be in your way of life . Look out to the sea and set off thebubbleagain .
Now just make your way to thedilapidated houseat the end of the path . Go inside and look through thehole on the left . You ’ll find the terminal pattern here . Now all you have to do is make your way back to the rune door . Crawl through the crack in between rocks and make your way down to the water supply . you could now mind to the story of the giant , Sjavarrisi .
Go through the water until you get back onto the beach . research the settlement before discover Astridr . There is ahidden facenext to one of the huts that you require to pile up .
Screenshot by Pro Game Guides
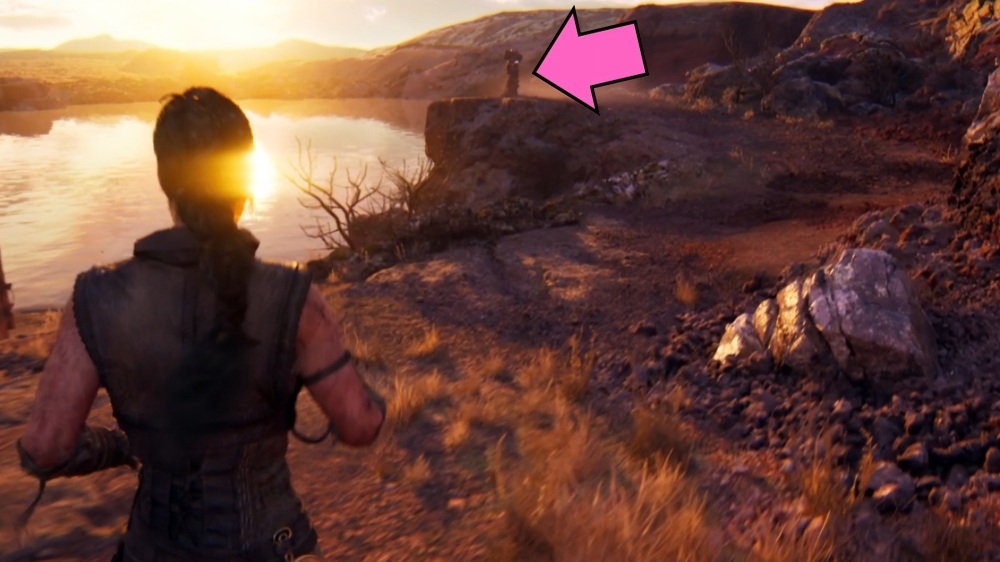
point down themain pathuntil you reach the wooden plank that lead up to Astridr . Instead , go to theleftand climb up until you reach aLorestone . That one is pretty obvious but there is also ahidden facein this area . Head to the right and to the last hutch . Go around it , following thetorchlight , and you ’ll chance another hidden face . With this done , head up to get wind Astridr ’s story .
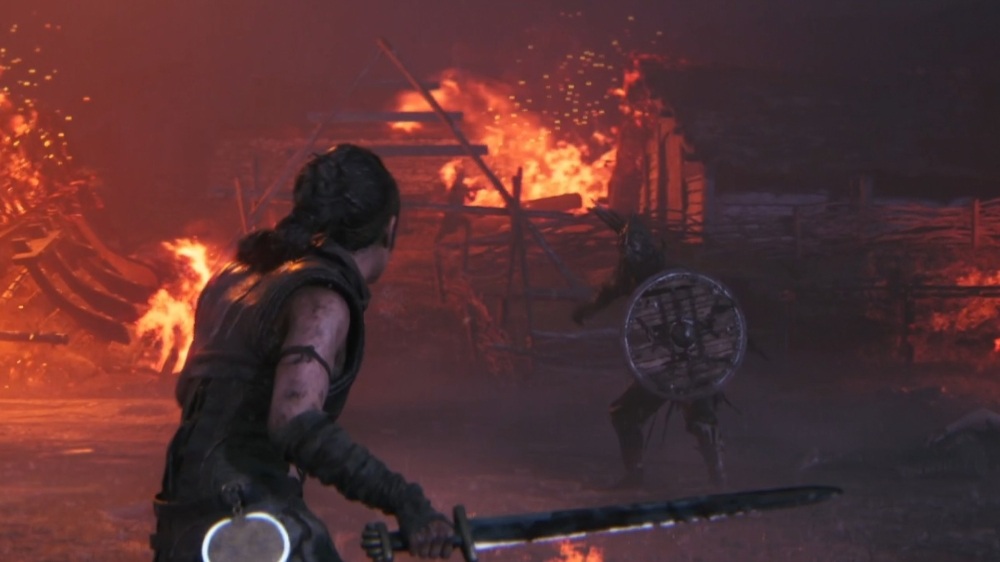
After talking to Astridr , the colony is attacked by theDraugar . There isone new foe typethat join in — ashield lancer . This Draugar can have the lance at you , so be certain to dodge it . He can also block your attack pretty easily with the carapace , so flip thing up between fast and heavy attacks . A mirrored attack work best , and in this conflict , I mostly used it against the lancer and the firebreather .
In club to attract out the giant , Sjavarrisi , you involve to round him withfire . The primary thing in this incision is running . And if you see a person lighting up alancein front of you , grab it and shed it at the giant to slow up it down .
Screenshot by Pro Game Guides
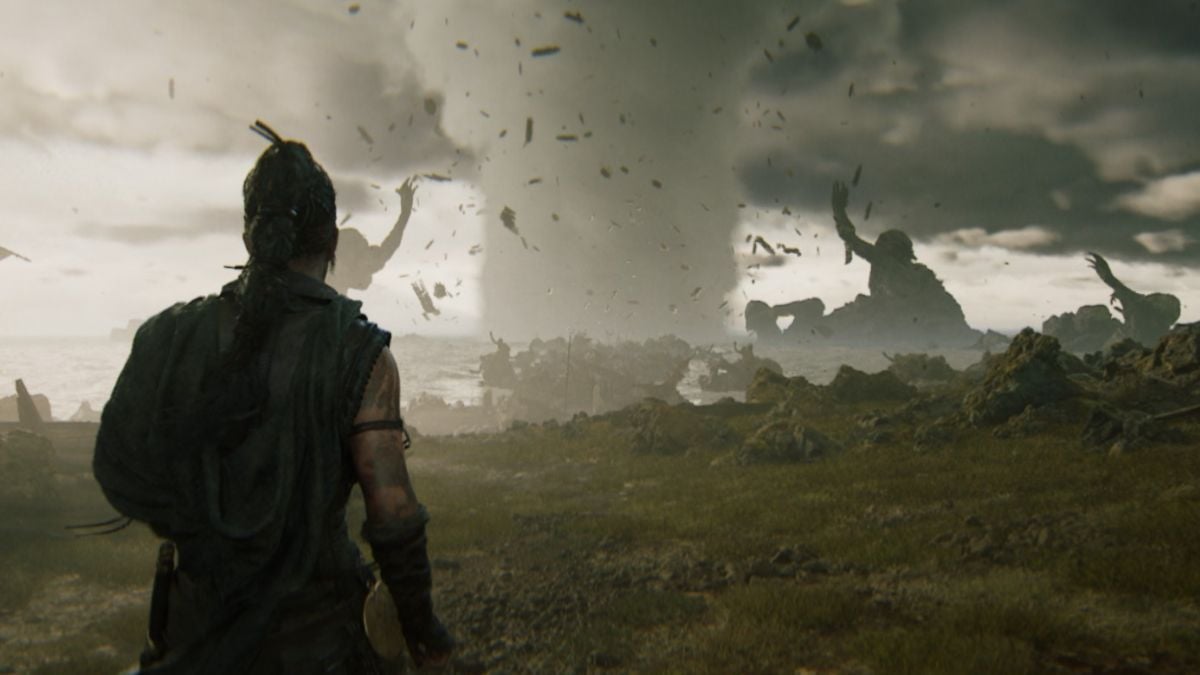
In Sjavarrisi ’s realm , there is astormbrewing . Senua needs to get to the philia of it for vote out and pull through him . The mechanic are similar to Illtauga ’s , you just have toavoid water attacksinstead of blast in this one .
As you go through the realm , you will have to hold onto therings tie with ropearound stones and wooden circuit board . This will keep the Wave from washing you aside . In thefirst area , there areonly stones , so there is no additional danger .
However , when you get to thesecond division , the wooden control board can be broken . Once they ’re dampen , it ’s your sign to run to the next ring . In thelast subdivision , just like with Illtauga , you have to run . There are many physical object falling from the sky ; watch over out for fantasm on the floor .
Screenshot by Pro Game Guides
Chapter 6 Borgarvirki - Senua’s Saga: Hellblade II
Go on as everyone keep getting progressively panicked . You ’ll reach ablocked pathbut all of your fellow traveller are miss . grow around andgo backthe fashion you came .
wring through the stone until you hit a choice . You have topickif you want to save Fargrimr or Astridr . I chose Astridr here . However , as you keep going , you ’ll die hard into Fargrimr somewhat apace , and then soon afterThorgestras well . Head up until youescape the forestand you ’ll see Borgarvirki in the distance .
After the cutscene end , Astrdir and Fargrimr design to free the slaves while Senua and Thorgestr go to address to Thorgestr ’s father .

Screenshot by Pro Game Guides
When they reachthe Godiand recount him how Senua knows to shoot down the giants , he does n’t trust them . Instead , he claim that he is the only one who can keep the giants at bay .
Senua is taken to be give and you ’ll have tofightin this section to give up yourself . After you defeat them , you ’ll hearThorgestryelling for you , so head in that direction . You ’ll be aggress by evenmore enemieshere .
When the Godi catches you , Thorgestr and the Hiddenfolk will hail to your aid . take the air through thestoryby the Hiddenfolk about the despot . Just keep following the sparkle until you are back in the material world .

Screenshot by Pro Game Guides
At the ending of the Hiddenfolk path , you ’ll reach Godi as he kill Thorgestr . Luckily , Thorgestr chose Senua , so he reveals hisfather ’s tangible nameto you .
This time , you have to campaign Godi to save the island from tyranny . He is very near atblocking , so you ’ll have to interchange betweenfast and heavy attacksto make him bumble .
For an old guy cable , heattacks quickly , and his slash attack have a prettylong range . When he jab hissword into the flat coat , use yourmirror attackand run towards him . You ’ll have to repeat this a few times until the Godi start stumble around , and the crew starts turning against him .
Screenshot by Pro Game Guides
Even though he is stumble around , he canstill hit you , so watch out . This engagement drags on a little flake , but once you finally defeat the Godi , you ’ll make out the secret plan and unlock a crowd of extra .
If you need to know our cerebration about the plot , check outSenua ’s Saga : Hellblade II Review – An intense story set to a stunning visual and audio backdropon Pro Game Guides .

Screenshot by Pro Game Guides

Screenshot by Pro Game Guides

Screenshot by Pro Game Guides

Screenshot by Pro Game Guides

Screenshot by Pro Game Guides

Screenshot by Pro Game Guides

Screenshot by Pro Game Guides

Screenshot by Pro Game Guides
Screenshot by Pro Game Guides

Screenshot by Pro Game Guides

Screenshot by Pro Game Guides

Screenshot by Pro Game Guides

Screenshot by Pro Game Guides

Screenshot by Pro Game Guides

Screenshot by Pro Game Guides

Screenshot by Pro Game Guides

Screenshot by Pro Game Guides

Screenshot by Pro Game Guides

Screenshot by Pro Game Guides

Screenshot by Pro Game Guides

Screenshot by Pro Game Guides

Screenshot by Pro Game Guides

Screenshot by Pro Game Guides

Screenshot by Pro Game Guides

Screenshot by Pro Game Guides

Screenshot by Pro Game Guides
Screenshot by Pro Game Guides
Screenshot by Pro Game Guides
Screenshot by Pro Game Guides

Screenshot by Pro Game Guides

Screenshot by Pro Game Guides

Screenshot by Pro Game Guides

Screenshot by Pro Game Guides

Screenshot by Pro Game Guides

Screenshot by Pro Game Guides

Screenshot by Pro Game Guides

Screenshot by Pro Game Guides

Screenshot by Pro Game Guides

Screenshot by Pro Game Guides

Screenshot by Pro Game Guides

Screenshot by Pro Game Guides

Screenshot by Pro Game Guides
Screenshot by Pro Game Guides
Screenshot by Pro Game Guides

Screenshot by Pro Game Guides

Screenshot by Pro Game Guides

Screenshot by Pro Game Guides

Screenshot by Pro Game Guides

Screenshot by Pro Game Guides

Screenshot by Pro Game Guides

Screenshot by Pro Game Guides

Screenshot by Pro Game Guides

Screenshot by Pro Game Guides

Screenshot by Pro Game Guides

Screenshot by Pro Game Guides

Screenshot by Pro Game Guides

Screenshot by Pro Game Guides

Screenshot by Pro Game Guides

Screenshot by Pro Game Guides

Screenshot by Pro Game Guides

Screenshot by Pro Game Guides

Screenshot by Pro Game Guides

Screenshot by Pro Game Guides

Screenshot by Pro Game Guides

Screenshot by Pro Game Guides

Screenshot by Pro Game Guides

Screenshot by Pro Game Guides

Screenshot by Pro Game Guides
Screenshot by Pro Game Guides

Screenshot by Pro Game Guides

Screenshot by Pro Game Guides

Screenshot by Pro Game Guides

Screenshot by Pro Game Guides
Screenshot by Pro Game Guides
Screenshot by Pro Game Guides
Screenshot by Pro Game Guides
Screenshot by Pro Game Guides

Screenshot by Pro Game Guides

Screenshot by Pro Game Guides

Screenshot by Pro Game Guides
Screenshot by Pro Game Guides
Screenshot by Pro Game Guides
Screenshot by Pro Game Guides
Screenshot by Pro Game Guides
Screenshot by Pro Game Guides
Screenshot by Pro Game Guides

Screenshot by Pro Game Guides

Screenshot by Pro Game Guides
Screenshot by Pro Game Guides

Screenshot by Pro Game Guides

Screenshot by Pro Game Guides
Screenshot by Pro Game Guides

Screenshot by Pro Game Guides

Screenshot by Pro Game Guides

Screenshot by Pro Game Guides

Screenshot by Pro Game Guides

Screenshot by Pro Game Guides

Screenshot by Pro Game Guides

Screenshot by Pro Game Guides
Screenshot by Pro Game Guides

Screenshot by Pro Game Guides

Screenshot by Pro Game Guides

Screenshot by Pro Game Guides

Screenshot by Pro Game Guides

Screenshot by Pro Game Guides

Screenshot by Pro Game Guides

Screenshot by Pro Game Guides

Screenshot by Pro Game Guides

Screenshot by Pro Game Guides

Screenshot by Pro Game Guides

Screenshot by Pro Game Guides

Screenshot by Pro Game Guides

Screenshot by Pro Game Guides

Screenshot by Pro Game Guides

Screenshot by Pro Game Guides

Screenshot by Pro Game Guides

Screenshot by Pro Game Guides

Screenshot by Pro Game Guides

Screenshot by Pro Game Guides

Screenshot by Pro Game Guides
Screenshot by Pro Game Guides
Screenshot by Pro Game Guides
Screenshot by Pro Game Guides
Screenshot by Pro Game Guides
Screenshot by Pro Game Guides
Screenshot by Pro Game Guides
Screenshot by Pro Game Guides
