Catnap is here to haunt your dreams .
Poppy Playtime is a free - to - encounter , single - chapter game with additional DLC for each chapter . Chapter 3 is , in person , one of the most challenging . to get through this mystifier natural selection horror title , you might require a walkthrough .
How to complete Chapter 3 Deep Sleep in Poppy Playtime
So far , we have faced down some chilling animatronic friends , but now we will have to contend with a new one name Catnap . Catnap has the power to put people to sleep , so this will add up up in the future .
The Beginning
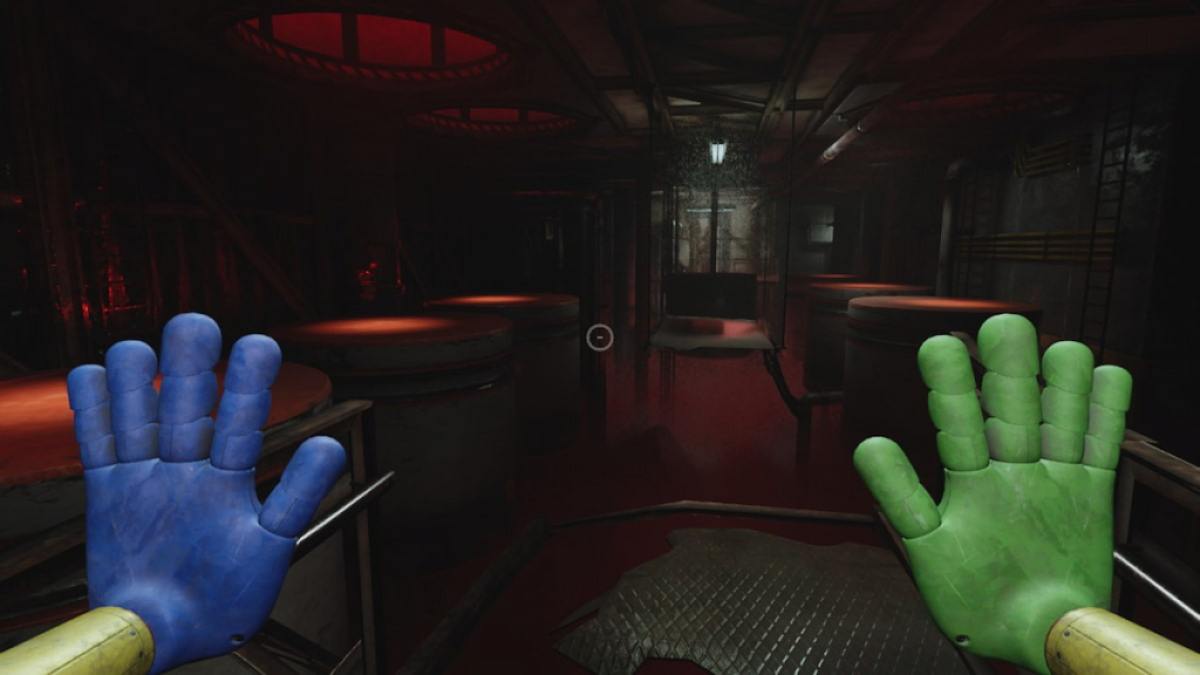
Once you drop in from the possible action cutscene , you ’ll involve to head up the ramp to the leftfield . Fall down between the bars in front of you , then take the air forward until you ca n’t any longer . The game will then instigate you to reckon up and grab the legal profession above you . The next room contains a simple jumping puzzle ; hop along the top of these elephantine pistons when they are in a straight line , then hop into the opening to the left field . Make certain tonot stay on the pistons that go upwardwhile await through the movement cycle ; you ’ll be crushed against the ceiling .
Related : All Poppy Playtime Chapter 3 lineament
Duck through the cakehole in the rampart immediately in front of you , then turn left and look for a door along the wall to the left . contract E to interact with it . Next up , you ’ll be in a elbow room with a more or less hard jumping puzzle ; do n’t stand up on the pistons as they go down , or they will take you down into the nightmare gas filling up the way below . So you ’ll have to startle all three of them to the middle chopine , then leap the remaining to get to the Allium tricoccum on the far side of the way .

see to the right field and find the grabbable program ; take clutch of it and jump onto it while support it . Let go to have it slide back across the throttle .
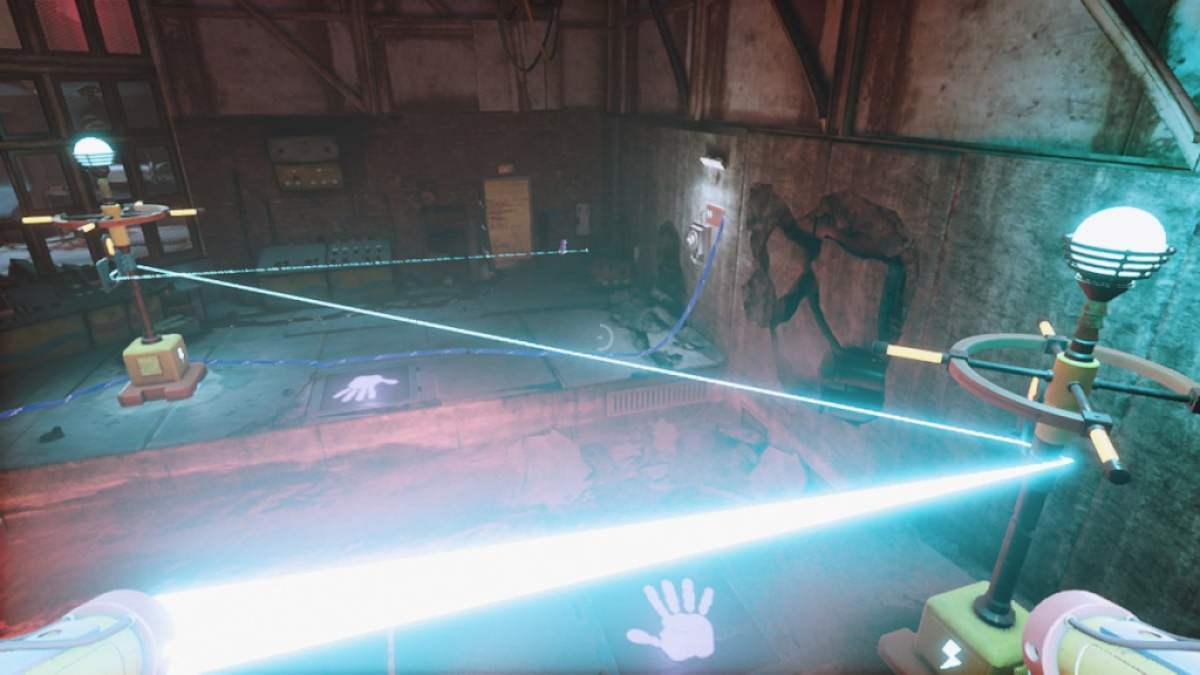
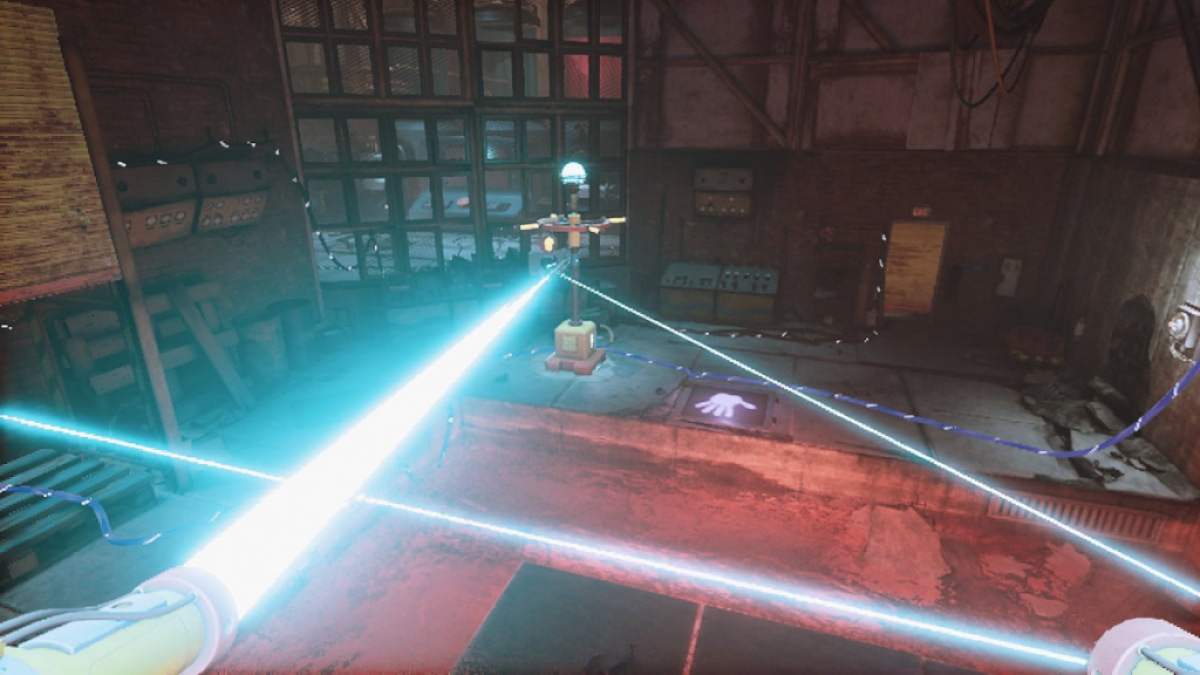
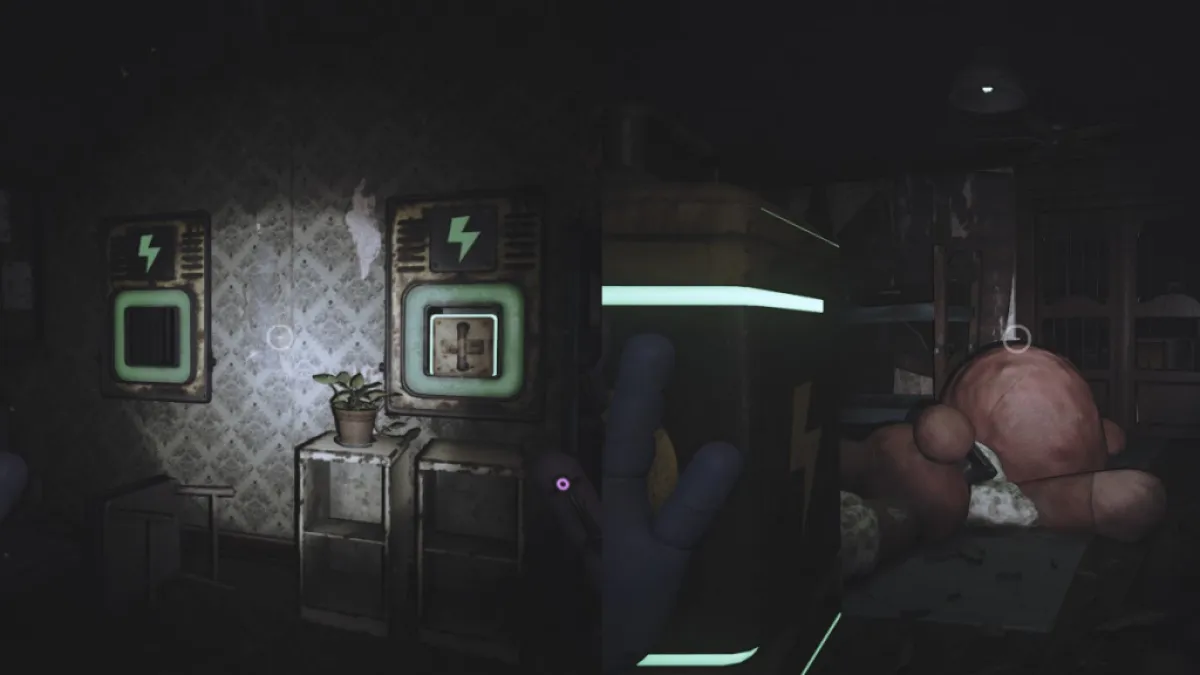
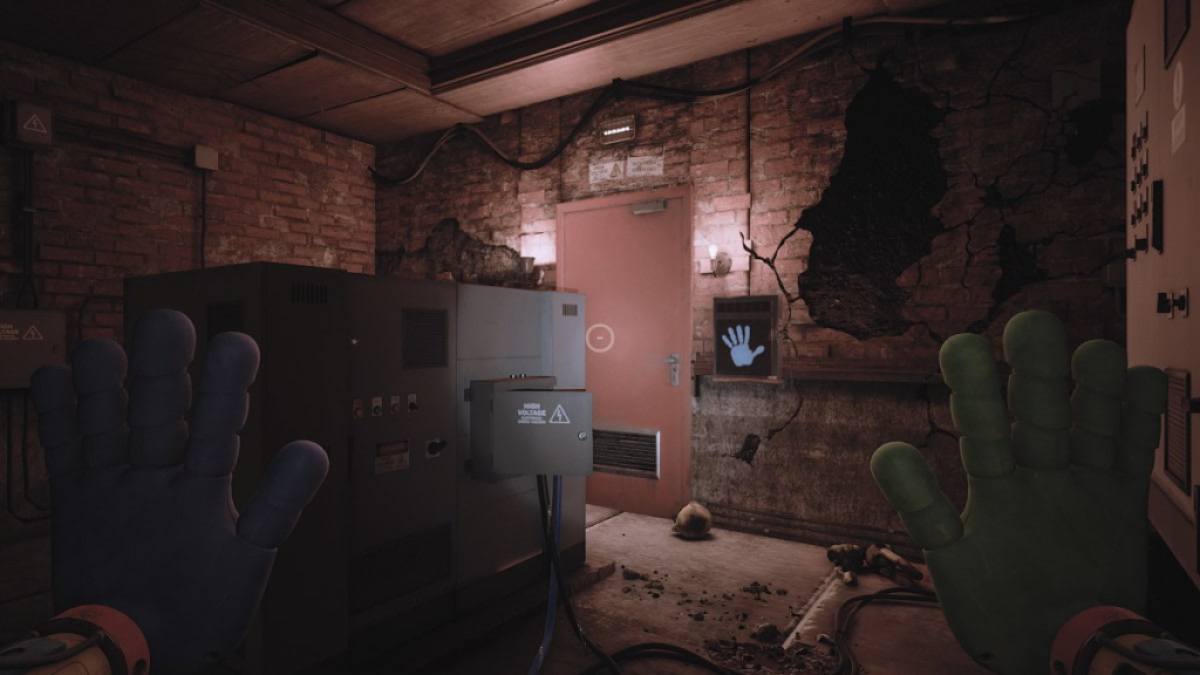
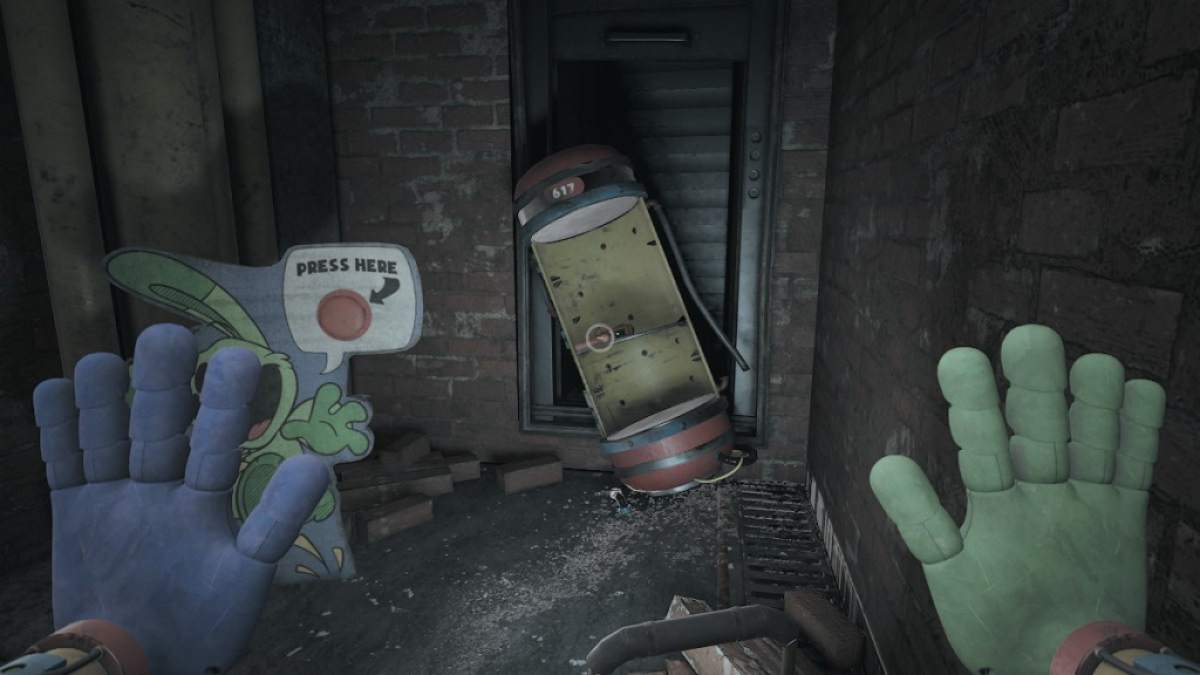
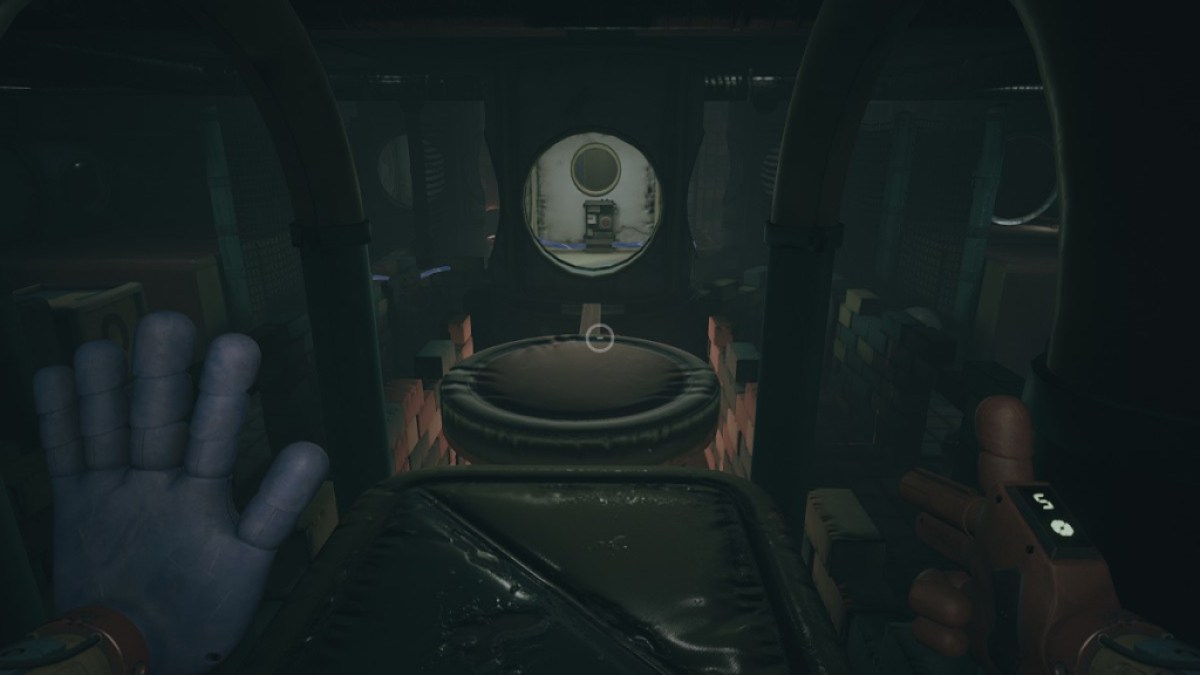
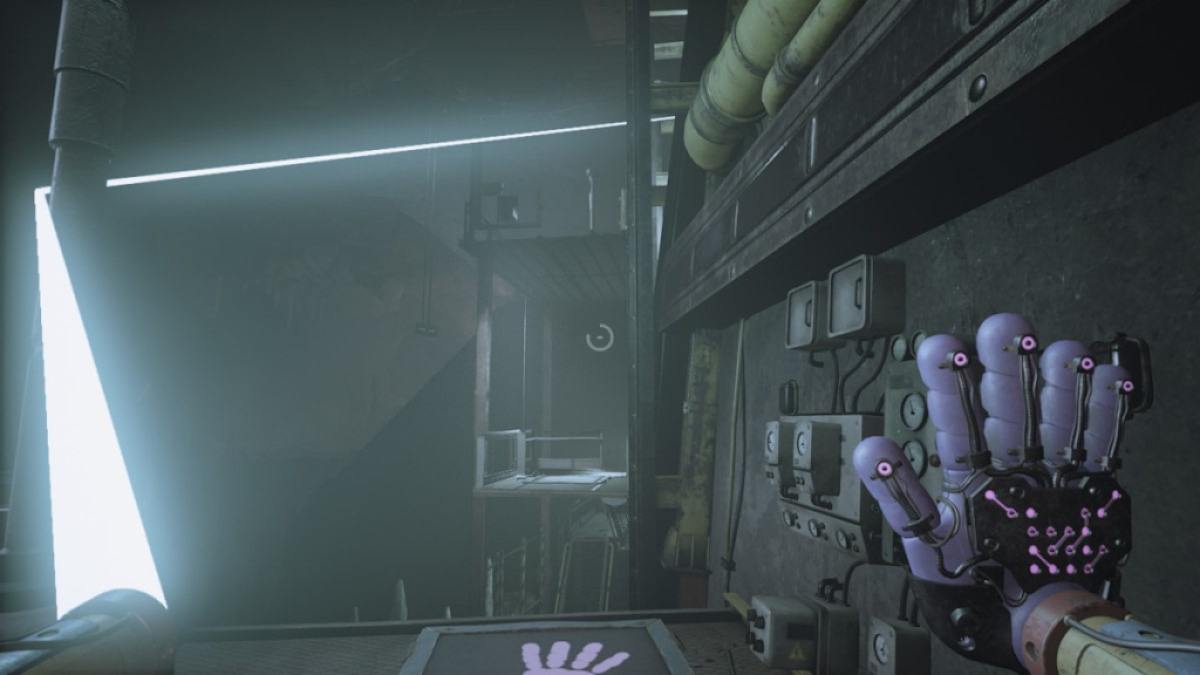
Go through the ventilation system shafts until you ascertain your way into a way with a sofa and a TV ; there is a VHS tape measure on the floor that you’re able to grab and watch on the goggle box in the corner by the couch . On the other side of the room , there is an well-situated battery puzzle ; using the two handwriting , beak up the two bombardment ( 1 , 2 ) and put them into the empty slots ( A , B ) . Then press your paw against the hand launch area to launch the door .
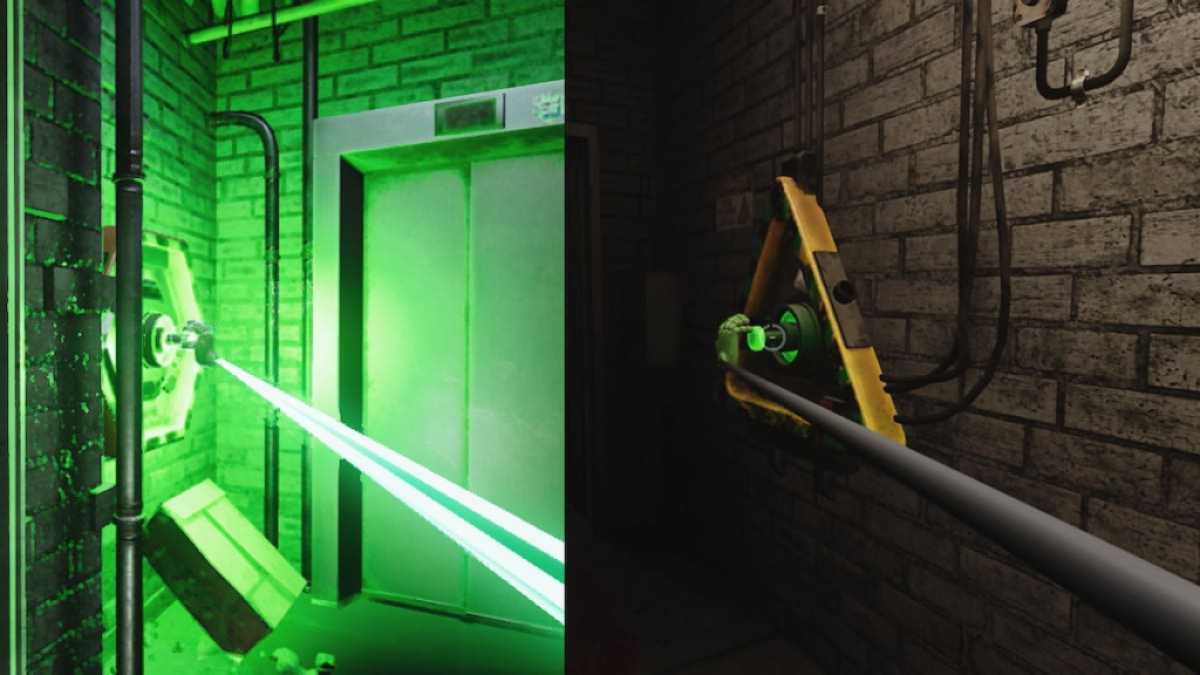
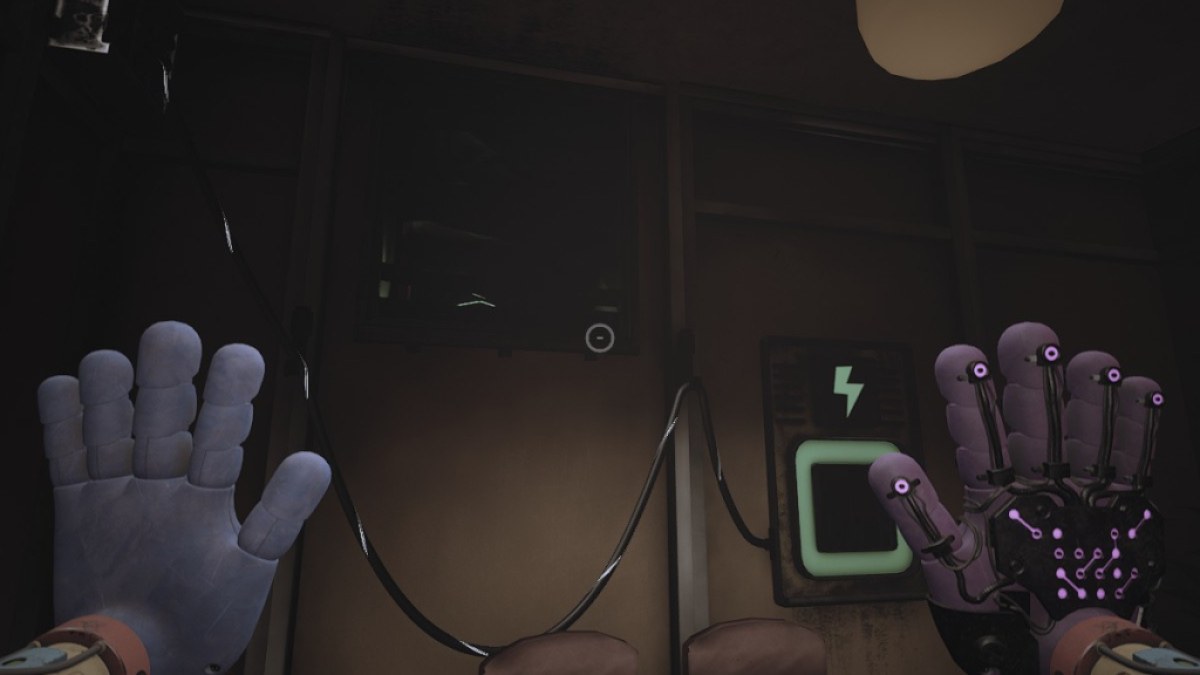
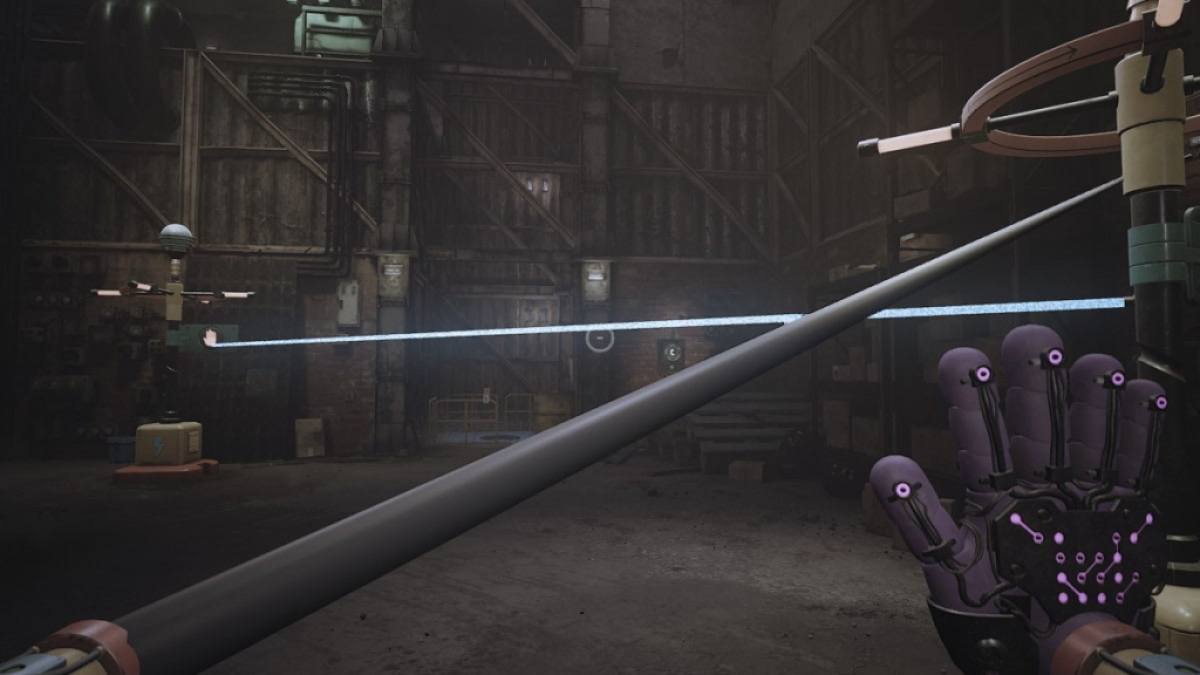
Go through the doorway , then to the remainder of the hallway . flex to the leftfield , look for the electrified hexagon . Use right - black eye - click to take green electrical energy with the green handwriting ( it wo n’t solve with the blue one ) , and take it across the mansion to the triangular unripe galvanic button on the other side . The door wo n’t stay open long , so check that to go through as shortly as it is clear .

Screenshot by Pro Game Guides
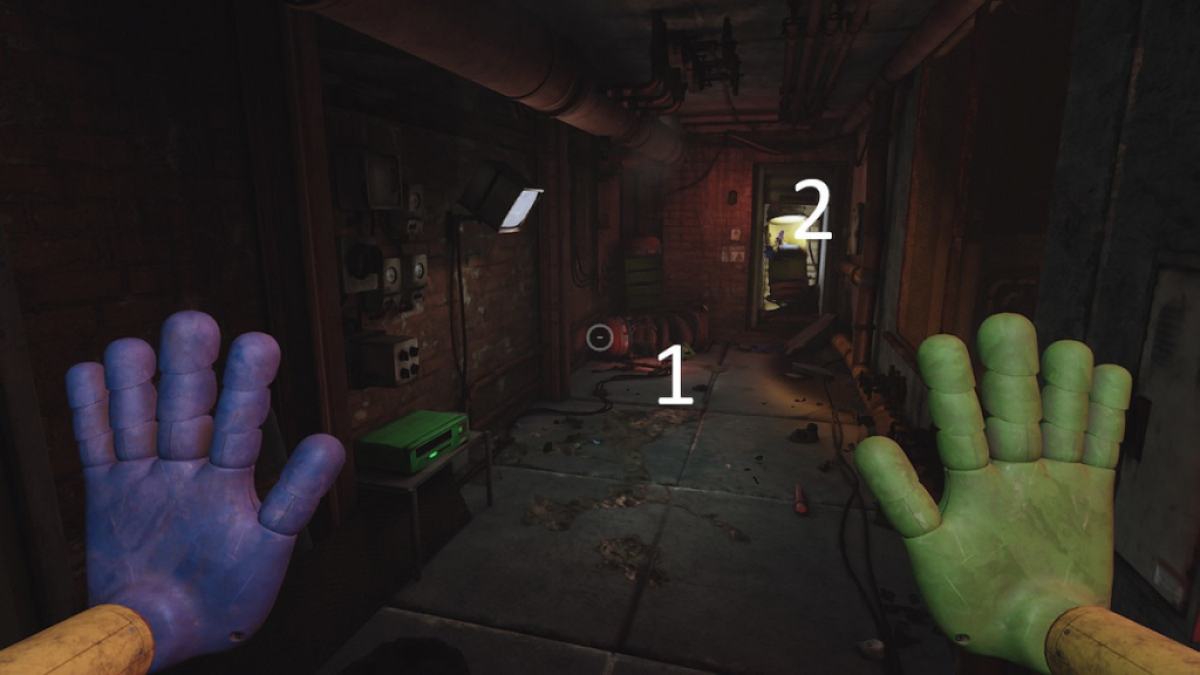
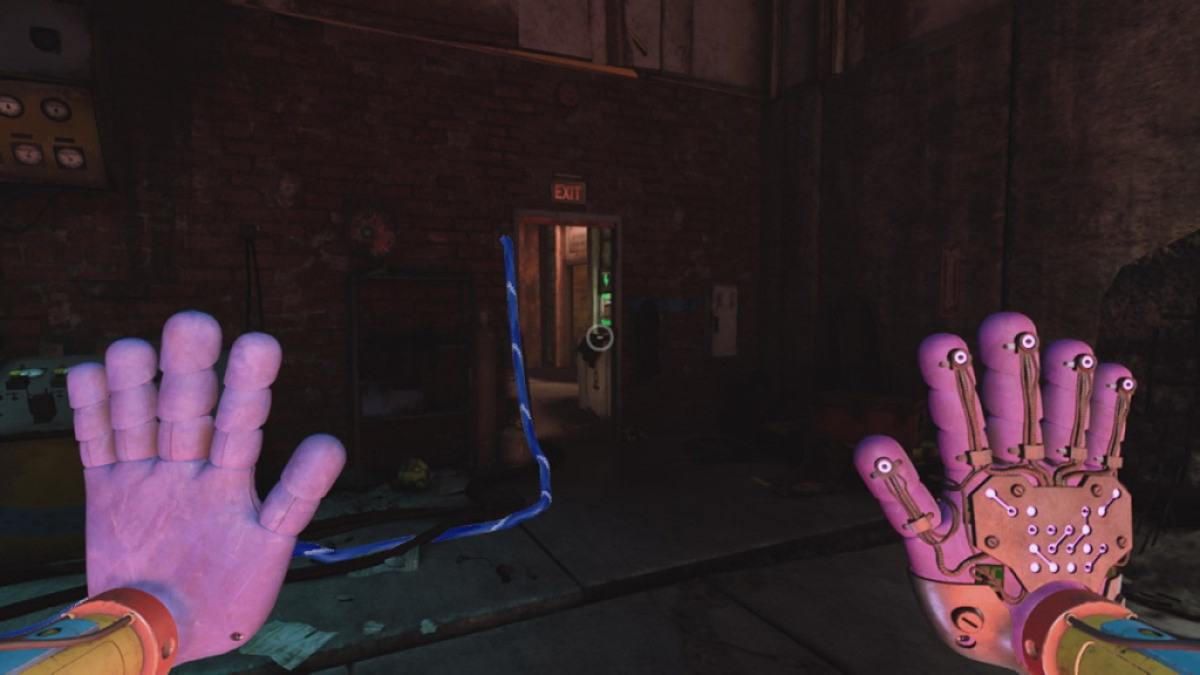
fix the ringing phone in this elbow room , and the speaker unit will give you a bombardment to assist you afford the room access . Go out through the door and walk down the tracks away from the fire . Toward the end of the gearing tracks , you will find a grabable handle in the roof to serve you get up onto the power train platform . The door labeled " security measure " on the unexpended side of the platform is the only door that is heart-to-heart , so head through that . There is another doorway in the back of the way that leads over into the locked " Maintenance " door . Here is the solvent to the puzzle inside .
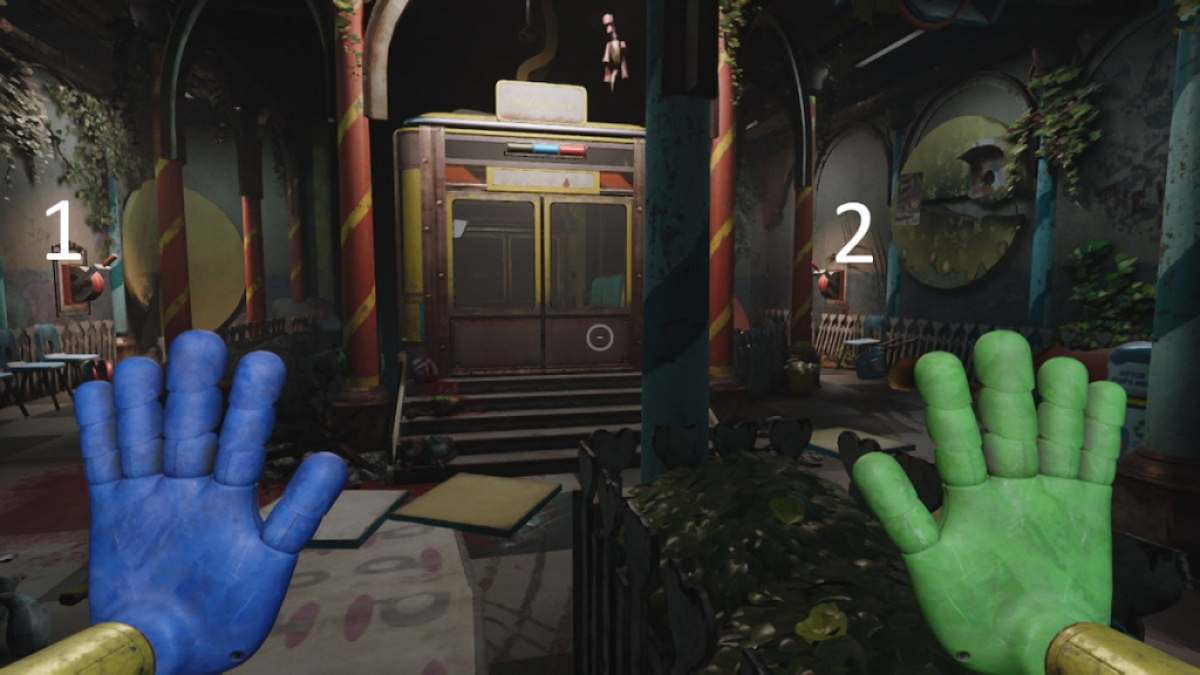
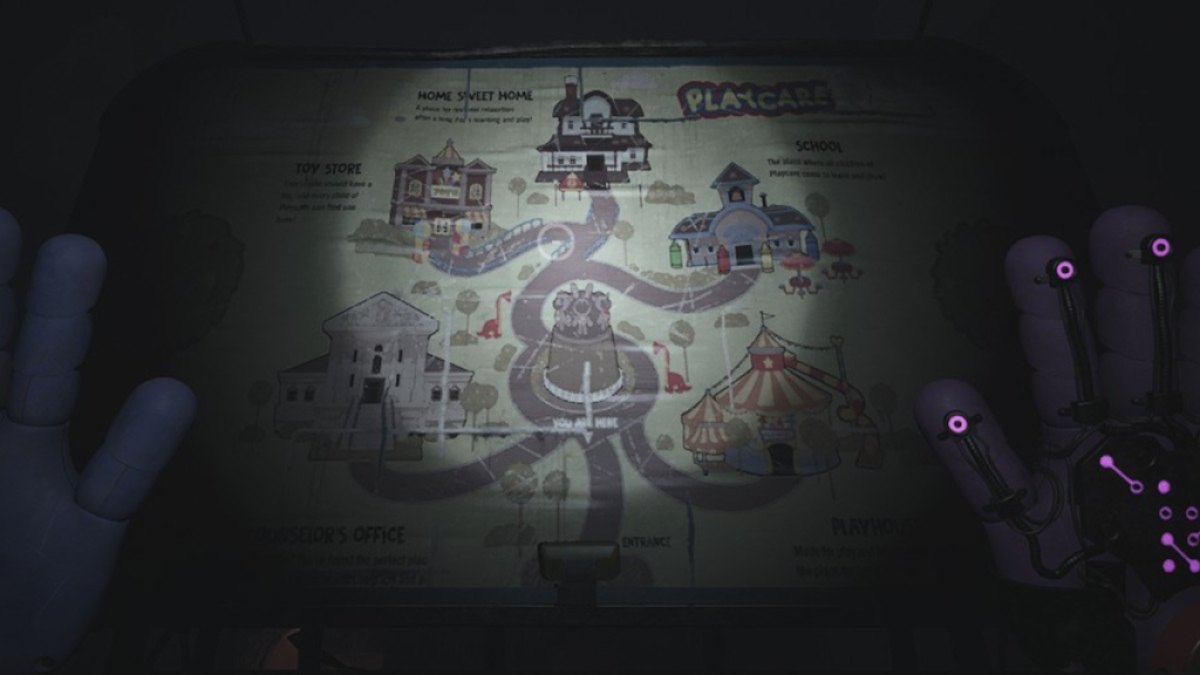
Into Playcare
At the top of the stairs is a trolley ; it will take you to the next expanse . You just require to pull the two switch on either side of the door into the tram . Then the doors will open , get in and ride it until the end . This will take you to Playcare ; Ollie will descend over the phone again to ask you to head down into the centre where the statues are . lead down the stairs into the major power inwardness . in spite of appearance , Ollie will have a key hidden inside a little cage . The key goes to the glowing , flushed door to the straightaway left field of the trolley car you claim into this area .
The Gas Production Zone
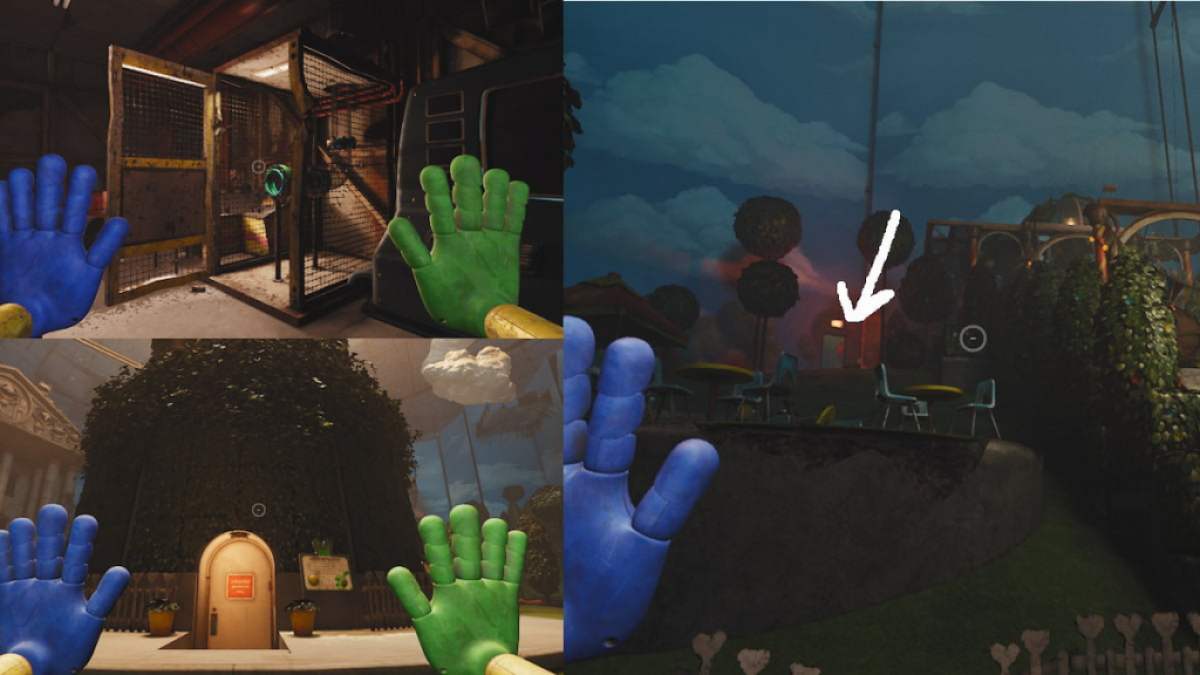
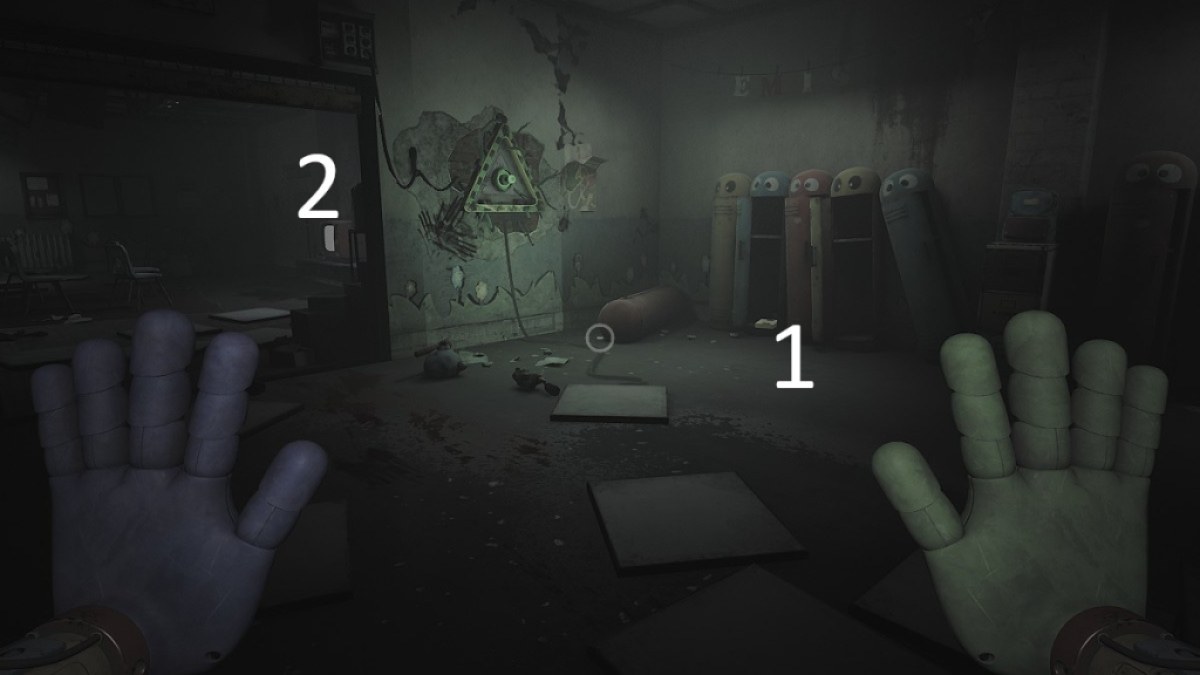
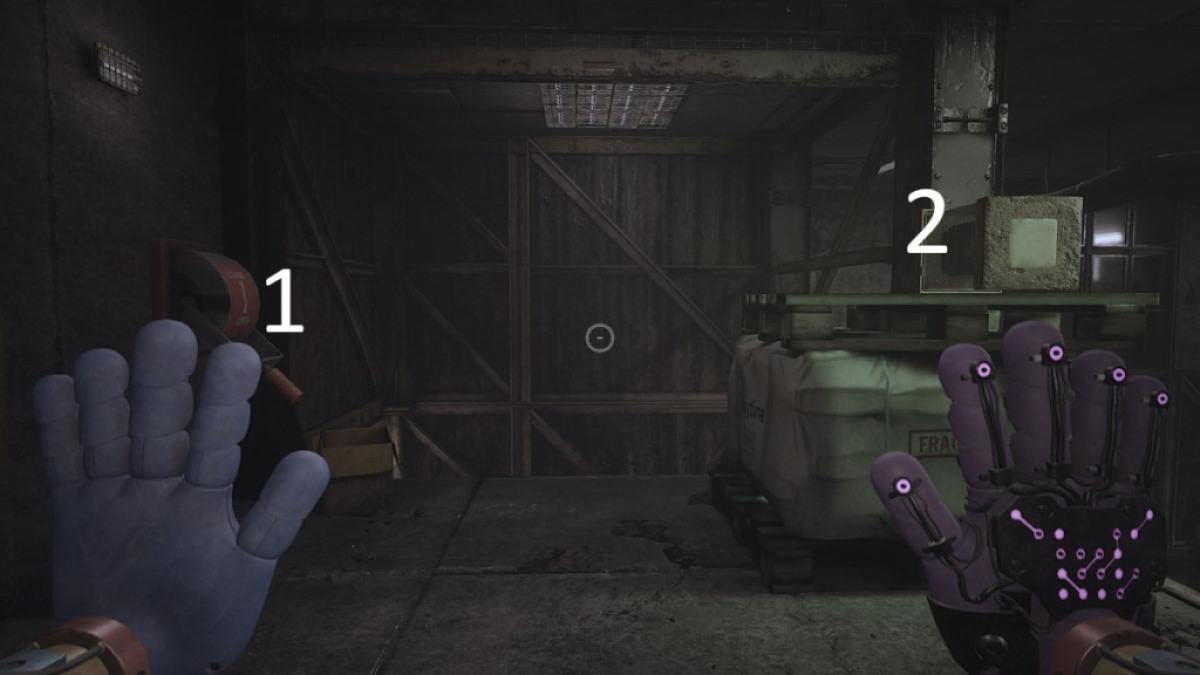
Head inside the Gas Production Zone , then head through the door to the left wing . Inside , you ’ll find a green battery . This can be used in the green port on the ripe side of the Gas Production ’s main room . Make certain the battery color matches the embrasure ’s colour . This will start the room access next to the port ; you could head inside to find a VHS ( 1 ) and a new , over-embellished hand called the Grabpack 2.0 ( 2 ) .
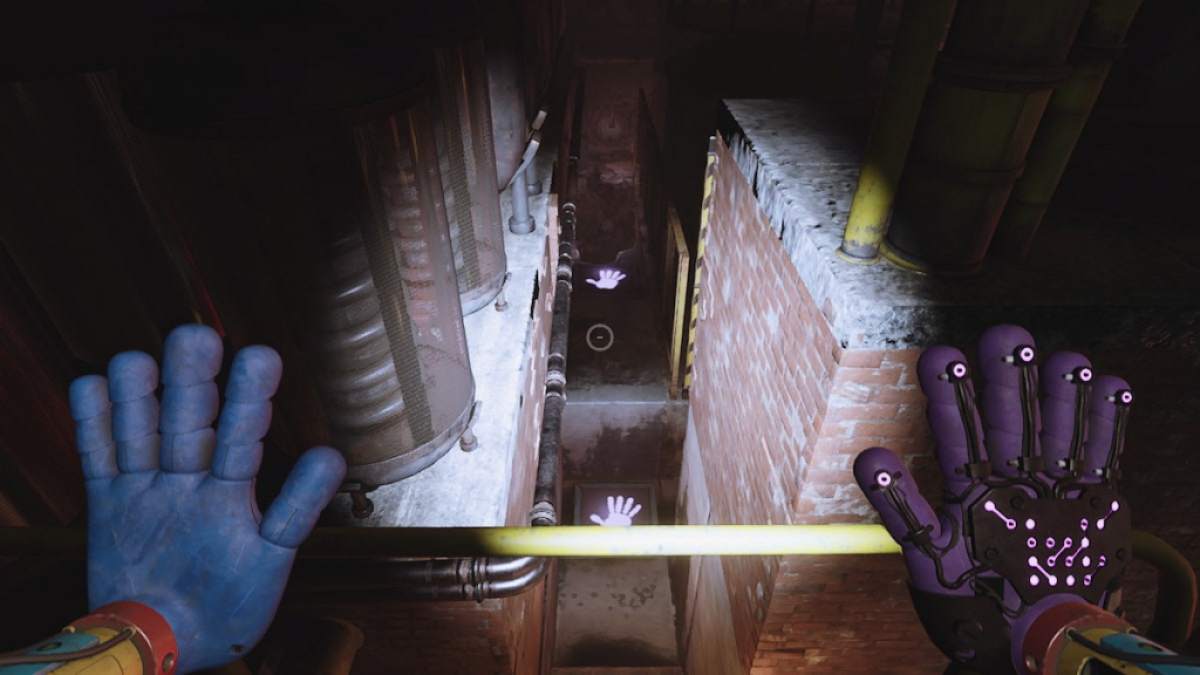
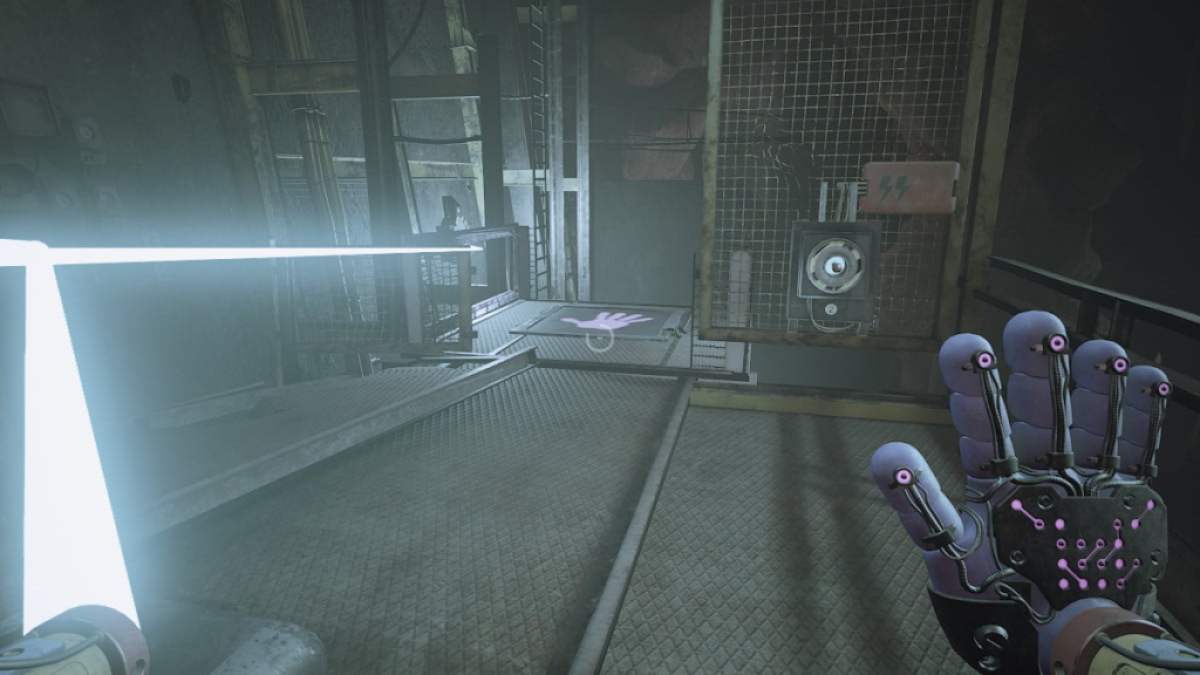
How that we have the Grabpack , we can head out into the main elbow room and take care on the floor to the left of the doorway unbolted with the unripe bombardment . There is a purple handprint on the base you’re able to use to launch yourself into the air and get up onto the balcony above you . Inside , you’re able to reckon down and see a small Grabpack puzzle below . lead down there , using the Grabpack paw to push yourself through it . You ’ll need to run to the handprint and expend the purple hand to plunge yourself over the holes in your path .
Next up , histrion will have to do a quick jump puzzle with the purple deal . If you look across the red lake of flatulence , there is a grabable program across the room . You need to take hold of onto the chopine , bring it close , and then use it to startle on the pipes sticking out of the left wall . Turn around and grab the program again , dragging it as far to the left as possible .
Screenshot by Pro Game Guides
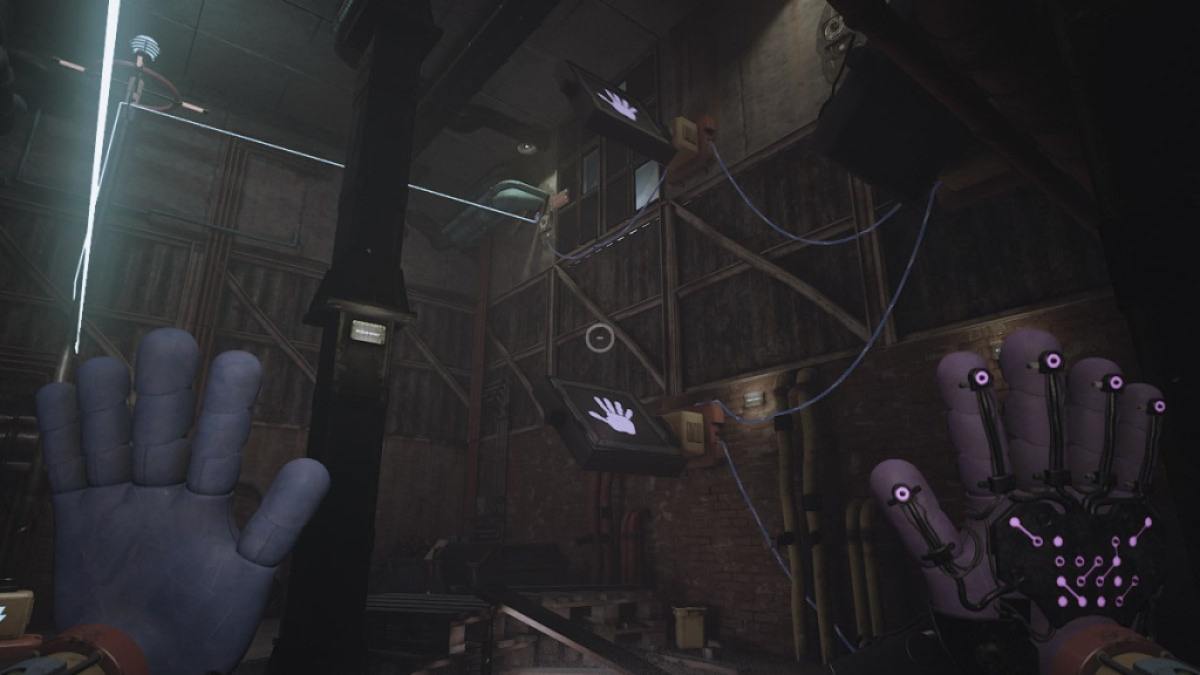
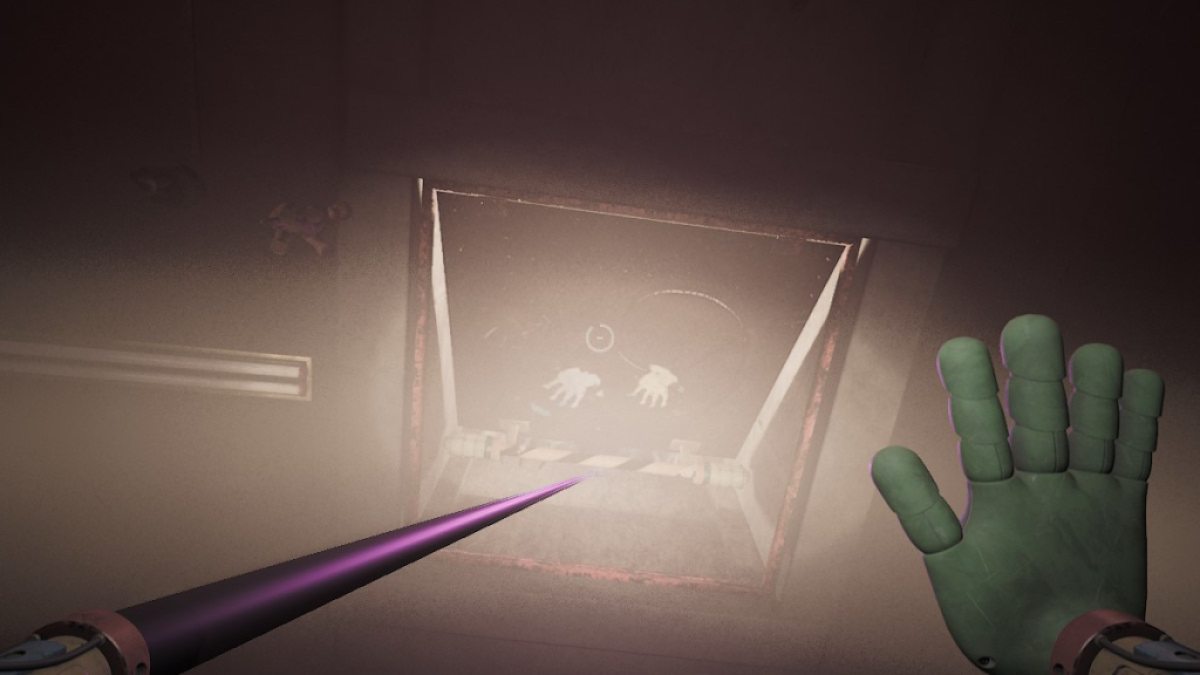
You should be able to pass over over to the far side . Take hold of the program and tear it all the way to you , then expend it to hop over the wall . Still stuck ? Check outthis YouTube videoto help get over the pitfall . This will put you into a room with another hand - connection puzzle . In ordering to puzzle out it , you ’ll necessitate to :
The Exit precede you back out into the first elbow room of the Gas Production , and the tycoon is finally back to that giant button in the very inwardness of the room . constrict it , and the mogul will go out . Head back the style you came in from Playcare , back into the center under the statue , and chance a new paint in the petty deliverance batting cage where the old key was found . This cay is forHome Sweet Home , which is on the other side of the independent area from the Gas Production Zone .
Home Sweet Home
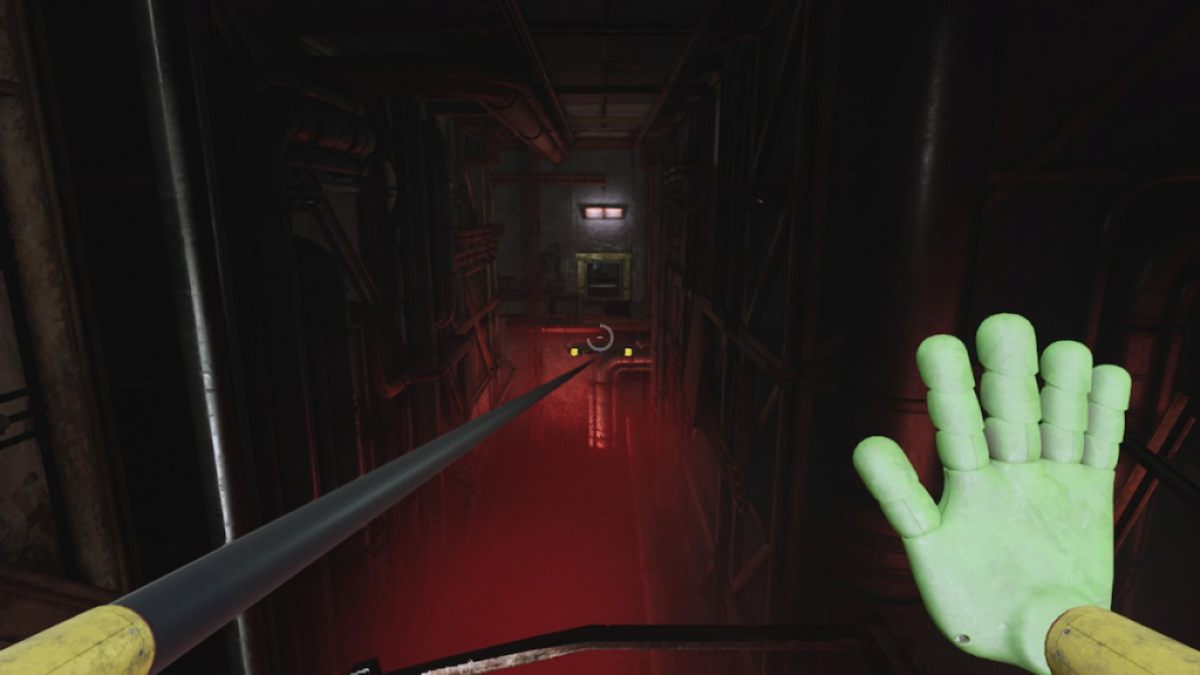
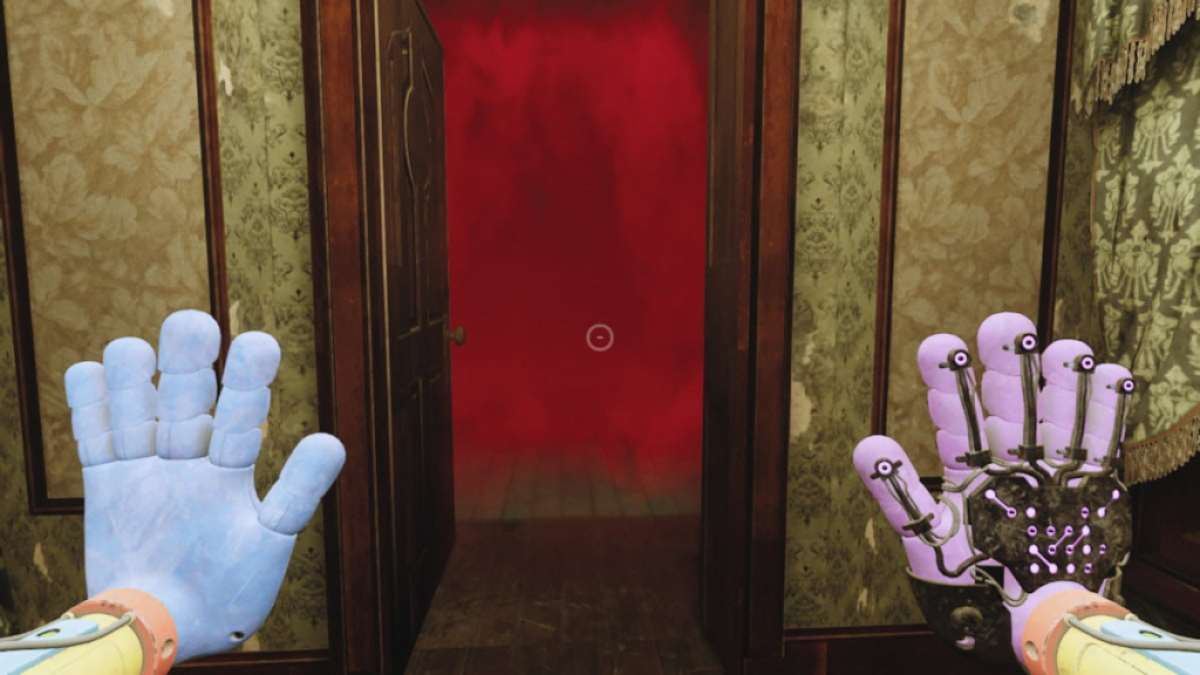
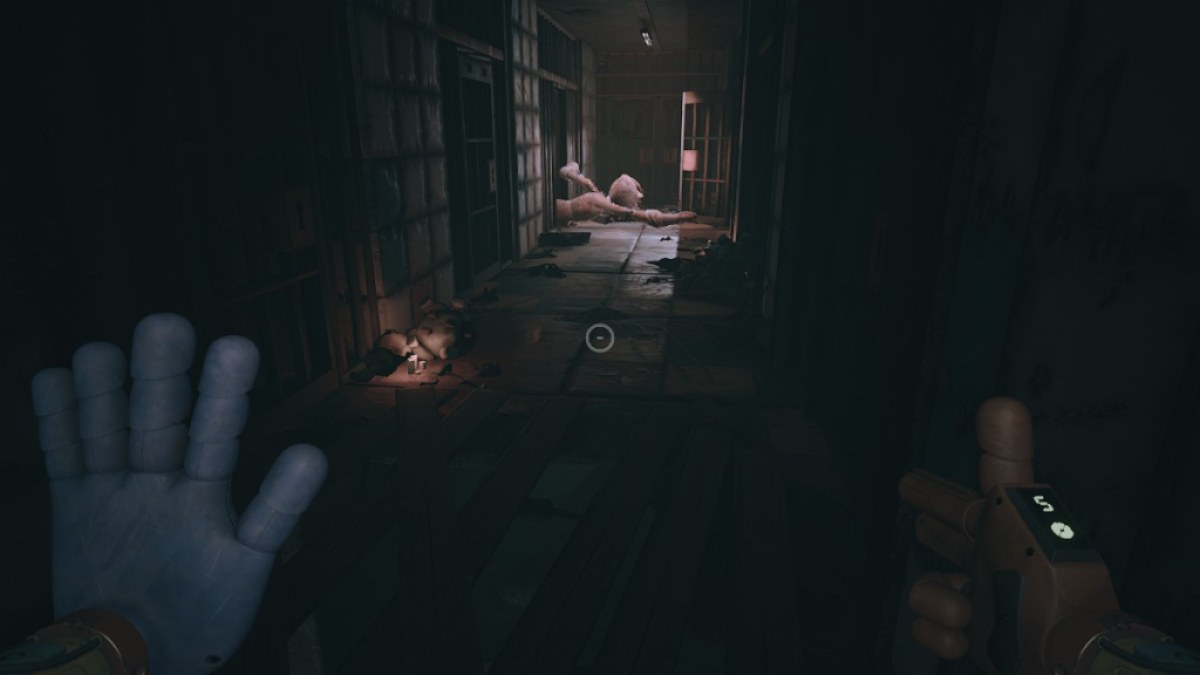
The first affair you will be faced with inside of Home Sweet Home is a door fill to the brim with Catnap ’s The Red Smoke . The only way out is through , unfortunately , is to prevail as tight as you could through the sens . It ’s really easy to get through this — you just need to pass straight frontward , through the door , and down the stair . This will coldcock you into the labyrinth that is the inside of Home Sweet Home . Go to the end of the hallway , then sour either way ( both ways direct back to the same office ) .
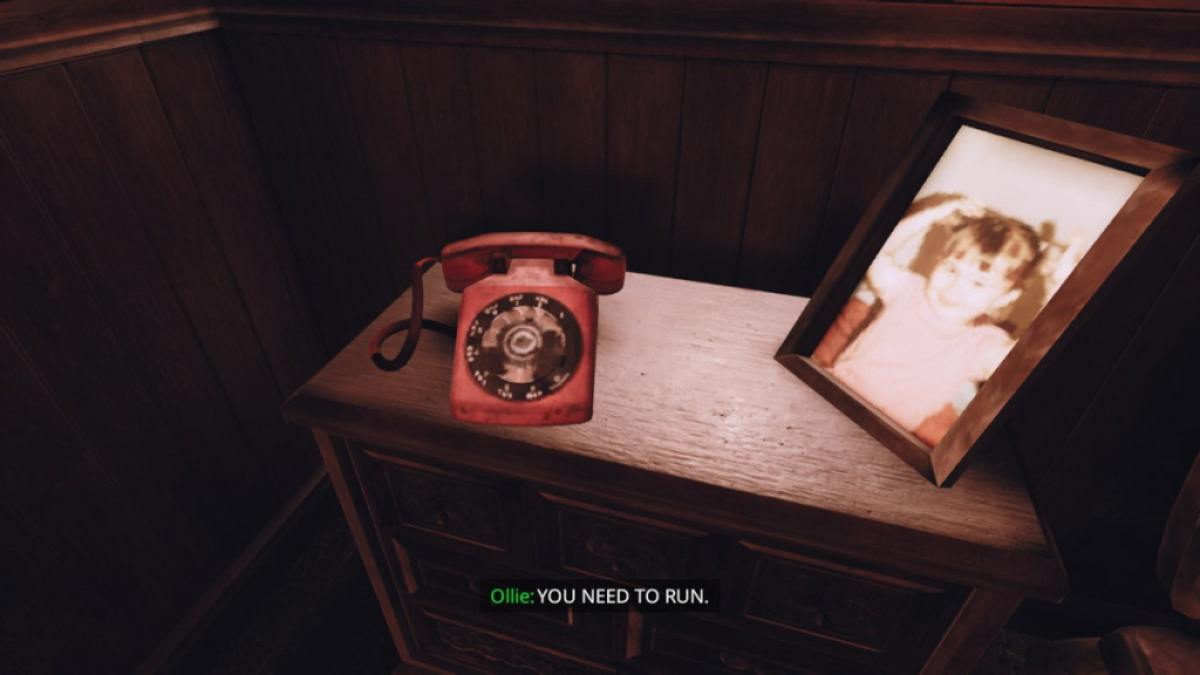
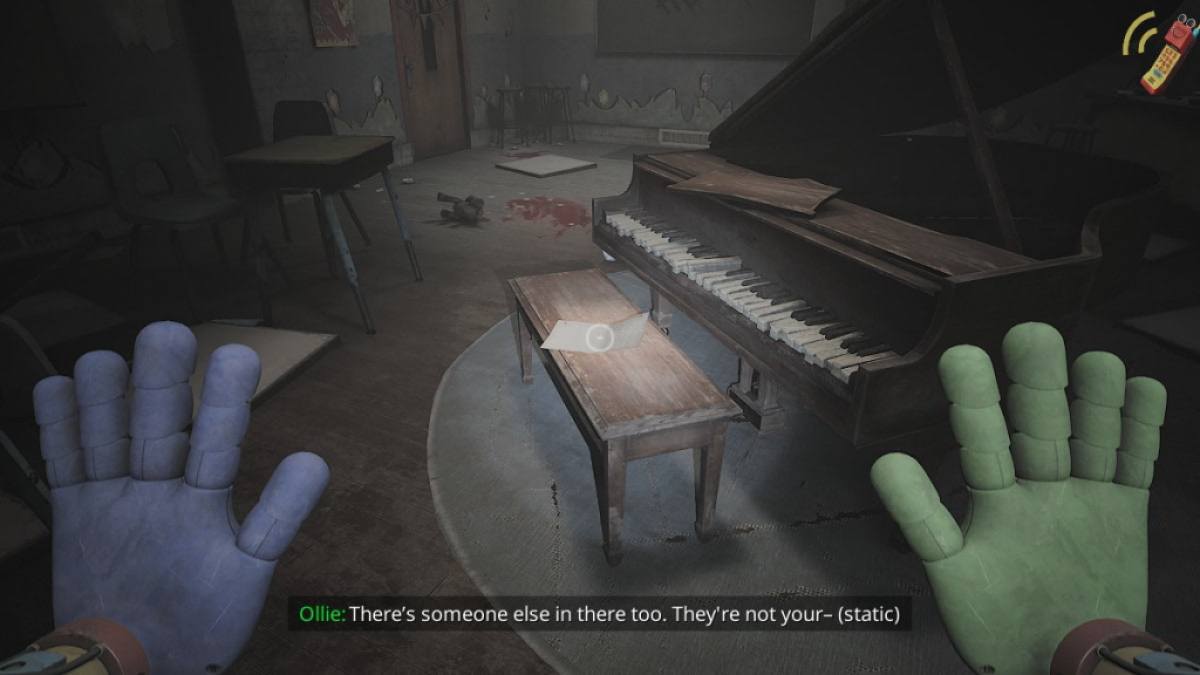
As you progress toward the back of the edifice , you ’ll heara phone tintinnabulation ; you need to find that phone and respond it , as Ollie has something exceedingly important to state you :
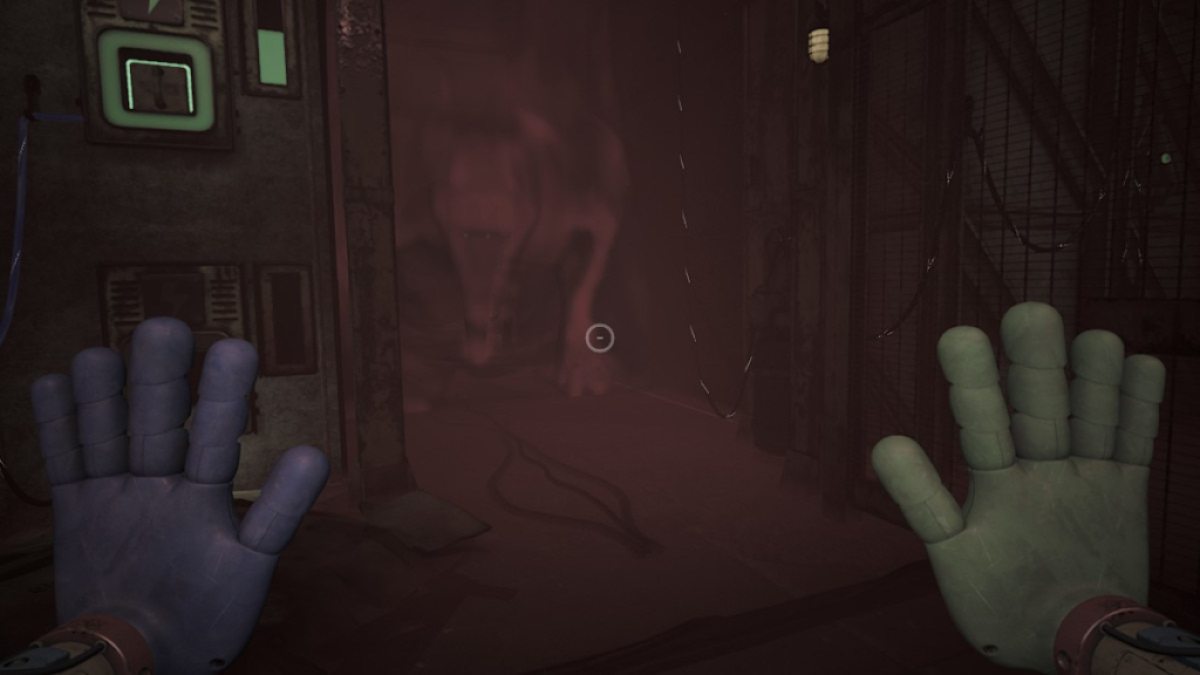
Next , it ’s prison term to run . Head back toward the entrance , and the lights will flicker . No matter which way you go , you ’ll ascertain yourself next to a door with very flash knocking . When you turn the corner from here , you will be human face - to - face with Catnap for the first time . Walk toward him , and he will leave behind . This will lock you in a small circular area ; take the air back and forth until a mode out opens up .
Screenshot by Pro Game Guides
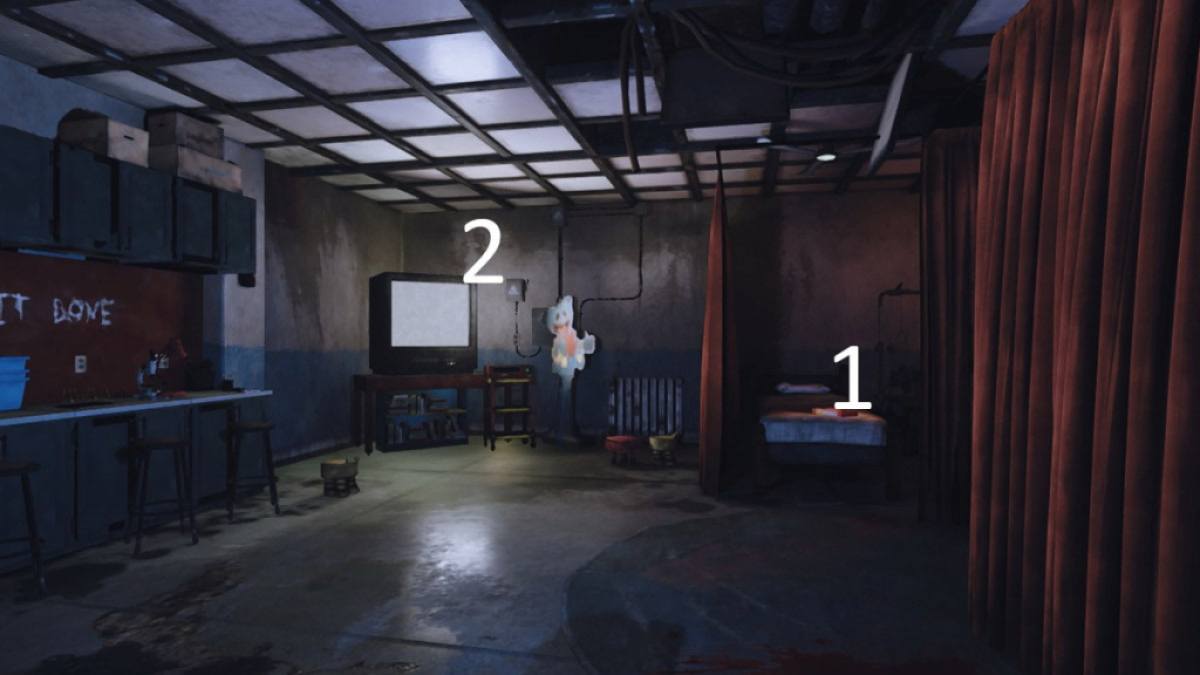
Once the G. Stanley Hall opens again , there will be a room at the end of this hallway , but you are prevented from entering or interacting with it . alternatively , just take the first left in the red - ish colored hall . No matter which way you go onwards after this point , all ways lead you to a position with atape(1 ) and a TV ( 2 ) .
playact the taping , and a chase sequence will start . You ca n’t outrace him , but once he catch you , you ’ll wake up up in the elbow room that is filled with The Red Smoke . take the air through the open door , then reckon down into the hole in the floor . Using one of your hands , pick up the Gas Mask . you’re able to equip it by press F.
Jump into the hole in the floor , then use a hand to interact with the back of the toy dog car . It will erupt down the boxful blocking the way of life out . Put on your gas mask , then move through this corridor until you chance a handprint launch pad at the remnant .

Screenshot by Pro Game Guides
Now , you ’ll be in the Laundry Room . There will be a dresser blocking the way into the next way ; you ’ll need to use both hand at the same prison term to move it . Aim both hands at the handprint on the article of furniture , then get through with both push button to pull it back . Hop over the obstruction and header into the next room . Inside there , you ’ll involve to duck under the mesa immobilise the door to get to the next position .
utilize the aristocratic hand on the pad by the doorway to open up it . like a shot to the right inside the door will be a newtape , and the TV to flirt it will be in front of you when you start the room access . After watching the television , head back the manner you total , duck under the table blocking the room access again , then go to the right through the hole in the paries . There will be a room access opposite the hole in the wall in this room ; spread it up and walk through to see Catnap walk by .
Duck under the planks to walk through the door straightaway in front of you , go through the hole in the rampart to the right , and channelize into the doorway in front of you . I adjusted the place setting in my game to make the screenshots a little clearer in this section as well .
Screenshot by Pro Game Guides
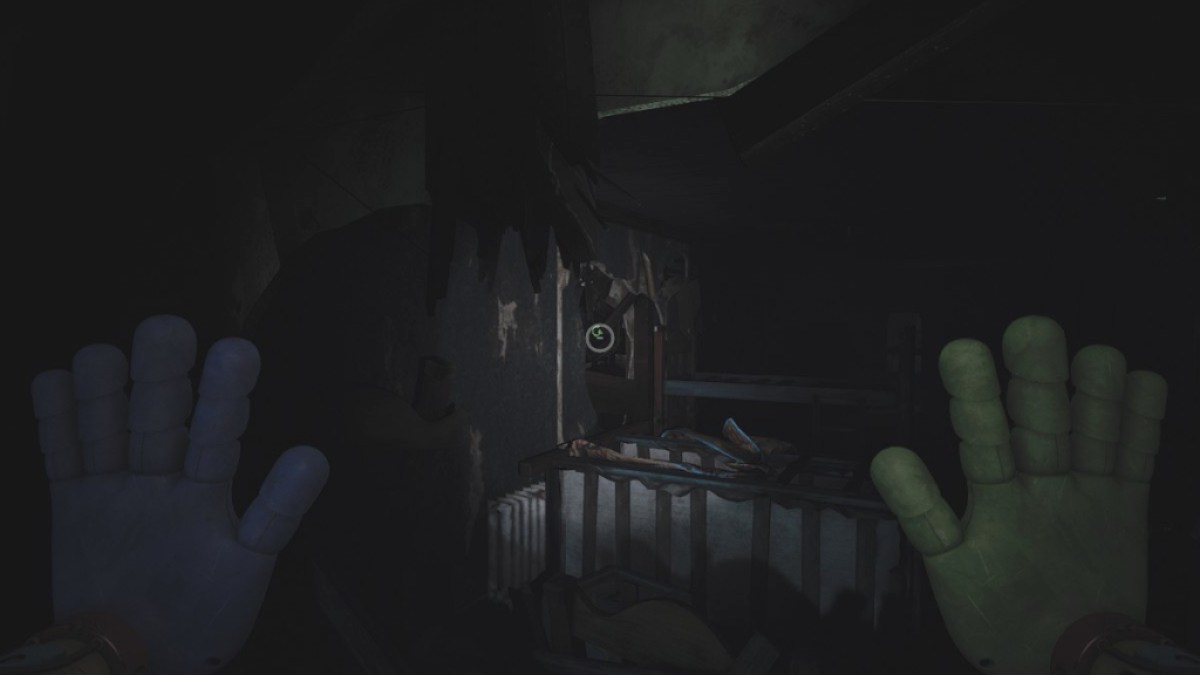
Next up , you require to seize the two batteries to power the door to the next section . One of these is on the story by the two battery ports , and the second is one floor up . Head over to where there is a alive electrical wire hang down from a hole in the ceiling and calculate up ; there is a grabable bar on the ceiling to bring you into the sleeping region above .
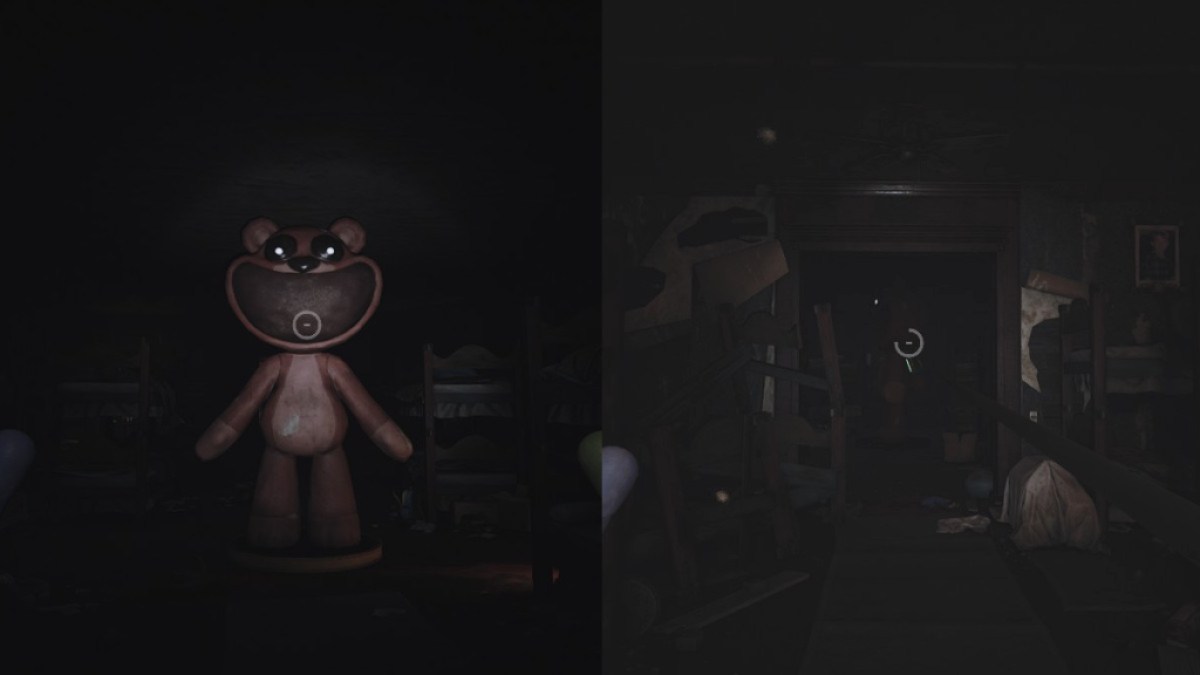
take the air through the baby’s room into the next way ; there will be a gargantuan bear on the base with a stamp battery in its back . This will permit you to conjure the red release to the right of the battery port to open up the threshold to the stairs .
Go up the stairs and interact with the slipstream car there . It will empty the way to the balcony of the main elbow room of Home Sweet Home . To the right side of the balcony is an open threshold into a living room . Behind the couch , there is a bookshelf you’re able to enter the door of to find aVHS tape(1 ) to find out on theTVthere ( 2 ) .
Screenshot by Pro Game Guides
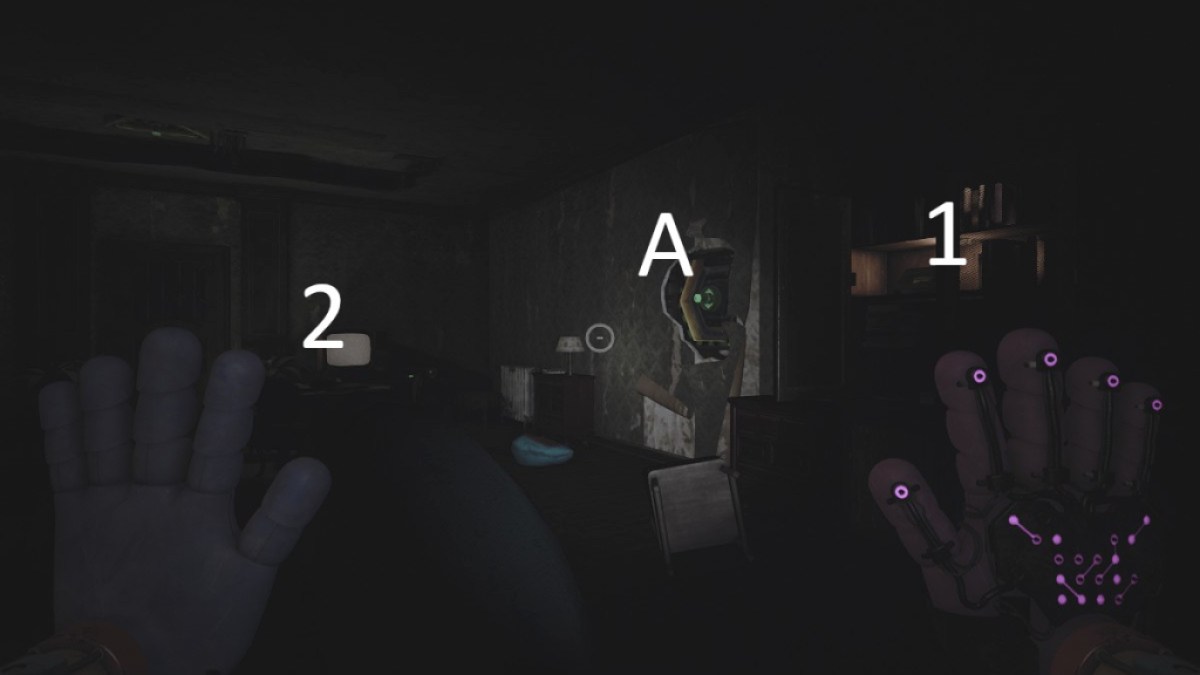
Next , we require to switch to thegreen handto use thepower source(A ) . The socket for the power informant is in the cap ; it will spread a door under the ceiling socket ; you ’ll need to be quick since the door does n’t stay open for tenacious . In the next room , there is a hidden power source and another socket in the ceiling . This unfold the threshold on the polar side of the way from the door you participate through .
The next room has a similar locked door to your left ; you unlock it the same way . Hop on the giant cylinder block by the hole in the paries , and you will be capable to see the ability beginning from before . Use it on the port in the ceiling to launch the room access and move on .
In the next session , you ’ll chance a giant statue with a battery in the back of it . It will turn to face you no matter how fast you unravel , so you ’ll need to go through the next rooms and sneak up on the side of it to get its index generator . Go through the vent in this room to get to the next incision .
Screenshot by Pro Game Guides
The venthole will bestow you to the other half of the office you were in before ; you ’ll need the battery you are carrying plus one more . At one oddment of the hall is this office , and on the other end is a doorway that requires two light-green charges . You ’ll need to be quick for this incision ; you ’ll need to open up the threshold to the stairs , charge your green deal , put the king in the socket on one side of the closed threshold , then charge your green helping hand again in the office staff , run back , and commit the other side .
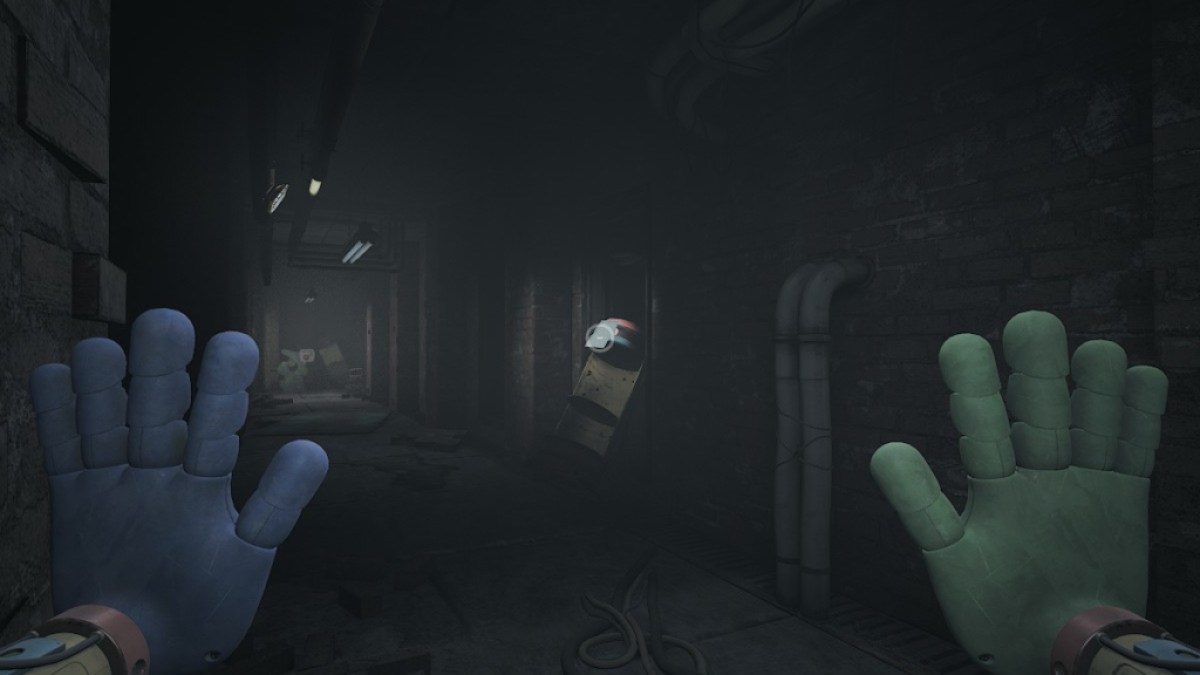
Inside this door is a elbow room with another race car ; pull its cord to break down the box on the other side of the hallway and go there . There are three way you’re able to walk into ; look for the one with the closed door that is take with The Red Smoke . It will havea ventyou can go into .
take the air into the next room , and there will be abatteryon the left . Grab it with yourgreen hand , then proceed forward ; a few steps forward and you should see a doorway with a blue handprint glow over the top of it . This will run you back to the office , where you may put the other battery in and iron the wake - up button on the wall nearby . This will open up the threshold to the primary area ; the doorway there is finally open , and you could lead inside .
Screenshot by Pro Game Guides
Use your blue script to enter the doorway here and proceed to the next big mystifier room .
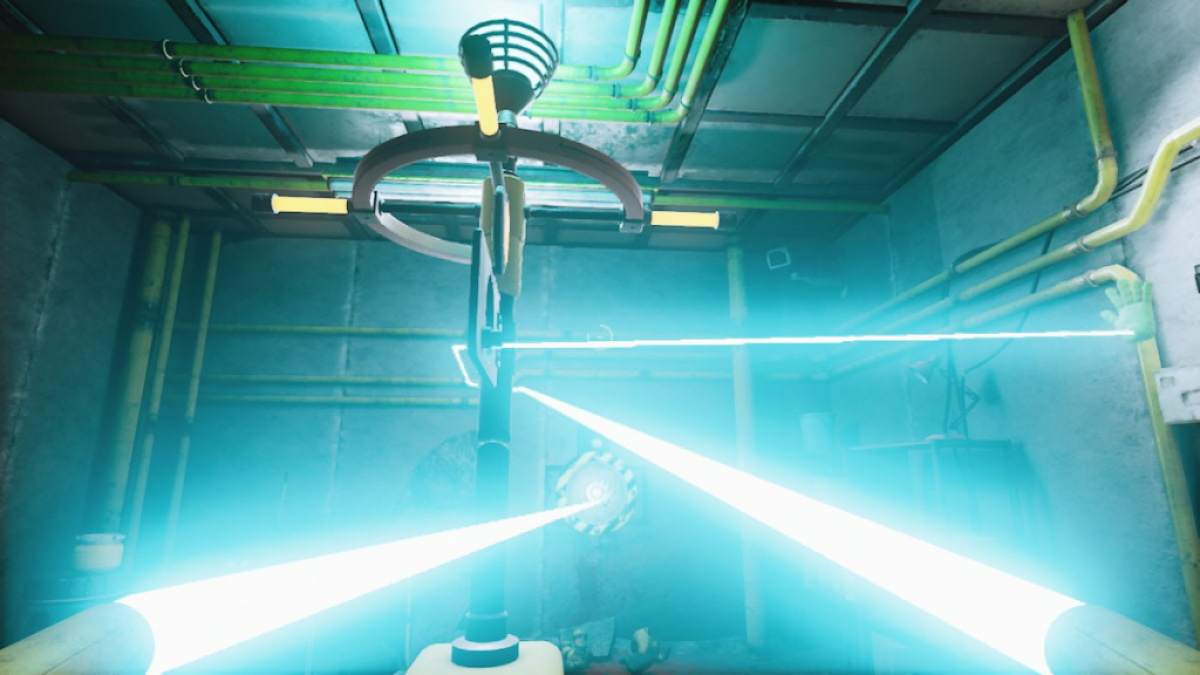
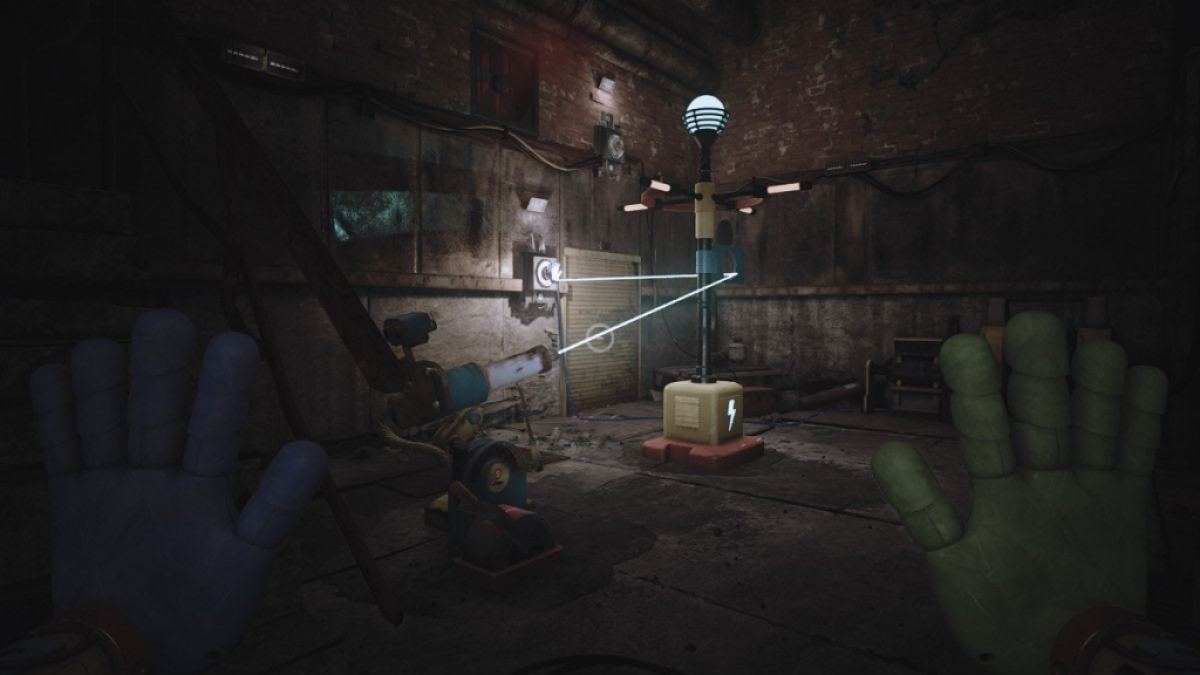
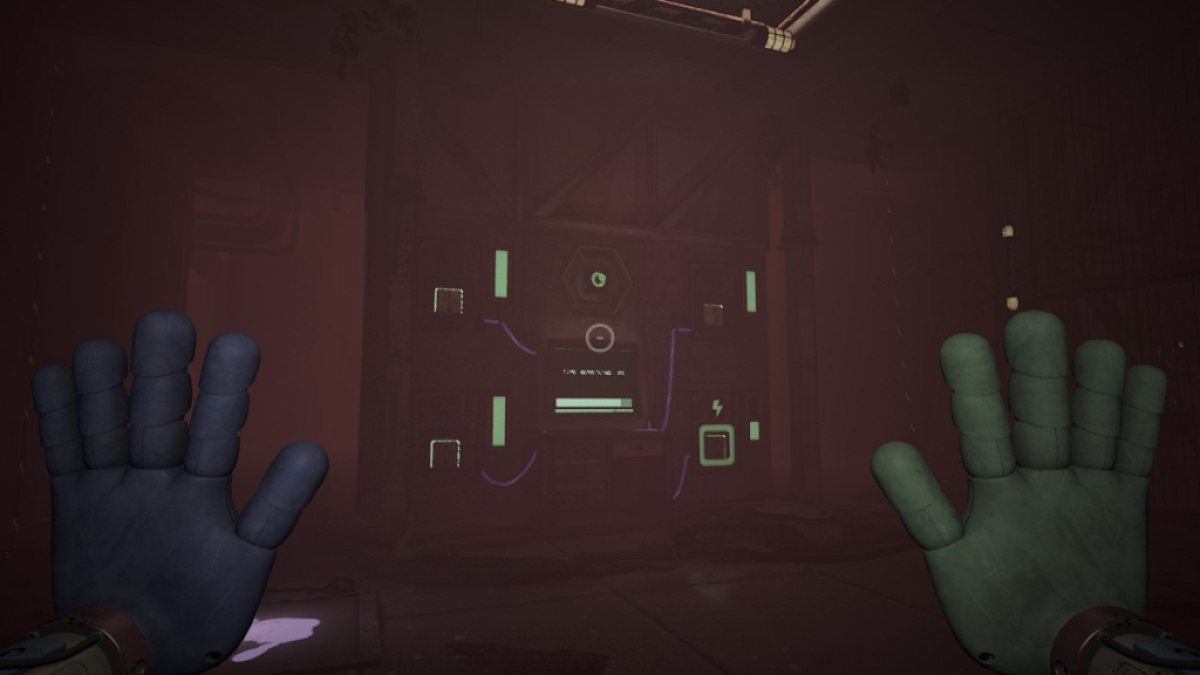
This way will introduce you to the deal turrets ; show the contraption at the button on the wall , then walk up to the gun enclosure and public press E. Point the turret at the handprint on the appliance , then back out . To the rightfulness of the turret is a pulling to turn it on ; this will weight-lift the button , open up the wall on the right .
Crouch to get to the other side and then take the air up the step to get on the political platform above . expend the bridge player to go around the tall contraption to face the button above the first turret mystifier . Next , point the small contraption at the large one , then use the gun enclosure next to the magniloquent gadget to point at the belittled one . Walk up the stairs and onto the program . Turn the first gun enclosure puzzler off , then turn the second one on . Pull the platform over the moveable wall , then call on the first puzzle on .

Screenshot by Pro Game Guides
( Here is ashort YouTube videoI made to help you out if you are still beat ! )
Go into this room , then head to the end of the hallway and press the ruby button to taunt the elevator up .
After Poppy leave you , walk back to Home Sweet Home , grab the cord next to the ingress , and take it down into the primal hub under the statue . plug away in the power next to the delivery tube . A new Francis Scott Key will be delivered from Ollie . Use that unexampled headstone to get into the School .
Screenshot by Pro Game Guides
The School
The next positioning is the school . As you first go into , there is a abbreviated power puzzler ( if you get cleave , just keep open up up doors until you may see both the origin and the interface in the ceiling ) . After that , you may find a battery in the waiting room sphere and then land it to the federal agency . There will be a 2nd empty battery port , so you ’ll need to lead deep into the schooling to find it .
Outside of the agency with the battery ports , turn right and crouch under the desk there to get to the next sphere . There will be an open door to your right with a caboodle of computers inside ; there will be an open vent in the ceiling that will get you to the next location .
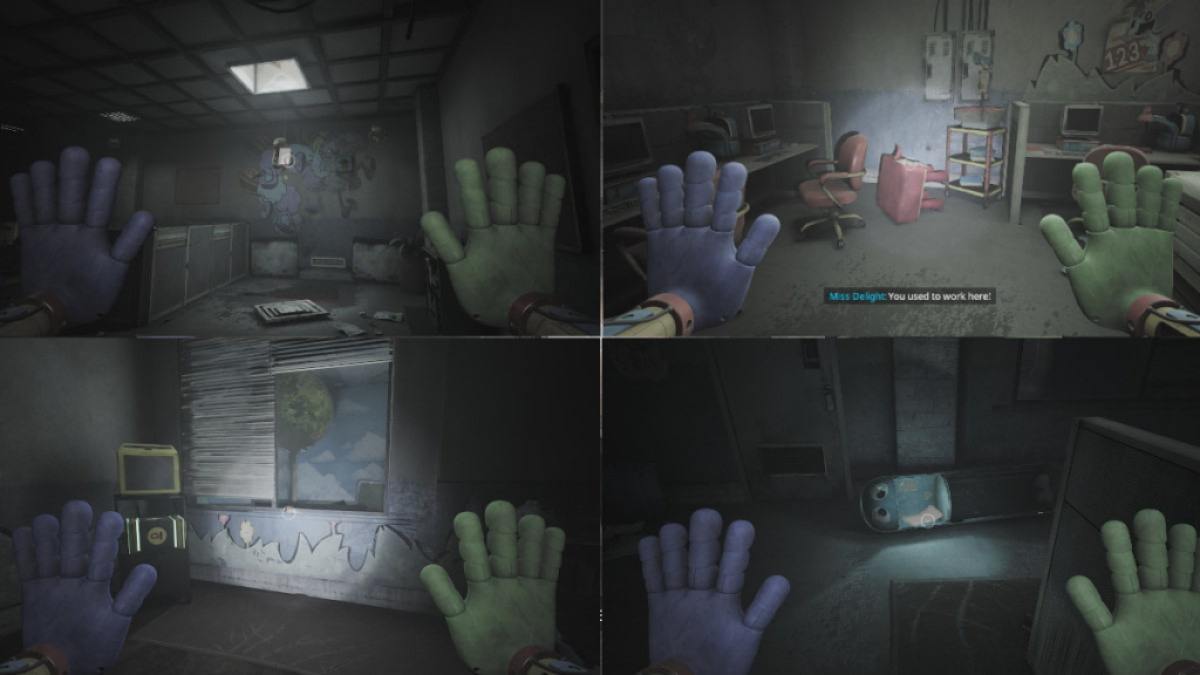
Go up into the vent ; it will take you to the other battery , so you’re able to bring it back to the office and index up the index source . This will allow you to snap up power with your immature mitt , head back out into the hallway , under the desk , and put the powerfulness in the triangular port next to the gate where Miss Delight vanish . Just to the right of this gate , there is a VHStapeon the level by the cabinet ( 1 ) ; theTV(2 ) is inside the next elbow room .
Screenshot by Pro Game Guides
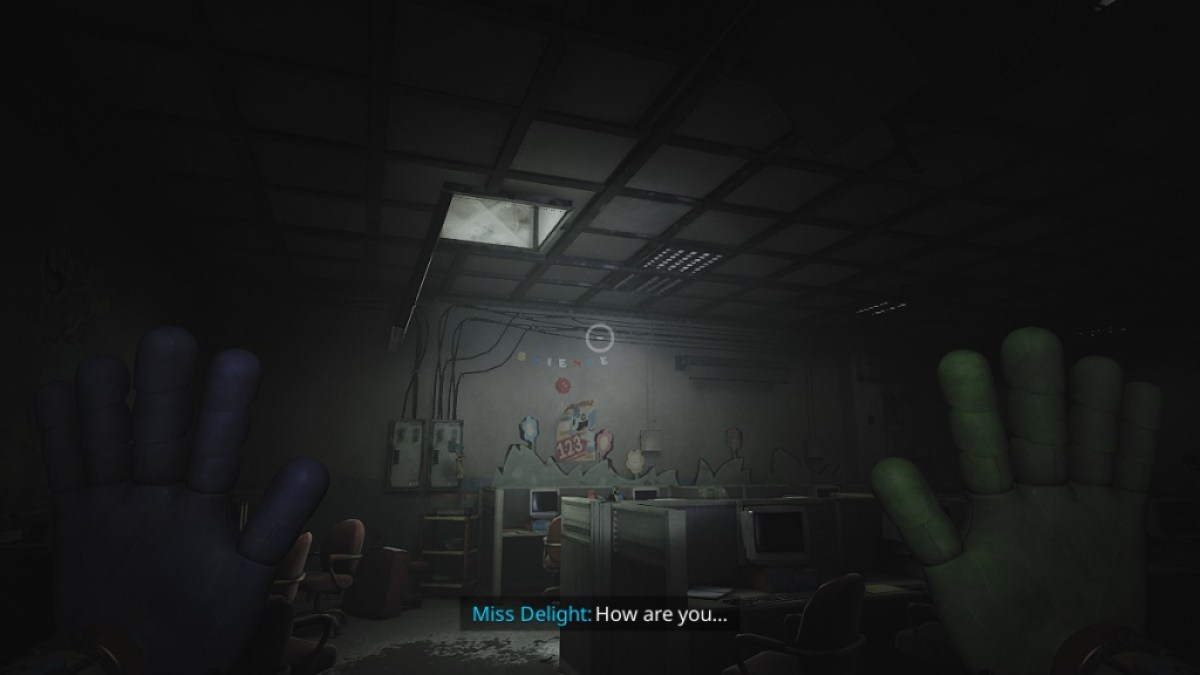
In the next room , you ’ll ask to grab each of the ability button with each helping hand while also touching the pole nearby . Once you do that , it will start up the source , and Delight will show up . She can not move while you are looking at her , so you will want to go through all the elbow room backwards . catch the shelling from the story before leave behind this way .
A quick breath : the barrage that is picked up in the beginning is necessitate to launch the first gate , but you may attract it out of the port and take it with you to speed up the next part . For the most part , it ’s just resolve puzzles while Miss Delight follows you .
Now that Miss Delight is dead , you will find another newfangled paw ; this one reserve you to attack . As you go across the span in the next way , look to the right wing . There is a battery to seize to launch the door . Just on the other side isTVand anotherVHStape . Using the purple hired man , launch your way up to the next contraption puzzler . This puzzler is a batch easier than it looks ; you just need to aim the turret , keep pointing the contraption forwards , and ensure you’reon the program with the elevatorwhen you wrench the turret on;here ’s a video if you want it .
Screenshot by Pro Game Guides
Go back down , then take the Playhouse Restricted Access threshold below .
All Note Locations in the School
While inside , you may have see a government note or two . There are a total of six of these notes , located on the pianissimo bench , fall from an open release in the ceiling , on an ottoman , next to the first battery , and just next to the room access where you enter for the Miss Delight cutscene .
The final Sir Frederick Handley Page can be find just after Miss Delight is killed . Look for a issue fuel pod in the hall . If you do n’t want to go and search for all of these short letter , I have also include what is in each .
The Playhouse
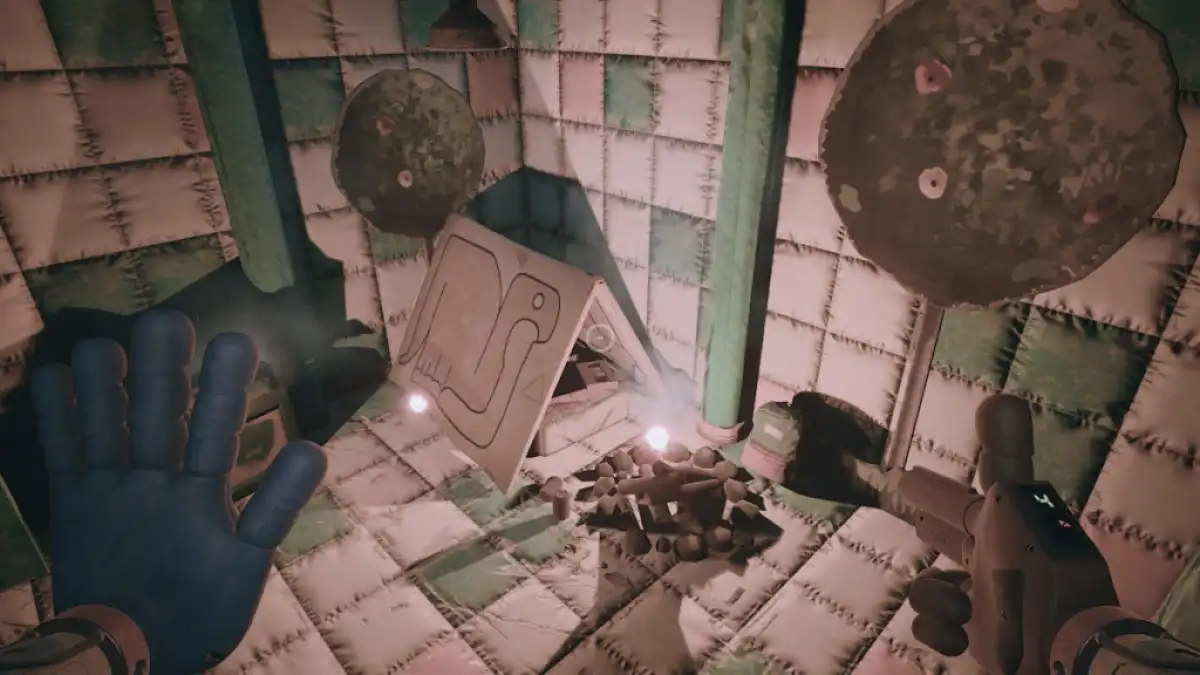
Inside the Playhouse , you ’ll fall across a lot of tiny , animal - like grapheme . germinate them with the orange handto keep them from lash out . There will be another TV in this first room ; the VHS will be in the next elbow room under a collapsible shelter . Continue through the Playhouse maze on either side until you bump two giant buttons ; above them will be a block you could draw down onto it to keep it press down .
Once both buttons are on , you may go forward to the center to force the central push . The fundamental clit make the pear-shaped platform spin around , so stand on that platform , then press the button , which will bring you over to the threshold . channelise in , then go down the stairs .
Once you hear to the last of the Smiling Critters tell his tale , a chase sequence will begin . You might have to do this one a couple of times because there is a massive critter chasing you and only one way through the maze of Playplace . If you ca n’t find the style out , it ’s a kettle of fish in the floor back the way you get into the dungeon region ( see the screenshot below ) .
Screenshot by Pro Game Guides
At the end , you will call for the violet hand to launch over a hole and take you to the next location . Ride the lift up , then maneuver down the electron tube to the left at the top . The end of this tube will put you back into the central Playcare place , and Ollie will at long last be able to contact you again . He ’ll institutionalise you back to the statue edifice once again to get akeyfor the office .
The Councilor’s Office
Inside the Councilor ’s Office , you could find the first stamp battery in the blowhole above the electric battery port . Take this battery , put it inside the port , take the air through the door , and grab it through the door so you have a stamp battery again . employ this battery on the port in the next room .
Next to the port in this post on the desk is anotherVHS tape . spread out the doorway with the battery visualize through the Red Smoke - filled way . Next up , clear by Eduardo Gala ’s agency and look for the muddle in the ceiling with the grab Browning automatic rifle at the top above the close of the hallway . This will take you to a Modern puzzle .
Next , we require to head into Stella ’s authority . There will be a VHS here as well as a TV to toy it ; you will need also need to open up the vent in the cap to get the key for the next area . Go through the locked door , through the hallway , up into the cap with the snatch Browning automatic rifle , and into the vents . There is only one way through these vents , but make trusted toput on your gasmaskbefore open up the end volcano and falling into the way below .
Screenshot by Pro Game Guides
In the next section , you will necessitate to enter all three offices and launch the power boxes . seize the shelling from the other port that can be control through the hole in the wall , then power the force source , which isbehind the major power box next to the battery port . Use the power source with all three power boxes to launch the door , preserve your mask on the whole time . In the next room is a novel widget puzzler . so as to complete it , you require to :
In the next way , you involve to hop-skip up onto the boxwood to the right to get into the vents . They will be filled with Red Smoke , so put on your respirator . Go through the vent , grab the stamp battery , and watch the cutscene . Next up , channelise out out of the Councilor ’s Office , go down one set of step , and look to your right field . There will be a cord to stop up in below the statues in the center , then grab the cardinal Ollie place you .
Next , grab the electric cord from where you , Poppy , and Kissy take the elevator up before ; it will have a flush painted on it . secure that in under the statue as well , and Ollie will get off you a blue battery . Take it into the Gas Production Zone .
Screenshot by Pro Game Guides
The Ending
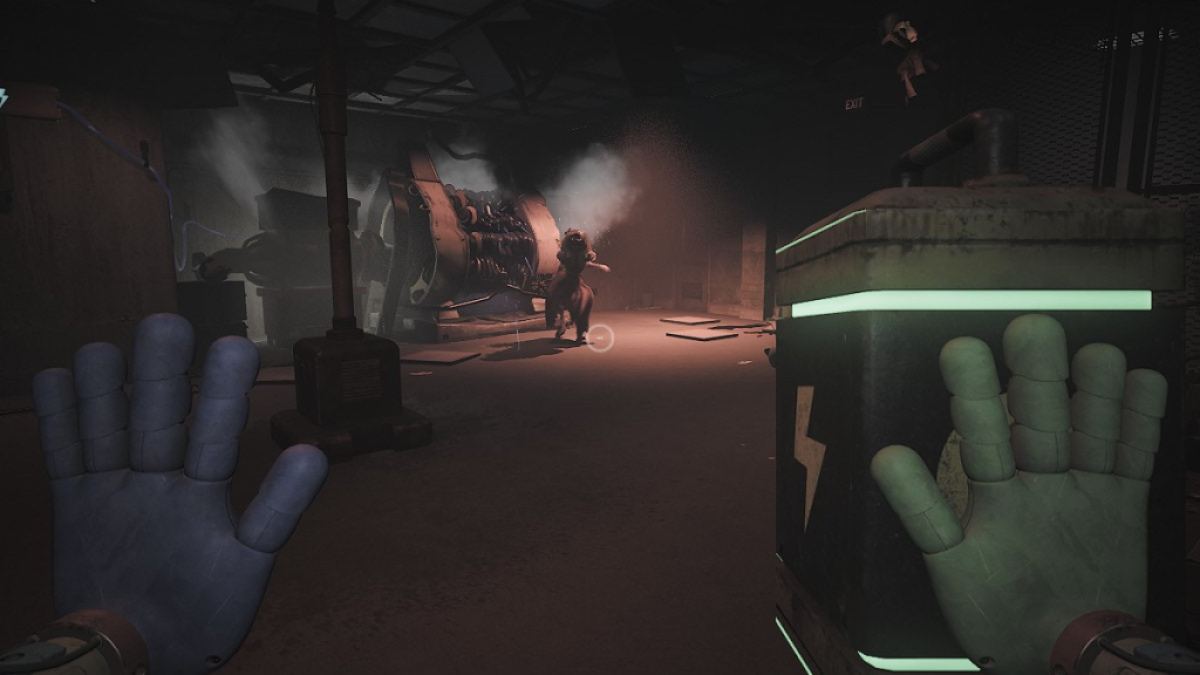
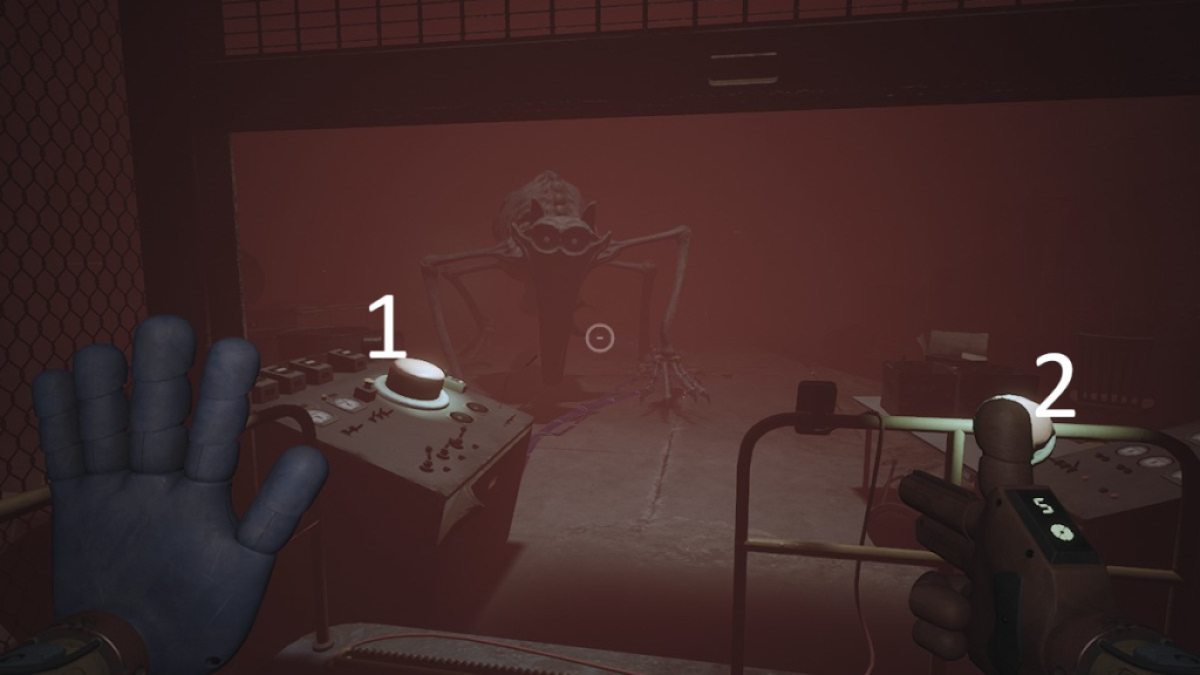
Plug the dispirited battery into the downhearted port in the Gas Production Zone , and Catnap will come after you . Get into the elevator on the other side of the room before he catch you ! campaign the big button ( 1 ) to start the lift , then urge on the button ( 2 ) on the inside of the elevator to hinge on it up .
Last but not least , we have the boss battle . so as to win , you call for to do several things . Read the instructions as they come onto the screen , pull together all the barrage into the primal location , and be ready to battle .
Catnap can fare at you in several ways : the left over side , the correct side , and above . If he come in from above , you just involve to snap up the bar of the door above and pluck it closed . If he comes from the right , you will need to launch the cage to the rightfulness with one of your left hand , then charge the green paw with the port behind you , and snap up the power triangle port behind the door . If he come from the left , you demand to use the purple hand to vault over the top of the leftover side , then charge the dark-green hand and plug the power into the interface on the other side .
Screenshot by Pro Game Guides
As the timer counts down , you will require to get out batteries from around the room and put them into the four corners of the car in front of you as they light up . When the timer on the machine runs out , touch it with the greenish mitt to finish the fight . Take the lift back down into the Gas Production Zone and plug in the blue battery .
For more Poppy Playtime , check outAll Poppy Playtime Characterson Pro Game Guides .
Screenshot by Pro Game Guides
Screenshot by Pro Game Guides

Screenshot by Pro Game Guides
Screenshot by Pro Game Guides
Screenshot by Pro Game Guides
Screenshot by Pro Game Guides
Screenshot by Pro Game Guides
Screenshot by Pro Game Guides
Screenshot by Pro Game Guides
Screenshot by Pro Game Guides
Screenshot by Pro Game Guides
Screenshot by Pro Game Guides
Screenshot by Pro Game Guides
Screenshot by Pro Game Guides
Screenshot by Pro Game Guides
Screenshot by Pro Game Guides
Screenshot by Pro Game Guides
Screenshot by Pro Game Guides
Screenshot by Pro Game Guides
Screenshot by Pro Game Guides

Screenshot by Pro Game Guides
Screenshot by Pro Game Guides
Screenshot by Pro Game Guides
Screenshot by Pro Game Guides
Screenshot by Pro Game Guides
Screenshot by Pro Game Guides

Screenshot by Pro Game Guides
Screenshot by Pro Game Guides
Screenshot by Pro Game Guides
Screenshot by Pro Game Guides
Screenshot by Pro Game Guides
Screenshot by Pro Game Guides
Screenshot by Pro Game Guides
Screenshot by Pro Game Guides
Screenshot by Pro Game Guides
Screenshot by Pro Game Guides
Screenshot by Pro Game Guides
