Mystery Detective Adventure is a slaying - mystery indie title . In order of magnitude to complete the entire game , you will need to work all three cases , gather all the collectibles , then complete the underground case . We have covered the first two cases , and so it ’s prison term to head into the third cause in our final walkthrough . For the other cases , check out :
Mystery Detective Adventure Walkthrough - Case 3: Mine Accident
In the first two casing , Detective John Woodbray has had to take on a murder that was covered up as a suicide and what seemed like a giant demon dog attacking a pocket-size townsfolk . With those two typesetter’s case resolve , it ’s clip to take on an ostensible murder in a mine . With his handy portable science laboratory , Woodbray is ready for to take on the mine .
Entrance of the Mine
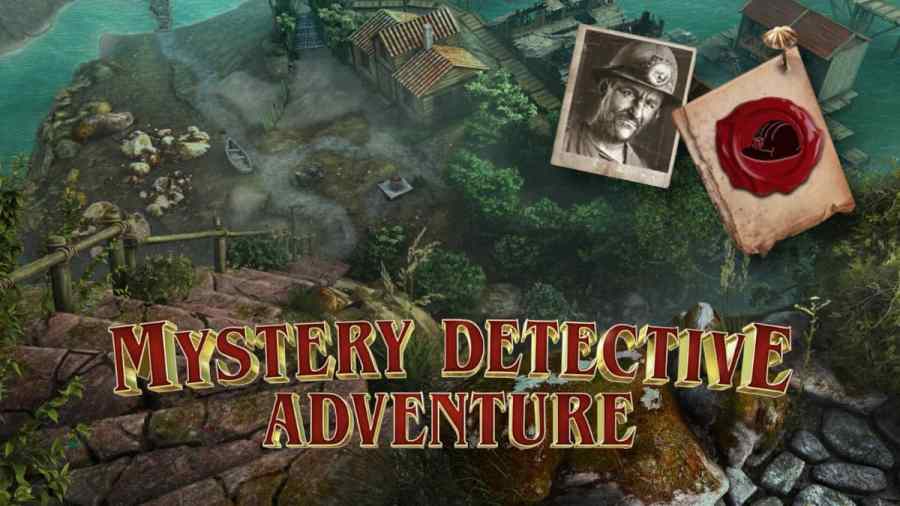
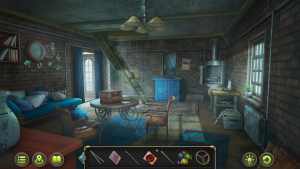
You get down in the entranceway , and you conform to up with the head of the mine , Margaret . She open you aPassto the mine . On her desk , you could pluck up theNewspaper , and under the newspaper publisher is aClipto take . go away her place , and you will be back in the Entrance localization . There are several things to look at and shipway you may go out this location .
Mine
Now you could go into theMineitself . Walk over to the red elevator doorway and use thePassthat Margaret give you . This will bring you underground . There will be an old man there that you will mechanically interact with ; he will give you aKey .
The Boiler Room
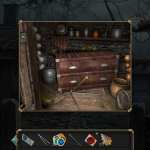
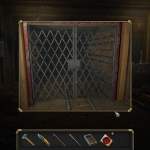
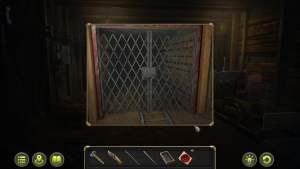
With the key to theBoiler Roomin hand , go back up out of the Mines to the Entrance . tap the right - most door on the concealment , which will whizz along you in on a set of locked double door . habituate theKeythe old human race in the mine collapse you to unlock it , and channelise in spite of appearance . You will need to find all the object outline at the bottom of the filmdom to finish this incision .
Workshop
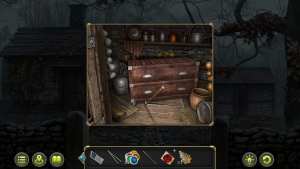
Go into the Workshop ; the door to it is a little to the left of the Boiler Room door . Once inside , you will be capable to get gaseous state for the minecart , find a couple of collectibles , and look at some other objects . Here ’s everything you may interact with here :
Entrance to the Mines
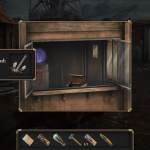
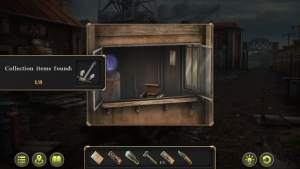
Once you have finished all the above steps in the Workshop , back out to the Entrance to the Mines location . Use the twoDetail Pieceswith the fork and spoon on them to launch the little sliding glass doorway on the supervisor ’s office by the entry to the mines . There will be anAnchor Collectibleinside . If you take a close looking at at the boxful on the table in the elbow room , it will soar up in enough for you to see theDetail Piecewith the arrow on it . Pick that up , then interact with the box . This will start theFruit and Vegetable Puzzle Box .
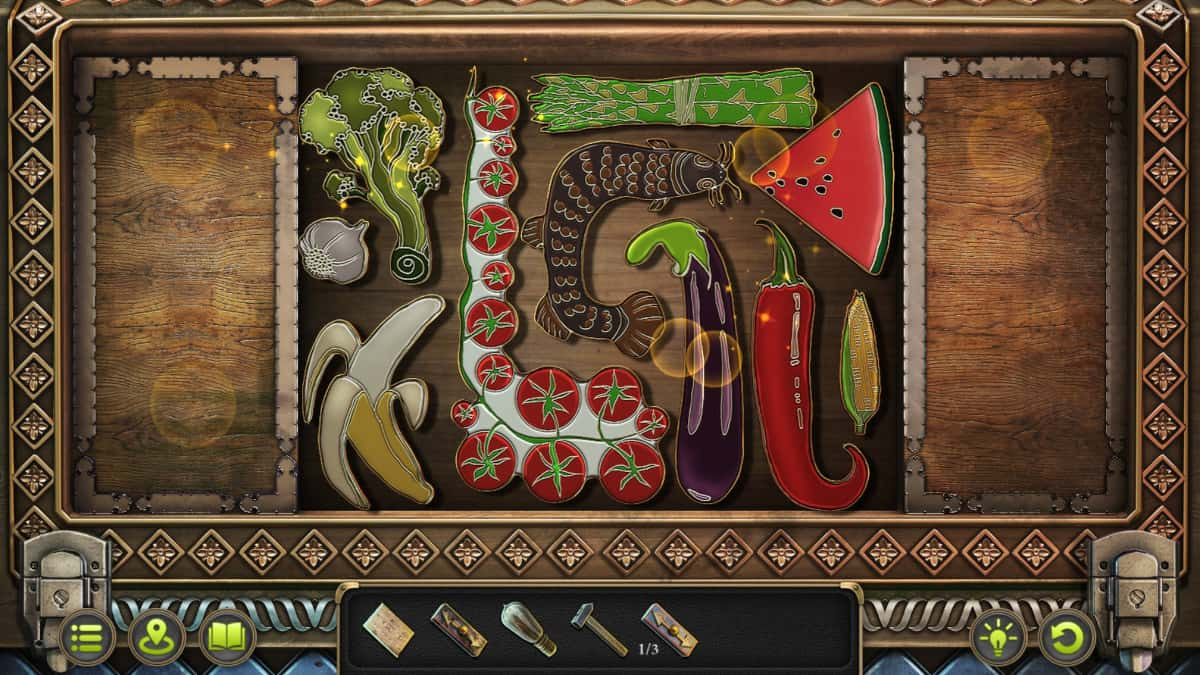
The Fruit and Vegetable puzzle box solution
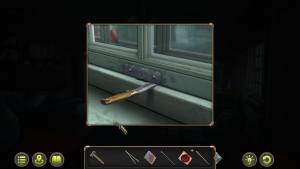
You have to run along all the fruits and veggies up on the top of this box to solve it and open it up . I have tried it several way , but this seems to be the only layout that works that I have find so far . This teaser ’s answer should be the same for everyone . Put all the solid food in the correct spots to spread up the box and get theKnife .
The Place of Death
Once you have theKnifeand theHammer , you could make your style to thePlace of Death . Go back into the mines and interact with the minecart . Pour theJerry Canfilled with gas into the minecart , then start the engine with the pull cord . utilize theHammerto move the wedge holding the minecart in place out of the fashion . ensure the flag in the middle of the runway is face to the right wing , then exit out of the screen to the right mine .
This location is the Place of Death . The first thing you have to do when you come in is to replace theLight Bulbin the flood tide lighting to the rightfield of the silver screen . If you plunk up theBulbfrom the Workshop , you should be able to get it work again . This will light up the crime panorama .
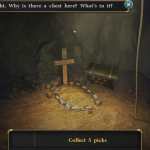
Now that you have theKeyfrom the soundbox ’s bag , you could unlock theRusty Boxin the mouth of the Mines by the old man . Inside this loge is aHard Hat Collectibleand aPickaxe . After you pick these two up , head back to the Place of Death .
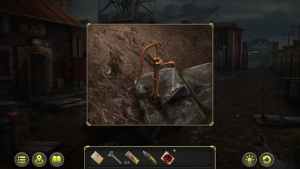
Use thePickaxeon the boards on the odd side of the screen at the Place of Death ; this will pull the board off of the wall , revealing the piss pumpLever . In the Entrance to the Mine , use theLeveron the water heart where you got theHoseat the beginning of the biz . practice the body of water ticker to clean off theDirty Detailwith the arrows on it . Now you should have all threeDetailsfor the Arrow Detail Puzzle , which is settle inside the Workshop .
Arrow Detail Puzzle in the Workshop solution
Take all theDetailsinto the Workshop and put them into the blue panel in the heart of the screen . This will open up a puzzle . The point of the puzzle is to tack the red plus and the blue subtraction . You also get an achievement if you fill out it in less than 80 seconds , so here is a video of how to do it as fast as possible . After you fill out it , the compartment behind the mystifier will open up , giving you aScrewdriverand a primed ofDrills . This mystifier is not random , but is the same for everyone .
Fingerprinting the Dead
Go to the Entrance of the Mine , and snap on Woodbray ’s vehicle to get inside . clean up theFingerprinting Kit , theTweezers , and theEvidence Envelopefrom inwardly . Return to the Place of Death , and apply theFingerprinting Kiton the body to get theFingerprints , then peck up theGunnext to the body with theEvidence Envelope .
Return to Woodbray ’s portable science laboratory elevator car and expend theFingerprintsand theGunto start a piddling puzzle . You will need to twin the fingerprint on the report to the ones on the gun . correspond up each fingerprint shape to the identical one on the gas . Once ended , you ’ll get theGun(Death of Henry : Evidence 2/4 )
Crossroads
The Crossroads can be accessed from the Entrance to the Mines location where you vehicle is . oral sex northerly through the logic gate a small to the right of the Boiler Room door . On the other side , you will see a little intersection point where you’re able to get to the Marina and into town right .
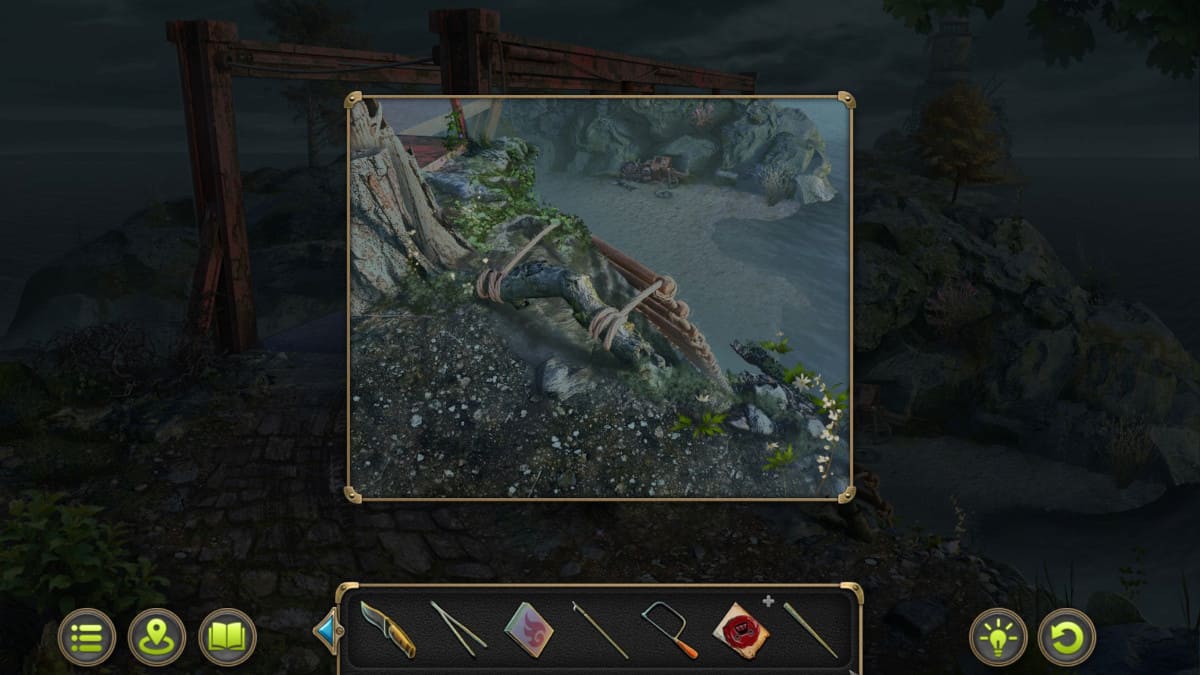
Go back to the Place of Death and use theLadderon the excavator . This will allow you to look more close at the top of the crane and see more clues . If you launch the metal door at the top , you ’ll see aHandprint(Death of Henry : Evidence 3/4 ) and that theRope was Cut(Death of Henry : Evidence 4/4 ) .
Go back to the Entrance of the Mine and speak with the Miners that will be there . They will say you to attend for a man named Jacob , and that he can most in all likelihood be witness in his home . To get there , go north to the Crossroads , then continue up to the right to get to the Entrance of the Miner ’s House .

Image by Pro Game Guides
The Entrance of the Miner’s House
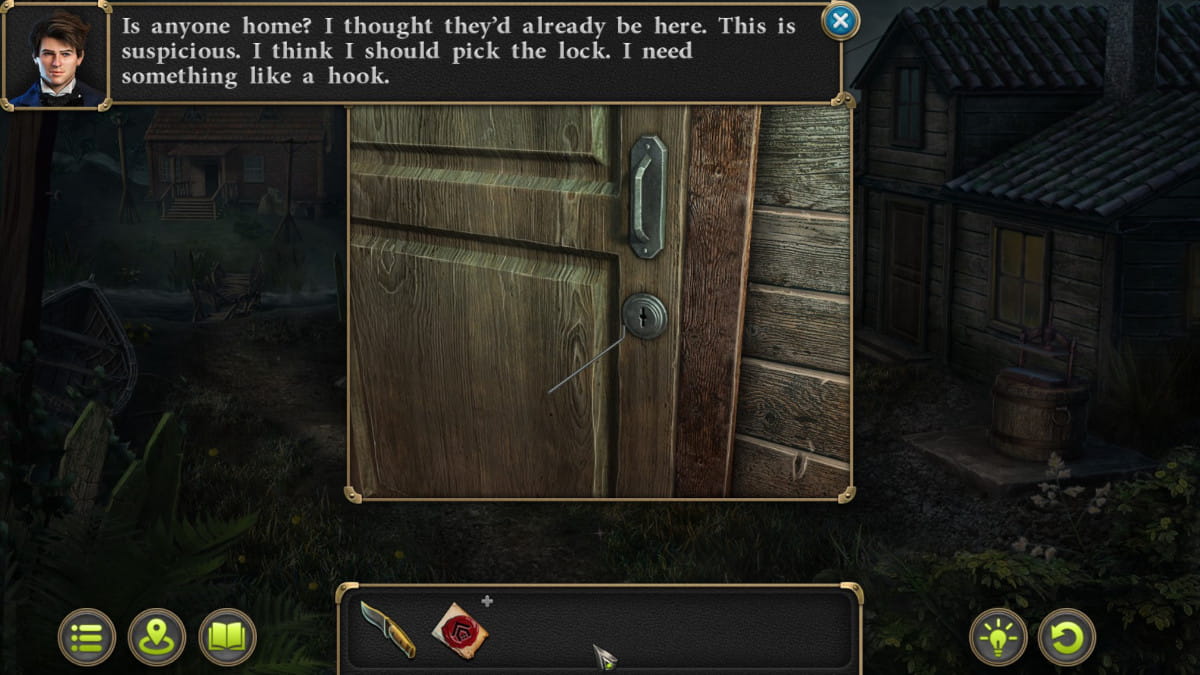
Going through town will get you to Jacob ’s menage ; it seems to be empty , and the front door is locked . You will need to go around back to seek to break in .
clack to go around back of the home and blame up theFleur - De - Lisnext to the dog home , then interact with the back doorway . If you reckon into theLockof the back threshold , you will see that theKeyis in the lock . Put theNewspaperunderneath the threshold , then expend theScrewdriverto thrust theKeyout of the lock ; it will come down to the paper , and then you’re able to commit out the newspaper and pick up theKeyoff of it to unlock the back threshold .
Jacob is inside the planetary house bushed , hanging from the neck opening . You will have a variety of things to interact with here to work out this represent suicide . Here are all the physical object and places you could interact with in Jacob ’s home base .
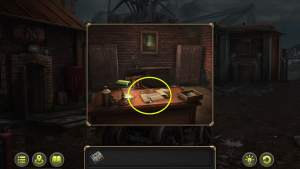
Image by Pro Game Guides
Jacob’s house cabinet puzzle solution
for get to the cabinet up , you ’ll need to figure out the cabinet teaser and make it match the picture you found in the base ; this picture is not random and will be the same for everyone . The best way to start is to splay the blue bricks until the bricks are in the correct shoes in the bottom right niche . Then move the crimson bricks in a circle until the very pith piece is a yellow sunshine square toes . Move the final red part into the second power and swing it around to fill in that nook . Now that you have both the scarlet and gamey corners done . spin around the purple around , pulling the green away and down , then whirl them until they are both filled in . Once you have finish the cabinet teaser , you ’ll get aFleur - De - Lispiece . Here is a video to help you through the appendage of finishing this puzzle .
Shed puzzle outside the Minor’s house
You should have twoFleur - Diamond State - Lispieces now , so you could start the shed next to the Minor ’s home . Go out of doors and interact with the room access to the shed . Put the twoFleur - De - Lispieces into the shaped slots , and you will be given a teaser . This one is pretty comfortable ; you just ask to run along up the holes in the metal opus over the embodiment of the items in the door . ensure none of them overlap , and the door will open up .
In the shed , take theHookfrom in front of the actor’s assistant inside . Use theHookto prop the dressing table up , and then slide theWheelfrom the desk inside underneath it . This will let you roll it out of the way . There will be aLeafinside the hatching under the drawers as well as aHacksaw Frame . Above the chest of drawers on a shelf is anotherHard Hat Collectible . Now that you have theHook , you could use it to knock theChipout of the skirt ’s nest outside the Minor ’s house and pick the 2d - to - lastChipout of the vase in the Crossroads .
Combine theHacksaw Frameand theHacksaw Bladeto get aHacksaw . Return to the Minor ’s house and use the twoLeafpieces you have to open up theDrawer of the Desk . Inside will the lastChipand a paper clipping about the murder five eld ago ( Death of Jacob : Evidence 5/5 ) .
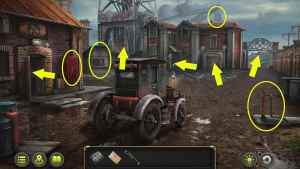
Image by Pro Game Guides
Octopus Gate Puzzle in the Crossroads
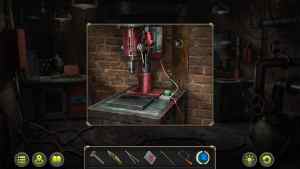
Since you have all fiveChips , you’re able to enter theOctopus Gatein the Crossroads . So go to the gate , sink in on the gate and utilise theChipson it . It will put all but one flake in piazza ; you will then get theBlue Chipback and it has been stay as theWrong Chip . Since it does n’t match , take it back to the Workshop . Use theDrill Bitson the Drill , then put theWrong Chipdown on it . Use the meth at the top of the recitation to use it . This will give you the micro chip back with the right holes in it .
This will start the Octopus Gate puzzler . for complete this one , you just have to match the symbolic representation on the chips to the ones engraved underneath each of the chips . Here is a video recording on how to discharge it .
The Bridge
Walk through the logic gate now that is it open , and head into the next incision . This is the Bridge , and there is yet another body for Woodbray to look at . There are only a couple of things to look at for now , at least until you fix the span itself .
The Marina
to get down to the trunk , you ’ll involve to manoeuvre to the Marina , which can only be accessed through the Crossroads . Take the passage under the tree , then take the air to north in the midriff of the cover and not toward the house . You will be in the Marina , and you could speak to the Captain .
Head back to the Bridge emplacement and employ the Captain’sRope Ladderto make your way down to the next slaying scene . You will need to zoom in on the stump , then use the run on the roots .
The Third Murder Scene at the Bridge
Climb down to the murder scene . There will be several items to interact with here , including a collectible and the organic structure itself . First , you want to pick up theHard Hat Collectiblefrom the leftfield of the soundbox . Then interact with the organic structure itself , and take theKeyout of his pocket . enter the carriage door ; there will be aStoneon the seat deep down . Last , start the box on the correct side of the screen with theHacksaw , and get theHandleand theValve .
Now , you will need to head back to the Fork where the path to the Marina is . There is a locked sign of the zodiac on the right field , and another locked house in the backcloth of the left part of the sieve . The Foreman ’s business firm is the one on the left field . With theKeyfrom the body , you may get inside . But first , there are a couple of thing you ’ll want to interact with outside the house , in the Fork location .
The Foreman’s House in the Fork
Use the Foreman ’s Key on the Foreman ’s star sign in the length , and head inside . There will be a long ton to do in here , so verify you are look through everything cautiously . countenance ’s startle on the left-hand side of this location , and we ’ll work from the scandalmongering roach on the leftfield of this epitome to the right field .
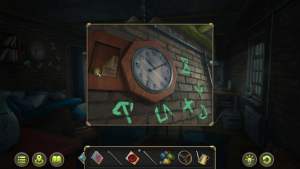
Now that you have used theLeverto get into the bonce , go up up the stairs . The elbow room will be right smart too dark to see much , but you will be able to pick up anOilerand theFace of the Clockfrom the one president that is in sunlight . Take theClock Faceback into the main room of the mansion , then put it in the empty clock . This will open up a hidden compartment and give youPart of a Codeand the last of the fourStones . Put the fourStonesinto the box on the tabular array in the middle of the room , and you will get a teaser to figure out .
The Stone puzzle in the Foreman’s House
The Stone puzzler is a strange a difficult mystifier if you do n’t get it . to complete all the stagecoach of the puzzle , you need to image out what you would need to make each of the items on either side of the top of the puzzle . Here are the combinations :
The Foreman’s Safe Puzzle
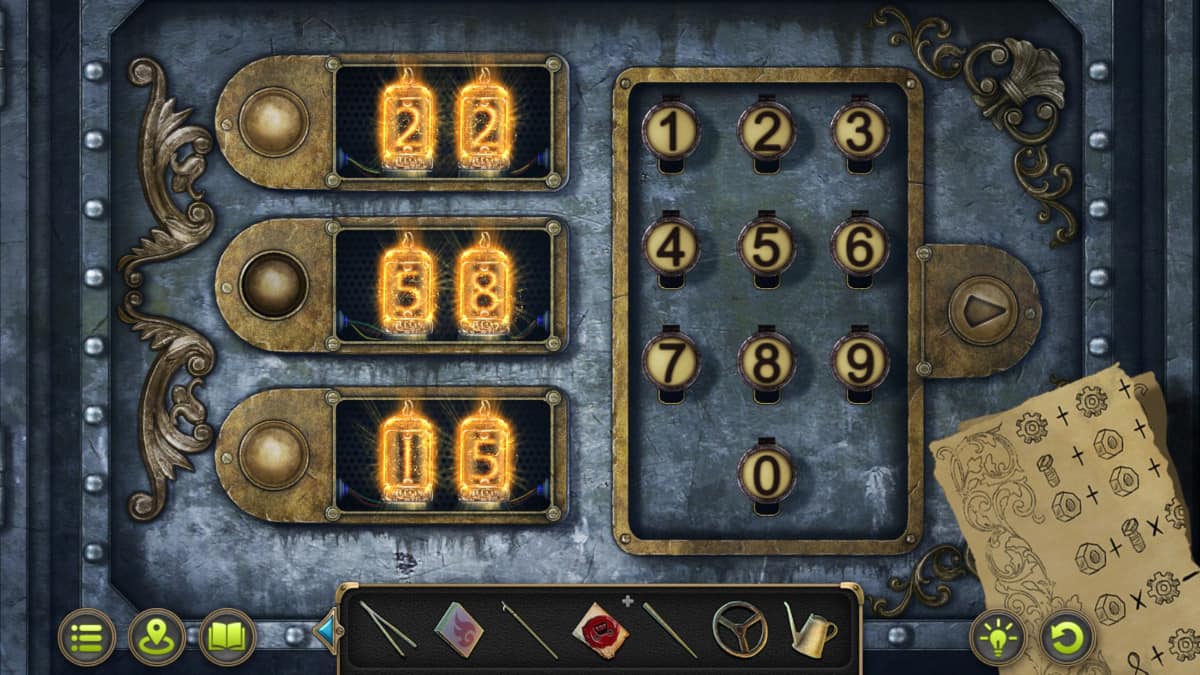
Once the box is loose , you will get the other half of theCodeneeded to unlock the Foreman ’s Safe . The safe is locate behind the Mirror in the middle of the way . This one is a little odd , becausethe solution will be different for everyone . I can share my numbers though , so you may see how it was done .
The first is the easiest ; you take the numeral that the Gear + Gear + Gear is adequate to and separate it by 3 ; in my case it makes the Gear = 5 . Next , you postulate to image out what numbers will equalise up to 26 ; in my case , I knew that the Nut had to be the higher act since Nut + Nut + Bolt is 26 while one Bolt , one Nut and one Gear only equals 19 . If you add 12 + 12 + 2 , you get 26 , and you also get 19 when you add up 2 + 12 +5 , so I knew that the Nut was 12 and the Bolt was 2 . So this follows that my first result is 12 + ( 2 x 5 ) = 22 . The second root is 12 x 5 - 2 = 58 . Third is 8 + 5 + 2 = 15 . So the numbers for mine are 22 , 58 , then 15 .
The gears in the attic
Inside the good will be a letter about the ghost ( end of Michael : Evidence 3/4 ) . Now that you have this evidence , you could return to the garret where you will be able to unfold the window . There will be 15 total geartrain to find . There are nine gear wheel located around the way ; the 10th one is underneath a board that is nailed down and you necessitate to apply the pry on the left over side of the screen to pry it up . The others are in the starred place : the trunk and the window . There are three gears in the trunk ; one is on top and the other two are under piles of clothes . In the window , there is one etched into the glass , and the second , you need to pull up the pall and it will fall out .
The Entrance to the Lighthouse
Now that you have collected all theGears , take them to the Bridge fix and use them to repair the bridge ’s chemical mechanism . This will allow you to go to the Entrance to the Lighthouse . This location will have several things to interact with .
The House by the Lighthouse
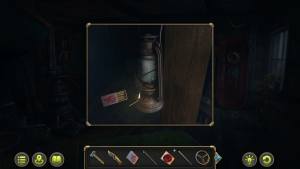
The house will be pretty dark when you first participate , so you need to use theMatchesfrom Jacob ’s House on the lantern . This will give you a good look at the elbow room and everything you may interact with .
The House by the Lighthouse Puzzle
The first thing you want to do after collecting the morphing object and the hard hat collectible is to open up the lockbox in the heart of the way under the bed . for fill in the puzzle , you just postulate to put the symbols that match the background signal in the veracious place to line up . So the ribbon tree diagram , for case , should terminate up on the left center one-armed bandit to rival up with the trees in the desktop . Here ’s how to do it :
After this puzzle is complete , you will get aTap , a box ofNails , and aTokenfrom inside the safe-deposit box . practice theValvefrom the Bridge to unfold theRed Dooron the right side of the House by the Lighthouse . This will give you another enshroud object puzzle .
Hidden object puzzle in the House by the Lighthouse
Once you have start the cherry door with theValve , you will incur a hidden object puzzler on the other side . There are 10 object to find .
Next , you require to take theOileryou got from the Attic of the Foreman ’s House , theTapyou get from the House by the Lighthouse , and take it to the Crossroads . Use theTapon the barrel of oil colour in the bottom left recession of the projection screen , then utilise theHammerto drive theTapinto the barrel . penetrate theOileron the barrel to fill it up with oil . Bring theOiler with Oilback to the House by the Lighthouse , and use it to oil the grate on the ground near the house . You will then be able to open it and use theHookon the box to take out the box up . start the corner ; at heart will be aTokenand aToken Stuck in a Melted Candle . Take theToken Stuck in a Melted Candleinto the House by the Lighthouse , and apply the lit range to melt the wax , then retrieve theToken .
The Lighthouse
Take theKeyyou get from the obscure object puzzle inside the House by the Lighthouse , and utilize it on the locked gate in front of the Lighthouse . Zoom in on the door the Lighthouse , and you will see that you need fiveTokensto get inside . You currently have four . gratefully , there is a hiddenDolphinpiece that you may practice to open theDolphin Panelinside the House by the Lighthouse .
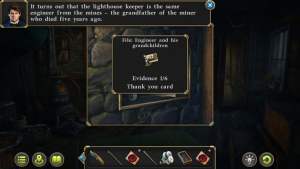
Use the twoDolphinsto enter the gore , and there will be a Thank - You Card ( Engineer and His Grandchildren : grounds 1/6 ) and the finalTokento get into the Lighthouse . Use them on the Lighthouse Door to start the Lighthouse Door Puzzle .
The Lighthouse Door Puzzle
You need to get the proper number of sauceboat next to each of the tokens to enter the Lighthouse door . So if the token has a numeral 1 on it , it can only have one sauceboat next to it , and so one . It can be done in just a couple of moves , as demonstrate in the video below .
Once you are inside the Lighthouse , go up the stairs , then interact with the symbols on the lights . This will give you the symbols clue ( Death of Michael : Evidence 4/4 ) for the Foreman ’s clues . pass to the Entrance to the Mines , and go into Margaret ’s Office . She ’ll give you aKeyto the locked gate in the mines .
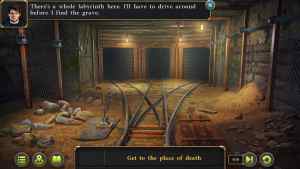
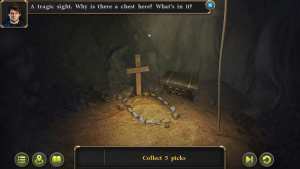
The Mine and the Grave
Open up the gate in the Mines with theKeyMargaret gave you , then pull the lever to change the direction of the tracks to go to the leftover inside . habituate the minecart , and you will regain yourself in a tunnel that branches three ways .
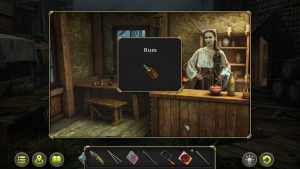
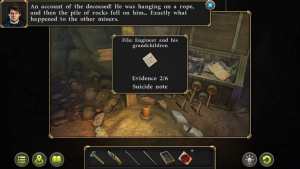
The note inside the box by the grave is a self-destruction promissory note ( Engineer and His Grandchildren : Evidence 2/6 ) . After you have completed this department , go to the Workshop , talk to the erstwhile valet , then go to the Marina bar , and talk to the barkeep . Look through the windowpane in the bar , and you ’ll see a bloody weapon . Head back out the Marina proper , and walk around the other side of the bar . There will be theBloodied Club(Death of Robert : Evidence 1/2 ) . Use theWood Boardslaying by the club along with theNailsfrom the House by the Lighthouse and theHammerto make aBridge . blame it up and take it with you .
Use theBridgeover the Marina to get to the other side . Interact with Robert ’s Body with theHook , and then use theKnifeon the netting around the eubstance . There will be aHandprinton the back of the body ( Death of Robert : Evidence 2/2 ) , proving it is the same successive killer who pop the others . Go back to the Fork , and use theBicycle Spoketo make a lockpick to get into the Engineer ’s House .
Screenshot by Pro Game Guides
How to unlock the door to the Engineer’s House
There is a ready mini - puzzle to get into the Engineer ’s House with the lockpick . You need to push up the numbers in the correct lodge , which you have to figure out by visitation and wrongdoing . The ordering for me was:3 - 4 - 2 - 5 - 6 - 1 - 7 - 8 , as shown in the video below .
The Engineer’s House
Now that you have suffer inside the Engineer ’s House , you are very close to the end of the game ; you just have a couple more things to do before you could cleanse up this serial killer and arrest the suspects . There are loads of thing to look at inside the entrance of the sign as well as the bedroom .
The Bookshelf puzzle in the Engineer’s House
Go back to the Fork , and use theKeyfrom the handbag in the sleeping accommodation of the Engineer ’s House to start the locked bag on the bike . Inside will be the last of the fourDetailsand theBookneeded to complete theBookshelf Puzzleinside the Front Room of the Engineer ’s House . Solve it by putting the romish numerals in order , lowest to high . Inside will be a little hidden nook withAlcoholinside .
Use theAlcoholon the dirty trading floor by the Trunk in the Bedroom of the Engineer ’s House , and this will give you the answer to unlocking the Trunk . It may be different for you , but my numbers were82 - 71 - 63 . cheer these numbers on the twoRotating Dialson the body ; it does n’t weigh which way you gyrate the two dials .
Take theValveout of the trunk . Return to the Fork . employ theValveon the Press by the Engineer ’s House , then put theBent Detailinto it . select the machine to drop theBent Detail , and it will turn into the fourthDetailyou need to solve the Detail Number mystifier on the Bookshelf in the Front Room of the Engineer ’s House .
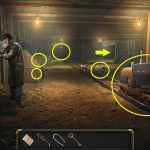
Image by Pro Game Guides
Detail puzzle solution (Front Room of Engineer’s House)
The canonic premise of this mystifier is that you have to bring or multiply all the number in the center to get all the numbers on the outside . Below is a video of my solution to help you out , and below that the order I had to do them in .
( I found the easiest way to work out this one was to bulge out with the biggest telephone number in the centre to make the giving turn on the away first , and work my way of life to the smallest to give myself some margin inside the puzzle ’s mechanism . Solving the puzzle will give you theKeyto the blue door in the Engineer ’s House . )
The Timed Puzzle in the Basement of the Engineer’s House
Before unlocking the door to the basement : make certain you have amass all the collectable objects , as there is no turn back from this point . Unlock the door to the basement , then watch the cutscene . This will start a time puzzle . You haveTwo Minutesto terminate it before you have to start over .
This is the destruction of character 3 and the end of Mystery Detective Adventure . There are several miniskirt - game and other things you could play in the main computer menu , but this is the terminal case .
All collectibles in Mystery Detective Adventure Case 3
Just like in the premature chapters , there are two different type of collectible object and several morphing objects to get . This case hasHard Hat Collectiblesas well asAnchor Collectibles . There are eight of each of those collectible and 15 Morphing Objects .
All Hard Hat Collectibles in Case 3
All Anchor Collectibles in Case 3
All Morphing Objects in Case 3
For more full walkthroughs of indie games , check outRiven ( 2024 ) Walkthrough – 100 % All achievements & endingson Pro Game Guides .
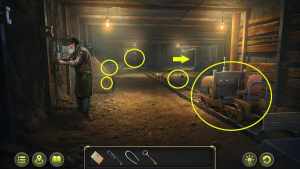
Image by Pro Game Guides
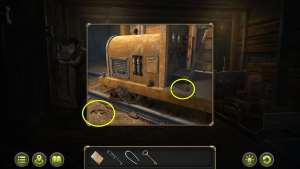
Image by Pro Game Guides
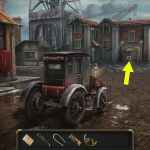
Image by Pro Game Guides
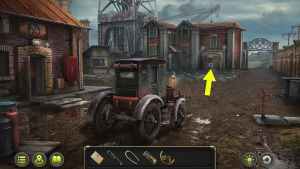
Image by Pro Game Guides
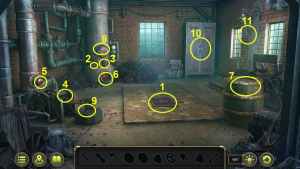
Image by Pro Game Guides
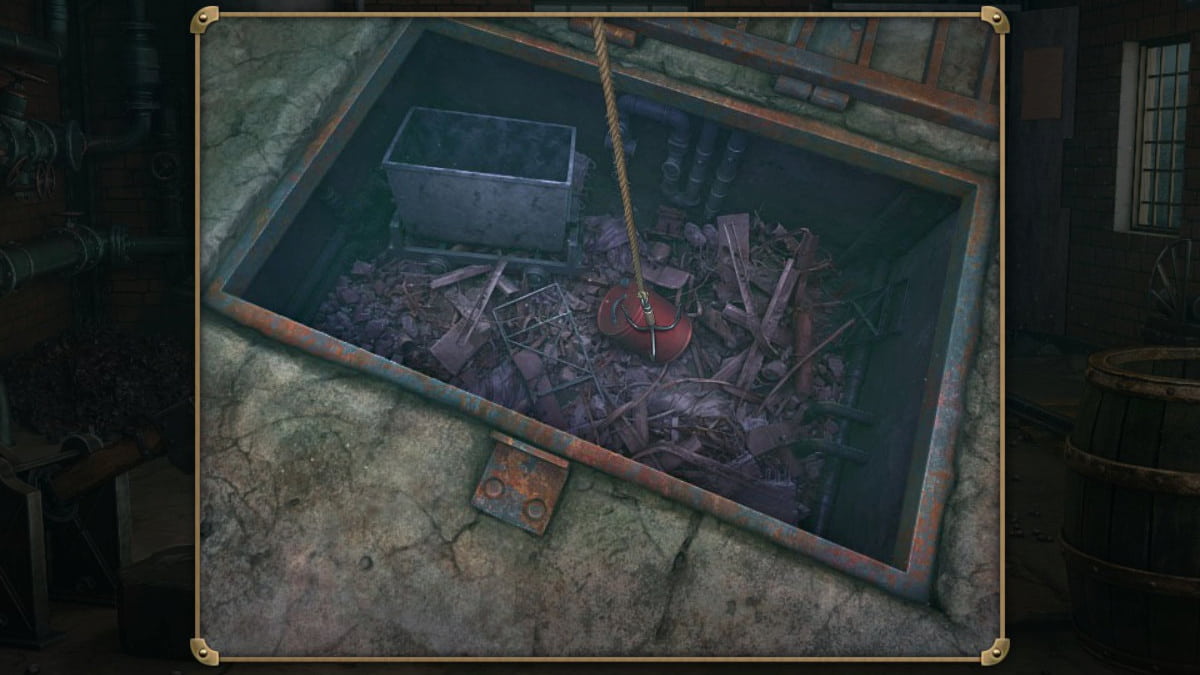
Image by Pro Game Guides
Image by Pro Game Guides
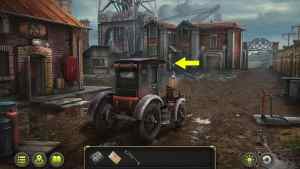
Image by Pro Game Guides
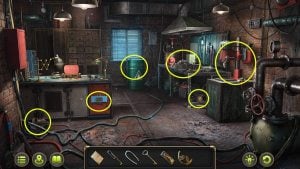
Image by Pro Game Guides
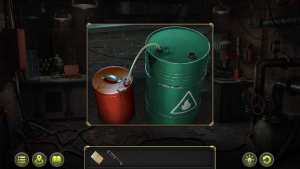
Image by Pro Game Guides
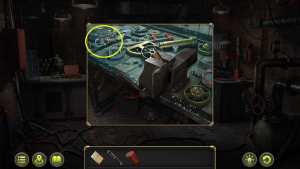
Image by Pro Game Guides
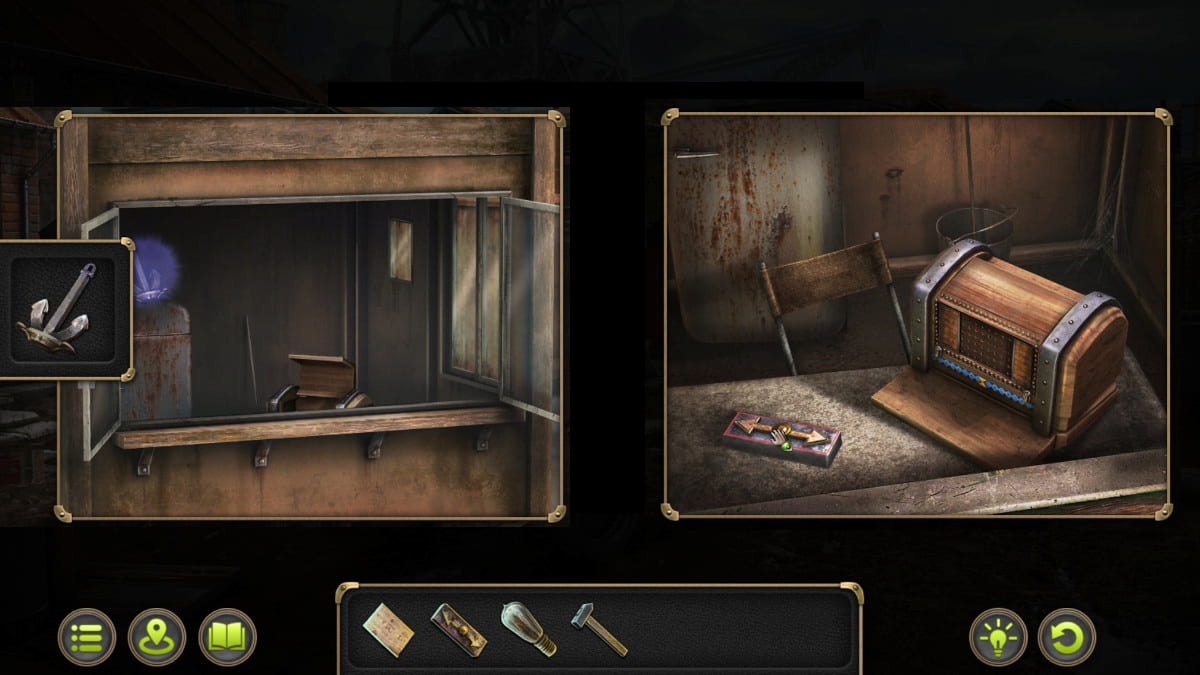
Image by Pro Game Guides
Screenshot by Pro Game Guides

Image by Pro Game Guides
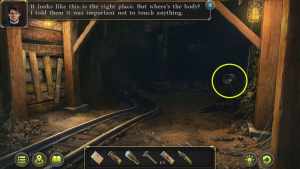
Image by Pro Game Guides
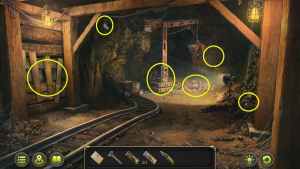
Image by Pro Game Guides
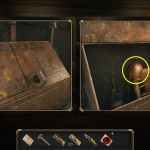
Image by Pro Game Guides
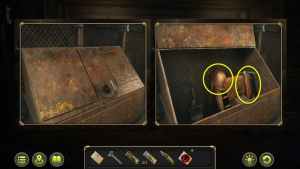
Image by Pro Game Guides
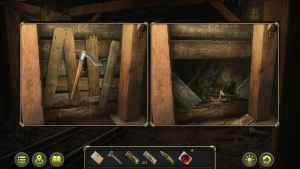
Image by Pro Game Guides
Screenshot by Pro Game Guides
Image by Pro Game Guides
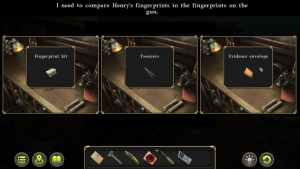
Image by Pro Game Guides
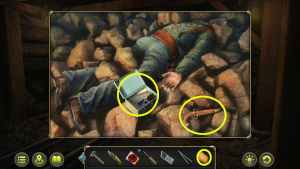
Image by Pro Game Guides
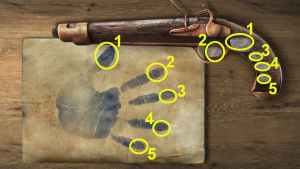
Image by Pro Game Guides
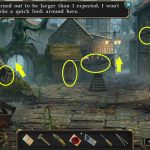
Image by Pro Game Guides
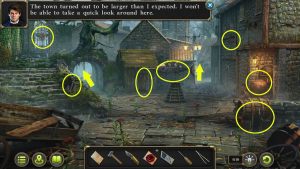
Image by Pro Game Guides
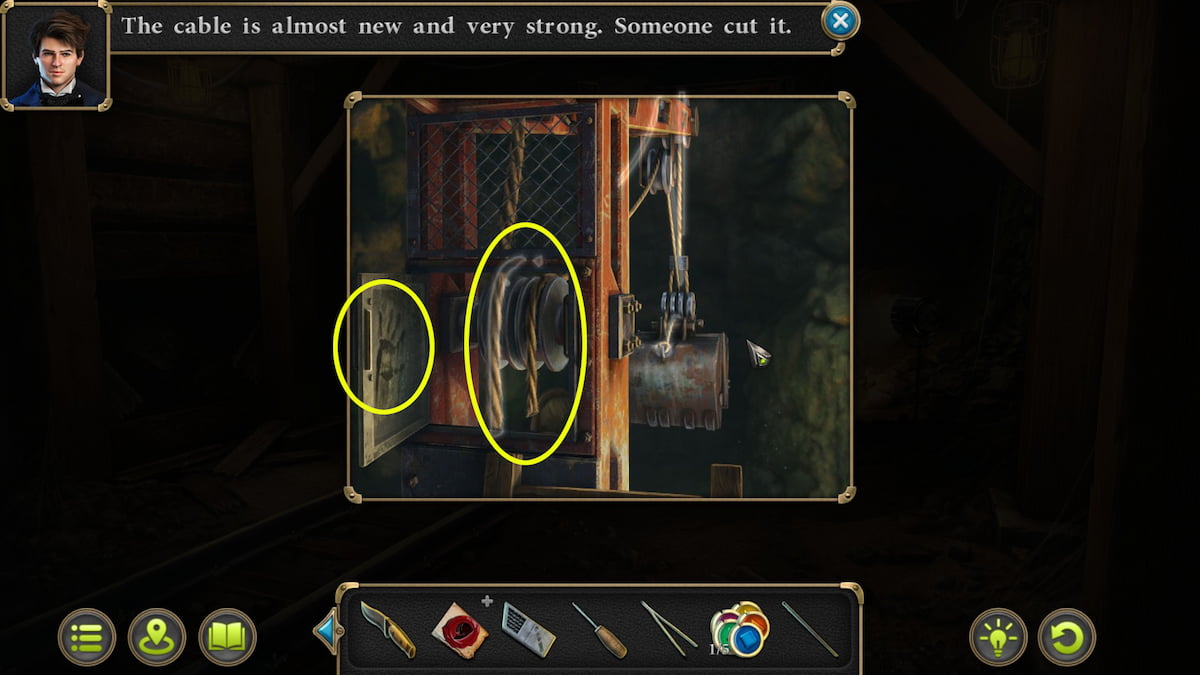
Image by Pro Game Guides
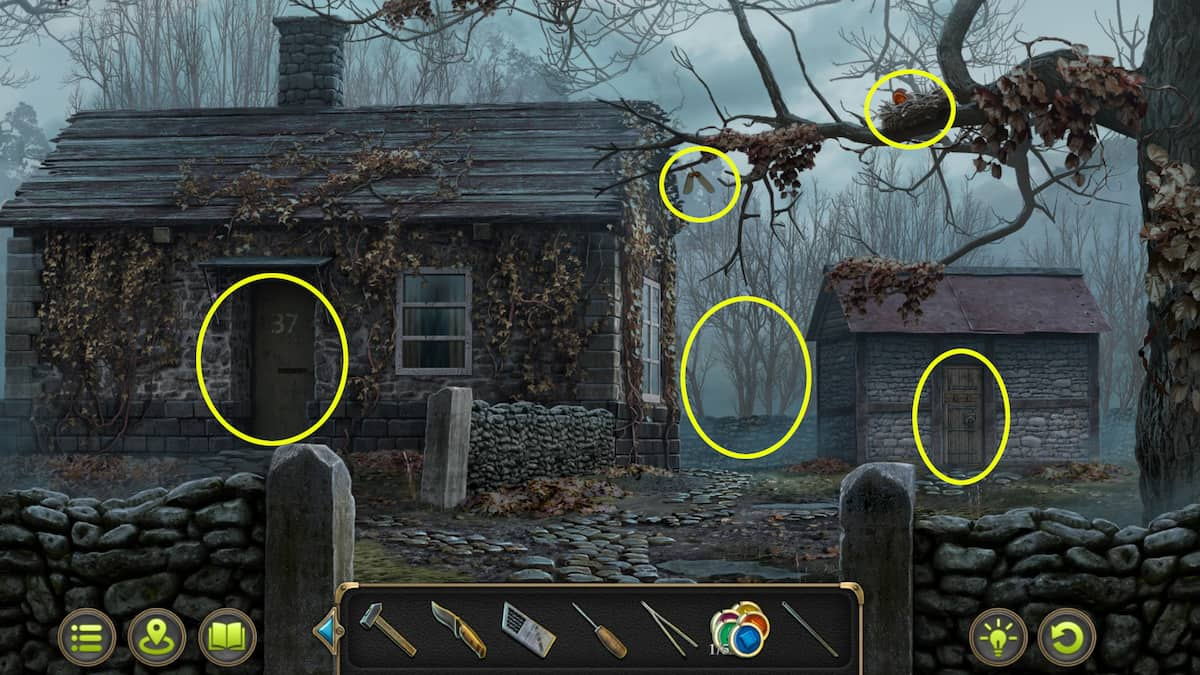
Image by Pro Game Guides
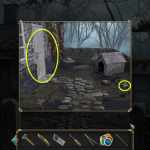
Image by Pro Game Guides
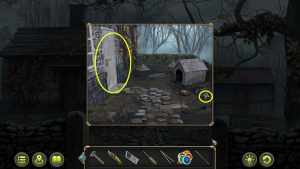
Image by Pro Game Guides
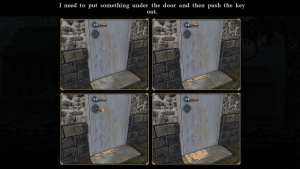
Image by Pro Game Guides
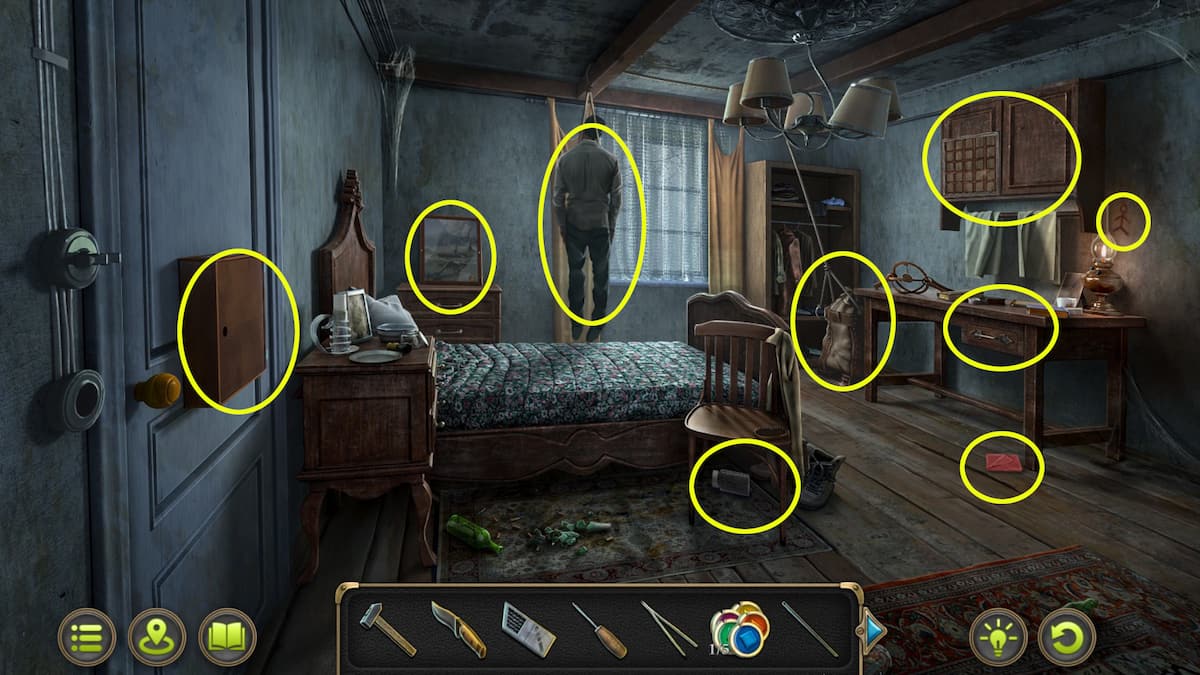
Image by Pro Game Guides
Screenshot by Pro Game Guides
Screenshot by Pro Game Guides

Screenshot by Pro Game Guides
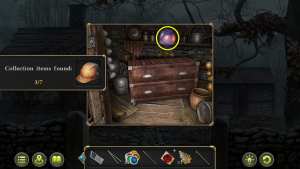
Image by Pro Game Guides

Screenshot by Pro Game Guides

Screenshot by Pro Game Guides
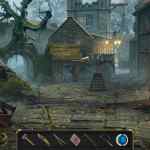
Image by Pro Game Guides
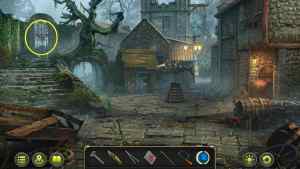
Image by Pro Game Guides
Screenshot by Pro Game Guides
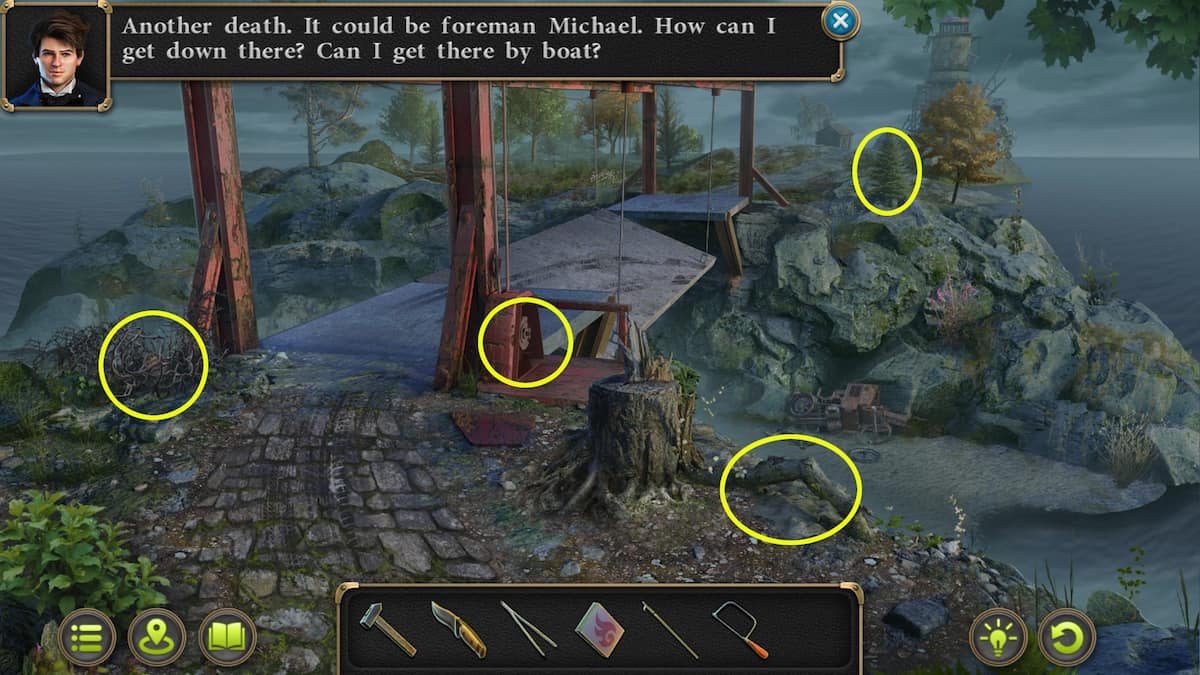
Image by Pro Game Guides
Image by Pro Game Guides
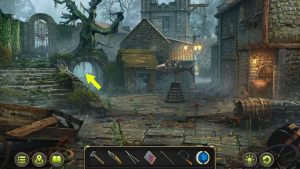
Image by Pro Game Guides
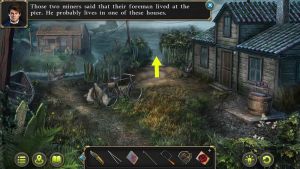
Image by Pro Game Guides
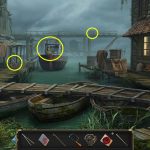
Image by Pro Game Guides

Image by Pro Game Guides
Screenshot by Pro Game Guides
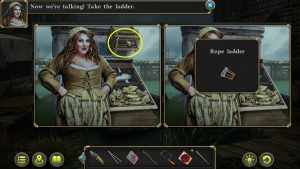
Image by Pro Game Guides
Screenshot by Pro Game Guides

Image by Pro Game Guides
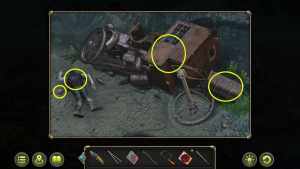
Image by Pro Game Guides
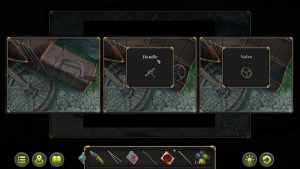
Image by Pro Game Guides
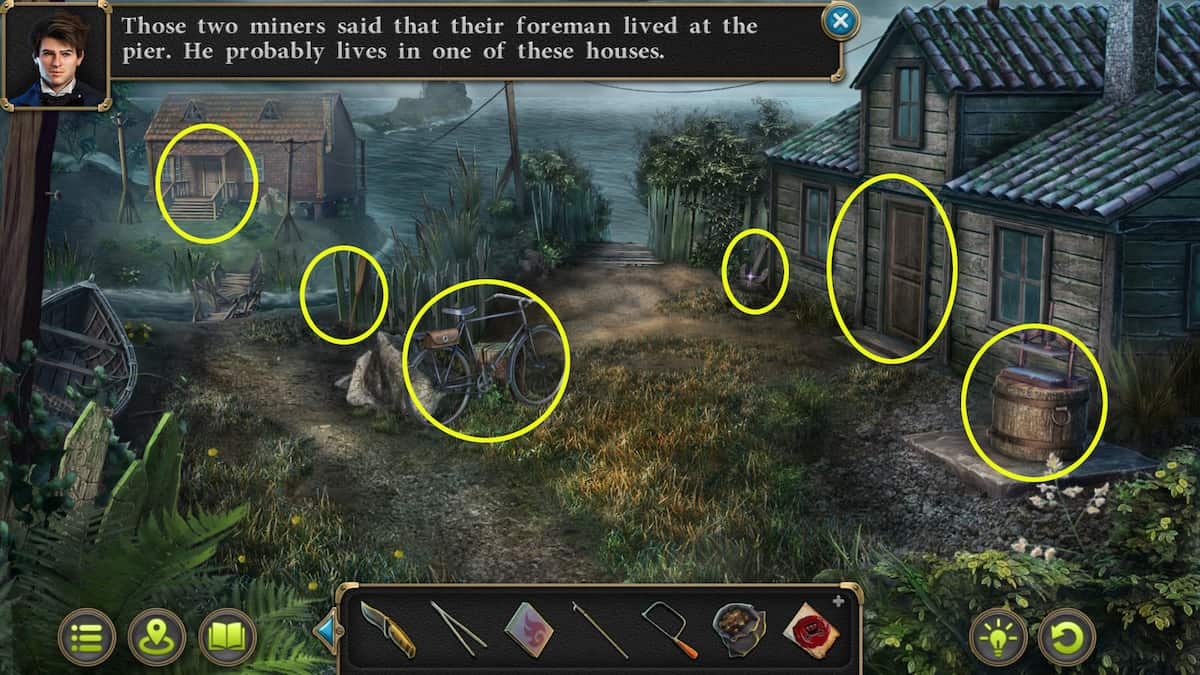
Image by Pro Game Guides
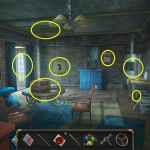
Image by Pro Game Guides
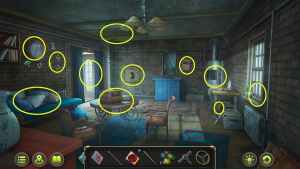
Image by Pro Game Guides
Screenshot by Pro Game Guides
Screenshot by Pro Game Guides
Image by Pro Game Guides
Image by Pro Game Guides
Screenshot by Pro Game Guides

Screenshot by Pro Game Guides
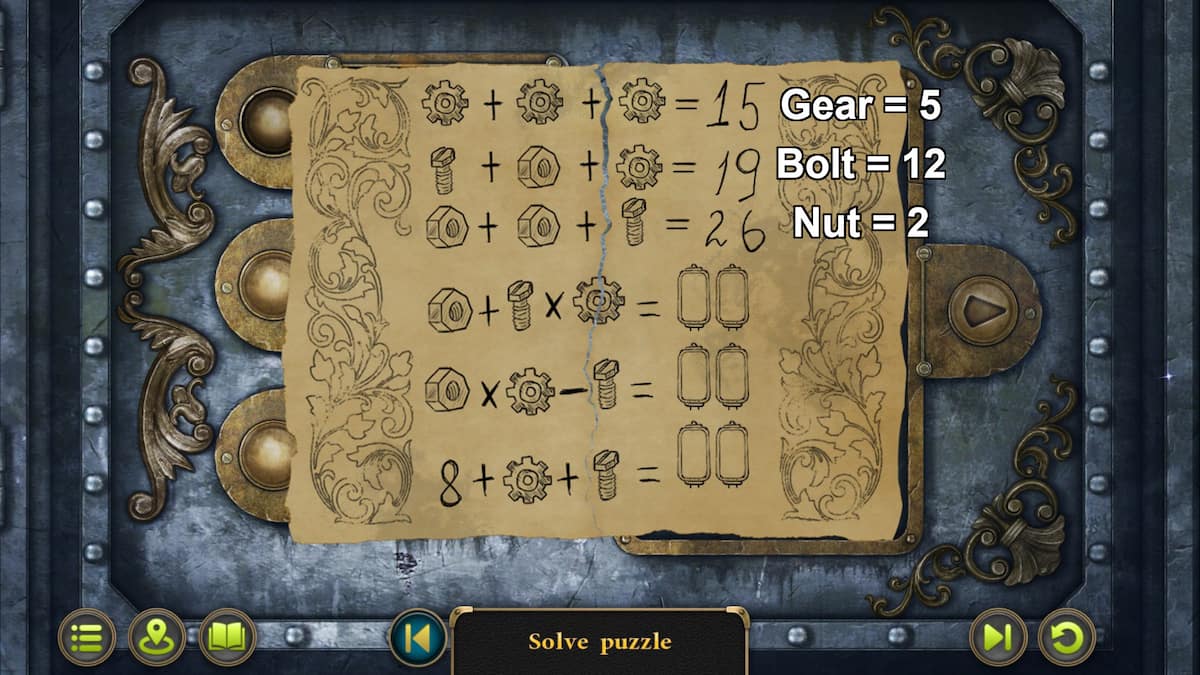
Image by Pro Game Guides
Screenshot by Pro Game Guides
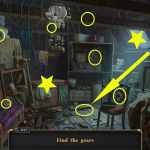
Image by Pro Game Guides
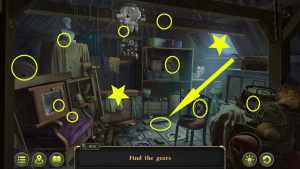
Image by Pro Game Guides

Image by Pro Game Guides
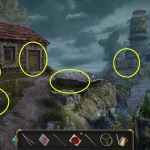
Image by Pro Game Guides
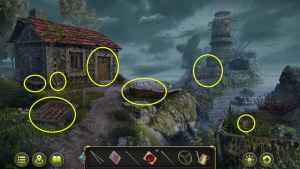
Image by Pro Game Guides
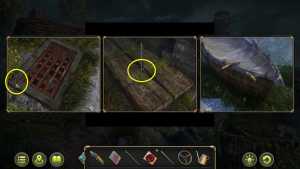
Image by Pro Game Guides
Image by Pro Game Guides
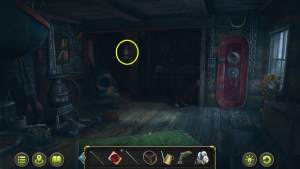
Image by Pro Game Guides
Screenshot by Pro Game Guides
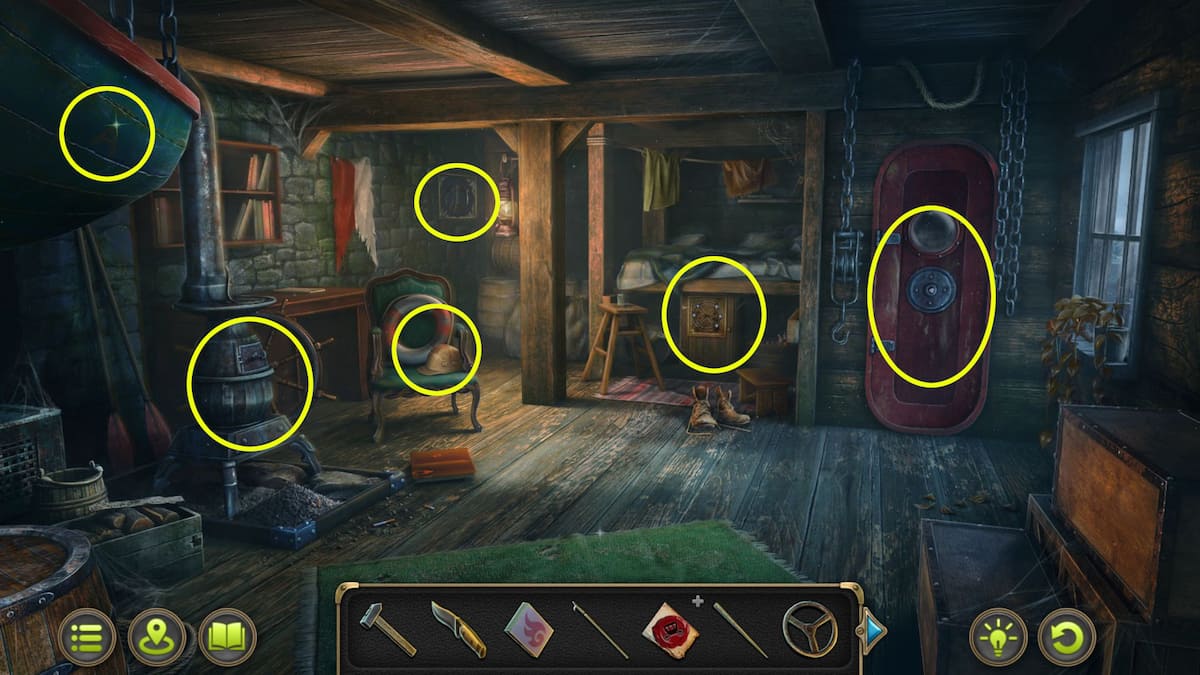
Image by Pro Game Guides
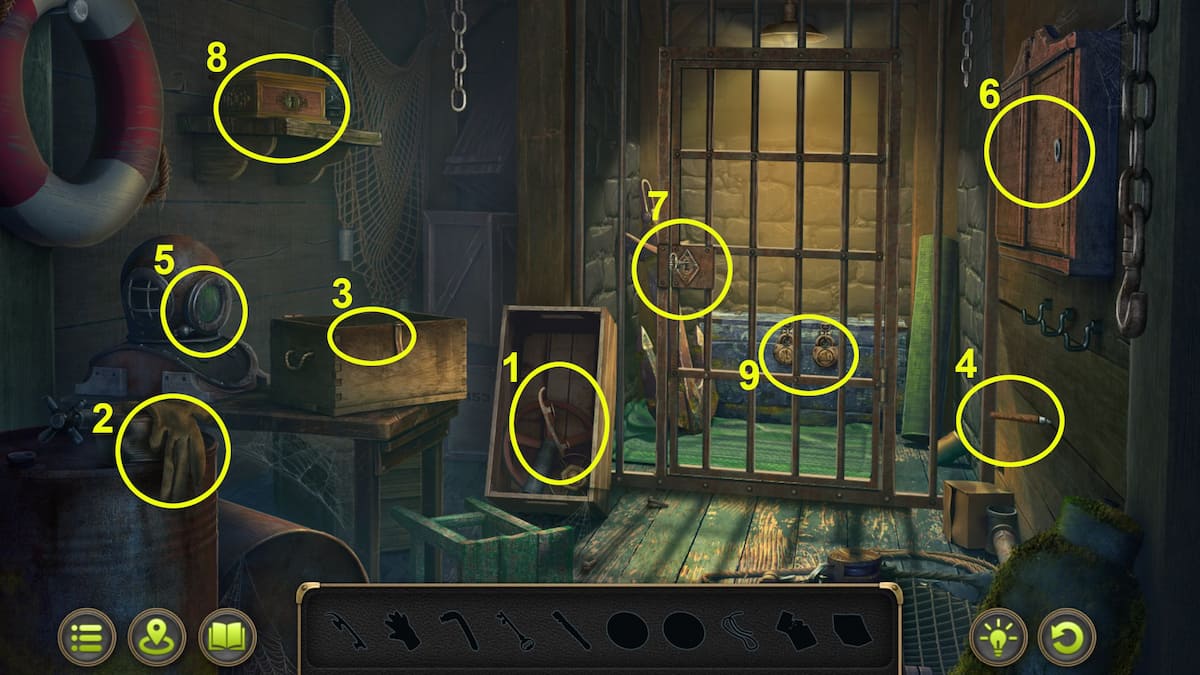
Image by Pro Game Guides
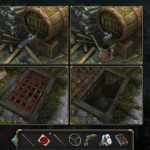
Image by Pro Game Guides
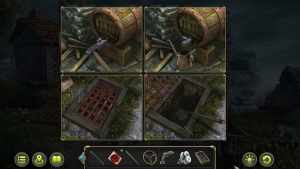
Image by Pro Game Guides
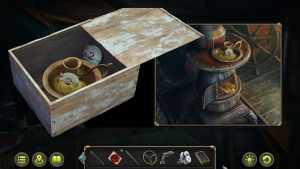
Image by Pro Game Guides
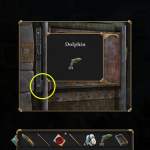
Image by Pro Game Guides
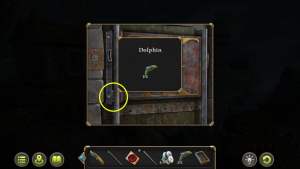
Image by Pro Game Guides
Screenshot by Pro Game Guides
Screenshot by Pro Game Guides
Screenshot by Pro Game Guides
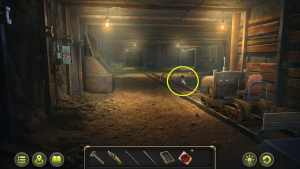
Image by Pro Game Guides
Screenshot by Pro Game Guides
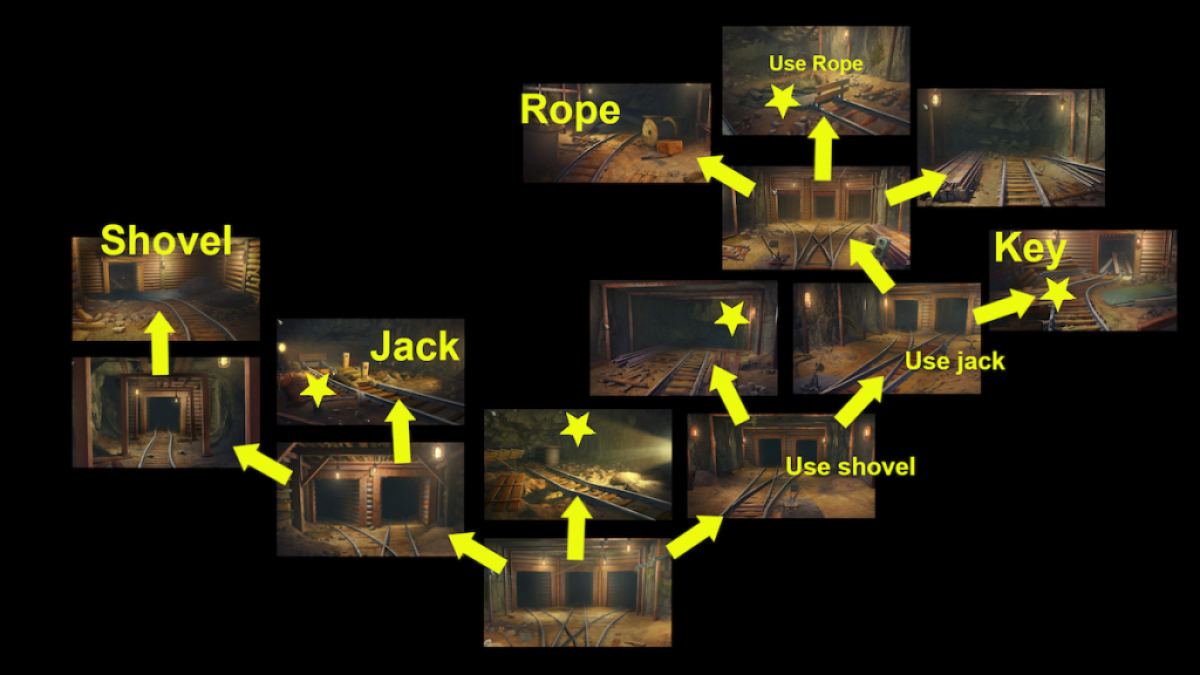
Image by Pro Game Guides
Screenshot by Pro Game Guides
Screenshot by Pro Game Guides
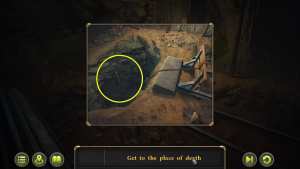
Image by Pro Game Guides
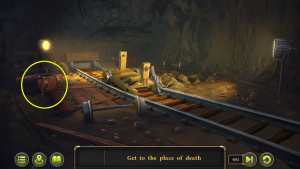
Image by Pro Game Guides
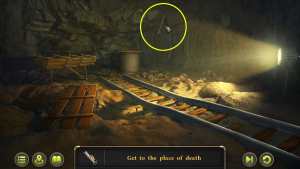
Image by Pro Game Guides
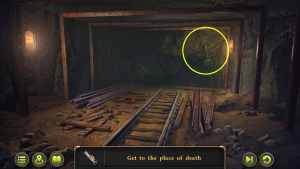
Image by Pro Game Guides
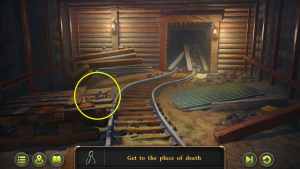
Image by Pro Game Guides
Screenshot by Pro Game Guides
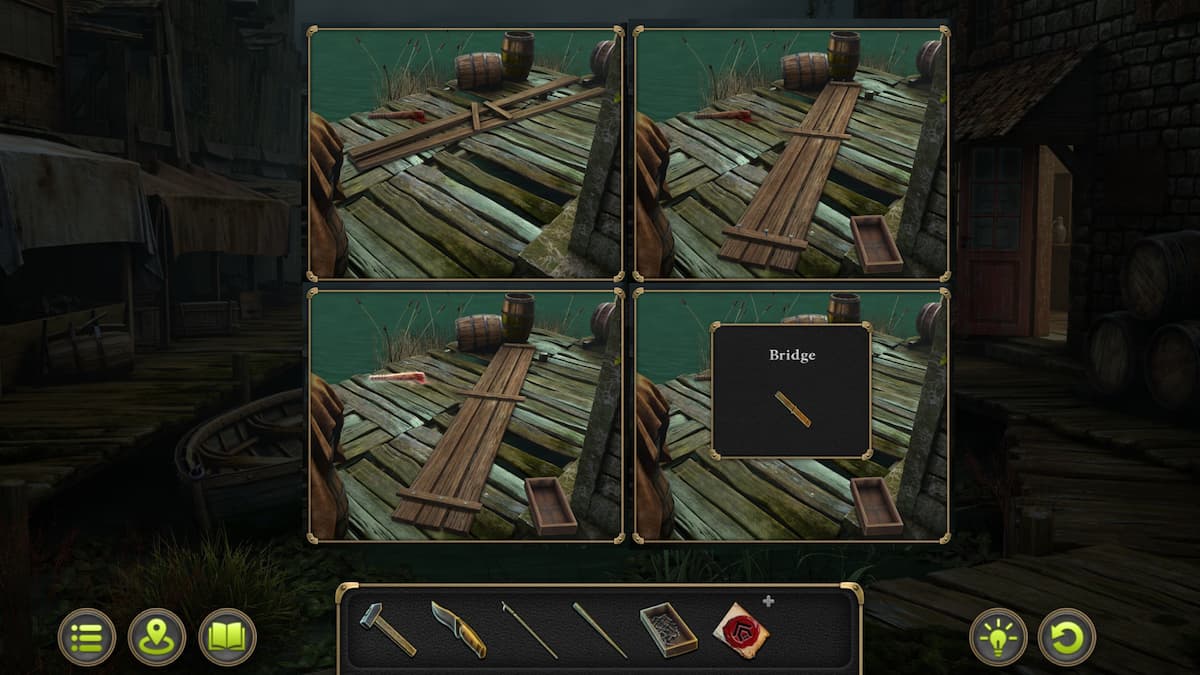
Image by Pro Game Guides
Screenshot by Pro Game Guides
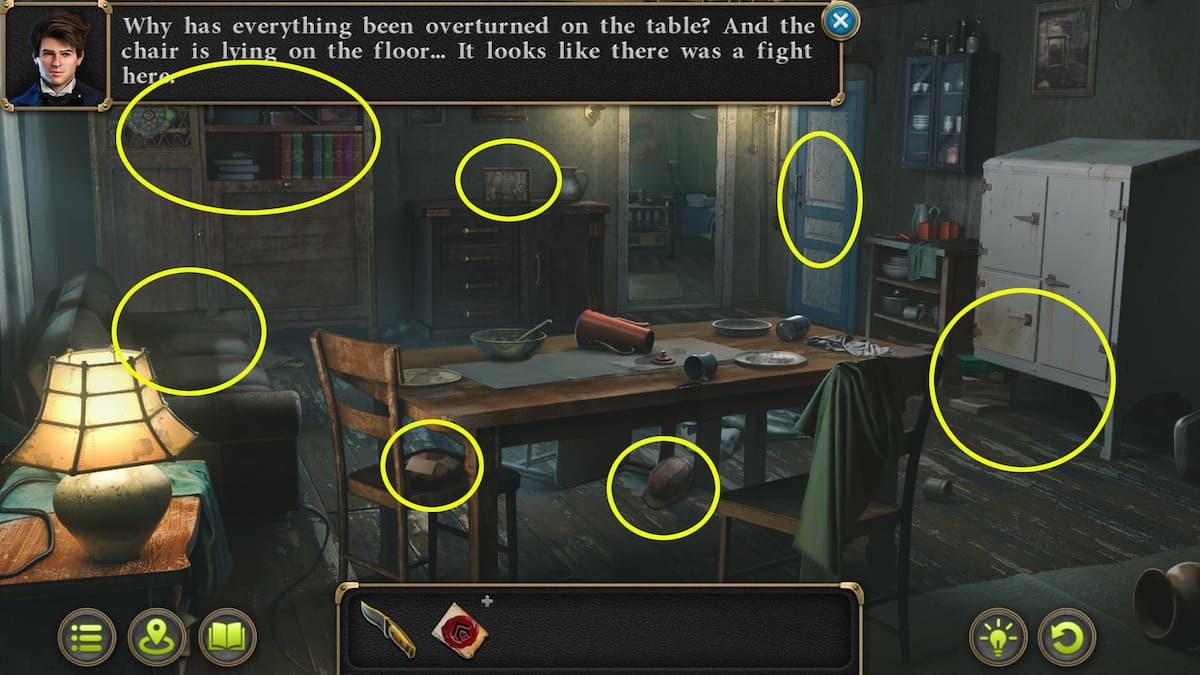
Image by Pro Game Guides
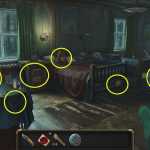
Image by Pro Game Guides
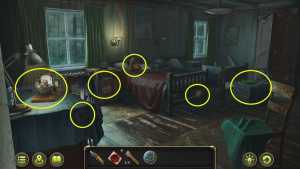
Image by Pro Game Guides
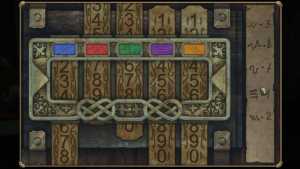
Image by Pro Game Guides
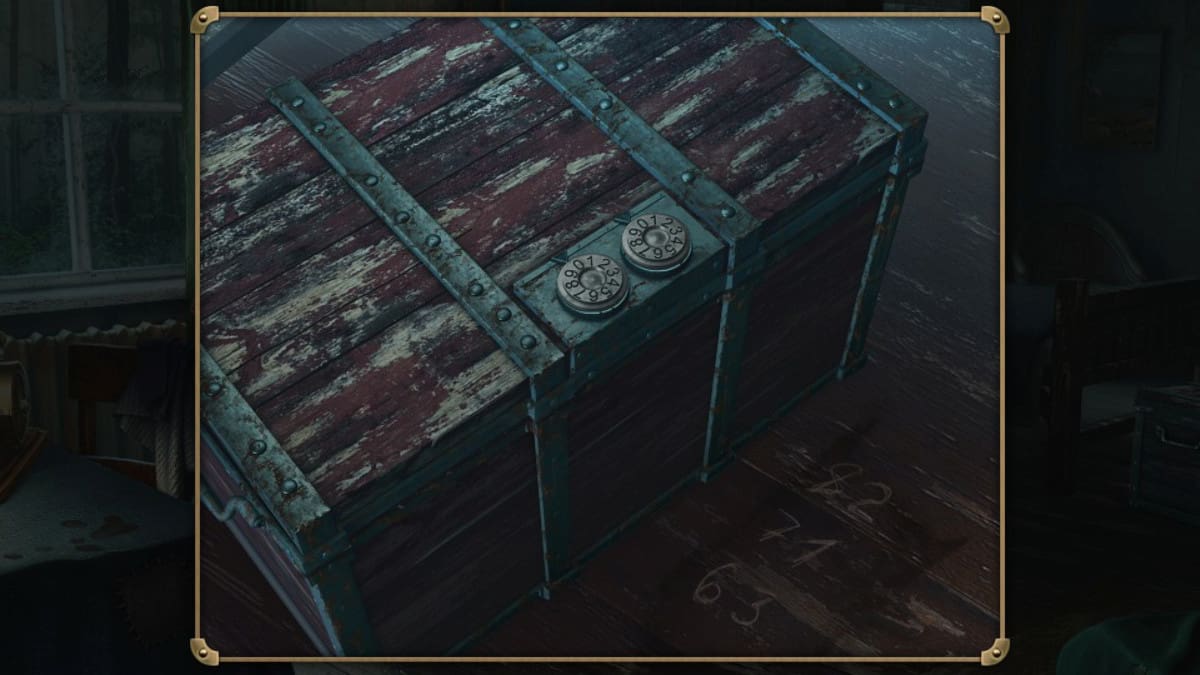
Image by Pro Game Guides
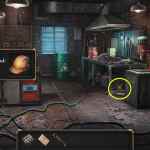
Image by Pro Game Guides
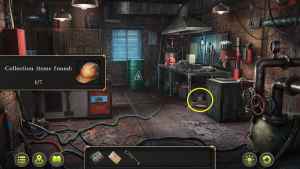
Image by Pro Game Guides
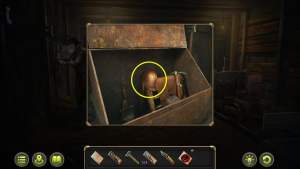
Image by Pro Game Guides
Image by Pro Game Guides

Image by Pro Game Guides
Image by Pro Game Guides

Image by Pro Game Guides
Screenshot by Pro Game Guides
Screenshot by Pro Game Guides
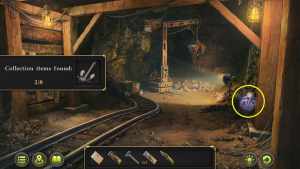
Image by Pro Game Guides
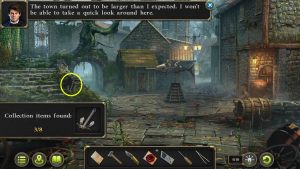
Image by Pro Game Guides
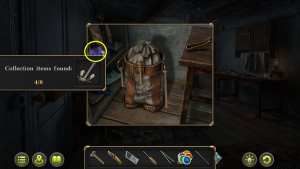
Image by Pro Game Guides
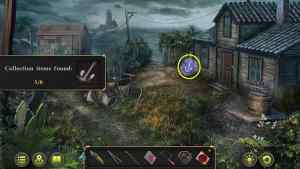
Image by Pro Game Guides
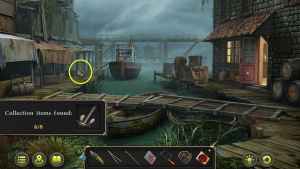
Image by Pro Game Guides
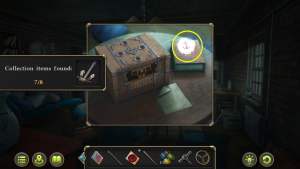
Image by Pro Game Guides
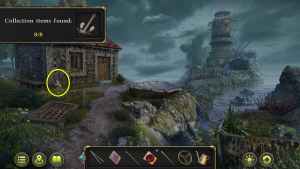
Image by Pro Game Guides
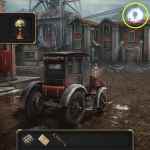
Image by Pro Game Guides
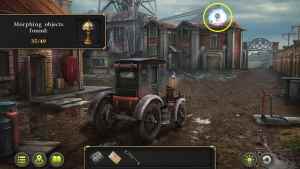
Image by Pro Game Guides

Image by Pro Game Guides

Image by Pro Game Guides
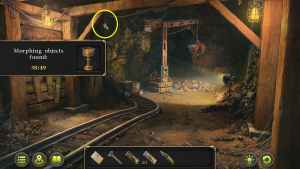
Image by Pro Game Guides

Image by Pro Game Guides
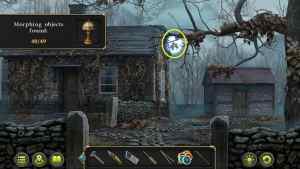
Image by Pro Game Guides
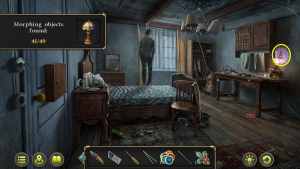
Image by Pro Game Guides
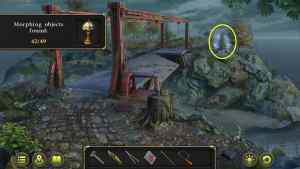
Image by Pro Game Guides
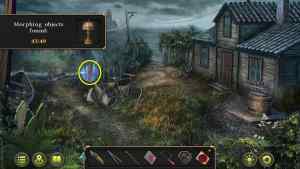
Image by Pro Game Guides
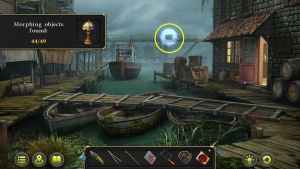
Image by Pro Game Guides
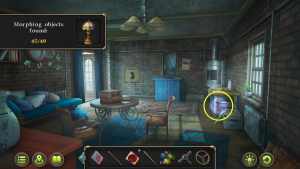
Image by Pro Game Guides
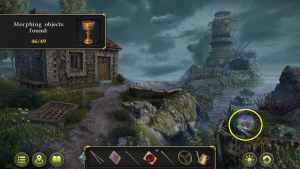
Image by Pro Game Guides
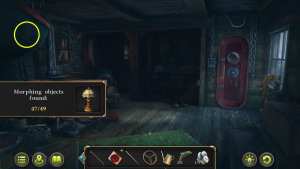
Image by Pro Game Guides
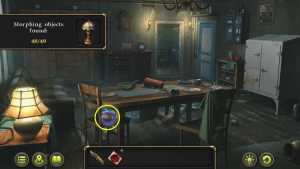
Image by Pro Game Guides
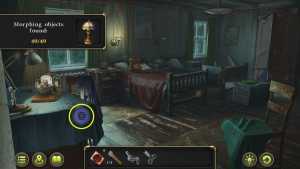
Image by Pro Game Guides
