" Hell is empty , and all the Devils are here . " - Rambley the Racoon ( Citation needed )
For whatever reasonableness , indie horror darlings limit in theme park with brute motifs seem to haunt me now , after my Erolia minutilla in the brilliant Crow Country , which we also covered with afull walkthrough ! Not that I ’m complaining , mind you .
Indigo Park Chapter 1 relinquish on May 18th , and seems to have win marrow and psyche fairly chop-chop , so if you ’re here from this newfangled wave of discernment but have base yourself stuck on a particular section , we ’ve catch you comprehend with our walkthrough .

Indigo Park Chapter 1 Walkthrough - Birds of a Feather
Right out the gate , we ’ll be met with some dark-skinned and eery surroundings and a braggart gate straight in the lead . This gate is closed off to us , so rather , head towards the rightfield to access a ' Ranglers Only ' room access . There ’s acollectableon some boxes nearby so verify to break up that up .
Head on through the Ranglers Only door and you ’ll see that a TV will twist on , before a ( really well animated ) racoon introduces you to the park , and take a firm stand that you get registered . Once he ’s done , maneuver to the back of the room with the desk and interact with the president .
Now you ’ll require to head back out and towards the main gate you consider right on at the head start . Get close to the concealment at the remaining side of the main gate to muster up the savage once more , and he ’ll inform you that the logic gate is undefended .

Screenshot by Pro Game Guides
The brute lies , and presently inform you that you must go on an extra special one - off dangerous undertaking to turn on thegenerator ; a far cry from the comically bombastic Republic of Turkey leg and funnel cake I had in nous . There ’s anothercollectablenext to the principal logic gate here on the right side , so make certain to pick it up .
Head back toward the Ranglers Only door , and you ’ll see a doorway has opened . maneuver on in , and you ’ll find out that the generator is missing a musical composition . There ’s acollectableon the right of the door as soon as you head in , so grab that whilst you ’re here and then simply turn around and go back into the former room to find themissing cogplaced on a corner .
Return the missing cog to the source , and then interact with the lever tumbler to the right hand before heading back to the master logic gate .

Image by Pro Game Guides | Rangler door and collectable
direct frontward until ' Rambley ' ( I do n’t trust him ) talk again , and he ’ll let you sleep with that in Holy Order to have charges the right way allocate to your room ( and go in the common ) , you ’ll need a ' Critter Cuff ' . This will open up up the giving shop for you , and you’re able to head straight to the counter at the back to receive your shackle .
When you go to manoeuver back out , the room access will lock , sointeract with the sensoron the rightfield to unlock it with your new cuff .
When you leave , steer straight on before go on into the park to grab anothercollectable , seen in the 5th simulacrum below .

Screenshot by Pro Game Guides
1a - Gift Shop/1b - Main Gate/1c - Collectable
With all that done , continue on into the next area , and head up veracious for the big archway towards the back right hand , which will take you to a fresh area before go away you ensnare behind some debris .
Indigo Park Rambley’s Railroad & Plaza Walkthrough
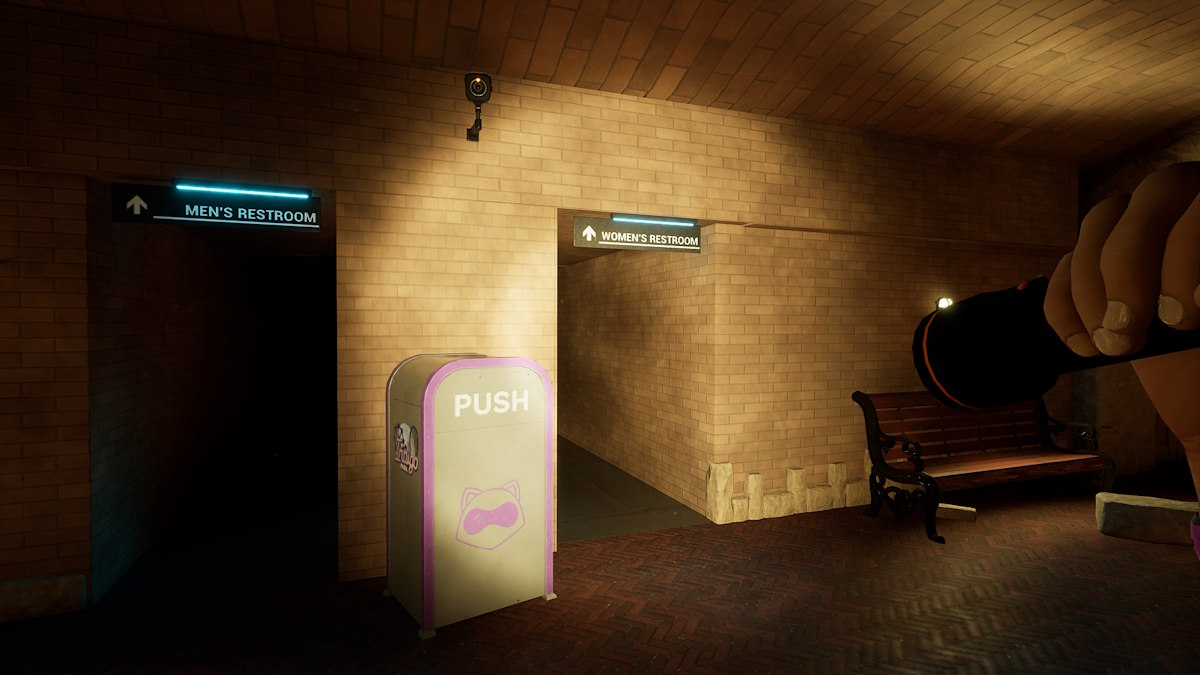
Directly on your left as you total into this new area you ’ll see the bathrooms , fountainhead into thewomen ’s restroomand check the right side as you enter for anothercollectable .
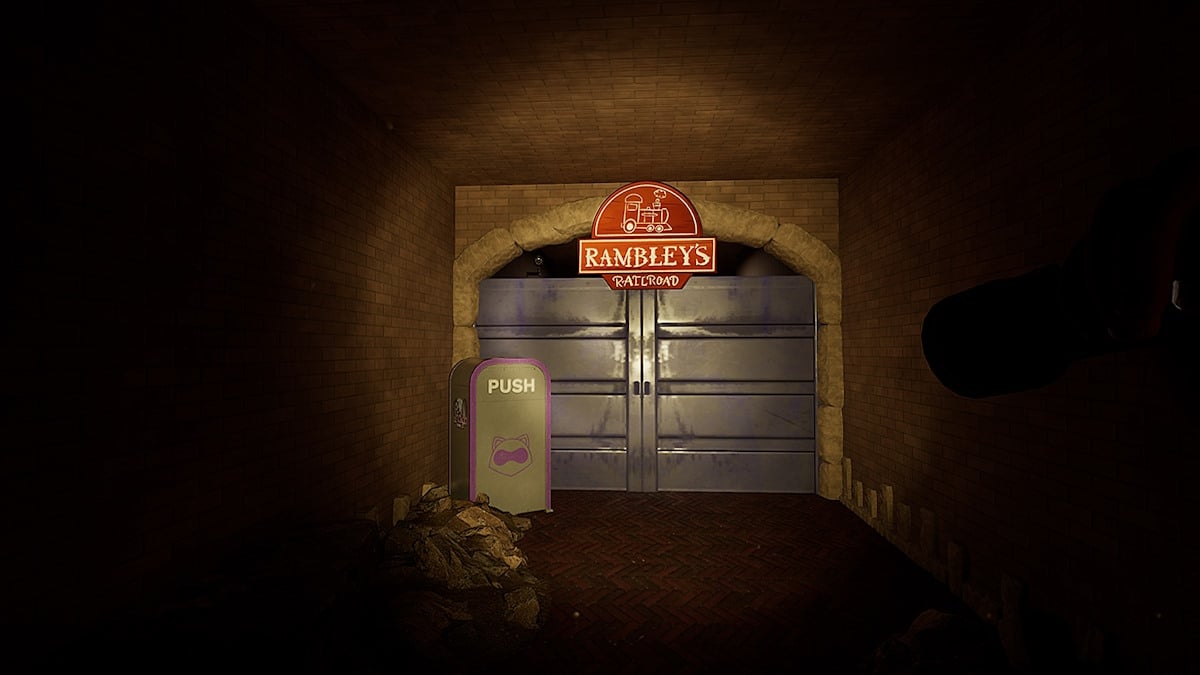
Continue on until Rambley retrovert to apologize for the parking lot being in disarray ; he ’ll even propose you a discount of ' innocent ' before doubting your ability to retrieve a massive set of room access . Head through the tunnel to the rightfulness , just behind the screen where Rambley was , and enter Rambley ’s railway .
Head through the empty queue area , trying not to noticesomething darting around a corner , with what look to be some rather bright plume . Rambley will verbalise his love for trains as you get along , though I doubt he is qualified to control a locomotive . When you finally reach the wagon train , interact with thecarriage .

Screenshot by Pro Game Guides
We will then be take through the ride and introduced to more characters , like ' Mollie Macaw ' and ' Finley ' . Mollie Macaw also appear to be function an industrial vehicle without a license , and expresses joyfulness at causing massive dimension scathe . Finley will say perhapsthemost questionable thing I ’ve ever hear , and finally we ’ll be take to a tip in which the ride ceases to function , before being tasked with get it up and carry again .
1a - Cog/1b - Cog/1c - Collectable
Head through the door towards the rightfulness and traverse the corridors . You ’ll come to another room with the machine you need to repair , which requirestwo cogs . Both sprocket are in the room , along with acollectablebehind the boxes you first see when you infix .

Screenshot by Pro Game Guides | Registration desk
Place both cogs in the machine , and head back to the gearing . The train will take off again , and we ’ll meet ' Lloyd ' , someone who Rambley is certainly not a rooter of . This will take us to the remainder of our string journey , and we ’ll get to see all of those lovely drive word picture . ( Only one of them has a beast in it ! )
Continuing on , we ’ll embark a largeplazaarea . Head toward theCaféyou can see in the second image , and go at bottom to grab thecollectableon the counter at the back . Once you ’ve got it , continue heading down the main street .
Rambley will seem on aninformation kiosk , which we can use to get some details about any collectables we might have clean up . Directly across from the information kiosk is an loose doorway to adiner , guide on in to find anothercollectableon one of the table .

Screenshot by Pro Game Guides
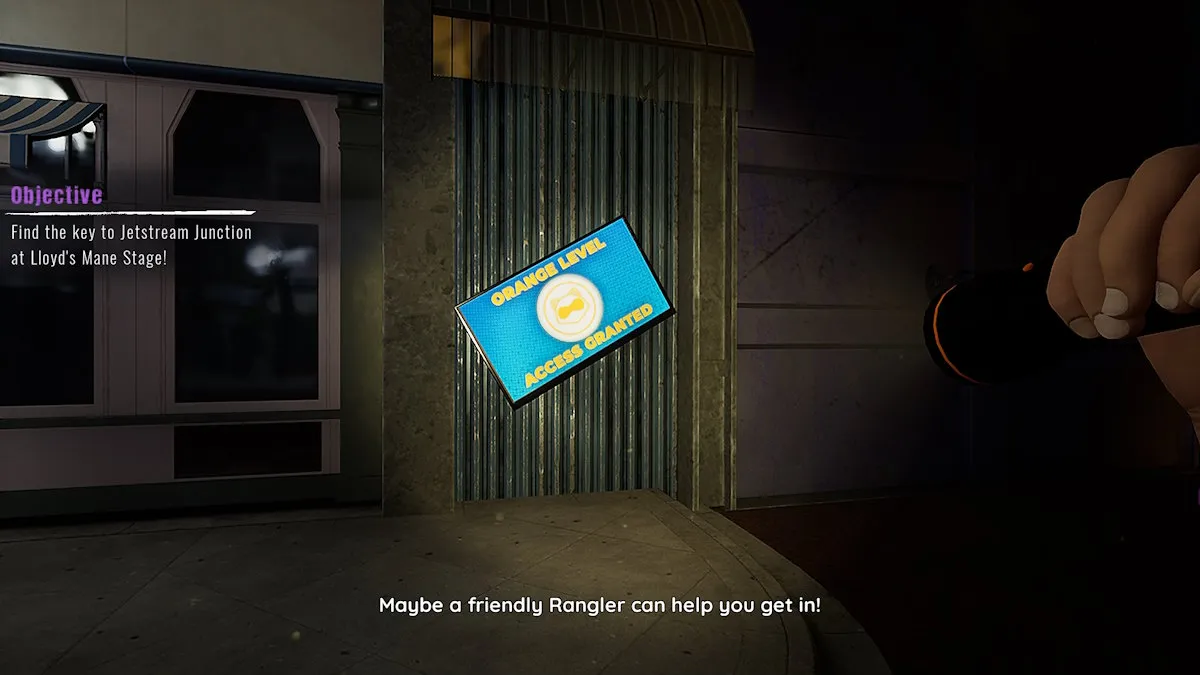
Continue down the main street until you reach a large set of locked doorway leading to another ride . Rambley will come out and tell apart us to head to thetheatre , which is to the left of the big fountain back - a - ways ( right if you ’re head from the gift workshop of the Rambley ’s Railroad ) . Rambley will grant us ' Orange Level Access ' so that we can enter and obtain a helpful Rangler to let us in to Jetstream Junction .
Indigo Park Lloyd’s Theatre Walkthrough
Interact with thesensoron the right field of the theater door to gain entree , and you ’ll load in to the theatre .
channelise towards thestage , and watch out as what appears at first to be a really deadened and really animatronic lion quick becomes a really not dead , really not animatronic Leo the Lion . channelize up the stairs to either side of the stage , and walk on until Rambley appear once more to inform us that he ca n’t see back there , so caution is advised .
head up through theRanglers Only doorat the back right of the stage , and channelize into the storage orbit in the back . This department is middling linear , butbe preparedfor a creep or two , as that aforementioned not dead lion scout from a length , and even charges you at one spot .

Screenshot by Pro Game Guides | Collectable on the right
You simply demand to continue on , heading towards the back of the memory board area to make thesecurity officeand snap thekeysneeded for the other drive back in the Plaza .
Once you ’ve grabbed the keys , high tail it all the way back to the entering . The door will be shut , so interact with thesensorto open up it before being jumped byLloyd . ( Who will strangely back off , almost as if he ’s in pain . )
You ’ll seeMollieagain , but she wo n’t stop you from run all the agency back to the entrance to the dramatic art . But at least now we have the headstone to the next area : Jetstream Junction .

Image by Pro Game Guides | Collectable on the right
Indigo Park Jetstream Junction Walkthrough
Head back through the plaza and toward the door in which you got the Orange Level Access from Rambley , and interact with the large padlock .
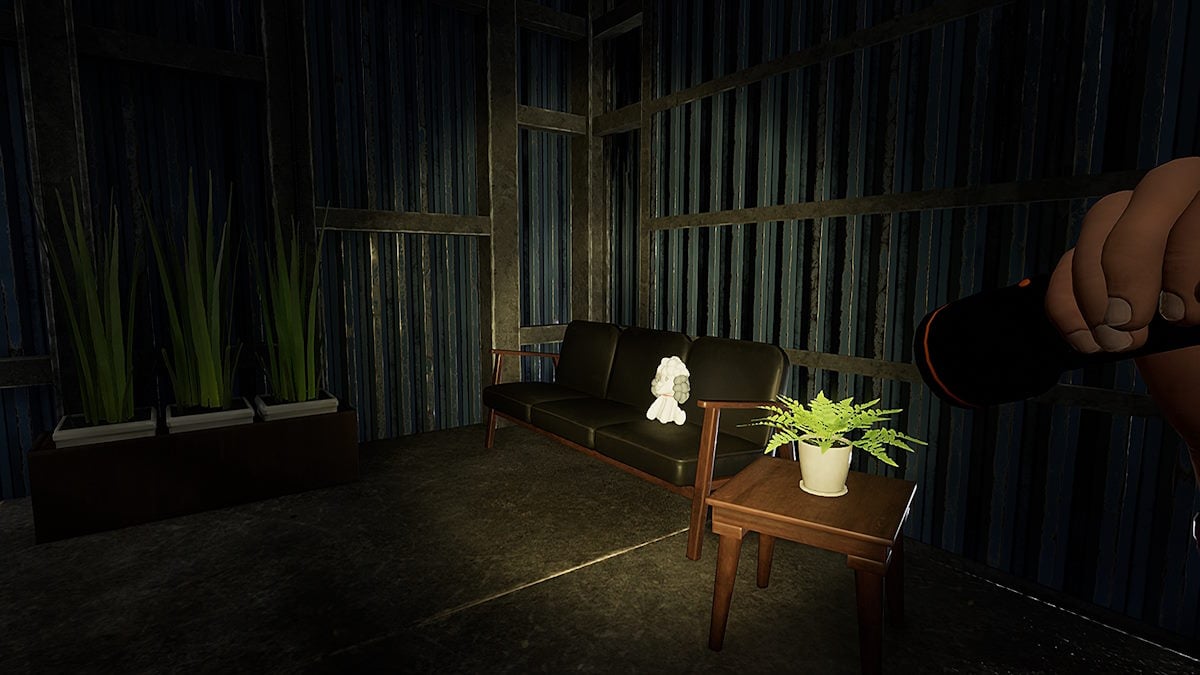
Upon get in Jetstream Junction , Rambley will render to tell us that we might want to look at doing Mollie ’s Rooftop Races before taking on any of the bigger rides . But before we even do that , there ’s anothercollectablewe can get , only this one is slightly more involved .
Head into the elbow room at the back of the country as point out in the 2d image , and interact with the arcade auto to begin a little minigame . It ’s your typical platformer rodeo where you jump on heads to do equipment casualty and collect hoot .

Screenshot by Pro Game Guides | Collectable in generator room
There ’s even a boss scrap of sorting at the final stage , in which we ’re introduced to ' Salem ' , a gage who is clearly the opponent to our … heroes ? Then again , it was n’t Salem attacking an unarmed individual in the Theatre , was itLloyd?Just avoid bumping into Mollie Macaw unless it ’s a leap on the dome ' , and be deliberate of the blue … hooey . Once you ’re done , she ’ll react poorly to lose , crash the game , and you ’ll receive anothercollectableas a reward .
Head back out , and over to theRooftop Racessign . Head up the steps but before going up the steps on the right wing , lead down the other specify on the left and progress along the walk for yet anothercollectable .
1a -Collectable/1b - Rooftop race

Screenshot by Pro Game Guides | Cog outside generator room
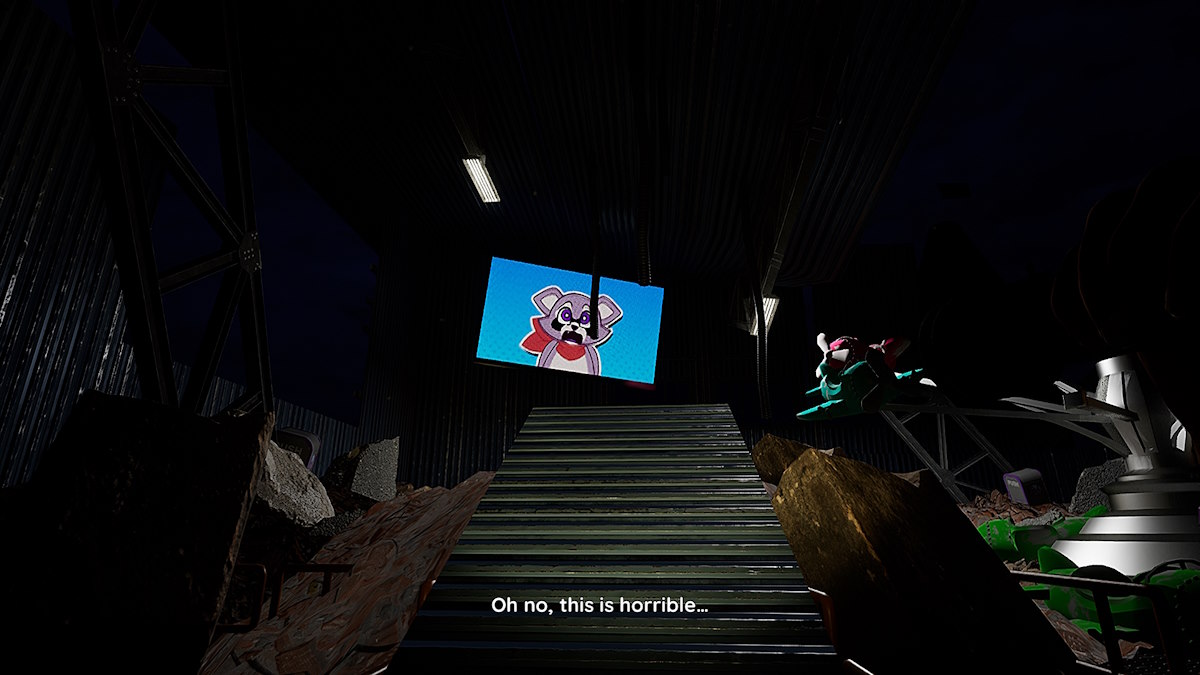
double back and keep up the step proper , and we ’ll be greeted by a disaster and Rambley once again coming to cover his own fell . He ’ll manoeuvre you back down towards theLanding Padagain .
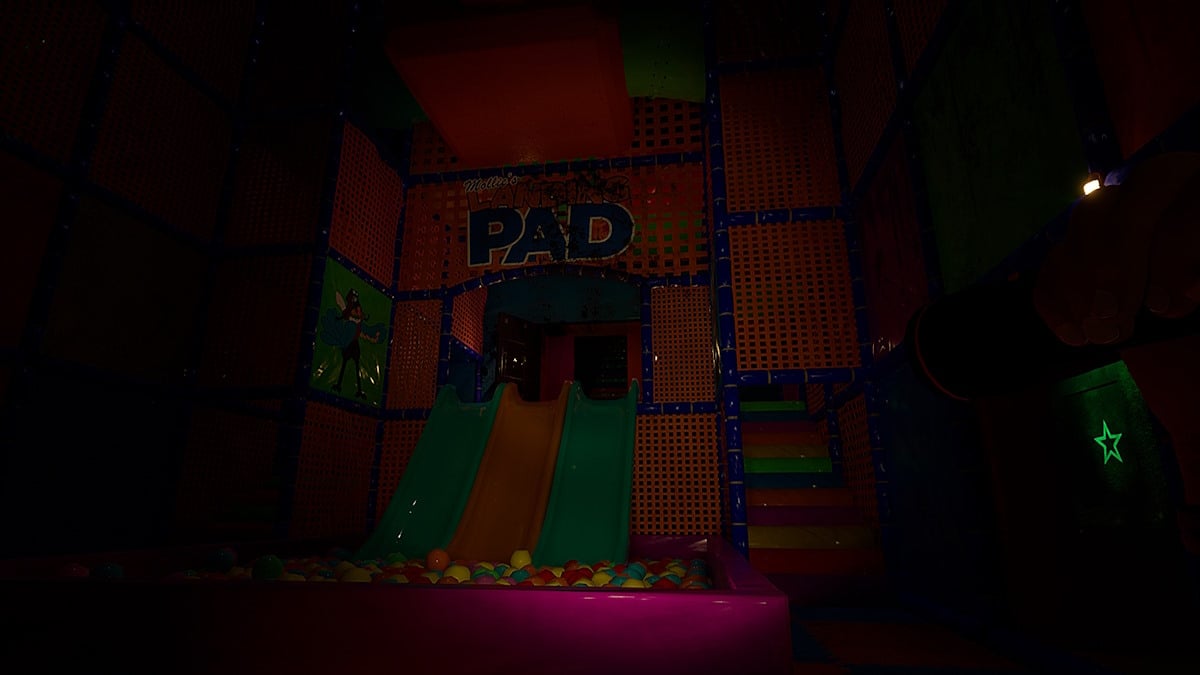
Interact with the sensor on the metallic element ray of light to the rightfulness of the doorway to enter a shipment concealment , greeting you with asoft play area . you’re able to go down the slide if you want to ( I did ) . When you ’re done , head towards the heavy purple regular hexahedron on the leftfield of the room as you enter . Interact with it until it circumvolve to thestar(which we can see painted on the wall ) and tremble as the power goes out . Progress through the largecircular doorthat just open .
As soon as we enter we can see that we are not alone , asMollie Macawis prowling .

Image by Pro Game Guides
Donotgo into the tunnel directly forward of you , and instead proceed on the way of life to the right hand . If youdodecide to go into the tunnel , here ’s a helpful gratuity : youcansprint backwards !
Upon continuing on thePROPER PATHwe’ll see another anatomy paint on the rampart over the Lucille Ball pit below — this meter ared star . Take note before running onto the trampoline ahead to get across to the other side and enter another burrow .
Upon die the burrow , we ’ll see another painted shape — agreen triangle . Keep moving , and head up some trampoline before being greeted with another objet d’art of the puzzler — ablue star .

Screenshot by Pro Game Guides
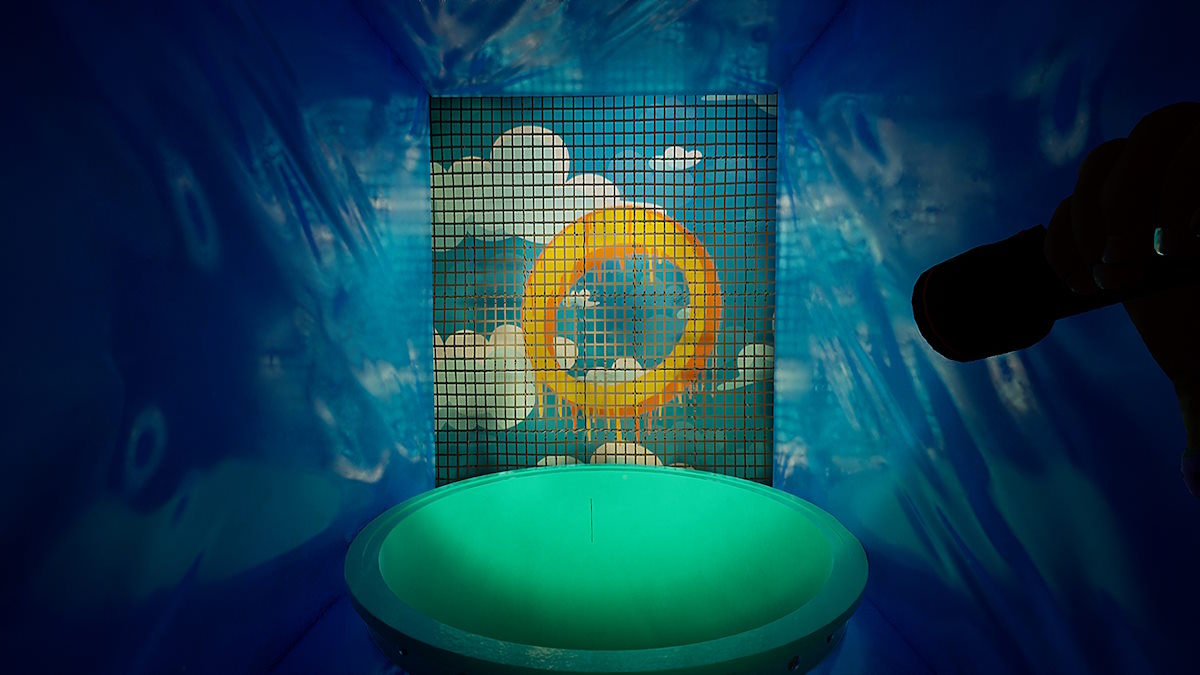
You ’ll eventually be led back to the slides area , but we ’re still missing a piece of the puzzle . So sadly , we ’ll have to go back up that tunnel I explicitly secern you not to go up to get the final objet d’art - ayellow circle .
you may now return back to the slides surface area and input the code using the blocks on the rampart ( like before with the imperial star ) . The code isRed Star - Green Triangle - Blue Star - Yellow Circle . The room access on the top of the sliding board will open , leading to the next sphere .
Head up , steer in , and go through the burrow . When you get through the load blind , walk up the raised platform to the rightfulness to interact with asensorto reach the doors ahead , andget readyas we have a chase section coming up . You ’ll uphold on before being ambushed by Mollie , and when she shows up justturn flop aroundand caput through thetunnel .

Screenshot by Pro Game Guides
Do n’t concern , you ’ve gotunlimited sprinthere ; so as long as you do n’t stop move , you ’ll be fine . The paths can watch you off safeguard , but we ’ve get you covered .
It ’s important not to bother leap in this section , as you might miss trampolines and allow Mollie to catch you , so just keep running . Be sure to seize thecollectableyou can see on the shelf in the 7th double !
When you reach the end , Mollie will be … unluckily dispense with , and Rambley will finally grant you a meagre boon of honesty before instantly turn to inflict his will of furbish up the park upon you , at which time you ’ll be made a member of faculty .

Screenshot by Pro Game Guides
Ignore Rambley ’s instruction to maneuver left in the next area at first , and continue on to grab anothercollectable .
Once you ’ve snag it , channelize back and into theRanglers Onlydoor as instructed . Keep channelize on , just a little mo , and you ’ll see one moreinformation kioskbefore being greeted with the entry toOceanic Odyssey , and sadly for now , the destruction of the game .
I hope you ’ve enjoy your least sandpiper in this ballpark fulfil with wildly incompetent animals . If you ’re looking for more flighty good , then see out ourlist of the salutary horror games of 2023 , only at Pro Game Guides .

Screenshot by Pro Game Guides | Collectable across from gift shop
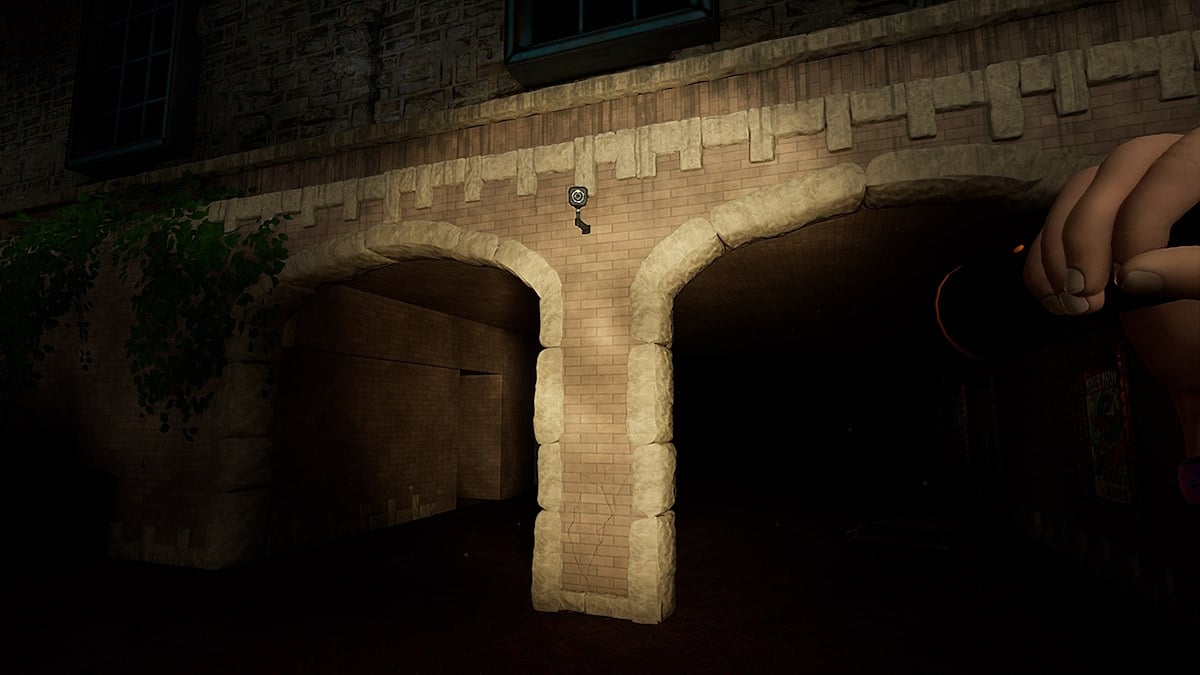
Screenshot by Pro Game Guides | Archway to Rambley’s Railroad
Screenshot by Pro Game Guides
Screenshot by Pro Game Guides
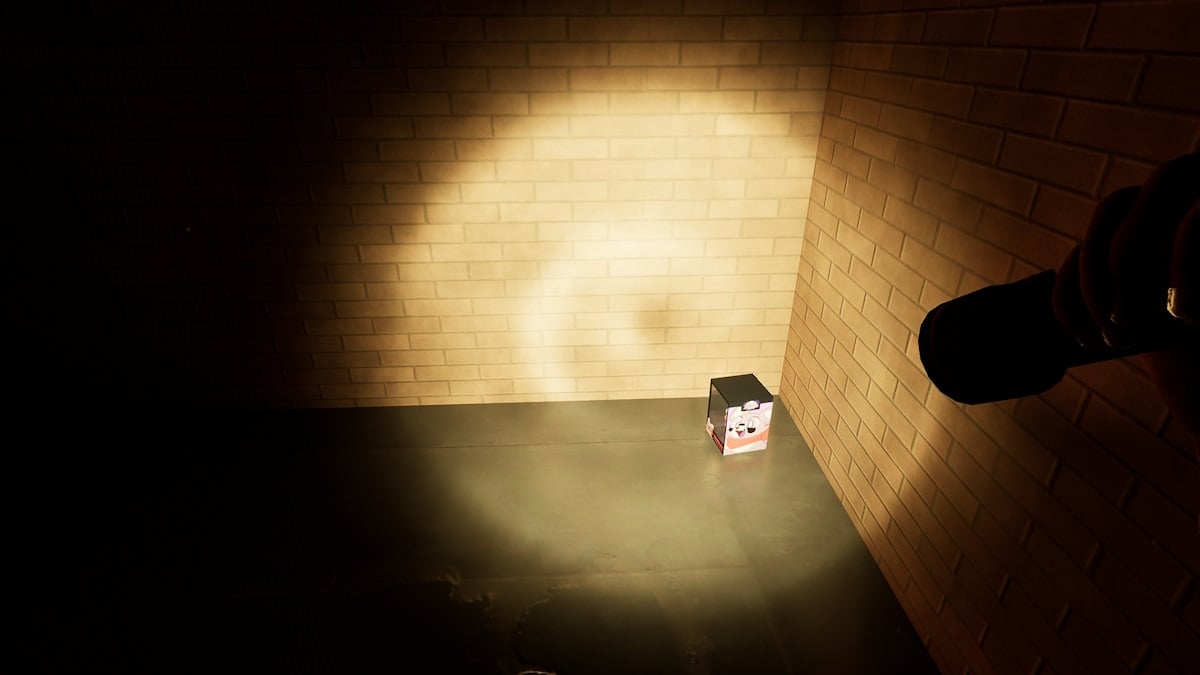
Screenshot by Pro Game Guides | Bathroom Collectable

Screenshot by Pro Game Guides

Screenshot by Pro Game Guides

Screenshot by Pro Game Guides

Screenshot by Pro Game Guides | Door to Generator Room

Screenshot by Pro Game Guides

Image by Pro Game Guides

Screenshot by Pro Game Guides | Generator Room Collectable

Screenshot by Pro Game Guides

Screenshot by Pro Game Guides

Screenshot by Pro Game Guides

Image by Pro Game Guides | Café

Screenshot by Pro Game Guides | Café Collectable

Screenshot by Pro Game Guides | Information Kiosk

Image by Pro Game Guides | Diner

Screenshot by Pro Game Guides | Diner Collectable
Screenshot by Pro Game Guides

Screenshot by Pro Game Guides

Screenshot by Pro Game Guides

Screenshot by Pro Game Guides | Entrance to the storage area

Screenshot by Pro Game Guides

Screenshot by Pro Game Guides

Screenshot by Pro Game Guides

Screenshot by Pro Game Guides | Jetstream Junction Keys

Screenshot by Pro Game Guides | Sensor to leave Theatre storage area

Screenshot by Pro Game Guides
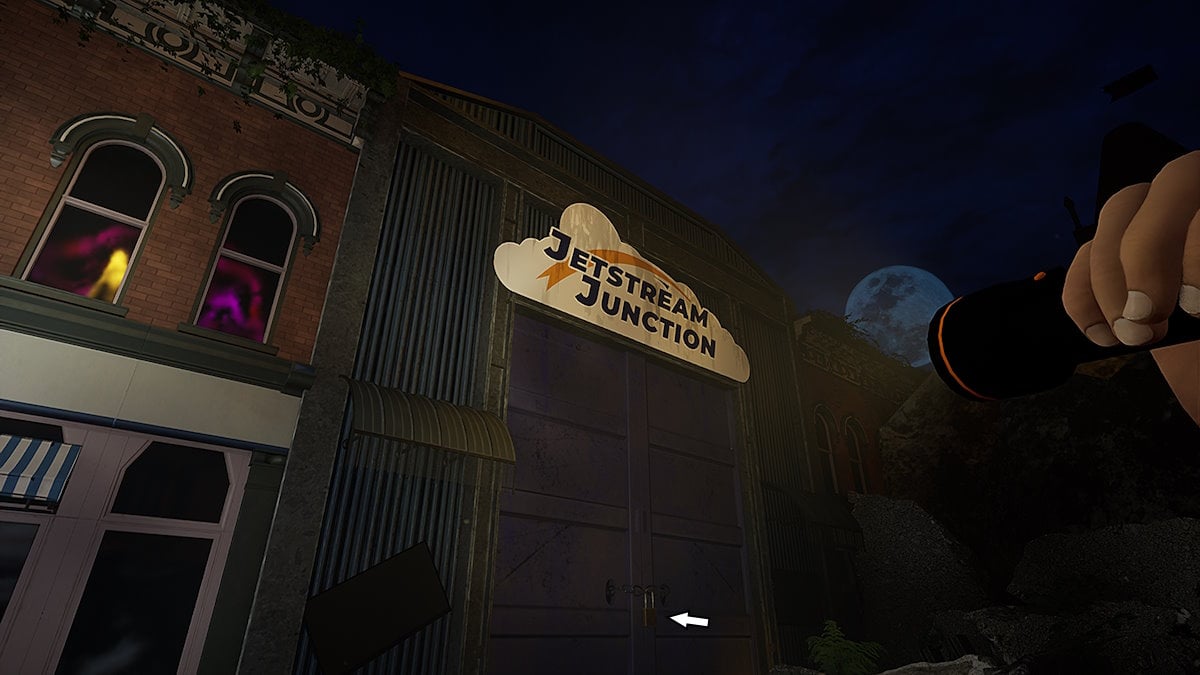
Image by Pro Game Guides | Padlock to Jetstream Junction

Screenshot by Pro Game Guides

Image by Pro Game Guides | Directions to Arcade Machine

Screenshot by Pro Game Guides

Screenshot by Pro Game Guides

Screenshot by Pro Game Guides

Screenshot by Pro Game Guides | Arcade Collectable
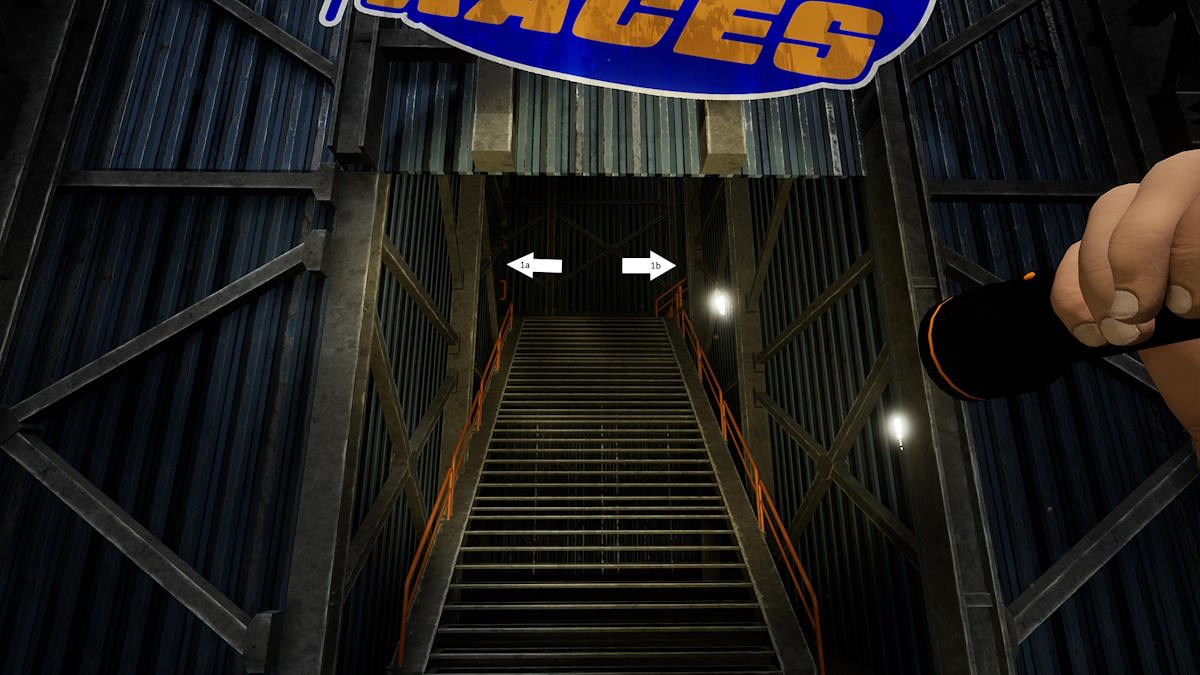
Image by Pro Game Guides
Screenshot by Pro Game Guides | Jetstream Junction Walkway Collectable
Screenshot by Pro Game Guides | Rooftop Races

Screenshot by Pro Game Guides

Screenshot by Pro Game Guides | Large Circular Door
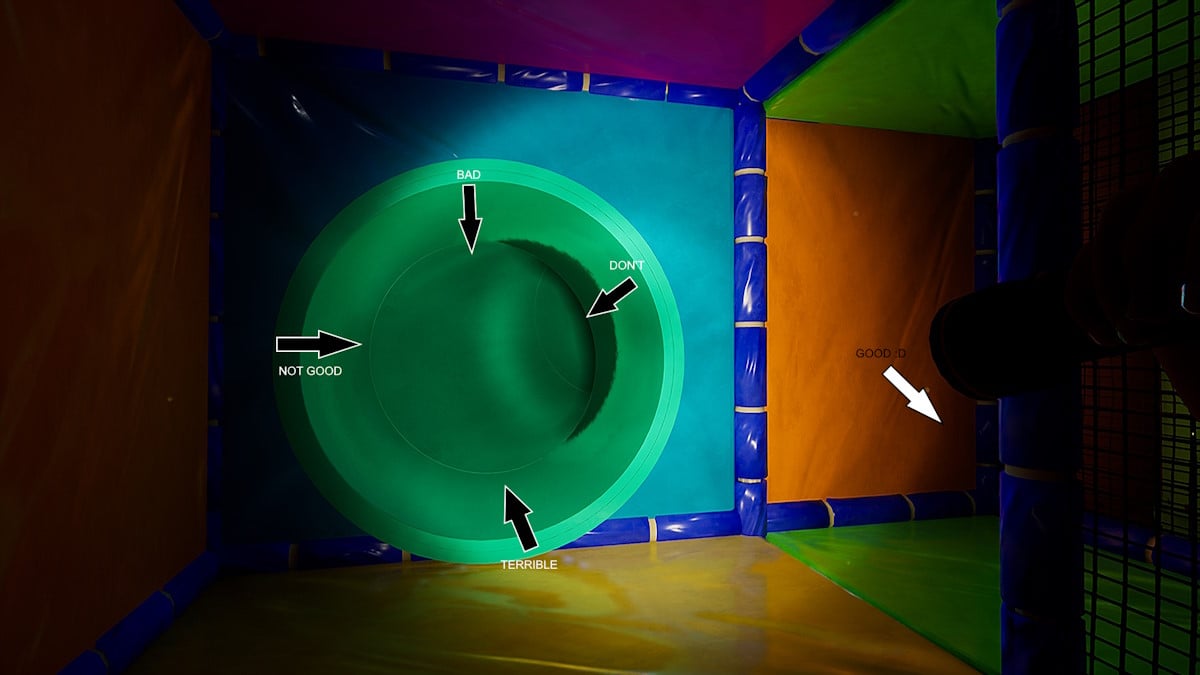
Image by Pro Game Guides | Bad Tunnel and Good Path

Screenshot by Pro Game Guides | Red Star

Screenshot by Pro Game Guides | Green Triangle

Screenshot by Pro Game Guides | Blue Star
Screenshot by Pro Game Guides | Yellow Circle
Screenshot by Pro Game Guides | Entry to chase area

Image by Pro Game Guides | Sensor to access chase area

Image by Pro Game Guides | Left turn

Image by Pro Game Guides | Trampoline to get across

Image by Pro Game Guides | Another left turn

Image by Pro Game Guides | Drop down

Image by Pro Game Guides | Another drop down

Image by Pro Game Guides | Shelf collectable

Image by Pro Game Guides

Image by Pro Game Guides | Left after vent exit

Screenshot by Pro Game Guides

Screenshot by Pro Game Guides
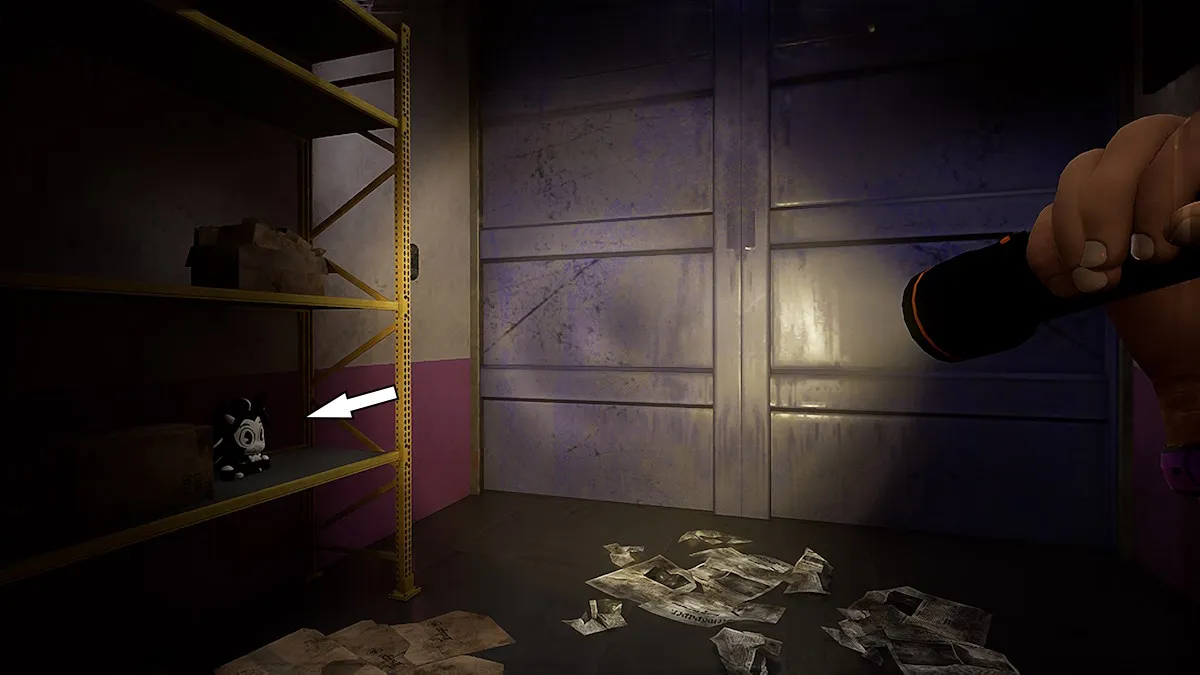
Image by Pro Game Guides | Final Collectable
