So many doors , so many hallways , so many badges …
Like most experiences on Roblox , the horror / survival - style experienceDoorshas ton of badges uncommitted for thespian to collect . histrion can earn badges for just about anything , from surviving monsters to solving puzzles ! For a closer look at all 68 of these badges and how to unlock them , continue reading below .
All badges in Doors and how to earn them
If you ’re looking for a quick peek at every badge , check out the listing below . Or , if you ’re looking for a more elaborate breakdown of each badge , continue read past this list .
Welcome
To make this badge , simply fall in the door experience — that ’s all there is to it !
Buddy System
The Buddy System badge is automatically earned when you and a role player on your friends list join and act a game of Doors together . Just join the same vestibule is n’t enough ; you have in reality to get in a game and go through it together .
Welcome Back
This badge is earned by anyone who play doorway two daysin a quarrel . Playing Doors twice in a day consecutively does n’t count .
Join The Group
To join the LSPLASH Roblox grouping and earn the Join The Group badge , simply snap on the wordLSPLASHlisted underneath the Doors title and select theJoin Groupbutton . After pressing this button and successfully join the mathematical group , you will receive the Join The Group badge and a free revive the next time you act Doors .
Betrayal
The Betrayal badge is make when a player dies while trying to figure a loo that you ’re already in . You may feel like a unsound mate afterward , but hey , at least you have a lustrous new badge !
Back From The Dead
Each time that you break in door , there ’s a possibility to resurrect yourself with Robux . You will unlock the Back From The all in badge by purchase one of these revives or using the gratuitous one you receive when you unite the experience ’s Roblox group .
One Of Many, Ten Of Many, and 100 Of Many
All three of these badge are earned by dying … and dying a mass ! The One Of Many badge can be take in as early as your first playthrough , depending on how long you live on . The other badges , on the other hand , Ten Of Many and 100 Of Many , will command multiple playthroughs to unlock . So get to dying !
Out Of My Way
To earn the Out Of My Way badge , actor must outlive the tight - actuate entity , Rush . Rush is one of the first , if not the first , entities histrion will run across inThe Hotel . When Rush spawns , the lights in multiple way will flick , and you ’ll pick up a malformed growling sound — this is your cue to hide ! Rush can be avoid by obliterate in a vent or water closet or by crawling under a bed .
You Can Run
You Ca n’t Run is earn by survivingSeek . Seek is one of two entities that have more than one guaranteed visual aspect . Players will encounter Seek for the first time sometime between doors 30 through 45 , then again sometime between doorway 80 through 95 . Before Seek spawn , players will start seeing unsettling orb on the walls around them .
Eventually , walking through a numbered door within the ranges mentioned above will make Seek to manifest from a pile of slime on the floor . After a brief cut scene , Seek will commence chasing instrumentalist down a long hallway and through multiple door . As you run , keep an eye out for bloodless sparkles — these will direct you along the correct path .
During this running sequence , there ’s no pauperism to useCorShiftto crouch — if you approach a path that requires you to crawl , your character will do so automatically . Also , during this sequence , avoid the fallen pendant and slime - cover hand ( pertain the chandeliers will take 40 HP , and the hand will pop you instantly ) . If Seek catches up to you , you will also insta - die , so look out for those sparkles !
Eviction Notice
The Eviction Notice badge is pull in by those who encounterHide , a figureless entity that spawns when instrumentalist have expend too much time cover under bed or inside blowhole or closets . If Hide deems that you ’ve been hide for too long , your screen will begin to turn red and flash the wordsGET OUT , and your pulsing will progressively increase , get louder and louder by the second . If you still refuse to leave , Hide will eventually kick you out of wherever you ’re hiding and lower your health by 40 % . After you ’ve been kicked from the closet , you will earn this badge .
Rebound
Rebound is earned by those " fortunate " enough to meet Rush ’s angrier , quicker , and rarer counterpart , Ambush . Each clip that Rush is set to breed , there ’s a very down in the mouth chance thatAmbushwill spawn in its place . like to Rush , Ambush will make the lights flicker and create a distorted noise before it appears and will then range through all of the nearby hallways / rooms .
Unlike Rush , however , Ambush can feed through these room up tosix times . The good scheme for hold out Ambush is to hide in a closet when you listen its comportment , step out of the closet when it disappears , and replicate this cognitive process until it in full disappears . Staying in the closet for too longsighted will spawnHide , so it ’s skillful to leave and re - embark .
Two Steps Forward
This badge is earned by those who survive the ghostly entity , Halt . Similar to Rush and Ambush , Halt have its mien known by flickering lightness . Unlike these two entities , however , Halt does n’t immediately come out after the light flicker . Instead , it spawns behind the next numbered door that players unfold . Upon opening this doorway , players will record a dark hall only clear by Halt ’s glow blue eyes .
To escape Halt , course down this hallway and out the door at the other end . As you trip down the hallway , you ’ll need to keep an eye out for flash word , specificallyTurn Around . WhenTurn Aroundappears on your blind , directly turn your camera / character and take the air the opposite focal point . You ’ll need to retell this summons , turning around and walking fore each time the prompting appears , until you successfully make it through the doorway at the end of the hall .
Look At Me
histrion need to survive the all - see entity , Eyes , to earn the tone At Me badge . As you move from room to room , opening doors as fast as potential , there ’s a chance you ’ll run into a purple glow — this isEyes . After a few endorsement , a 36 - eyed entity will spawn from the purple gleam and will deal 10 scathe to anyone who looks at it . To survive Eyes , simply maneuver out of its area while looking at the floor , cap , or wall . Basically , reckon anywhere but at it !
I See You
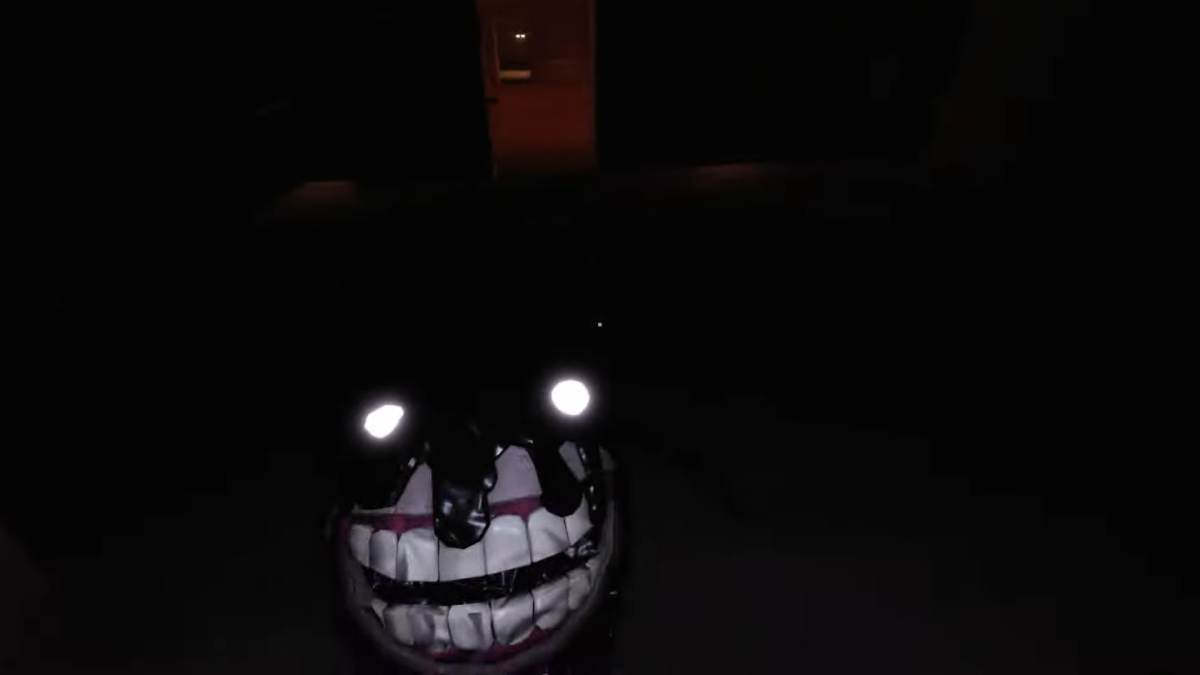
The name of this badge is perhaps the most meet of them all , as you ask to survive the badly terrifying entityScreechto garner it . This entity only exists in dreary room and will make its bearing known by whispering a quiet " pst"—when you get wind this sound , change by reversal your photographic camera behind you as fast as you may and look directly at Screech . If you see at it in time , it will scream forte and climb up at you , but deal no terms . If you conk out to front at it in time , however , it will scream , leap , anddeal40 damage .
Having a light informant , such as a flashlight or lighter , will lower the fortune of Screech attacking in a dark room .
Sshh!
This badge is earned by anyone who successfully escapesFigure , solves the level 50 teaser , and moves onto room 51 . ascertain out our in - depthwalkthroughfor a full guide on this spirit level , include how to solve the book puzzle and unlock the library room access .
Expert Technician
To earn the Expert Technician badge , you ’ll need to successfully solve the level 100 puzzle in underone bit . If you ’re unsure how to solve this teaser , see out our completelevel 100 partitioning !
Meet Timothy
musician can unlock the Meet Timothy badge by simply encountering theTimothyentity . Each time that you afford a drawer in door , there ’s a 1/200 chance of being jumping - scared by Timothy , who will jump onto the instrumentalist ’s sieve , take5 HP , and then disappear . After meeting Timothy , you will earn the like badge .
Meet Jack
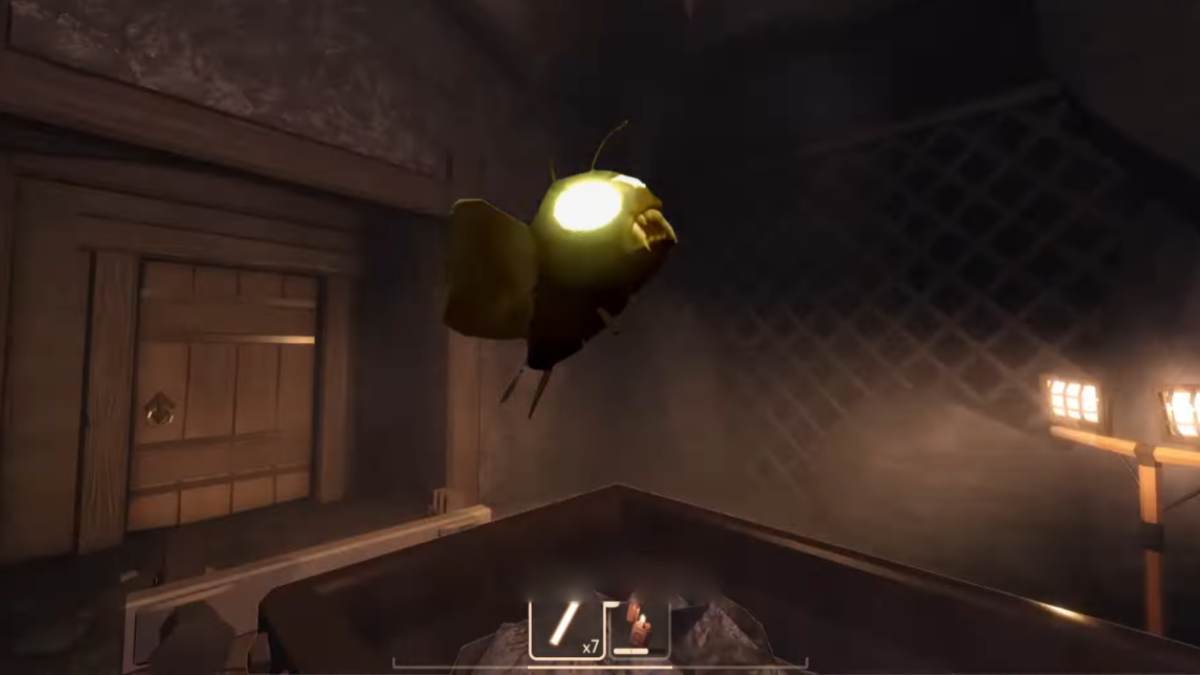
Just the like the Meet Timothy badge , the Meet Jack badge is bring in by those who encounterJack , another jump - scaring entity . Jack has a 1/20 chance of appearing in closets , and a 1/2000 luck of appearing behind numberless doors . When this entity does come along , it serves as a mere start - scare and does no legal injury to the player . The more closets you open up , the more potential Jack is to spawn behind one of them .
Error
To reset the Error badge , actor must encounterGlitchin a multiplayer server — if you ’re playing alone , there ’s a 0 % prospect that this encounter will happen . In multiplayer servers , Glitch only attacks those who stray from the chemical group , taking away 10 to 40 HP and teleport them near the other player .
Rock Bottom
The last badge in Doors is earned after finish all levels and break away The Hotel .
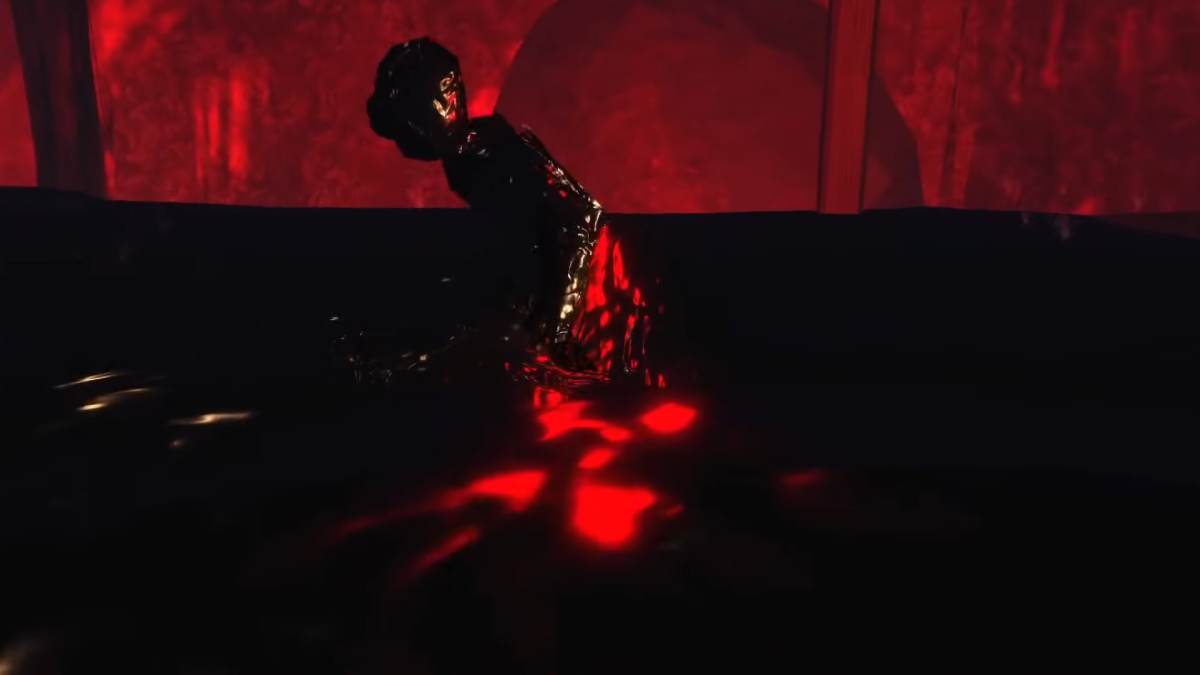
Dead of Night
To get this badge , you must breed Dread and survive it . If you have a Crucifix and encounter Dread , use it before he reaches you to potentially neutralize him . you’re able to get Crucifixes at the Jeff Shop or in random container .
you may engender Dread in any room except major one like Seek Chase and the Library . To engender it , you ’ll need to check opening doors for around nine minutes , at which point the in - biz clock strikes 12 AM . If you cash in one’s chips from Dread , you wo n’t get the badge , so remember , survival is key .
Lost in Translation
To unlock this badge , you must transform an item using a Rift . start into the hotel story and hit Door 100 while collecting a candle on the means . Once the Figure devil spawn , fudge it and go down the staircase to find a secluded room . Place the item in the break to translate it into a Possessed Candle and get the badge .
Just a Prank
To unlock it , you ’ll want to be on Floor 2 and look for any giggle on the ceiling . Once you line up one , only take the air under it to get the badge .
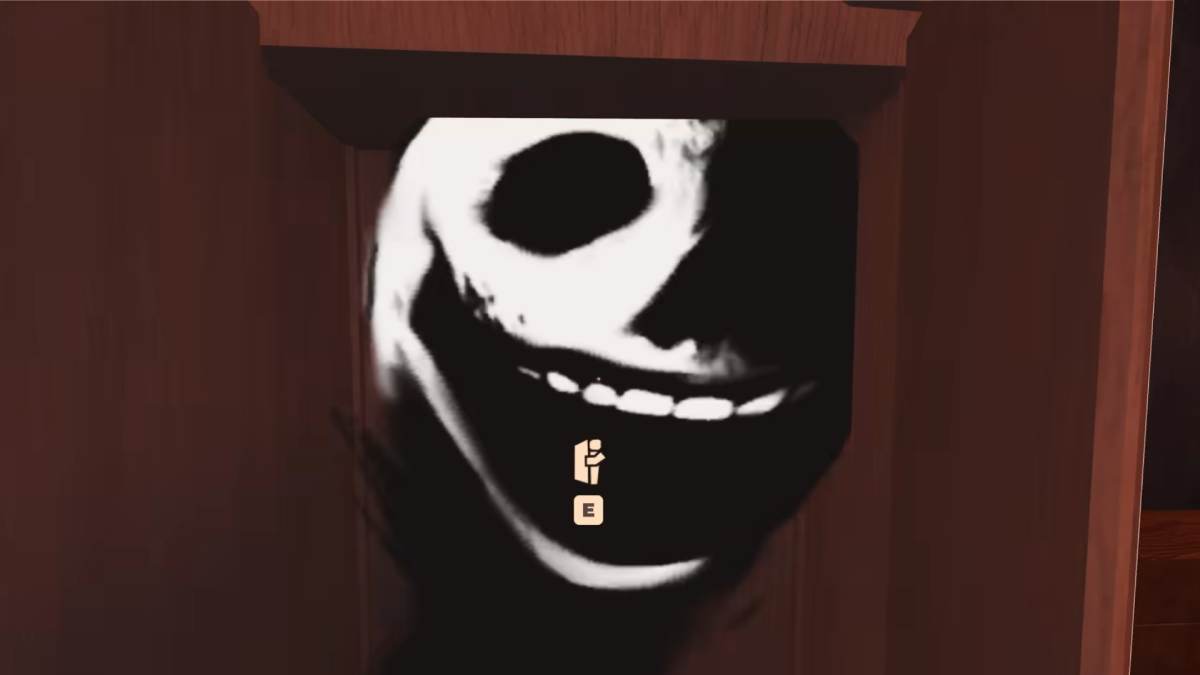
Helping Hand
You have to keep your friend while they are getting attack by a Giggle by pressing " einsteinium " on your keyboard .
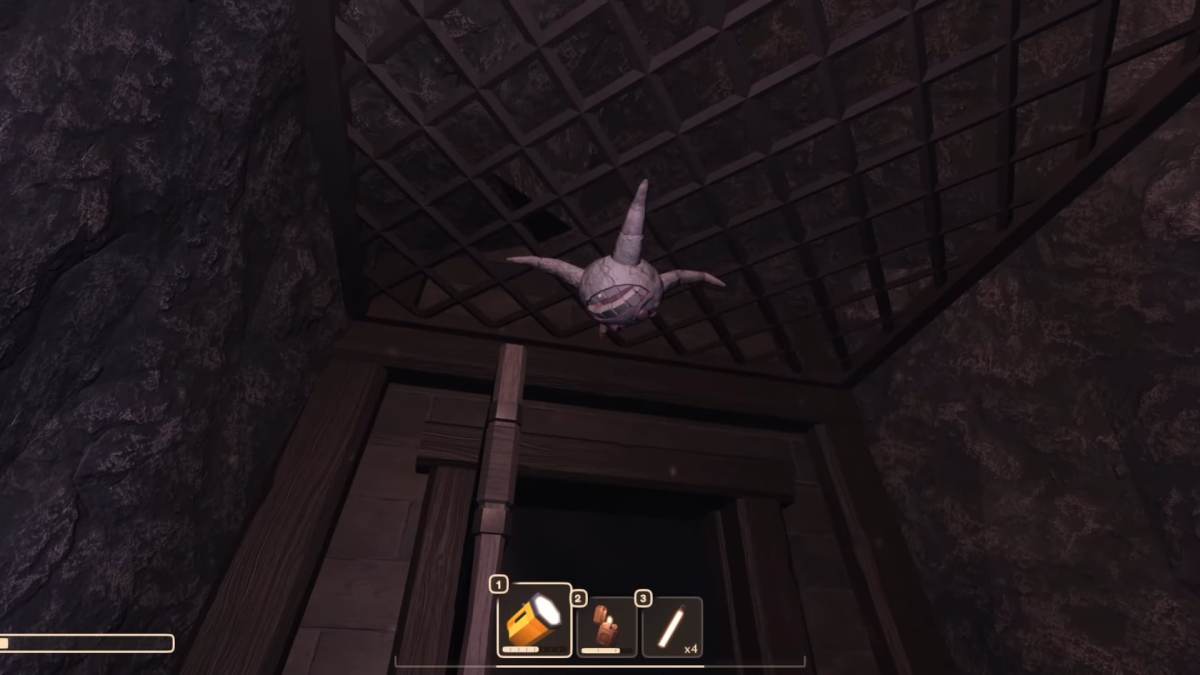
Trickshot
To get the Trickshot badge , you need to expend a glowstick to hit a Giggle before it attack a player . This item spawns indiscriminately in different room , so verify to check all the drawers and wardrobes to find it . Check the ceiling of every room you infix to find a Giggle and hit it before it latches onto you or your friend .
I Don’t Believe My Eyes
Find a room with a drove of Gloombats ( moderate the glum parts of your map ) . but go away the room when you find one , but make trusted not to turn on any light rootage , or the critters will attack you .
Whoever Smelt It
Find a Firedamp way which by and large has a fire word of advice on the door . Once you insert the room , chop-chop proceed to the next one to make this badge . You should n’t stay long in the fire room . Also , do n’t endeavor to apply a light .
It’s Not My Time
utilize a Crucifix against Dread . you’re able to get the Crucifix by purchase it from the Jeff Shop or by exploring random container in the game . Dread is a random goliath that can breed anywhere in the game .
It’s Not Funny
Use a rood on a Giggle by but walking under it and spamming left - click .
Flyswatter
To get this badge , apply a rood against a swarm of Gloombats . you may get the Crucifix by purchasing it at the Jeff Shop or by exploring random containers in the secret plan . Gloombats can be found hang in the dismal theatrical role of the map .
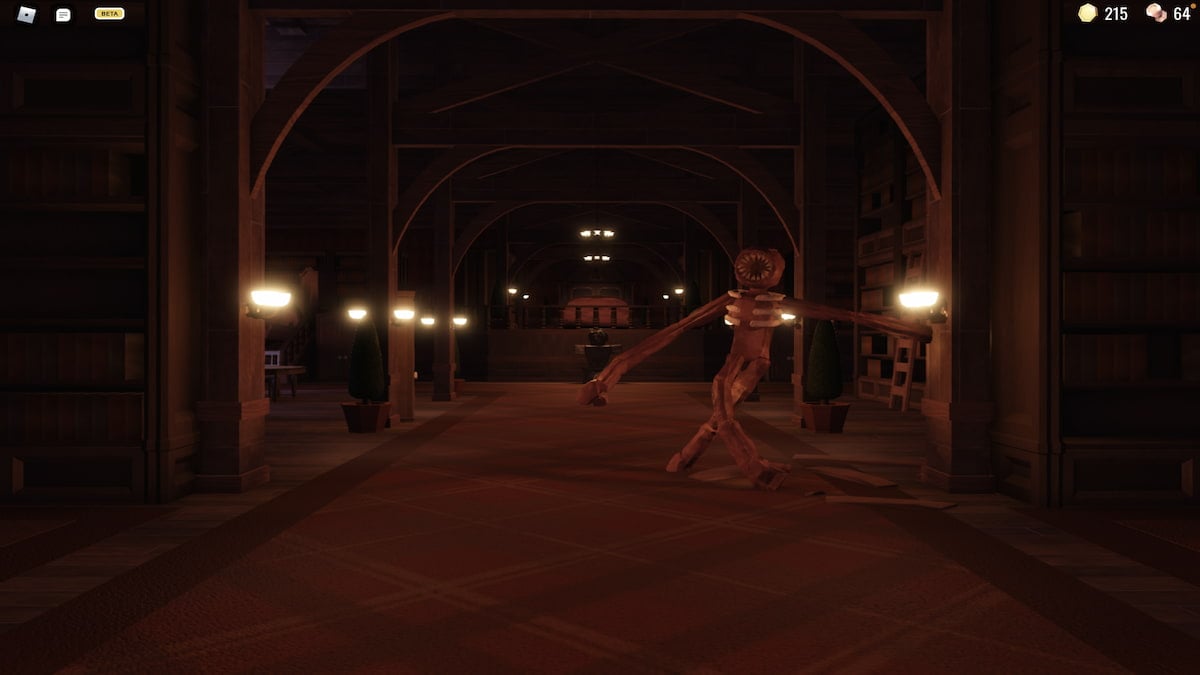
The Bigger They Are
Successfully using the Crucifix against Grumble will unlock this badge . Grumble can be found in Room 150 of Floor 2 in Roblox DOORS .
Running Track
You need to reach the Chasing Scene at Door 200 , where you will encounter the Seek Entity . During this scene , successfully sidestep the Seek Entity . If you expire , you wo n’t get the badge .
Down the Drain
Defeat Seek in its blob - like form once you reach Room 200 ( cognize as the Dam ) .
See You Soon
Complete theentire Mines levelon any trouble to get this badge .
look for more Roblox horror content ? determine out our recent guides onHow to get every Lantern in Roblox The MimicorRoblox Apeirophobia Walkthrough – How to get layer 0 - 10here on Pro Game Guides !
Image by Pro Game Guides
![]()
Screenshot by Pro Game Guides
Screenshot by Pro Game Guides
Screenshot by Pro Game Guides

Screenshot by Pro Game Guides
![]()
Screenshot by Pro Game Guides
Screenshot by Pro Game Guides
Screenshot by Pro Game Guides
![]()
Screenshot by Pro Game Guides
Screenshot by Pro Game Guides

Screenshot by Pro Game Guides
![]()
Screenshot by Pro Game Guides
![]()
Screenshot by Pro Game Guides
Screenshot by Pro Game Guides
![]()
Image by Pro Game Guides
Screenshot by Pro Game Guides
![]()
Screenshot by Pro Game Guides
