Do n’t get burn !
If I want to find a fast , free , but challenging teaser game , I recognise to head toCool Math Gamesto find one — and the situation has come up trump again with Lava and Aqua . If you ’re stress to beat it , read on for my full walkthrough .
How to beat Lava and Aqua - Walkthrough Guide
The game is made up of go point , and on each , you call for to perplex the lava to escape the projection screen before it enclose the commonwealth . Move block , and remember you canpress Zas many times as you liketo undo your moves(even if you become flat ) . Whenever I sayefficientlybelow , it meansevery move has to be exact , or you ’ll go out of time .
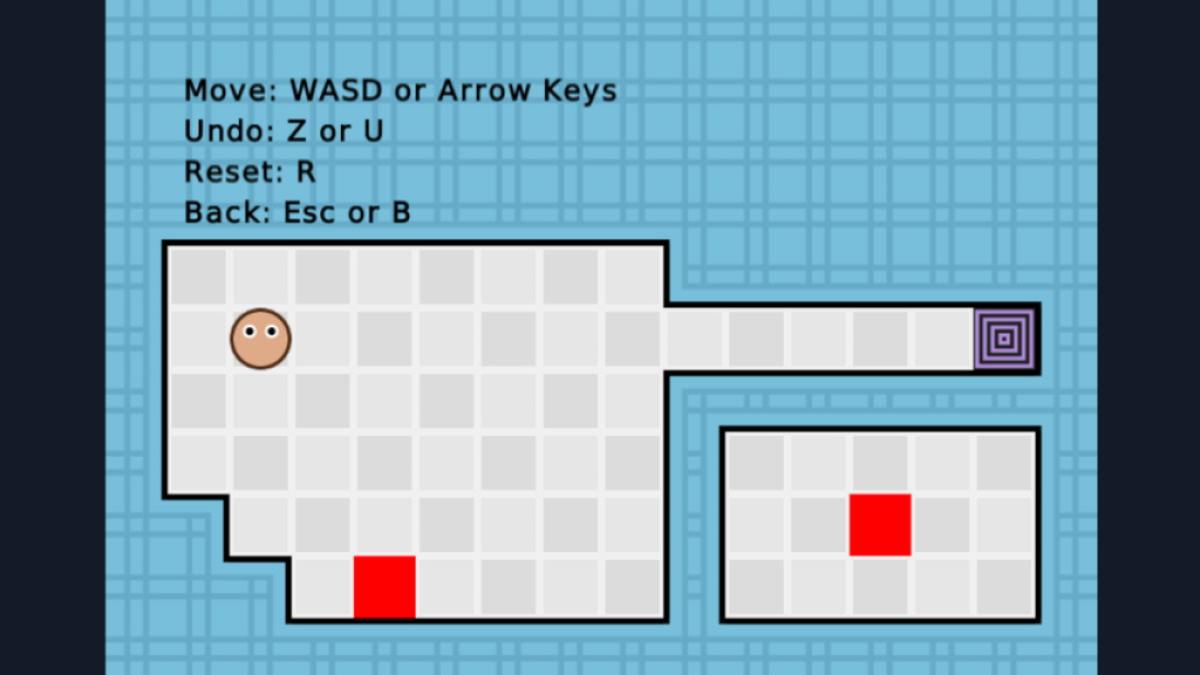
Level 1
Simply move right and out of the vena portae .
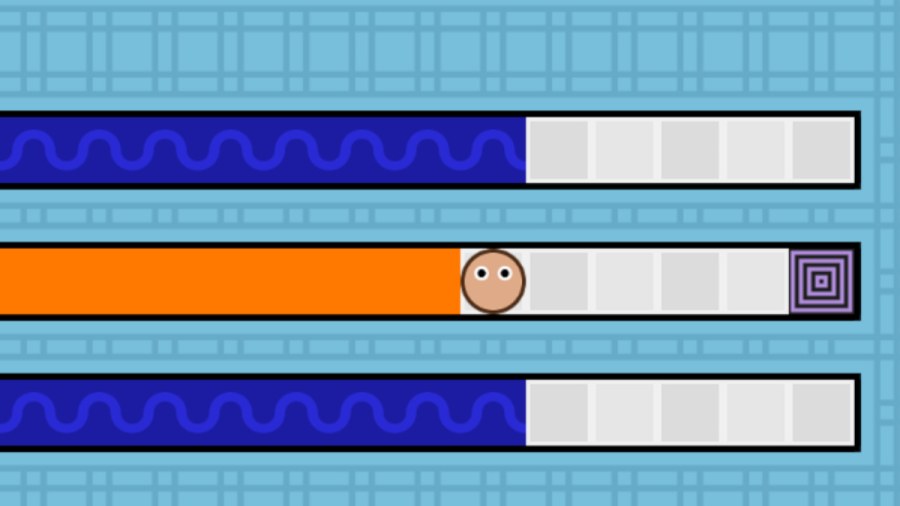
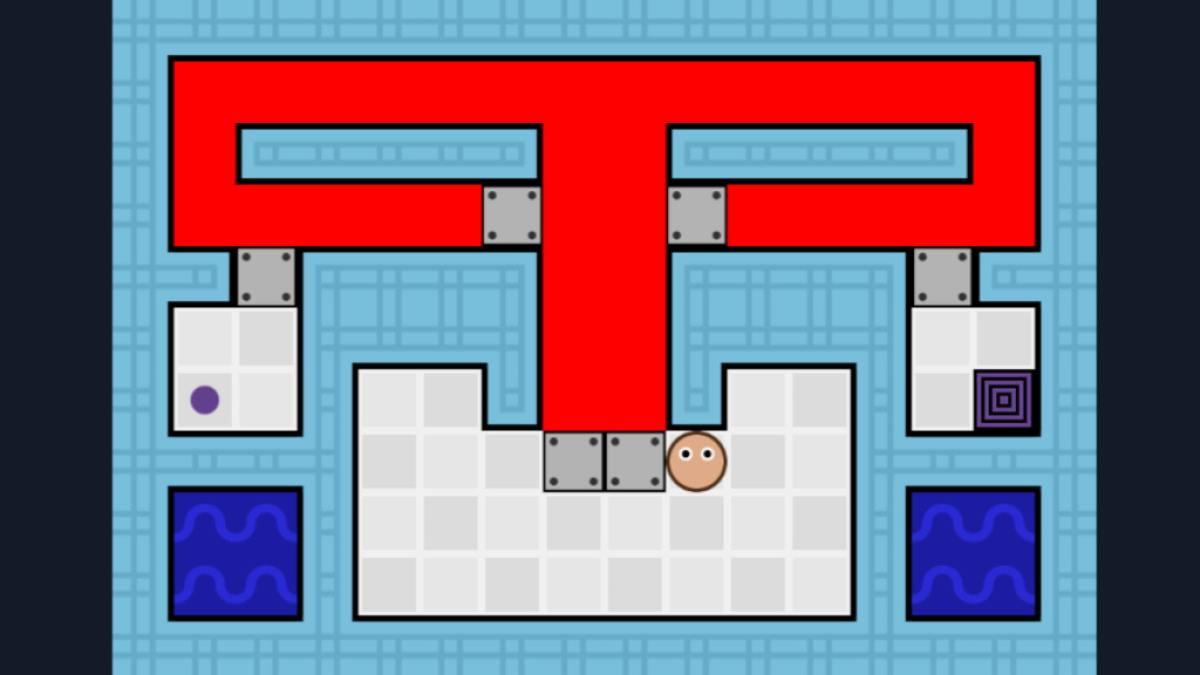
Level 2
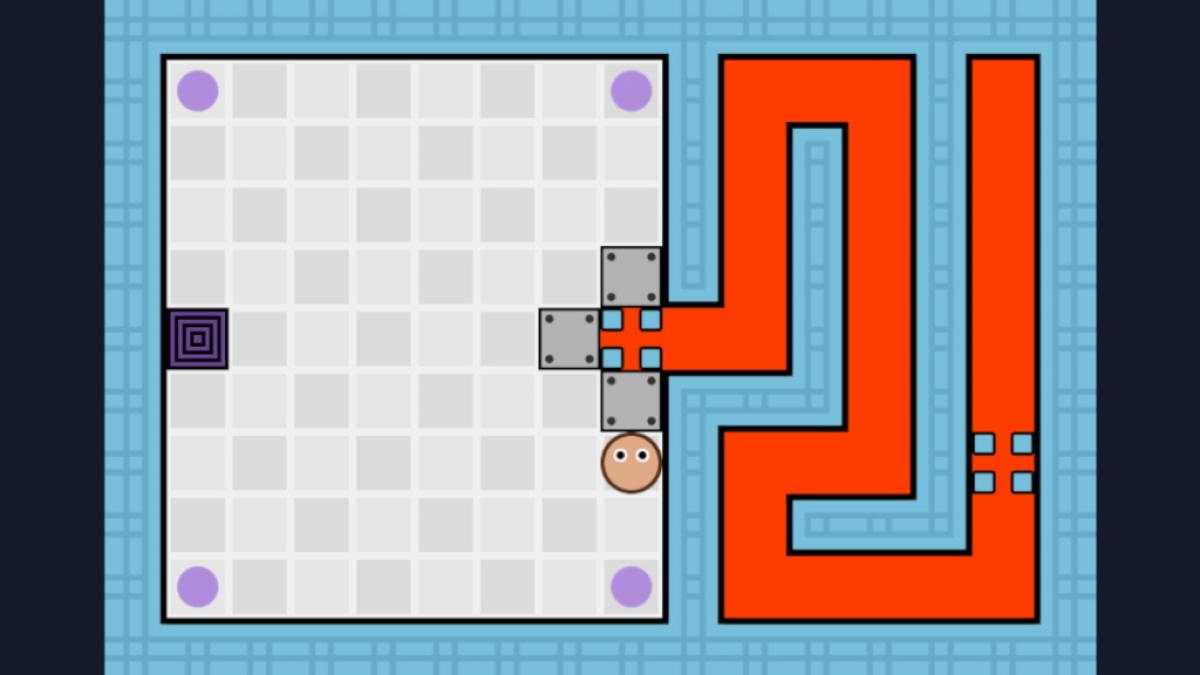
Move up four time , pushing the pulley up to block the lava on the left . Now , move right-hand four times , blocking the lava on the rightfield . Head out of the hepatic portal vein at your leisure .
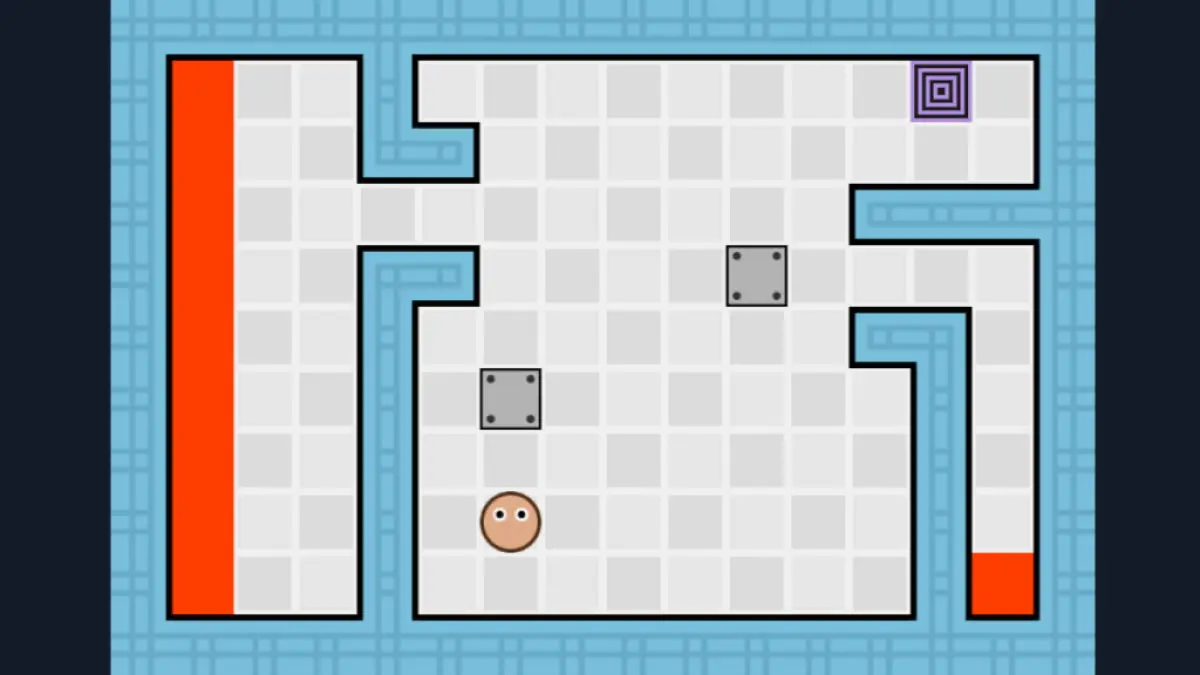
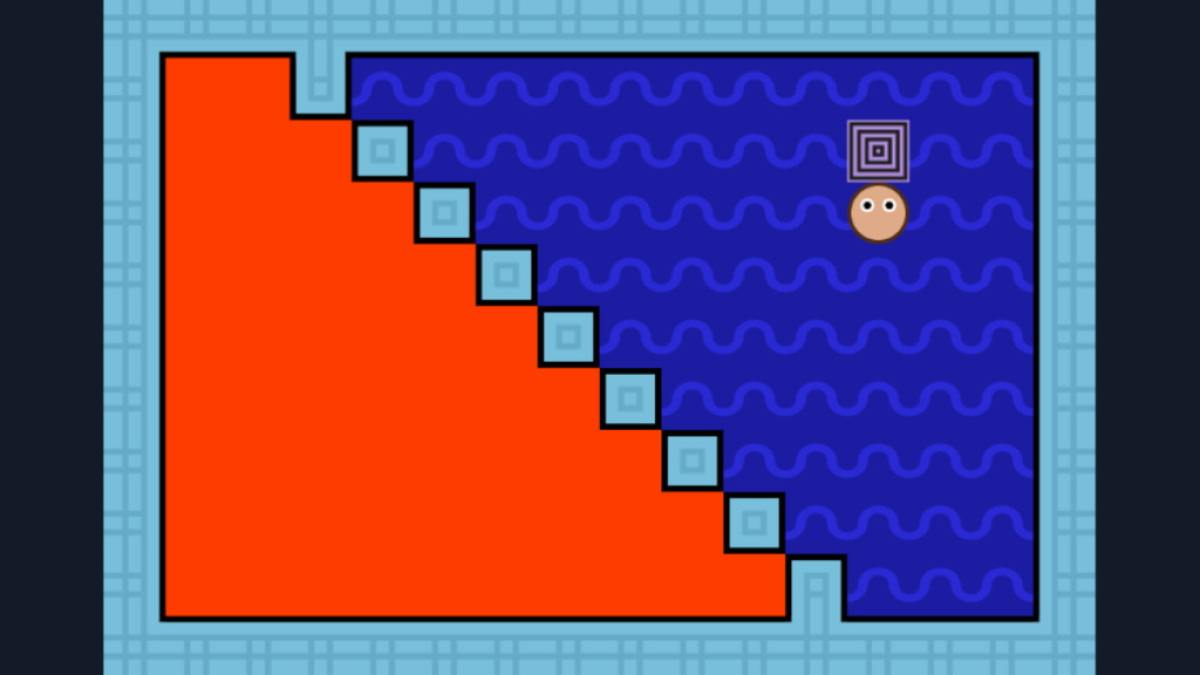
Level 3
go down twice , then move to the left of the block and push it right . It will push the lava back , so push it properly into the corner . Now push the next stoppage up into the elbow room above , right to the top , then go to its right field and crowd it exit a couple of times , up once , and then push it left along the passage ( pushing the lave back once more ) . When you get to the block below you , push it down and into the little room and then take the air around it into the portal to complete the level .
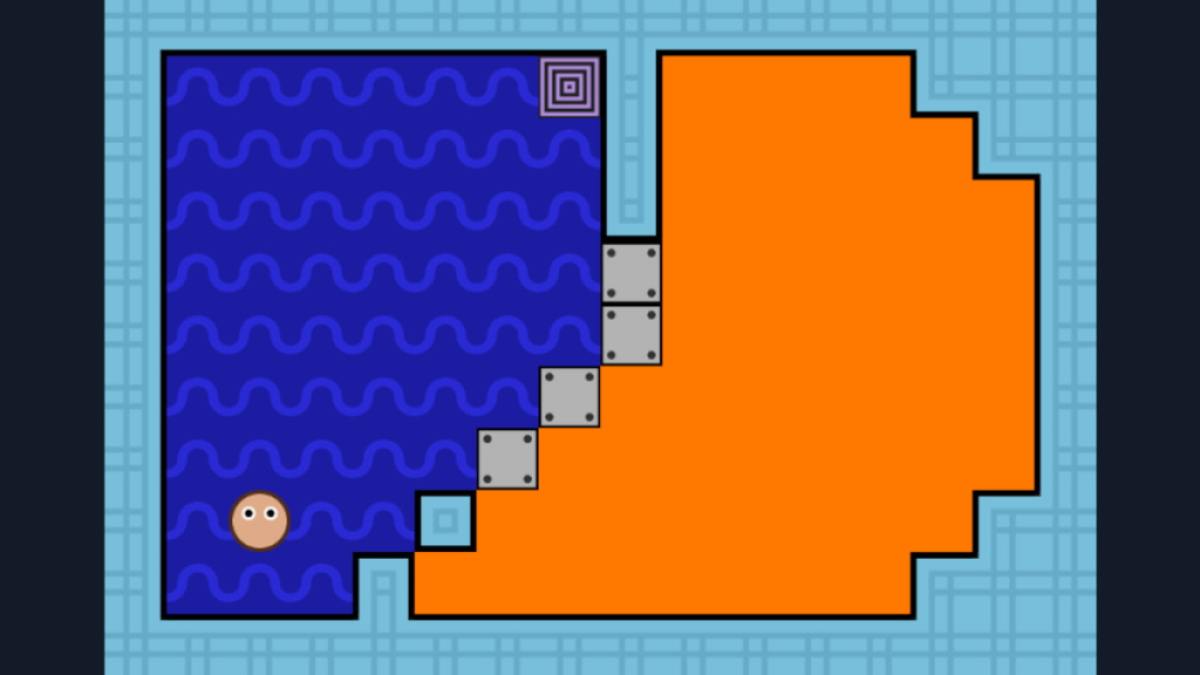
Level 4
The cobalt blue terminate the lava on its own , and you’re able to alk in the aquamarine , so just move up and correct and out of the portal .
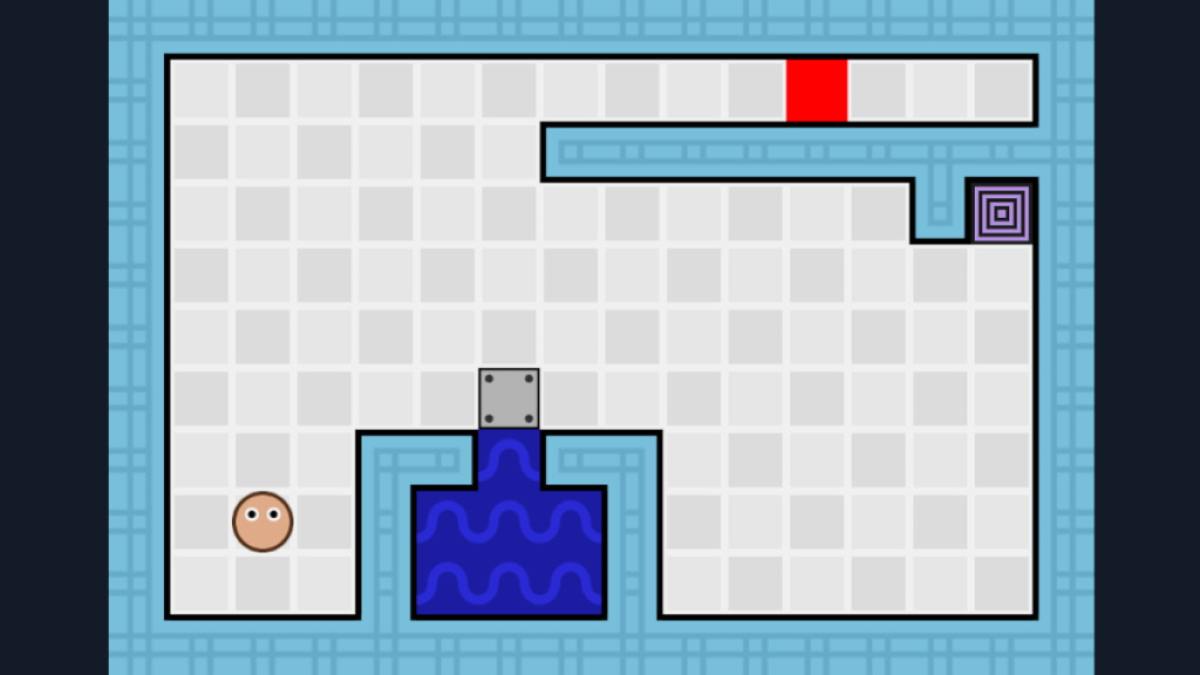
Level 5
Move up double and then right , push the block off to liberate the water . Keep pushing the block right until the urine blocks the lava , then channelise up and through the hepatic portal vein .
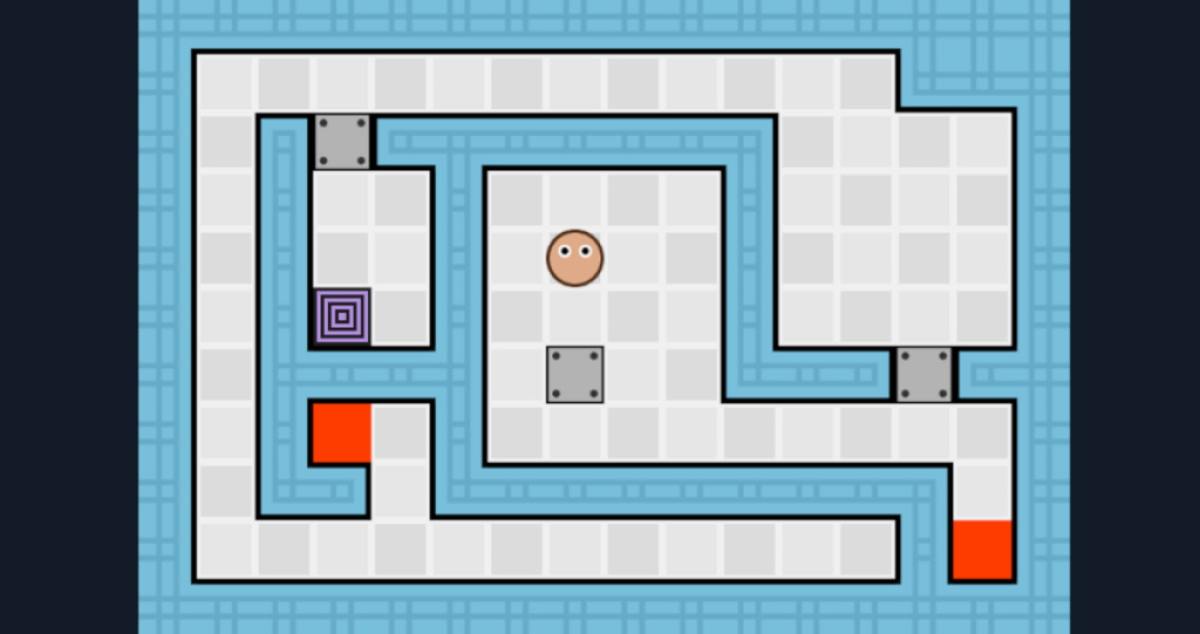
Level 6
Now , you also need to equal the violet dot to remove the level , as well as escape yourself . Move around the block you ’re on its right hand , push it left once , move underneath it , then push it up again to choke up the top lava flow .
Move down and push the other city block down to cease the lower lava rate of flow . you may now grab the royal acid and leave in your own fresh time .
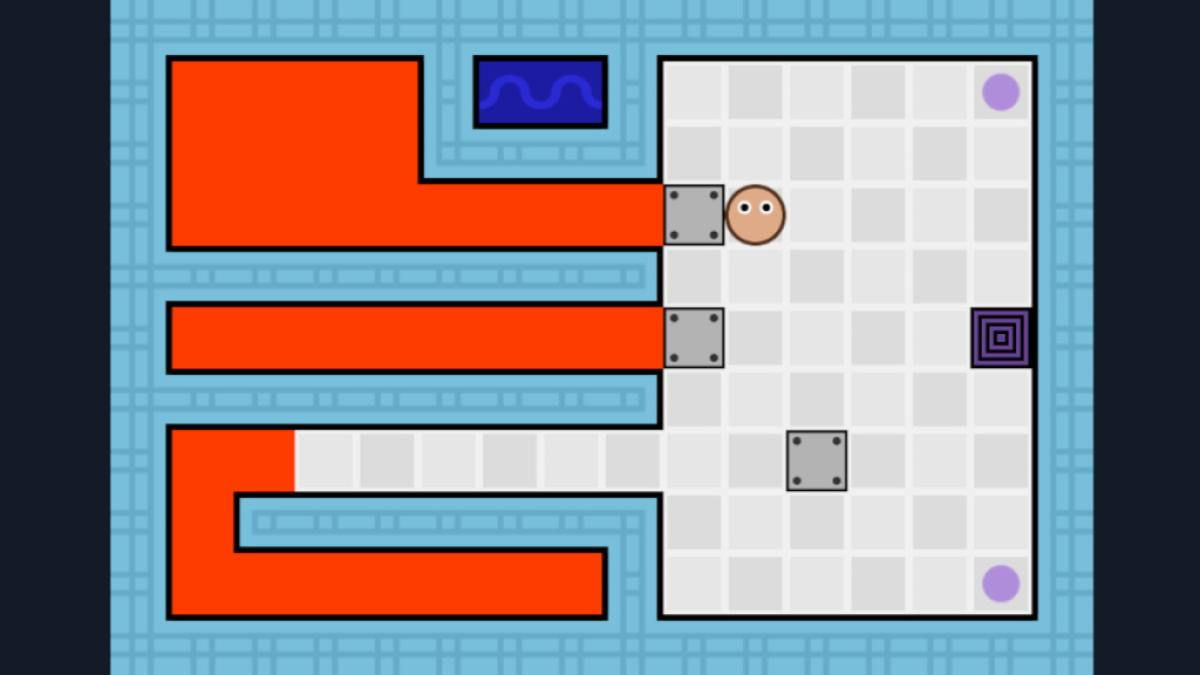
Level 7
Move to the center and drive the top blocking mightily once , let the water out of the top . Move back and then push the left cube down doubly . This is enough to now let the water do its occupation . Collect both purple dots from the weewee and provide through the portal .
Level 8
Move down once and push the middle block left double . Move up to the right side of the top pulley block and also push that right doubly . Move down to the right of the bottom block and advertize that right twice as well , blocking the last of the lava . Do a little dance ( optional ) , grab the empurpled dots , and leave .
relate : How to beat layer 43 on OvO
Level 9
Head down and move the two blocks into the status I ’ve pictured above . Now keep edging them up one place at a meter , first allow and then decent , until those two cardinal lower block are above the two blocking the remaining and good passageway . you may now push the block down the left passage far enough to compile the regal ballock , then do the same to the blockage in the correct passage to leave .
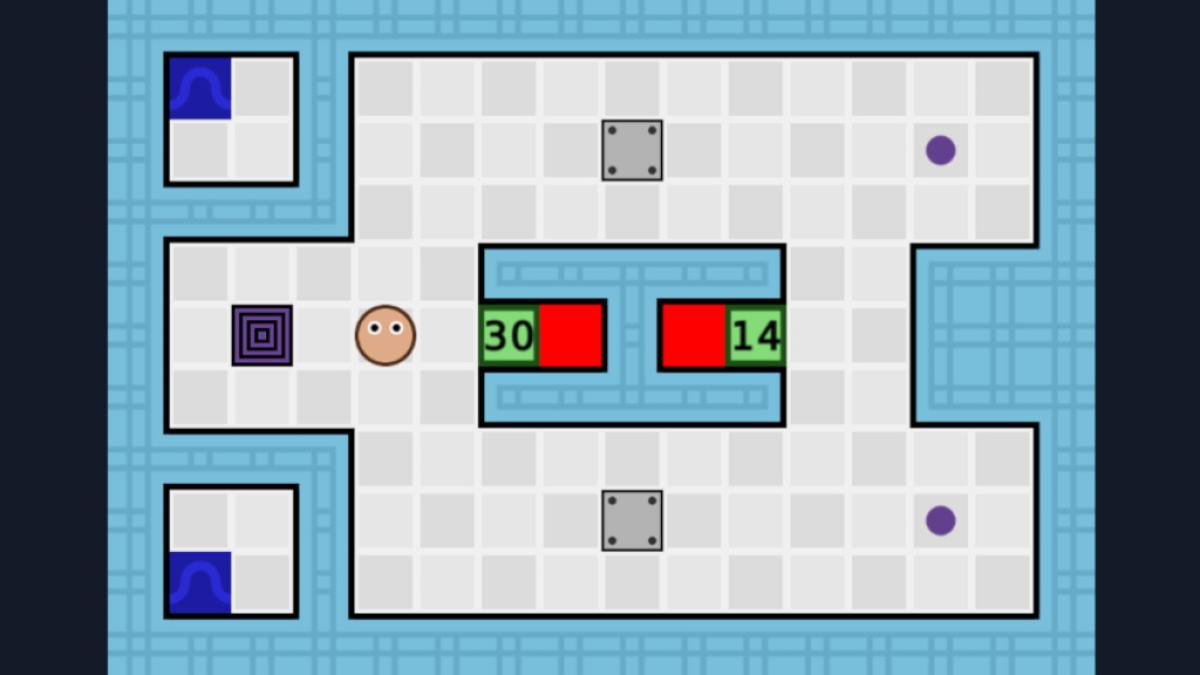
Level 10
Things have vary up again now . The green number show how many turn it will take until the green block vanish , free the lava . In this shell , you have exactly enough clock time to move one block to a posture just outside the far musical passage and then the other to block the left passage before the green timers run out , stopping the lava from leave behind the burrow . Once done , you could put the kettle on , take your clip , grab the purple dots , and move along .
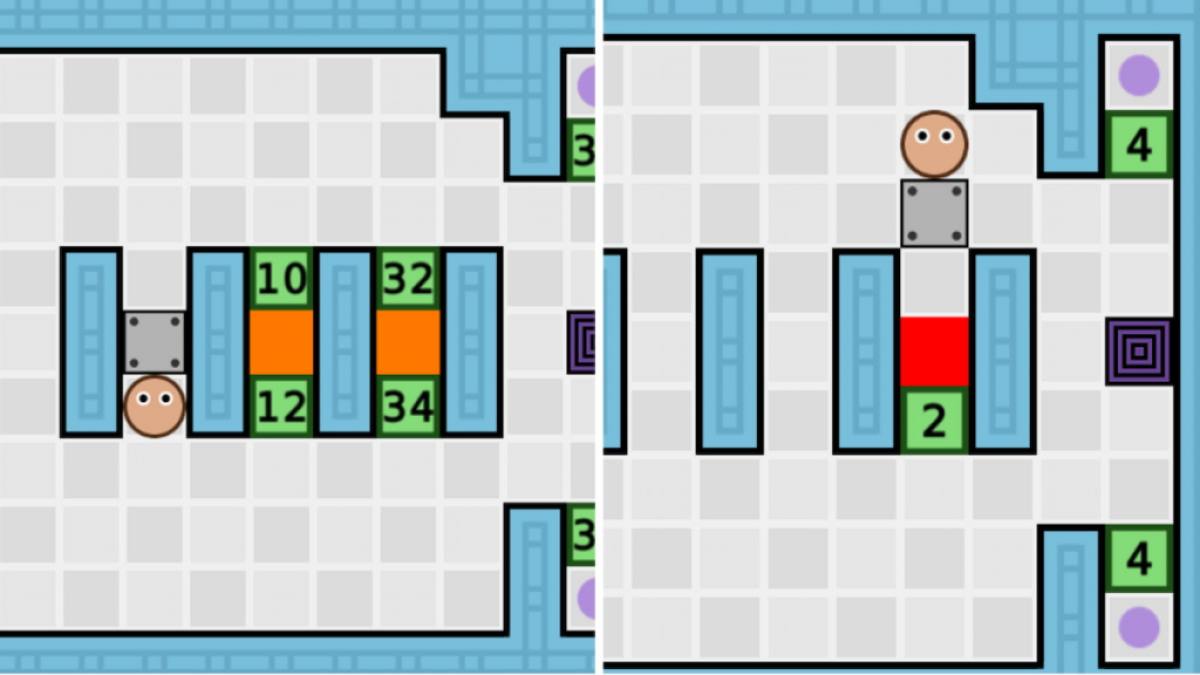
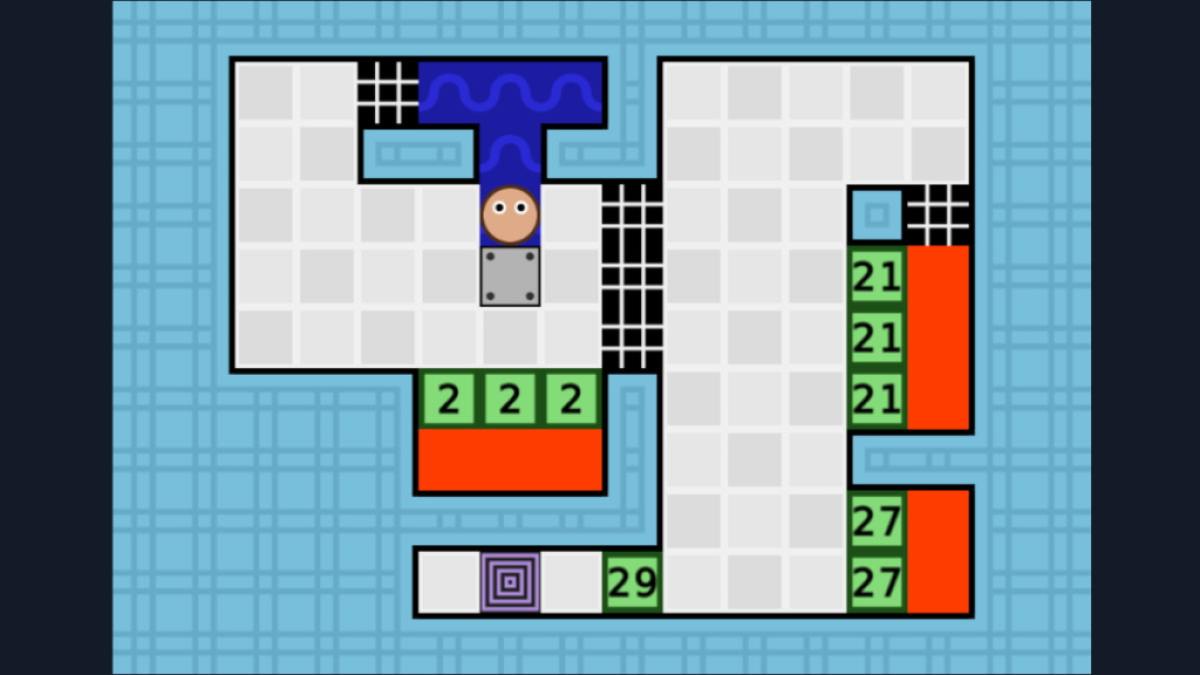
Level 11
The green Book of Numbers are fundamental here . Again , moving efficiently , you have just enough time to push the block below the bottom left gullible blocking ( 12 ) and up into the lava . This remove the lava wholly . Now , do the same through the top of the midway unripe number into the middle foursquare .
Note that the top number is scummy on the right side greens , so once you ’ve execute the blockage into the primal space of the middle tower , you ’ll need to move around to the bottom of the block ( using the now empty odd column ) and force the block up from underneath , then across and into the correct column . The two fleeceable squares forget the purple dots will disappear just after , leaving you innocent to make clean up .
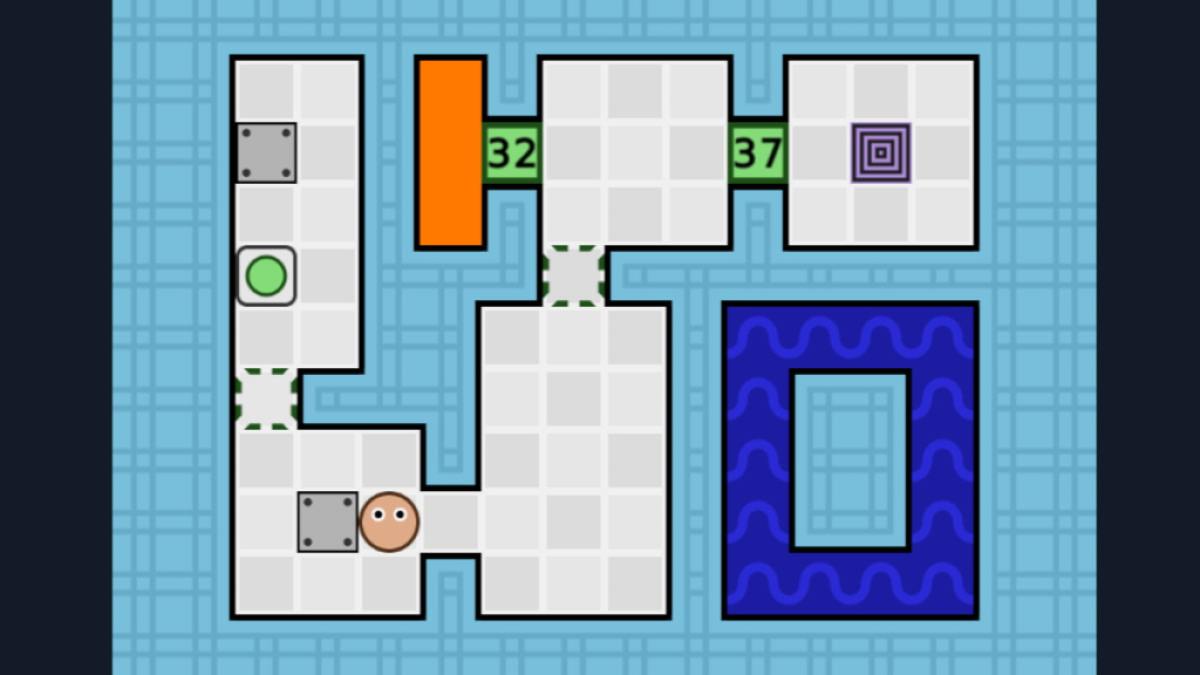
Level 12
For the first clock time , water is a problem this clip . Push the block down twice , then across to the right and up through the weewee and also through the lava , allowing you to move to the right of the screen . If you do n’t do this , the water supply meets the lava , creating a block that traps you on the right .
Move across and under the moveable block on the right , pushing it up and right so that it block the lava from above and then down ( pull together the top - right over-embellished circle in the appendage ) to squash the lava while depart room for the body of water to escape . Head back up and across to get the top - depart purple dot . While you ’re doing that , the weewee will class out the lava at the bottom of the screen , reserve you to walk through the H2O to get the bottom - leave majestic dot and then drown off through the portal site .
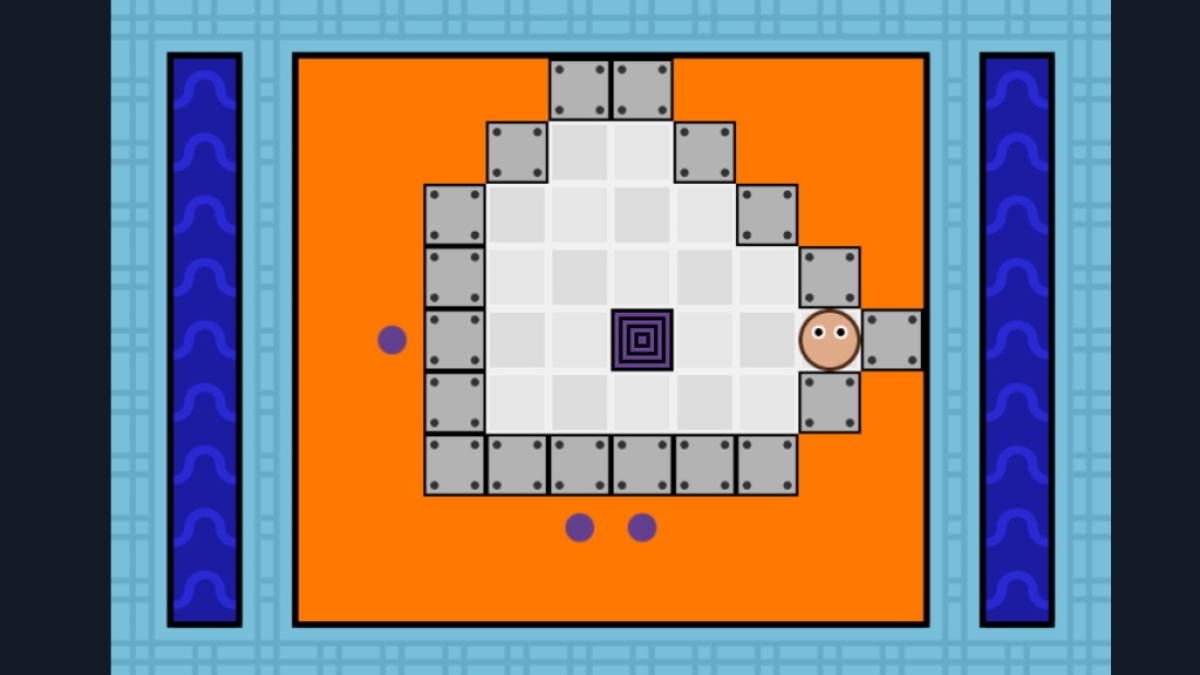
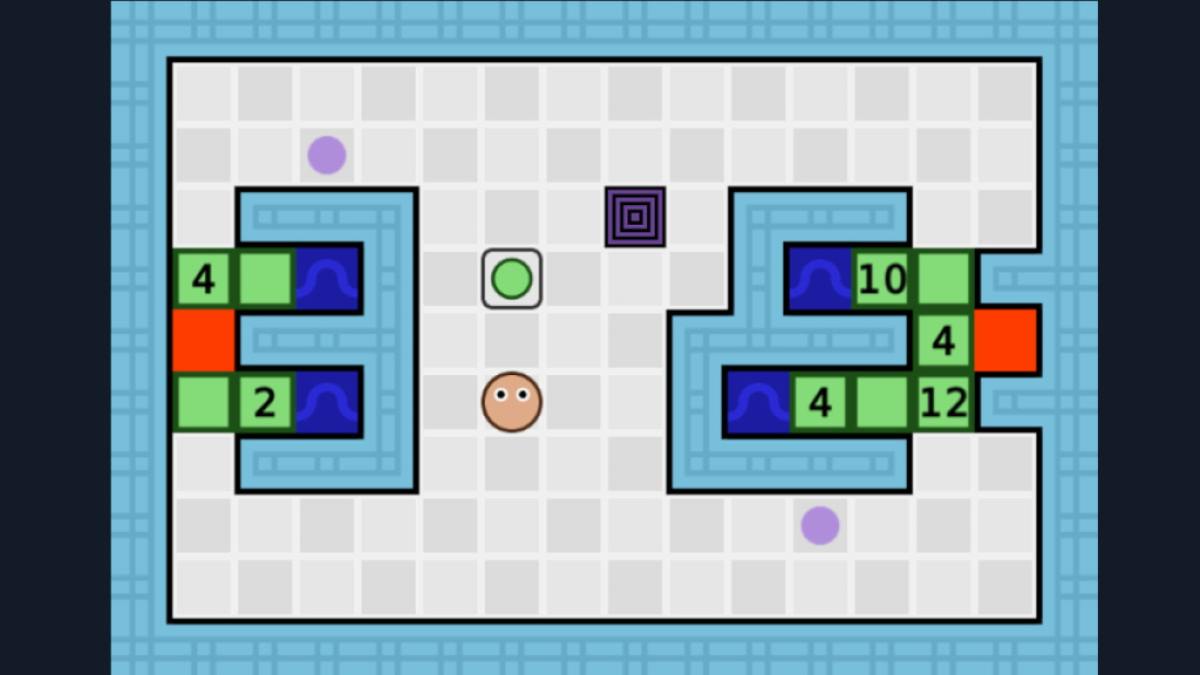
Level 13
This level is all about edging the blocks outward to expand your playable country while not letting the lava in . The image above express how it is done for the first three purple acid . only repeat for the other three .
Level 14
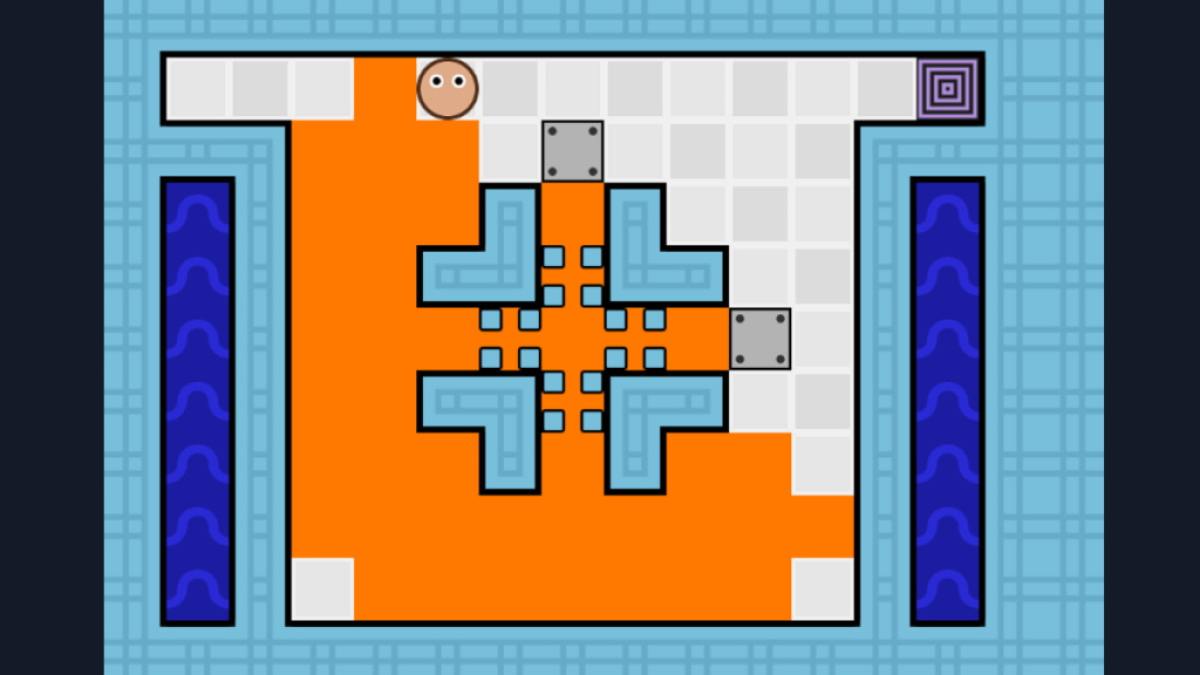
Ooh , a newfangled plaything . The galling spaces with the blue square in each street corner block you whole but have the lava through . Here , you simply need to efficiently advertise the three moveable blocks to block each side , which you have just enough time to do .
Level 15
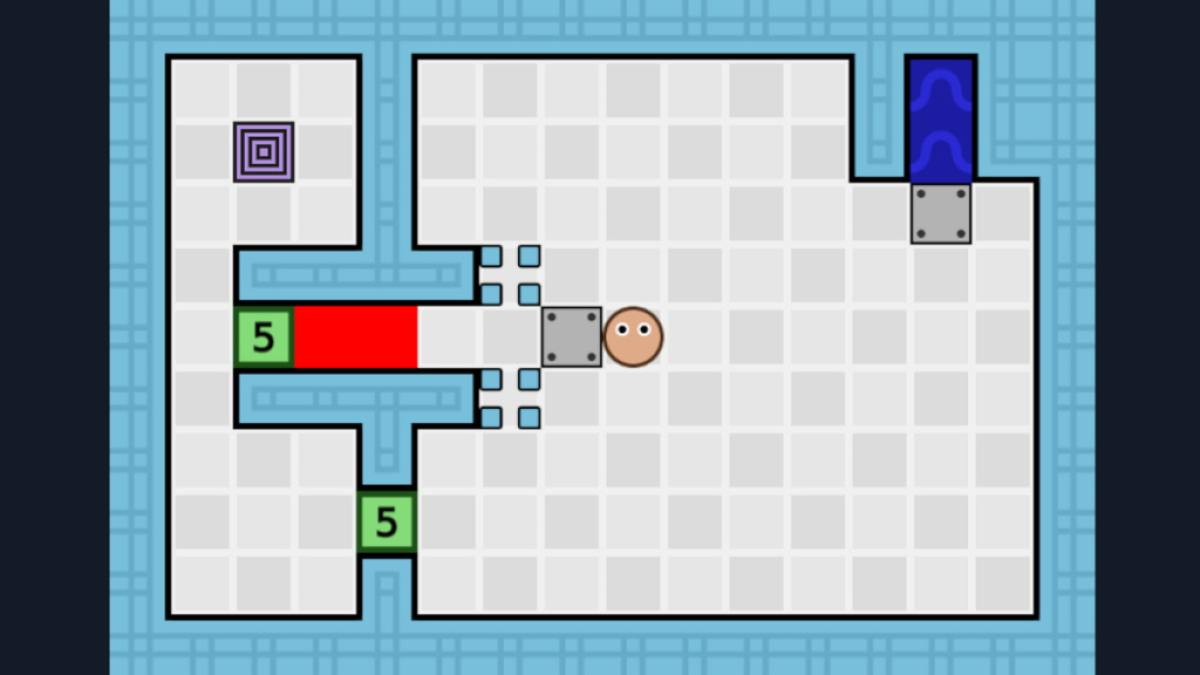
Once more , the weewee is your enemy here . expeditiously push the top moveable block so that it choke up the water . Next , move down to the bottom block and put it in place to move right through the lava . If you ’ve clock it perfectly , the green square will disappear , allow you to push that block forget and into the lava , quelling it . you may now move through the lower burrow and up to the portal .
Level 16
This is a more complicated version of level 1 , in which you have to outrun the lava rather than beat out it . Move down and tug the low-toned block to the right wing and then up , block the right lava flow . Then , move up and labor the top closure so it blocks the top lava stream . Now dash across and get the purple back breaker , then frighten away back just in time to escape . You have to be exact , but it does work !
Related : How to wash up Must get by the Haunted House ( Cool Math Games )
Level 17
Here you need to make yourself a footling castle rampart to survive inside while the dark-green block stop you from have to the portal runs down . Once you ’re in the place I ’ve shown above , push the terminal mental block into the eye of your little shelter , go to the other side of it , and complete your bulwark just in time . Then just expect out the timekeeper and you ’re barren .
Level 18
Another unexampled square to encounter with ! These dark squares block both water system and lava , and you could take the air on them too . For a pleasant change , there is no surge here . Move the veracious cube to the right side of the portal , then move the top and bottom blocks so they ’re directly above and below the first block ( see prototype ) . Now merely campaign the in-between pulley block left twice and dribble through the portal .
Level 19
advertize the block up and right and then down through the three laval space in the top right . Move quickly down and left so that you ’re in front of the greenish block in front of the portal . It will disappear just in prison term for you to fly the coop .
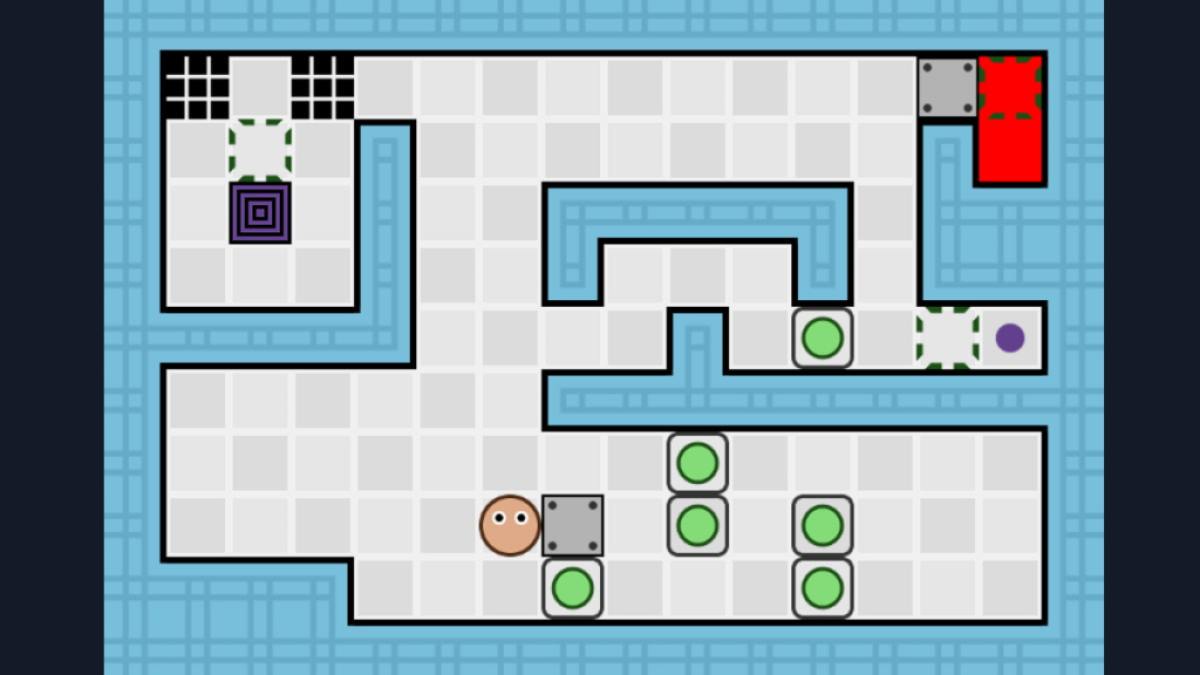
Level 20
You require to take the lava out before the green blocks time out . Efficiently move up to the top remaining occlusion down between the two top green pulley block . Move the top - right engine block onto the key right black space . Use the bottom - right block to go between the bottom two green squares . Finally , move back to the moveable pulley block on the rightfield and push it through the center .
Level 21
compact or covering the green button affects the green squares in various manner . In this instance , you just want to push the moveable city block over the green button . Once done , you’re able to just grab the purple dot from the top room and walk out of the level .
Level 22
incisively push the primal moveable block until it cover the dark-green button on the low-toned left corner . Now move up and around the top left cube , pushing it down onto the other green release .
As you move back down again , collect the first transportable block ( that is on the low light-green button ) and crusade it back to the right and then up and through the passage to be in front of the left green occlusion that ’s counting down by the lava . This will block it , allowing you to leave once the other green block ’s sideboard hits zero .
Level 23
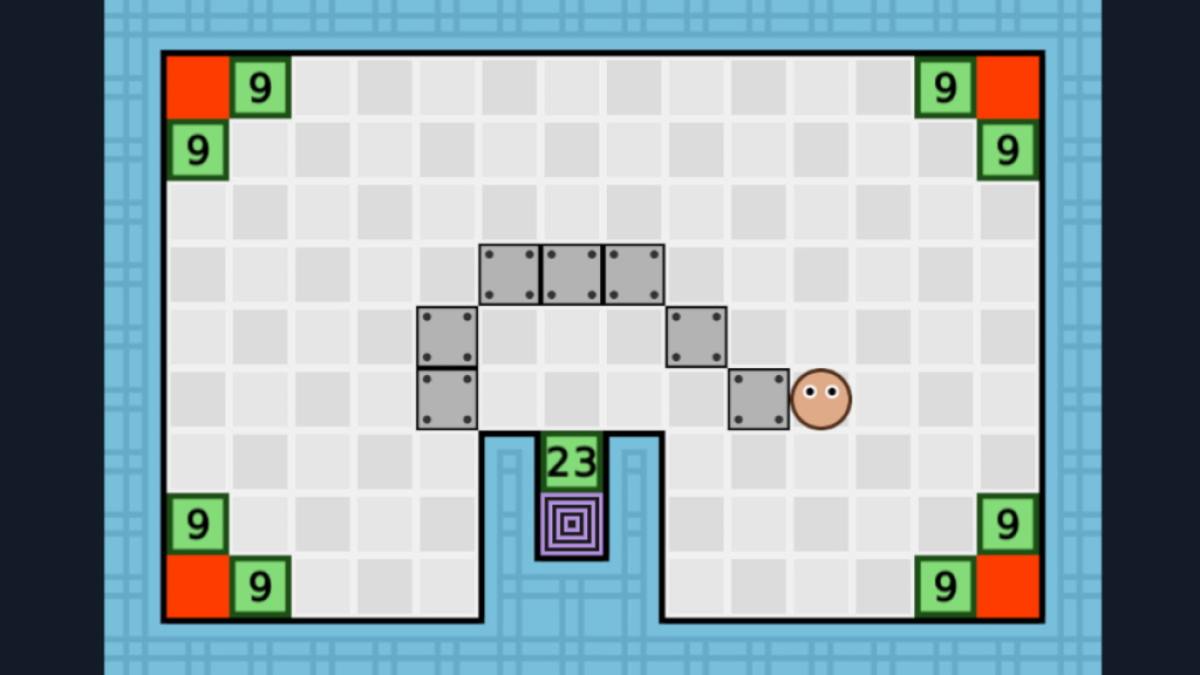
Your timing demand to be exact here . Move up , right , up , left ( onto the green button ) . Move aright off the clit , parry the lava on the left . Then , move clockwise around the clitoris , stepping on it again when the bottom green roofing tile on the rightfulness is about to go from 1 to zero . abuse off the button again , and that lava is also dealt with . you may now gather up the dots in your own clock time and leave .
Level 24
maneuver across to the transportable blockage on the bottom left without touching any of the green button . Push the block right and up and then pass on so it destruct the top - left lava space . Now walk around the moveable block to its left side and push it right on across the map and into the top - right street corner ( just in front of the fleeceable block ) , blocking the lava there too .
Move down and left through the green push button so that you ’re on the right of it . Push it out and down , and then right until it covers the immature button visualise above . This gives you submission to the imperial dot ’s location . congratulation ! You ’ve beaten Lava and Aqua .
For more Cool Math Games guide on here at Pro Game Guides , check outHow to beat Stage 11 on BloxorzandOpen 50 Doors Walkthrough !
Screenshot by Pro Game Guides
Screenshot by Pro Game Guides
Screenshot by Pro Game Guides
Screenshot by Pro Game Guides
Screenshot by Pro Game Guides

Screenshot by Pro Game Guides
Screenshot by Pro Game Guides
Screenshot by Pro Game Guides
Screenshot by Pro Game Guides
Screenshot by Pro Game Guides
Screenshot by Pro Game Guides

Screenshot by Pro Game Guides
Screenshot by Pro Game Guides
Screenshot by Pro Game Guides
Screenshot by Pro Game Guides
Screenshot by Pro Game Guides
Screenshot by Pro Game Guides

Screenshot by Pro Game Guides
Screenshot by Pro Game Guides

Screenshot by Pro Game Guides

Screenshot by Pro Game Guides
Screenshot by Pro Game Guides
Screenshot by Pro Game Guides
Screenshot by Pro Game Guides
