A glimpse of a masterpiece .
Final Fantasy 7 Rebirth Demo narrates the story of the Nibelheim portion fromCrisis Congress of Racial Equality , or at least a variant of it , including an awful miniskirt - game , boss combat , and cliffhanger to conclude the curtain raising segment . Read on for a full walkthrough of the integral FF7 Rebirth Demo .
Final Fantasy 7 Rebirth Demo: Full Walkthrough
The demo bug out with a unretentive recap of what happened in Final Fantasy 7 : Remake . Afterward , you ’ll plunge directly into battle withSephiroth .
Full Nibelheim Demo Walkthrough
Take your clip in learning how to use Sephiroth and execute his combos . I recommend you exercise not getting hit during this engagement sinceSephiroth ’s special attack saloon will readjust if you get run into by an opposition .
Nibelheim
After the battle and a unretentive cutscene , you ’ll be at Nibelheim . Cloudwill be the primary governable character at this point . The first objective is to eithervisit your mother ’s houseorclimb up the water pillar .
Before you head there , there are a couple of chests and collectibles scattered around the Greenwich Village . you could practice the images above as a ocular mental representation of the chest locations and here are all of descriptive localization :
After climbing the Water Tower , you’re able to visit either theNidhogg Hotel or Tifa ’s House . Going to the Nidhogg Hotel will allow you to meetZanganand pillow for the expedition while going to Tifa ’s House will unlock thefirst Piano Sheetfor the miniskirt - plot .
Once you ’re done getting your highest score on Tifa ’s Theme in the Piano miniskirt - game , head to thesecond level of the Nidhogg Hoteland get quick to explore Mt. Nibel the following day .
Related : All new and returning car-mechanic in FF7 Rebirth
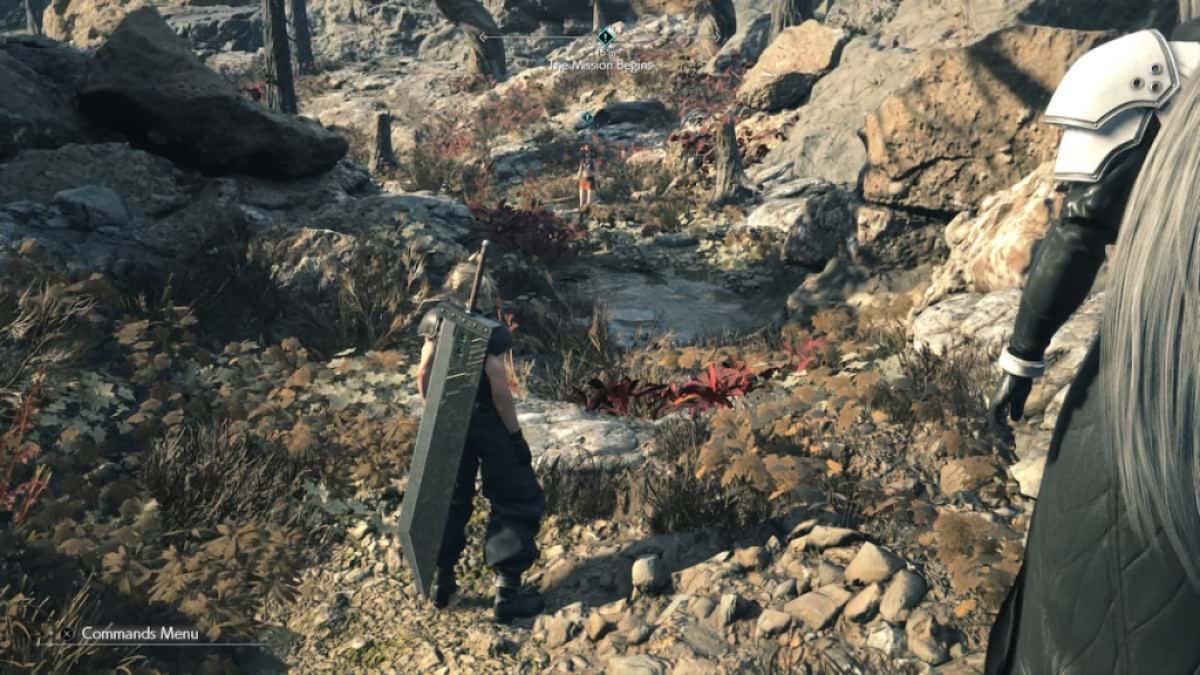
Mt. Nibel
After a shortsighted cutscene where Cloud decides to wander off on his own , take the diametric route of Sephiroth and Tifa and struggle a few more monsters until you reachTreasure Chest # 1 in Mt. Nibel , which contains2 motley hi - potion . you may utilise the image above to see the worldwide country of Treasure Chest # 1 .
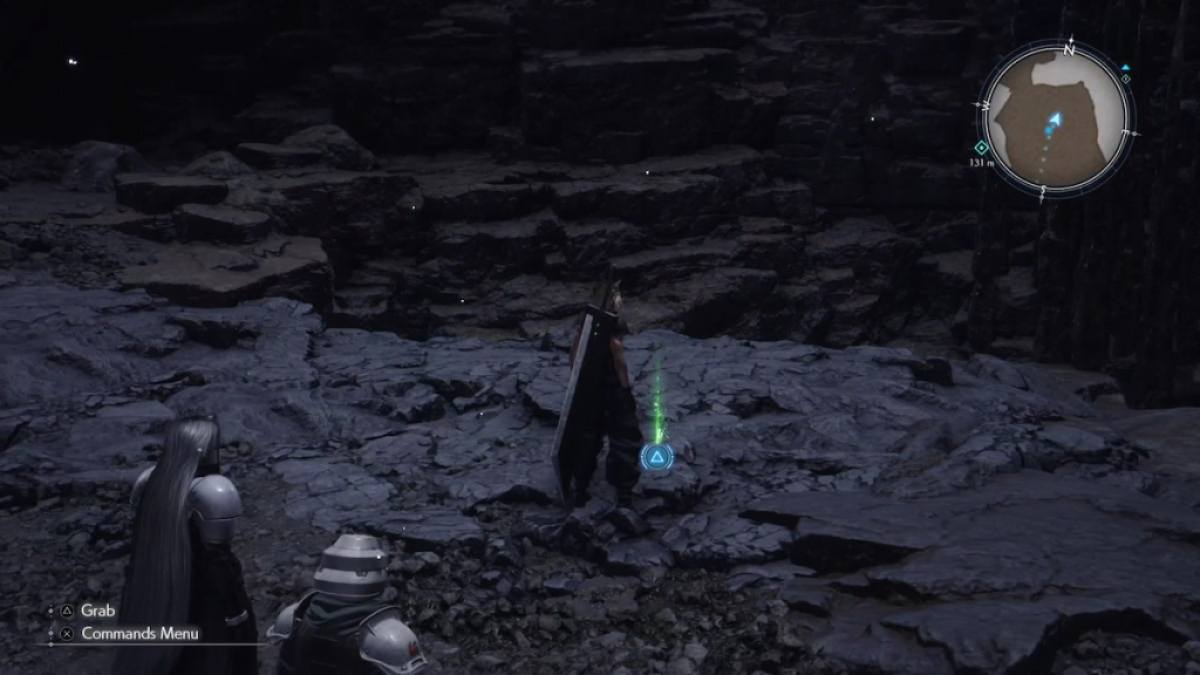
In the image above , if you keep heading up the side , you ’ll see aglowing green materiaon top of the rock pillars . Get behind the rock pillar and hold R2 , and you should mechanically overleap to the materia . blame up the materia will grant you Aero ( Wind Materia ) . Push forward , and you ’ll notice a dead end . Then , Tifa will guide you in the correct direction . After crossing through the narrow-minded opening , you ’ll end up at theMako Measurement Facility .
Related : Best in biz configurations for FF7 Rebirth Demo

Screenshot by Pro Game Guides
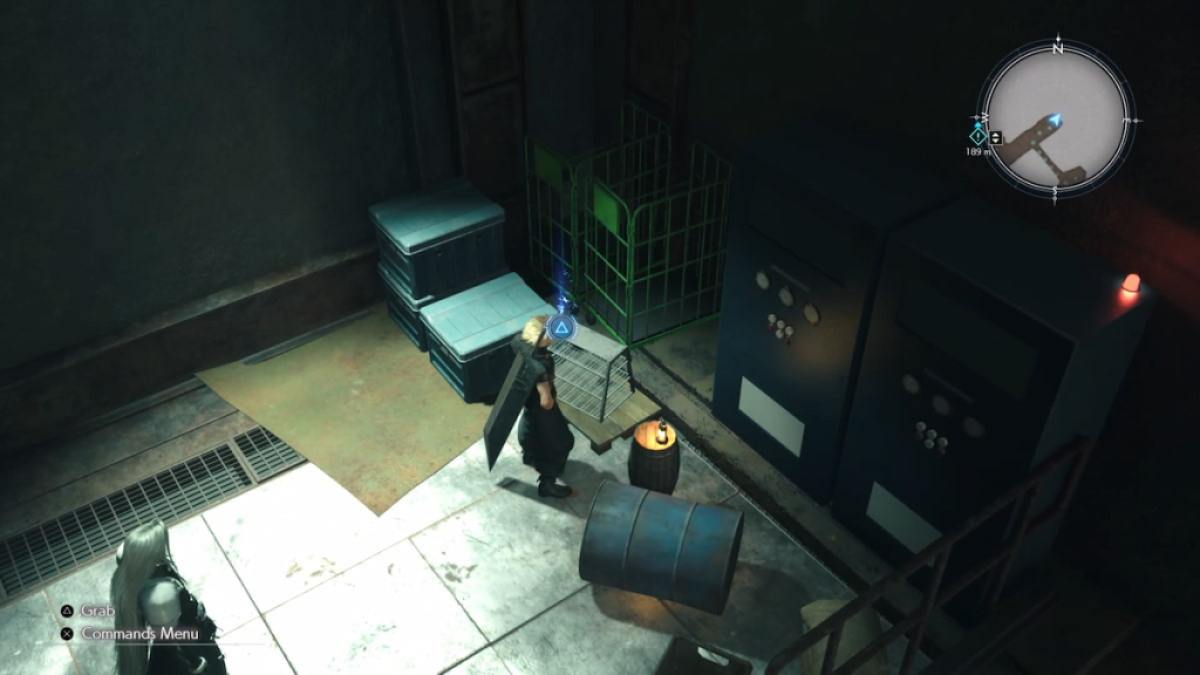
Mako Measurement Facility
Once you enter the readiness , now maneuver up the stair and turn right . find fault up the drear materia ball , and you ’ll get theLevel Boost Materia , as shown in the image above . Take the elevator , and you ’ll encounter theScreamer . UseCloud ’s Punisher Modeto instantly stand off the Screamer ’s swinging branch . Once the Screamer is careen , useFireto eliminate the beast .
After the fight , continue forth , and you ’ll have a light and easy mystifier to solve . To activate the lift , you ’ll need to expend thePurifierto get rid of all the superfluous Mako within the surrounding area . only interact with the Purifier(L2 Button)and thrust / pull it toward the concentratedMako energy(i.e.glowing green smokeson the ground as seen in the 2d photo above ) spots .
Take the elevator up , and you ’ll get to theSouthern Ridge - Summit Approach area . There are no enemies nor chests in this field , so proceed to the Bridge where a minuscule cutscene will play , bringing you to theGunnthra River Falls .

Screenshot by Pro Game Guides
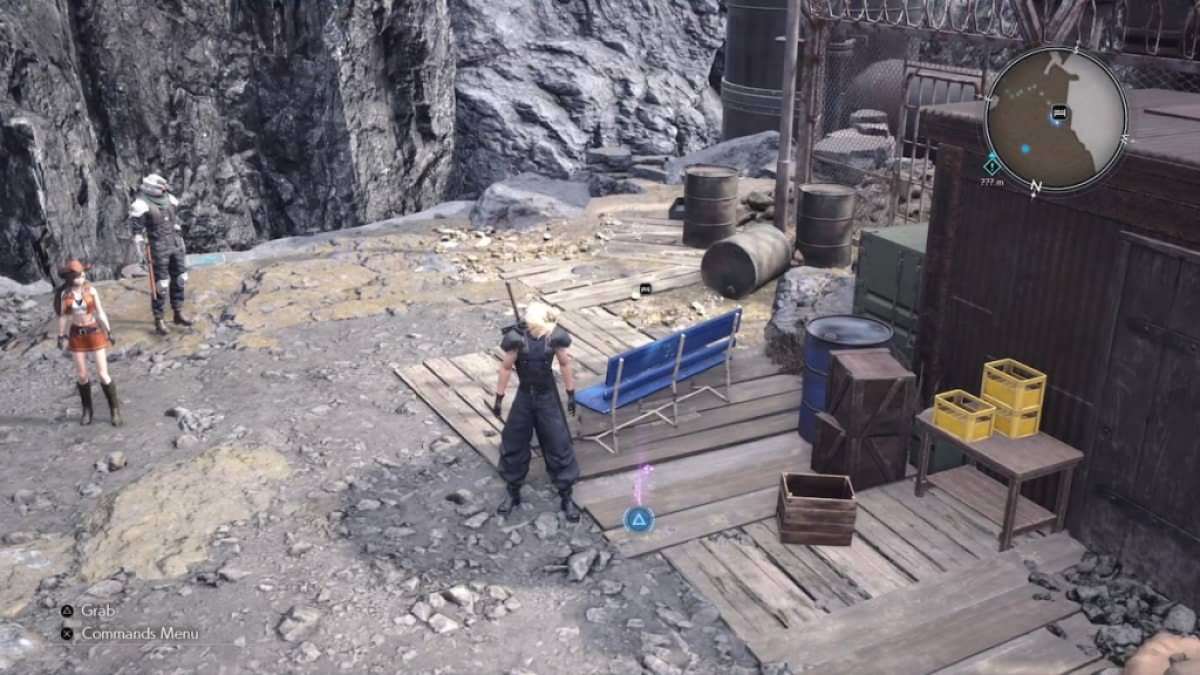
Gunnthra River Falls
Sephirothwill now conjoin your company from this degree forward , so make certain to set him as theparty leaderso you could always contain him first at the beginning of every battle . In the exposure above , after you climb up the initial set of rock in front of you , you ’ll see arest stop and an HP Up Materia .
Here are all the new devil within this region :
Proceed to the cave in front of you after disposing of a few Insectoid Chimeras , and go direct to the right side of the cave where you could acquire theEmpowerment Materia , which enable you to employ Bravery . It is near thenorthern cornerof the cave plane section , as seen in the pic above . Press ahead , and you ’ll come across a forgetful cutscene once you hit the Mako Spring .

Screenshot by Pro Game Guides
At this point , the game isvery analogue , so you wo n’t get lost while explore . However , I do urge you make a detour before you reach the 2nd Shinra Facility to obtain theMagnify Materia . You have to scale a set of rocks downward to prevail the material ; chink the second exposure above for your map mention .
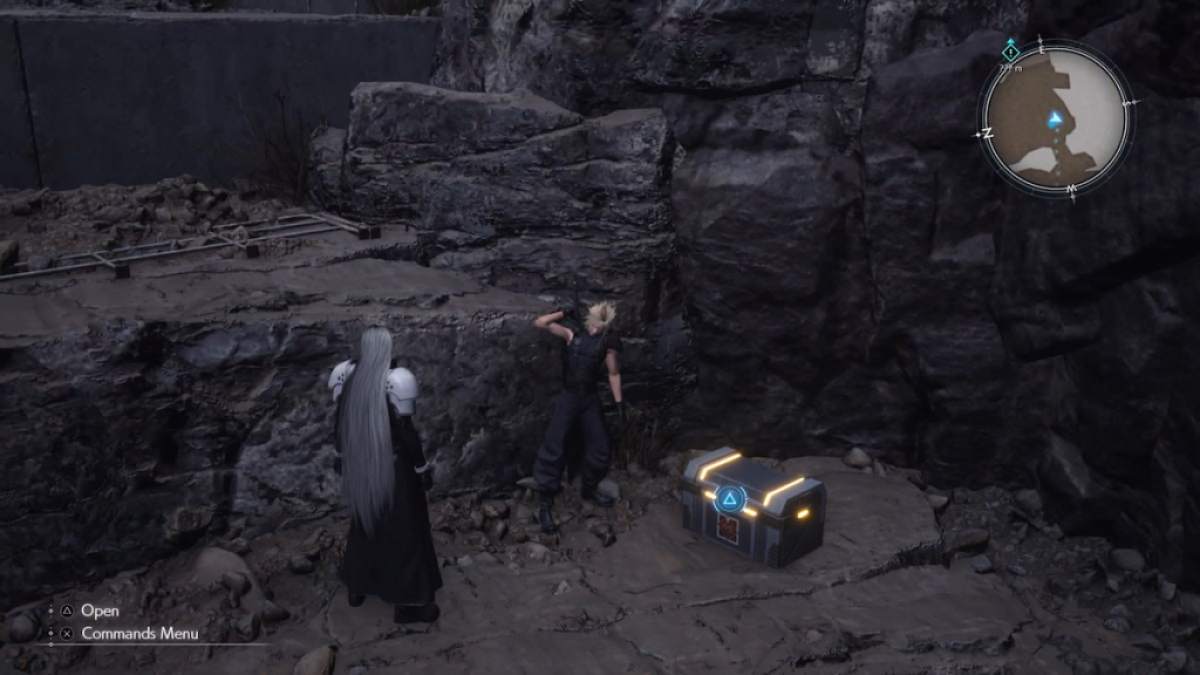
After hold the Magnify Materia , push through to the next Shinra Facility , and you ’ll fightZu . Its helplessness is idle words , so have Sephiroth or Cloud castAero . Move forward , and you ’ll see thefirst treasure chestin this area , which contains a mega potion . The hoarded wealth thorax is on theright sideafter the Zu fight , as seen in the picture above .
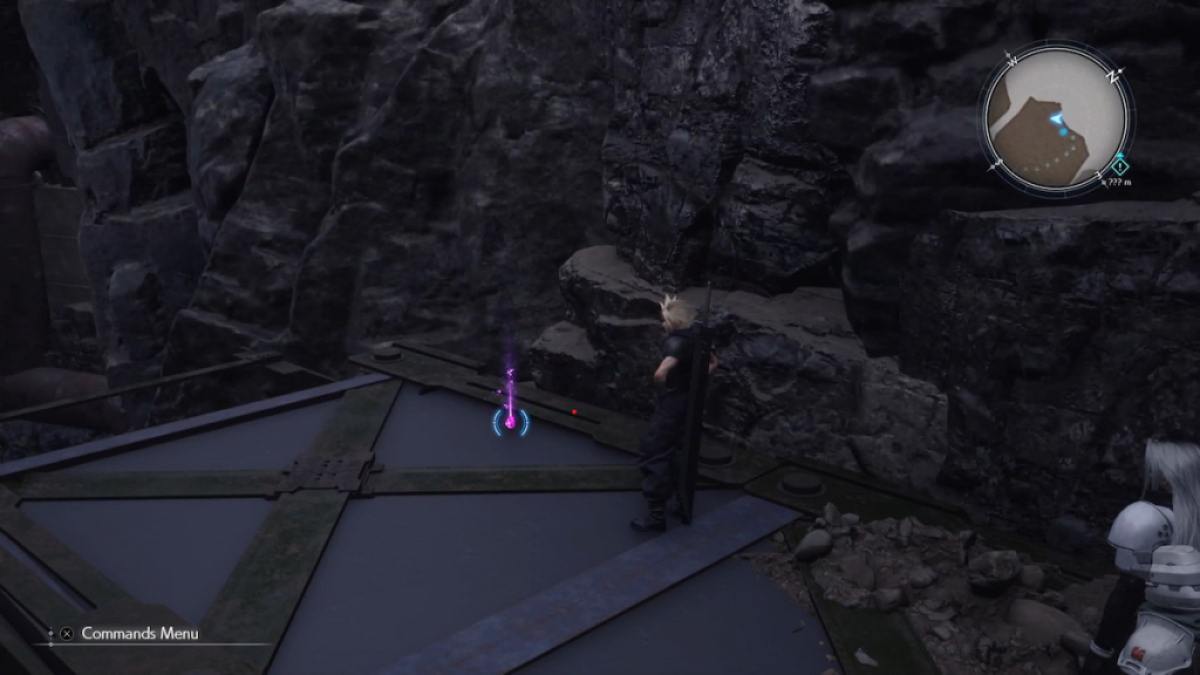
Opposite the gem chest , you ’ll see aglowing purple materialon top of a pocket-sized metal edifice ( refer to the photo above ) . Use the rocks behind the building to get to the cap , and you ’ll hold thePrecision Defense Focus materia , which is very useful forextending your " counterpunch " window time .
Screenshot by Pro Game Guides
Make your way up the adroitness by using theset of run , and you ’ll see anotherglowing materiaon top of a clustering of crate . foot it up , and you ’ll get theAuto - Cast materia(First photo above ) . Ascend the ladder once again , and you ’ll see a glow green materia on the veracious side of your screen . PressR2to traversal through the area , and you ’ll gain aComet materia(second photo above ) .
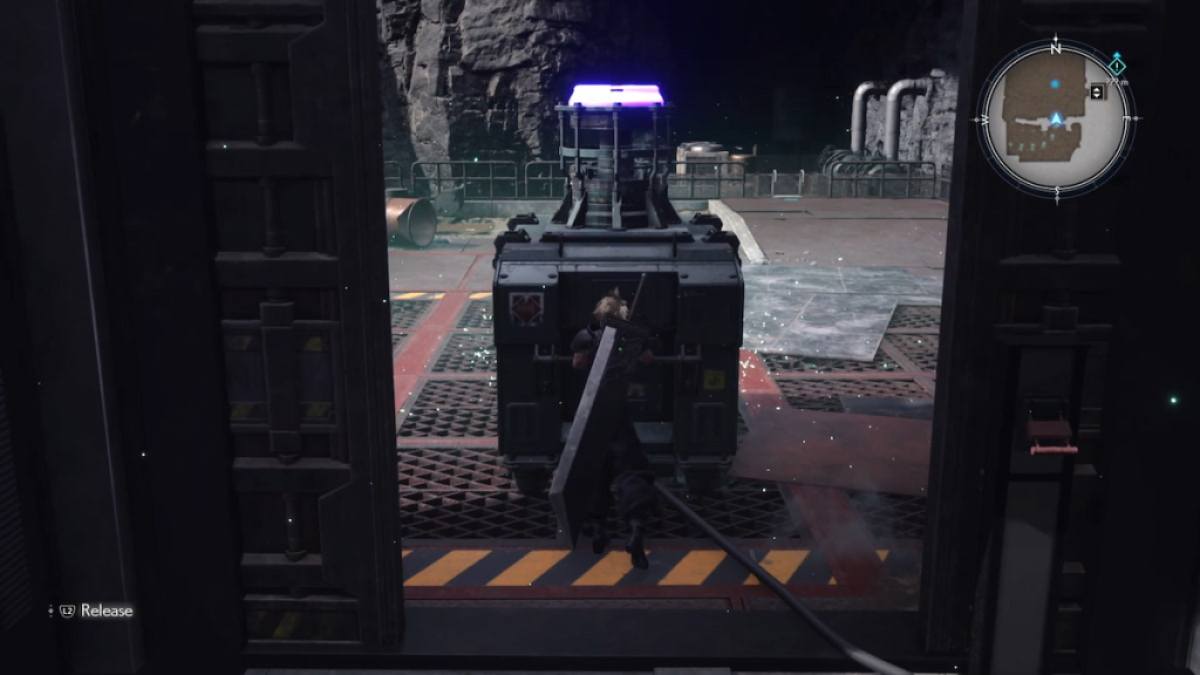
The next segment involves the Purifier once again , but this sentence , you ’ll have toopen the gateso you may reach other Mako Spots with the Purifier . Before open up the gate , fight the Purifier to theMako spot in front of itand then clean the rest afterward .
employ the new working elevator to ascend , and channelise over to the fenced area , where you ’ll see thesecond Treasure Chesthousing anElixir . you’re able to also go down a set of step next to the eternal rest spot to get to thethird Treasure Chestcontaining anotherElixir . Use therest spotif necessary , as the next part is a honcho battle . The general location of both chest can be visualise in the photo above .

Screenshot by Pro Game Guides
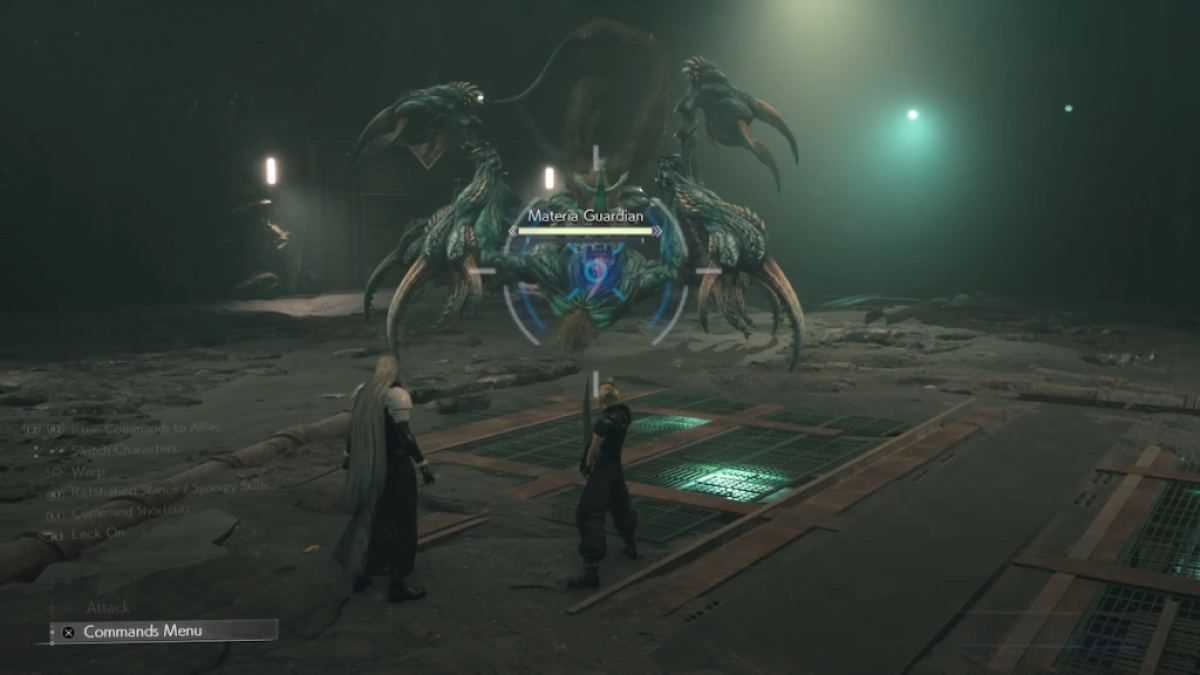
Materia Guardian Boss Fight Guide
The easiest fashion to fend off the Materia Guardian in its first phase is by focusing on either theLeft or Right Hindlegswhenever Sephiroth or Cloud gets attain with theSeizing Claws . you’re able to also prefer to useCloud ’s focussed Thrustto build up pressure , as well as the Synergy Skill calledVoidshatter .
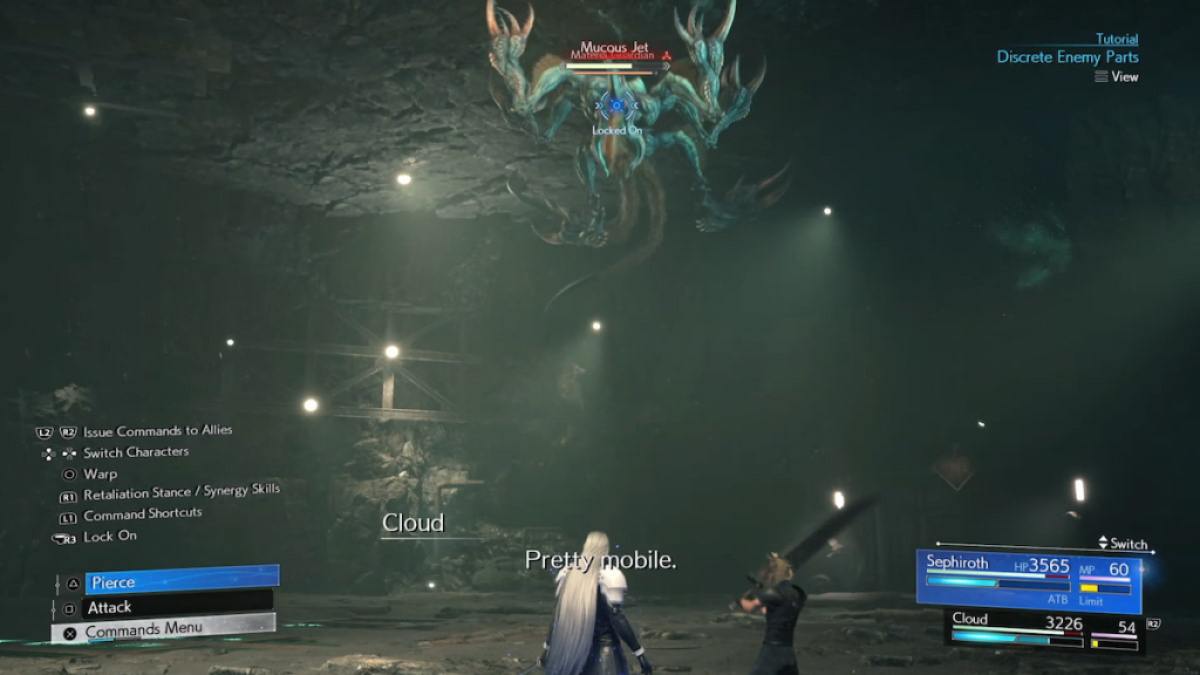
In the 2d form , the Materia Guardian will surmount the wall and use various range plan of attack on Cloud and Sephiroth . Use the Synergy SkillCounterfireto contradict its range attacks likeMucous DischargeandStonefall onslaught . Keep echo this strategy for the second phase until you may use any Fire spell to lend it down .
Lastly , in its third phase , the Materia Guardian will stand on the Mako Pipes , further authorize its attacks . Use Synergy AbilityDouble Helixto topple it from the high ground . Expend yourATB gaugesandLimit Breaksat this point to chuck out of the boss immediately .

Screenshot by Pro Game Guides
Related : FF7 Rebirth State of Play breakdown : Modern story content , gameplay footage , minigames & more !
Aftermath
After defeat the Materia Guardian , there ’s not much else to do other thanfollow the storyand go forward to the nuclear reactor . For this reason , I decide to keep the total aftermath section out of the guide since it ’s mostlycutscene - found and storytelling scenarios , which everyone should experience at first hand .
Full Junon Demo Walkthrough
The Junon section of FF7 Rebirth revolves around exploring a small receptive area of the secret plan where you ’ll be able totransmute items , gather hoarded wealth , and much more . Since the primary objective of the plot is to find uncommon variants of monster in the field and one story - based boss , I ’ll focus on providing information on those instead .
From here on out , I ’ll only haveTifa , Aerith , and Cloudas my party members , as I have finished the full Junon demo by only using those three .
Fiend Sighting 1: Enmidunk Mini-Boss
The first Fiend Sighting you ’ll encounter aretwo Enmidunks . Enmidunks areweak to fire , thus makingClouda very in effect character because of hisPunisher Mode and Firebolt Blade . Once the combat begins , ramp up up Cloud ’s ATBand castFirebolt Blade .
The Firebolt Blade will cause the Enmidunks to useSee Red , which willincrease their defensesand begincounterattackingyour melee attacks . Do n’t vex too much about this , and keep Cloud in hisPunisher modeand castFirebolt Blade .
Once either of the Enmidunks is lurch , useTifa to storm up the Stagger Multiplier . Finish them off with Cloud ’s Firebolt Blade , and you ’re done with the first Fiend Sighting .
Screenshot by Pro Game Guides
Related : All Minigames in Final Fantasy 7 Rebirth
Fiend Sighting 2: Fonadu Mini-Boss
The Fonadu is a very straightforward boss combat . It ’s weak toAero and Aerora , so you should outfit your party members with those spells . Once you inflict enough equipment casualty during the battle , Fonadu will castDeath From Above . You should prepare tododge this attackas it ’s the only mode topressureit during battle .
Fiend Sighting 3: Whymzelett Mini-Boss
Whymzeletts are very annoying to mete out with , as they have a acquisition calledSoothing Breeze , which willknock all political party members awayandheal enemiesat the same time . Luckily , Soothing Breeze is also Whymzelett ’s downfall , as you may castBlizzard / Blizzarato cut off and force them .
I recommend puttingBlizzard / Blizzara with MagnifyonAerithto cut off both Whymzeletts if they decide tocast soothe Breeze . later on , it ’s just a matter of dodging their well - telegraphed attacks and finishing them off with Cloud or Tifa .
Fiend Sighting 4: Silver Chimera Mini-Boss
The two Silver Chimeras are the easy out of the Fiend Sighting questline . They do have muscular skills to appear out for , like the Aquatic Beam , but theyautomatically become pressuredafter using the skill . Make indisputable tododge the Aquatic Beamand rainwater downCloud ’s Focused ThrustorTifa ’s Focus Strike .
Silver Chimeras are also weakly to fire , making this fight even easier since Cloud has hisFirebolt Blade . Once either of them is lurch , useTifa ’s Unbridled Strength two times , castOmnistrike , then Rise and Fall . Finish both of them with Firebolt Blade , and you ’re done with the Fiend Sighting !
Related : Best Piano Performances We ’ve get a line From Cloud So Far in Final Fantasy 7 Rebirth

Screenshot by Pro Game Guides
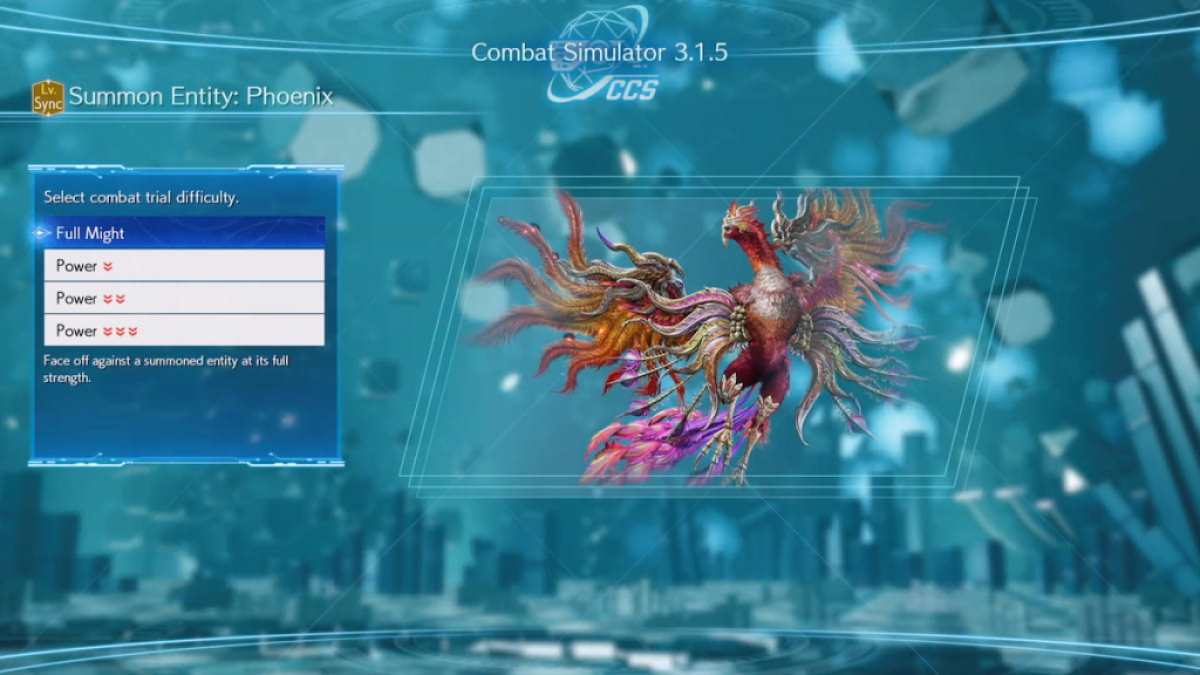
Phoenix Boss
It ’s fourth dimension for a hole-and-corner boss engagement . Phoenixmakes an appearance in the Final Fantasy 7 Rebirth Demo , and it did make its bearing make out inChadley ’s Combat Simulator . To unlock the Phoenix fight , you have tofight all enemy within Junon , admit thefour Fiend Sighting quests .
Afterward , you need to head to Chadley ’s location on the function above and clear theJunon Battle IntelandJunon Region Intel missions , and you ’ll unlock theSummon Entity : Phoenixmission in Chadley ’s Combat Simulator .
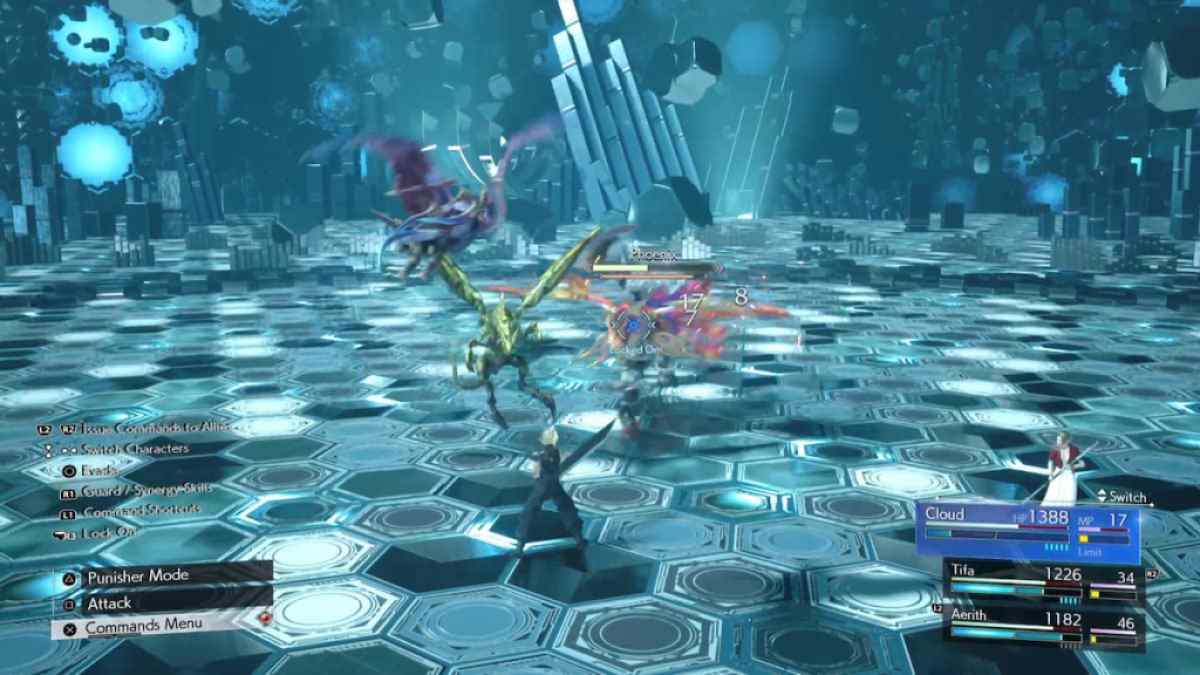
Phoenix is the toughest political boss I have ever find in the demo . To start , Phoenix commonly castsEmpowering Flame . If you fail to inflict enough terms and pressure Phoenix , it will benefit increase magic and attack damage .

Screenshot by Pro Game Guides
Phoenix can muster up three monsters when it castsBreath of Creation . The first set of monsters areFlan , Bomb , and Grandhorn . You demand to eliminate all threebefore you’re able to damage Phoenix again .
Once you administer enough damage to Phoenix , it will summons another set of three monsters . This time , the lusus naturae areFleetwing , Archdragon , and Ogre . Dispose of them , and Phoenix will castEmpowering Flameagain .
If you give way to interrupt it for the 2d fourth dimension , it will useRebirth Flame , which is usuallya one - shot accomplishment , wiping out your entire political party . Even if you manage to survive Rebirth Flame , you ’ll encounterthree newly summoned foeman at once .
Screenshot by Pro Game Guides
Keep your party in top shape by having at least two extremity withCure / Cura . Phoenix is weak to Ice , so haveAerithcastBlizzard / Blizzaraduring Empowering Flame . Use all bound breaks once Phoenix is flounder , andsummon Ramuhwhen you get overwhelmed by the goliath summons .
If the conflict is too elusive for you , Square Enix added acombat difficultness adjustmentfor Phoenix . you’re able to opt tolower its strengthso you do n’t get defeated trying the battle over and over again . Lowering its strength does n’t have any untoward effects on the reward . you could still make thePhoenix summonthrough this method .
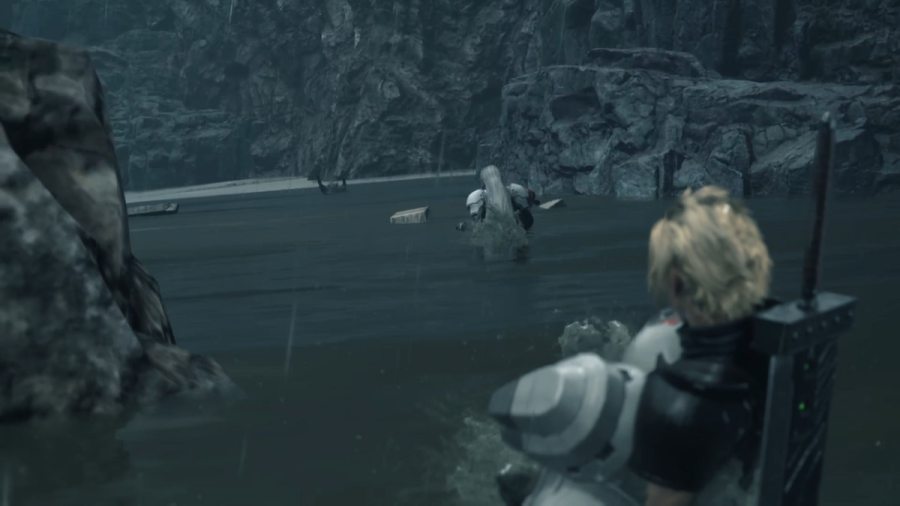
Terror of the Deep Boss Fight
The last story hirer of the Final Fantasy 7 Rebirth Demo is the Terror of the Deep . Avalanche come intoJunon Cityand amount across Yufi , who seems to be in deep waters as she encounters theTerror of the Deep .
The scrap is very gentle comparative to the Summon Entity : Phoenix mission . TheTerror of the Deepis weak to lightning , so have eitherTifa or Aerith use Lightning Spells . Cloud can centre on dealing strong-arm scathe upclose . If any of your member get trapped in theWater Cellability , use Lightning to quickly destroy it .
The Terror of the Deep can also use its derriere to perform a catch attack , which deals massive hurt . Use any other destitute party members todeal damage to the tail . If you damage the posterior enough , you ’ll stun the Terror of the Deep .
Screenshot by Pro Game Guides
In itssecond phase , the Terror of the Deep will get down to submerge under the platform and will reappear to damage your party . Keep up the same strategyorsummon Ramuh , as it has more or less the same moveset in its 2nd phase angle , and you ’re finally finish with the demonstration .
For more guide inFinal Fantasy , condition outAll DMW Effects and Limit explained in Crisis Coreright here in Pro Game Guides .

Screenshot by Pro Game Guides

Screenshot by Pro Game Guides
Screenshot by Pro Game Guides
Screenshot by Pro Game Guides

Screenshot by Pro Game Guides

Screenshot by Pro Game Guides
Screenshot by Pro Game Guides

Screenshot by Pro Game Guides

Screenshot by Pro Game Guides
Screenshot by Pro Game Guides
Screenshot by Pro Game Guides

Screenshot by Pro Game Guides

Image by Pro Game Guides

Screenshot by Pro Game Guides

Image by Pro Game Guides

Screenshot by Pro Game Guides

Image by Pro Game Guides

Screenshot by Pro Game Guides

Image by Pro Game Guides

Screenshot by Pro Game Guides
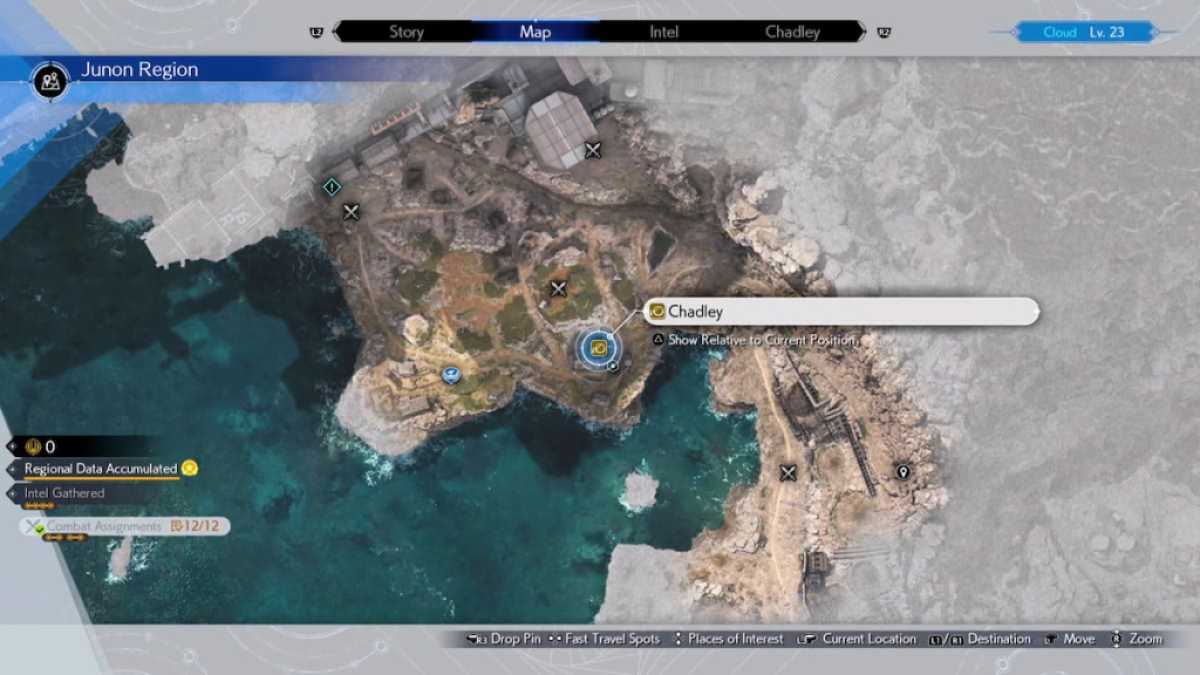
Image by Pro Game Guides

Screenshot by Pro Game Guides

Screenshot by Pro Game Guides
Screenshot by Pro Game Guides
Screenshot by Pro Game Guides

Screenshot by Pro Game Guides
