All the soundness you need .
Like every innovative Zelda plot , The Legend of Zelda : replication of Wisdom has hundreds of item to collect , puzzle to solve , and quests to complete . Whether you ’re struggling to find something or just are n’t trusted where to commence , this Legend of Zelda : Echoes of Wisdom walkthrough has what you need .
Legend of Zelda Echoes of Wisdom Walkthrough - Quest List
This quest lean is split into two portion . The first table heel the master quests and what you must do to complete them .
There are also a variety of side pursuance to feel and complete in Echoes of Wisdom . The follow table lists the name calling of each quest , how and where to get them , how to complete them , and their rewards . Their order in the table is the order I happen them in - secret plan because some of them will only become useable after sure rupture or other quest are complete .
All Cucco Locations for the Cucco’s on the Loose Quest
How to complete the Deliver the Grilled Fish quest
Before starting this quest , I extremely commend going to the forest Second Earl of Guilford of Seesyde Village and clearing out the monsters . It ’ll be immensely easier than trying to protect the grilled fish while fighting off monstrosity .
This quest requires you to pick up the Grilled Fish in front of the woman(A1)and deliver it direct to her son in the forest . The quest will not work if you summon the grill fish using an echo .
After grab the fish , die the village toward the north(A2)and walk toward the river . The wanton way to track the river I ’ve found is to apply beds as a bridge(A3)and thresh the grill Pisces onto the grass on the other side(A4 ) . subsequently , carry the fish to the cliff the woman ’s son is resting on(A5 ) . Set it on the land to build a staircase(A6 ) , then slowly throw away the Pisces the Fishes up the stairway until it ’s on the top ledge(A7 ) . set up it down in front of the tiddler to dispatch the delivery(A8 ) . recall to the woman in Seesyde Village to collect the reward .

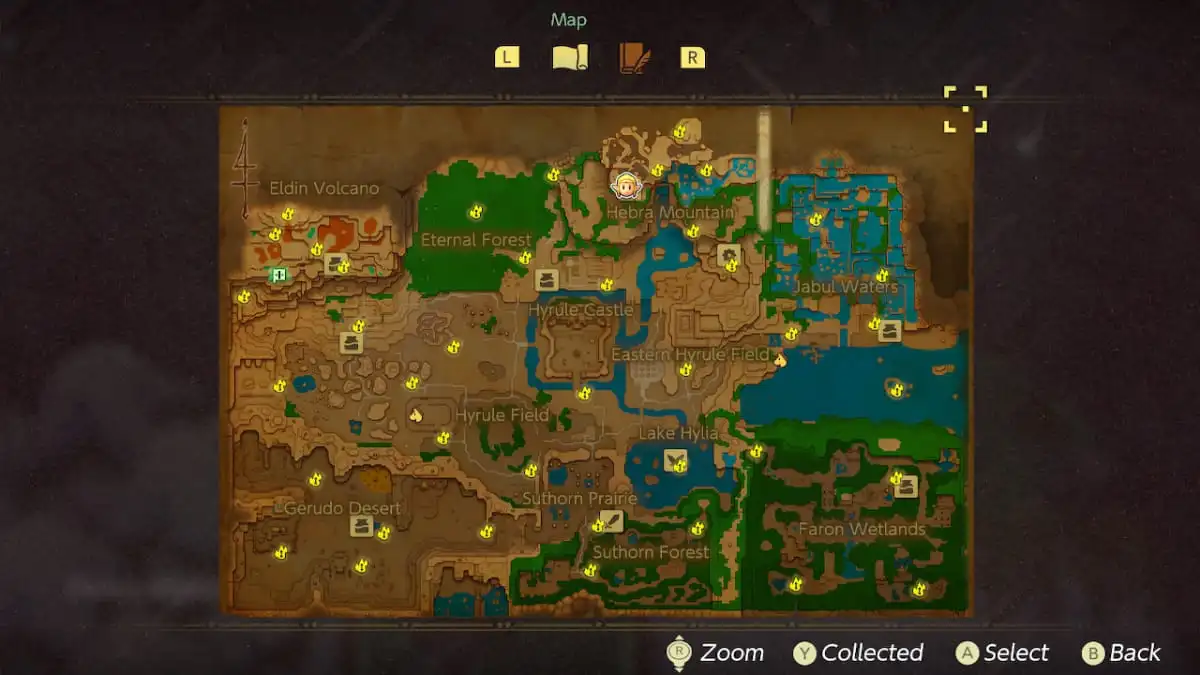
All Waypoint Locations in Echoes of Wisdom
This function shows all of the Waypoints on the Hyrule single-valued function . The symbols representing them are sensationalistic and form like them . Make certain to visit every one of these while exploring the area around it . There ’s nothing worse than experience to revisit an surface area and bring in you never activated the Waystone next to it .
All Echo Locations in Echoes of Wisdom
The follow table contains all127Echoes in the Legend of Zelda : Echoes of Wisdom and the locating where I originally found it . They are direct alphabetically from A to Z to serve you find what you ’re missing easily .
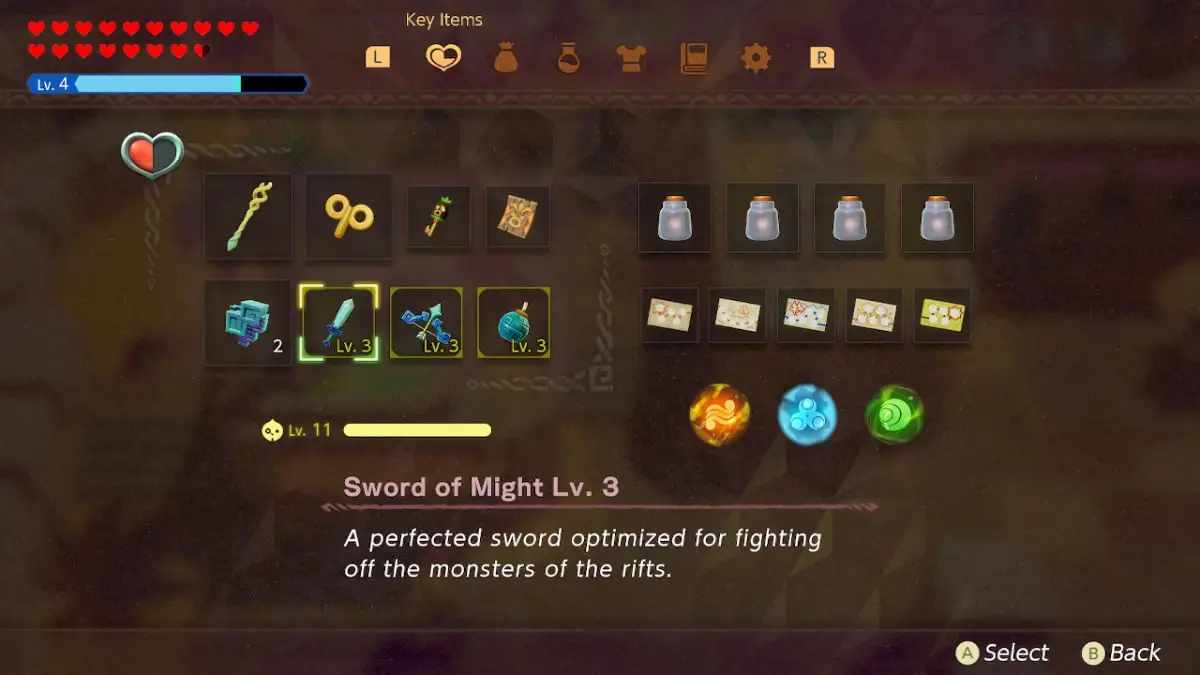
All Key Item Locations in Legend of Zelda Echoes of Wisdom
Key Items are used to go on further in the plot . While you do not have to assemble all of them , I commend get even the on the face of it unimportant ace to make your game easy . Several of them will be given to you automatically through the independent quest while others require you to take detours or complete side seeking .
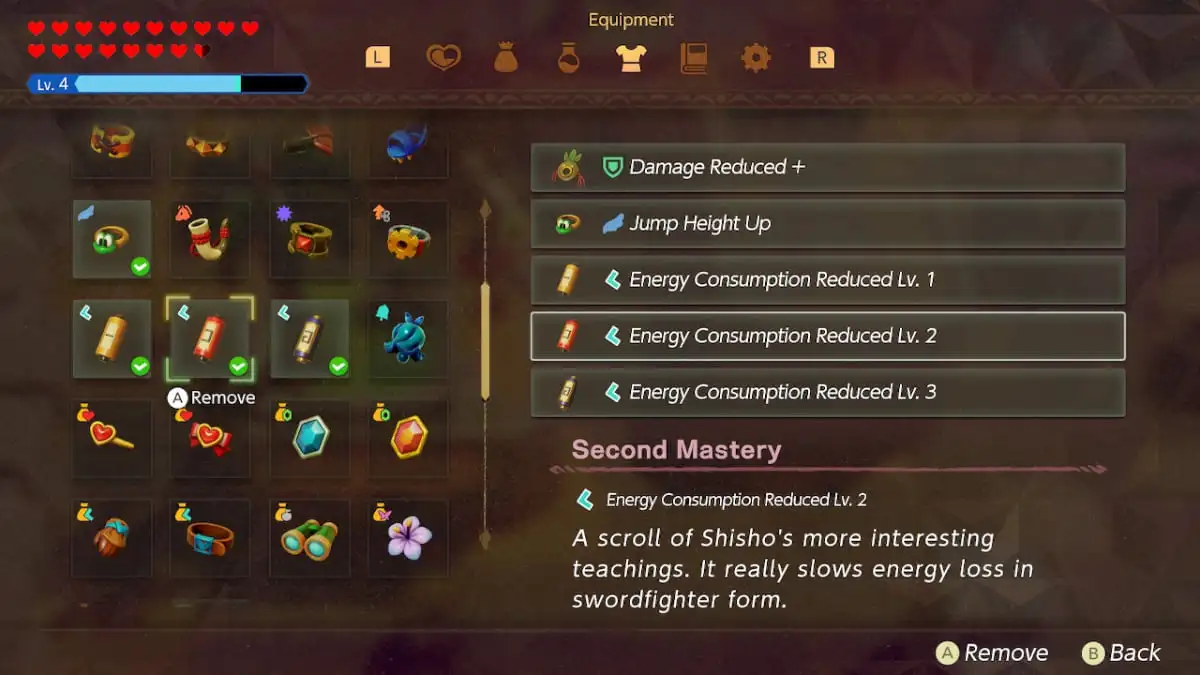
All Equipment Locations in Echoes of Wisdom
In Echoes of Wisdom , Zelda can wear out equipment to help her find specific detail , thin the peril of danger , and other helpful benefits . She can also change her outfits , some of which have special effects . Firstly , the table below goes over all of the accessory Zelda can wear .
This next table has every rig uncommitted to Zelda in Echoes of Wisdom . The first eight are available directly in - game while the last three require Amiibo to be scanned .
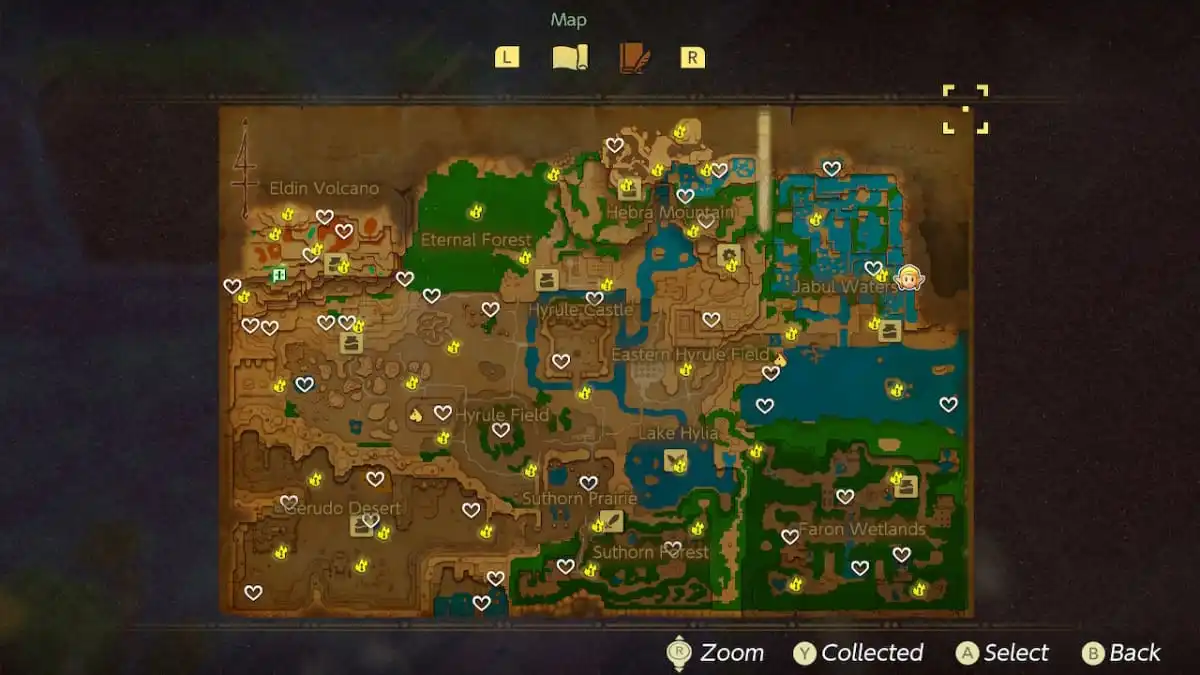
All Stamp Rally Locations in Echoes of Wisdom
In echo of Wisdom , you ’ll take to complete five Stamp Cards to earn all of Stamp Guy ’s reward . Each add-in need to be stamped five time to be completed . This means that you will demand to visit25separate emplacement to finish all of the cards . The map below shows the fix of every Stamp Rally stand in Hyrule . I ’ve screen out them into five groups free-base on the order I came across them in the game , so the order you find out them will likely disagree from mine .
Completing each Stamp Card gives you the following rewards :
All Heart Pieces Locations in Echoes of Wisdom
By gathering four pieces of heart , players will unlock a newfangled heart of wellness in Echoes of Wisdom . The tabular array below contains the locations of all 40 Pieces of Heart in the game .
In addition to the pieces of heart , you ’ll also getHeart Containersfor doing the following :
Suthorn Forest Heart Piece Cave
The second cave in Suthorn Forest is home to a Heart Piece(A1 ) . To take hold of it , you ’ll take to address the cave ’s trials . Climb down the run on the left over side of the entrance(A2)and take on the Caromadillo in the pit(A3 ) . I recommend dropping Sea Urchins into the muddle . The Caromadillo will ceaselessly incline into them until he is defeated .
You ’ll come in upon a passageway impede by boxes next(A4 ) . Set them on flak with an Ignizol(A5 ) , then go through the passage to accomplish the mounting wall(A6 ) . finish up the cave by jump between the mounting walls(A7)to get the Heart Piece . Be careful as a Caromadillo on a higher shelf that will drop down on top of you .
Holmill Western Hyrule Field Heart Piece
The cave containing this Heart Piece is at the easterly border of Hyrule Fields . Rather than going into the cave directly , head to the flaxen plot on top of it(A1 ) . Place a Holmill here to create a cakehole into the cave(A2 ) . You ’ll fall down right on top of the Heart Piece(A3 ) . To leave the cave , use Tri to pull the first bolder into a gap in the floor(A4 ) , rise over it , and crowd the second bolder into the disruption to the right of the ladder(A5 ) .
Holmill Cave Heart Piece Between Hyrule Fields and Eternal Forest
This Heart Piece ’s cave is at the border of Hyrule Fields and the Eternal Forest . Climb on the shelf on top of the cave and use a Holmill on the little patch of grit to make a hole into the cave . This hole will cast off you straight into the bedchamber with the Heart Piece . After grab it , use another Holmill to dig into the primary sphere of the cave .
Hyrule Field Boulder Heart Piece
This Heart Piece is beneath a bolder to the right of the cave holding another Heart Piece . Start by build a staircase on one side of the bolder , then apply Tri to snap up it(A1 ) . Next , climb the stairway while harbour the bolder(A2 ) . This will move the bolder onto the nearby ledge , give you access to the hidden Heart Piece .
Gerudo Desert Heart Piece Cave above Gerudo Town
The cave containing the Heart Piece is on the drop-off behind the enceinte edifice in Gerudo Town(A1 ) . After entering the cave , walk under the first Platboom to make it fall and take it out with your sword(A2 ) . Next , bait the 2nd Platboom to the ground(A3 ) . take the air by it to the stairs on the right(A4 ) , bait it again , and hop on top of it(A5 ) . tantalise it to the top of the ledge(A6)and summon your own Platboom to squeeze the boxes in the way(A7 ) . While still on the Platboom , utilise Tri to snap up the big boulder in the way(A8 ) . devolve on the Platboom to the top and walk forward to place the Boulder on the edge(A9 ) . This frees up the path , giving you the ability to walk up and snap up the Heart Piece(A10 ) .
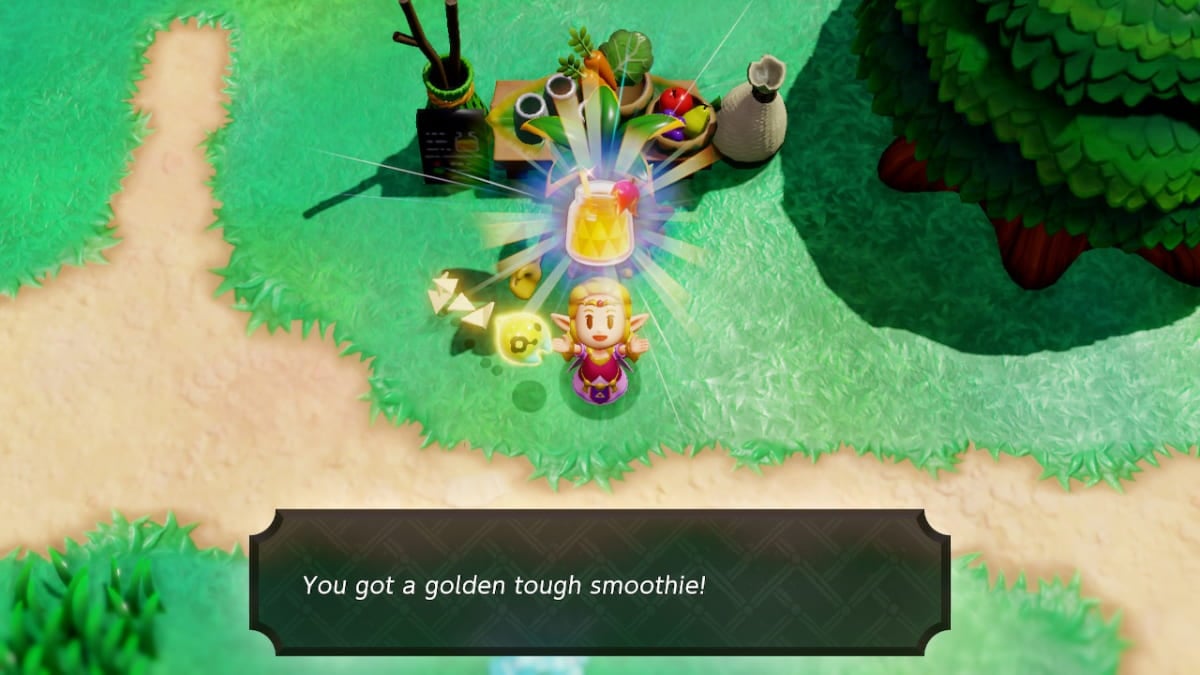
All Smoothie Recipes in Legend of Zelda Echoes of Wisdom
There are over 60 smoothy to make in Echoes of Wisdom , leaving you with a lot of experiment to do to receive them all . If you ’re tired of examination or just need a few more recipes for theRecipes Please!quest , this board contains every single formula in the secret plan . They are organized by telephone number like in the business gown ' shop . To reckon your collected recipes in - game , talk to a business chaparral , take the smoothie pick and pressure Y.
Any smoothie combinations not on this tilt will result in an Unfortunate Smoothie . When you ’ve unlocked them all , the Business Scrub will give you 10 Golden Eggs .
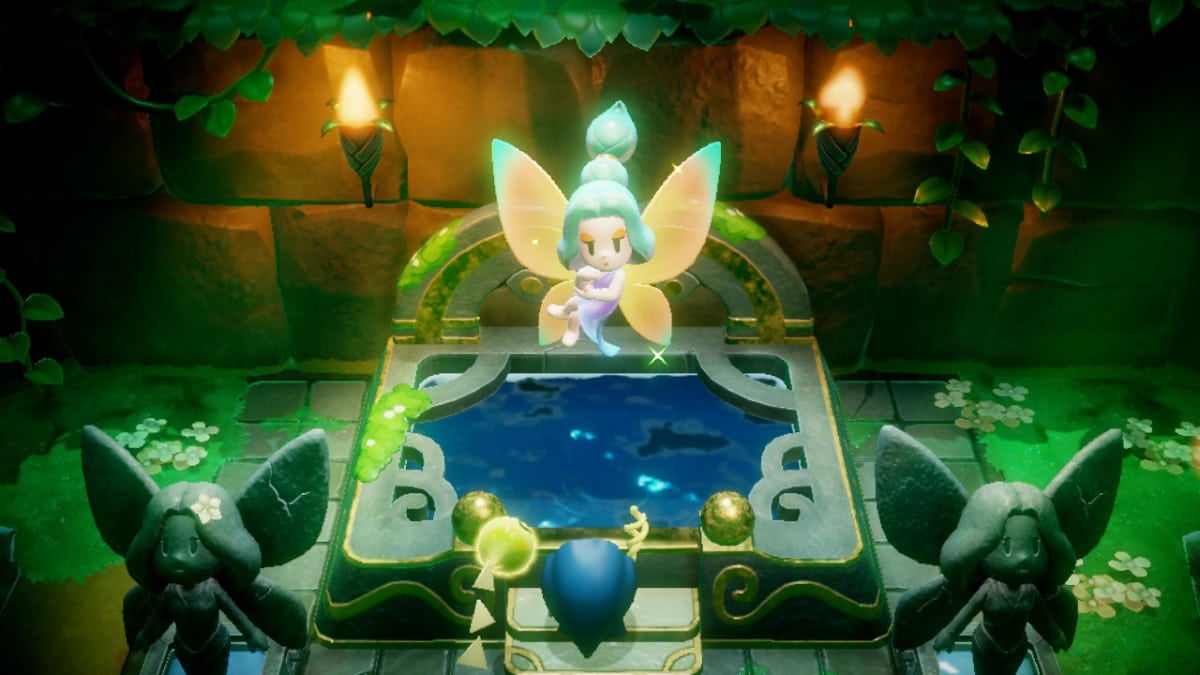
All Great Fairy Rewards in Echoes of Wisdom
The Great Fairy Fountain is locate in the middle of Lake Hylia . After visiting it , the Great Fairy will offer up to allow you to wear extra supplement in interchange for rupees .
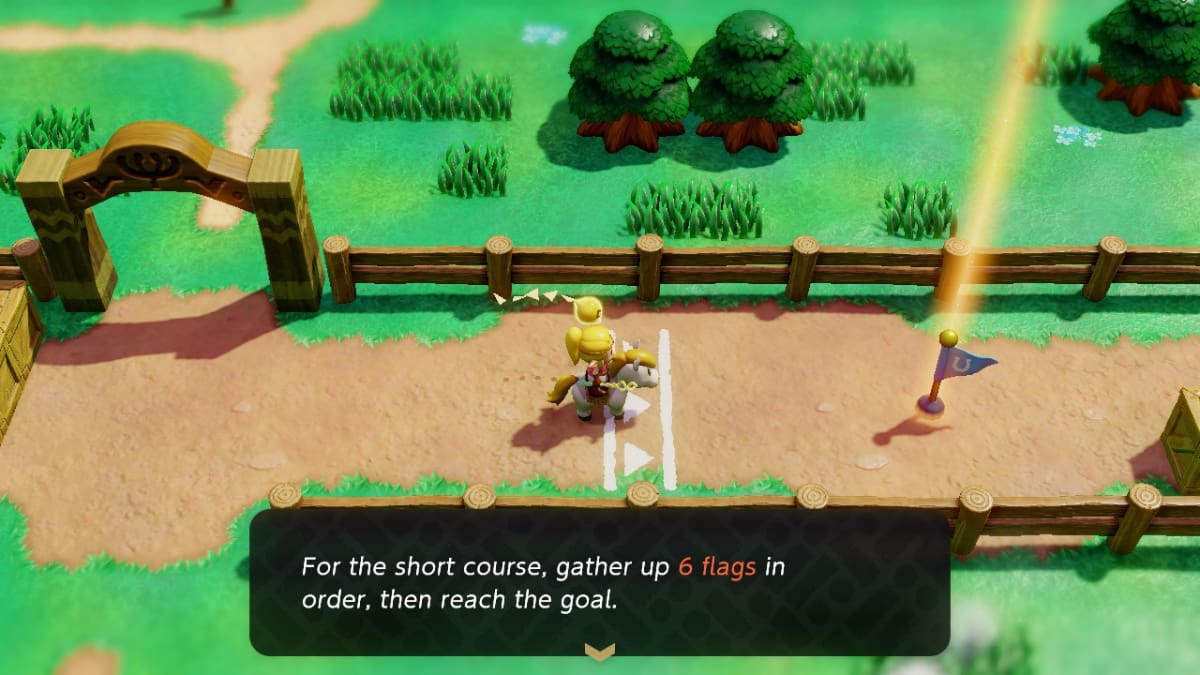
All Flag Race Rewards
You will unlock Flag Racing at the Hyrule Ranch after completing theImpa ’s Giftquest . Each Flag wash has four prizes : beating the finish time for the first time , beat the finish fourth dimension every meter after , beating the Master for the first time , and beating the Master time afterwards .
The prizes for theSmall Courseare :
TheMiddle Coursehas the following rewards :

Image via Pro Game Guides
Completing theLong Coursewill give you the following four reward :
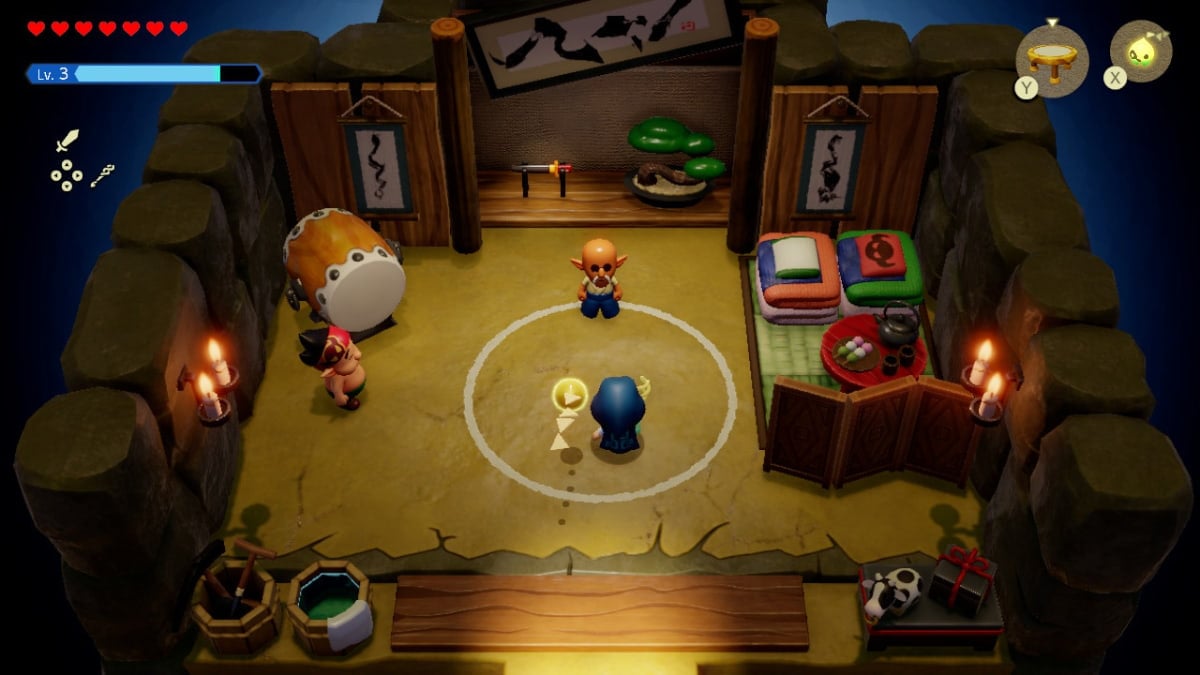
All Slumber Dojo Rewards
The Slumber Dojo in Kakariko Village has rewards for beating a training the first time , subdue it , and for how many training you have completed . I ’ll explicate all of the rewards so you may adjudicate if it ’s worth the effort .
You ’ll also get the following reward when you complete a specific identification number of trainings :
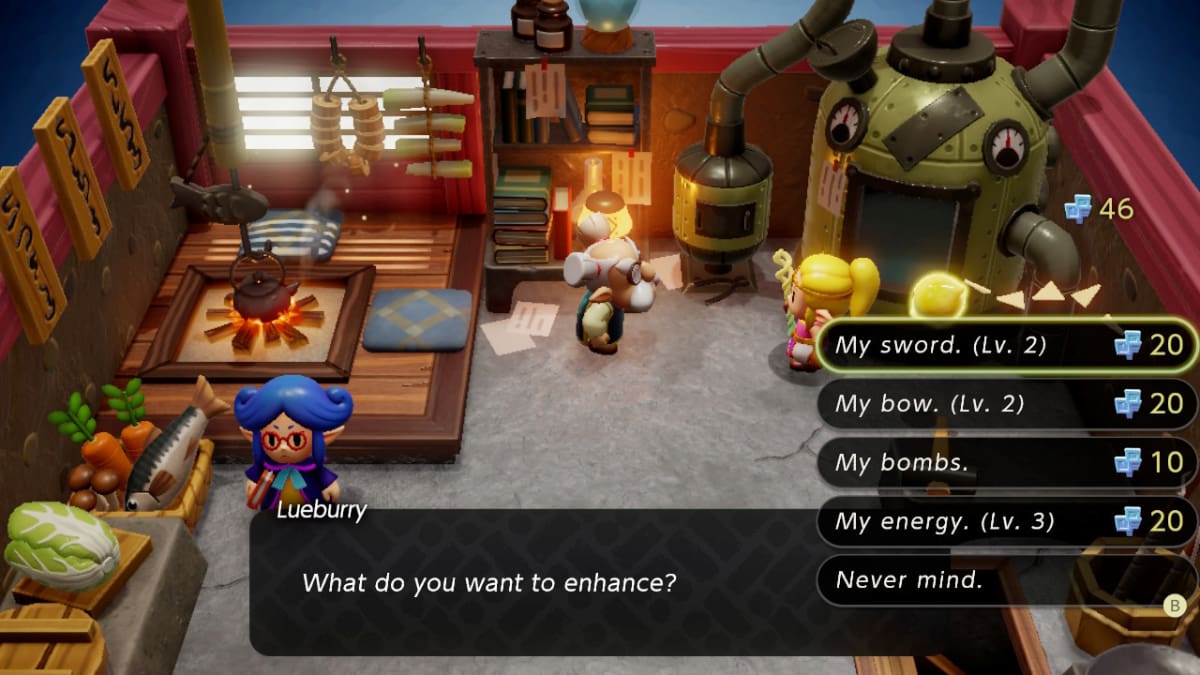
How to get Might Crystals
Might Crystals are used to upgrade your energy and artillery stratum at Lueburry ’s home . While you may only elevate a few levels to start , the further you go into the game the more you may advance your weapons . The job is having enough Might Crystals to complete all of the rising slope . There are multiple room to get them in the game , include :
The last agency in particular is a great way to easy collect Might Crystals . It sound hard , but the game does a good job of making the rocks and weed bear these crystal stand out from others through placement and their surroundings . For instance , I found one Might Crystal beneath a patch of grass next to an arrow - shaped pasturage patch pointing toward it . Another Crystal was hidden beneath a rock’n’roll on top of a tree diagram stump . I ’ve included a few sample distribution figure of speech below so you know what to look for .
How to dig up buried treasure chests
To dig up a buried hoarded wealth chest , transmit Tri into it . Afterward , walk backward while colligate to the chest of drawers . The hoarded wealth will protrude out of the ground , leaving you to open it up .
How to beat a Lanmola in Echoes of Wisdom
The Gerudo Desert ’s first Lanmola is found nor'-east of Gerudo Town in a sandstorm . Before it pops up from the ground , you ’ll see a hammock with sand amount out of it . When the centipede crawls out , hold off for its tail to be visible . snap up the tail using Tri and continue extract backward . The centipede will fall to its back , leave it vulnerable to your attacks .
The second Lanmola is found and fought similarly in the eastern part of Gerudo Desert . However , you ’ll want to approach the Lanmola from theWild Sandstormsquest more cautiously . You will still overcome it in the same way , but it constantly has small enemies spawn during the battle and it may take a few tries in a run-in to pitch it on its back . I recommend recharging your energy before the fight , bringing potions that refill vigor , and using an AOE pack or two to help clear out the small fry while still dealing damage to the Lanmola .
How to get the Bombfish Cave chest in Echoes of Wisdom
The chest at the end of the cave filled with Bombfish is on a wooden plank at the top of the cave(A1 ) . To get it down , build a small stairway and marshal and hold up an Ignizol(A2 ) . The Ignizol will dismount the board on fire , breaking it and dropping the chest(A3 ) . you may then open it for a Golden Egg .
How to beat Null in Echoes of Wisdom
Null ’s boss scrap takes place over three phases . In the first phase of the fighting , you need to take out all of Null ’s weapon system so you may assail their consistence freely . One of my favourite bidding for this fight is thePathbladebecause it will keep hitting Null ’s arms back and onward . To accompany the Pathblade , summon a retentive - range foeman like a Wizzrobe to deal extra damage . If you do n’t listen invariably re - summoning , use a close - compass assailant like the Level 3 Sword Moblin . When Null ’s arm have been demolish , summon theLevel 3 Sword Moblinto switch some wakeless attack at them .
The 2d phase of the fight takes space submersed without Link . Before you do anything else , reach the equipment CRT screen and put theZora ’s FlippersandZora Scaleon . These will aid you keep up with Null safely during the battle . TheChompfinis a good friend to summon in this fight . It can swim speedily toward Null to chomp on the tails lulling behind them . To make the competitiveness go more quickly , summon two Chompfins and then employ Tri to grab onto Null ’s arse . Swim backward while attached to them and let the Chompfins do the eternal sleep of the body of work for you . You will have to reset and resummon when Null summons Vocavor , but dodging their plan of attack will be loose with the Zora appurtenance .
The third phase of the Null conflict is exchangeable to the first , but with added difficulty . Make certain to swap out your Zora accessories for something more meet , like the Golden Sash or the Stone Anklet . During this fighting , Null will summon Echoes of the bosses you ’ve fought previously . They will always apply the same attacks , so seeing them once is all you involve to get a handle on them . The thing you do need to look out for is when Null melt and a shadow on the ground follows underneath Zelda . Move chop-chop to obviate this shadow or you will be grab by Null and wedge in its hand until either Link or your Summons rid you . Otherwise , I recommend using the same process you did in the first form of the fight .

Screenshot by Pro Game Guides
Want to revisit one of the classic Zelda games , but are n’t sure which to pick ? crack out ourZelda Games Tier Listhere on Pro Game Guides .

Screenshot by Pro Game Guides

Screenshot by Pro Game Guides

Screenshot by Pro Game Guides

Screenshot by Pro Game Guides

Image via Pro Game Guides

Image via Pro Game Guides

Image via Pro Game Guides

Image via Pro Game Guides

Image via Pro Game Guides

Image via Pro Game Guides

Image via Pro Game Guides

Image via Pro Game Guides
Screenshot by Pro Game Guides
Screenshot by Pro Game Guides
Screenshot by Pro Game Guides

Screenshot by Pro Game Guides

Screenshot by Pro Game Guides

Screenshot by Pro Game Guides

Screenshot by Pro Game Guides

Screenshot by Pro Game Guides

Screenshot by Pro Game Guides

Screenshot by Pro Game Guides

Image via PhillyBeatzU on YouTube

Image via PhillyBeatzU on YouTube

Image via PhillyBeatzU on YouTube
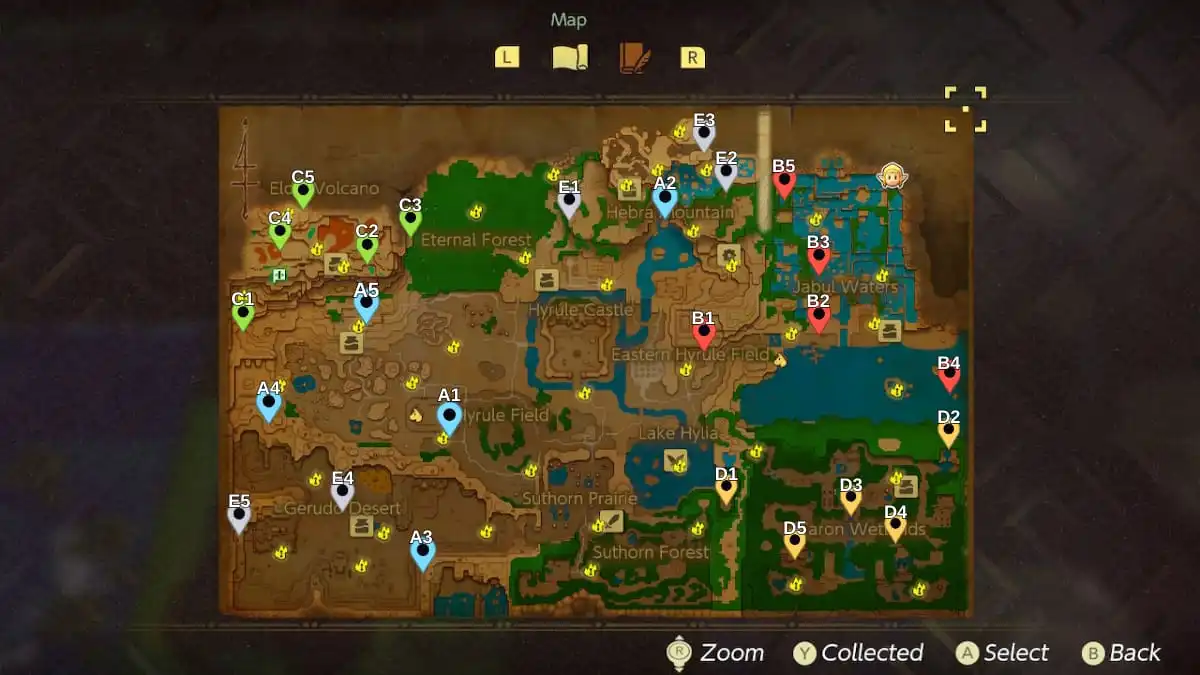
Image by Pro Game Guides
Screenshot by Pro Game Guides

Image by Pro Game Guides

Image by Pro Game Guides

Image by Pro Game Guides

Image by Pro Game Guides

Image by Pro Game Guides

Image by Pro Game Guides

Image by Pro Game Guides

Screenshot by Pro Game Guides

Image via Pro Game Guides

Image via Pro Game Guides

Image via Pro Game Guides

Image via Pro Game Guides

Image via Pro Game Guides

Image via Pro Game Guides

Image by Pro Game Guides

Screenshot by Pro Game Guides

Screenshot by Pro Game Guides

Screenshot by Pro Game Guides

Image via Pro Game Guides

Image via Pro Game Guides

Image via Pro Game Guides

Screenshot by Pro Game Guides

Image via Pro Game Guides

Image via Pro Game Guides

Image via Pro Game Guides

Image via Pro Game Guides

Image via Pro Game Guides

Image via Pro Game Guides

Image via Pro Game Guides

Image via Pro Game Guides

Image via Pro Game Guides

Image via Pro Game Guides
Screenshot by Pro Game Guides
Screenshot by Pro Game Guides
Screenshot by Pro Game Guides
Screenshot by Pro Game Guides
Screenshot by Pro Game Guides

Screenshot by Pro Game Guides

Screenshot by Pro Game Guides

Screenshot by Pro Game Guides

Screenshot by Pro Game Guides

Screenshot by Pro Game Guides

Screenshot by Pro Game Guides

Screenshot by Pro Game Guides

Screenshot by Pro Game Guides

Image via Pro Game Guides

Image via Pro Game Guides

Image via Pro Game Guides

Screenshot by Pro Game Guides

Screenshot by Pro Game Guides

Screenshot by Pro Game Guides

Screenshot by Pro Game Guides

Screenshot by Pro Game Guides

Screenshot by Pro Game Guides

Screenshot by Pro Game Guides
