The Witness ? Yeah , see these paw champion .
I ’m ill-famed as a author for overweening preamble , but not today . You wanna cognize how to getthrough Salvation ’s Edge in Destiny 2 ? We ’ve got you handle .
How to Start Salvation’s Edge in Destiny 2
First and first off , ensure you ’ve complete bothThe Final Shape CampaignandThe Wild Card Questwhich you could do afterwards . SuggestedPower Level for this action is 1945 , which you ’ll likely exceed in the process of doing the safari . You ’ll locate the raid node in the Destinations menu and in the Pale Heart area off to the far right . First you ’ll need to really get into the Raid outer space , and as with most raid , this usually imply a bit of platforming and some ad clearing . When you put down , run directly ahead until you turn over a bridge . Move along it , and finally you ’ll seetwo hatchway in the wallto your rightfulness . Jump into thetopone and conform to thewhite lit pathuntil you reach the first coming upon . ( You might need to scrunch through some section ; these arelit in redinstead . )
The Substratum Encounter Walkthrough - Destiny 2
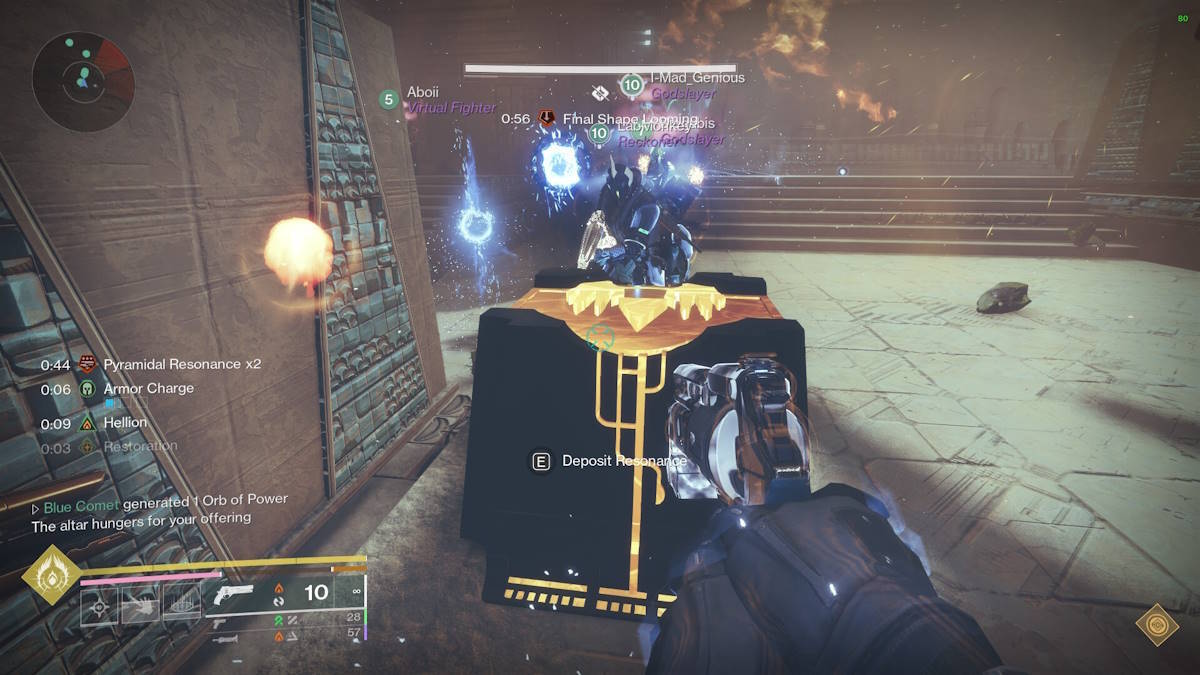
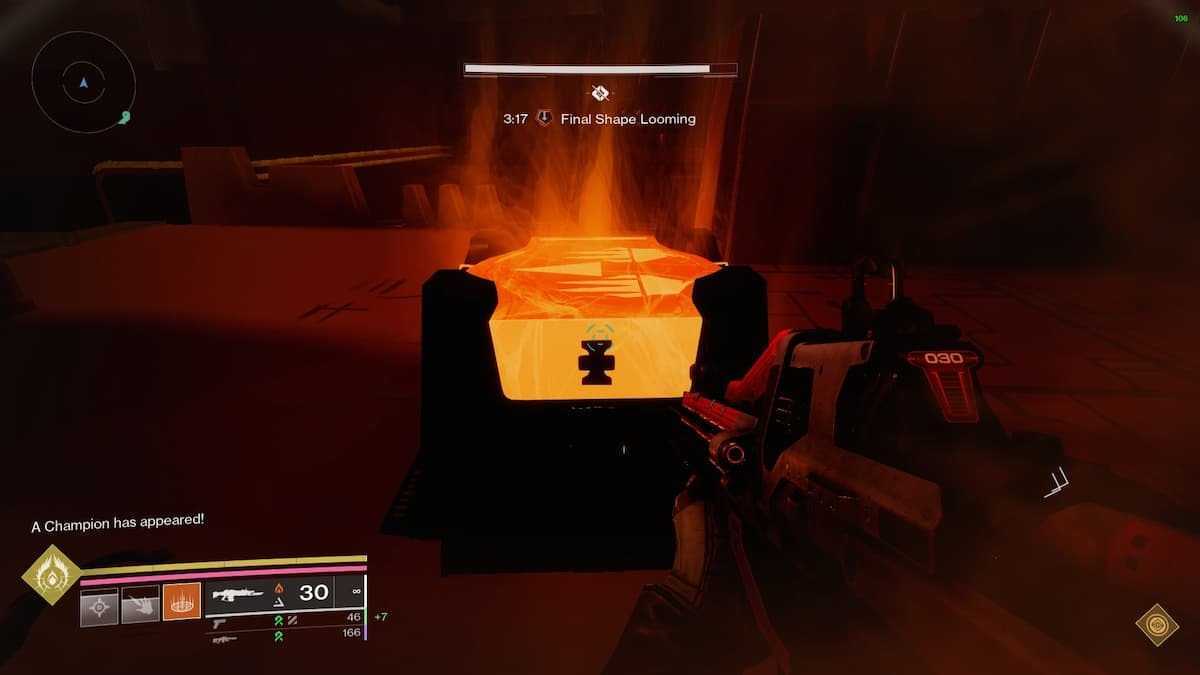
When you participate the meeting way , you ’ll be met with something scream the ' Resonant Altar ' , and a ' Pyramidal Resonance ' shard . pick up the Shard and lodge it into the Altar will lead off the brush . When you start you will all receive the ' Final Shape Looming ' timekeeper , which is your wipe timer . It start at four minutes and 15 seconds , but can be gain back as the encounter stay .
Two room on either side of the confrontation arena will open up , and you ’ll need tosplit into two squad of three , and enter one room each . Your intent in the room is to kill a chain of enemies to continue the encounter . This starts with both squad needing to killVex Minotaurswhich will spawnVex Hydras(Keepers of the Monolith ) . shoot down the Hydras opens up more rooms around the circumference , which you ’ll need to look in rules of order to findOverload Champions(Devotees of the Witness ) . Killing them will breed a Tormentor ( Threshold Sentinel ) back in the center of the encounter arena . ( You ’ll know it ’s spawned when you get the notification ' You are being beckoned back to the center ' . )
All role player need toreturn to the center and vote out the Tormentor . Repeat this same loop one more meter to right move on with the encounter . There will beglowing platesin the rooms in which you killed the Overload Champions , but disregard them until you ’ve kill the two Tormentors .
After all this is done , you ’ll be ready for the second phase angle . Split into three teams of two , with two detain in the center of the field , and the other two heading for the two position again . The two teams in the side suite will need to split up up further , with one going back to theglowing platein the room you killed the Overload Champion and the other blend to theResonance Conductor Pillar , which should now be glowing .
This next part requires serious carbon monoxide - ordination between you and your pardner . One of you will abuse onto the first glowing home base , which will do apulseto begin to move around to the pillar , along the base . ( Like electrical energy in a wire . ) When this pulse connect with the pillar , acirclewill briefly appear on the plate . Step on the circleto spawn aPyramidal Resonance Shard , and send the pulsation back to the first scale , in which your partner will ask to also ill-treat on . Both side team can do this a full ofthree times , to get the maximal amount of pyramidal resonance ( which is nine ) . One shard will breed in each of your side room , and one will engender in the center where the other two thespian are . Each musician should aim to getthree shards(one more than that will toss off you ) .
In order toclose a chainyou’ll need toshoot at the pillar whilst the pulse moves between elbow room . Doing this will forestall you from getting the failure mechanic of a Subjugator spawn . Doing this will also despawn any currently breed shards , so only do this when you ’re quick to wrap up . conclude both pillars will breed another Subjugator back in the center room , which all actor will need to return to so that they can obliterate it . Once it ’s dead , theResonant Altaryou saw earlier will revert , and you ’ll all postulate todeposit your pyramidal resonance . Doing so increases your rub timekeeper by20 seconds , which is why it ’s significant to get as much as potential . Once you ’ve done that , the Altar will despawn , and you ’ll need to ingeminate this entire process . Repeat three times to fill in the skirmish . Once you ’re done , collect your spoils , and move on . You ’ll need to head up some stairs and take a big cerise elevator and do some platforming to build to the next showdown .
Screenshot by Pro Game Guides
The Dissipation Encounter Walkthrough - Destiny 2
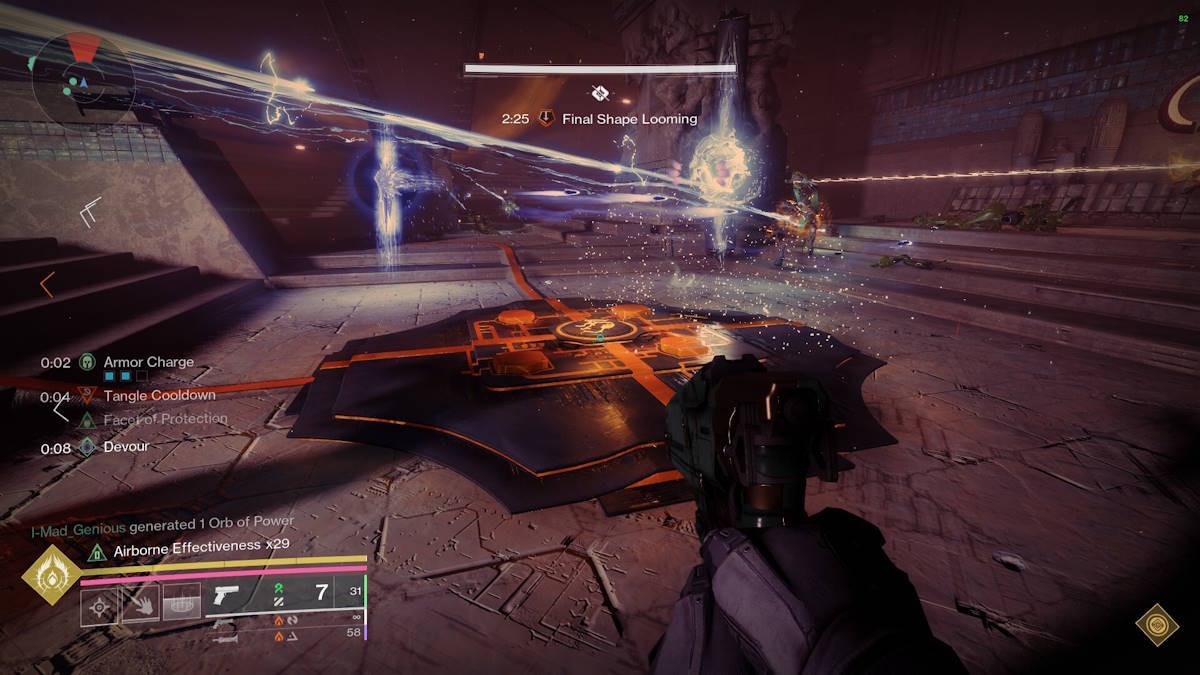
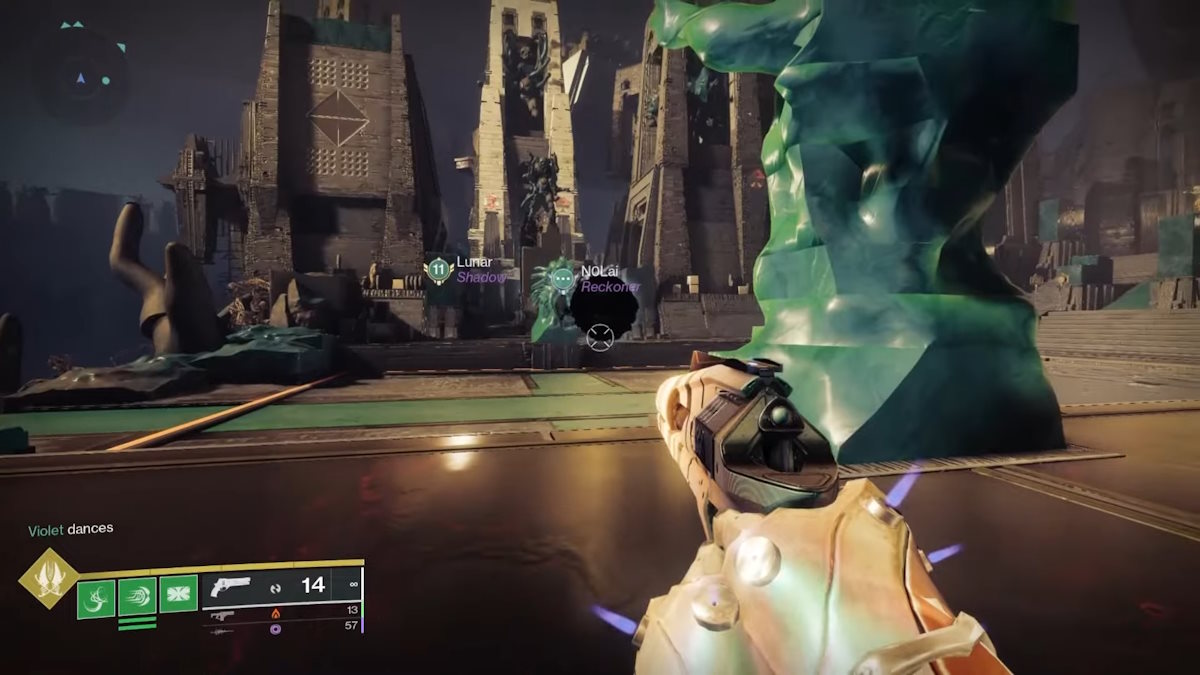
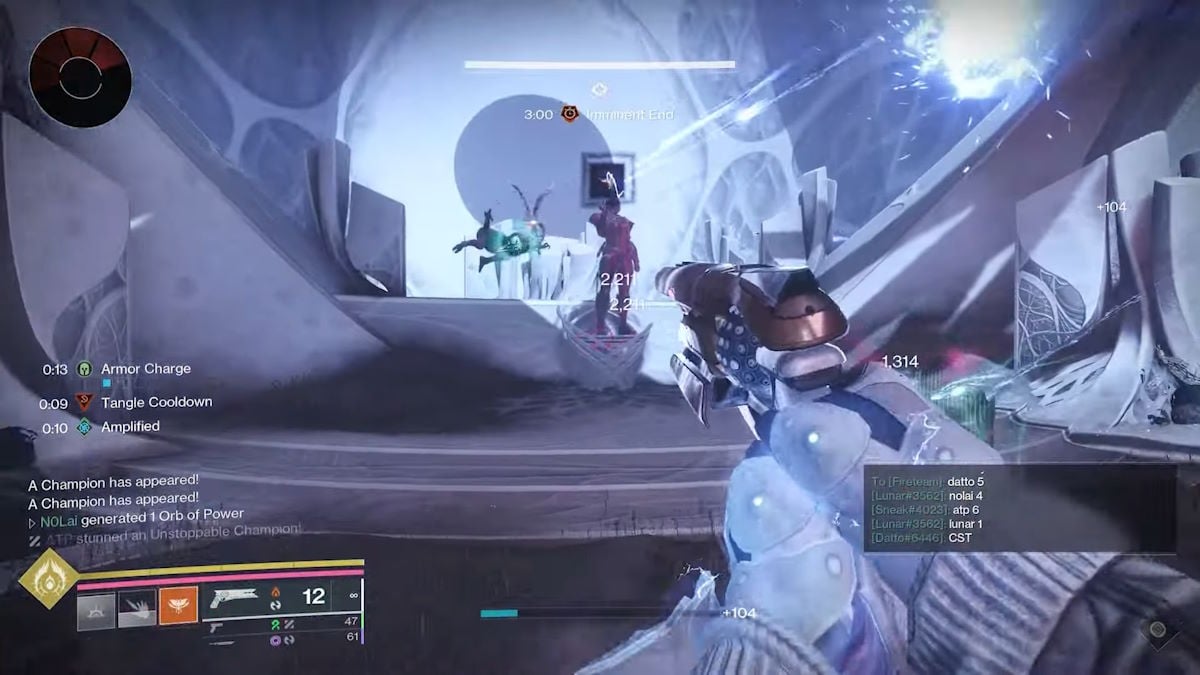
This next arena consists of a large open space and threepillars . These pillars will each have plates nearby , and you ’ll need to split up into pairs and head to one column per pair . This clash will also have theFinal Shape Loomsdebuff , so prison term is of the gist again . To begin the encounter , buck theBlightin the heart and soul of the orotund open space .
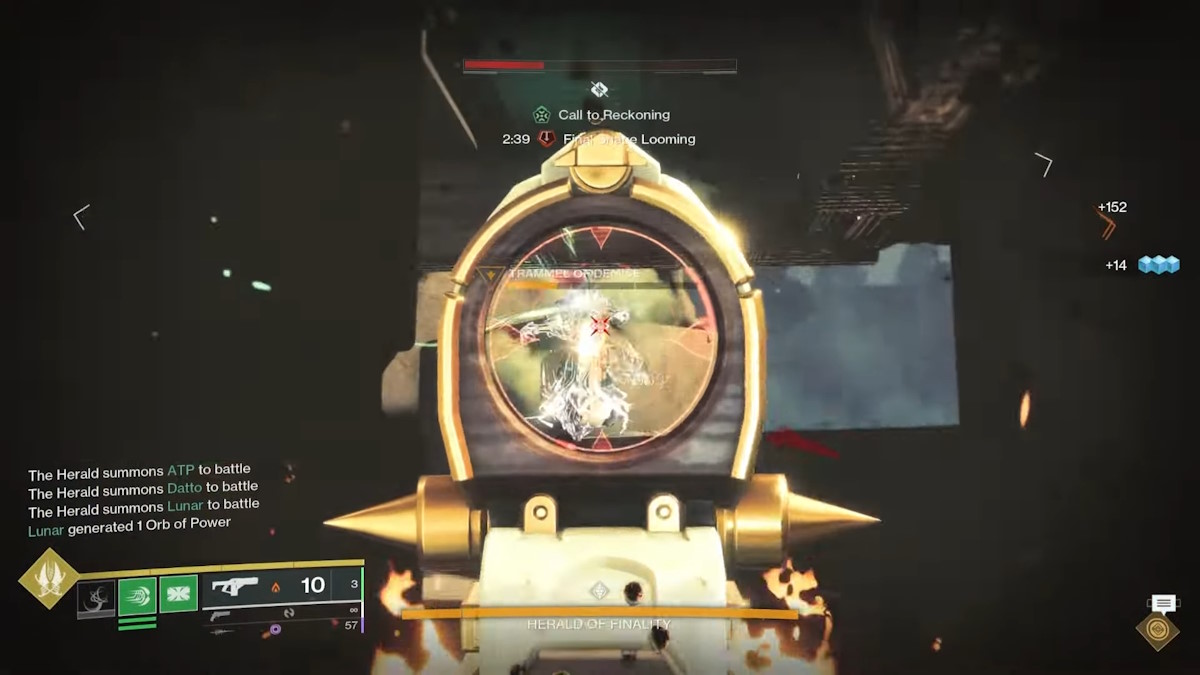
Each team will have to kill threeorange health barenemies , with one showing up as aHive Wizard(pictured below ) , one showing up as aCabal Phalanx , and the other prove up as aHive Ogre . Once all three of the orange health bar foe are dead , one person on each pillar will get theCall for Reckoningbuff , and all three need to direct to thecenter .
The boss you ’re here to pop will be roaming around this country , and the three in the meat will demand to shoot him in the head to progress . Doing so will causeBlightsto spawn around the boss , and make one smaller one to come out above his head . dismiss the small one , and focus on the other three . Everyone will need to take all the blights ( which can spawn around the arena ) out , and when they ’re lead , the three in the center require to keep shoot the honcho in the nous . Once you ’ve done enough damage , the Call for Reckoning buff will become theStolen Favorbuff .
Screenshot by Pro Game Guides
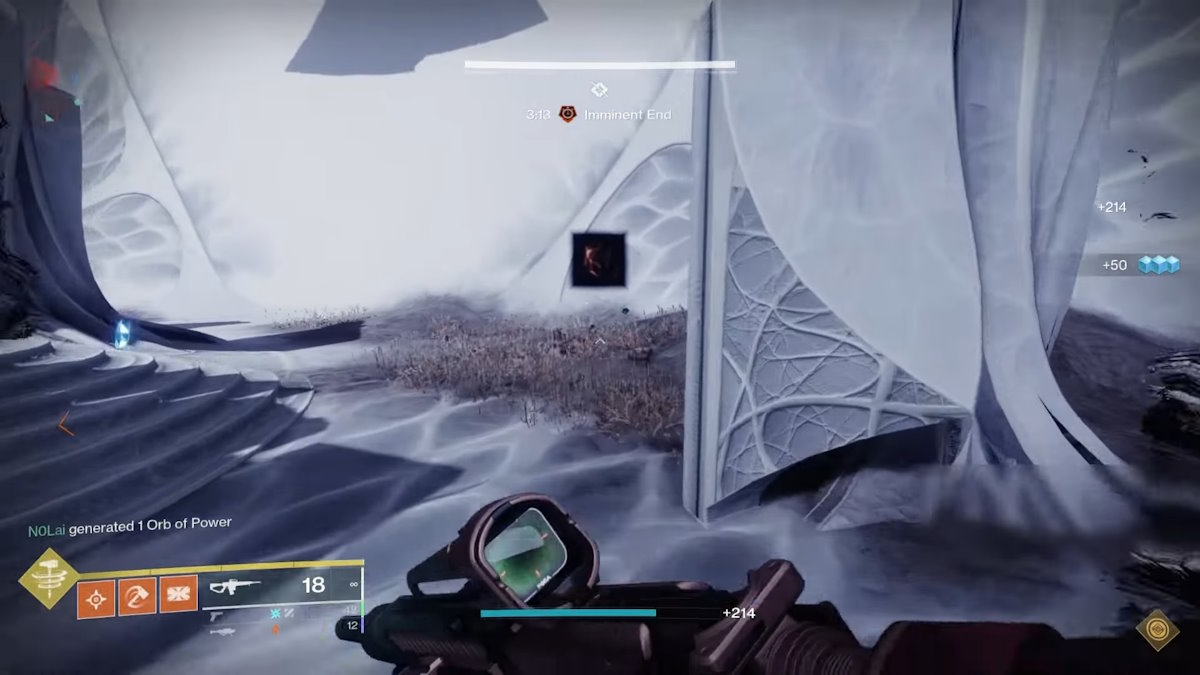
This buff will allow all carriers of it to seesymbols on the pillars(pictured below ) , each one correlating with a case ofresonance.(The Pyramidal Resonance from earlier return , but is conjoin bySpherical Resonance . ) All carriers must return to their respective pillar , and note which symbol seem . It will either be a Pyramid , or a Sphere .
Your mainstay will open , same as the ones in the first encounter , and you ’ll need to do thepulse bouncingagain . This time however , you ’ll generate two different kinds of rapport . The player on the plateclosest to the Pillarshould get the resonance thatmatches the symbol on their column . The other participant should garner the opposite . Once again , when you ’re both full ( no more than 3 again),shoot the pillar to exit the eyelet . Remember to do this when the pulse is travelling between plates .
Please note that so as to exit the mainstay , youmust be carrying the match resonance type(i.e . - If the pillar is marked with a Sphere , the person carryingSpherical Resonancehas to be the one to germinate it ) . Another percentage point of eminence is that failing will cause another opposition to breed , and will make the conformation on the pillars to shuffle . And in conclusion , the resonance you bear is shape by which resonance youlastpicked up . For representative , if you were to pick up two Pyramidal Resonance charge , and then one Spherical Resonance , you would stop up withthree Spherical Resonancecharges . All of these notes will carry over into the third confrontation , so keep them in head .
Screenshot via Datto
When everyone is done , all playersshould return to the center and run for theresonance deposit boxlike in the first meeting . ( Which will refresh your wipe timer too . ) Once all players have fix their stacks , lead off deal legal injury to the foreman . This is your damage phase , so it ’s crucial to do everything you could to ensure you deal as much damage as possible before he becomes invulnerable and you get the loop-the-loop again .
After the boss reaches a health brink , he will enter a raw country known as ' Last standpoint ' , and more enemies will spawn in the arena . You will not reset the loop this time , his damage stage will be extended , and you mustkill him before you play out of time .
Once he ’s dead , accumulate your spoils , and cover on . You ’ll have some more platforming , elevator and walking to do , and eventually you ’ll total across a roadblock defend by a Tormentor . Killing him will take away the roadblock , and you’re able to go forward . Note that this plane section between encounters is long , and absolutely monolithic , but remains comparatively directly forward and mostly consist of protracted platforming sections . You ’ll have to climb a large monolith , and you should be wary of snare along the way .
Screenshot via Datto
The Repository Encounter Walkthrough - Destiny 2
This clash in effect combines everything from the late two together , so there ’ll be some sections in which I only briefly glance over those grease monkey for the sake of brevity . in the main , these mechanics areResonance , Resonance Conductor Pillars , Plates and Stolen Favor . If you ’re unfamiliar with any of these , please cite to earlier section of this guide . This encounter is comparatively straight forward once you ’re familiar with these concepts , and simply duplicate three times for three suite . Once again you ’ll have the wipe timer , and deposit resonance is once again the way to increase it .
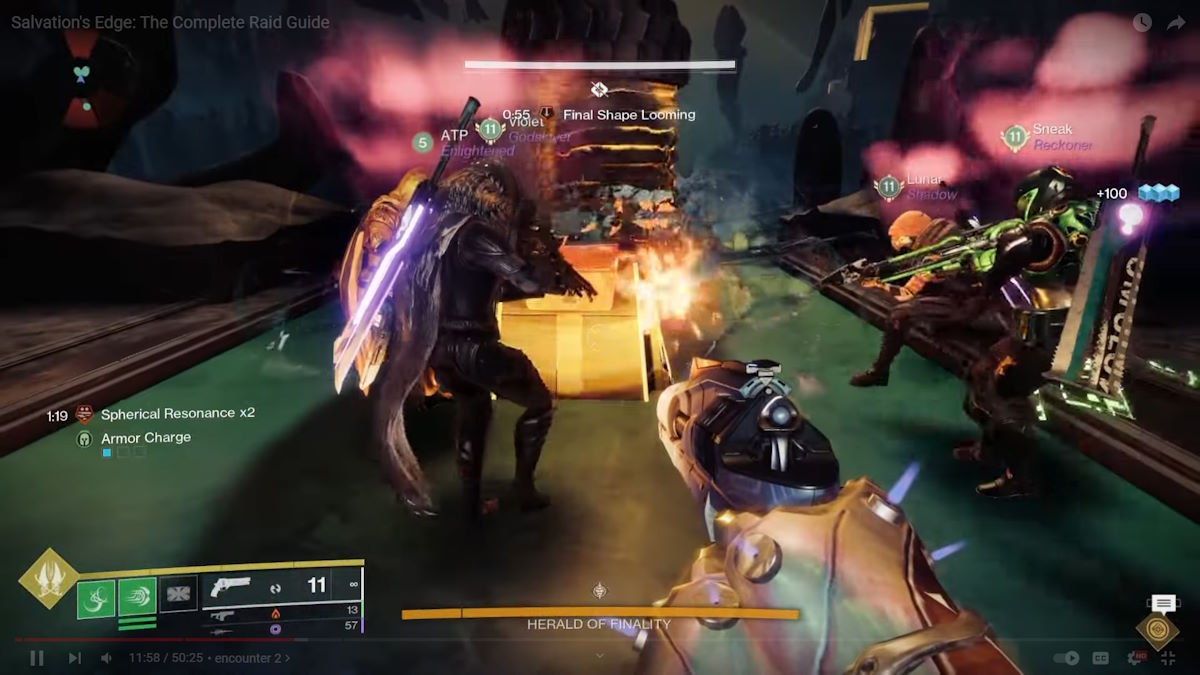
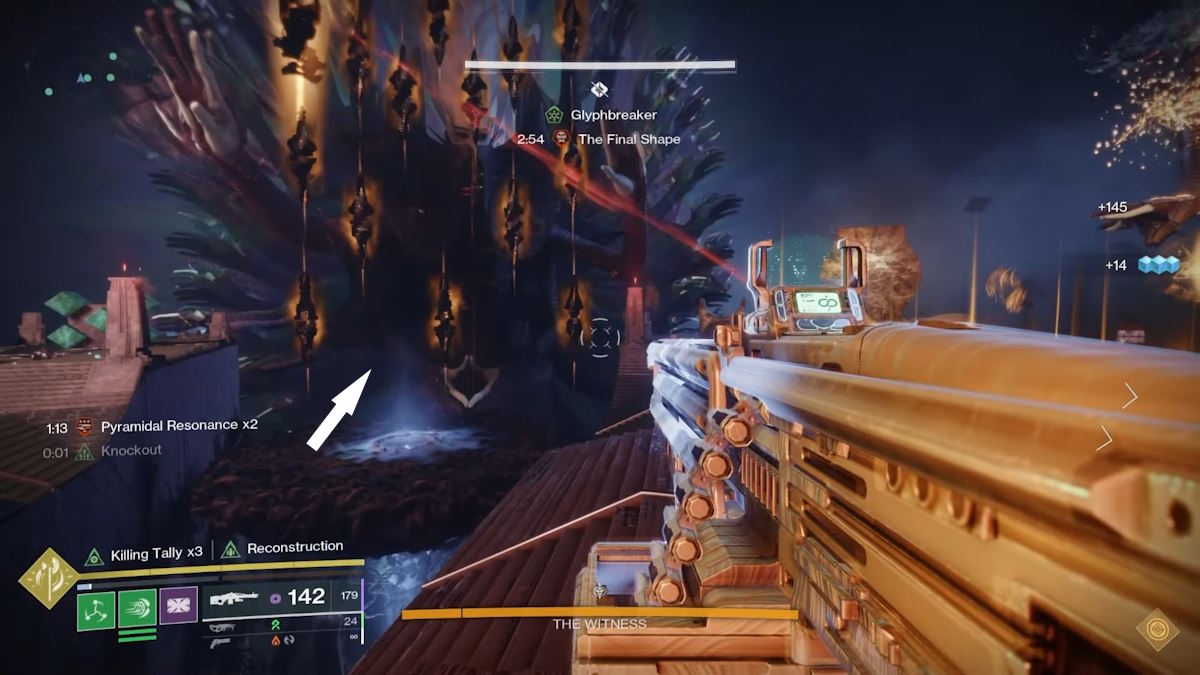
When you enter the showdown room , there will be three sets of plates on the left hand , in the top nerve centre , and on the rightfulness . Each set of plate will have aTormentor , so shoot down them all to unlock all of the plate . Any player that lands the concluding puff on a Tormentor will receive theStolen Favorbuff . They will then be able to see thesymbols on the column , and can inform the team of which resonances correspond to which mainstay . There will be three character of resonances to generate here , Spherical , Pyramidal , and Hexahedral .
As cite prior , this clash efficaciously act as an lengthy version of the old two encounters . Your squad will postulate togenerate resonance , shut the pillars , deposit resonance , and then deal with a final wave of enemies before moving on to the next room . reduplicate this cognitive process in three rooms total , and the coming upon will be ended .
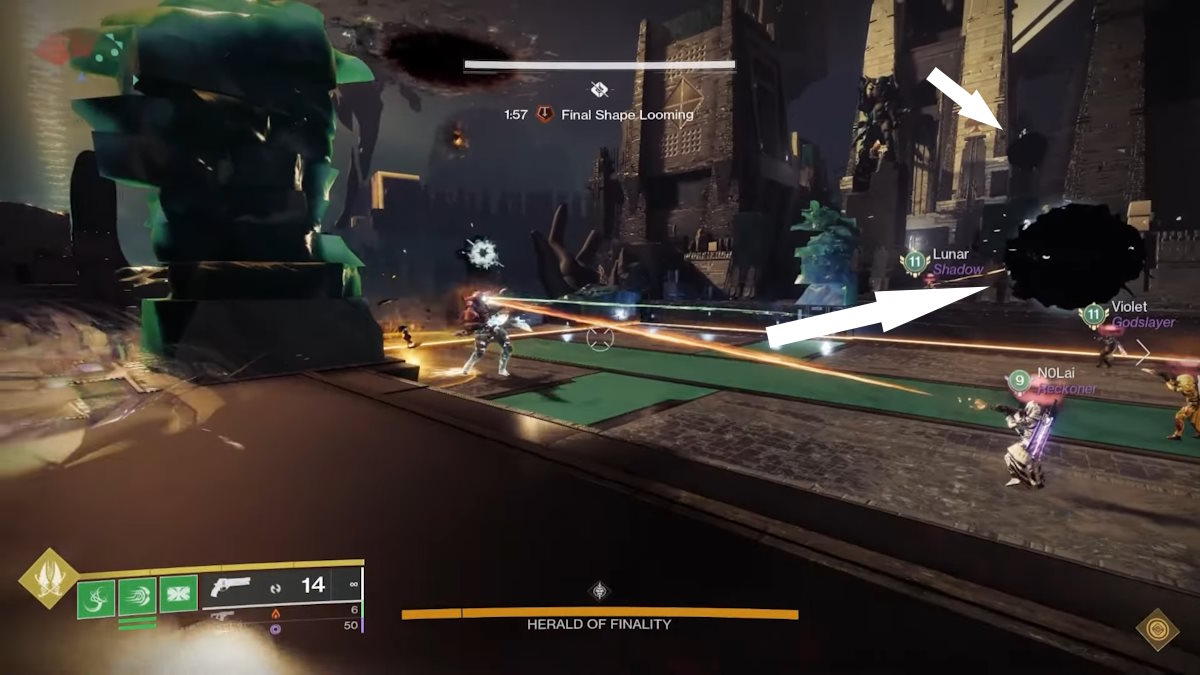
Image via Datto
It should be noted that whilst the mechanics may not convert , the layouts of the suite absolutely do . They can become quite complex , and this means that you must double check the layouts of the plates , and be sure what plates generate each case of ringing .
The Verity Encounter Walkthrough - Destiny 2
I wo n’t saccharify pelage it : this encounter is a lot . In some sections I will be give examples to more well explain the mechanics .
Upon go into the encounter region , you ’ll see six statues in a one-half lap organization . Each one will have the same appearance as one of the Guardians in your fireteam . Because of how important this will be later , you should make certain everyonehas a unequaled and easily identifiable slice of armor on . In plus to this , assure each musician has aunique Ghost case , as this will be all but required for a later car-mechanic . It ’s good here to assign each statue and their respective Guardian a number going from 1 to 6 , from allow for to right around the half circle of statues .
Shortly after entering , three players will be teleported at random to room by themselves . I ’ll be collapse down their instructions first .
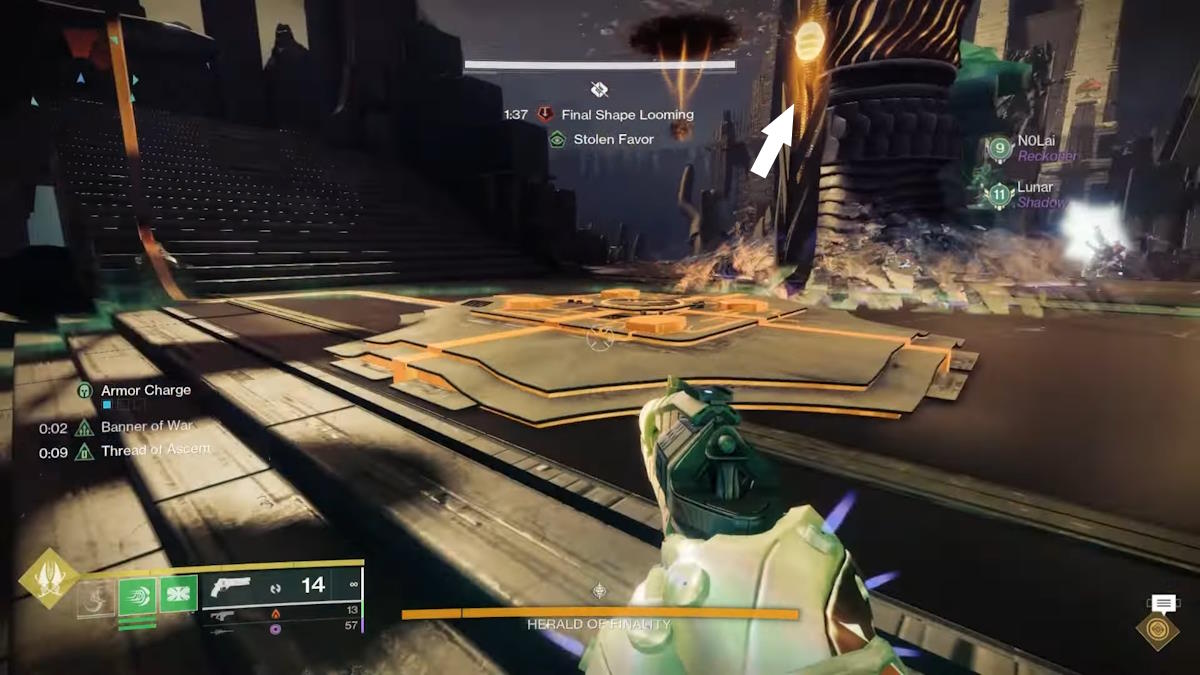
Image via Datto
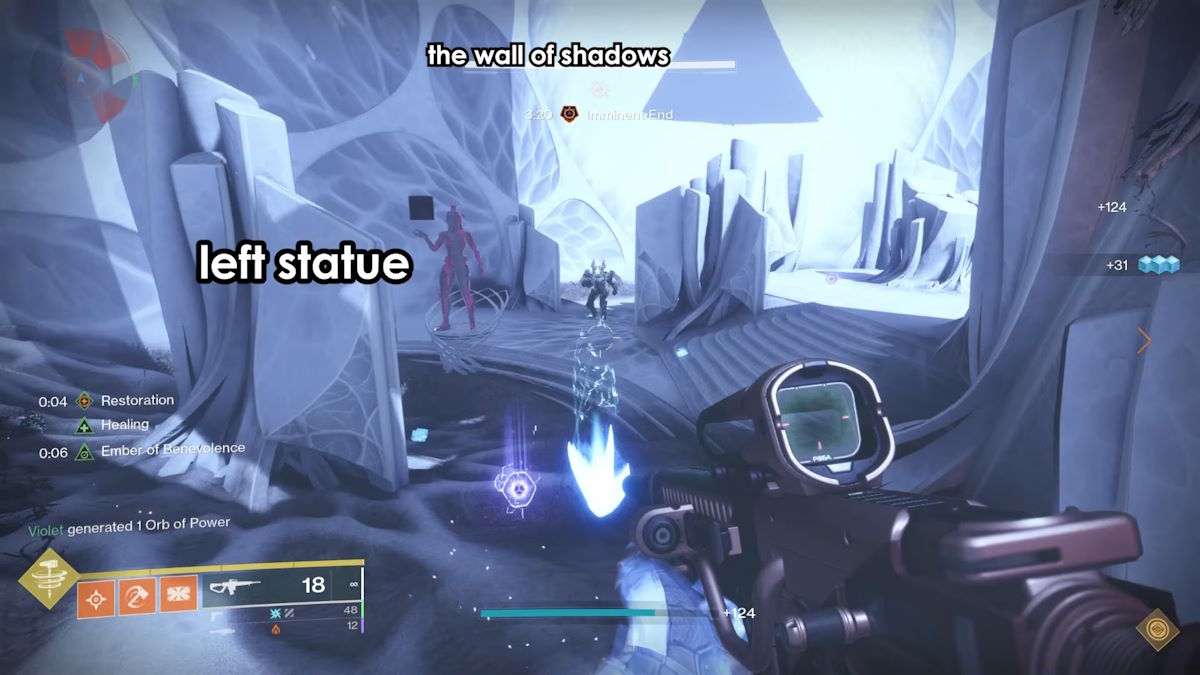
The player who get teleported to their own rooms will be met with a room filled with three statues , one of themselves and two of the other two teleport players , and a back wall which will display two distinct shape . The back rampart will switch between these two form every few moments . The persona below shows a statue in the room , as well as the trace on the back wall for reference .
Each of the statue in the way will be holding a shape , either being asquare , circle , or triangle . Your first step should be to type out or communicate the shapes on the statue move from left to right . Only one thespian demand to do this , as the statues themselves will rest the same between the solo rooms . Then , you must refund toyourstatue in the room , and note which form it is holding . Then , look to the paries with the two shifting shapes and note what form they are . Your aim will be tosend the embodiment that you are NOT holding to one of your mate who is holding that shape . For example , if your statue is entertain a rophy , and the shapes on the rampart are switch from circle to triangle , you will involve to send the triangle to the mate whose statue is holding a trigon .
To do this , you must killHive Knightsthat spawn in your arena , and upon demise they will overlook a ' sliver ' ( which will take the form of a form , see below ) which can be picked up . Please mark that these Knights can pretermit both of the shapes that are displaying on the back wall , so be sure to double check out what it drops upon death before rushing to pick it up . When you ’ve collected the right shape , you ’ll demand to take it tothe statue that is also holding that shape . Deposit the shape , and wait for your teammates to do it on their end .
Screenshot via Datto
When you ’ve done this right , you ’ll observe that the back wallstays the same shape . It will still perform an animation of sorts , but it will always end up as the same frame . Now , more Knights will spawn , and they will now only cast the shape displayed on the back wall . You ’ll postulate to kill two Knights , collect both of their shape , andgive one to each of the statues that belong to your friends . They will need to do the same , and by the end , the shapes on the back wall should beunique to the one your Guardian is holding .
So , here ’s an example to try and help ease this account .
You enter your room , and situate your Guardian . Your Guardian is take hold a Square , and the human body on the back wall are moving between Square and Circle . You will postulate to vote out Knights until one of them drops a circle , and then take that R-2 to the statue that is also holding a dress circle . Once you ’ve all completed this footstep , your back wall should now show only a square . Now you ’ll need to kill more Knights to collect two more square , and you ’ll postulate to deliver these to the statue belong to your acquaintance . Once this is all done , your Guardian will still be bear a square , and the shapes on the back wall will be shifting between rophy and triangle .

Screenshot by Pro Game Guides
Now , as if this was n’t enough , the brush tot up an additional bed of complexity . At some point during this mental process , theWitnesswill kill all three of the solo Guardians .
This will cause their wraith to engender back in the principal room with the other three instrumentalist . These players mustescort each Ghost back to their respective Guardian . This is why it ’s important to mention which Ghost belongs to which Guardian and why having unique Ghosts is basically a requirement . And to make matters even bad , the three bushed Guardian statue will beinvisible . This is why it ’s important to give each player a turn to represent to the position of their statue . The three dead participant will be able to seeone miss statue eachas they spectate in death , so they ’ll be able to call out the post of the musician if there ’s any muddiness , andthisis why it ’s crucial for every player to be able to easy discover the other Guardians by ascertain they have a piece of unique and identifiable armour on . Taking the Ghost to the wrong thespian willkill the player carry the Ghost at once .
Here ’s another example , albeit extremely simplified and improbable to be this clean cut in raid .
Screenshot by Pro Game Guides
Statues 2 , 4 and 6 are missing . Player 2 can see the statue of Player 4 , Player 4 can see the statue of Player 6 , and Player 6 can see the statue of Player 2 . Player 2 state ' I can see Player 4 , they had the Trials of Osiris Ghost , that ’s PGGWriter4 ' . actor 2 can then direct the musician carrying that Ghost to the statue they call for to go to . The bouncy player needs to lodge the Ghost in the correct statue , which will rise that player and they ’ll go back to their solo way .
One thing that help in this position is that the three solo players will have some advanced word of advice on when they ’re fit to die , free-base on an effect that will begin to show on their HUD . This give you all some clock time to co - ordinate before decease . An representative of this HUD element is shown in the time below from Datto .
When you return , you must keep the mechanics as describe originally . You ’ll know you ’re done whenyour statue is the only one holding a chassis , andthe soma on the back paries are both unique and different to the one your statue is have . Before continuing , stamp out both Knights again , and grab the two shapes that shed from them . These two shapes will combine into a newfangled configuration , with one example being that a circle and a trilateral will become a cone , though this does n’t much count as it ’s simply the sign to hump you ’re able to leave once the away players are done . Once you and the other solo role player , and the three international player ( which will be discuss next ) are done , you ’ll be capable to walk through the wiped out glass bulwark at the back of your room to return everyone .
Screenshot via Datto
Whereas the solo players will be portion out with 2D shapes , the three player in the center will be dealing with 3D shapes . There will be three statues correlating to the three solo histrion , and each one will be hold a random 3D shape . These 3D form are comprised of combinations of 2D shapes , and I ’ll list them below .
Now , this is where the callouts mention earlier come into play , and why it ’s of import the solo participant give their contour callouts going from left to right . When you ’re outside you ’ll have to rearrange the shapes toexcludethose called out in the rooms . You demand to do this whilst also ascertain the statuesdon’t contain two of the same frame . This mean that Spheres , Cubes and Pyramids areinvalid . at long last you ’ll want each of the statues to be holding either a Cylinder , Prism , or Cone .
So for example , let ’s say the solo players call out Triangle on the left-hand , Square in the middle , and Circle on the right . If the left statue outside is holding a Prism , which is a Triangle and Square , then the outside thespian will postulate to pull out thetrianglefrom that left statue by replacing it with a different shape . In this example , you would trade out the Triangle for a Circle , leaving the left statue with Square and Circle . The same operate for the other two statue , where middle can not have a Square , and rightfield can not have a Circle .
Screenshot via Datto
Doing all this involves the ' Dissection ' mechanic . Dissection comprises of killingKnightsthat pearl 2D shapes , similar to solo players . However , in the group area , the Knights ( see below ) here will sink their shapes reckon on where they spawn . There are three spawn domain in entire , withone on the left , one in the midriff , and one on the right . Theleft Knight swing a circle , the middle Knight a Triangulum , and the veracious Knight a square .
You set out the dissection summons by pick up a material body that you want to withdraw from a 3D embodiment that has that same form as part of its design . So for example , if you want to off a square from a Prism , you ’d take to pick up a lame from the Knight who spawns on the right side , and take it to that Prism . Then , you ’ll grab a different shape from a different Knight , and takethat2D shape to another 3D Supreme Headquarters Allied Powers Europe that also has it as part of it ’s design . This will thenswapthose shape with one another .
However , this works on a trading machinist as opposed to simple disposal , meaning that once you have removed a 2D shape from a 3D Supreme Headquarters Allied Powers Europe , you ’ll demand to take that 2D material body to a different 3D conformation that requires it as part of its solution .
Screenshot via Datto
Okay , so get ’s give one last example to really put the nail in this Pythagorean coffin .
The solo players call outTCS . That stand for in their rooms , the left statue hold a triangle , the centre a band , and the right a square . In the out-of-door elbow room , the three players have to make indisputable the left statue does NOT contain a triangle , the midsection a circle , or the right hand a square . intend their final compounding of 3D shapes would be Cylinder , Prism , and finally Cone , going from left to right .
And here ’s the ever brilliant Datto explain it , if that ’s your favourite method acting .
Screenshot via Datto
And yet , somehow , this encounter is still not over .
Once all role player are joined back together , repay to the half circle of statue andspread out . Unstoppable Ogreswill spawn , so make them dead as quickly as possible . Now , once again , instrumentalist will go bad . Only this sentence , it will befive playersas opposed to the earlier three , have in mind one player will have to do the same grease monkey as earlier to bring everyone back .
Again , they ’ll have to take a player Ghost to that instrumentalist statue , and down payment to bring them back . Each of the dead players will be able-bodied to see one of the other participant statues whilst they spectate , so use this to direct accordingly .
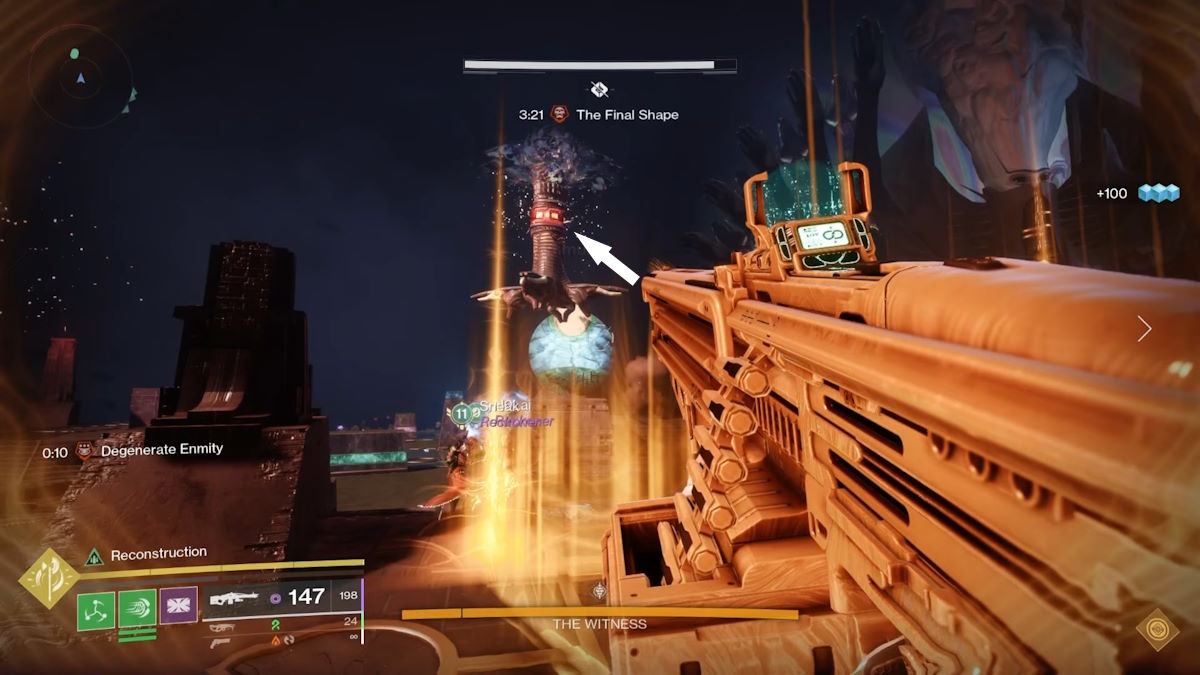
Image via Datto
Please bear in judgment that you will have onlyone minute to do thissection before you wipe , and have to repeat the entire process from straightforward 1 . verbalize of which , completing this grease monkey require you to reprize this ugly song and dancethree times .
The completion finish is to rescue a aggregate of 24 Guardians , with three solo player deaths early on , and the further five after completing the puzzle once , that ’s 8 per foot race . When you ’re done , dry your eye from the stress tears , and get ready to move on to thefinal encounter .
To move on , find thedouble helixnear the outside player area , which will now act as an elevator . Then keep an eye on a distinctive platforming change of location section as you move towardsThe Zenith .
Screenshot via Datto
The Zenith Encounter Walkthrough
This is it , the final encounter .
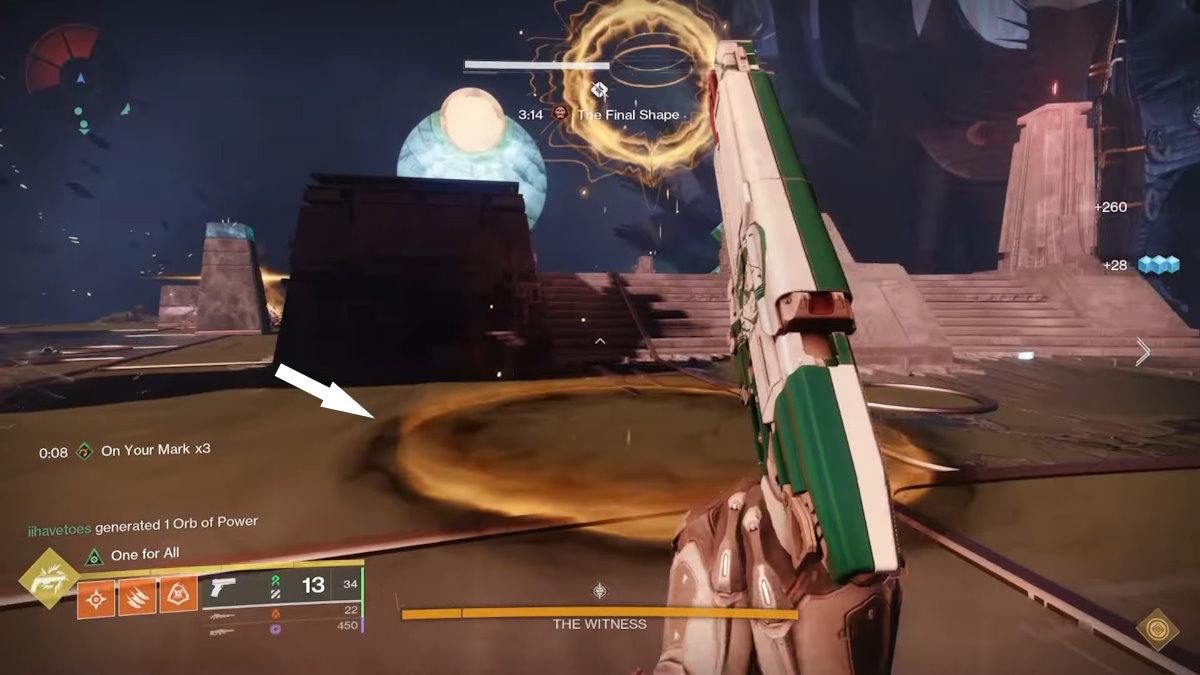
The arena here is quite with child , with a platform in the middle and two raised sections on either side . Ideally you ’re cash in one’s chips to desire to split your group into two teams of three here , with one focused on clear opposition , and the other focused on doing the mechanic . Of the ace doing those mechanics , it ’s best to assign one shop mechanic to each player to reduce confusion later on . The core principle to activate the damage stage in this combat is to use the attacks the Witness throws at you to gain theGlyphbreakerbuff .
The Witness has three attacks he ’ll throw out in the duration of this incision . The first is the hand be adrift above , which will periodically summonorange triangular zoneswhich legal injury and bolt down you if you ’re in them for too long . The 2nd is the script coming up from the ground , which will periodically shoot projectiles into anorange round area . The third is the bridge player off to the sides , which will sporadically shell large beam of light across the sphere inareas set by an orange rectangle . An example of the orbitual orbit is evidence below .
Screenshot via Datto
step into each of these zones provides you with a differentresonance bufflike the first three encounter . In rules of order to gain the resonance buffs , you must step into the areas in which the attack will strike for long enough to gain ground the buff , whilst not staying in long enough to die . The Triangle zone will give youPyramidal Resonance , the Circular zone will give youSpherical Resonance , and the Rectangular zones will give youHexahedral Resonance .
Now , in rescript to gain the Glyphbreaker buff , you ’ll necessitate to use this resonance to damage the hands related to certain attacks . When these attack trigger , you ’ll remark that each arm / hand has acolored band along with a shapesomewhere on it . You require specific resonances to damage specific colored hands , with those beingSpherical for lily-livered , Pyramidal for Green , and Hexahedral for Red . An model of one of these band is shown below .
Now of course , it is n’t quite that unsubdivided , as in rescript to damage the bands with the lover , you ’ll need to ill-treat into the attack area of the hand you ’re trying to damage for long enough to make the shot , butnotlong enough that your reverberance type is swap for another .
So rent ’s give an exercise of how this might play out .
You ’re grant the task of taking out theyellowband . This have in mind that you ’ll need to situate the sleeve which has that stripe before continue . Let ’s say for this example that it ’s the hired hand coming up from the ground . That intend you postulate to getSpherical Resonance , which means you ’ll require to locate hand which tear projectile into acircular area . Step into the arena for long enough to get the Spherical Resonance buff , and then pace out . Now you ’ll need to return to the paw coming up from the land , and step into it ’s area of effect . Step in , give it a good few shots , and back out before you accidentally trade your Resonance buff .
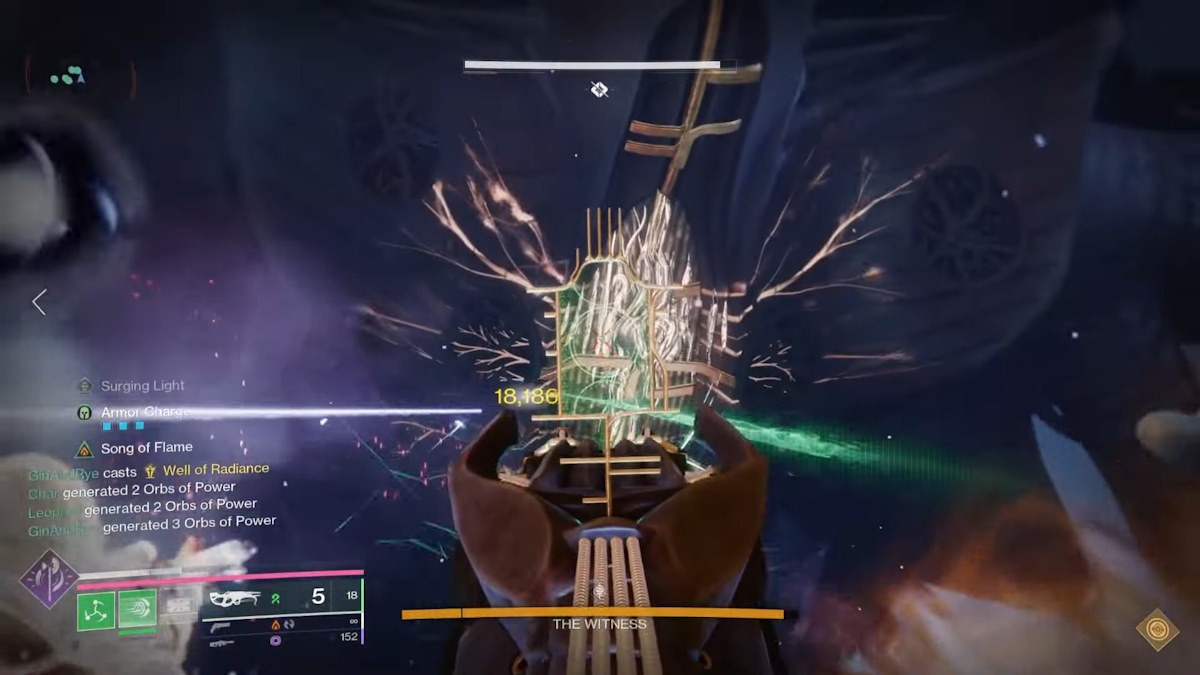
The band only necessitate a few well send shots to ruin , so make certain you ’re quick . Once you ’ve get your Glyphbreaker buff , go to themiddle program with a circle of twinkle on it , and take aim at one of thelarge circular areas on the chest of the Witness . Ideally you want to do this at around the same time as your two teammates , as breaking each Glyph will engender a Subjugator enemy on either side of the arena , but only a maximum of two can spawn at a time , so getting all the Glyphs shotbeforefighting them will be best here .
Now of course , breaking all six Glyphs is what activate the damage phase , but of course there ’s one more nasty mechanic to consider before you’re able to get there .
This is a doozy , but gratefully it ’s warm . It is however a rub mechanic , so do n’t get sloppy here . At random during the initial Glyphbreaker gain phase , specificallyimmediately after break one of the bands , you ’ll receive the notification ' The Witness prove You ' . Here you ’ll need to observe right away which of the bands waslast divulge , as this will determine what design you need to input into the pillars that have now breed in front of the Witness .
If you last break off the hand that did thecircular expanse approach , you’ll need to make the’Triangle’shape . If you last break the hand that did therectangular orbit attack , you ’ll postulate to make the’Square’shape . And if you last broke the helping hand that did thetriangular area fire , you ’ll need to make the’Circular’shape .
You ’ll need toshoot all the pillars that are NOT in the form , leaving the ones that are . So for example , if you ’re prosperous enough to get Square , you ’ll flash all but the four corner pillar .
Thankfully for us all , cristal ( Formerly Twitter ) user @MacticsG1 made this … helpful little diagram .
masterpiecepic.twitter.com/rAu5k5UCQU
Once this is done , proceed until you ’re quick for thedamage stage .
And mercifully , the damage phase is relatively unsubdivided compared to some of the nightmares prior . The Witness has abig glow crit spotright in the middle of his breast , so draw a bead on for that . A Well of Radiance Warlock is suggest as it would be with any damage stage in a raid boss .
The difficultness here comes from the fact that the Witnesswill fight back . He has several attacks he can contrive out , so the purpose is to ensure you ’re save lookout man of your surroundings during the damage phase . He can attack from the front , the sides , and behind you , so you ’ll have to be always cognisant . The attacks from the front can be leap out over , and the others only have to be moved away from . The areas will be mark so you know where to go .
Much like the Dissipation encounter , this one also has afinal standmechanic . This is activated when the Witness reaches a threshold in his health prevention , and is make or break down for your team . If you do n’t vote out him before this final timer runs out , you willwipeand have to do the entire encounter from scratch . His attacks during this part will be much , much faster , so you ’ll all have to verify you ’re invariably moving around the platform and preserve an eye on his attacks .
When his health prevention reach out zero , congratulations , you ’ve successfully completedSalvation ’s Edge . Collect your reward from the big bureau in the midsection , and have a little accent cry , you ’ve earned it .
Salvation’s Edge Exotic Rewards & Loot Table
Here ’s a quick crack-up of all potential weapon drops from the various coming upon in the foray , so you know what to keep your fingers scotch for .
If you ’ve found this guide helpful , and by God Ireallyhope you have , then contain out some of our other Destiny 2 pieces , such as our partitioning on theBest Prismatic Thundercrash Build , or our guide onHow to Complete Dual Destiny Exotic Class Item Quest . Whatever you want , we ’ve set out you covered here at Pro Game Guides .
