Begin a thrilling escape room adventure !
box lose Fragment sport a account of a high - stake looting turned into an escape way adventure . If you ’re feeling stuck on any puzzle , I ’ll walk you through it to help you get out of the mansion safely .
Boxes Lost Fragments walkthrough - Chapter 1 Initium
This section of the Boxes Lost Fragments walkthrough cut across the prefatorial tutorial and all the mystifier within the first half of Chapter 1 . If you need help with any other level , I ’ve yoke all of the walkthroughs for the game below .
Tutorial
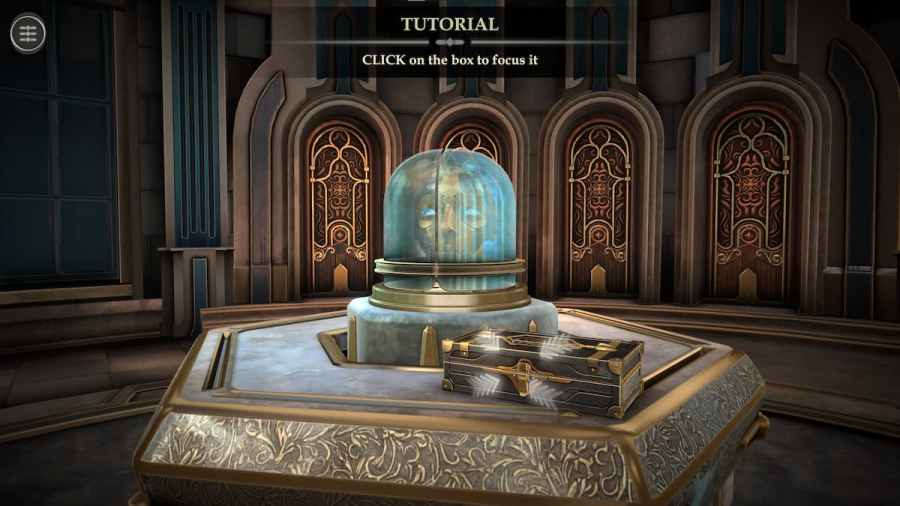
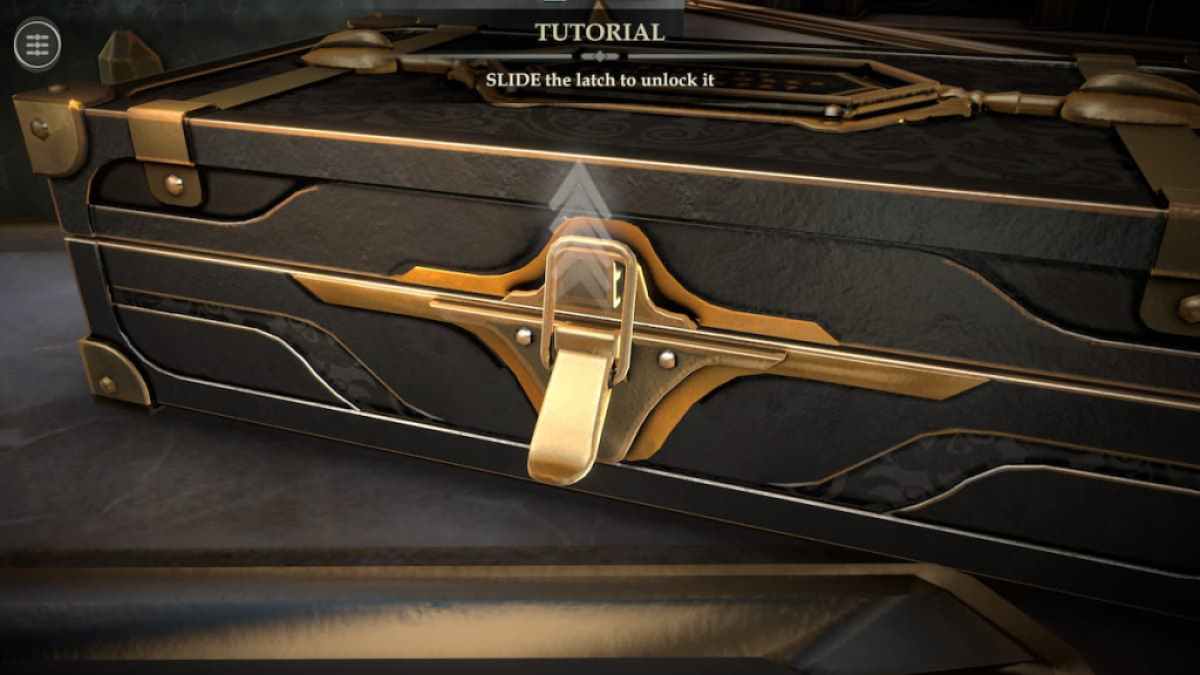
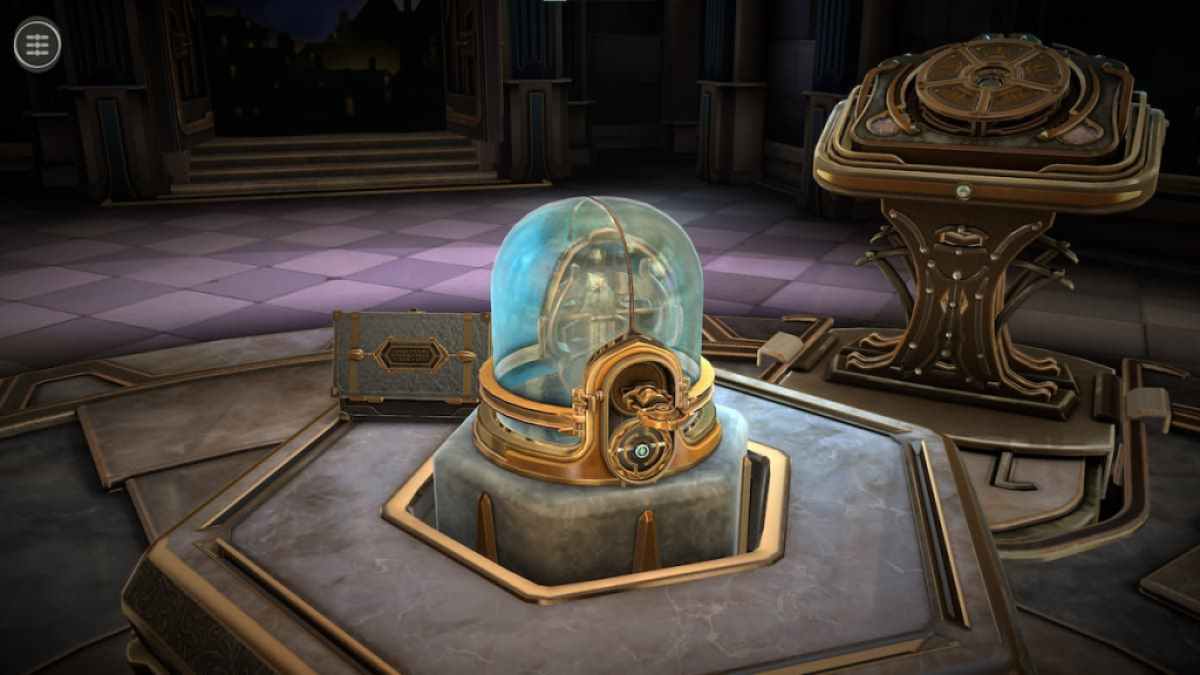
The game starts with a masque in a glass guinea pig and a contraband boxful .
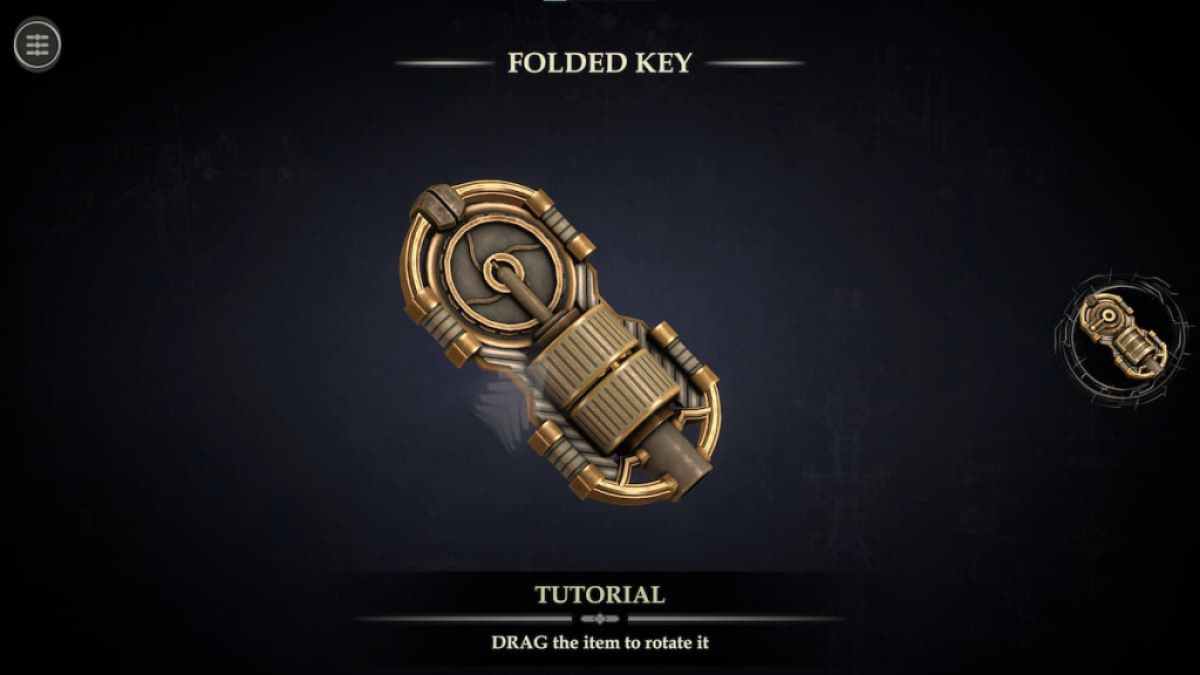
tap on the Folded Key in the loge will come out it in your stocktaking on the right . Tap it again to calculate at it .
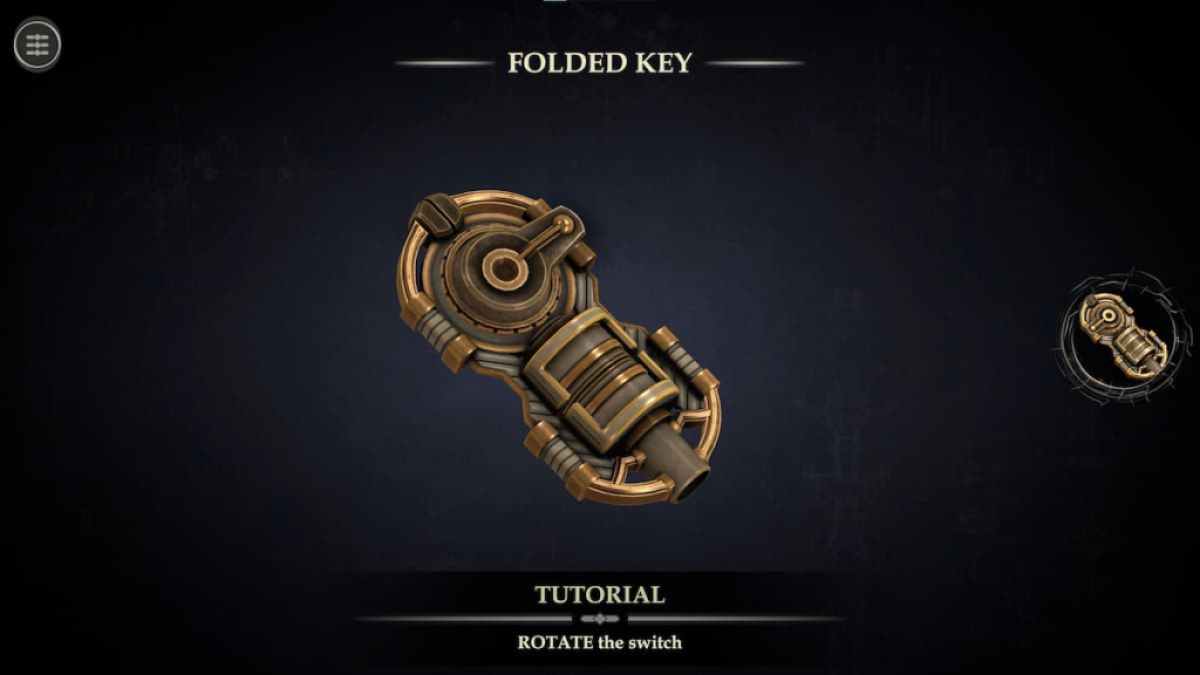
Flip the key to look at the back and go around the handle at its top to transform it into a key .
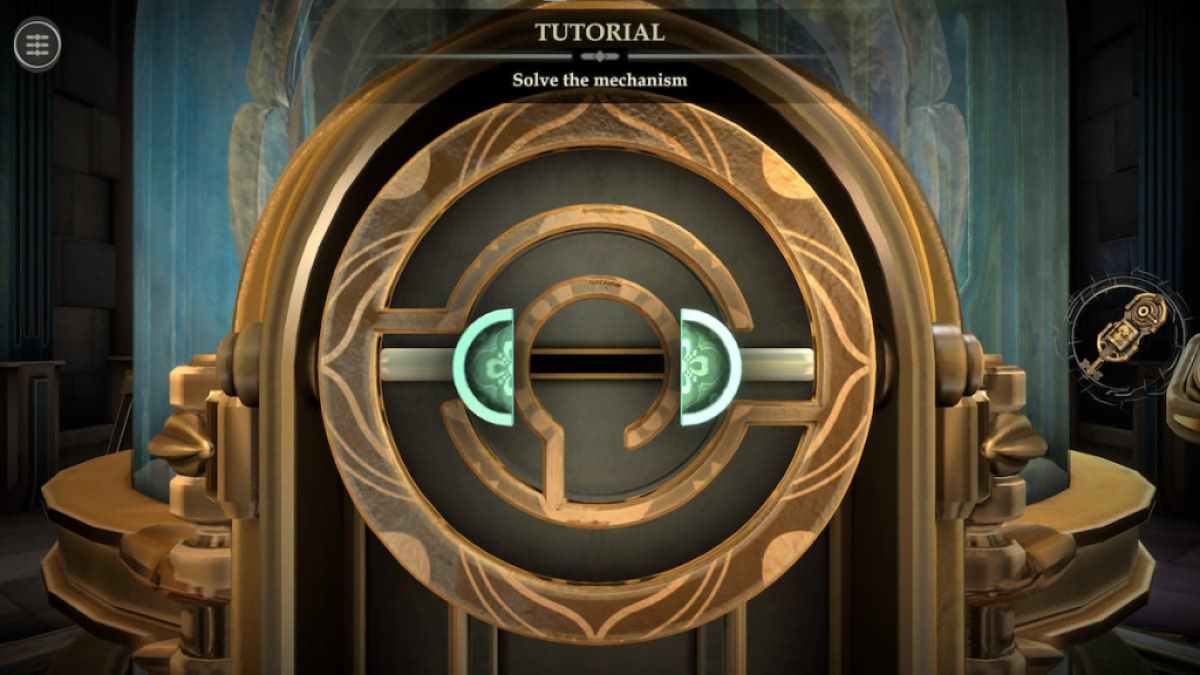
go around the screen until you ’re confront the back of the glass case to break a mystifier .
Rotate the chemical mechanism in the middle until both of the gamy sliders can move forward a space .
Then splay the mechanics until one of the blue sliders can be pushed into the center of the puzzle .

Screenshot by Pro Game Guides
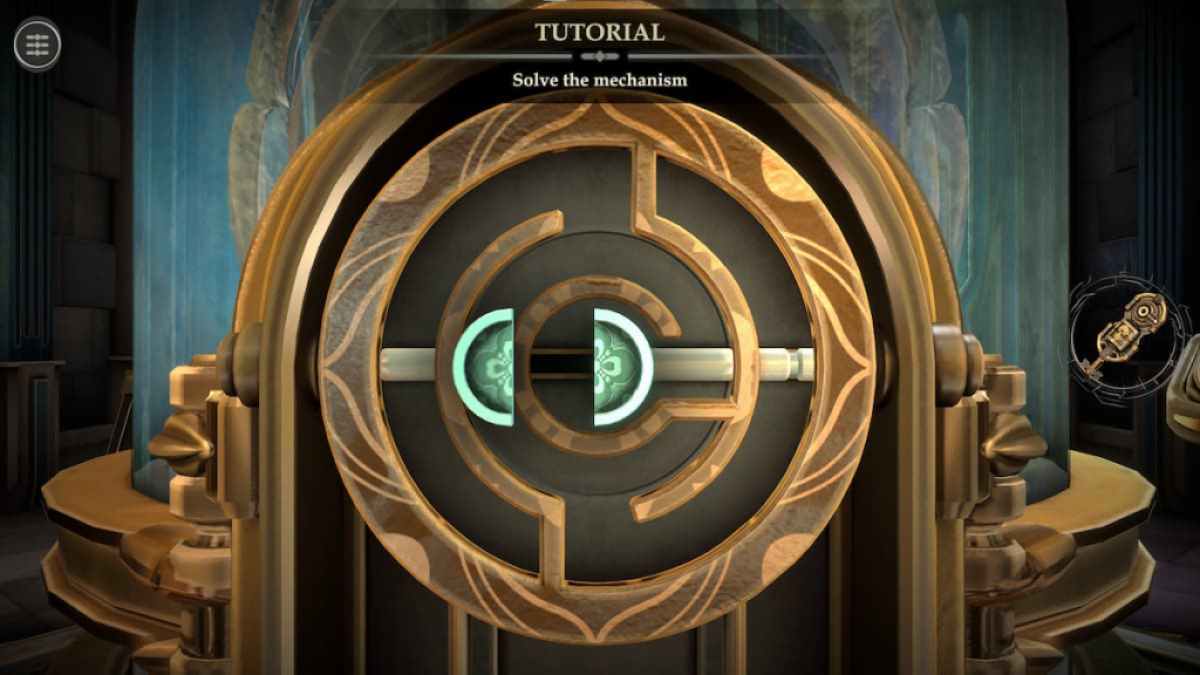
Repeating the last step with the other blue slider reveals a keyhole .
sneak in it and rotate it 360 degree to afford the fount . This will inspire a cutscene , after which you will get the instructions to explore .
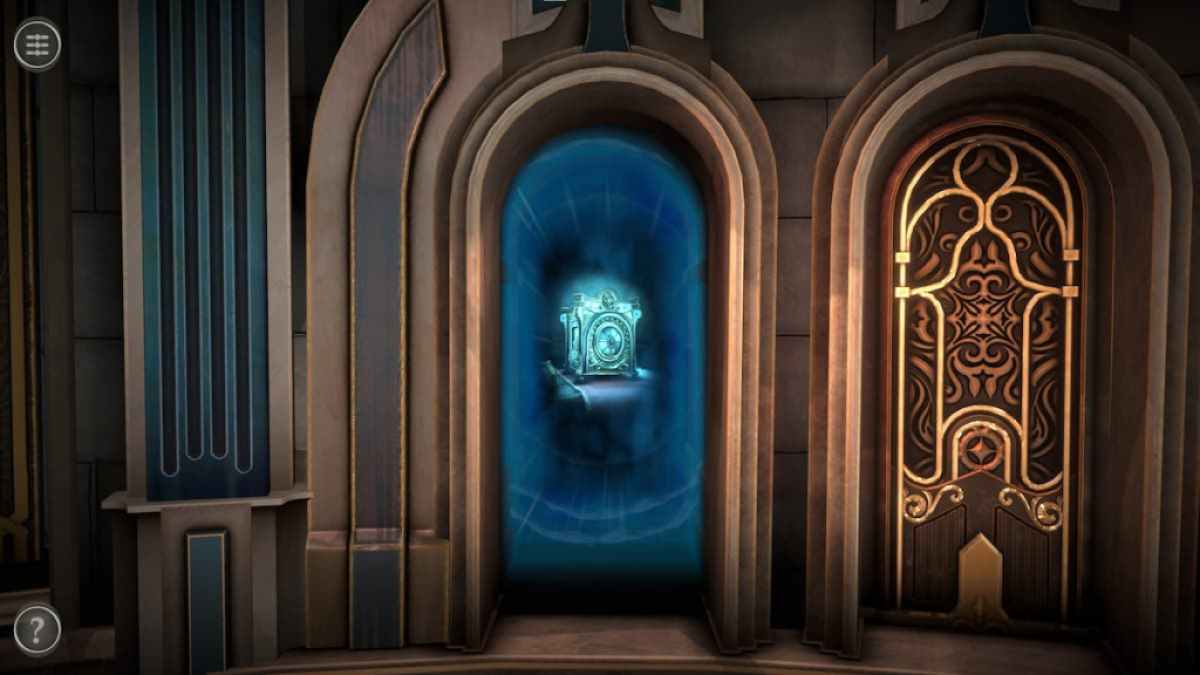
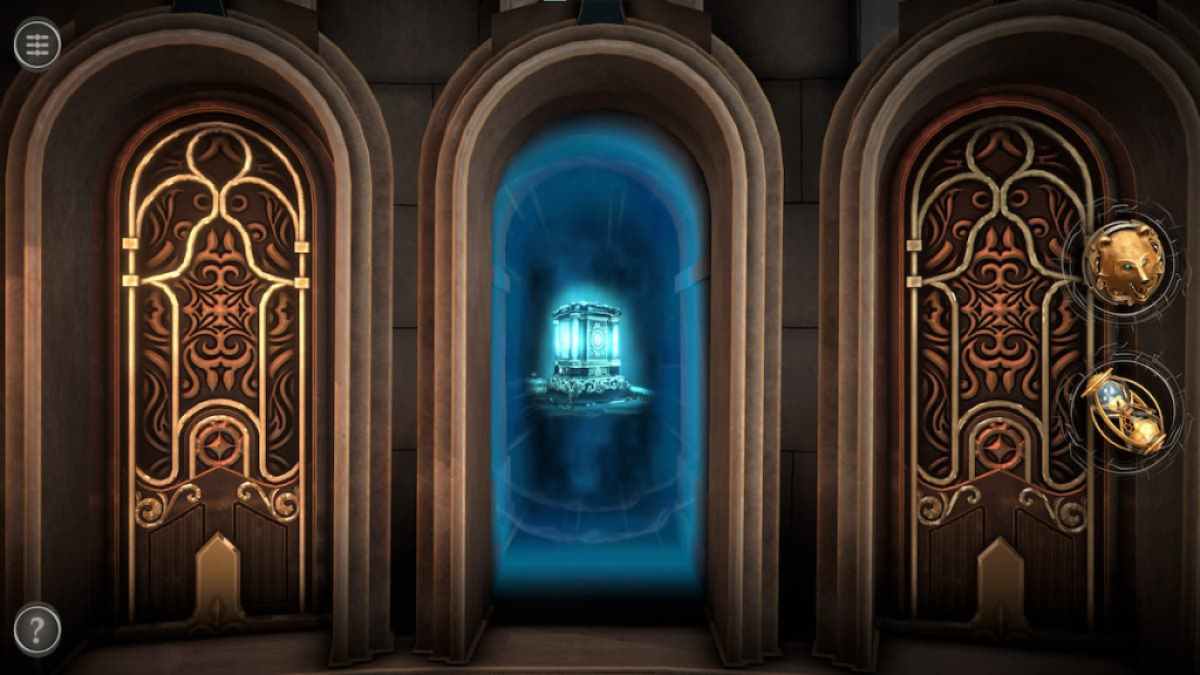
attend around until you see a side room . The side elbow room moderate three sections — a clock on the leftfield , a suit of armor in the center , and a gadget with a magical naughty light on the right . You ’ll need to lead to the gadget on the right field .
Screenshot by Pro Game Guides
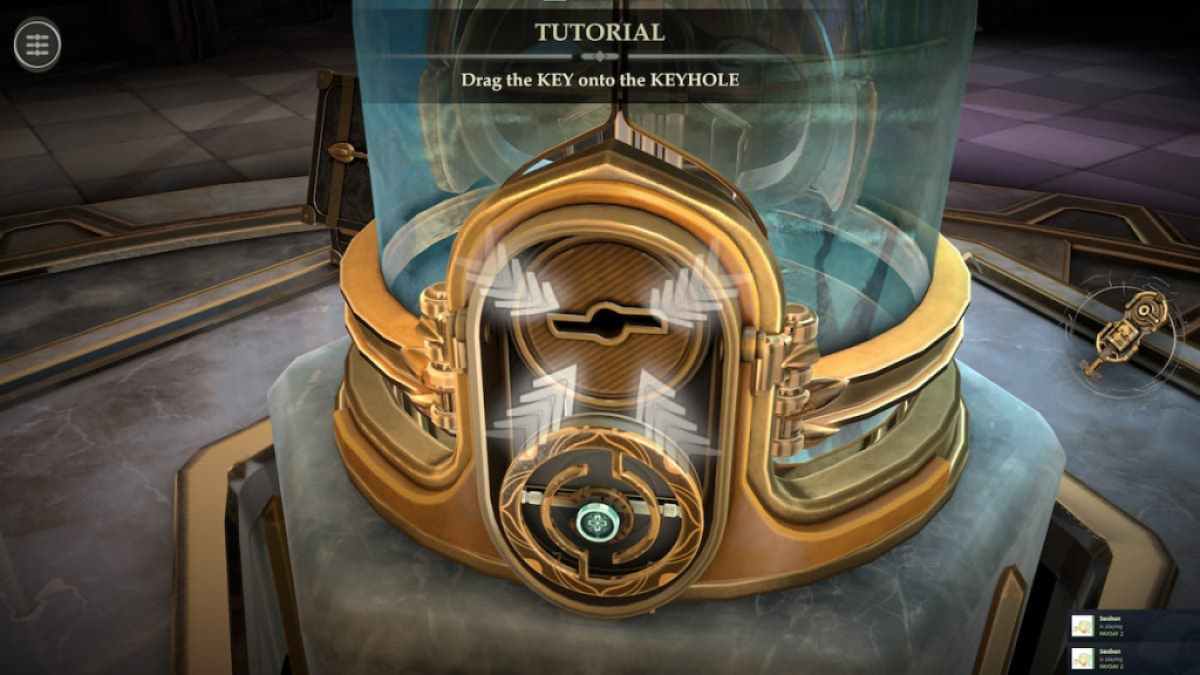
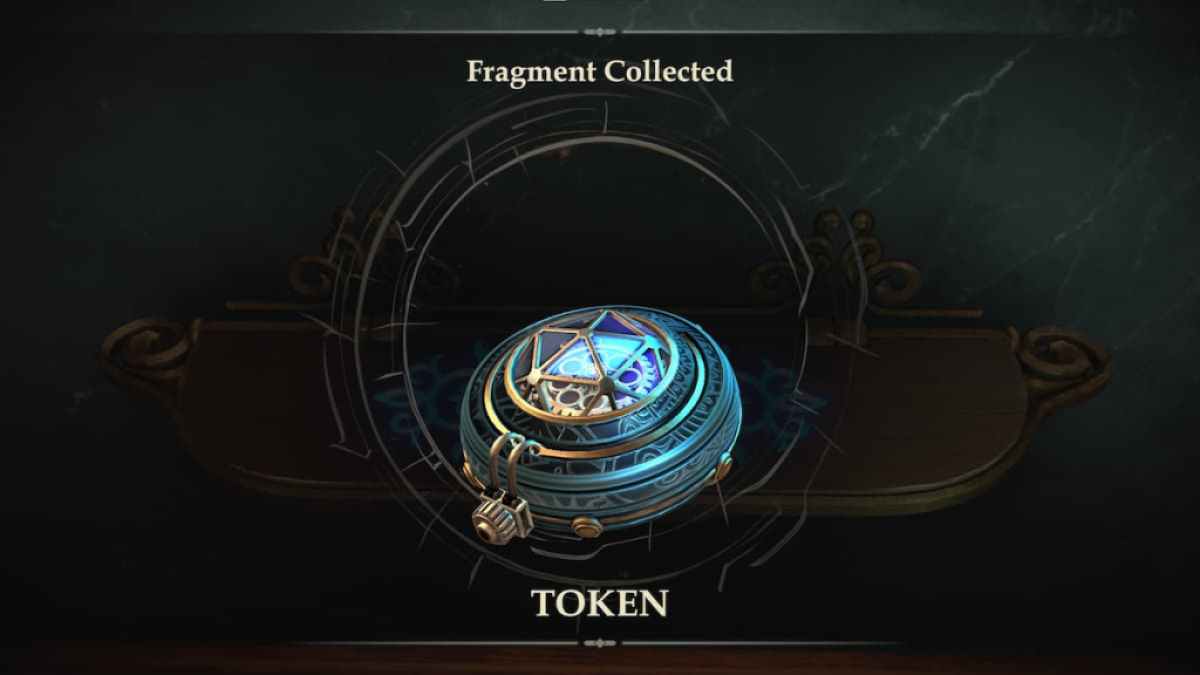
Tapping on the gimmick will give it in your armoury .
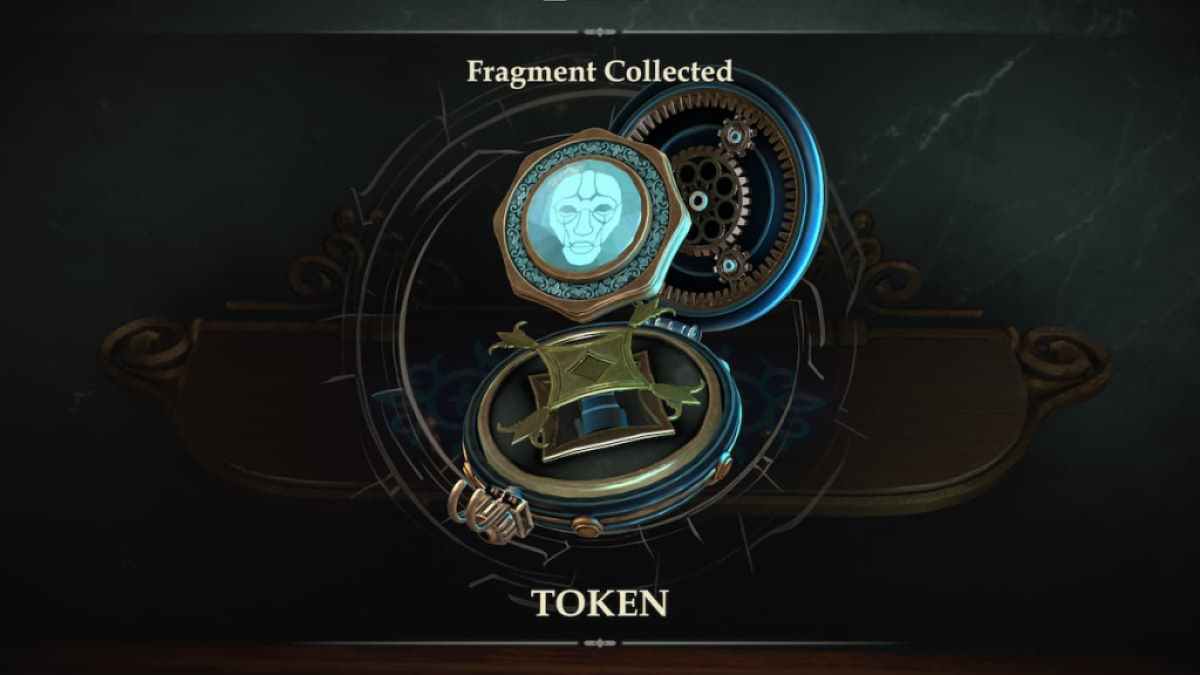
Once it expands , bug the token in the center to snap up it .
Add this token to the center of the pedestal in the master room .
Screenshot by Pro Game Guides
This will open one of the strange doors , allow you to enter Chapter 1 , titled " Initium " .
First room puzzles
Entering Chapter 1 locate you in a room with two box on a board .
spread out the screenland to see a greenish luger on the good side of the box seat .
Push the yellow-bellied terrapin to the right to unlock a small-scale compartment .
Screenshot by Pro Game Guides
splay each of the circles inside the compartment until their disruption align , discover a second slider .
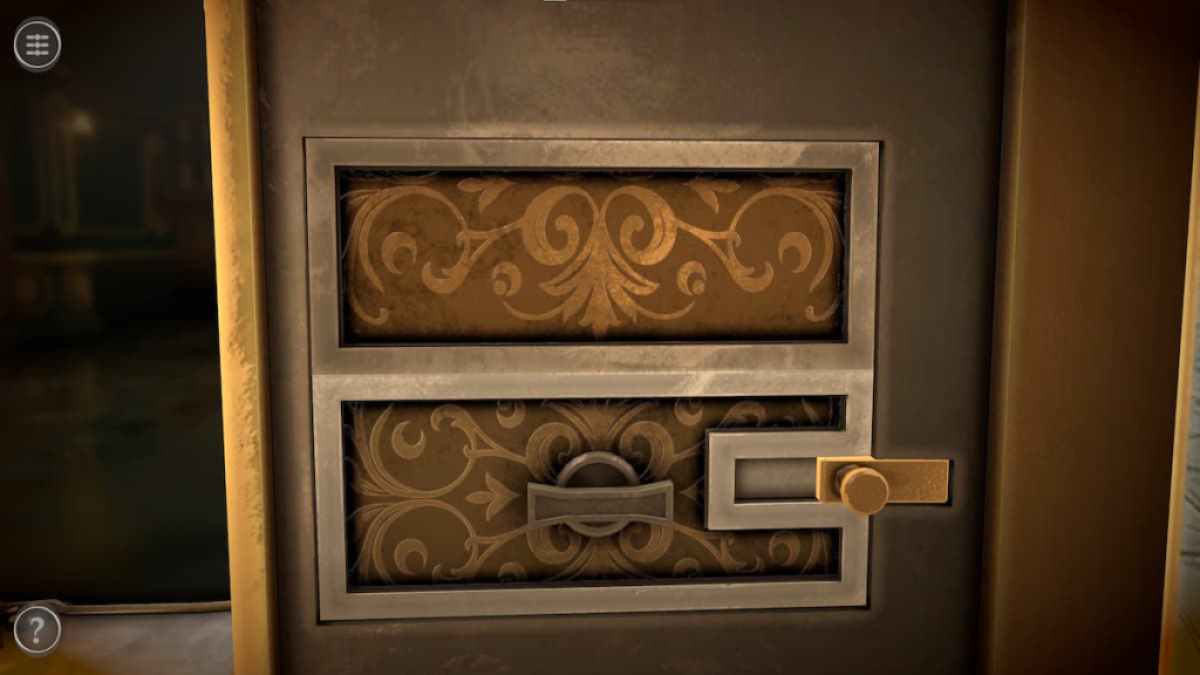
Pulling that slider extends the right side of the loge , revealing a third slider on its side .
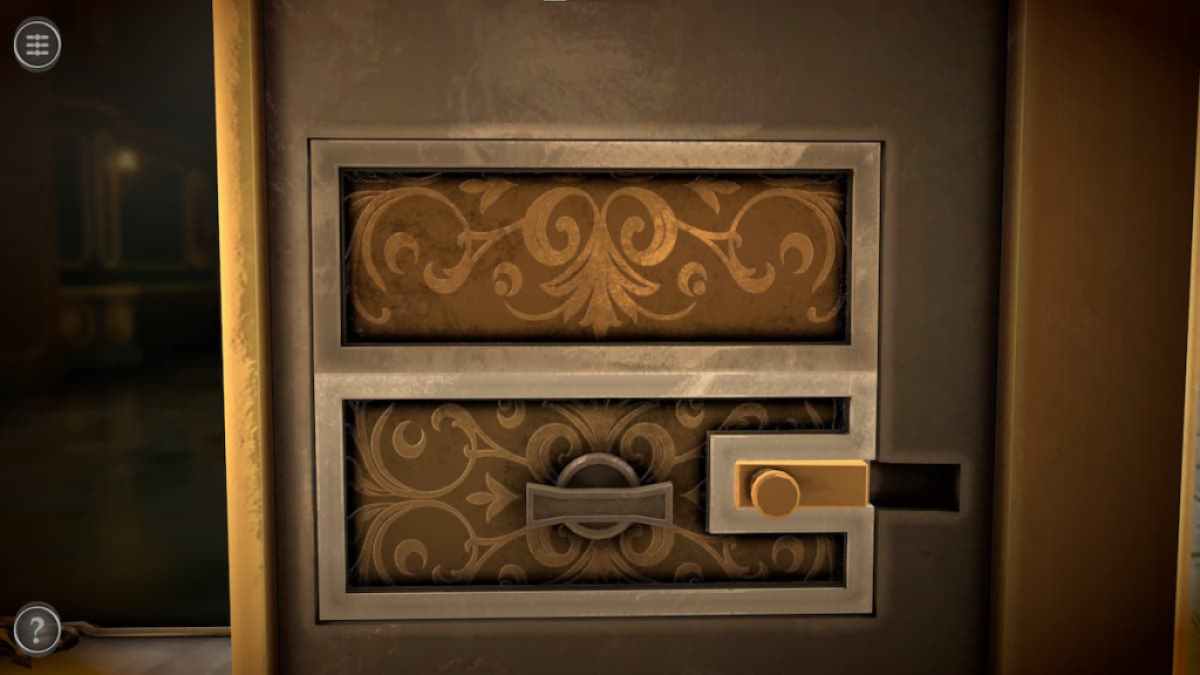
Push the golden slider on the bottom to the left .

Screenshot by Pro Game Guides
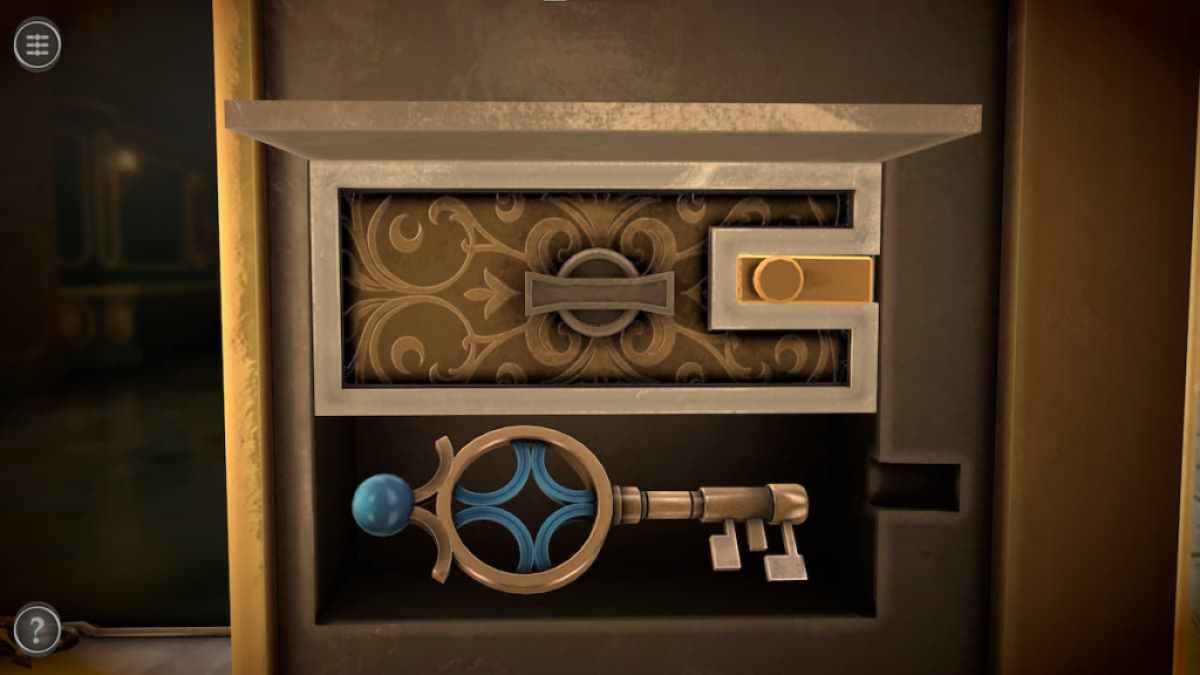
skid the brown drawer on the bottom up to get a keystone .
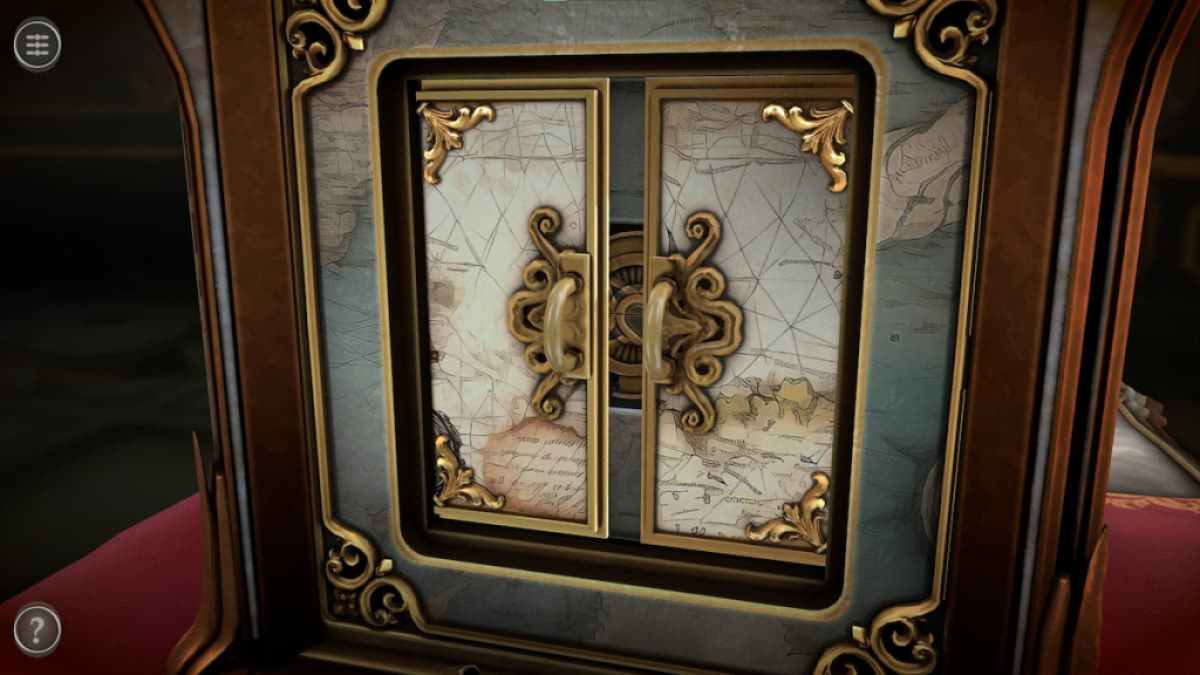
With the key in your inventory , straits to the left side of the swelled box .
introduce and spread out the key will remove the lock .
Screenshot by Pro Game Guides
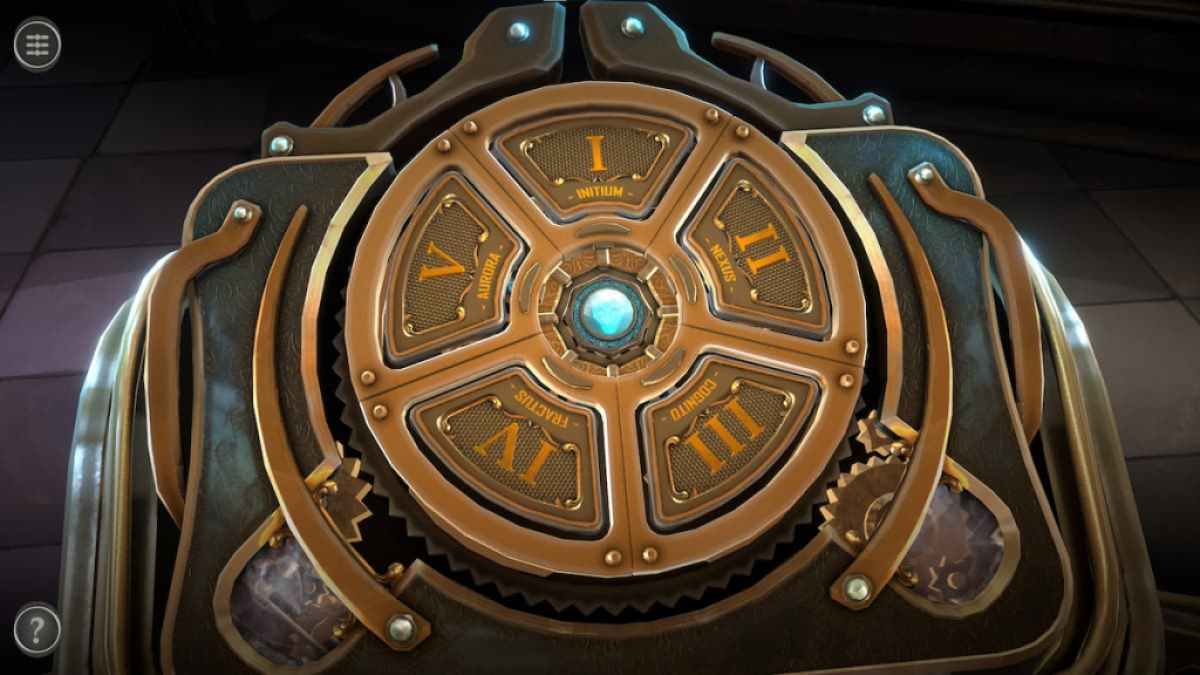
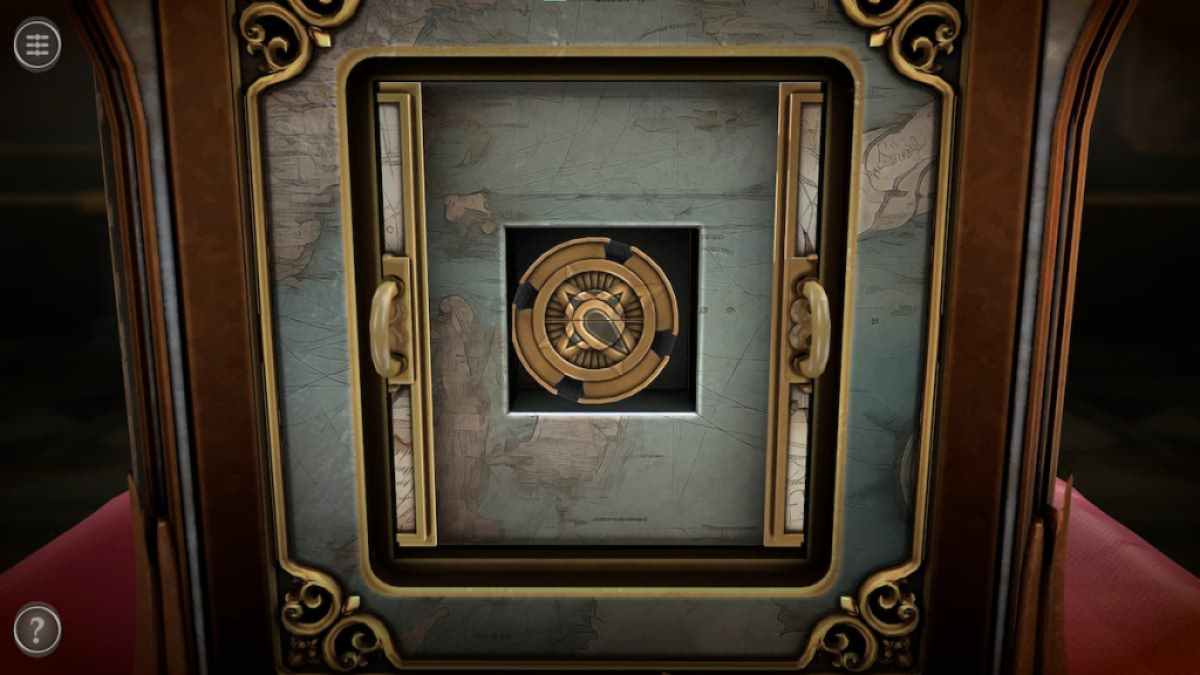
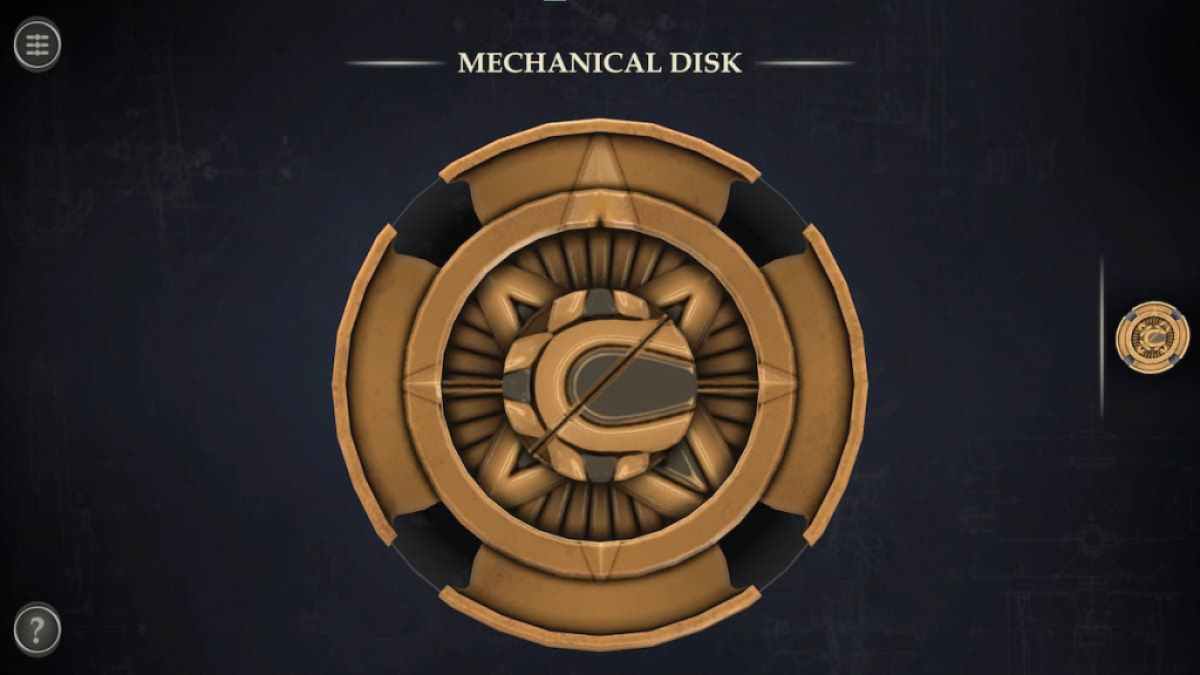
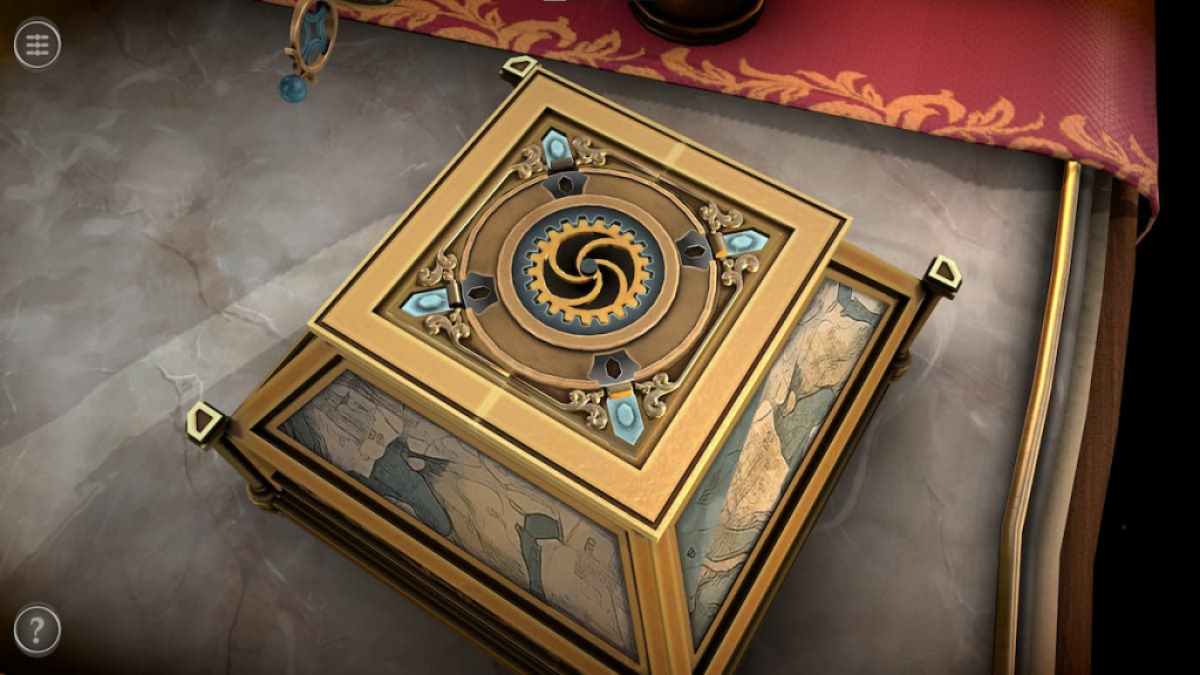
enter the doors to get a Mechanical Disk .
enter the Mechanical Disk in your armory .
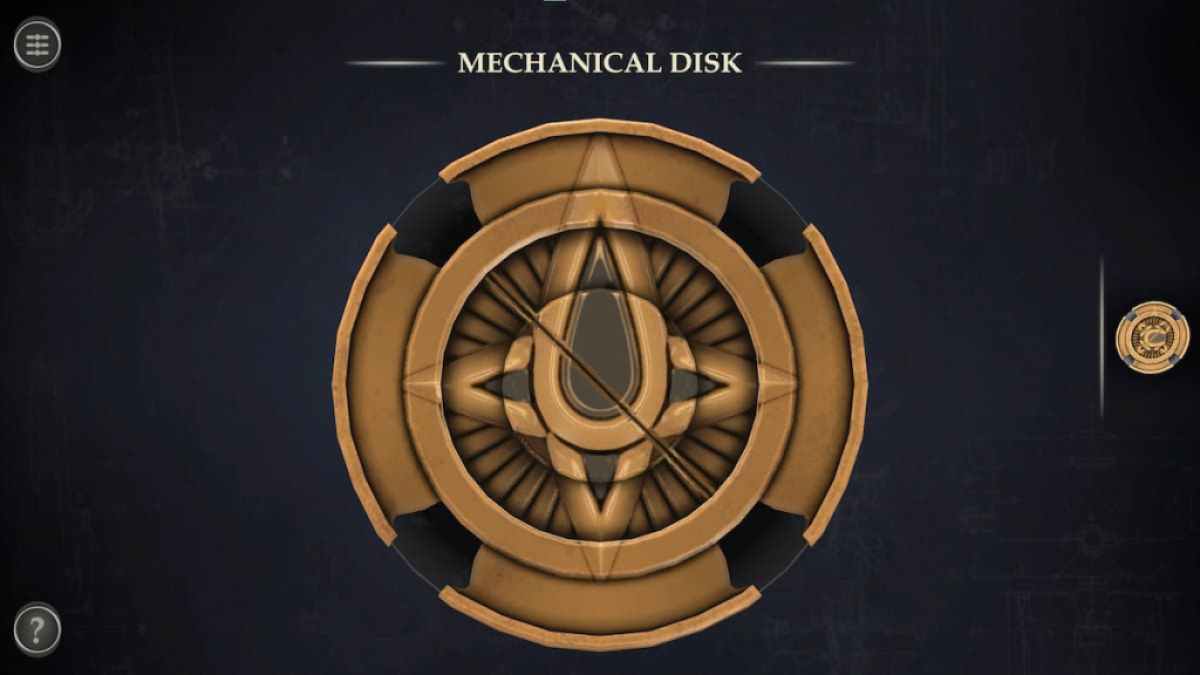
Tap each section to rotate them until they look like the image below .
Screenshot by Pro Game Guides
associate : Cafe Bacon Escape Room Walkthrough
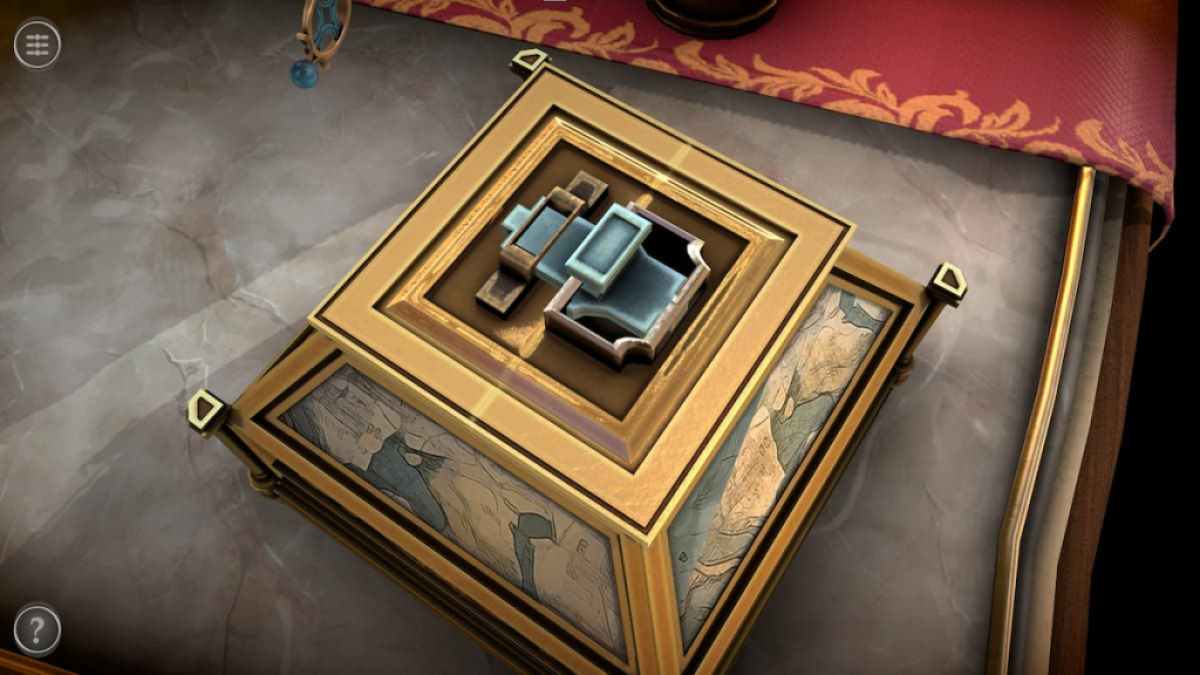
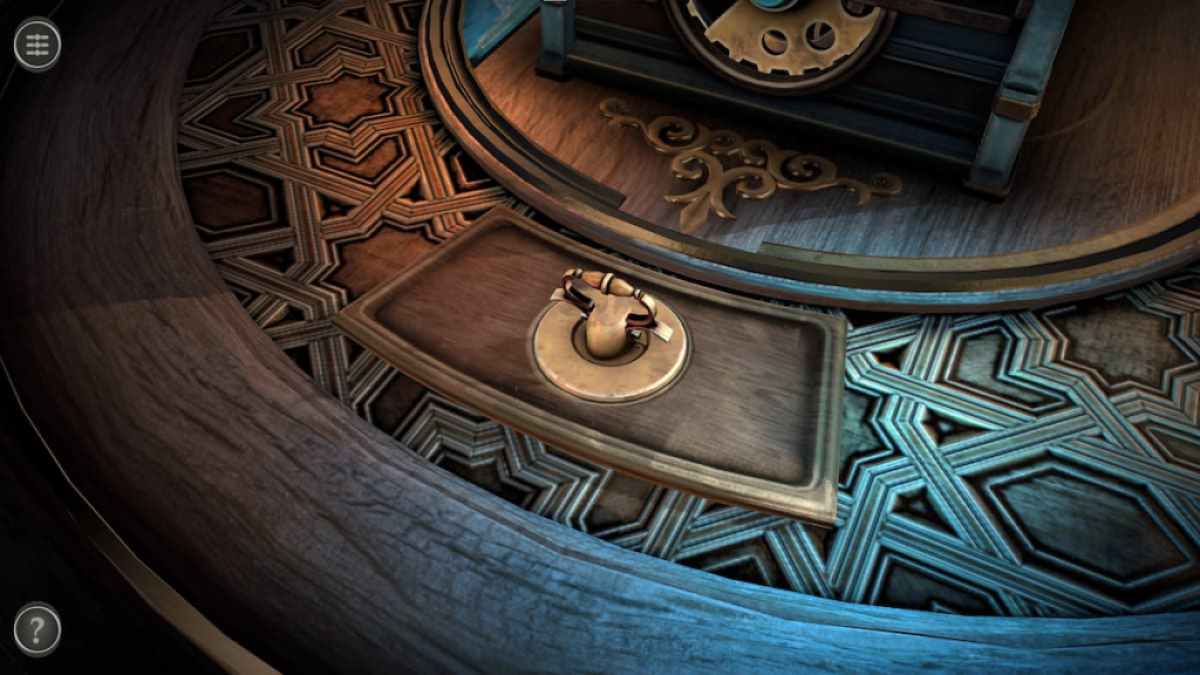
Focus on the top of the small metal box seat on the mesa ’s left side .
This will flip the top , unlocking a gray grip .
Screenshot by Pro Game Guides
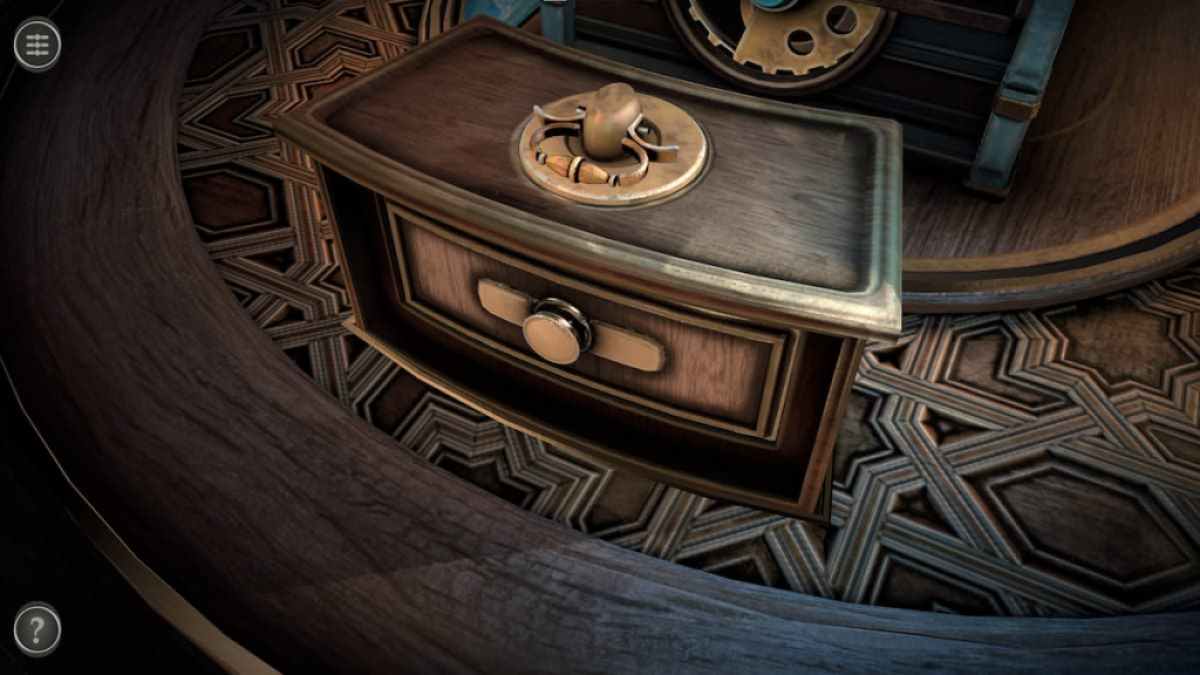
Pull the grey handle to the front to get to the box , which contains a Sphere . knock it to put it in your inventory .
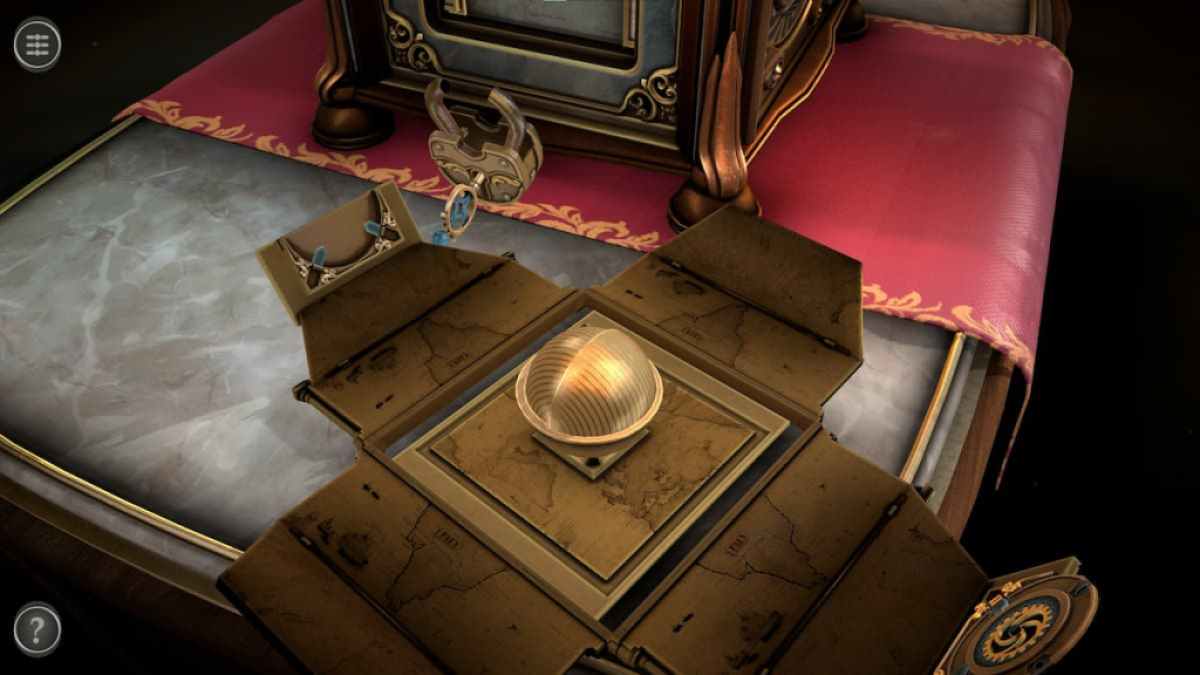
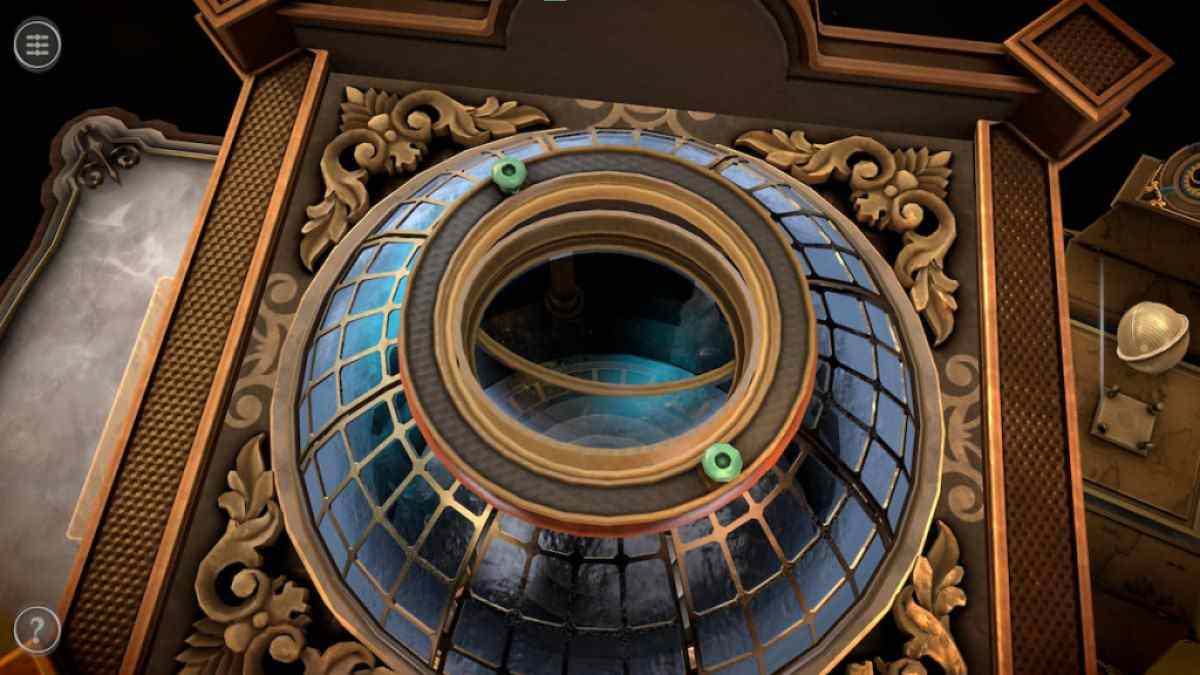
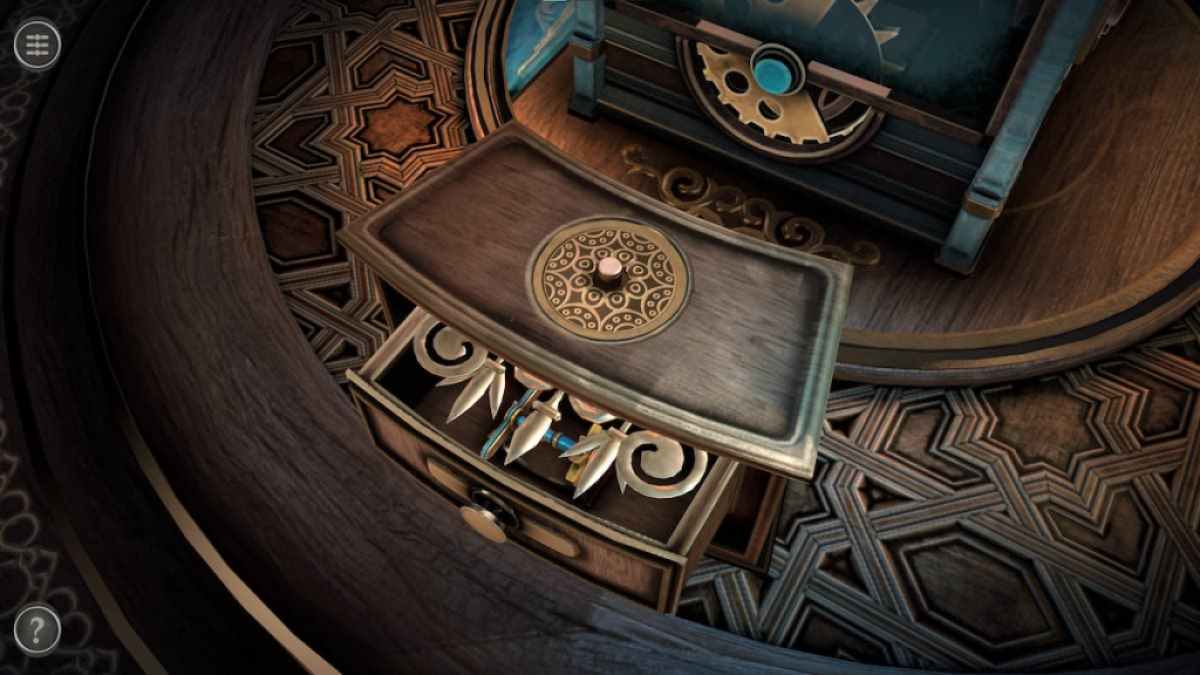
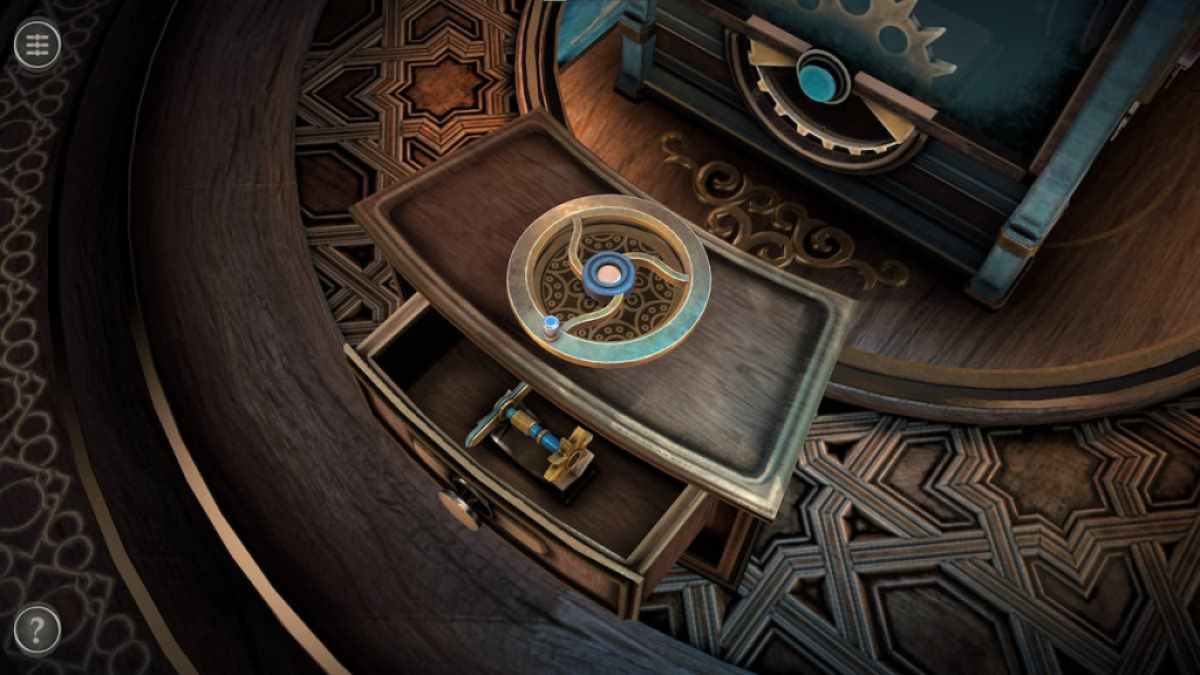
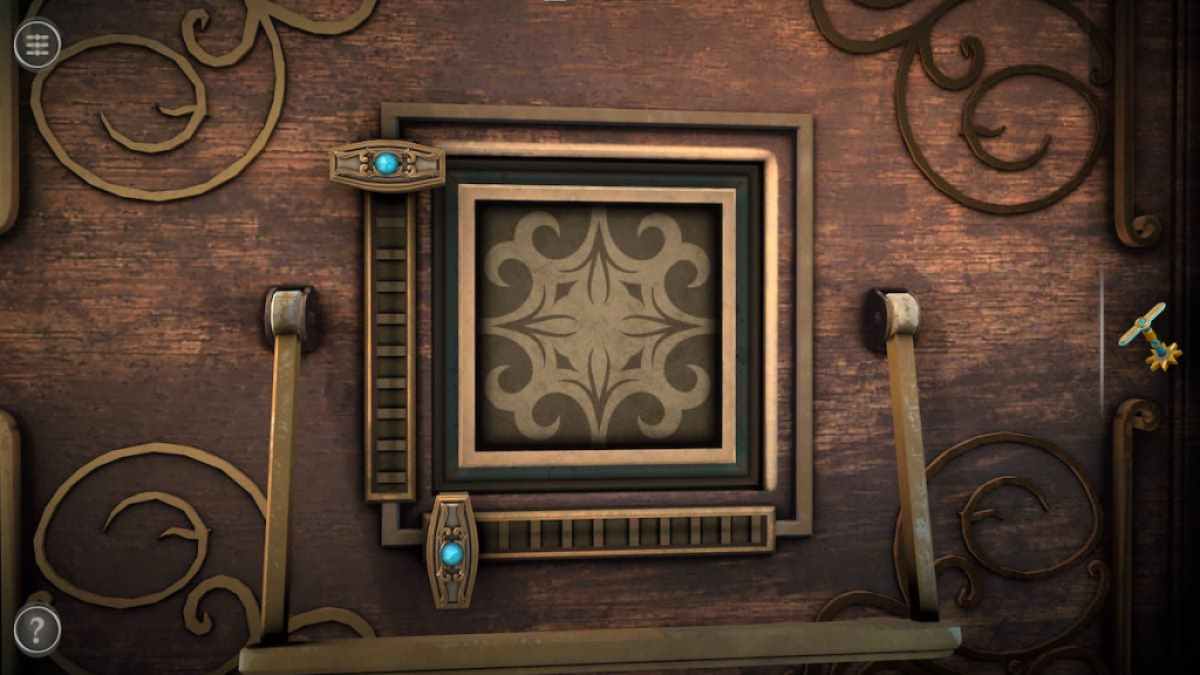
At the top of the corner is a globose hollow border by a gilded rim with two dark-green slider .
Rotate the slider around until they halt , after which they will spin around by themselves and the substance will rotate .
Screenshot by Pro Game Guides
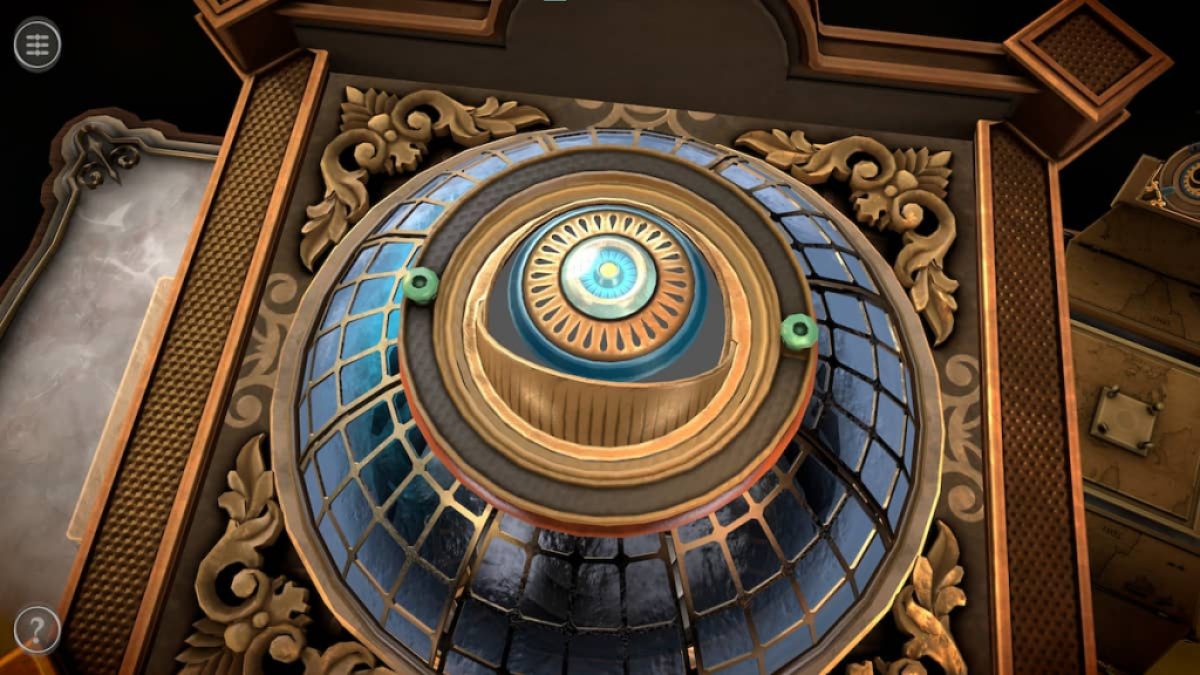
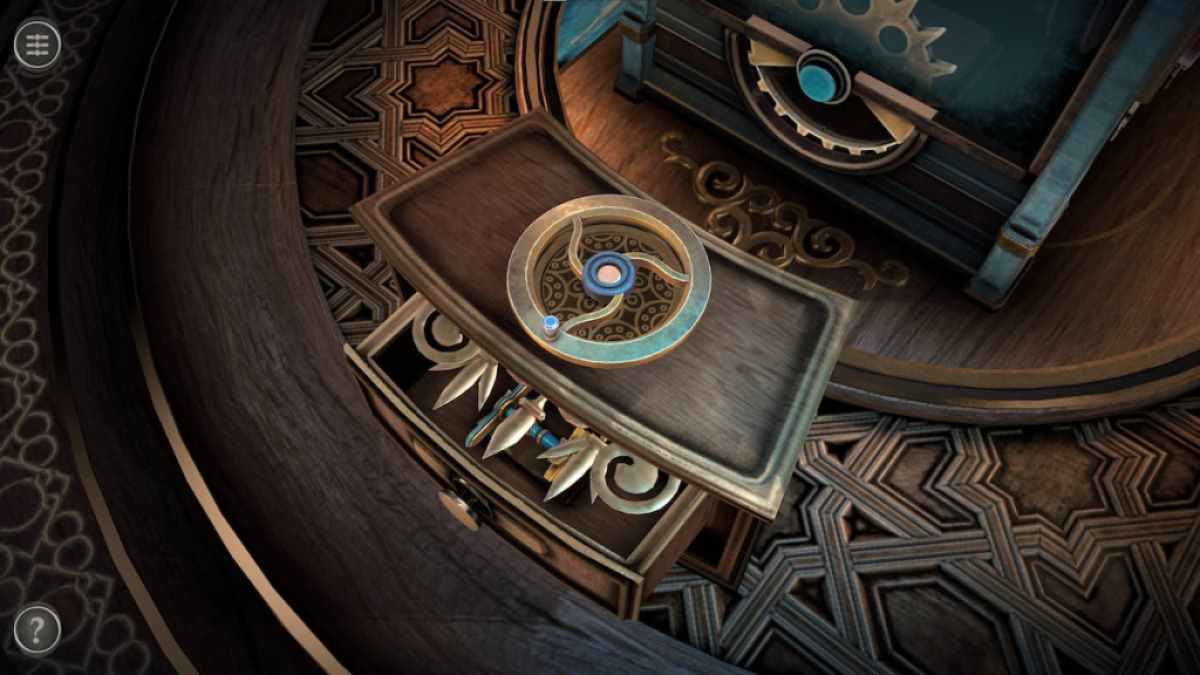
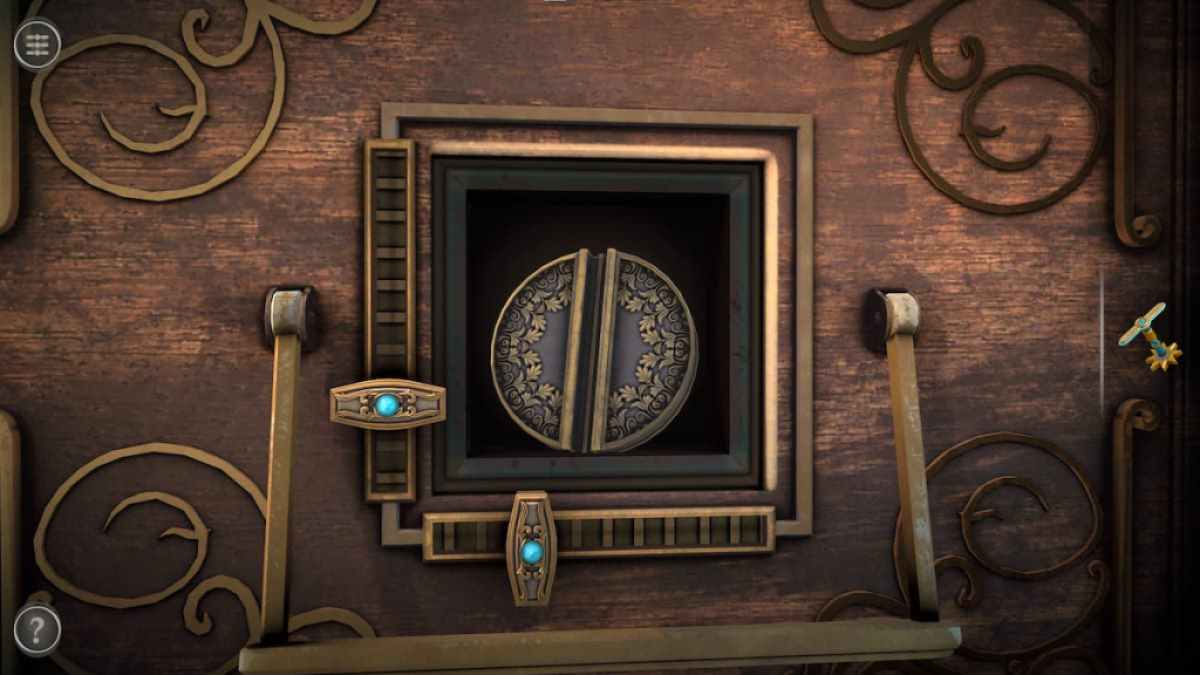
rate the Sphere into the centerfield
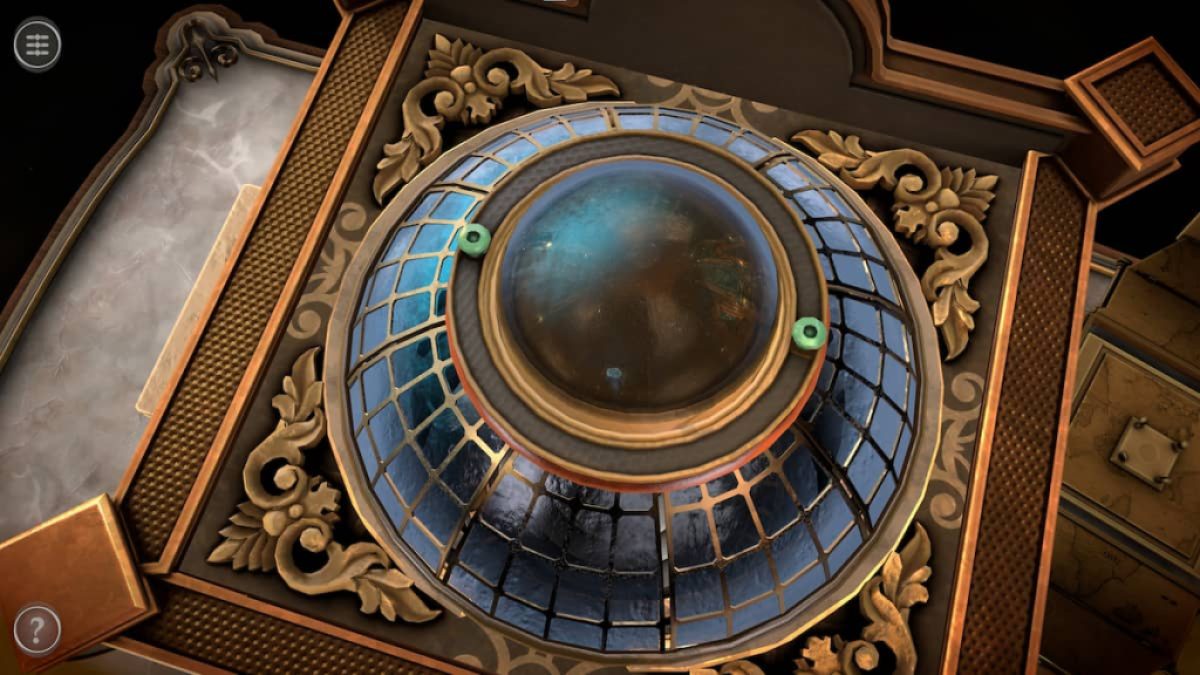
splay the heart so that it face the interior of the corner .
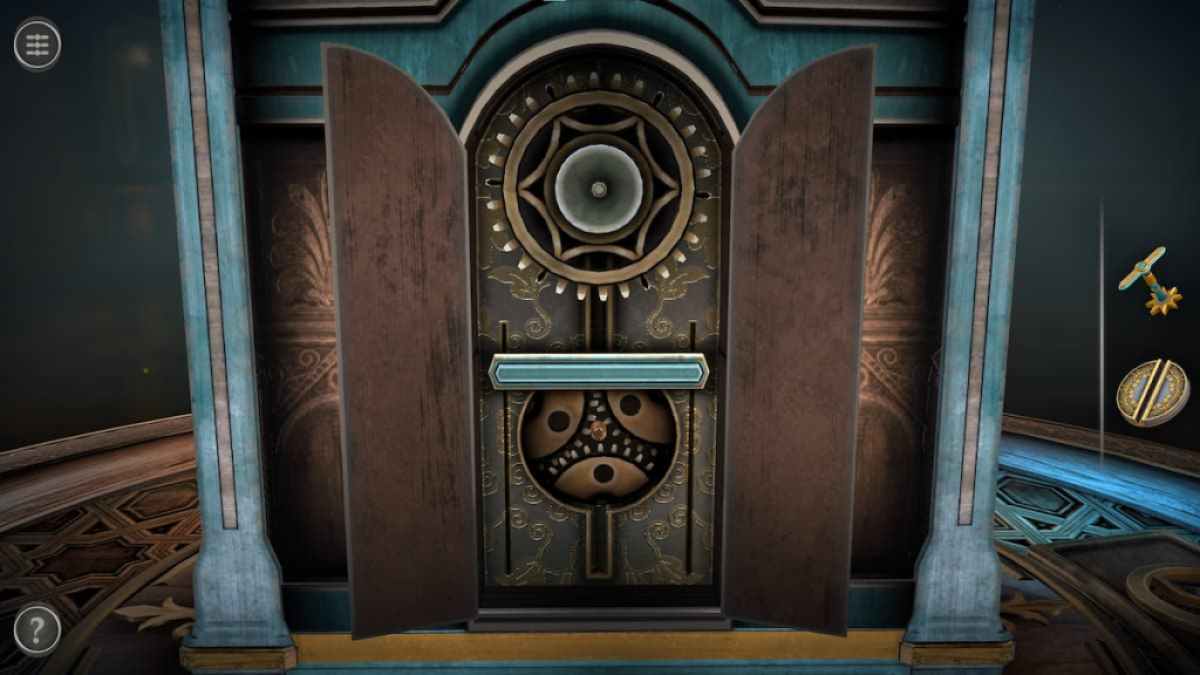
With the eye turn out inwards , look at the back of the clock .
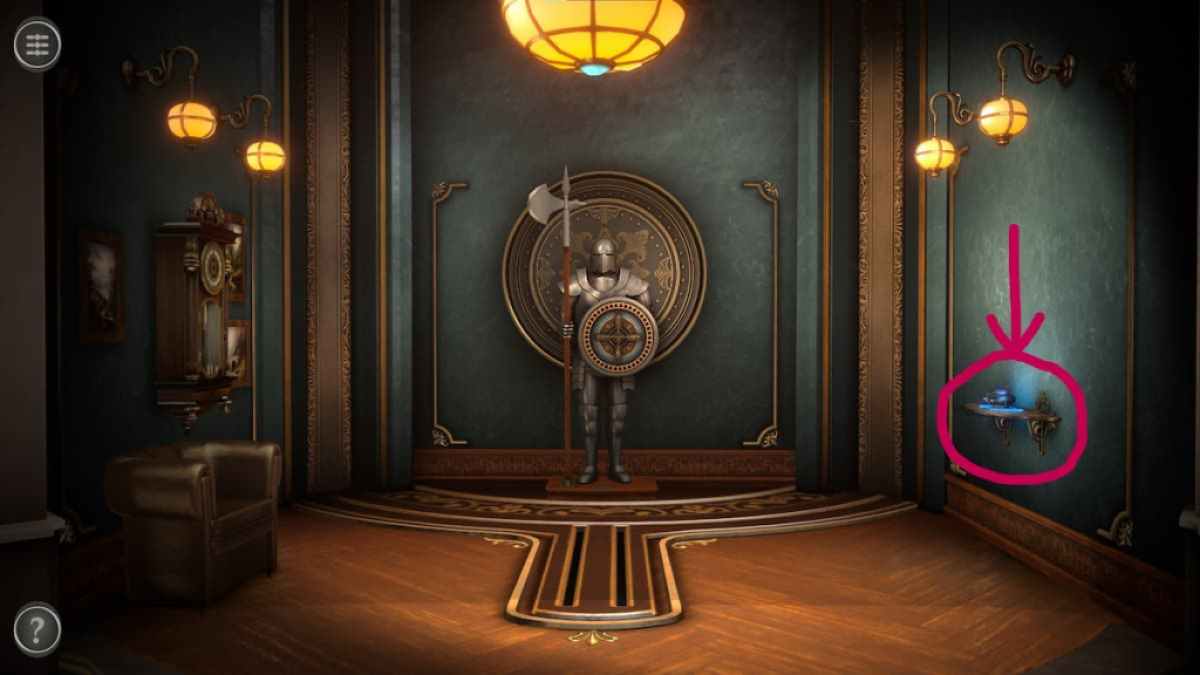
Image by Pro Game Guides
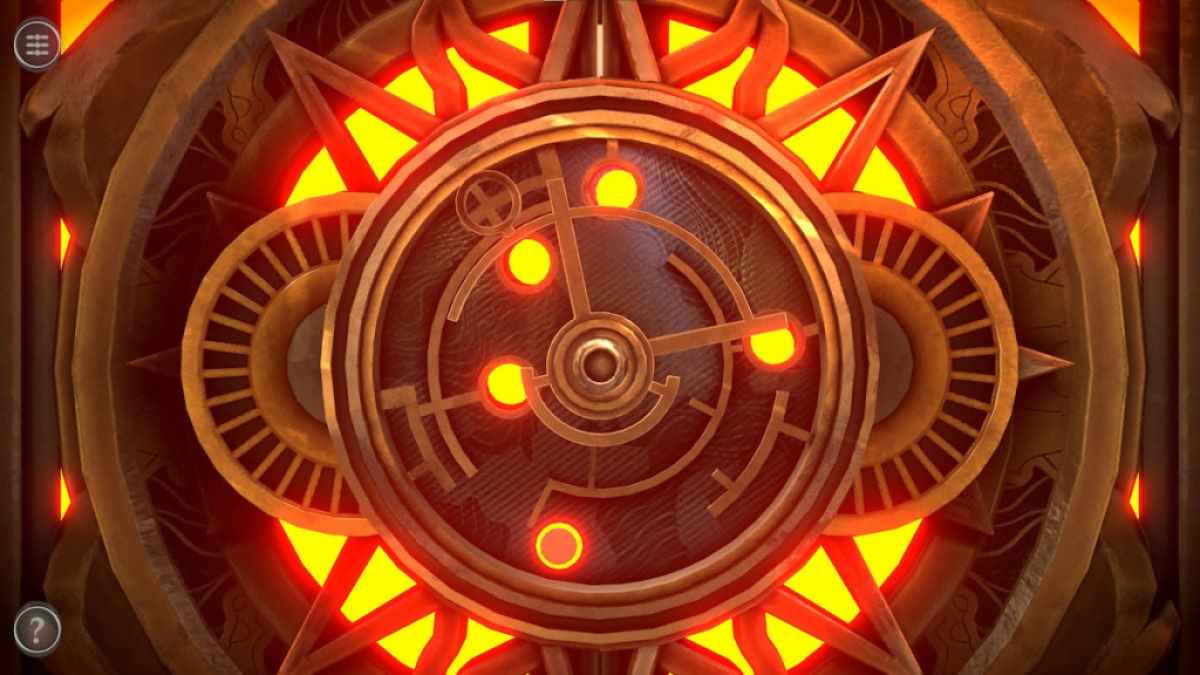
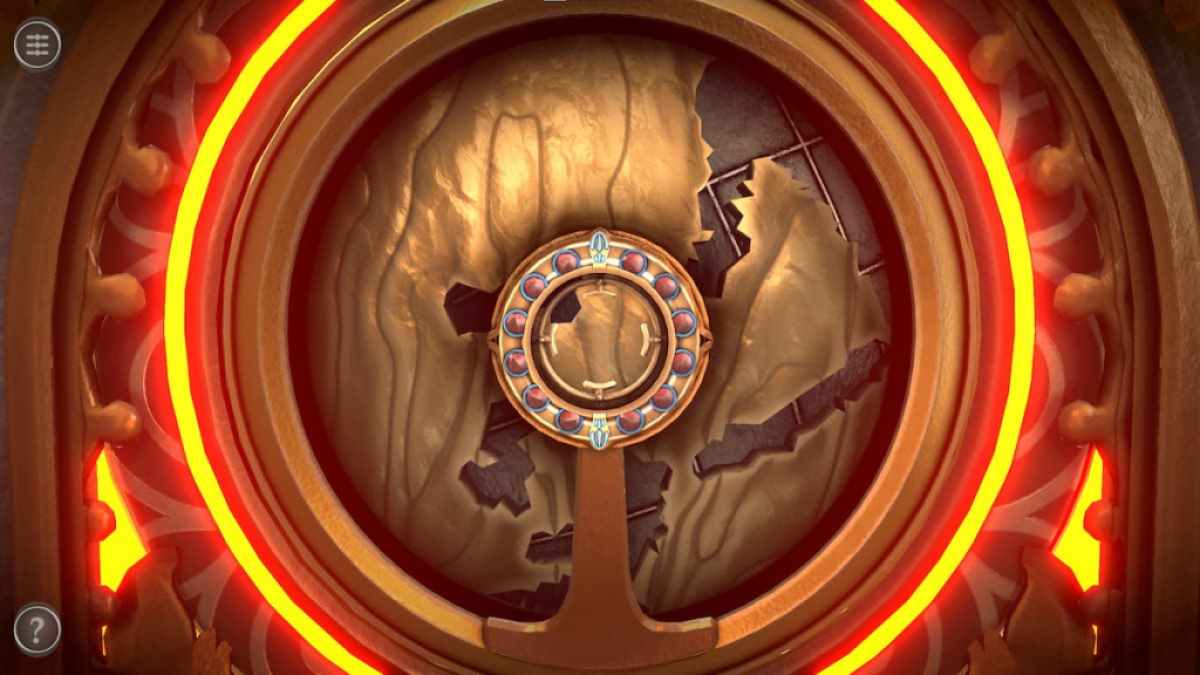
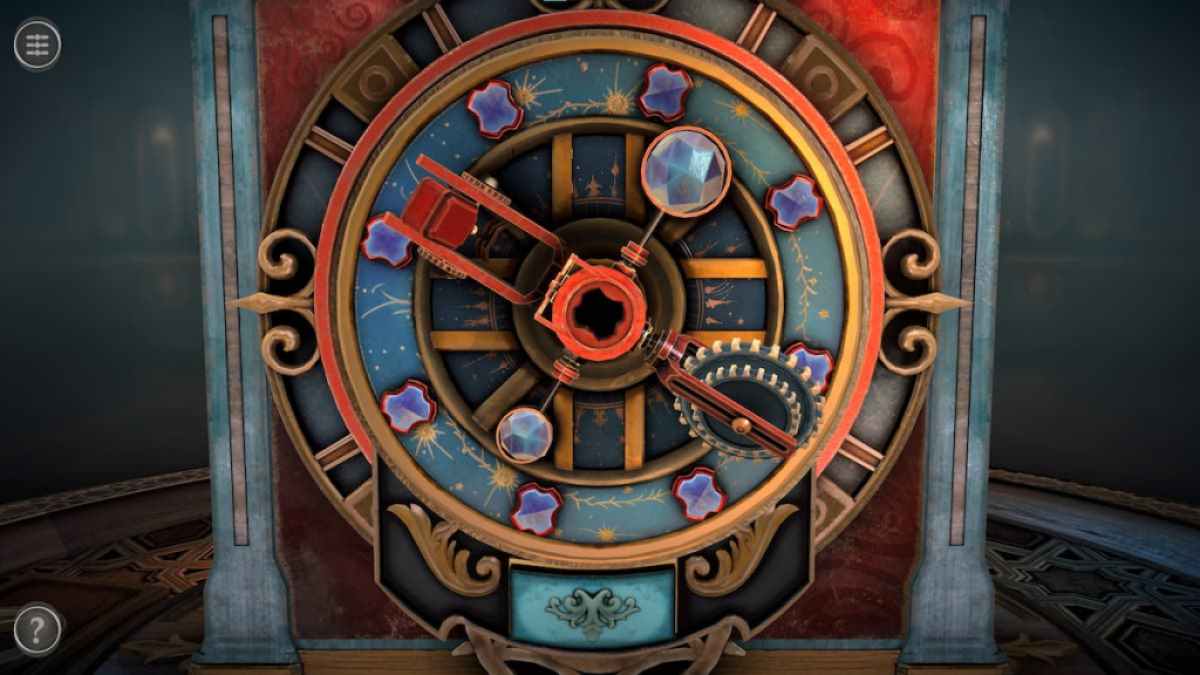
circumvolve the odd dial until its four circle cover the red glow circles on the clock . You ’ll know it ’s right when the reddened circles glow icteric on the interior .
Rotate the right dial so that its round covers the final red circle at the bottom .
This will open up the clockface , break a belittled door in the center .
Screenshot by Pro Game Guides
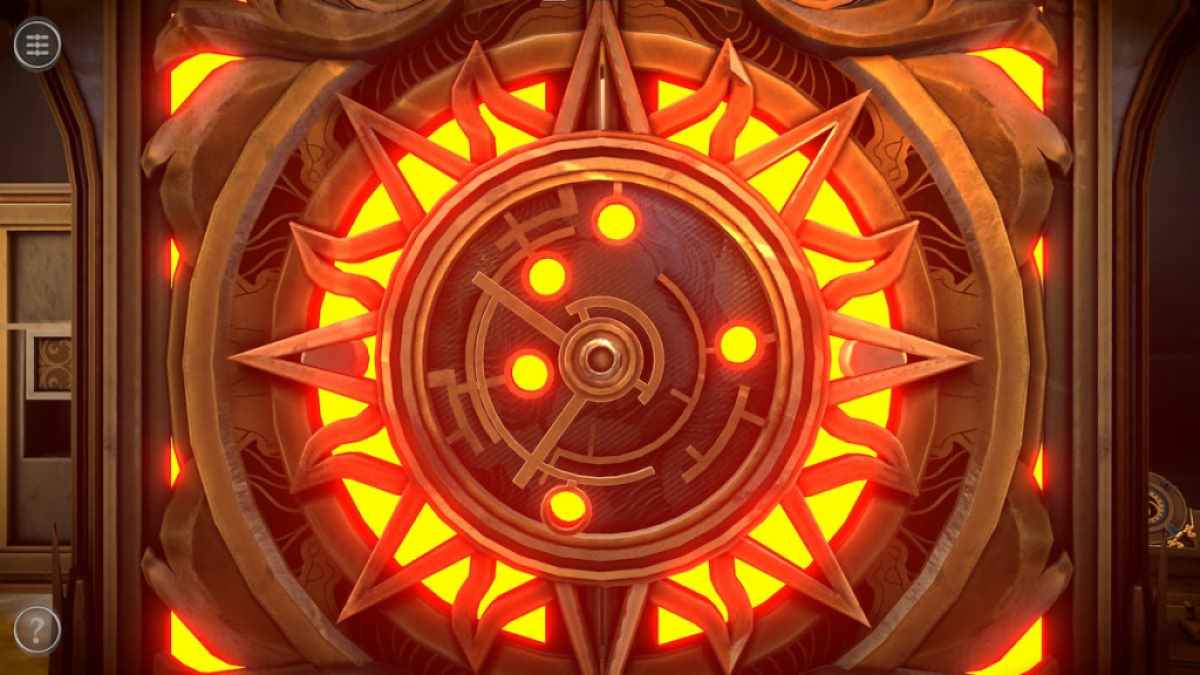
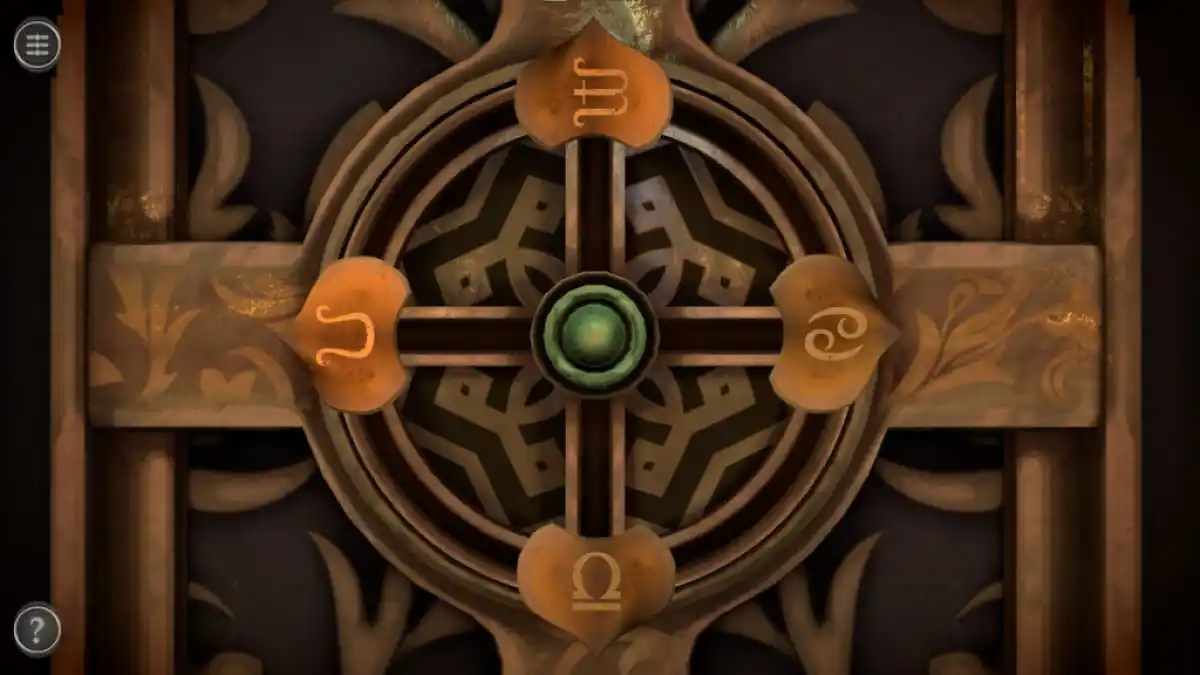
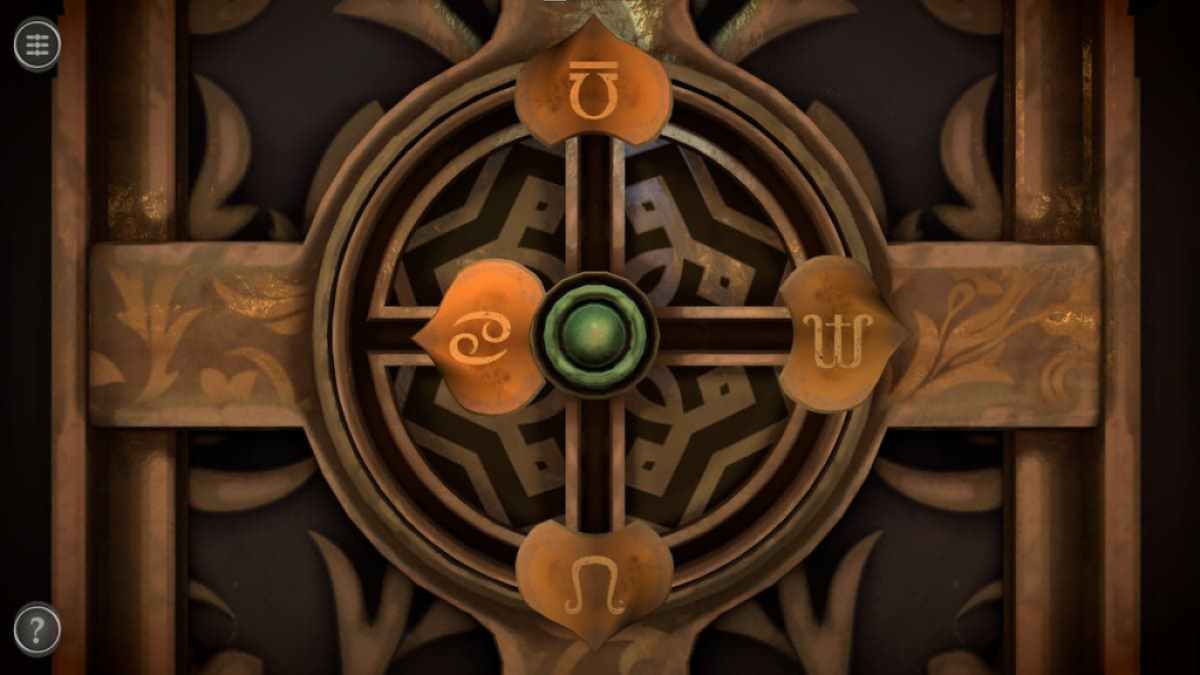
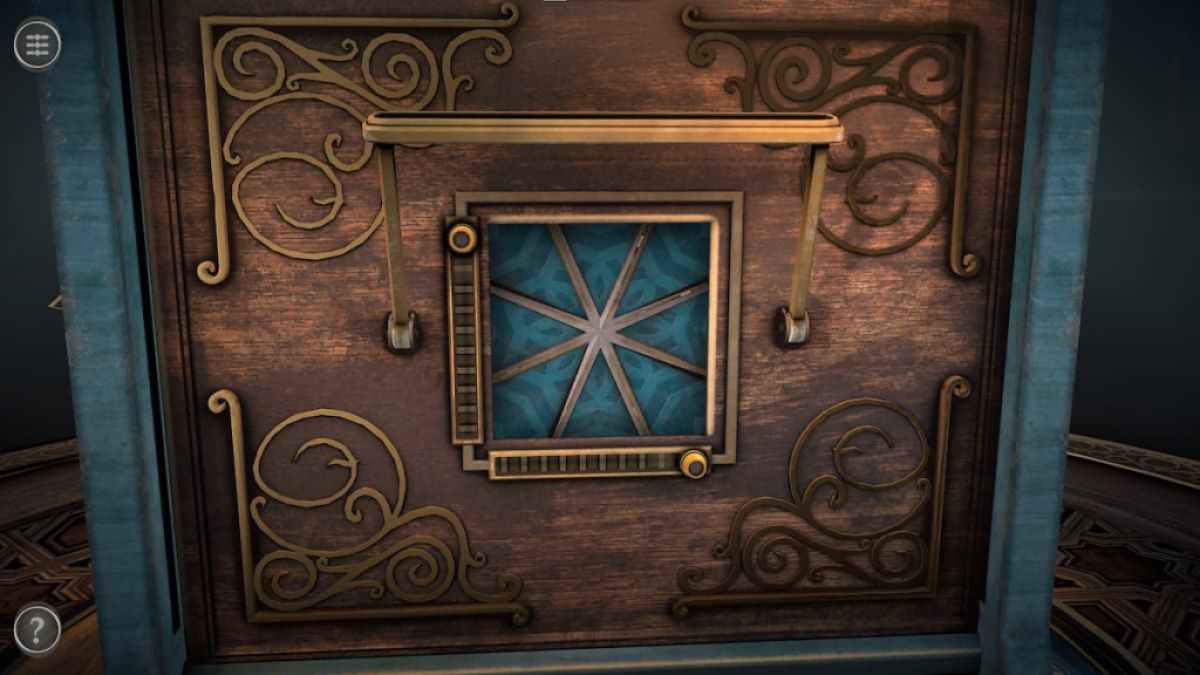
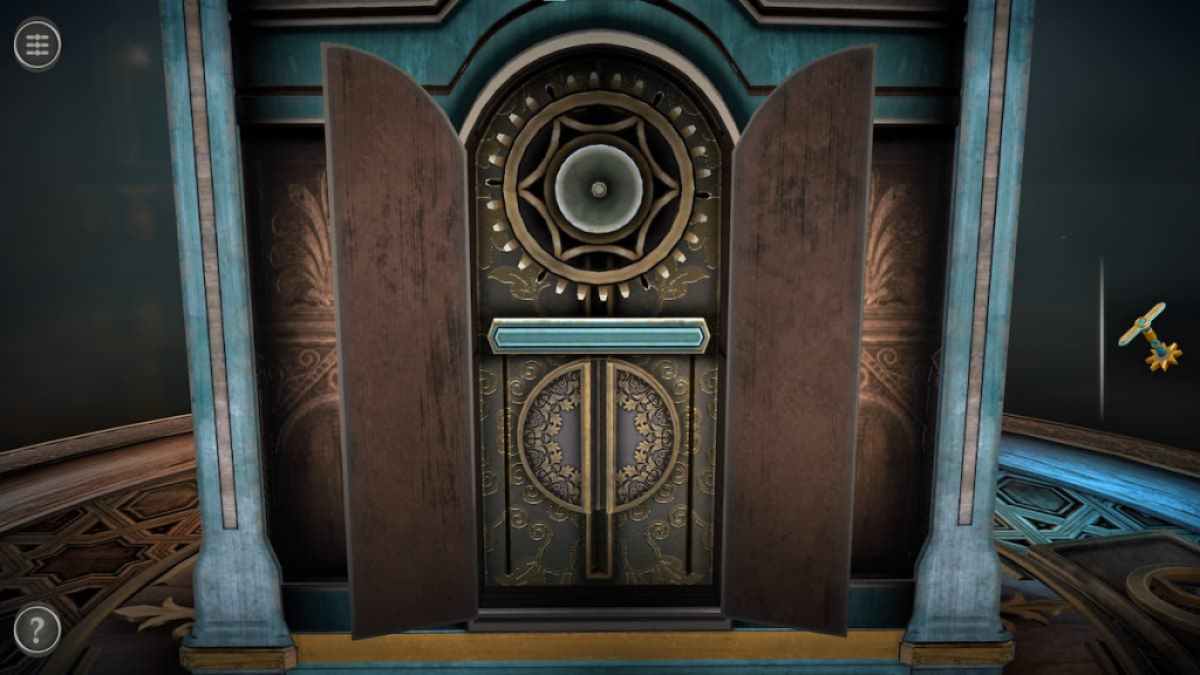
Before starting on the puzzle , rotate the platform the door is on . The symbols on the back of the door show where the symbolization on the front should be .
On the front door , push all of the slider towards the outside . Pressing the green button will rotate each one clockwise one space .
When a slider is in the right place , slide it inside to shut up it in place .
Screenshot by Pro Game Guides
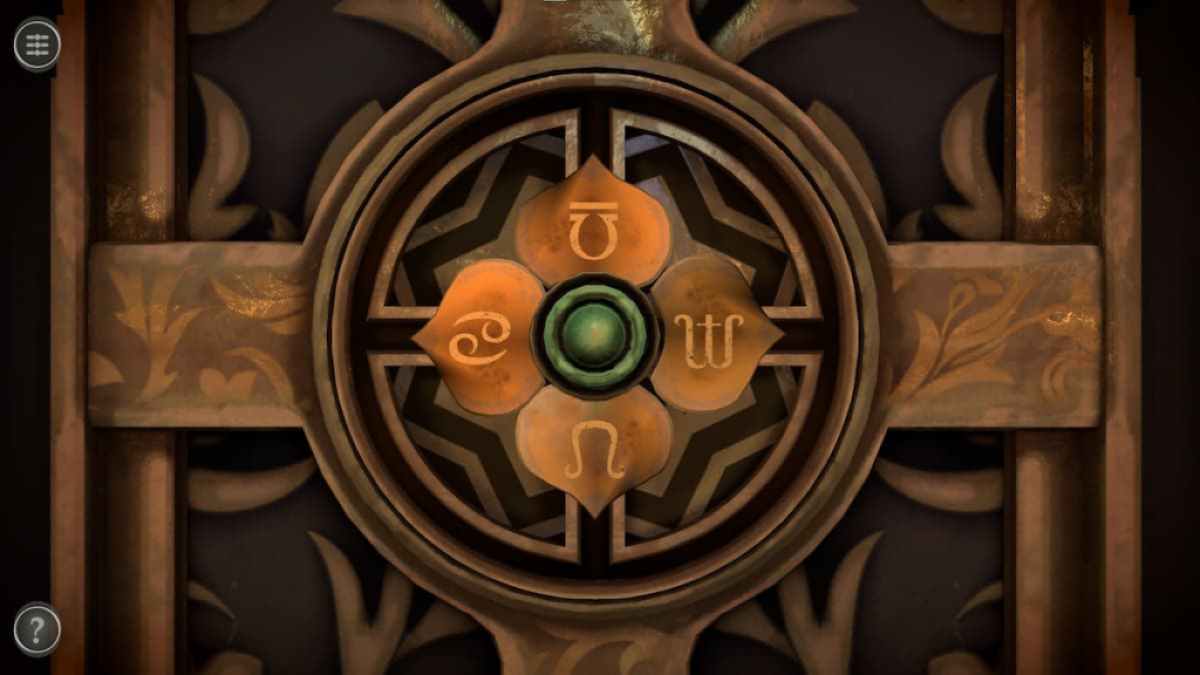
When the sliders are in the same places designated on the back , push them all in piazza to complete the puzzle .
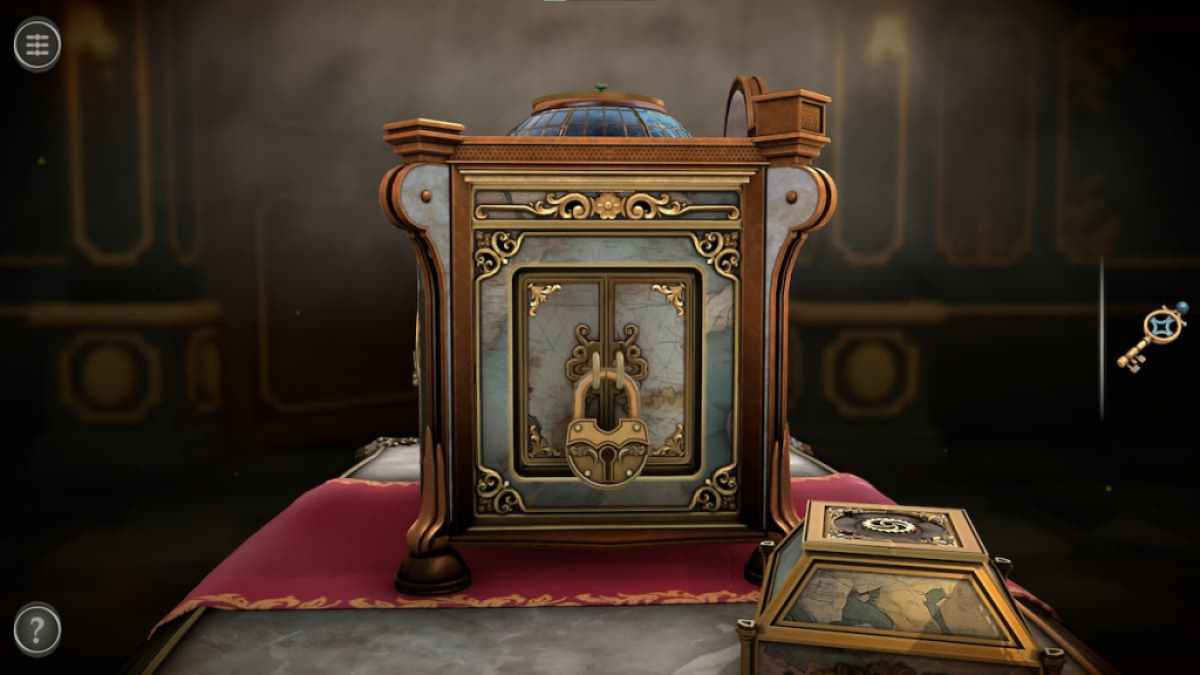
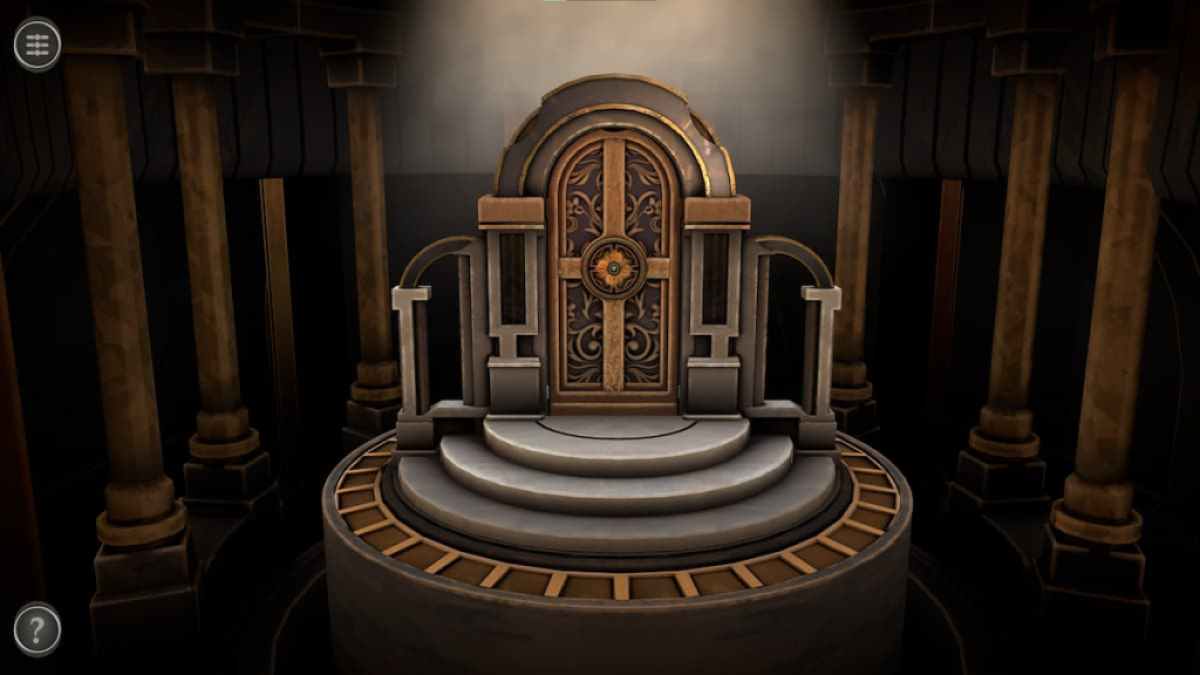
Completing the puzzler opens up the doorway , revealing a new puzzler .
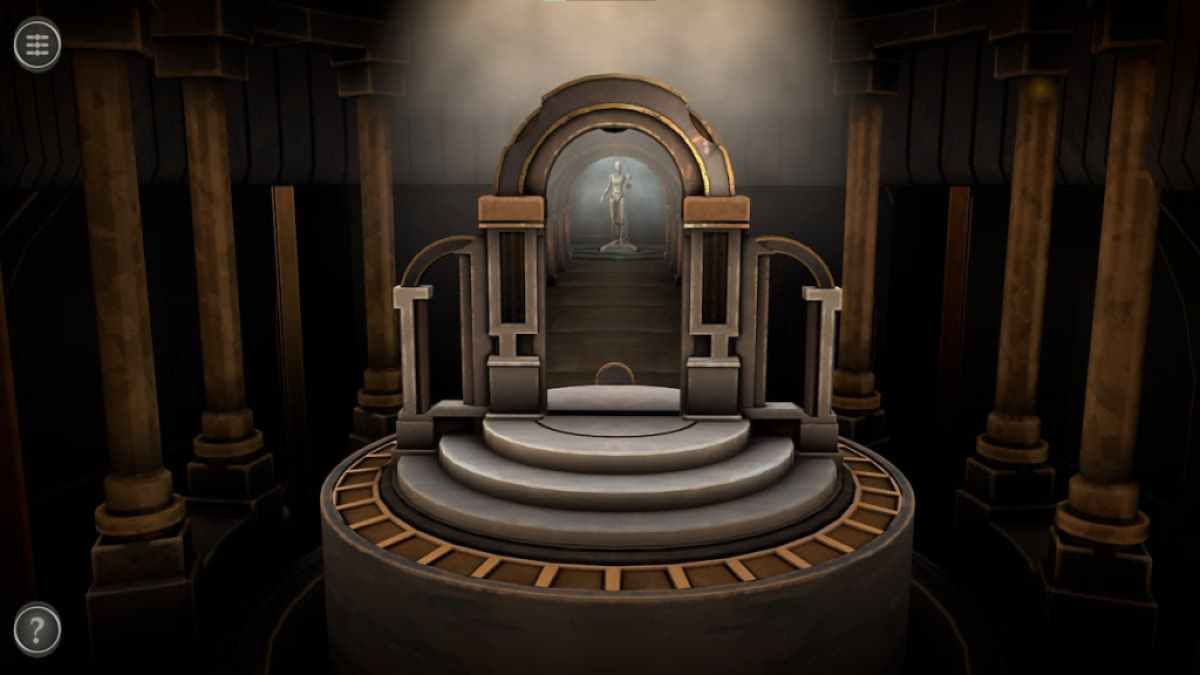
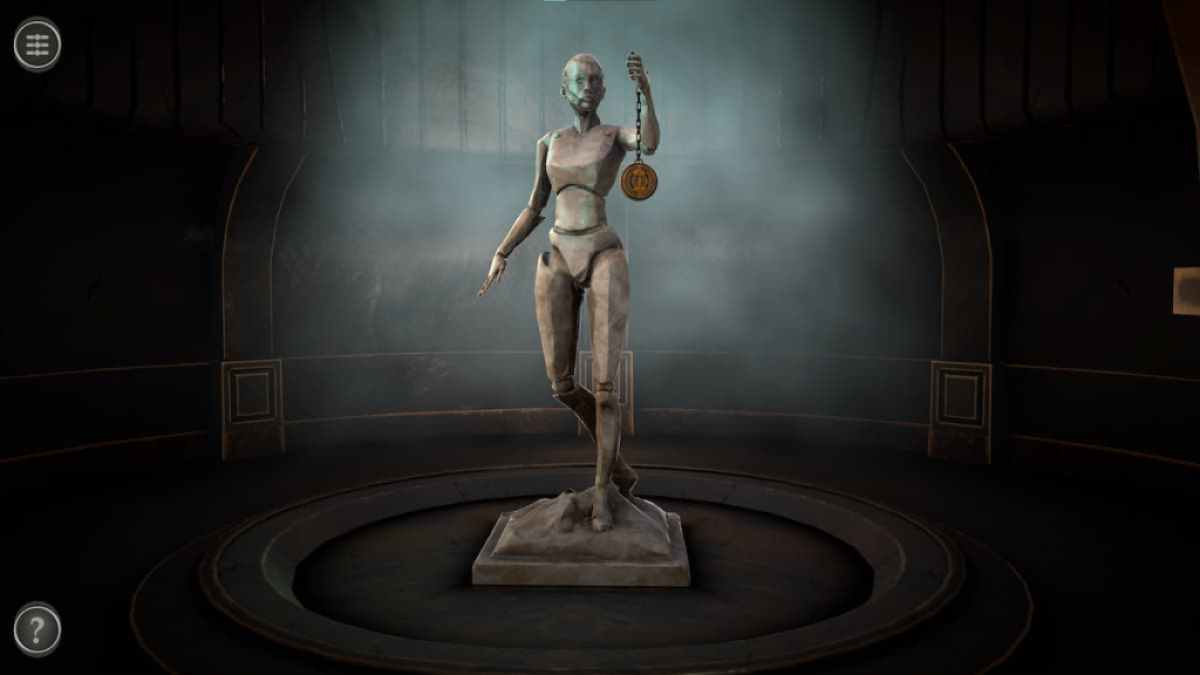
Inside the magical door is a manikin holding a locket on a chain .
Screenshot by Pro Game Guides
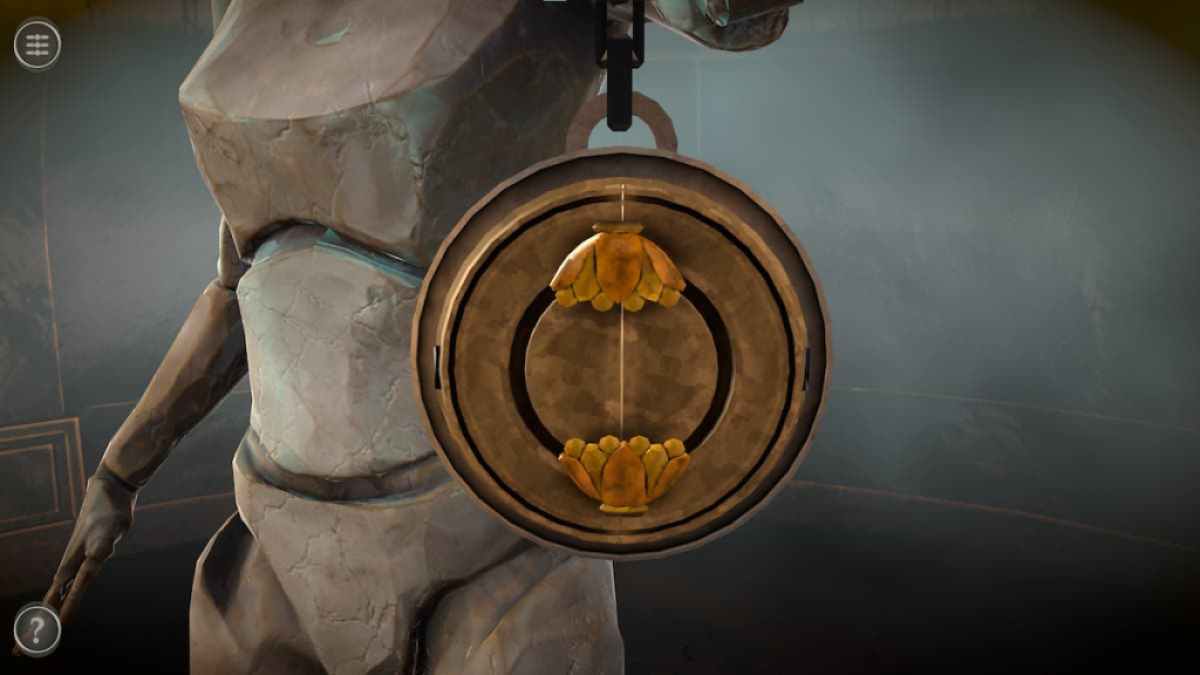
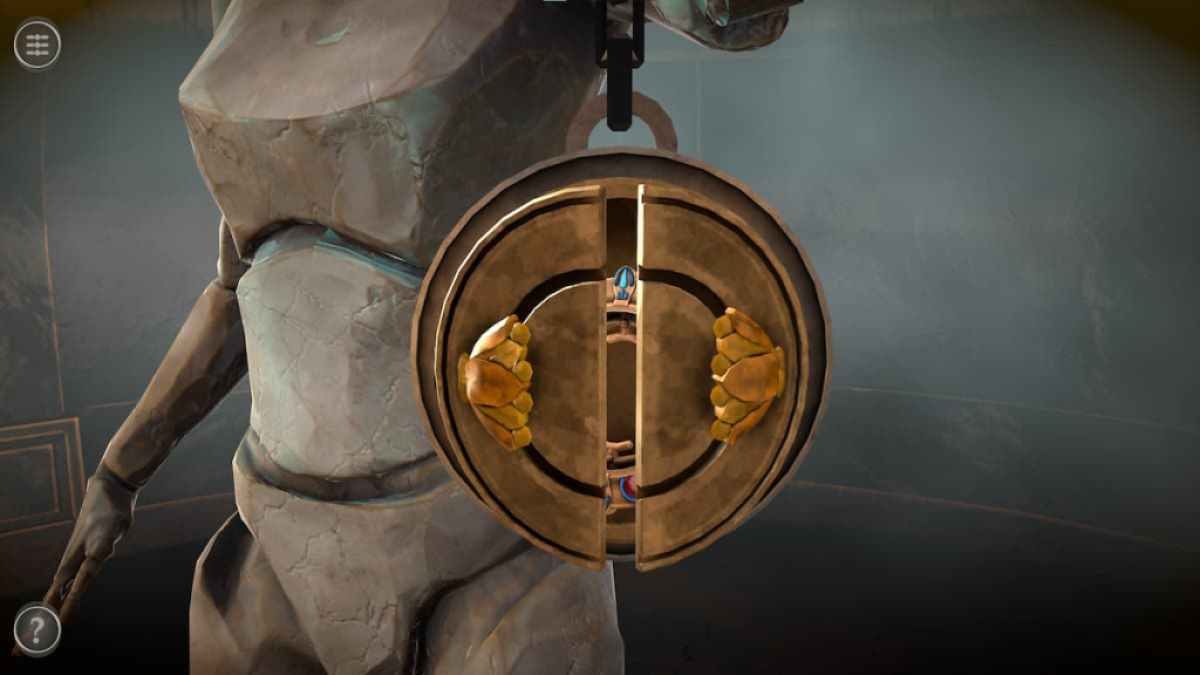
Focus on the locket to see two flower - shaped yellow-bellied terrapin .
Push one slipper to the left and one to the right to unlock the locket . Opening it up will give you a Strange Compass .
Focus on the front of the box .
Screenshot by Pro Game Guides
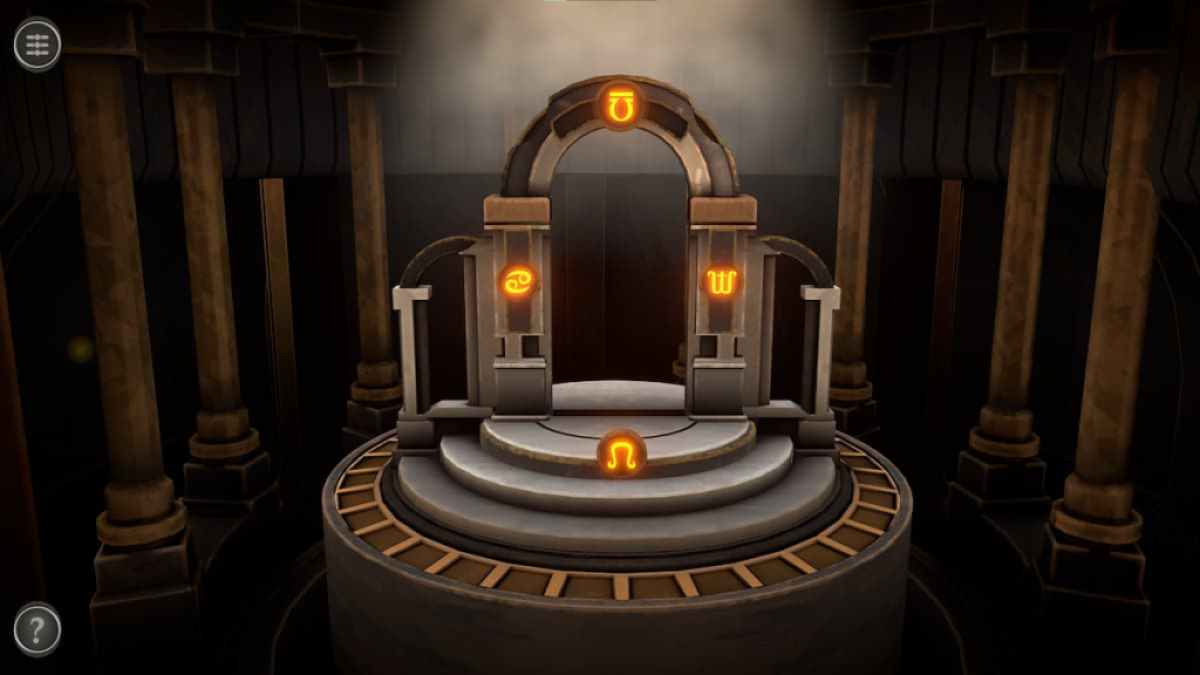
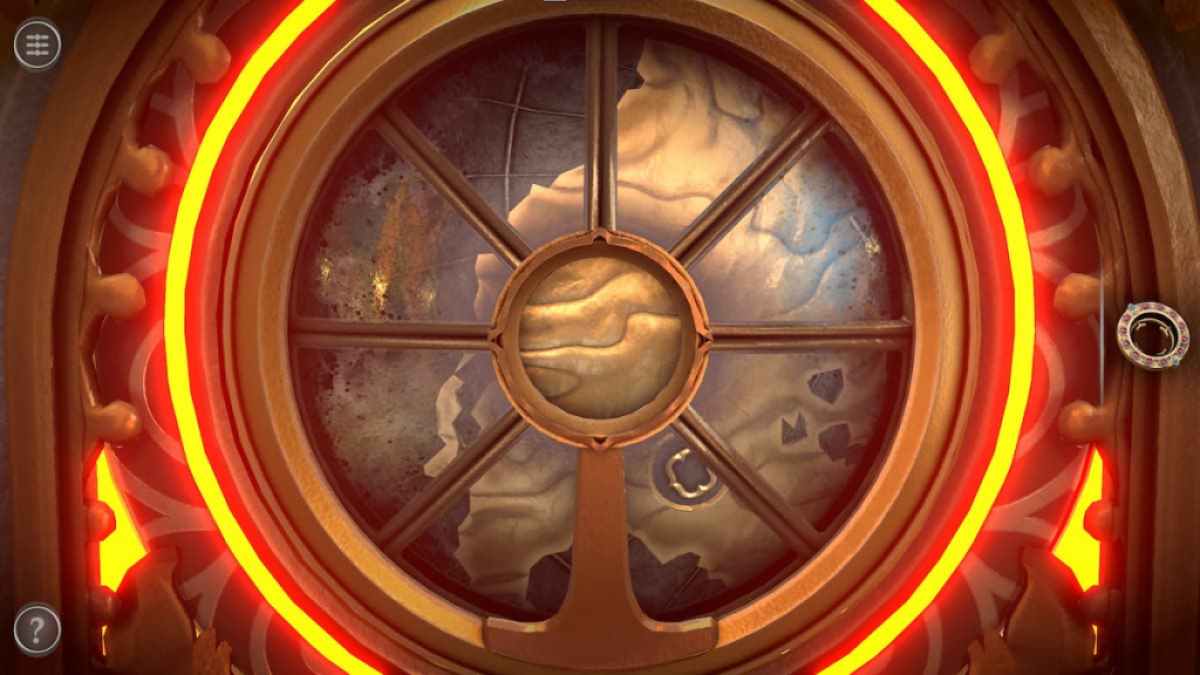
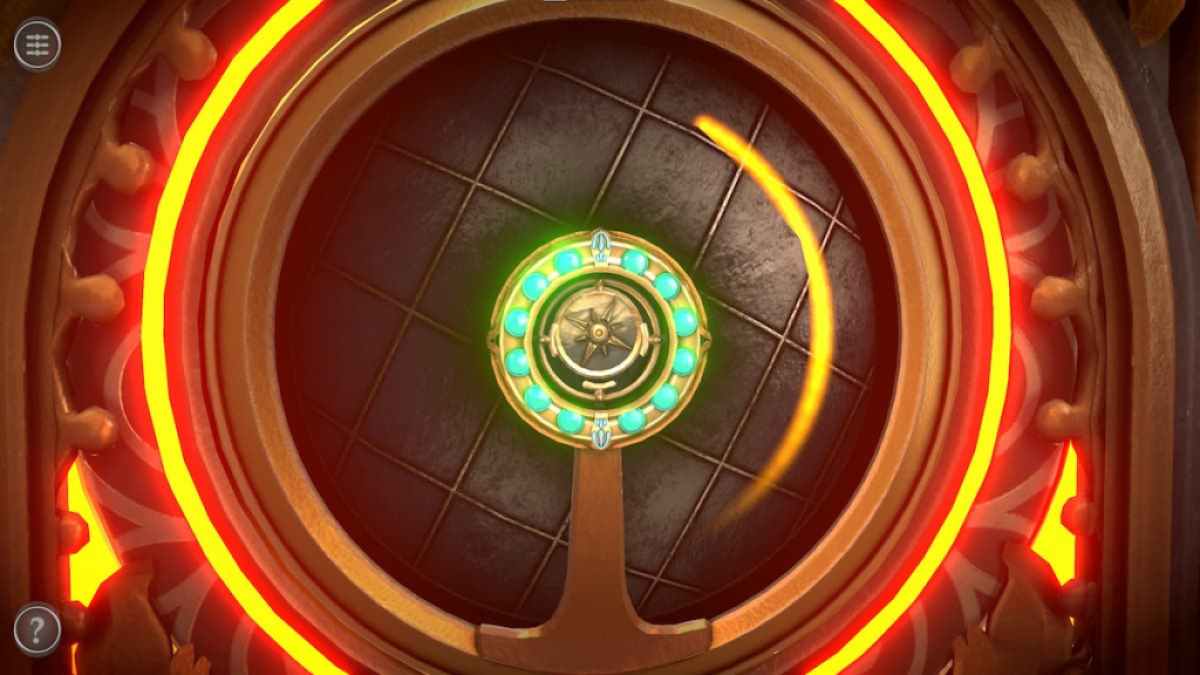
tally the Strange Compass to its center to unlock the map .
To solve the puzzle , you need to move the earth around until the compass besiege a circular sun symbolization . To help you find it , the lights on the range will turn green as you get close .
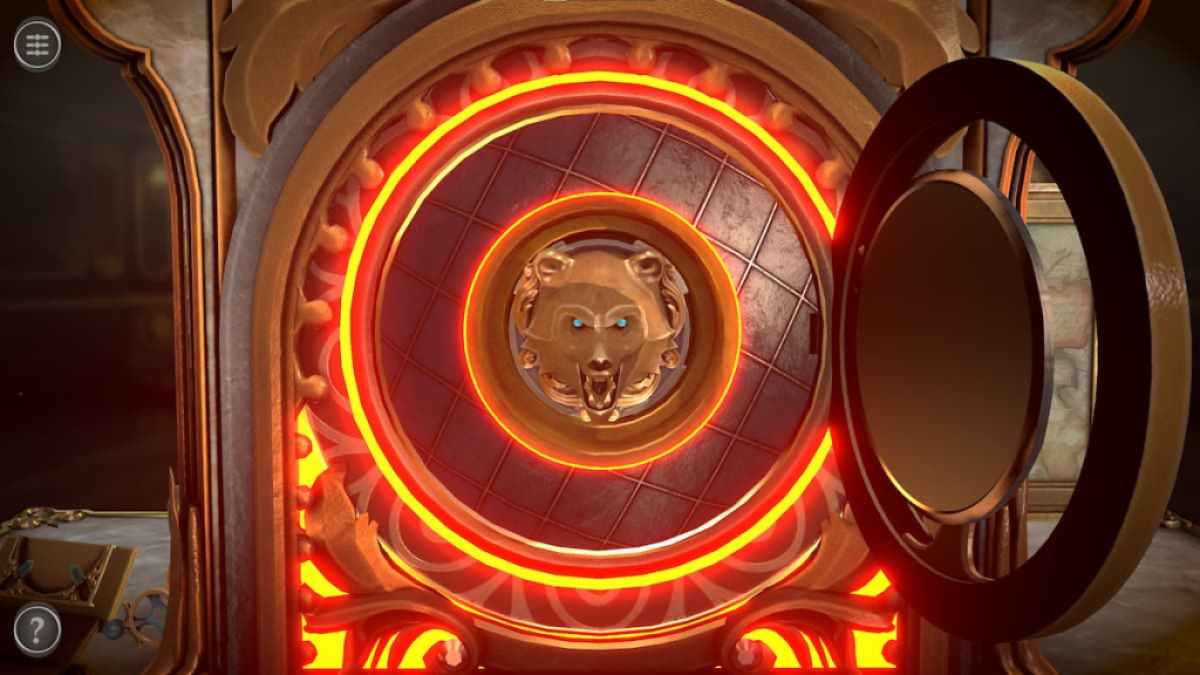
This open up the map , giving you a Strange Bear Sigil .
Screenshot by Pro Game Guides
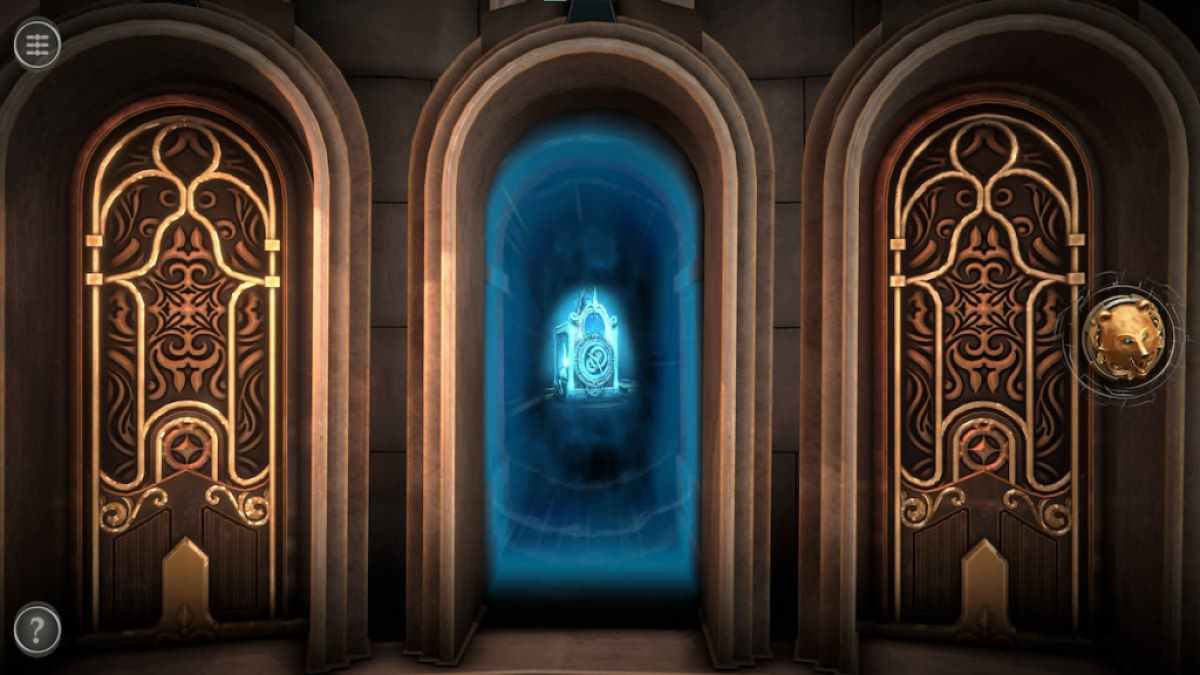
Grabbing the sigil will give back you to the main elbow room . The first room access will close , but the 2nd will open .
Room 2 puzzles
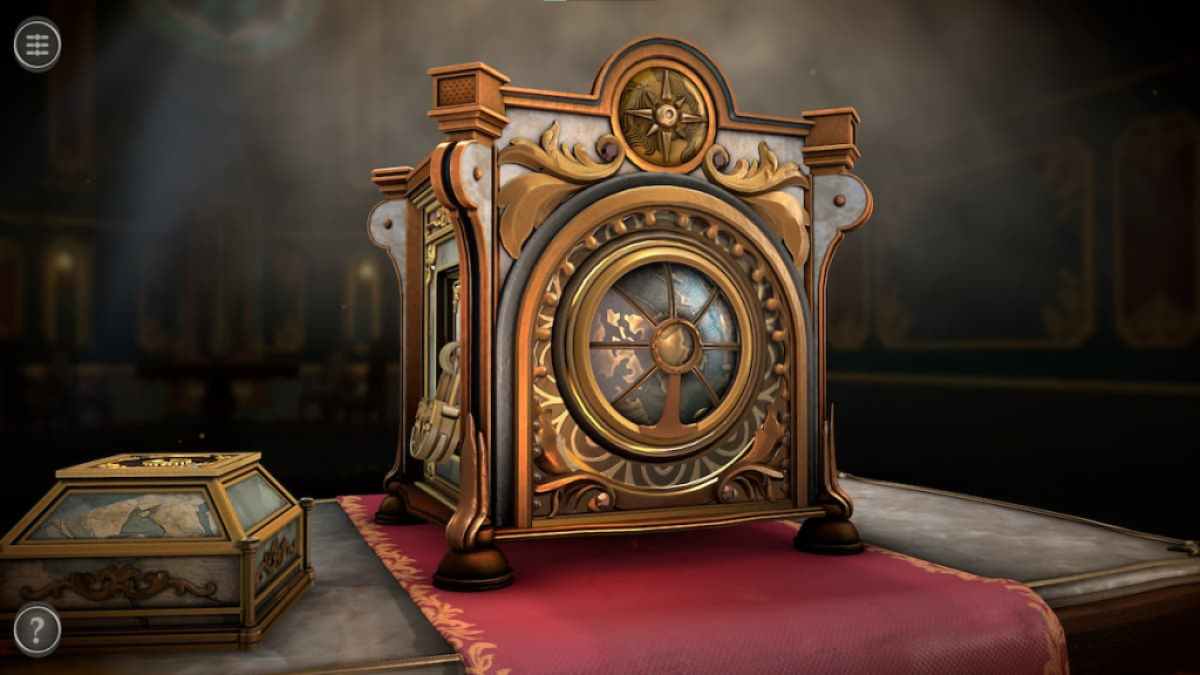
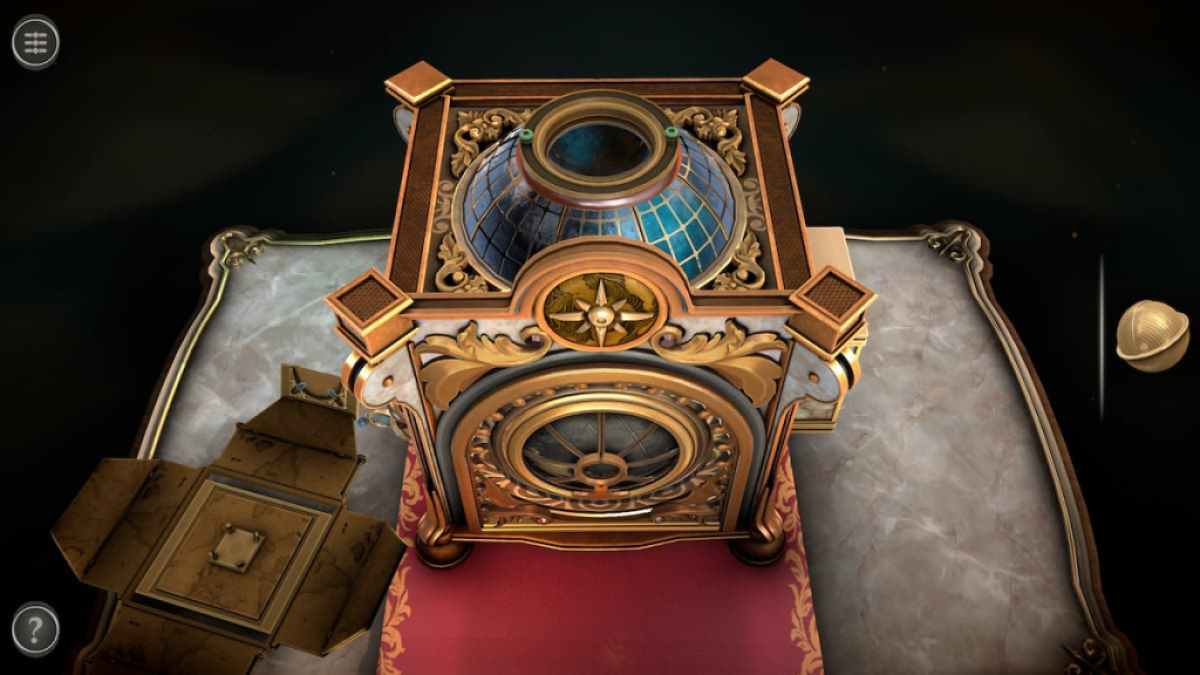
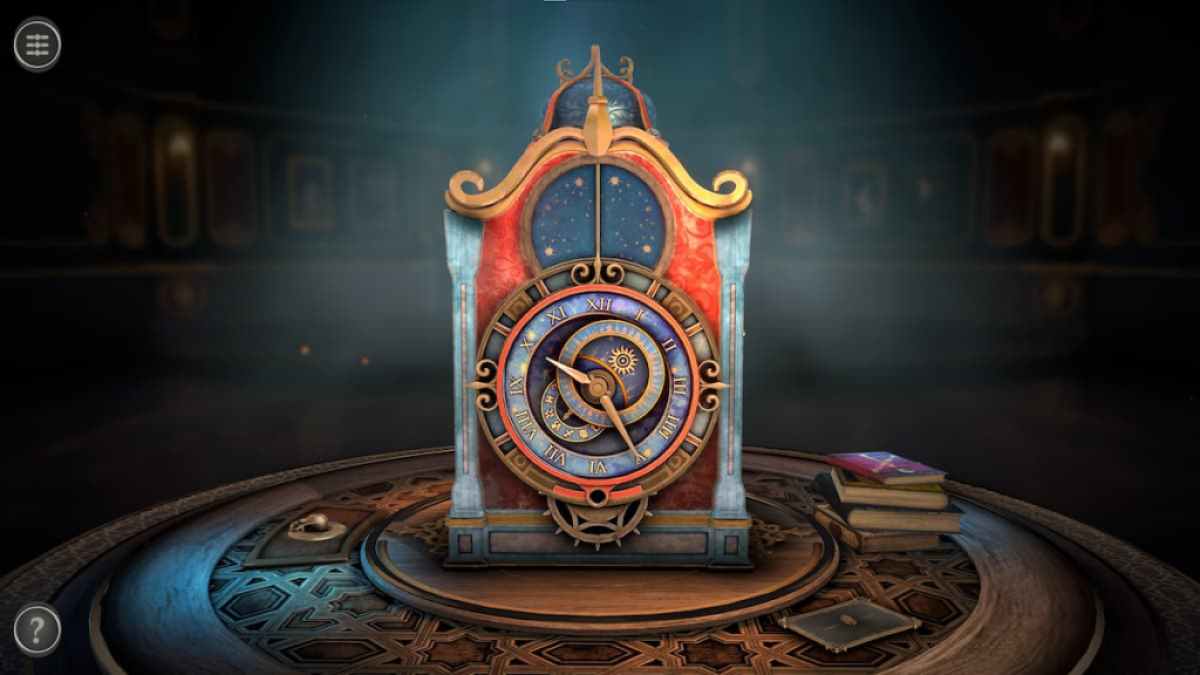
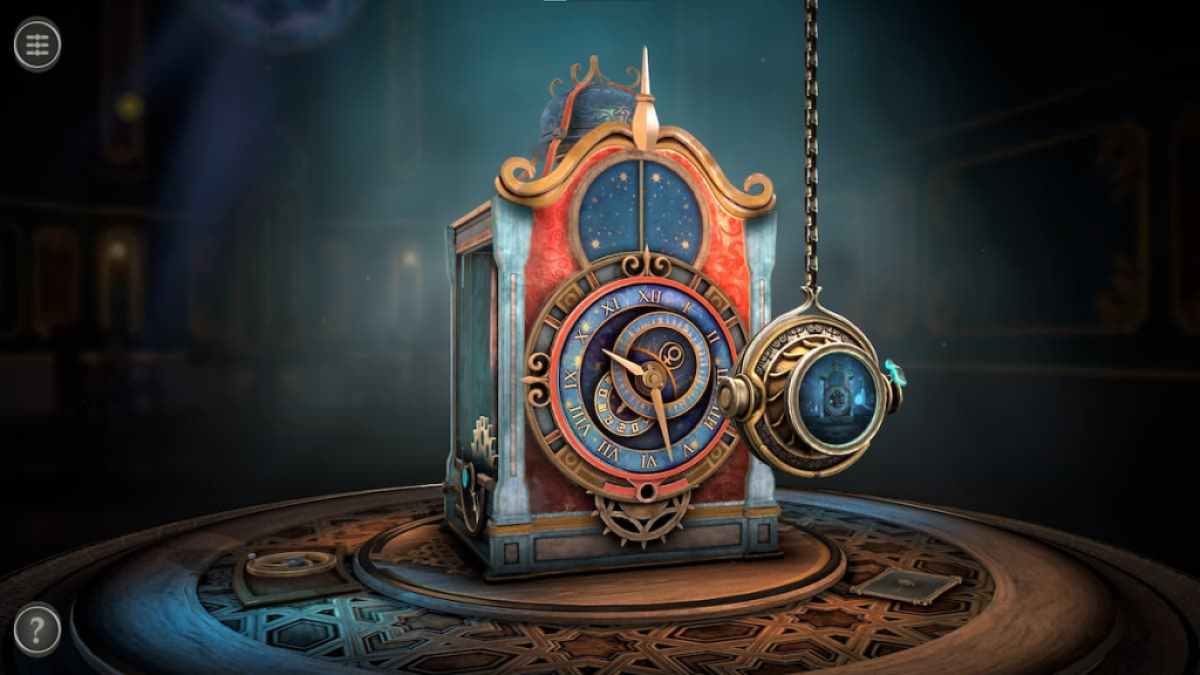
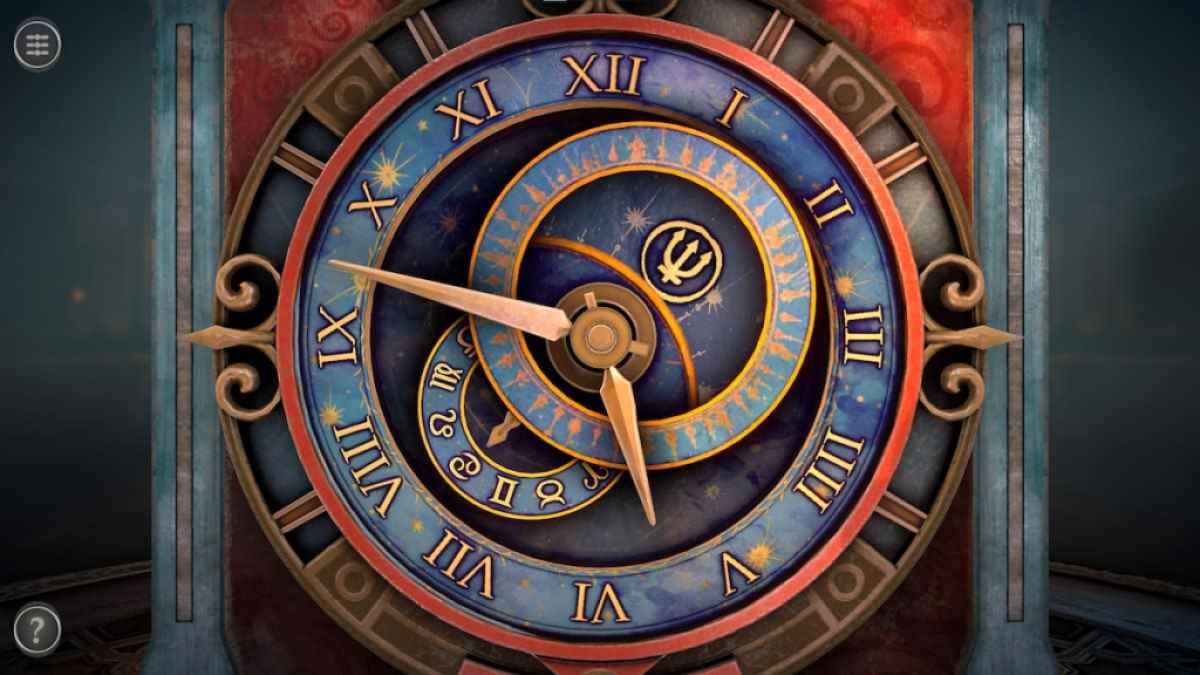
get into the second room access reveals a starry - theme clock .
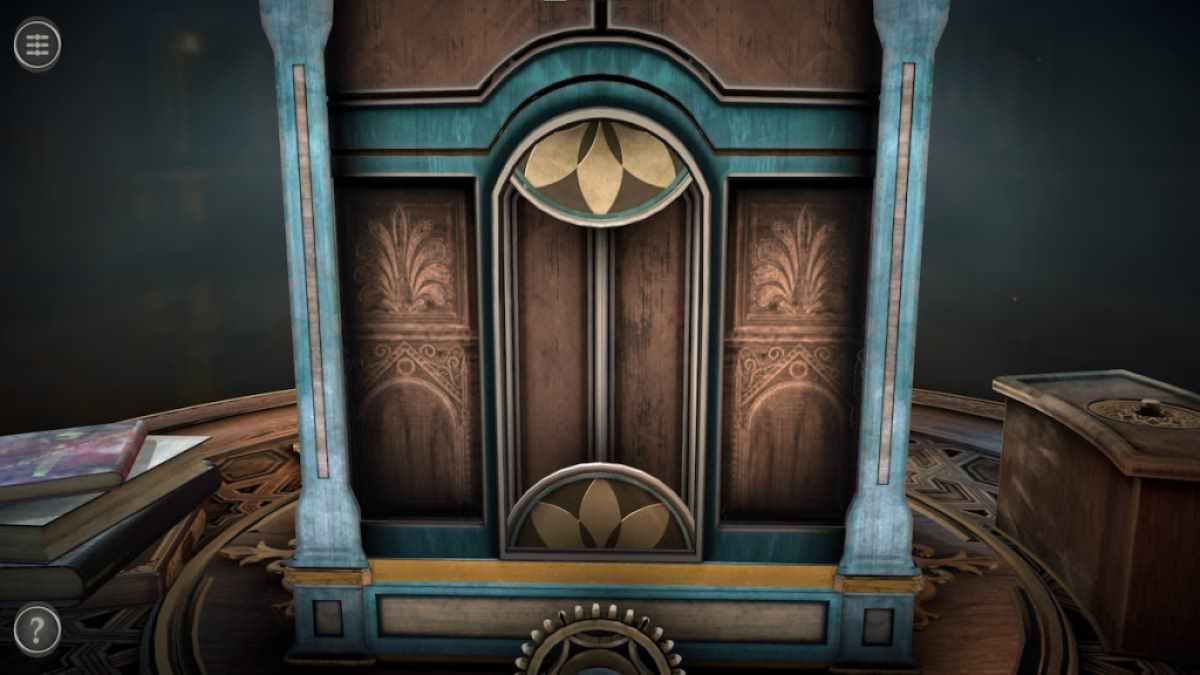
On the back of the clock is a simple rotating teaser .
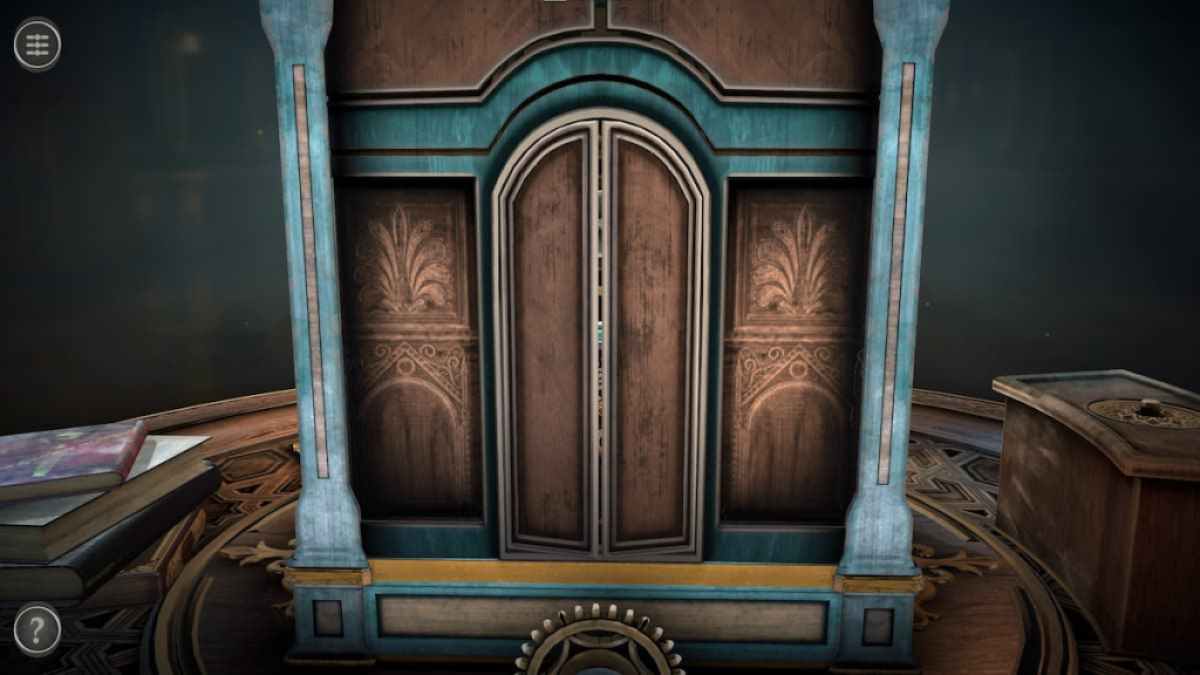
spread out the disks at the top and bottom until they can not be seen .

Screenshot by Pro Game Guides
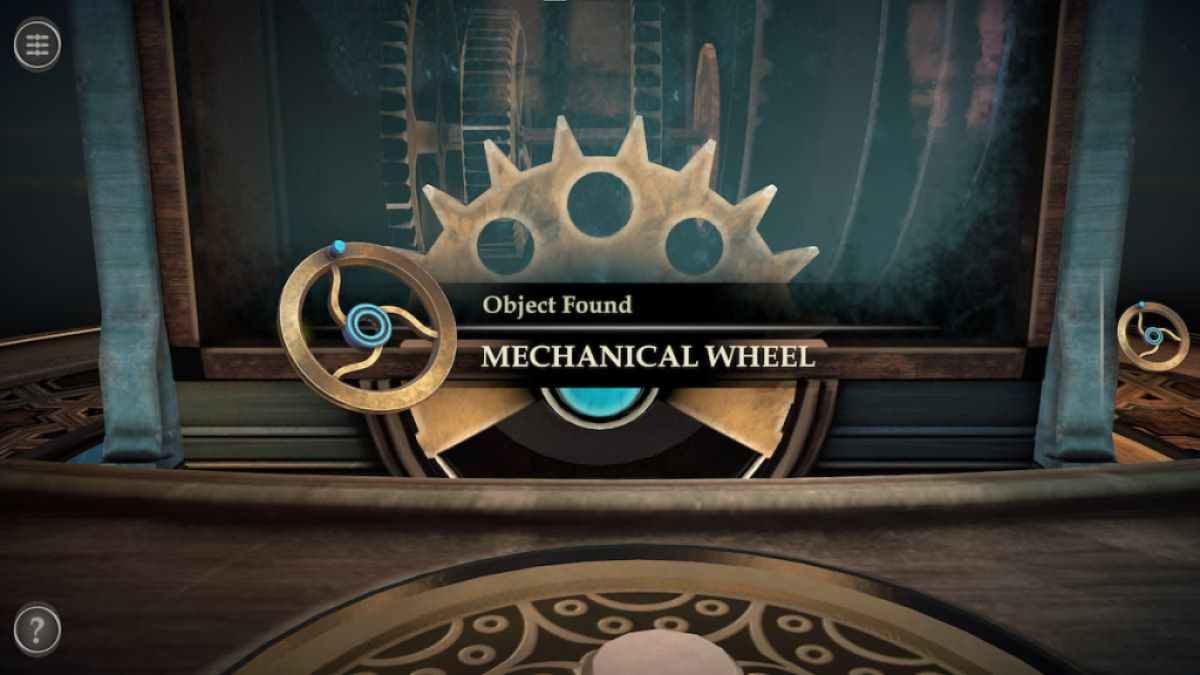
On the odd side of the clock , stop the train when it face the top . This allows you to grab a Mechanical Wheel on the bottom .
Now look at the handgrip to the left hand of the clock .
Pull up the handle to lift up the compartment , revealing a draftsman .
Screenshot by Pro Game Guides
launch the drawer to reveal a strange contraption .
localize the Mechanical Wheel on top of the drawer .
Rotate the Mechanical wheel to remove the gadget from the doorway , take into account you to grab a Handle .
Screenshot by Pro Game Guides
link : head for the hills From Castle Claymount Walkthrough – Cool Math Games
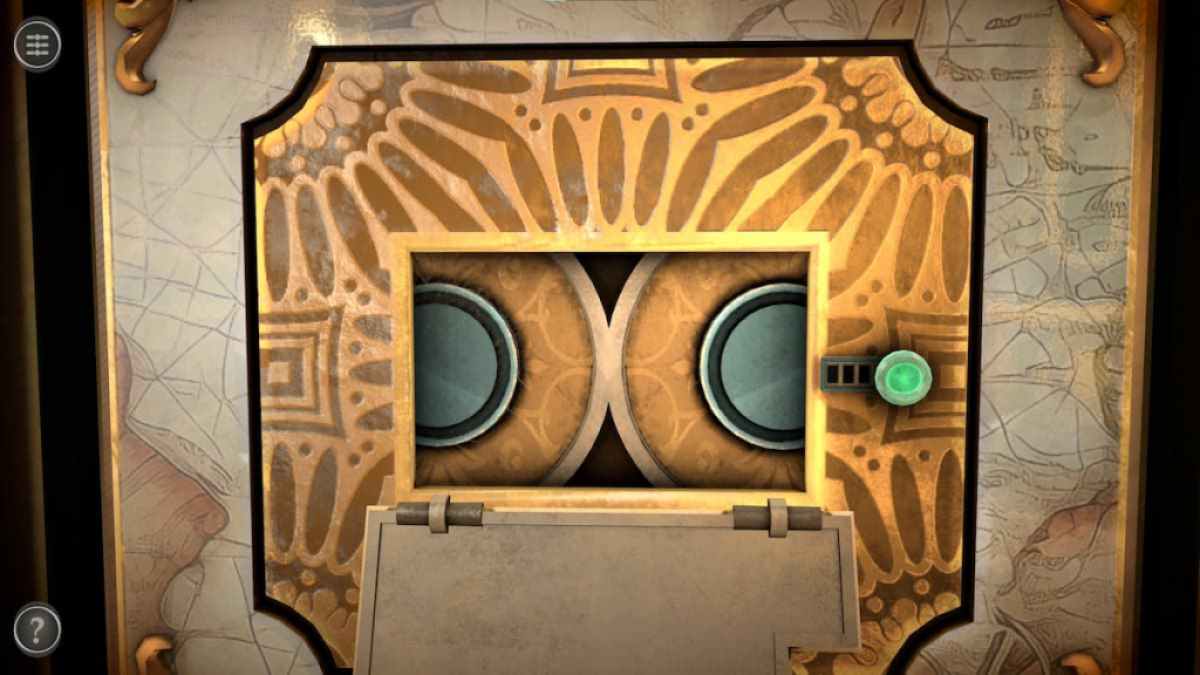
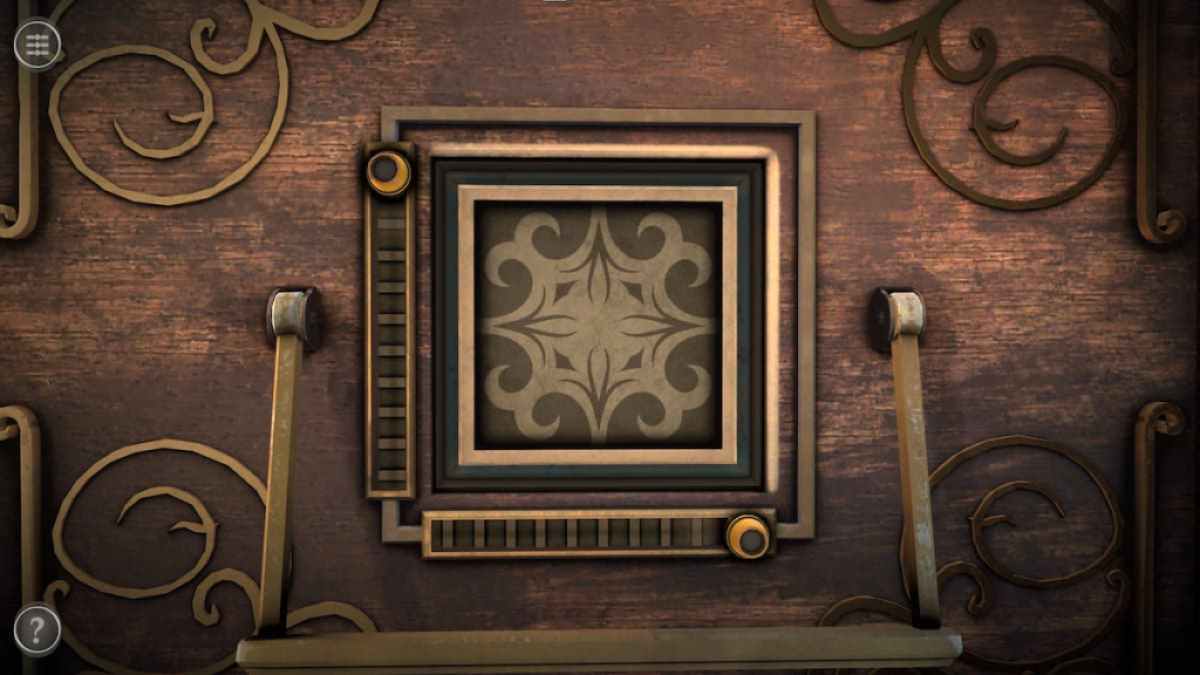
On the right side of the mystifier is a substantial puzzle with a handle above it and two minuscule sliders on either side .
tear the handle to open up up the puzzler . Before pass on , you ’ll need to get two Small Handles to make the sliders useable .
Screenshot by Pro Game Guides
To get the first Small Handle , look towards the top of the box .
turn out the gear beneath the blue lid to unlock a compartment incorporate the Small Handle .
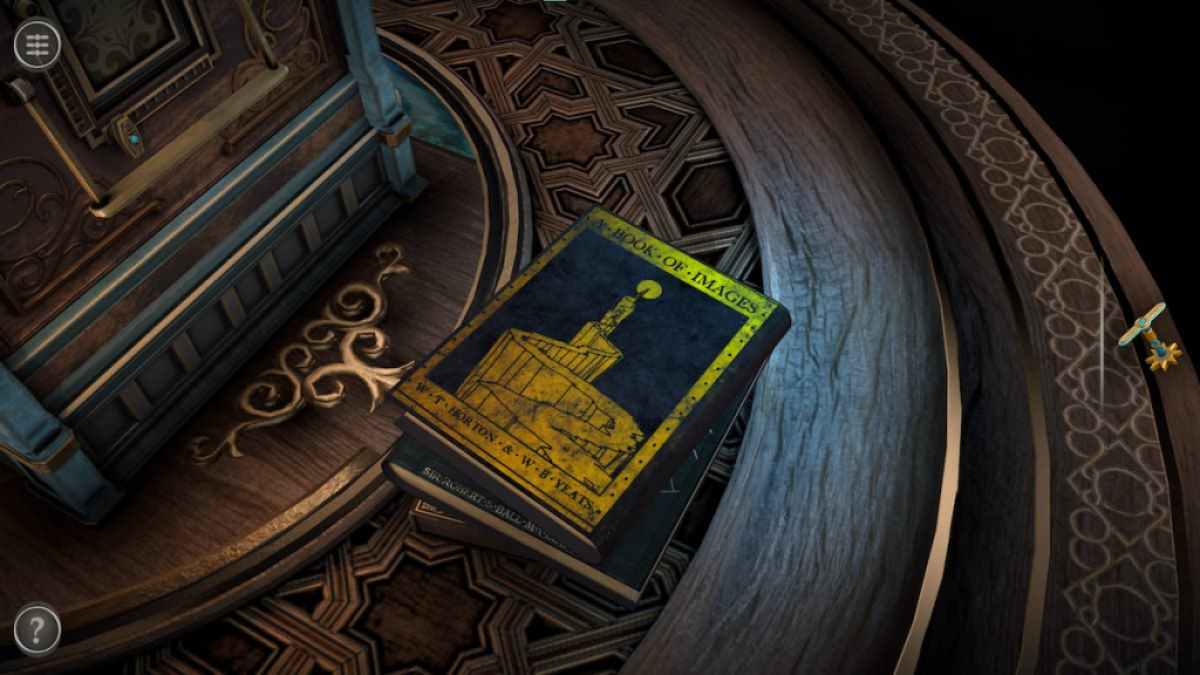
The next Small Handle is hidden in the stack of books on the board . Tap on a book to shake off it to the side .
Screenshot by Pro Game Guides
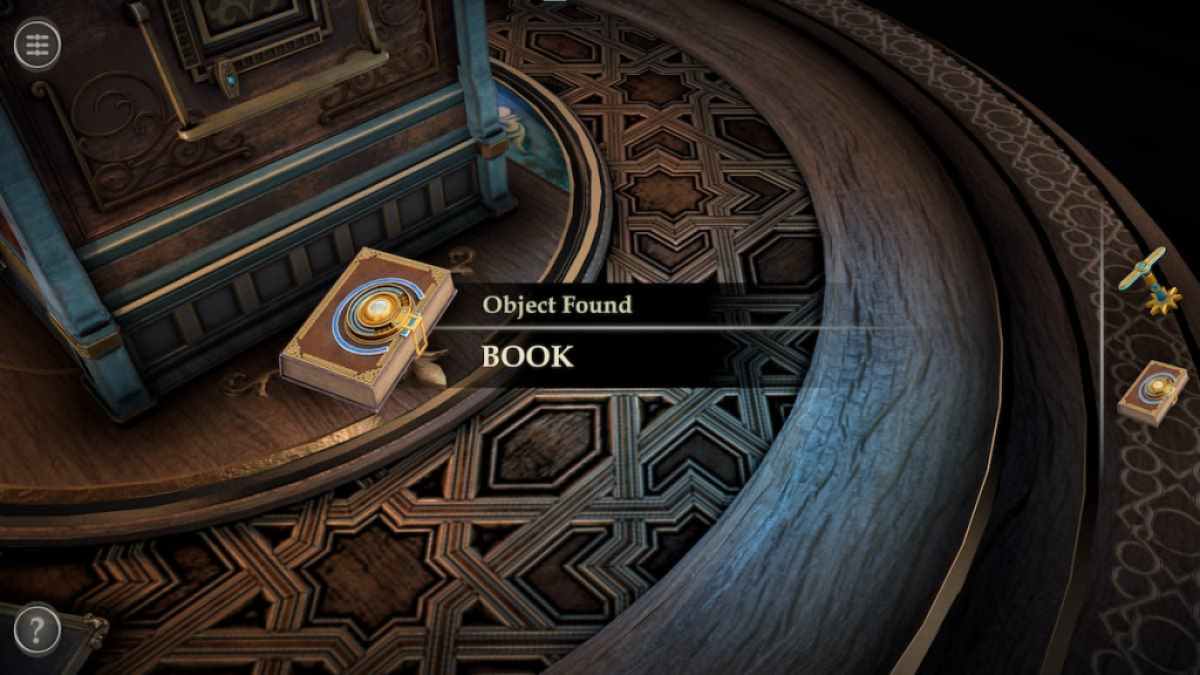
At the bottom of the stack is a locked Book item .
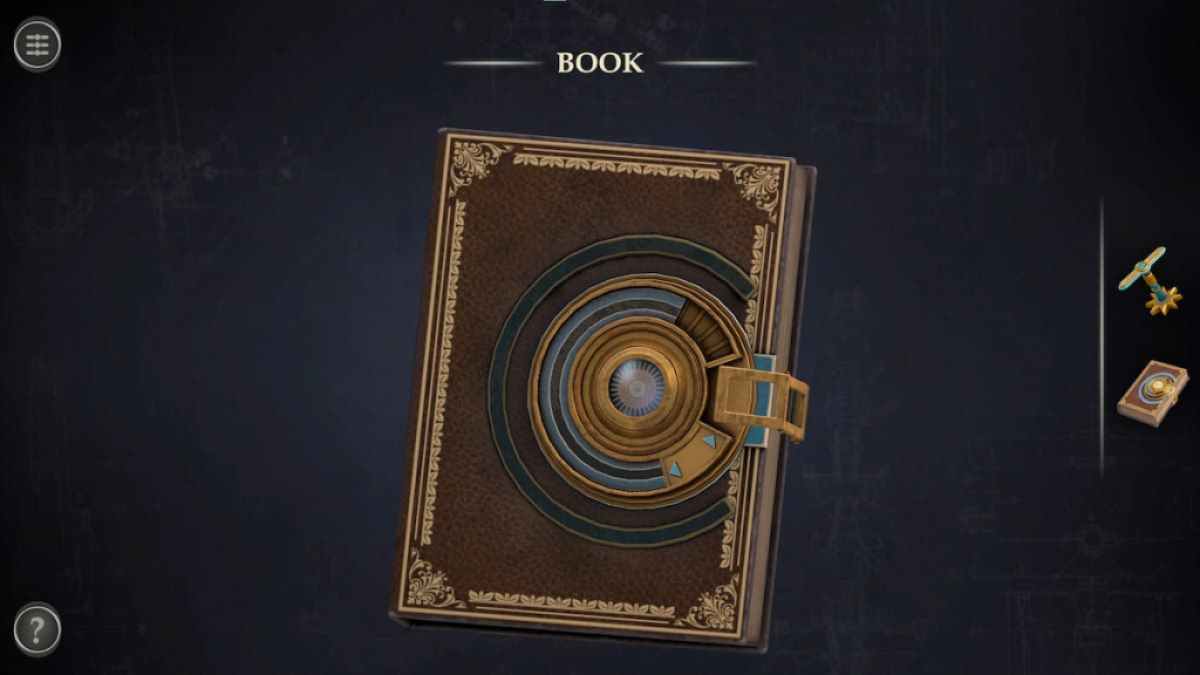
start the Book in your stock . Move the slider to the left sharpness , which will allow you to move the favorable lock .
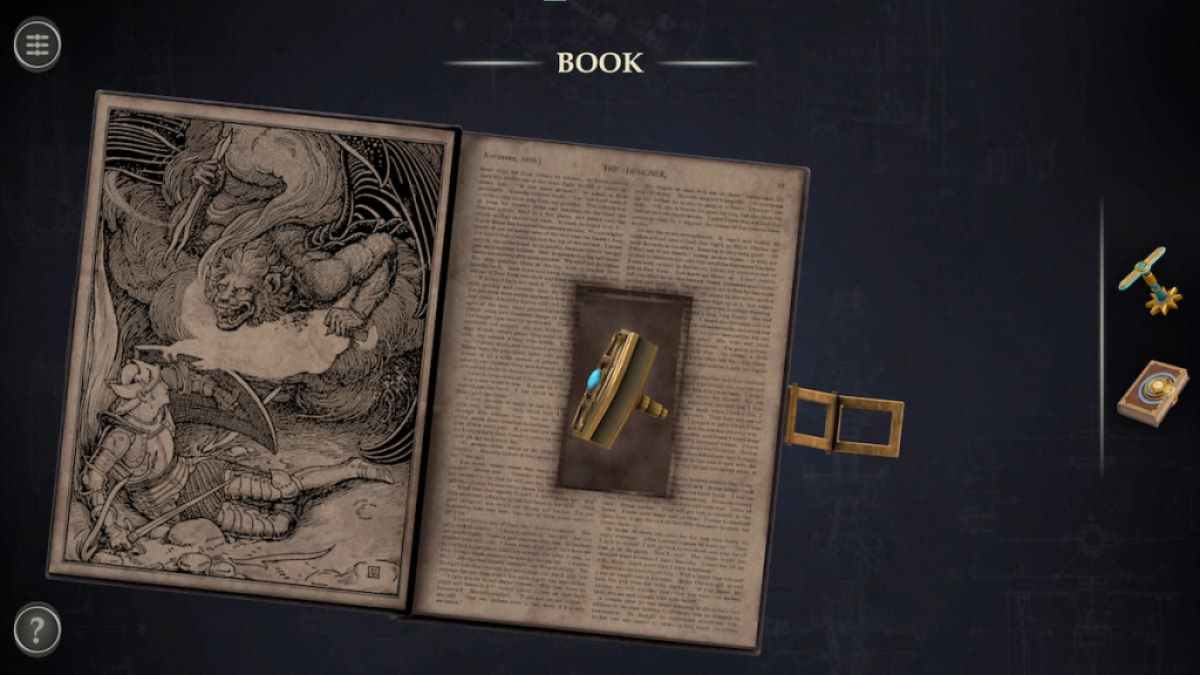
Opening the book reveals a Small Handle conceal within it .
Screenshot by Pro Game Guides
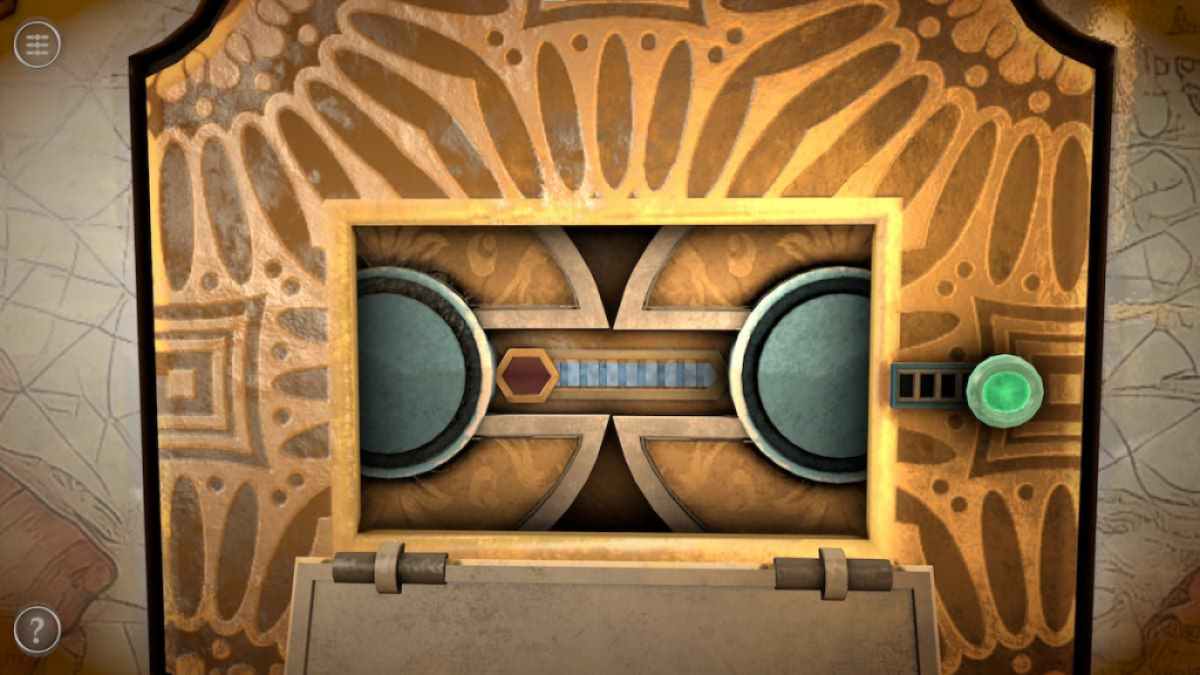
Now the two Small Handles can be summate to the sliders on the puzzle .
The left skidder should be one to two spaces from the bottom while the right yellow-bellied terrapin should be two to three space from the left . This unlock a compartment containing a Metal Disk .
come back to the back of the box .
Screenshot by Pro Game Guides
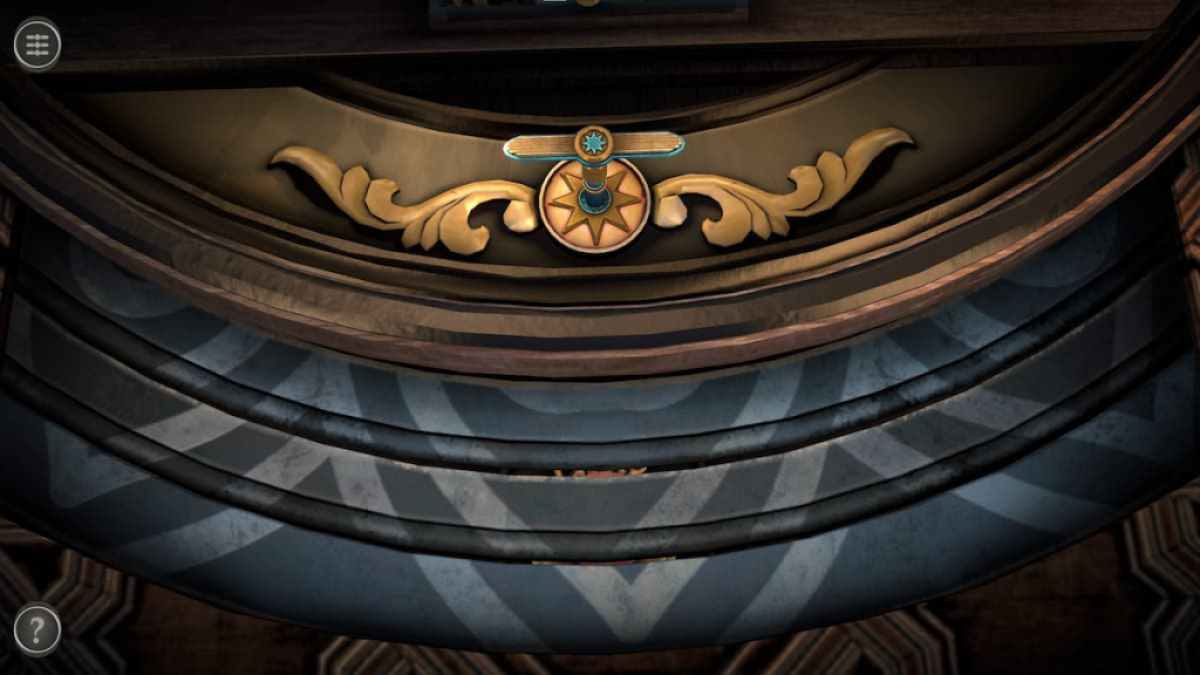
Add the Metal Disk to the lower circular gap .
Pull the handgrip down to slide the gear mechanism to the bottom . This will afford up a section at the nucleotide of the boxwood .
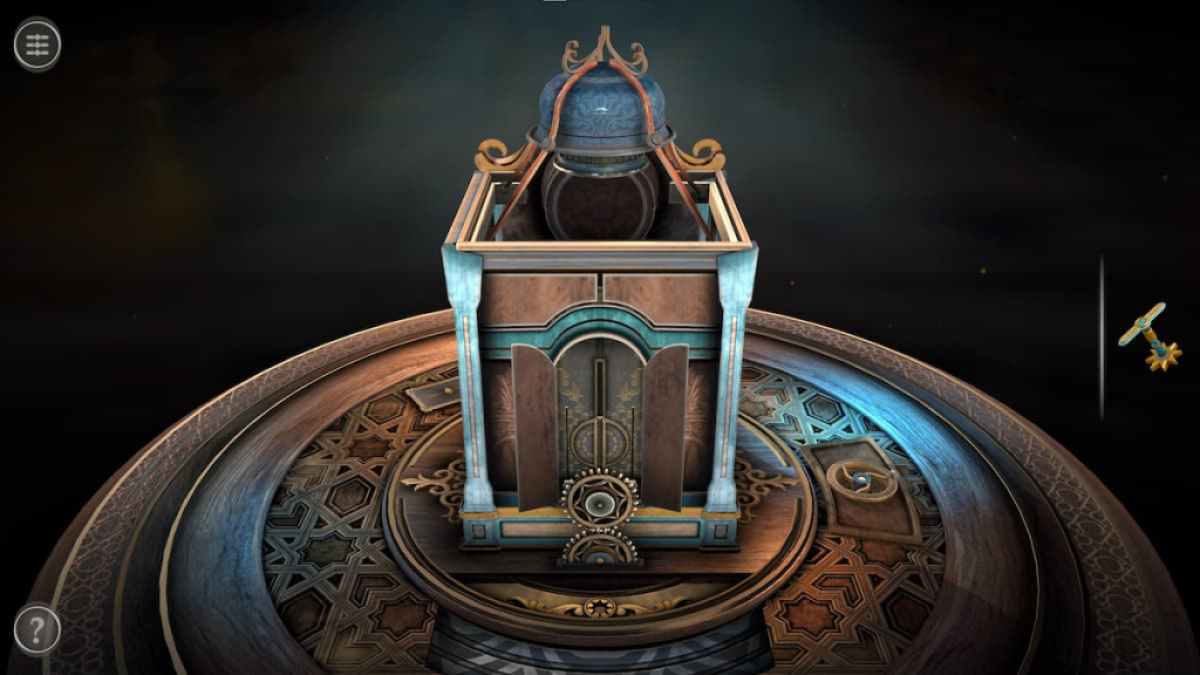
Place the Handle into the circular hole at the top of the section .
Screenshot by Pro Game Guides
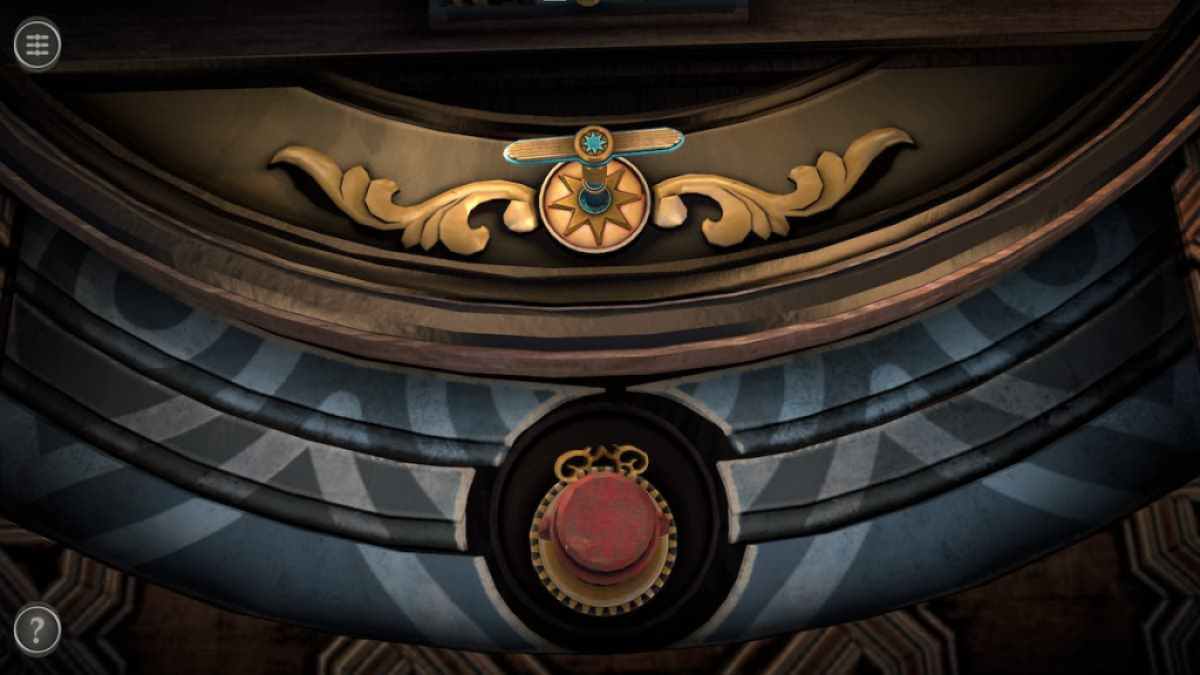
Rotate the handle until the spread in the three section align above a crimson object .
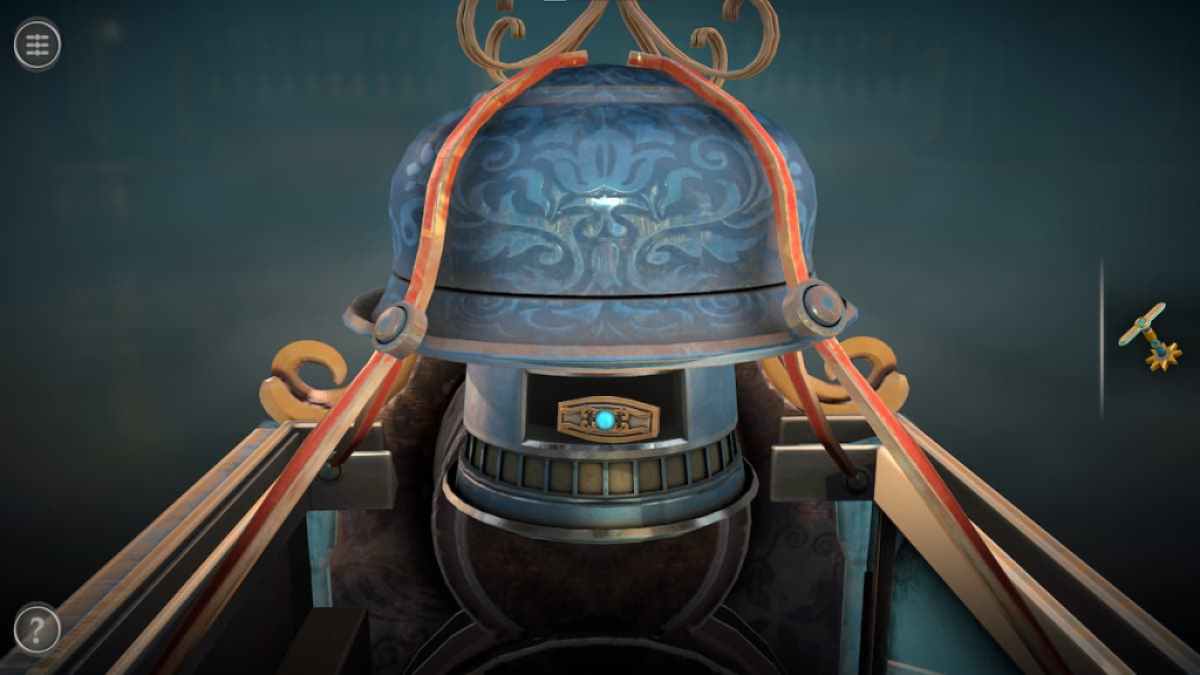
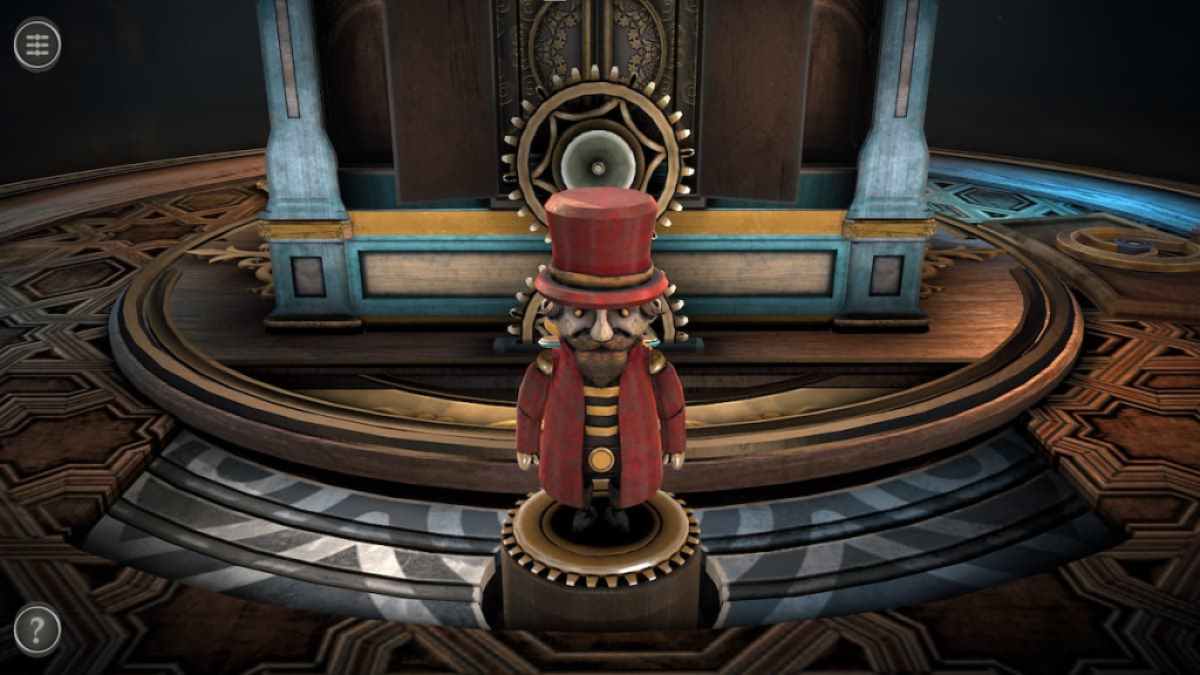
A foreign skirt will rise from the table .
twirl the doll around and grab the Small Key from its back .
Screenshot by Pro Game Guides
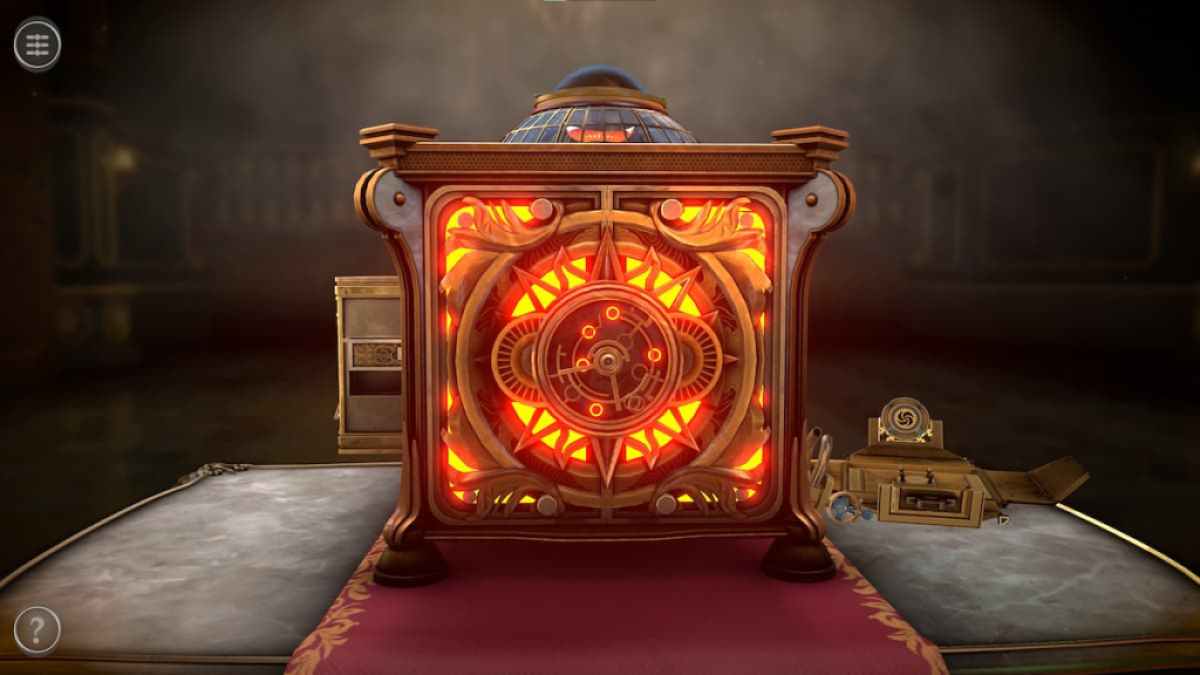
Focus on the clockface at the front of the box .
Add the belittled Key to the hollow at the bottom of the clock face .
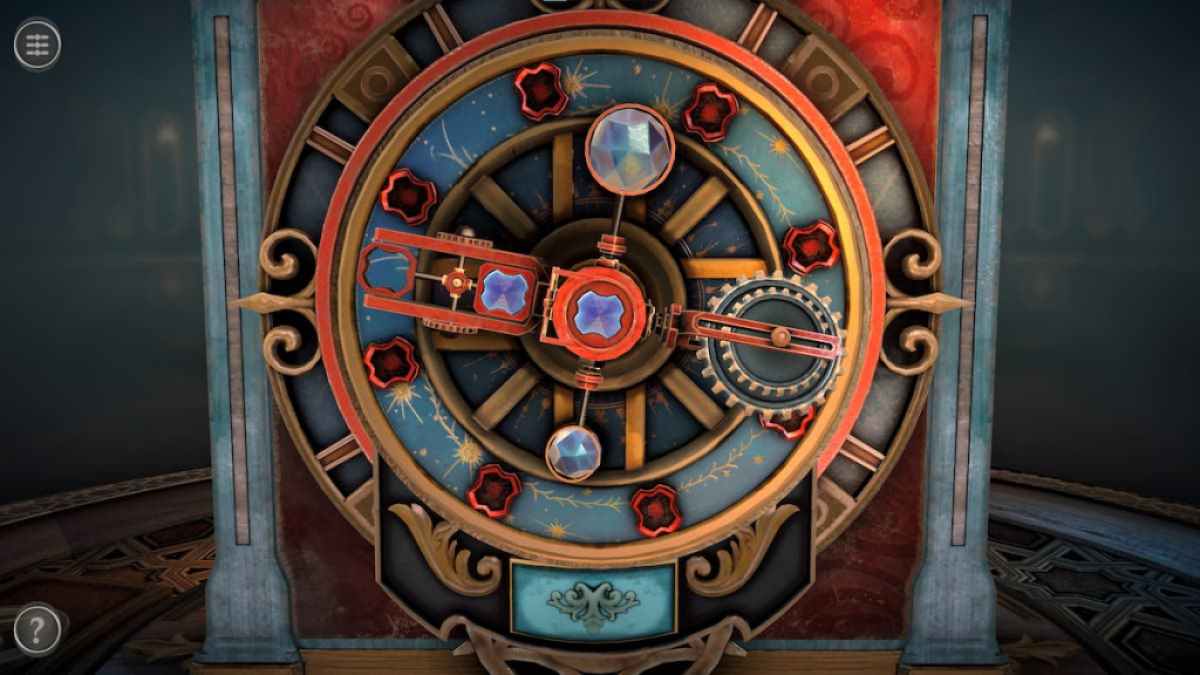
This flips the clock face , revealing a puzzle standardized to whack - a - groin . The goal is to beg the drear push at the bottom when the flushed segment of the mechanism aligns with one of the crimson symbols on the clock . When the hammer strike them properly , the symbolization will be filled with gloomy jewel - like stuff .
Screenshot by Pro Game Guides
When all of the symbols are take with blue , the teaser will be completed .
complete the puzzle causes a glass to drop from the roof .
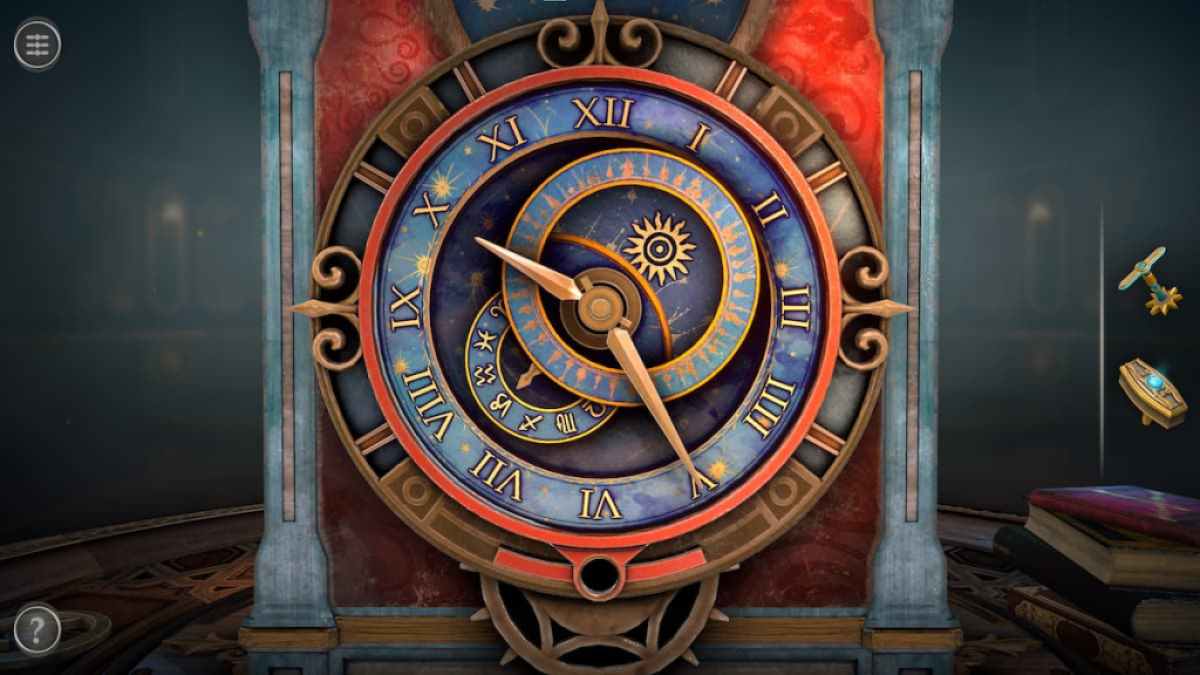
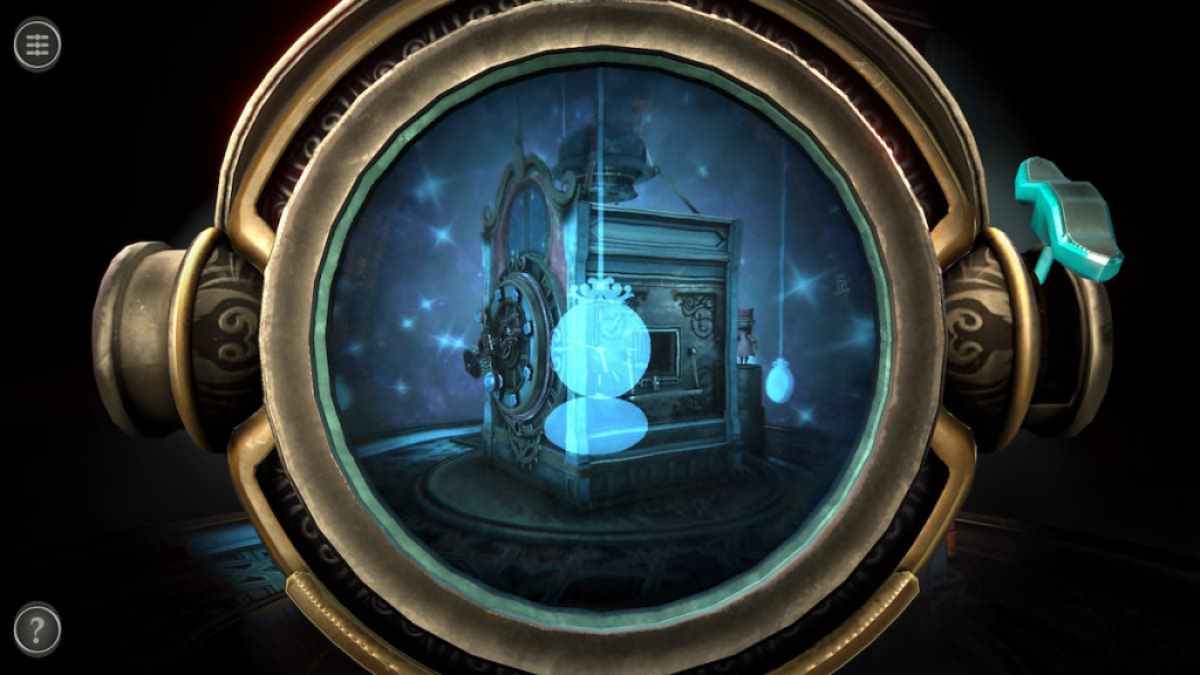
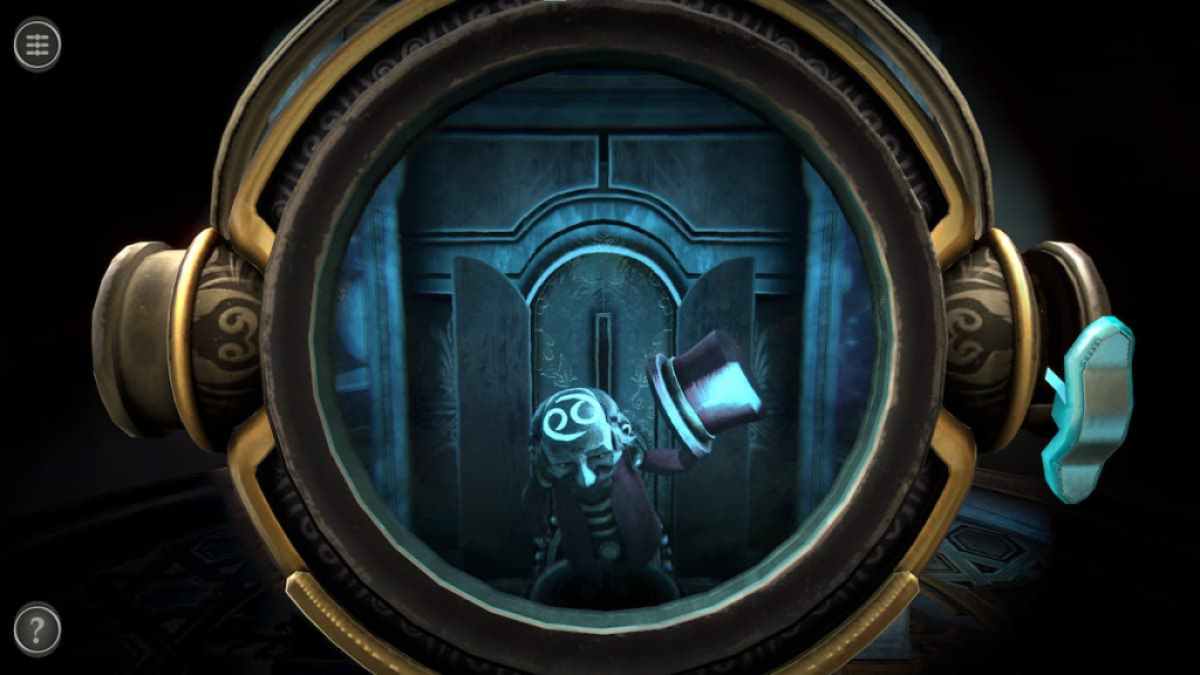
Begin by using the spyglass to look around the elbow room . The trace for the clock hired hand is found on the floating scoop ticker near the front of the loge .
Screenshot by Pro Game Guides
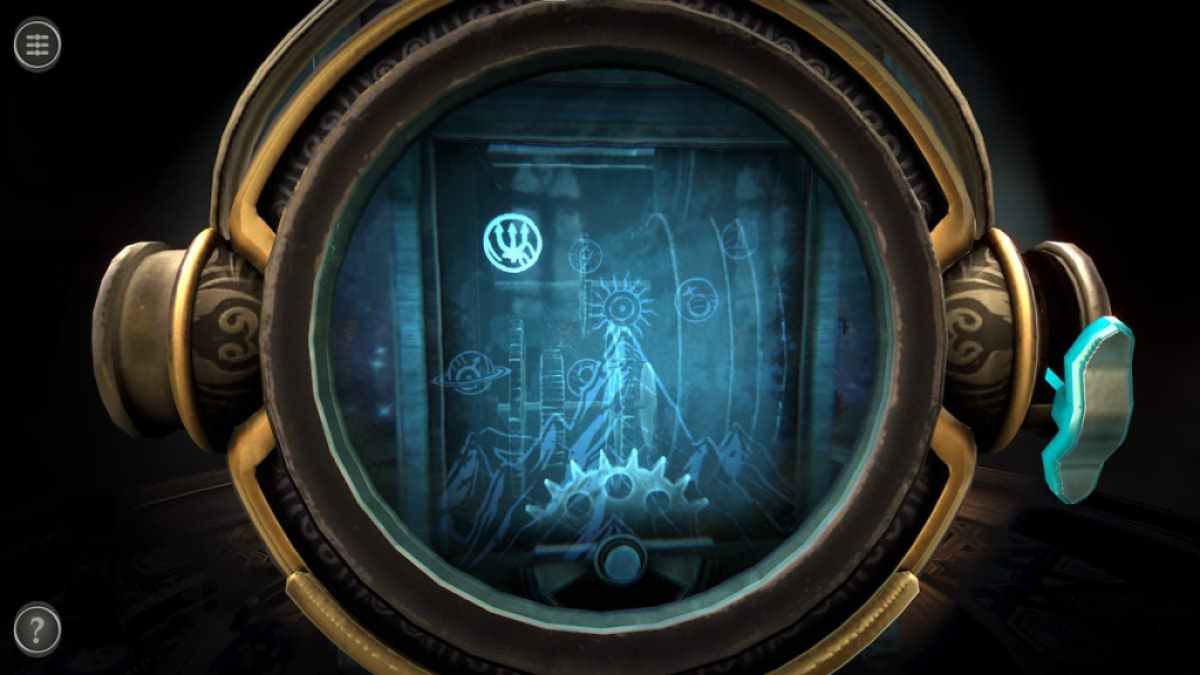
On the unexpended side of the box , a beam symbol like a trident can be seen floating around in circles .
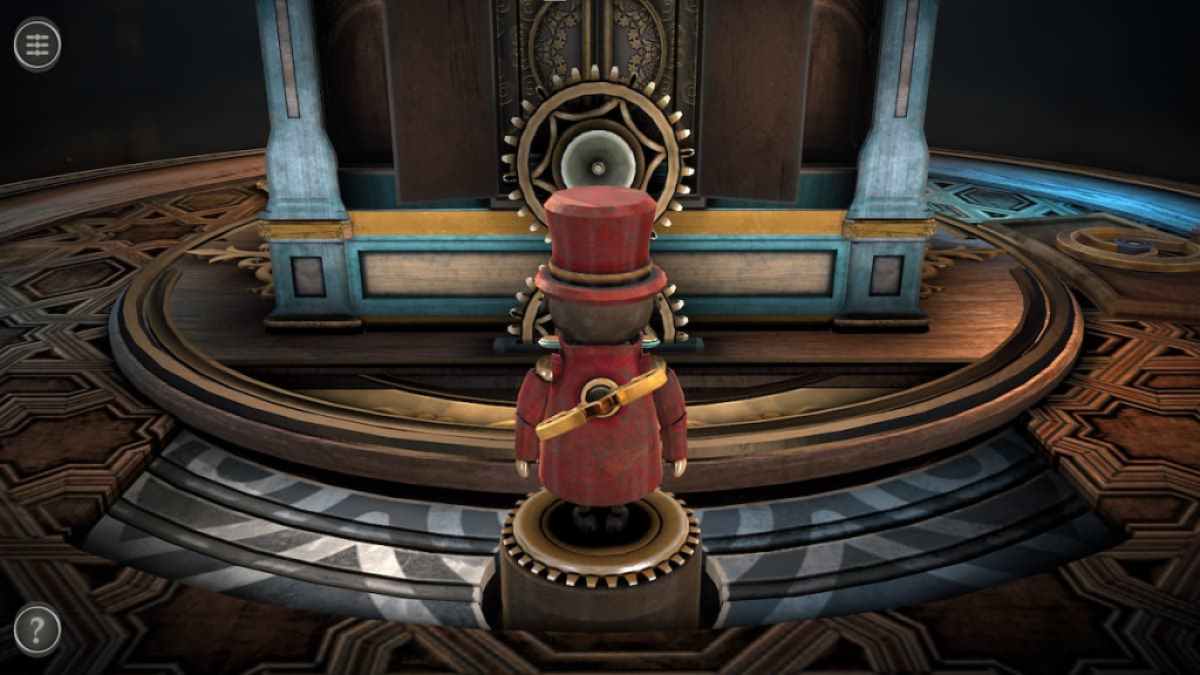
The last touch is the Cancer symbol , which can only be seen when the doll in the back motion and removes its hat .
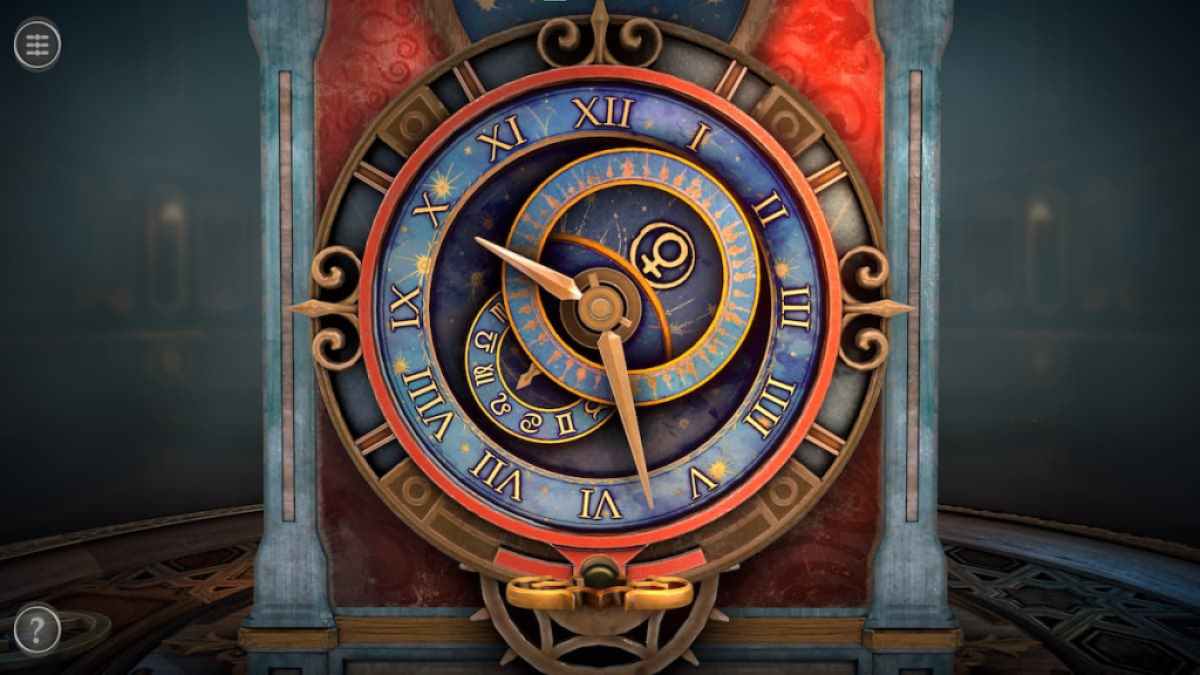
Return to the clock typeface . Move the clock paw to mimic the air pocket watch , rotate the circle to the upper right of the hand to show the trident symbolisation , and spread out the bottom left circle so that the arrow stop at the Cancer symbol .
Screenshot by Pro Game Guides
This will hit you from the second way and unlock the third room of the first chapter .
Looking for another long evasion room puzzle biz that secern a chronicle ? gibe out our3D Escape Room Detective Story Chapter 1 walkthroughhere on Pro Game Guides .
Screenshot by Pro Game Guides
Screenshot by Pro Game Guides
Screenshot by Pro Game Guides
Screenshot by Pro Game Guides
Screenshot by Pro Game Guides
Screenshot by Pro Game Guides
Screenshot by Pro Game Guides
Screenshot by Pro Game Guides
Screenshot by Pro Game Guides
Screenshot by Pro Game Guides
Screenshot by Pro Game Guides
Screenshot by Pro Game Guides
Screenshot by Pro Game Guides
Screenshot by Pro Game Guides
Screenshot by Pro Game Guides
Screenshot by Pro Game Guides
Screenshot by Pro Game Guides
Screenshot by Pro Game Guides
Screenshot by Pro Game Guides
Screenshot by Pro Game Guides
Screenshot by Pro Game Guides
Screenshot by Pro Game Guides
Screenshot by Pro Game Guides
Screenshot by Pro Game Guides
Screenshot by Pro Game Guides
Screenshot by Pro Game Guides
Screenshot by Pro Game Guides
Screenshot by Pro Game Guides
Screenshot by Pro Game Guides
Screenshot by Pro Game Guides
Screenshot by Pro Game Guides
Screenshot by Pro Game Guides
Screenshot by Pro Game Guides
Screenshot by Pro Game Guides

Screenshot by Pro Game Guides
Screenshot by Pro Game Guides
Screenshot by Pro Game Guides
Screenshot by Pro Game Guides
Screenshot by Pro Game Guides
Screenshot by Pro Game Guides
Screenshot by Pro Game Guides
Screenshot by Pro Game Guides
Screenshot by Pro Game Guides
Screenshot by Pro Game Guides
Screenshot by Pro Game Guides
Screenshot by Pro Game Guides
Screenshot by Pro Game Guides
Screenshot by Pro Game Guides
Screenshot by Pro Game Guides
Screenshot by Pro Game Guides
Screenshot by Pro Game Guides
Screenshot by Pro Game Guides
Screenshot by Pro Game Guides
Screenshot by Pro Game Guides
Screenshot by Pro Game Guides
Screenshot by Pro Game Guides
Screenshot by Pro Game Guides
Screenshot by Pro Game Guides
Screenshot by Pro Game Guides
