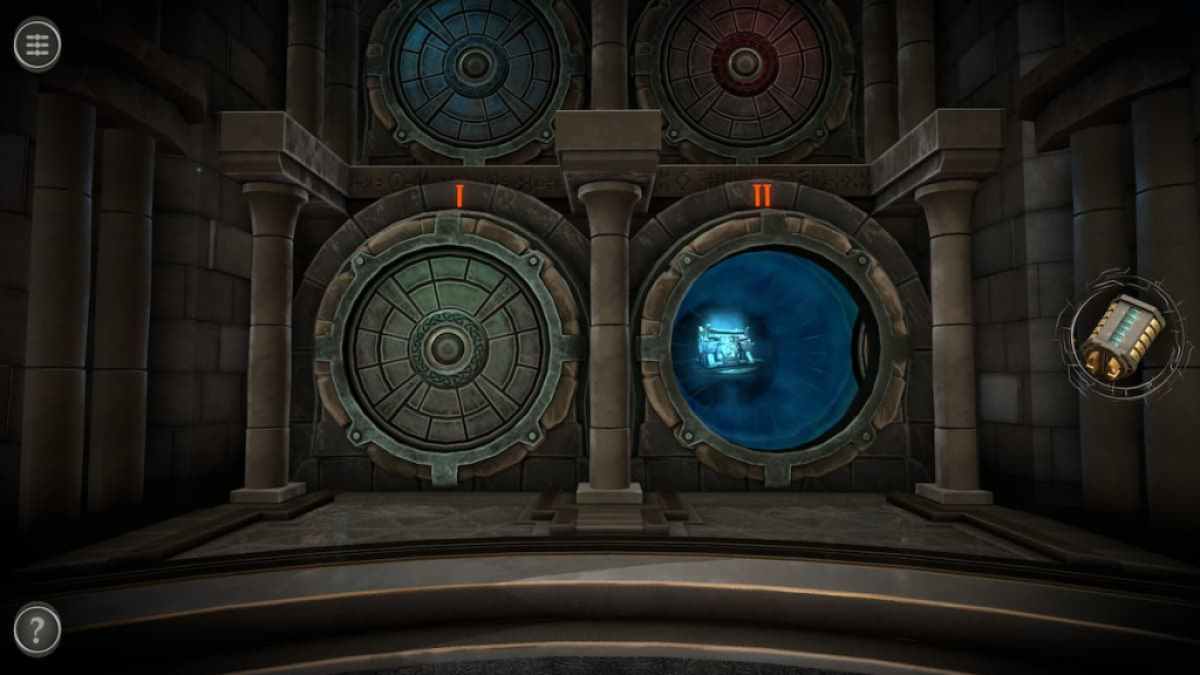
Take on the final level of the hall .
Boxes Lost Fragments provides role player with a unique point - and - click escape way risky venture with a variety of puzzle and an interesting story . In this part of the walkthrough , I ’ll guide you through the first two grade of Chapter 5 in Boxes Lost Fragments .
Boxes Lost Fragments Chapter 5 Aurora part 1 walkthrough
This pathfinder covers the first and 2d tier of Chapter 5 of Boxes Lost Fragments . For help with any of the former chapter or the goal of the secret plan , I ’ve linked the other parts of the walkthrough below .
Room one puzzles
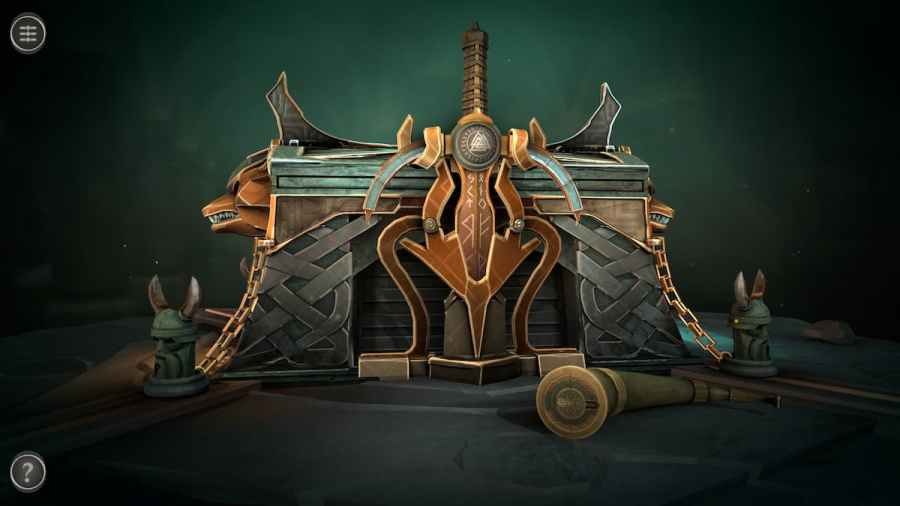
Unlike the last few chapter , you remain on the same storey as the fourth chapter . A fresh section is revealed containing all four doorway for the chapter . introduce the first one .
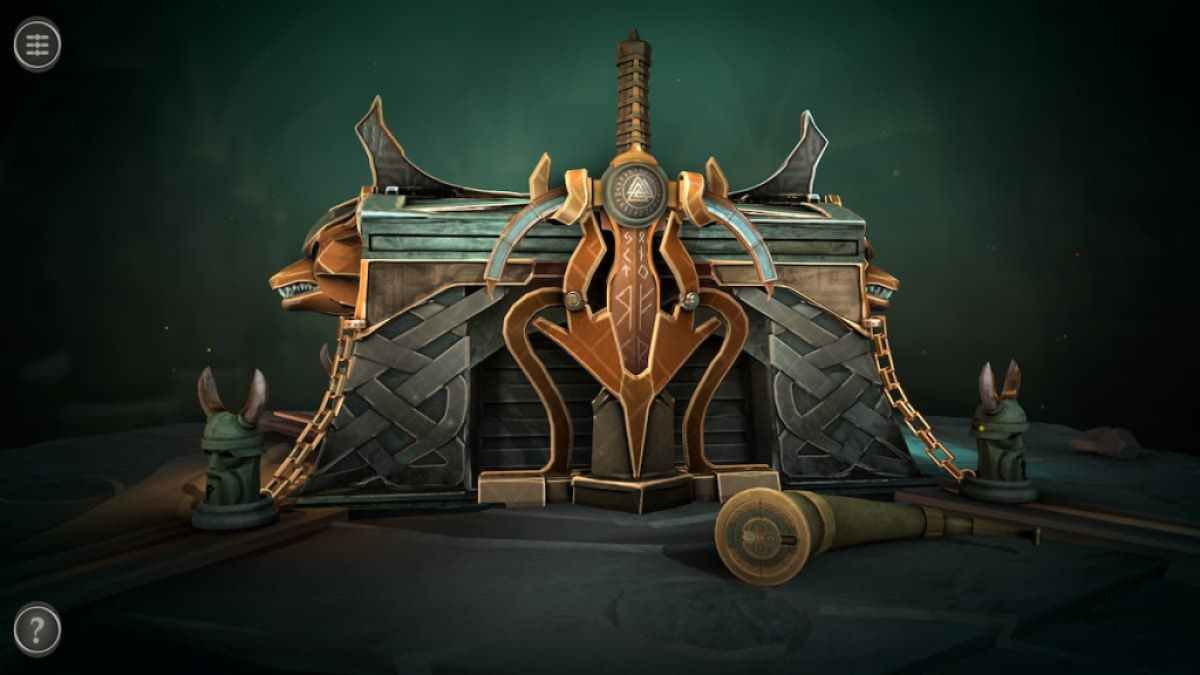
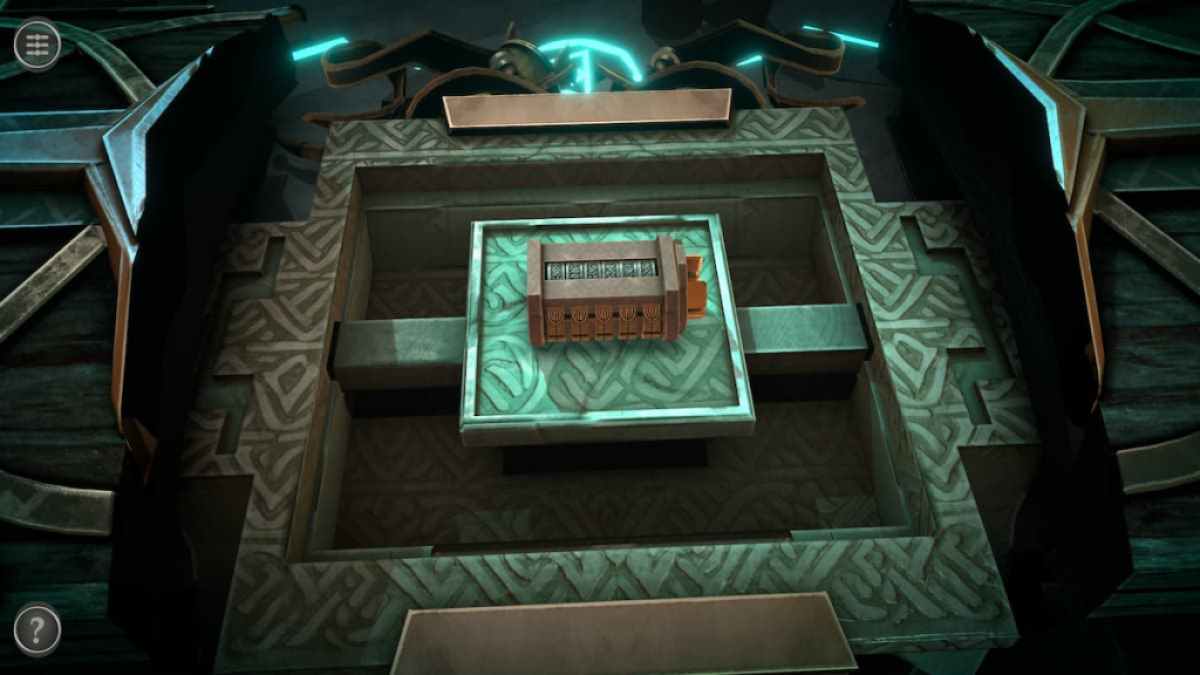
This box has a Viking paper complete with weapon system , Viking head , and wolf heads on the side . A letter containing lore can be feel on the backside of the corner .
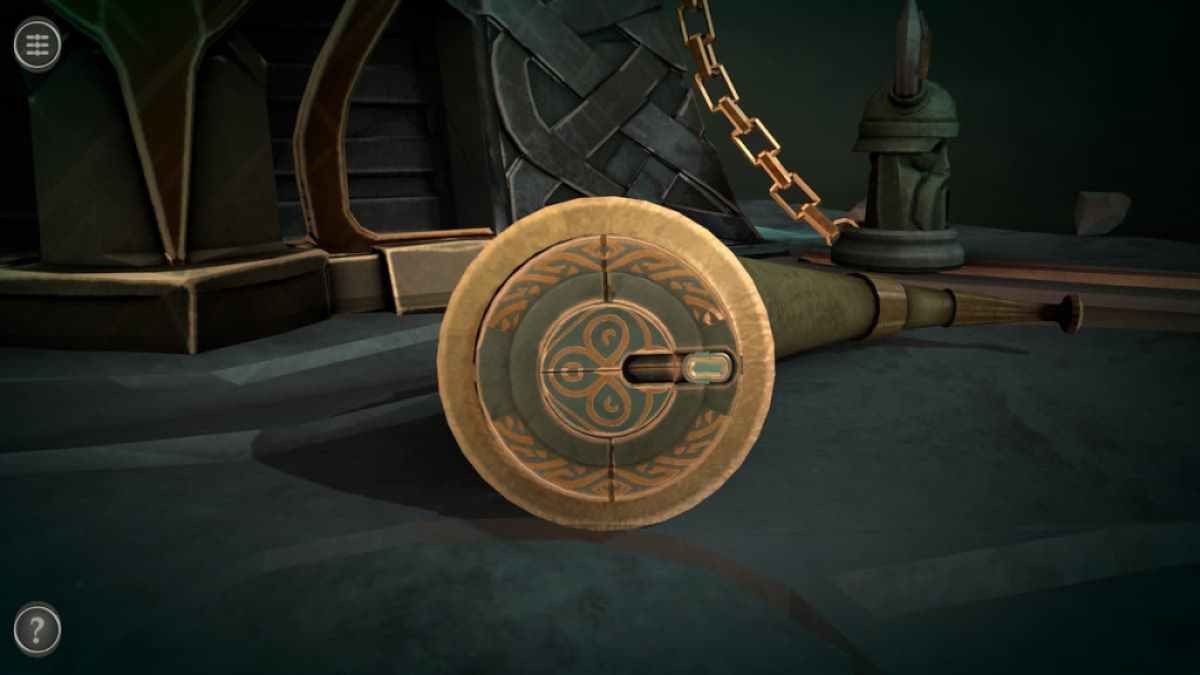
Focus on the French horn in front of the chest .
Rotate the center until the yellow-bellied terrapin can be locomote to the crack on the right . Then circumvolve the pith once more so that the gap faces the bottom of the puzzle to unlock it and get a Handle .
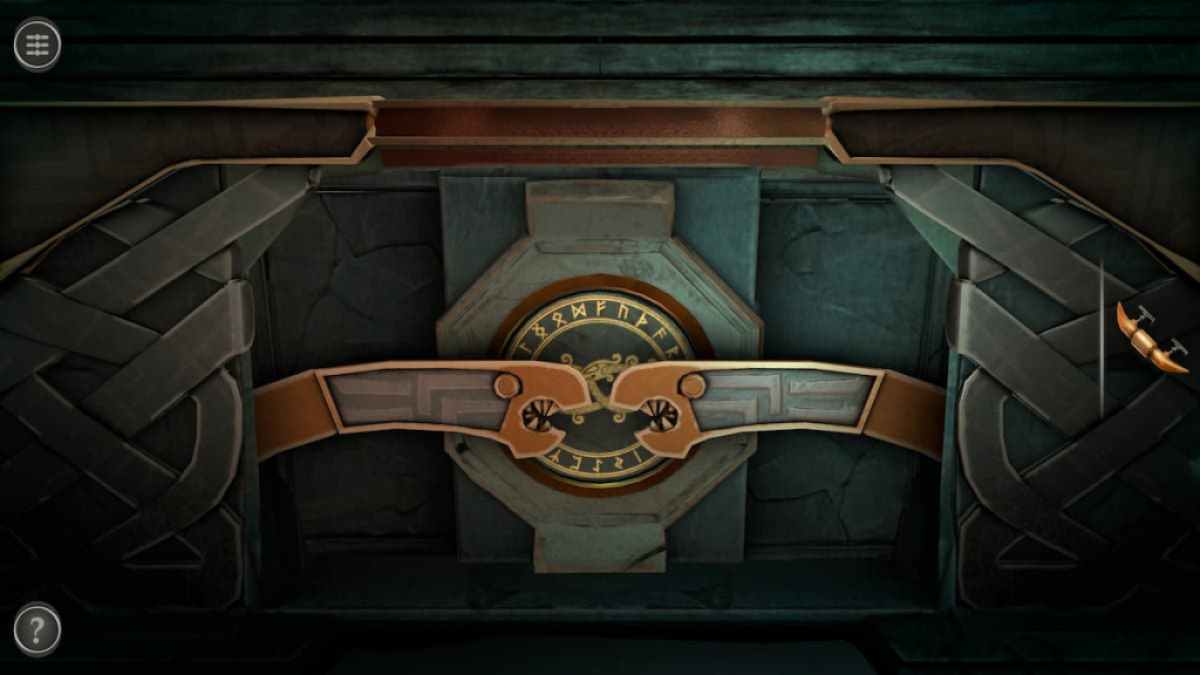
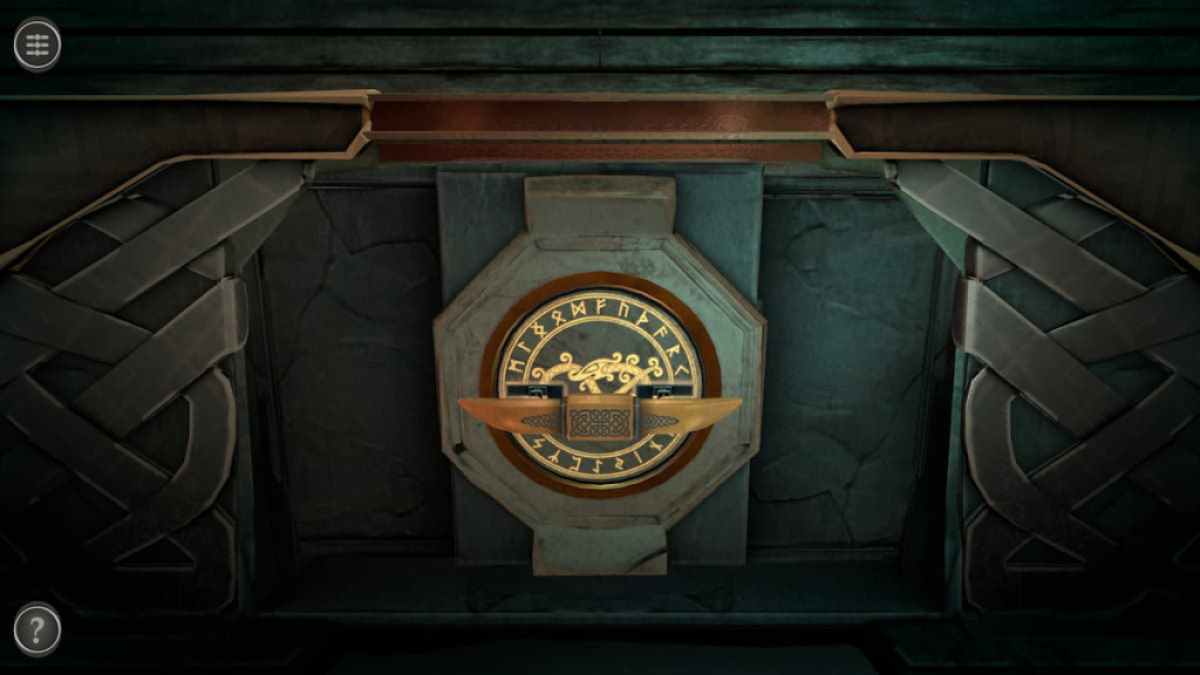
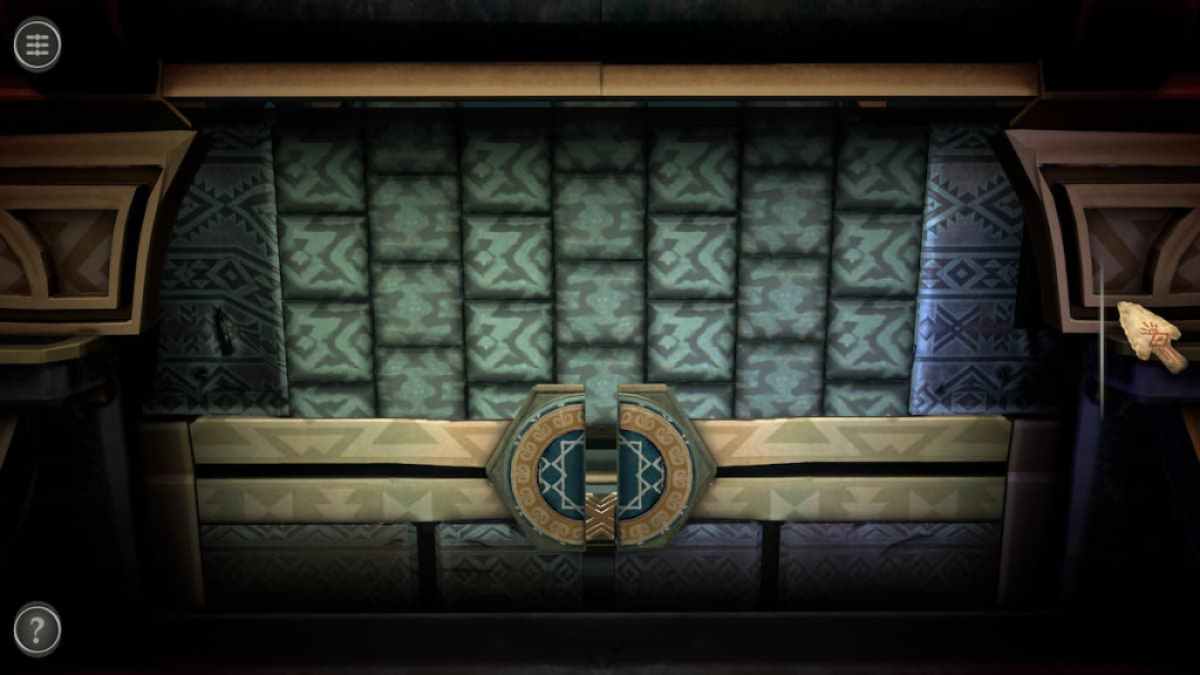
The back of the box has an Ouroboros - shaped lock .
Slide each heading to the side faithful to it and add the Handle to the center . Rotate it to unlock the pathway puzzle .
Screenshot by Pro Game Guides
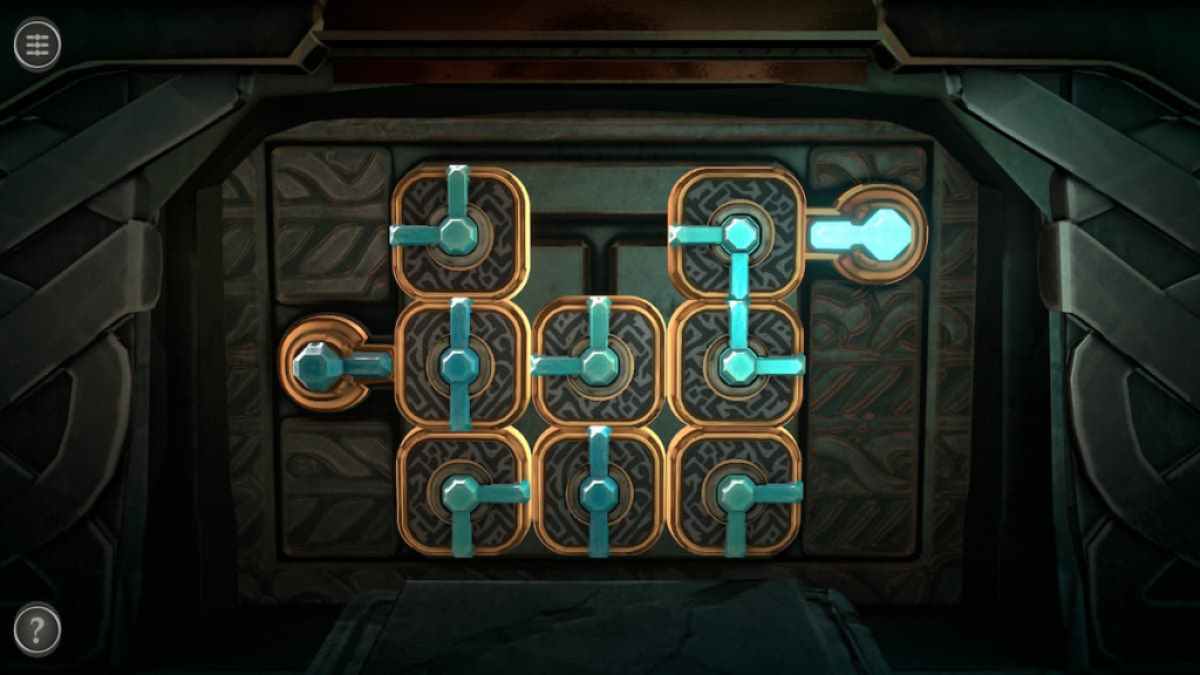
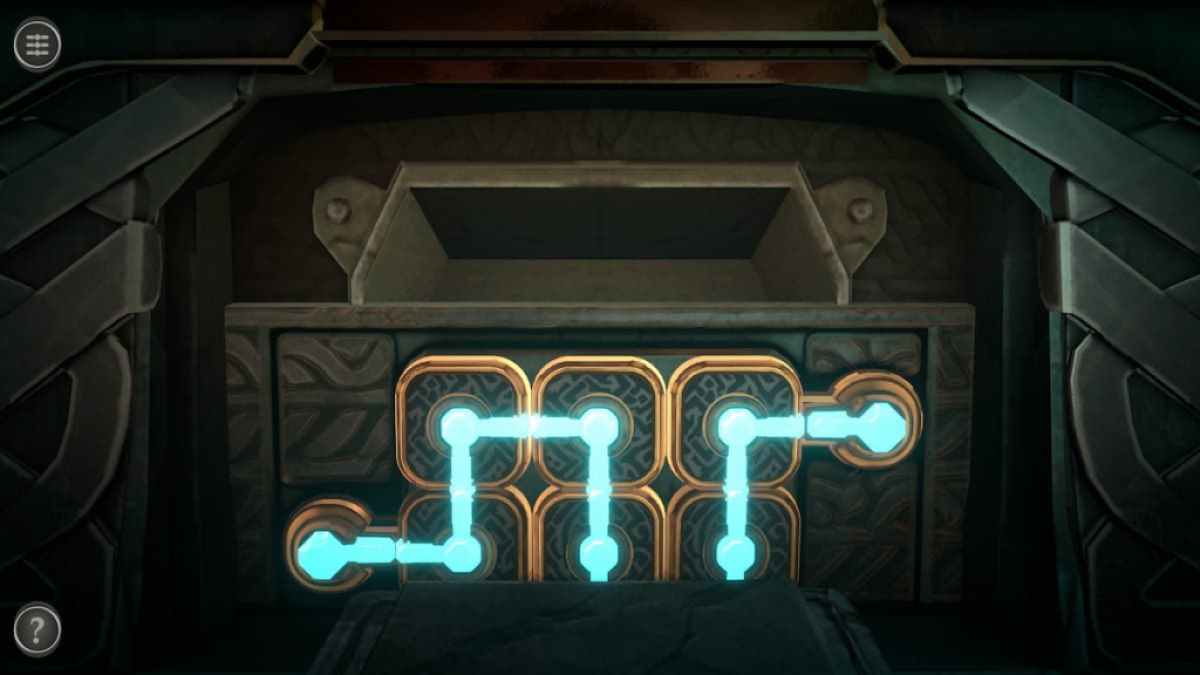
This teaser requires you to move the puzzler piece around until they make a complete path from the top correct square to the center - left square .
Once the path is complete , the puzzle will sink into the box and give you a Puzzle Box .
interrelate : Viking Ship Escape Walkthrough – Cool Math Games
Screenshot by Pro Game Guides
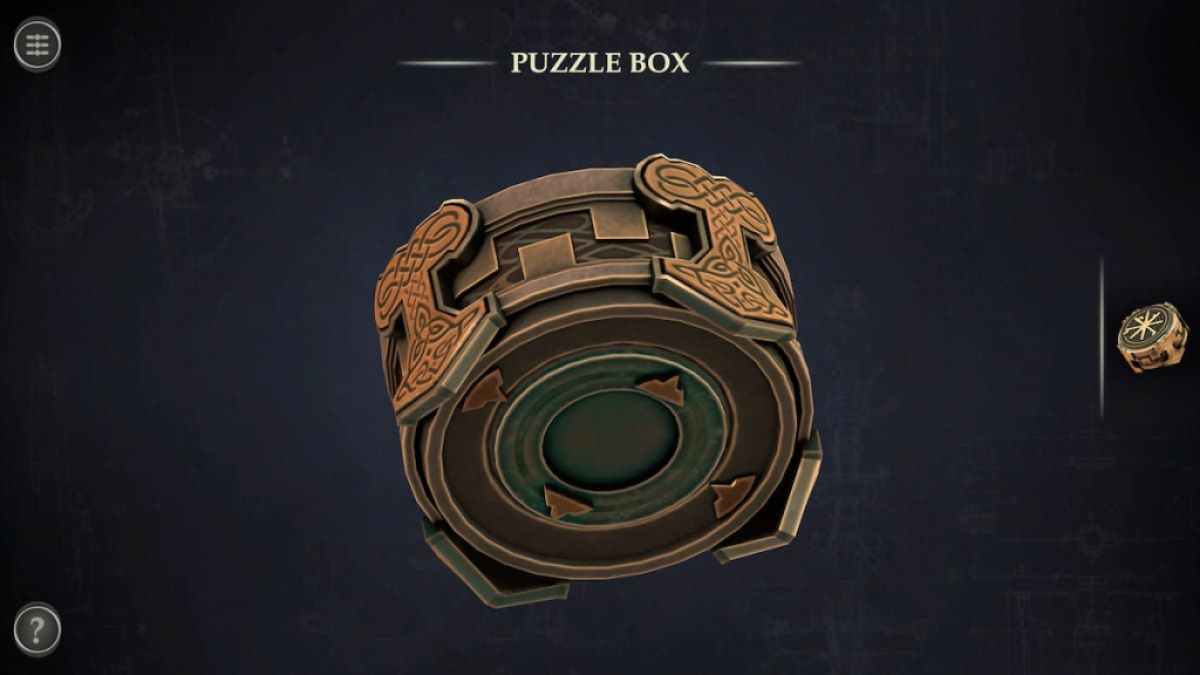
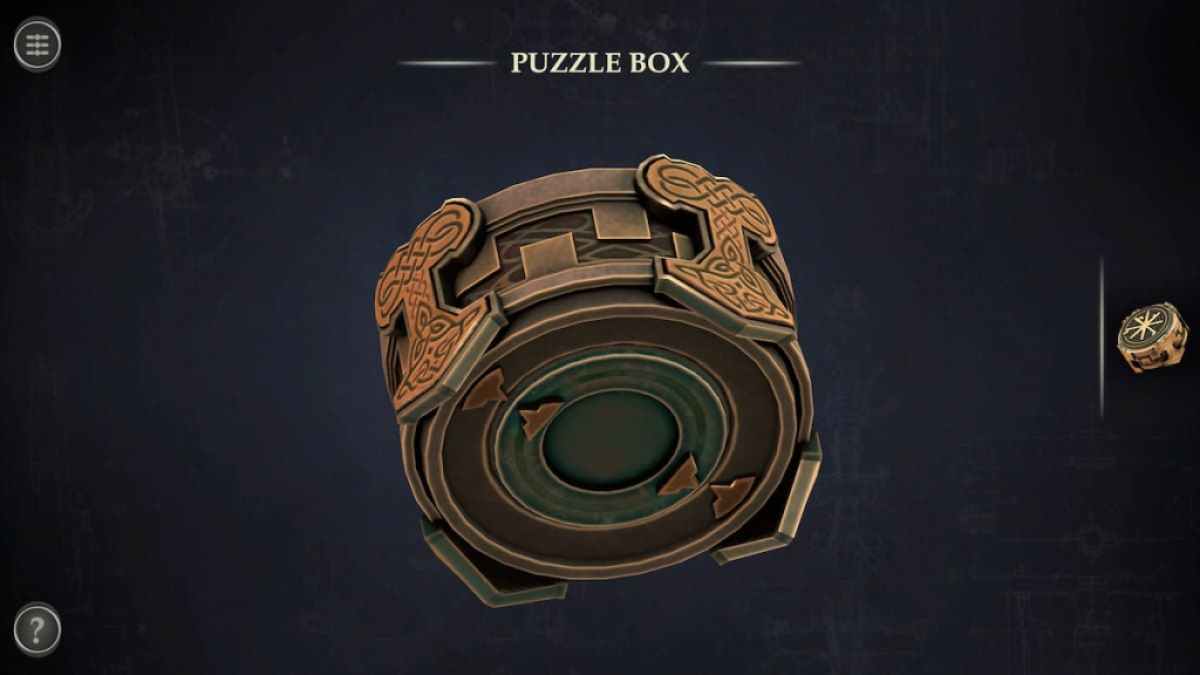
Tap the Puzzle Box in your inventory and rotate it to view the bottom .
Rotate the inner band to align the arrows to open up the box and get a Celtic Knot .
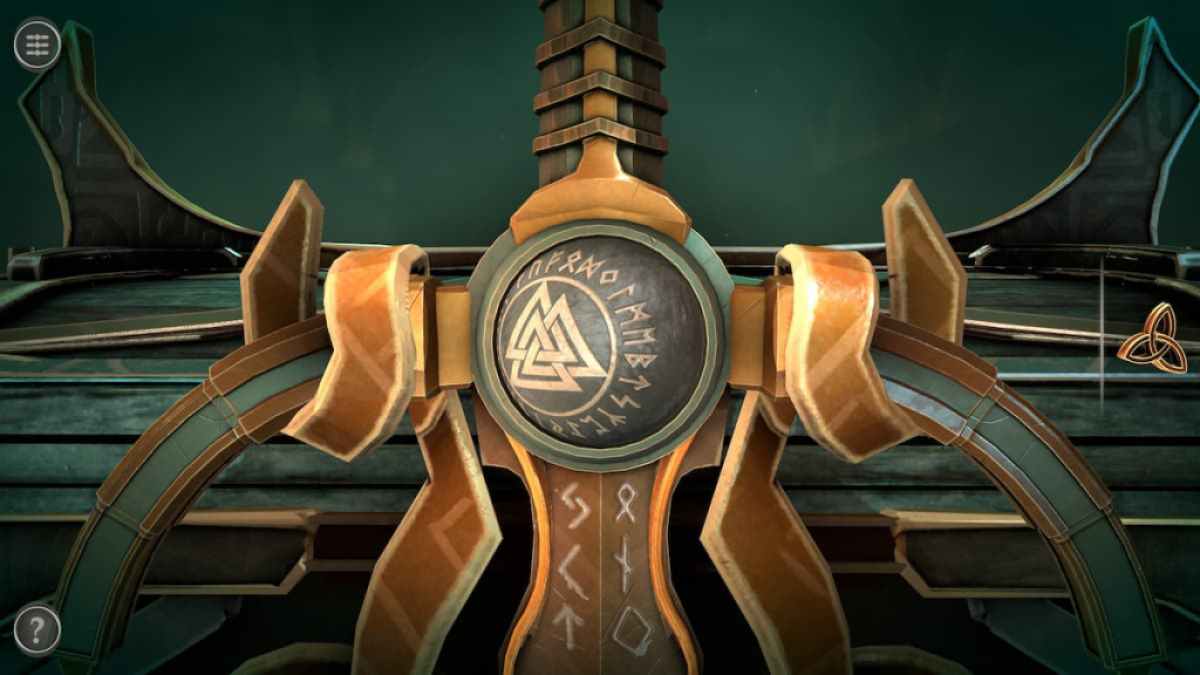
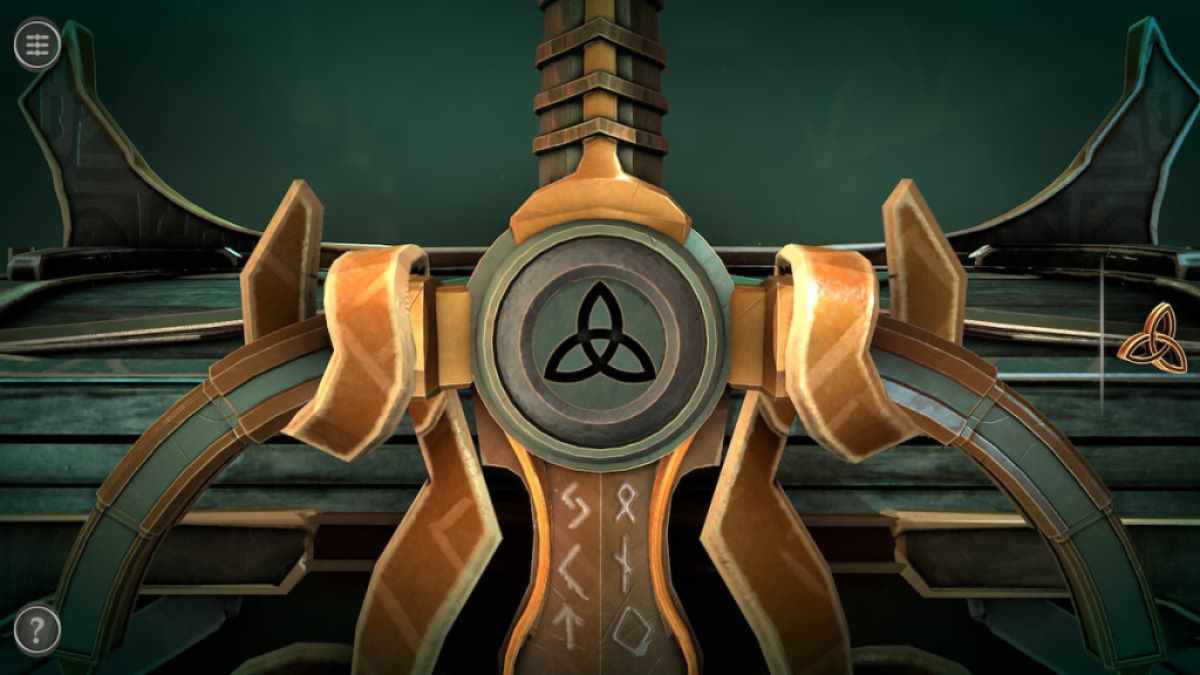
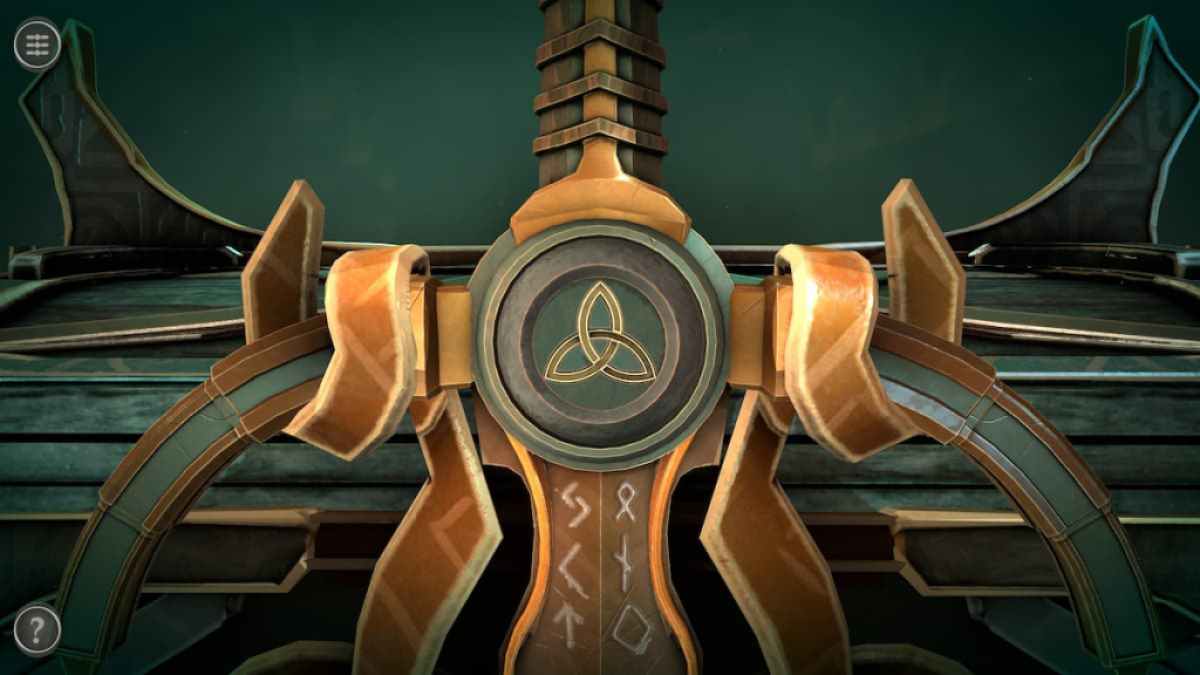
The ball on the hold of the forgetful sword can be go around .

Screenshot by Pro Game Guides
Completely rotating it let out a hidden slot mate the Celtic Knot .
Place the Celtic Knot into the slot .
Afterward , each of the handles on either side of the steel can be go down . take out the brand up to place the Short Sword in your stocktaking .
Screenshot by Pro Game Guides
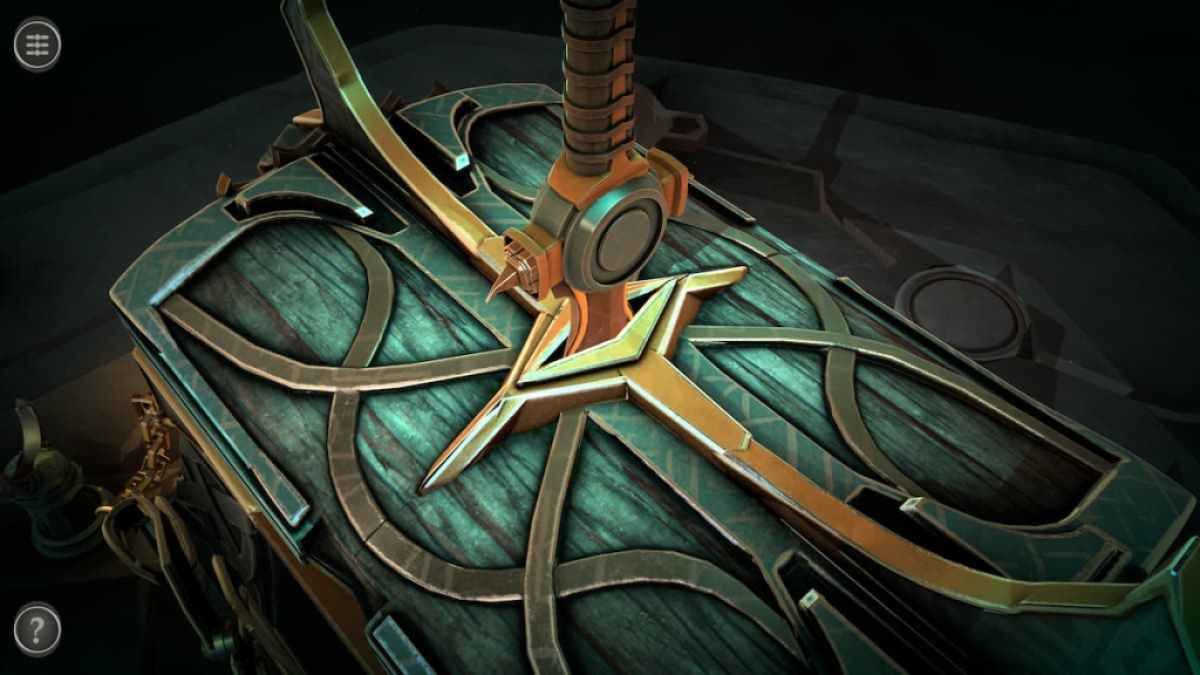
Place the Short Sword into the slot at the top of the boxwood to unlock a puzzle beneath each of the wolf heads on the corner ’s sides .
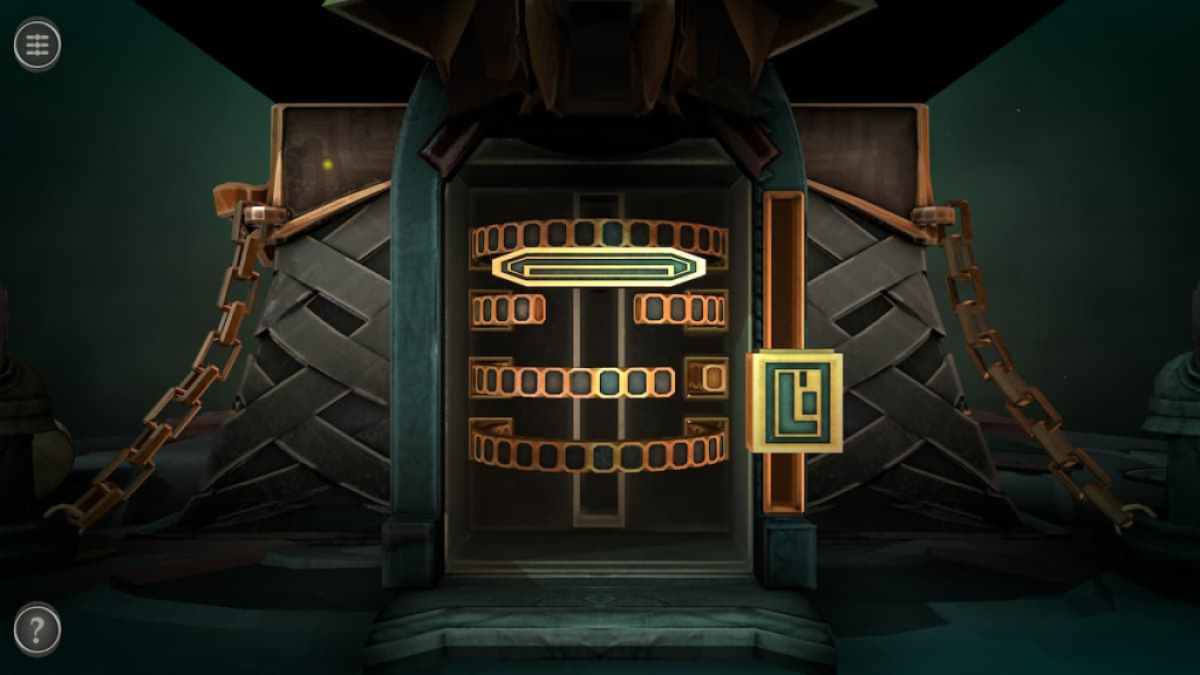
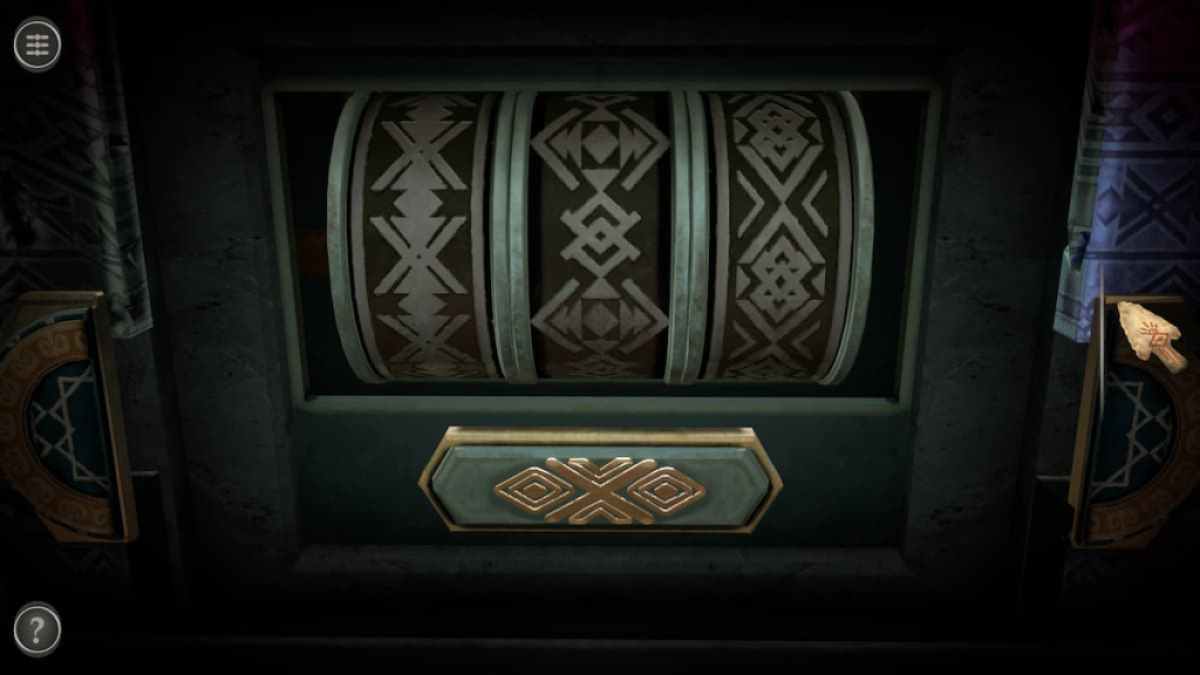
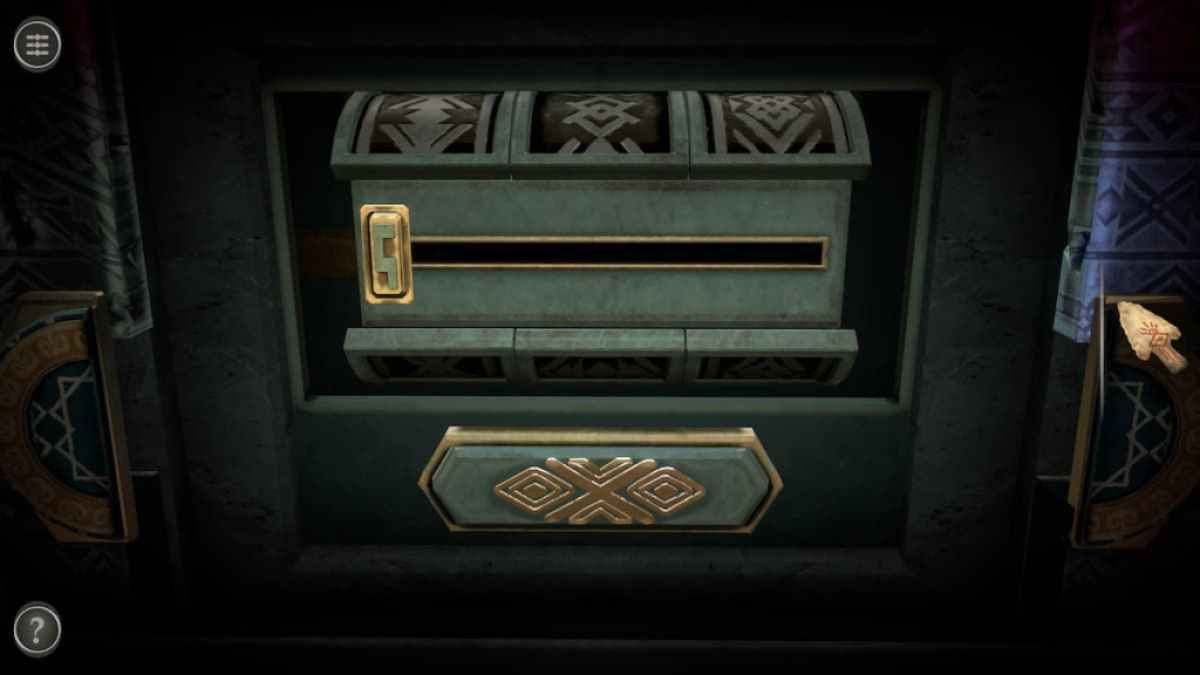
This puzzle boast a slider on the right and a handle at the bottom .
Move the luger until the row above the hold has a gap . The handle can then be moved above that row and below the next one .
Screenshot by Pro Game Guides
Repeat this process with every row in the mystifier .
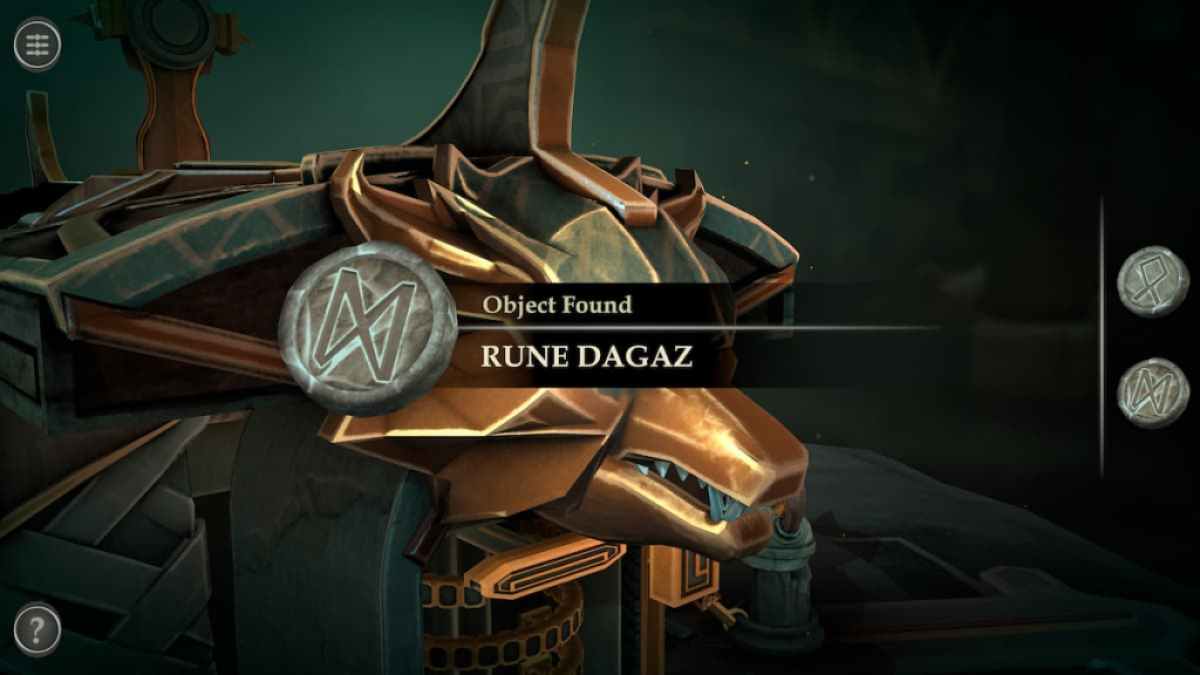
When you reach the end , the wolf drumhead will give you the Rune Othala and the Rune Dagaz .
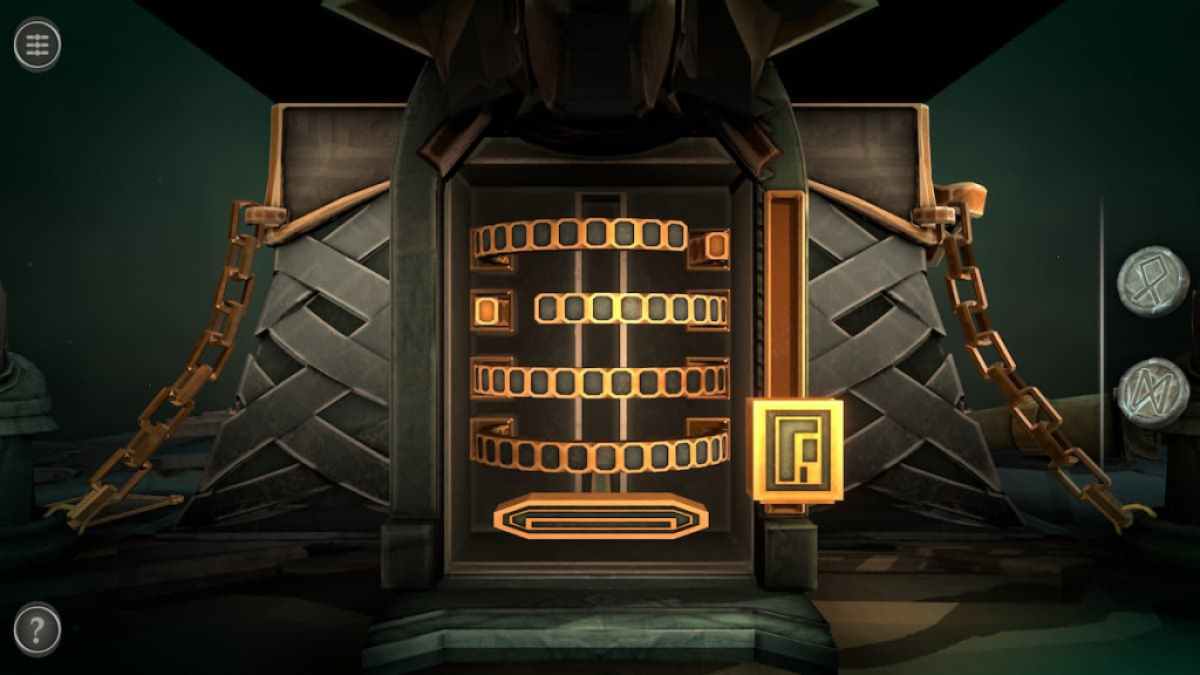
The brute head teacher on the unexpended side of the boxful is done in the same way as the right wolf head .
Screenshot by Pro Game Guides
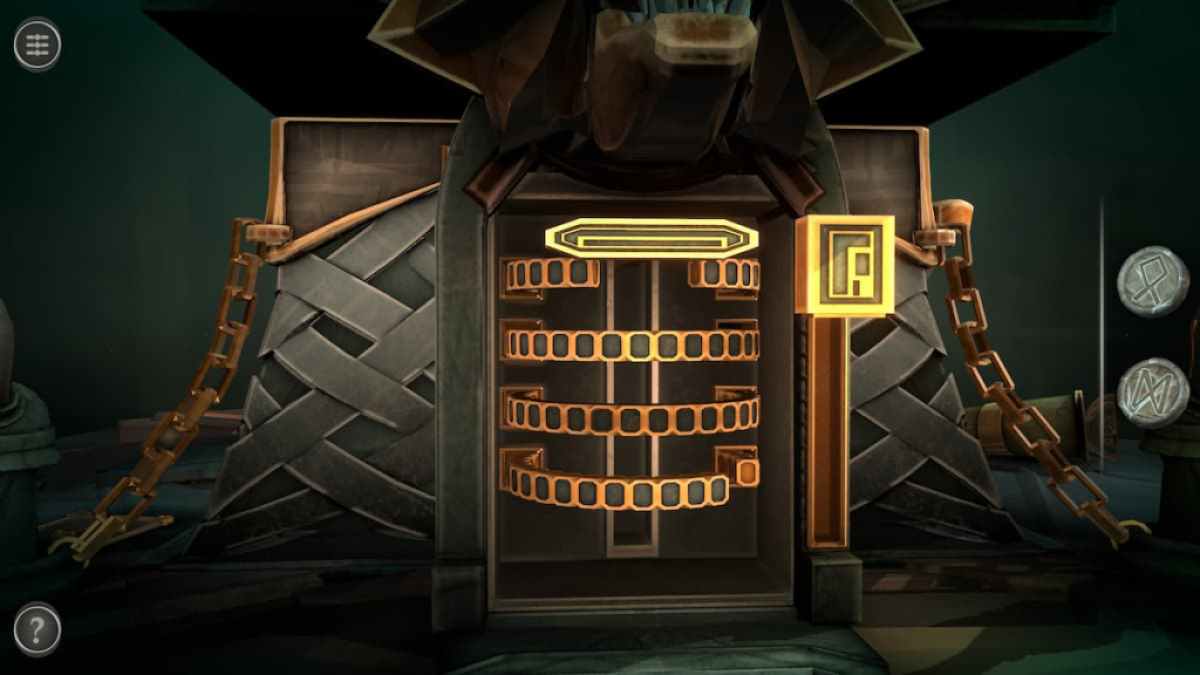
Once the handle is at the top of the mystifier , the wolf ’s mouth will open .
The wolf ’s mouthpiece contains the Rune Wunjo and the Rune Jera .
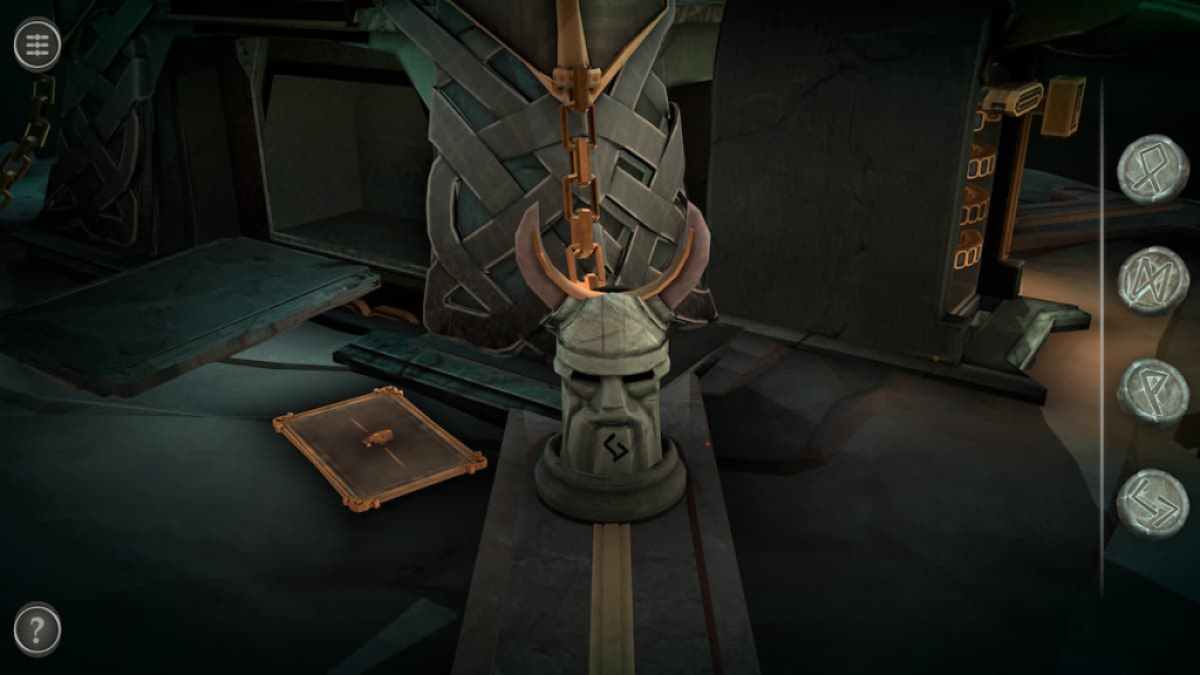
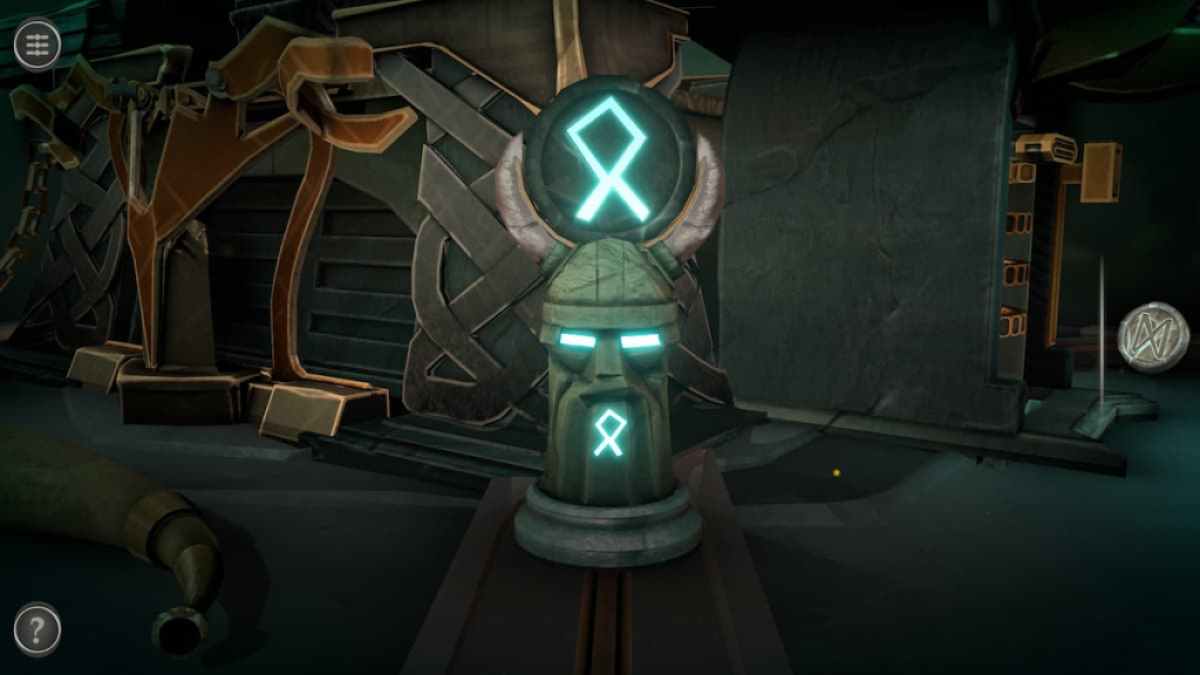
First , look at the Viking head behind the left over beast promontory .
Screenshot by Pro Game Guides
The symbolisation on it matches the symbolic representation on the Rune Jera . Place the Rune Jera on its head to spark off the fountainhead .
Rotate to look at the Viking head in front of the left wolf head .
Placed the Rune Wunjo on top of it to activate it .
Screenshot by Pro Game Guides
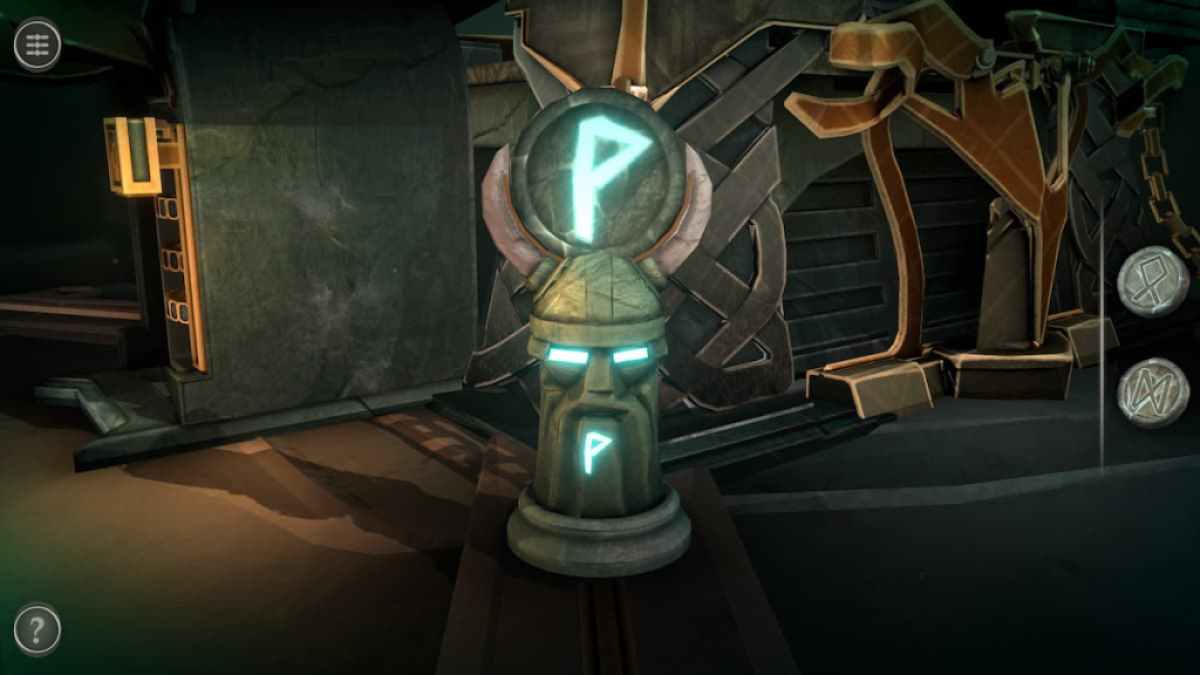
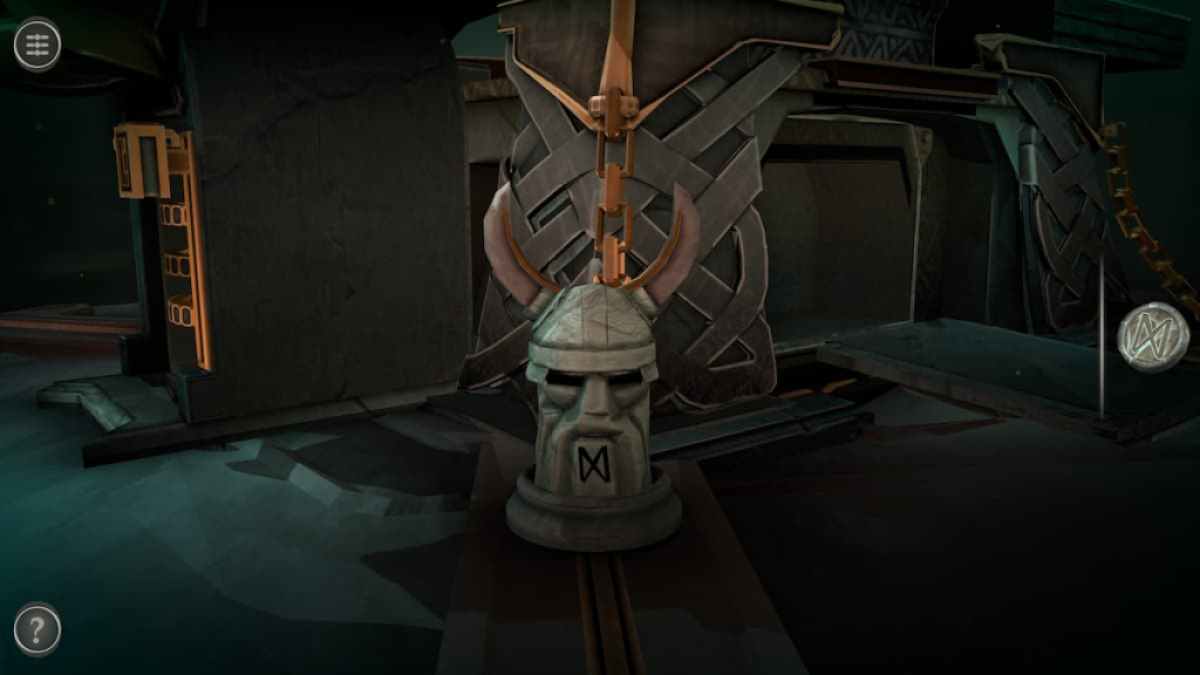
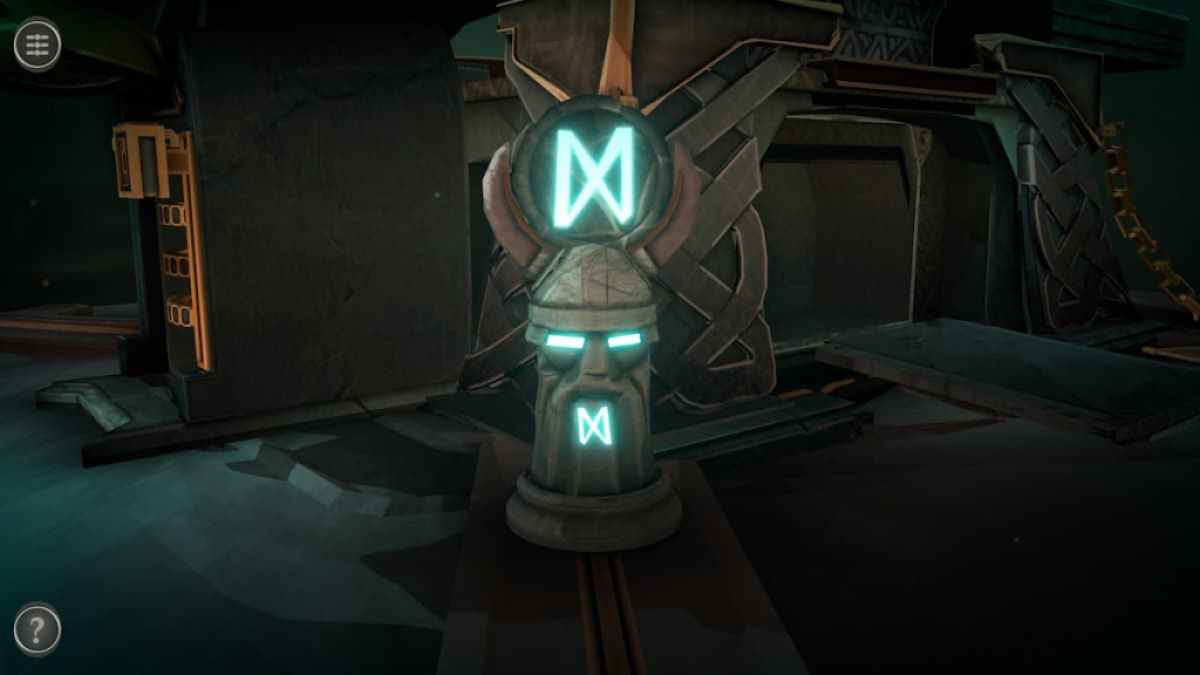
Move the tv camera to view the Viking head in front of the right Friedrich August Wolf top dog .
Place the Rune Othala on top of it to spark the header .
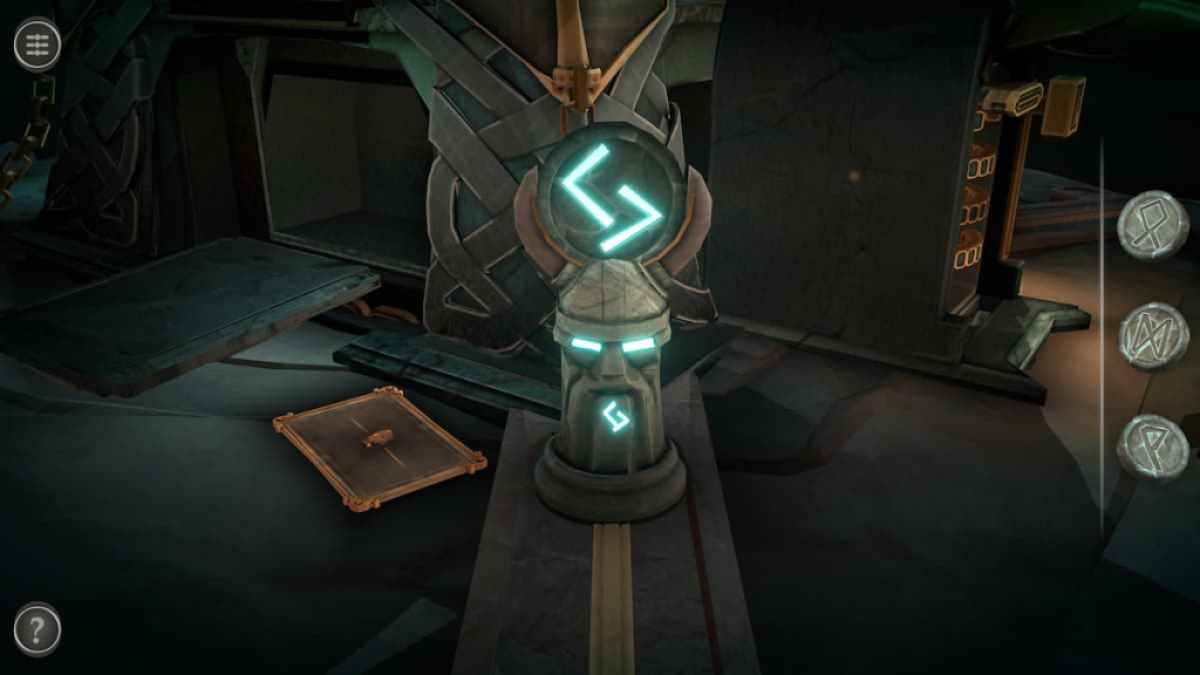
View the final Viking head .
Screenshot by Pro Game Guides
Place the Rune Dagaz onto it to aerate it .
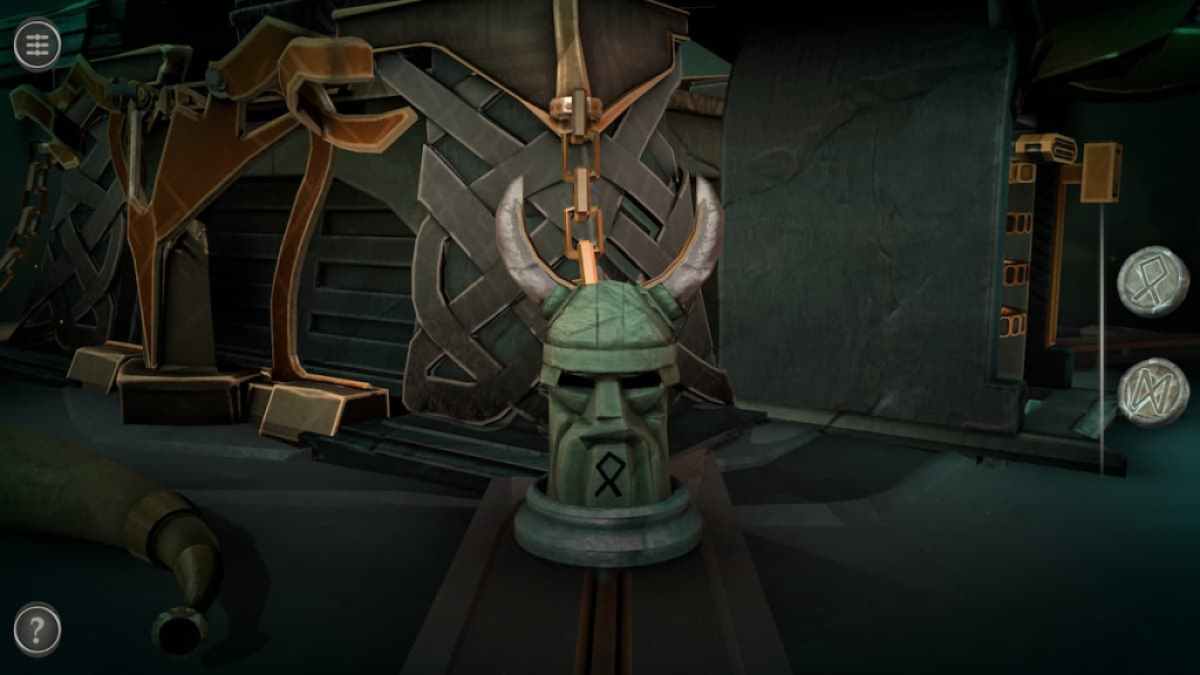
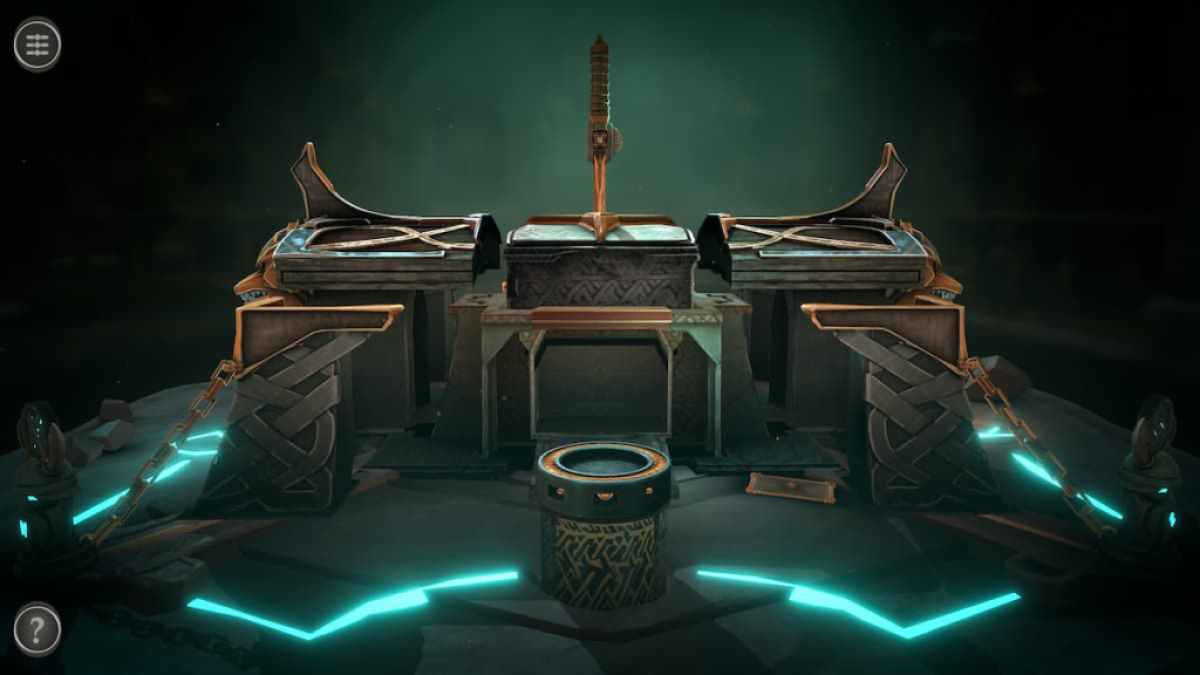
This will transubstantiate the boxwood by pull up all of the chained section out .
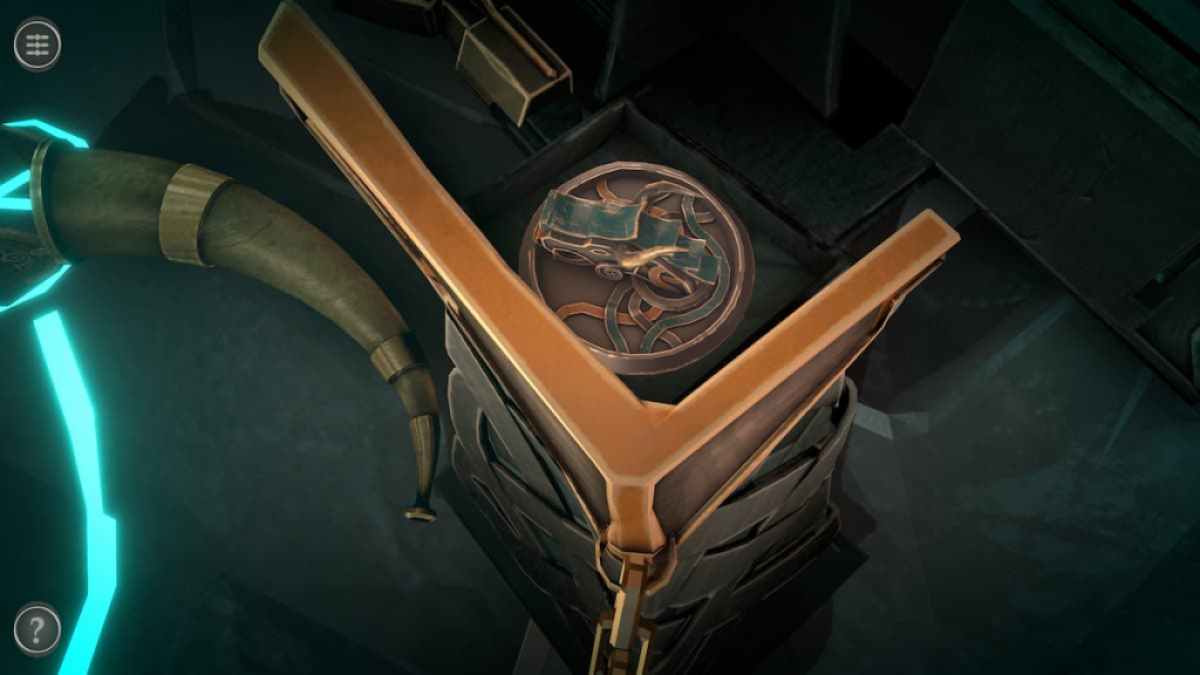
The Dragon Token can be found on top of the removed piece near the horn at the front of the box .
Screenshot by Pro Game Guides
come out the Dragon Token on the column at the back and splay it until the dragon ’s head is face up the boxful .
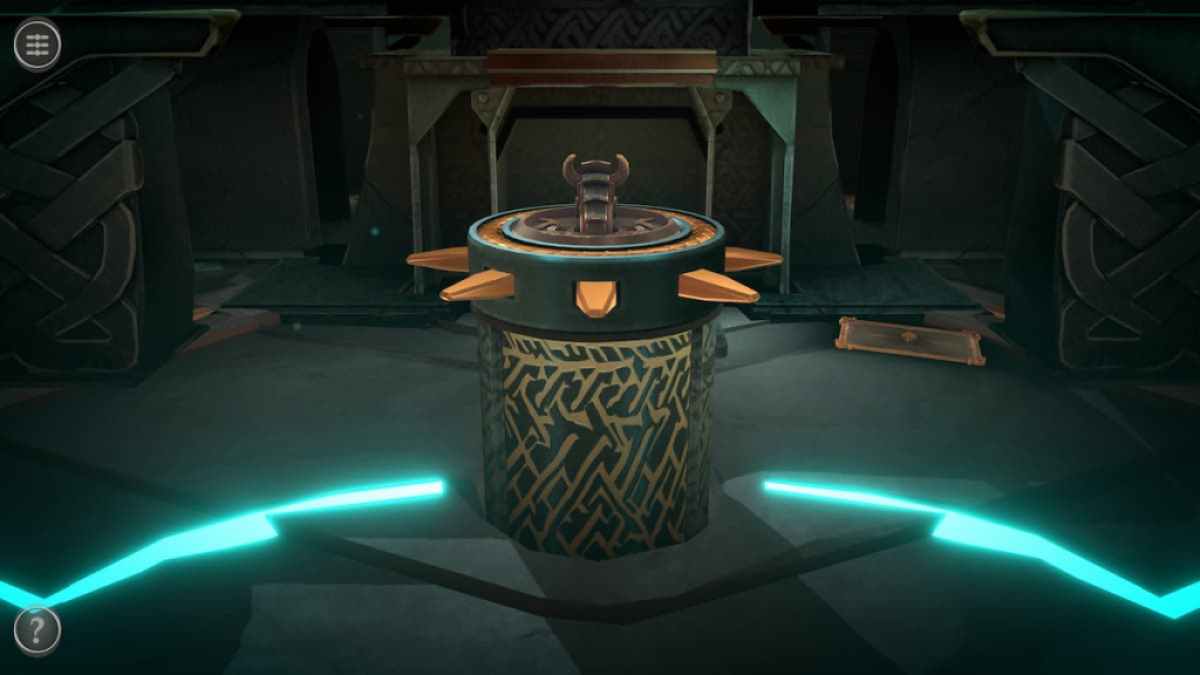
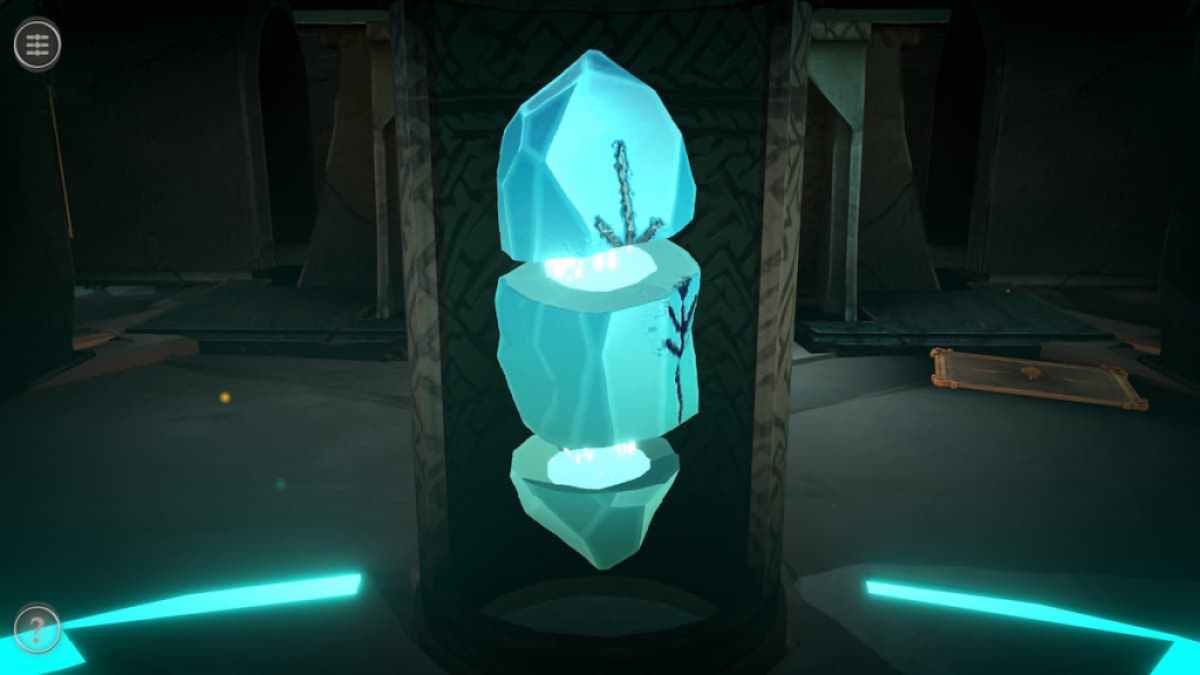
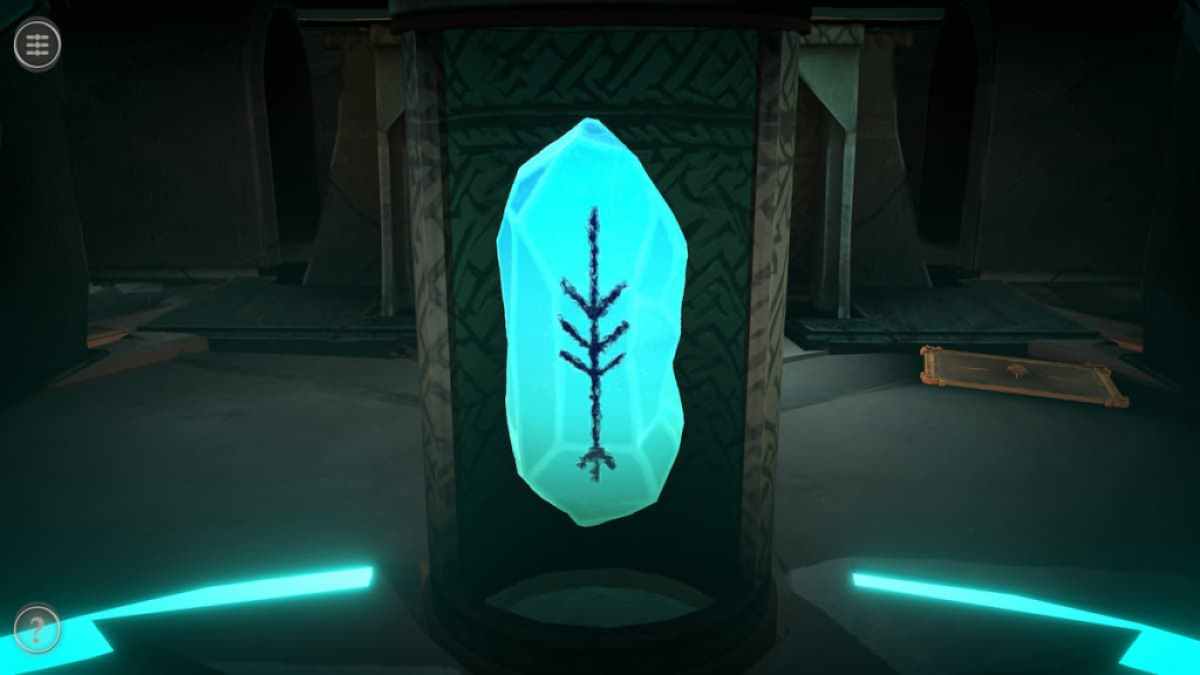
This will reveal a quartz split into three disjoined pieces .
turn out each piece until the black symbol on the front is complete . The piece will connect and mobilize a mystical firedrake to ruin the box .
Screenshot by Pro Game Guides
You ’ll be able to take hold of a Cryptex . Doing so will retrovert you to the main room .
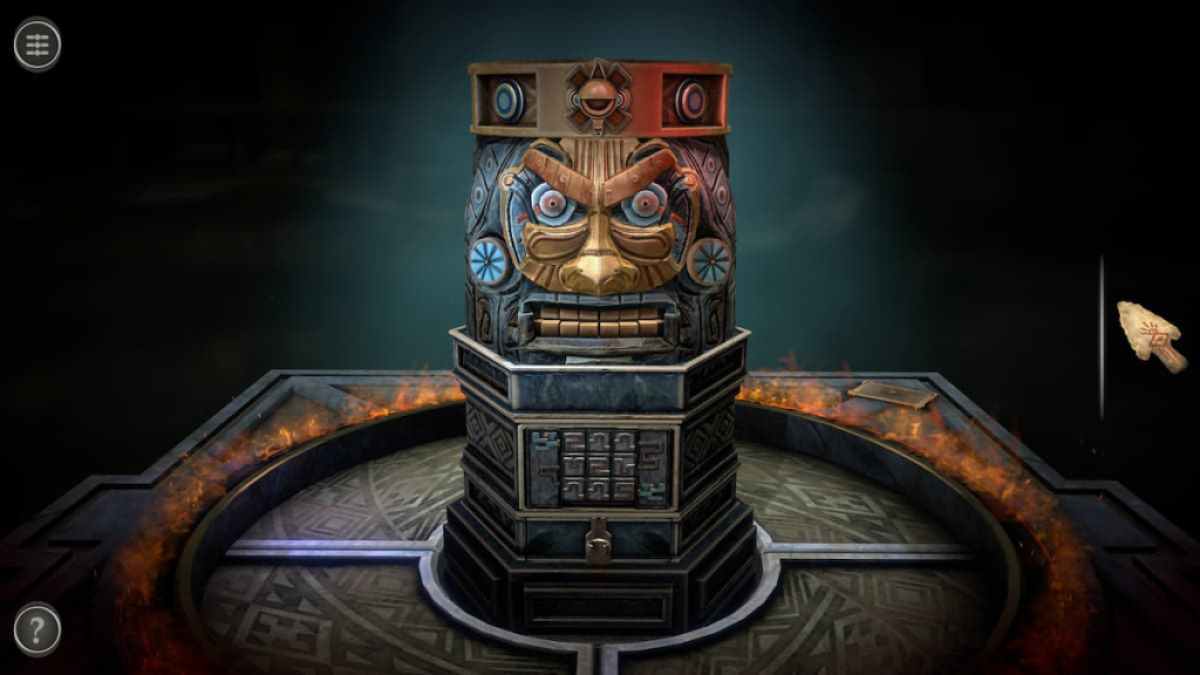
Room two puzzles
enroll the 2d room .
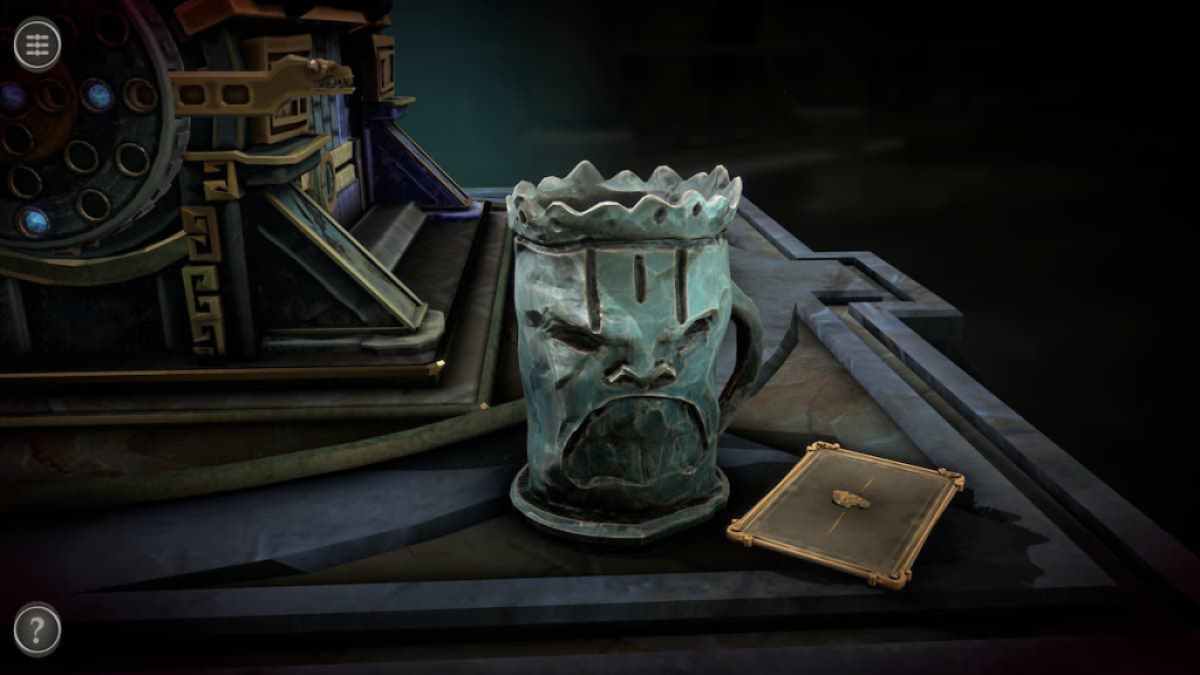
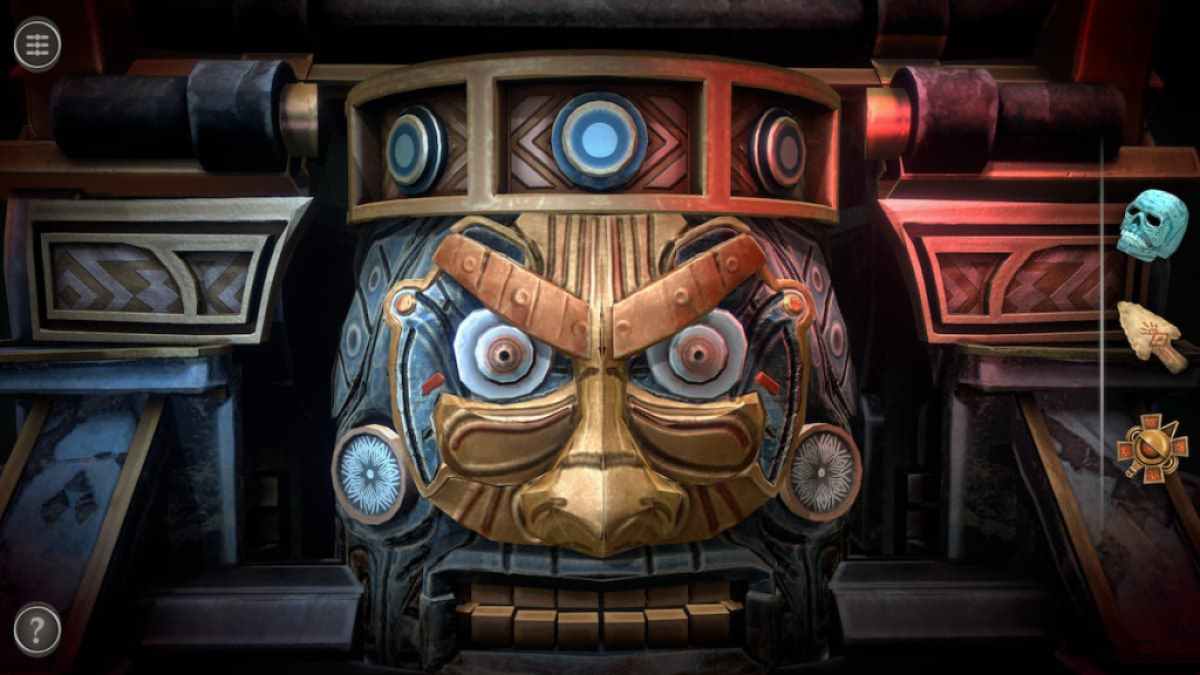
The front of the corner in this way is remindful of a Tiki statue .
Behind the box , grab the Aztec Mug on the table . There will be a lore varsity letter next to it .
Screenshot by Pro Game Guides
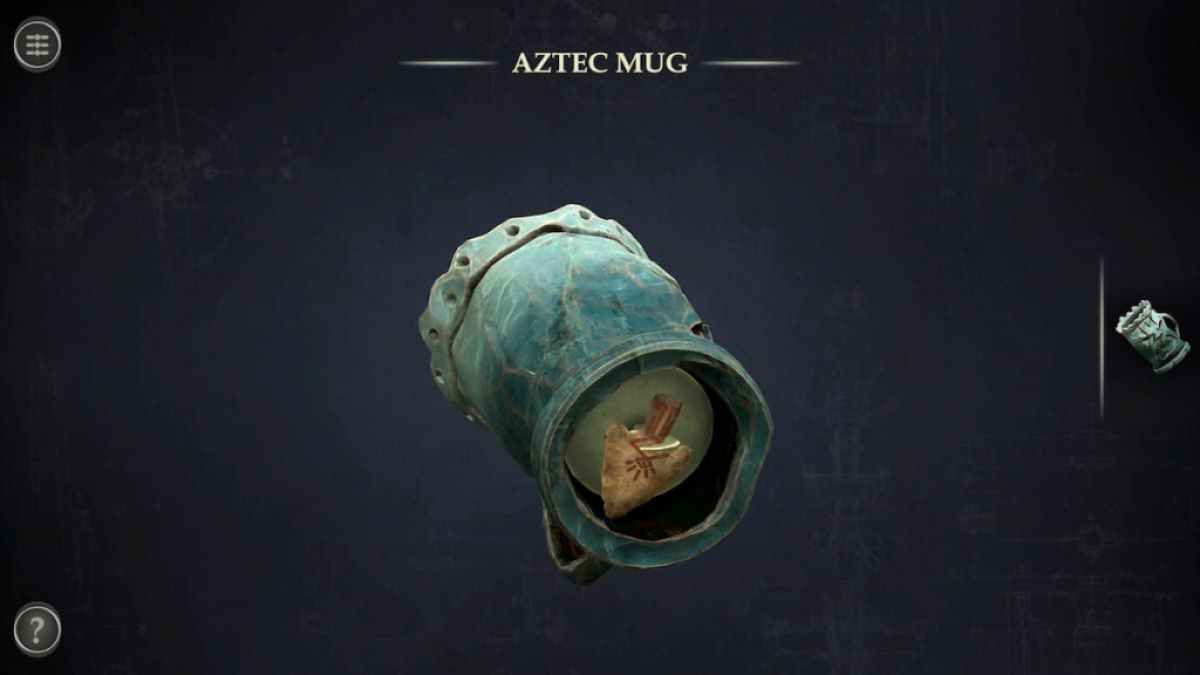
Select the Aztec Mug in your stock . circumvolve it to consider the bottom and snap up an Old Arrow Head .
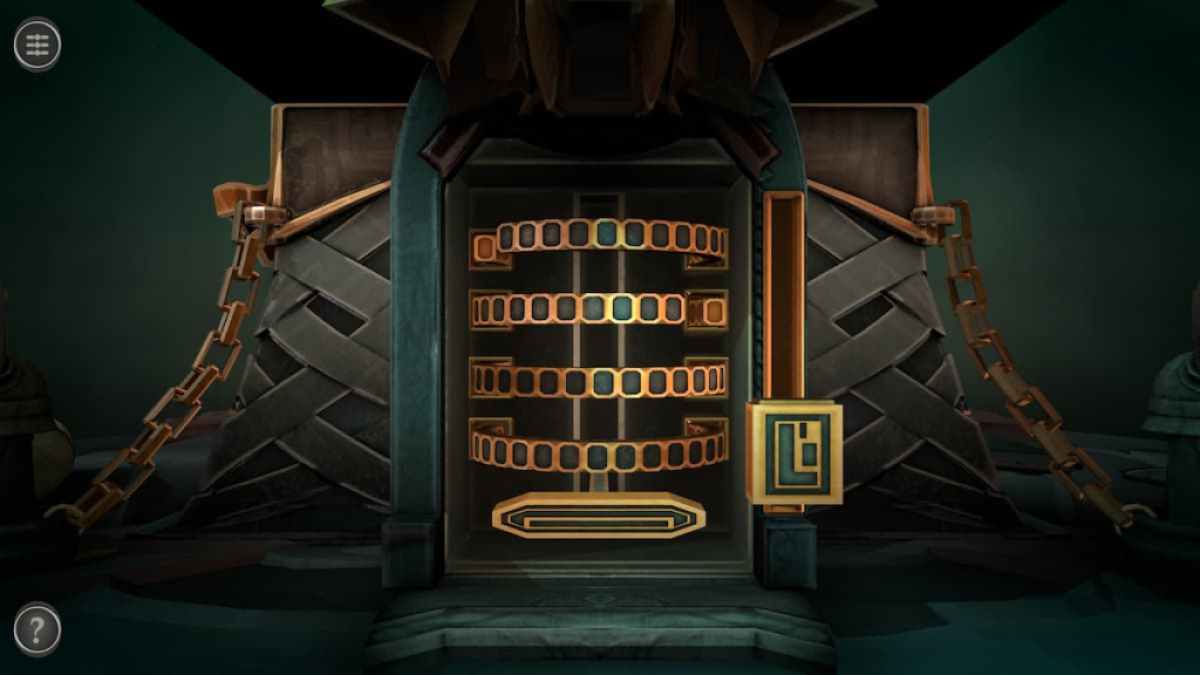
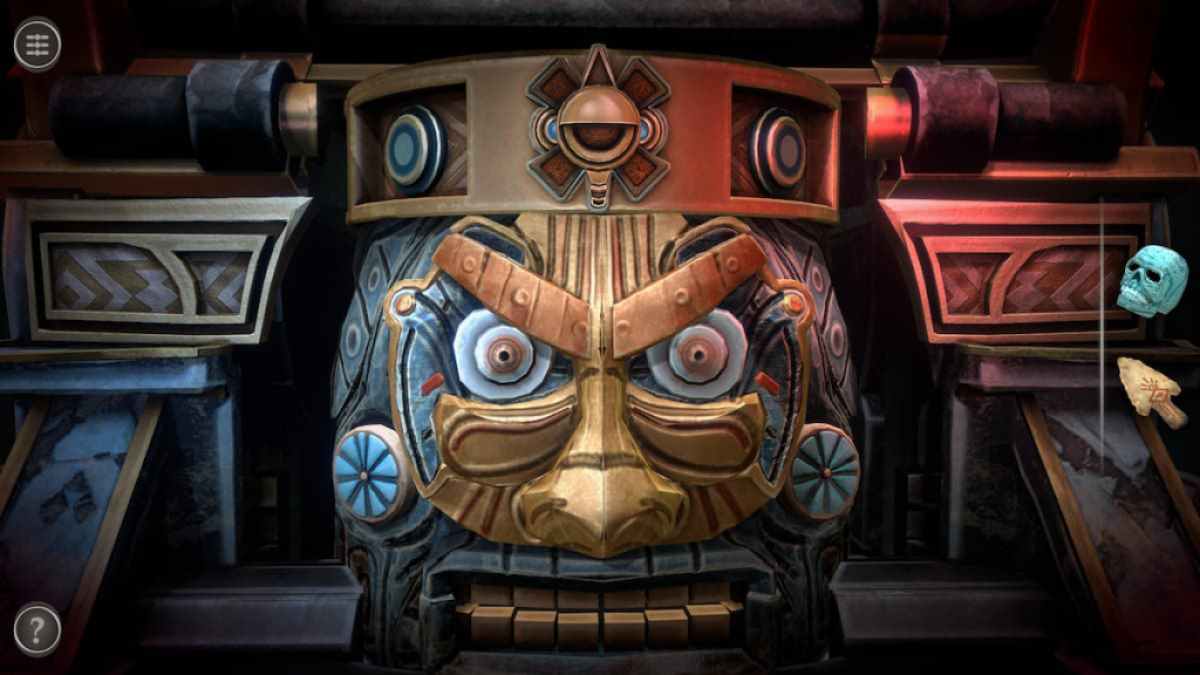
consider the slider mystifier with the circular lock at the back of the box .
Rotate the amber ring until the two lines in it are at the top and the bottom . This will allow you to draw them to the side , revealing the teaser behind the ringlet .
Screenshot by Pro Game Guides
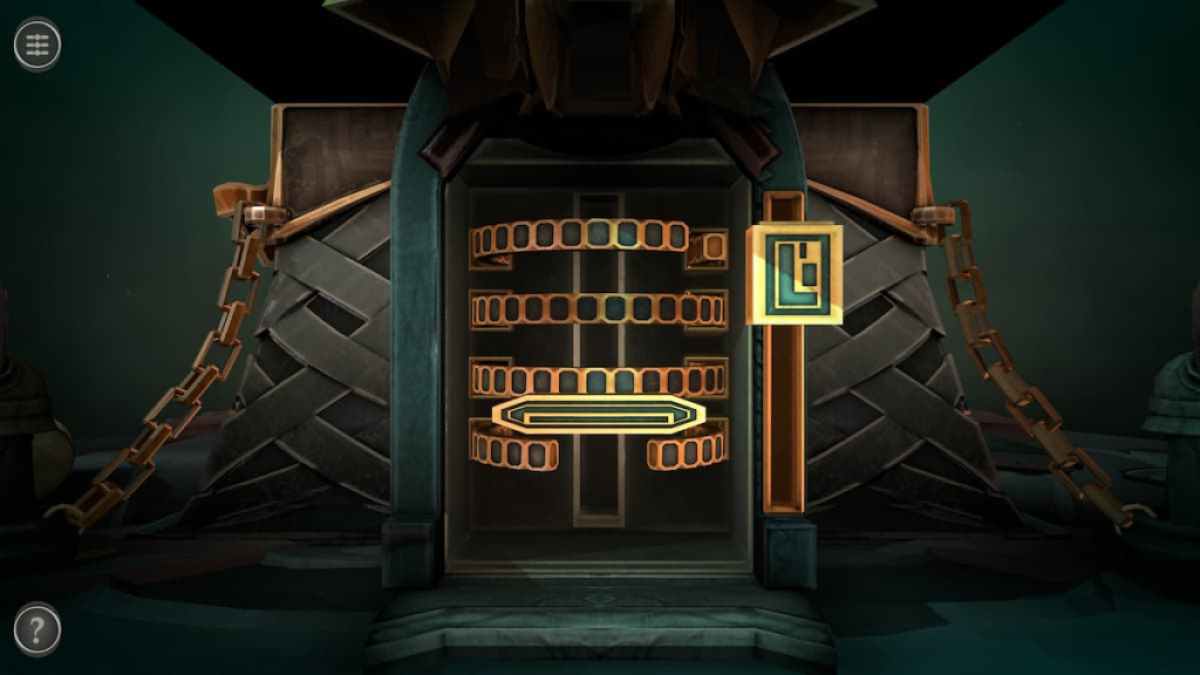
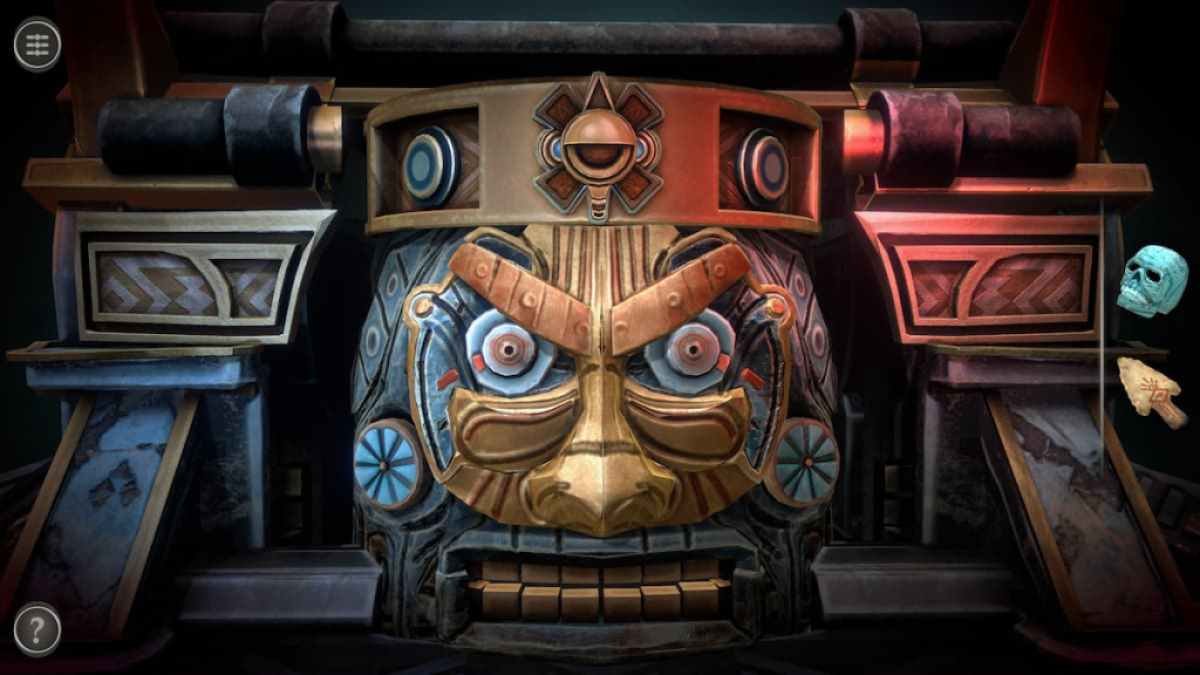
This mystifier involves pressing the button to turn out the instrument panel until the gap in each one is at the front .
Rotating the set until all of their gaps are at the front allow a skidder to be pulled .
Pull the slider to get a Small Figure .

Screenshot by Pro Game Guides
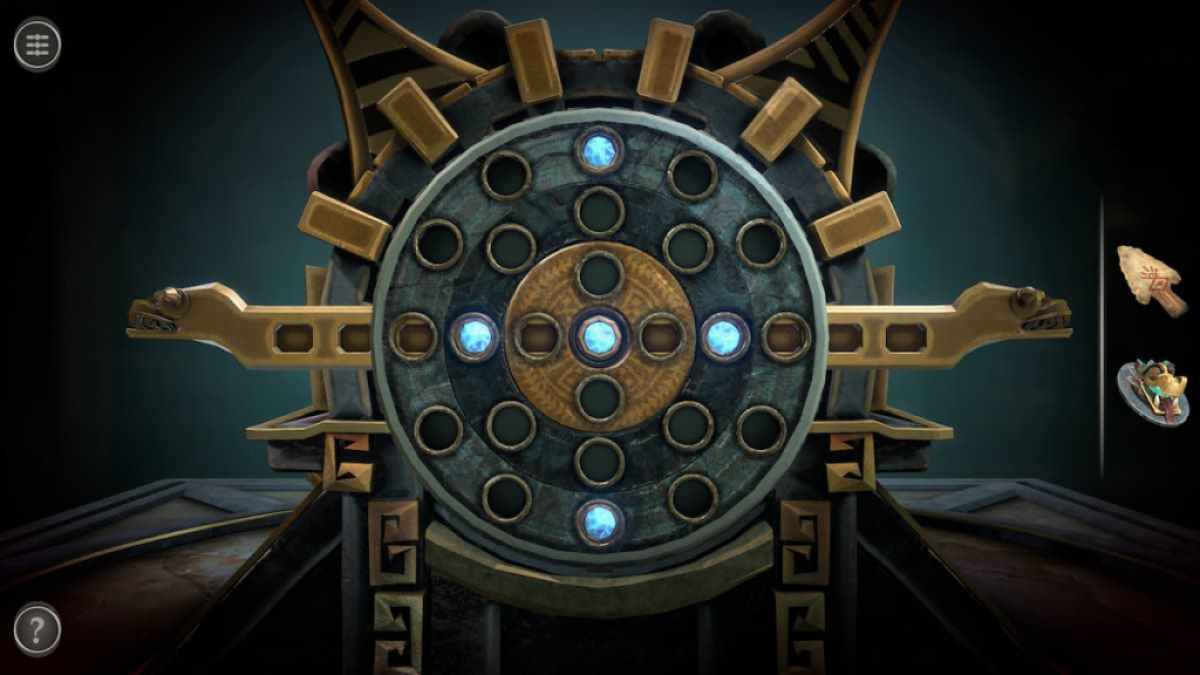
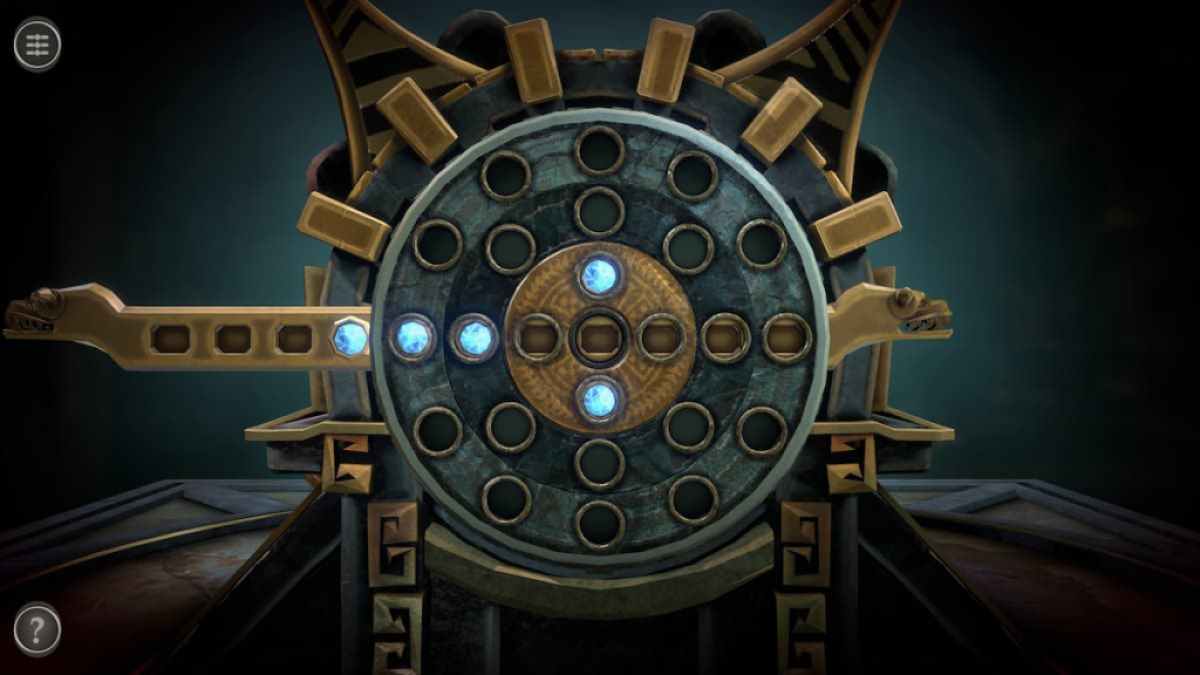
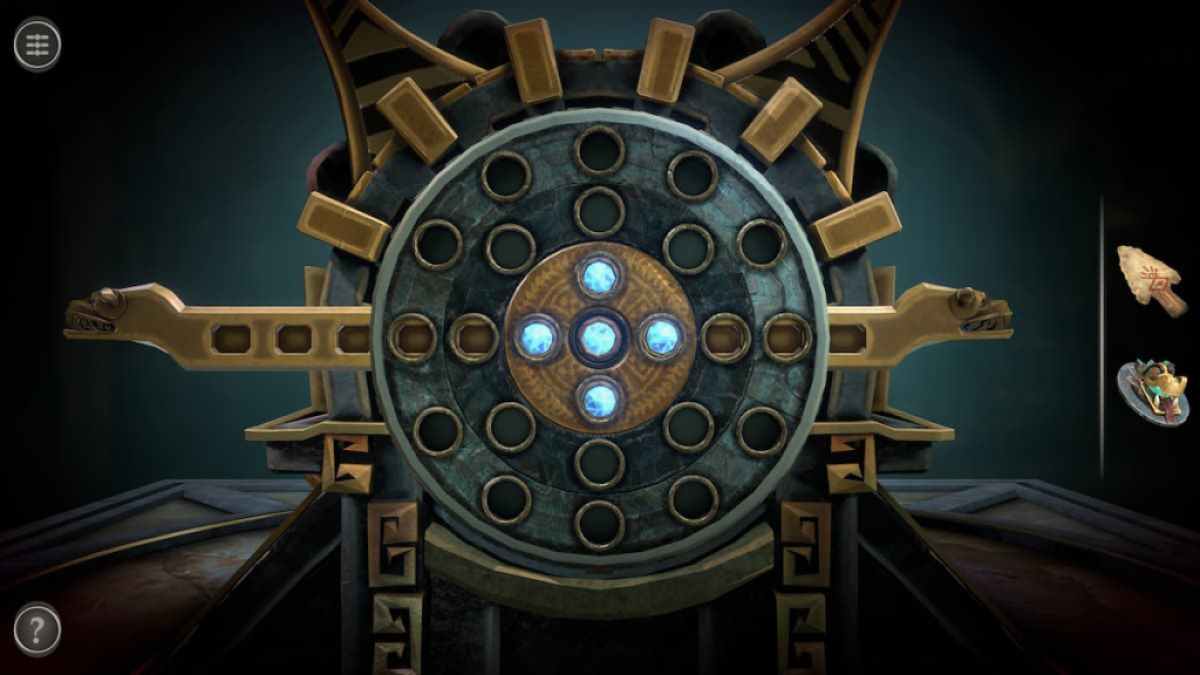
This teaser has four components , let in three go around rings and one golden slider in the center . The rings can all be rotated severally and the luger can be moved back and forth through the center of the puzzler .
The end of the puzzle is to get all of the blueish gemstone in the pith band . I find it easiest to place the gemstone at the top and bottom of the ring , then practice the other two rings to delineate up the remain three gem in the inwardness , pushing them into billet with the slider once they are array .
Completing this teaser gives you a Crystal Skull .
Screenshot by Pro Game Guides
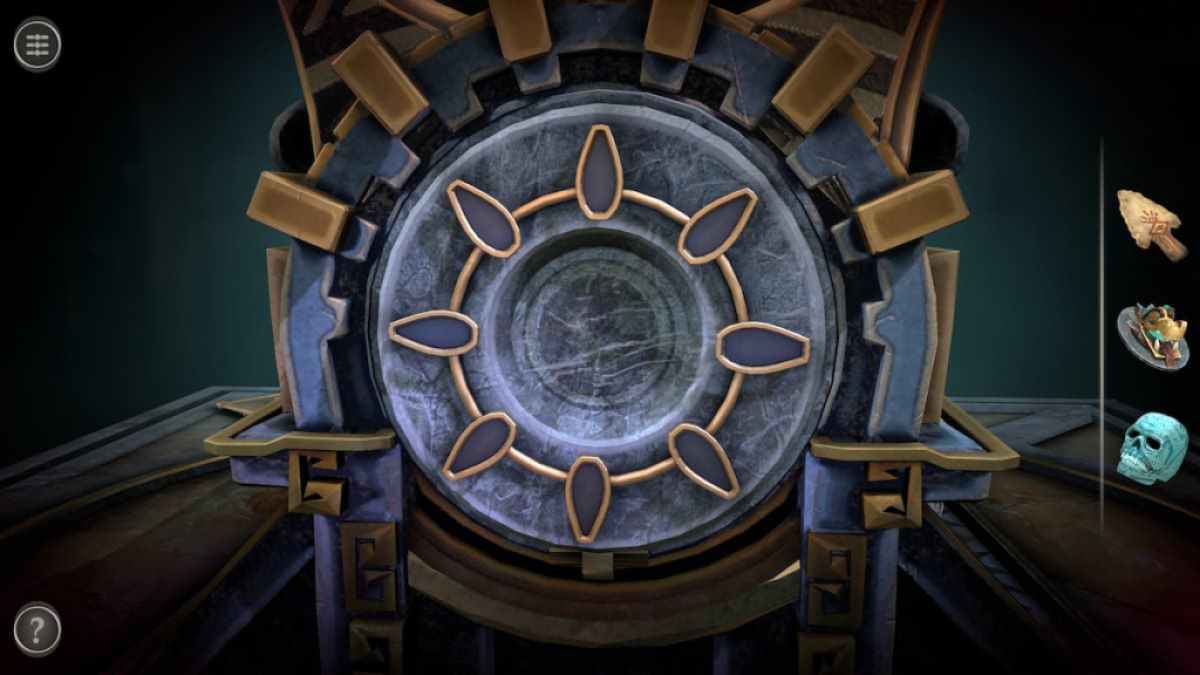
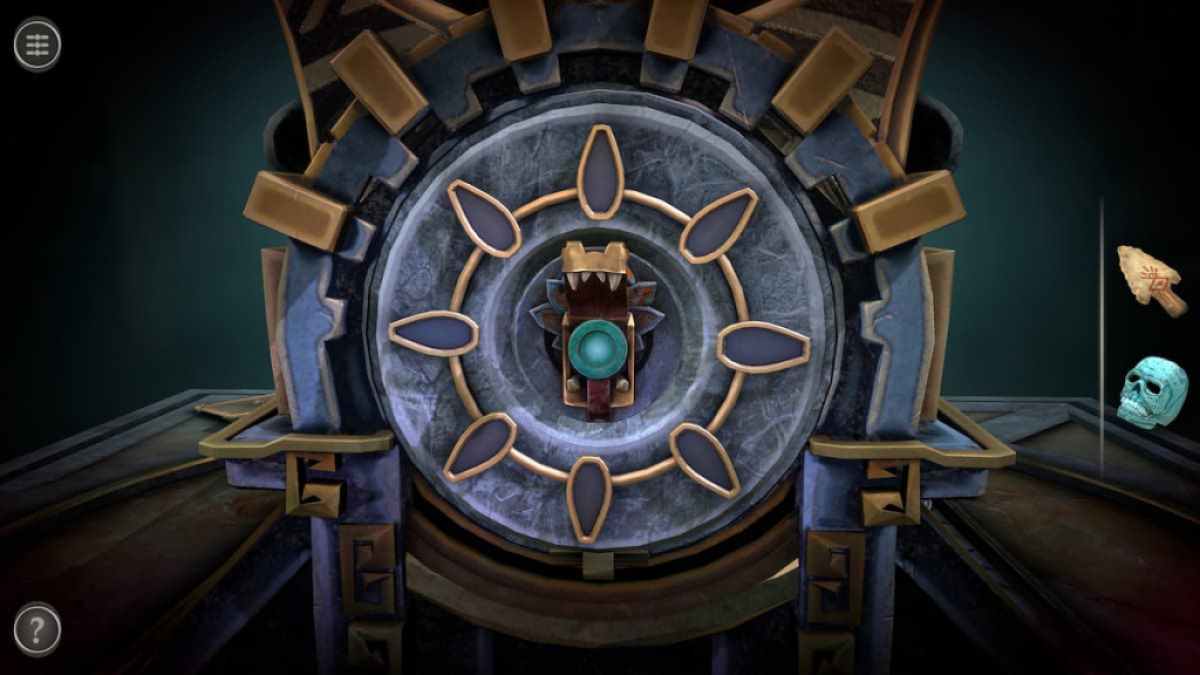
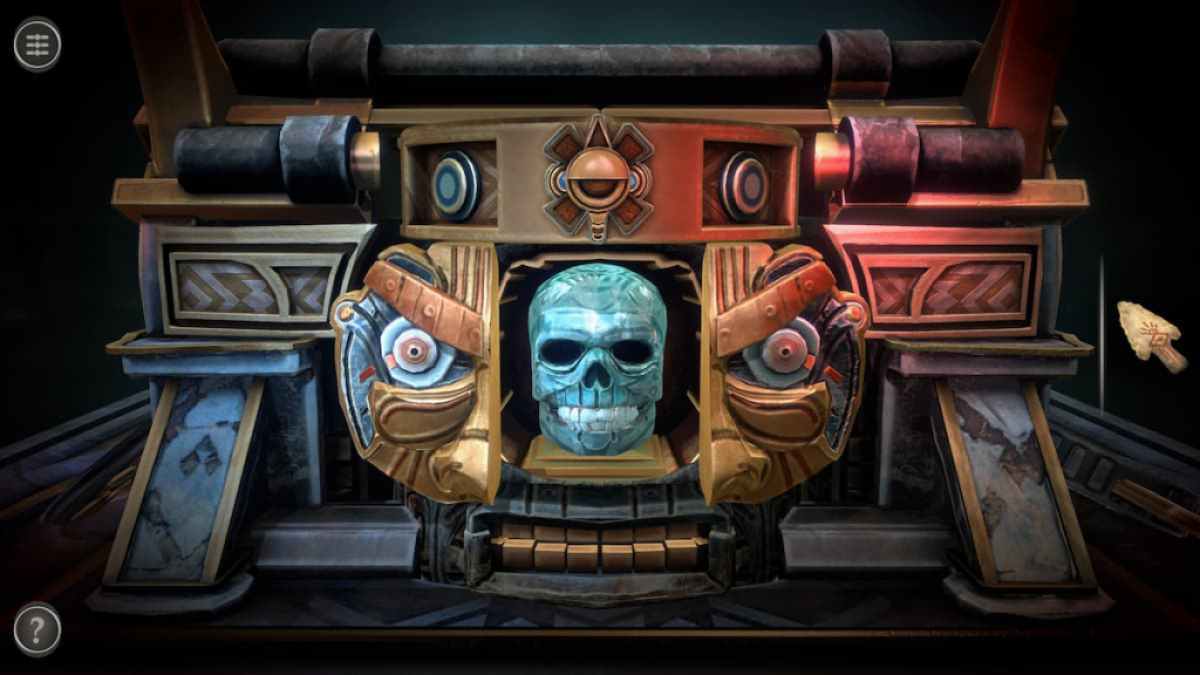
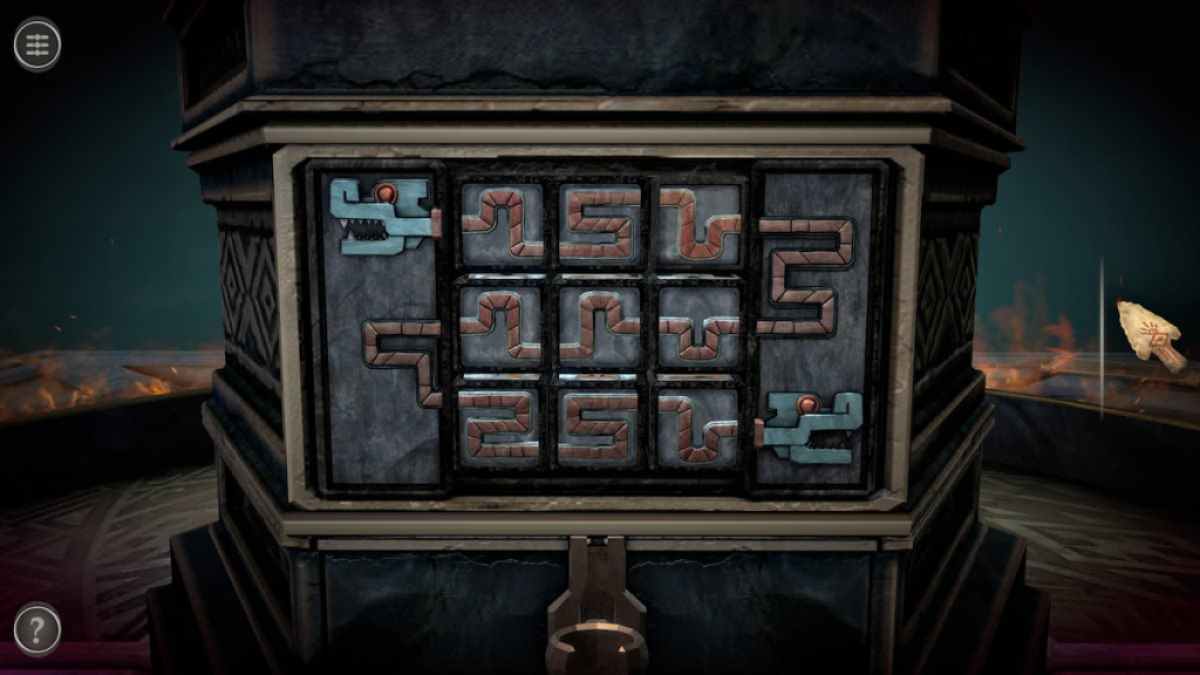
The left side of the box has a circular blank space beleaguer by eight petal shapes .
localize the Small Figure into the space and entreat the button on its mouth to participate the next puzzle .
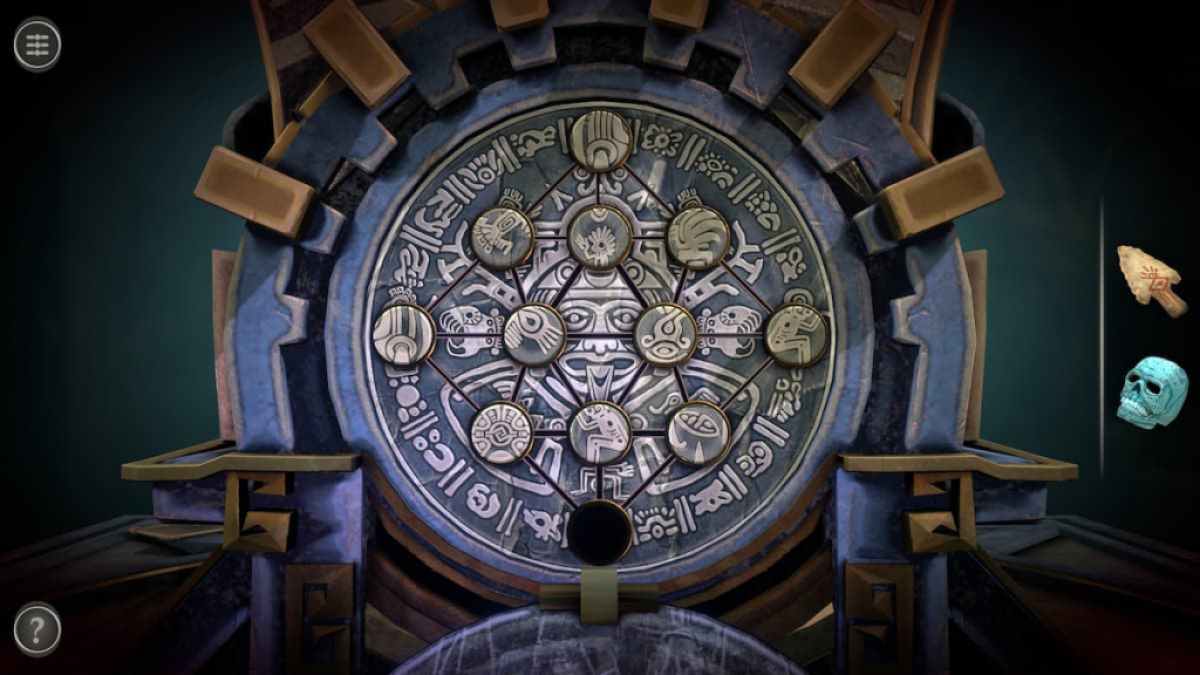
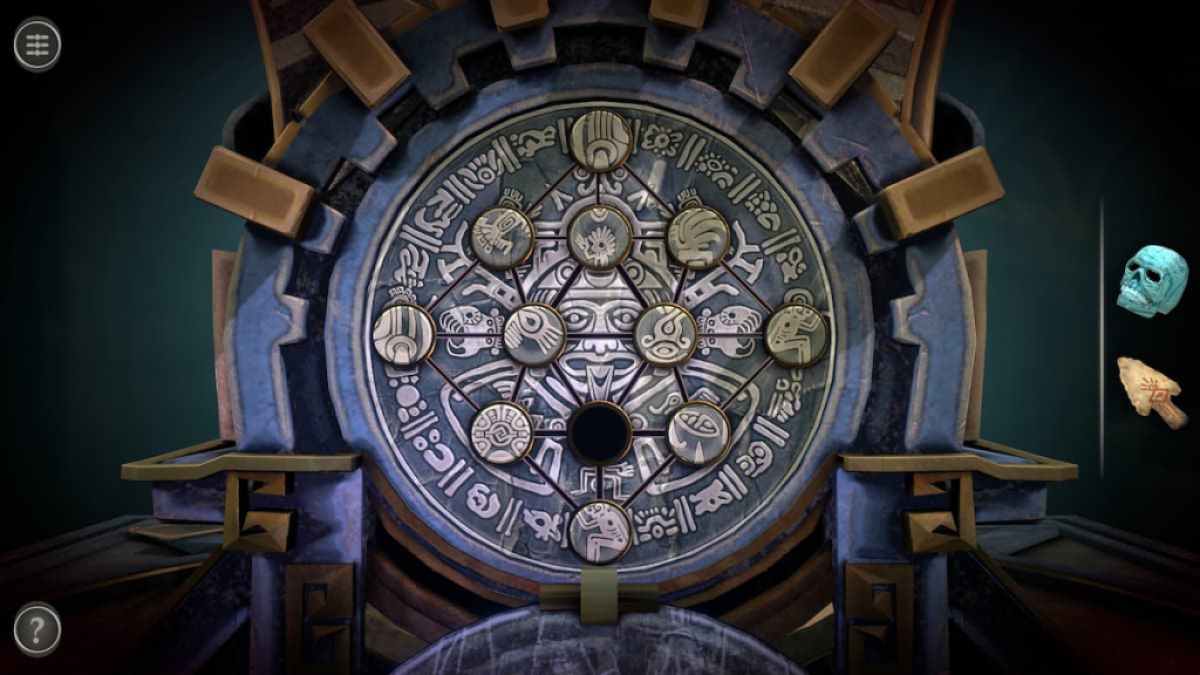
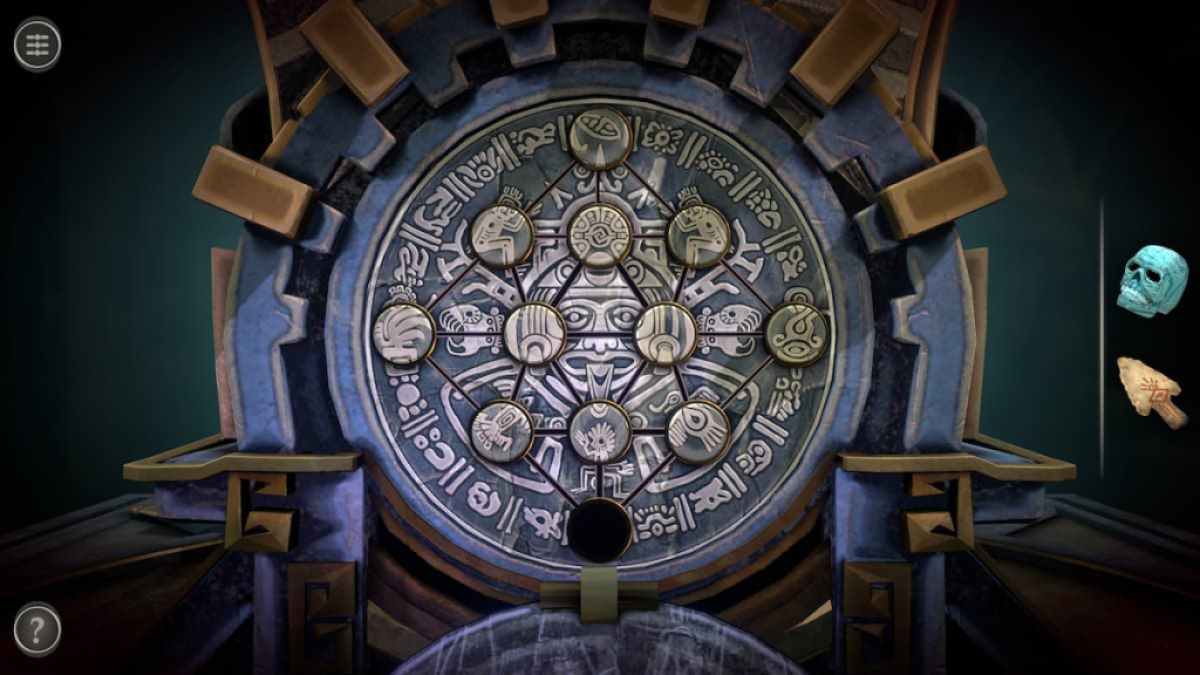
This mystifier involve moving symbols around to dispatch the image behind them .
Screenshot by Pro Game Guides
Tap an object adjacent to the empty outer space to move it to that space .
When the puzzle is make out , the space at the bottom should be empty . The mechanism will afford , give you an Aztec Artifact .
Related : AE Mysteries Picture Perfect walkthrough
Screenshot by Pro Game Guides
Focus on the Tiki Head at the front of the box .
Rotate the mechanism at the top of the head until the eye - shape is at the top .
direct the Aztec Artifact onto the eye .
Screenshot by Pro Game Guides
Rotate the earring until the flushed scrape on the center trace up with the cherry marks on the cheeks .
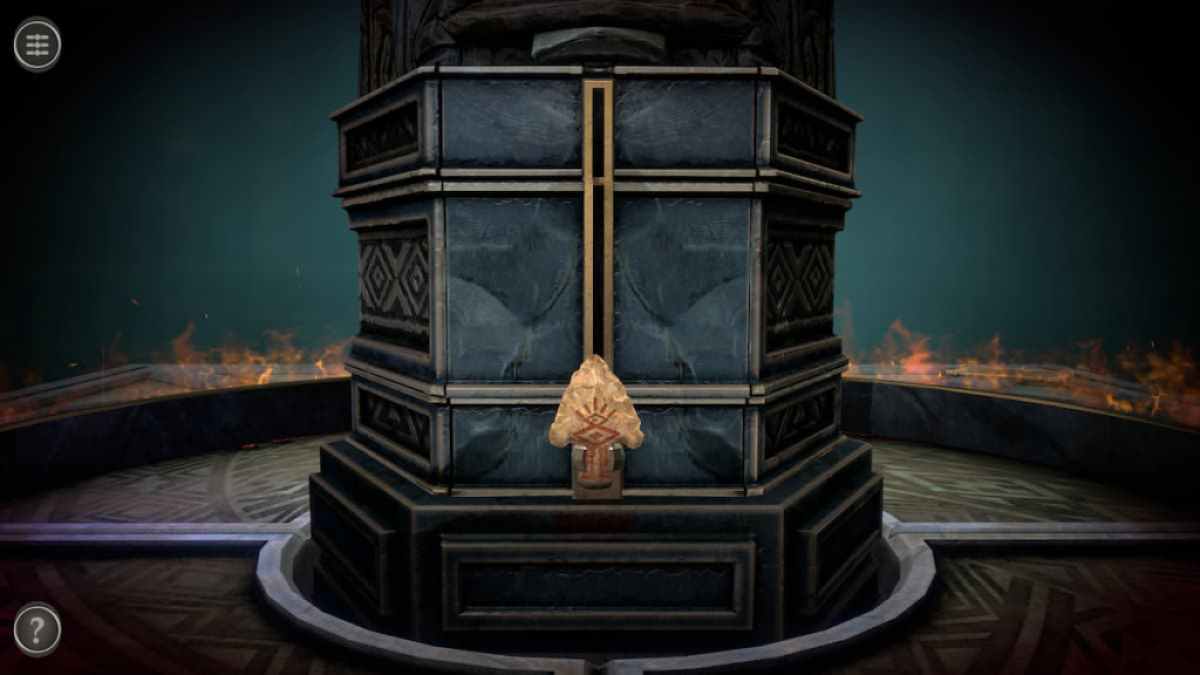
Place the Crystal Skull into the opening night of the Tiki heading to make the boxwood transform .
After placing the Crystal Skull , the Tiki statue turns into a tower .
Screenshot by Pro Game Guides
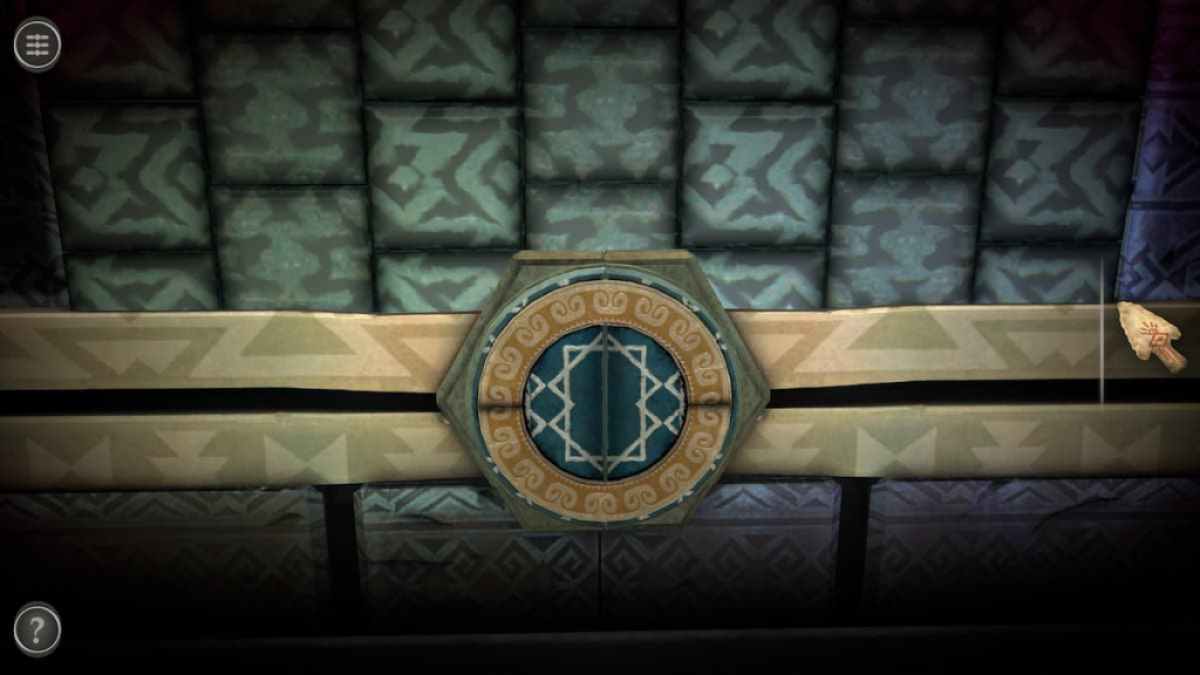
This Ouroboros teaser call for you to switch the tile to connect the two brain .
I found it easy to match the pieces to the outer sides first and fill in the shopping center . A few pieces have two likely matches , but it is easy to check which is right .
Completing the puzzle unlocks a recollective luger .
Screenshot by Pro Game Guides
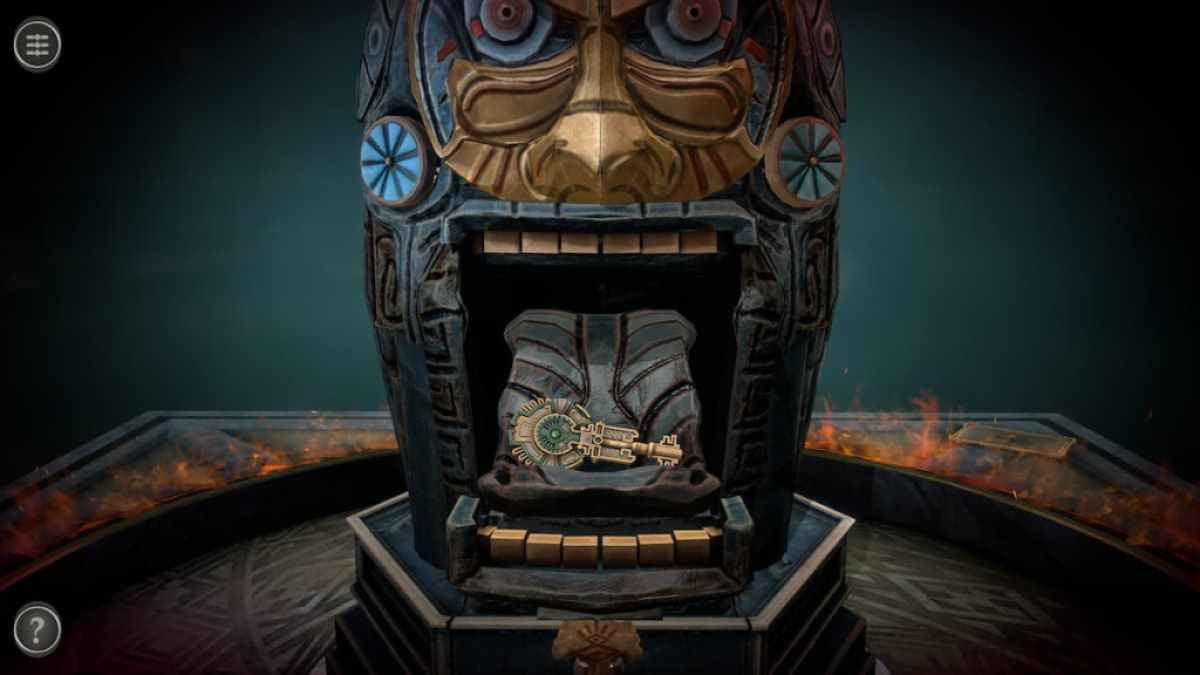
rate the Old Arrow Head into the luger time slot .
Push the Old Arrow Head into the Tiki ’s chin to open its mouth and get an Ancient Key . This completes the 2d room and sends you back to the main one .
For more escape room playfulness , curb out ourSweet Dreams walkthrough – Adventure Escape Mysteriesand otherAdventure Escape Mysteriesguides here on Pro Game Guides .
Screenshot by Pro Game Guides

Screenshot by Pro Game Guides
Screenshot by Pro Game Guides
Screenshot by Pro Game Guides

Screenshot by Pro Game Guides
Screenshot by Pro Game Guides
Screenshot by Pro Game Guides
Screenshot by Pro Game Guides
Screenshot by Pro Game Guides
Screenshot by Pro Game Guides
Screenshot by Pro Game Guides
Screenshot by Pro Game Guides
Screenshot by Pro Game Guides
Screenshot by Pro Game Guides
Screenshot by Pro Game Guides
Screenshot by Pro Game Guides
Screenshot by Pro Game Guides

Screenshot by Pro Game Guides
Screenshot by Pro Game Guides
Screenshot by Pro Game Guides
Screenshot by Pro Game Guides
Screenshot by Pro Game Guides
Screenshot by Pro Game Guides
Screenshot by Pro Game Guides

Screenshot by Pro Game Guides
Screenshot by Pro Game Guides
Screenshot by Pro Game Guides
Screenshot by Pro Game Guides
Screenshot by Pro Game Guides
Screenshot by Pro Game Guides
Screenshot by Pro Game Guides
Screenshot by Pro Game Guides
Screenshot by Pro Game Guides
Screenshot by Pro Game Guides

Screenshot by Pro Game Guides
Screenshot by Pro Game Guides
Screenshot by Pro Game Guides
Screenshot by Pro Game Guides
Screenshot by Pro Game Guides

Screenshot by Pro Game Guides
Screenshot by Pro Game Guides

Screenshot by Pro Game Guides
Screenshot by Pro Game Guides
Screenshot by Pro Game Guides
