sweep up on your puzzler - work out acquirement .
boxwood Lost Fragments is a story - driven decimal point - and - get through escape room biz perfect for puzzle lovers and detective wannabes . In this guide , I ’ll walk you through the final one-half of Boxes Lost Fragments ' Chapter 4 .
Boxes Lost Fragments Chapter 4 Fractus part 2 walkthrough
This templet covers the third and fourth rooms of Chapter 4 , plus the teaser in the main room at the end of the chapter . Those looking for helper with another level can conform to the links provided below to visit any other part of the walkthrough .
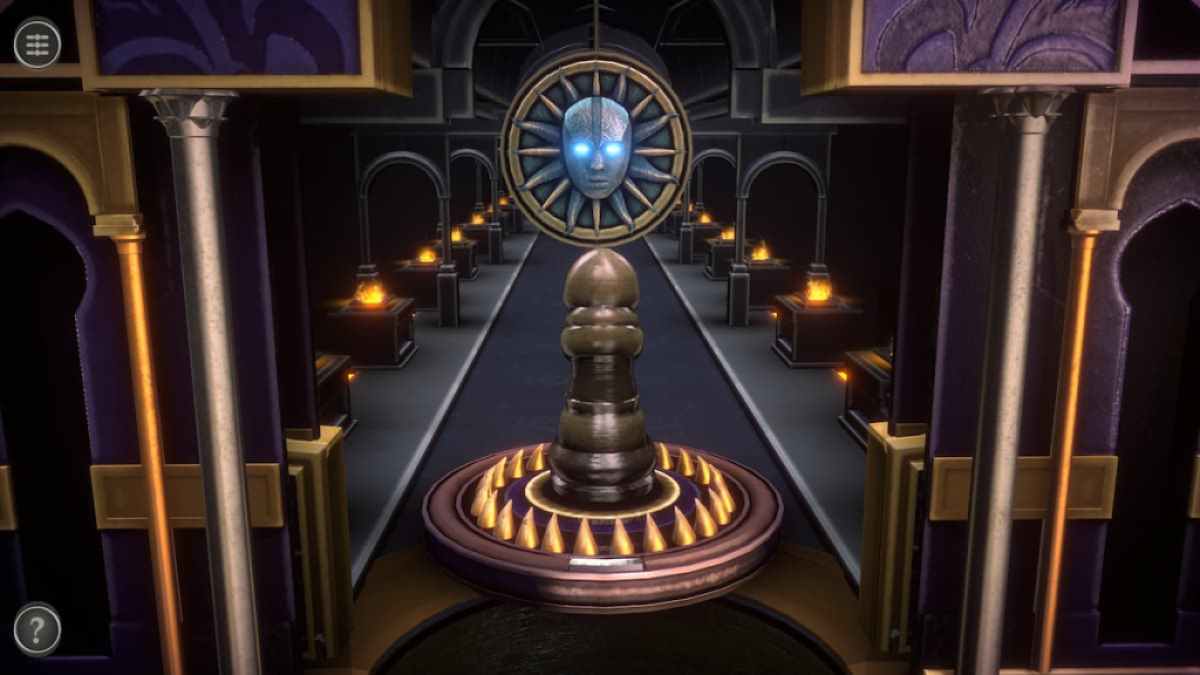
Room three puzzles
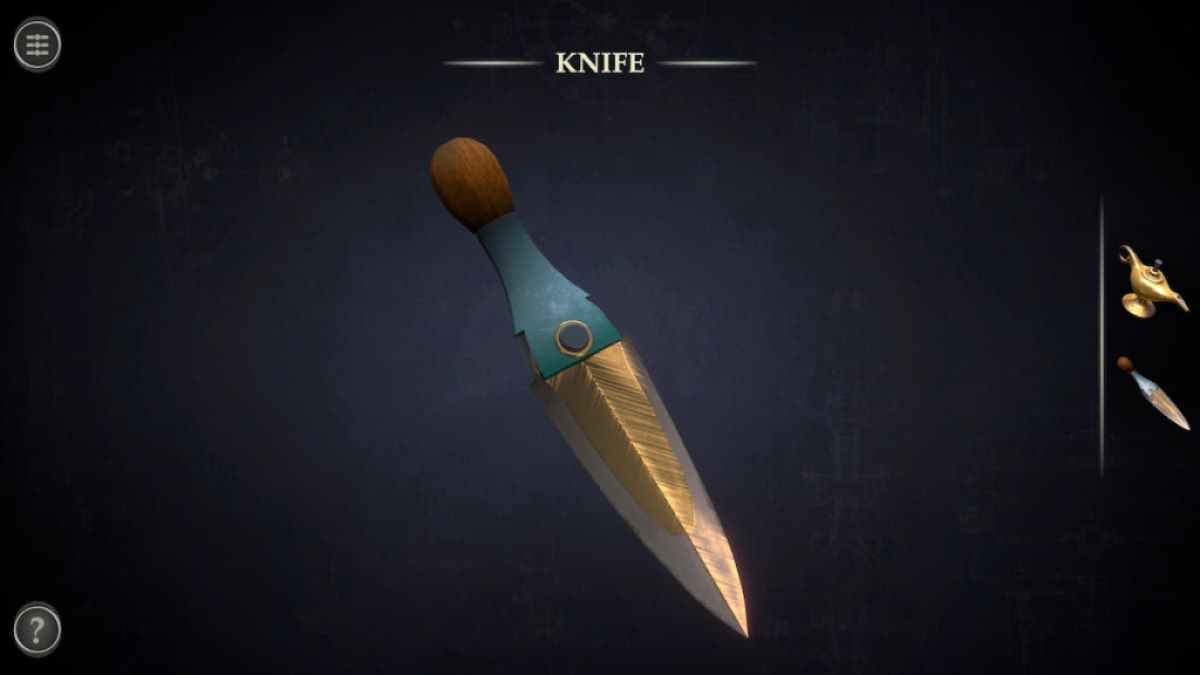
The third way has a desert base , with a box in the centre , plus a lamp , a tongue , and a lantern around it . Pick up the Oil Lamp and tear the Knife from the earth to add them to your stock-taking .
launch the Knife in your inventory . Press the black push button on it to get a key .
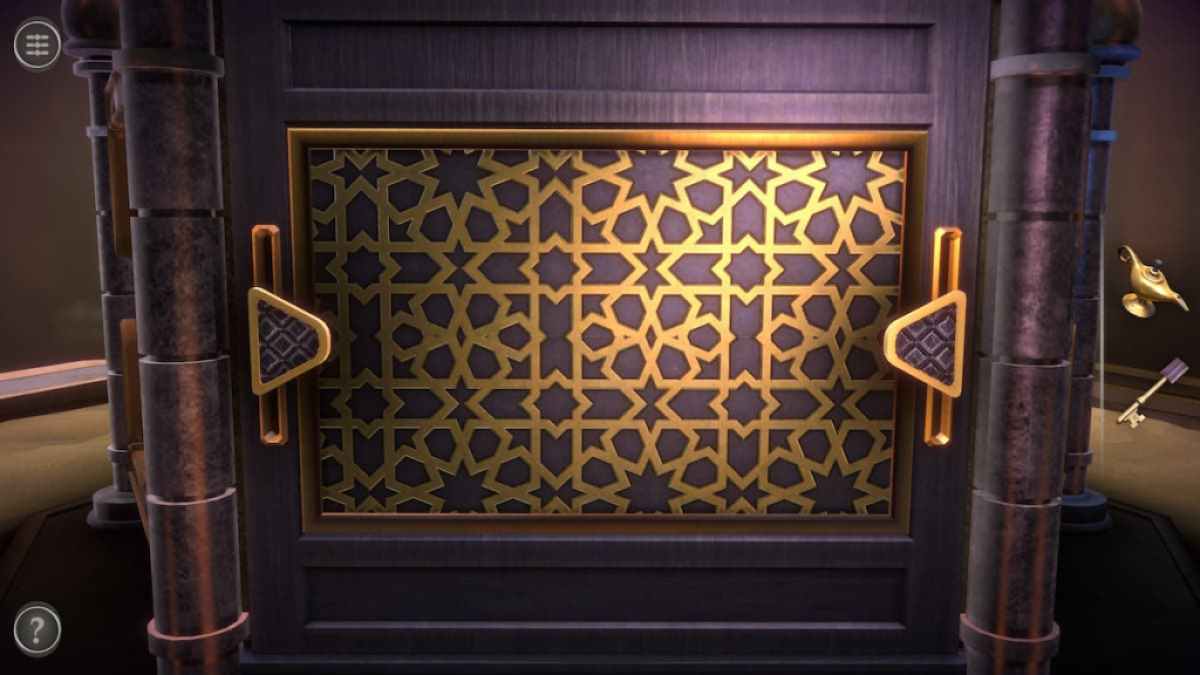
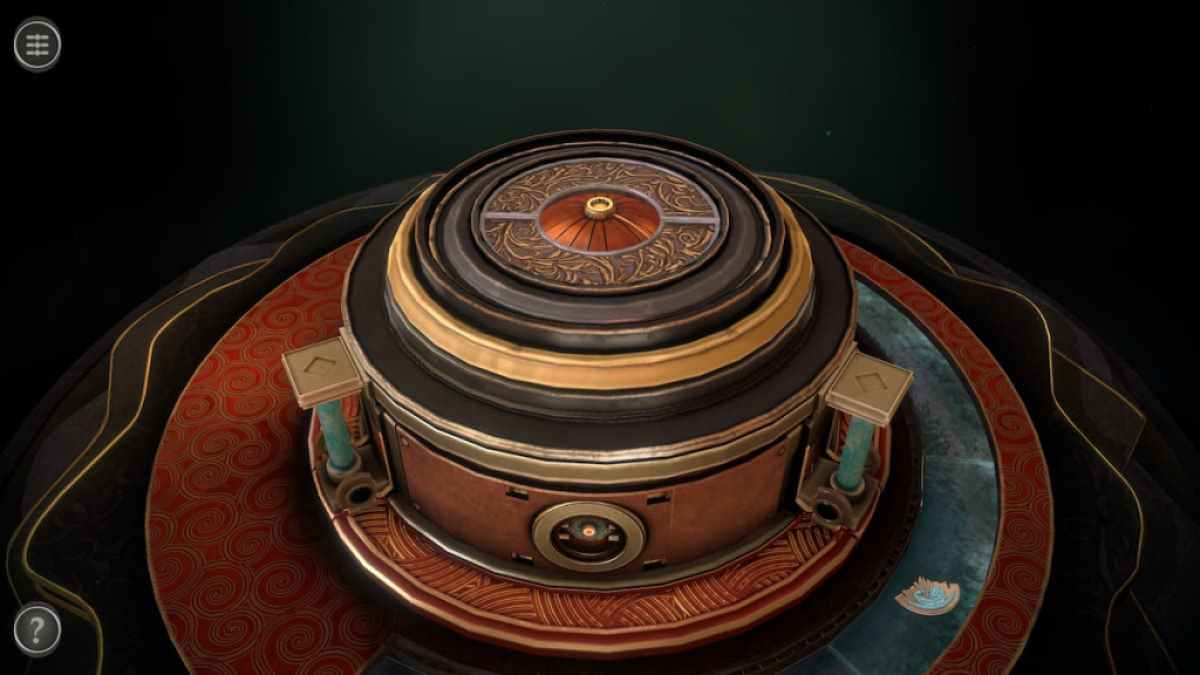
Begin with this luger puzzle on the side of the box .

Move both sliders to the top to give up the bottom panel .
Move both slider to the bottom to unlock the top panel and break a symbol - matching puzzle .
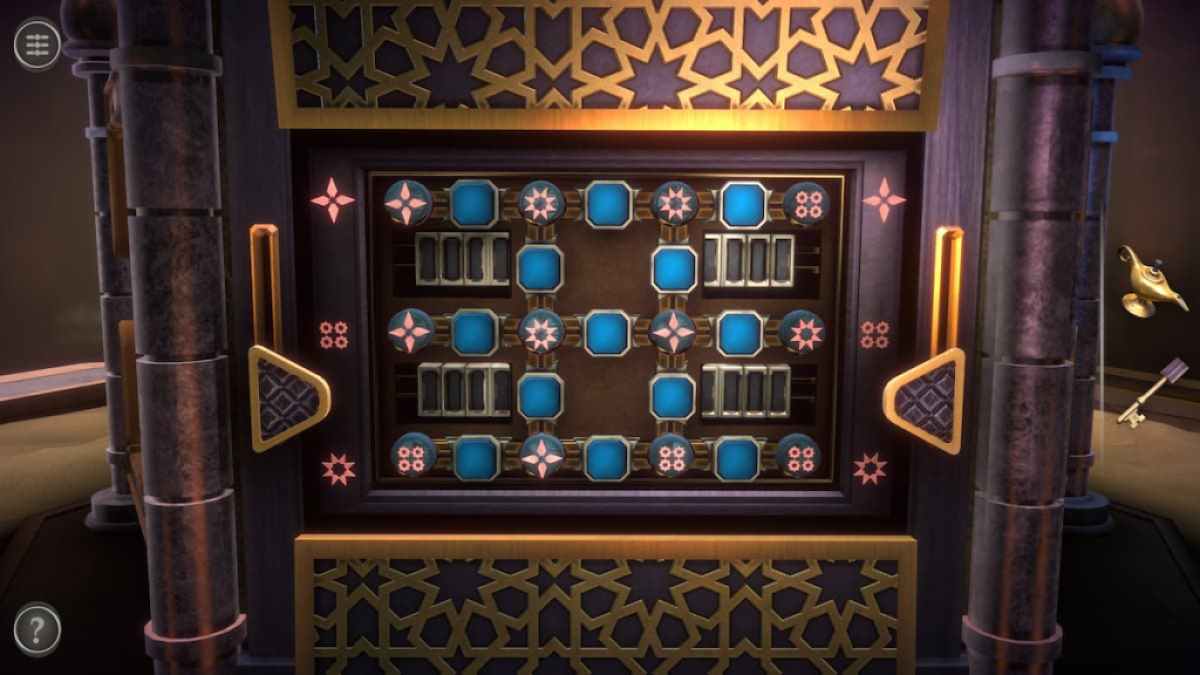
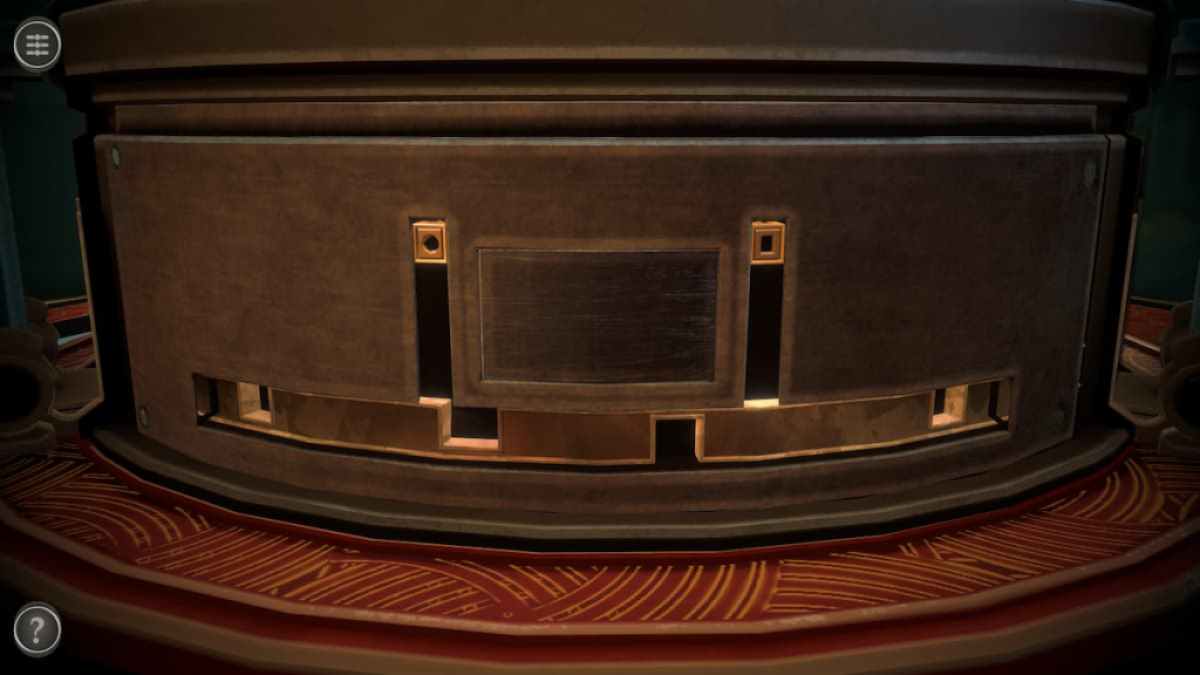
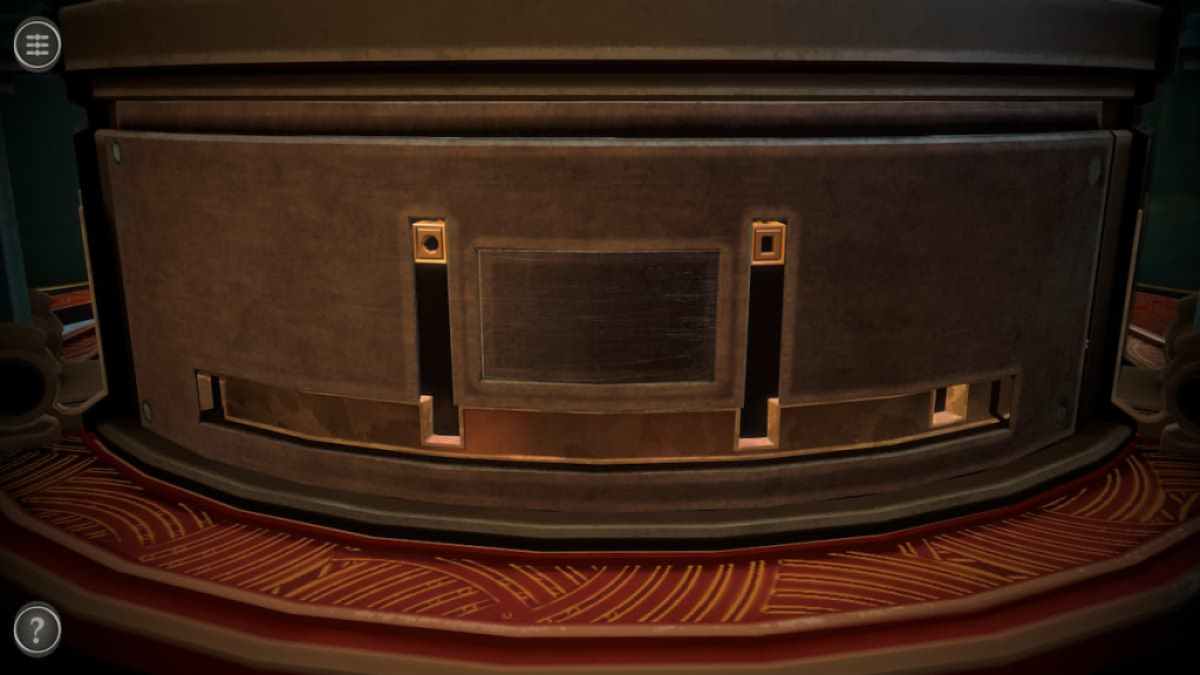
The goal of this puzzle is to fill each row with pieces containing the symbol on either end of it . The blue button in the row swap the piece they are between horizontally , while the grim buttons outside of the row swap the pieces between them vertically . I found that the easiest way to do this teaser was to fill in the top course corners first , then the top wrangle centerpiece , and reduplicate this physical process on the middle and bottom row .

Screenshot by Pro Game Guides
Completing the matching mystifier will stream out two piles of treasure . One hold a Scorpion pattern while the other contains a Coin .
This purple roof mystifier has a hexagon blank space in its center .
Looking at the Scorpion Figure in your inventory reveals a hexagon nog on its stomach . Place it here and slip it upward to unlock a gear mechanism .
Screenshot by Pro Game Guides
whirl the gear to give the top of the boxful , which take a Metal Ring .
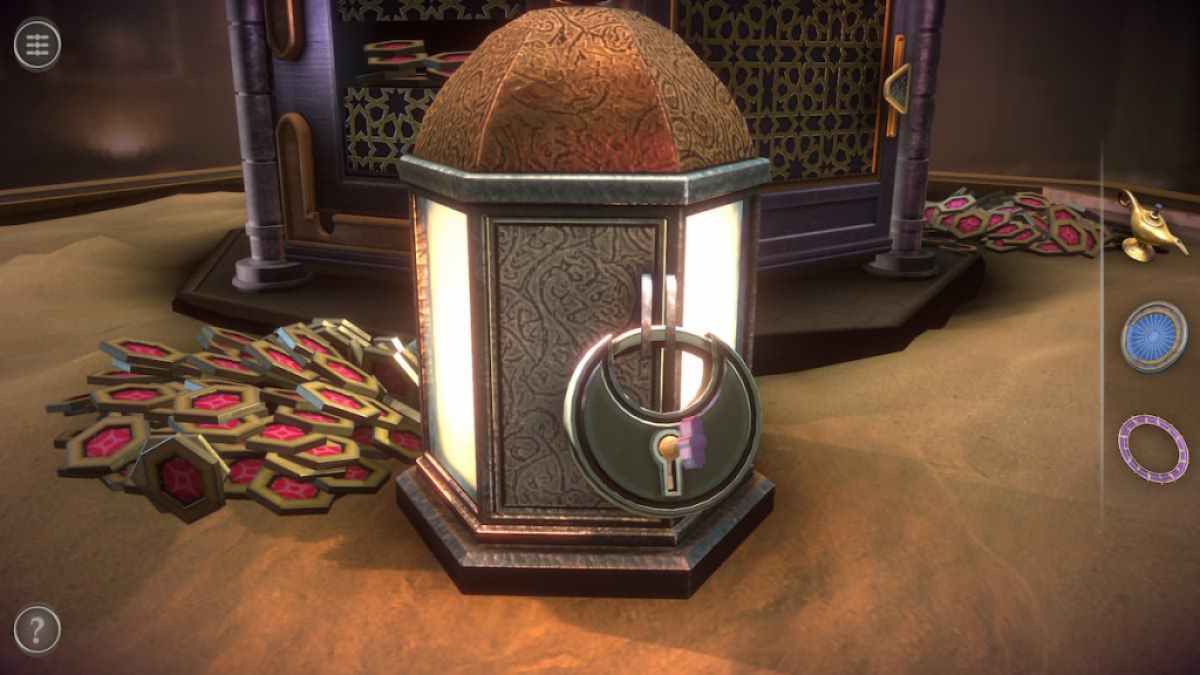
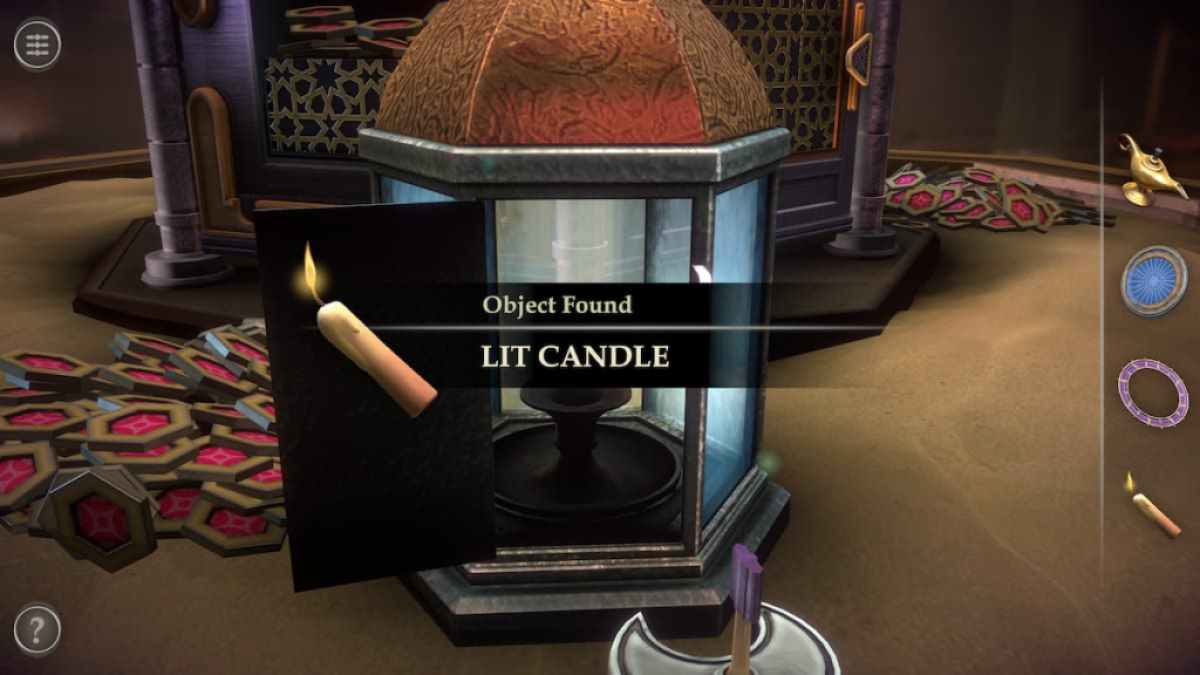
The Key from the tongue can be placed into the lantern ’s lock .
splay it and enter the lantern doorway to get a Lit Candle .
Screenshot by Pro Game Guides
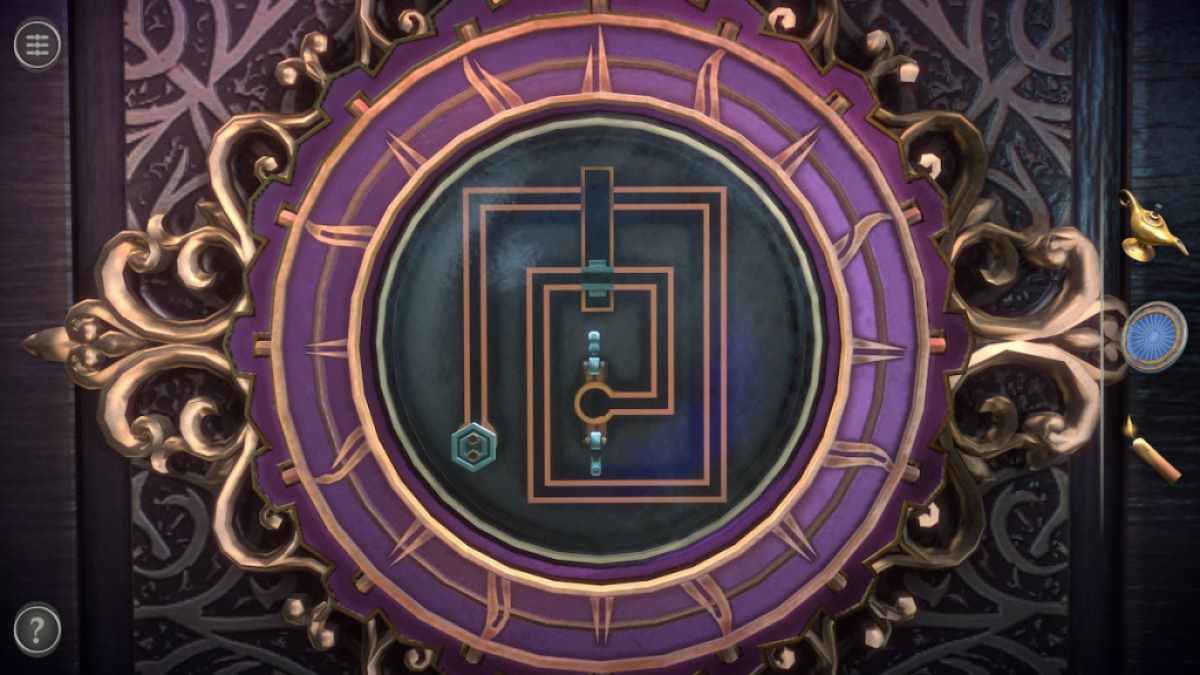
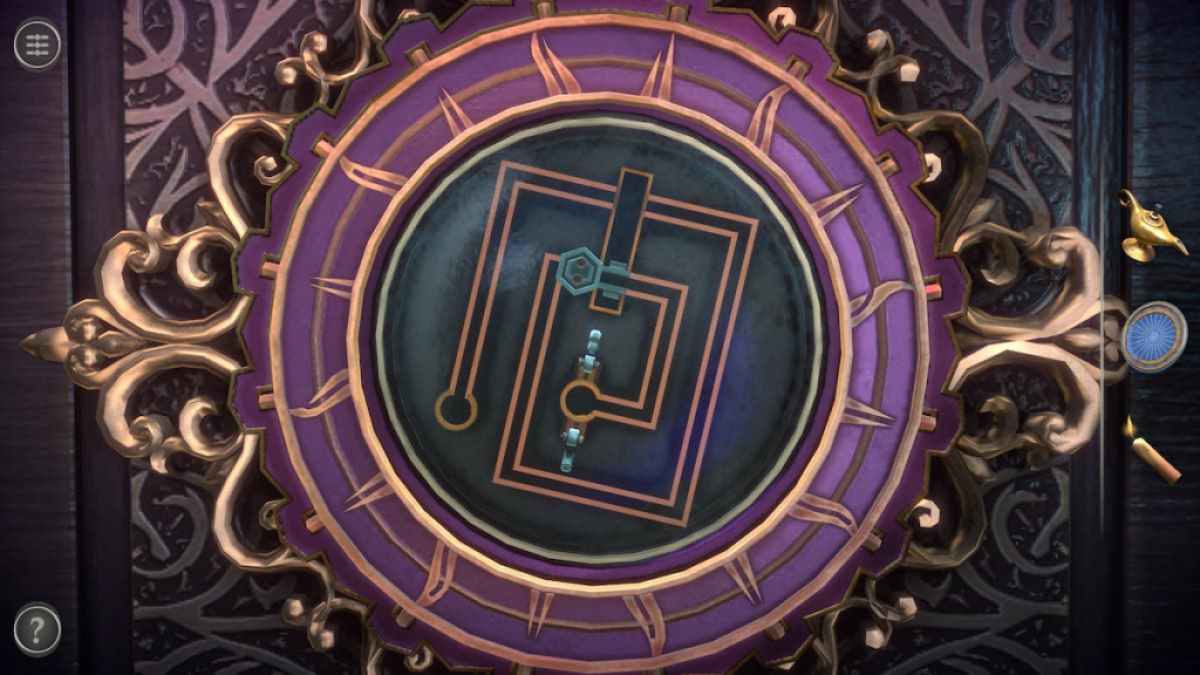
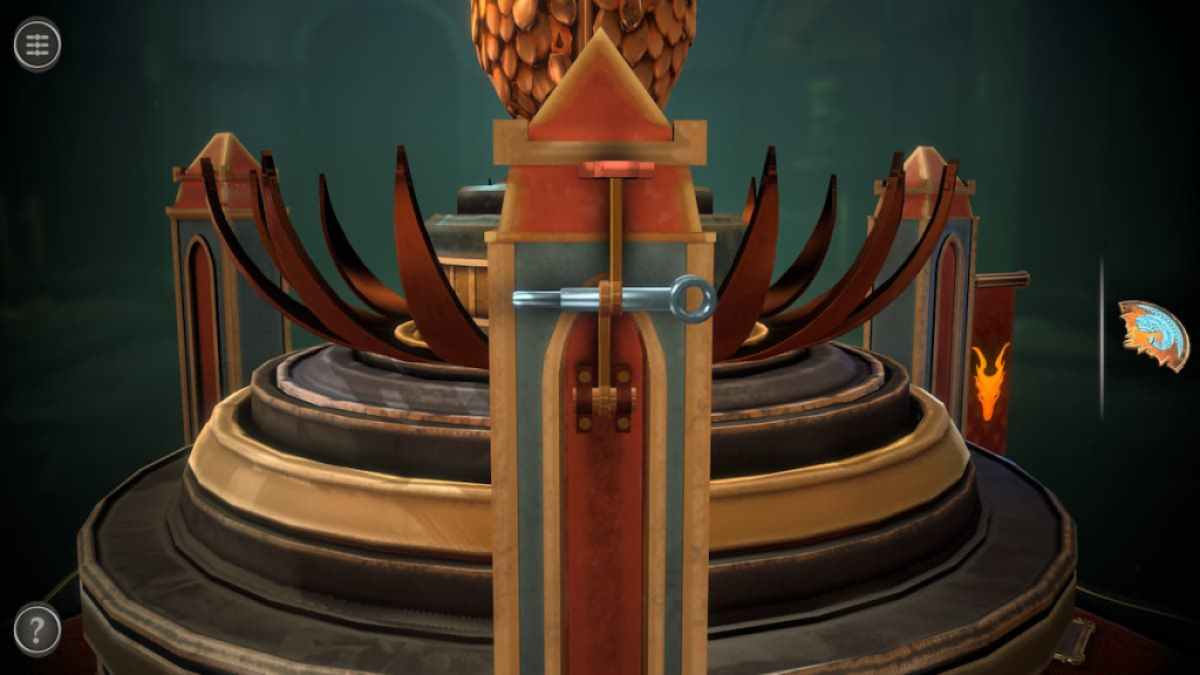
Focus on the red ball at the front of the box seat .
grade the Metal Ring around it to reveal a gravity puzzle .
The gear at the start needs to be moved to the center by rotate the teaser so that it falls down the path .

Screenshot by Pro Game Guides
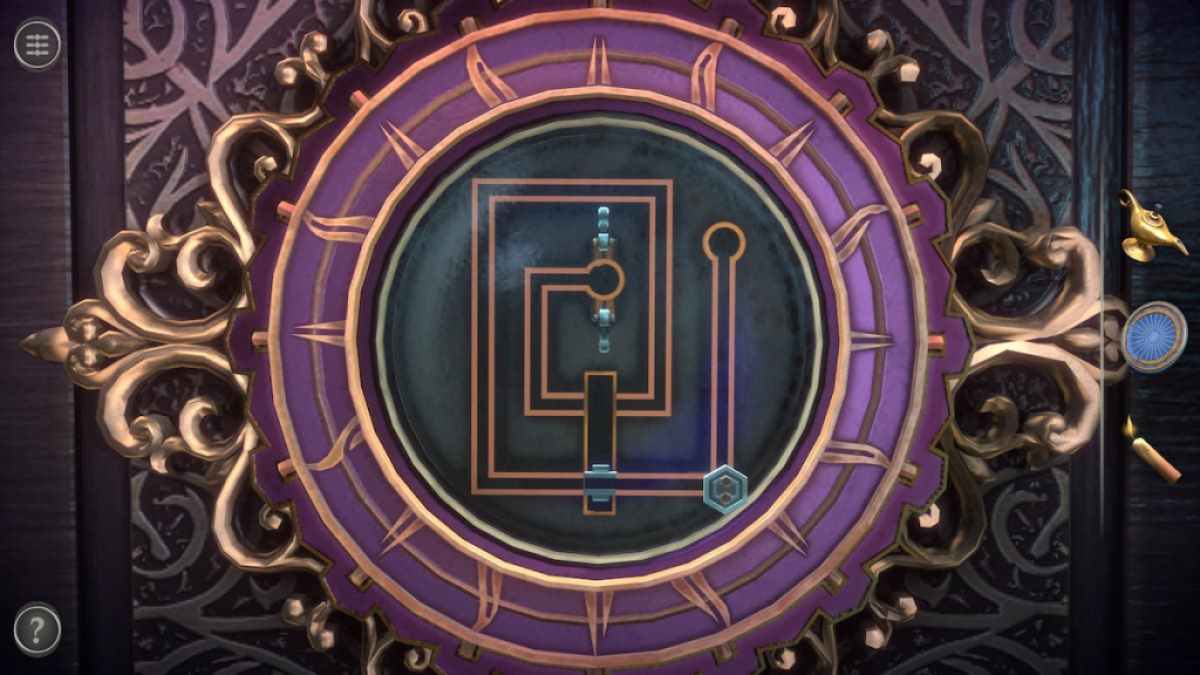
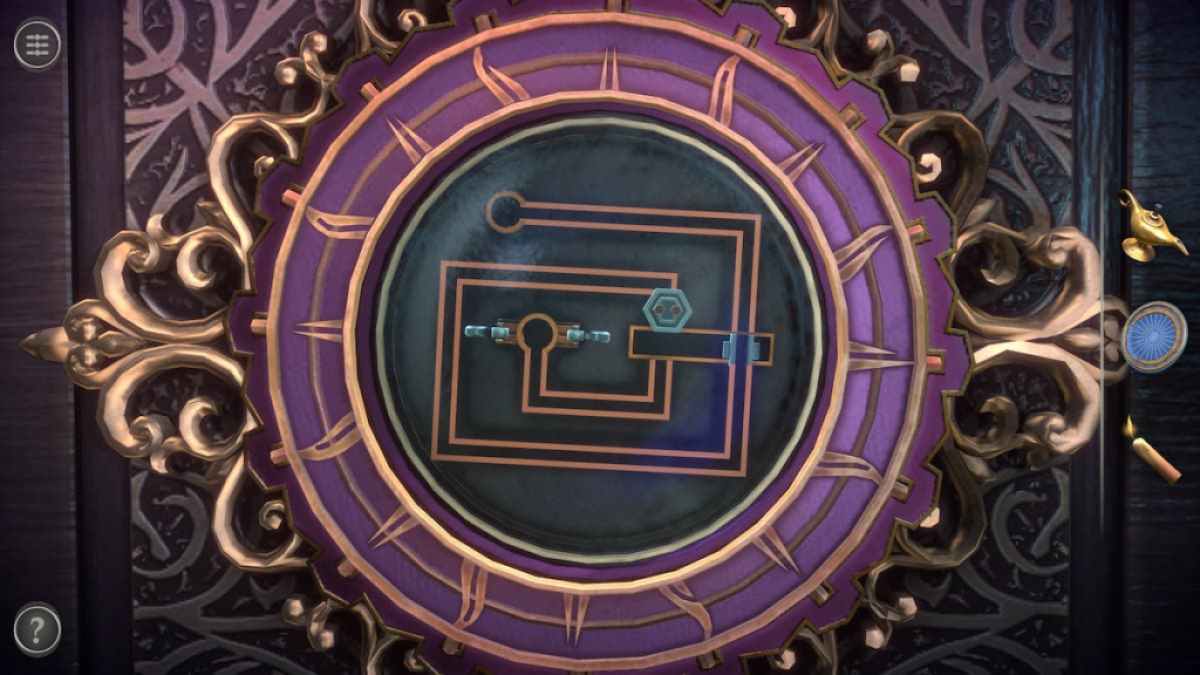
The tricky part comes when you ’re quick to push it towards the center , but the blue mobile pathway is still at the start . To get past this section , get by drop the gear as far down as it can go .
Then , rotate the puzzler so that the pathway falls into place . The gear should be held in place by the nearby bulwark .
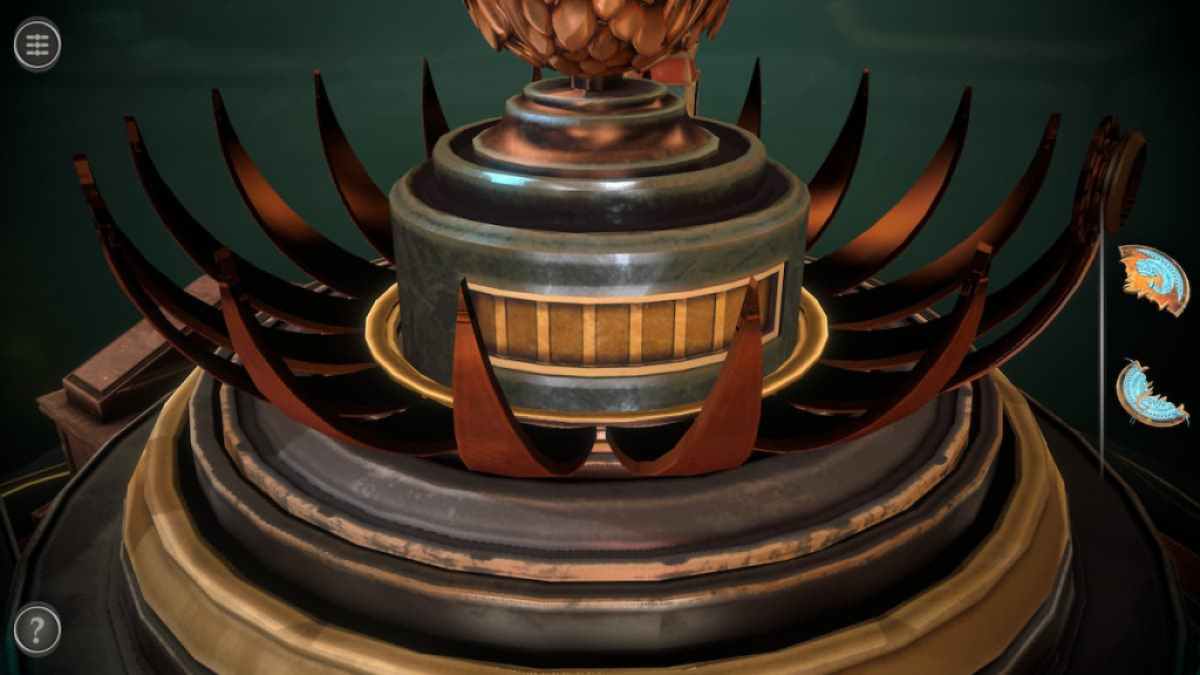
Now the gear can be moved easy into the center of the puzzle .
Screenshot by Pro Game Guides
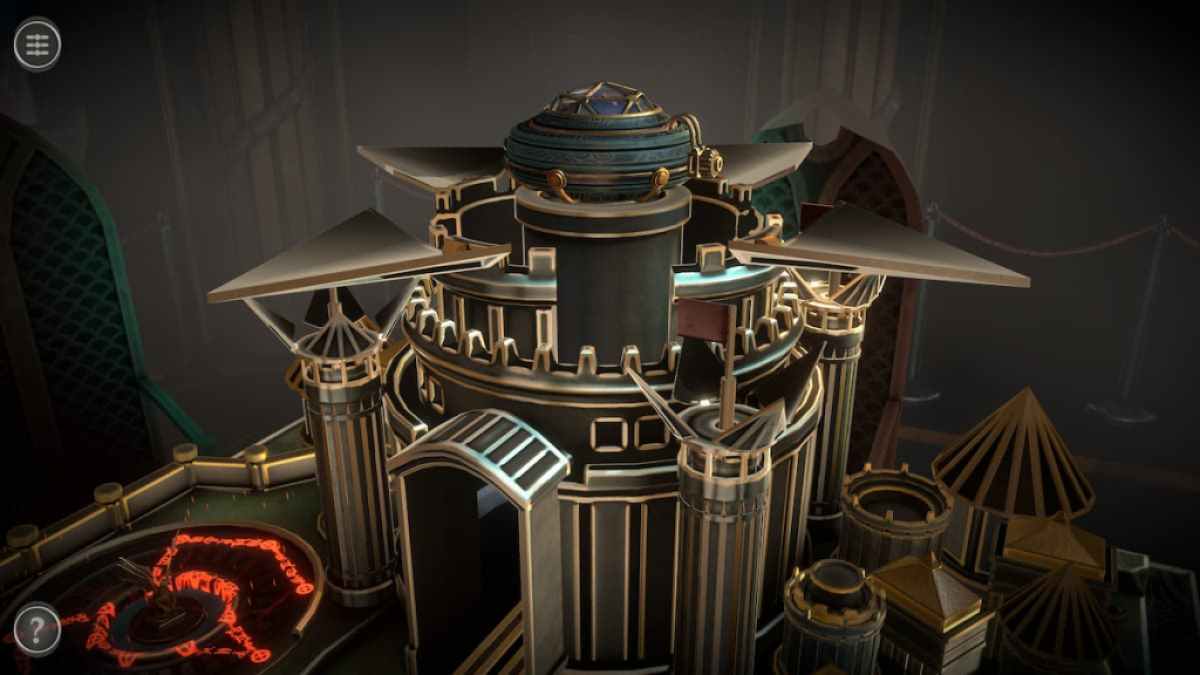
This will unlock the boxwood , transforming it into a synagogue - like body structure .
Related : New York Mysteries 5 Walkthrough – Chapter 2 , Part 1
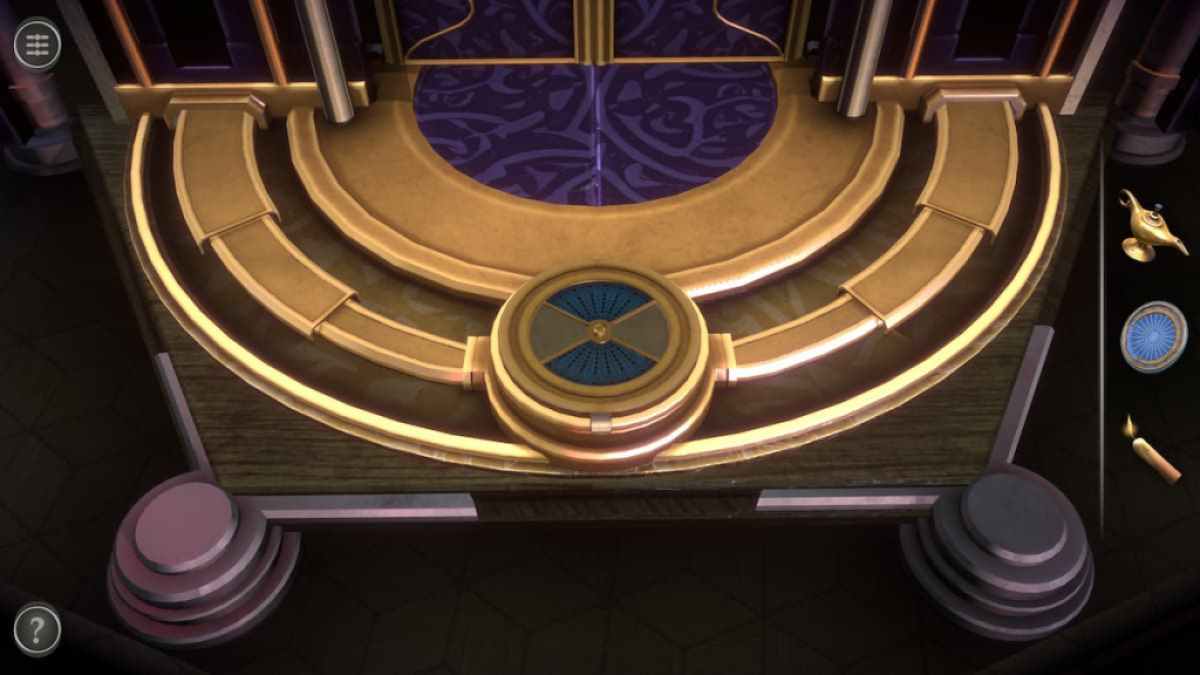
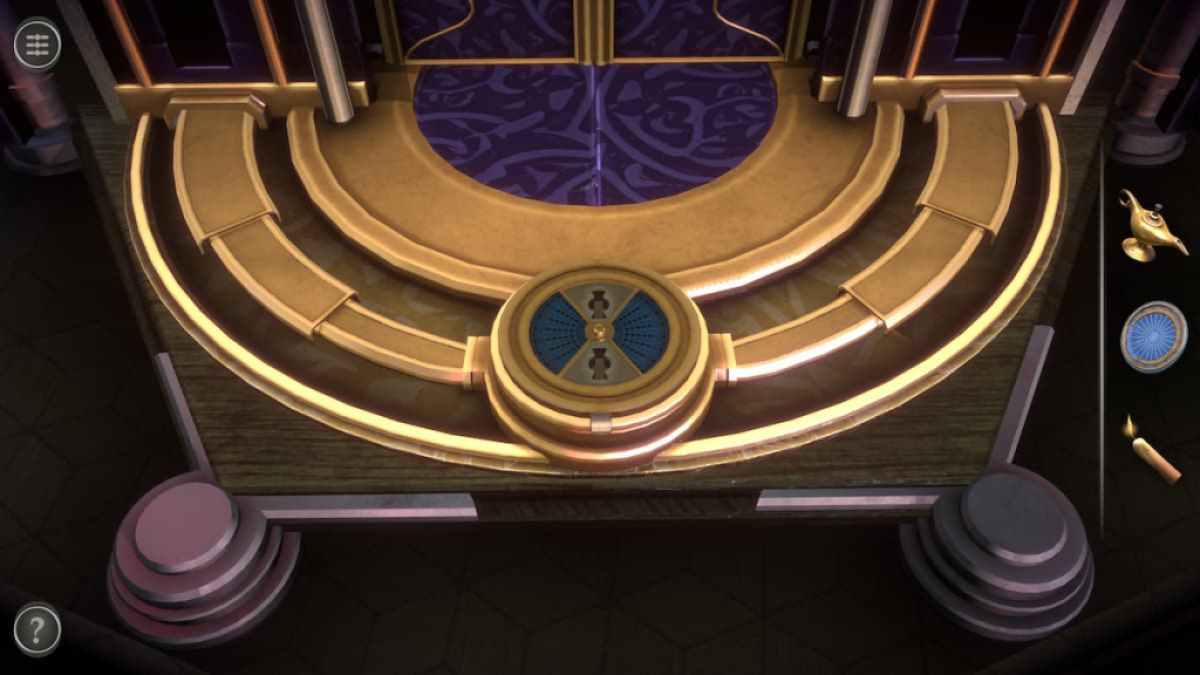
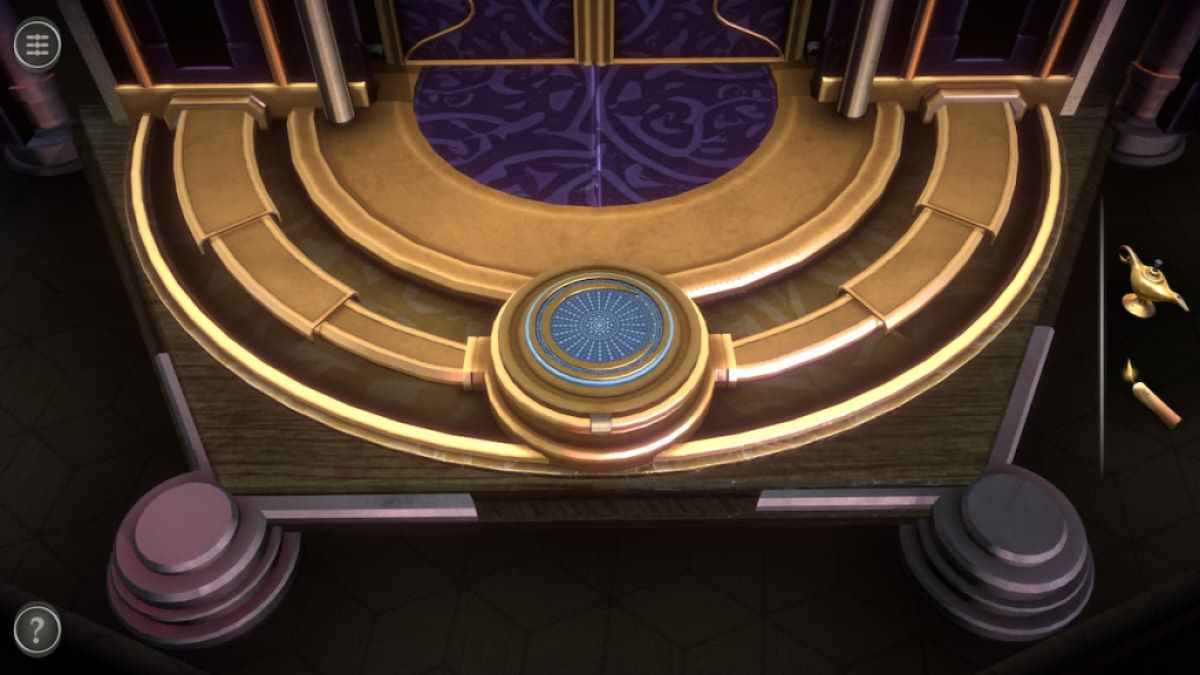
center on the circular political program in front of the mask .

Screenshot by Pro Game Guides
splay it so that the blue triangles are on the left field and correct .
Place the Coin on top of it to give up the section .
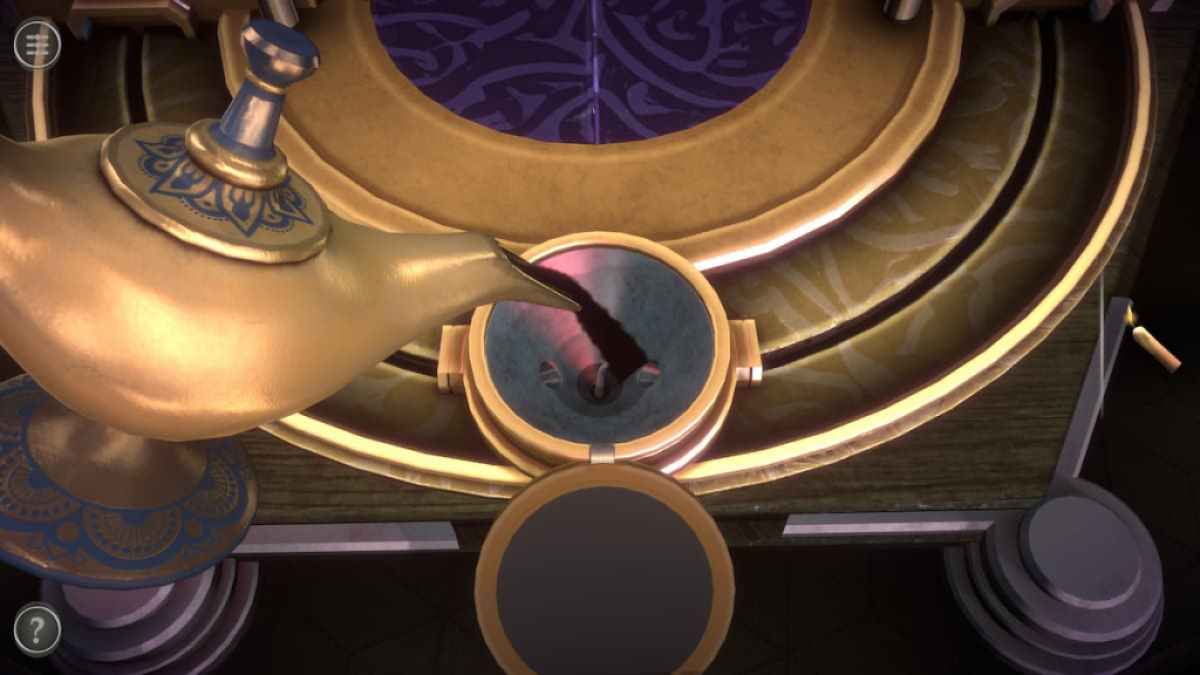
Use the Oil Lamp to fill the container with oil .

Screenshot by Pro Game Guides
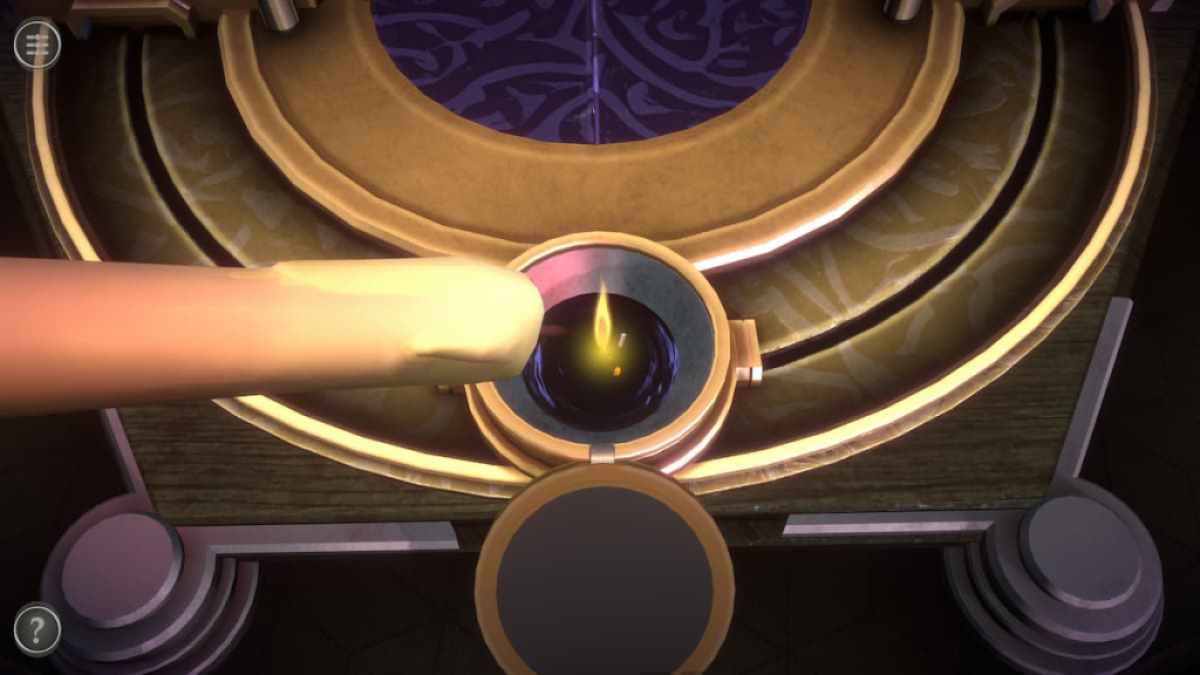
light up the oil with the Lit Candle .
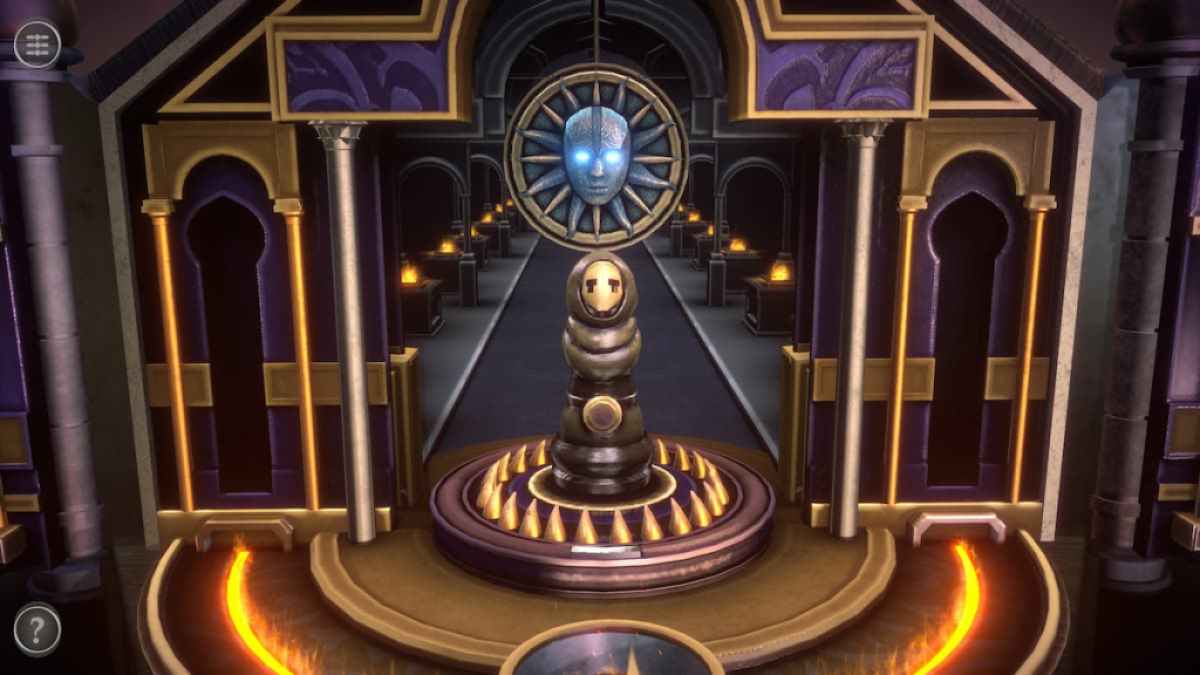
Lighting the fervor opens up a hallway behind the mask and display a diminutive statue on a notched program . This puzzle is unlike any other in the game , act as an acute plot of red luminance , green light .
Hold the left mouse push button on the statue to avail him take the air down the hall .

Screenshot by Pro Game Guides
When the mask flip and call on red , discontinue moving . If you do n’t , you ’ll be smashed to pieces and have to restart the mystifier . The well-off way to avoid this destiny is to let go as soon as the spin is halfway through .
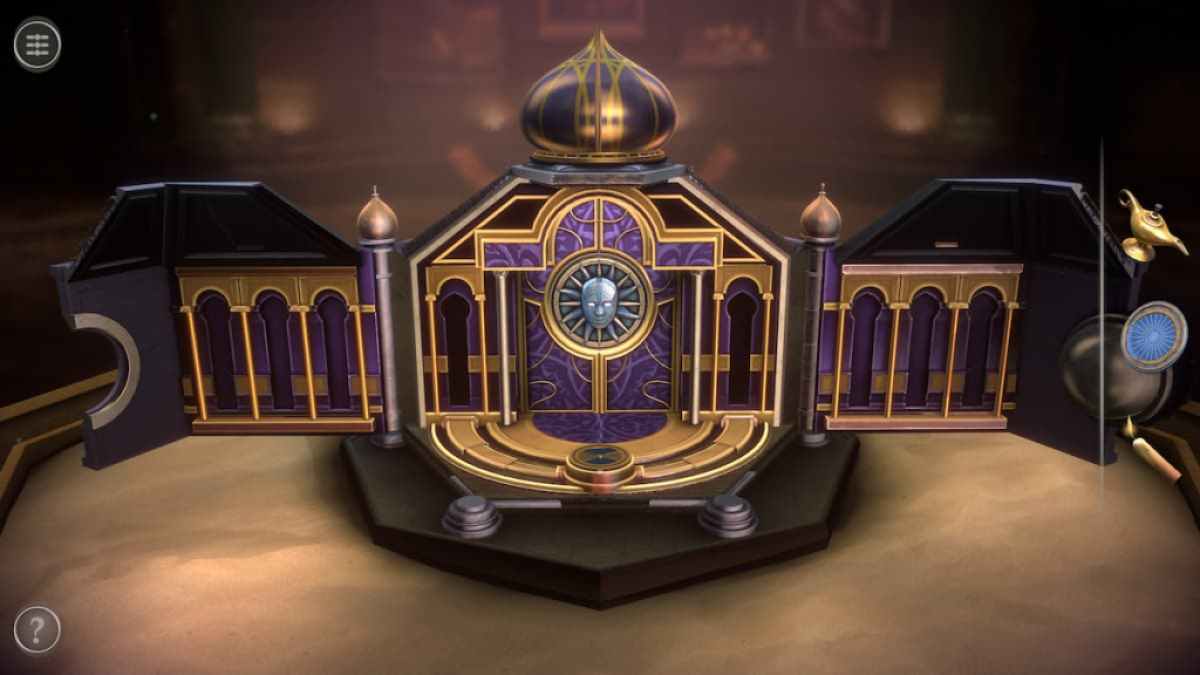
Completing this teaser yield you a Model Tower and return you to the chief room . The fourth way will now be unlocked .
Room four puzzles
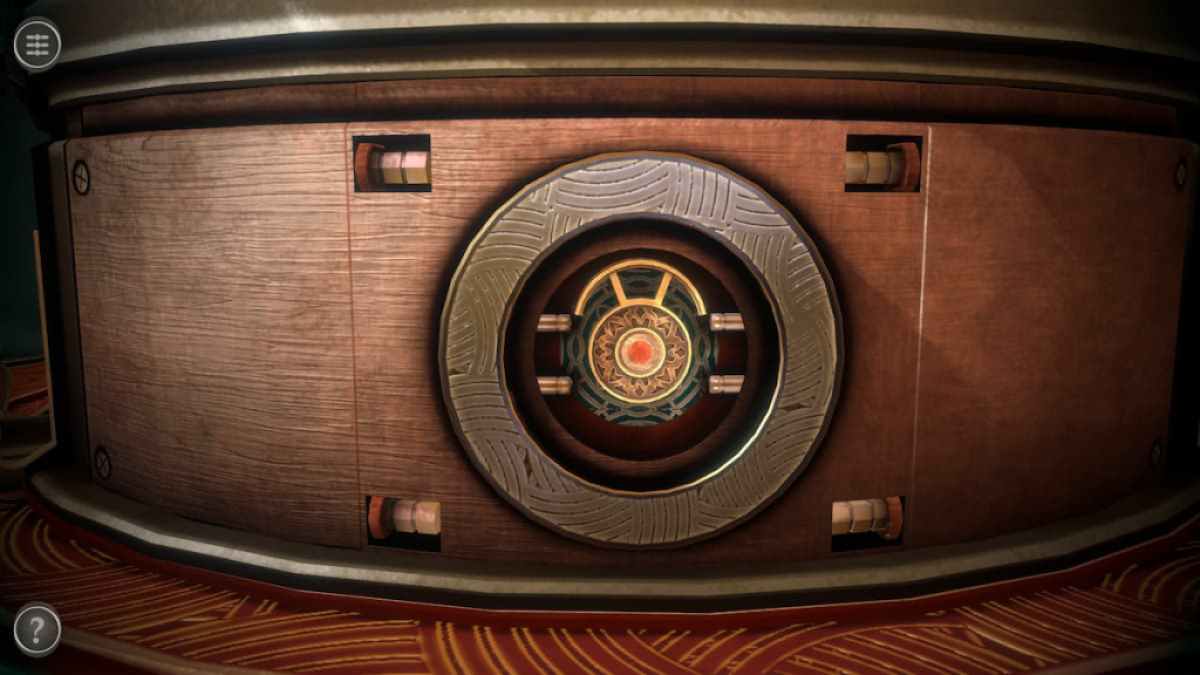
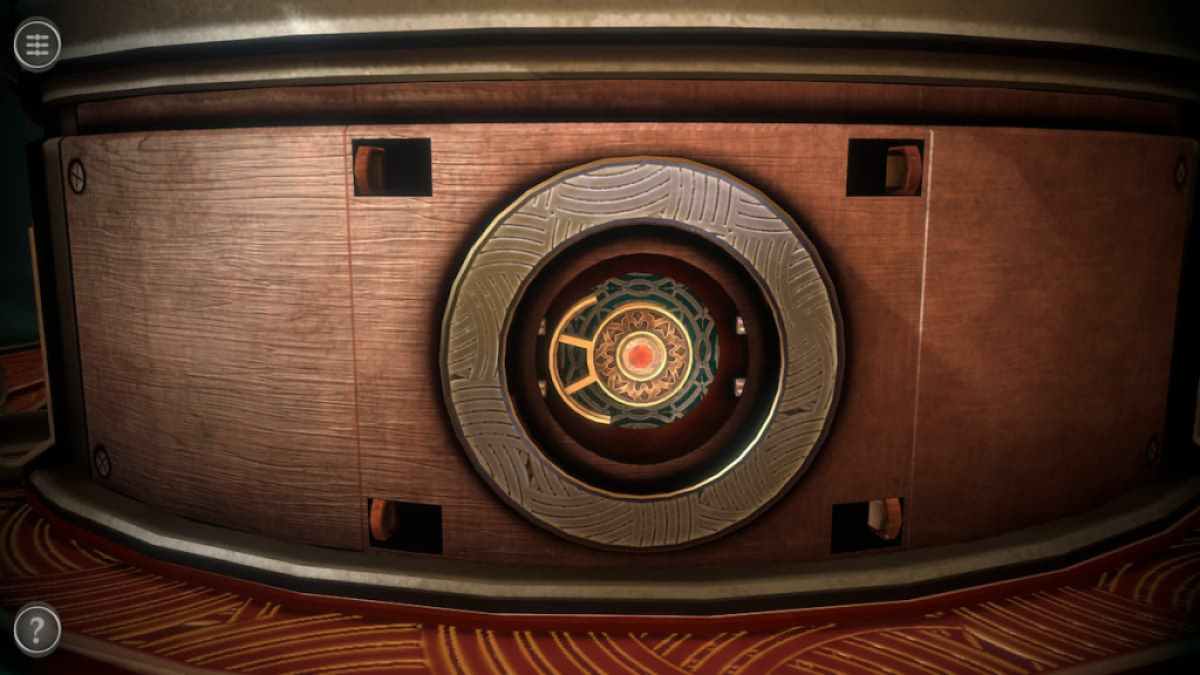
The 4th room has a circular corner on top of a board . Rotate the television camera to find a letter containing traditional knowledge behind the box .
Rotate the camera to the right of the front puzzle to see a puzzler with two sliders .
revolve the lower section until two slots line up with the sliders .

Screenshot by Pro Game Guides
bear on both sliders down to unlock the mall compartment and get a Wheel .
rank the Wheel on the center of the front puzzle .
Rotate the Wheel to push all four peg in . This will unlock the next puzzler .

Screenshot by Pro Game Guides
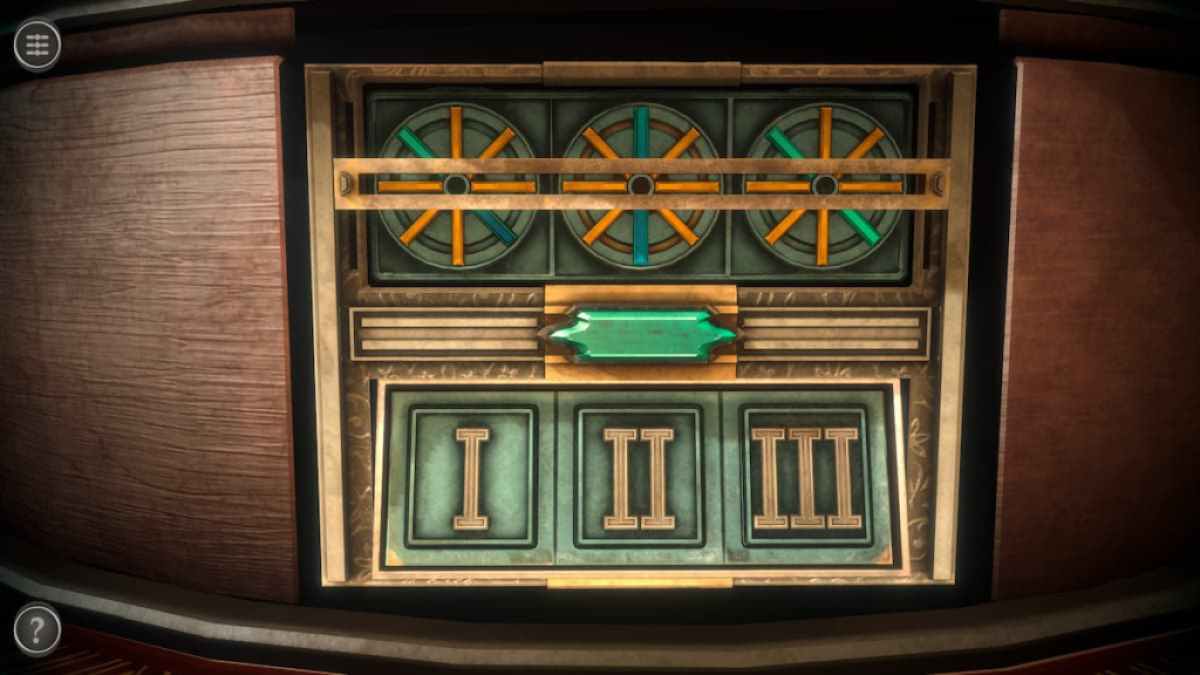
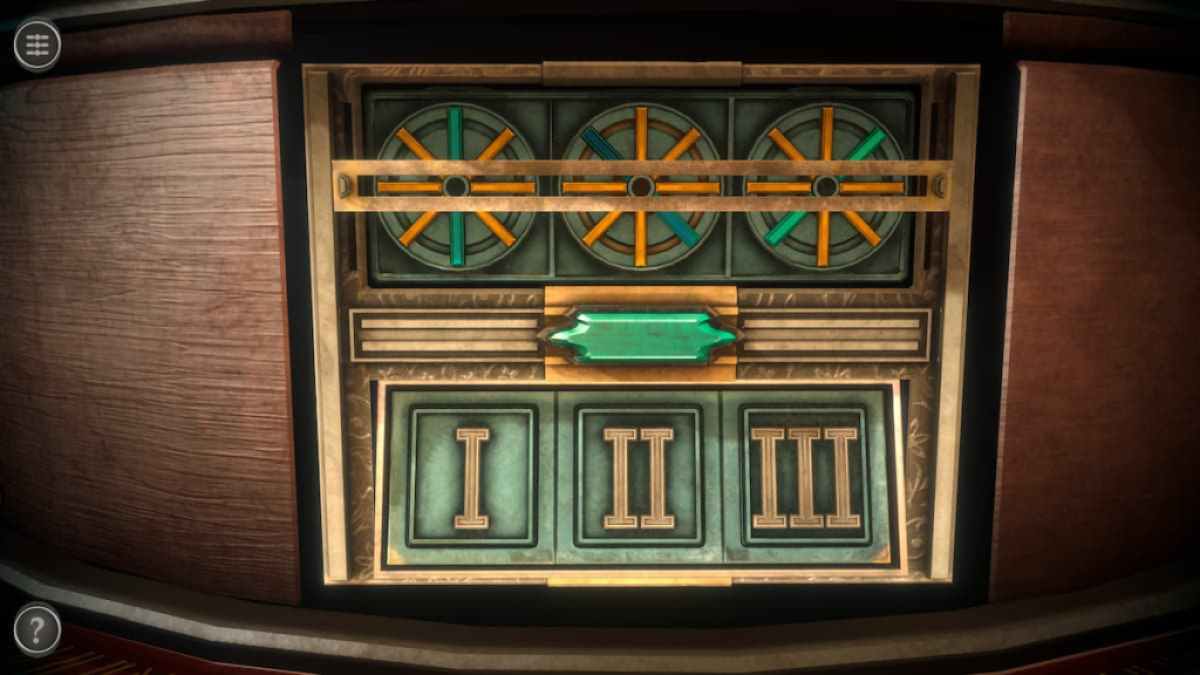
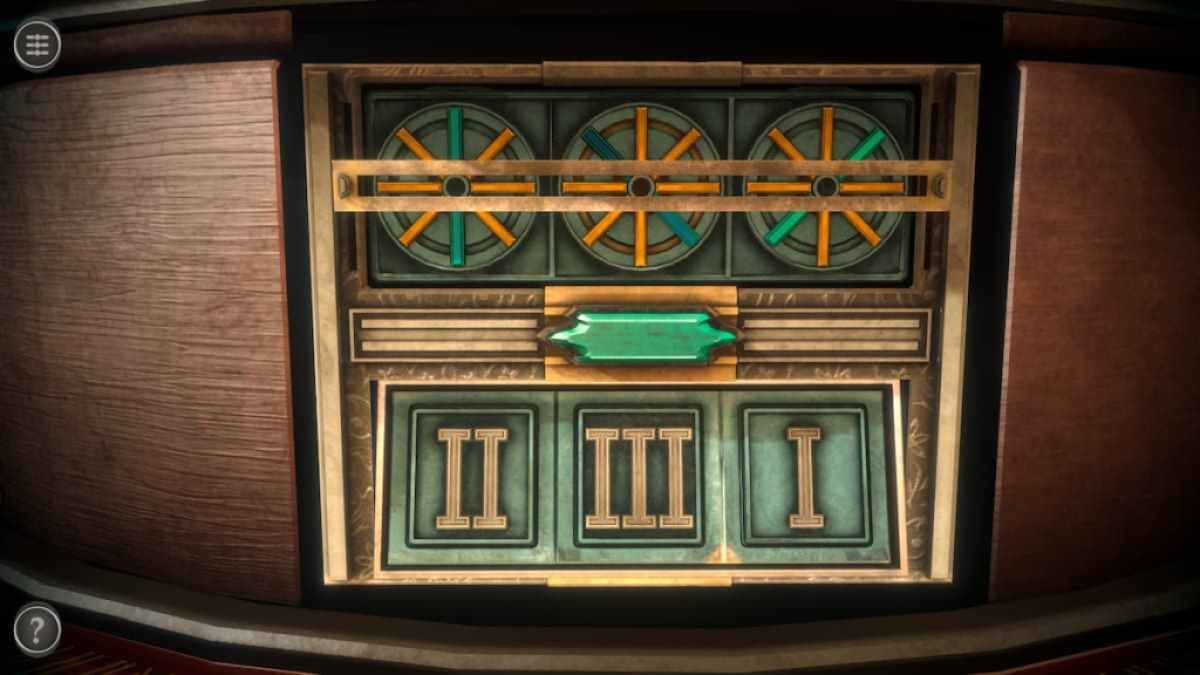
This puzzle involve clicking the metal release to rotate the three rings at the top and rearranging the number at the bottom over a few round . The goal is to have all of the blue bars in a horizontal line through the center . The numeral beneath the block ascertain how many time it will move when the button is pressed .
For example , in the image below , the left ring is two moves away , the center ring is three move away , and the right ring is one move away .
Rearrange the numeral so that the amount of the numeral is the same as the number of move the halo need to make . Clicking the metal push button now will align the blue segment . This causes the puzzle to revolve , beginning a 2d round .
Screenshot by Pro Game Guides
make out the 2d rhythm unlocks a slider .
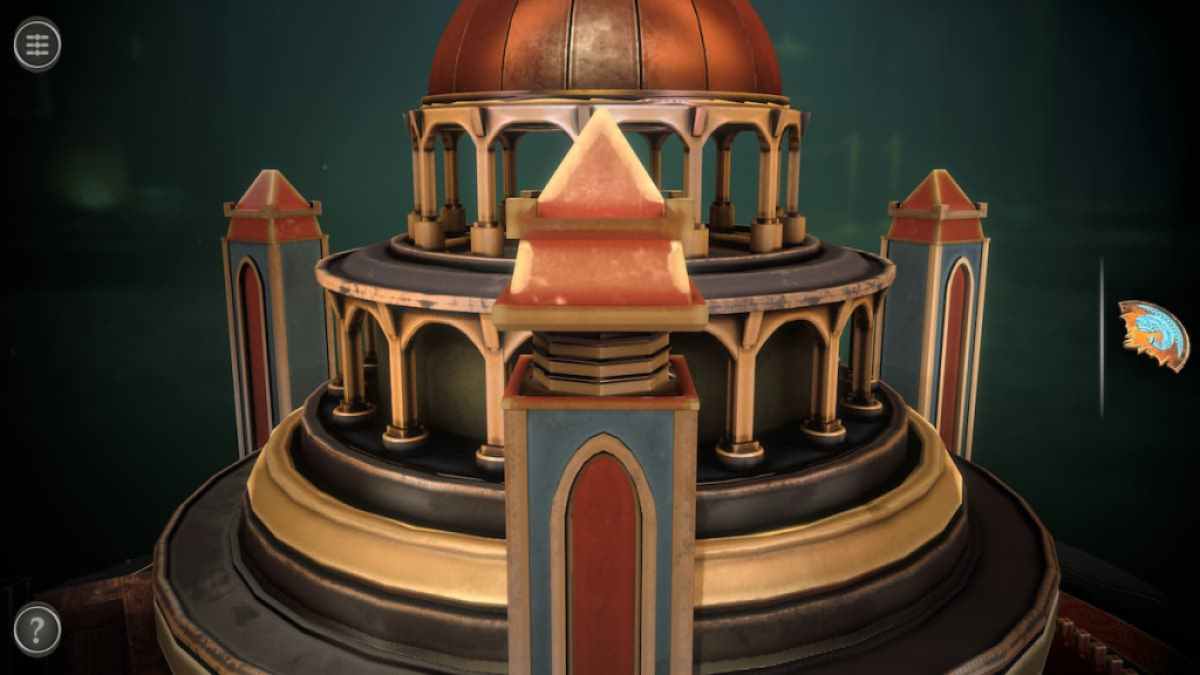
Slider it to metamorphose the box into a marvelous building .
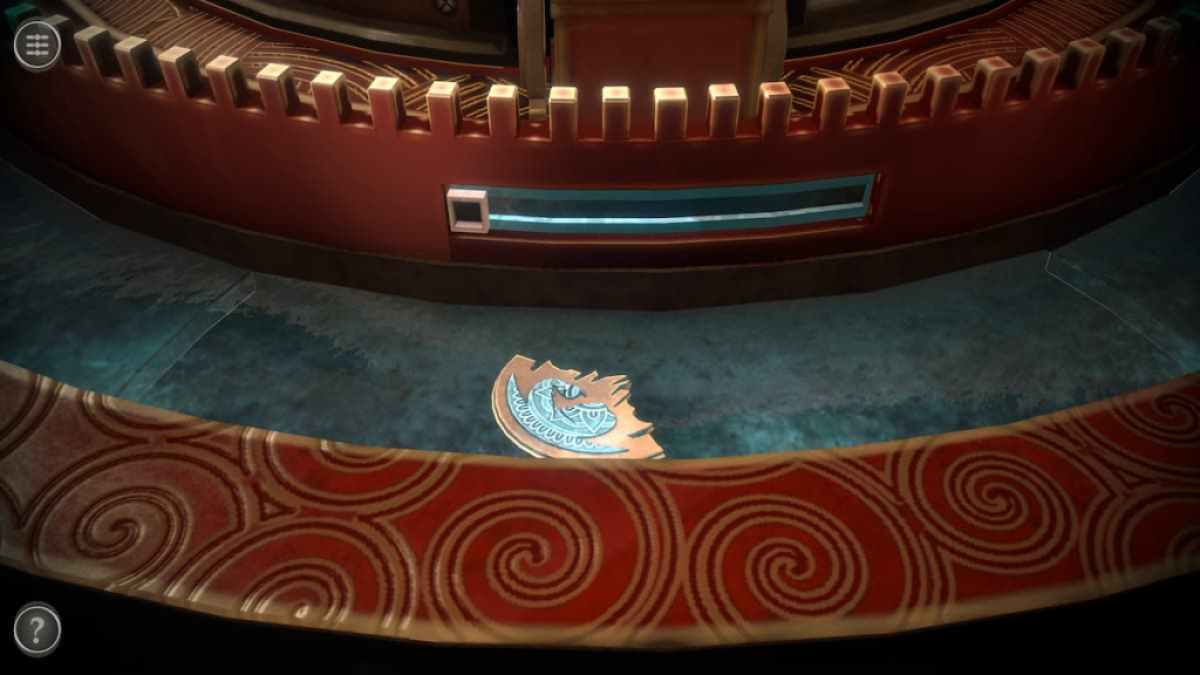
Rotate the camera to view the back of the mesa . There is a little yellow-bellied terrapin next to an item stuck beneath the spyglass . Pull the skidder to move the methamphetamine hydrochloride and get an Ornament Piece .
Screenshot by Pro Game Guides
One of the building ’s tug is not hump into its base . turn out the paraphernalia to tighten up it and get a Crank Handle .
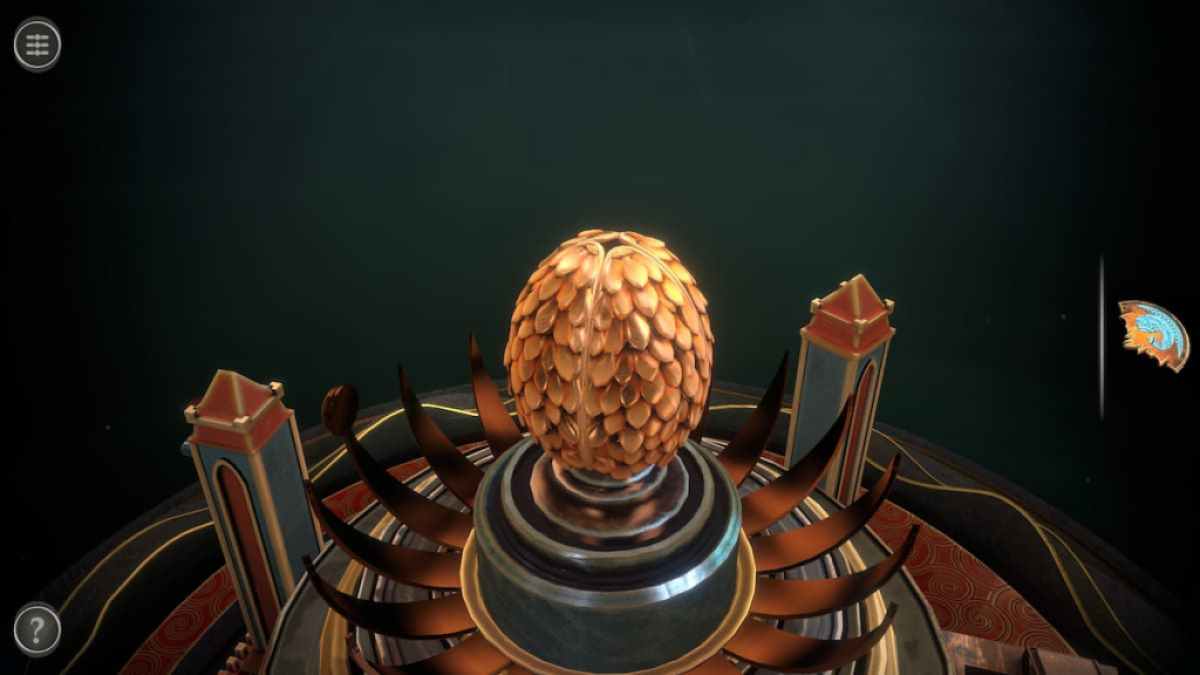
The Crank Handle can be placed onto the top of the building and circumvolve to reveal a giant gold testicle .
The tower to the left hand of the primary entree has a panel that can be pulled down .

Screenshot by Pro Game Guides
This reveals a reddish pin , which can be pull out down as well .
The last tugboat has a small lock on it . Pull the blue-blooded tholepin out to release the lock and get a 2d Ornament Piece .
There is a small gear on the platform the egg is on .
Screenshot by Pro Game Guides
Rotate it to get a Gong Mallet .
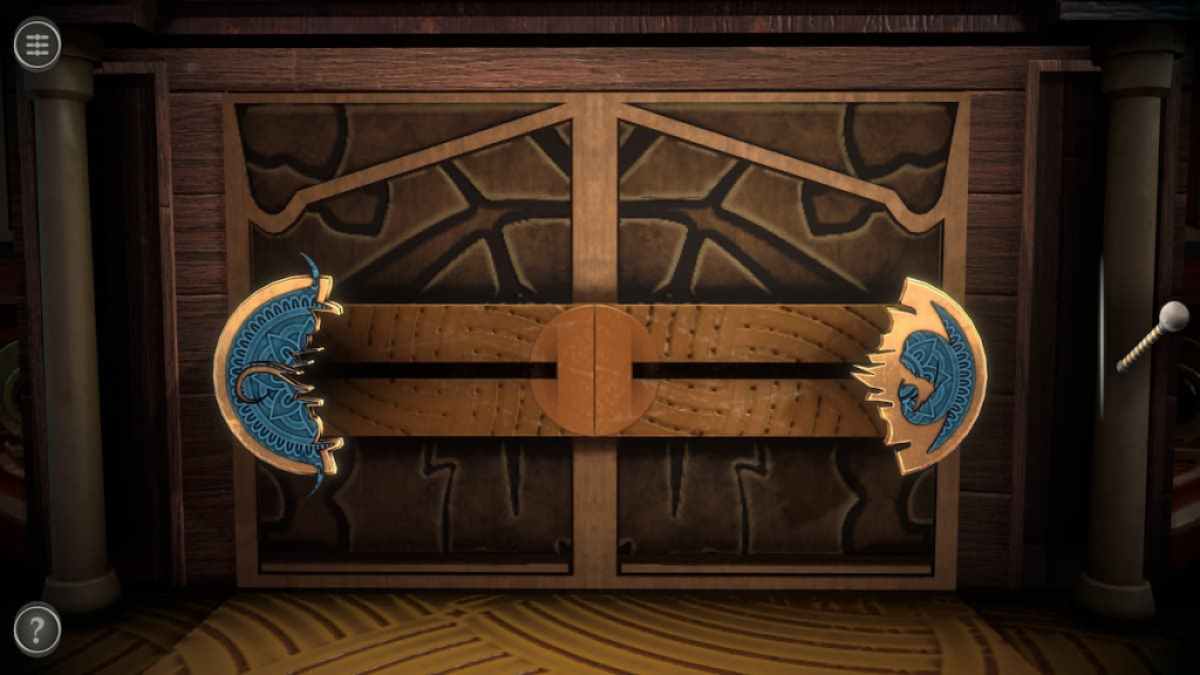
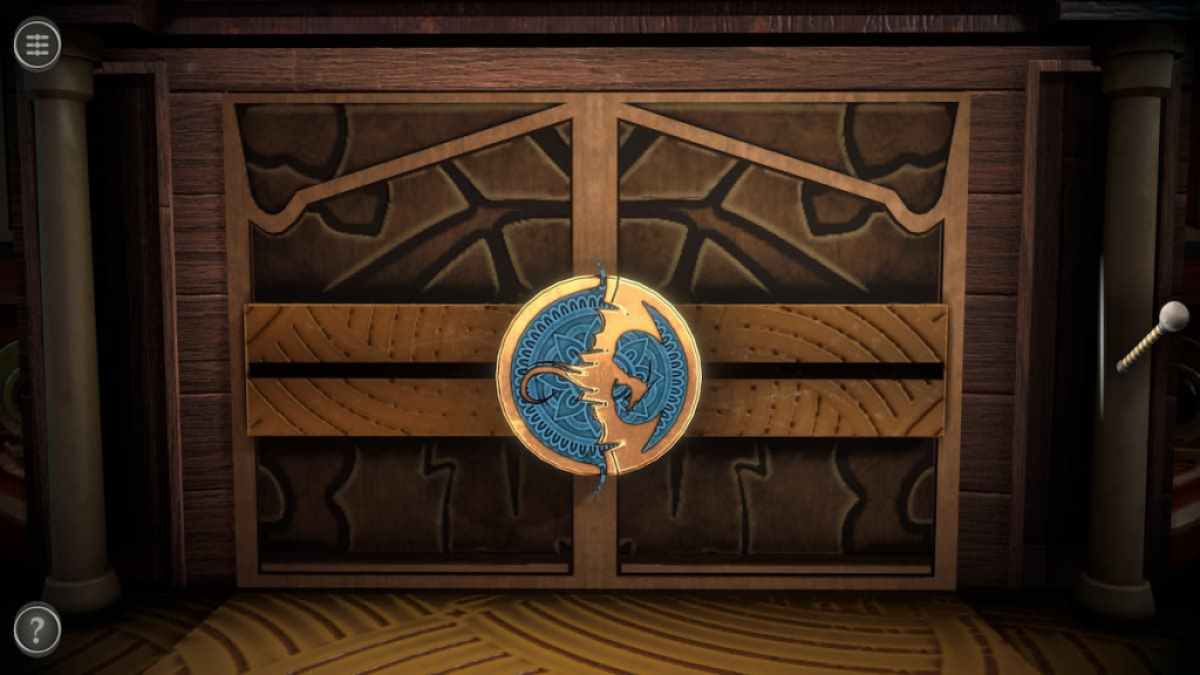
total the two Ornament Pieces to the front door .
Slide them together to open up the door .
Screenshot by Pro Game Guides
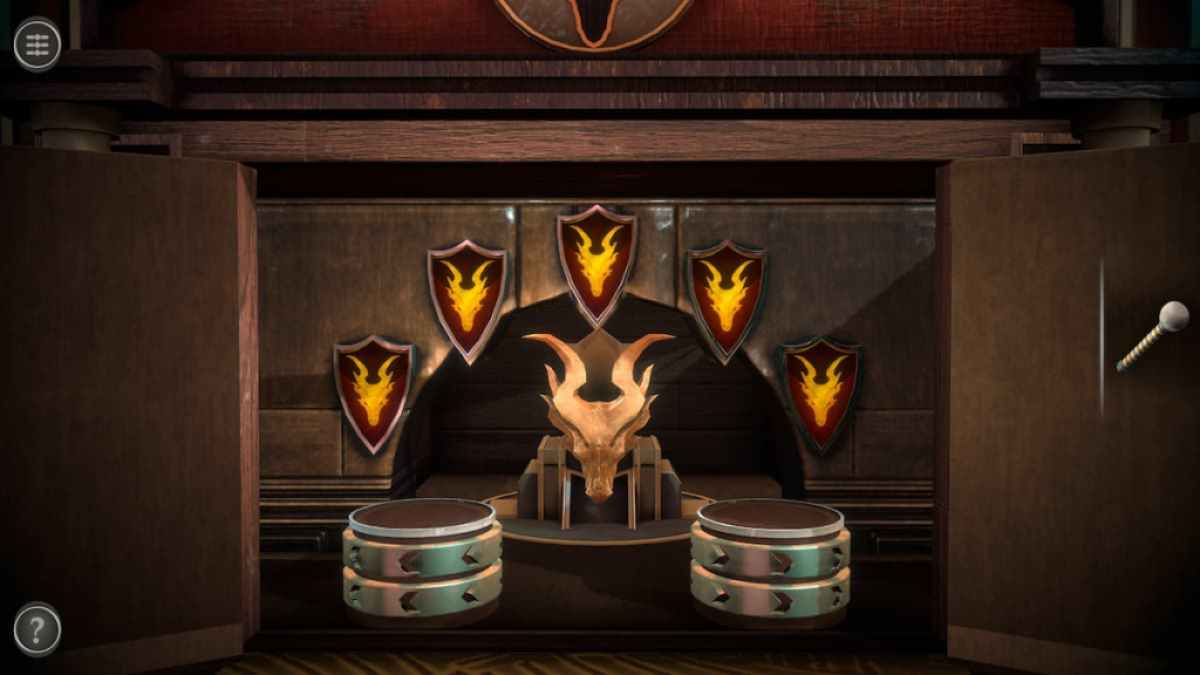
This mystifier involves rotating the five flags on the wall so that they match the flag outside with the red dragon intention . The four power train on the two column at the front can be used to rotate the flags .
When all of the flag display the cherry dragon pattern , the stool in the back will rotate and give you a Dragon Medallion .
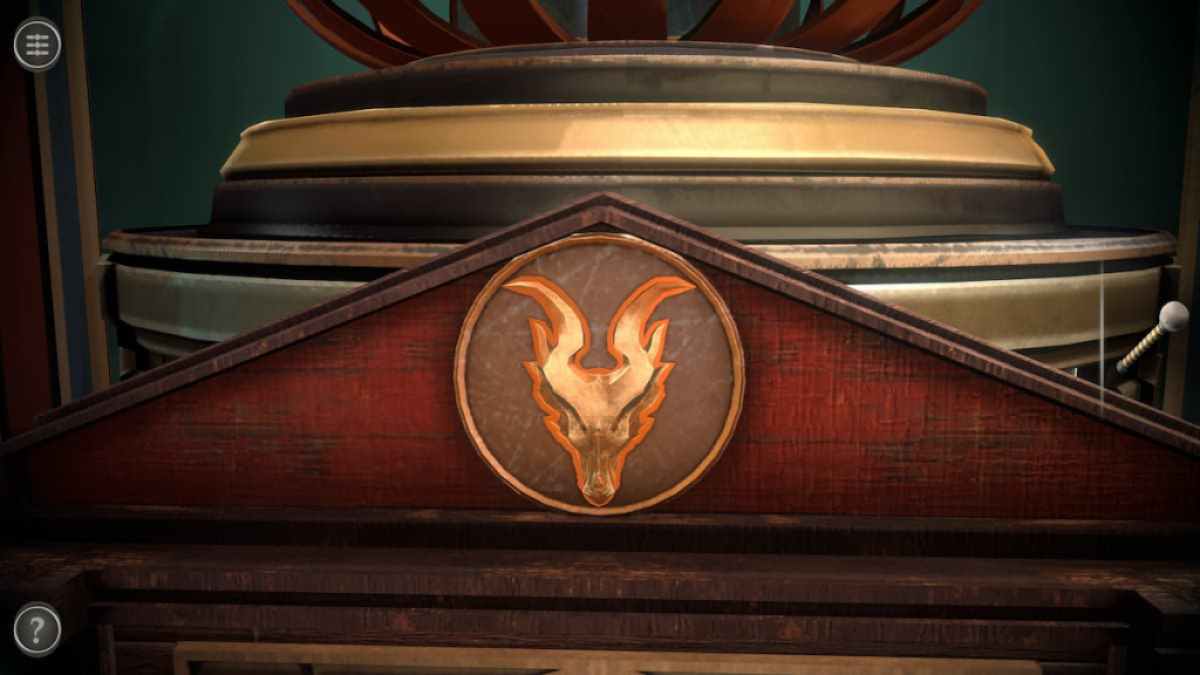
post the Dragon Medallion into the expansion slot above the door .
Screenshot by Pro Game Guides
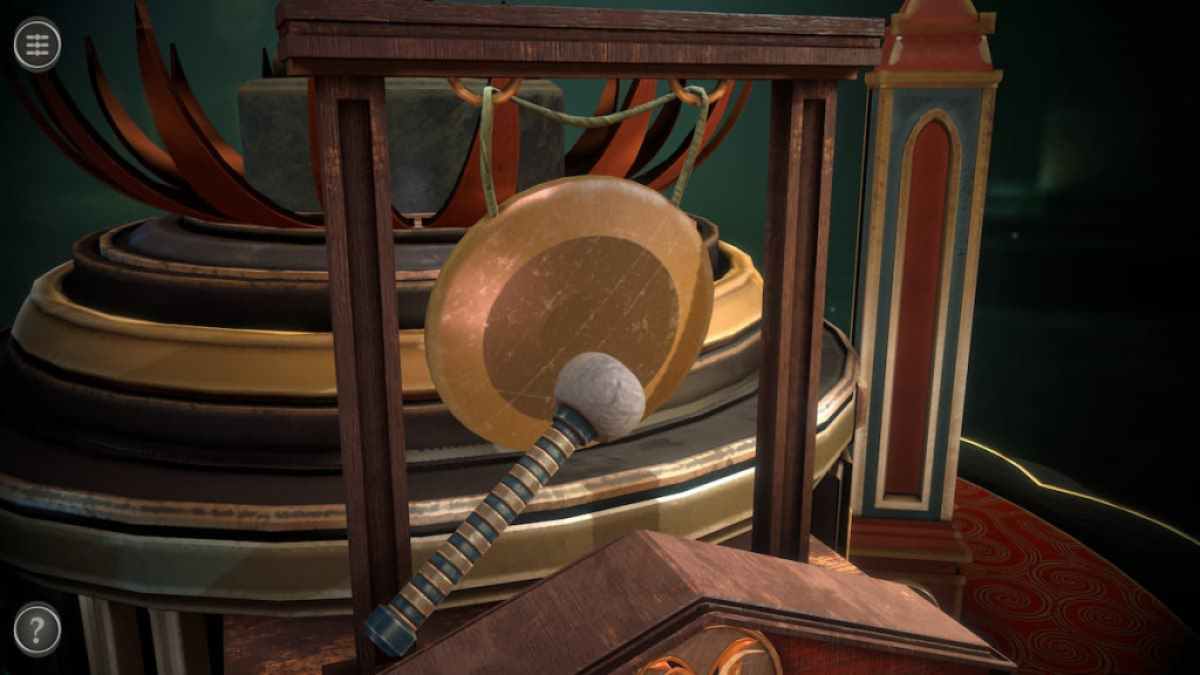
This will make a gong rise from the cap . Hit it with the Gong Mallet .
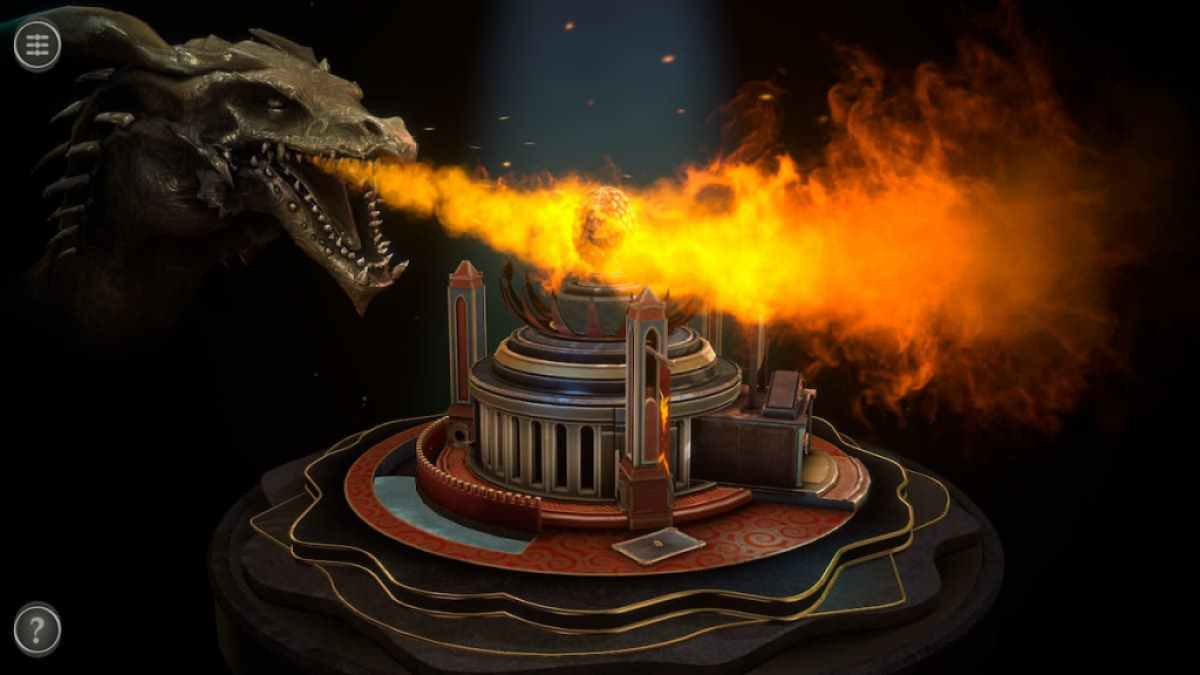
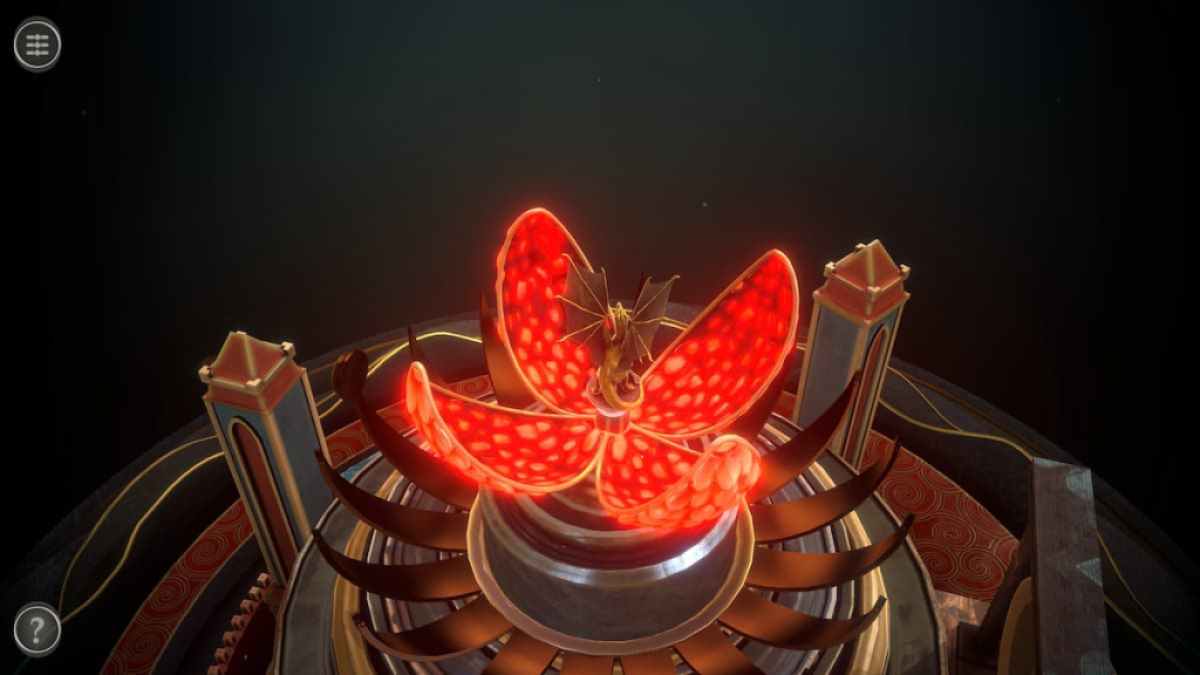
This makes a dragon school principal look , using fire on the golden ballock .
The egg will open , throw you a Dragon Figure and ending the fourth elbow room .
Screenshot by Pro Game Guides
Completing the main room
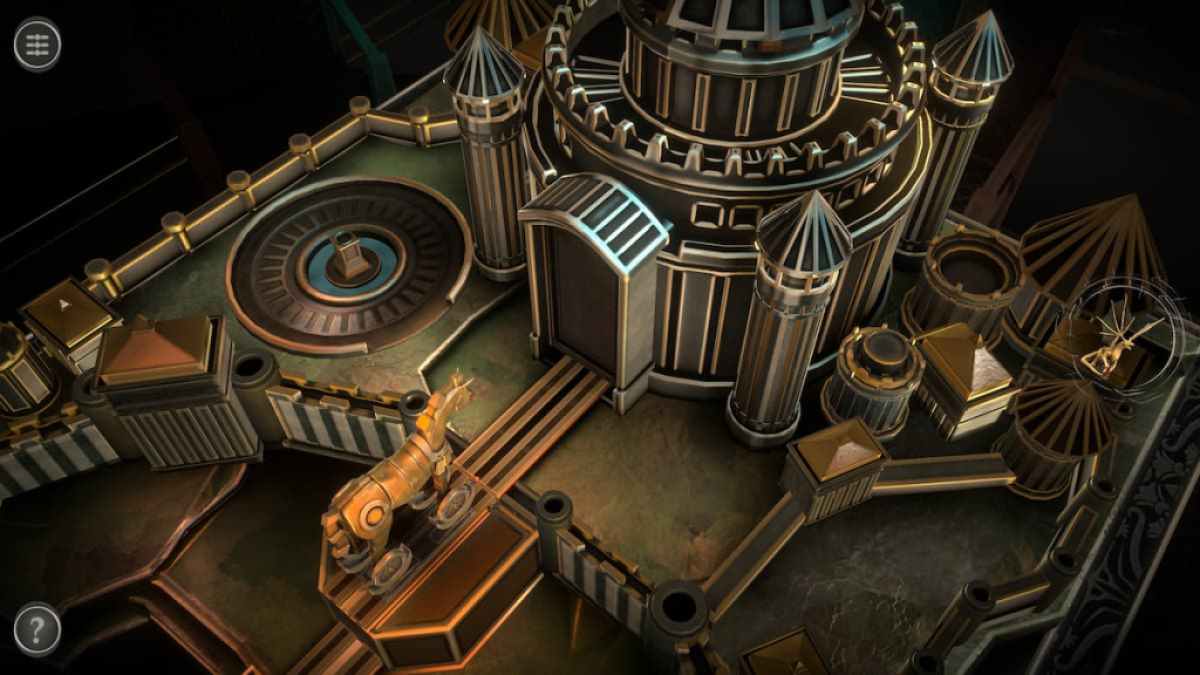
The side room of this chapter feature a mesa covered in a mechanical medieval diorama . It consists of a few different sections designed to move you from the front of the table towards the castle at the back .
relate : Escape From Castle Claymount Walkthrough – Cool Math Games
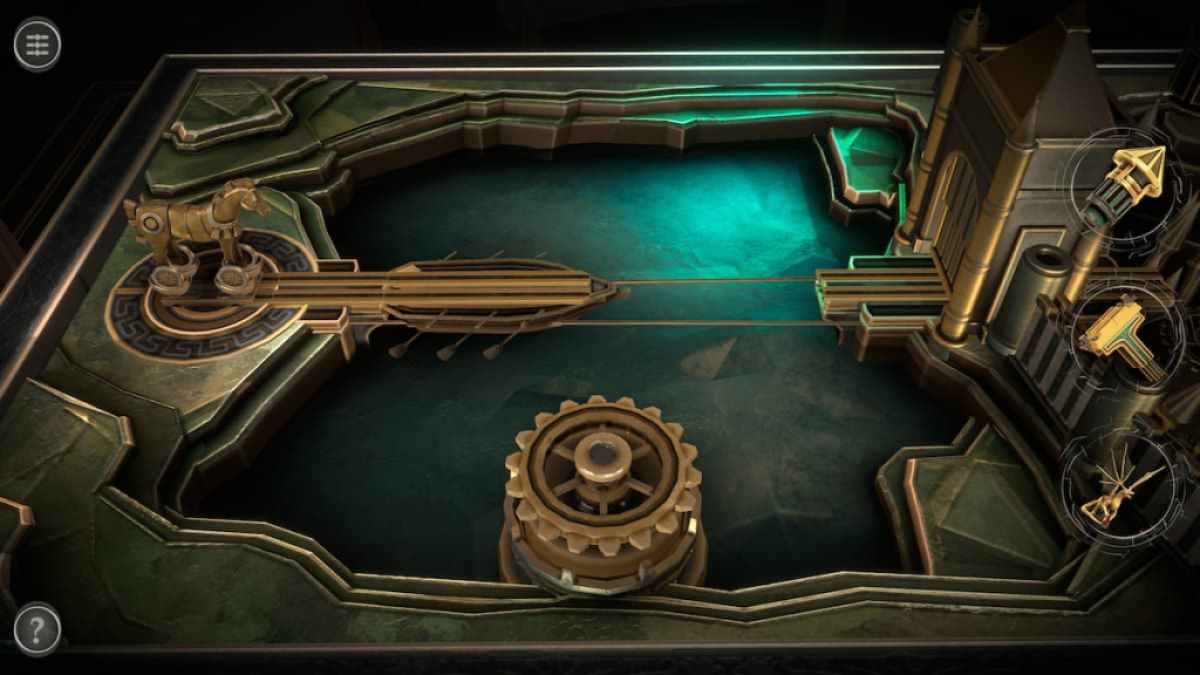
revolve the big gear at the bound to push the sauceboat against the left shoring . This will cause the chopine on the left to flip .

Screenshot by Pro Game Guides
identify the Horse Figure on this platform .
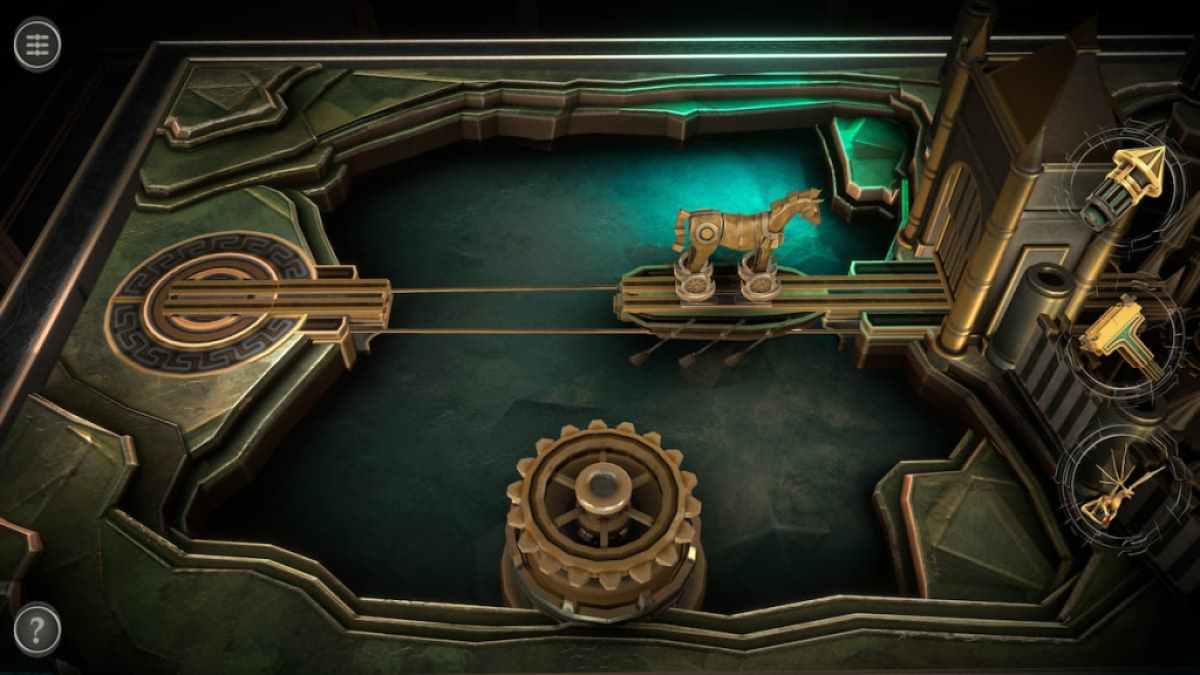
dawn on the sawbuck figure to labour it onto the gravy boat . Rotate the gear to move the boat to the gate , then fall into place on the horse figure and fight it again to send it through the logic gate .
The next obstruction is a large spiky pit .
Screenshot by Pro Game Guides
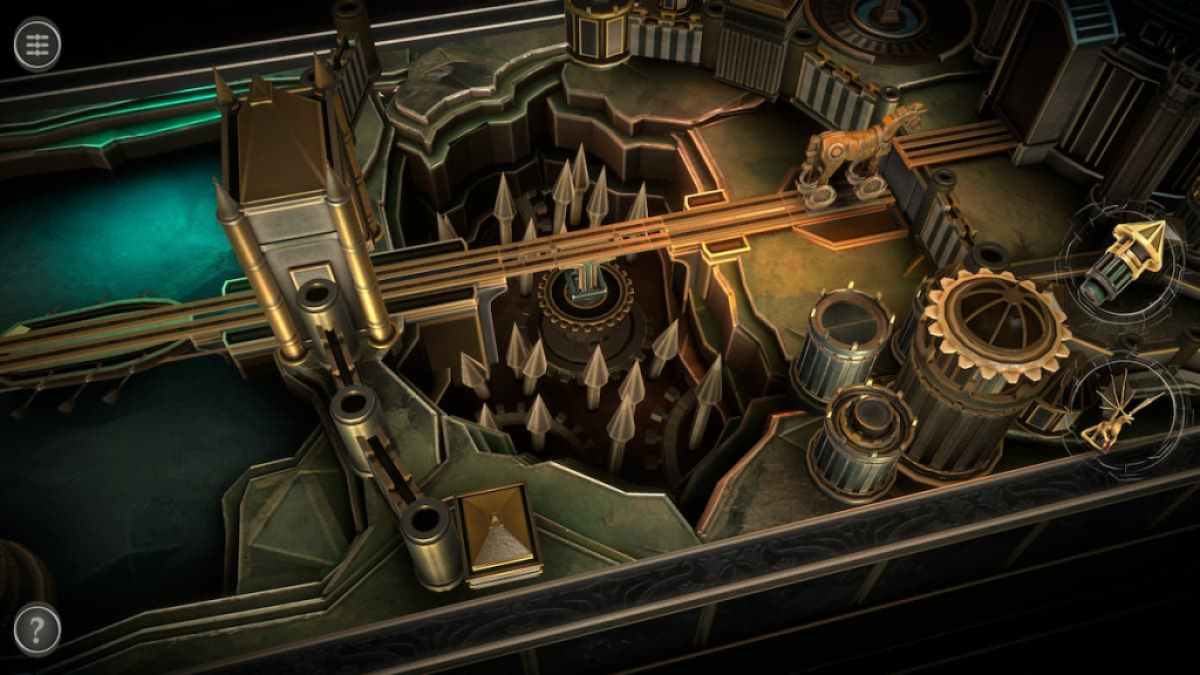
Place the Model Figure into the center and push the buck up to the castling .
To the right field of the buck is a tumid tower with a train on it . Spin it to reach the top of one of the diminished towers around it .
Place the Model Tower onto the newly opened column .
Screenshot by Pro Game Guides
This will turn the Model Tower into a fleeceable handle .
wrench the handle to provoke the base that the horse is on .
When the horse cavalry is face the castling , there is a notable outer space on the left .
Screenshot by Pro Game Guides
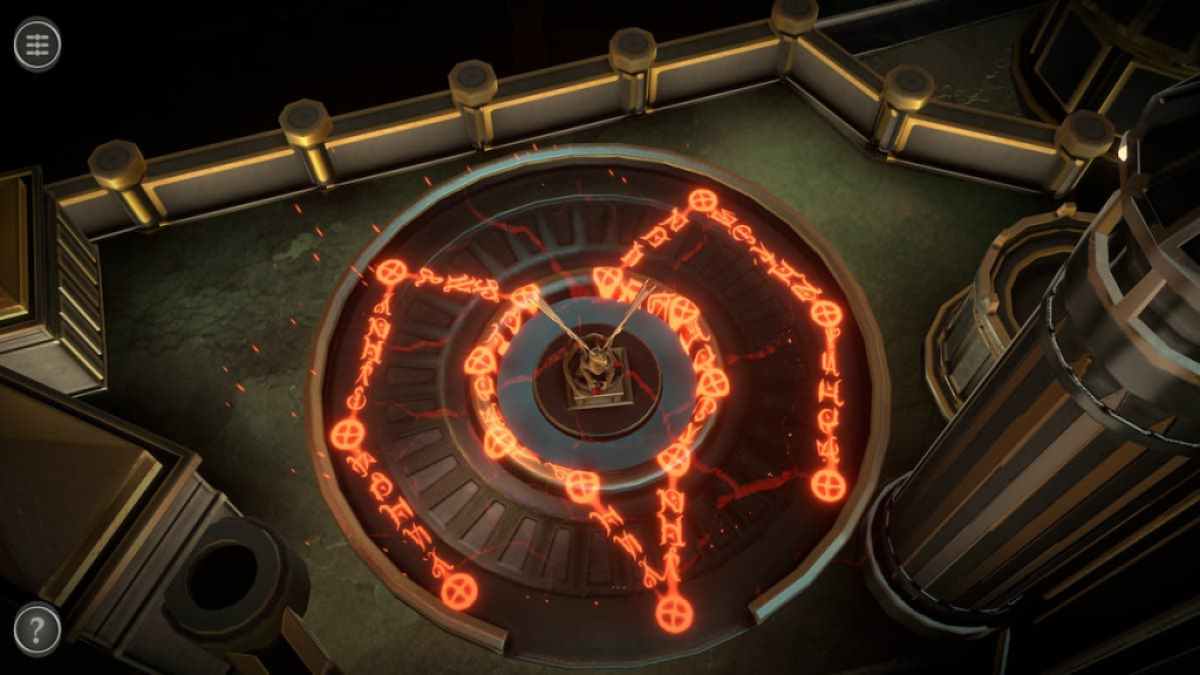
Place the Dragon Figure into the center of this distance .
It will create a symbolization that can be used for complete the next puzzler .
Placing the dragon unlocks a teaser on the castle door .
Screenshot by Pro Game Guides
Starting from the bottom left point , recreate the pattern around the Dragon Figure .
This will get some noise , after which the box seat curb the Token will rise from the top .
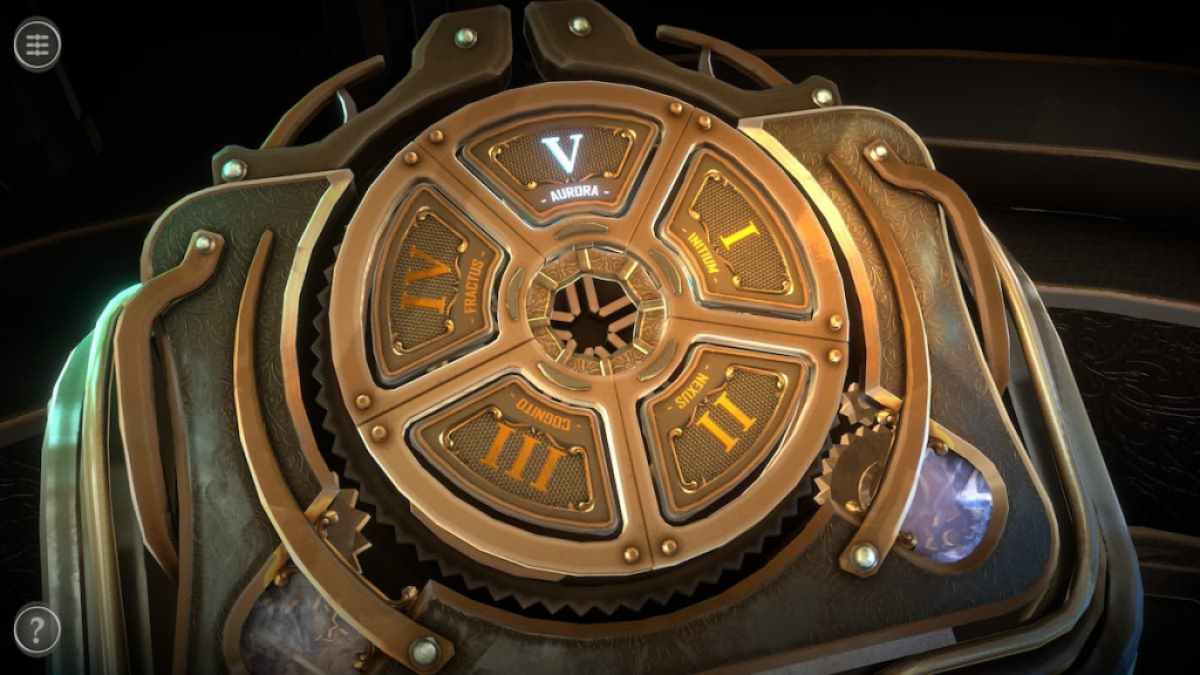
post the Token into the podium to unlock Chapter 5 , titled " Aurora " .
Screenshot by Pro Game Guides
escape valve rooms have been all the rage . For more puzzle - solving escape room fun , check out our25 Best Free Virtual escape cock Room Gamesguide here on Pro Game Guides !
Screenshot by Pro Game Guides
Screenshot by Pro Game Guides
Screenshot by Pro Game Guides

Screenshot by Pro Game Guides

Screenshot by Pro Game Guides
Screenshot by Pro Game Guides
Screenshot by Pro Game Guides
Screenshot by Pro Game Guides

Screenshot by Pro Game Guides
Screenshot by Pro Game Guides
Screenshot by Pro Game Guides
Screenshot by Pro Game Guides
Screenshot by Pro Game Guides
Screenshot by Pro Game Guides

Screenshot by Pro Game Guides

Screenshot by Pro Game Guides
Screenshot by Pro Game Guides
Screenshot by Pro Game Guides
Screenshot by Pro Game Guides

Screenshot by Pro Game Guides

Screenshot by Pro Game Guides
Screenshot by Pro Game Guides
Screenshot by Pro Game Guides

Screenshot by Pro Game Guides
Screenshot by Pro Game Guides
Screenshot by Pro Game Guides

Screenshot by Pro Game Guides
Screenshot by Pro Game Guides
Screenshot by Pro Game Guides
Screenshot by Pro Game Guides
Screenshot by Pro Game Guides
Screenshot by Pro Game Guides

Screenshot by Pro Game Guides

Screenshot by Pro Game Guides
Screenshot by Pro Game Guides
Screenshot by Pro Game Guides

Screenshot by Pro Game Guides
Screenshot by Pro Game Guides

Screenshot by Pro Game Guides

Screenshot by Pro Game Guides

Screenshot by Pro Game Guides

Screenshot by Pro Game Guides
Screenshot by Pro Game Guides

Screenshot by Pro Game Guides
Screenshot by Pro Game Guides

Screenshot by Pro Game Guides

Screenshot by Pro Game Guides
Screenshot by Pro Game Guides
Screenshot by Pro Game Guides
