Enjoy the beauty of escape rooms !
Chapter 4 of Boxes Lost Fragments is filled with historic - theme puzzles that take synergistic detective games to the next degree . In this template , I ’ll help you with the mystifier in the first two levels of Boxes Lost Fragments Chapter 4 .
Boxes Lost Fragments Chapter 4 Fractus part 1 walkthrough
This templet will overlay the first and second room of Chapter 4 in Boxes Lost Fragments . For any other puzzles , I ’ve provided links to the other parts of the walkthrough below .
Room one puzzles
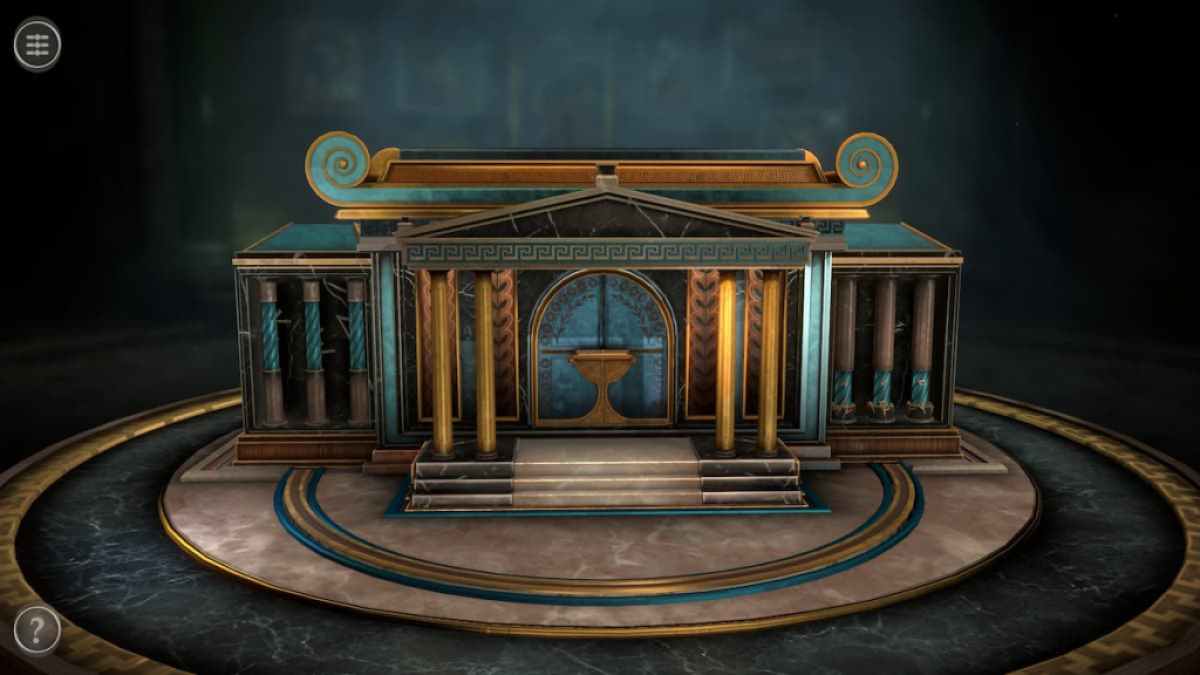
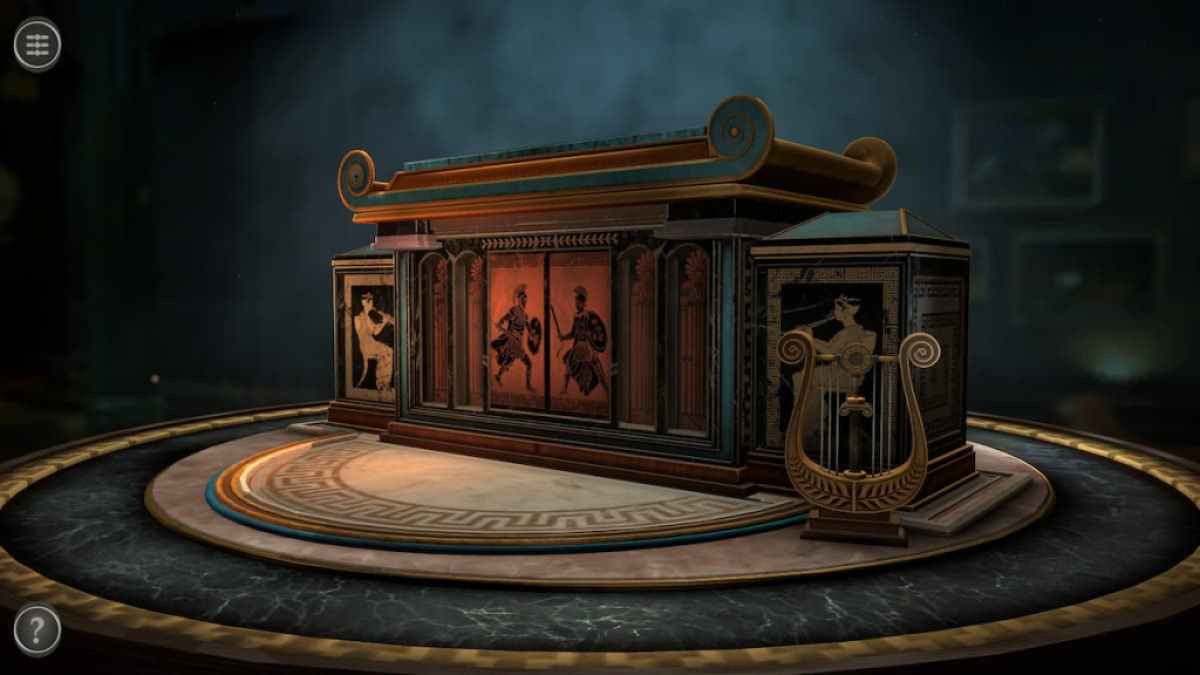
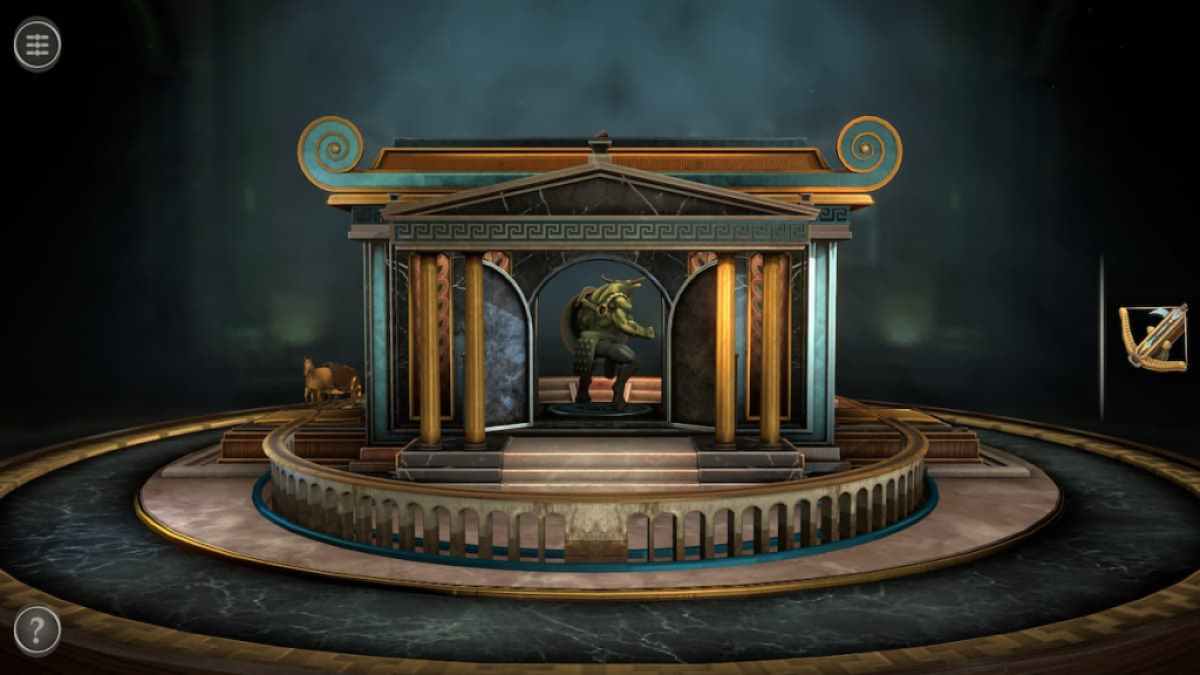
The boxwood in the first room has the appearance of an ancient tabernacle .
Turn the camera to face the back of the temple and snaffle the Lyre .
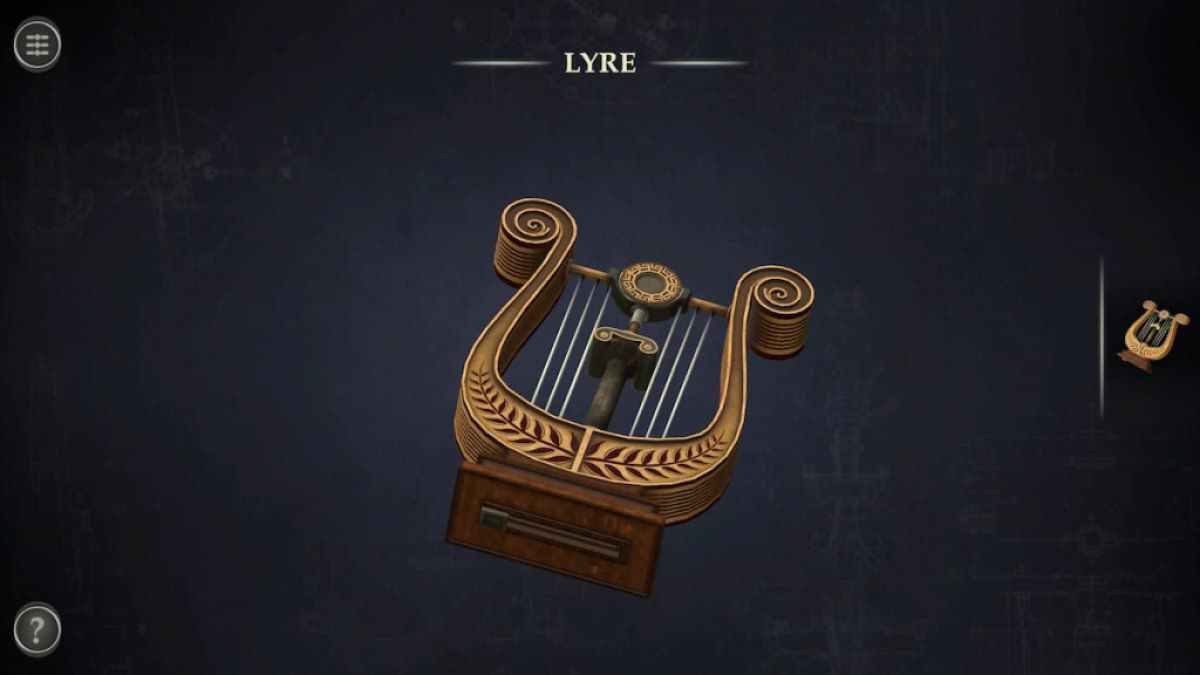
give the Lyre in your inventory and rotate to view a luger on the bottom .

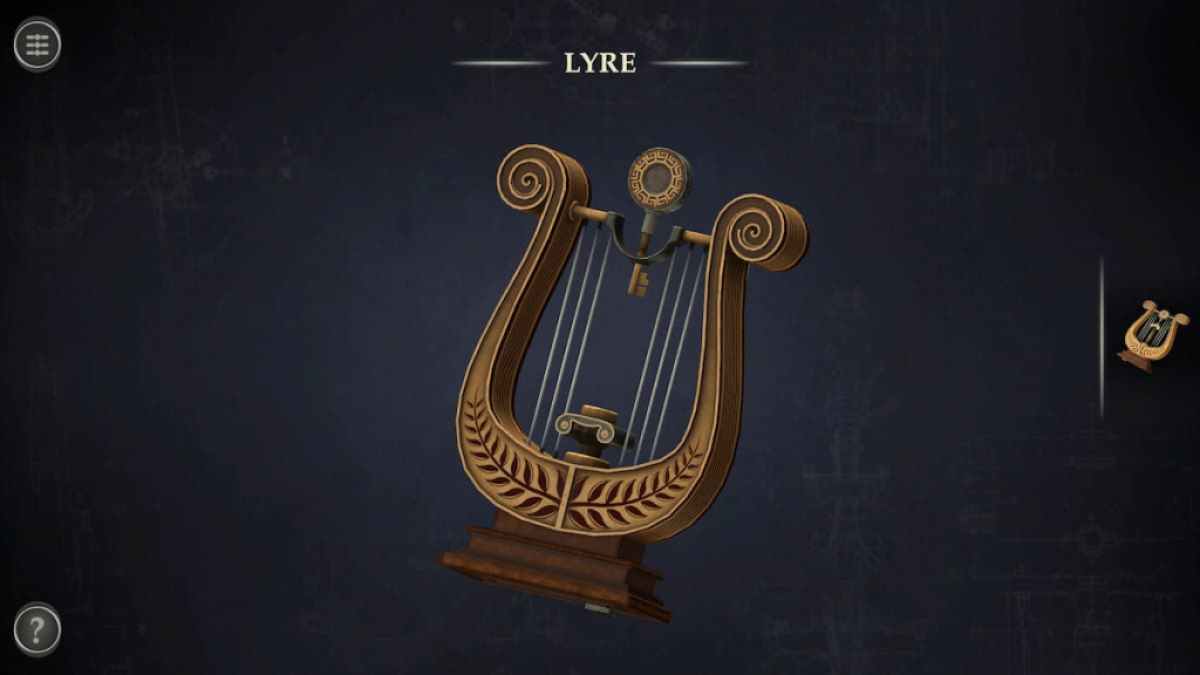
Push the slider to unlock the top art object of the Lyre , which is a key . Pull it up to grab it .
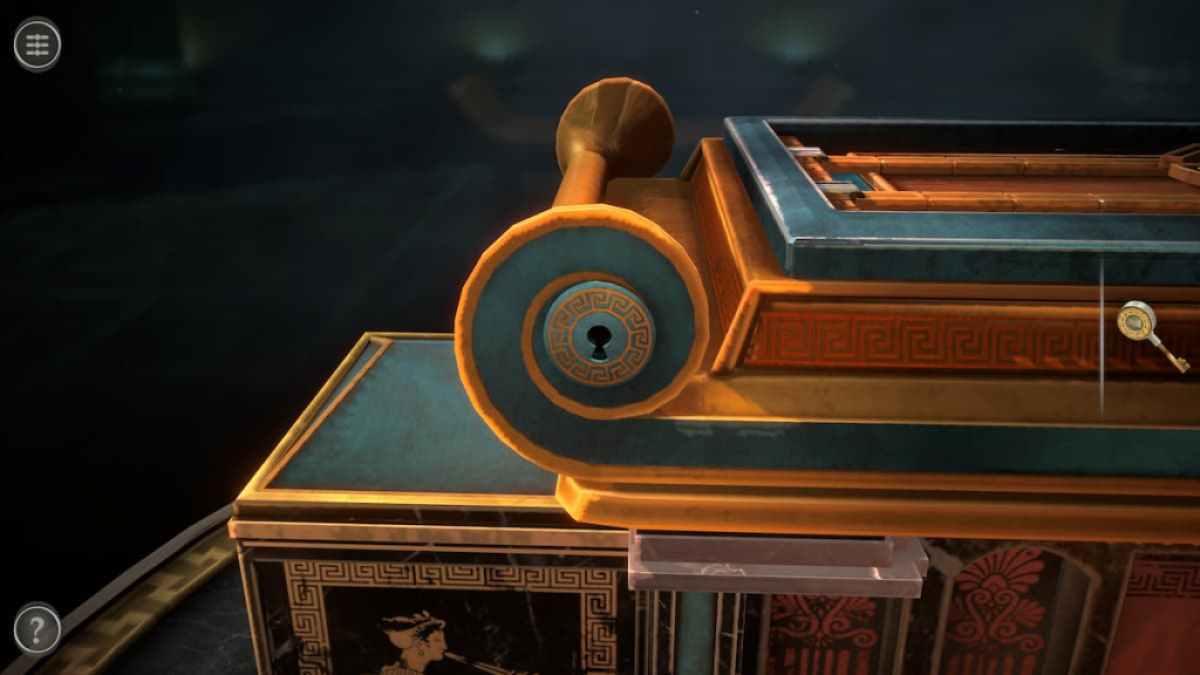
look around the castle give away a keyhole in one of its top ornamentation .
Use the small key to spread it , unlocking a slender compartment containing a tiny Crossbow .
Screenshot by Pro Game Guides
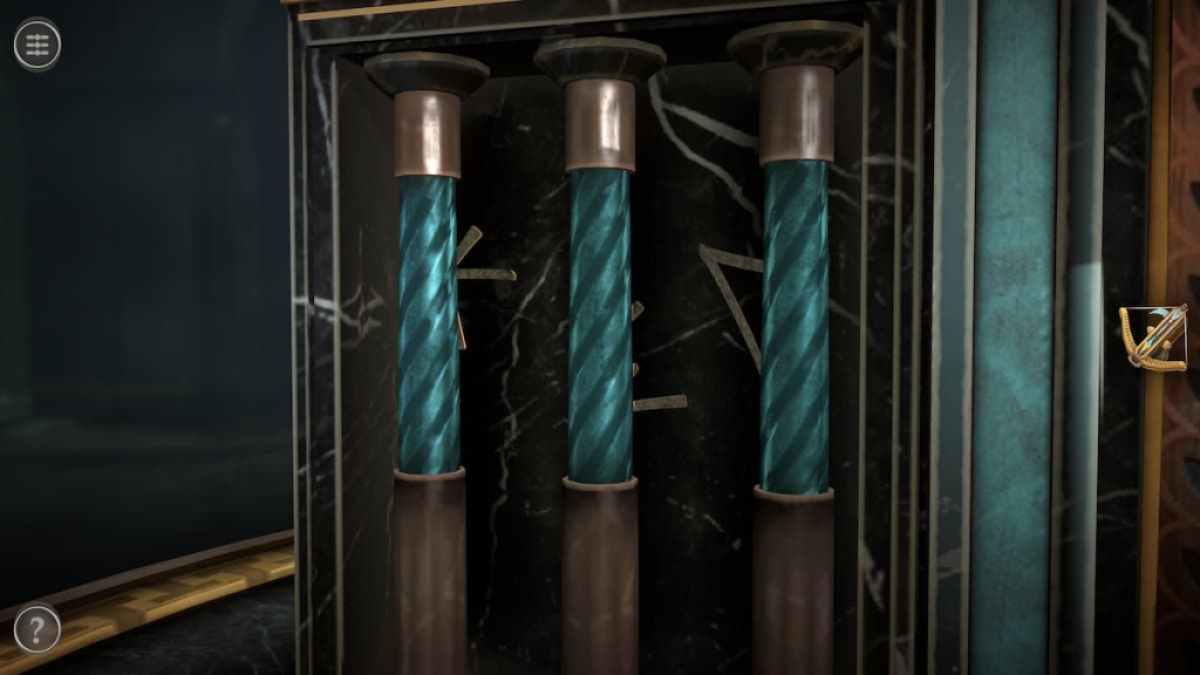
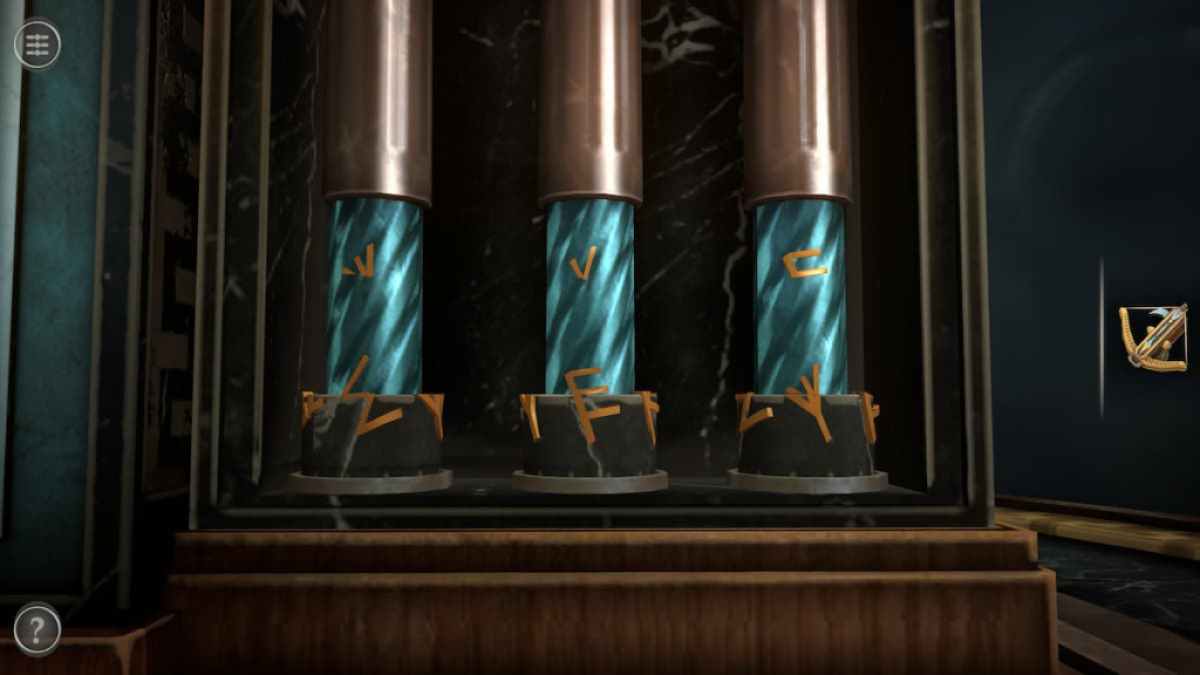
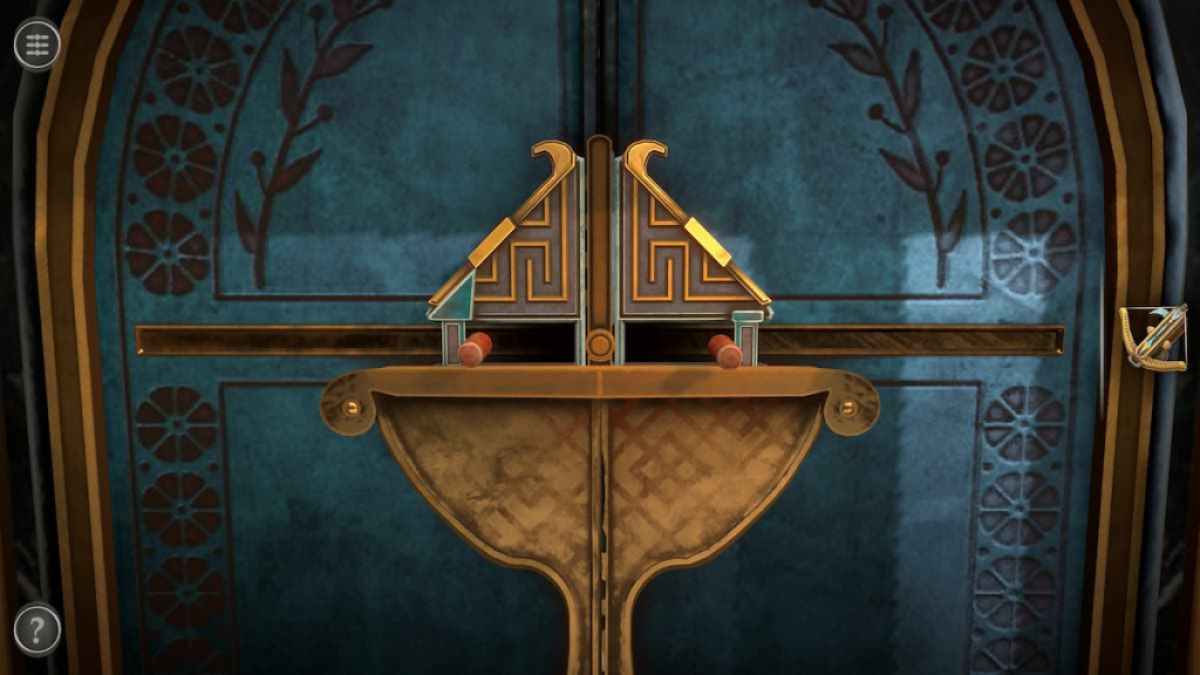
First , look at the solidifying of columns on the left .
revolve each column until the golden marking is seeable on the front . These three mark show the solution for the 2nd set of column .
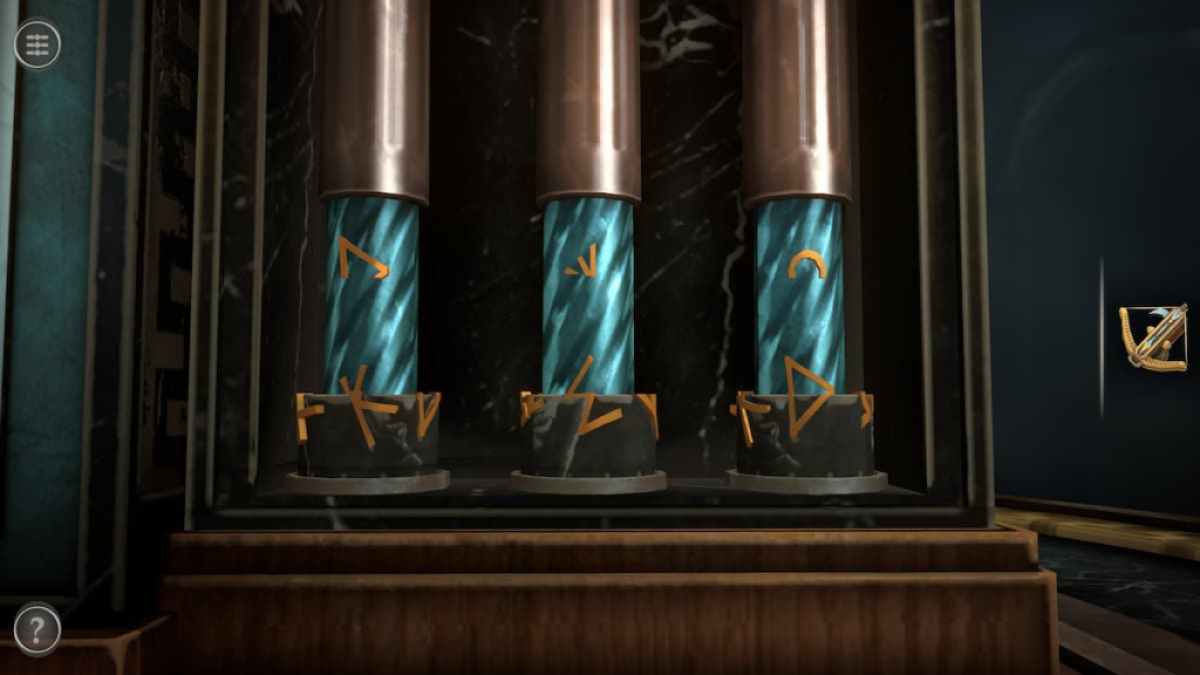
Turn your attending to the 2d set of newspaper column on the right .
Screenshot by Pro Game Guides
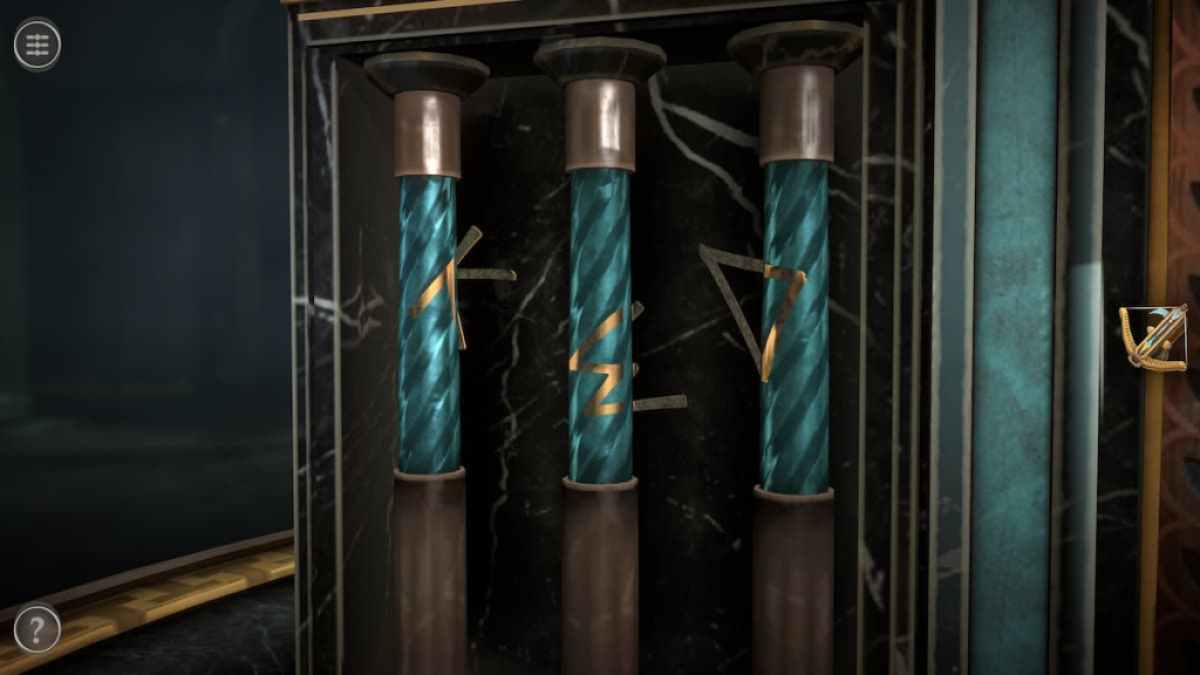
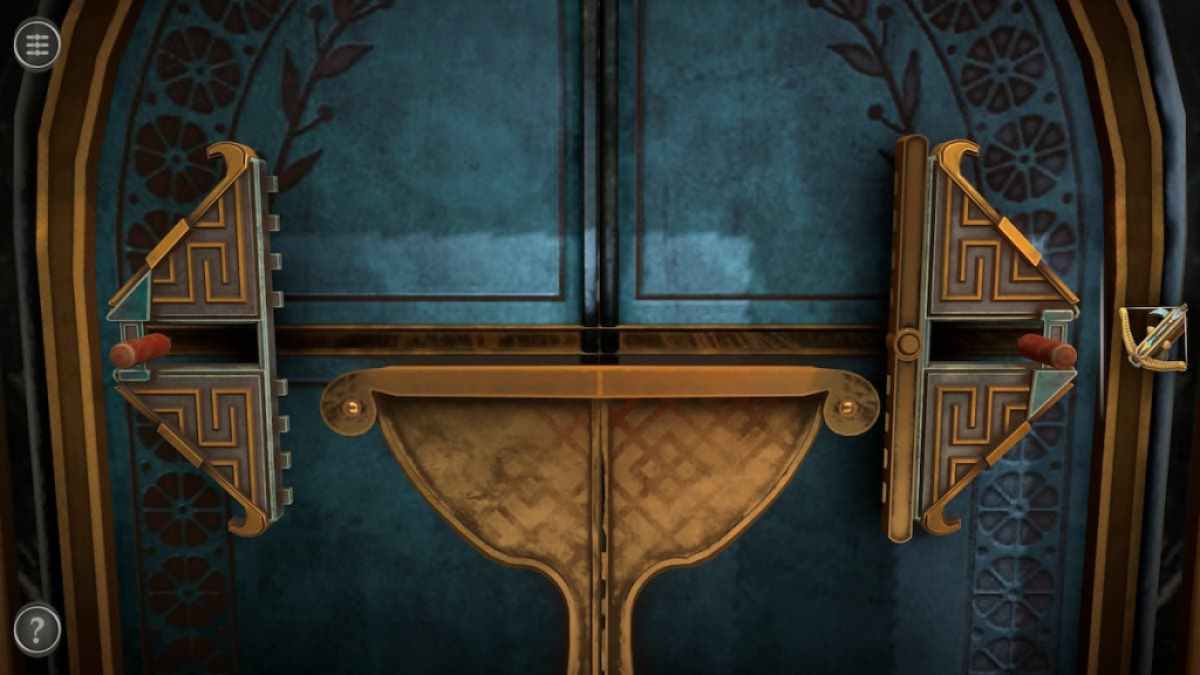
spread out their bases until their symbol match those on the other side . The one on the left should be like to a " K " , the one in the center a sideways " M " , and the one on the right is a pointed " D " . Completing this puzzler give you a Small Handle .
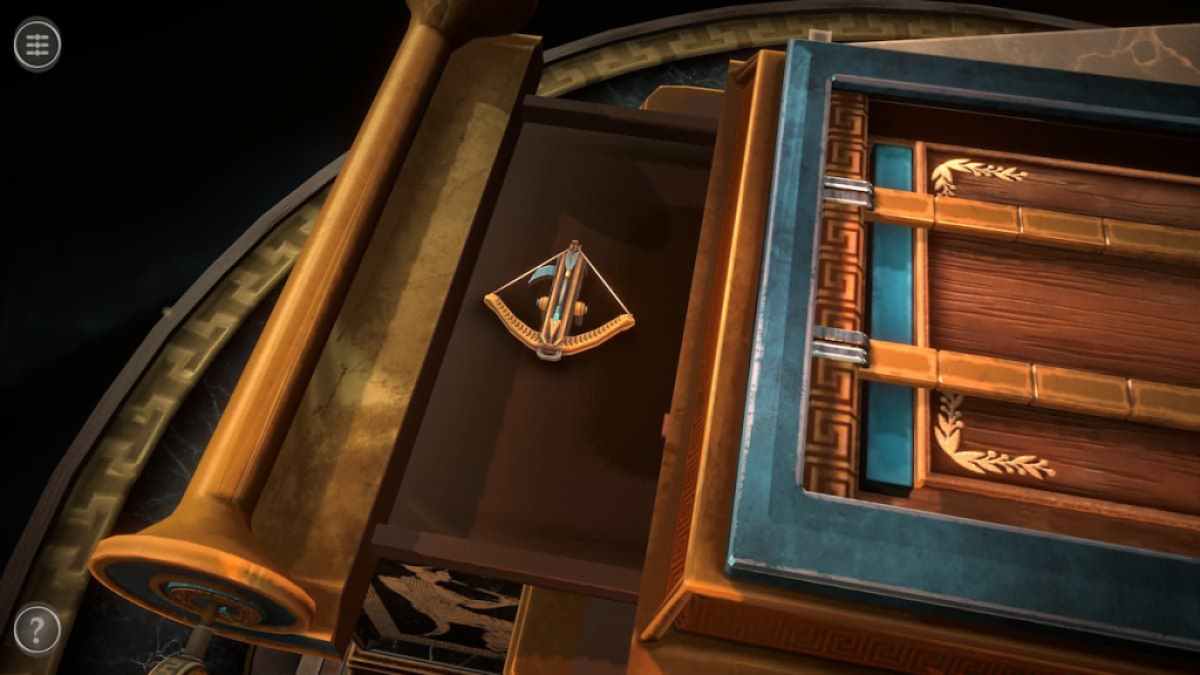
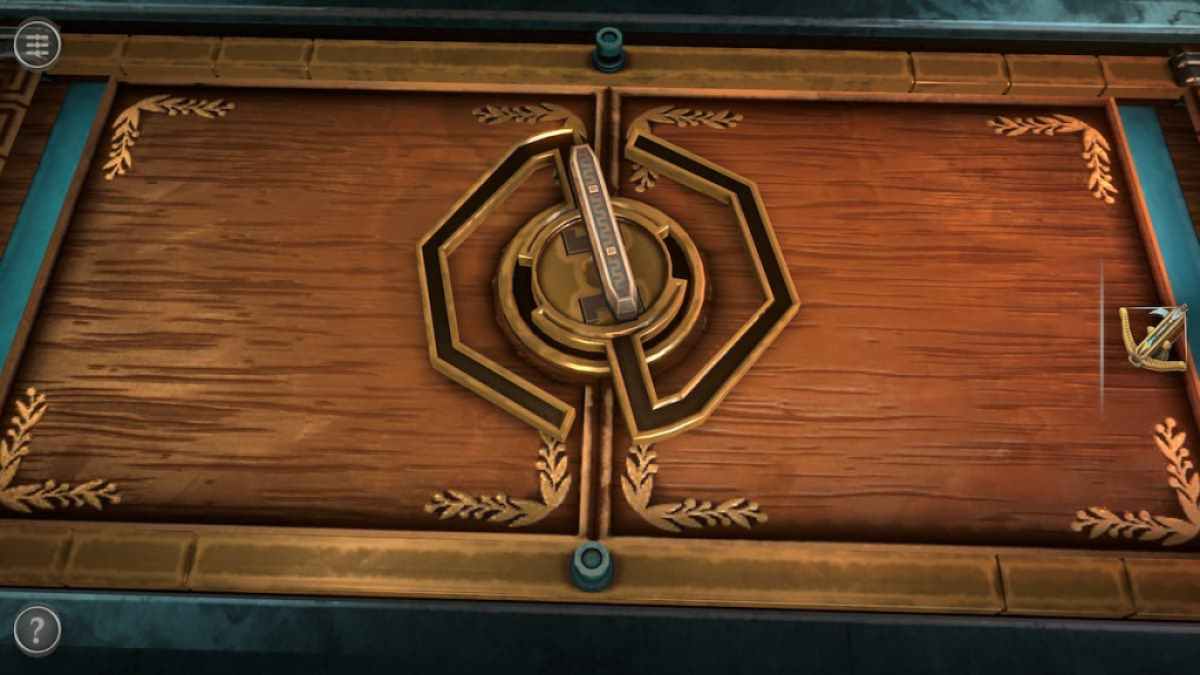
On top of the box is a uniquely shaped lock .
station the Small Handle into the ignition lock and rotate it .
Screenshot by Pro Game Guides
This unlocks the two larger bars , allowing them to be skid away to open up the box .
Related : Haunted Hunt Walkthrough , Chapter 3 – Adventure Escape Mysteries
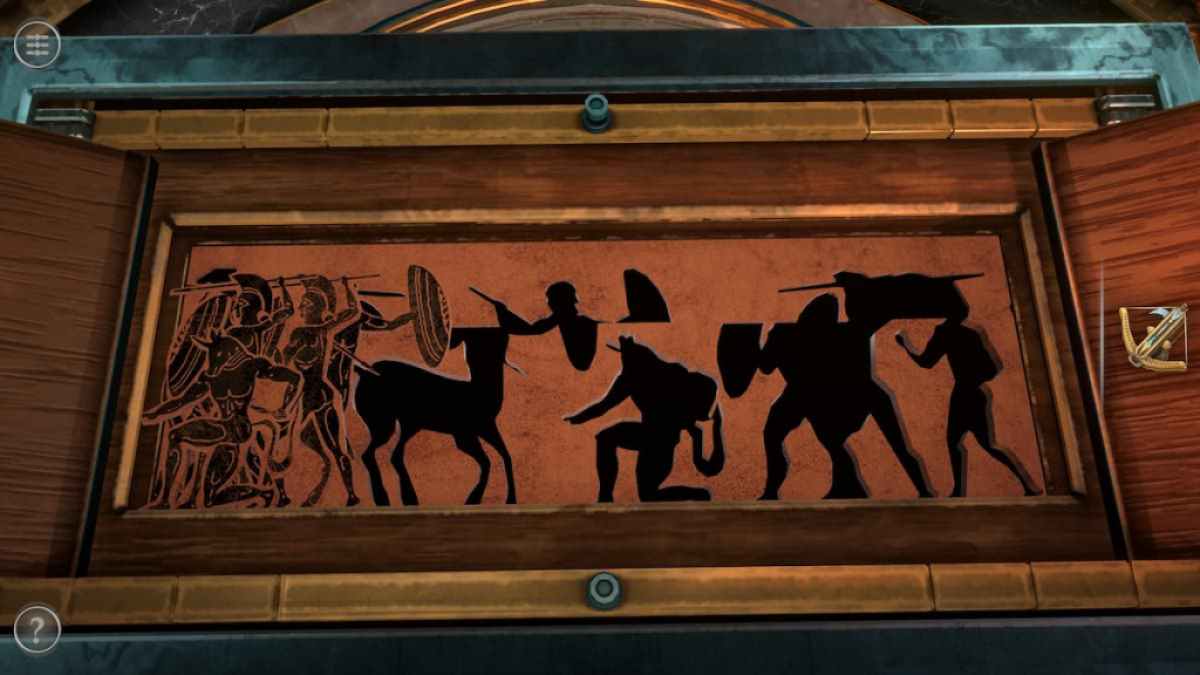
lead off this puzzle by act all of the slice to the leftfield .
Screenshot by Pro Game Guides
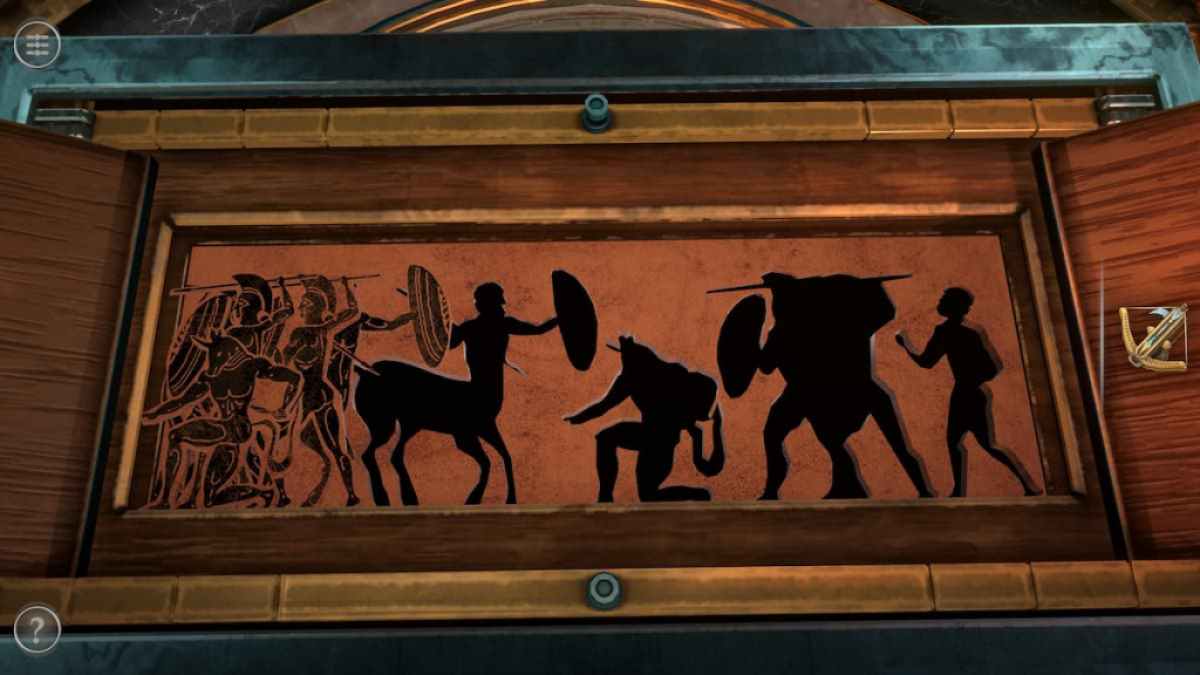
Then the top wrangle of the mystifier can be pushed to the left wing so that all the heads align with their bodies .
Place every firearm into post to fill in the puzzler , unlocking a young one on the back .
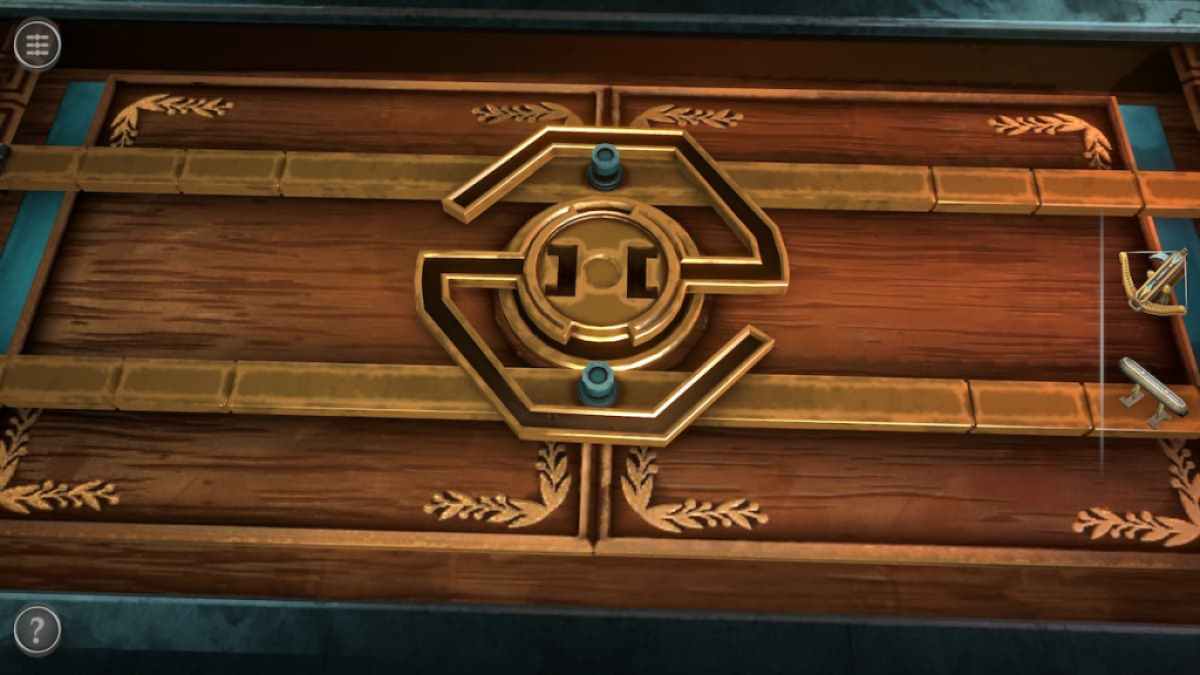
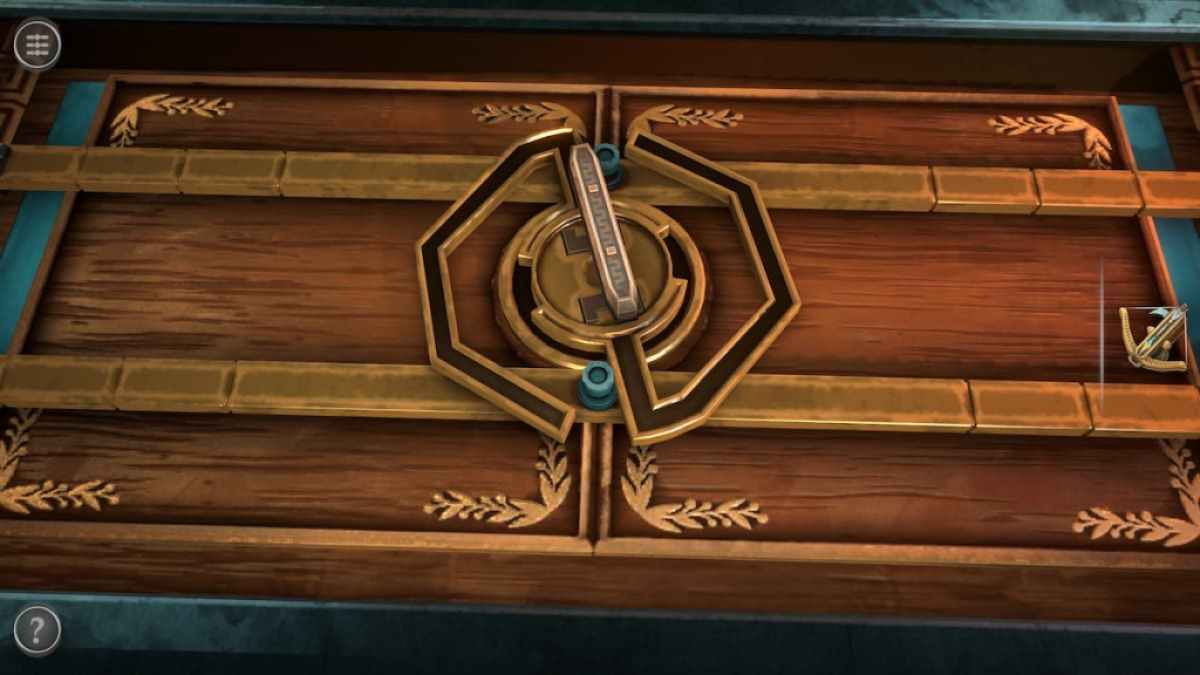
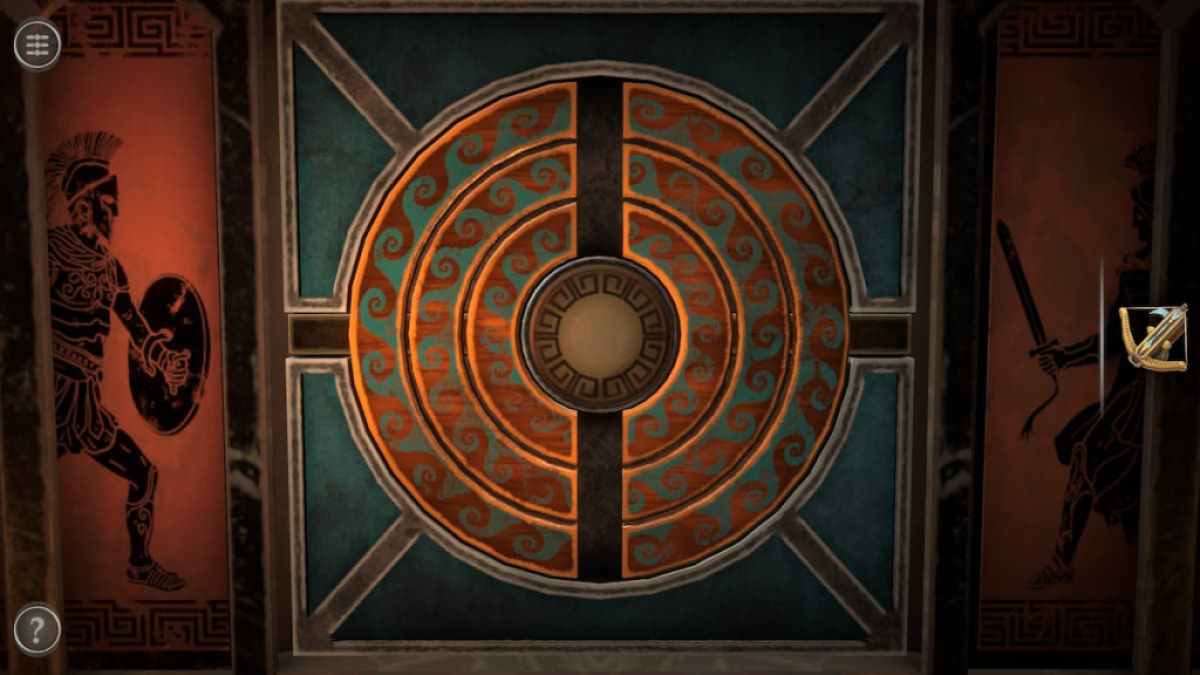
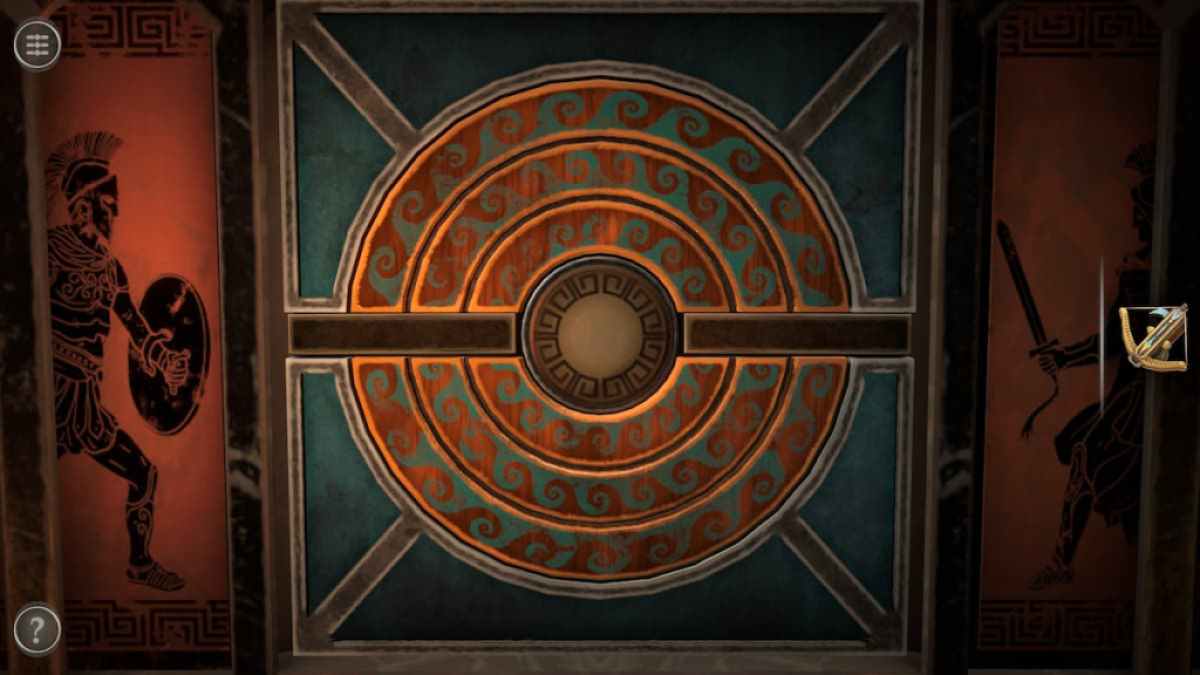
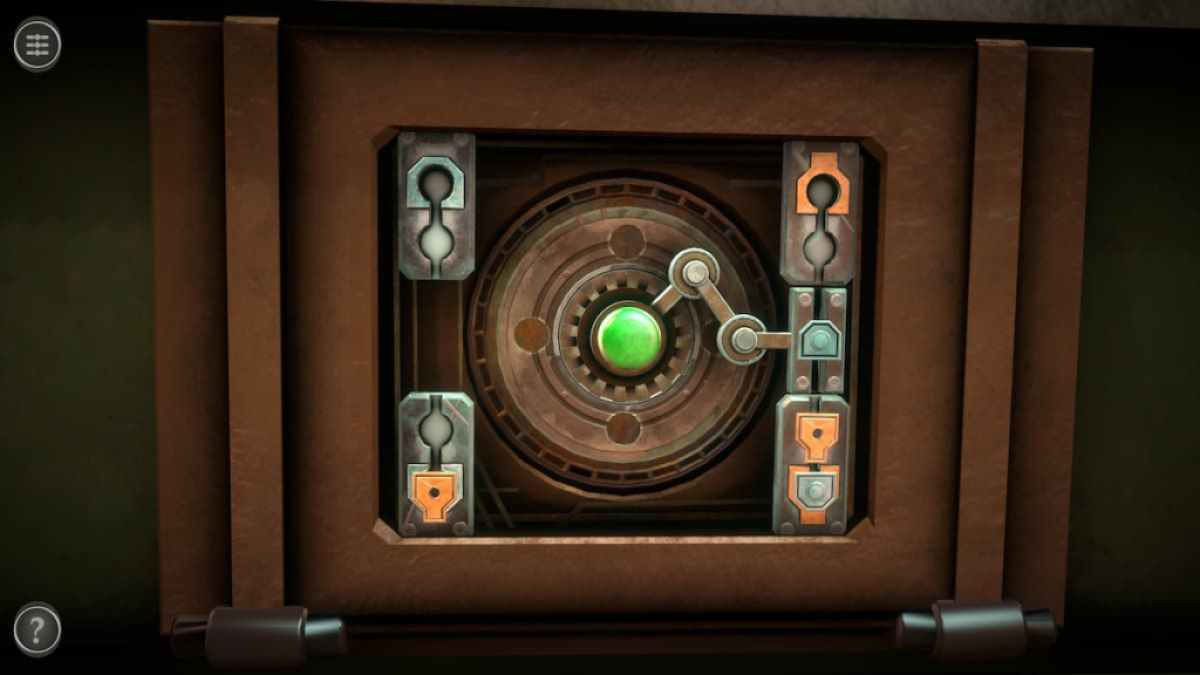
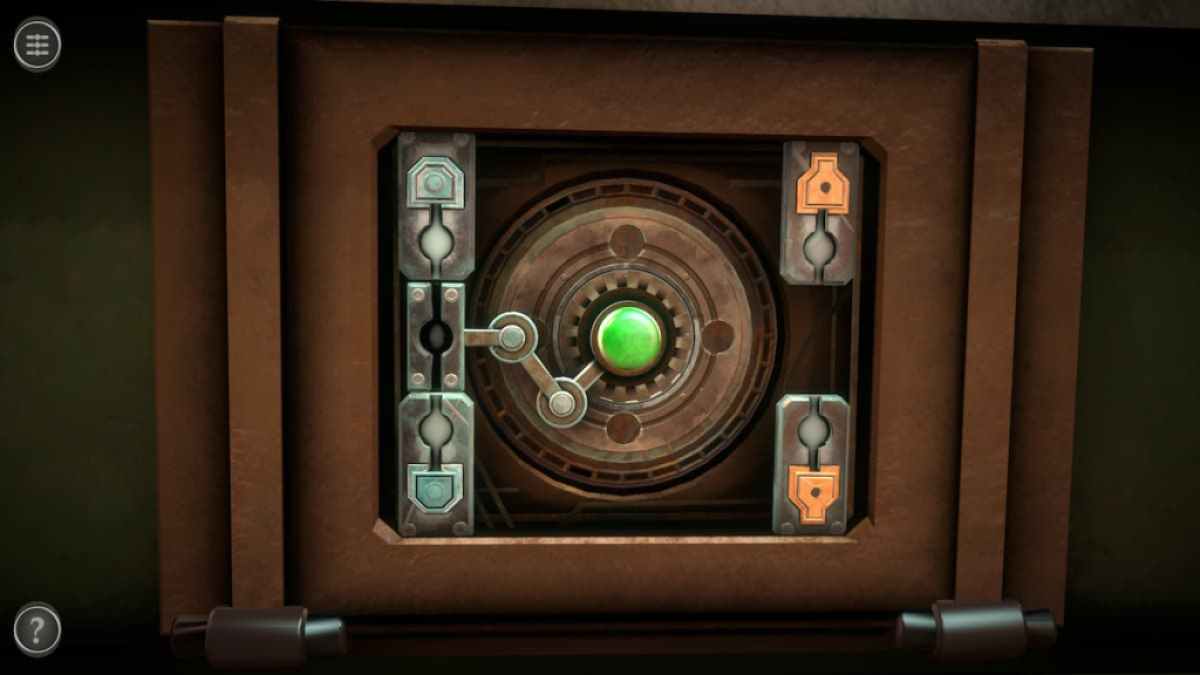
This puzzle involve compact and have the central button to spread out the three gang . Once the outer ring is align properly , the button will move to ensure the middle and then the inner closed chain .
Screenshot by Pro Game Guides
When all of the ring are aligned horizontally , the puzzle is complete .
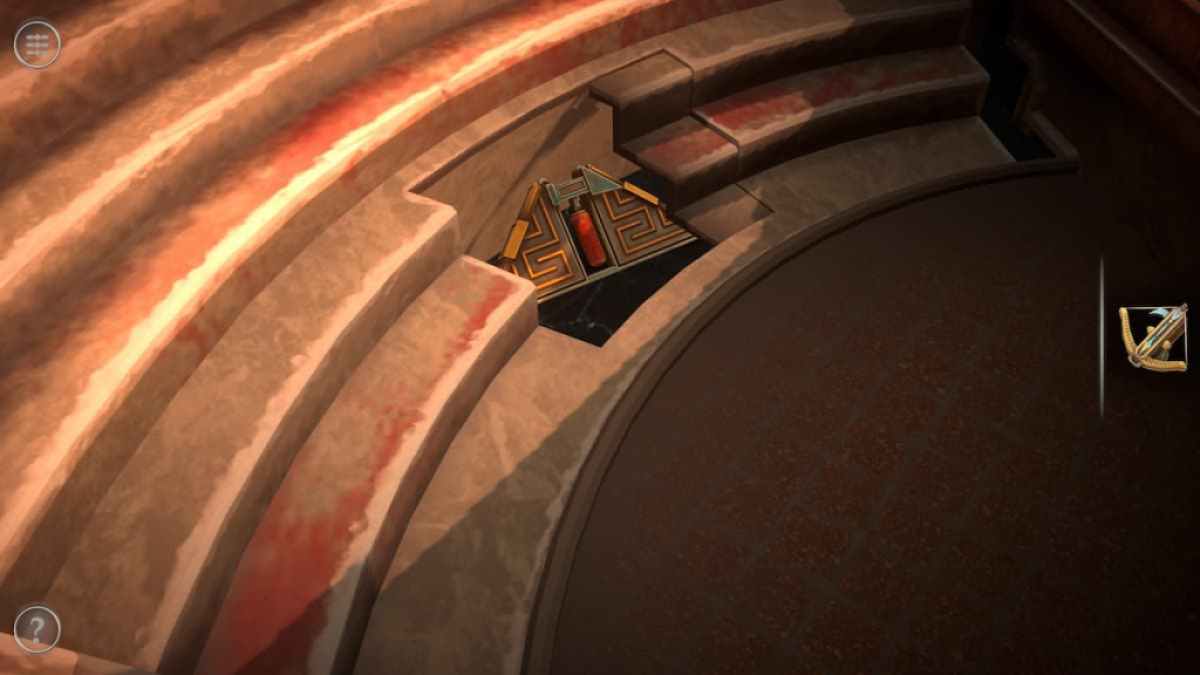
One of the seats on the left side of the stands is a secret compartment . Slide it to the right to find a Mechanism Part .
focalize on the atomic number 79 lock on the front door .
Screenshot by Pro Game Guides
Add the Mechanical Part on top of it .
revolve the Mechanical Part 90 degrees .
Pull each one-half of the Mechanical Part to the side to unlock the door .
Screenshot by Pro Game Guides
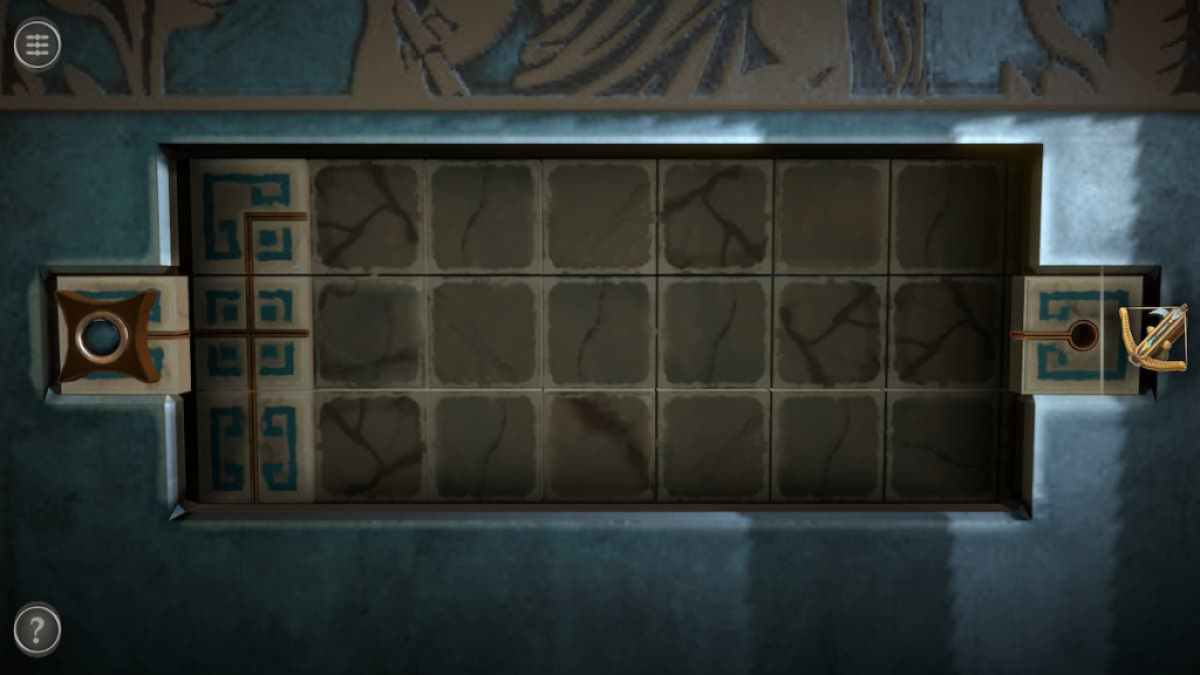
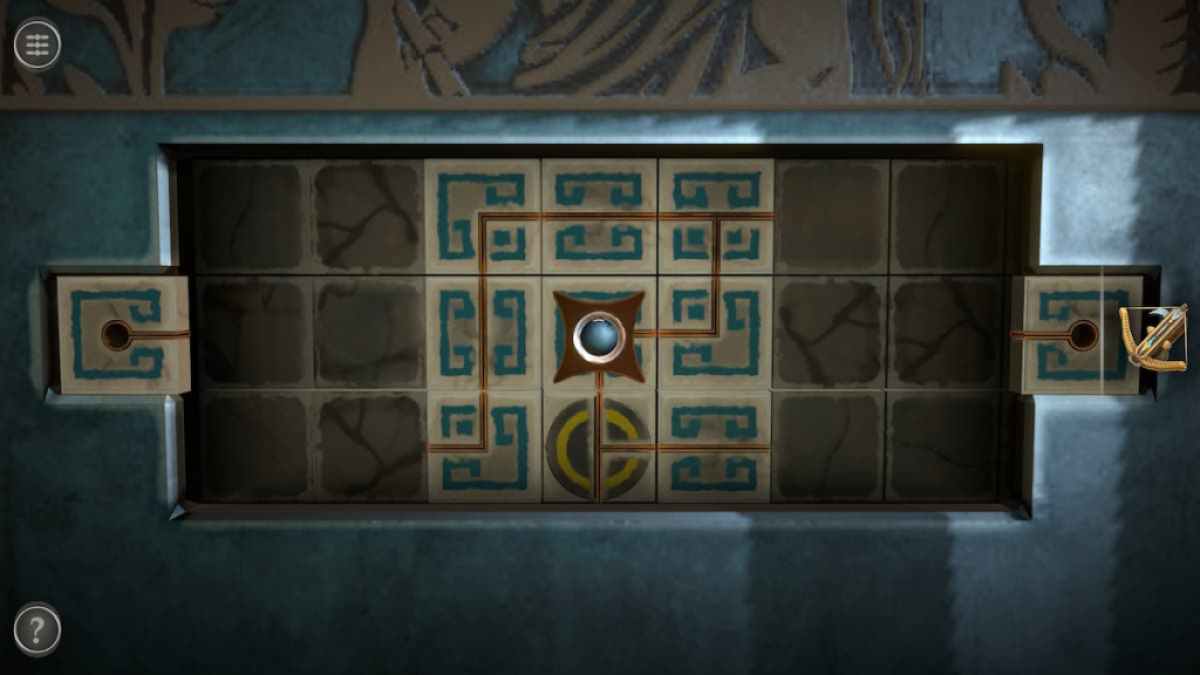
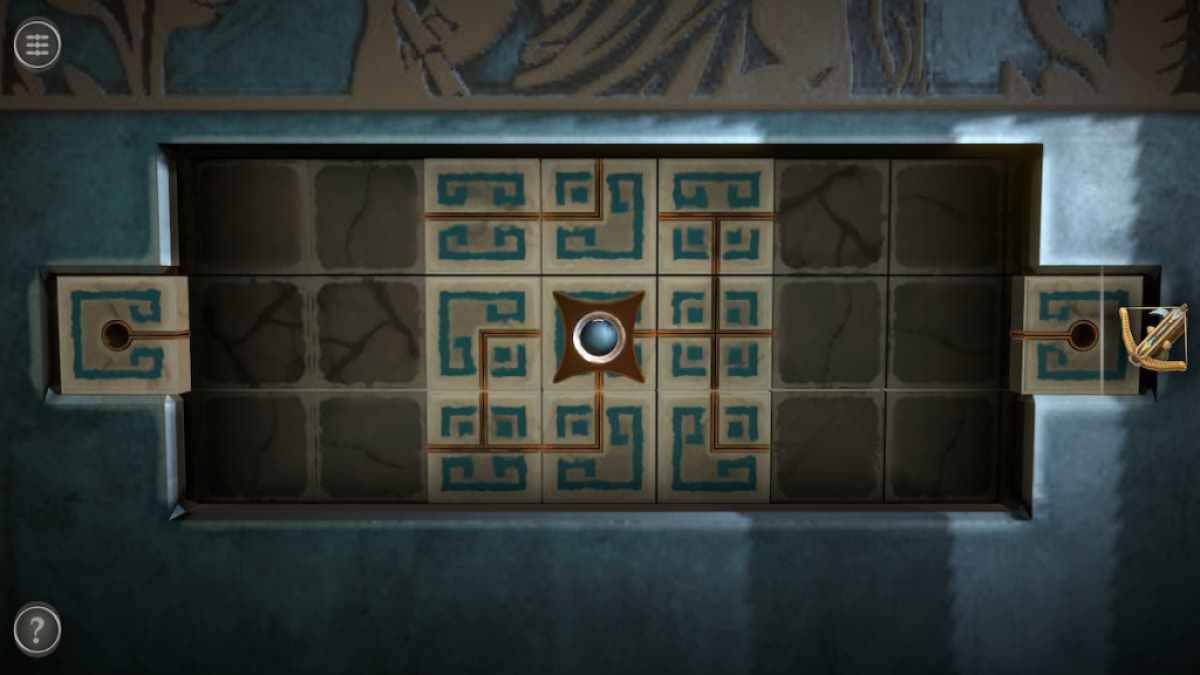
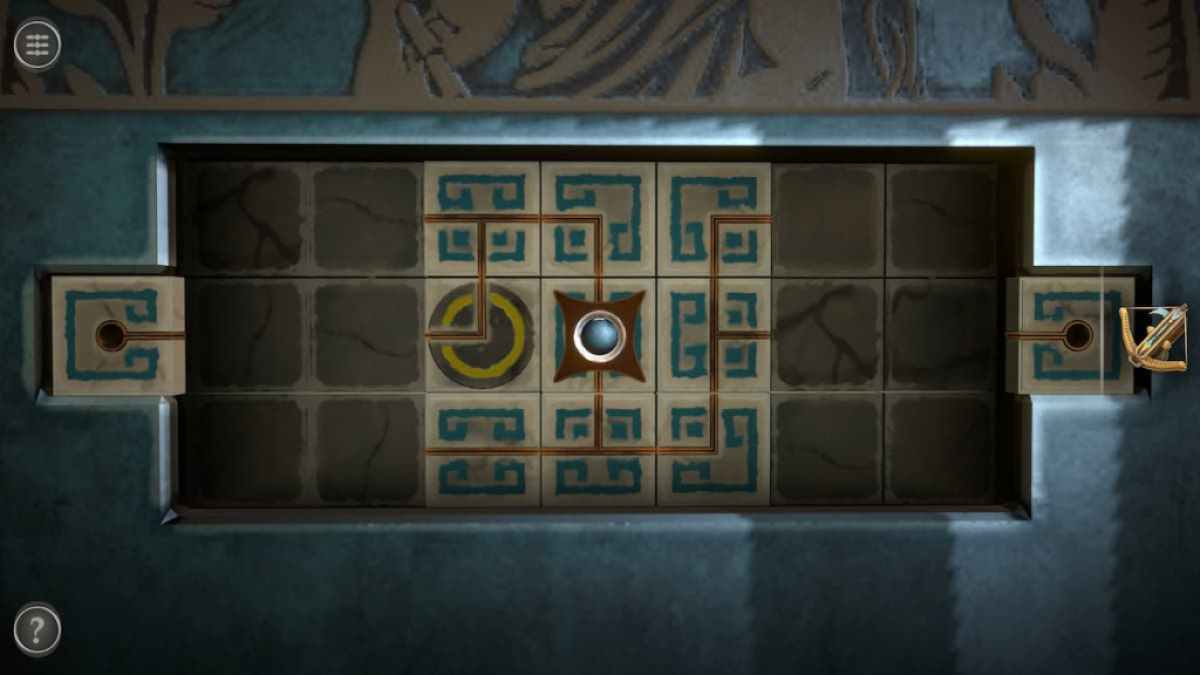
This mystifier involves moving the slider on the left side to the hole on the right side .
commence by move the yellow-bellied terrapin to the right hand . Tap the band until it associate the pulley-block your on to the block beneath it and jaunt to that one .
Move the slider down once and right once .
Screenshot by Pro Game Guides
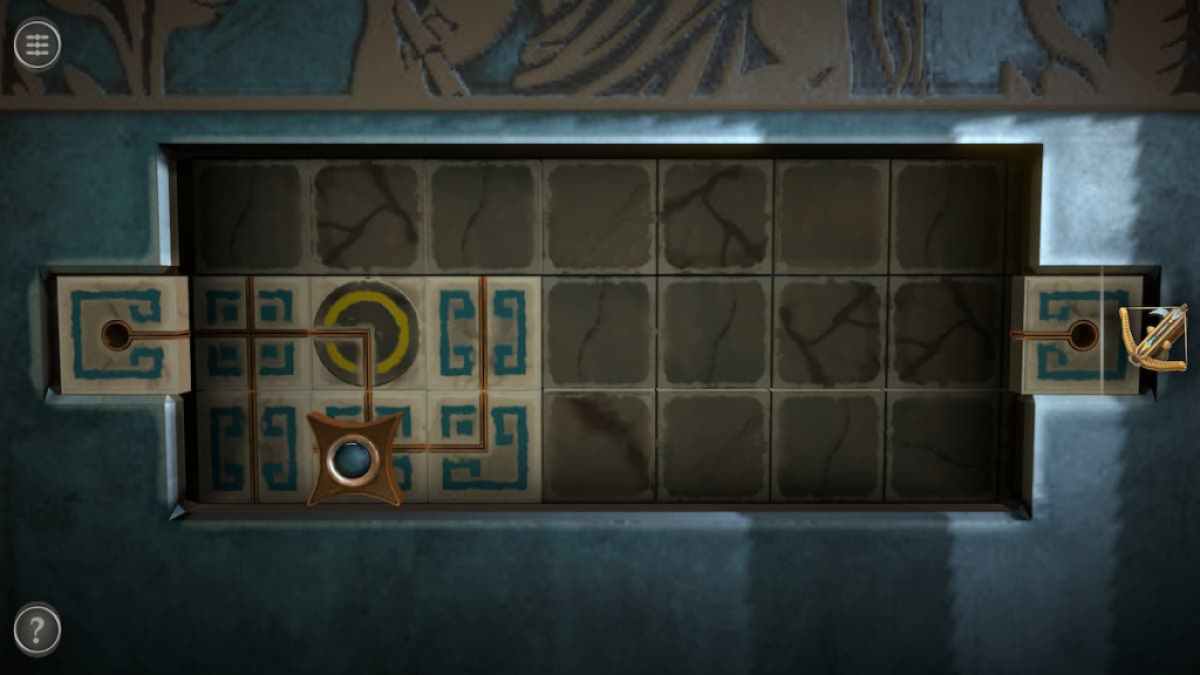
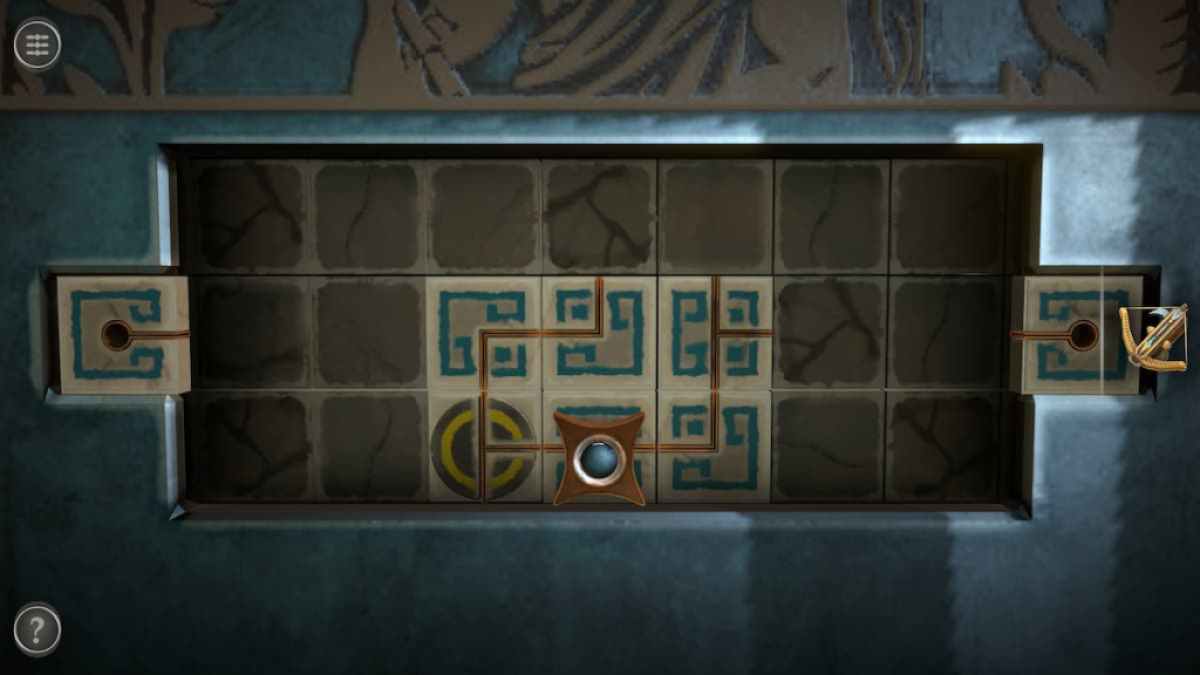
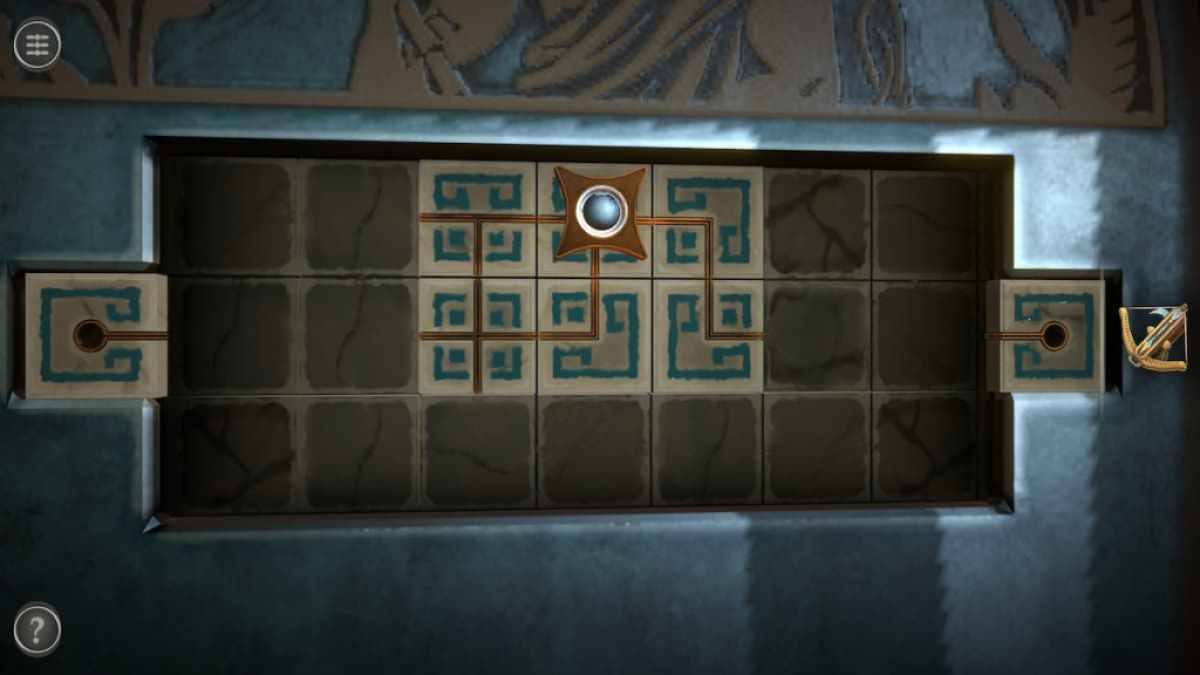
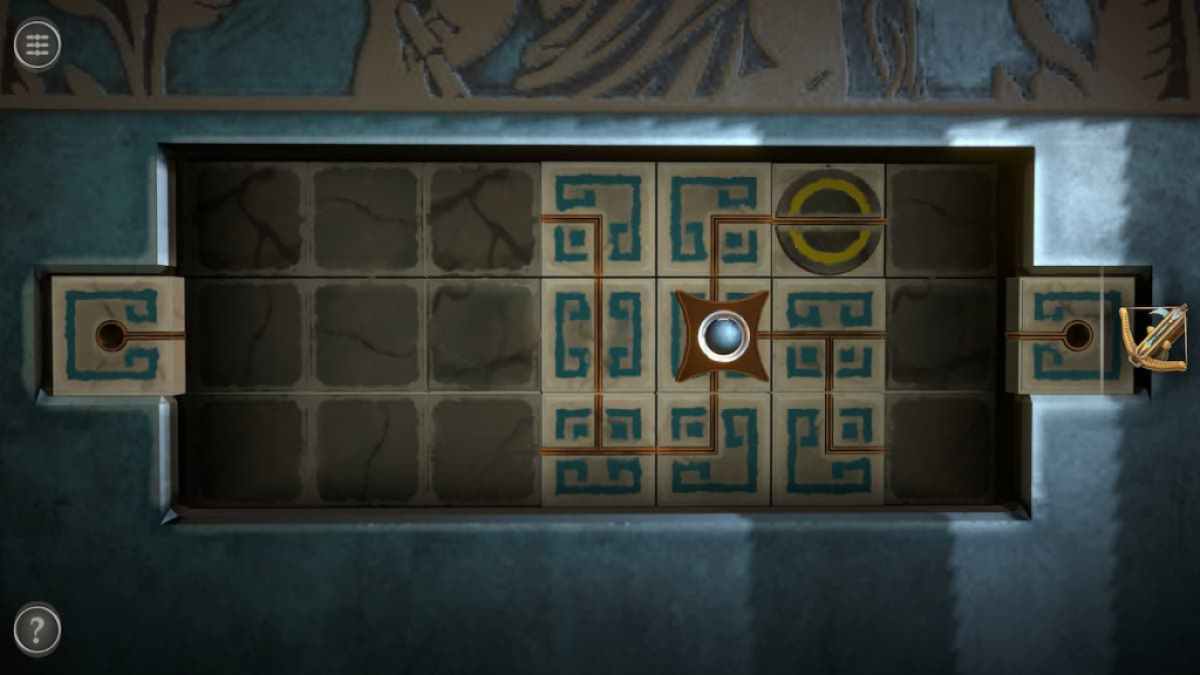
Now move it justly , then up , then right one more prison term .
Push the slider down one and flop once .
slue it the right way once and up once .
Screenshot by Pro Game Guides
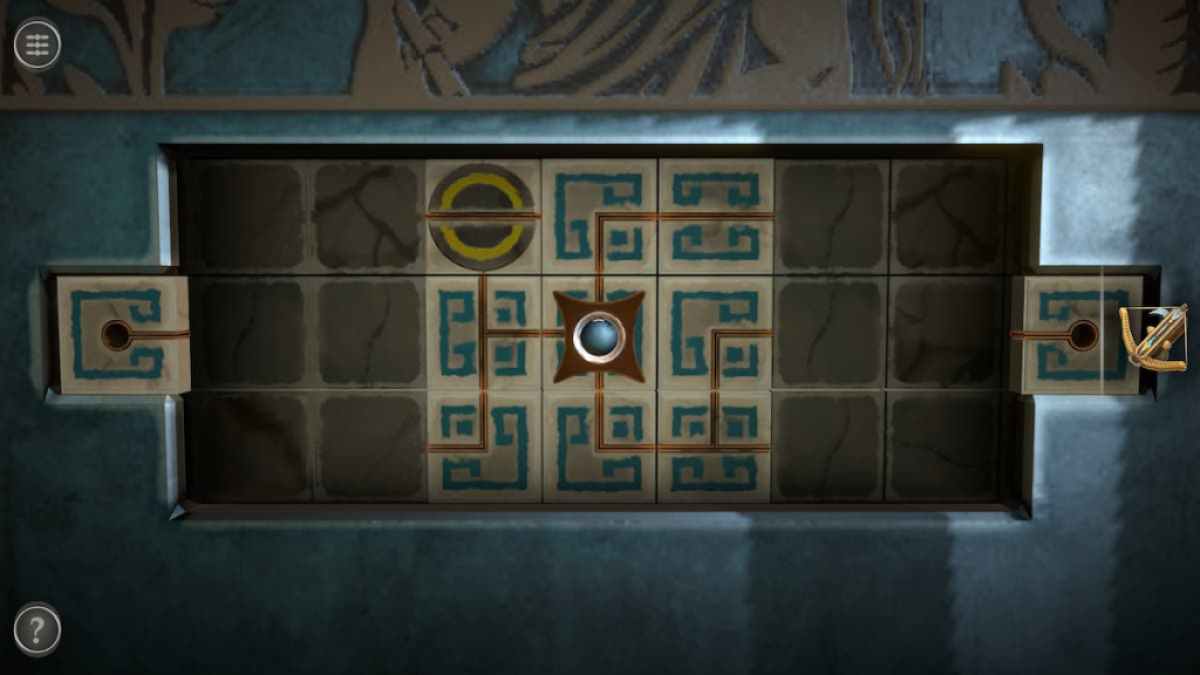
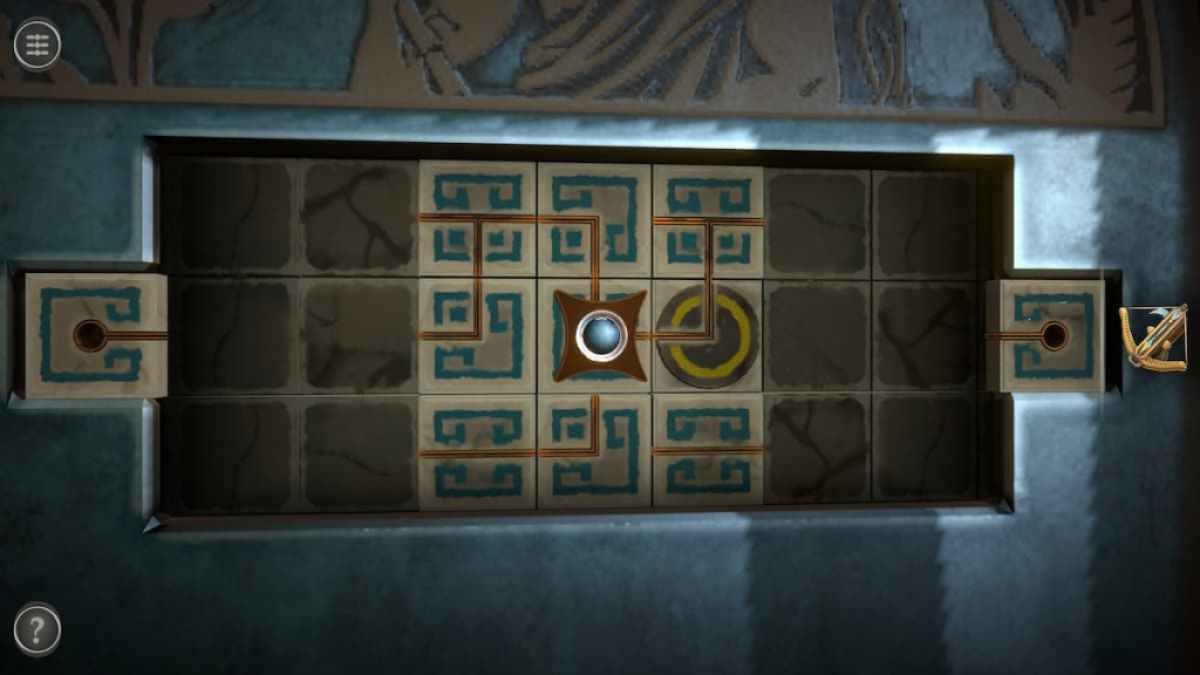
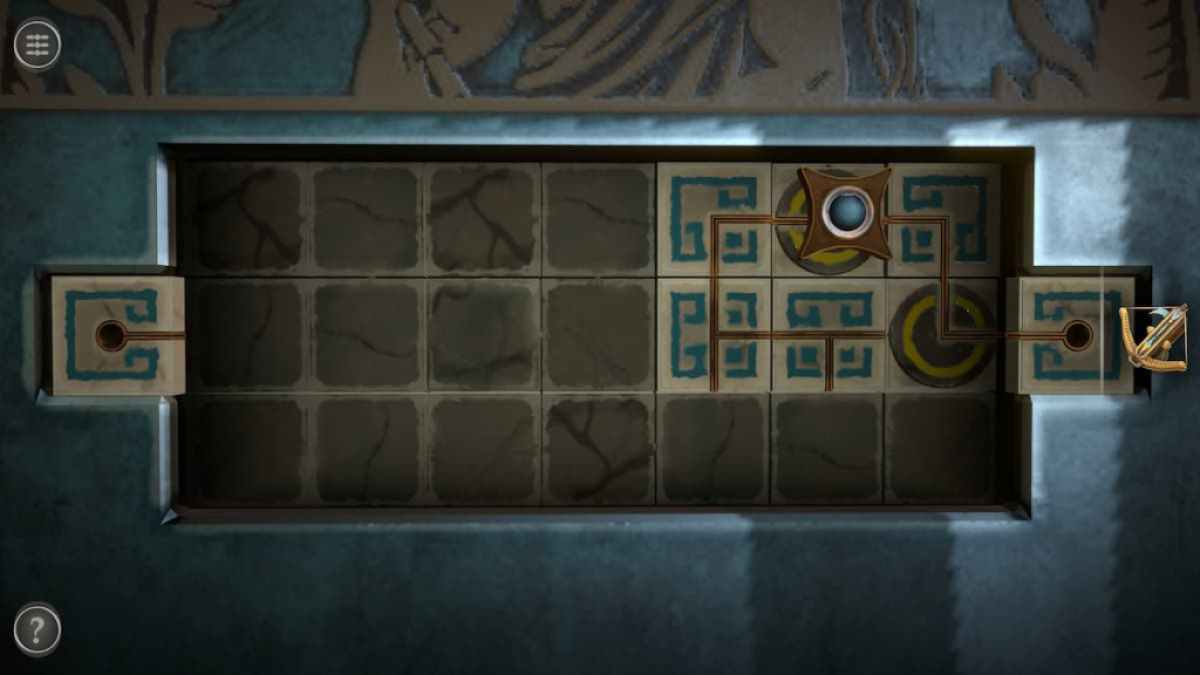
Push the slipper powerful twice and up once .
Now move the slider right once and then down . Rotate the circle so that it join the block you ’re on to the one above it .
Slide the slider to the engine block above the brown circle by moving right and up .
Screenshot by Pro Game Guides
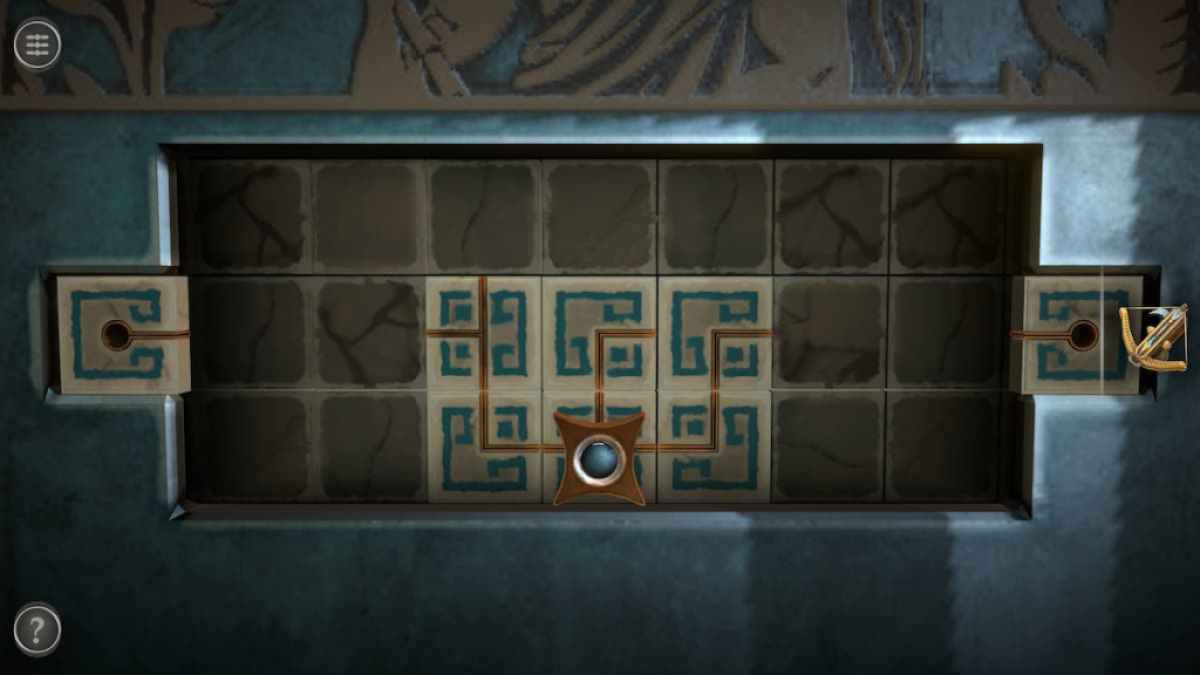
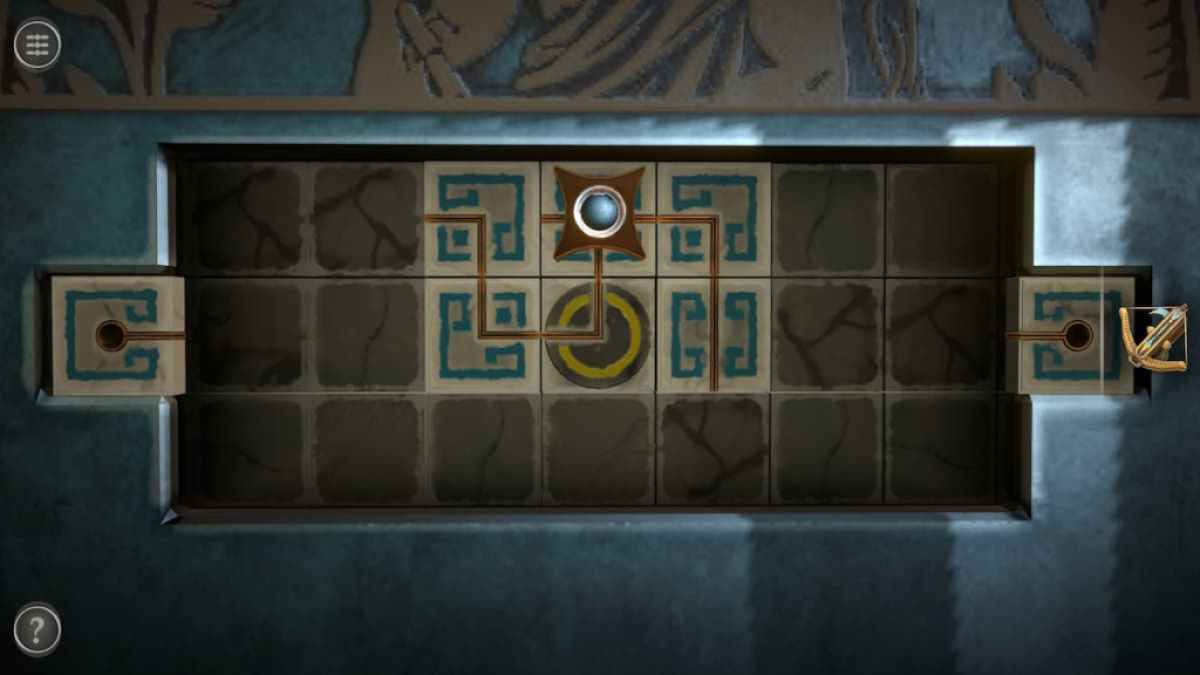
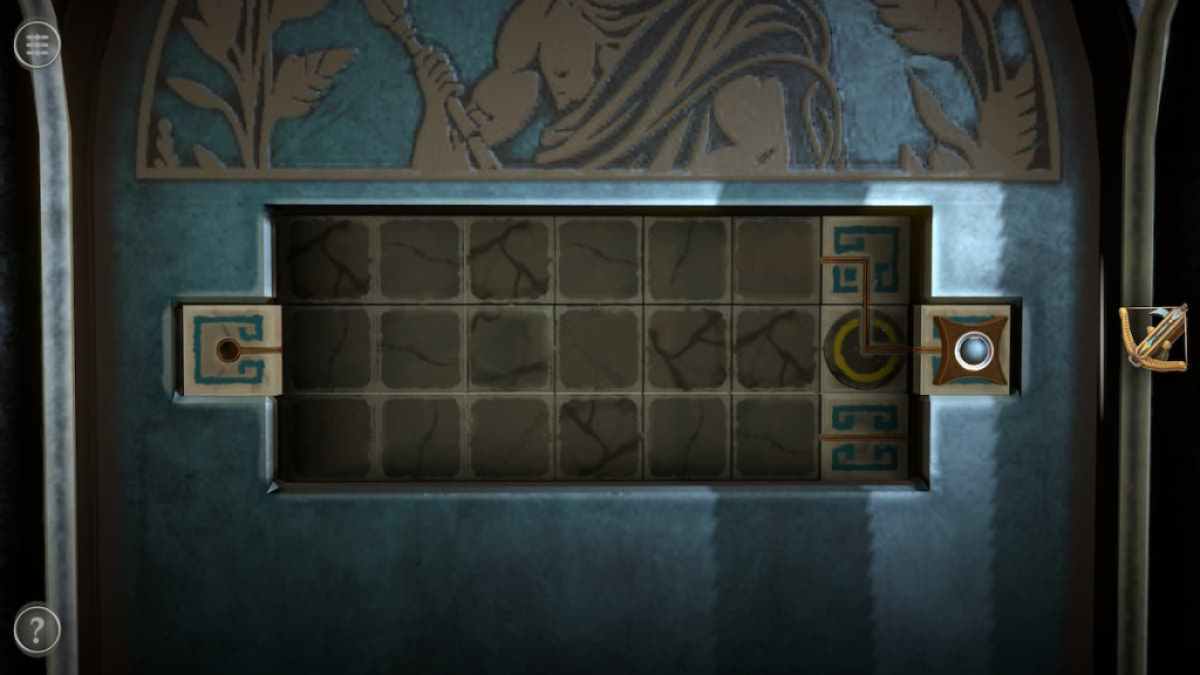
Push the slider right one and down one .
Move the slider down , then right , and then up . Tap the circular dark-brown block at the top right field to make it horizontal .
Now move the slider onto the browned block . switch the final circular brown block so that it connects the mental block in front of you to the end .
Screenshot by Pro Game Guides
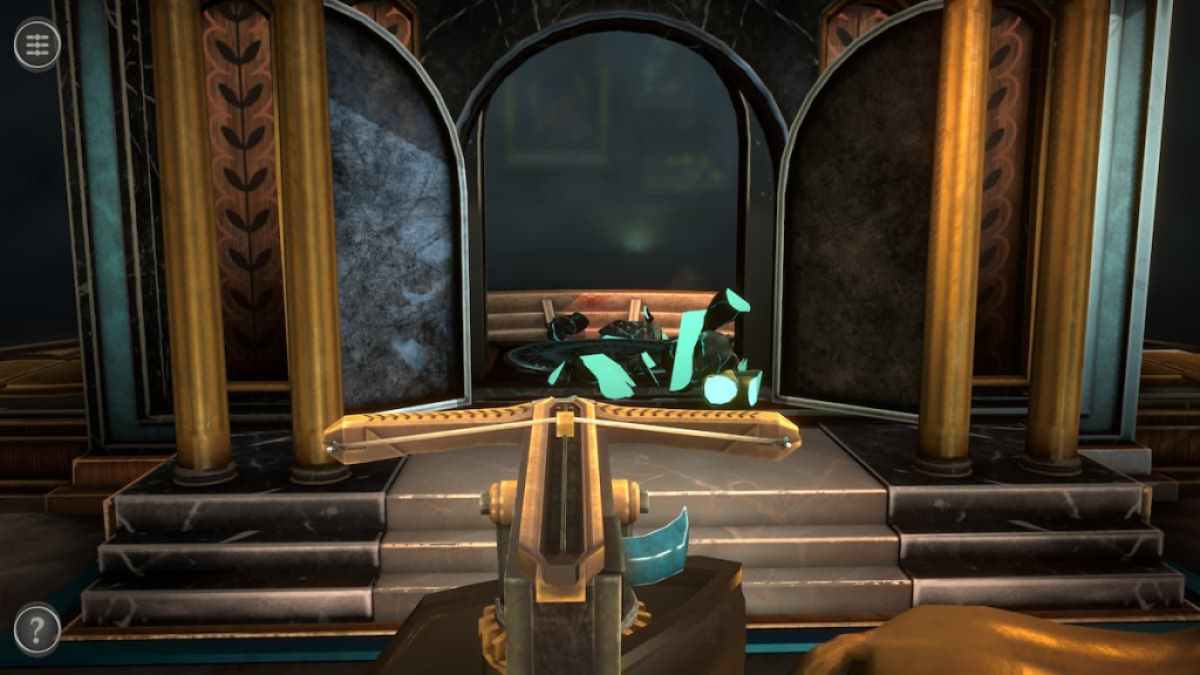
Finish the puzzler by moving the luger to the remnant .
This will start the back bulwark , leave you to see the gladiator from the back .
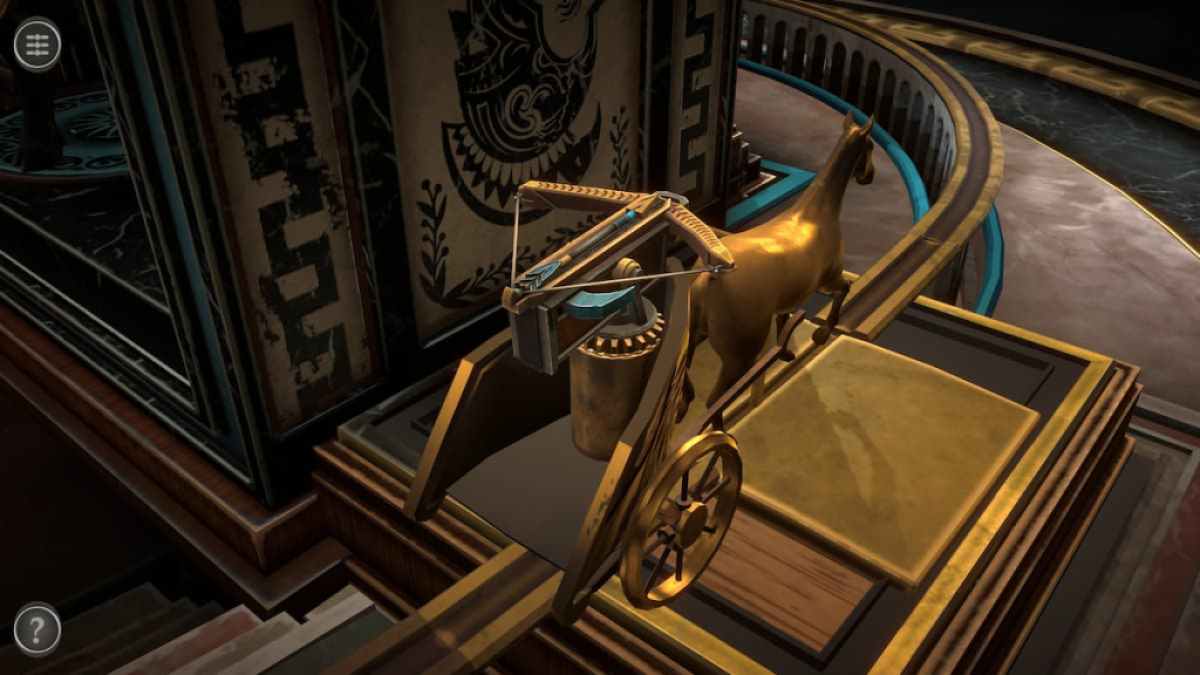
set the crossbow on the back of the cart being pulled by a sawbuck .
Screenshot by Pro Game Guides
This will make you recruit the cart . Move your shiner to shoot for the crossbow , tap the blue hold on the right side of the crossbow to fire when the gladiator ’s back is in front of you .
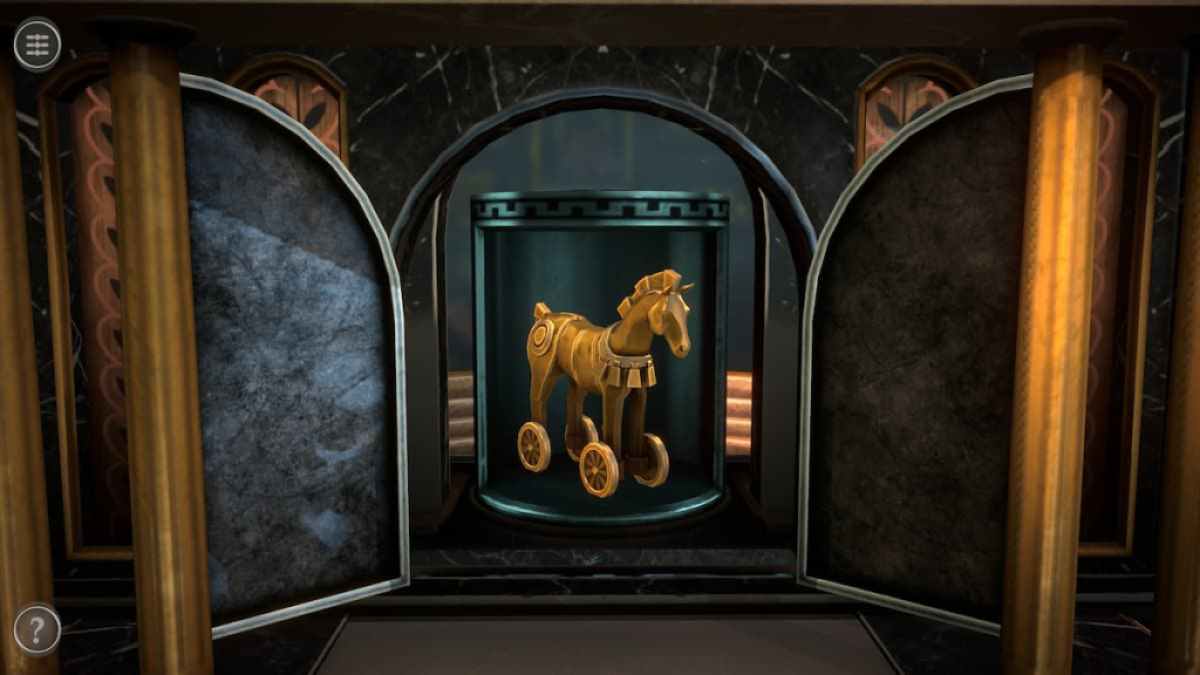
This will give you a Horse Figure , terminate the first room and opening up the second room .
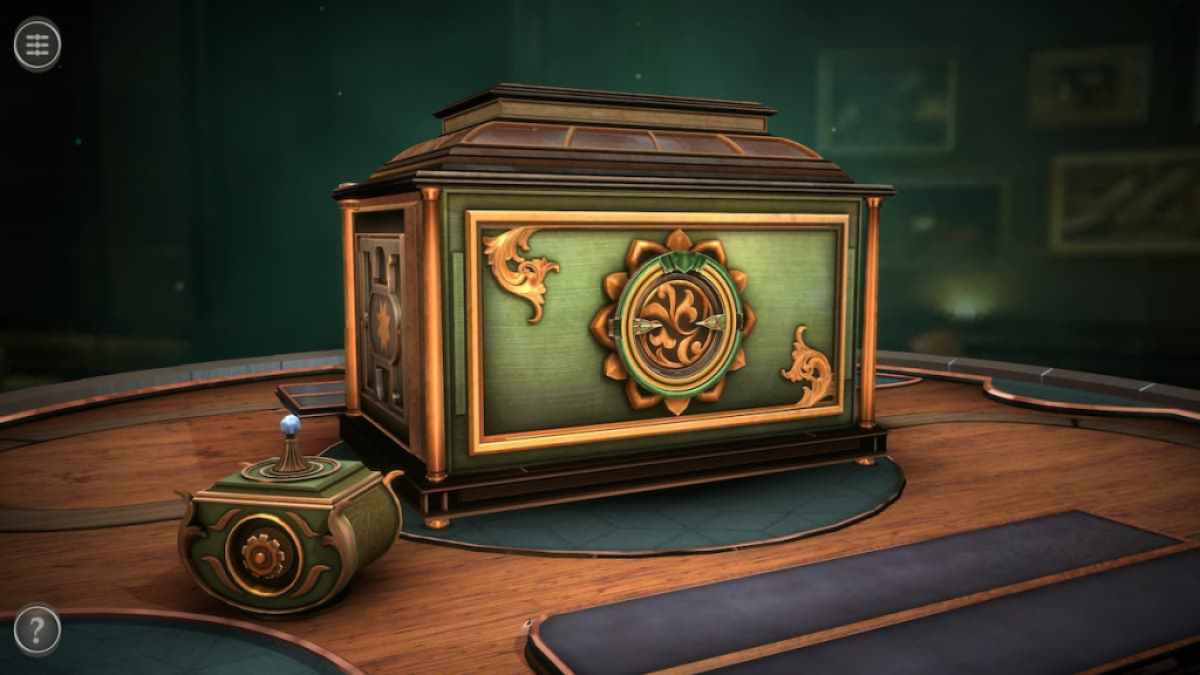
Second room puzzles
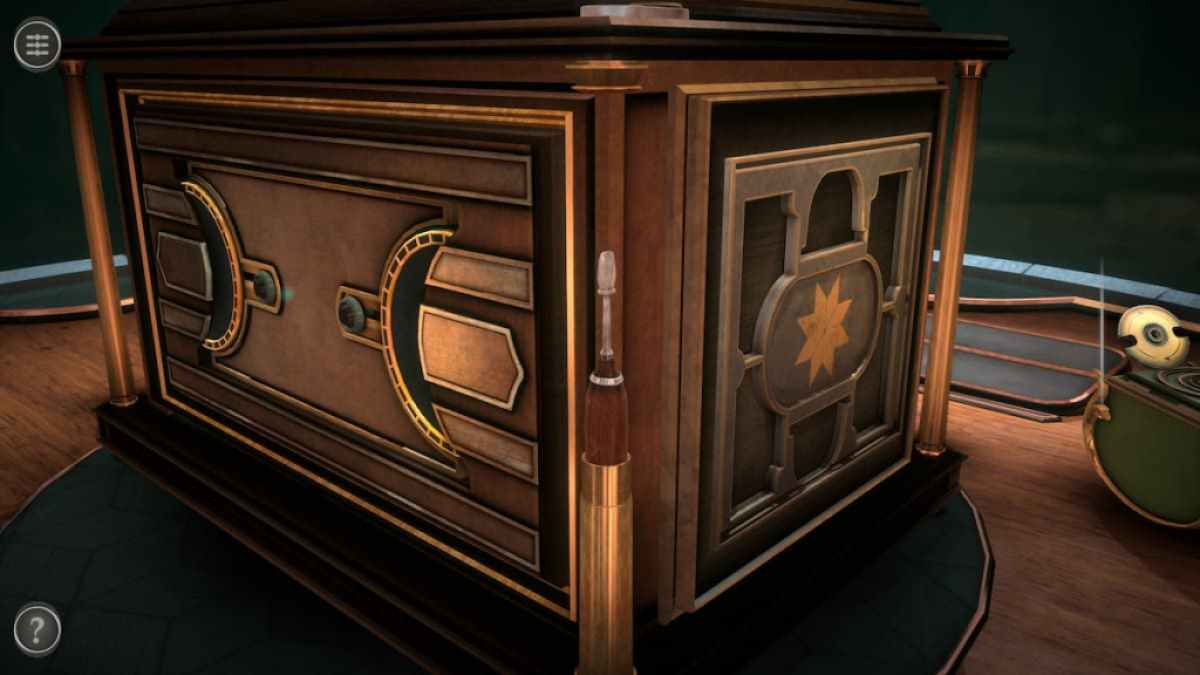
The 2d elbow room of Chapter 4 contains a fundamental loge and a smaller container on the left wing .
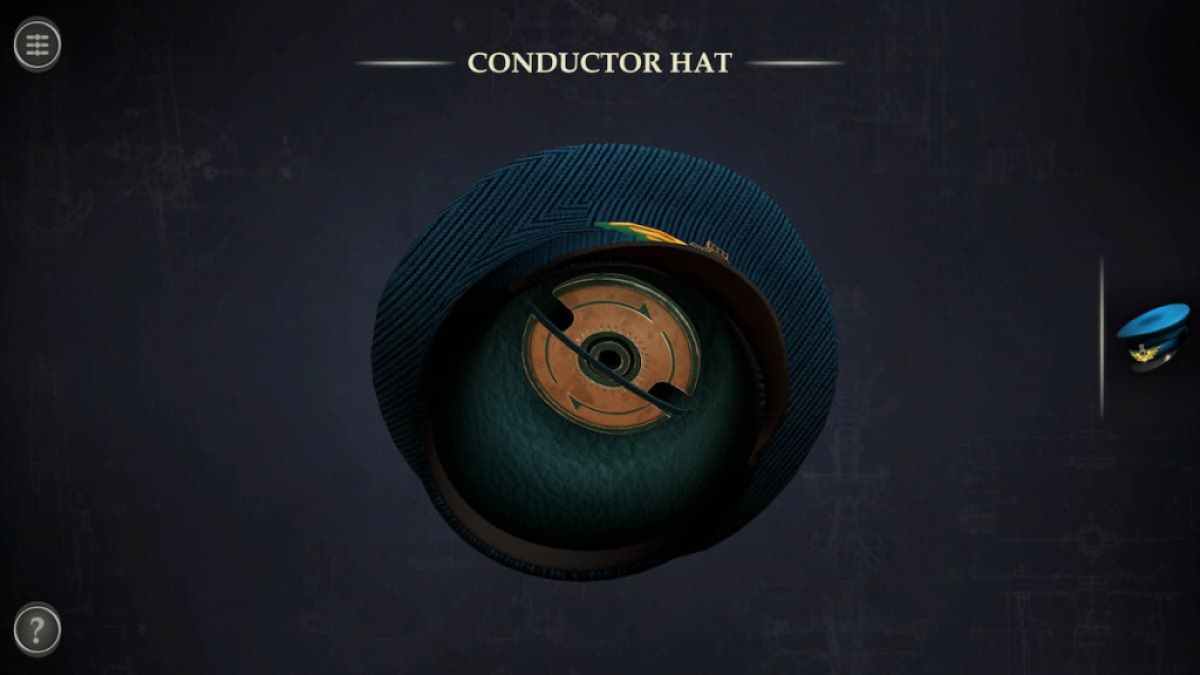
Rotate the television camera to peck up a Conductor ’s Hat on the back of the table .
open up the Conductor Hat in your inventory . Look inside of it to find a Metal Disc .
Screenshot by Pro Game Guides
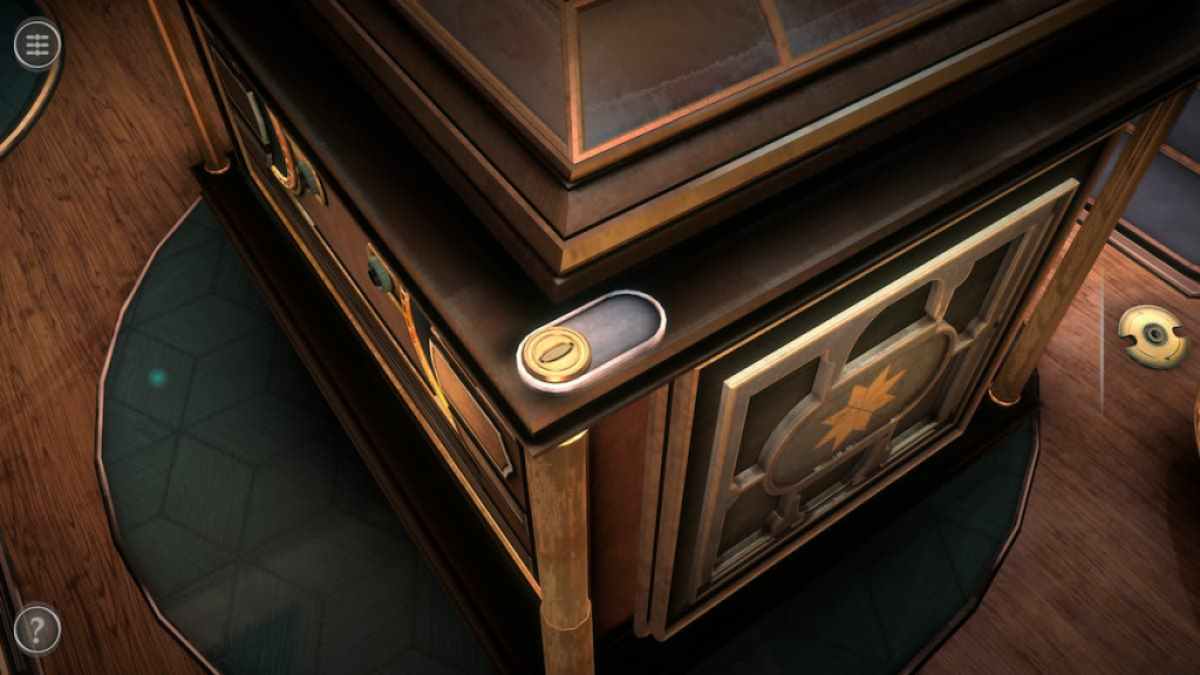
A small slider is hidden above one of the box ’s pillar . Slide it to the rightfulness and press the button hidden beneath it .
This will unwrap a Screwdriver .
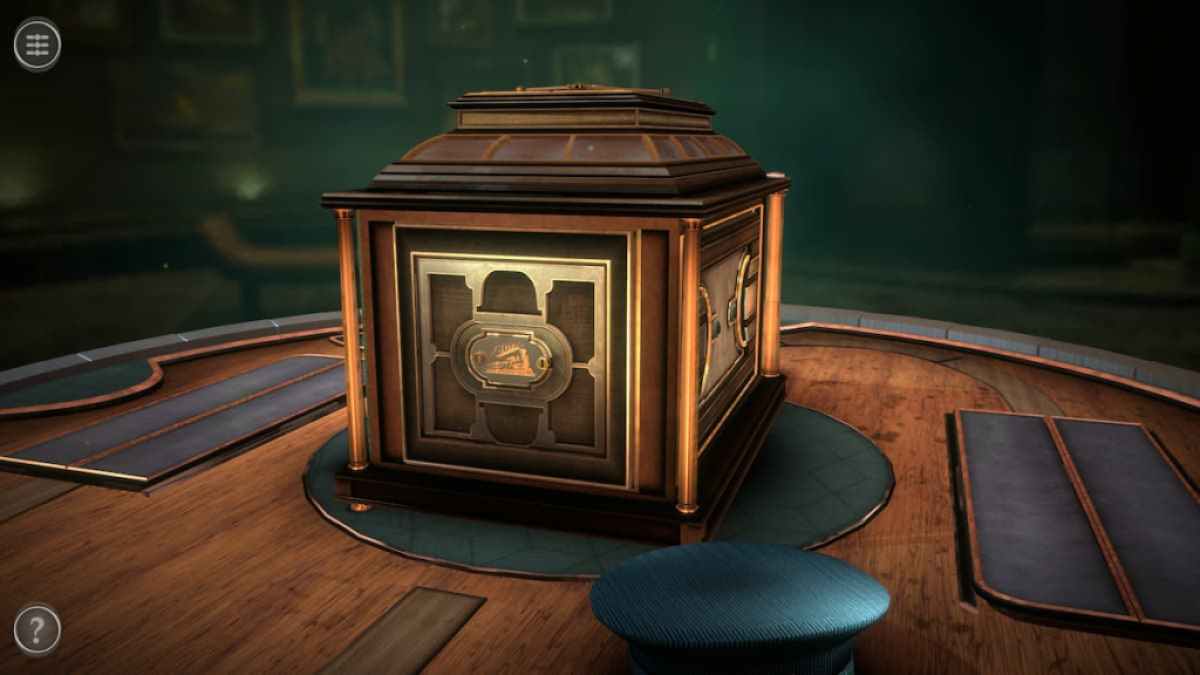
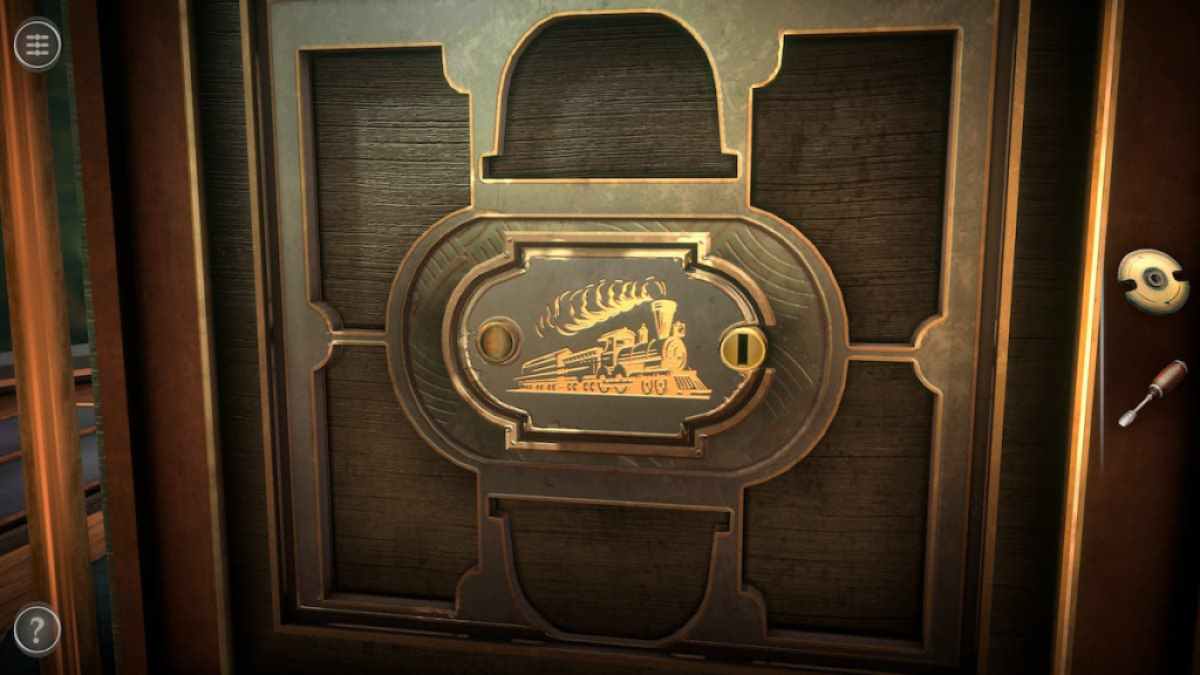
Look at the compartment on the right side of the box with the train image on it .
Screenshot by Pro Game Guides
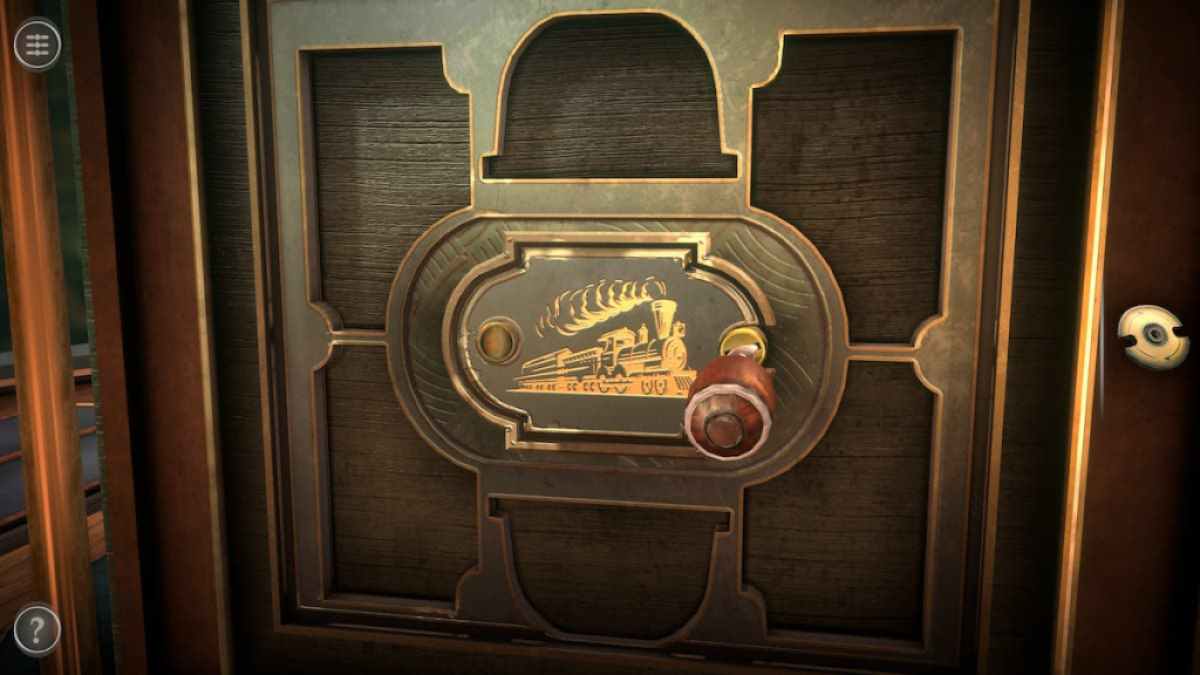
apply the Screwdriver on the screw propeller to start the compartment and get a Small Badge .
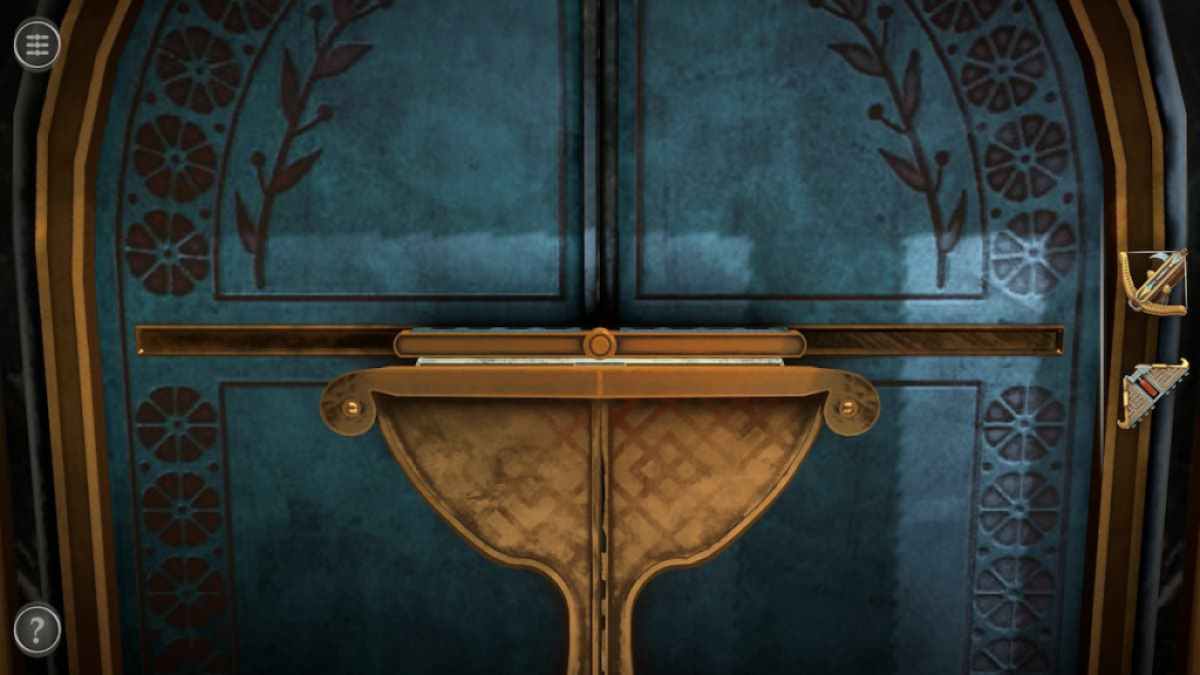
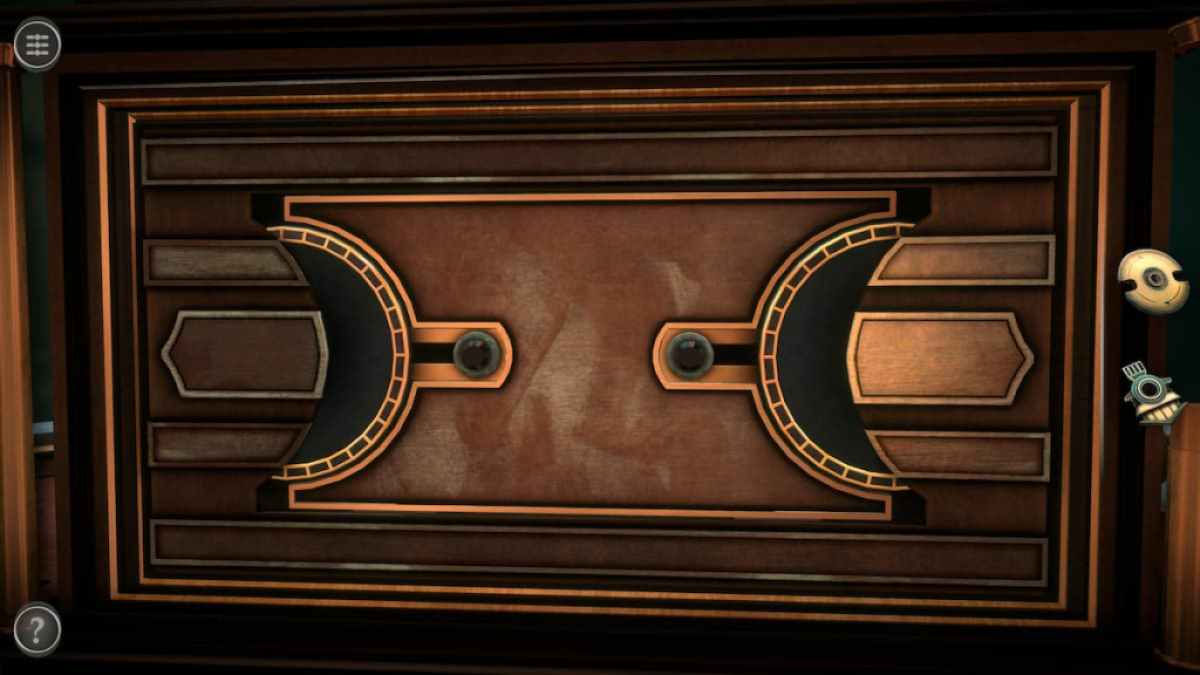
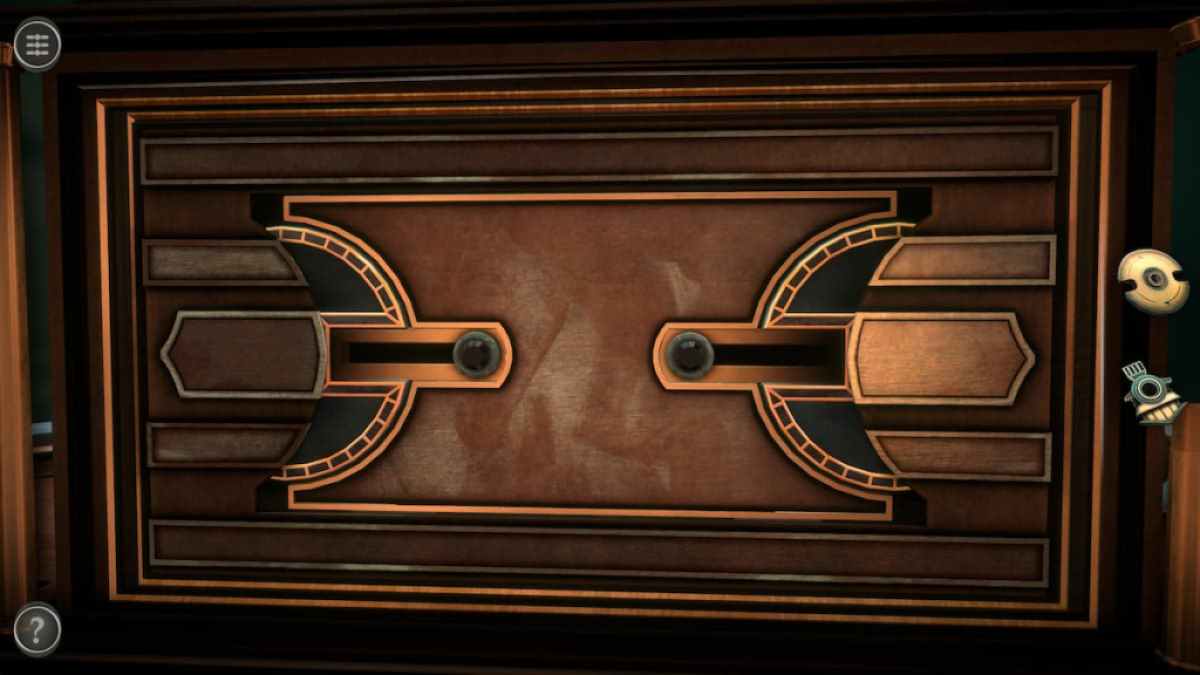
There is a teaser on the back of the box seat consist of two rotating sections and two sliders .
spread out each of the black department to make a longer path for the slider .
Screenshot by Pro Game Guides
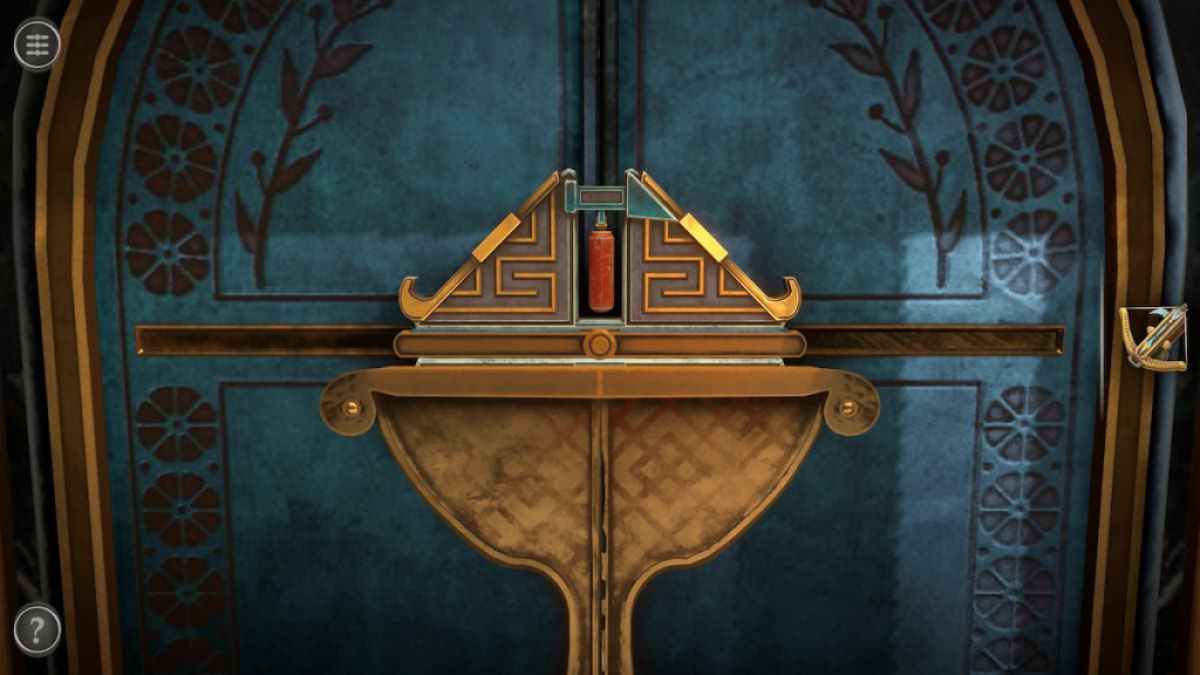
Move each skidder to unlock a compartment containing a Mechanical Wheel .
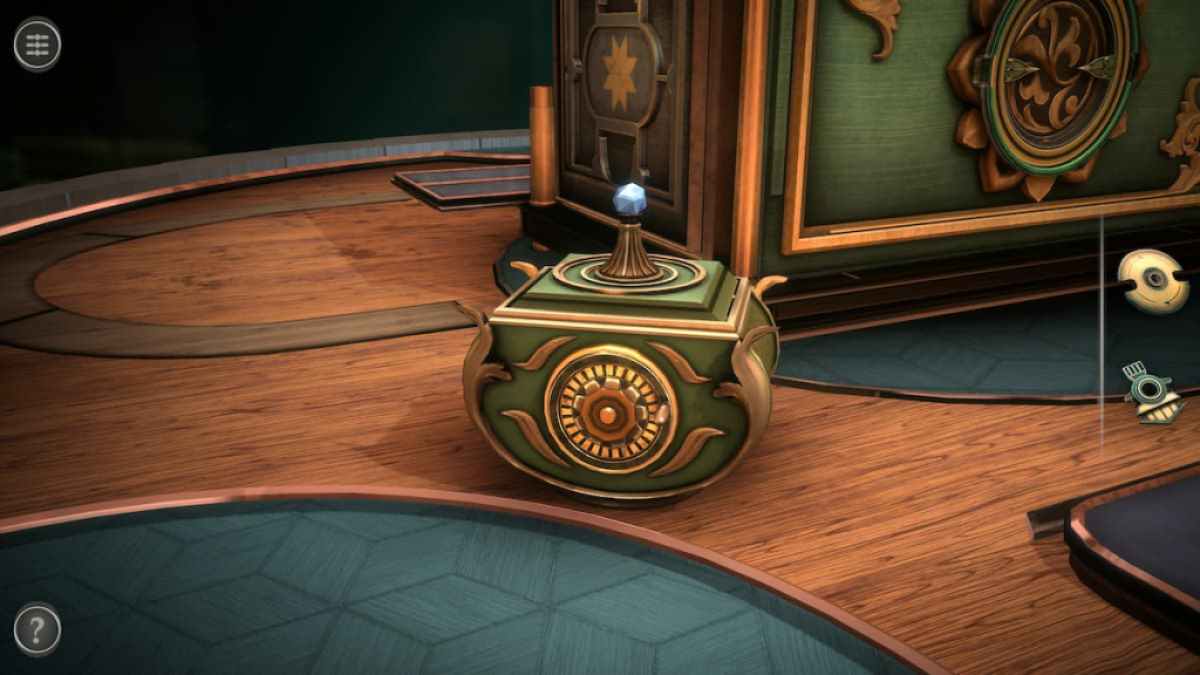
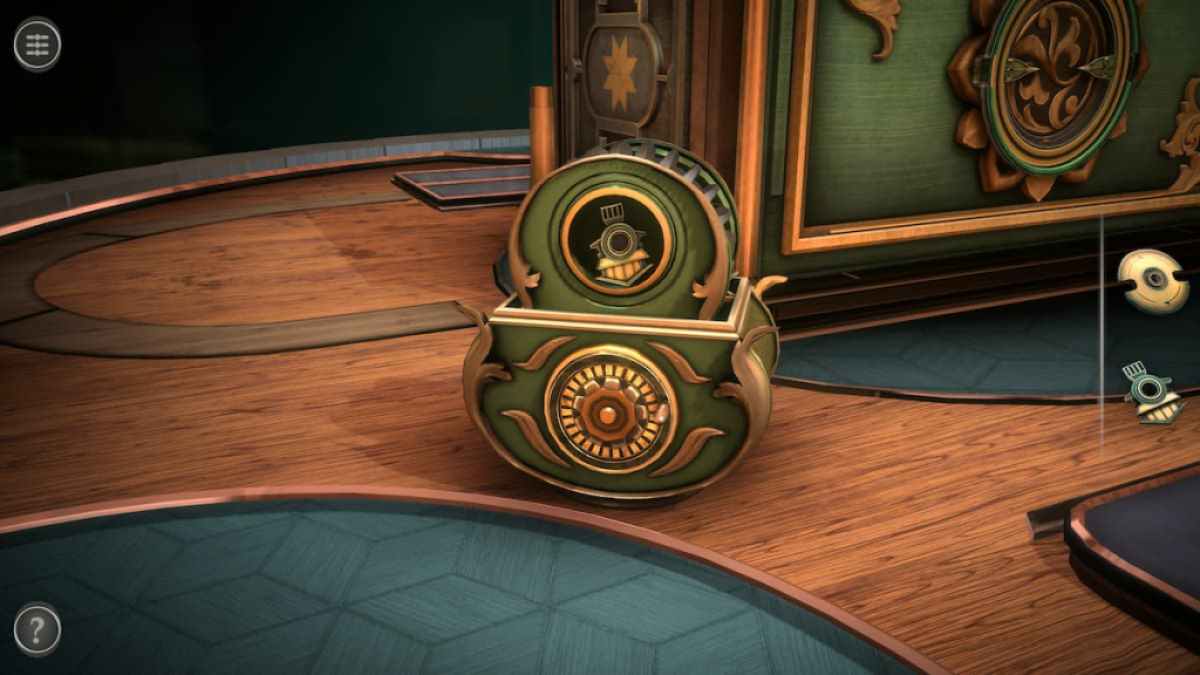
Place the Mechanical Wheel on the front of the small container .
go around the wheel to get a second Small Badge .

Screenshot by Pro Game Guides
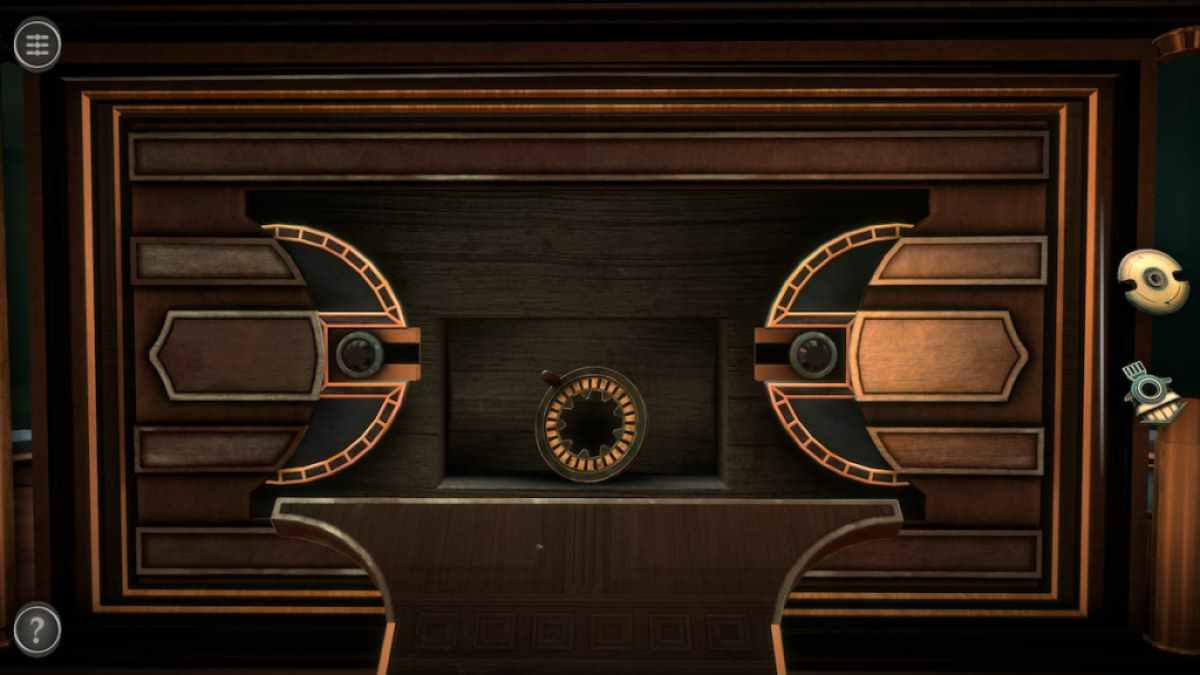
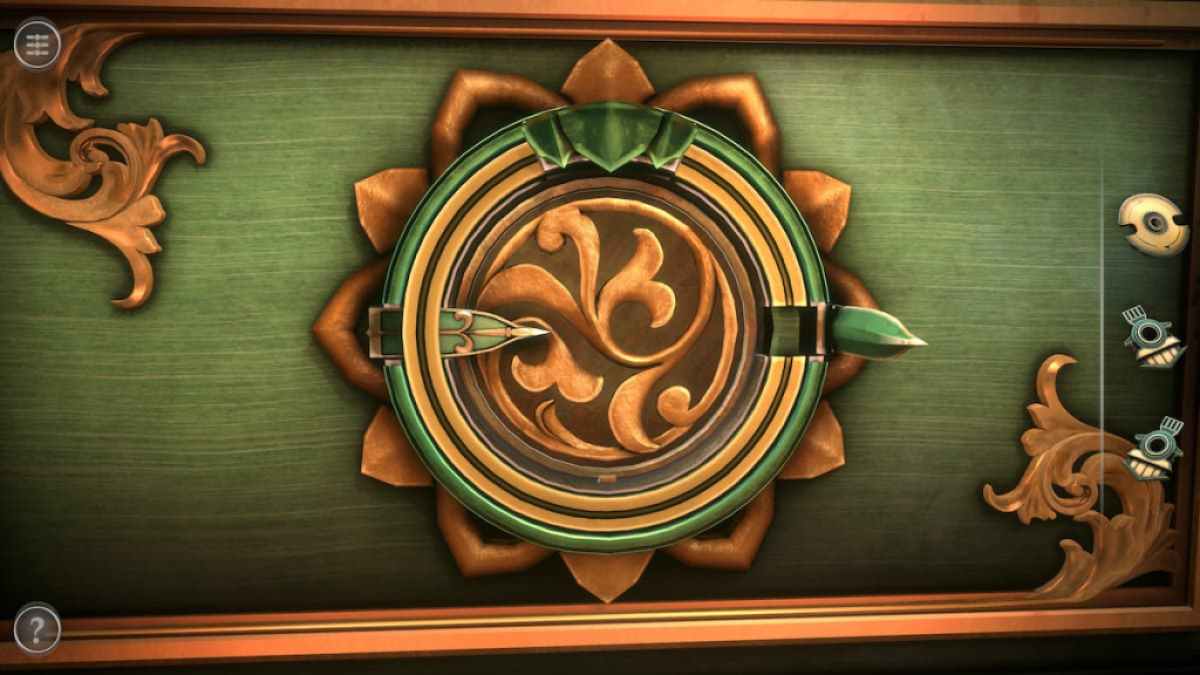
The front door puzzle consists of two green locks and a circumvolve ring .
Rotate the ring until the interruption aligns with one of the lock chamber and flip that lock undecided .
Repeat on the other side to unlock the next puzzle . Place the Metal Disc here to start the mystifier .
Screenshot by Pro Game Guides
Related : Vanishing Act walkthrough ( Adventure Escape Mysteries )
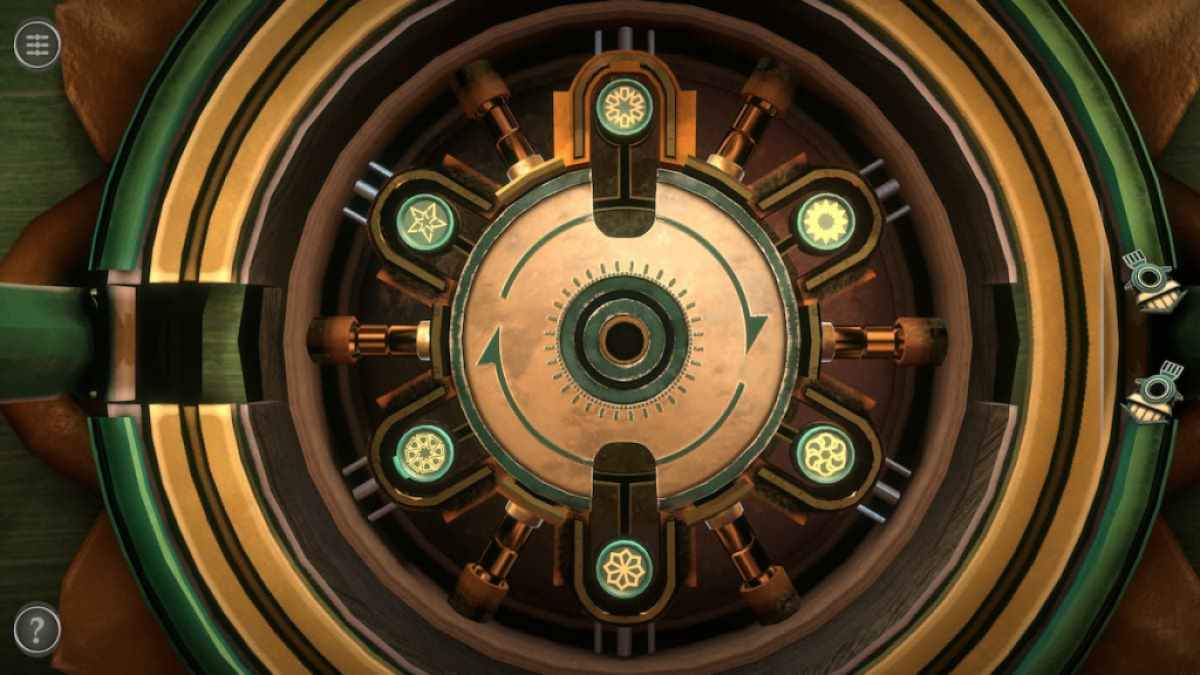
To solve this puzzle , begin by moving the top piece into the Metal Disc . This will reveal a cutting in the empty slot that picture the piece that needs to be placed there .
pluck up the piece matching the carving on the other side of the Metal Disc and place it into the slot .
Screenshot by Pro Game Guides
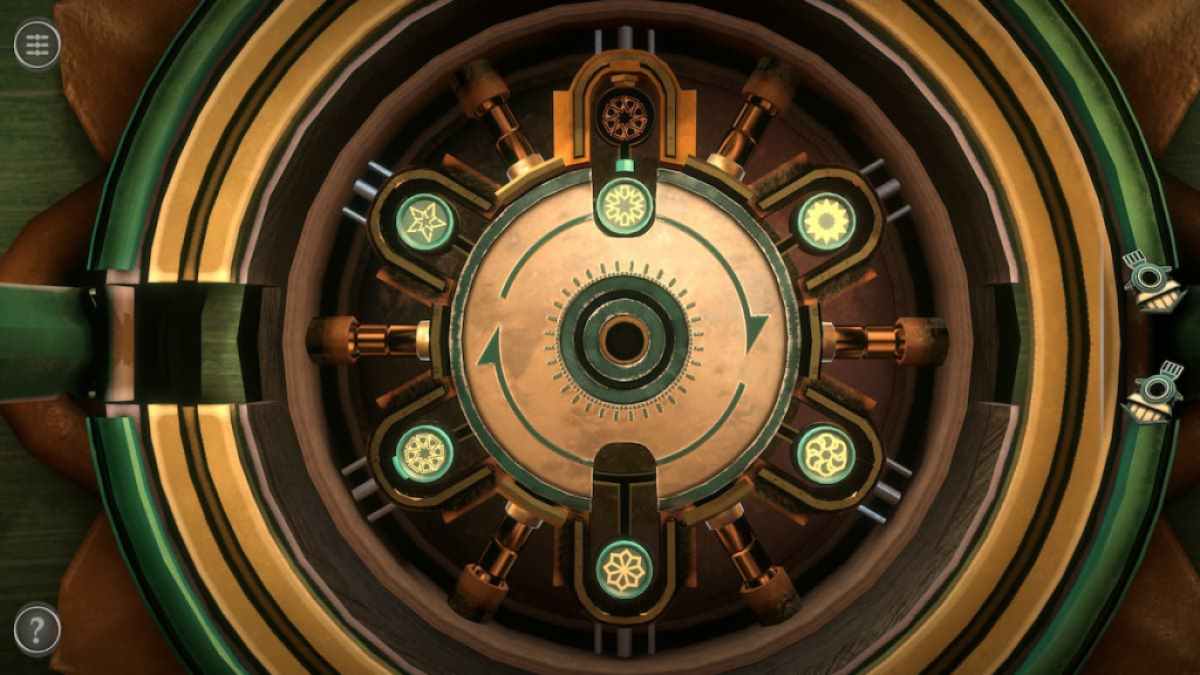
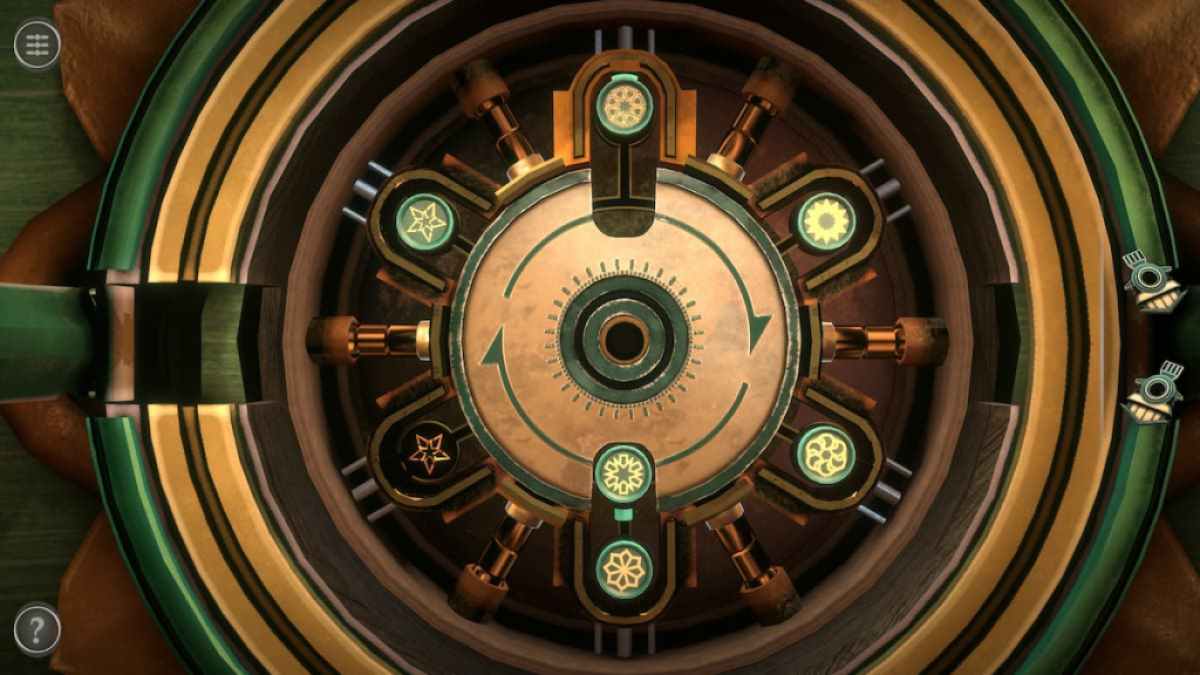
duplicate this procedure until you ’ve placed each opus into its expansion slot .
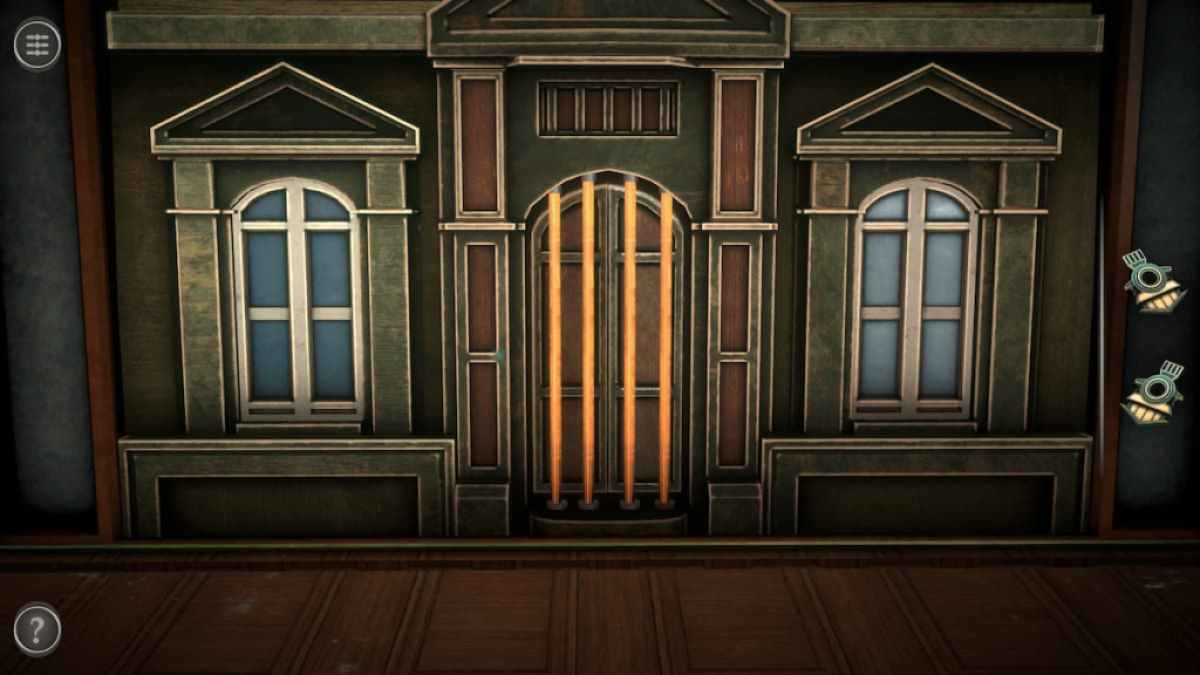
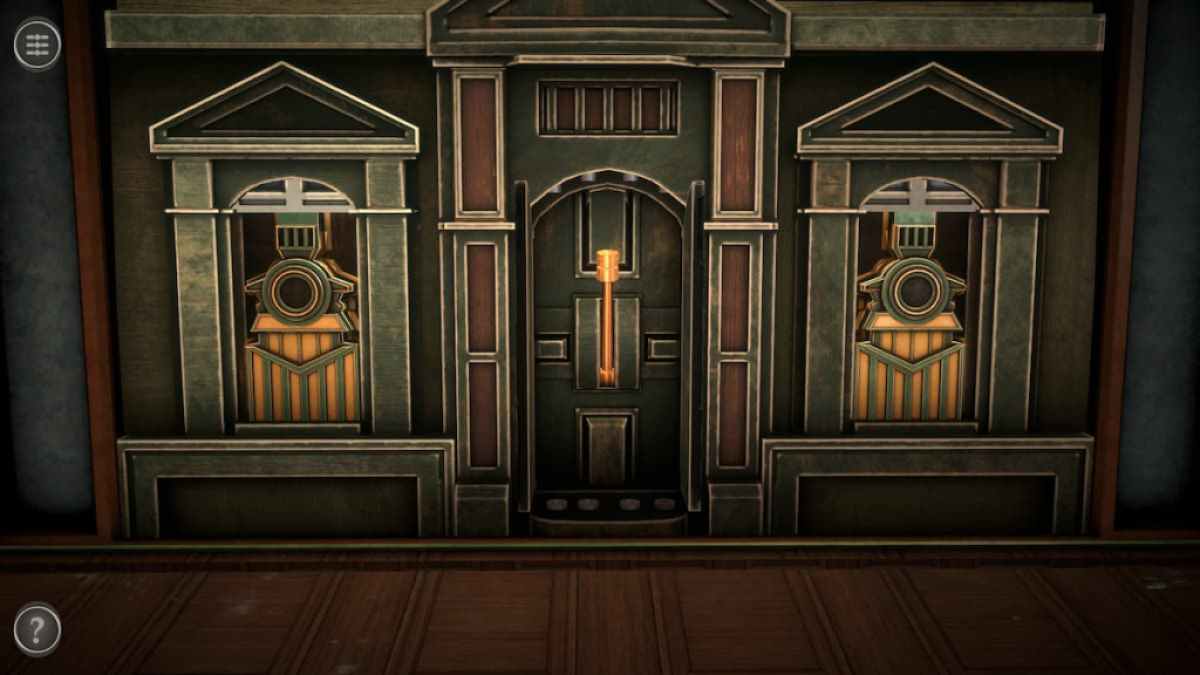
Unlocking the front door change by reversal the boxful into a building .
pull out up on each of the building ’s window to reveal a space for an point in each .
Screenshot by Pro Game Guides
Place the two Small Badges into the two slots . Pull the lever tumbler that appears beneath them to turn the building into a functional gear place .
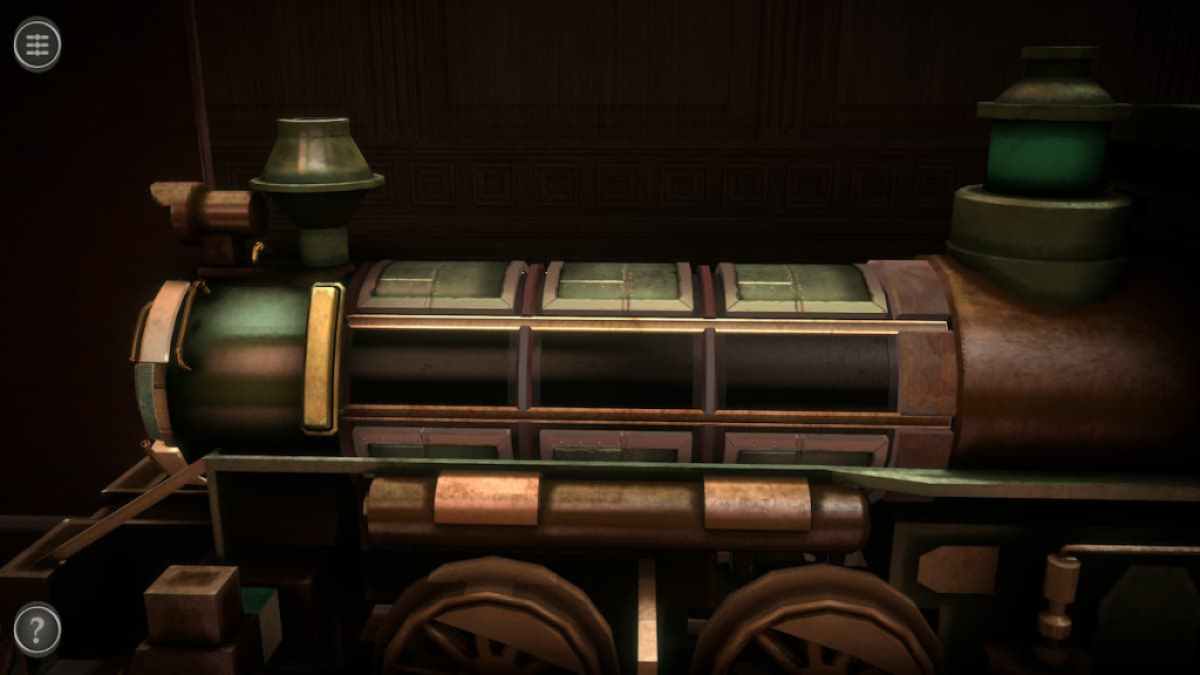
The first puzzle on the gearing call for a handle and three rotating sections .
Rotate each of the green row until the handle can safely pass through them .
Screenshot by Pro Game Guides
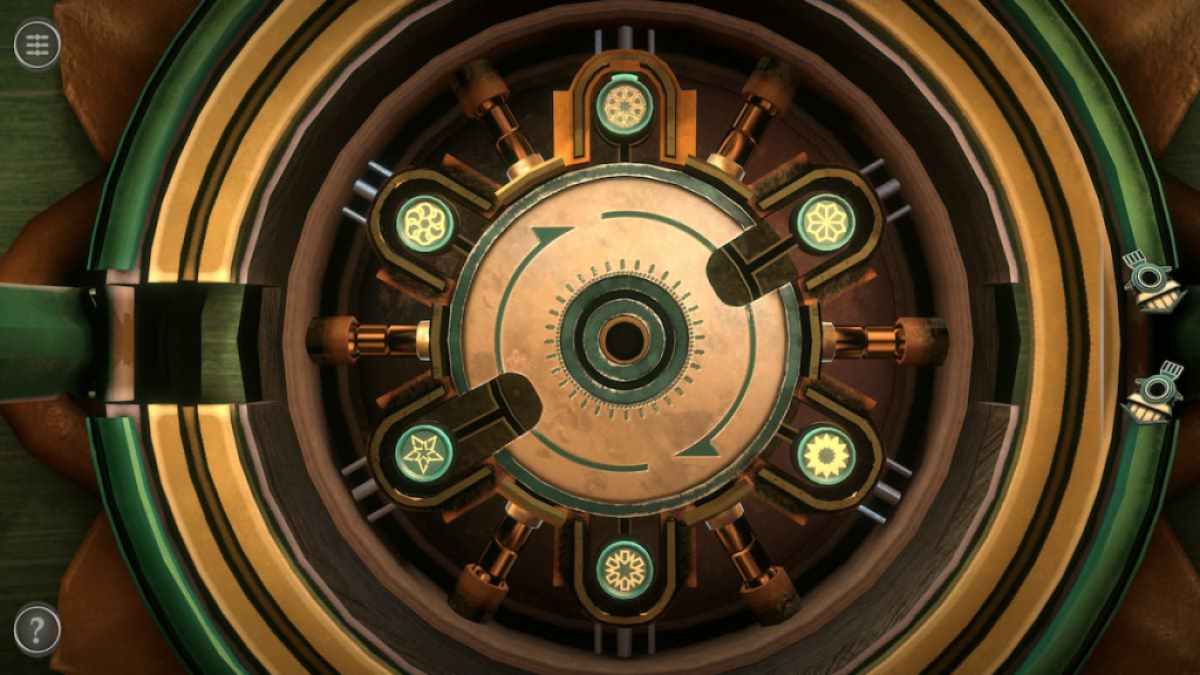
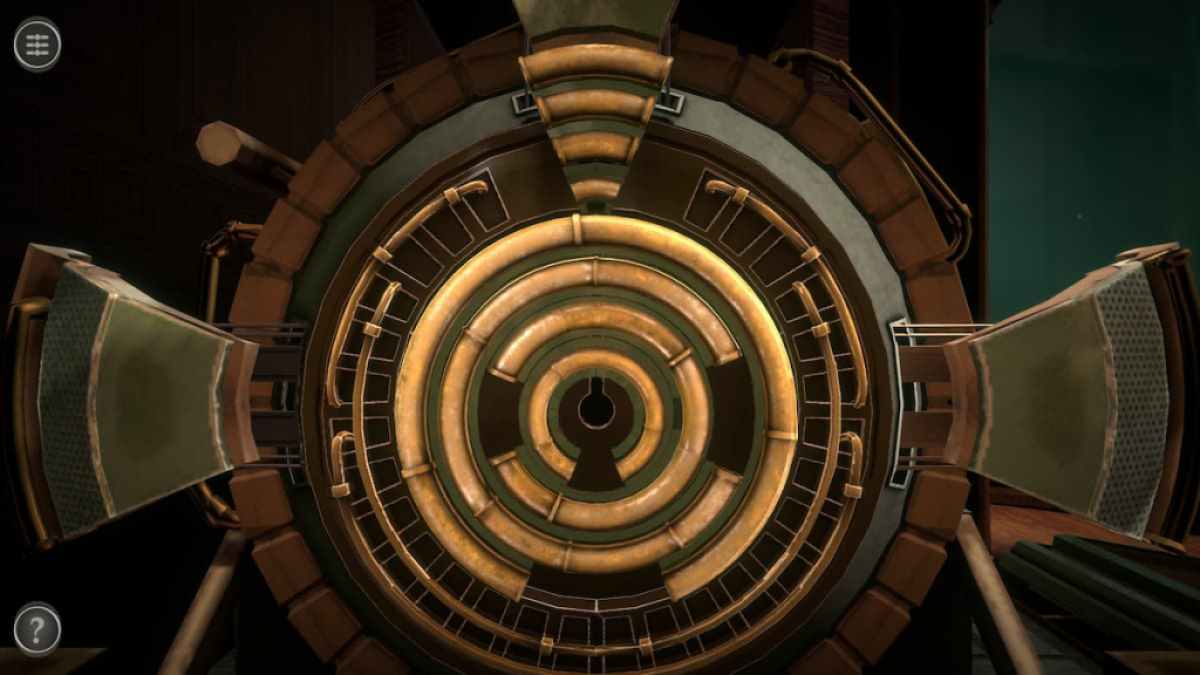
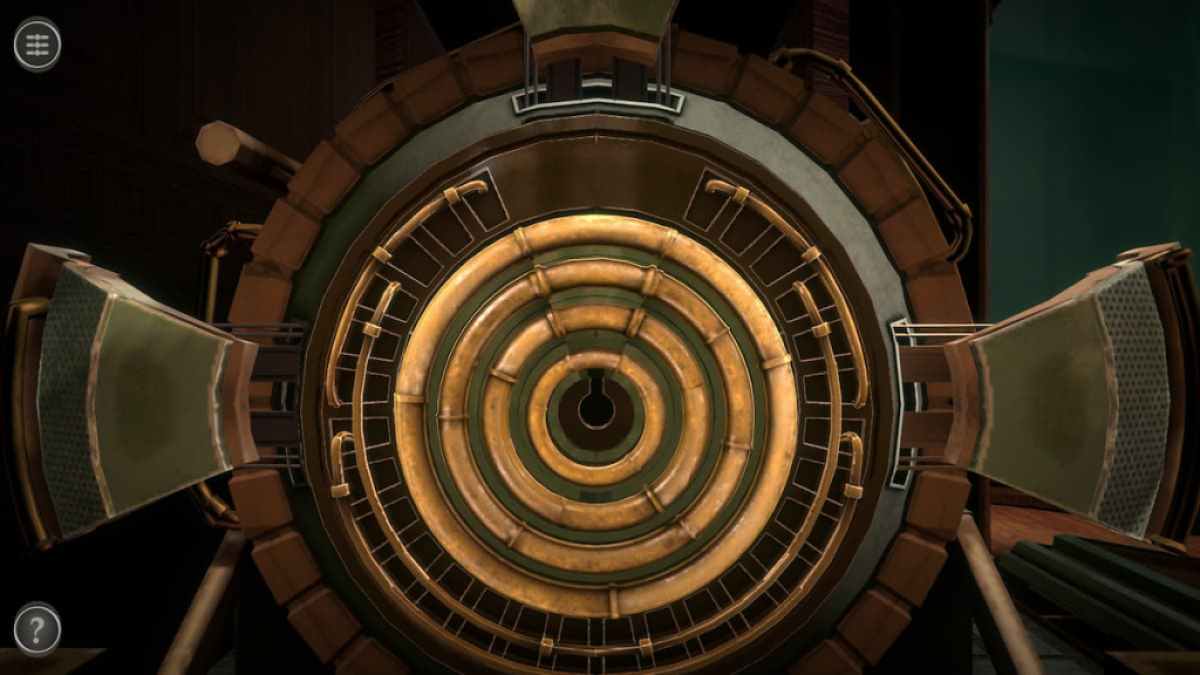
This will unlock a mystifier at the core of the train .
go around the traffic circle around until their empty space line up at the top of the ring .
fight the final part into the mystifier to start the caravan .
Screenshot by Pro Game Guides
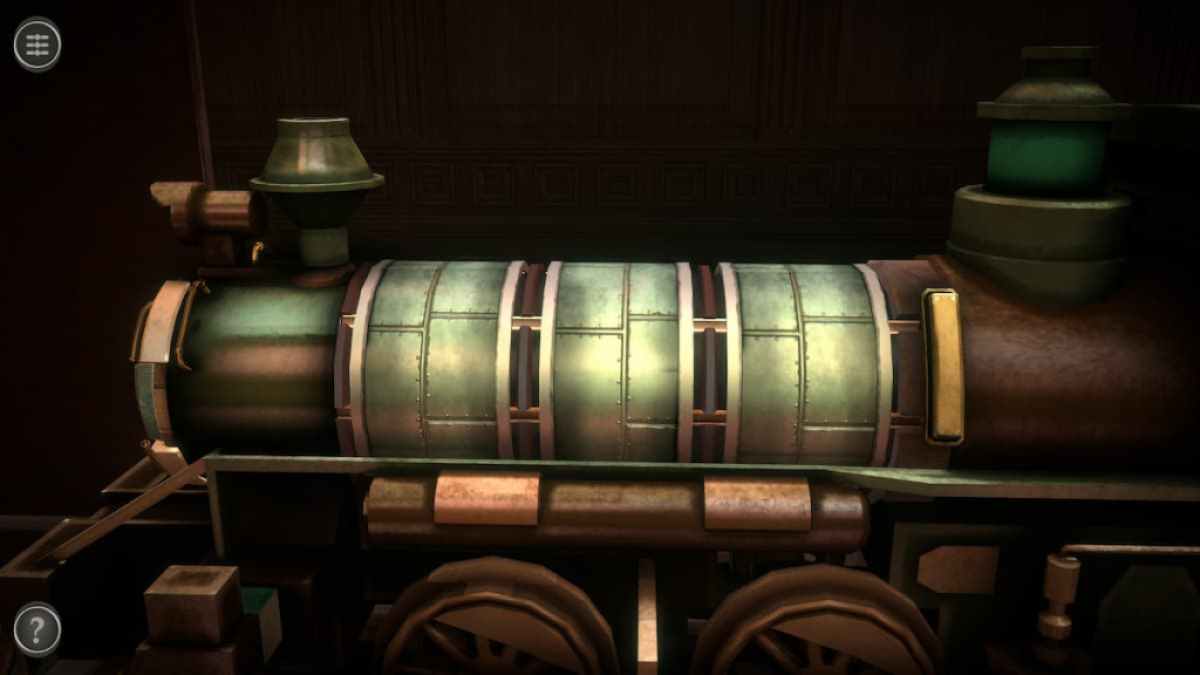
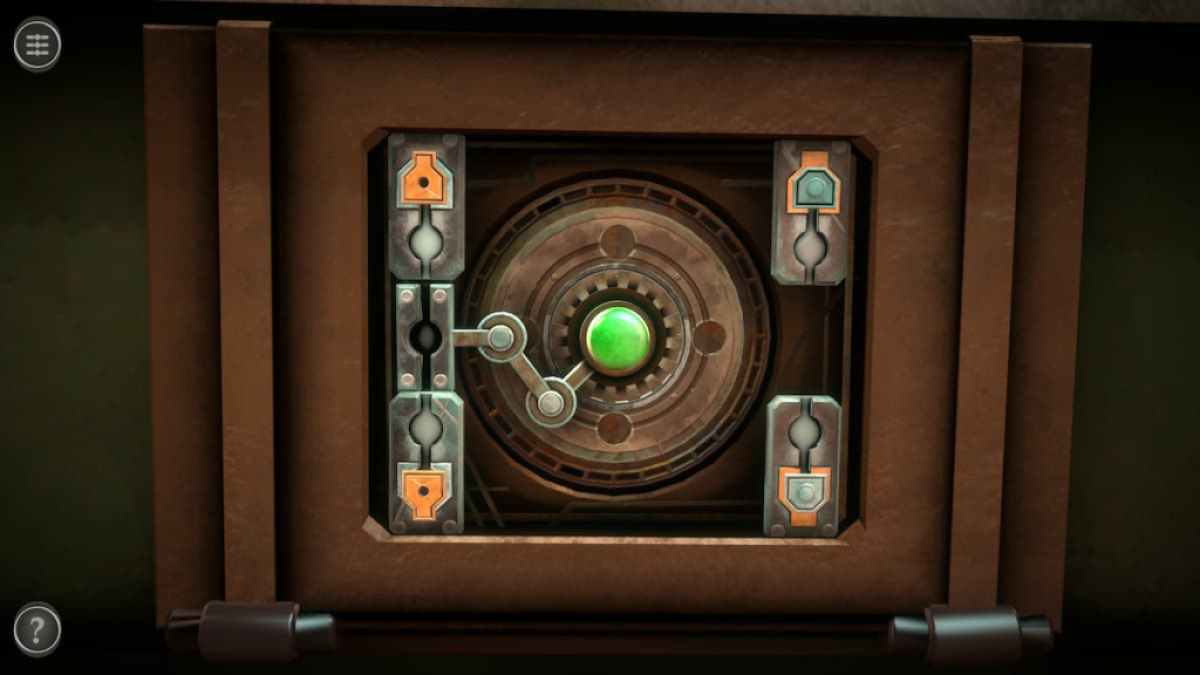
The gearing car puzzle is the final one of the elbow room .
To solve it , you want to use the chemical mechanism in the center to move the gold and dispirited pieces so that they are on the section that correspond them exactly . push the unripened clit in the center to move the fundamental piece between the left and ripe sides .
complete the puzzle gives you the Model Figure and unlocks the third room .
Screenshot by Pro Game Guides
jazz the late dodging way secret plan hype ? Check out ourAE Mysteries Picture Perfect walkthroughhere on Pro Game Guides .
Screenshot by Pro Game Guides
Screenshot by Pro Game Guides
Screenshot by Pro Game Guides
Screenshot by Pro Game Guides
Screenshot by Pro Game Guides
Screenshot by Pro Game Guides
Screenshot by Pro Game Guides
Screenshot by Pro Game Guides
Screenshot by Pro Game Guides
Screenshot by Pro Game Guides
Screenshot by Pro Game Guides
Screenshot by Pro Game Guides
Screenshot by Pro Game Guides
Screenshot by Pro Game Guides
Screenshot by Pro Game Guides
Screenshot by Pro Game Guides
Screenshot by Pro Game Guides
Screenshot by Pro Game Guides
Screenshot by Pro Game Guides
Screenshot by Pro Game Guides
Screenshot by Pro Game Guides
Screenshot by Pro Game Guides
Screenshot by Pro Game Guides
Screenshot by Pro Game Guides
Screenshot by Pro Game Guides
Screenshot by Pro Game Guides
Screenshot by Pro Game Guides
Screenshot by Pro Game Guides
Screenshot by Pro Game Guides
Screenshot by Pro Game Guides
Screenshot by Pro Game Guides

Screenshot by Pro Game Guides
Screenshot by Pro Game Guides
Screenshot by Pro Game Guides
Screenshot by Pro Game Guides
Screenshot by Pro Game Guides
Screenshot by Pro Game Guides
Screenshot by Pro Game Guides

Screenshot by Pro Game Guides
Screenshot by Pro Game Guides
Screenshot by Pro Game Guides
Screenshot by Pro Game Guides
Screenshot by Pro Game Guides

Screenshot by Pro Game Guides
Screenshot by Pro Game Guides
Screenshot by Pro Game Guides
Screenshot by Pro Game Guides
Screenshot by Pro Game Guides
