Become a teaser - solving expert .
Boxes Lost Fragments is a stop - and - click escape room biz fill with mystifier and a unique story to uncover . In this pathfinder , I ’ll guide you through the last one-half of Chapter 3 of Boxes Lost Fragments and all of the puzzles it contains .
Boxes Lost Fragments Chapter 3 Cognito part 2 walkthrough
This part of the Boxes Lost Fragments Chapter 3 walkthrough covers the third and fourth rooms , plus the close of the chapter . If you ’re appear for help outside of these three areas , I ’ve heel the sleep of the walkthrough below to help you wherever you may be at .
Room 3 puzzles
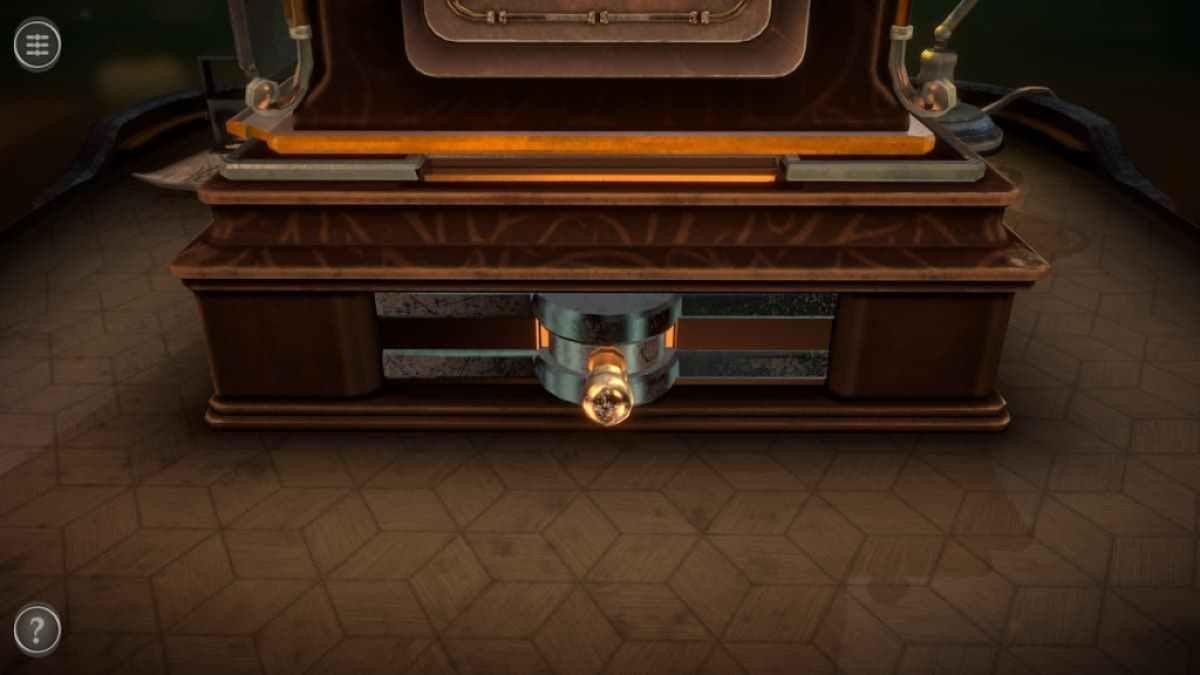
The third room contain a fundamental corner and a desk lamp .
The first teaser involves the grip on the bottom of the left side of the box .
crowd the hold to the left twice . The side it lands on will unlock , giving you two Small Knobs .

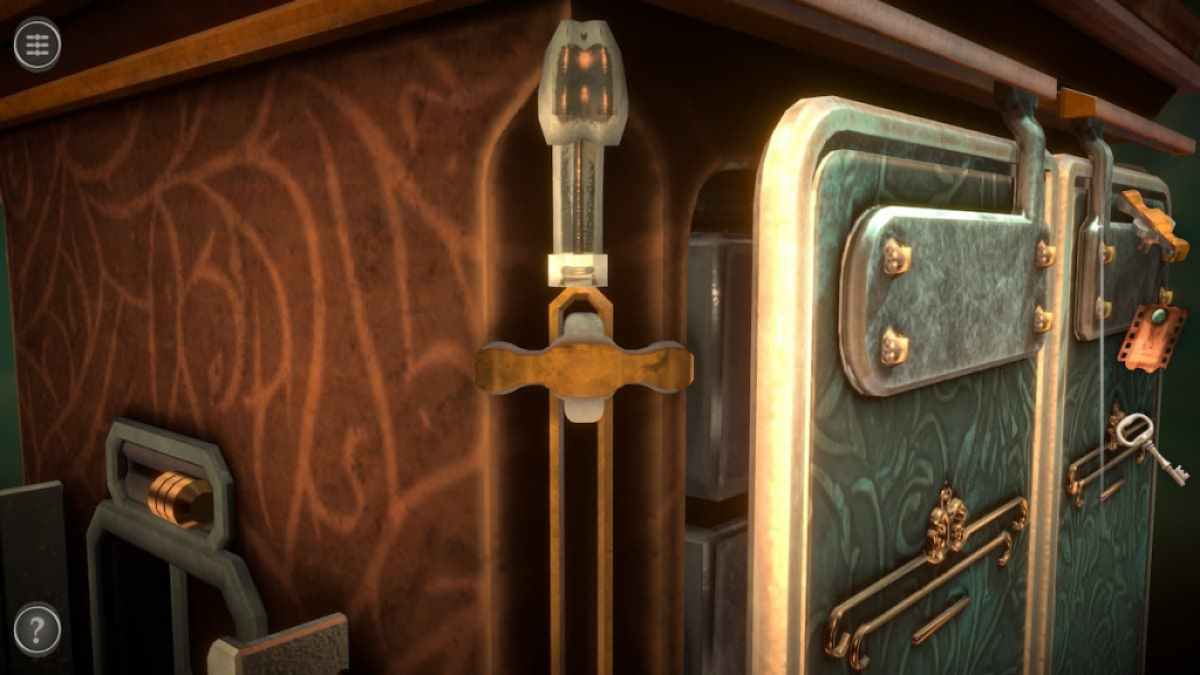
Next , move the slider to unlock the next teaser .
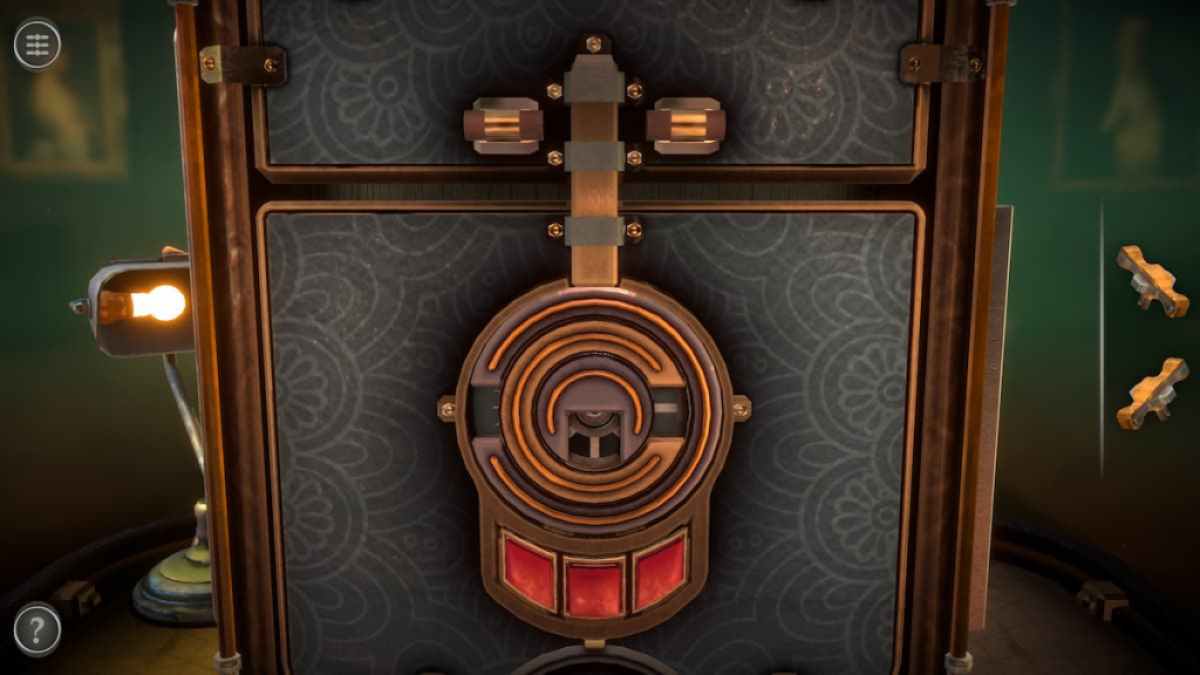
Pushing the slider on the left side unlocks this puzzle on the back .
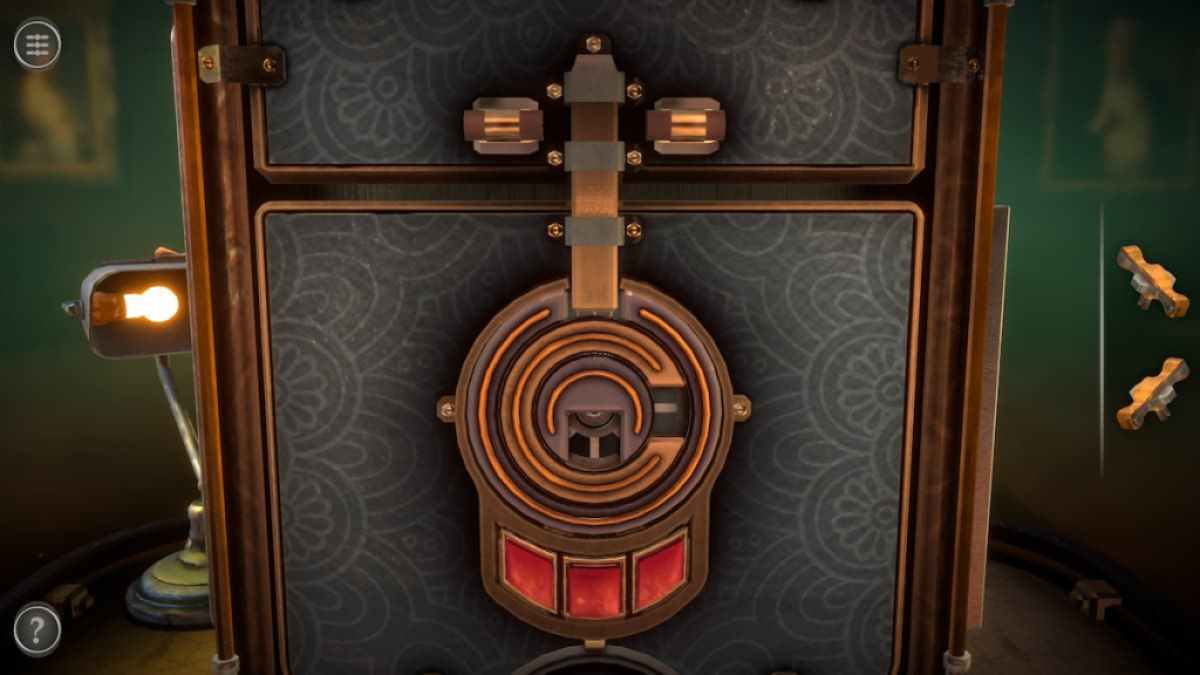
The left button controls the outer mob , the middle button controls the next ring , and the right button controls the low ring . iron the left button once to start spinning the out ring . Press the button again to contain the stunned doughnut when its gap faces the top .

Screenshot by Pro Game Guides
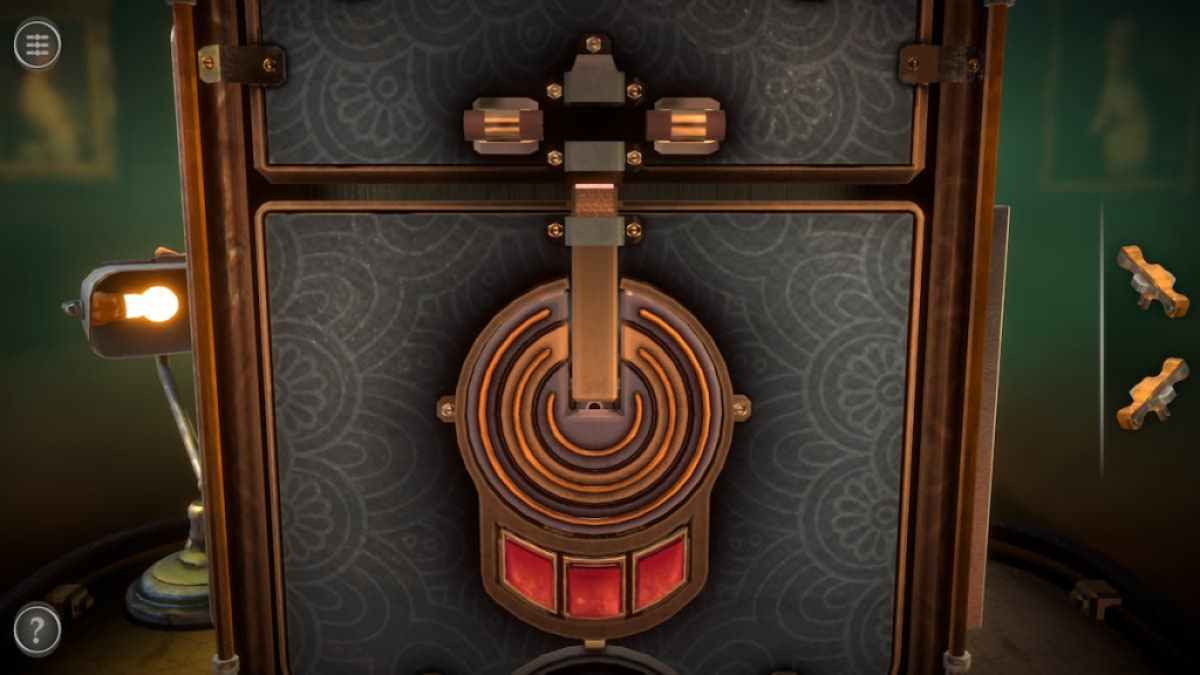
iterate this process for the two smaller rings .
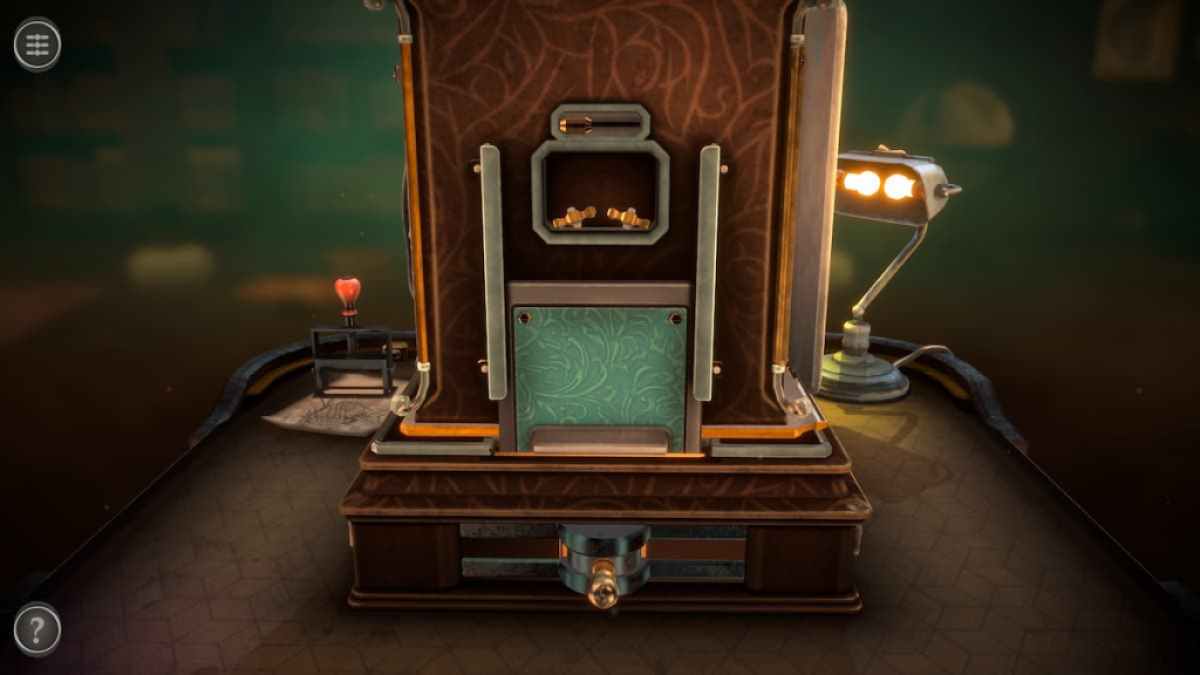
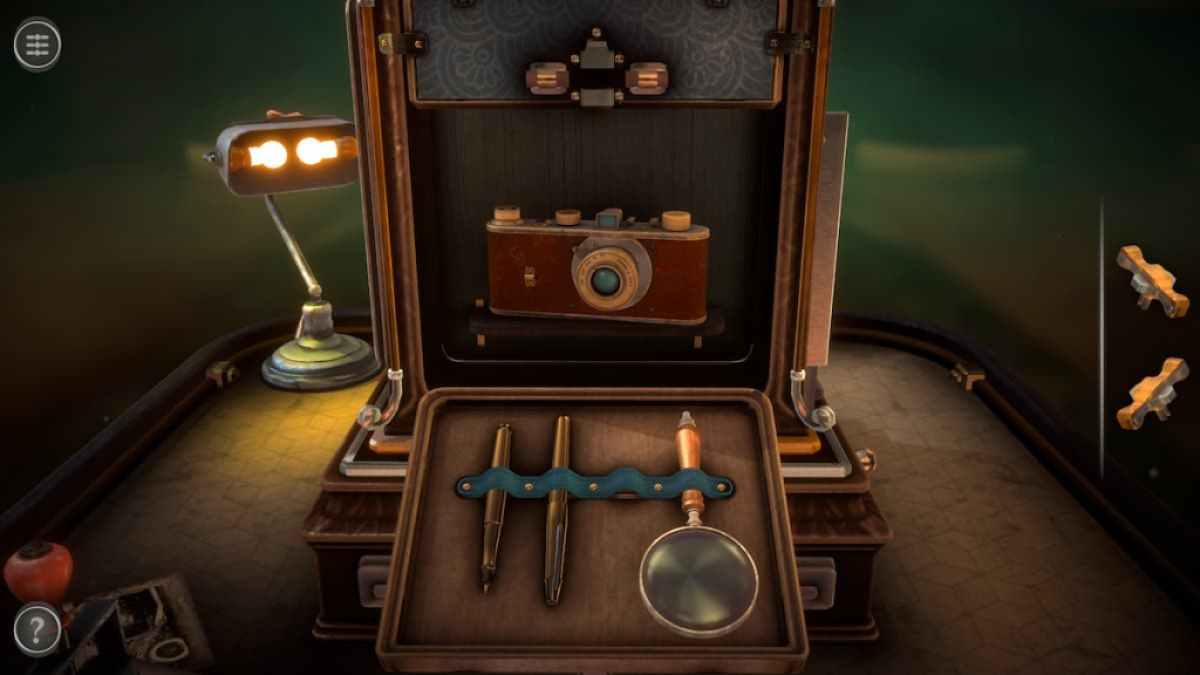
This unlocks a compartment containing a Camera and a Magnifier . plunk up both .
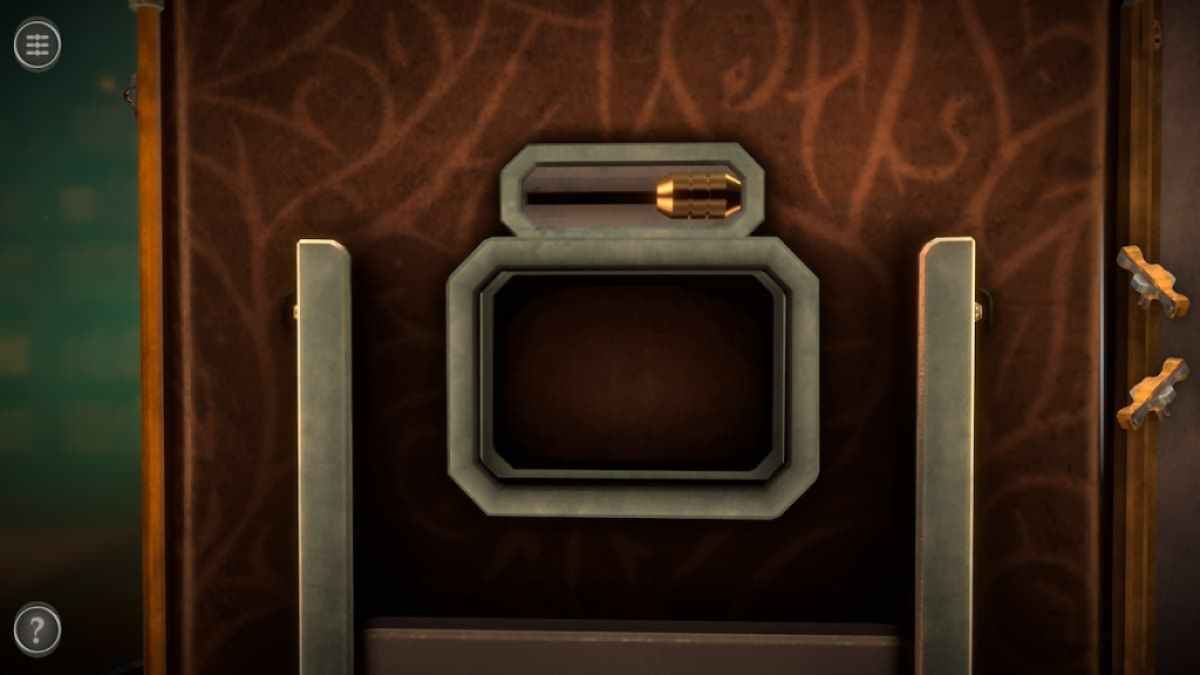
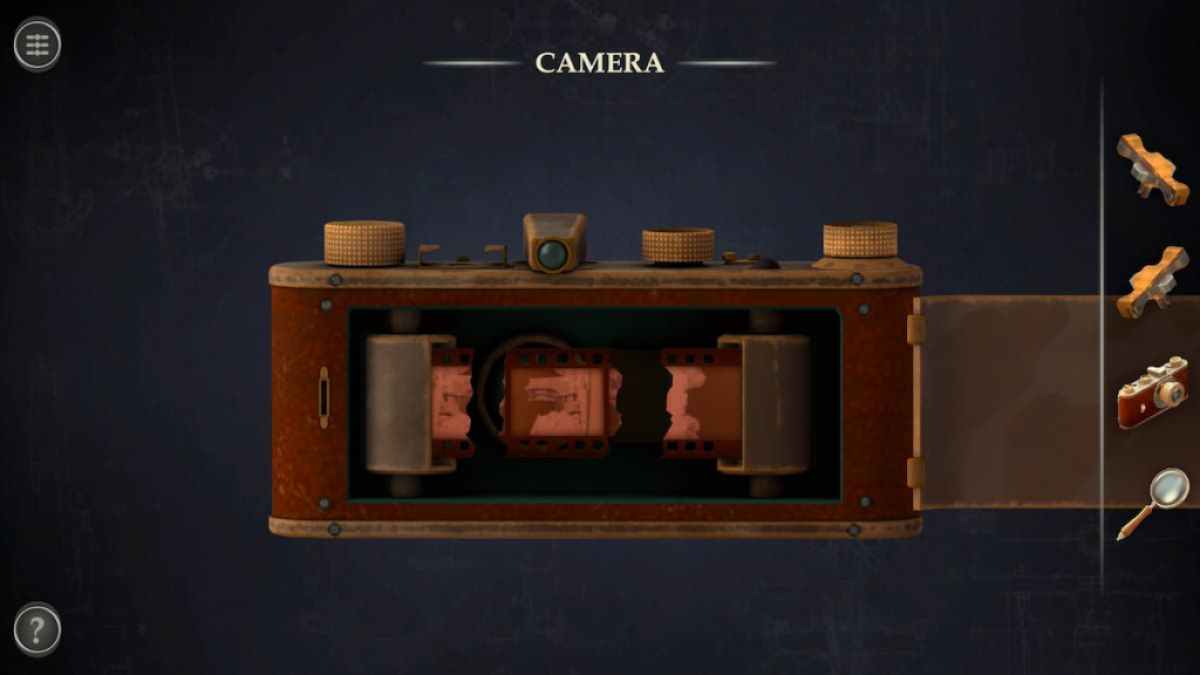
In your stock , go around the camera to view its back . tip the low mechanism on the left side to unlock the back compartment .
Screenshot by Pro Game Guides
snap up the Film in the center to complete the television camera .
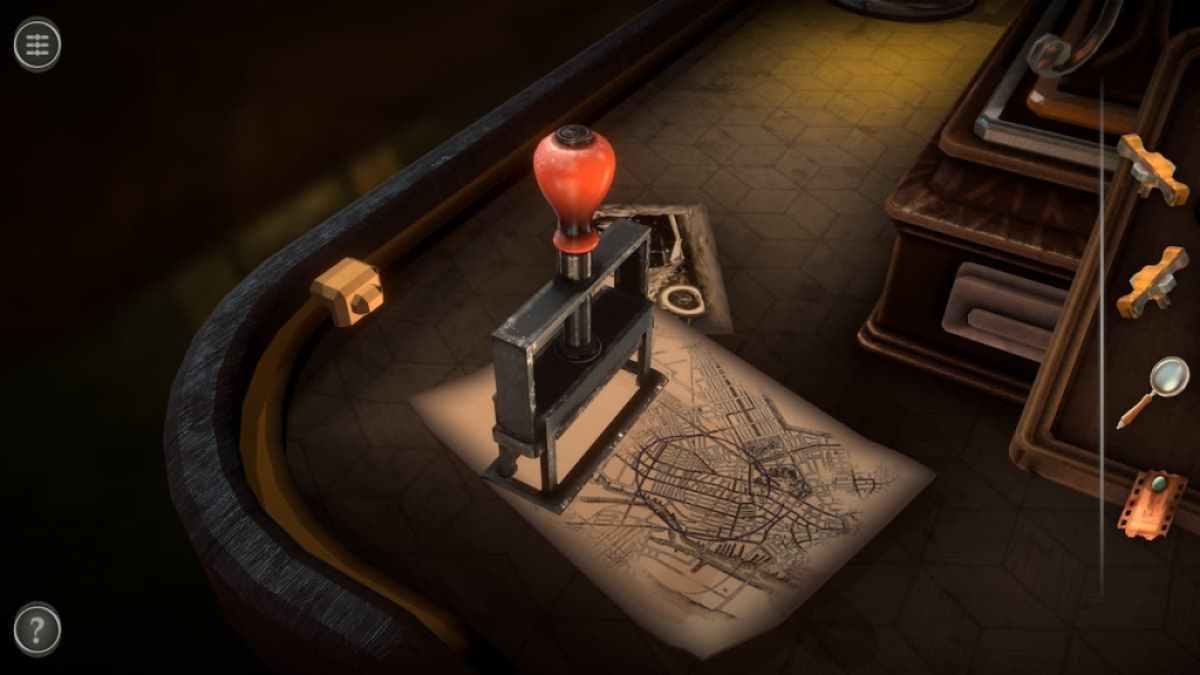
manoeuvre to the tender on the two documents .
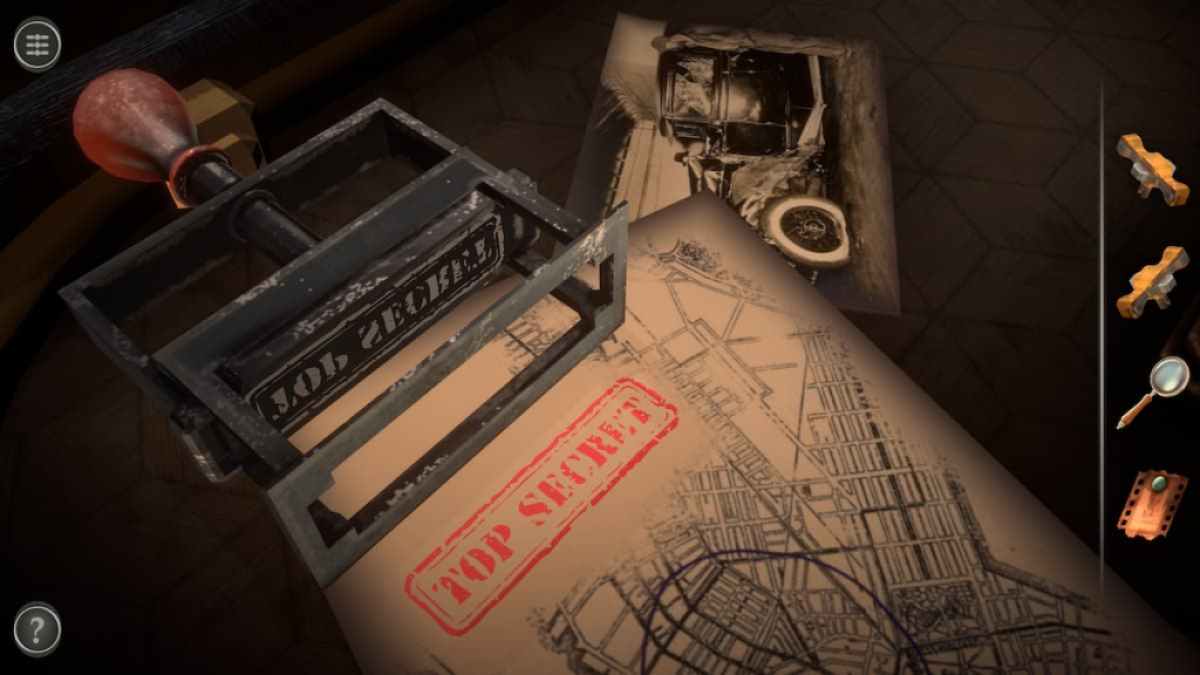
conjure the scarlet knob down to place a red " Top Secret " stamp on the paper .
Screenshot by Pro Game Guides
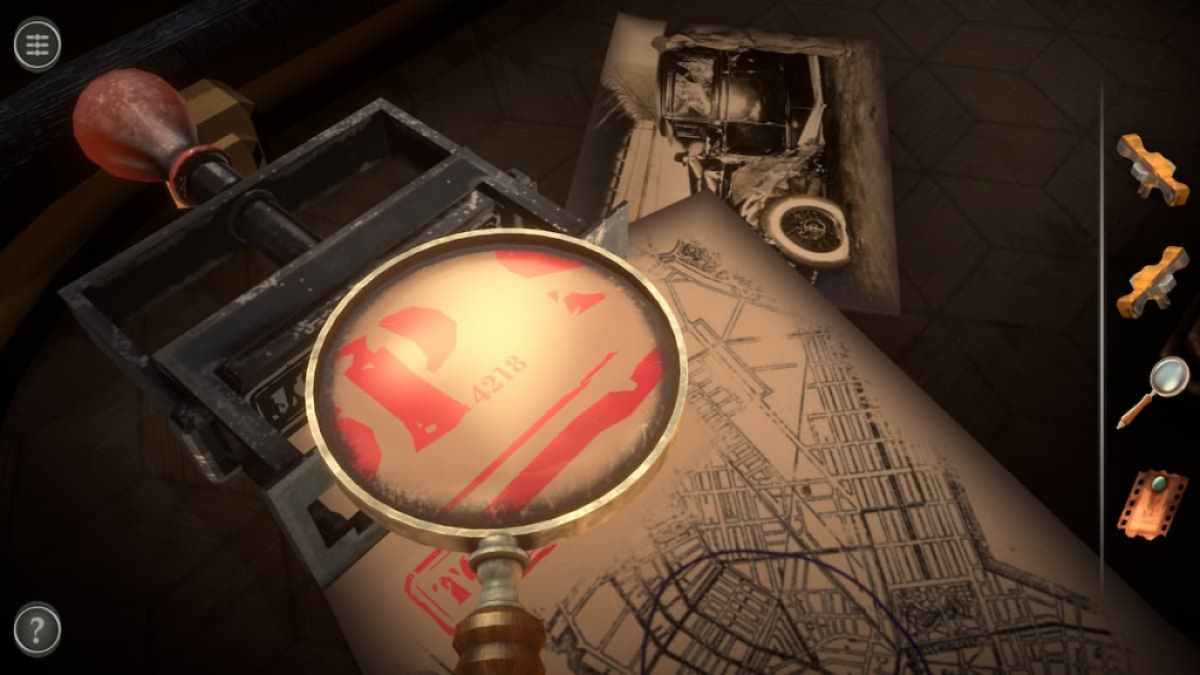
Use the Magnifier on the stamp to discover the computer code " 4218 " next to the " P " in " Top " .
Related : Isoland 4 Walkthrough – The Anchor of Memory
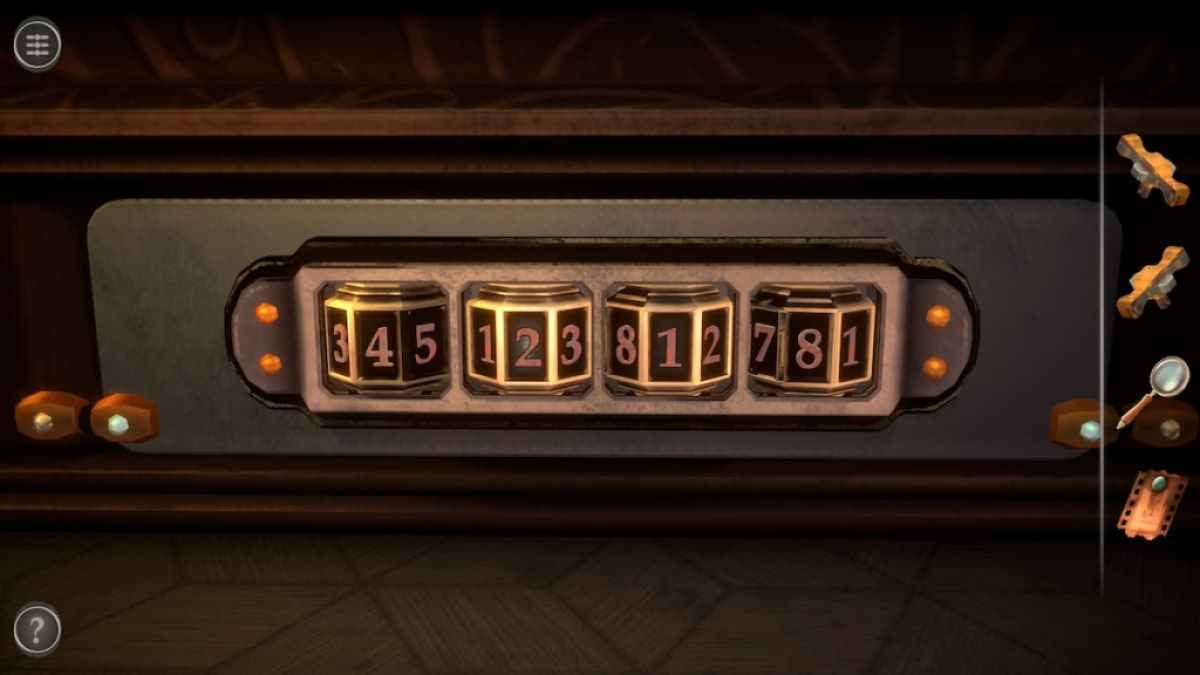
Enter the computer code " 4218 " from the red postage puzzle into the teaser . This will open a small compartment make another varsity letter hold lore and a Key .
Screenshot by Pro Game Guides
There are two well - hidden slider spots on the left and right side of the front doors of the box seat .
On each side , place a Small Slider in the slot and push it down to the bottom of the box .
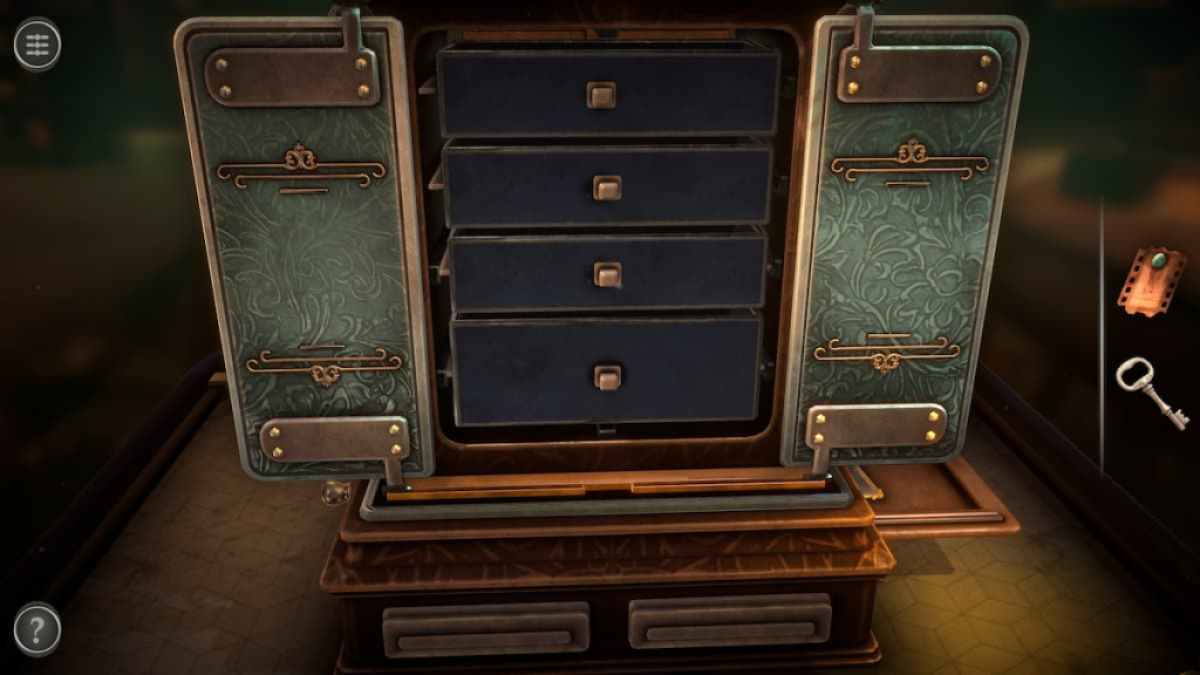
Moving both sliders will unwrap a set of four drawers . pink each drawer to post it fly out of the corner , break a red box with a handle in the back .
Screenshot by Pro Game Guides
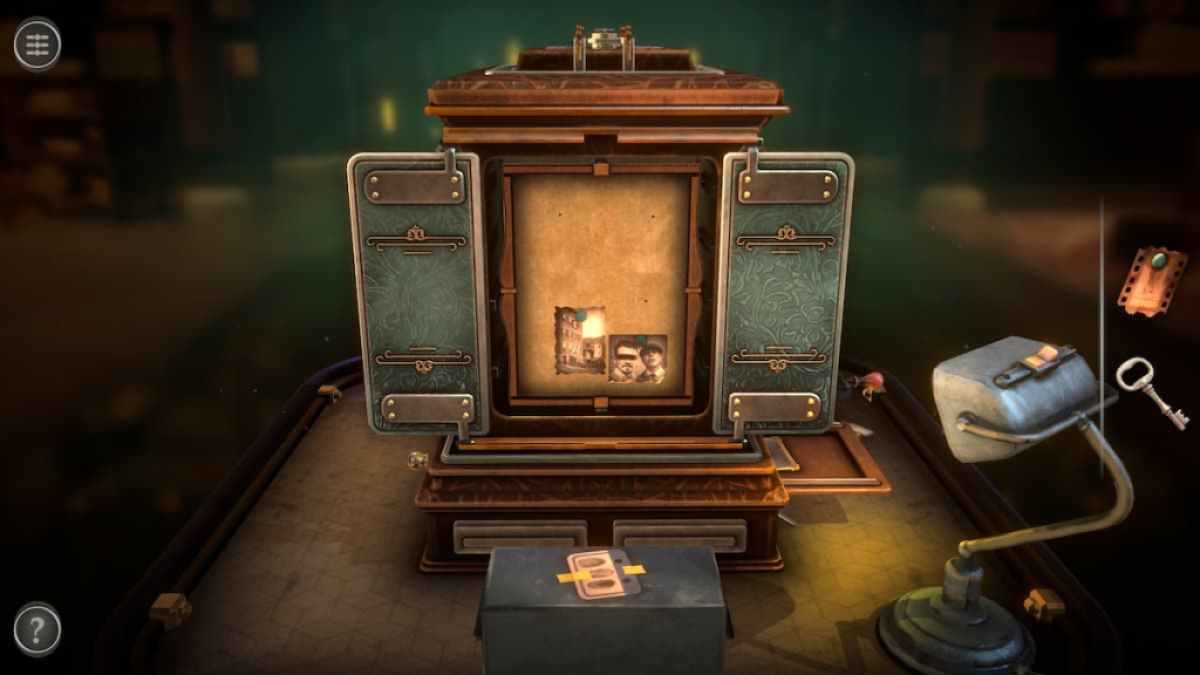
pull out the handle of the red box to uncover a motion picture mystifier .
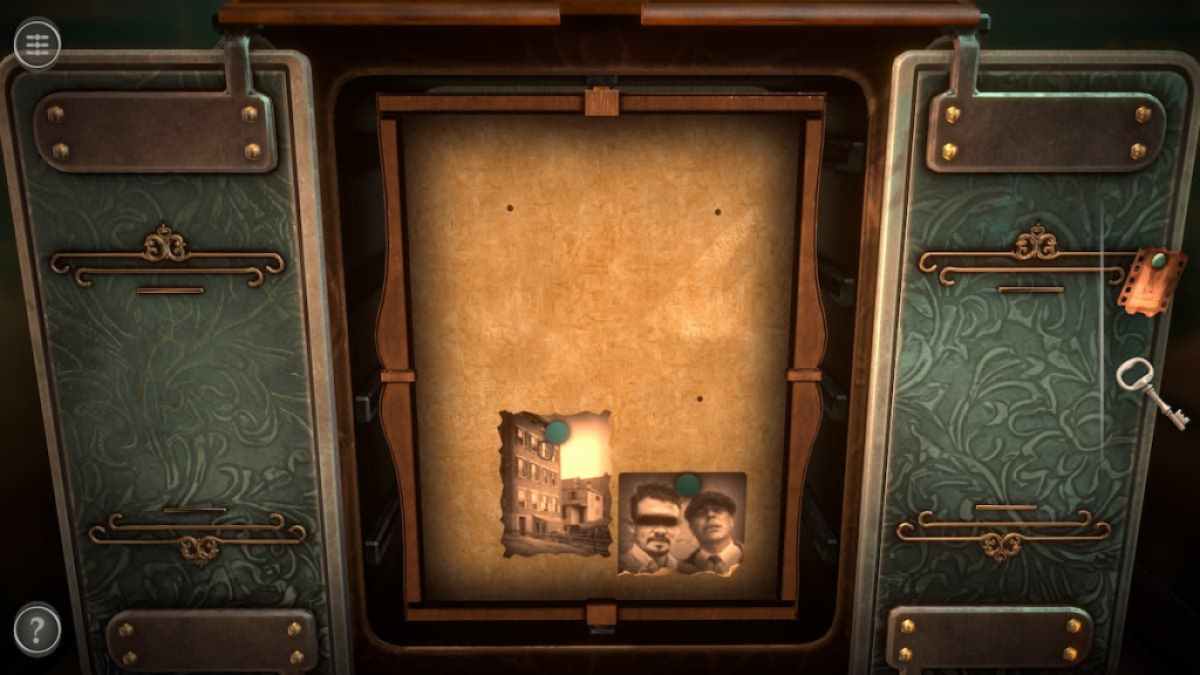
Before start the puzzle , take hold of the last image from one of the drawers that was accept out . It ’s lying on the front of the tabular array now that the puzzle is revealed .
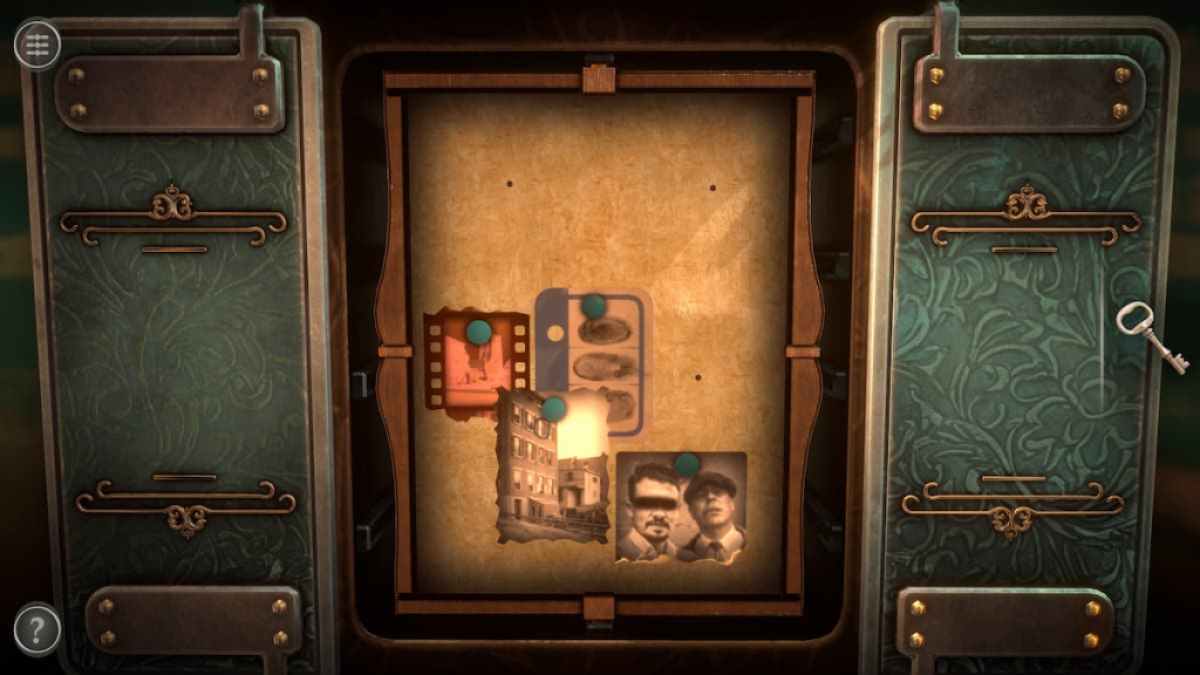
Place the new range of a function and the Film onto the board .
Screenshot by Pro Game Guides
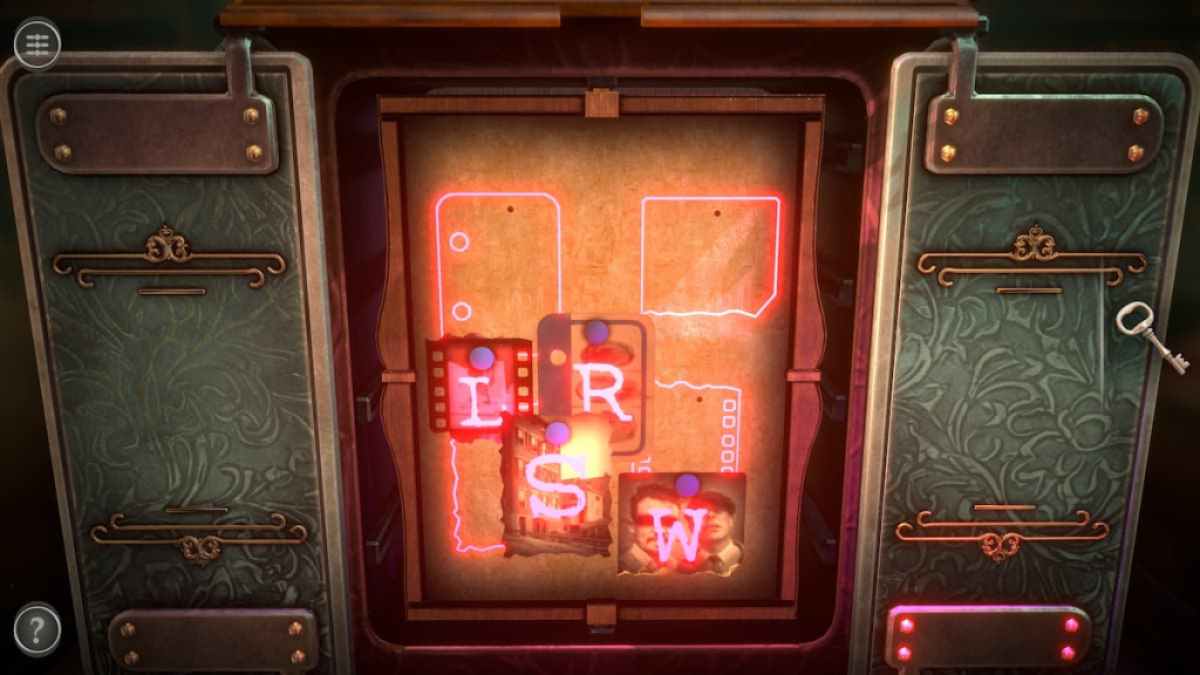
Now move the picture around between the four holes in the board . When a impression is matched with a hole on the dining table , it will move itself to check absolutely with that hole . If you ’re have fuss matching them up , urge on the push button on the lamp to deform it on . The pinkish lightness it emits will show the scheme of each image around the hole it belongs to .
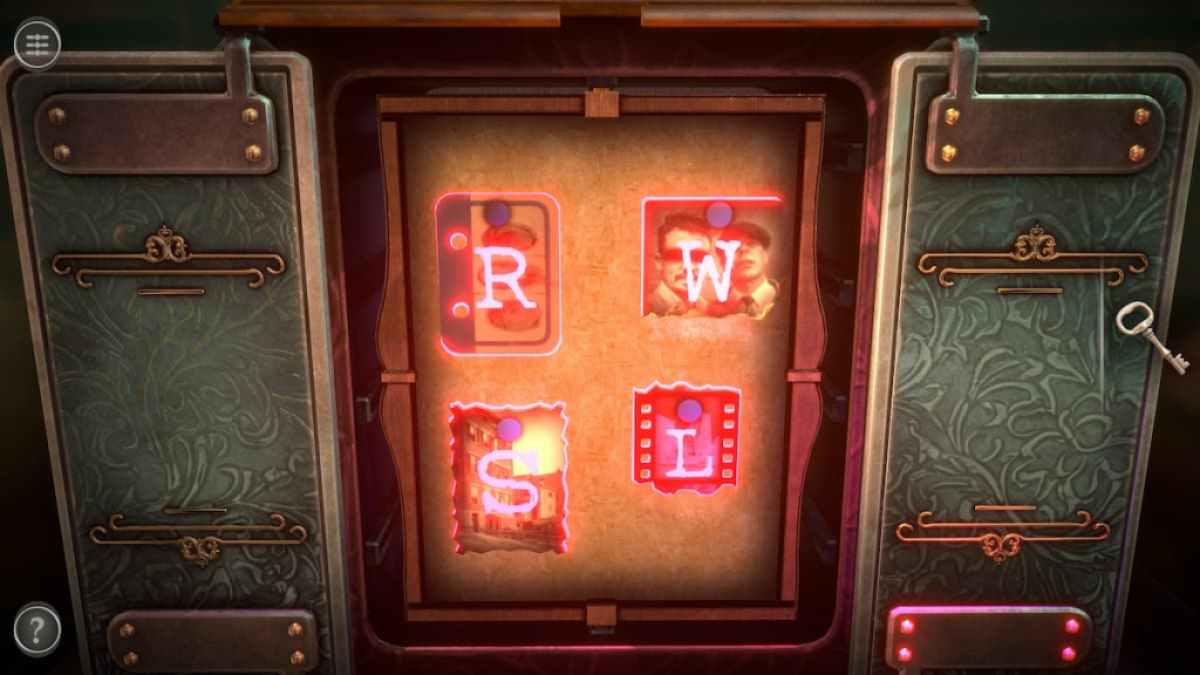
Once each picture is come out , the pinkish alphabetic character on all four will reveal the solvent for the next puzzle . These letters can only be see using the lamp , so leave it on so you could check them again .
Go to the top of the box and insert the headstone into the keyhole .
Screenshot by Pro Game Guides
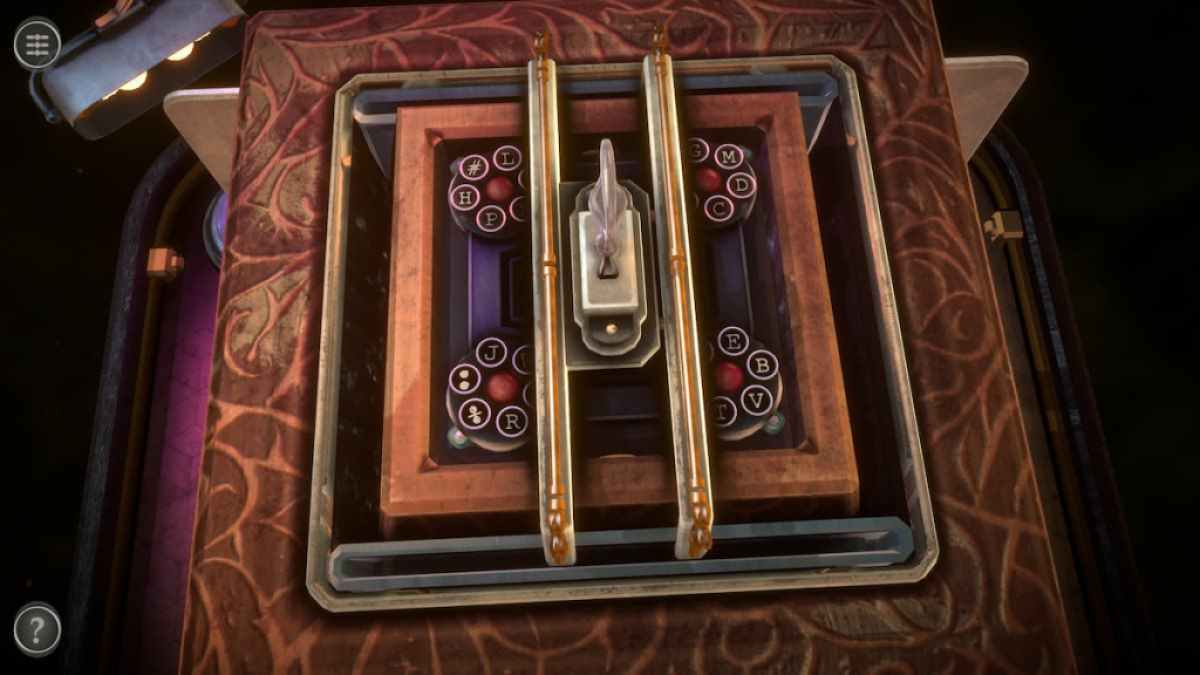
convolute it to unlock the top . Slide each of the prosperous locks to the side to interact with the orbitual teaser .
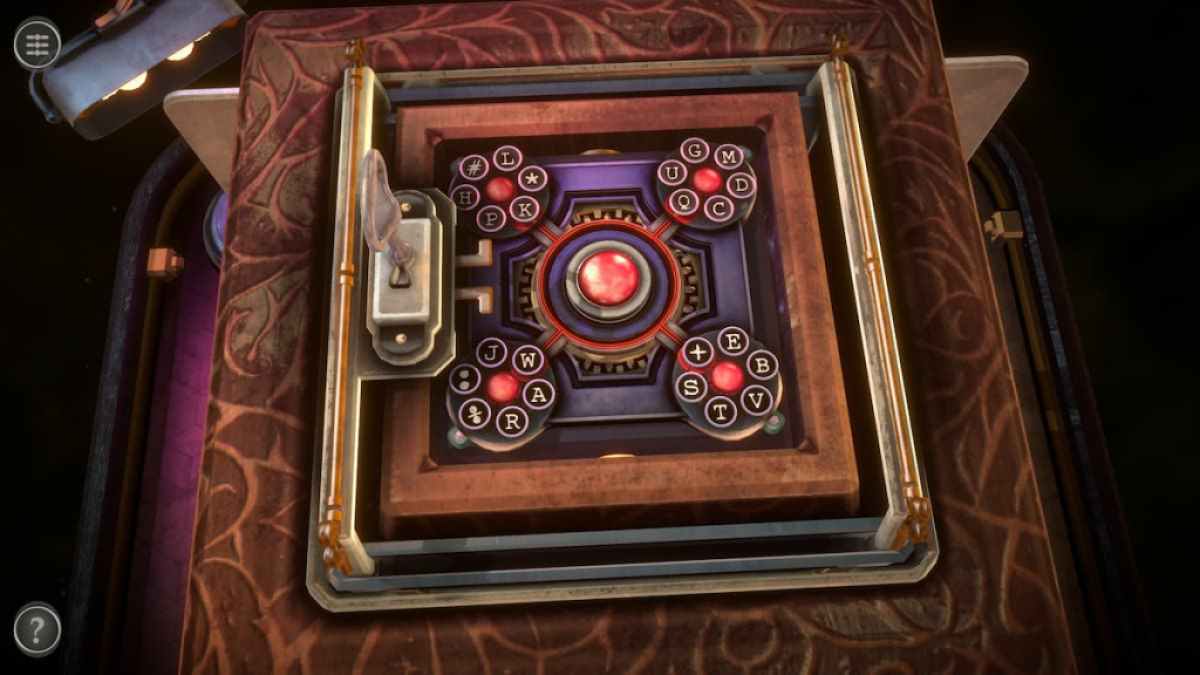
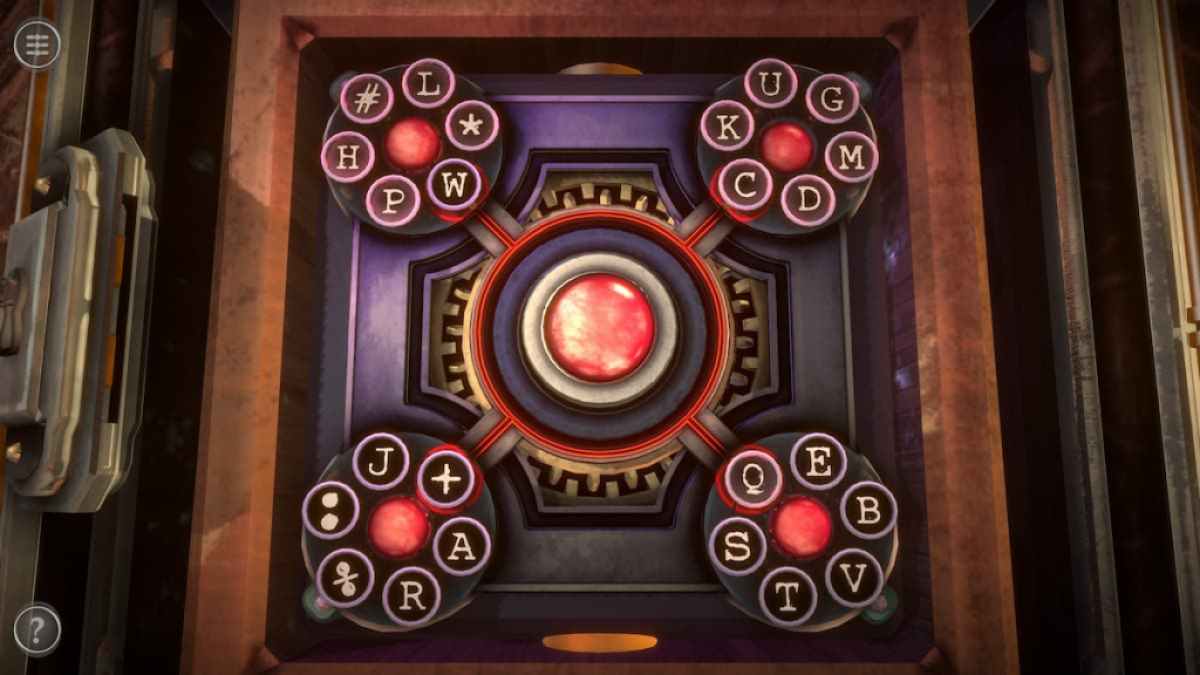
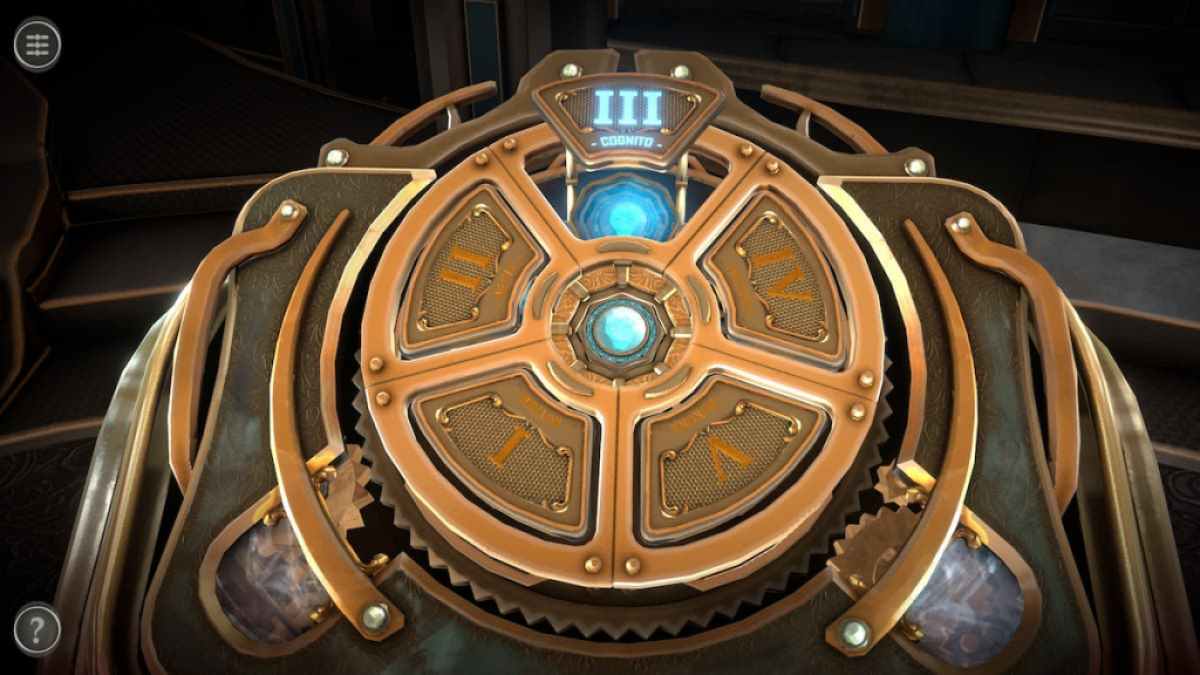
The rotary puzzle has one central red button and four smaller mechanisms . Each of the smaller mechanism consists of six symbols surrounding a flushed button . The outer space closelipped to the large red button has a red scheme around it .
Pressing the cardinal clit rotates the four symbolic representation in the red outlined spaces clockwise .
Screenshot by Pro Game Guides
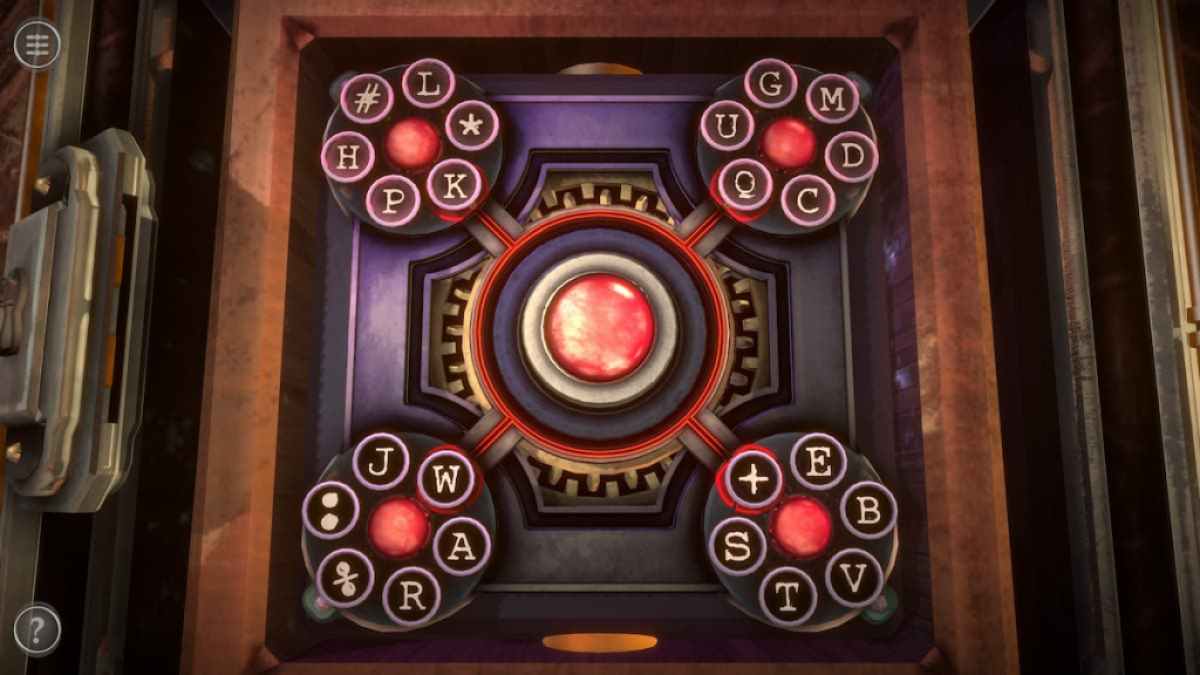
squeeze the smaller cherry push button will rotate all of the symbols around them
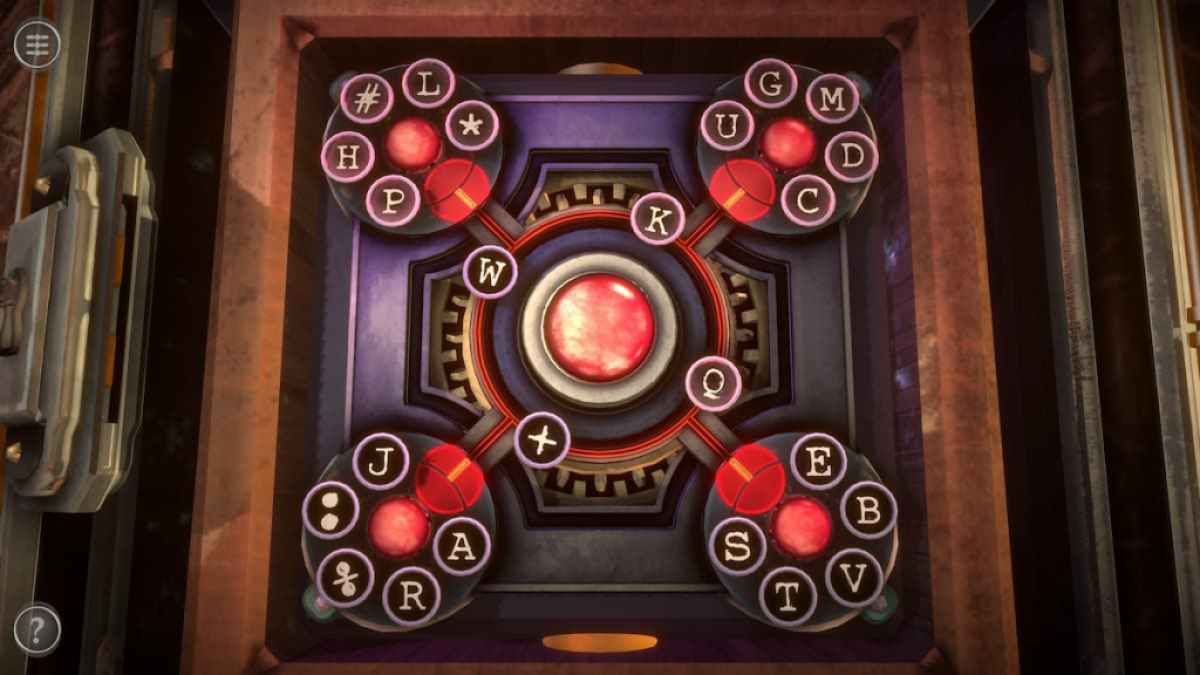
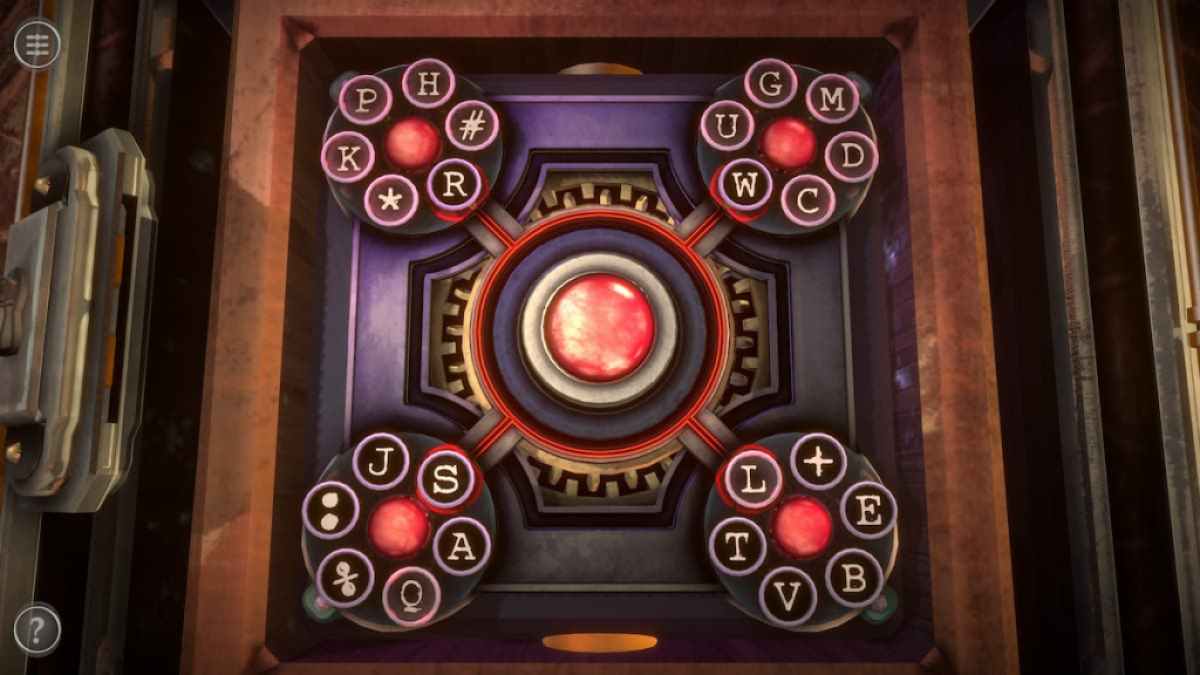
To complete the mystifier , the letters from the picture puzzler need to be placed in the correct place in rotary puzzle . The " R " needs to be placed in the red sketch spot of the top left circle , the " W " in the top right field , the " L " in the bottom right , and the " S " in the bottom left .
discharge the puzzler will give you the Film Reel , remove you from the third elbow room , and open up the last elbow room of the floor .

Image by Pro Game Guides
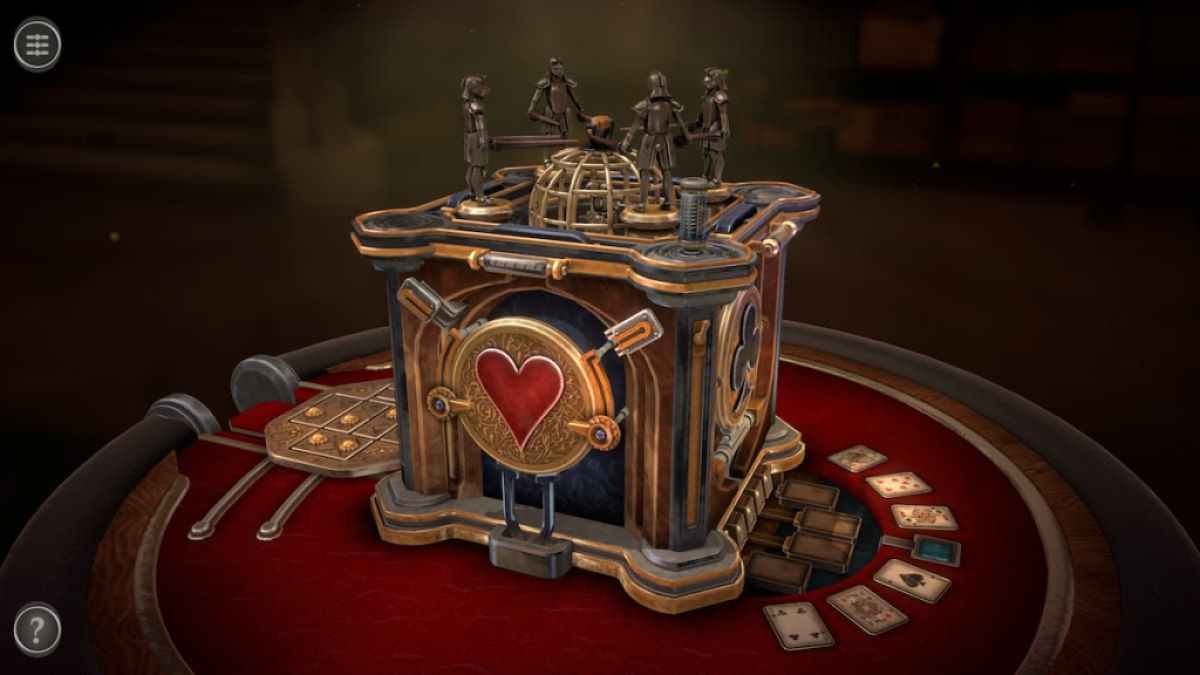
Room four puzzles
The box in elbow room four habituate imaging from a deck of batting order and is surrounded by likewise - theme puzzles .
Before take off a puzzler , recover the transposition between the kernel and club symbols .
Flip the switch and pull up the Power Source up to localise it in your inventory .
Screenshot by Pro Game Guides
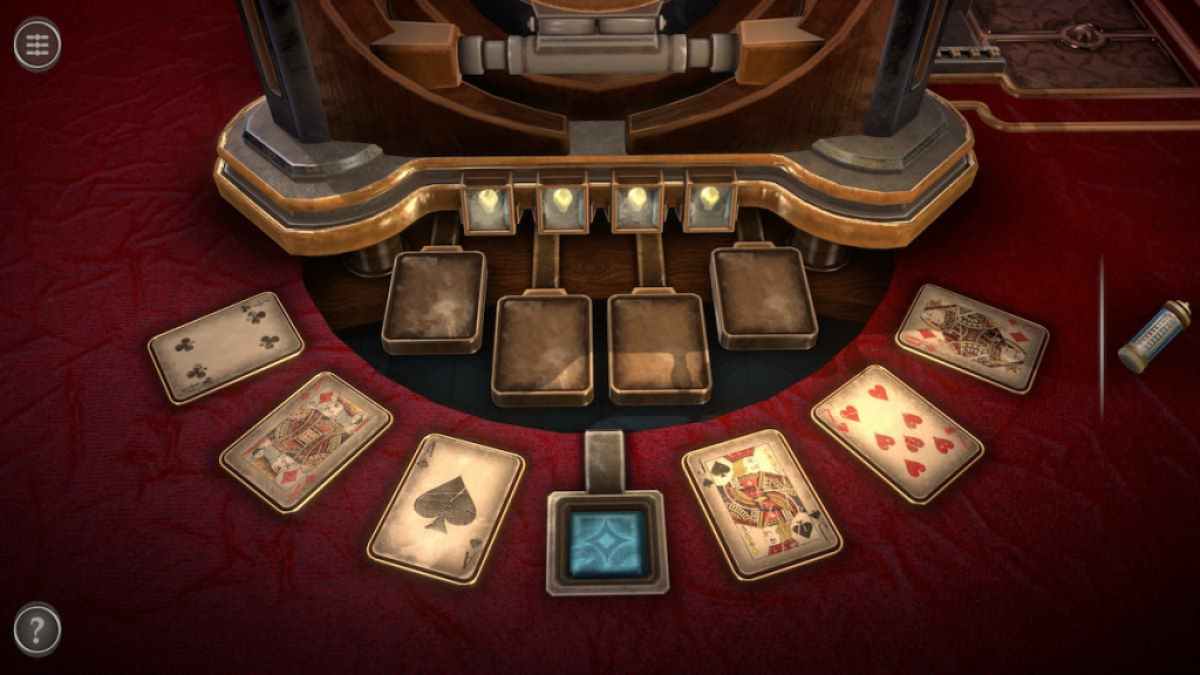
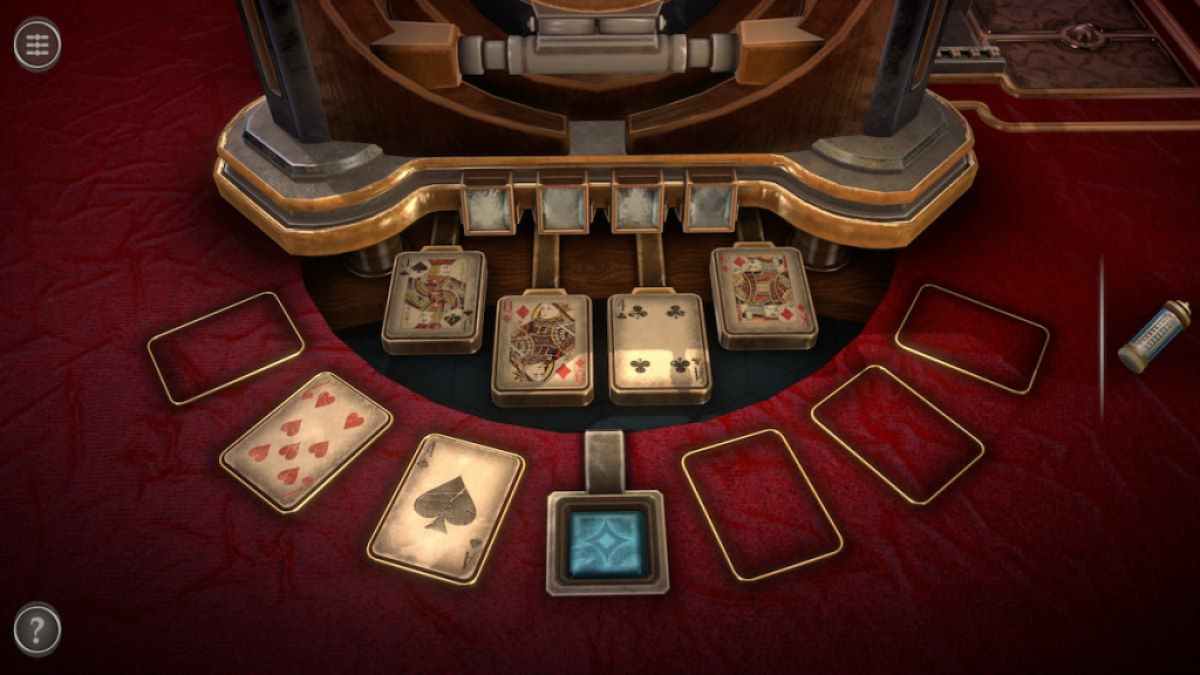
This puzzler involves place four cards into the time slot they belong to .
take up by placing four random cards into the four slots .
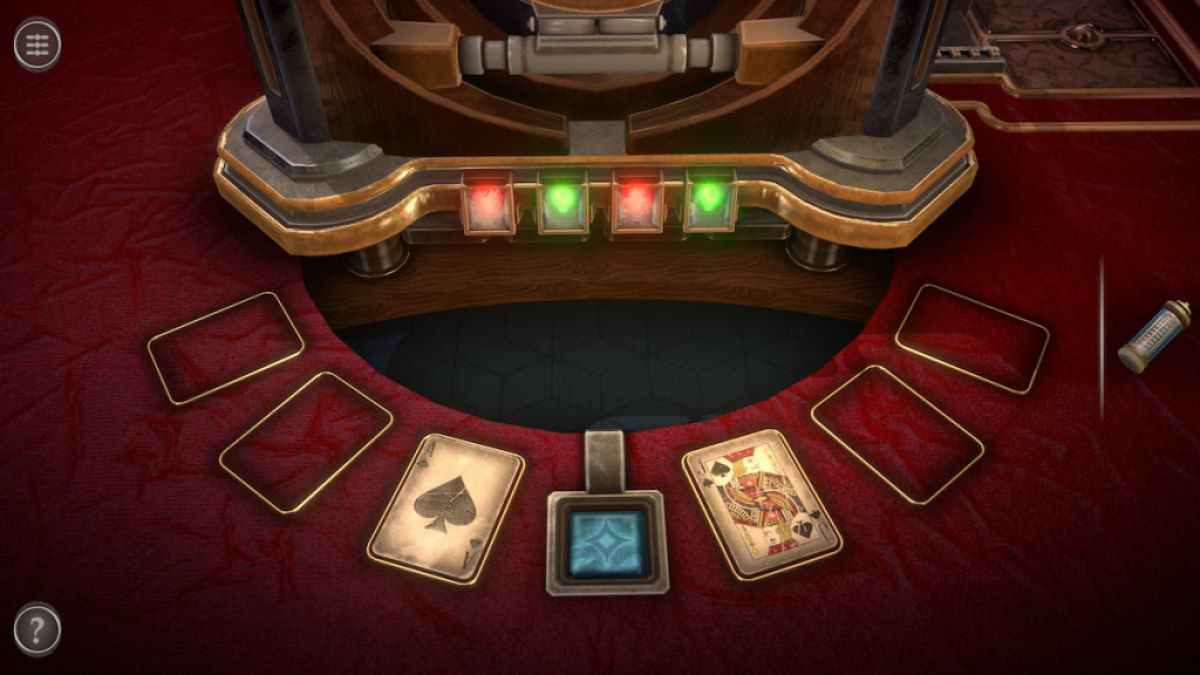
right card game will get a fleeceable light while wrong cards will get a red light .
Screenshot by Pro Game Guides
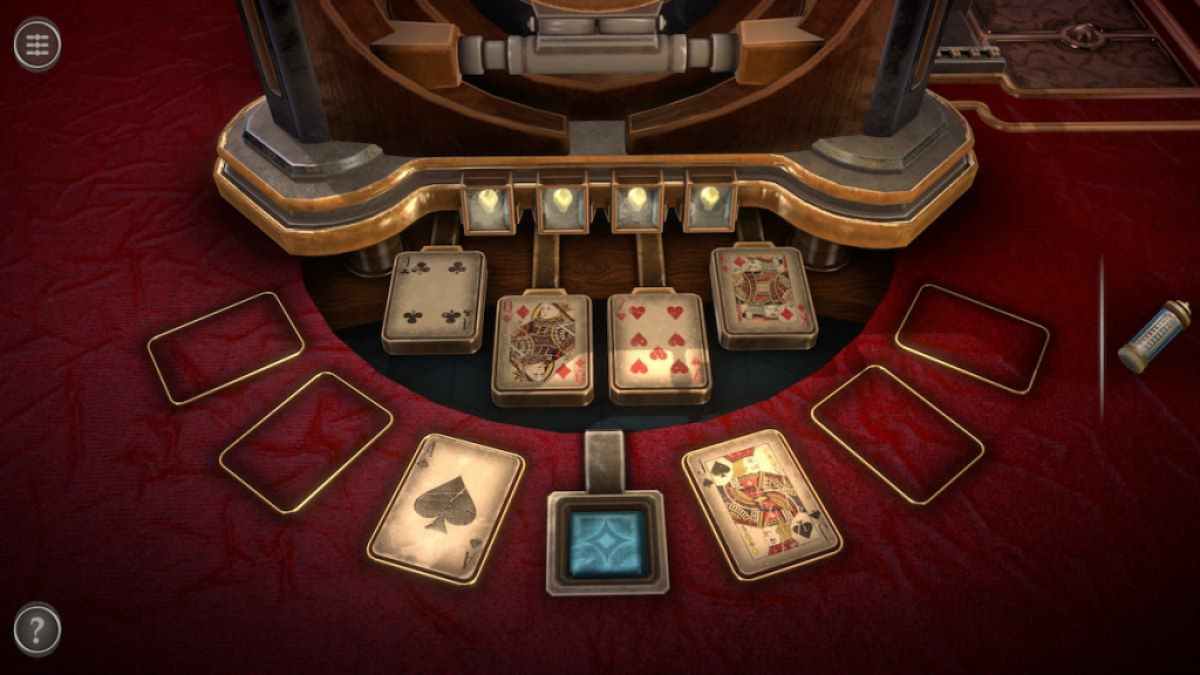
From bequeath to right , the right order of the cards is jack , queen , four of golf club , and mogul . make out this puzzle founder you an Ace Card .
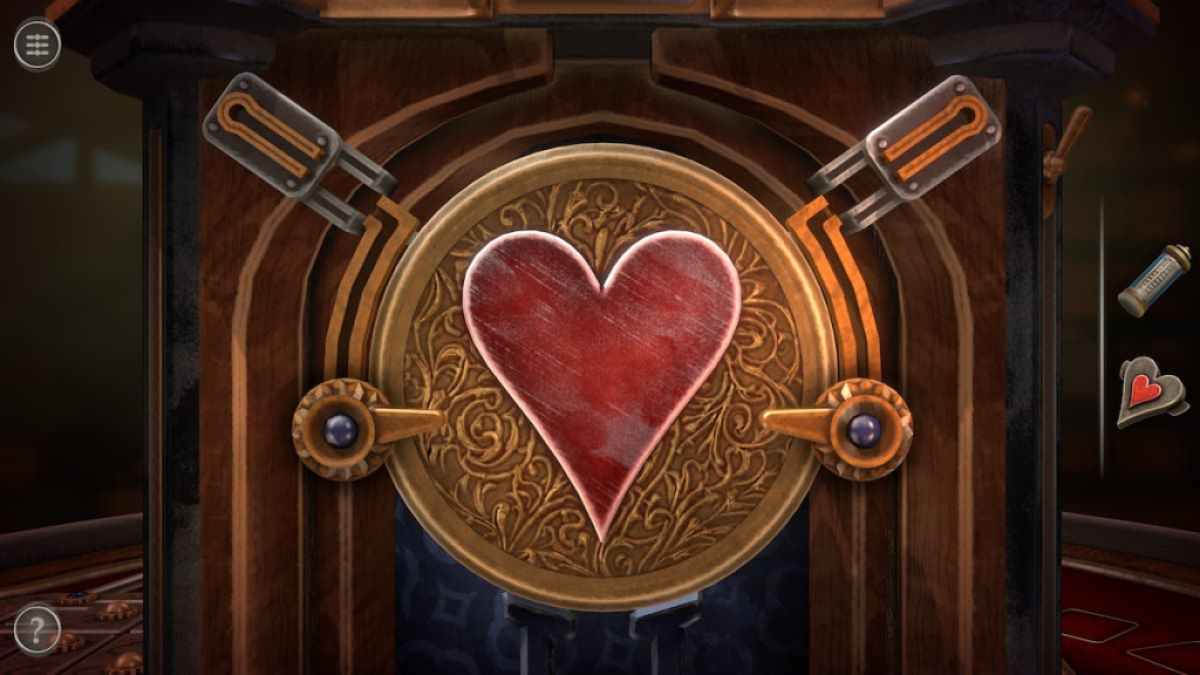
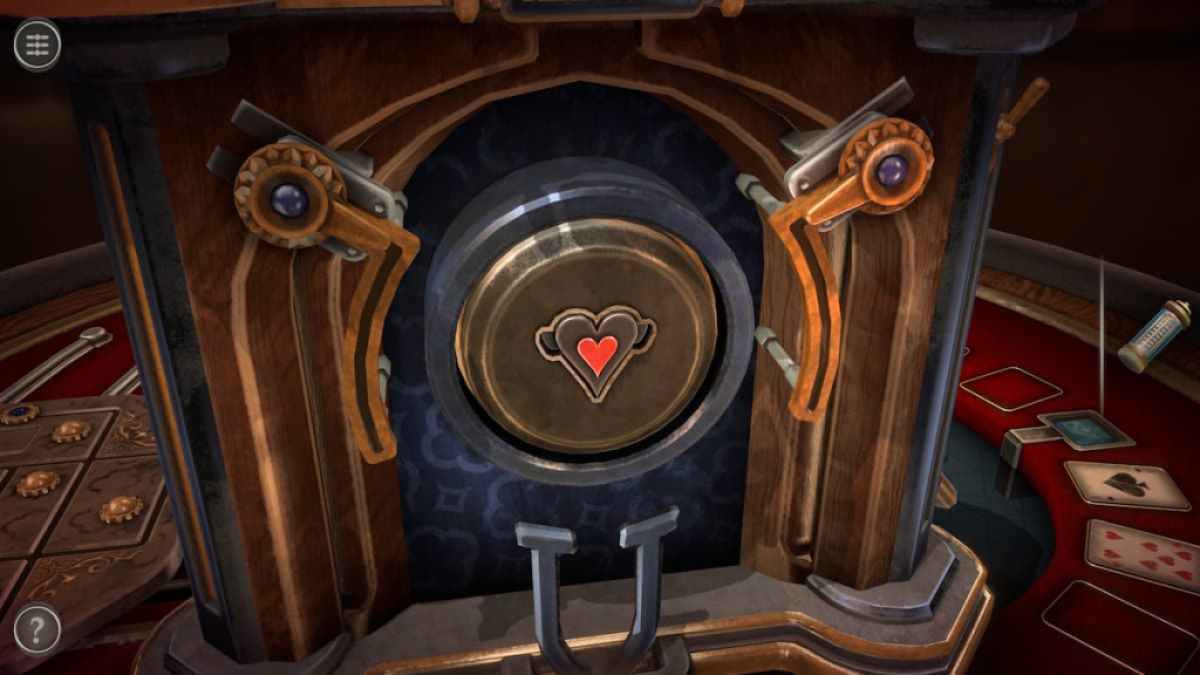
Open up the Ace Card in your armory and rotate to view the back . Slide each of the handle off of the substance in the center and tap it to get a Heart Shape .
go around the tv camera to look at the heart shape on the loge .
Screenshot by Pro Game Guides
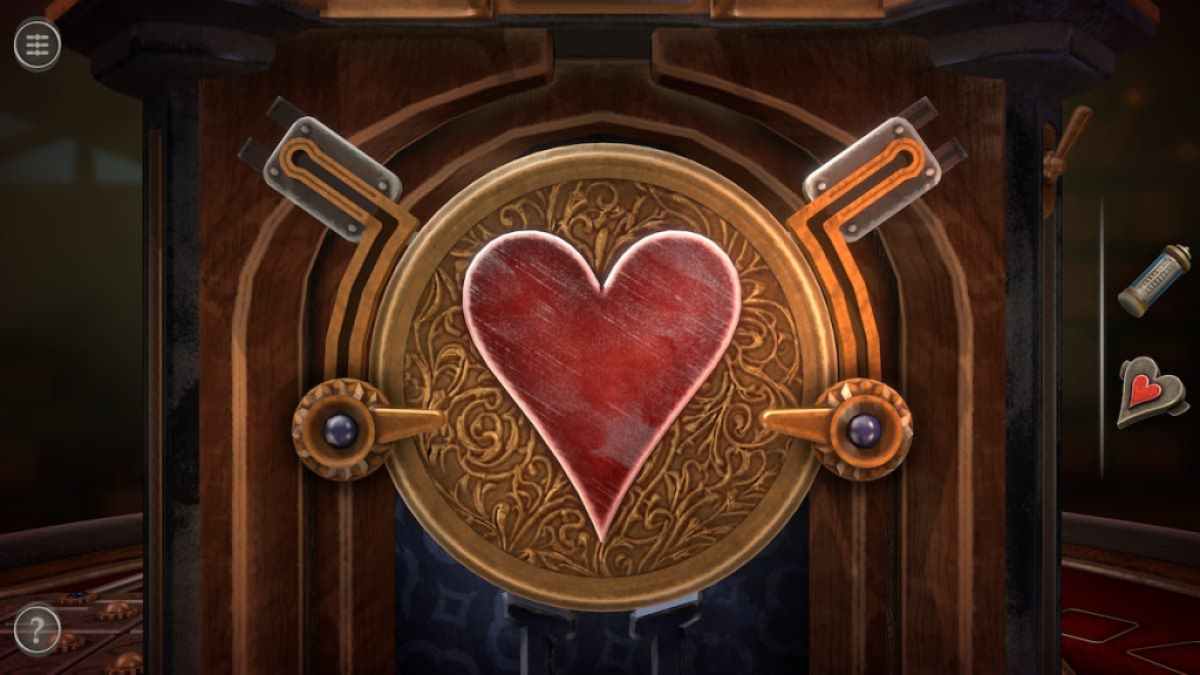
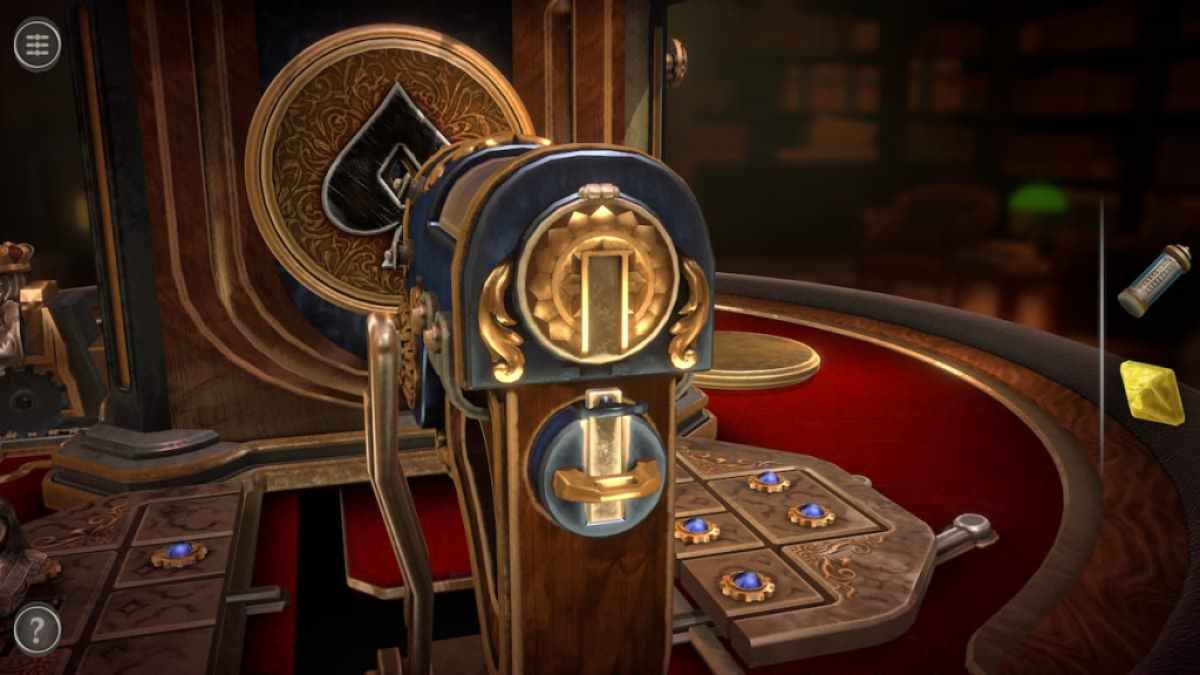
Pull the two top sliders down to connect with the residual of the nerve tract .
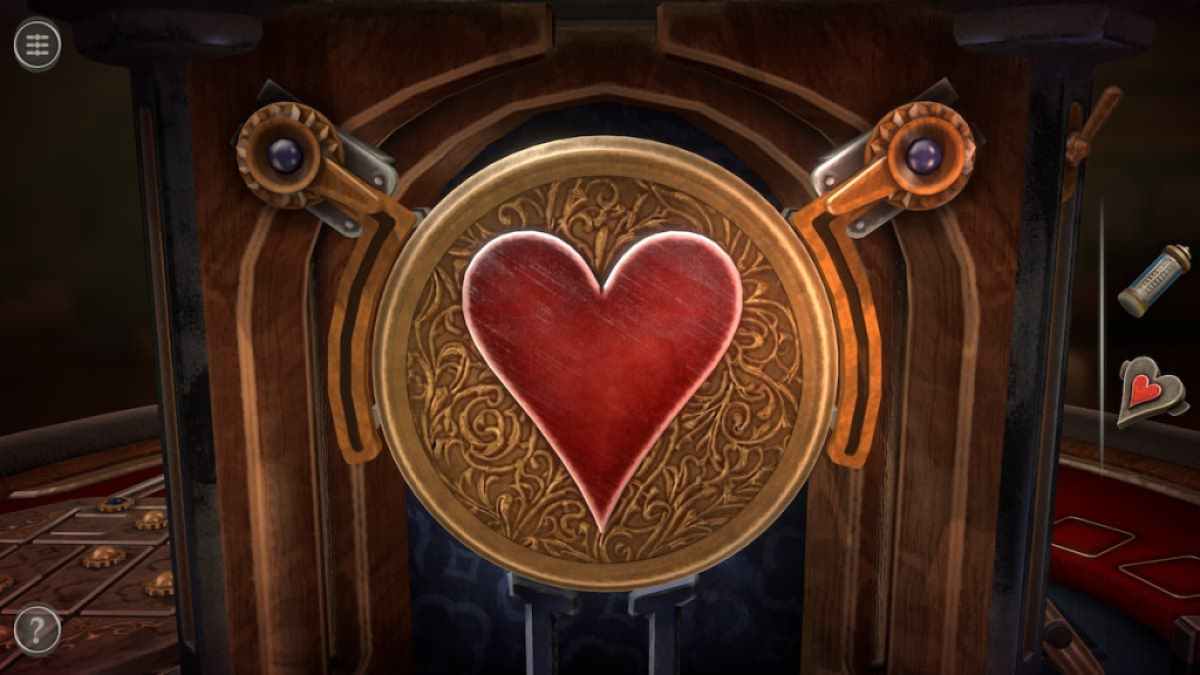
Push the two telephone dial sliders to the top of the previously moved slider .
invest the Heart Shape into the empty space to unlock a compartment curb a Small Figure .
Screenshot by Pro Game Guides
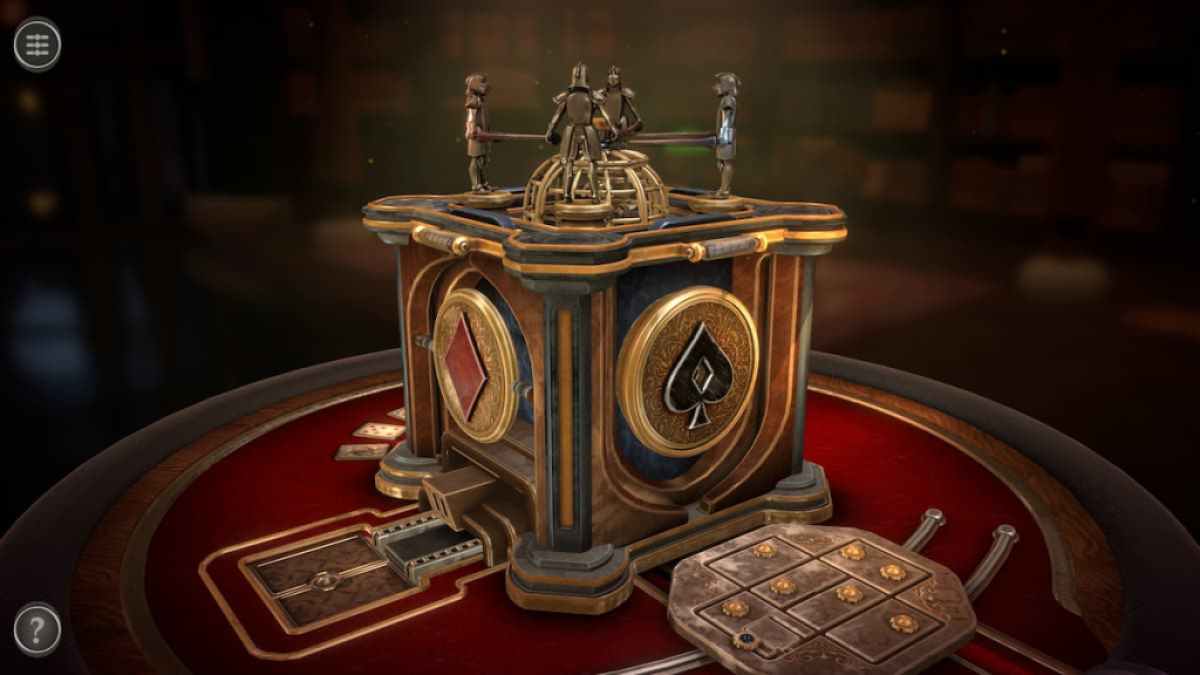
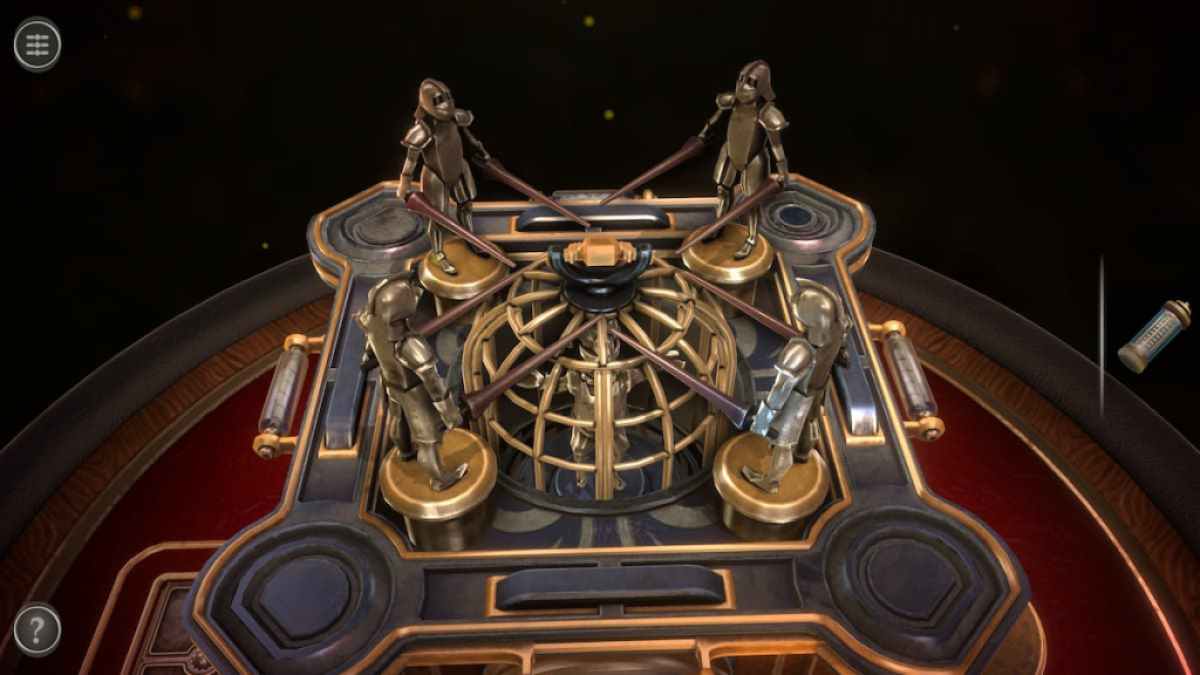
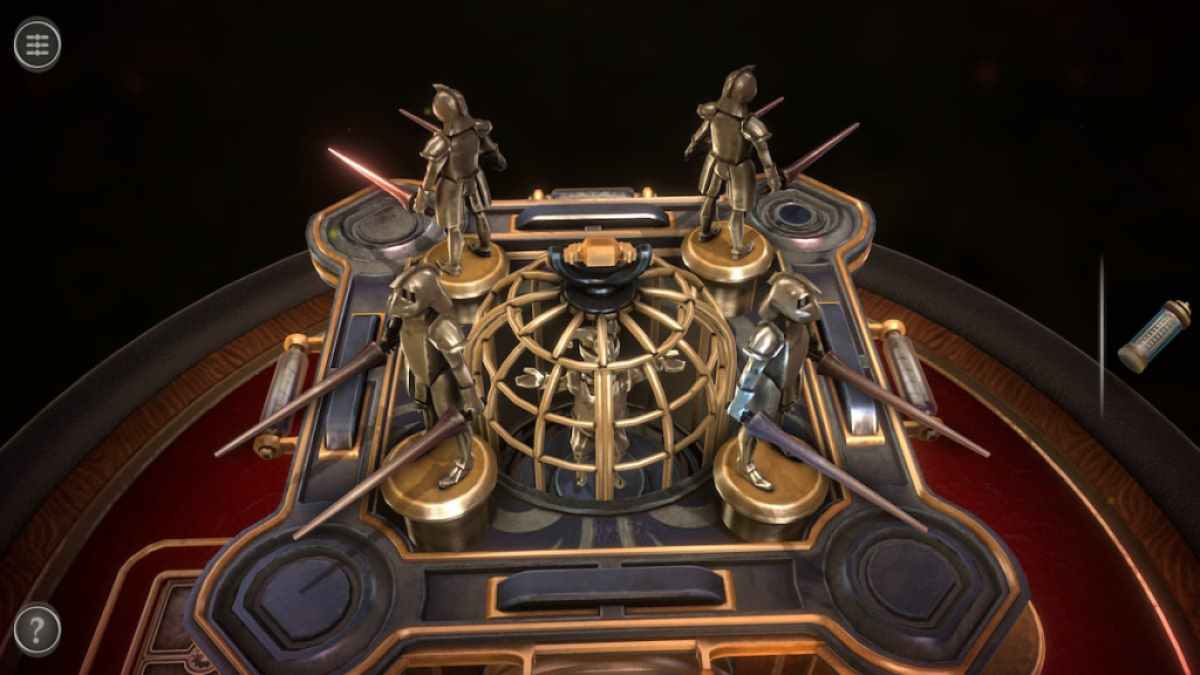
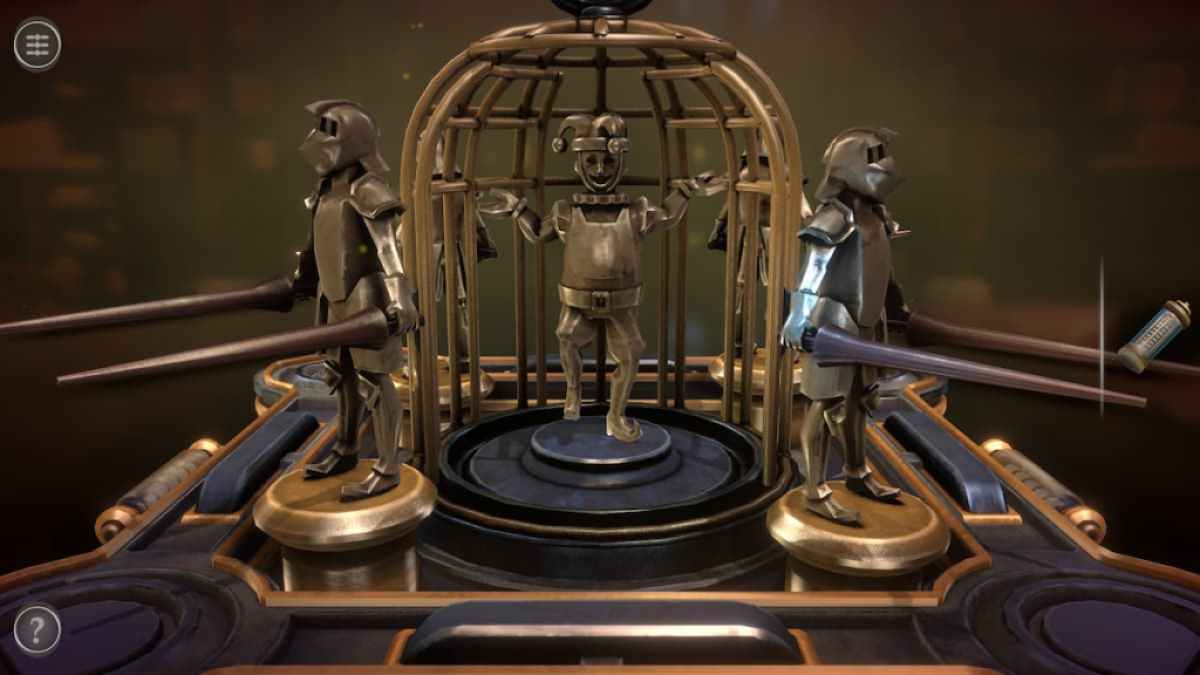
At the top of the box is a radical of four knights using their lances to restrain the batting cage in the center .
To launch the cage , you need to make each knight face the exterior . To do so promptly , tapdance them in the following order of magnitude :
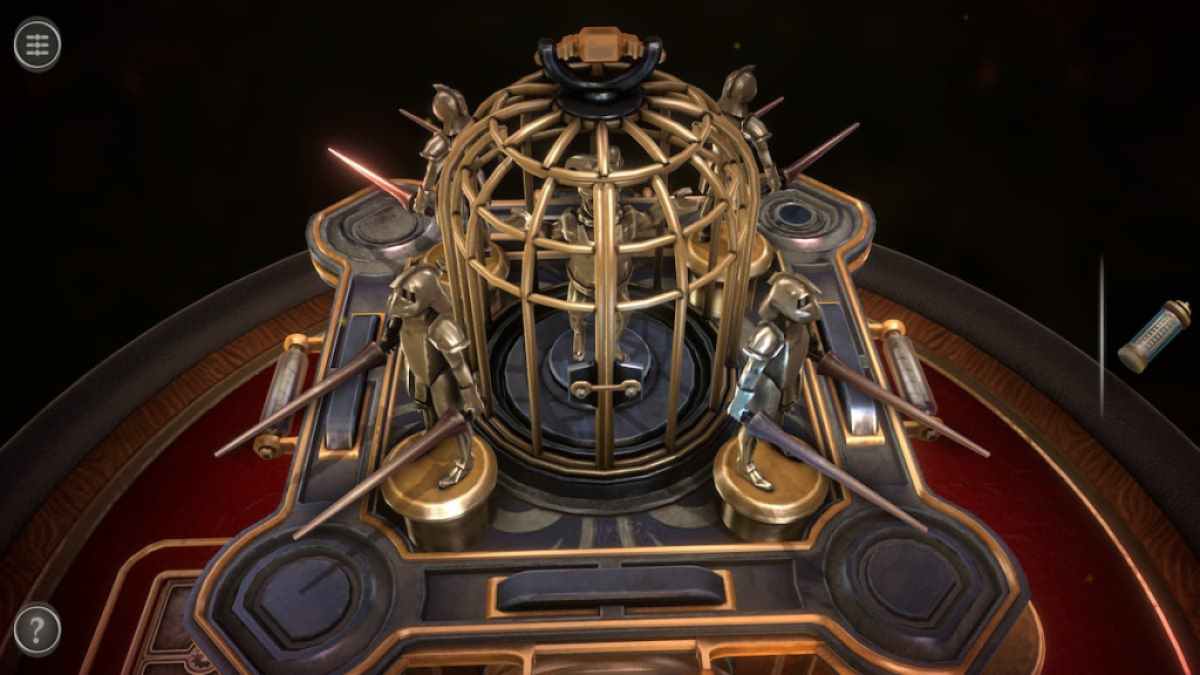
draw out the cage in the center up .
Screenshot by Pro Game Guides
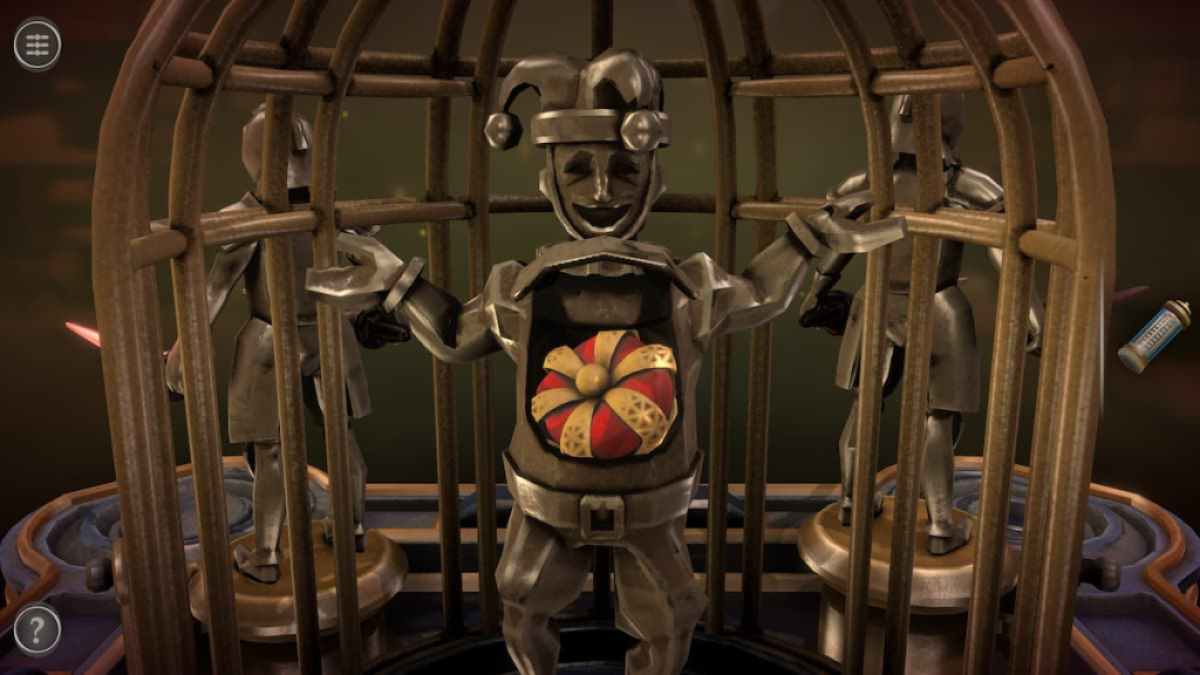
Unlatch the lock on the John Cage and pull each of the doorway to the side to approach the jester statue in the marrow .
Rotate the gear on his neck opening to get a Small Crown .
await at the puzzle with the golden welkin in the nerve center .
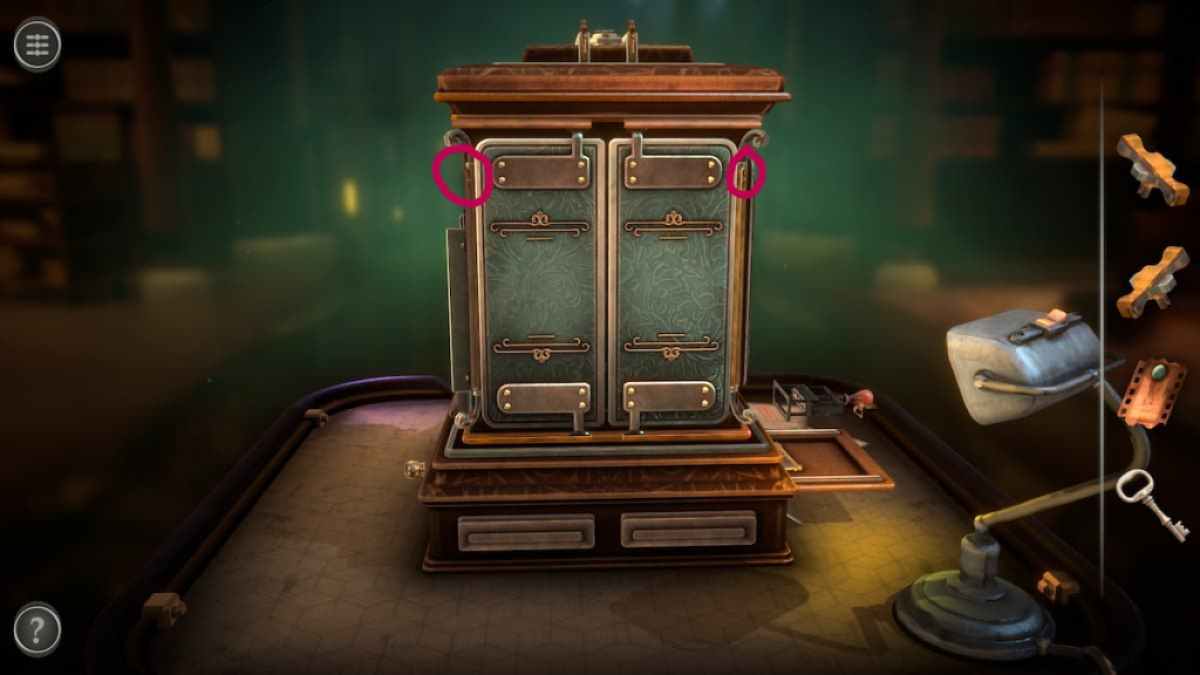
Image by Pro Game Guides
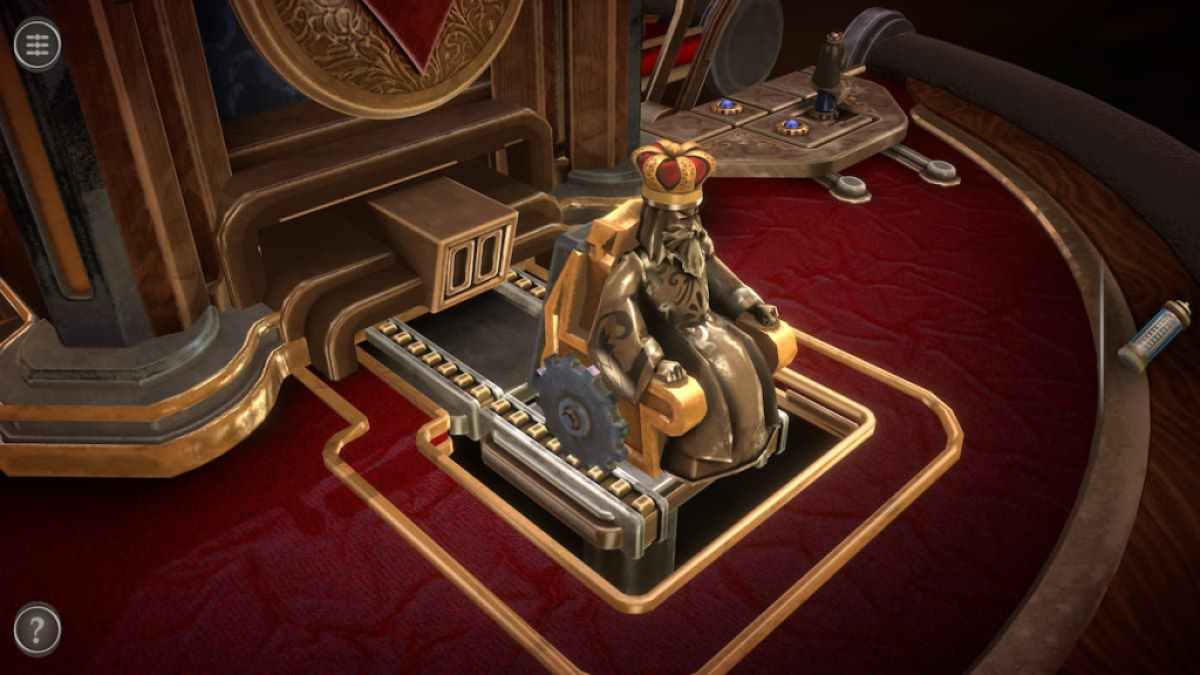
point the Small Crown onto this gold sphere .
This will cause the statue of a queen to rise up . It ’s attach to the boxful by two rows of gear .
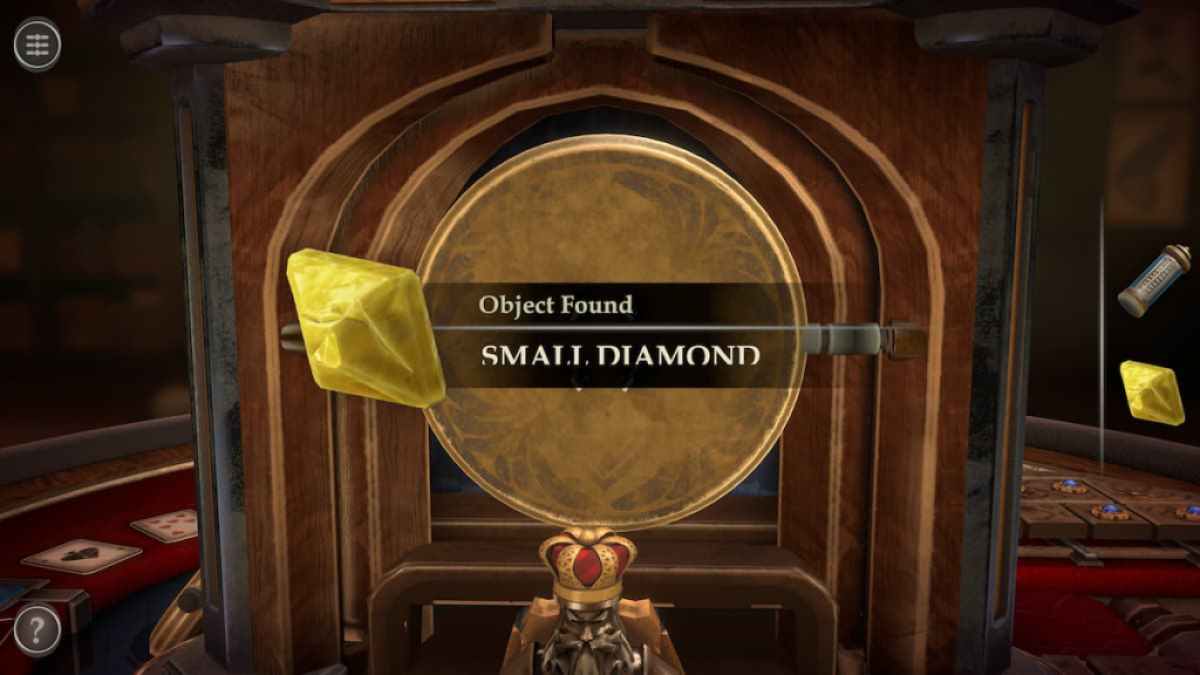
Pushing the Rex against the box will give you a Small Diamond .
Screenshot by Pro Game Guides
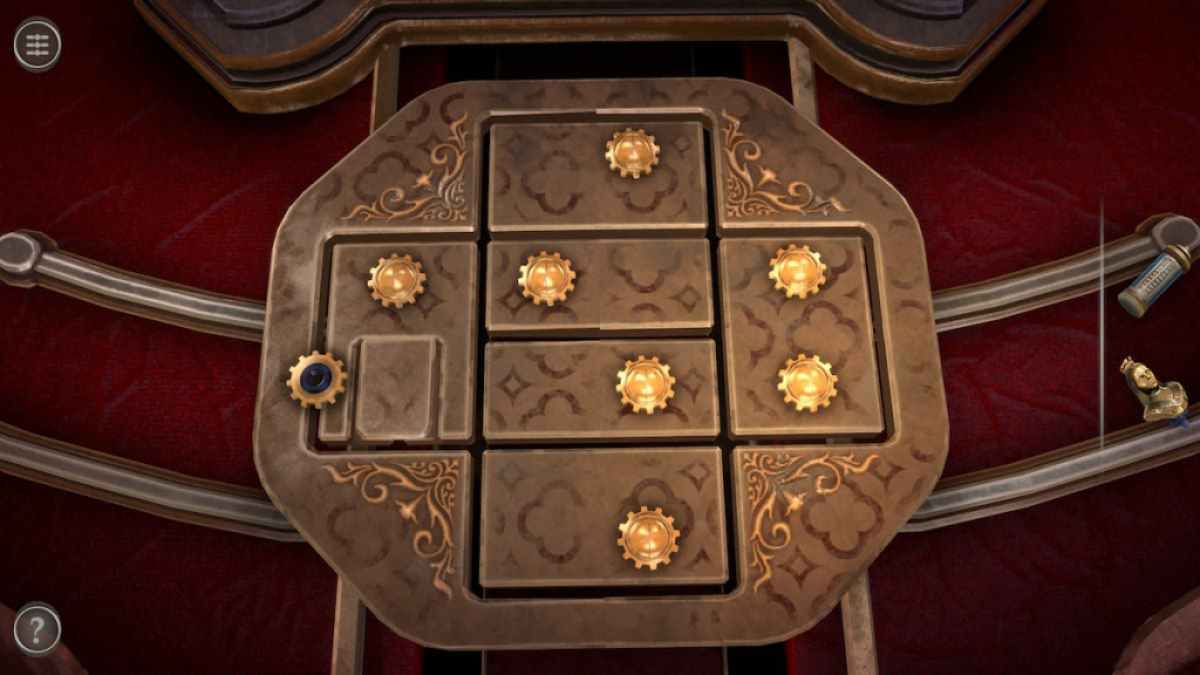
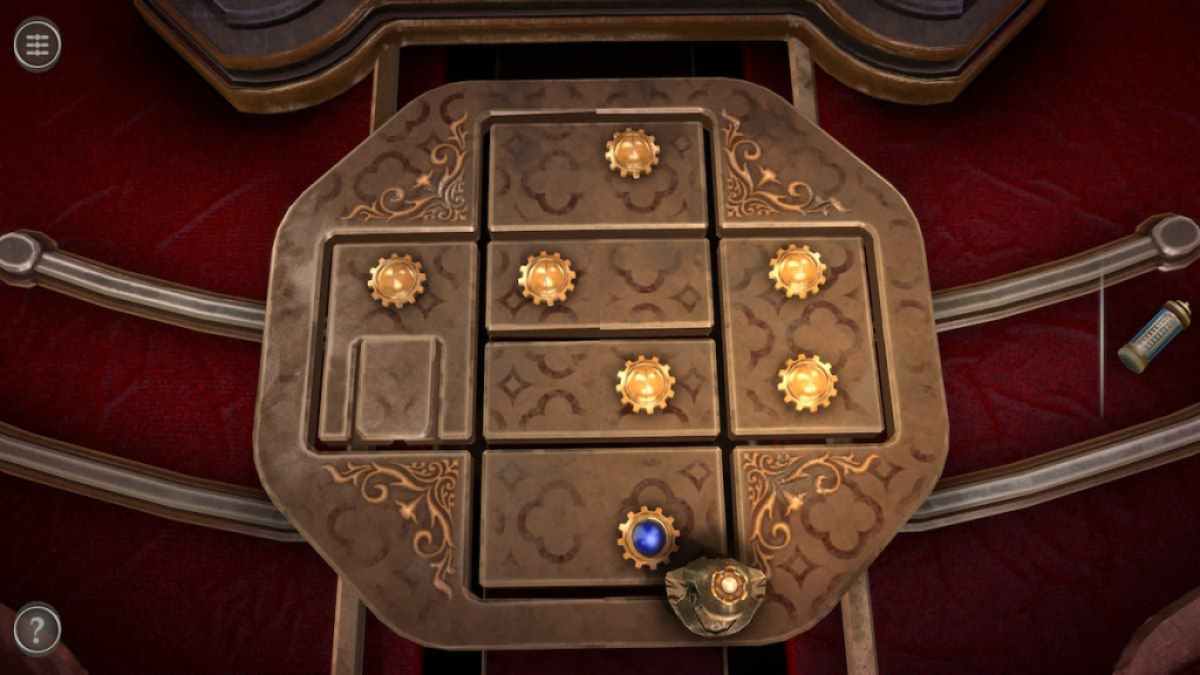
Before inserting the Small Diamond into the hole , solve the puzzler in front of it .
Place the Small Statue onto the geared wheel on the left side .
go the Small Statue past one of the gold spell will spread out it up , turn it racy .
Screenshot by Pro Game Guides
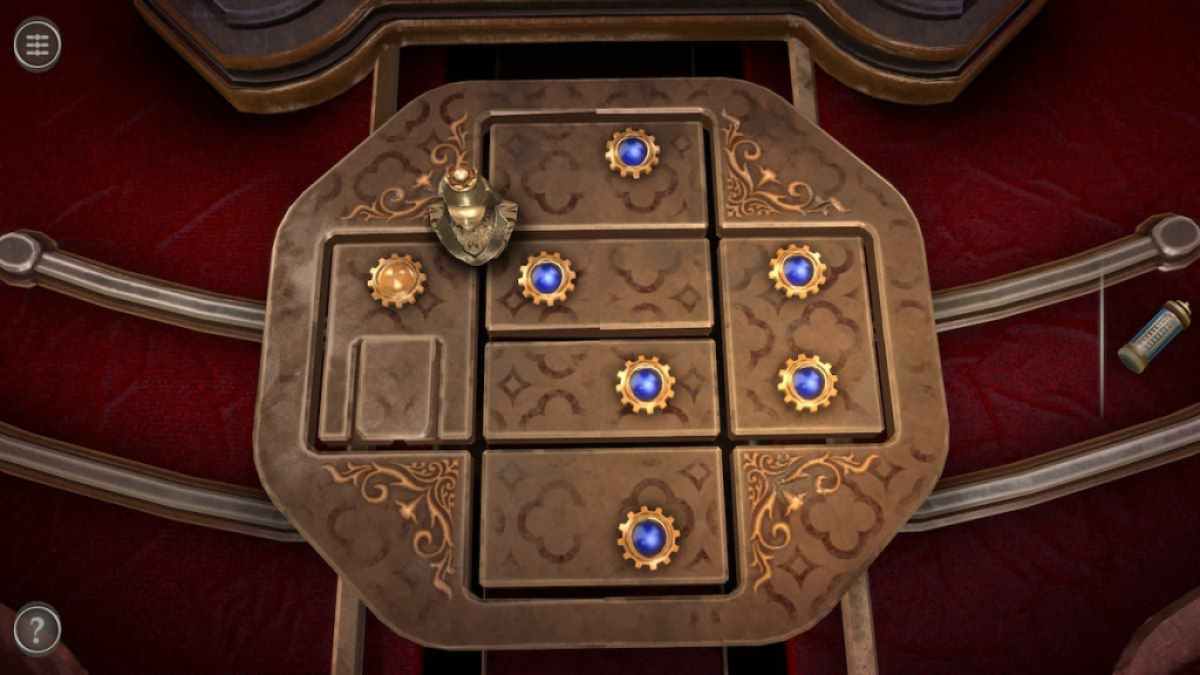
To lick the puzzle , you need to move the Small Statue passed each piece so that each one is grim . sink a blue while will revert it to amber , so you will need to tread carefully . Ideally , the last bit to wrick blue would be the one on the far left .
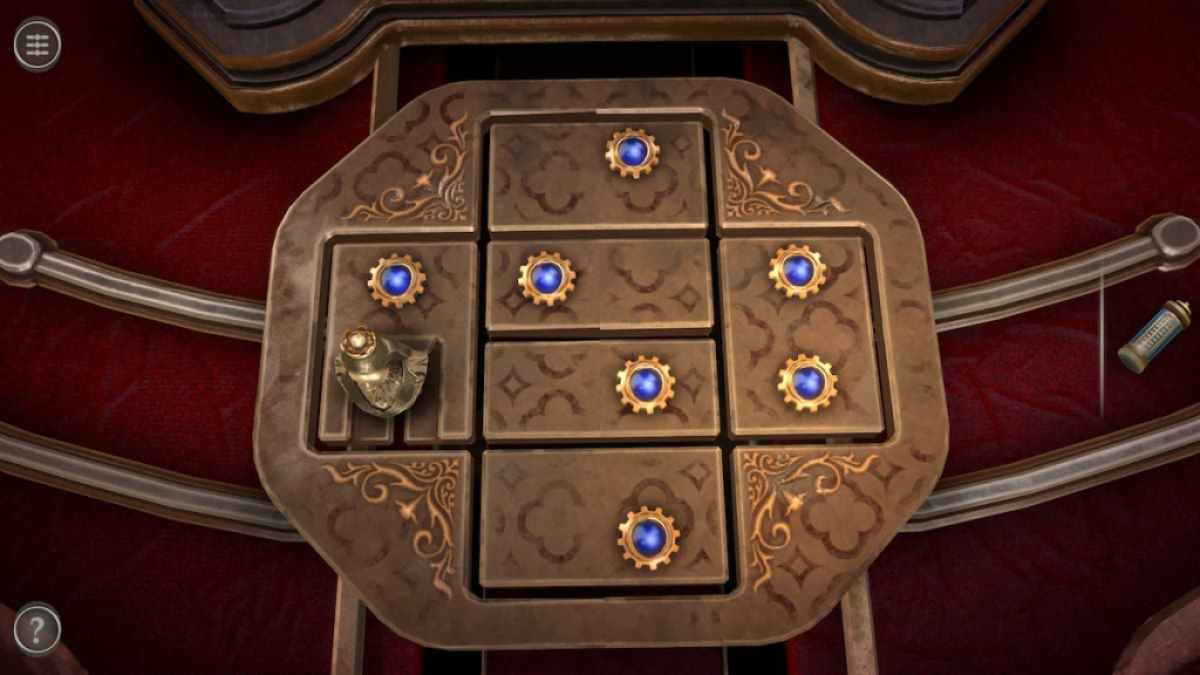
Turning the last fortunate slider bluing will open up a new itinerary . Push the Small Statue to the end of that way .
This will afford up a new mechanism .
Screenshot by Pro Game Guides
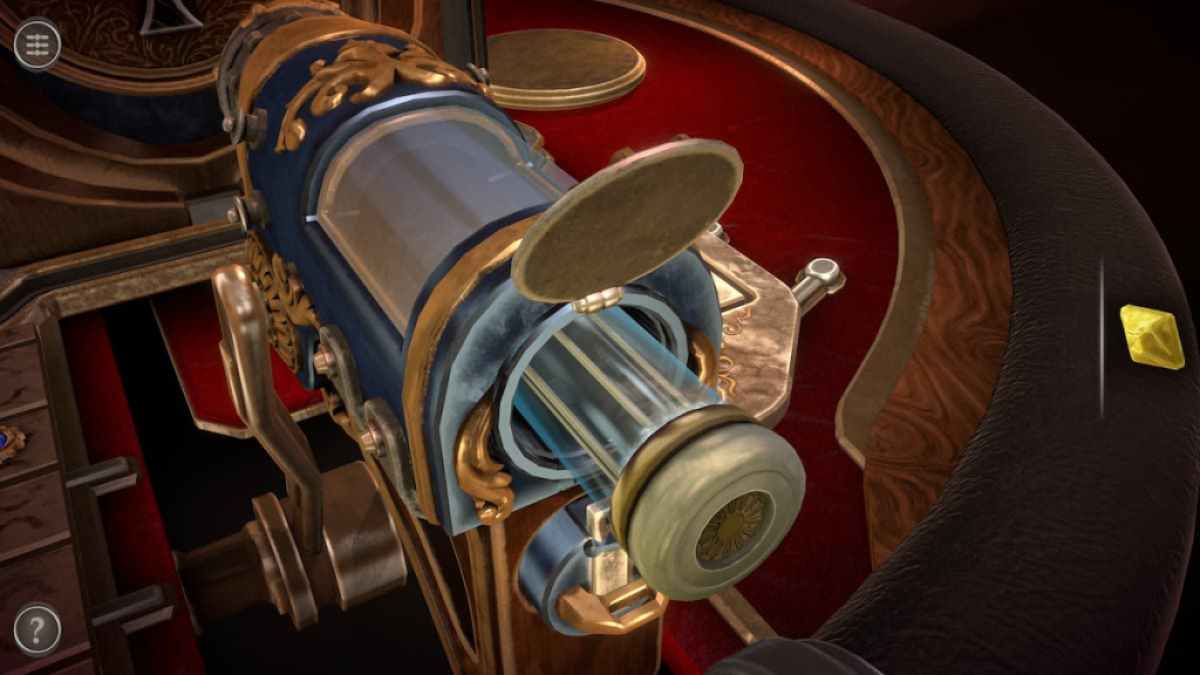
On the back of the chemical mechanism , rotate the badge so that the assailable close of the path connects with the path at the top . Push the bit on the top down along the path .
The compartment will open up , and the Power Cell can be placed inside of it .
This will shoot a sensationalistic laser towards the box .
Screenshot by Pro Game Guides
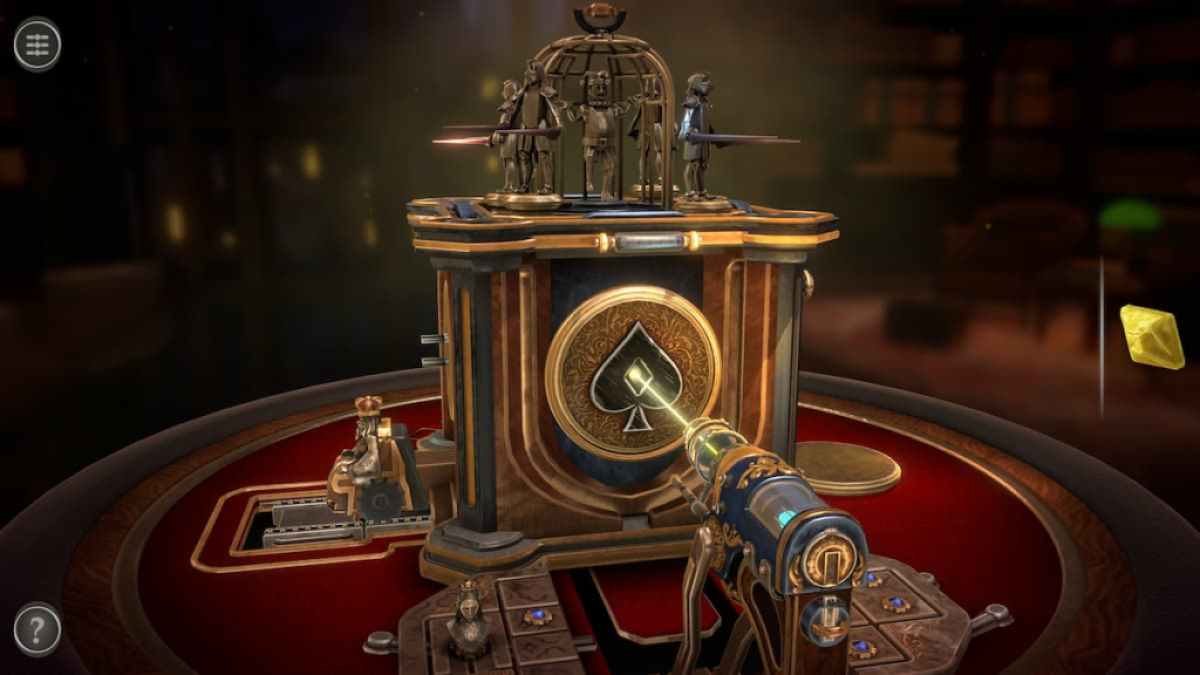
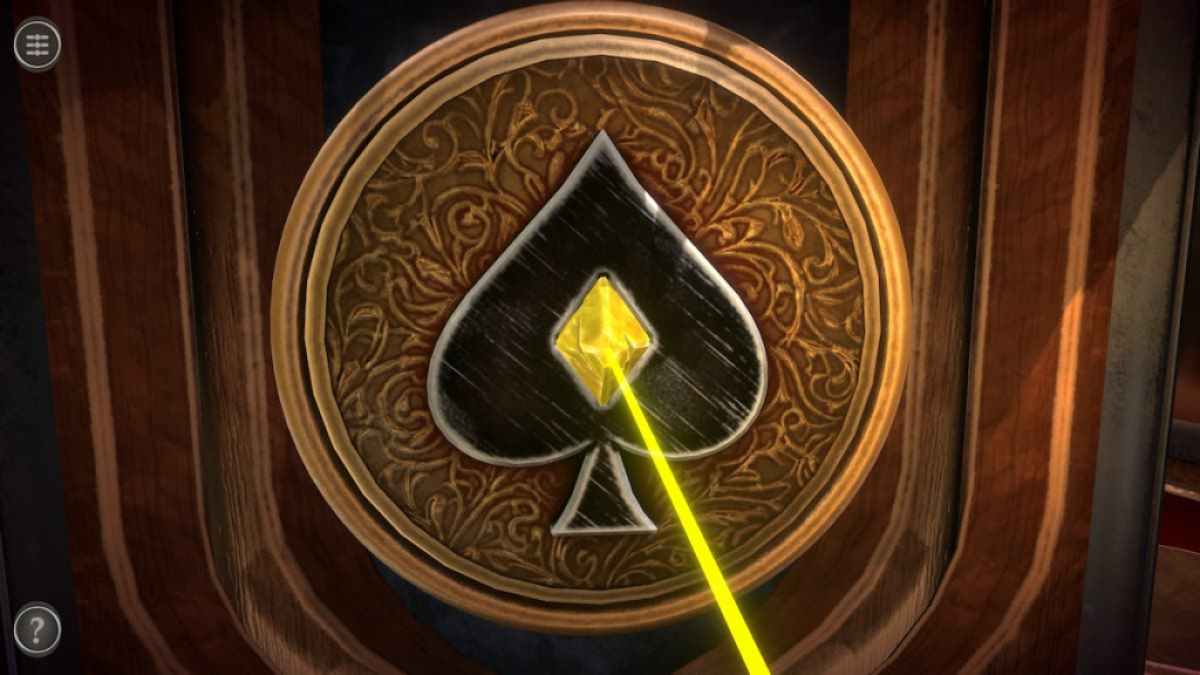
range the Small Diamond into the mess where the brightness shines .
The goal of this puzzle is to rotate the three row so that the light can touch all of the mechanisms on the edges .
This will give you a Remote Control and regress you to the main room .
Screenshot by Pro Game Guides
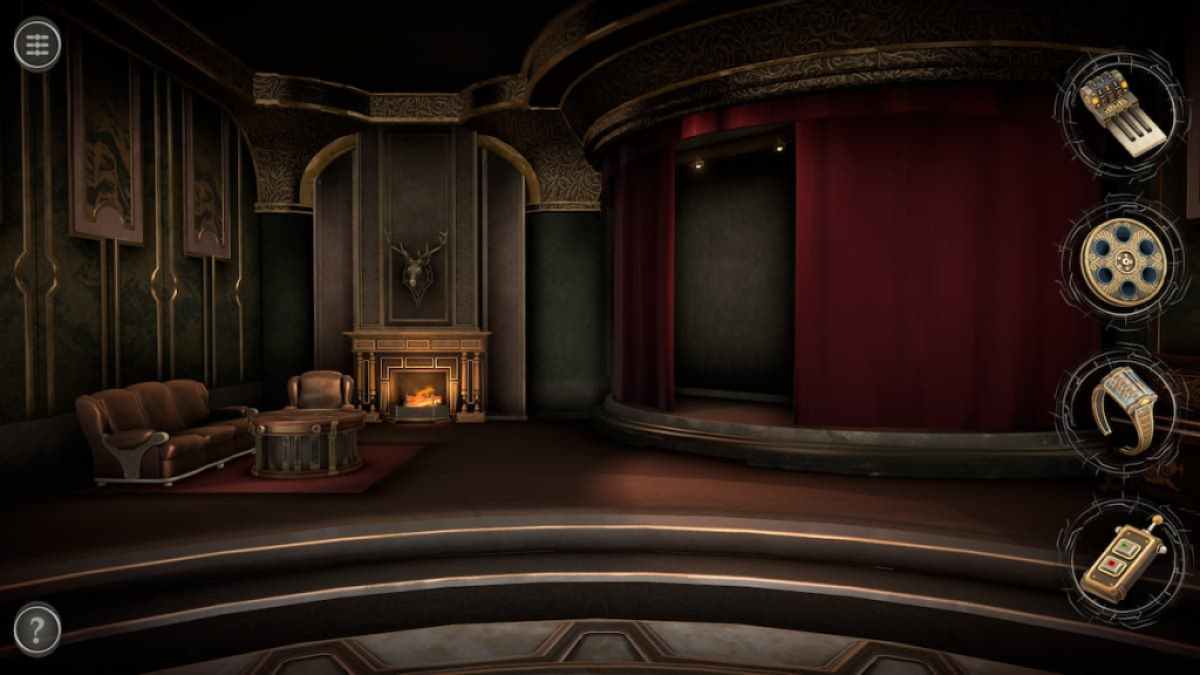
Main room final puzzles
The side room here have a cozy posing arena , a hearth , and a red - curtained stage .
Related : Echo Bay Murders – Chapter 2 Walkthrough
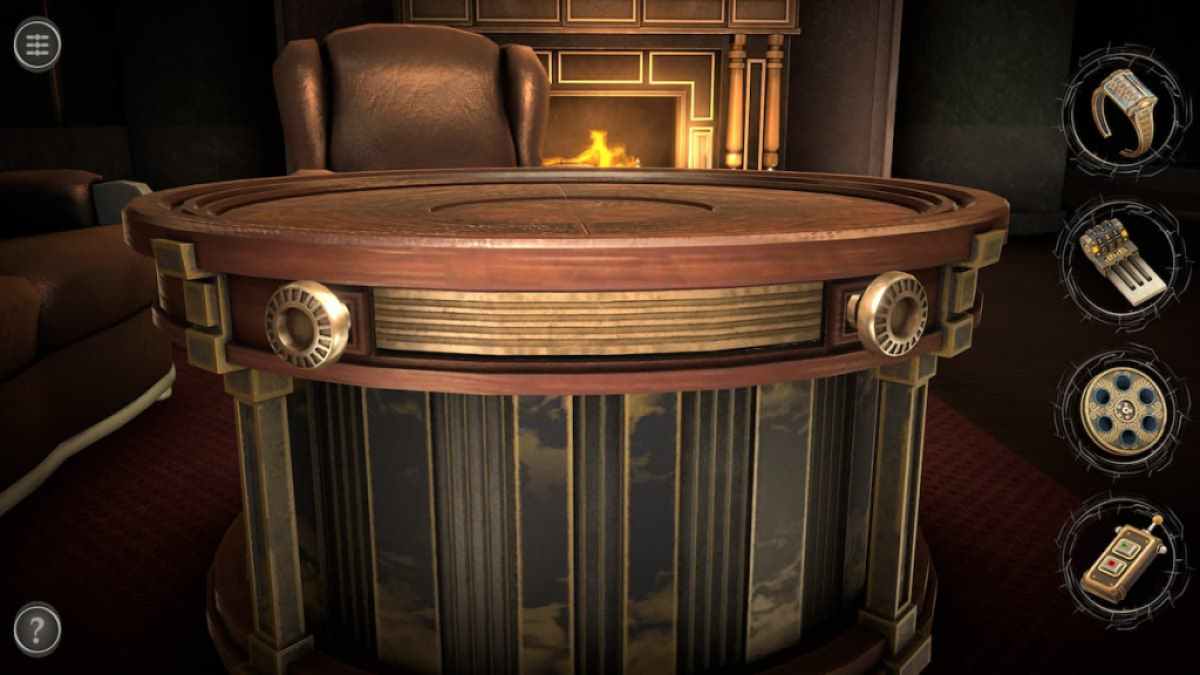
There are two gears at the front of the coffee table .
Screenshot by Pro Game Guides
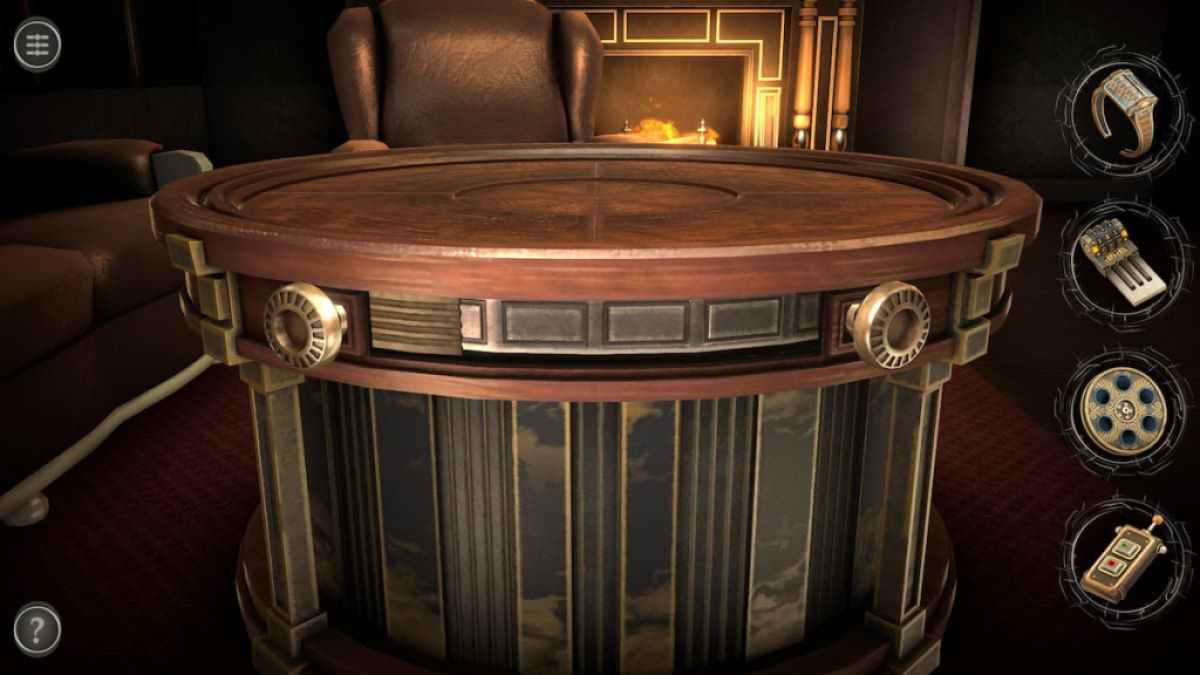
reel the one on the left first to reveal a 2nd control board with a square background behind the first .
splay the right dial second to reveal a button enshroud behind the second venire .
agitate it to unlock a mechanism on the top of the table . Finish the puzzle by come out the Remote Control on the table .
Screenshot by Pro Game Guides
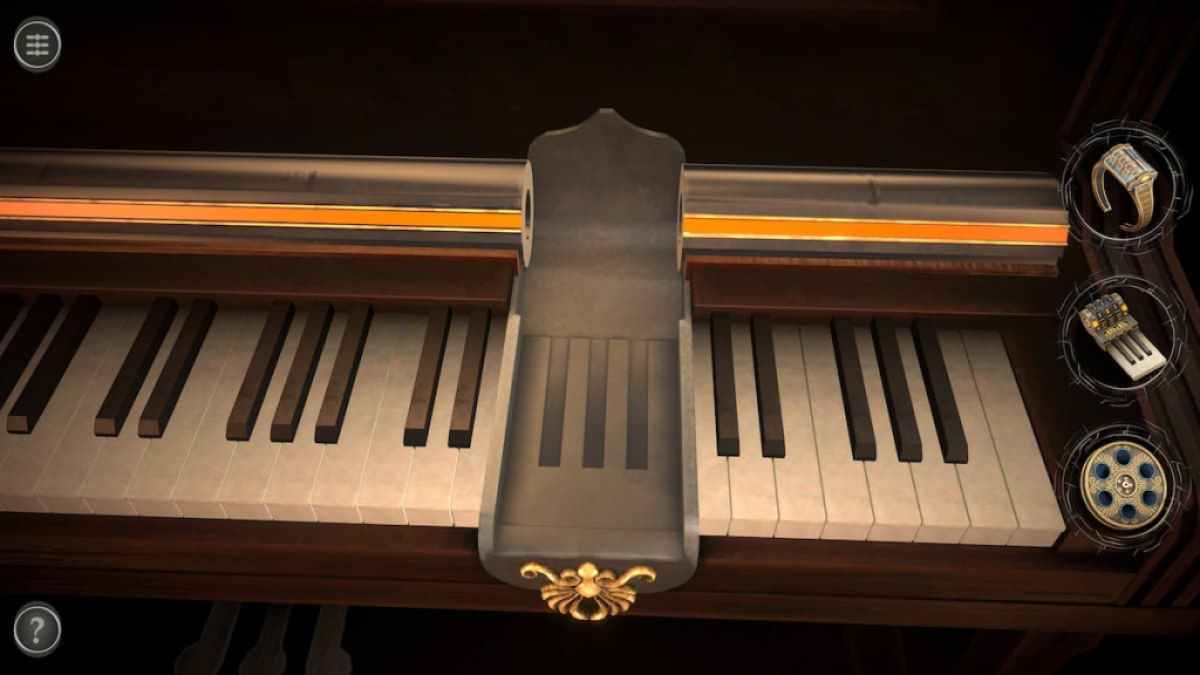
Look over to the piano to line up a overlook subdivision .
set the Piano Keys detail here .
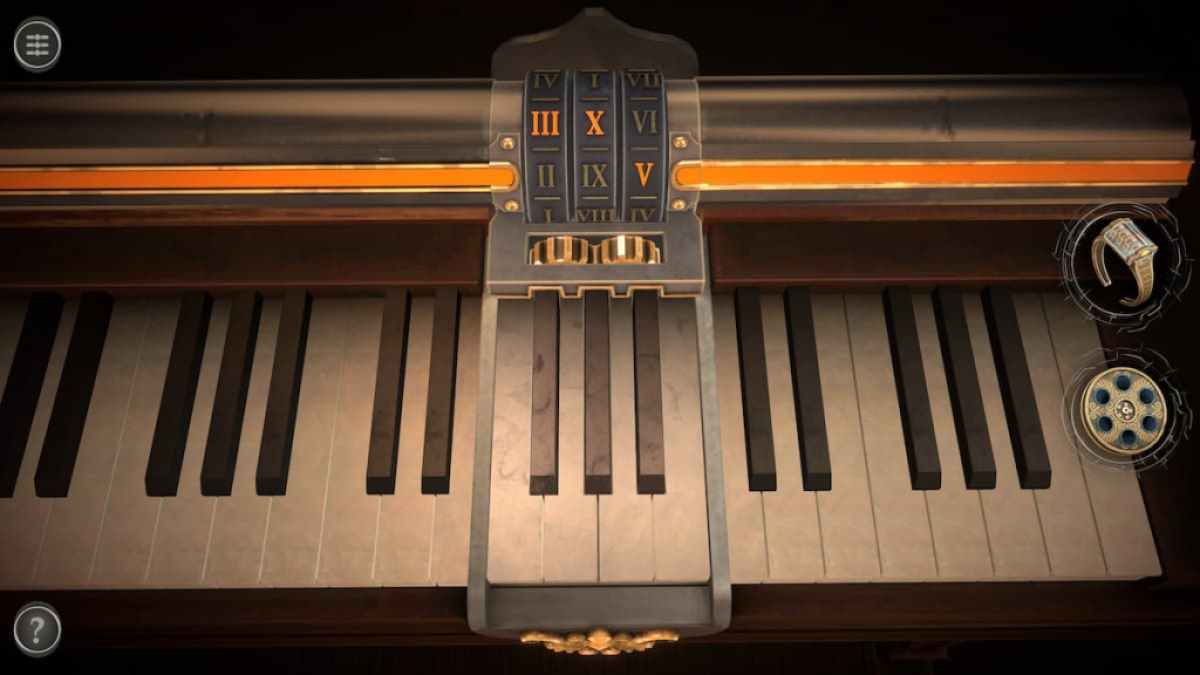
To solve this puzzle , you need to play the keys until all three golden symbols are in line with the orangish line on the piano . An easy manner to do this is by placing the leftover and center orange symbols next to each other . you may then use the right key to place the proper symbol in place and the left key to place the two other symbolization in place .
Screenshot by Pro Game Guides
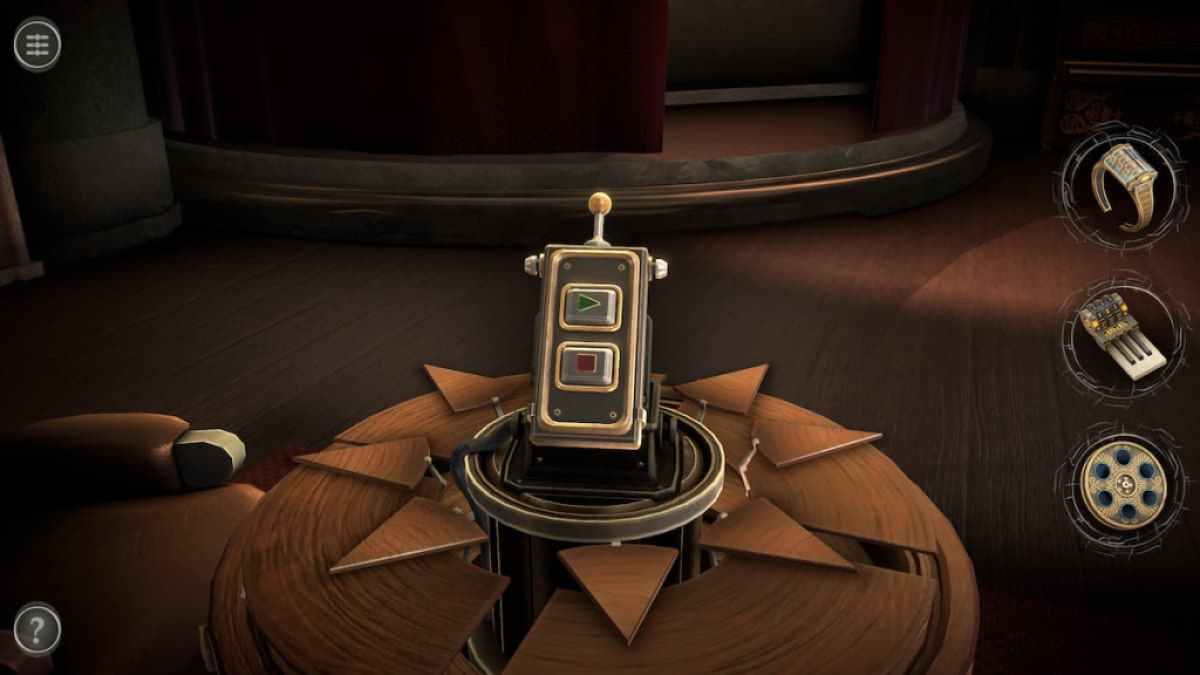
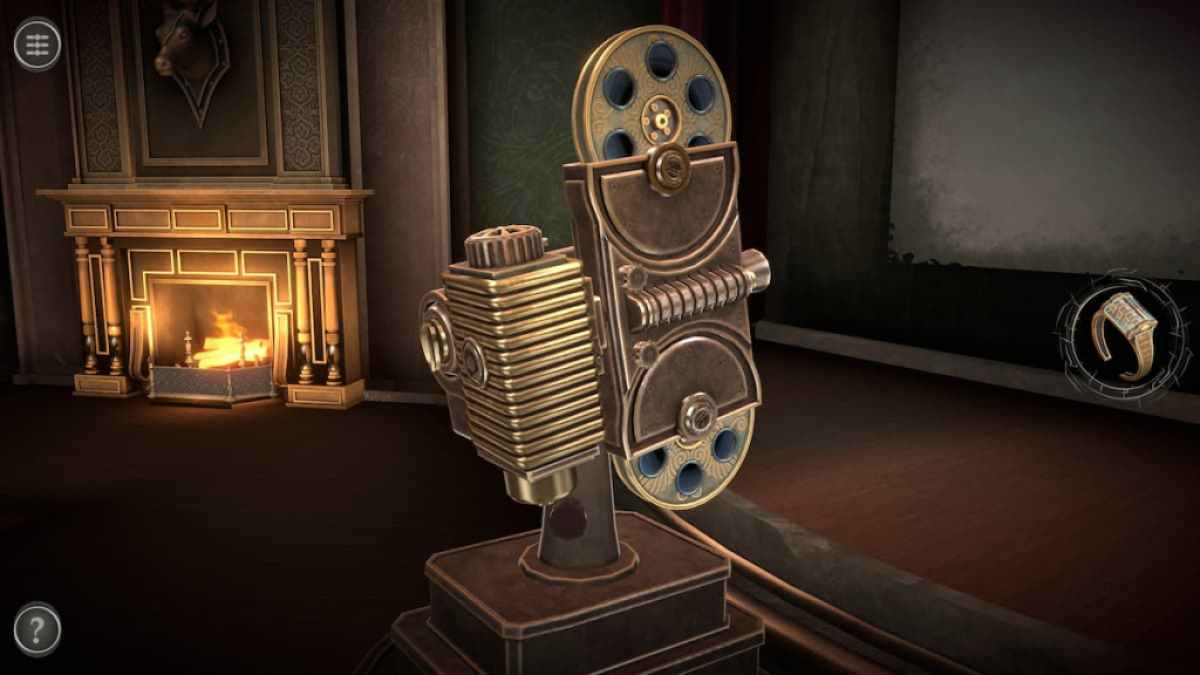
When the key are aligned , the pall will open up to uncover a screen . A moving-picture show actor will stand up from the base as well .
Place the Film Strip into the top slot of the moving-picture show player .
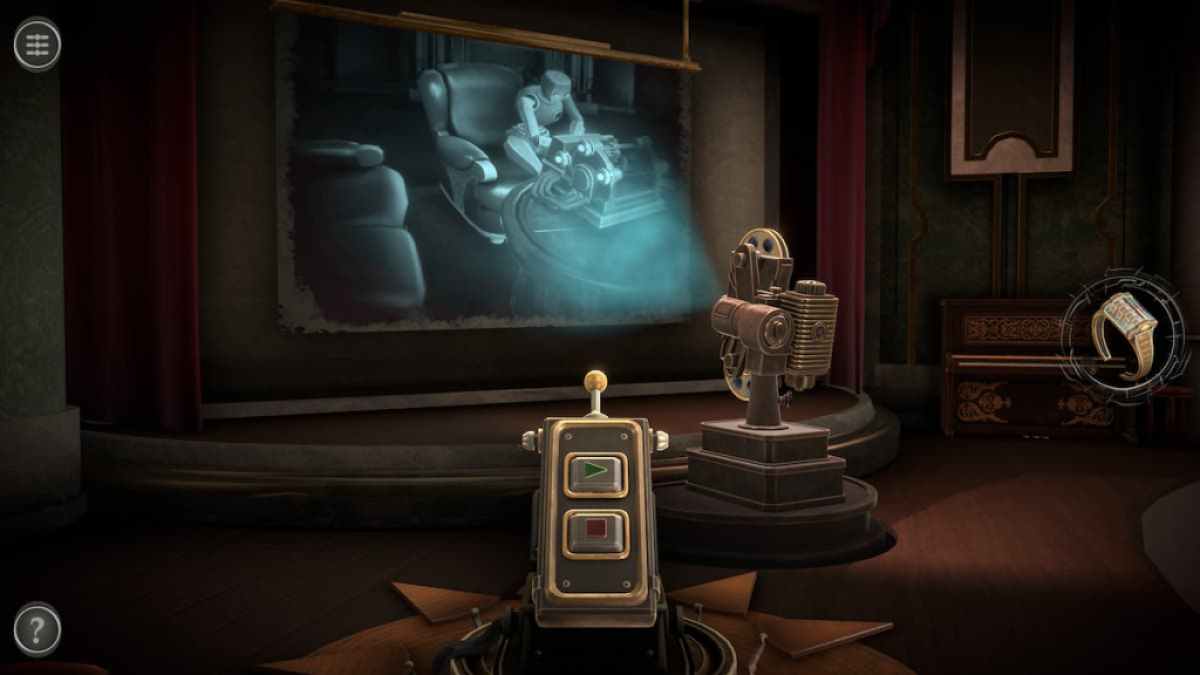
Return to the coffee table chemical mechanism and press the green manoeuvre button on the Remote Control .
Screenshot by Pro Game Guides
Watching the show for a snatch divulge the solution to the next mystifier .
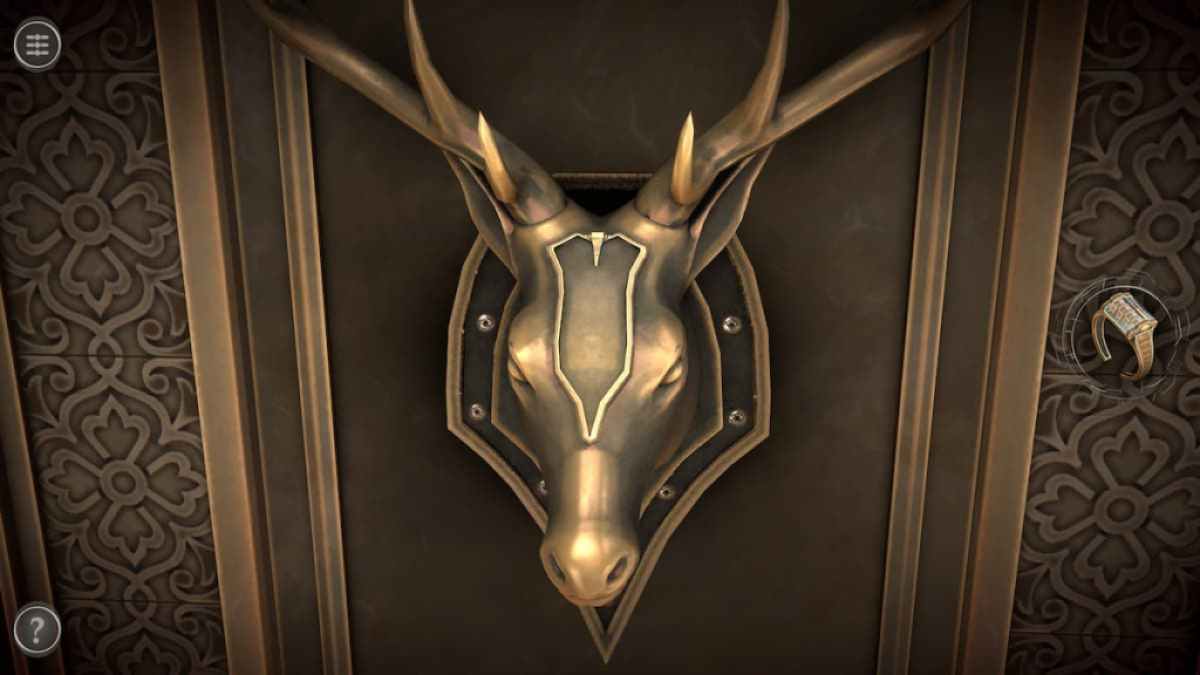
The cervid head above the fireplace is the net mystifier .
Pull the mechanism at the top of the forehead to launch the head and place the final item into it .
Screenshot by Pro Game Guides
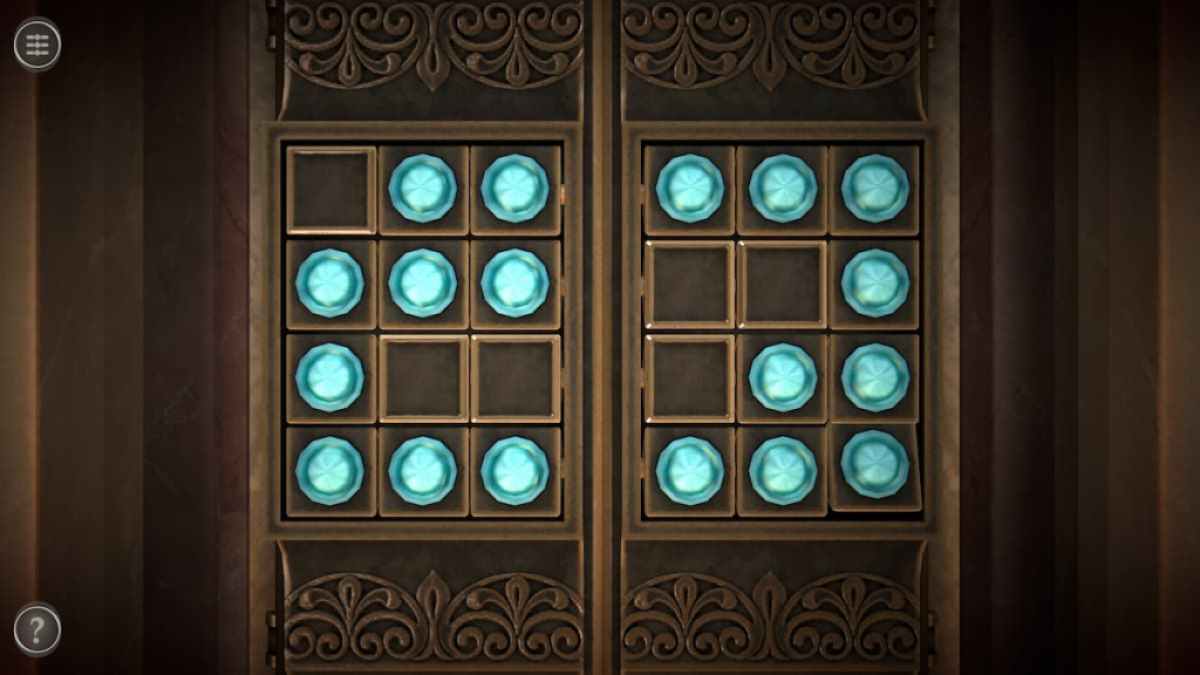
This puzzle can be solve by recreate the pattern from the film act on the sieve . Tap a box seat to leaf it and turn it blue .
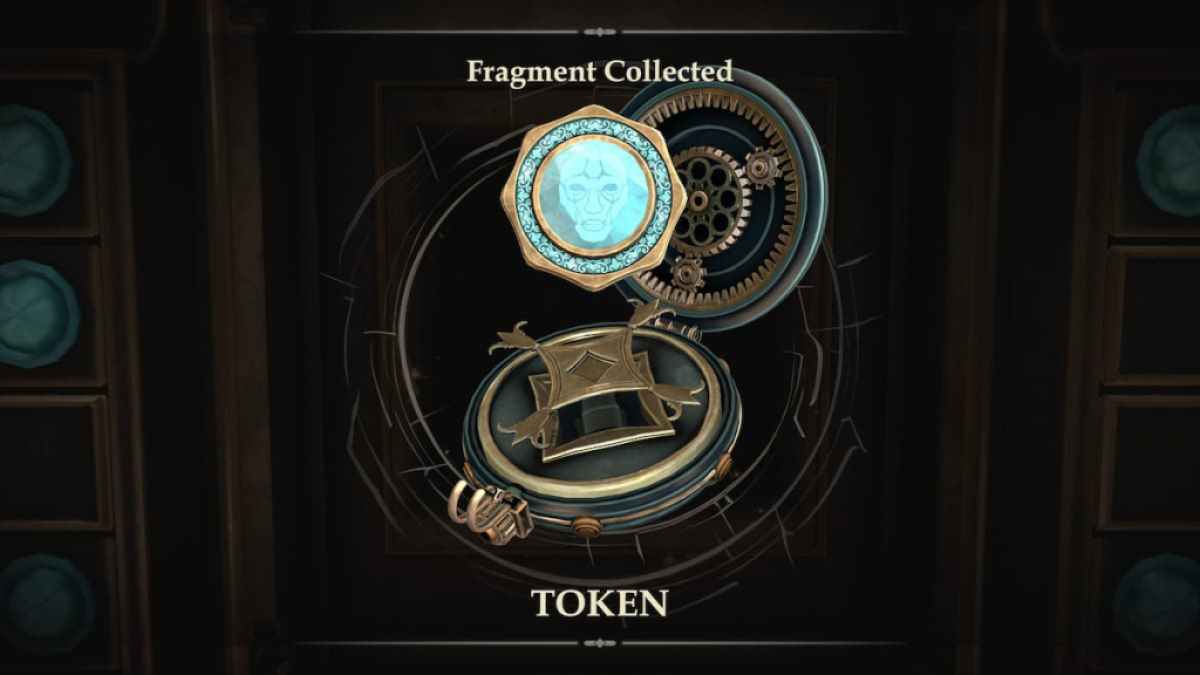
This will open a compartment containing one of the trinket boxes . allow its invigoration terminate and tap the Token in the center to collect it .
localize the Token into the center of the cabinet to finish Chapter 3 .
Screenshot by Pro Game Guides
For more escape elbow room narratives , check out our3D Escape Room Detective Story Chapter 3 walkthroughhere on Pro Game Guides .
Screenshot by Pro Game Guides
Screenshot by Pro Game Guides

Screenshot by Pro Game Guides
Screenshot by Pro Game Guides
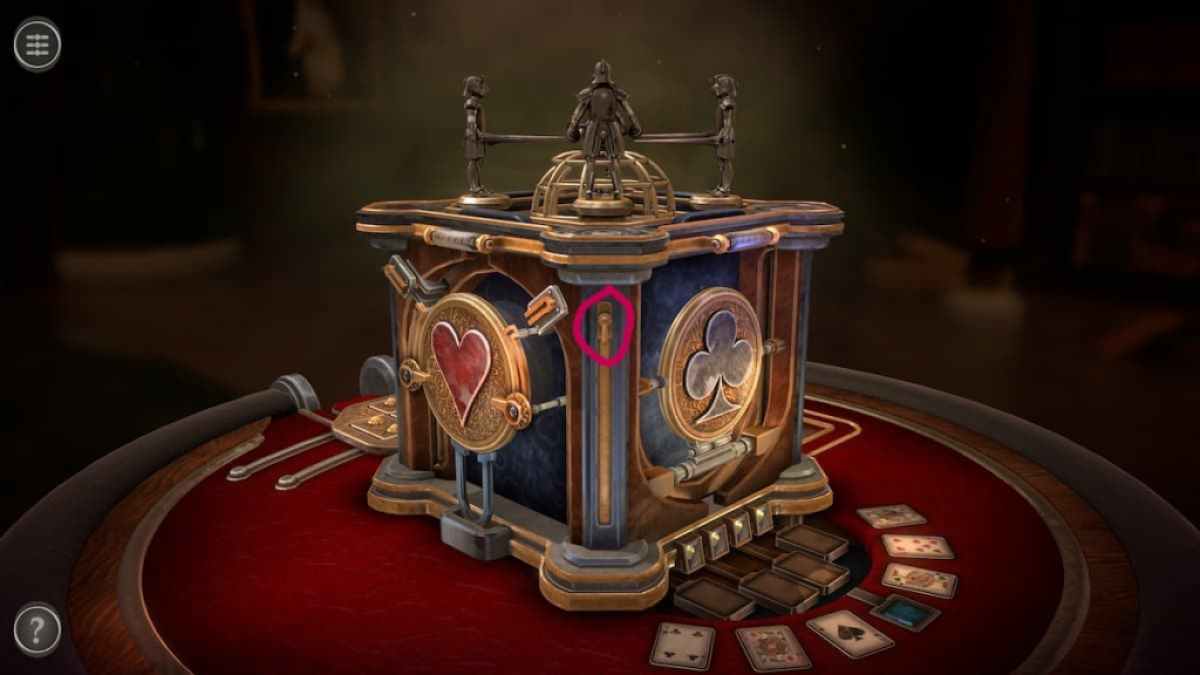
Image by Pro Game Guides
Screenshot by Pro Game Guides
Screenshot by Pro Game Guides
Screenshot by Pro Game Guides
Screenshot by Pro Game Guides
Screenshot by Pro Game Guides

Screenshot by Pro Game Guides
Screenshot by Pro Game Guides
Screenshot by Pro Game Guides
Screenshot by Pro Game Guides
Screenshot by Pro Game Guides
Screenshot by Pro Game Guides
Screenshot by Pro Game Guides
Screenshot by Pro Game Guides
Screenshot by Pro Game Guides
Screenshot by Pro Game Guides

Screenshot by Pro Game Guides

Screenshot by Pro Game Guides
Screenshot by Pro Game Guides
Screenshot by Pro Game Guides
Screenshot by Pro Game Guides

Screenshot by Pro Game Guides
Screenshot by Pro Game Guides
Screenshot by Pro Game Guides
Screenshot by Pro Game Guides

Screenshot by Pro Game Guides
Screenshot by Pro Game Guides
Screenshot by Pro Game Guides
Screenshot by Pro Game Guides
Screenshot by Pro Game Guides

Screenshot by Pro Game Guides

Screenshot by Pro Game Guides
Screenshot by Pro Game Guides
Screenshot by Pro Game Guides
Screenshot by Pro Game Guides

Screenshot by Pro Game Guides
Screenshot by Pro Game Guides
Screenshot by Pro Game Guides

Screenshot by Pro Game Guides
Screenshot by Pro Game Guides

Screenshot by Pro Game Guides
Screenshot by Pro Game Guides
Screenshot by Pro Game Guides

Screenshot by Pro Game Guides
Screenshot by Pro Game Guides

Screenshot by Pro Game Guides
Screenshot by Pro Game Guides
Screenshot by Pro Game Guides
Screenshot by Pro Game Guides
