Put your tec skills to the test .
Boxes Lost Fragments is a spot - and - tick escape room game with singular puzzle of diverge theme and trouble . In this guidebook , I ’ll take the air you through solving the puzzler in the first two level of Chapter 3 of Boxes Lost Fragments .
Boxes Lost Fragments Chapter 3 Cognito part 1 walkthrough
This guide cover the first and second rooms of Chapter 3.If you ’re looking for assistant with the third or fourth rooms , or just any of the other chapter , I ’ve linked the rest of the guides below .
Room 1 puzzles
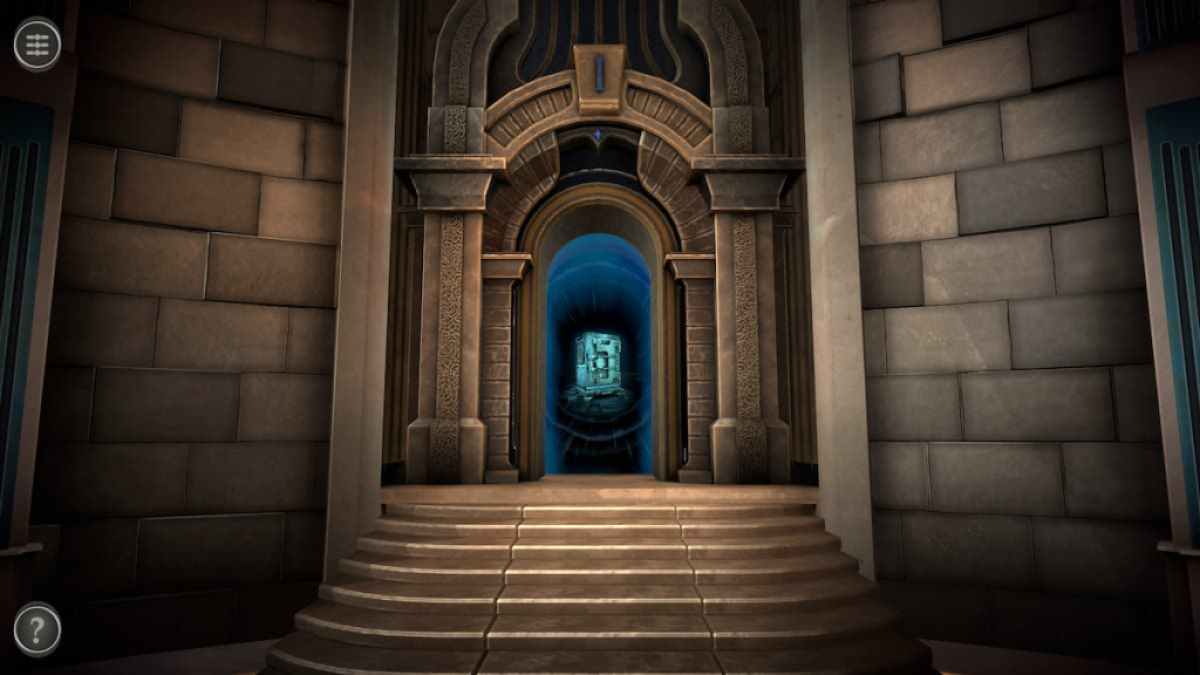
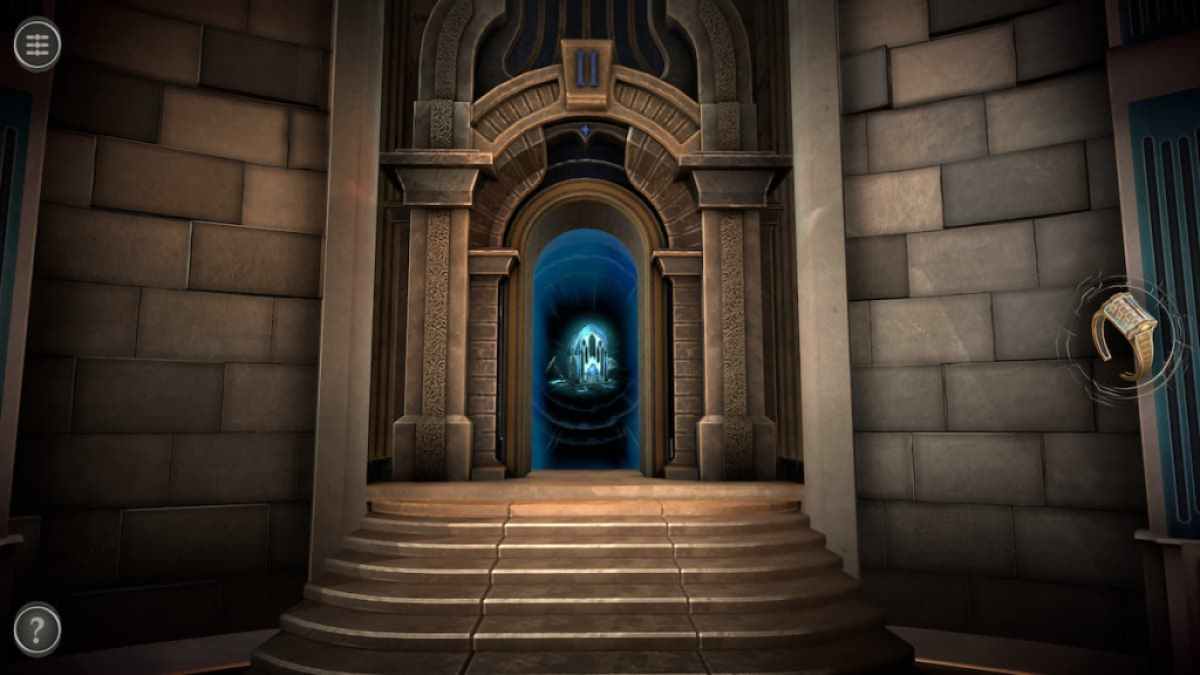
A loom room access with golden stairs leads towards the first elbow room of Chapter 3 .
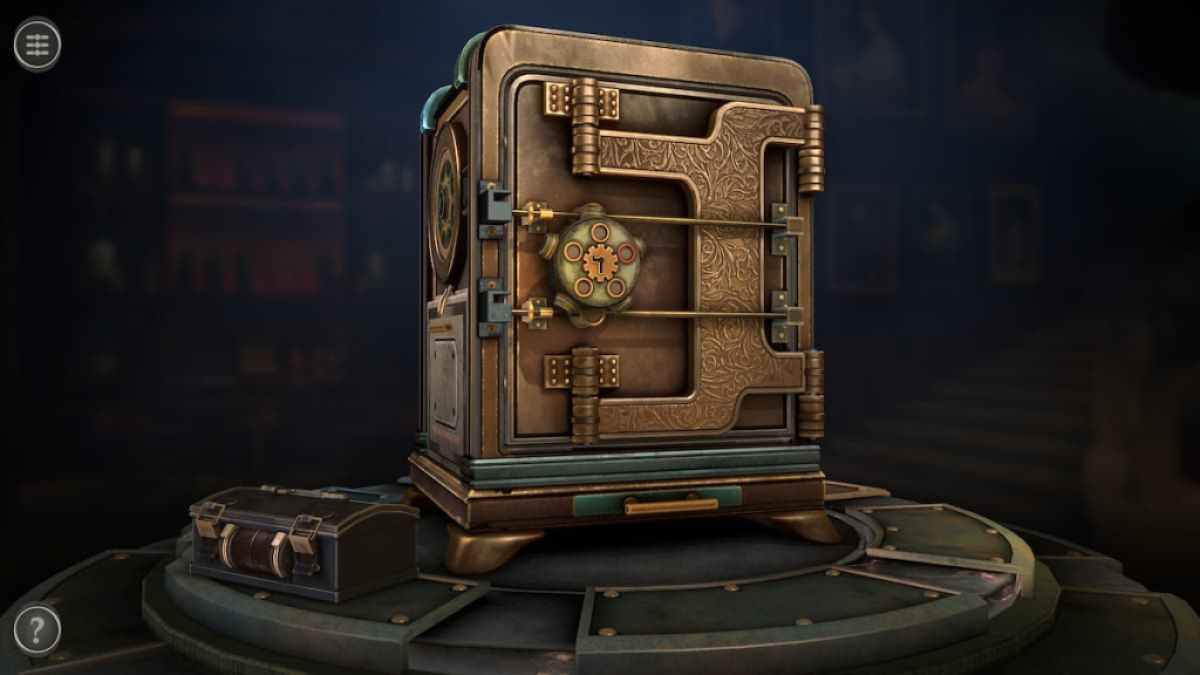
The first room has a book - form box in the center , plus a smaller one on the leftfield .
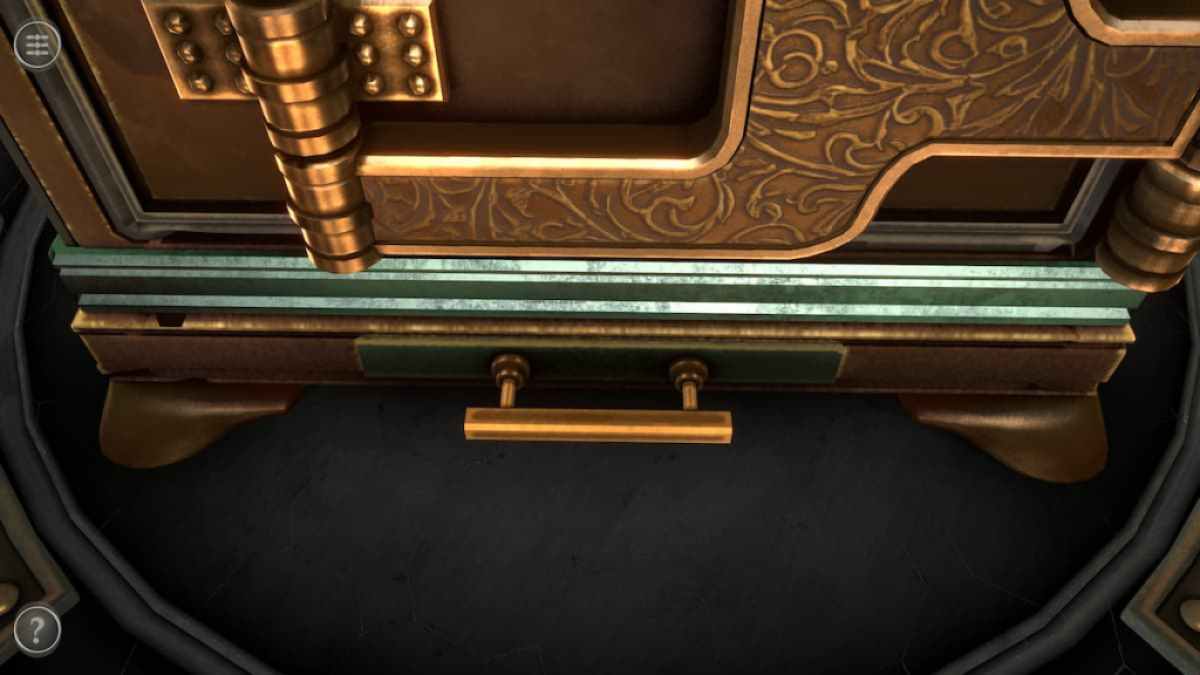
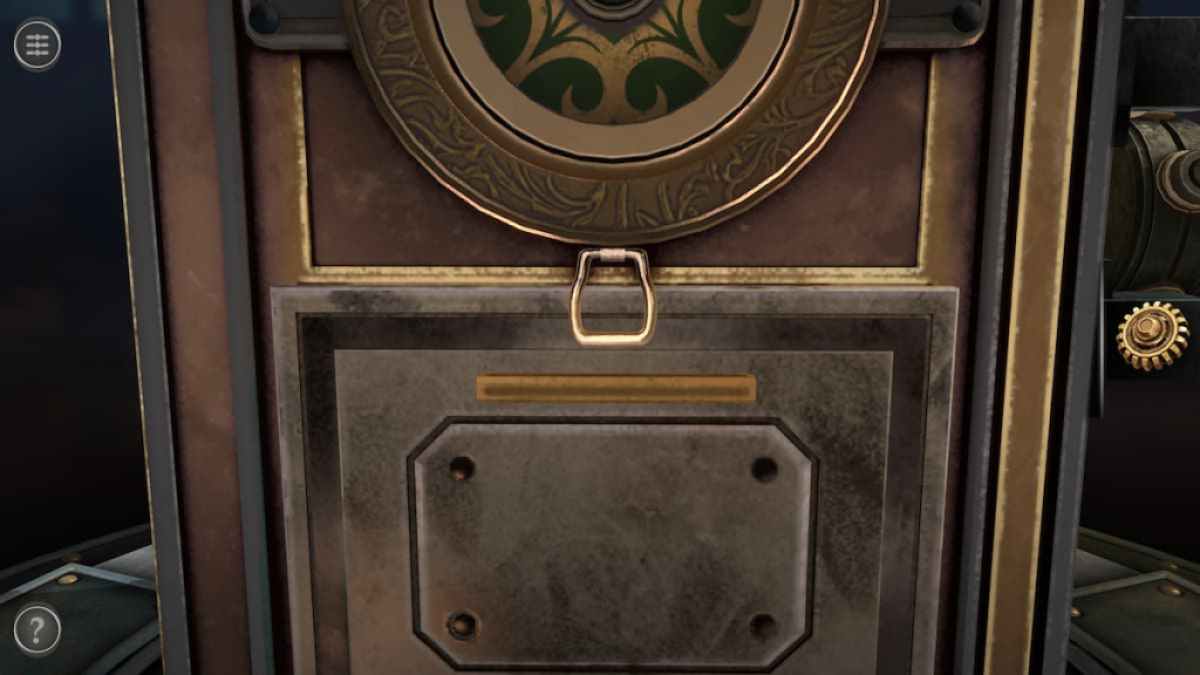
It has a small fleeceable draftsman with a golden grip on the front .

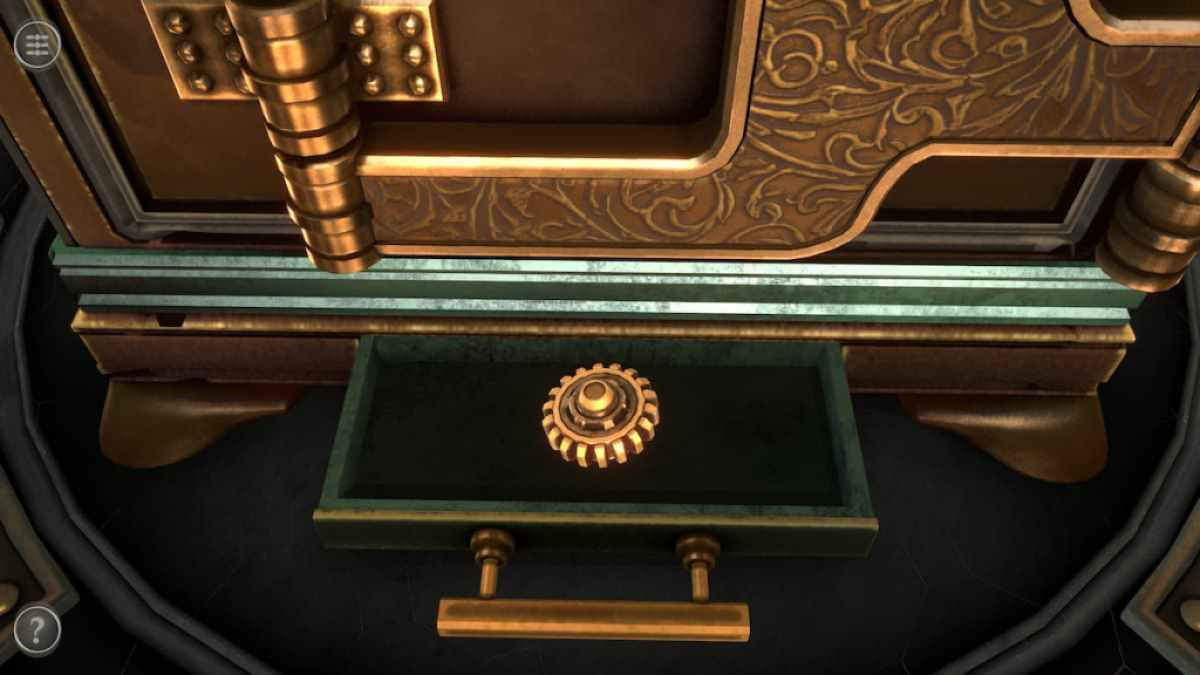
Pull it to get a Gear .
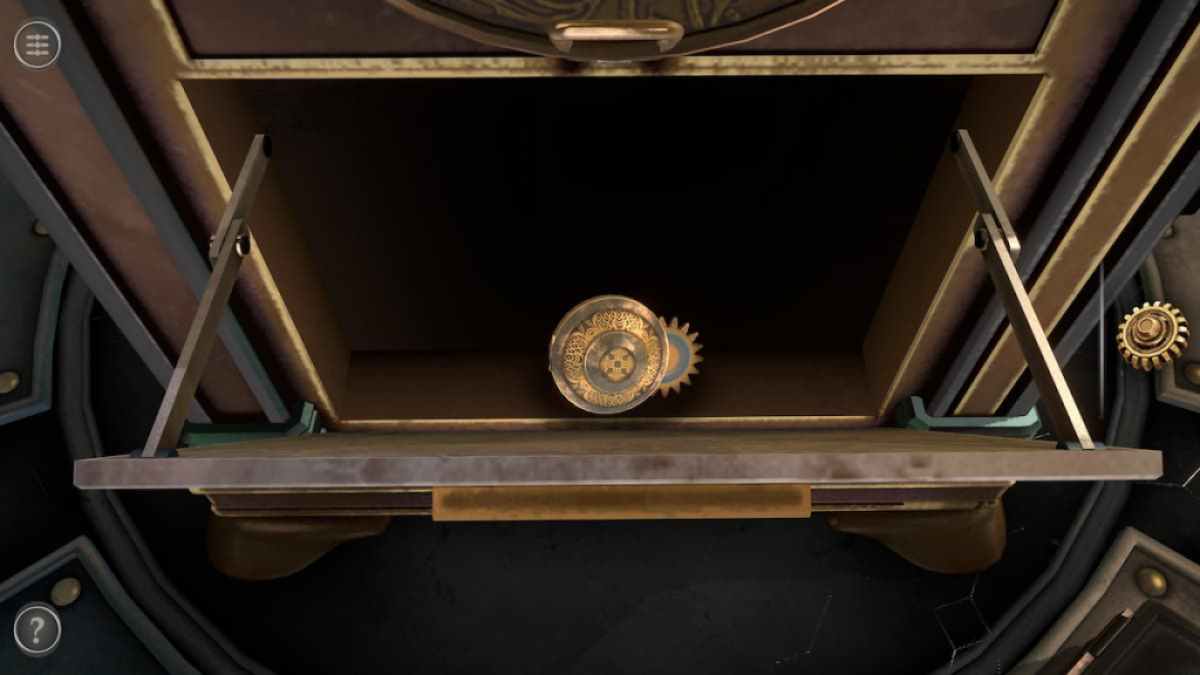
There is also a compartment on the leftover side .
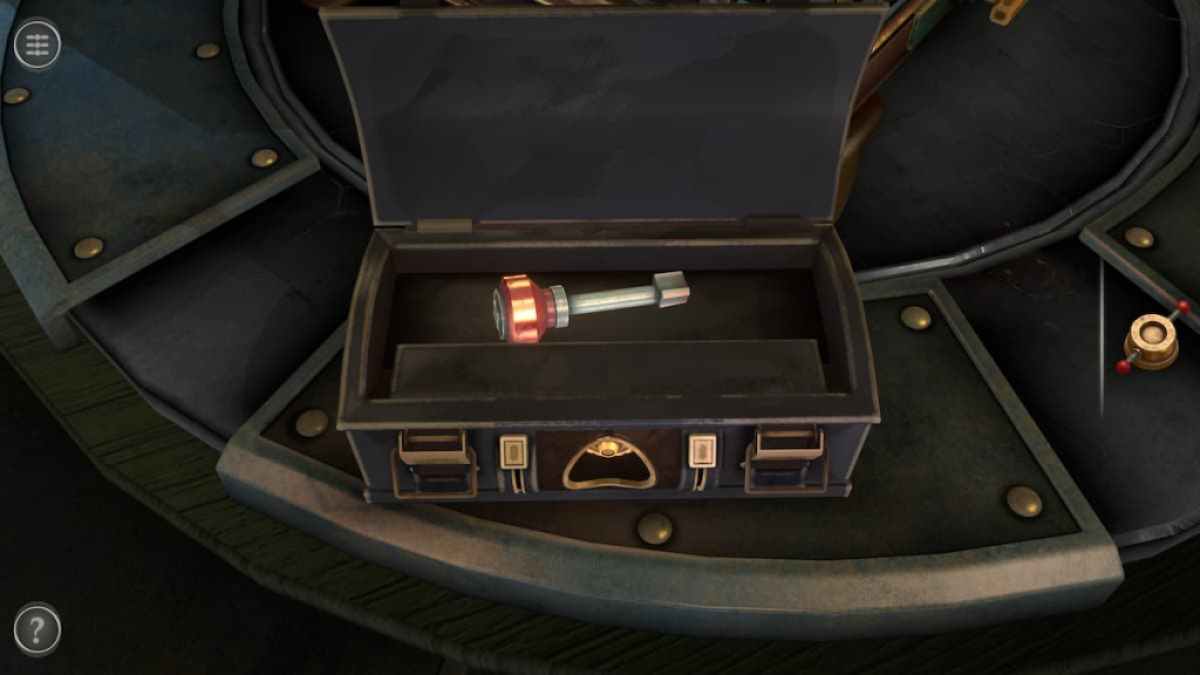
Pull the latch at the top to open it and get a Mechanical Container .
Screenshot by Pro Game Guides
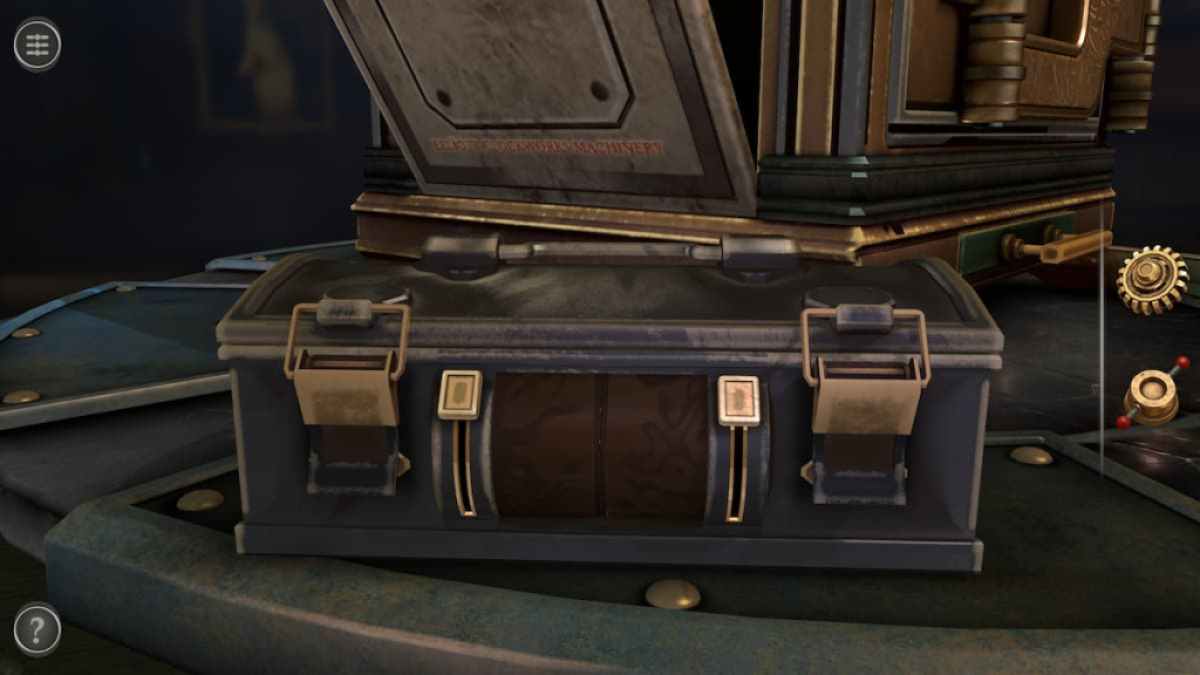
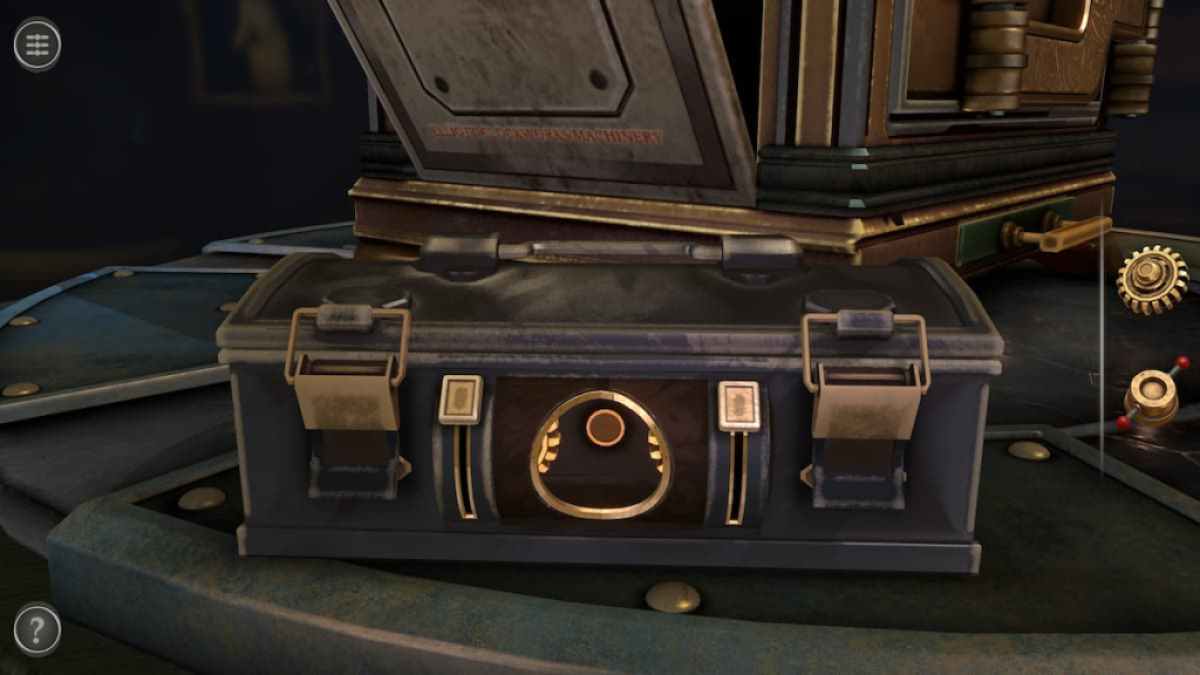
launch the Mechanical Container in your stock-taking . splay the small gear at the bottom left to start the container and get a Small Handle .
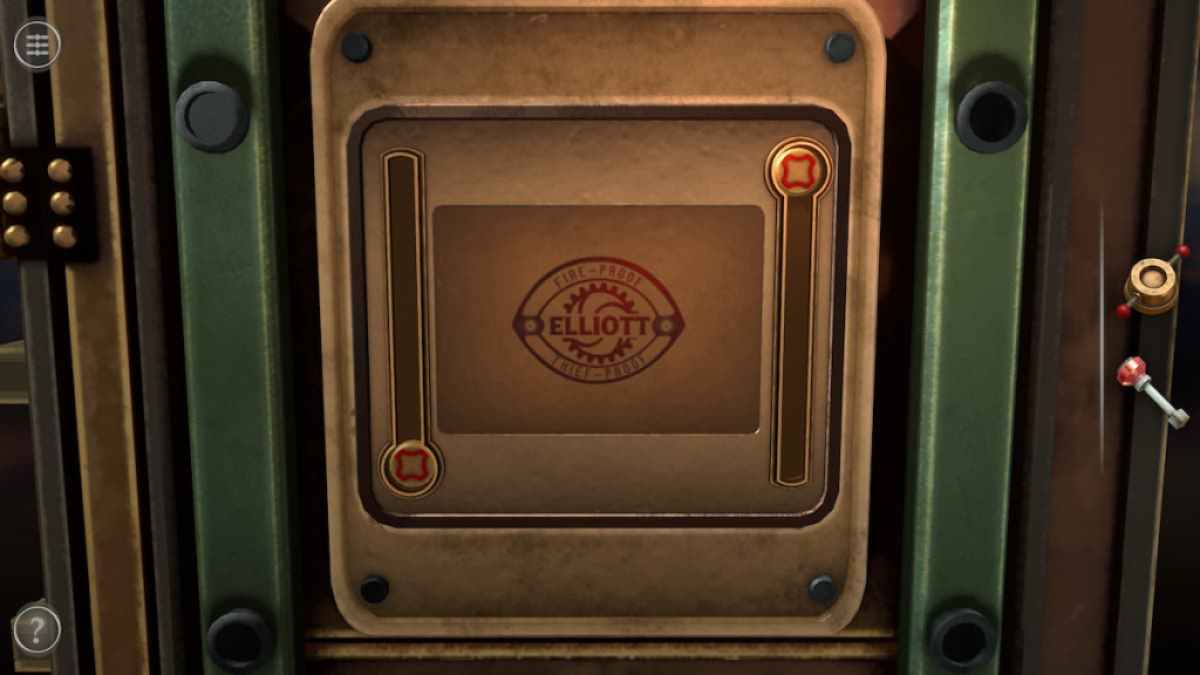
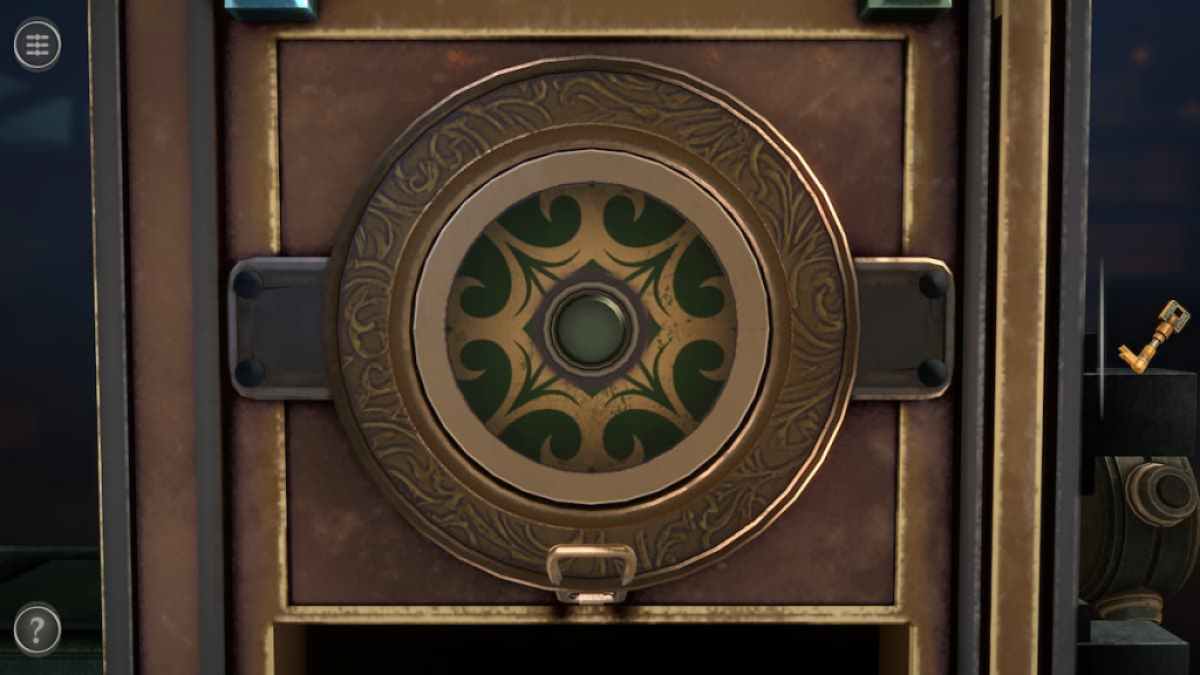
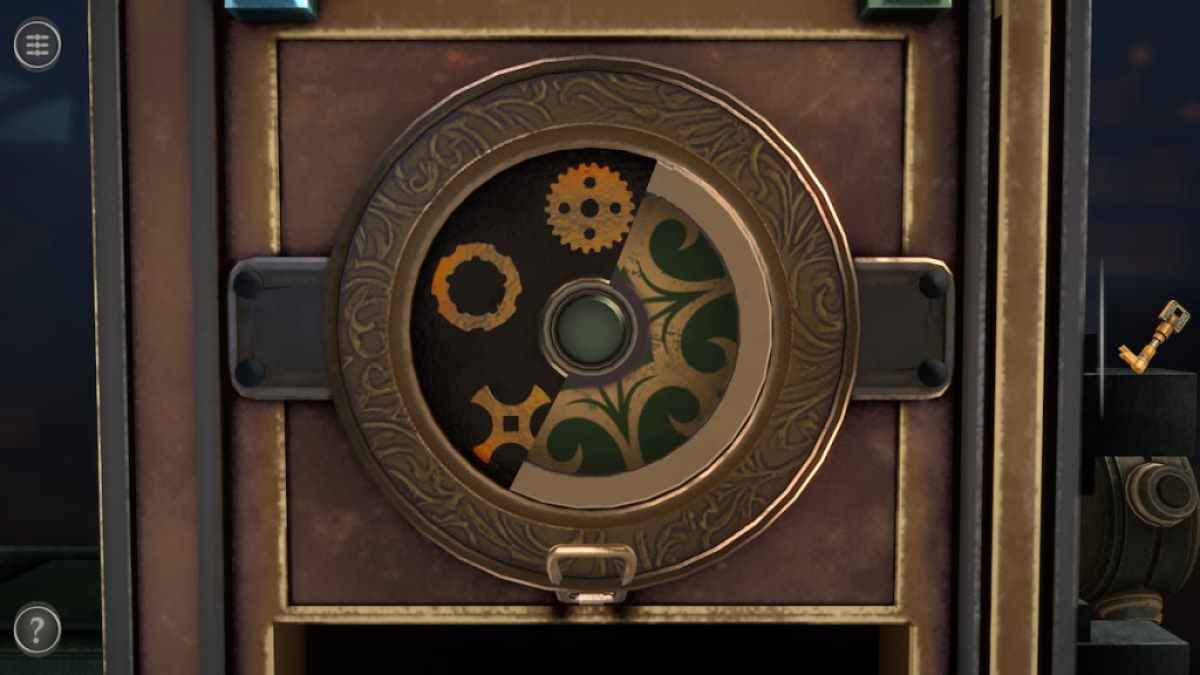
With the Gear in your stock-taking , focus on the modest ignition lock box to the left hand of the gravid chest .
Use the sliders on the side to rotate each half of the door until a gold lap is form .
Screenshot by Pro Game Guides
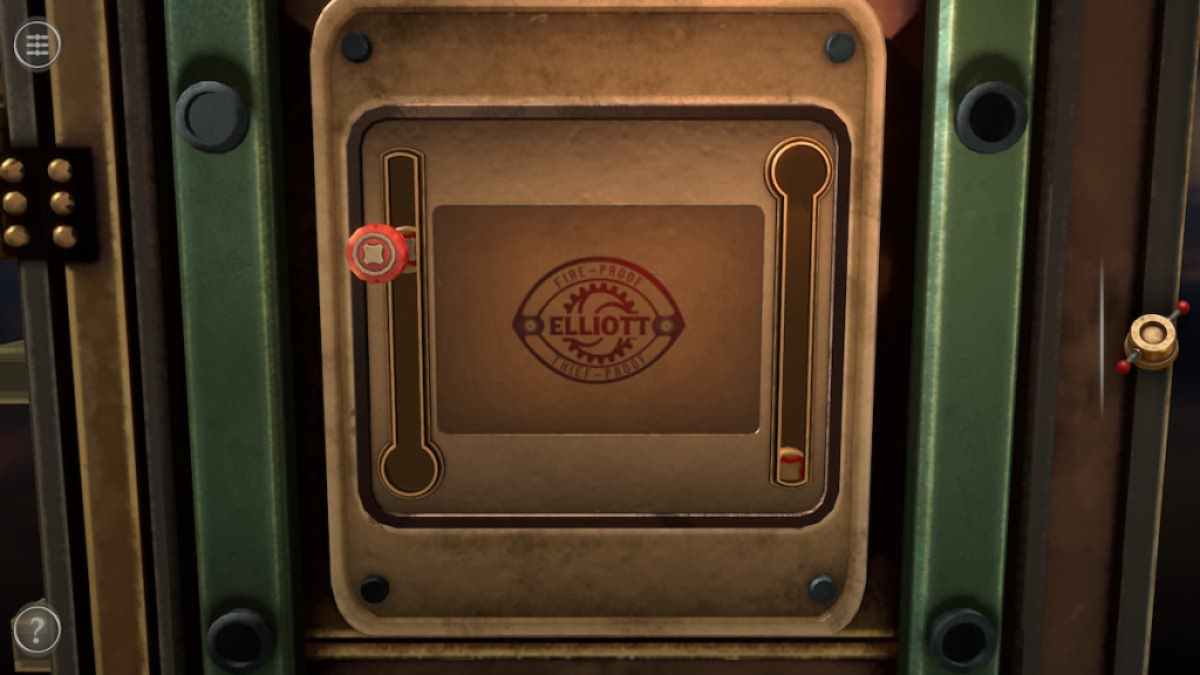
localise the Gear on the space within the circle to unlock the box . Lift the lid to get a Screwdriver .
Face the puzzle on the right side of the box seat .
practice the screwdriver to loosen the screws on either remnant and skid them to the opposite side .
Screenshot by Pro Game Guides
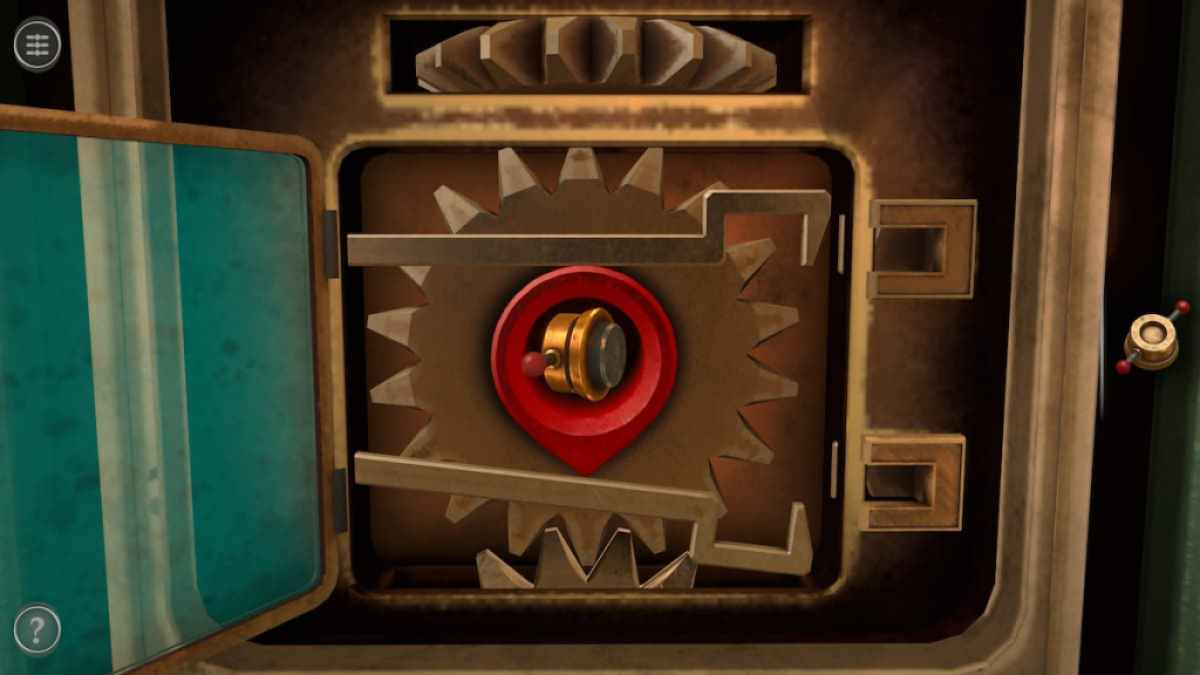
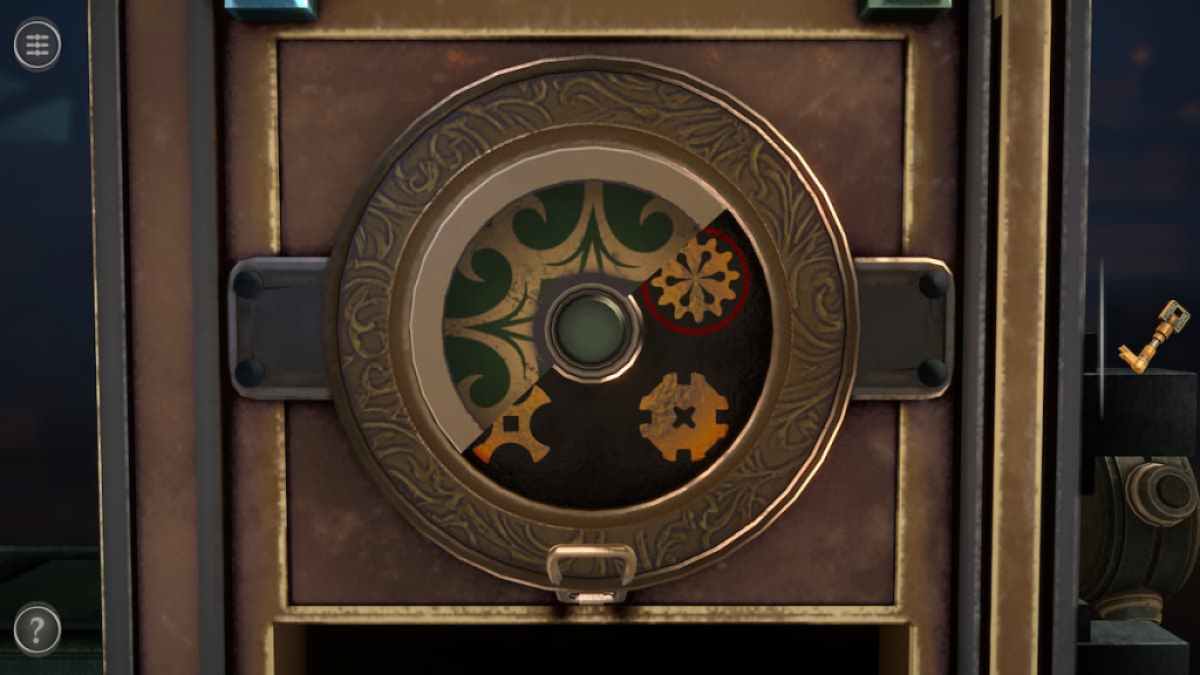
This will unlock the rotating gear puzzle .
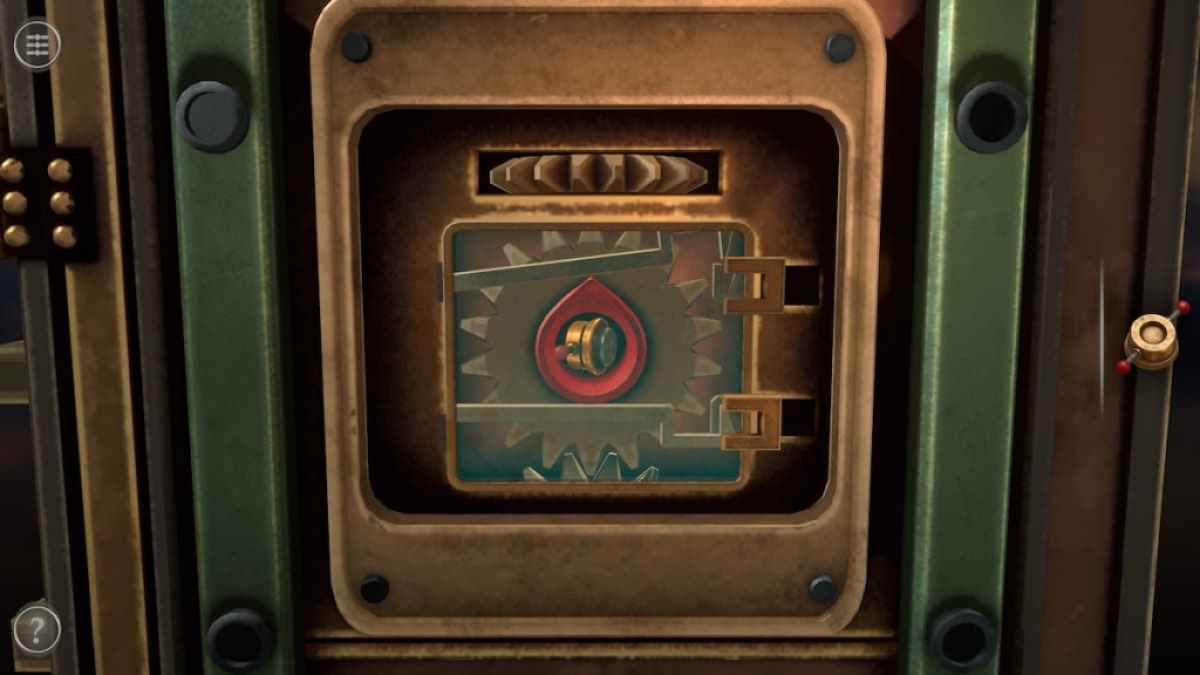
To resolve it , rotate the gear wheel so that the lock on the interior is not touching the golden lock chamber on the exterior . Here , we actuate the gear so that this happened on the top lock .
Moving the interior lock out allows you to pull the golden outer lock to the right hand .
Screenshot by Pro Game Guides
Repeat this process on the bottom whorl to launch the case , which contains a 2nd Small Handle .
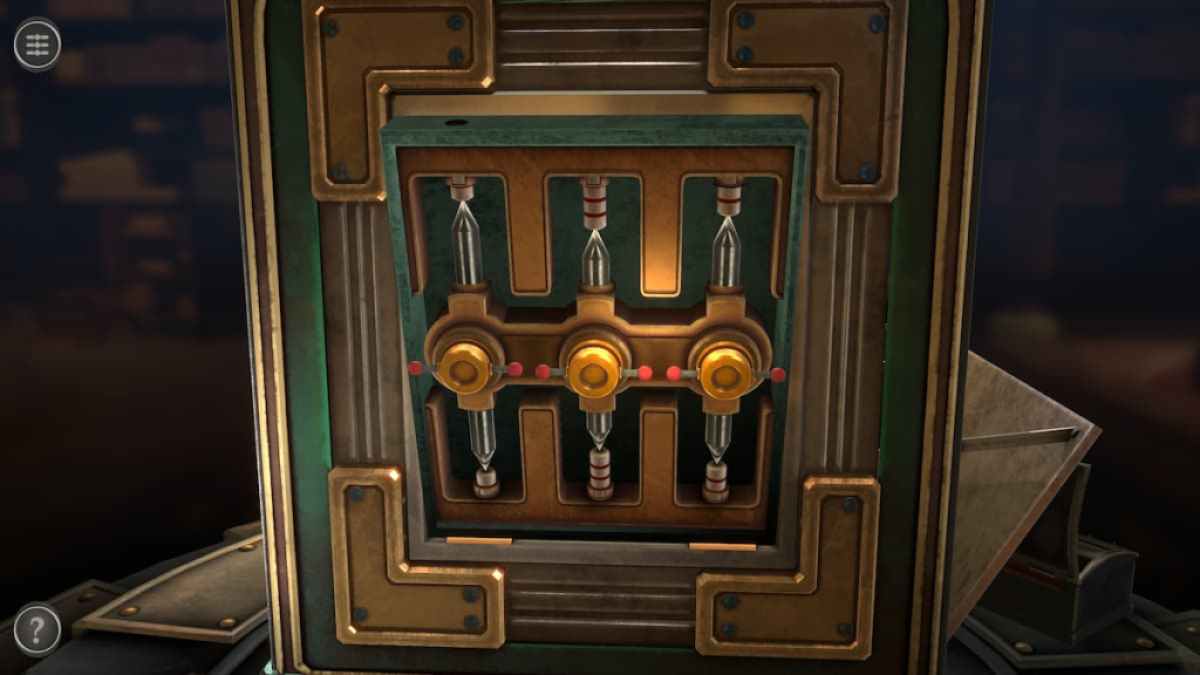
The teaser on the back has one Small Handle in the center with an empty time slot on the left and the right . lay the two Small Handles in your armory into these two slot .
Now rotate each handle 360 degrees .
Screenshot by Pro Game Guides
Rotate the remaining cover another 360 degrees .
go around the right-hand handgrip once to complete the puzzle and get an Intricate Key .
Related : Complete 50 Tiny Room Escape walkthrough
Screenshot by Pro Game Guides
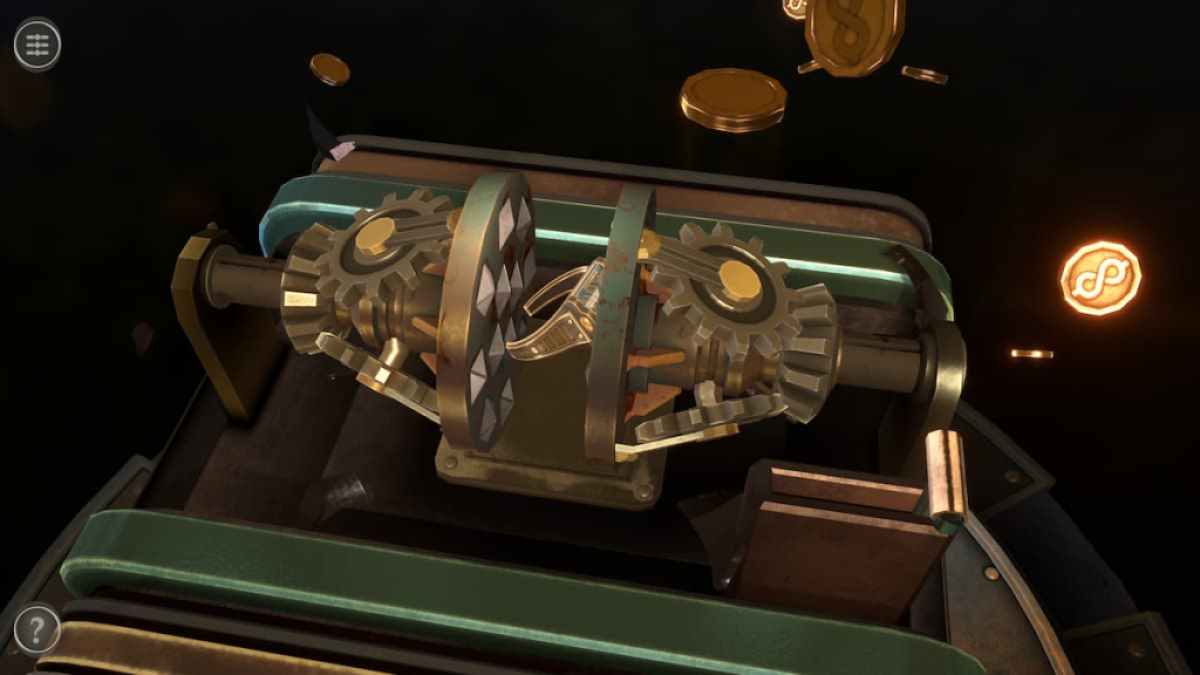
Before initiate the Intricate Key puzzle , you need to solve the puzzle on the remaining side of the box .
Press the button to make the two panels in the center of attention spread out . As they move , they ’ll bring out five symbolization for the next mystifier .
The button can be tapped repeatedly to trade the steering they rotate . Once you have intercourse all five symbolization , keep on to the next puzzler .

Screenshot by Pro Game Guides
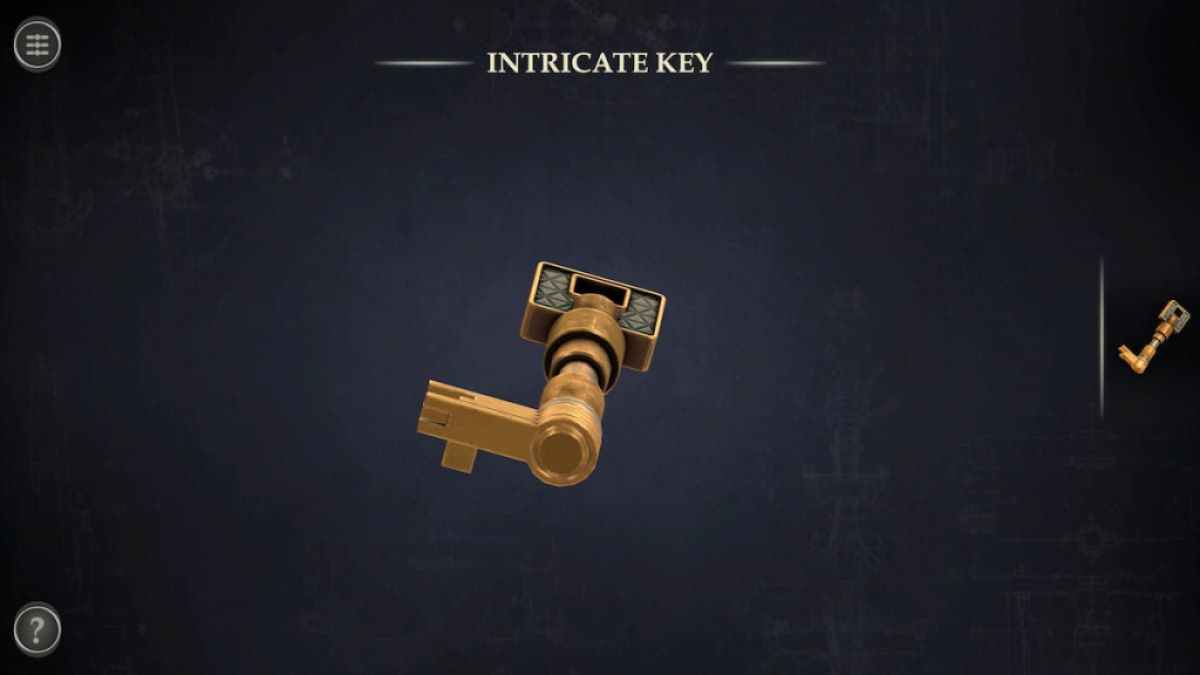
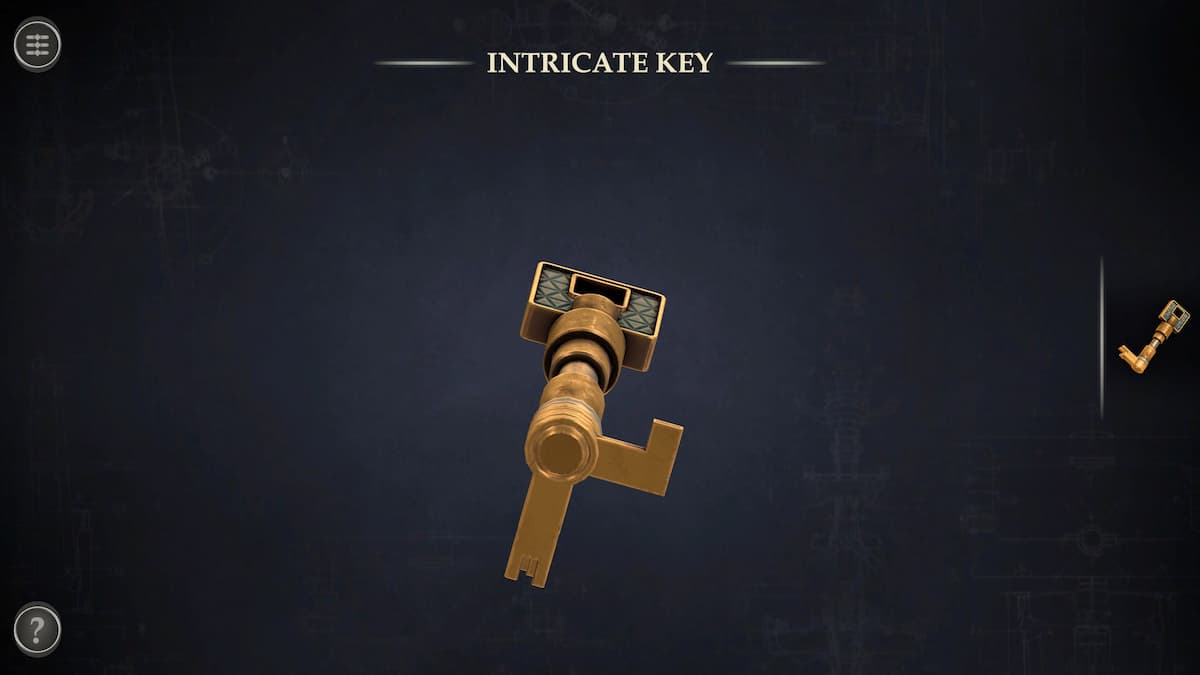
First , start the Intricate Key in your stock .
Move the pieces so that the " L " shaped cardinal branches off to the right while the other three segment manoeuvre down .
Rotating the cardinal home symbolisation in each of the five circles . solicit the circles to shift the symbols within them .
Screenshot by Pro Game Guides
When all of the symbol tally those in the former puzzle , the puzzle will turn into a cycle . Spin it to start the loge .
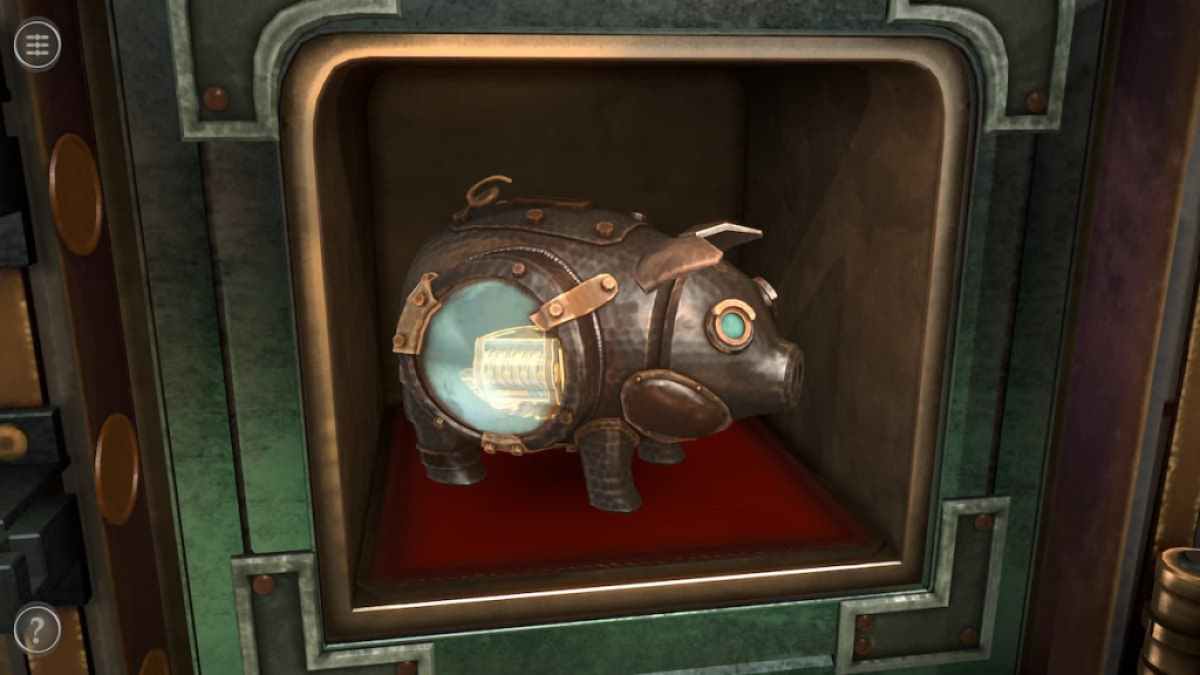
The corner hold back a piggy bank . Tap it to place it in your stocktaking .
To get the point inside the piggy bank , we need to solve the puzzler at the top of the box .
Screenshot by Pro Game Guides
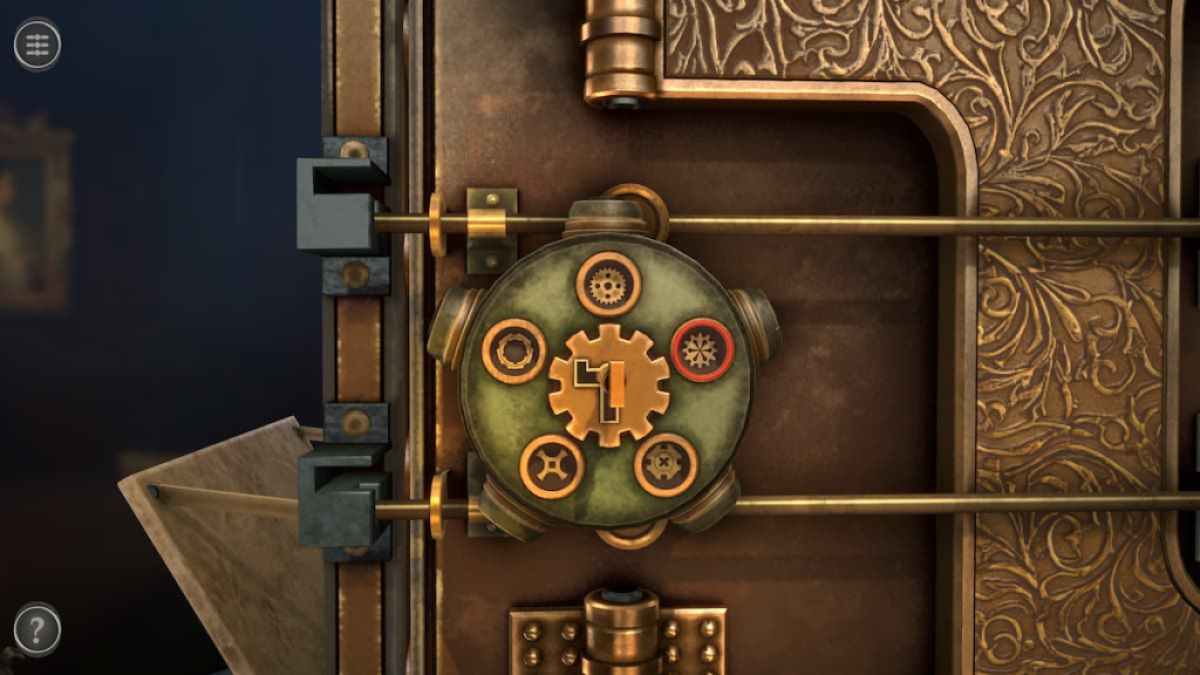
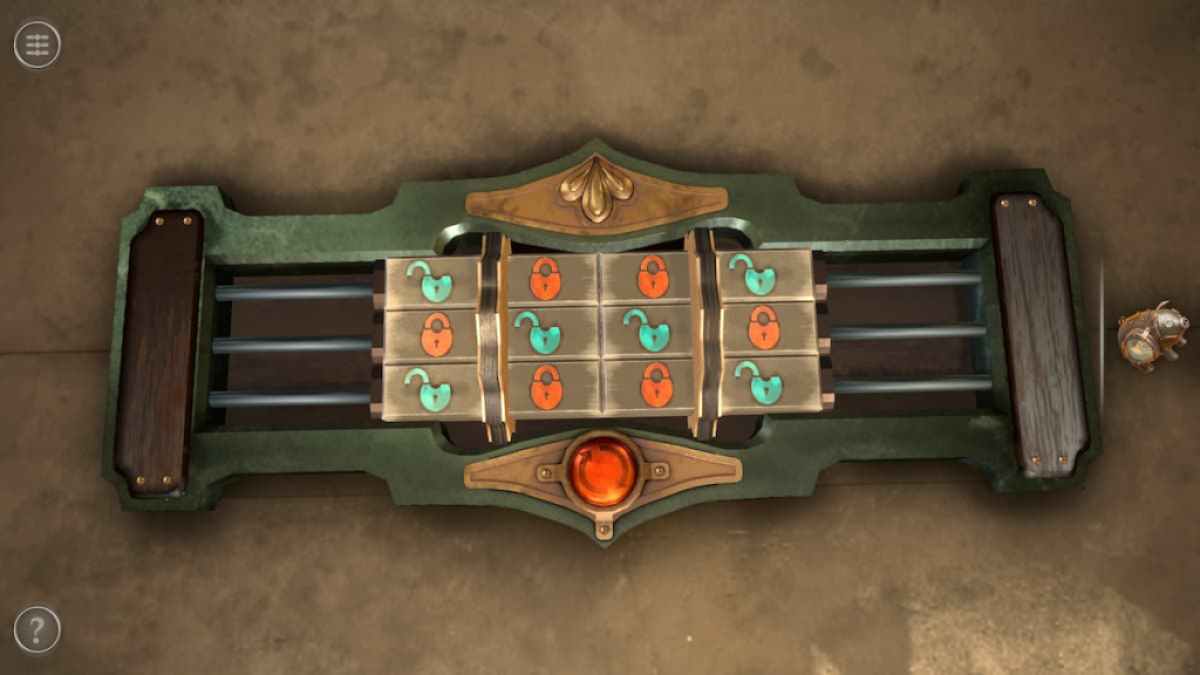
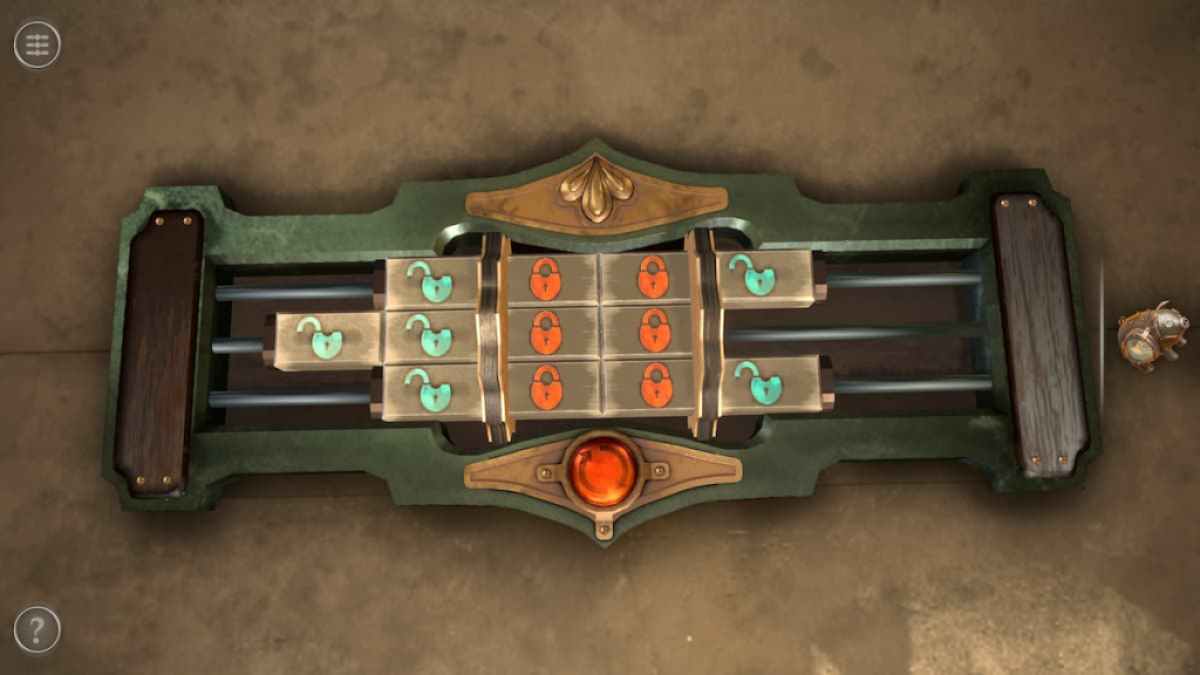
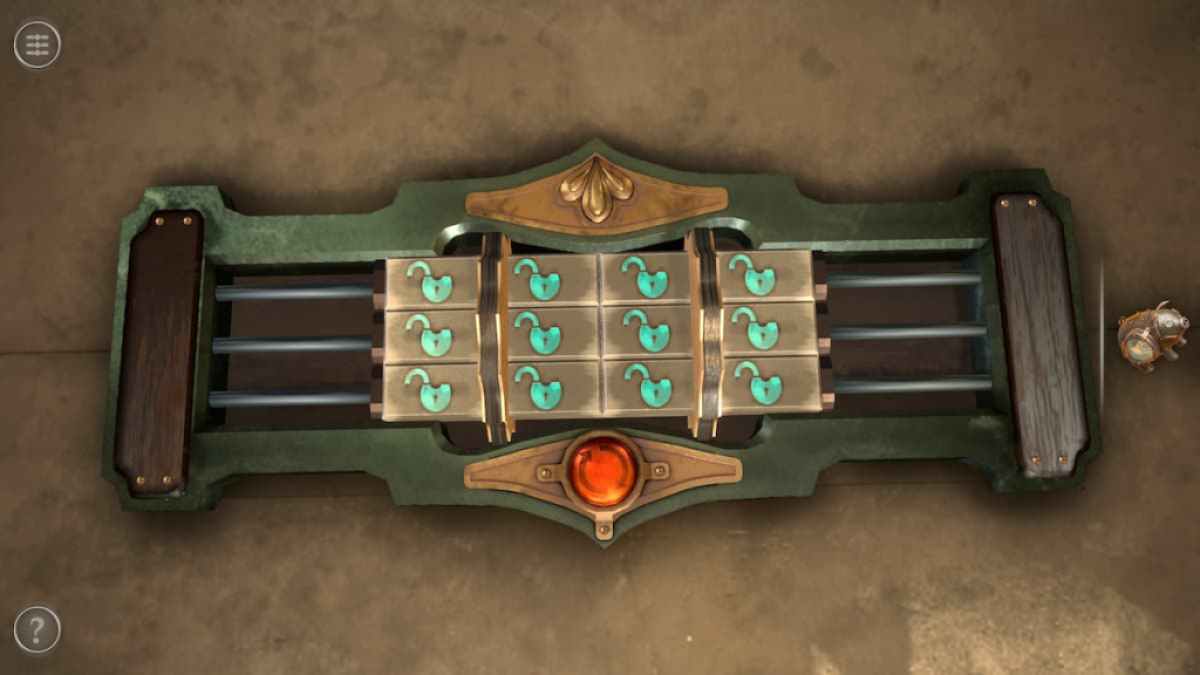
The three rows can be slue around and the red button can be bid to rotate all six segments in the center . To turn all of the symbols to the unlocked rendering , all of the symbols on the side demand to be the unlocked rendering while all six in the center need to be the locked translation .
The center row can be pressed one time to dispatch the teaser .
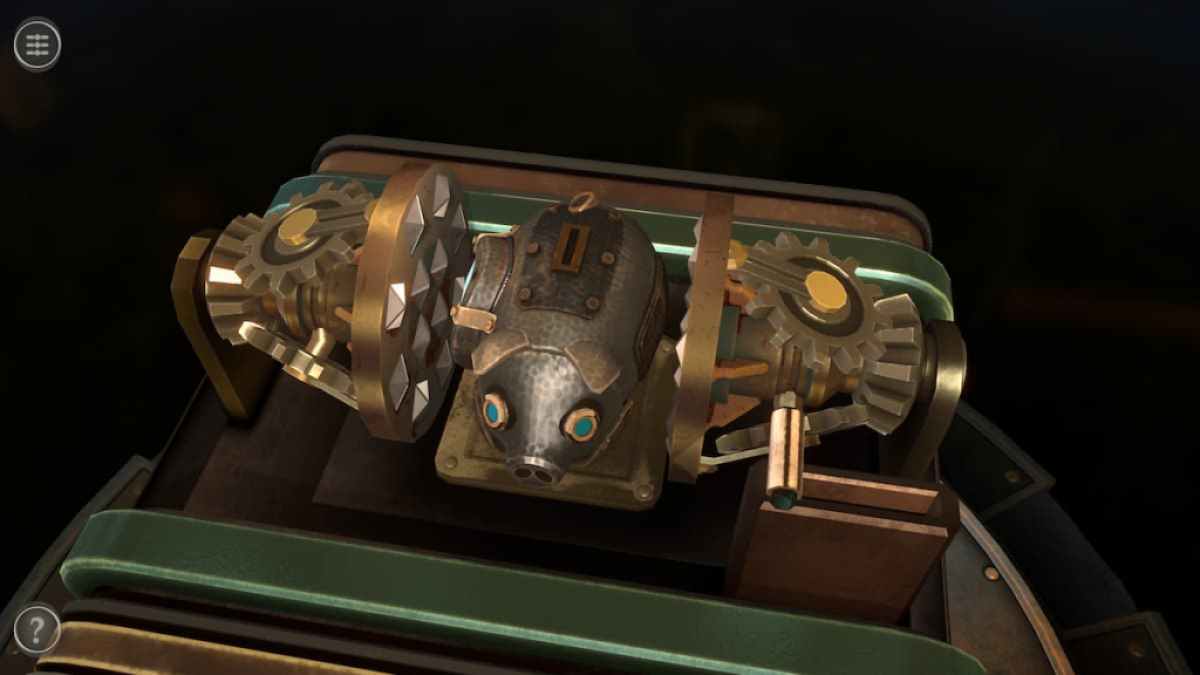
This opens up the top to reveal a crushing simple machine . Place the piggy bank in the center .
Screenshot by Pro Game Guides
Pull the lever tumbler to crush the piggy bank and get the Intricate Mechanism .
grab the Intricate Mechanism removes you from the first room while opening up the 2d room to search .
Room 2 puzzles
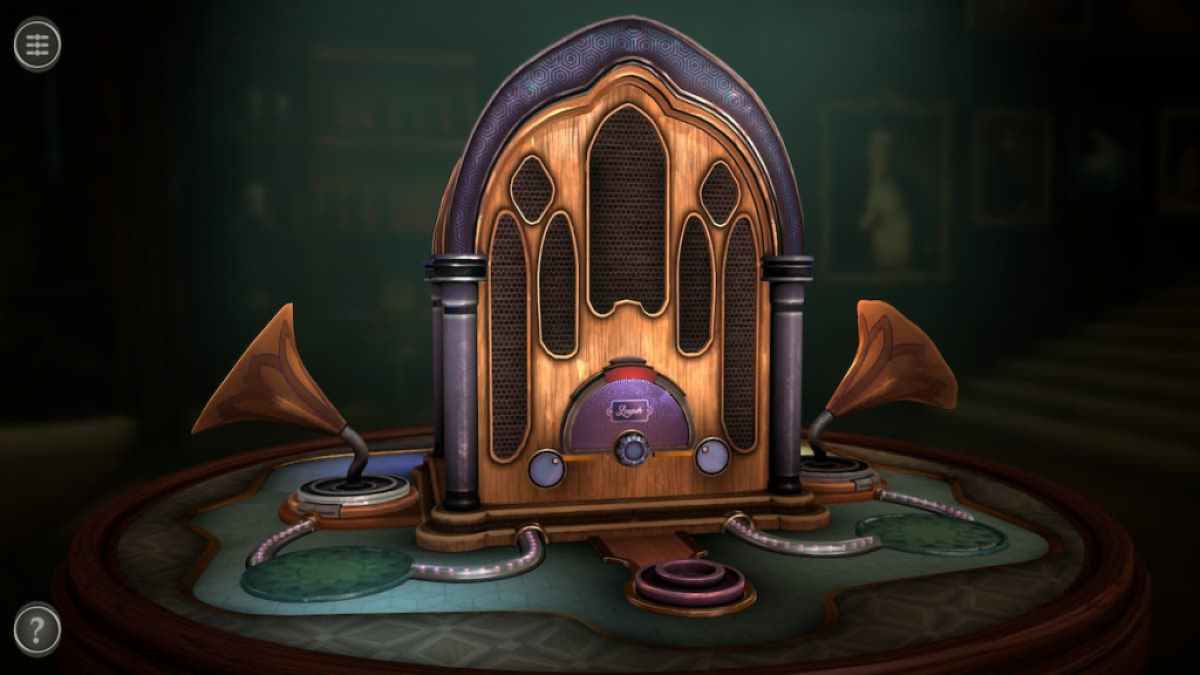
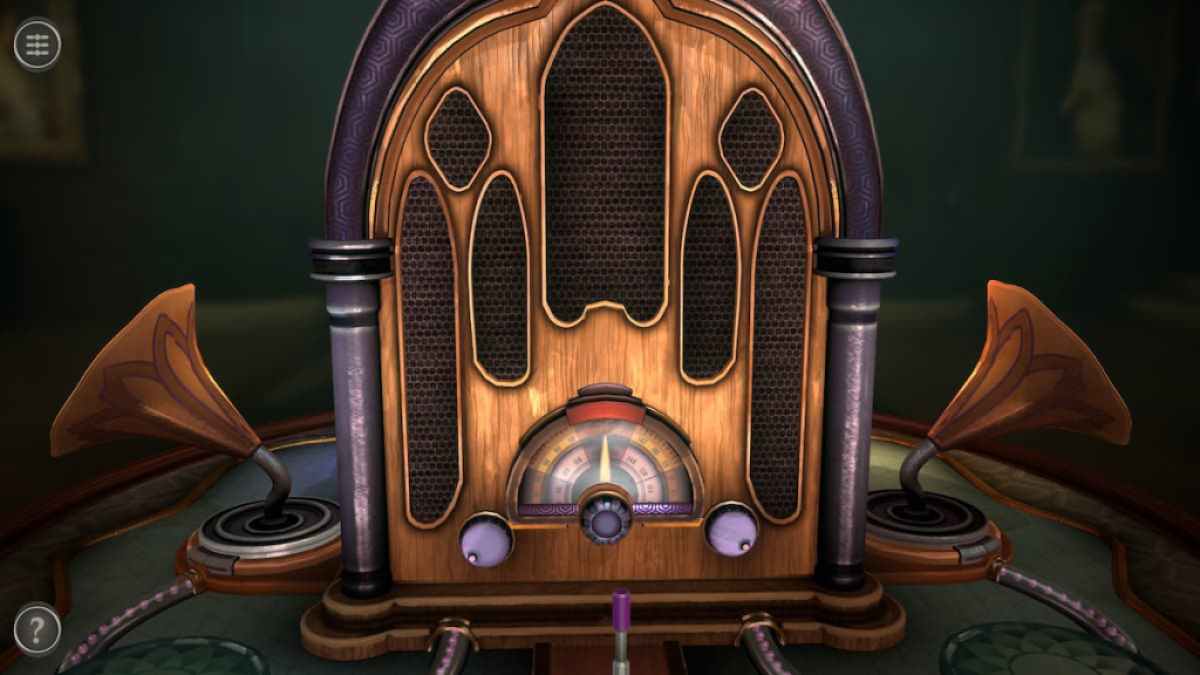
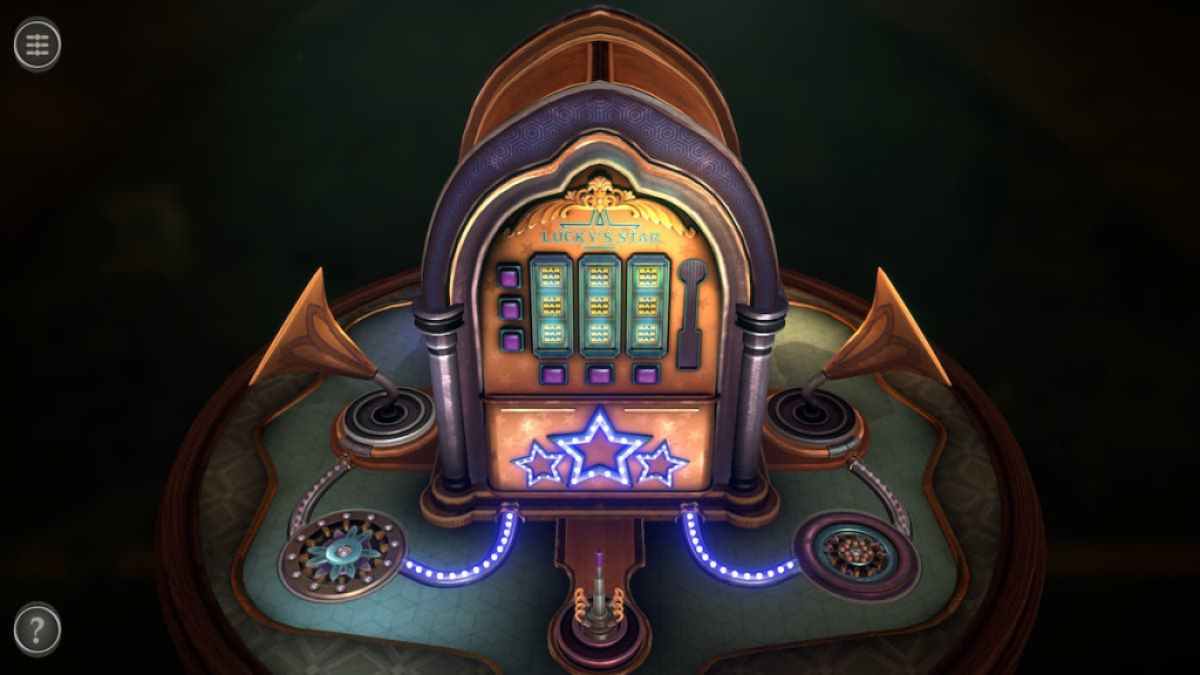
The second room of Chapter 2 has a nickelodeon as the central loge .
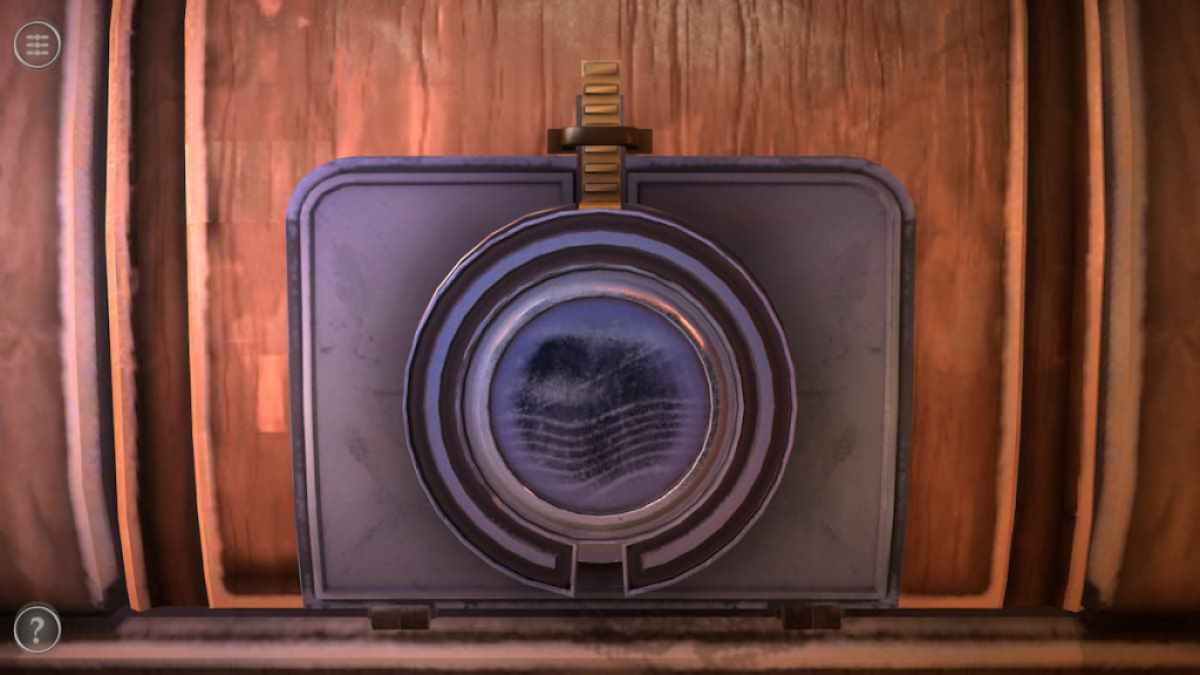
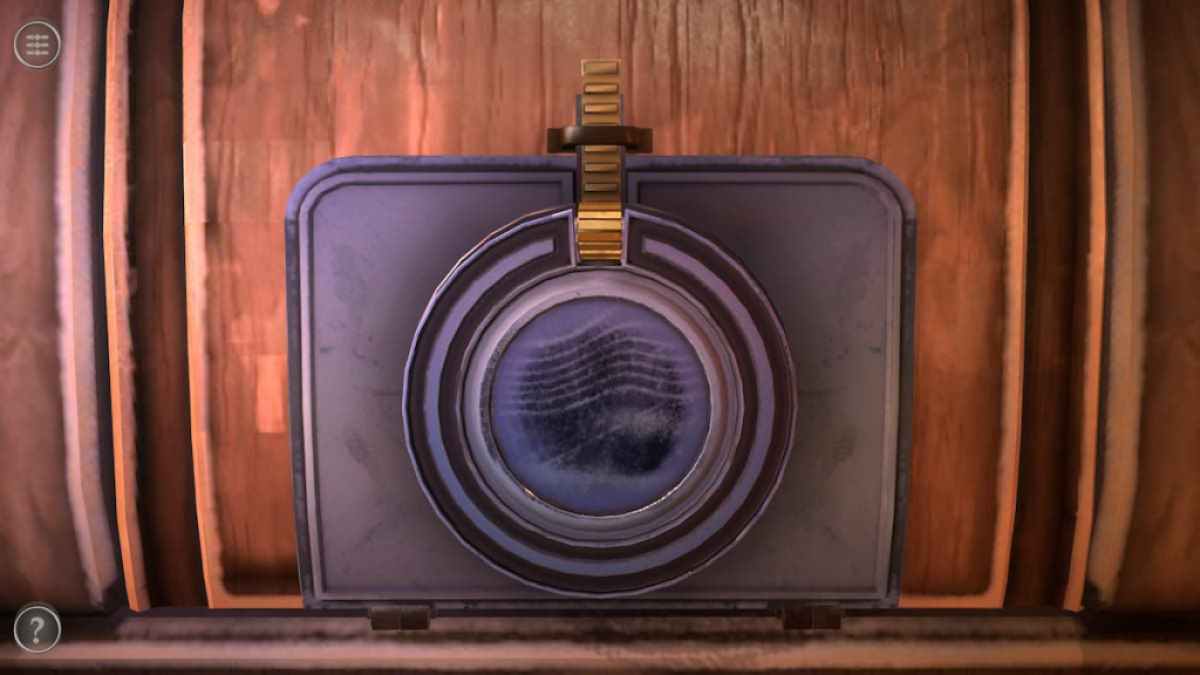
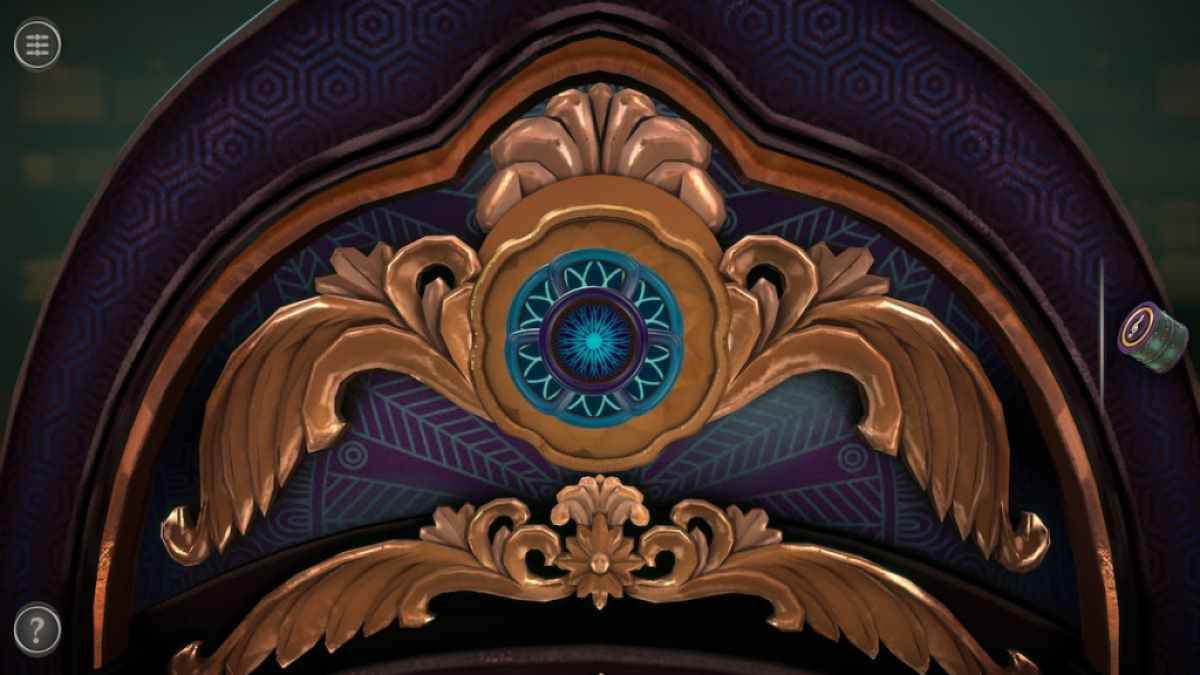
start with the mystifier at the top of the right side of the loge .
circumvolve the puzzle until a golden opus appears at the top . go around this while to unlock the puzzle .
Screenshot by Pro Game Guides
The unlocked compartment contains an Antenna .
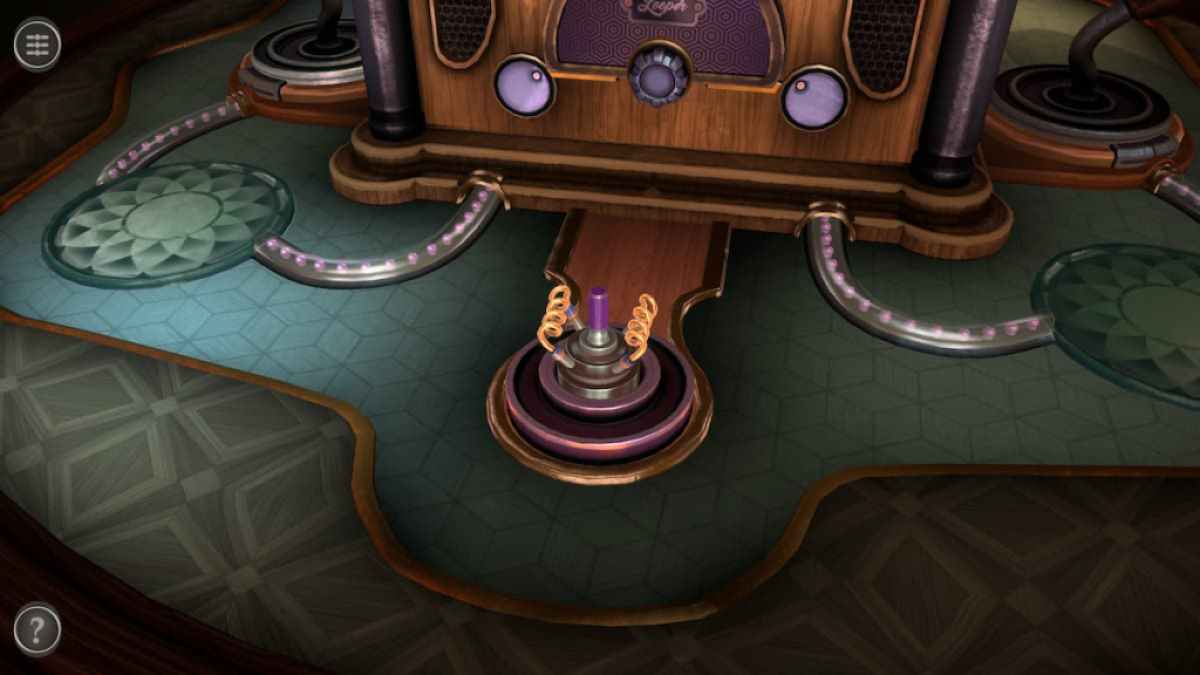
Place the Antenna into the hollow in front of the nickelodeon to unlock the two-channel mystifier .
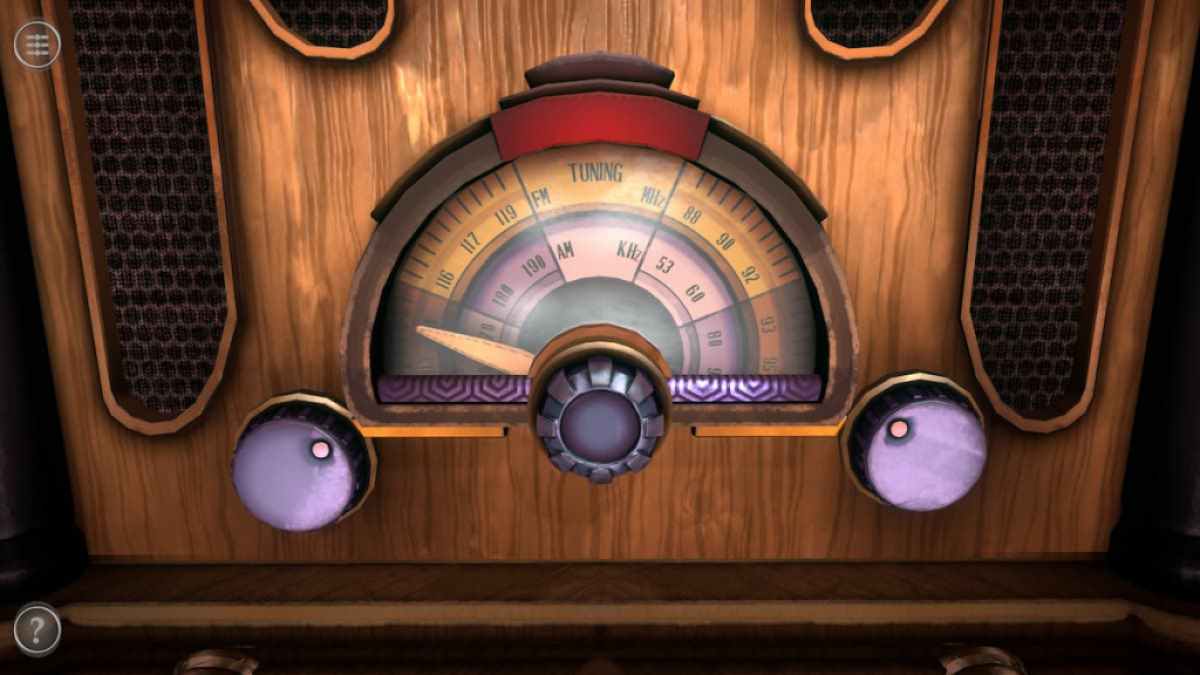
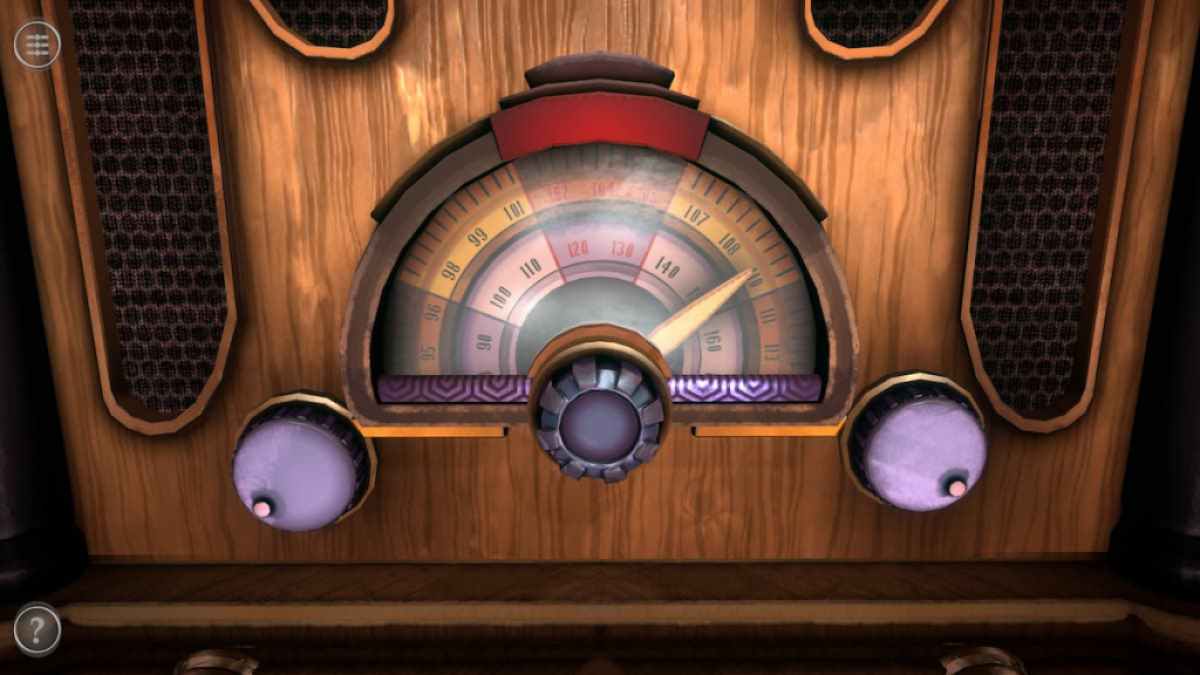
This puzzler comprise of two dial and a node controlling the pointer in the center .
Screenshot by Pro Game Guides
Move the cursor to the right wing and twist the left and correct knob so that red figure are in the center .
Turn the knob so that the pointer is pointing upwards to complete the puzzler .
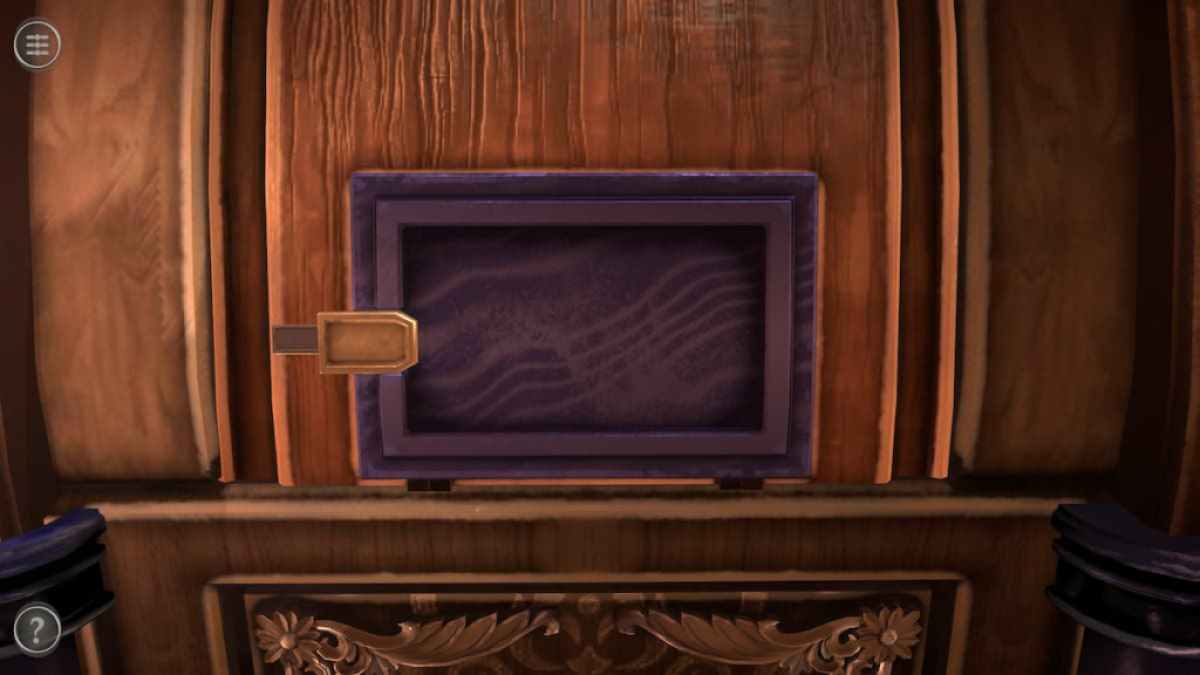
Before begin the jukebox puzzle , a hint can be found on the left side of the loge .

Screenshot by Pro Game Guides
Push the luger to the left field to unlock the result for the jukebox teaser .
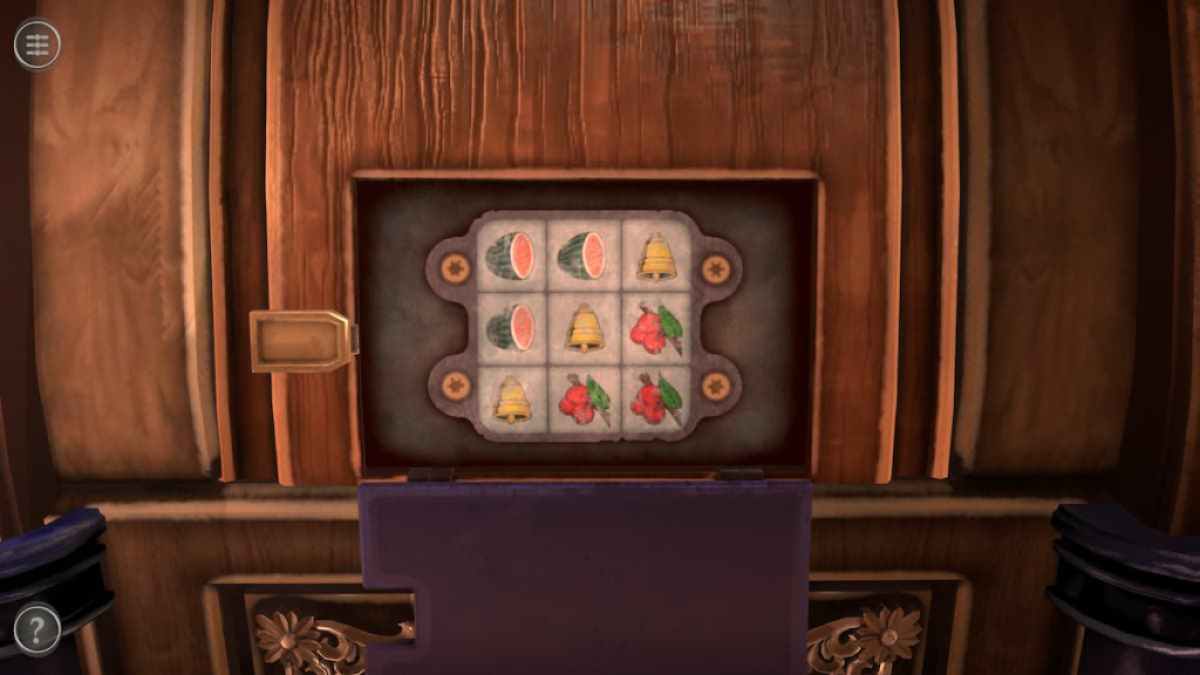
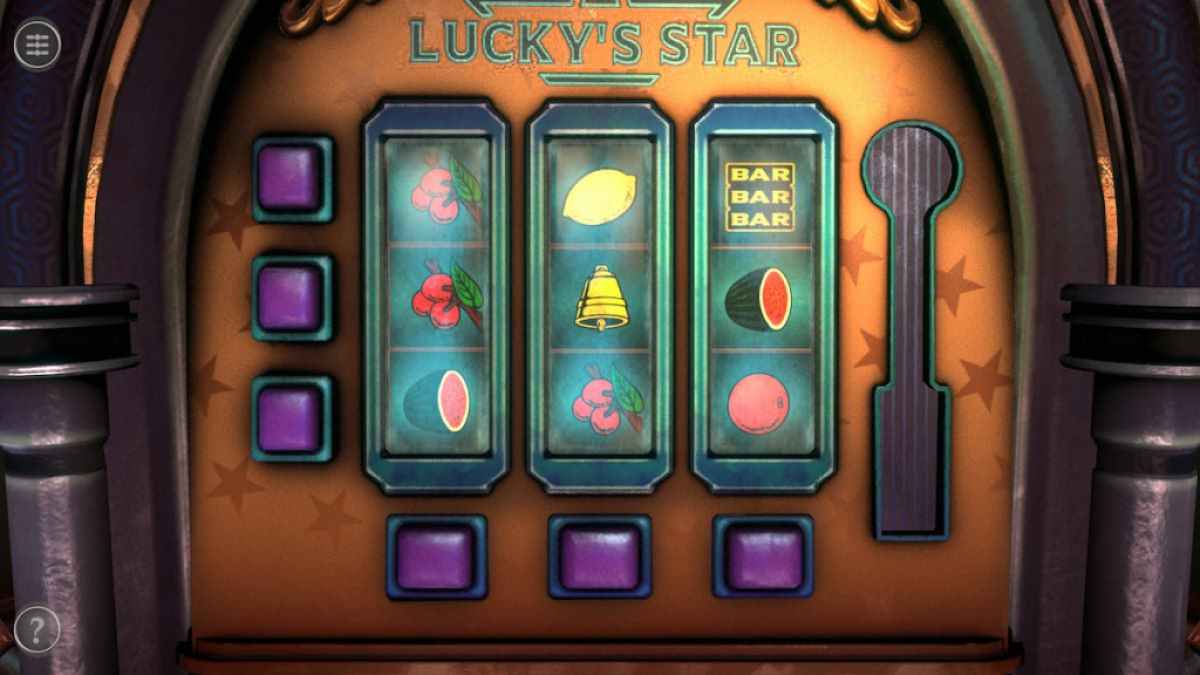
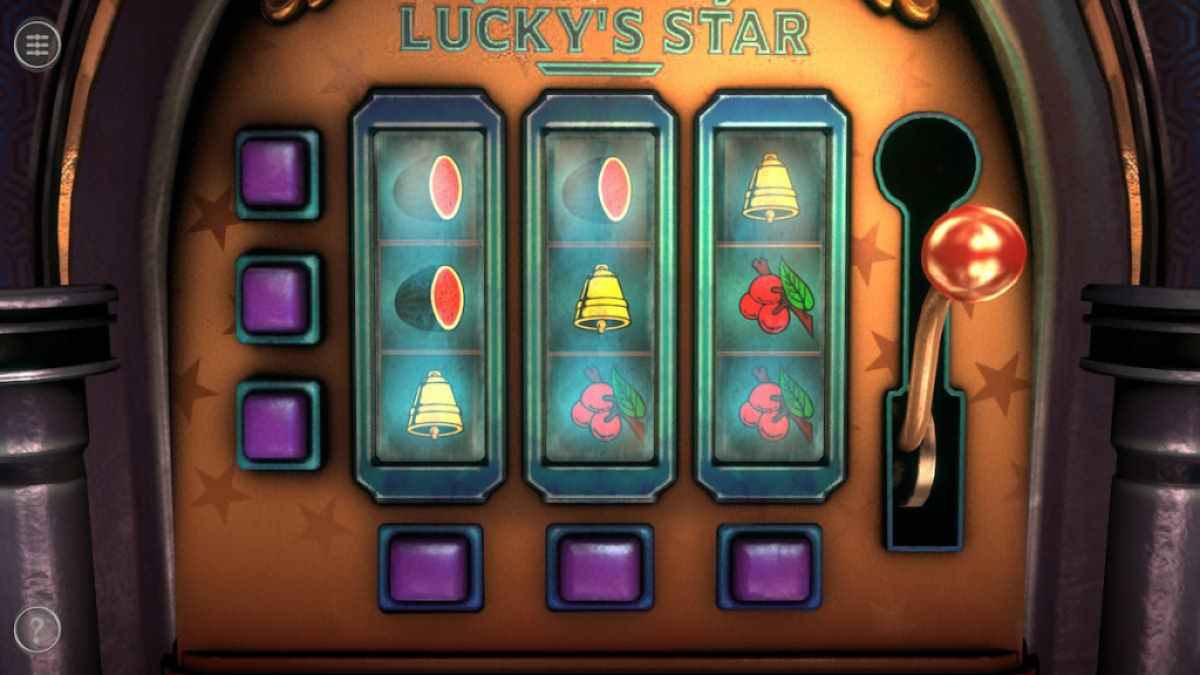
Now reelect to the jukebox puzzle . press any of the clit on the unexpended side will change all of the symbols in their quarrel while pressing any of the button on the bottom will change all of the symbolization in their column .
Completing the puzzler will offer a measure on the right side of the automobile .
Screenshot by Pro Game Guides
pull up it to unlock a new puzzle on either side of the machine .
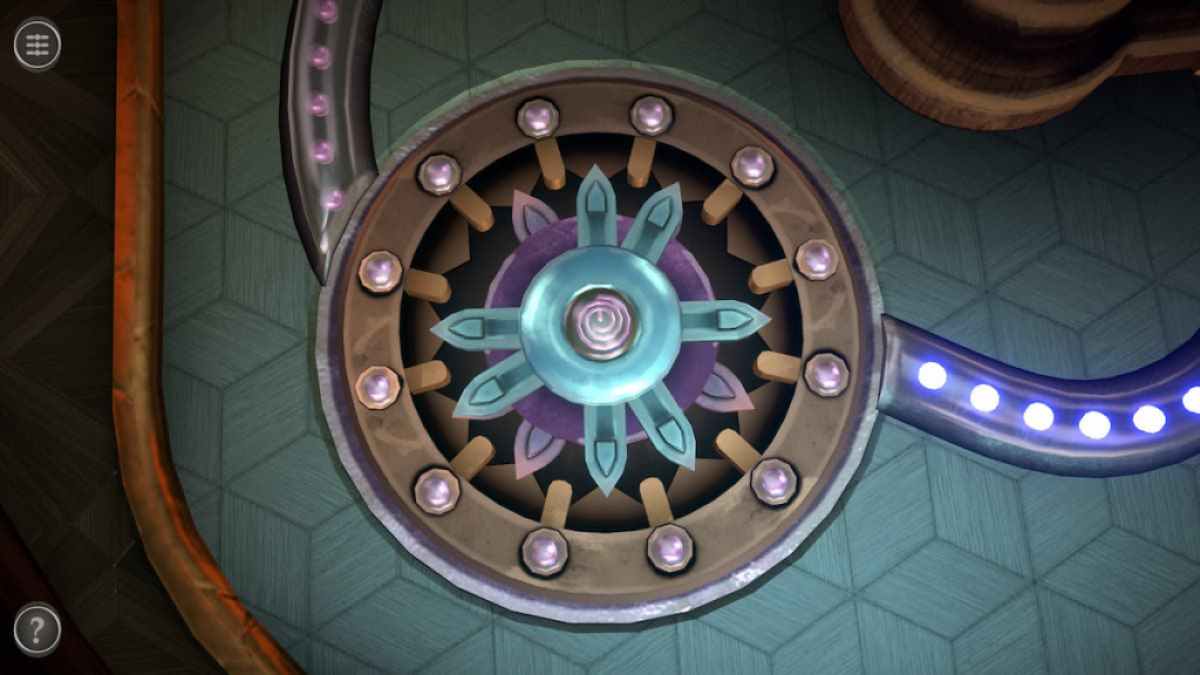
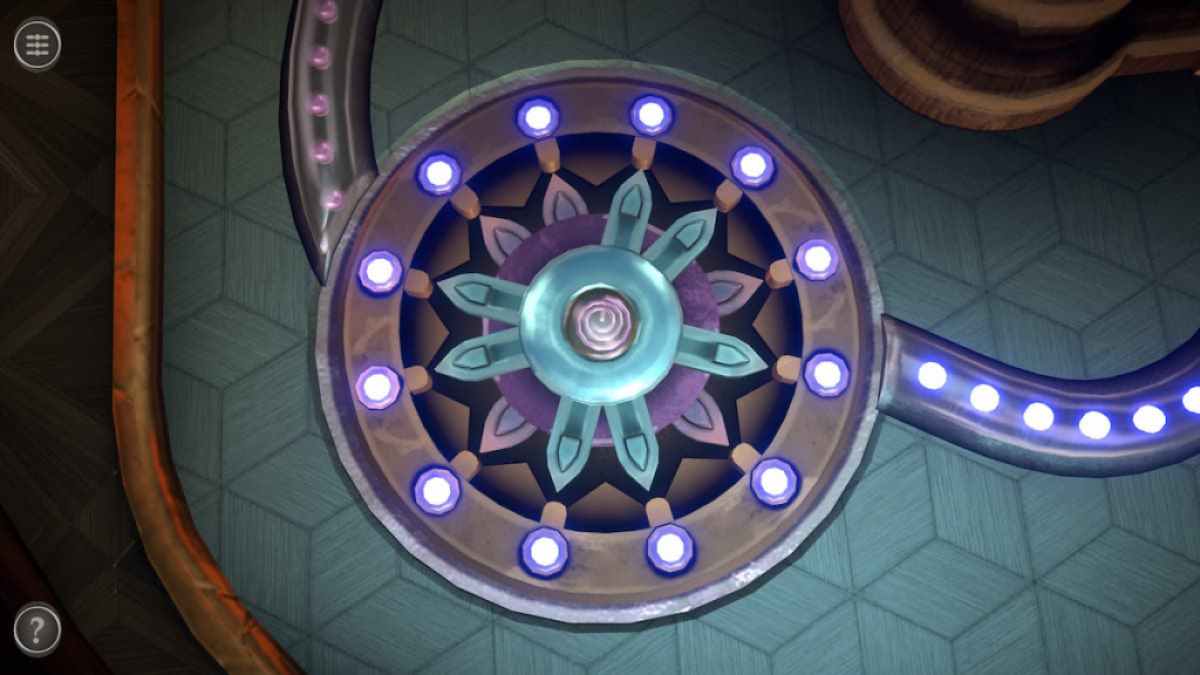
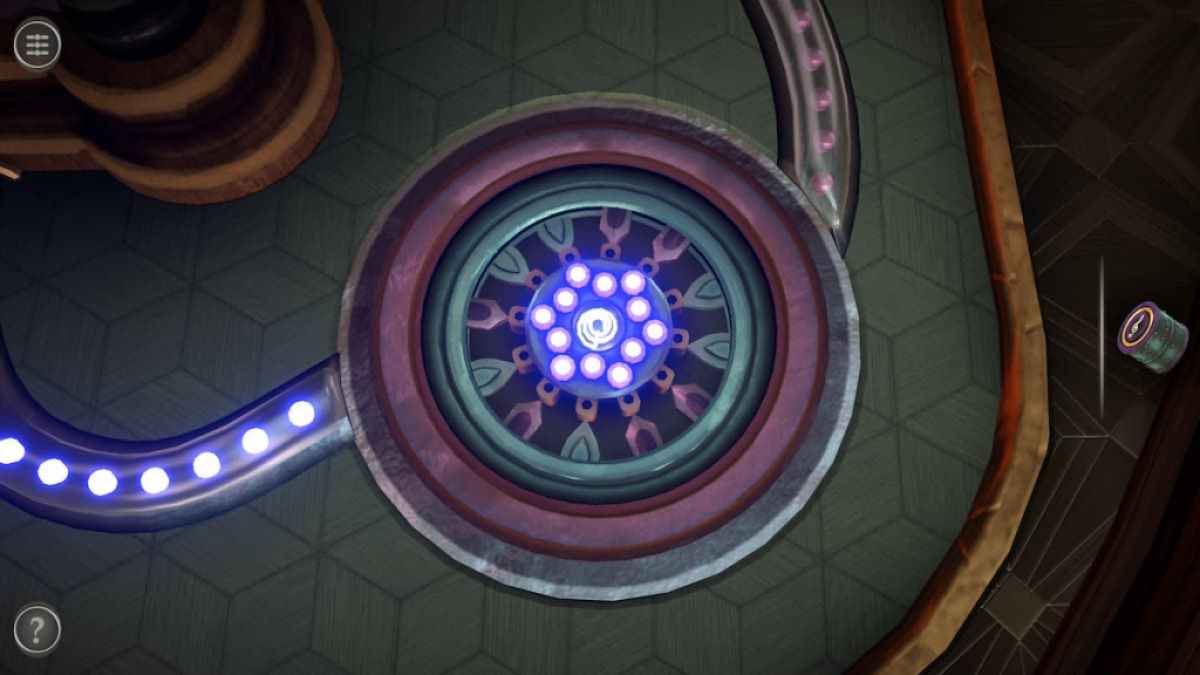
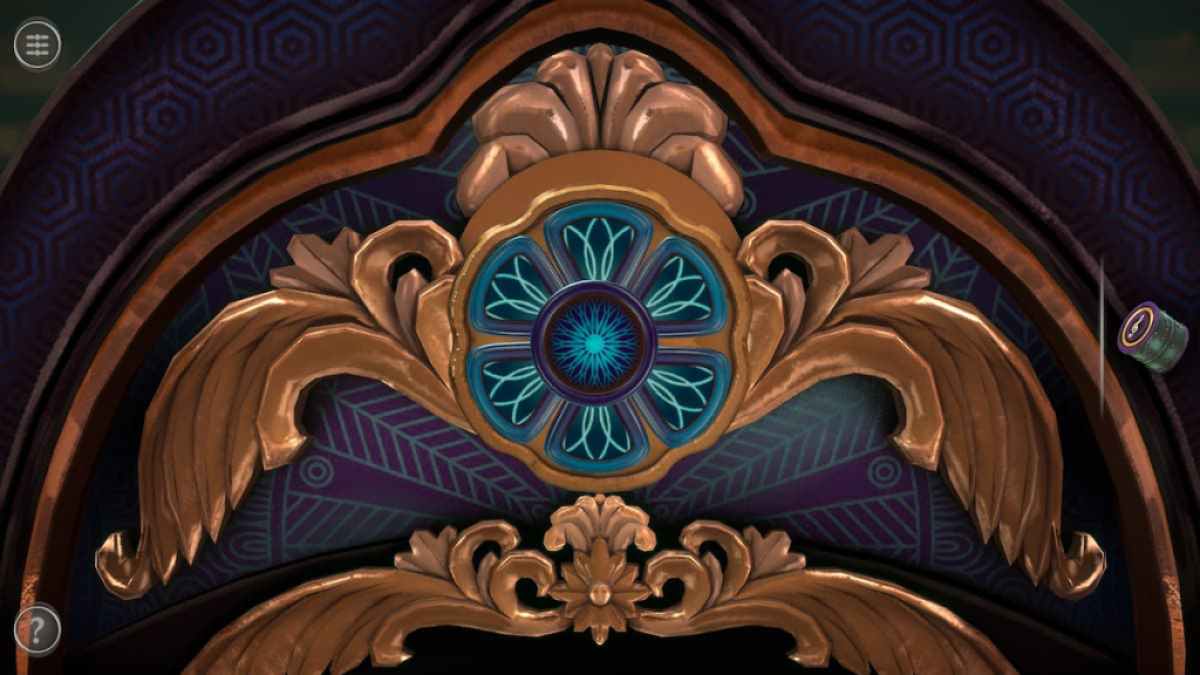
To the left wing of the machine is a blossom - form puzzle .
splay the two course of petal until all of the lights are on .

Screenshot by Pro Game Guides
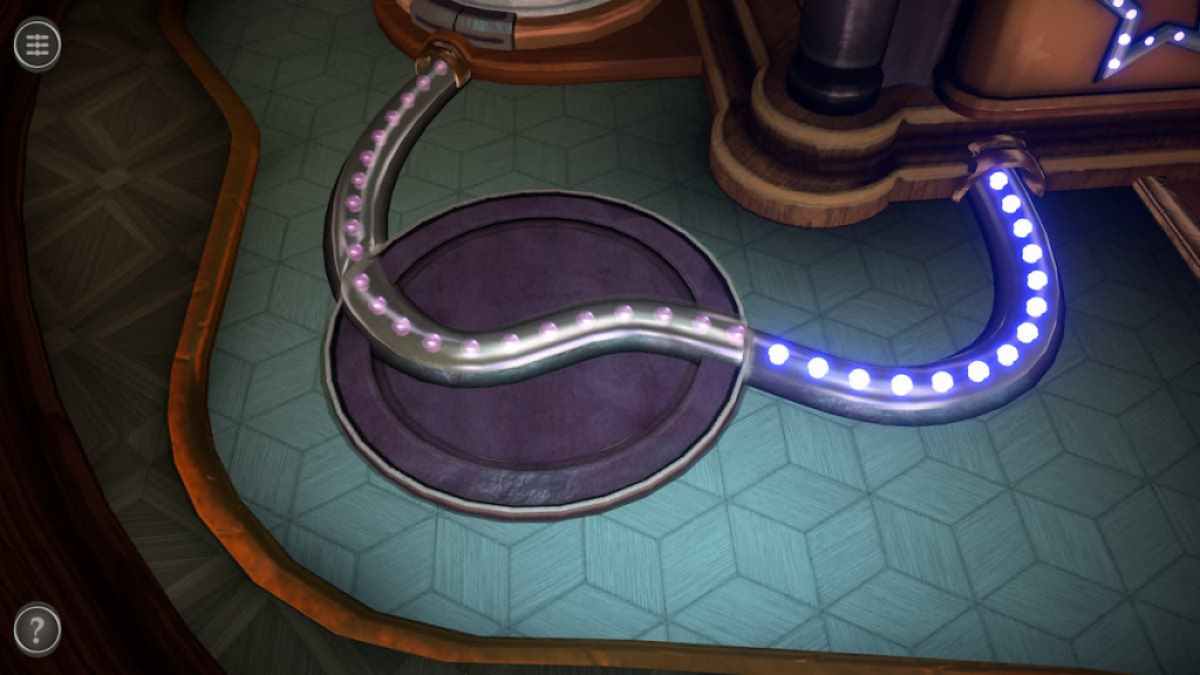
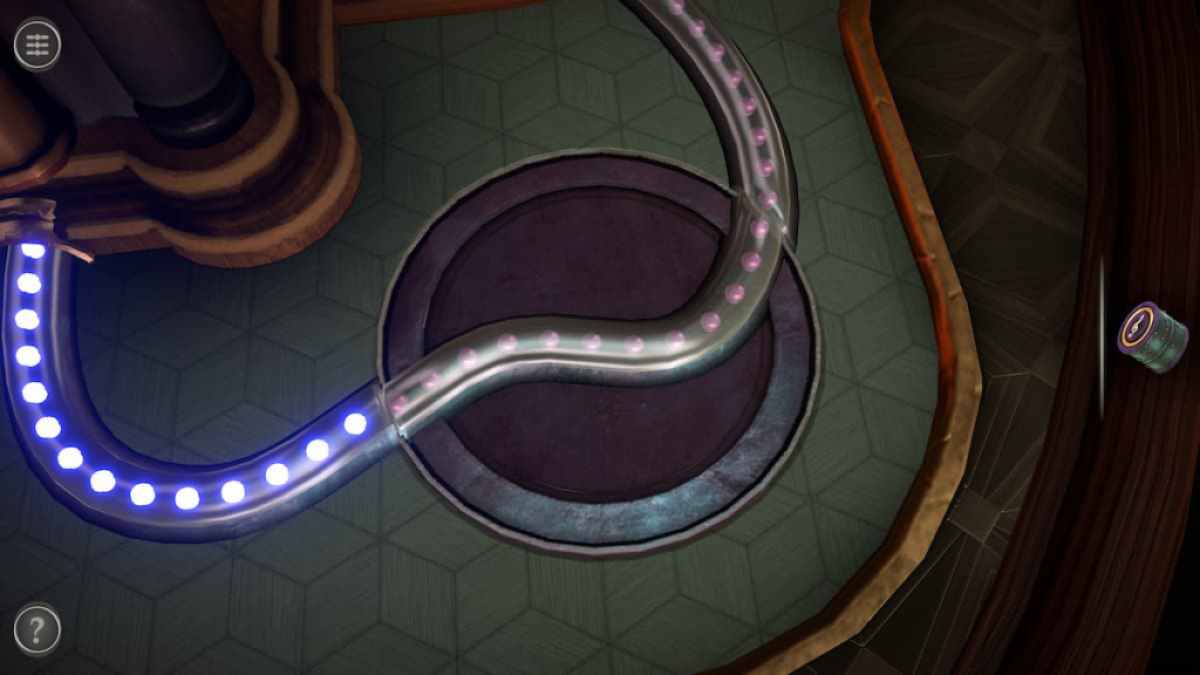
Then go around the novel part of the course to link up the paths on either side of it .
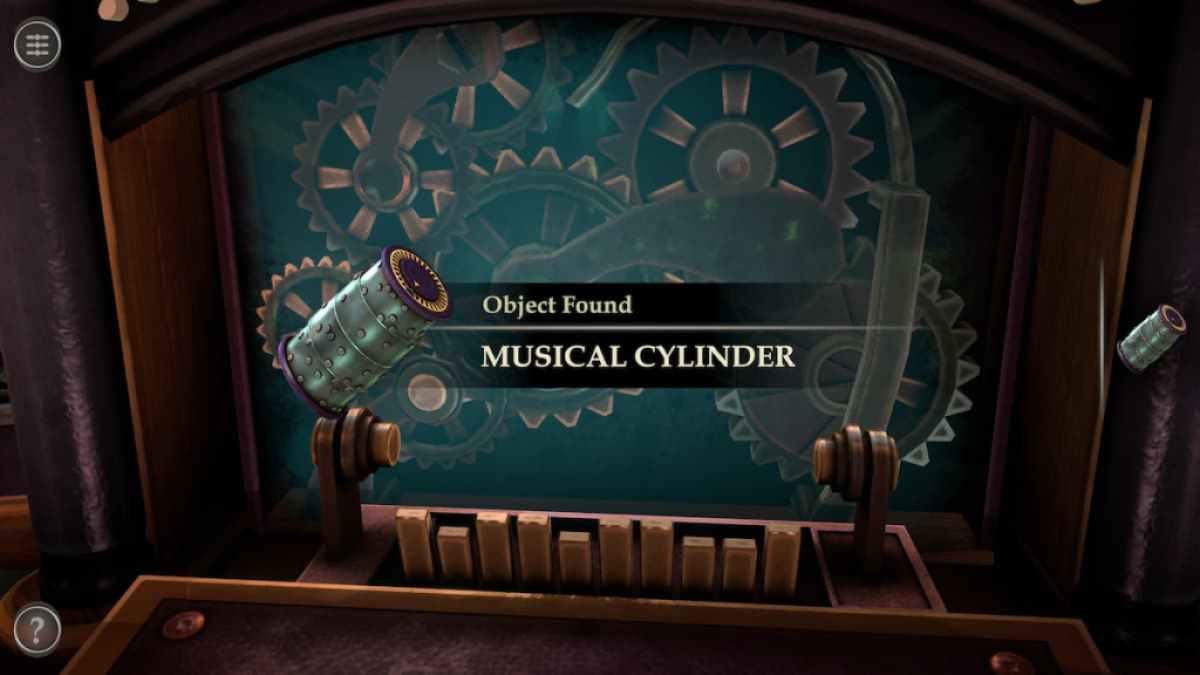
Finally , compact the green button to unlock a compartment holding a Musical Cylinder .
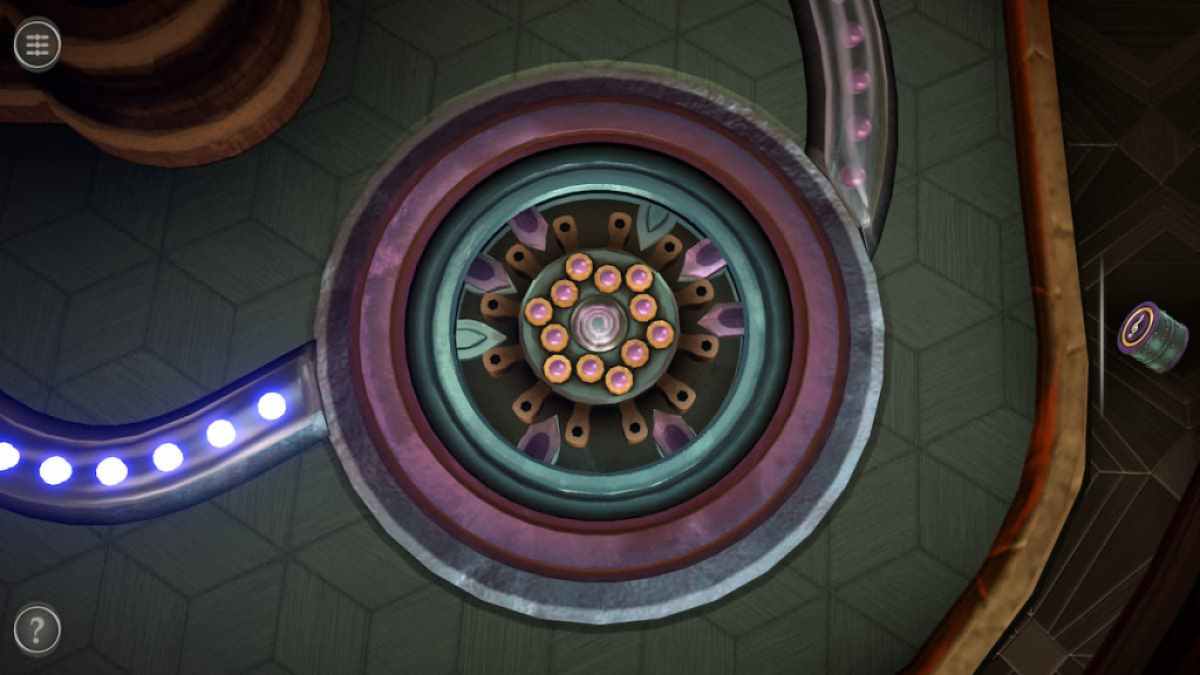
Now turn to the puzzle on the correct side of the nickelodeon .
Screenshot by Pro Game Guides
Move the petals around until all of the lights in the center are turned on .
Rotate the footpath until it connects the two paths on either remnant of it .
Press the green button to expose a compartment containing a Mechanical Flower .
Screenshot by Pro Game Guides
Related : Viking Ship Escape Walkthrough – Cool Math Games
Place the Mechanical Flower into the top slot at the back of the jukebox .
Each petal must be deplume out in a certain room to unlock the next puzzler . The order is as follow :
Screenshot by Pro Game Guides
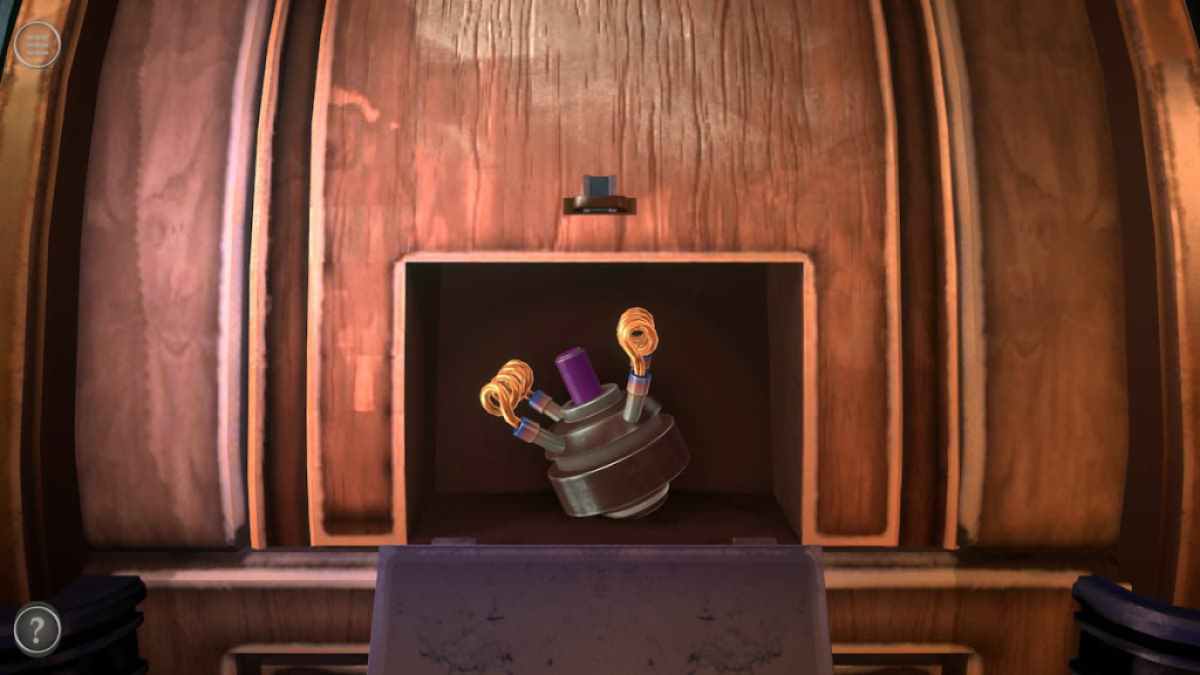
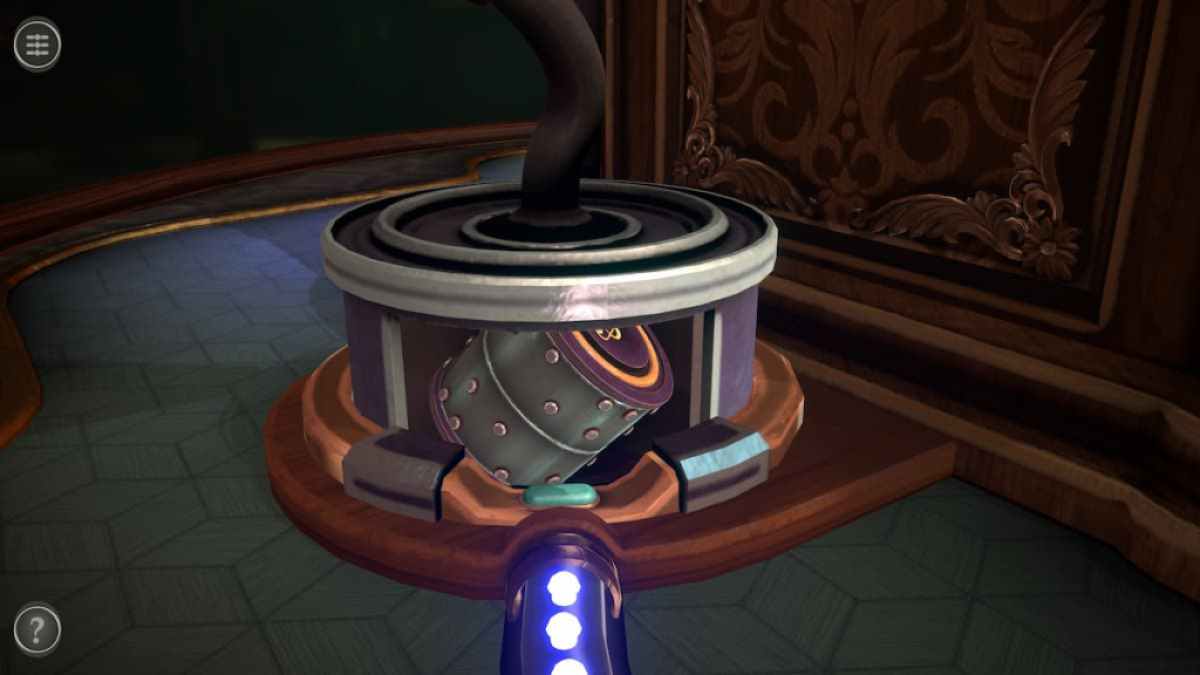
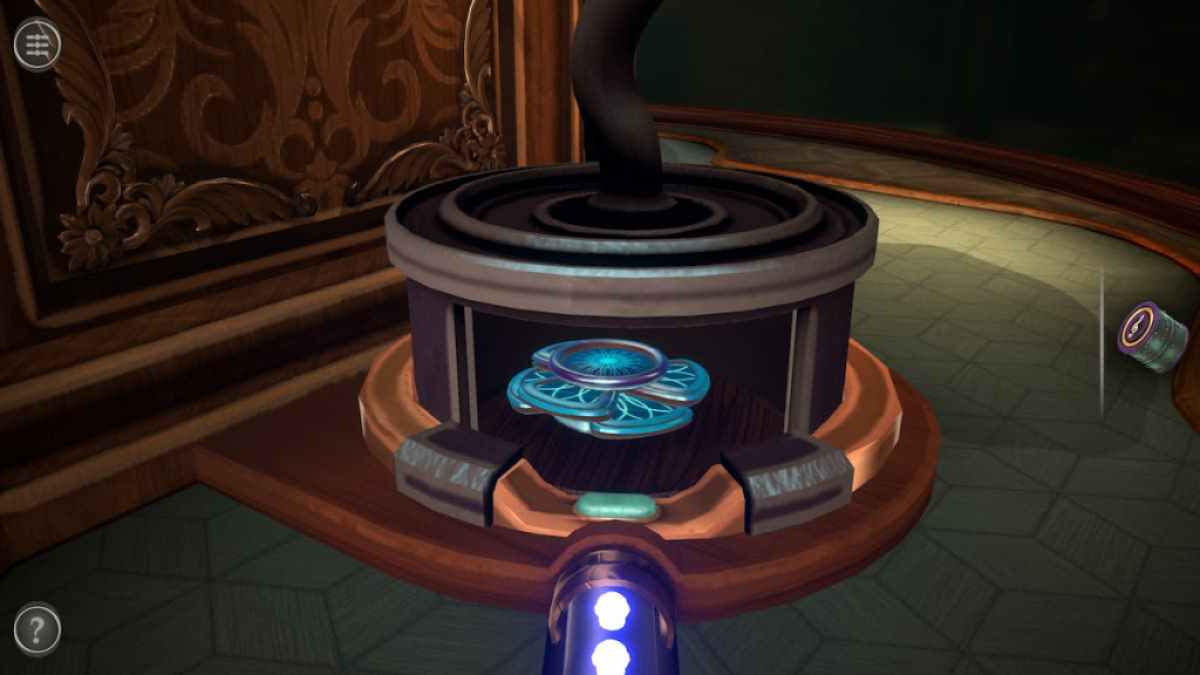
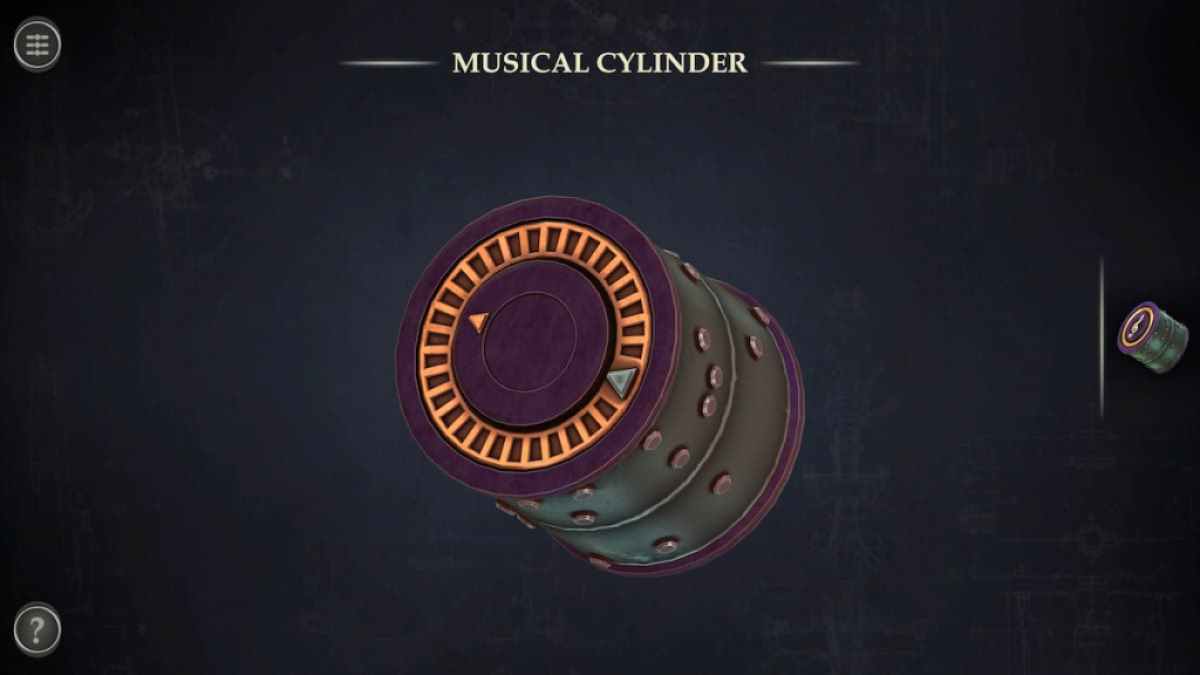
Rotate the Musical Cylinder box in your inventory to witness a secret gearing .
Spin the gear to to the full start the Musical Cylinder .
After cover it , the Musical Cylinder can be placed between the two mechanism . This will open it up for a second mystifier .
Screenshot by Pro Game Guides
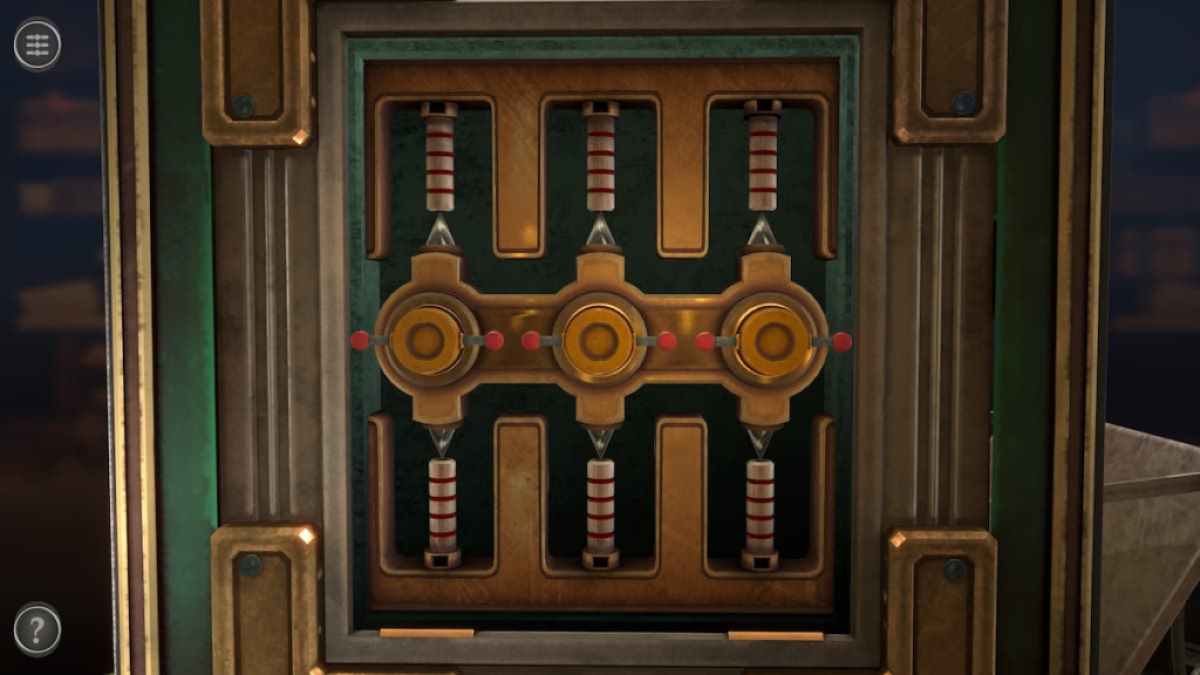
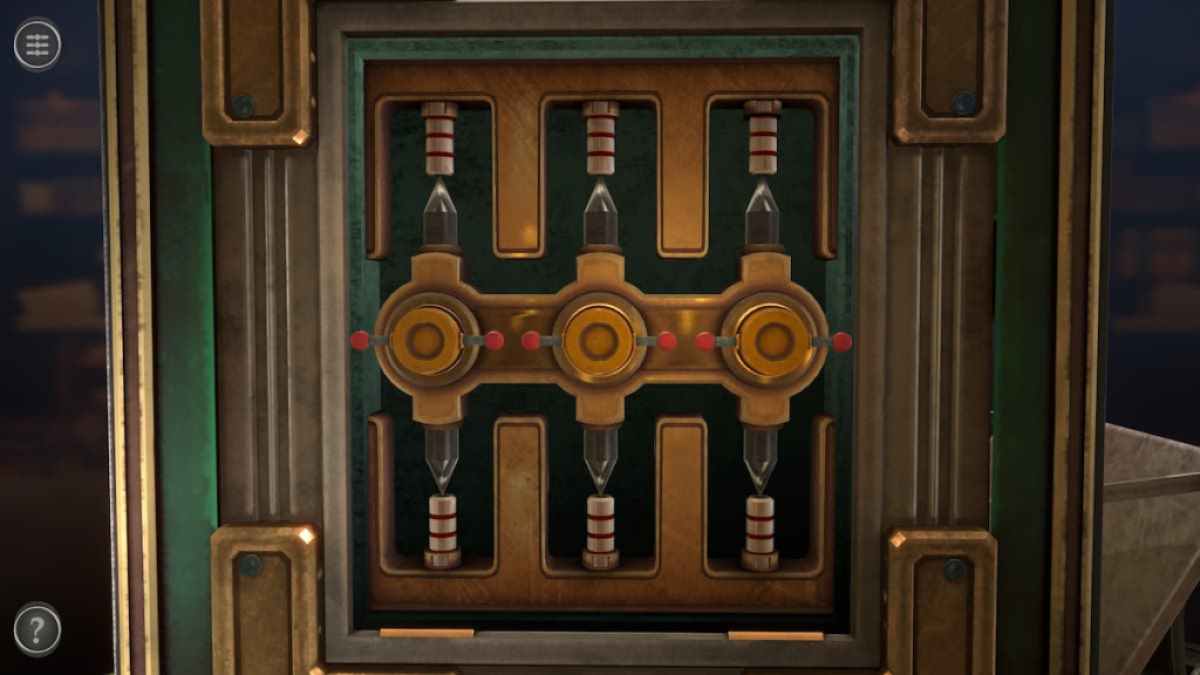
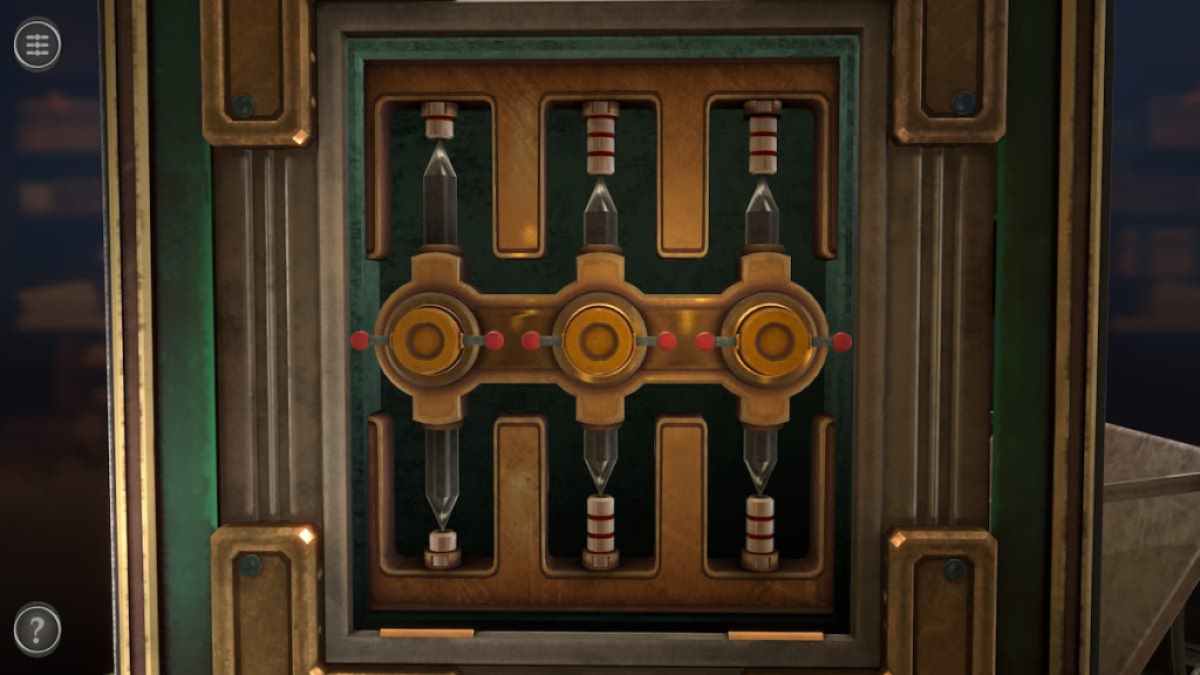
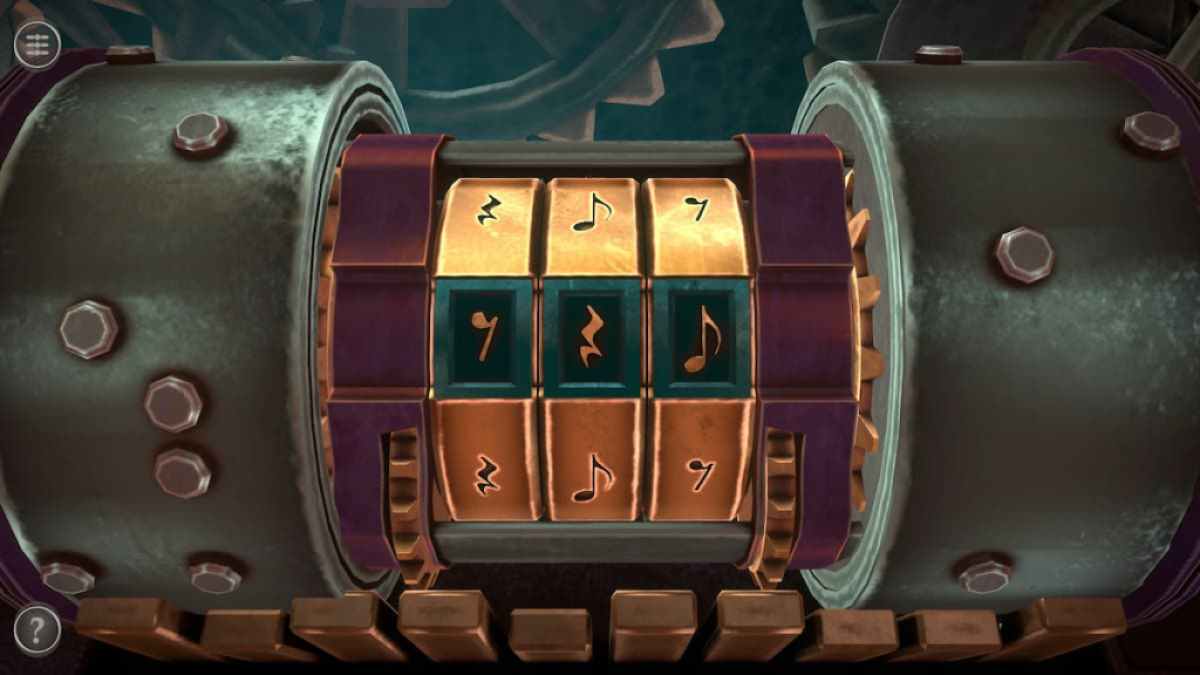
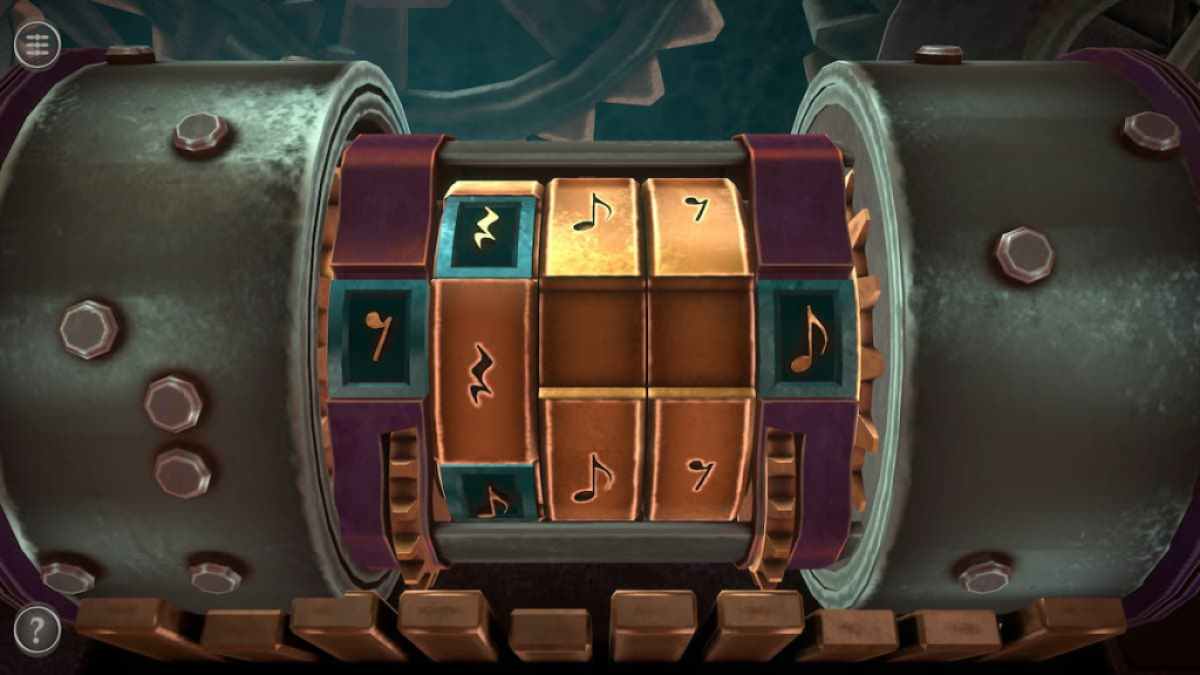
The finish of this teaser is to localise all of the green musical note in the sections with the matching golden notes . There are two slot on the side where annotation can be placed and each of the three columns can be rotated up and down .
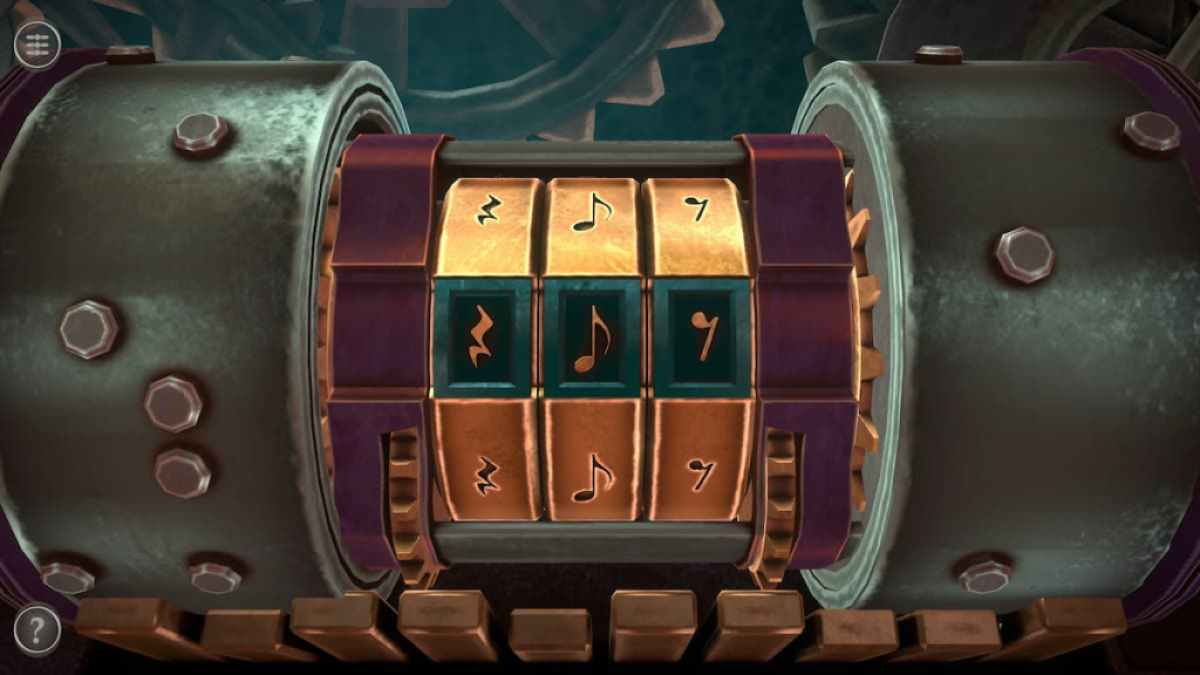
Once every note is in the right plaza , the puzzle will come home and launch the top of the boxful .
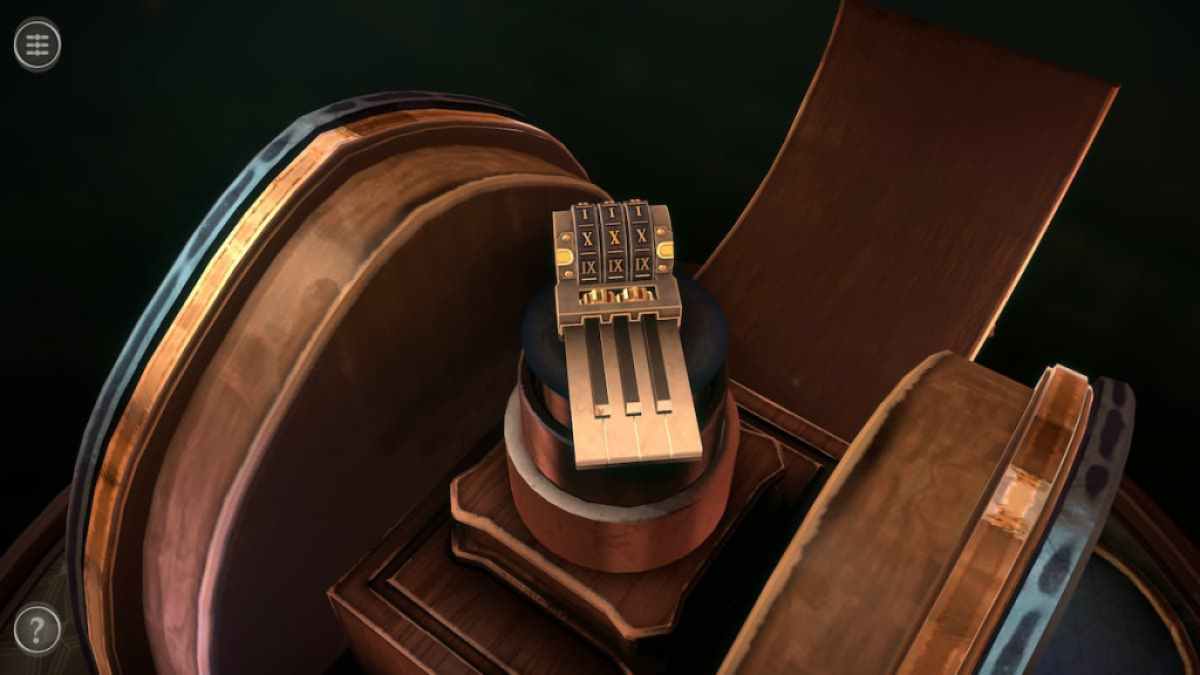
The Piano Keys can be snaffle from the top of the box to return you to the main room .
Screenshot by Pro Game Guides
This will unlock the third elbow room of the chapter .
For more story - base escape room games , tick out ourEcho Bay Murders – Chapter 2 Walkthroughhere on Pro Game Guides .
Screenshot by Pro Game Guides
Screenshot by Pro Game Guides
Screenshot by Pro Game Guides
Screenshot by Pro Game Guides
Screenshot by Pro Game Guides

Screenshot by Pro Game Guides
Screenshot by Pro Game Guides
Screenshot by Pro Game Guides
Screenshot by Pro Game Guides
Screenshot by Pro Game Guides
Screenshot by Pro Game Guides
Screenshot by Pro Game Guides
Screenshot by Pro Game Guides
Screenshot by Pro Game Guides
Screenshot by Pro Game Guides
Screenshot by Pro Game Guides
Screenshot by Pro Game Guides
Screenshot by Pro Game Guides
Screenshot by Pro Game Guides
Screenshot by Pro Game Guides
Screenshot by Pro Game Guides
Screenshot by Pro Game Guides
Screenshot by Pro Game Guides
Screenshot by Pro Game Guides
Screenshot by Pro Game Guides
Screenshot by Pro Game Guides
Screenshot by Pro Game Guides
Screenshot by Pro Game Guides
Screenshot by Pro Game Guides
Screenshot by Pro Game Guides
Screenshot by Pro Game Guides
Screenshot by Pro Game Guides
Screenshot by Pro Game Guides
Screenshot by Pro Game Guides
Screenshot by Pro Game Guides
Screenshot by Pro Game Guides
Screenshot by Pro Game Guides
Screenshot by Pro Game Guides
Screenshot by Pro Game Guides
Screenshot by Pro Game Guides
Screenshot by Pro Game Guides
Screenshot by Pro Game Guides
Screenshot by Pro Game Guides

Screenshot by Pro Game Guides
