Science your fashion off of this trading floor .
Scientific political machine meets point - and - click detective workplace in chapter 2 of Boxes Lost Fragments . In this guidebook , I ’ll take the air you through all of the skill - themed puzzles in the 2nd one-half of Chapter 2 .
Boxes Lost Fragments Chapter 2 Nexus part 2 walkthrough
This guide covers the second and quaternary rooms in Chapter 2 , plus the last puzzles in the main elbow room . If you ’re stuck on a puzzle in any of the other chapter , the guides for each of them are linked below .
Third room puzzles
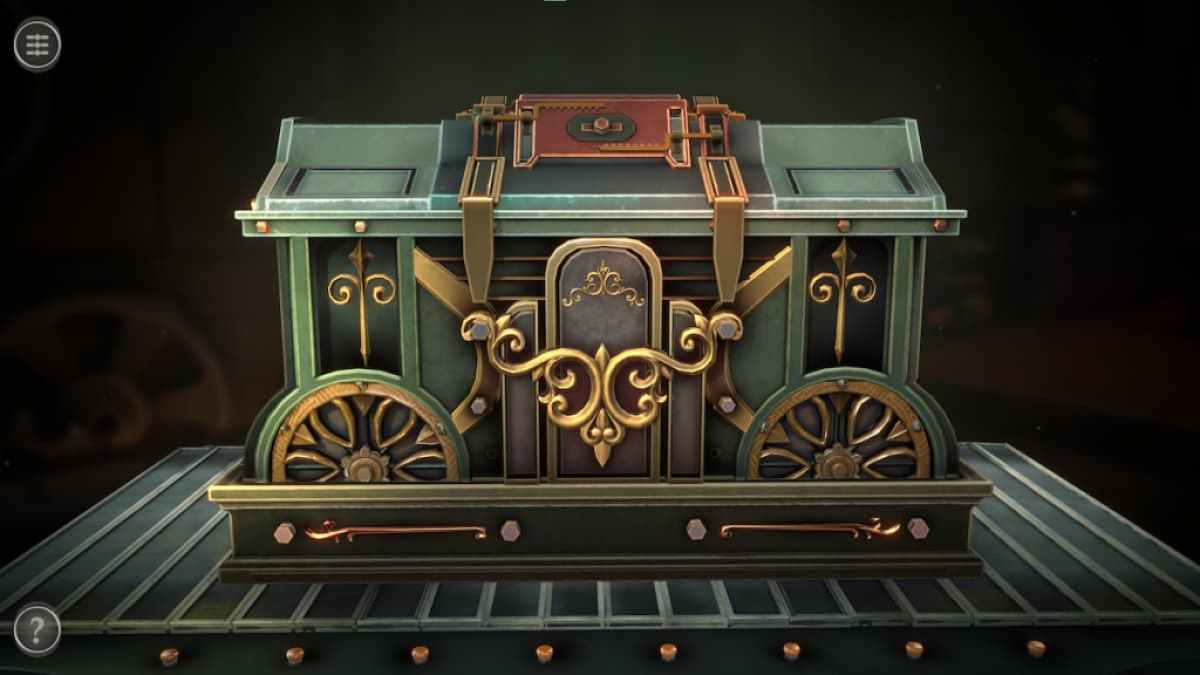
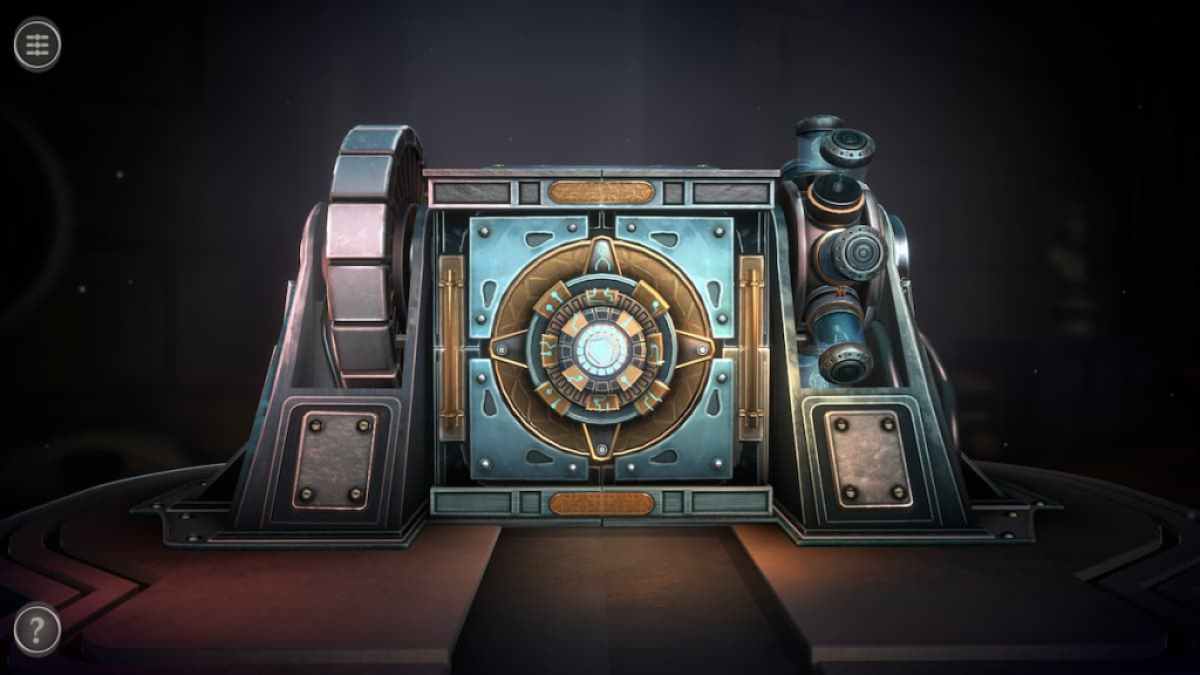
The third room contains a green chest with gold details .
Start by pulling the handle on the right side of the box . There will be an Ornament Piece in the leftover recession . Tap it and put it in your inventorying .
Rotate the camera to view the back of the thorax . look close exhibit that the golden medal on the left-hand side is miss .

Placing the Ornament Piece here will give you a Mechanical Item .
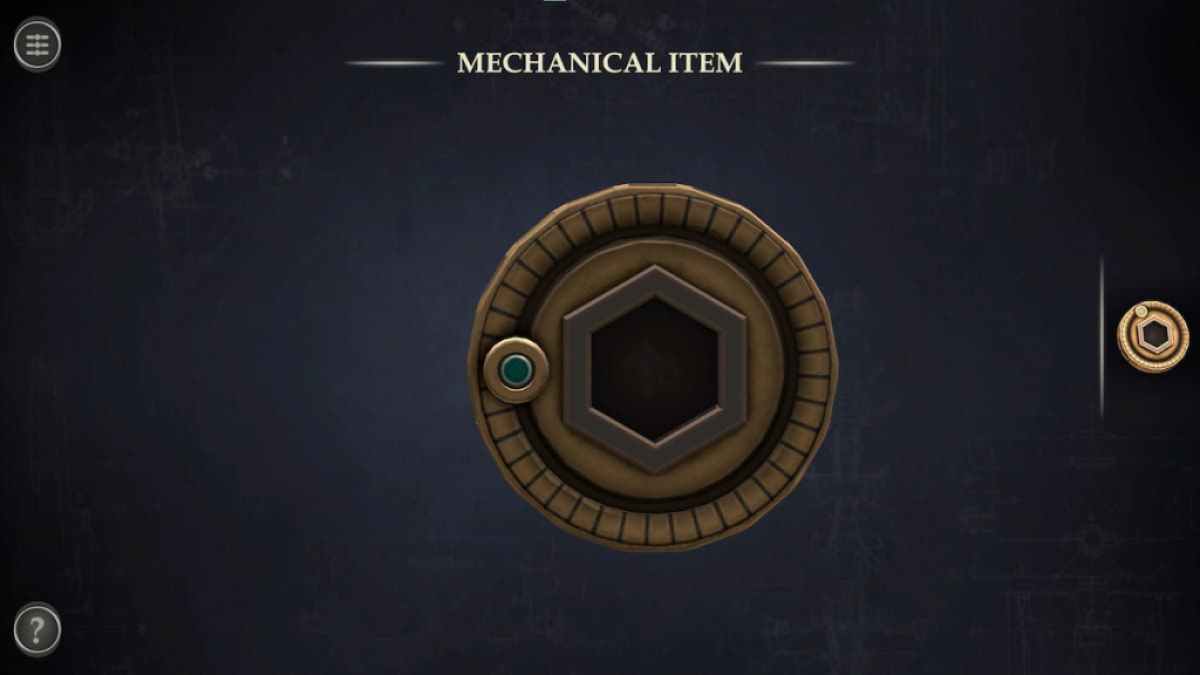
Mechanical Item puzzle
reach the Mechanical Item in your inventory .
Pull the green sider around the circular track it ’s on to deform the Mechanical Item into a Gear .
commit the Gear on the top circumstances of the center of the corner , between the two spike golden locks .
Screenshot by Pro Game Guides
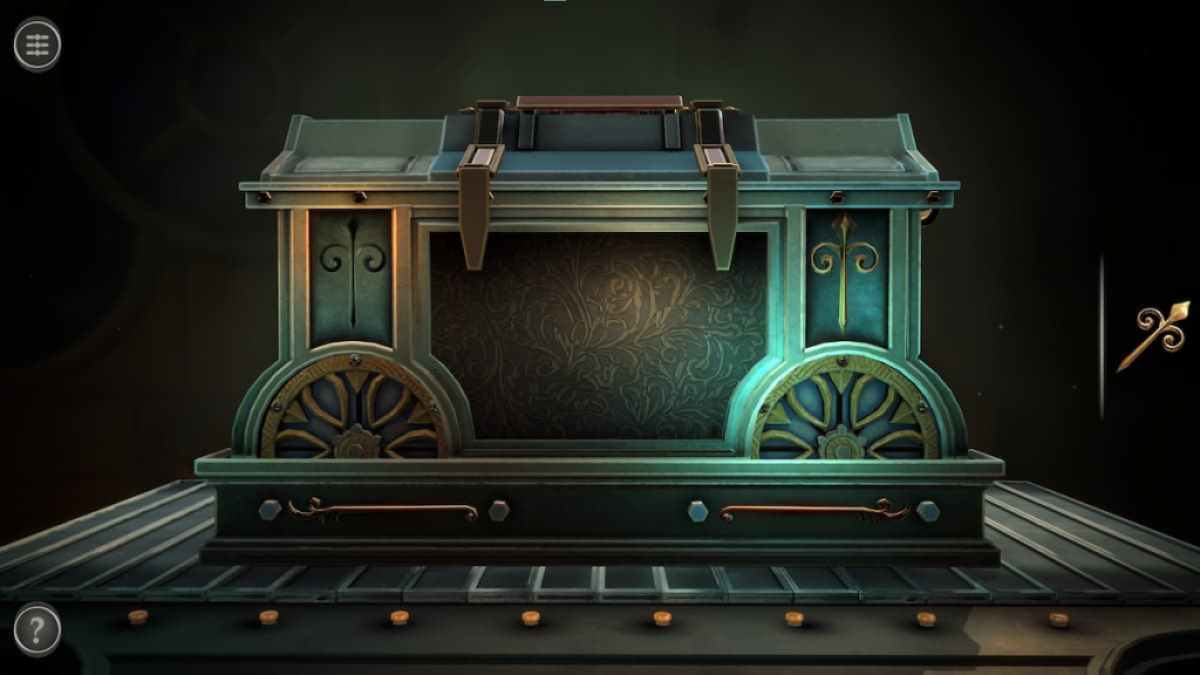
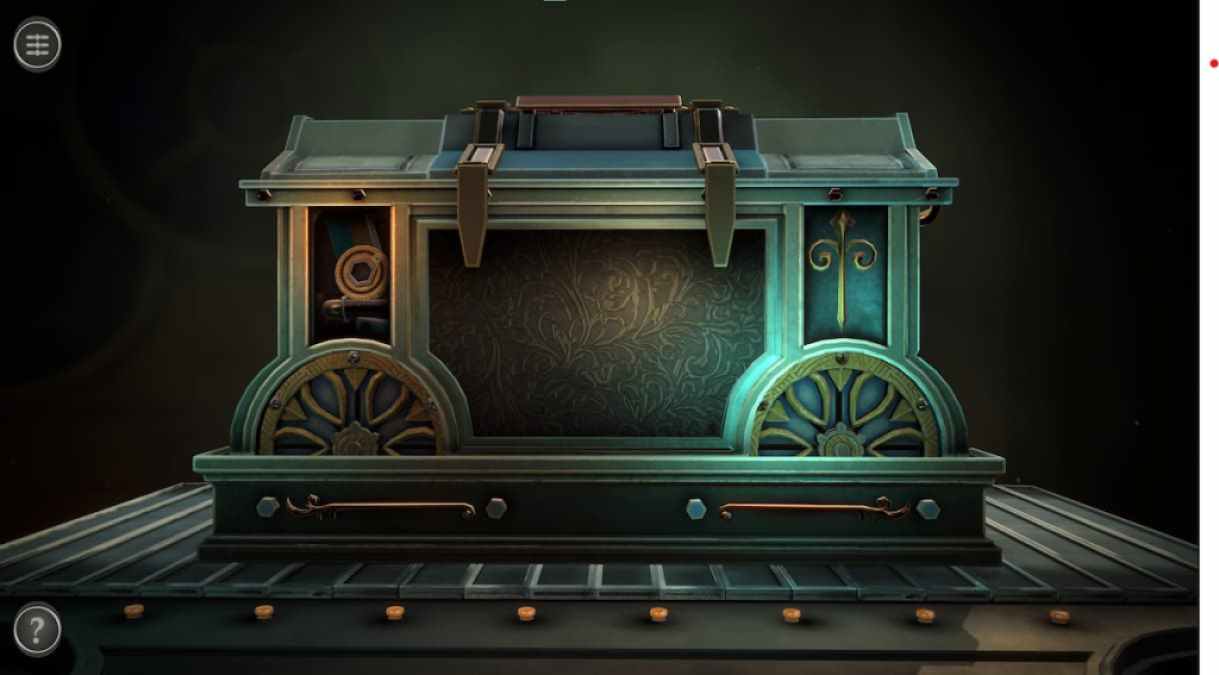
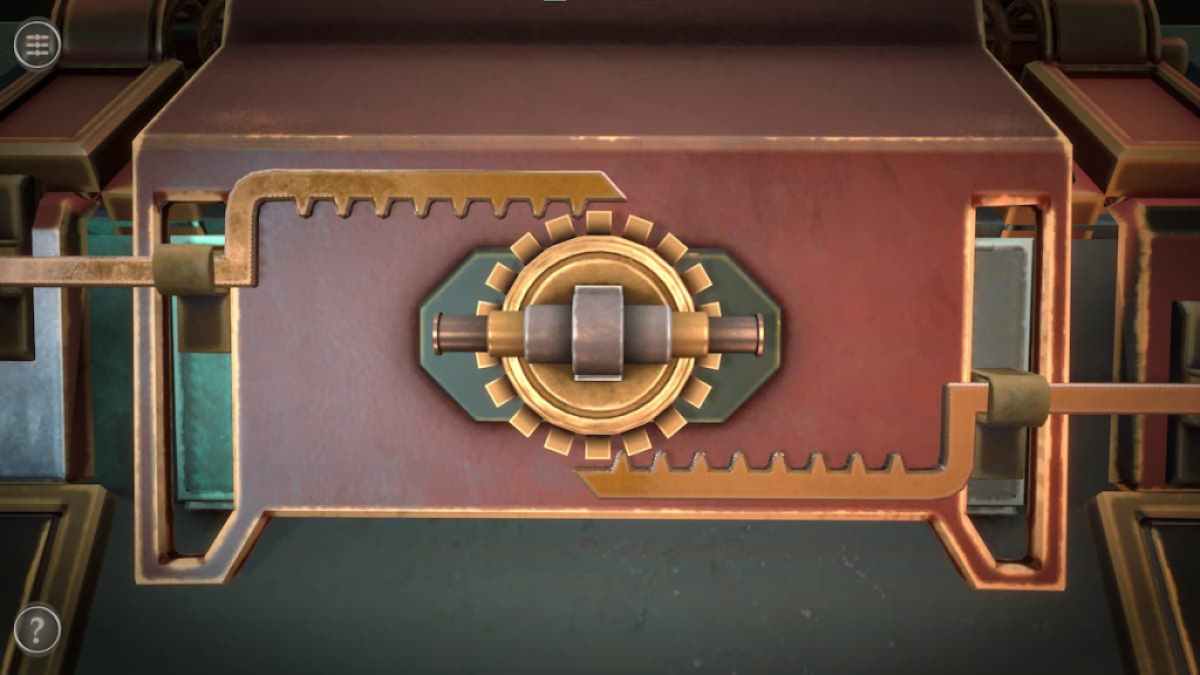
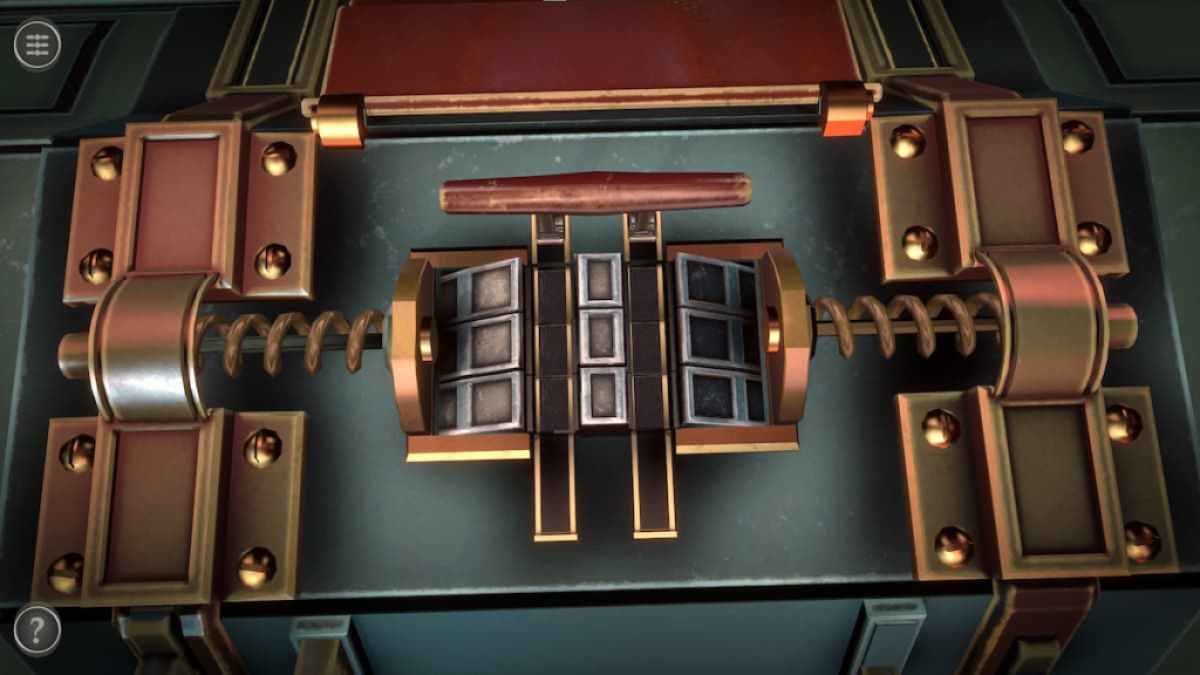
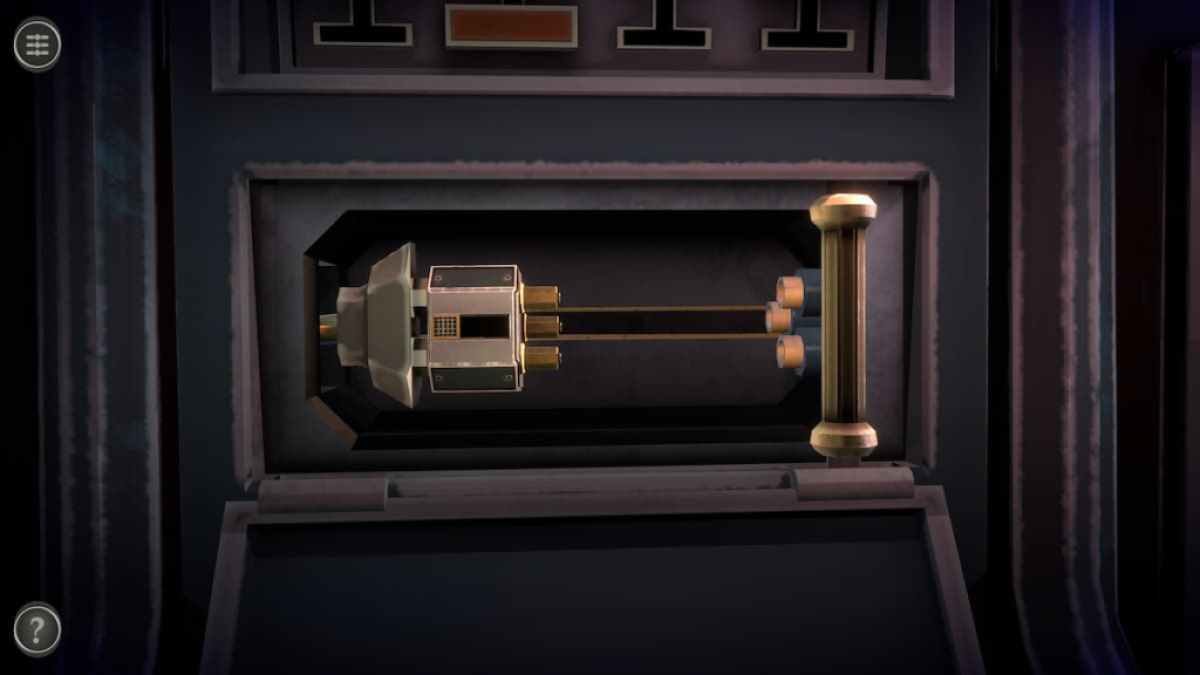
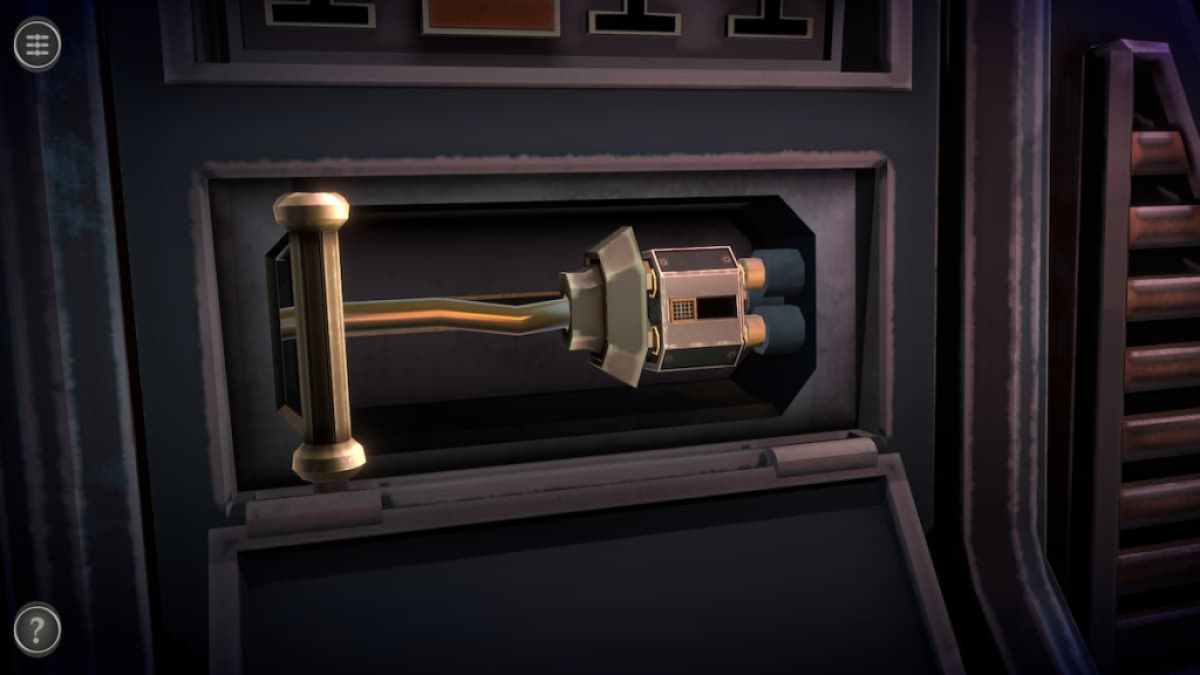
This unlock a puzzle consisting of a handle and three rotatable row .
splay each dustup until they have two empty spaces where each bar of the handle is , allowing it to freely slide pass them .
Doing so will drop the front and back wall of the box , turning it into a carnival pushcart . I used the handle on the left bulwark to lower it here as well .
Screenshot by Pro Game Guides
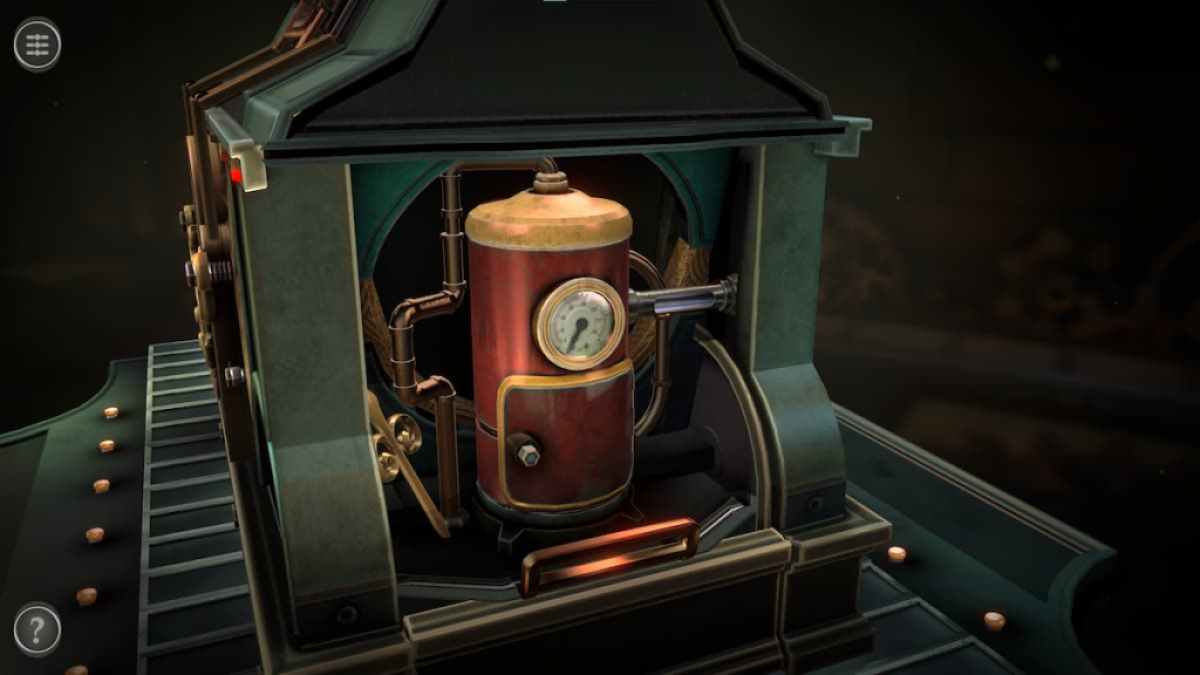
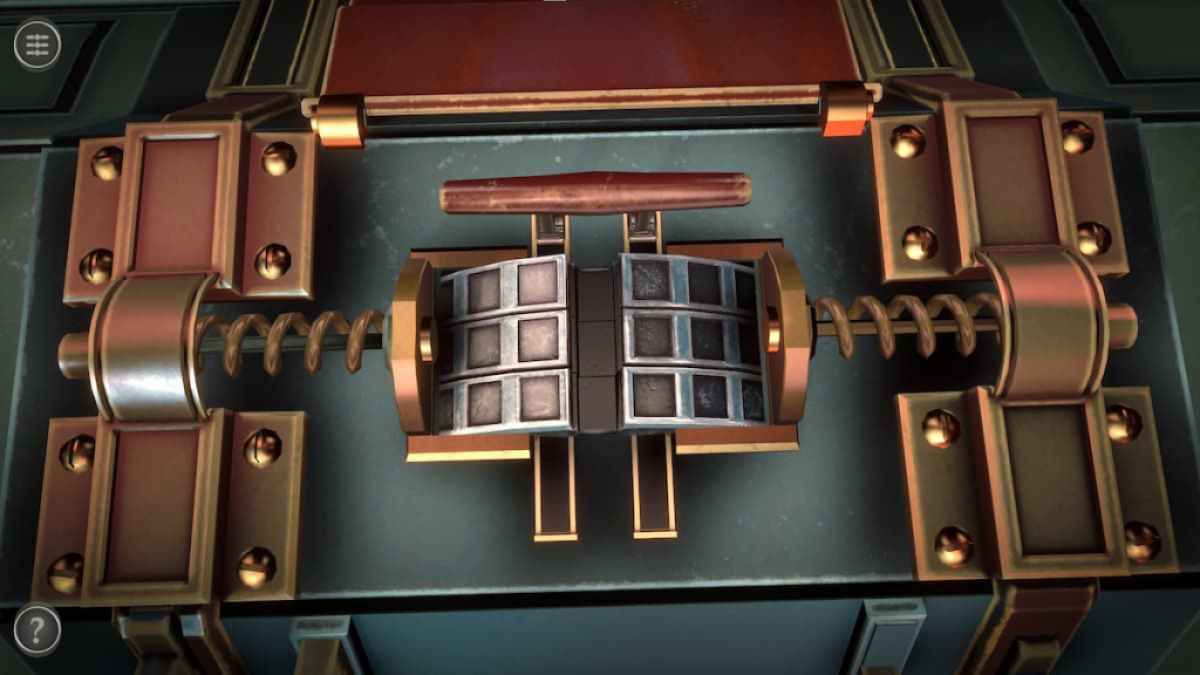
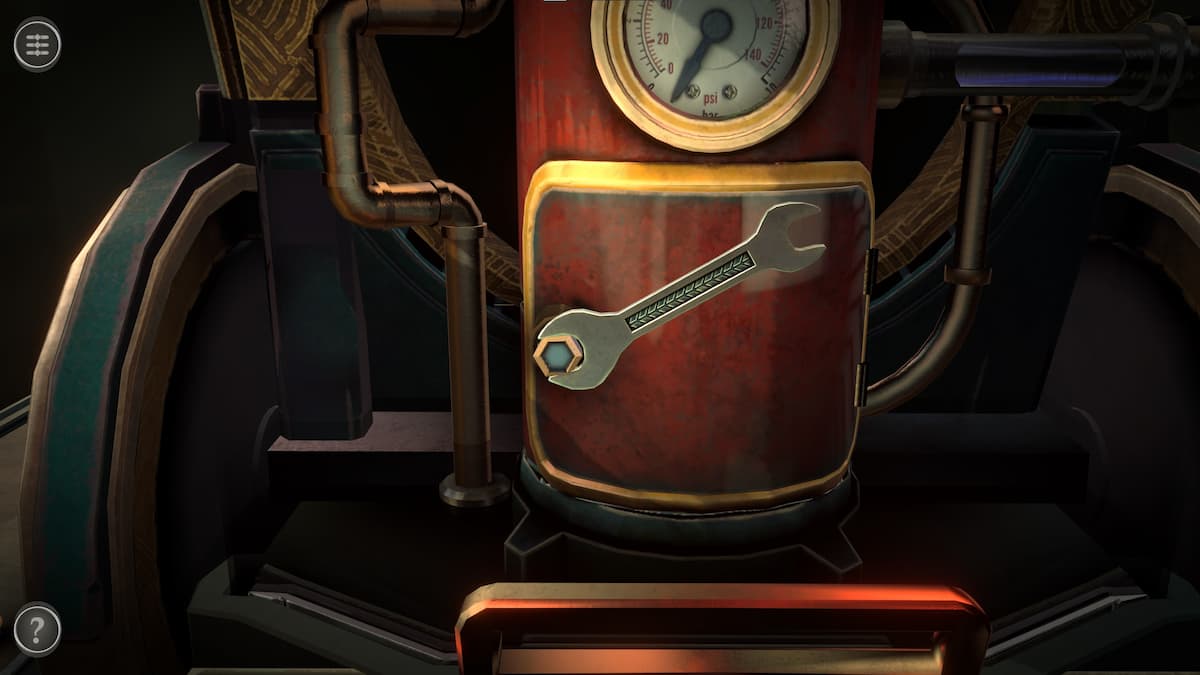
Before starting the puzzle , grab the wrench on the back of the box .
practice the wrench on the dark-green nut to open up the red capsule ’s doorway .
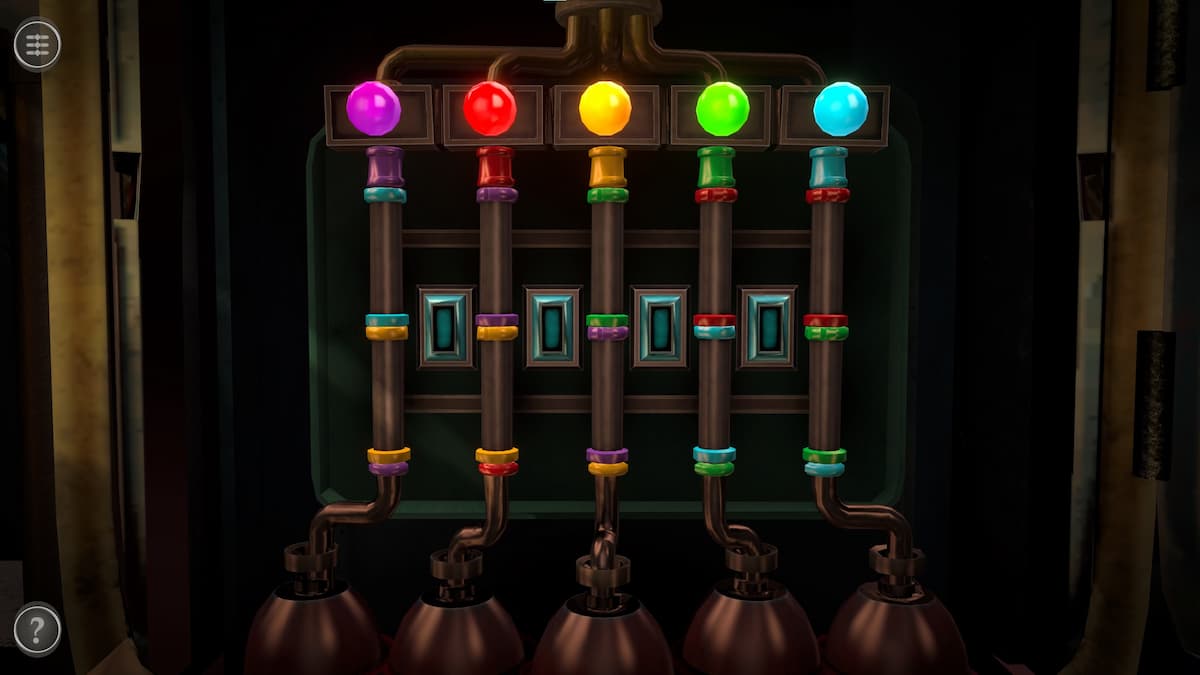
This reveals a puzzle containing five colored testicle , each with two section of pipage beneath them with two color rings on each section .
Screenshot by Pro Game Guides
Pressing a clitoris rotate the four pipe segments around it .
When all of the surgical incision of shriek match the color of the lump they ’re underneath , the ball will glow . When all of the orb shine , the puzzle will be completed .
Completing this puzzle gives you a hint for the gauge puzzle .
Screenshot by Pro Game Guides
Related : Echo Bay Murders – Chapter 2 Walkthrough
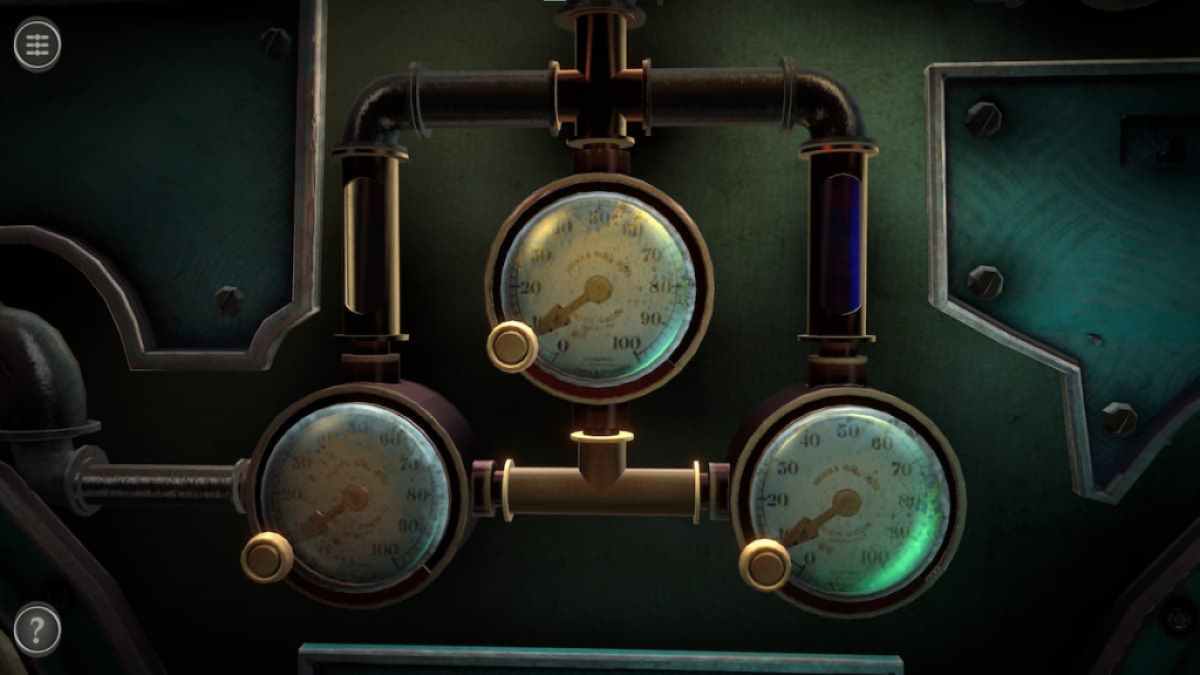
This puzzle consists of three gauges find on the back of the chest .
Make the gauge match the cue from the colored ball puzzle to complete their puzzle .
Screenshot by Pro Game Guides
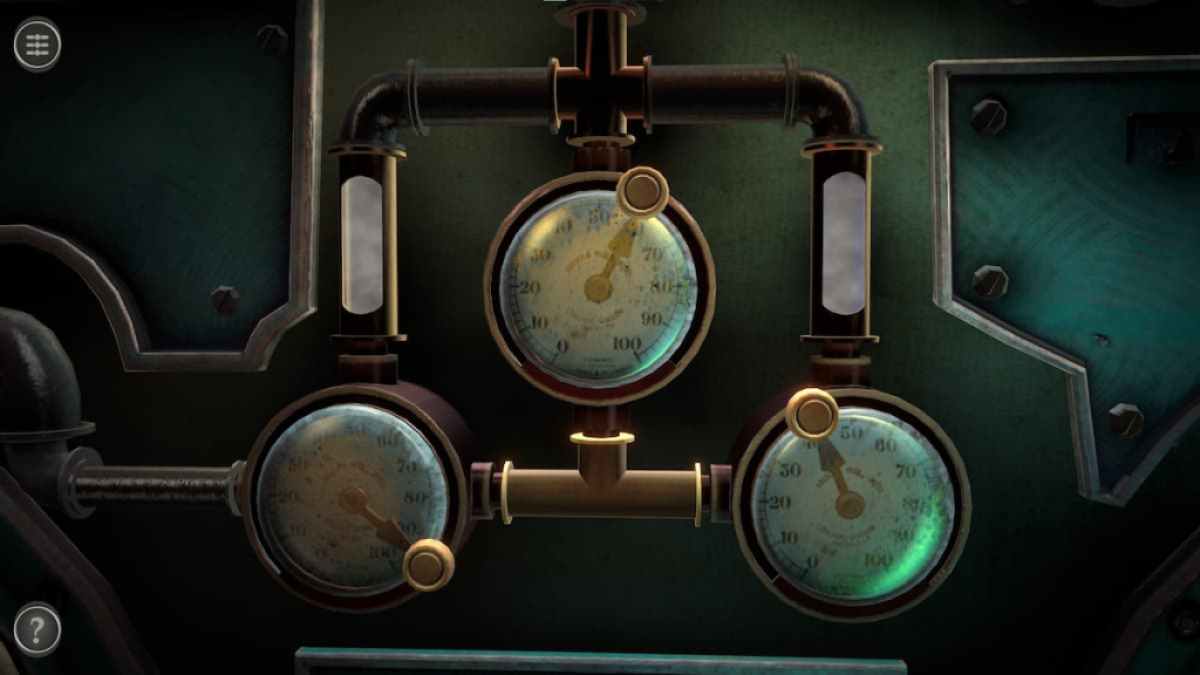
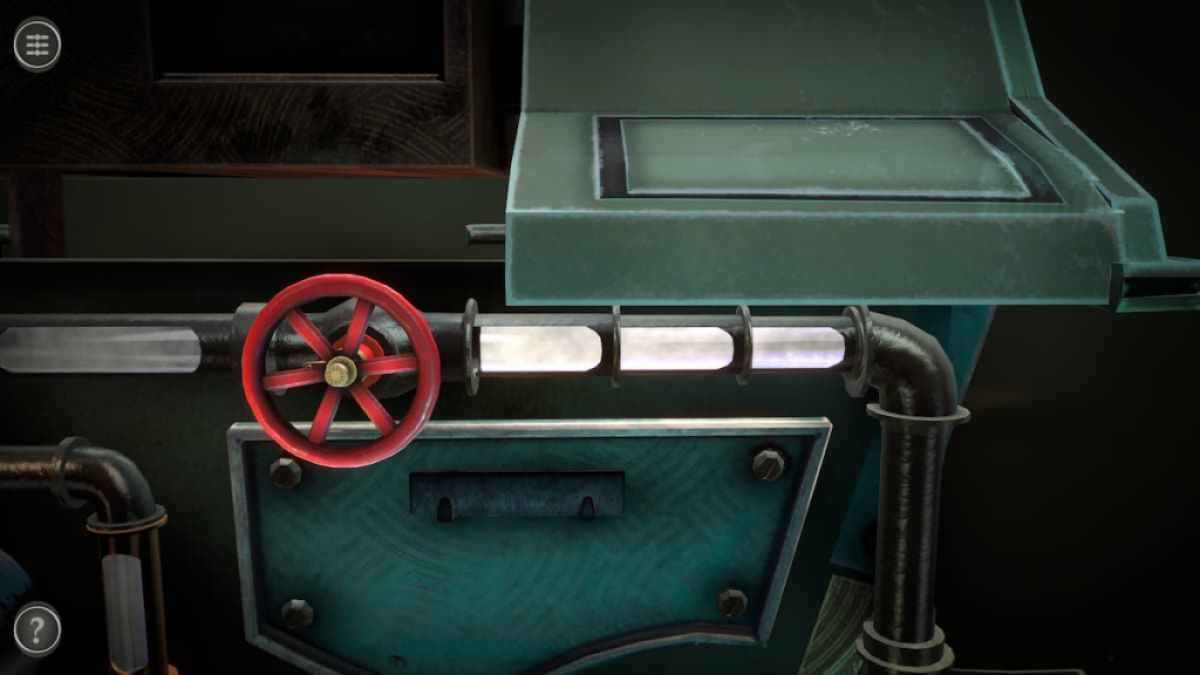
Doing so will sate the pipes with steam . However , part of the pipe on the top rightfulness is missing , prevent it from going any further .
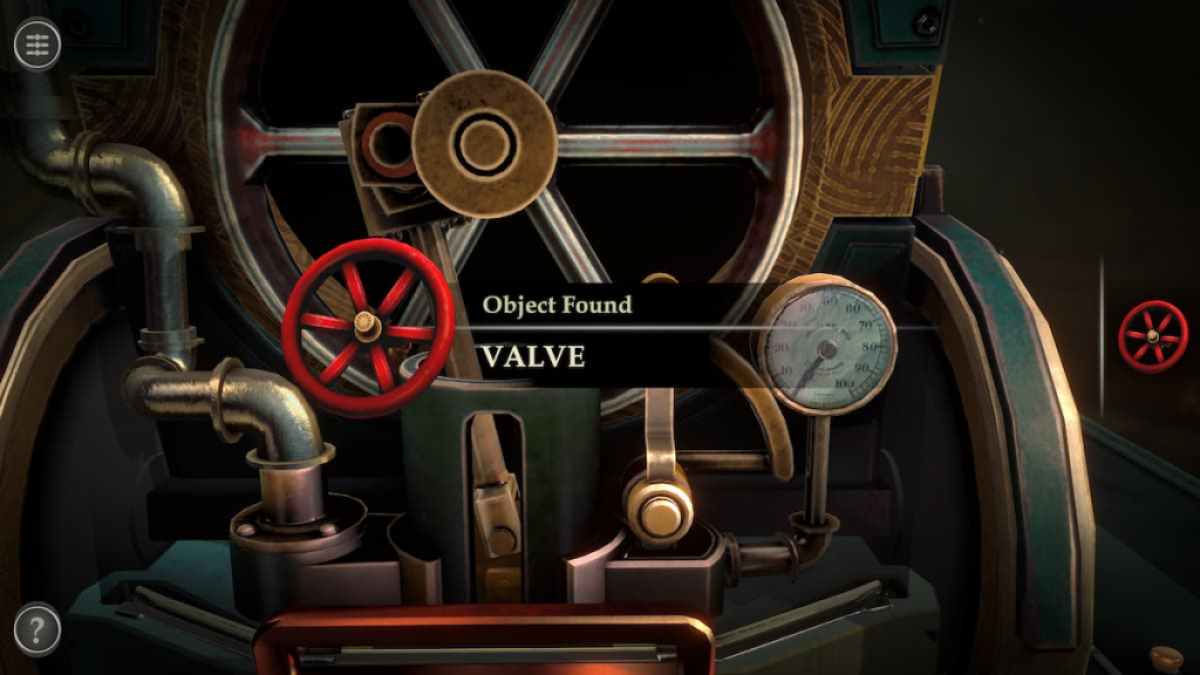
see to it the left side will allow you to plunk up a small-scale crimson Valve .
This valve can be site onto the red num and rotate to cover the pipe until it connect with the other tobacco pipe on the corner .
Screenshot by Pro Game Guides
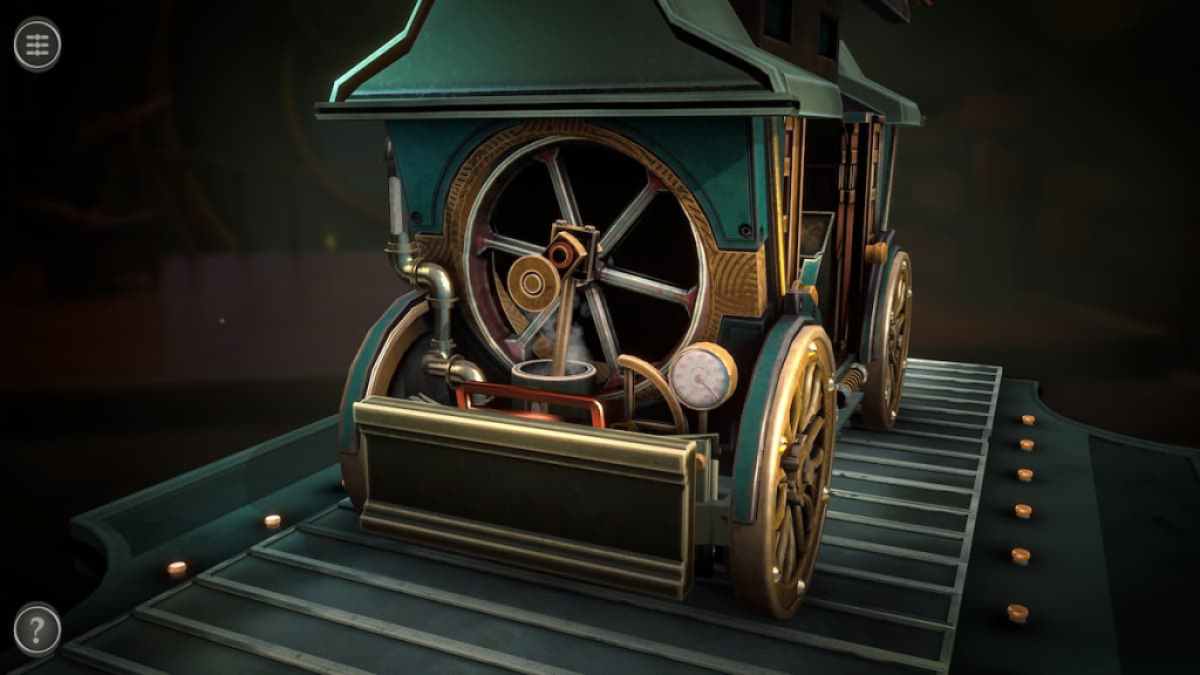
Doing so will direct you back to the leftover side to watch the press gauge rise .
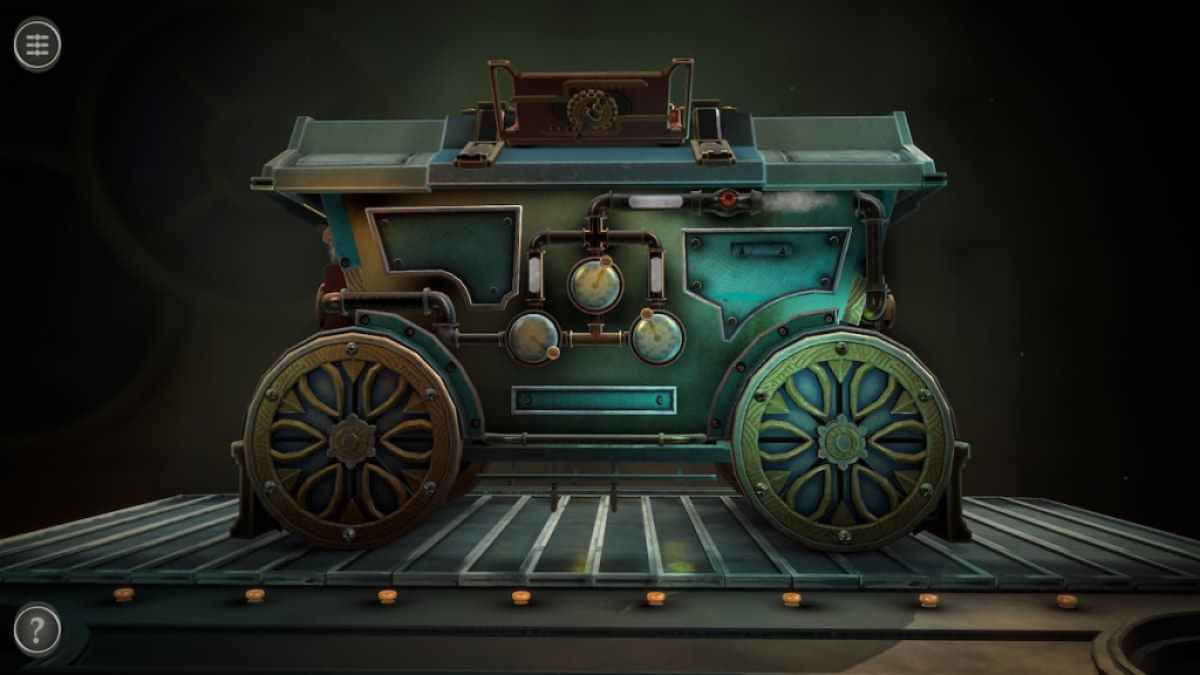
Pull the halcyon handle next to the gauge to reverse the board into a set of tracks and put the box in movement .
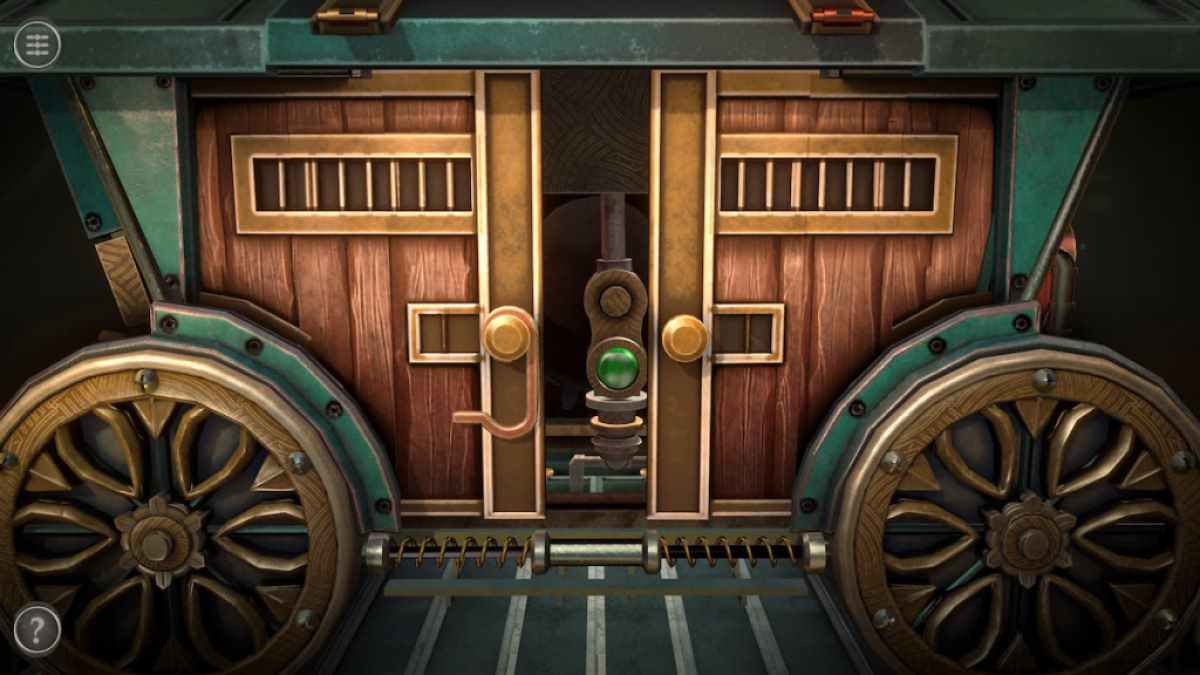
The last teaser is hide behind the front room access of the cart . Flip the lock and pull each door to the side to look into the room .
Screenshot by Pro Game Guides
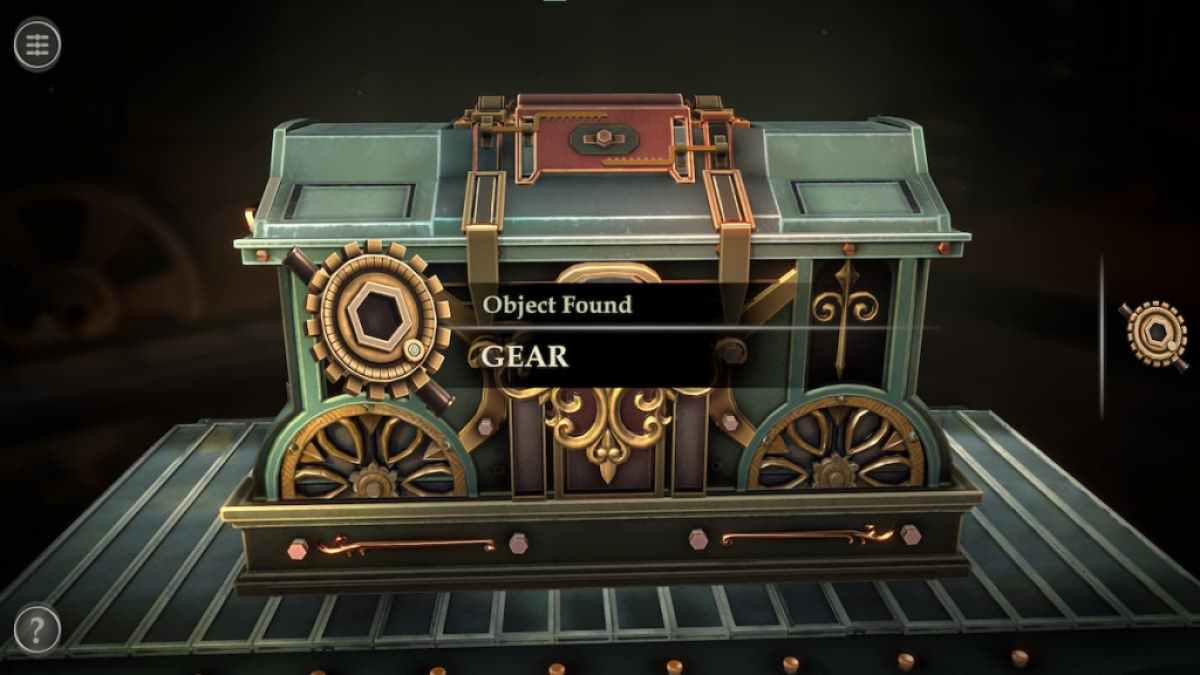
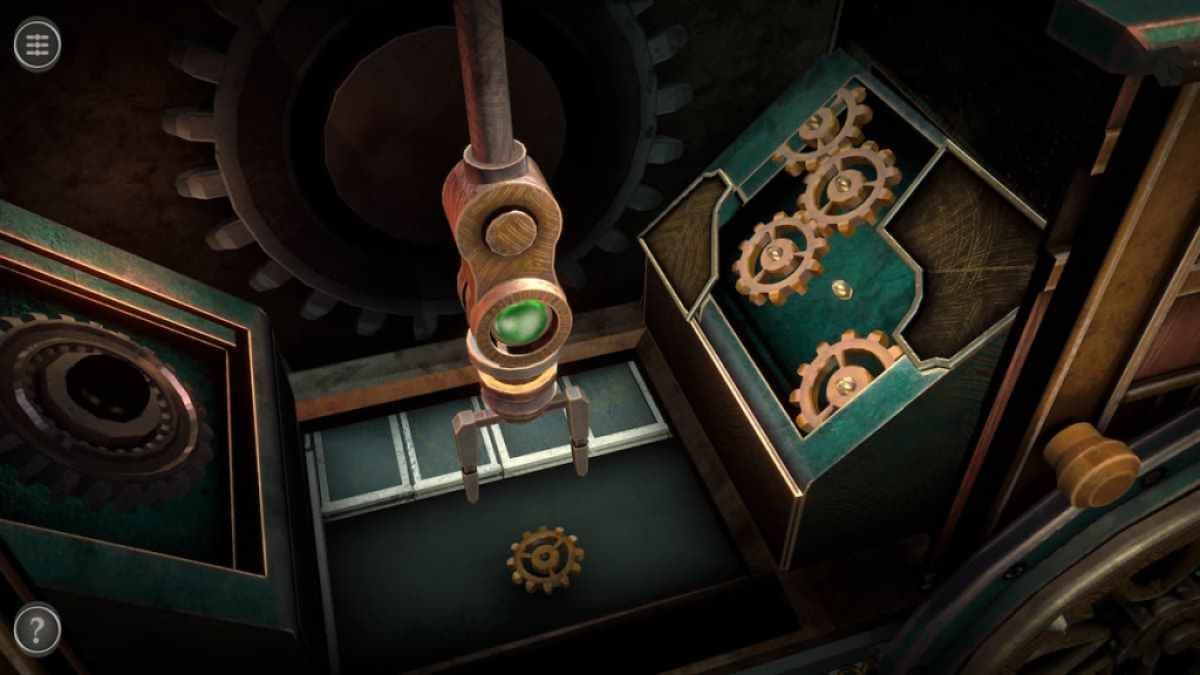
This elbow room has a chela in the center and spaces for three missing gears on the right side of the way . The goal of the puzzle is to place the missing three gears into their places . Each gear is in a hidden compartment beneath the story that appear for a myopic window of clock time as the conveyor belt rotates . To snap up a gear , you need to tap the green release on the nipper so that it can move down and pick up the gear before the compartment closes .
When all three gear mechanism are contribute , a compartment will open containing the Mechanical Console .
Picking up the Mechanical Console take away you from the third room , then unlock the fourth one .
Screenshot by Pro Game Guides
Fourth room puzzles
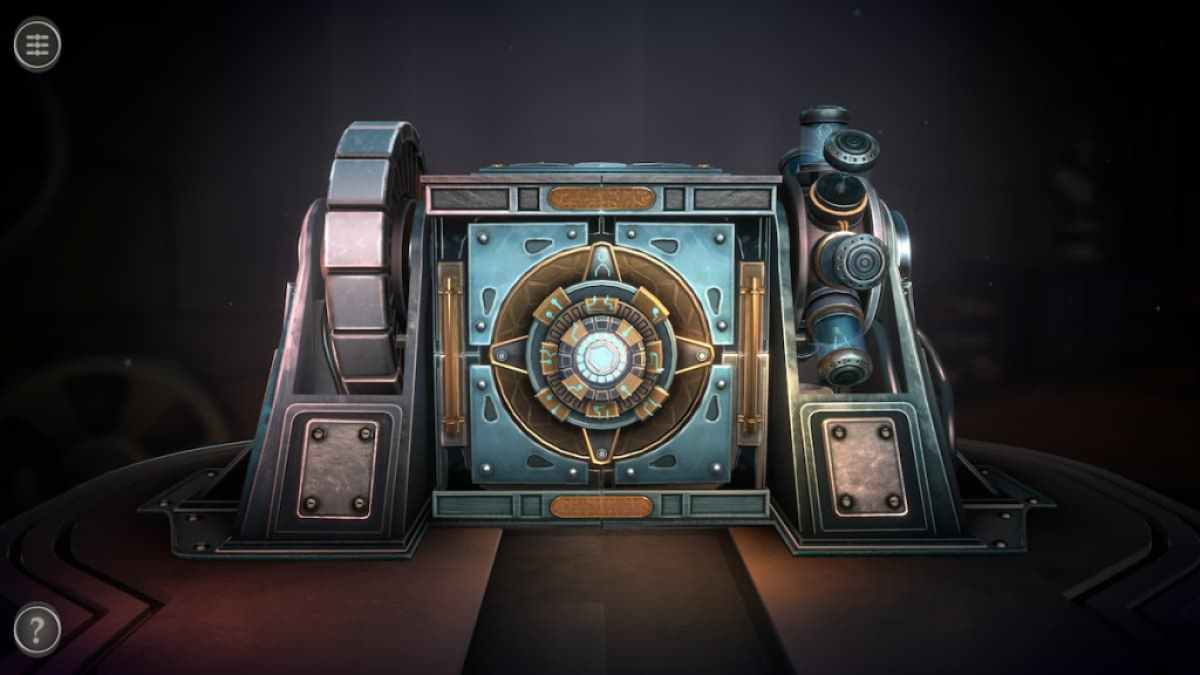
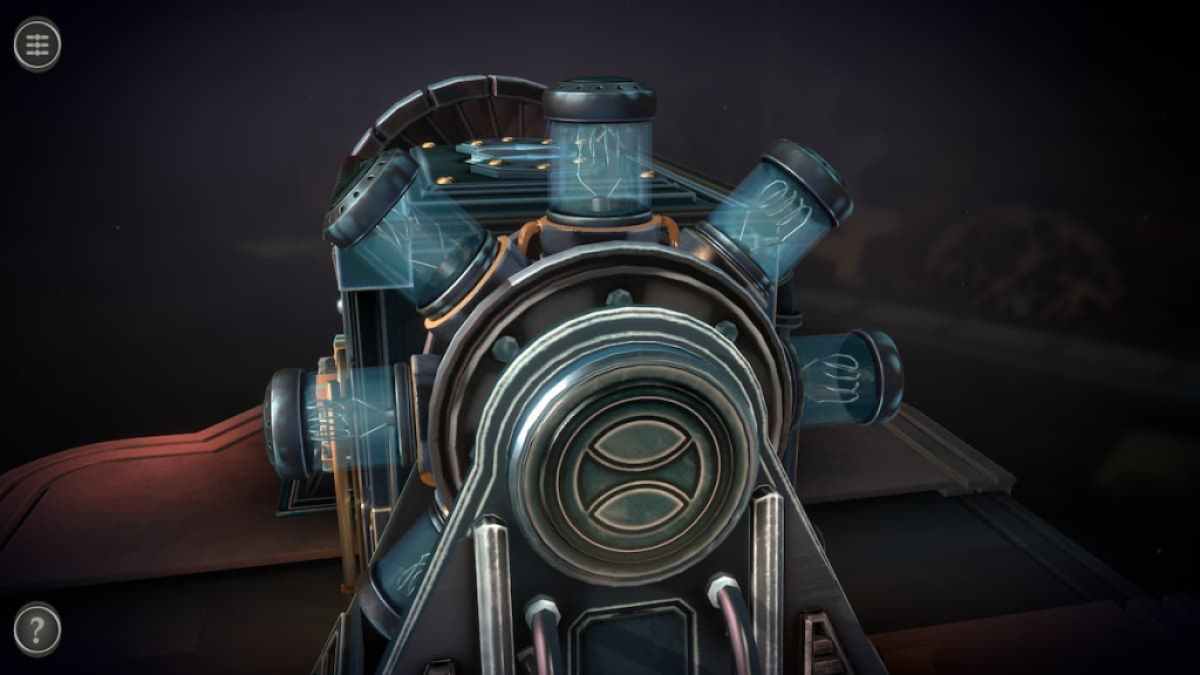
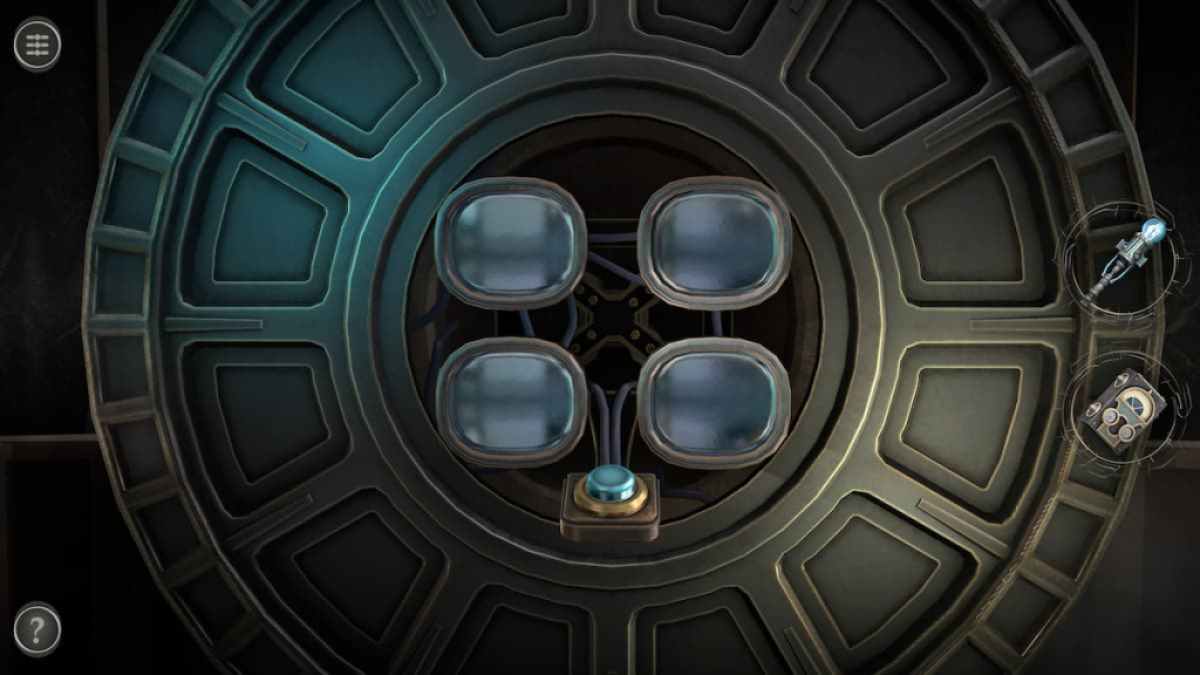
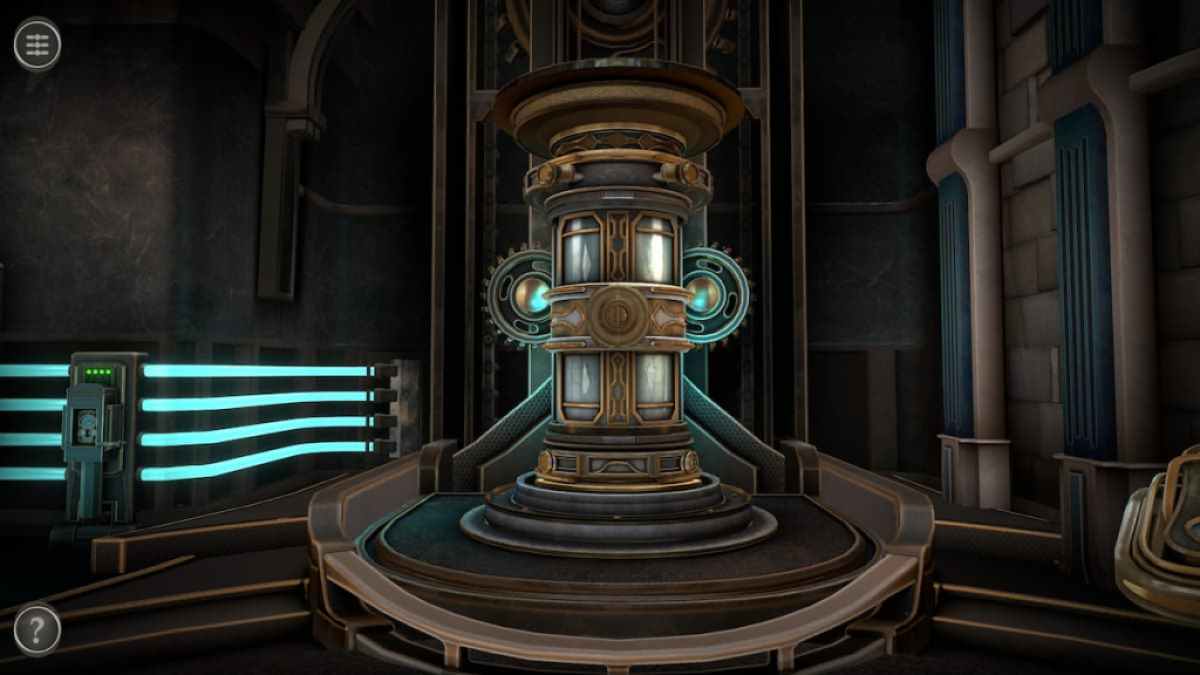
The fourth room displays a scientific regular hexahedron as a box .
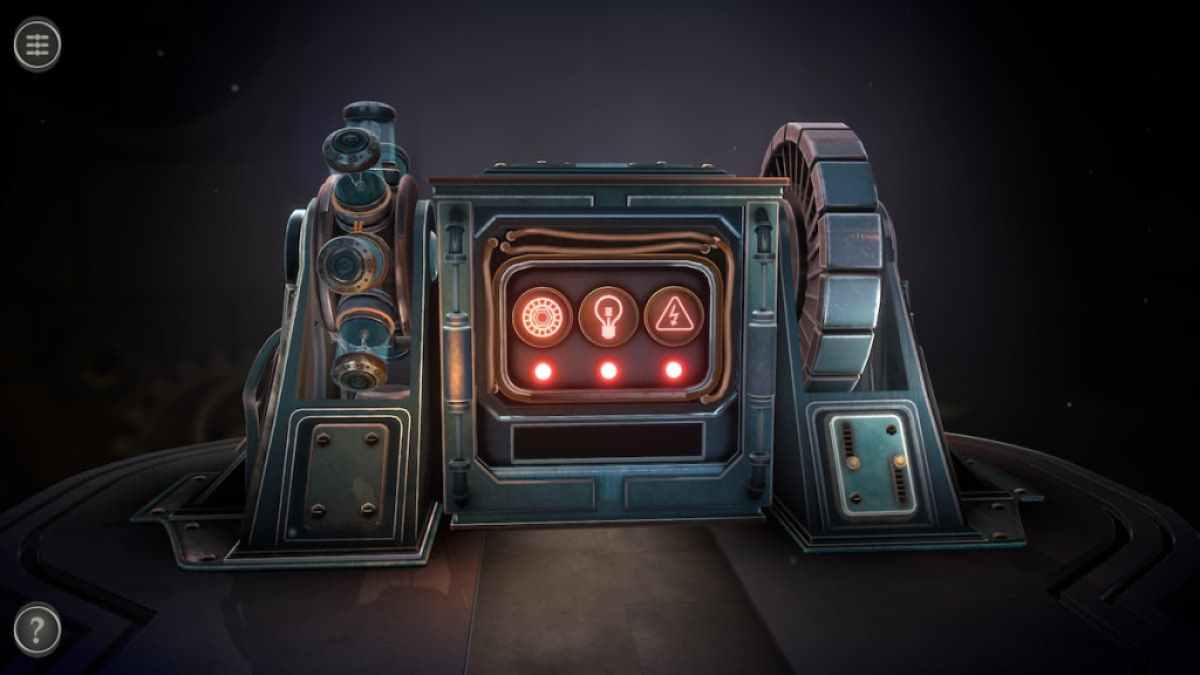
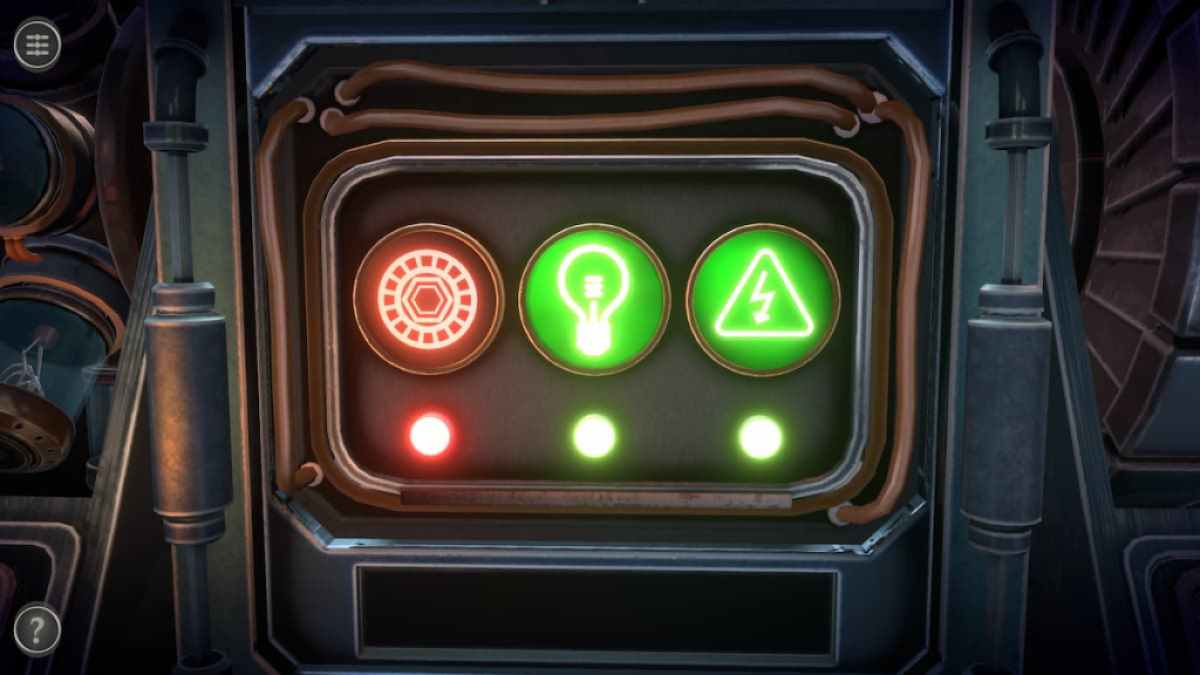
Looking at the back of it reveals three deactivated lights . You ’ll need to turn over each light green to continue on .
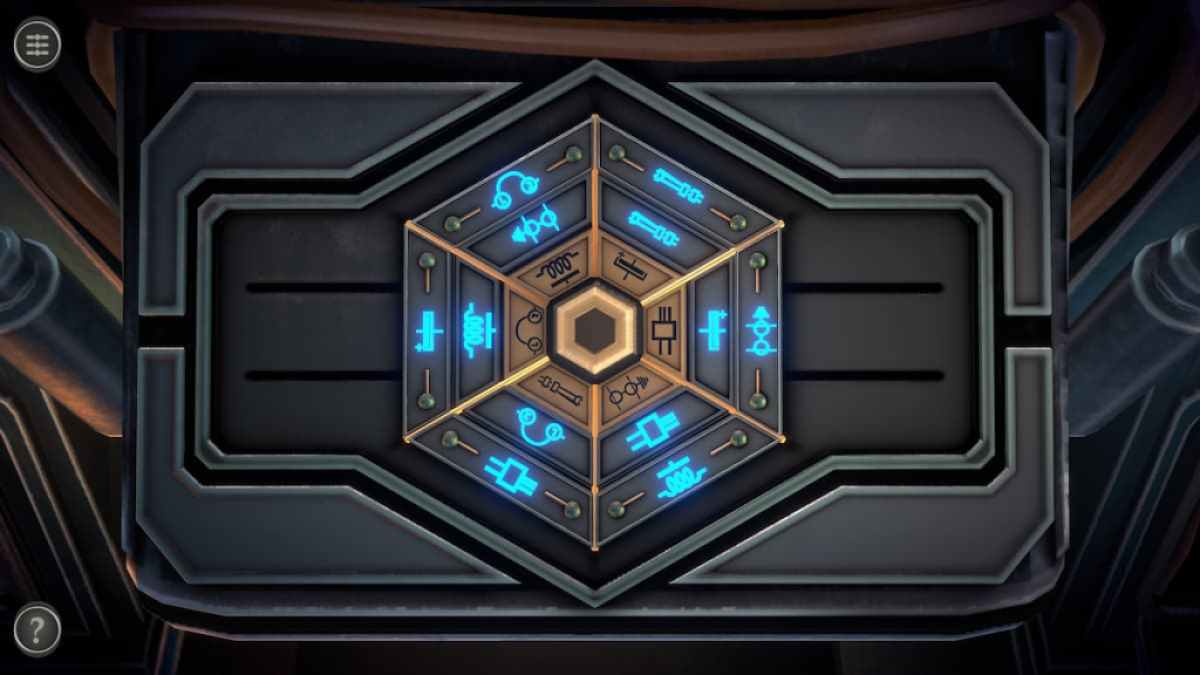
Before working with the actual lightbulbs , you ask to fill out the puzzle at the top of the box .
Screenshot by Pro Game Guides
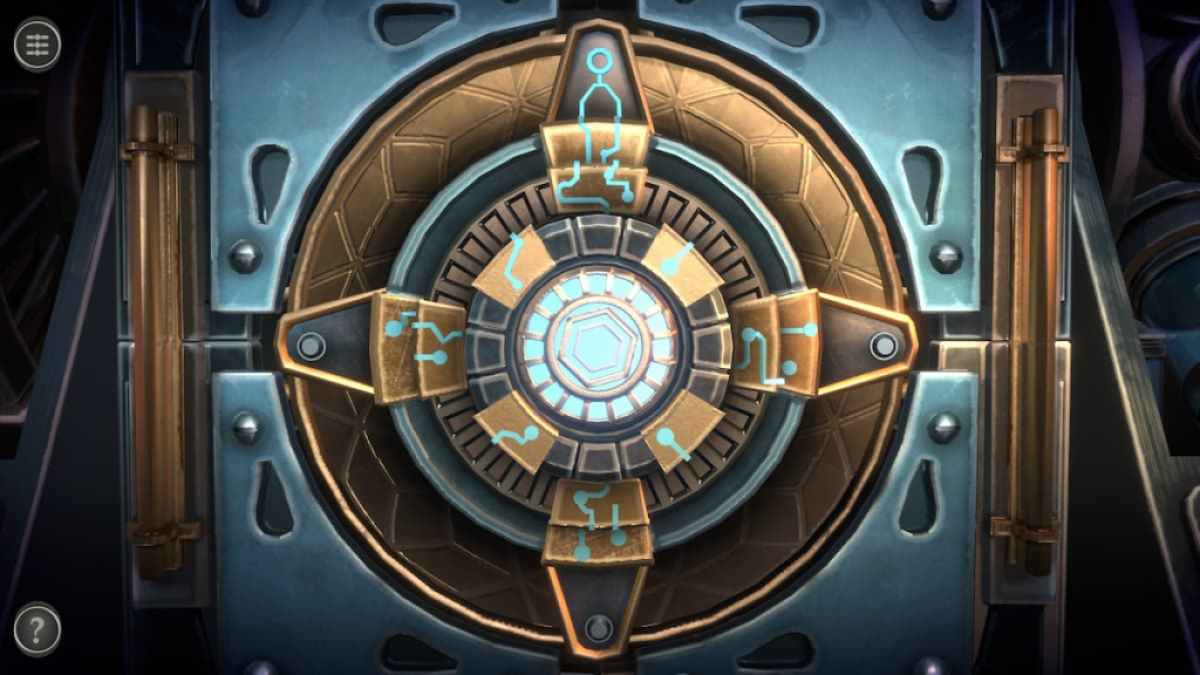
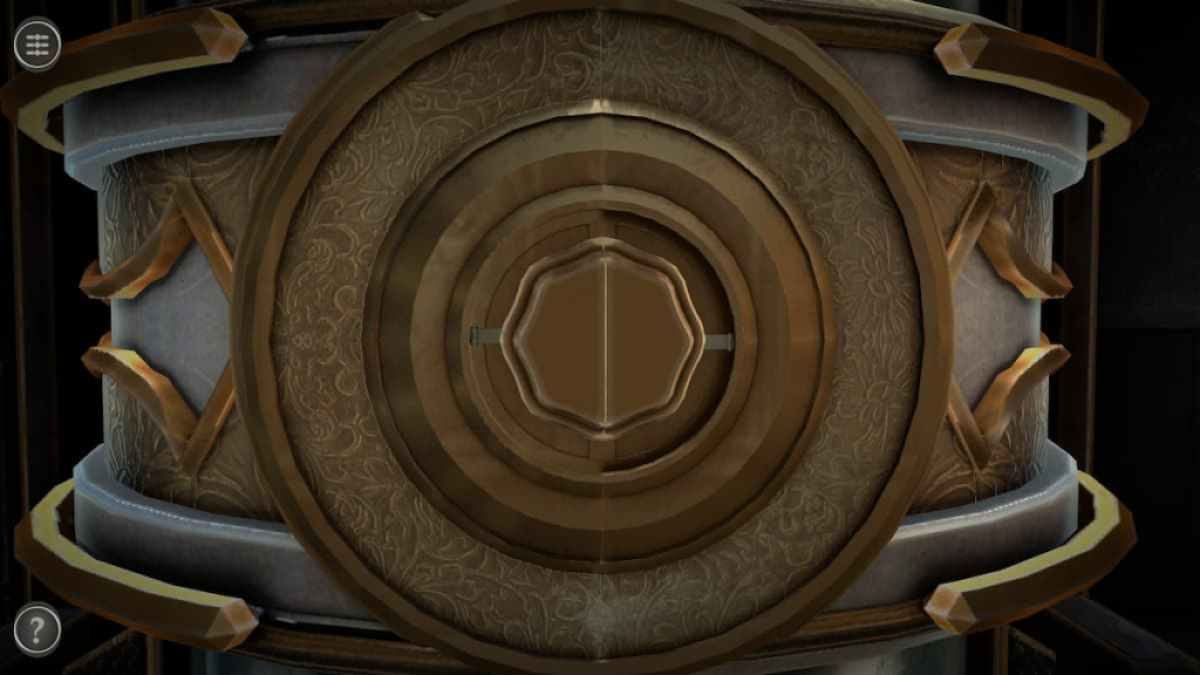
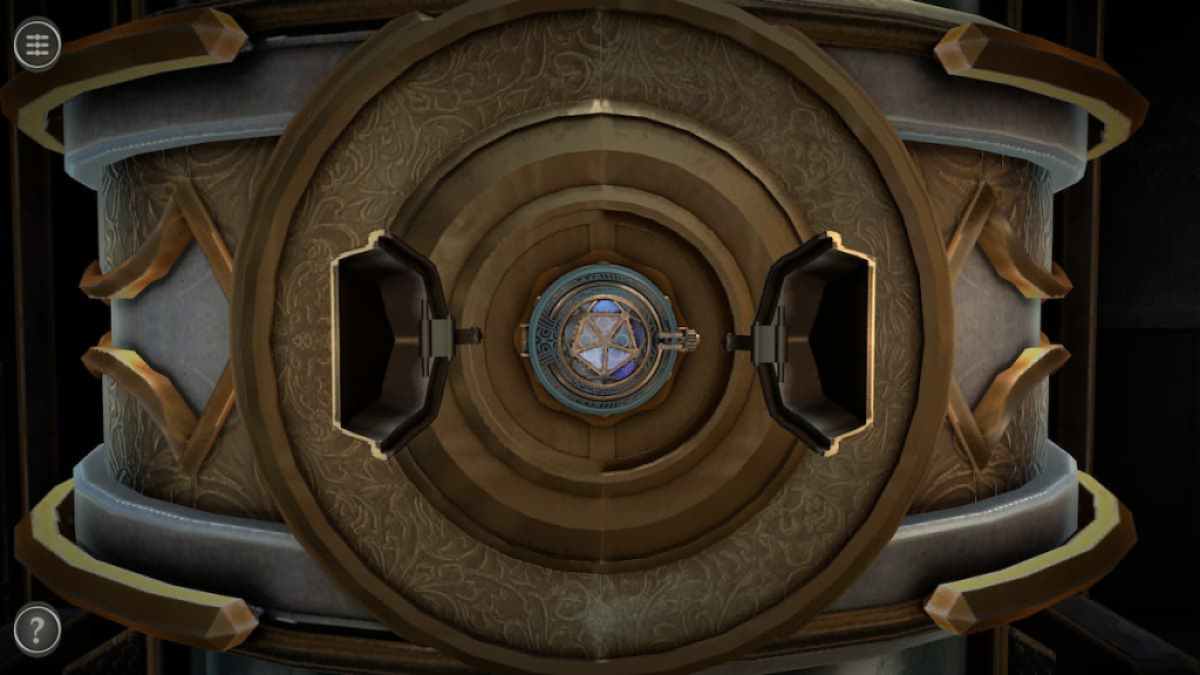
go around each of the external embodiment until their gaps face the inside . This will cause the hourglass in the sum to get up , revealing a electric light matching those on the bicycle to the right .
revolve the rack shows that one of the light bulb is missing .
invest the Lightbulb item into this hole .

Screenshot by Pro Game Guides
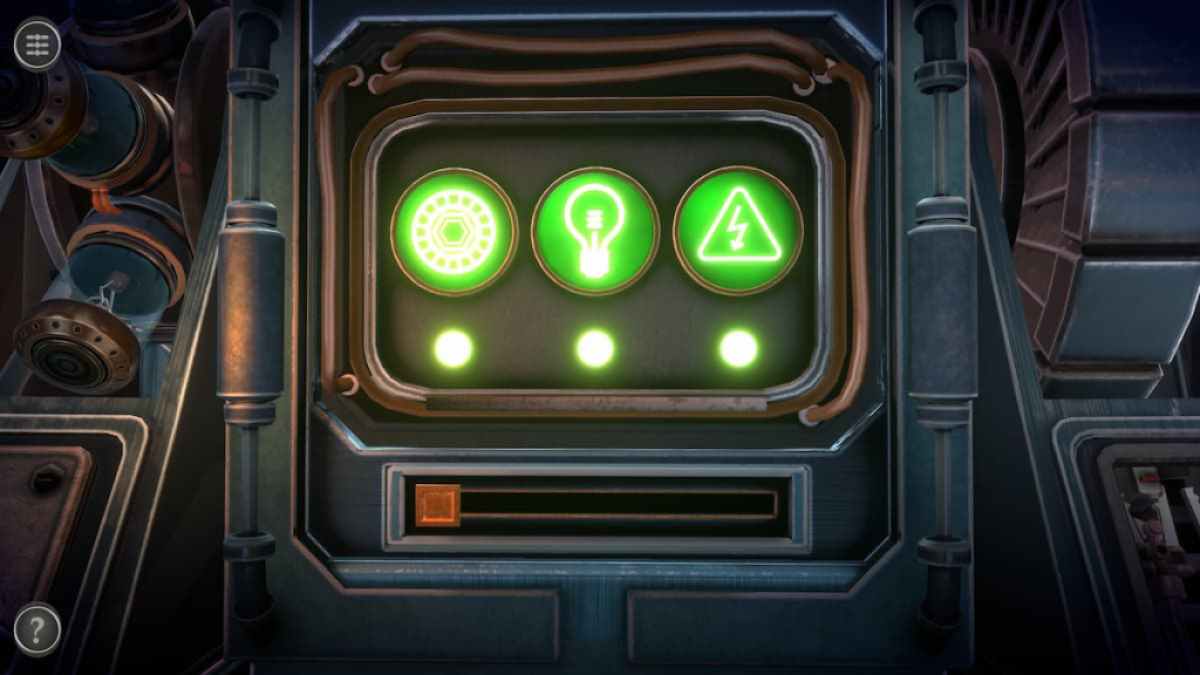
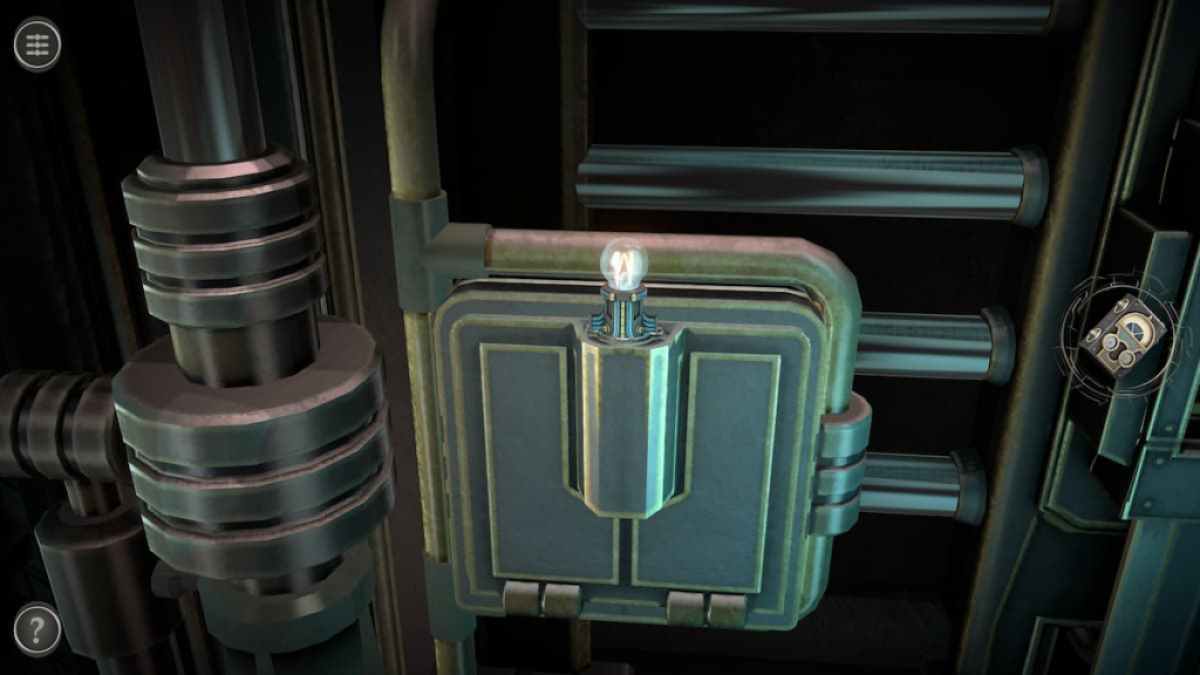
This will light up the lightbulb light in the center .
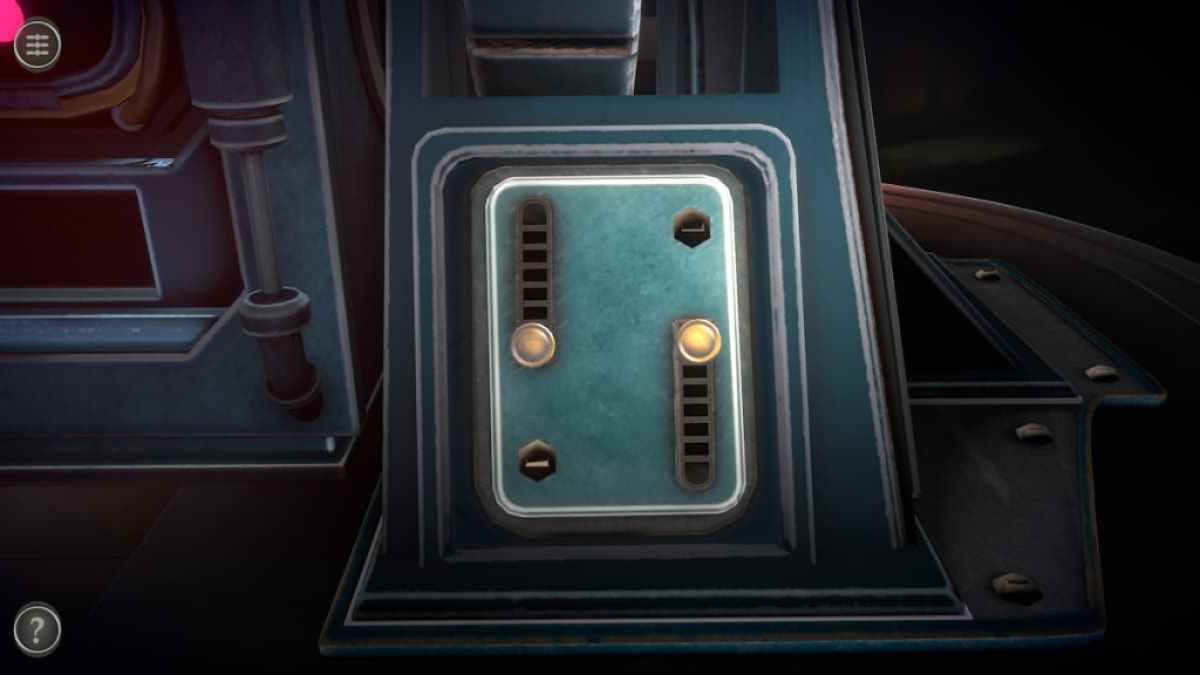
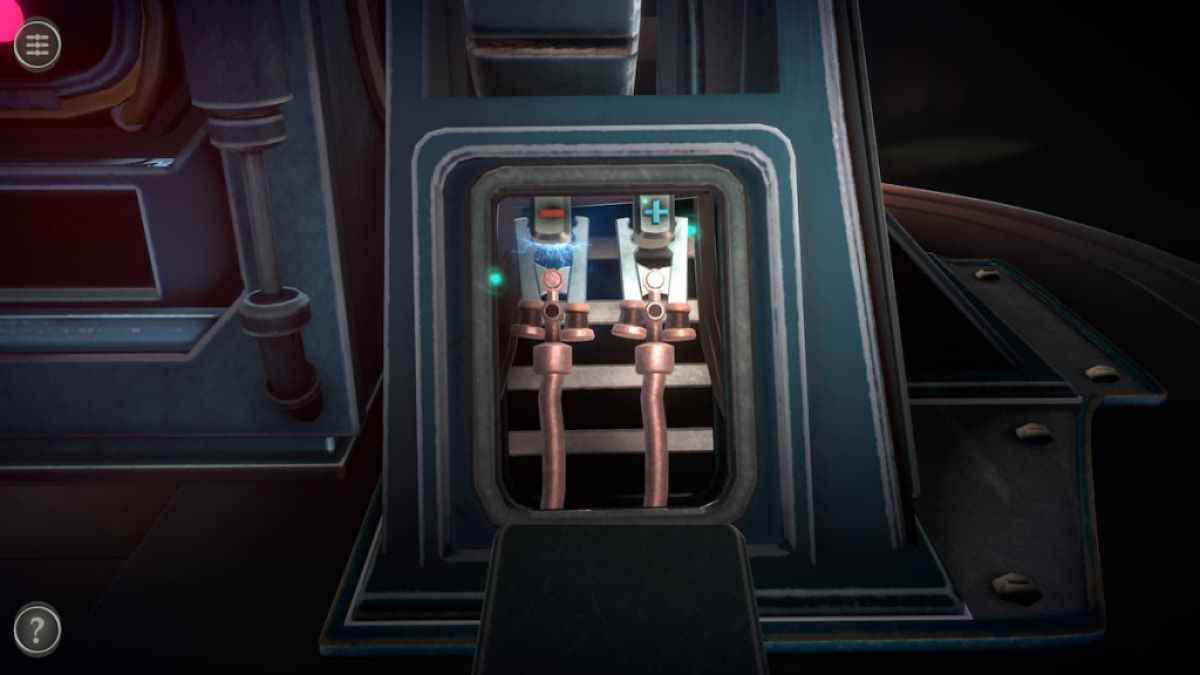
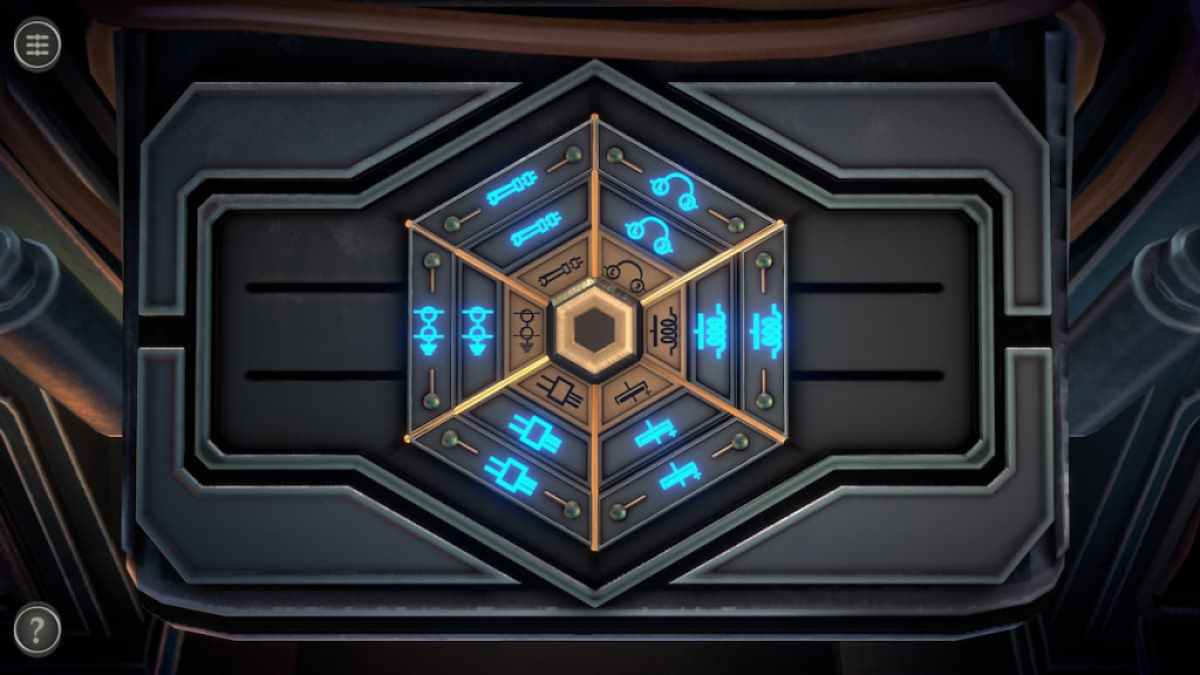
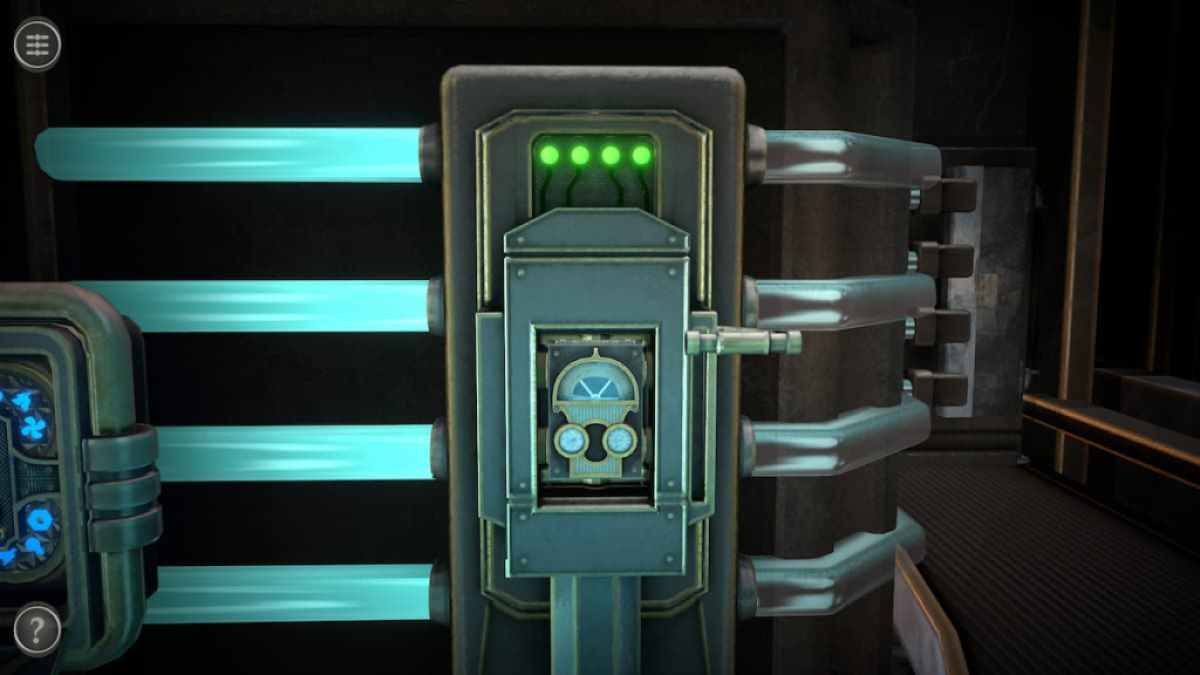
The puzzle that spark the power light is on the back correct corner of the box . Pull each of the slider to launch the compartment .
Connect each of the jumper cable television to the electric mechanisms flat above them .
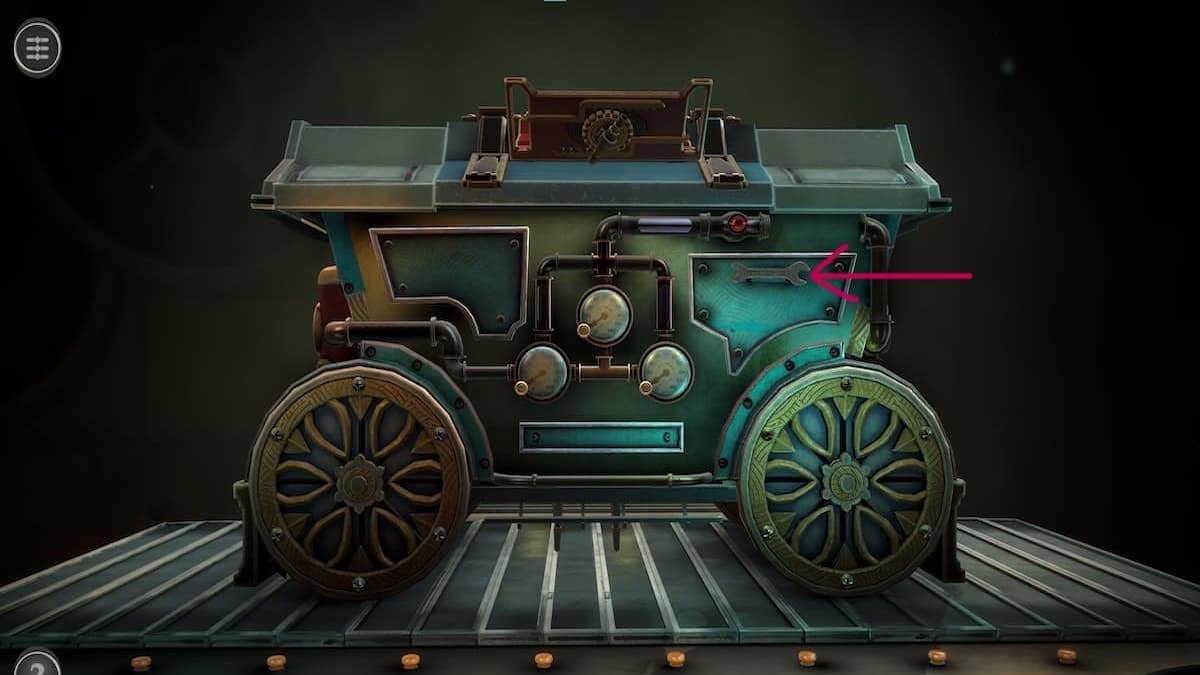
Image by Pro Game Guides
This will turn the brightness on the right green .
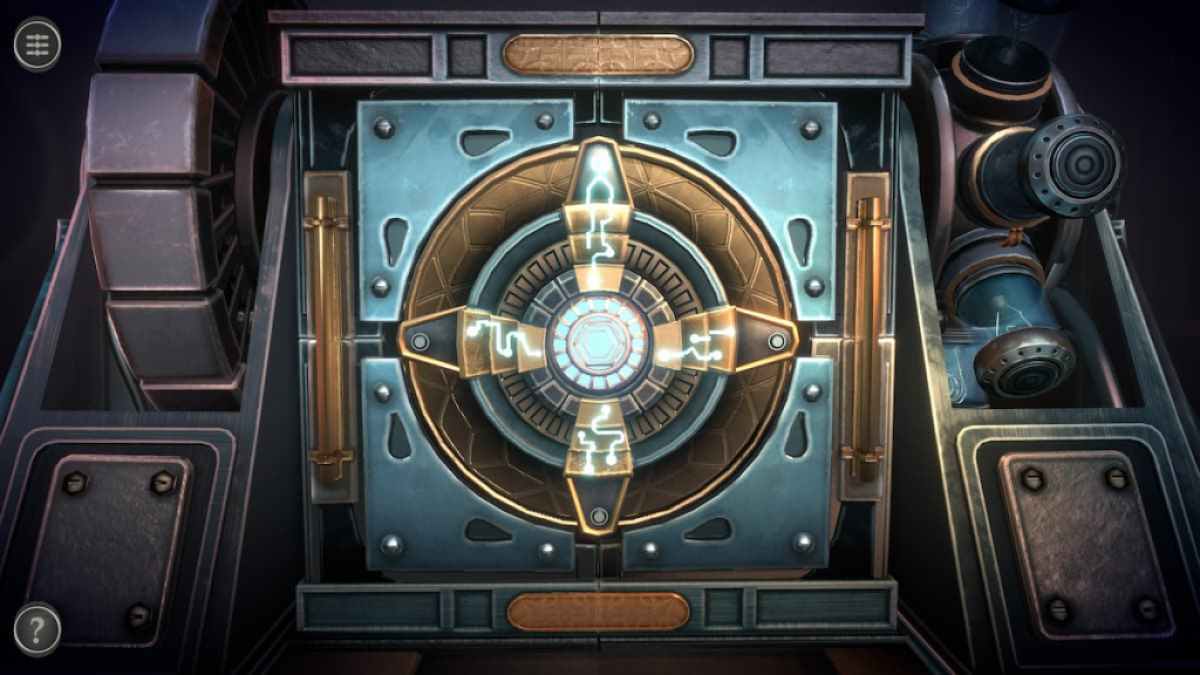
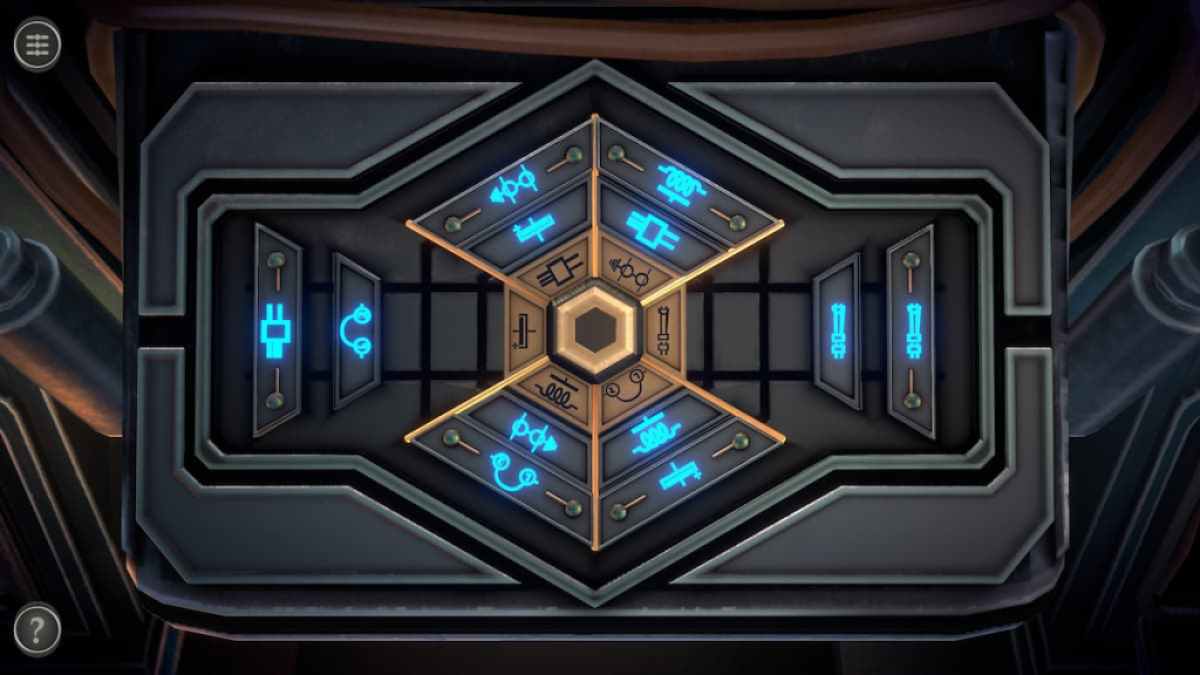
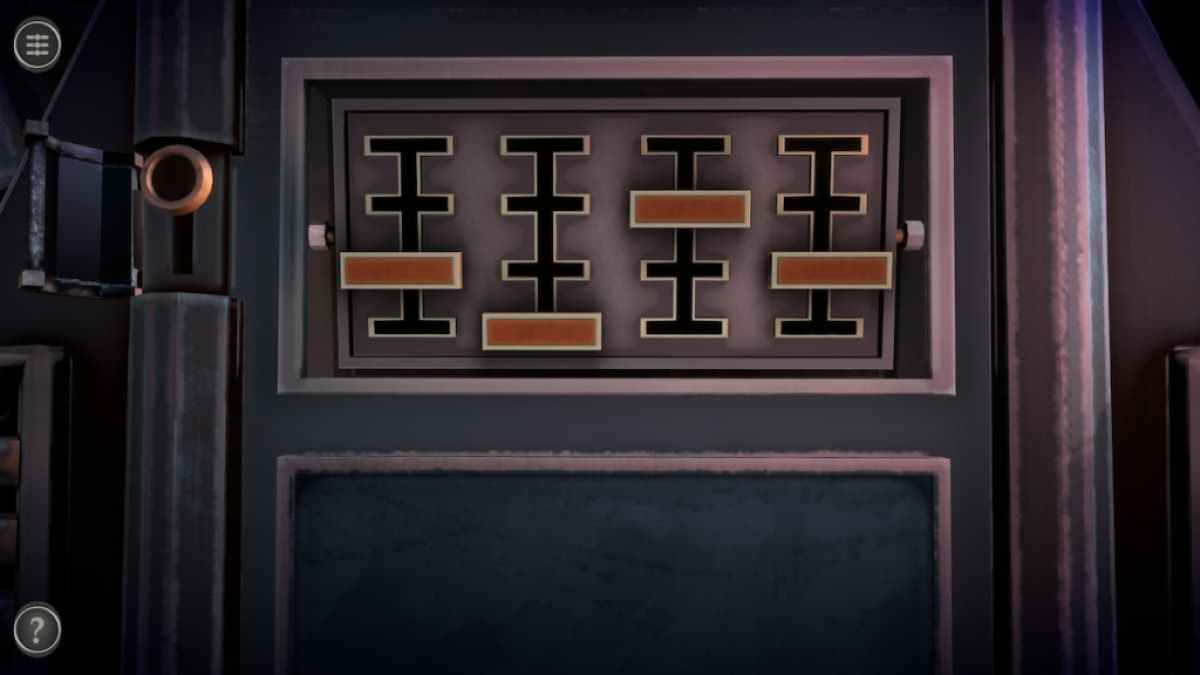
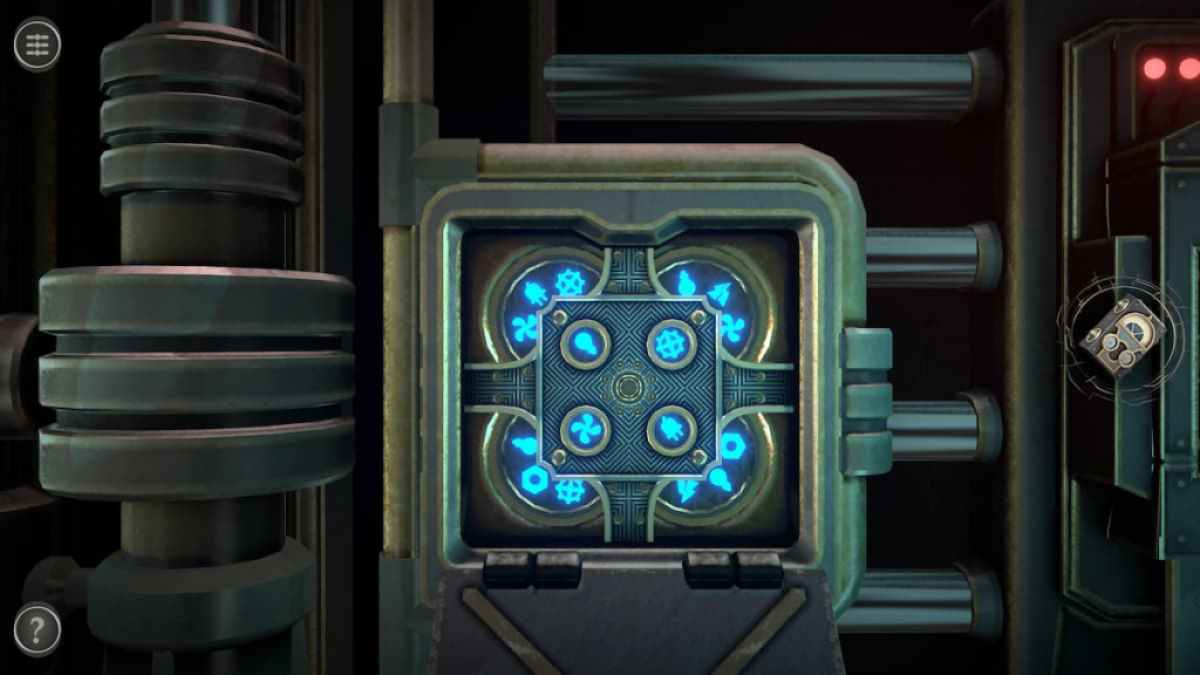
To activate the terminal light , we need to do the puzzle on the front of the cube .
commence by aligning the KO’d dustup to the pathway at the top of the puzzle .
Screenshot by Pro Game Guides
Then align the two inner course .
This turns the final light unripe and unlocks a yellow-bellied terrapin beneath the lights . Slide it to embark on a sliding symbol puzzle .
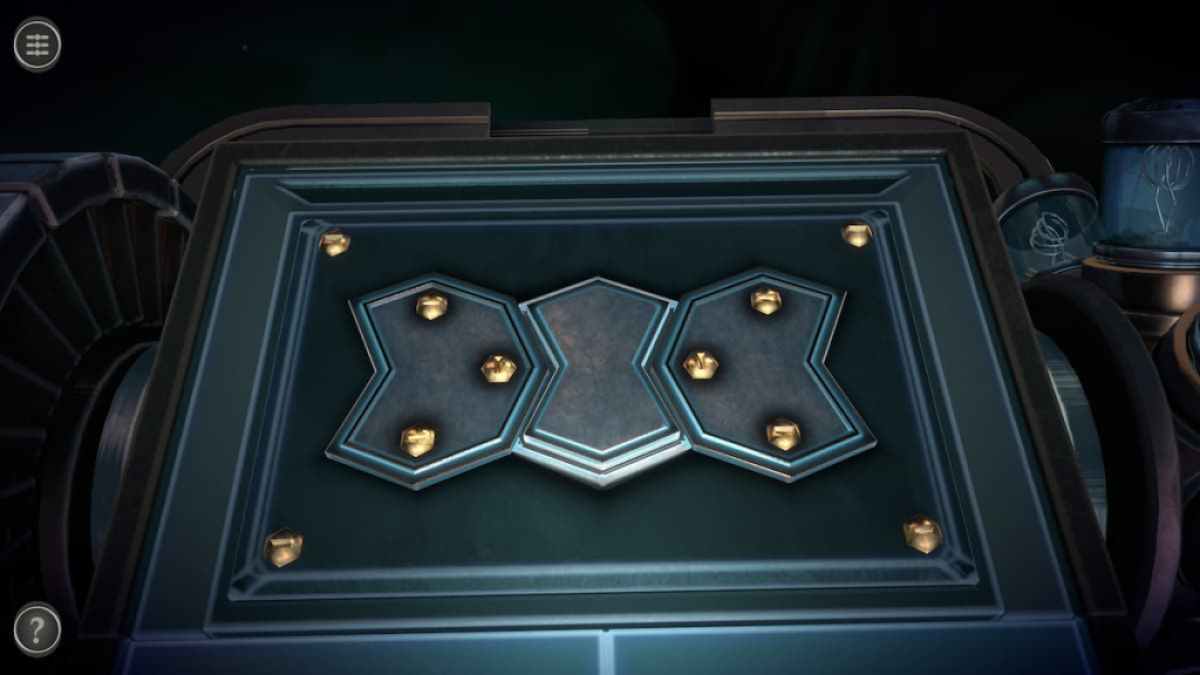
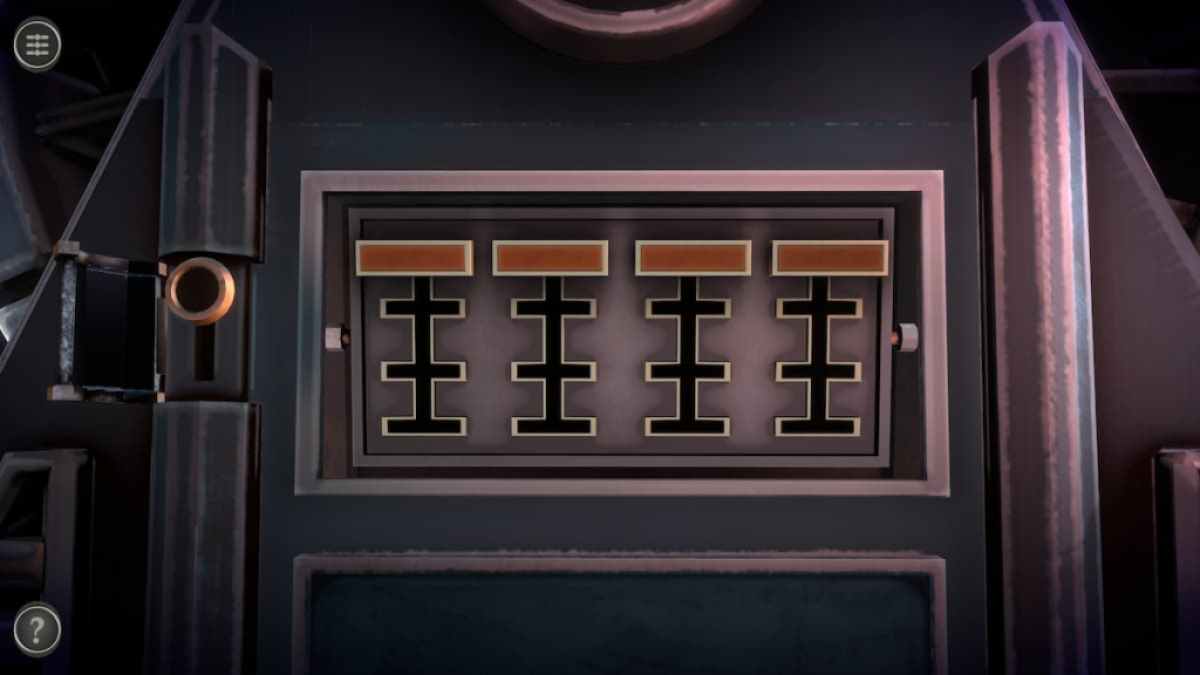
Turning all of the igniter green unlocks this teaser . The center has six symbols , with each symbol having a short piece and a long piece matching them .
Screenshot by Pro Game Guides
Two of these piece can be stored on the odd and correct slope of the puzzler . There can be two diminished , two turgid , or one of each .
The goal of the puzzle is to get the two pieces in each quarrel to match the objet d’art in the center .
Once every musical composition is in its rightful space , the box will undergo a transformation .

Screenshot by Pro Game Guides
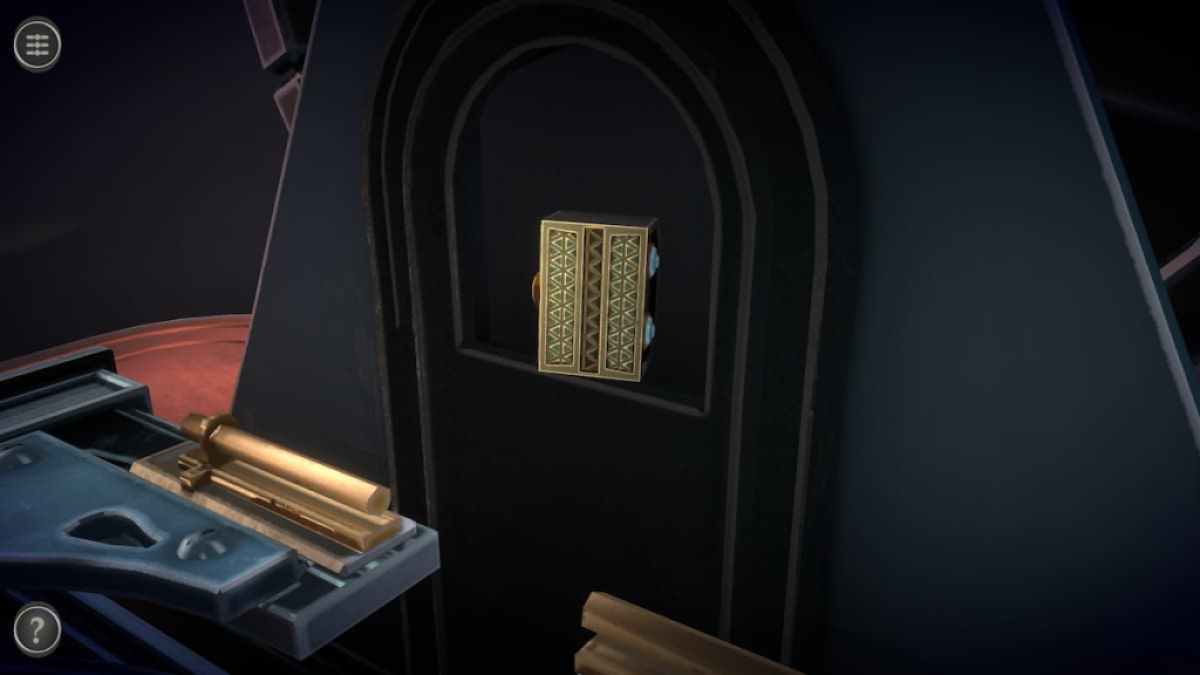
On the odd side of the auto , a minor puzzle contain four red yellow-bellied terrapin can be seen . Rotate the modest mechanism on the unexpended side of the puzzler to divulge a black button .
exhort the clit to toss the mystifier , which reveals the answer for it .
Press the push button again and move the four sliders into locating to give an electrical way out puzzler beneath them .

Screenshot by Pro Game Guides
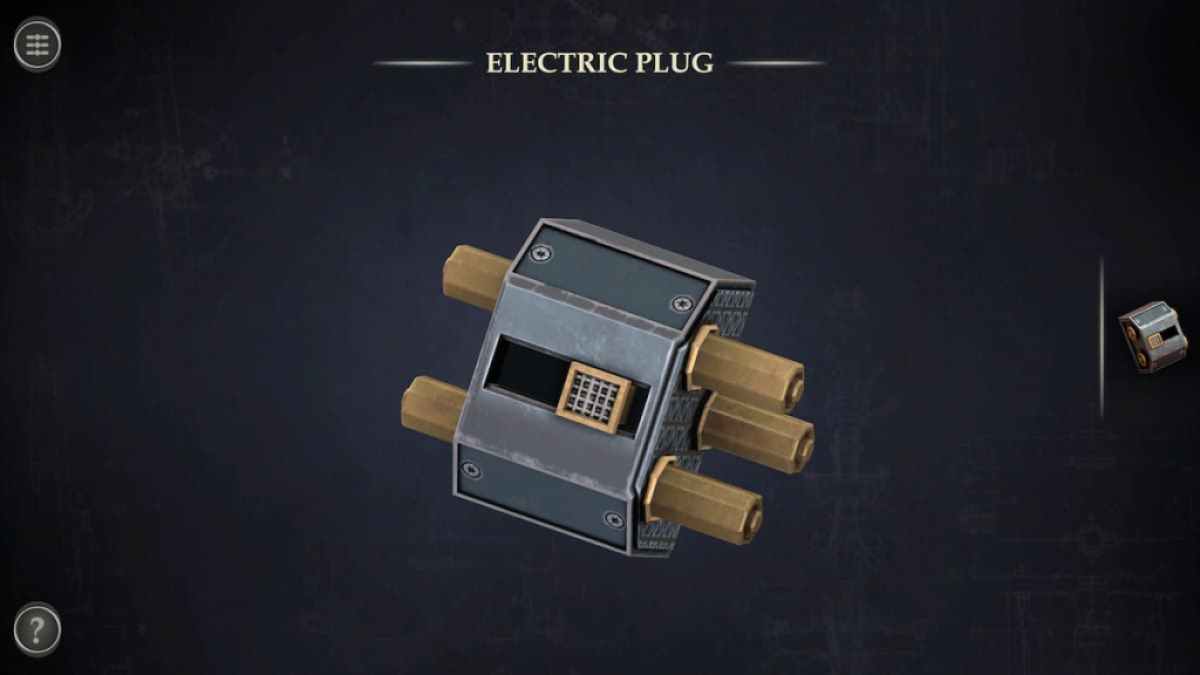
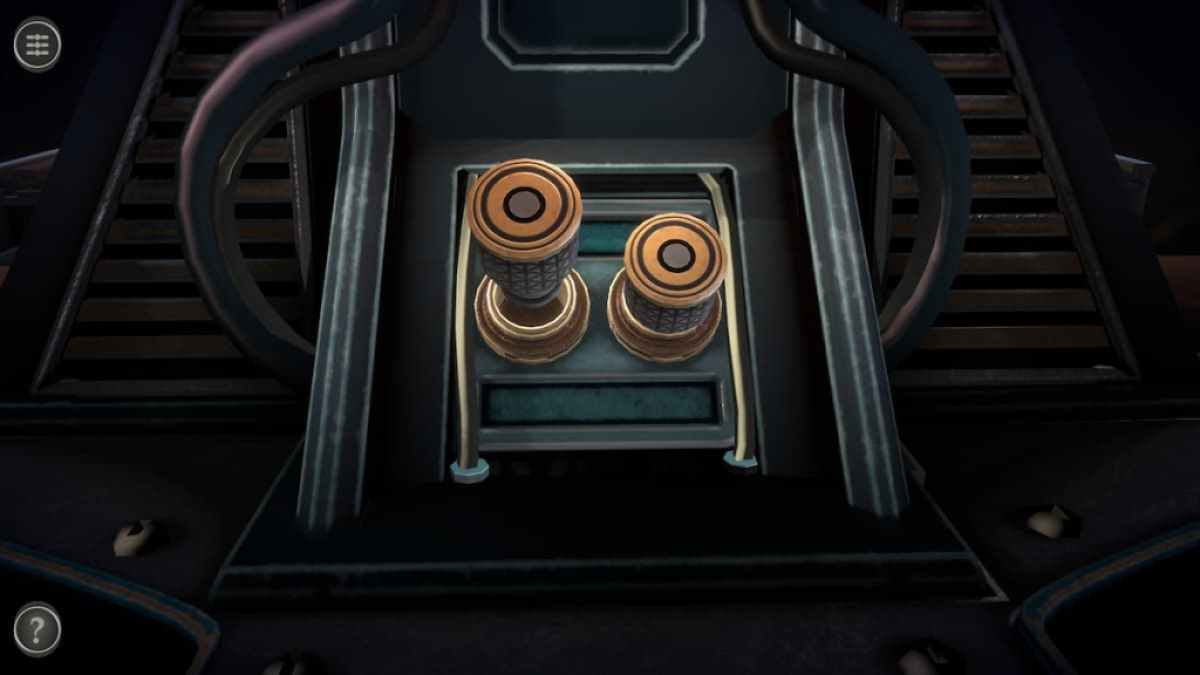
Before continue on , revert to the clump of plasma in the shopping mall . The Electric Plug can be found on one side of it .
While you ’re here , grab the Fuse from the other side .
start the Electric Plug in your armory and push the yellow-bellied terrapin to the right .

Screenshot by Pro Game Guides
Now it can be added onto the remaining side of the electric puzzle beneath the sliders .
draw the handle to the left wing to plug in the hype and the outlet .
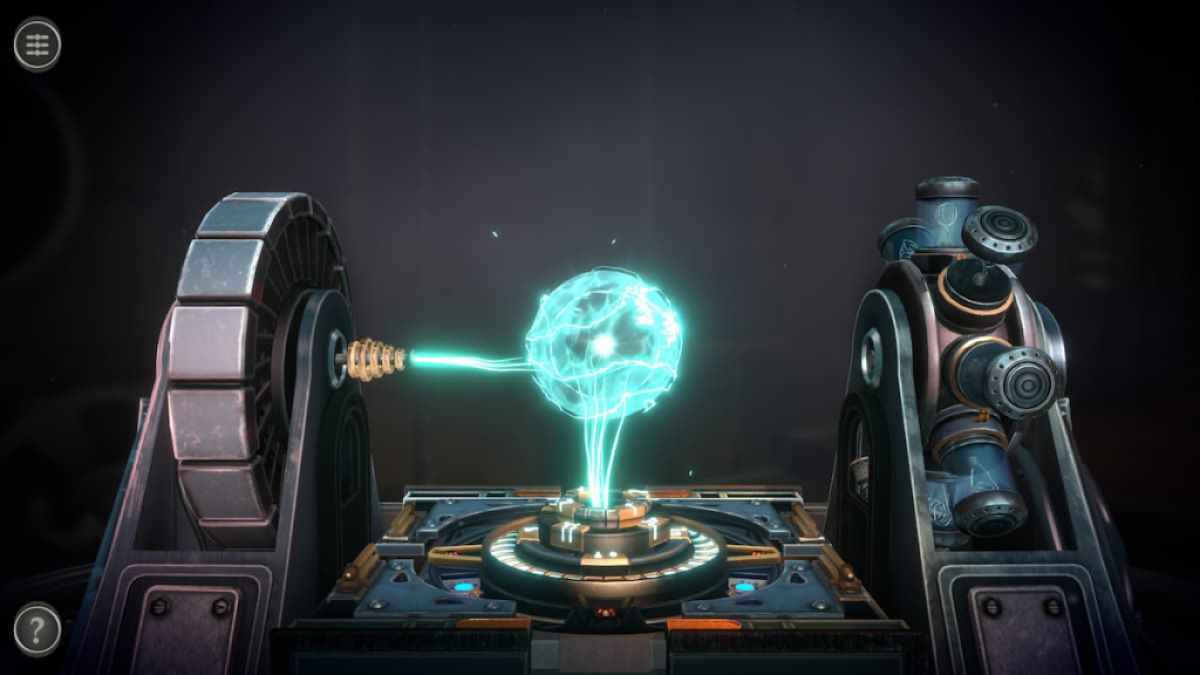
The left side will give notice a plasm ray of light at the ball in the center .
Screenshot by Pro Game Guides
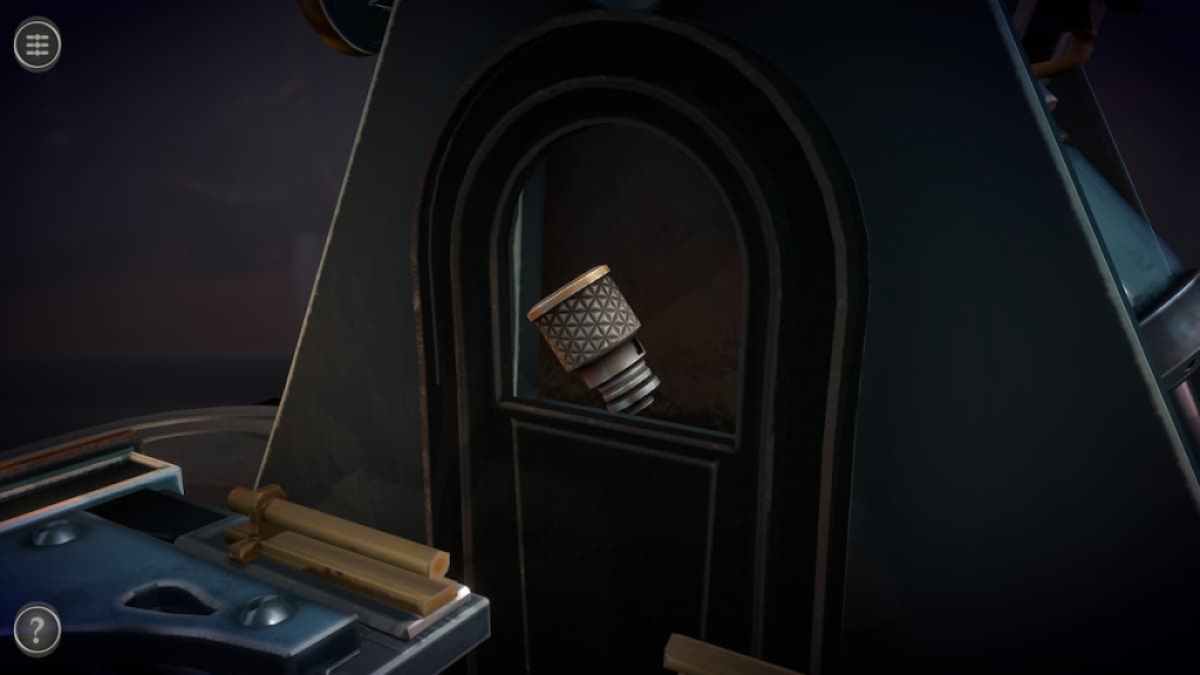
At the base of the correct side of the boxwood , there is a sparking plug with an empty slot to its left . come in the Plug into the empty spot .
This makes the right side shoot a beam of plasma at the glob in the center , turning it into a portal . A helping hand reach out of it , hold a Power Source . Take it to return to the chief room .
Completing the Chapter 2 main room
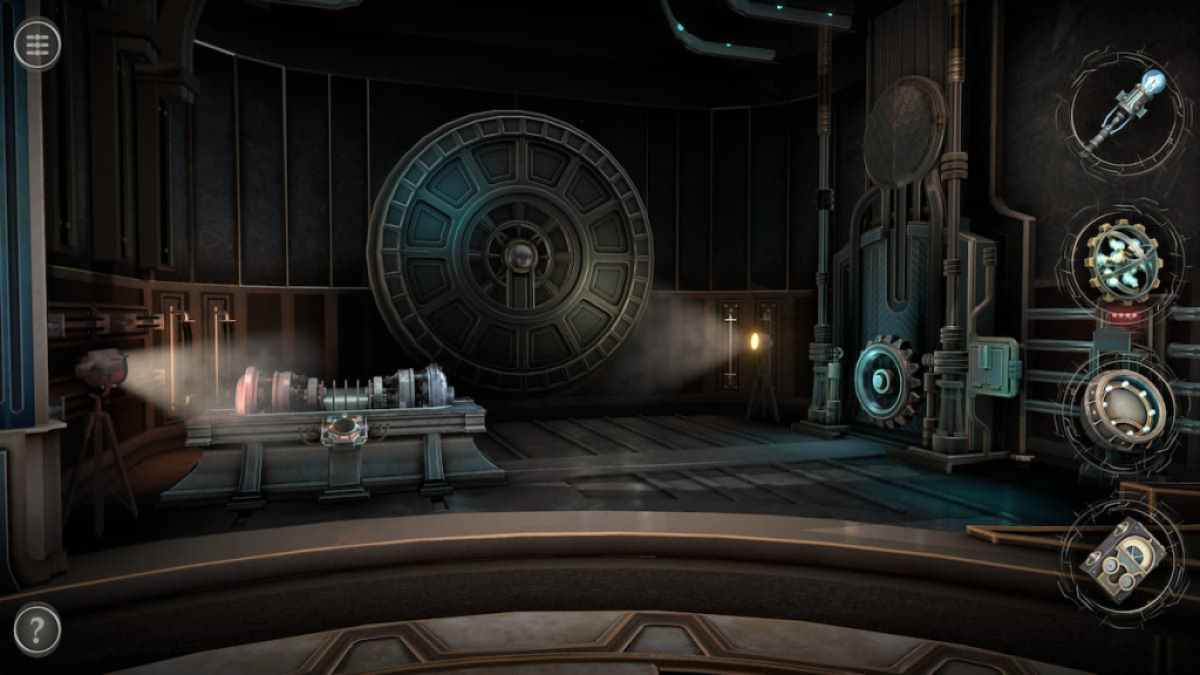
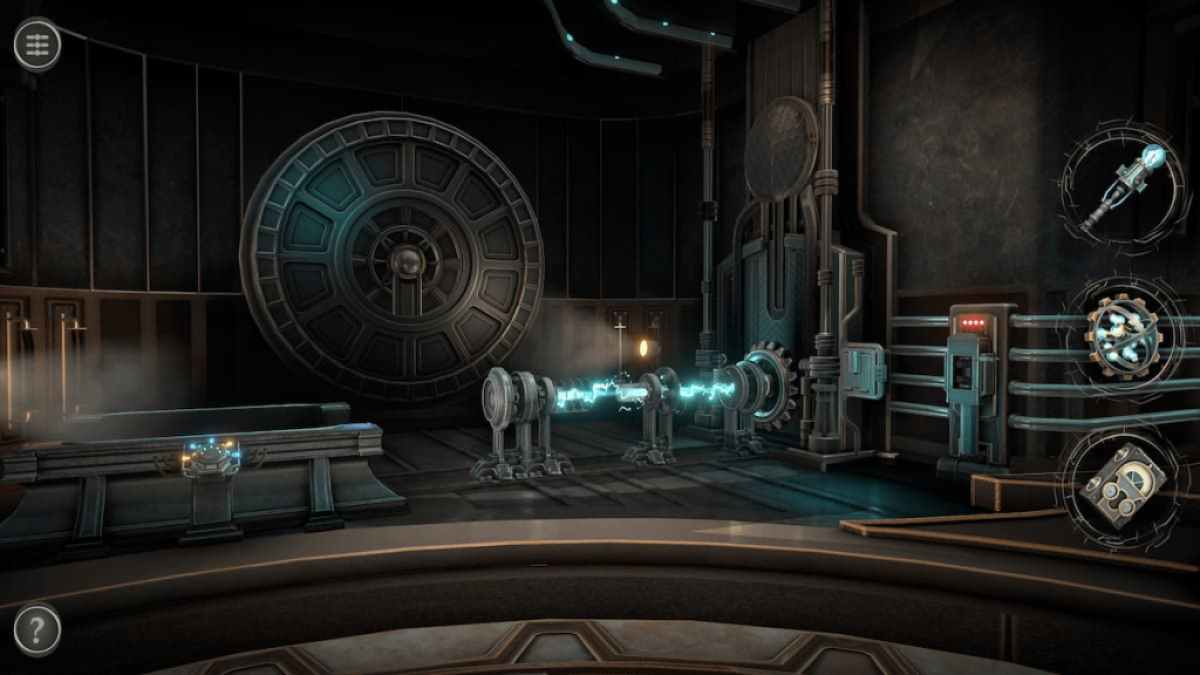
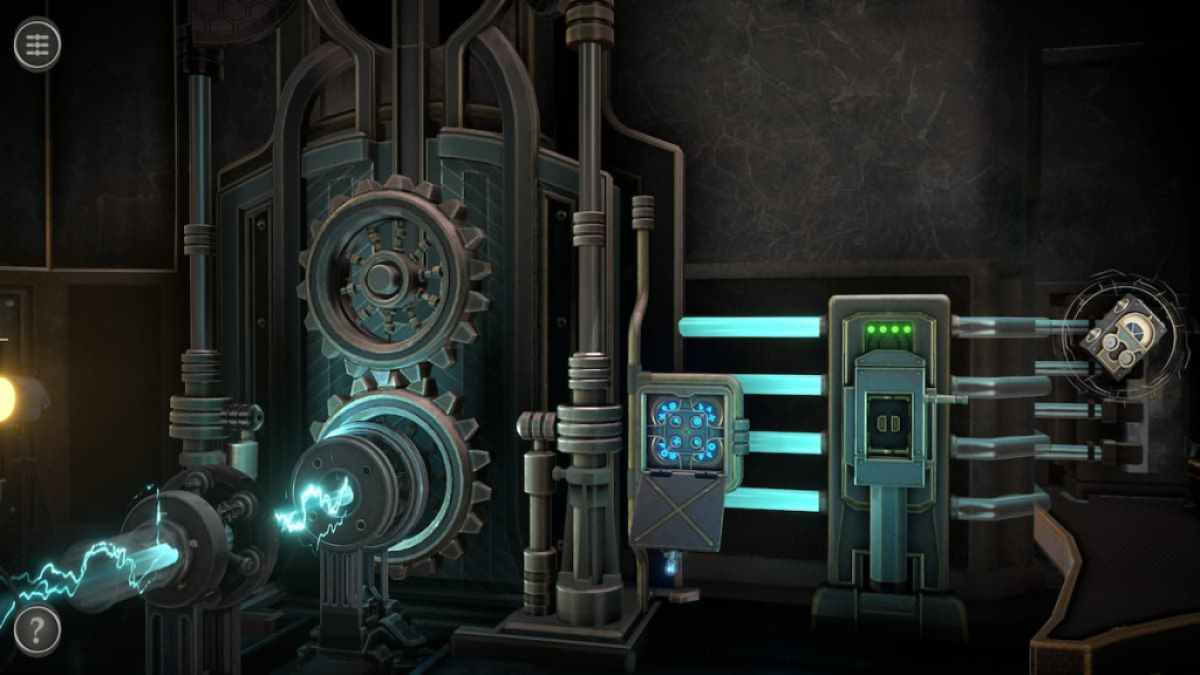
With all the small rooms nail , it ’s time to turn your attention to the elbow room within the main room .
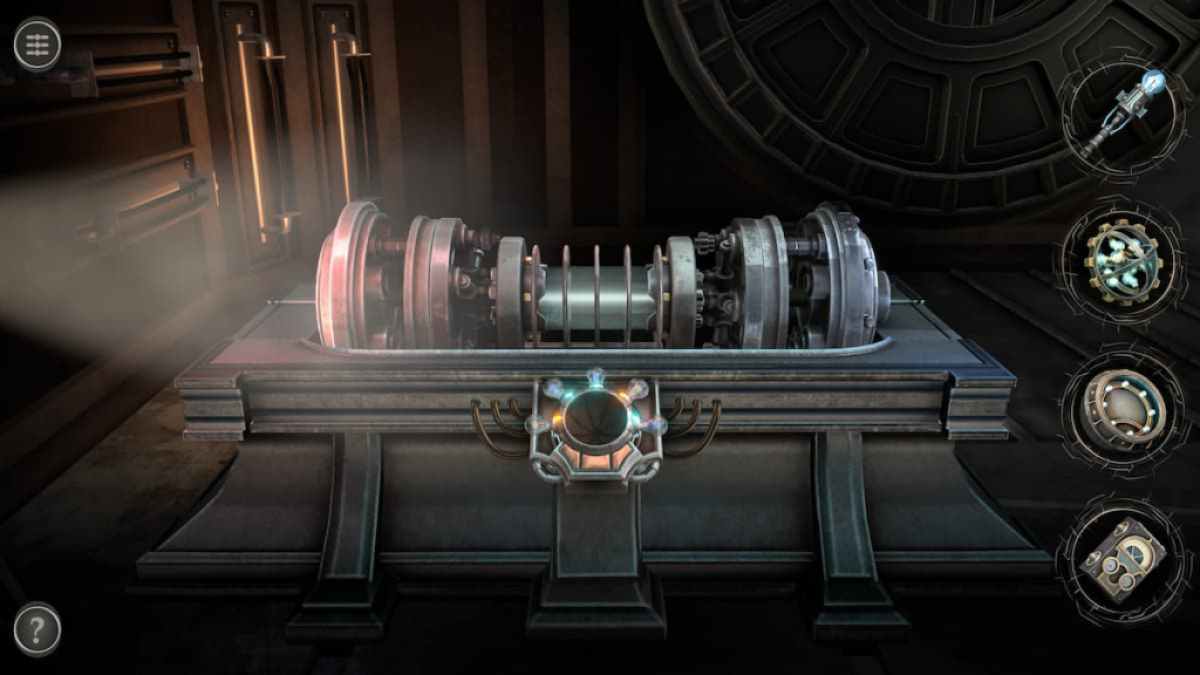
Start with the engine on the left wing .
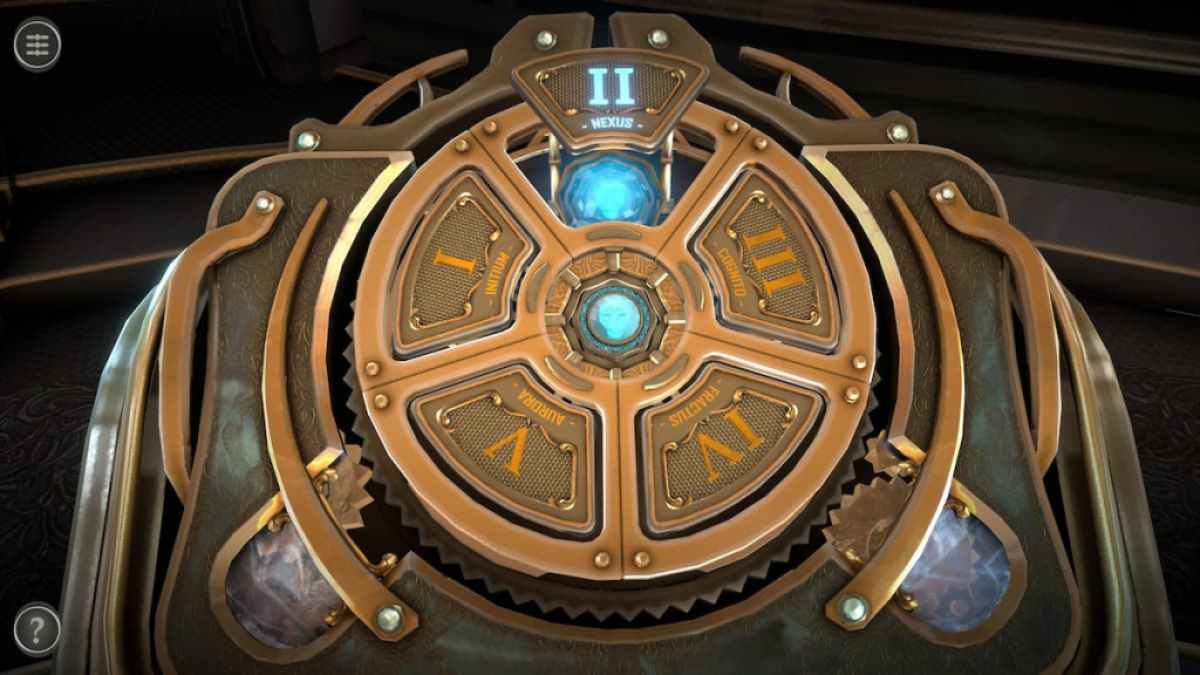
Place the Mechanical Console into the gap on the podium to begin the puzzle .
Screenshot by Pro Game Guides
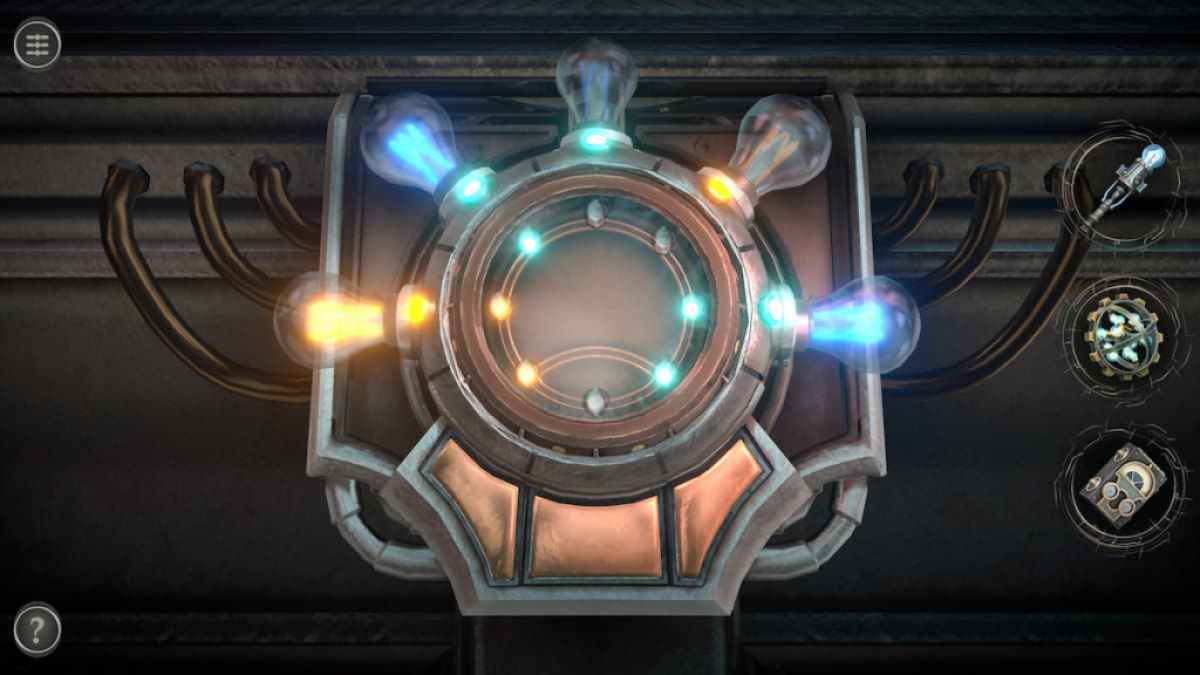
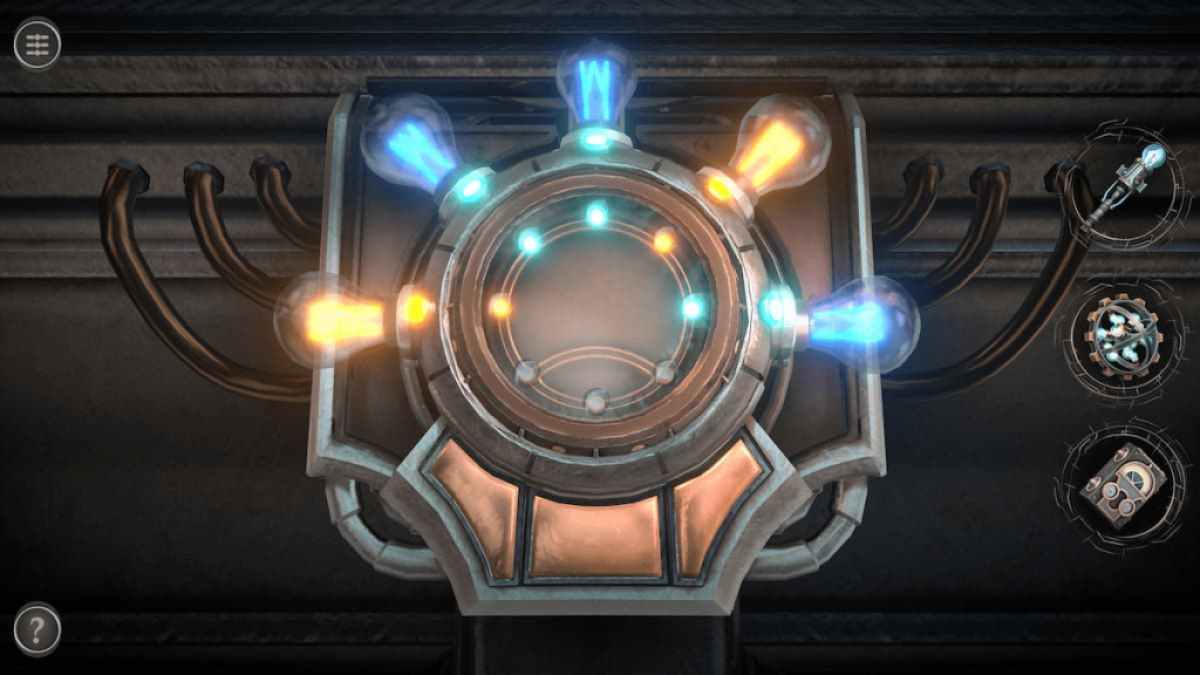
The unexpended and veracious buttons on the bottom can be contract to go around the key lighter clockwise and counterclockwise . The push button in the centre rotates the three bottom light around . The goal of the puzzle is to have the Inner Light in the heart touch the lightbulbs on the outside .
Doing so causes the engine to move and hit a beam of plasma into the mechanics on the right bulwark .
Related : Viking Ship Escape Walkthrough – Cool Math Games
Screenshot by Pro Game Guides
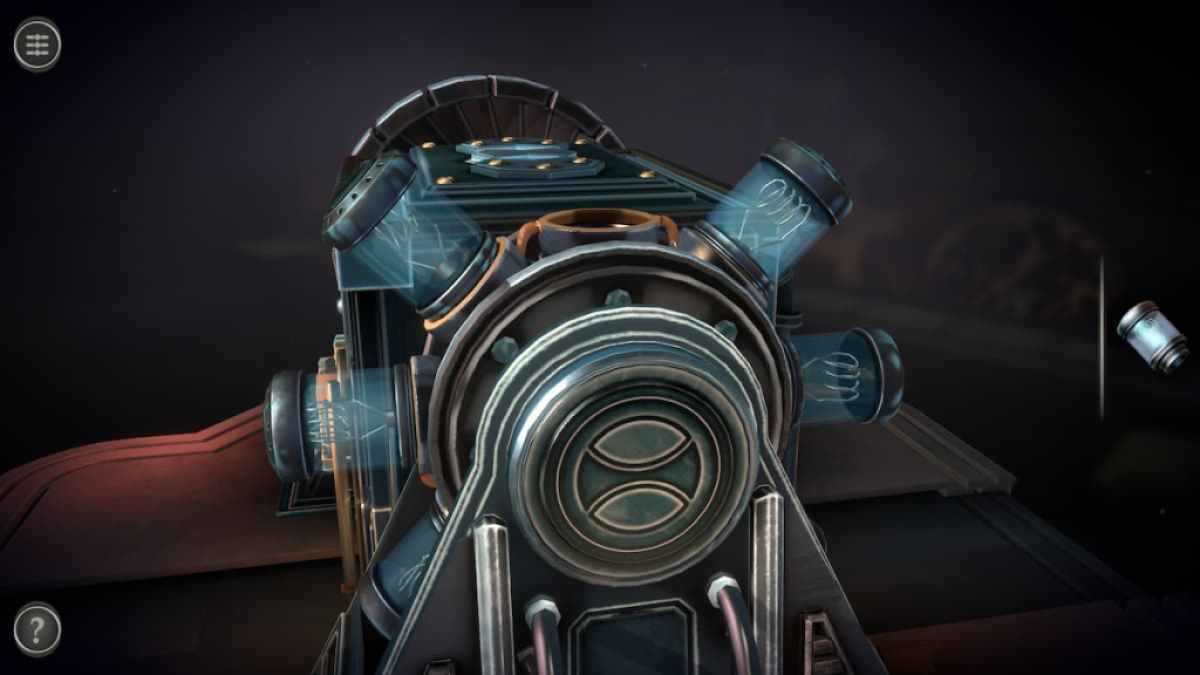
focalize on the puzzle on the bulwark .
turn out the gearing around the sphere to bring out an empty infinite .
Place the Mechanical Sphere into this empty spot to expel a set of four screens .
Screenshot by Pro Game Guides
flick the green button beneath the screens to make a symbolic representation pop up on each CRT screen . This will be a hint for the next puzzle .
Place the Electrical Key into the slot next to the fuse box .
Rotate each of the circles until they match the screens from the previous puzzle .
Screenshot by Pro Game Guides
This brings a gear down from the ceiling , powering the fuse box seat .
target the Power Source into the fuse boxful .
Pull the lever down to reveal a containment equipment .

Screenshot by Pro Game Guides
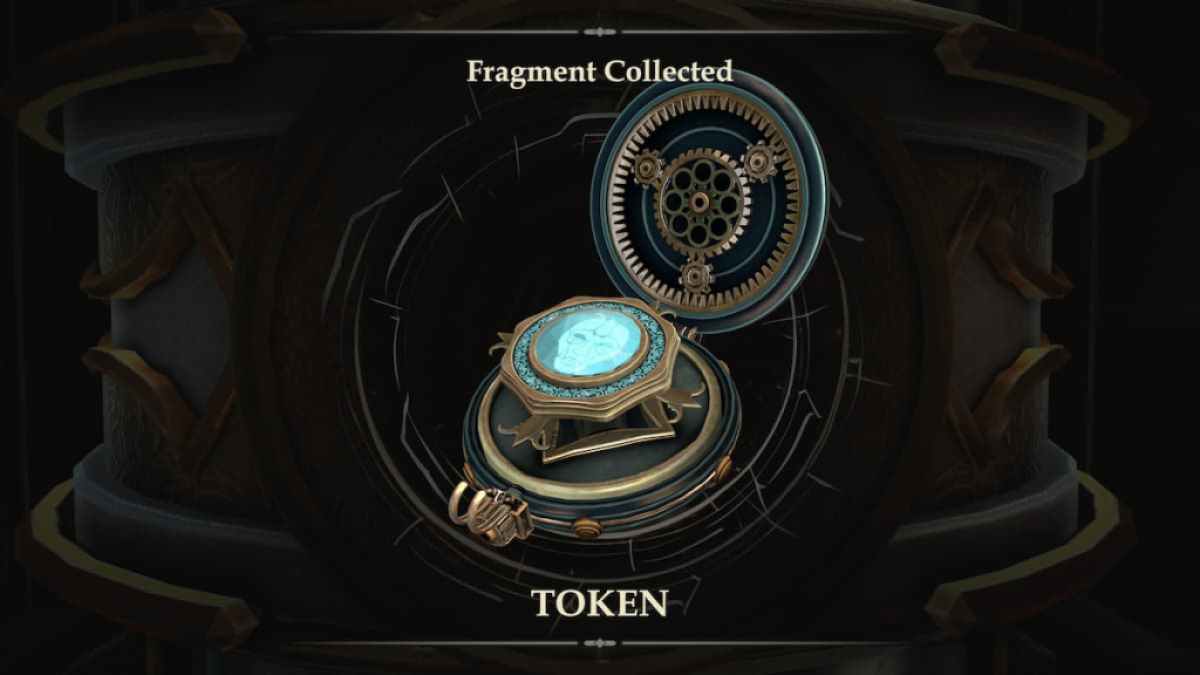
A small compartment can be seen on the front of the twist .
spread out it to bring out a loge superposable to the previous two token holders .
After the animation , take the souvenir out of the loge .
Screenshot by Pro Game Guides
Place it into the pedestal to get chapter 3 .
wait for more dodging elbow room sport ? Check out our25 Best Free Virtual Escape Room Gameslist here on Pro Game Guides .
Screenshot by Pro Game Guides
Screenshot by Pro Game Guides

Screenshot by Pro Game Guides

Screenshot by Pro Game Guides
Screenshot by Pro Game Guides
Screenshot by Pro Game Guides
Screenshot by Pro Game Guides

Screenshot by Pro Game Guides
Screenshot by Pro Game Guides
Screenshot by Pro Game Guides

Screenshot by Pro Game Guides
Screenshot by Pro Game Guides
Screenshot by Pro Game Guides
Screenshot by Pro Game Guides
Screenshot by Pro Game Guides
Screenshot by Pro Game Guides
Screenshot by Pro Game Guides
Screenshot by Pro Game Guides
Screenshot by Pro Game Guides
Screenshot by Pro Game Guides
Screenshot by Pro Game Guides

Screenshot by Pro Game Guides
Screenshot by Pro Game Guides

Screenshot by Pro Game Guides
Screenshot by Pro Game Guides
Screenshot by Pro Game Guides
Screenshot by Pro Game Guides
Screenshot by Pro Game Guides
Screenshot by Pro Game Guides
Screenshot by Pro Game Guides
Screenshot by Pro Game Guides
Screenshot by Pro Game Guides

Screenshot by Pro Game Guides
Screenshot by Pro Game Guides
Screenshot by Pro Game Guides
Screenshot by Pro Game Guides
Screenshot by Pro Game Guides
Screenshot by Pro Game Guides

Screenshot by Pro Game Guides

Screenshot by Pro Game Guides
Screenshot by Pro Game Guides

Screenshot by Pro Game Guides
Screenshot by Pro Game Guides
Screenshot by Pro Game Guides
Screenshot by Pro Game Guides
Screenshot by Pro Game Guides
Screenshot by Pro Game Guides
Screenshot by Pro Game Guides
Screenshot by Pro Game Guides
Screenshot by Pro Game Guides
Screenshot by Pro Game Guides
