Become an experienced dependable - cracker .
When it come to point - and - chatter escape games , Boxes Lost Fragments provides players with hours of puzzle - solving playfulness . In this guide , I ’ll take the air you through the solutions to every teaser in the 2nd half of Chapter 1 .
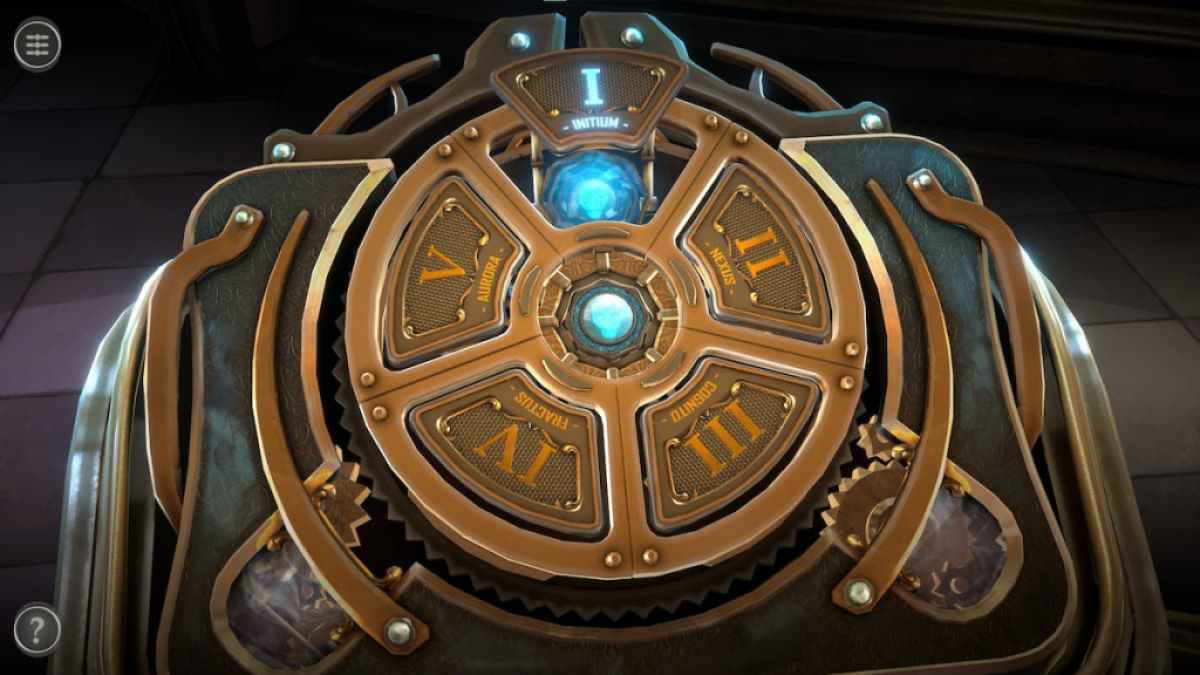
Boxes Lost Fragments Chapter 1 part 2 walkthrough
This part of the Boxes Lost Fragments walkthrough guide players through the 2nd half of Chapter 1 . If you ’re looking for help with the first part of Chapter 1 or any other chapters , I ’ve listed the guide for each of them below .
Third room puzzles
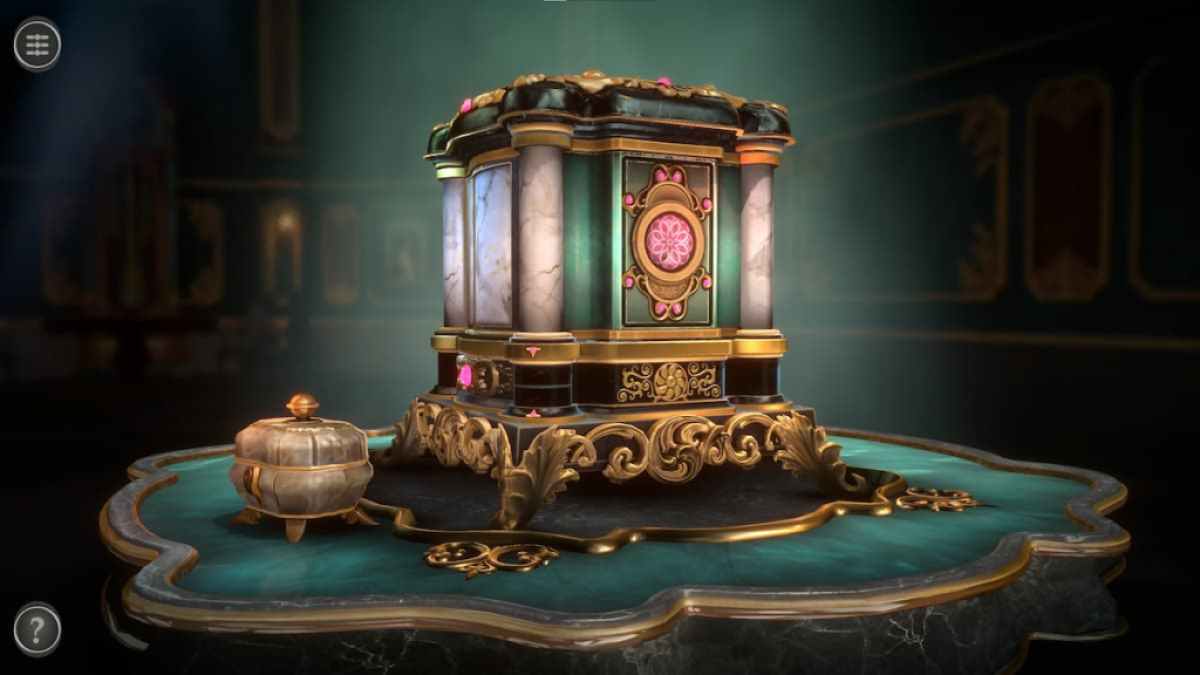
The third elbow room of the first chapter has a small-scale novelty box and a larger ornate box .
Rotate the camera to face the back of the box . This puzzle is a series of target that can be slid around to afford .
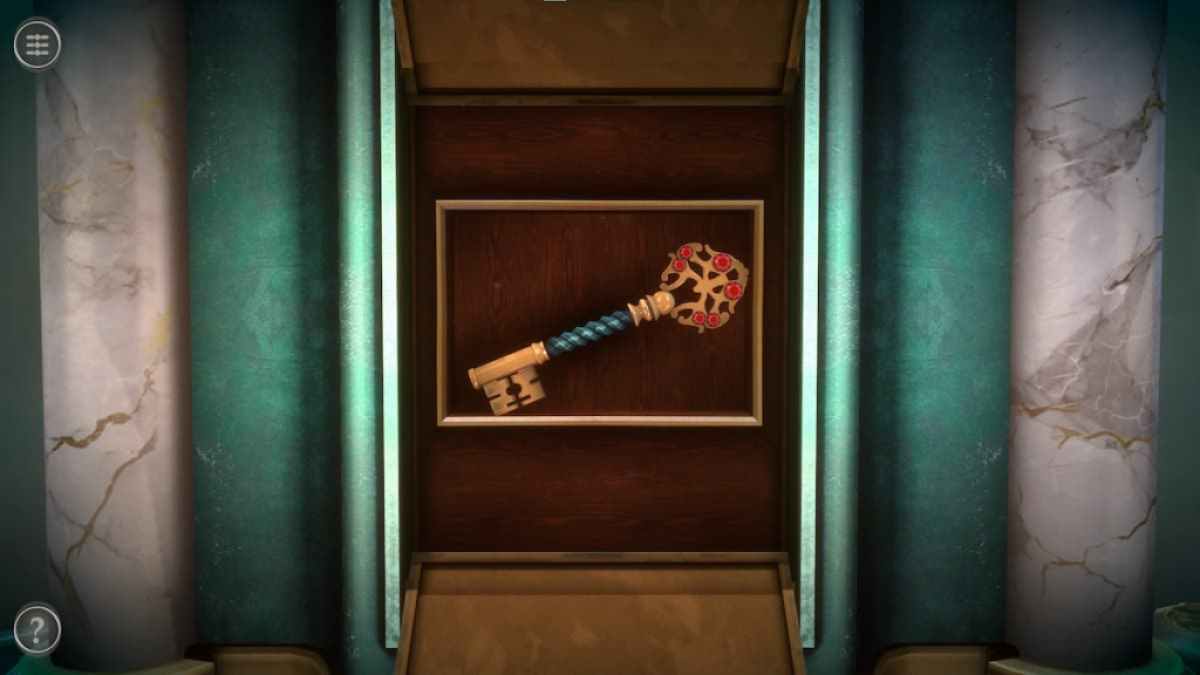
Opening all of the doors reveals a compartment with a headstone .

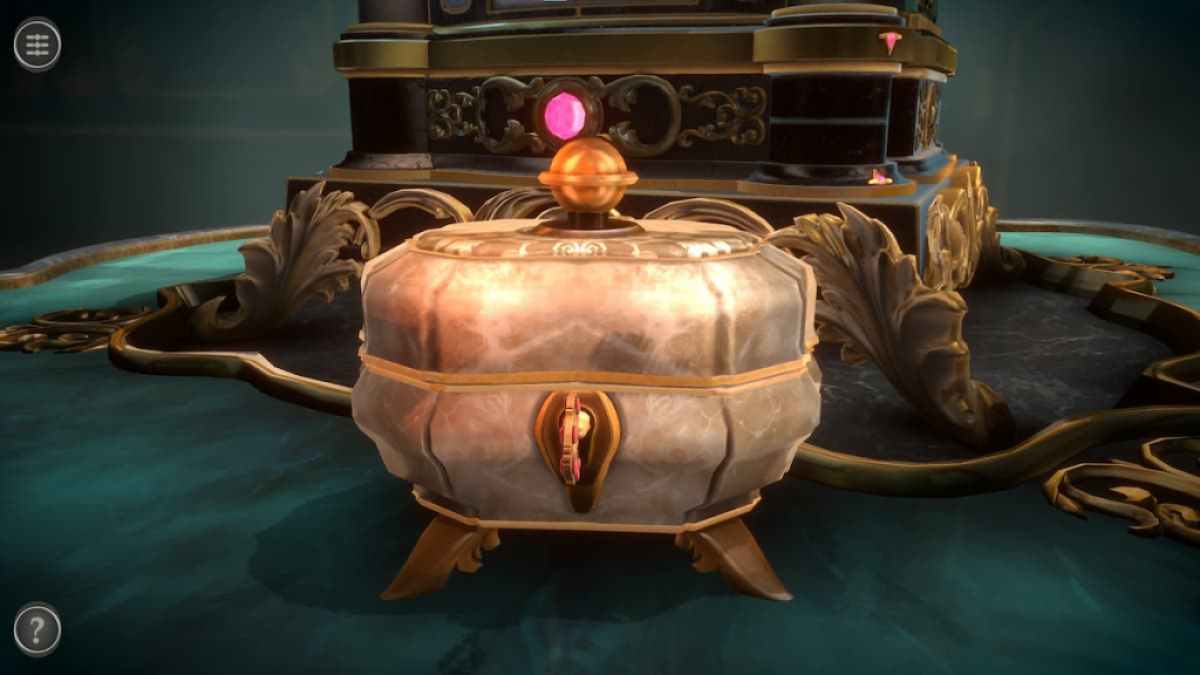
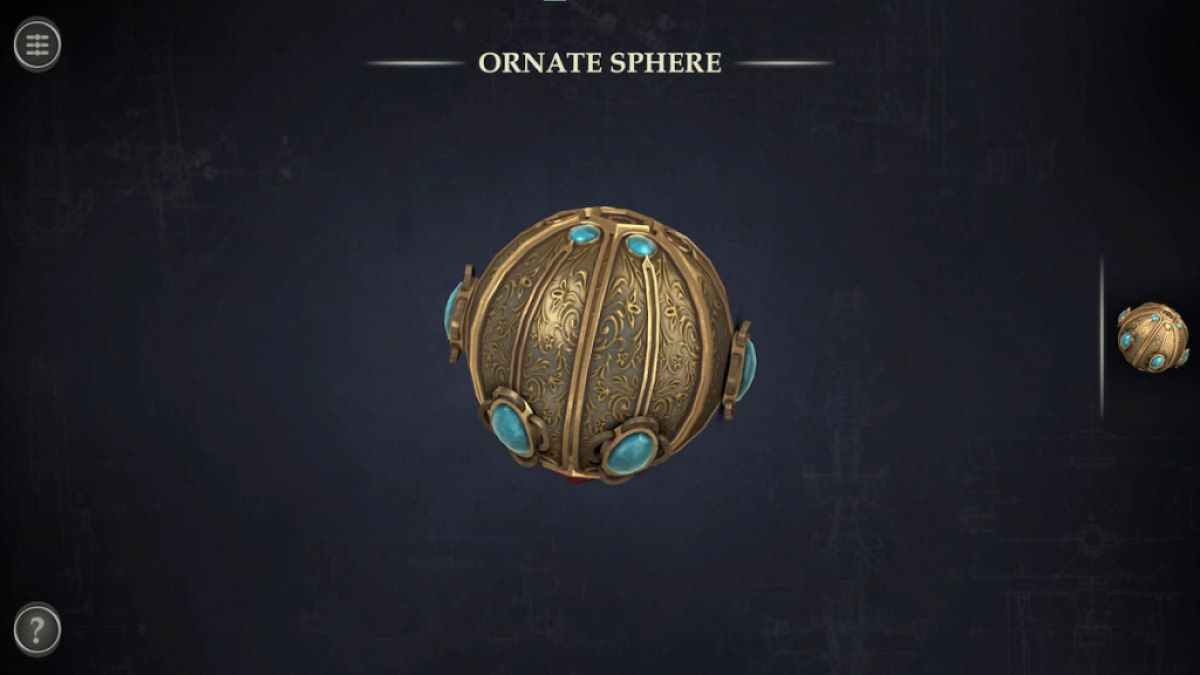
This key can be inserted into the fallal box to get an Ornate Sphere .
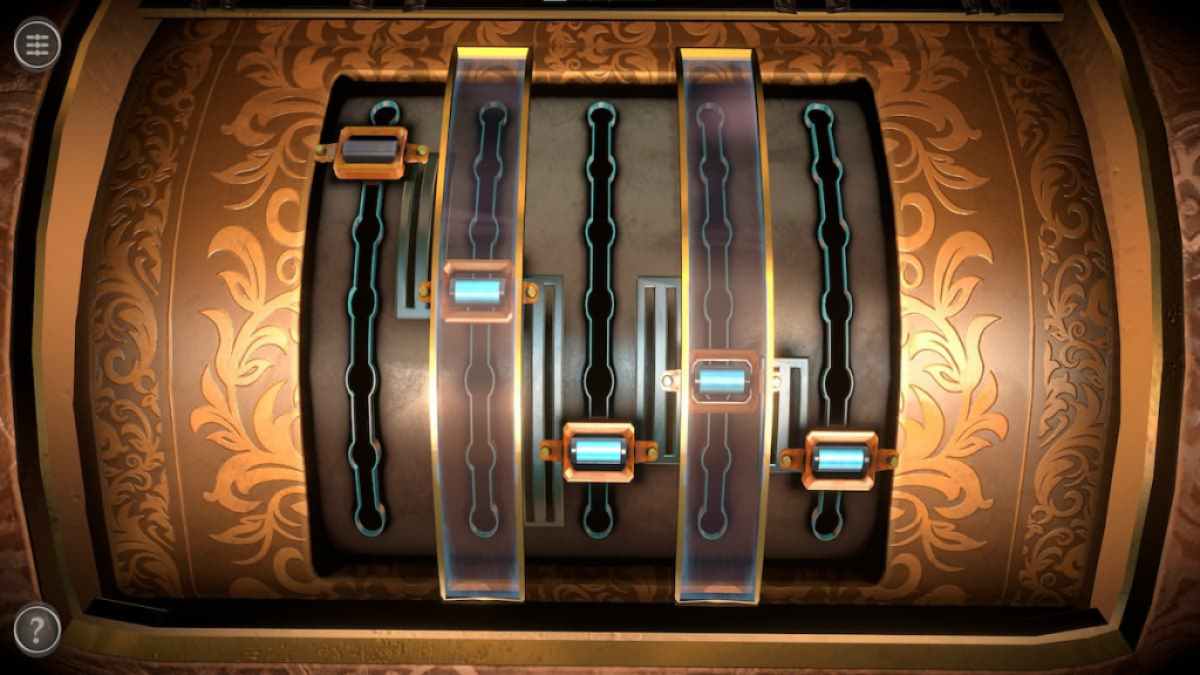
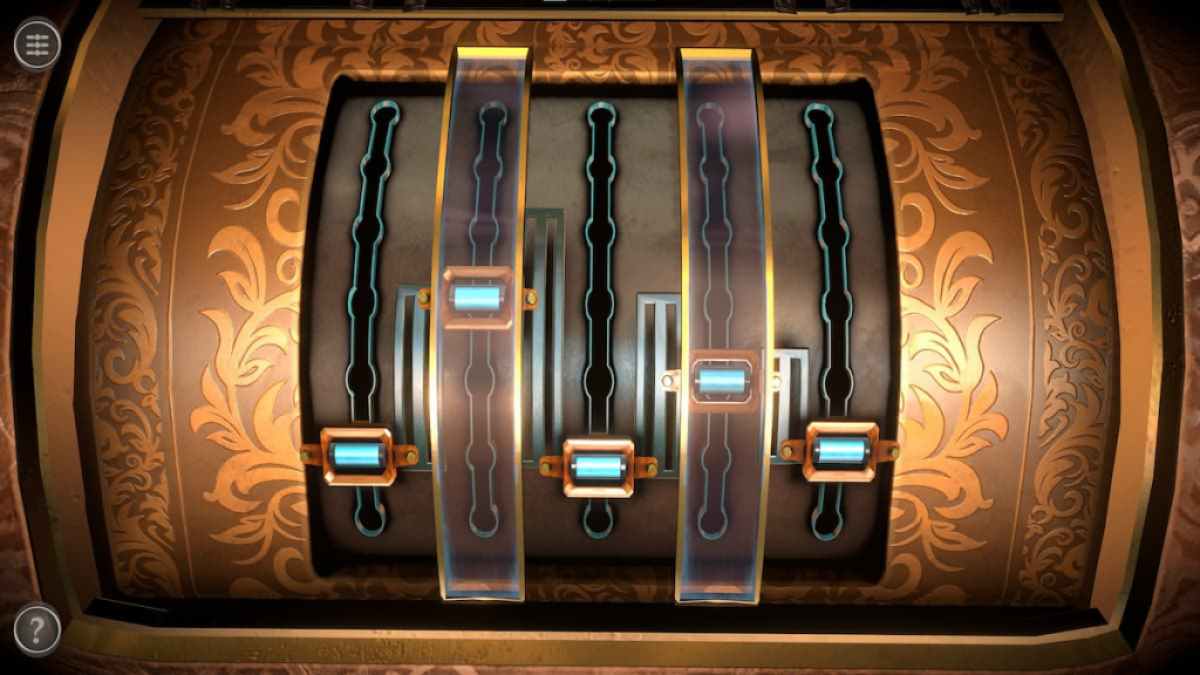
afford the Ornate Sphere in your stock .
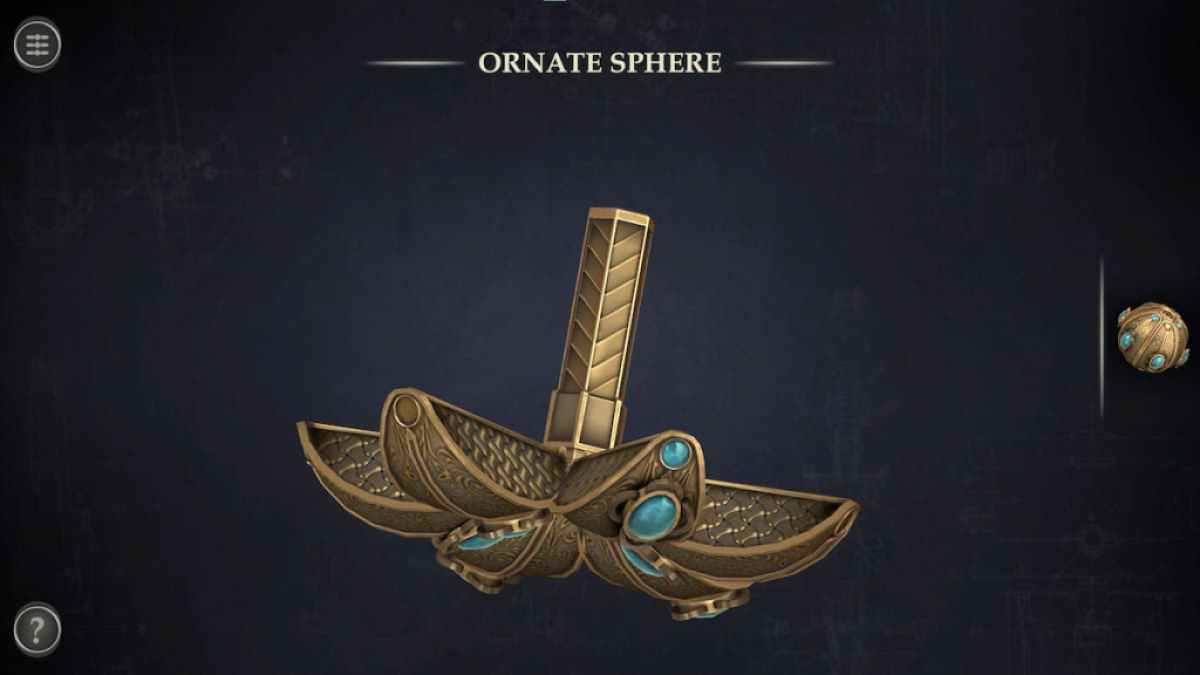
Pull each of the sliders on the sphere towards the green gem on their row to unlock the celestial sphere . This will release it into a Tool .
Screenshot by Pro Game Guides
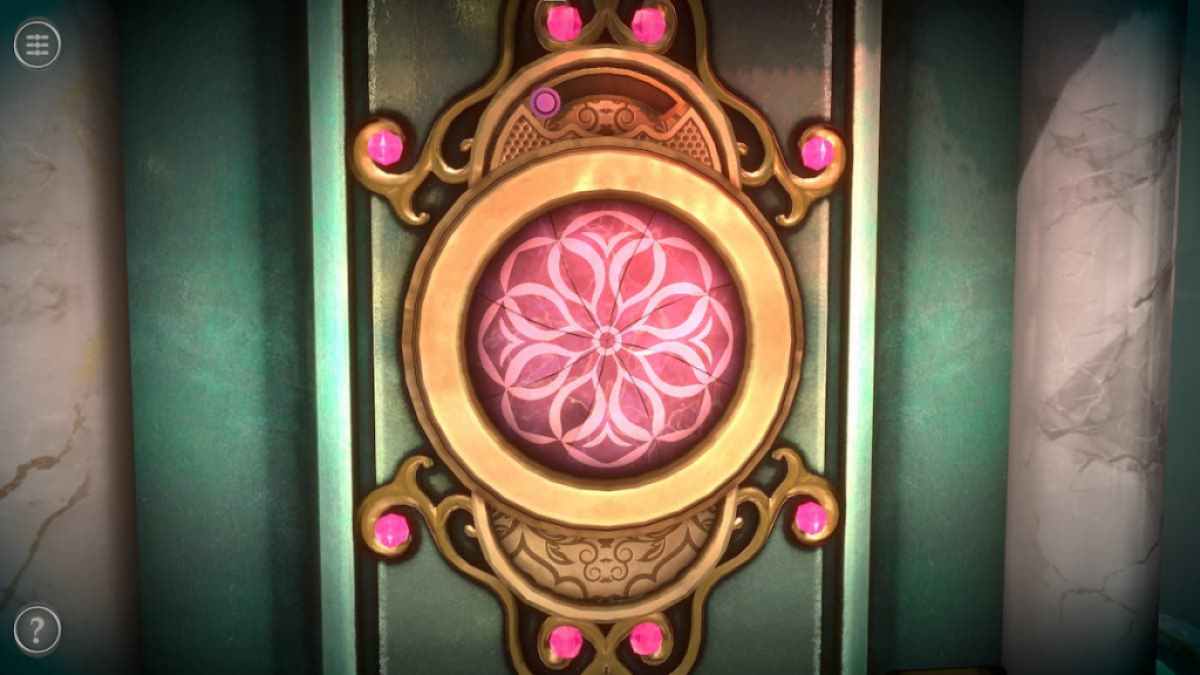
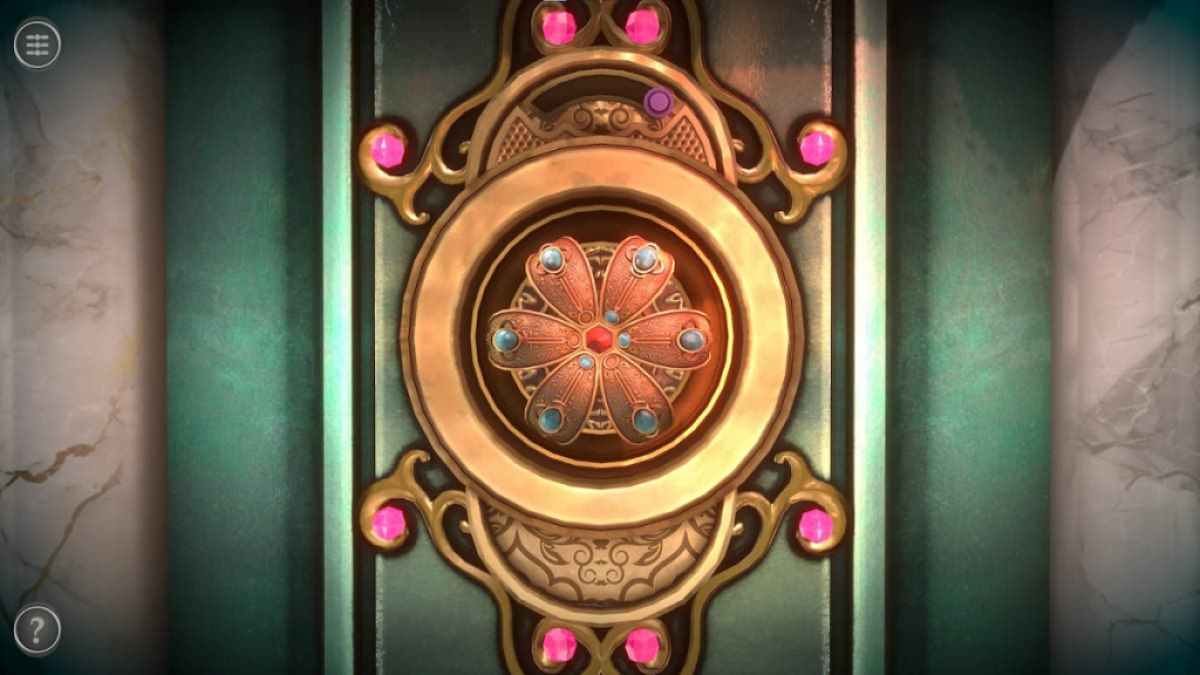
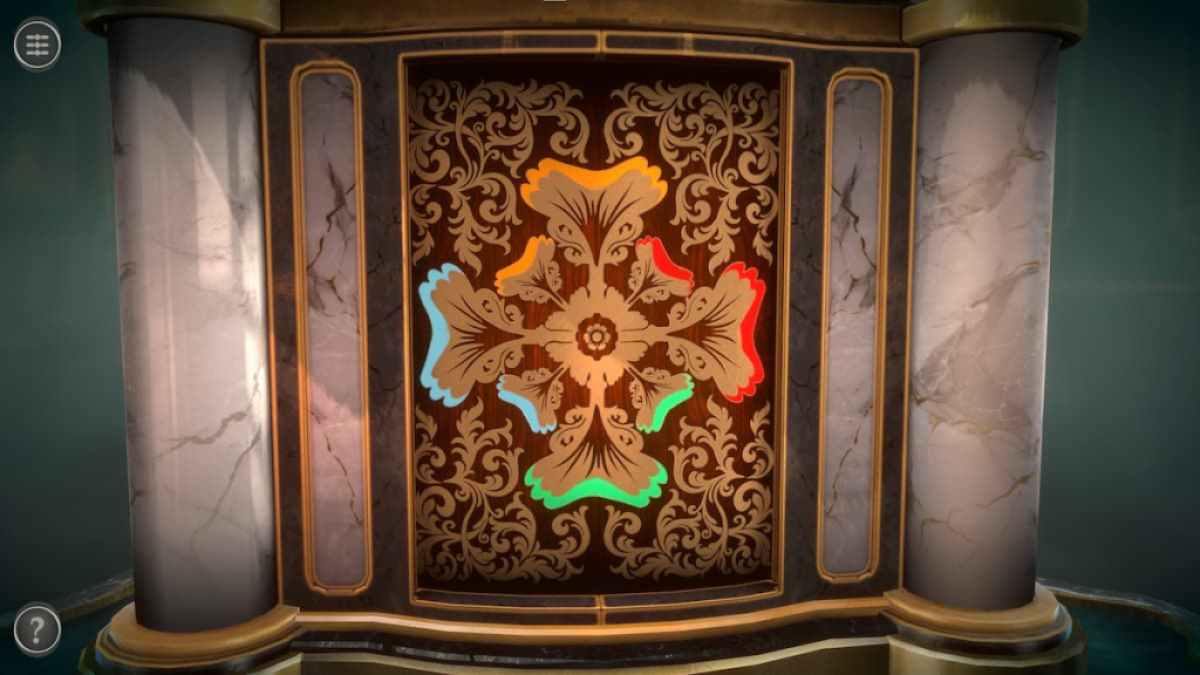
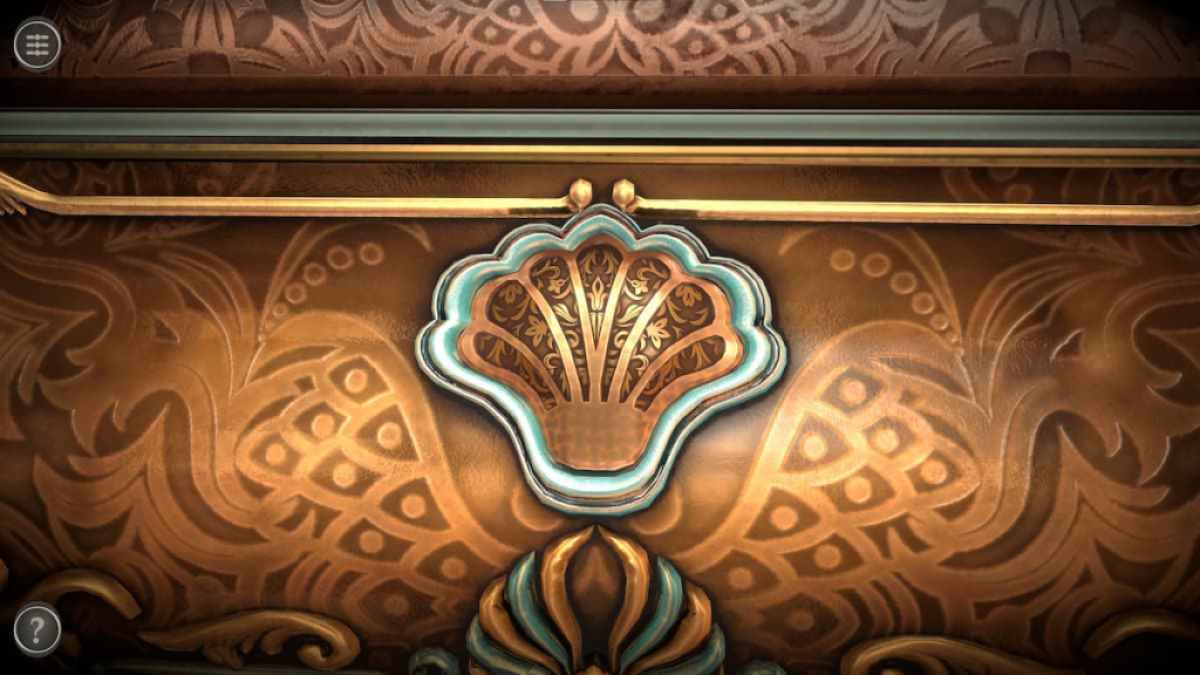
The pink blossom at the box ’s sum is a yellow-bellied terrapin puzzle . circumvolve the half - rotary on top to reveal a pink skidder .
Move the slider to reveal a small knob .
Place the Tool onto this knob .
Screenshot by Pro Game Guides
This will make two rowing of flower petal seem around the Tool .
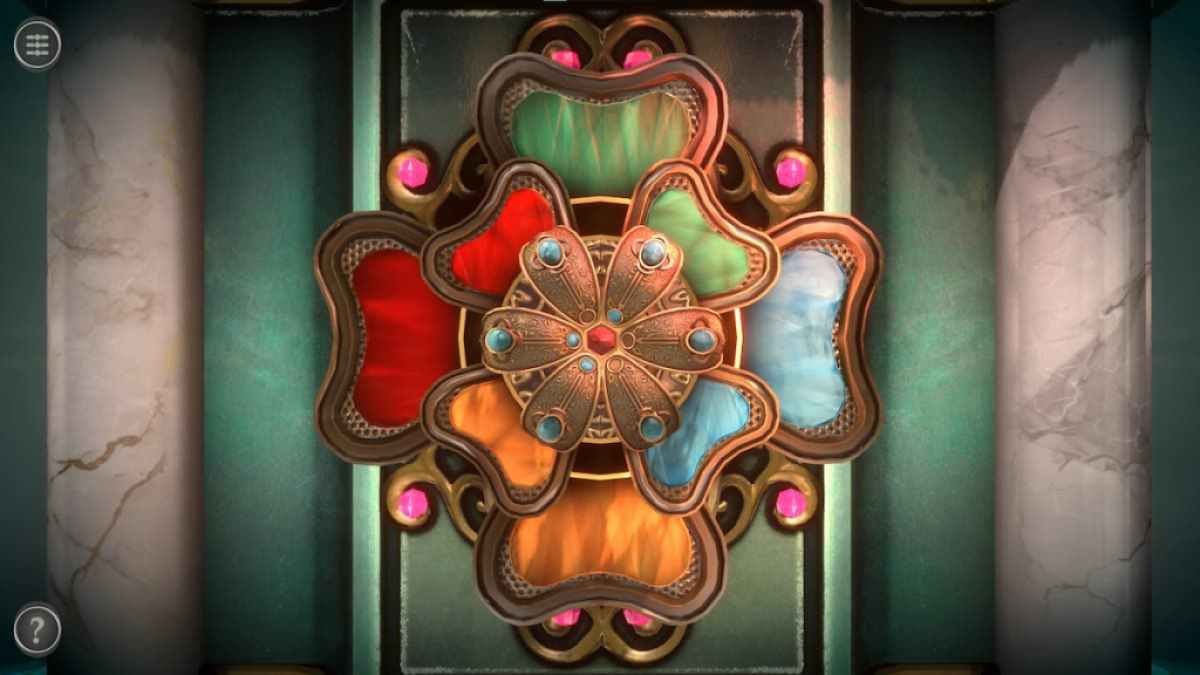
To figure out this puzzle , you need to solve the puzzle on the right to cipher out where each colored petal go .
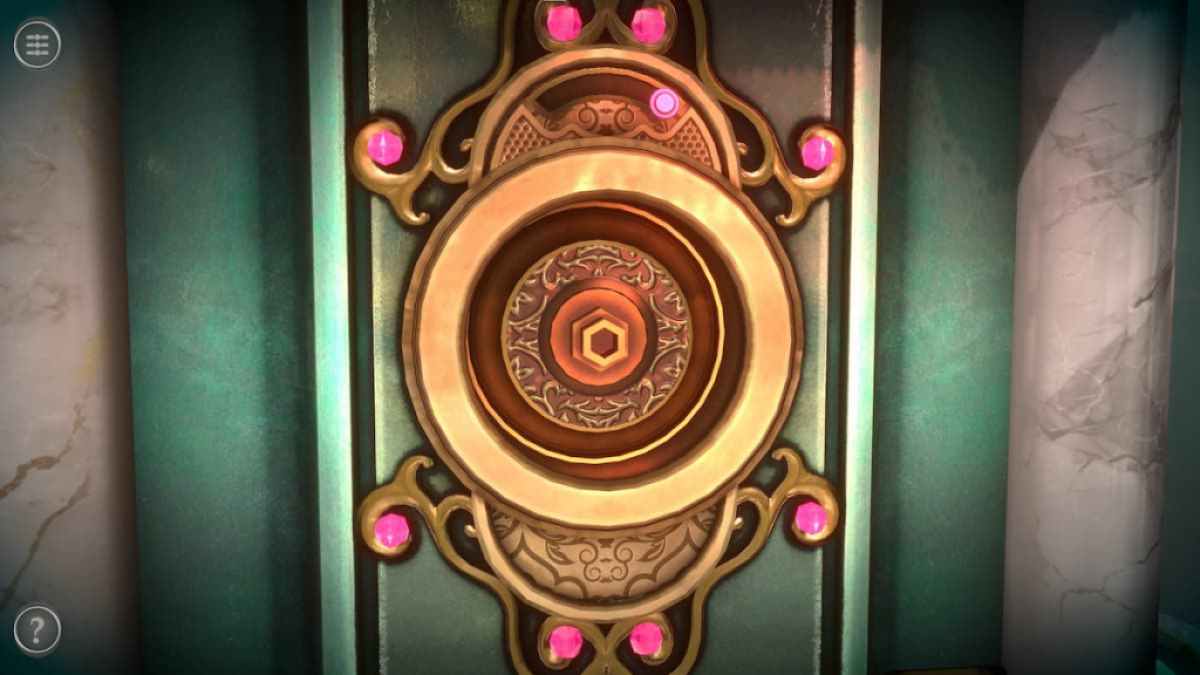
Move the sliders so that each circle in the marrow has a unbent vertical line .
Screenshot by Pro Game Guides
This reveals where each coloured petal should be placed on the first puzzle .
The completion of this puzzle gives you a Small Shield .
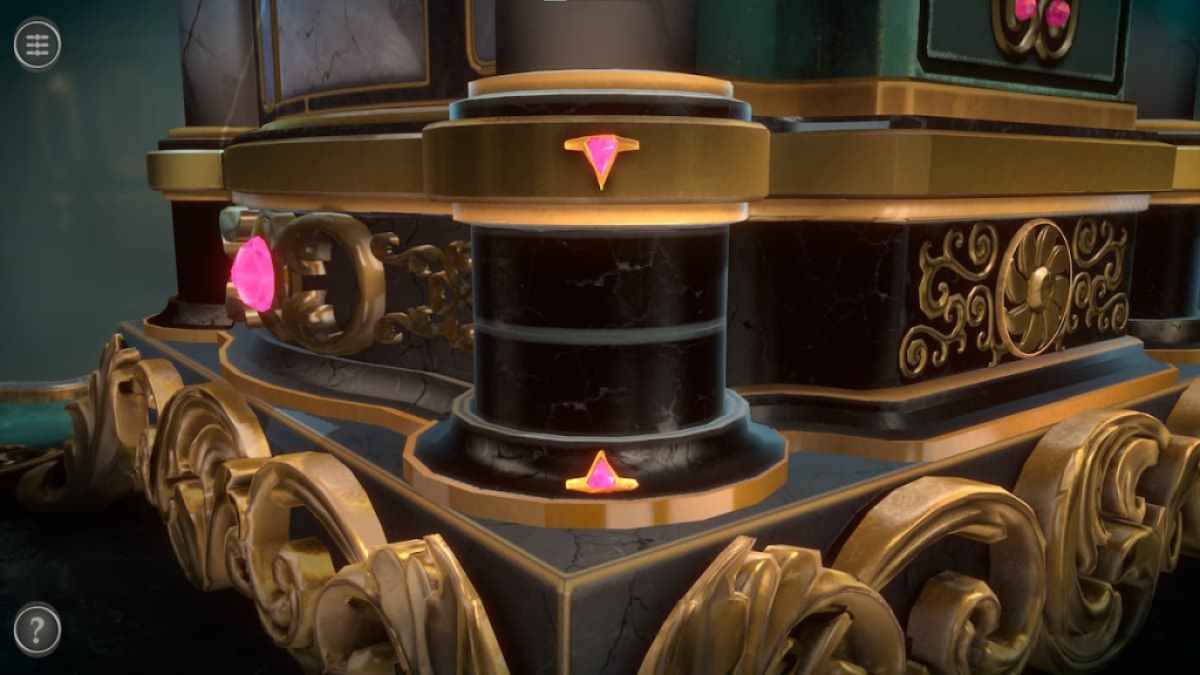
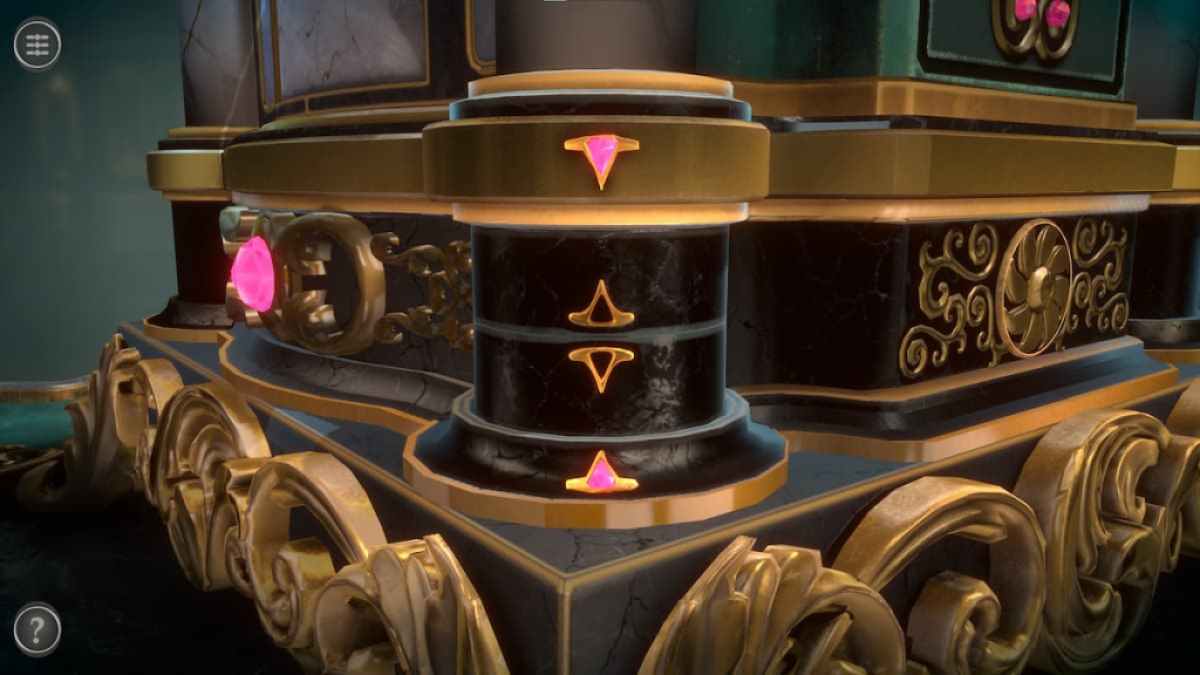
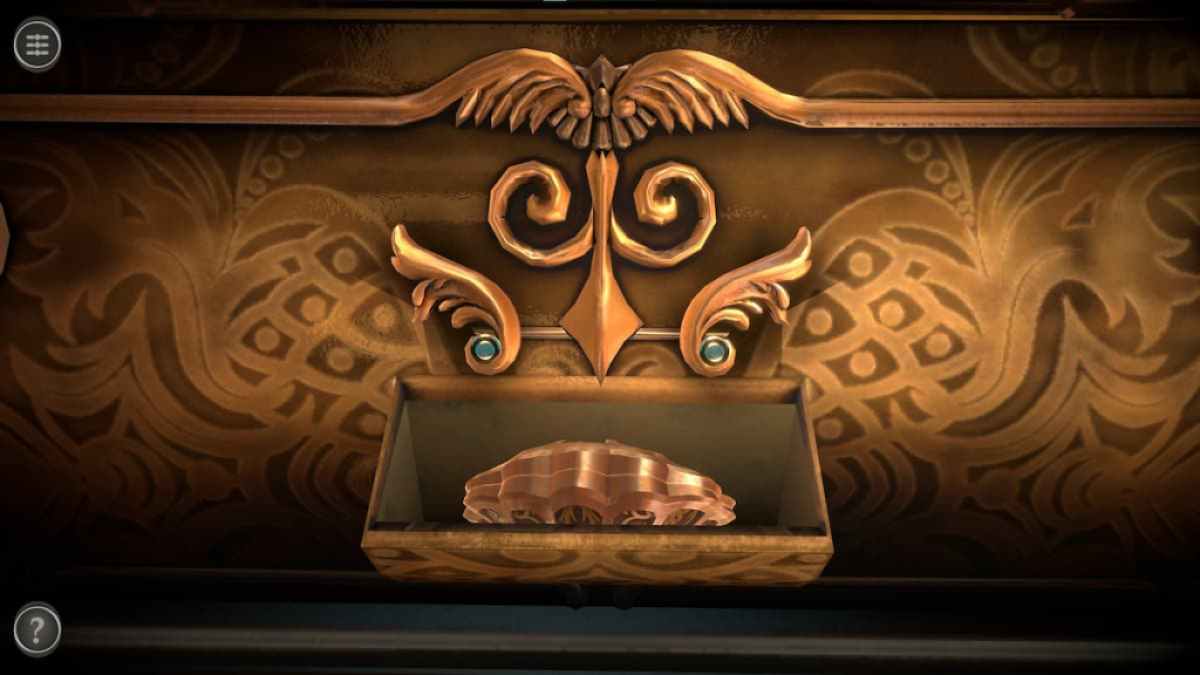
On the front of the box , the peg on the left side has two pink arrow on it .
Screenshot by Pro Game Guides
turn out the top and bottom center department until their arrows align with the pink ones .
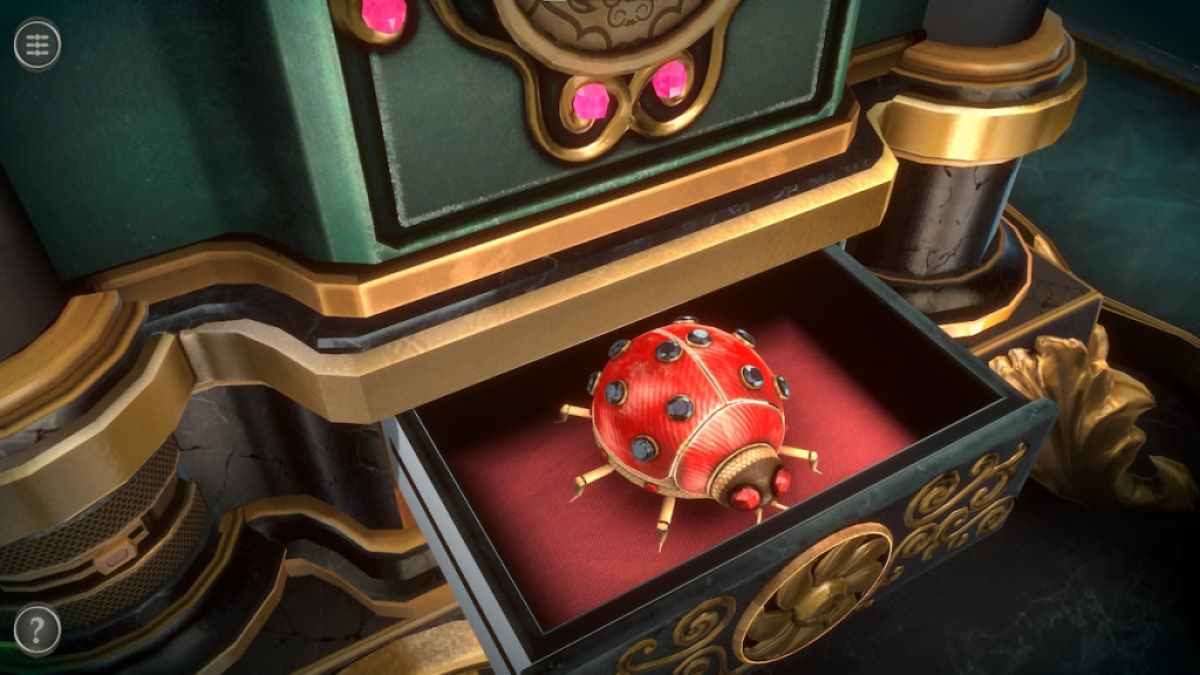
The leg will spread , break a slider . force the yellow-bellied terrapin to open a compartment containing the Mechanical Ladybug .
Related:3D Escape Room Detective Story walkthrough
Screenshot by Pro Game Guides
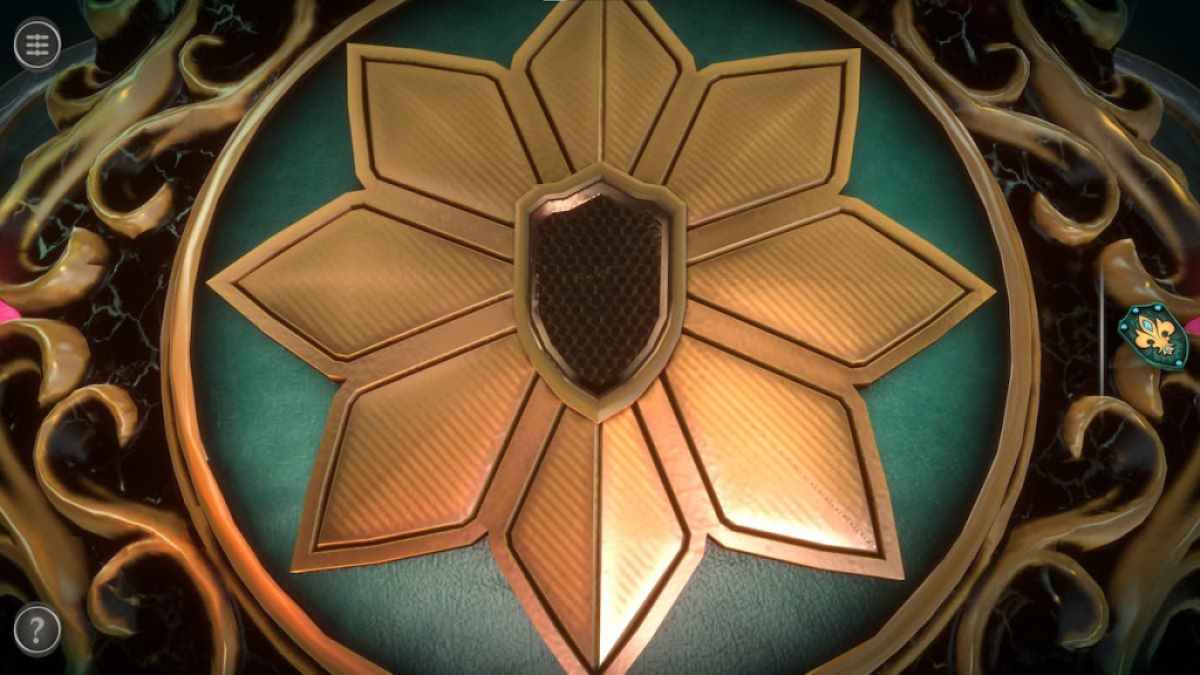
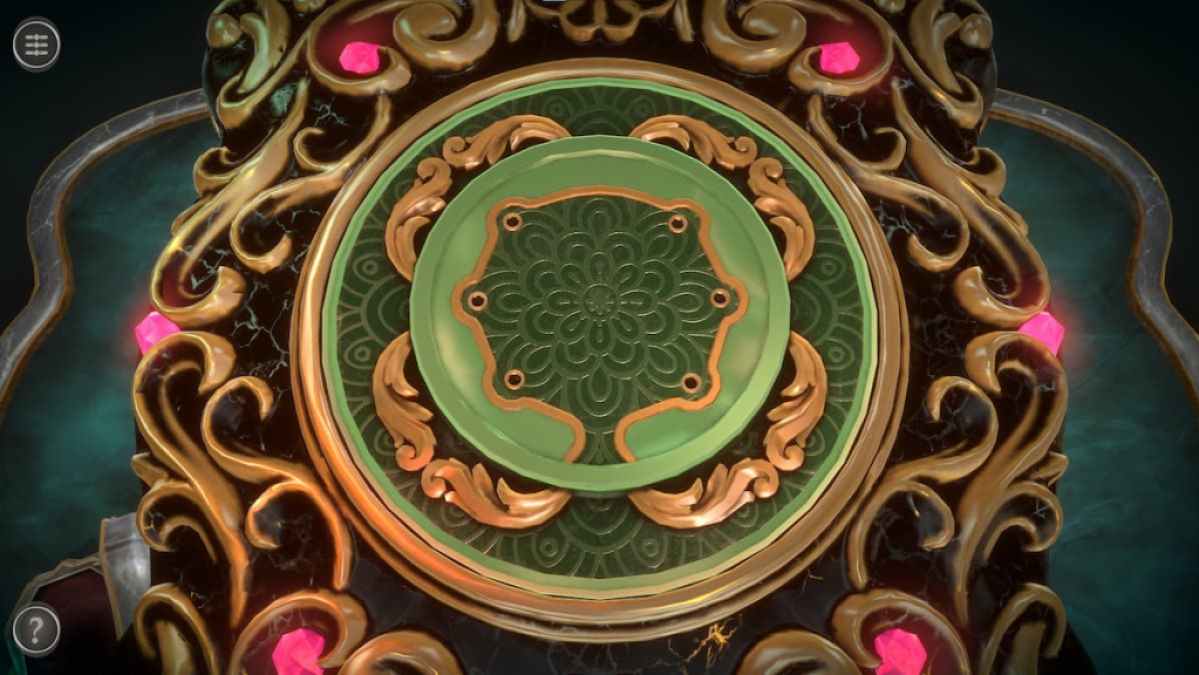
await at the top of the box .
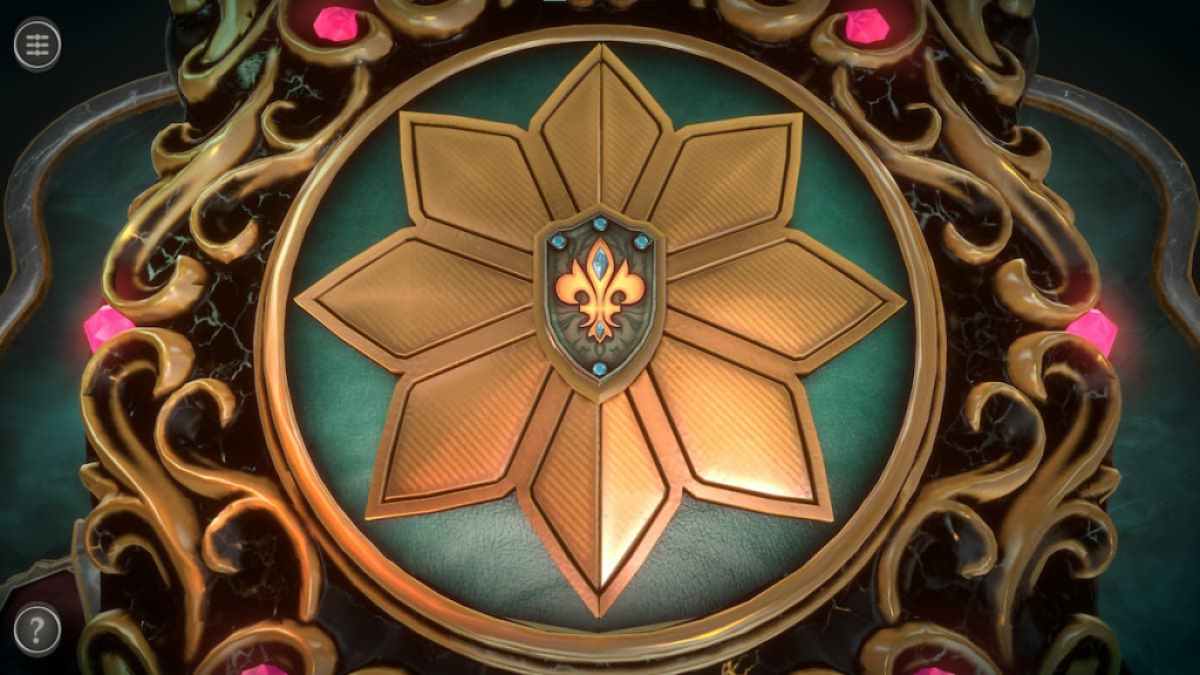
Place the Small Shield into the gap in the center .
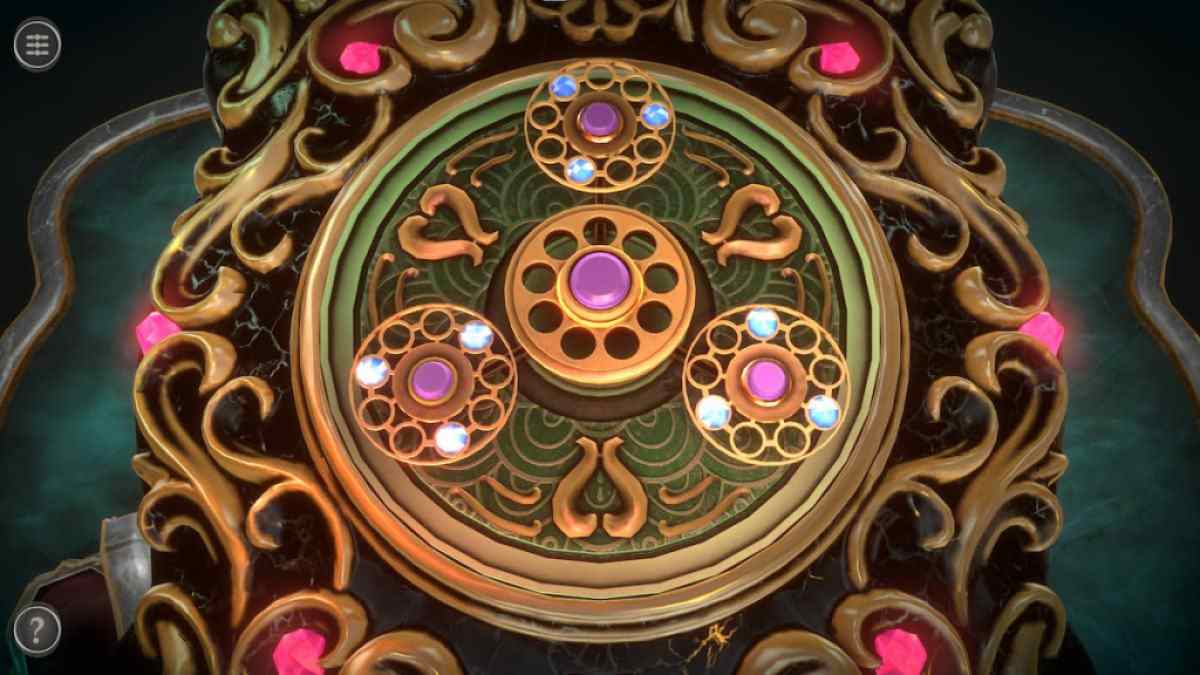
This open up the top to reveal a gemstone teaser .
Screenshot by Pro Game Guides
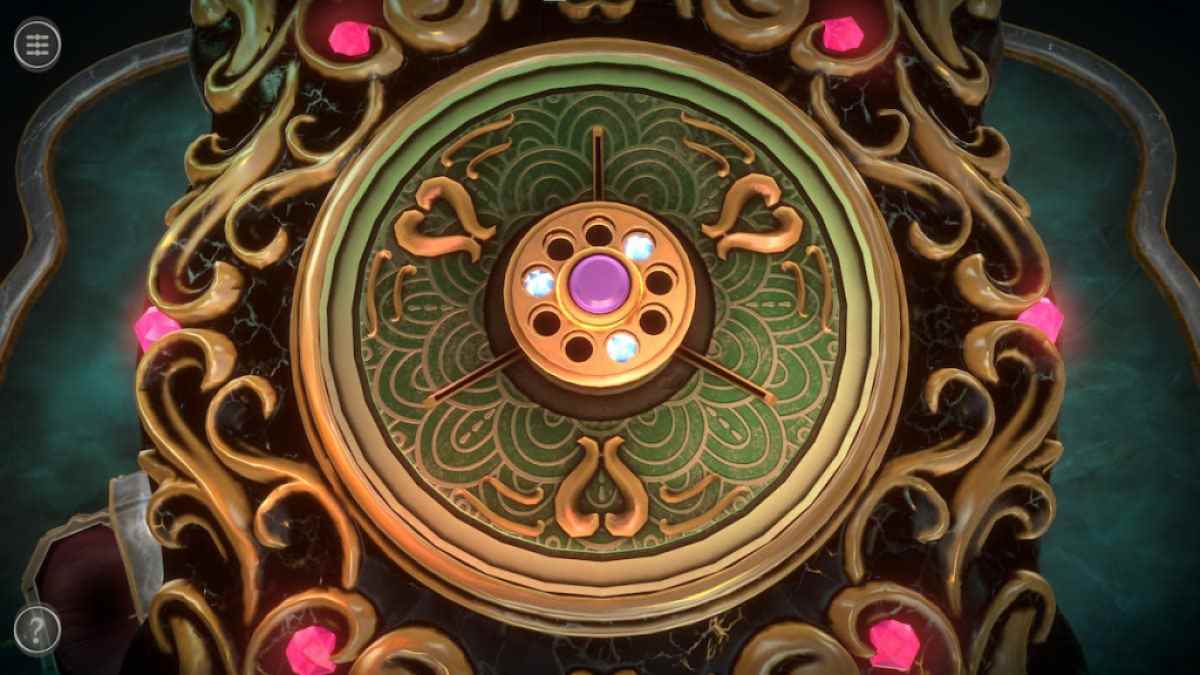
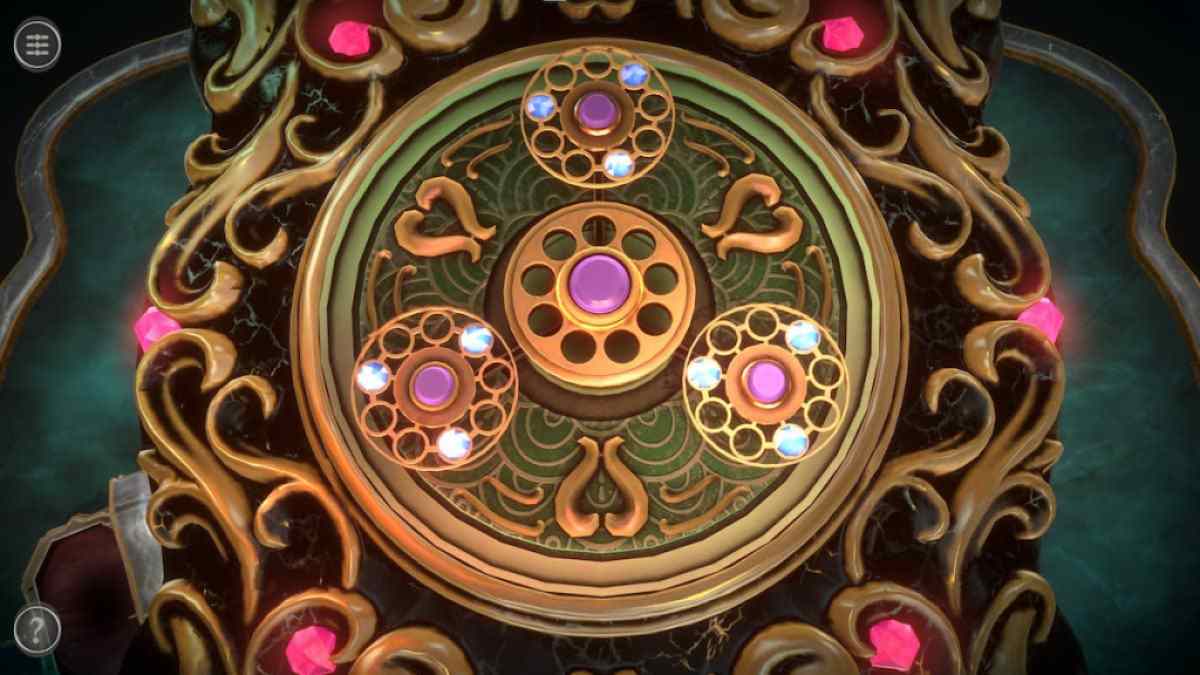
rap on the pinkish push button in the shopping center to move the three discs contain gems aside from the center disk .
Move the top rotary clockwise once and the bottom correct rope clockwise twice .
fight the pink button again to compound the discs . If they are place properly , the top will toss over to reveal a green base with six holes .
Screenshot by Pro Game Guides
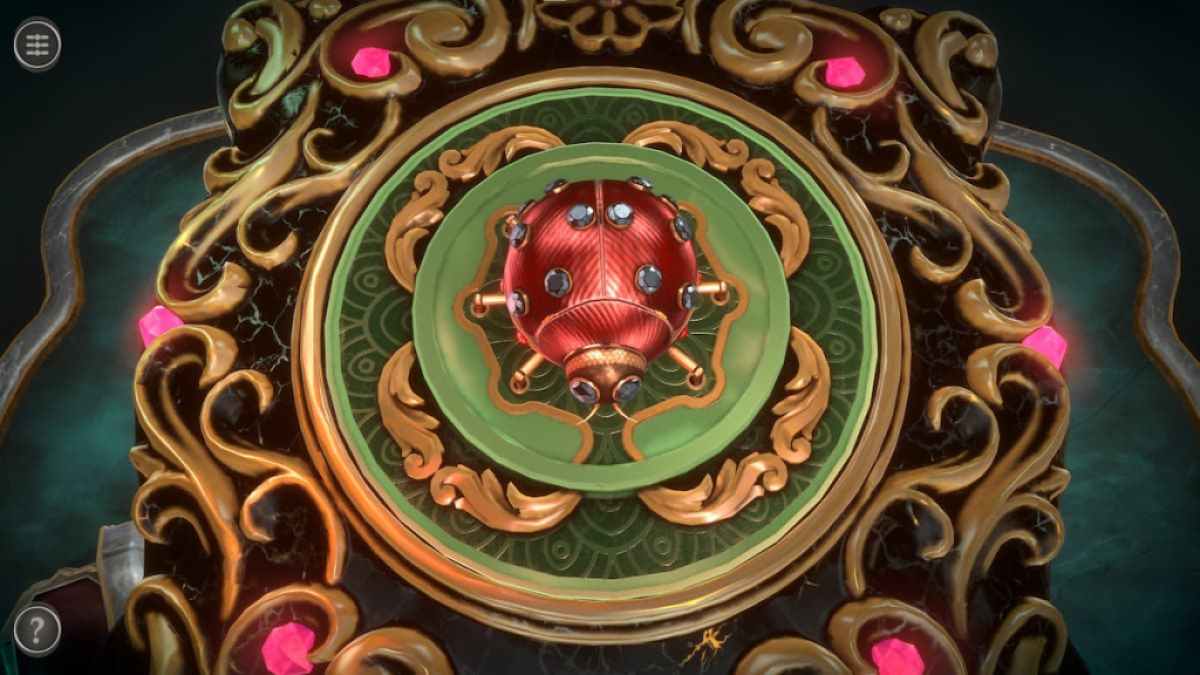
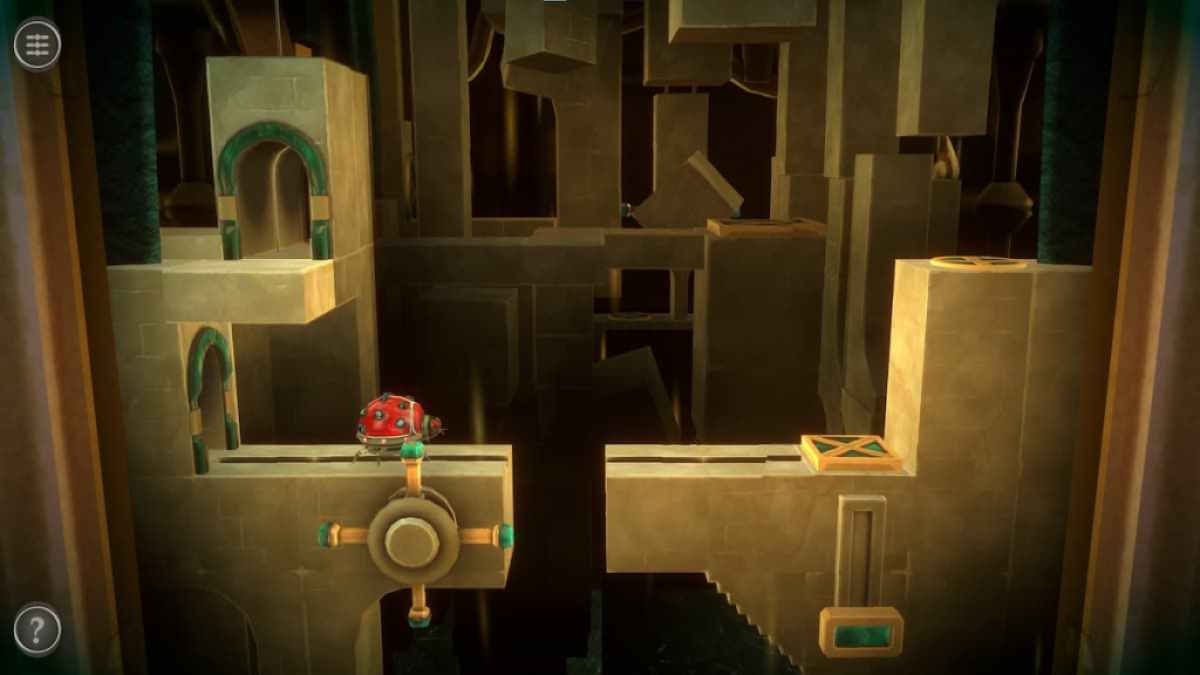
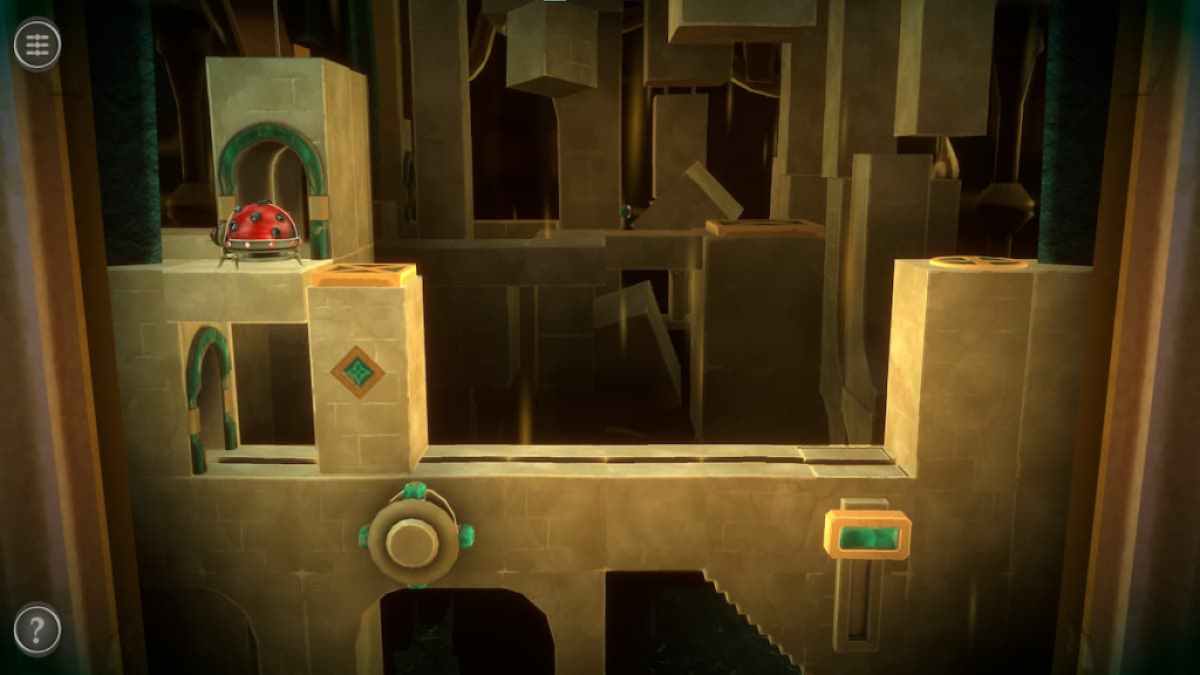
rank the Mechanical Ladybug on top to open up the sides of the corner . This will start a young puzzle have the Mechanical Ladybug .
The game will convey you directly to this ladybug puzzle once the Mechanical Ladybug has been added to the top of the corner .
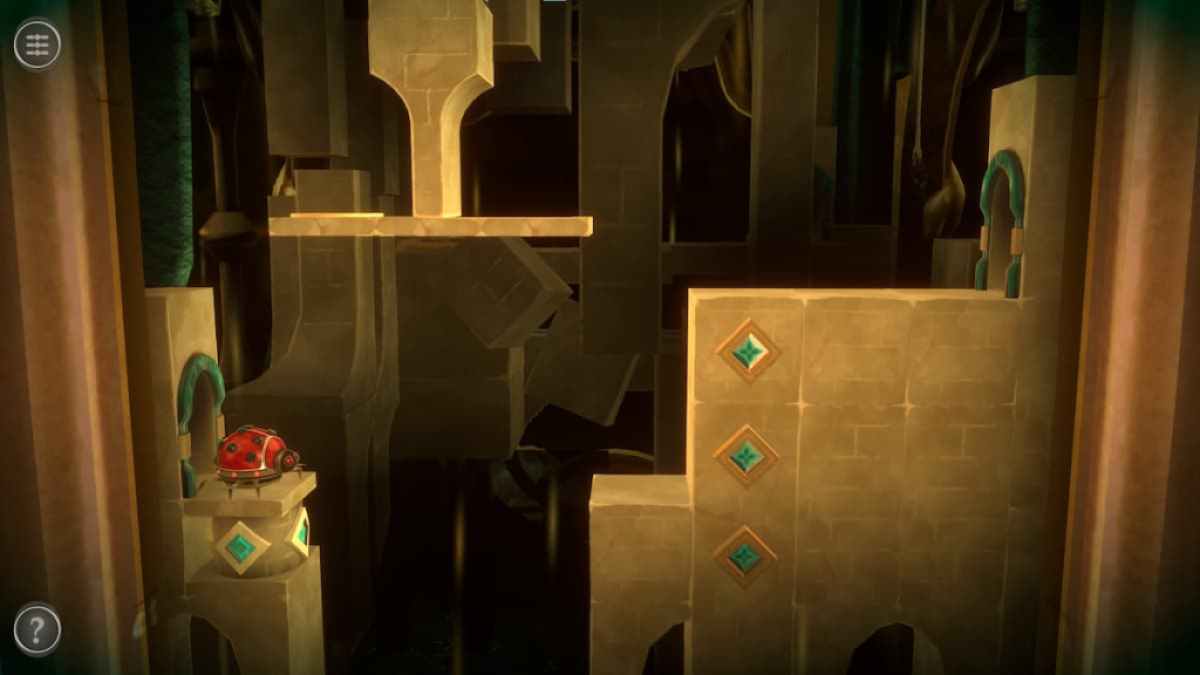
Rotate the green gear mechanism beneath the ladybug until the next section of the track aligns with the ladybeetle ’s current path .
Screenshot by Pro Game Guides
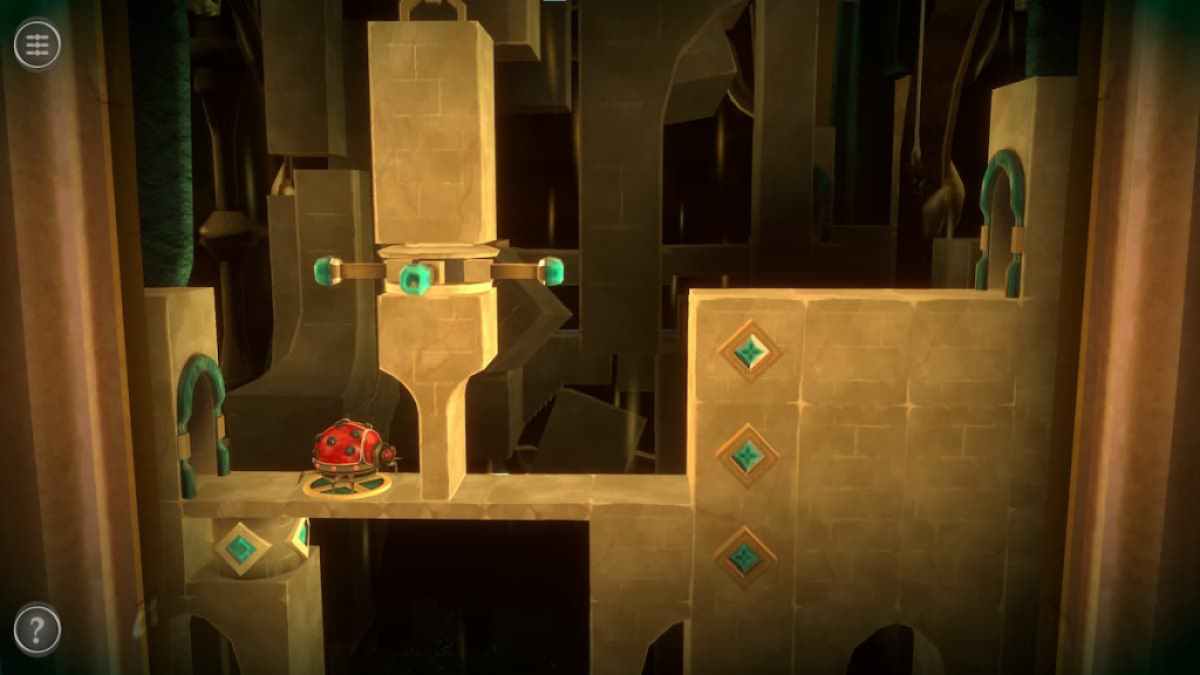
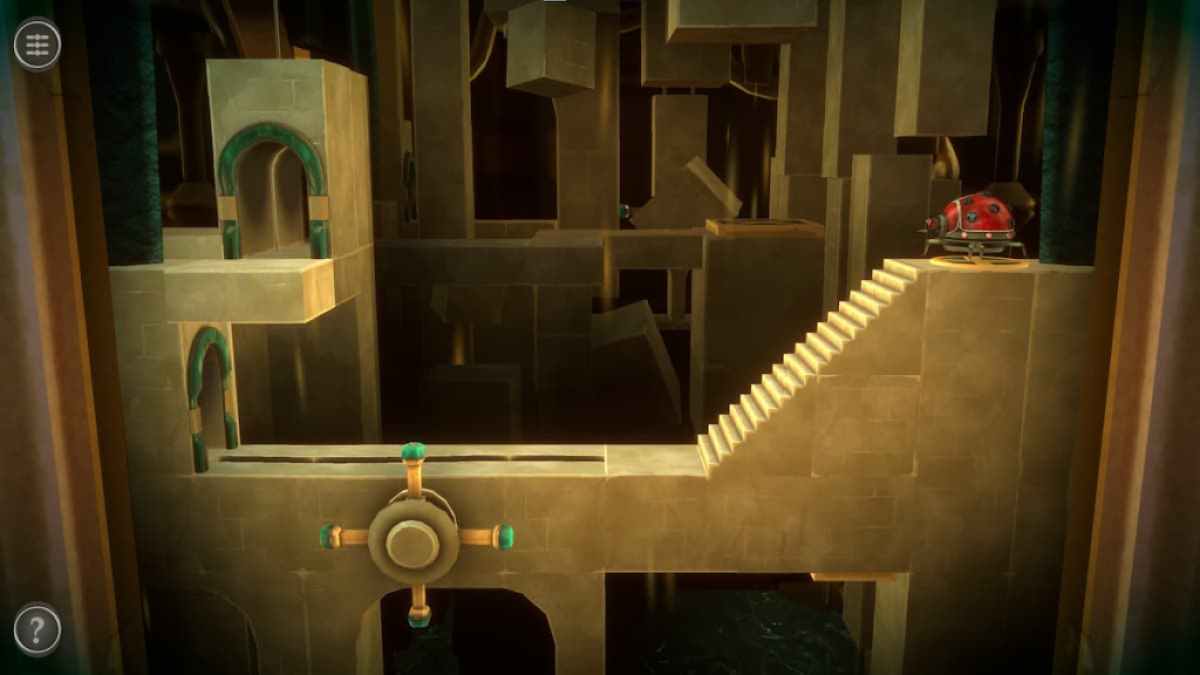
get in touch with the left handle on the wall blocking the ladybug and pull out it to the right field to rotate the program . This will put the ladybug on the other side .
draw out the first column down to create a makeshift stairway .
promote the column back up to align with the expiration doorway .
Screenshot by Pro Game Guides
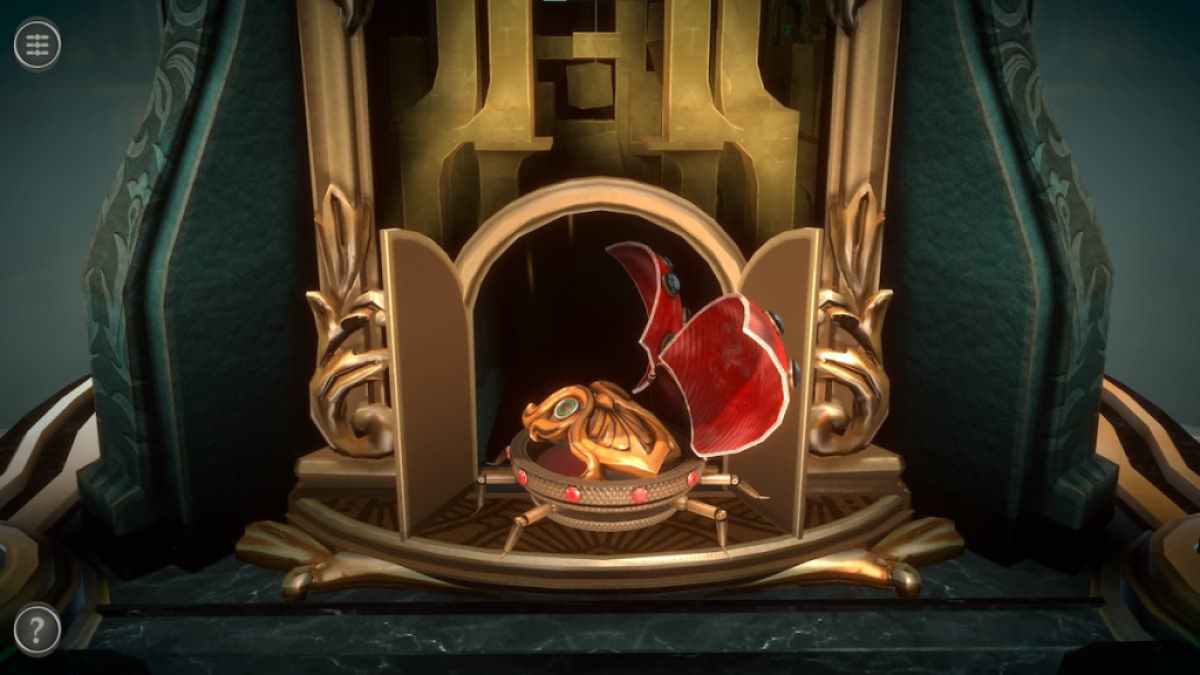
The ladybug will receive an Owl physique in the next room , overhaul through it with no help . It will then enter the third room .
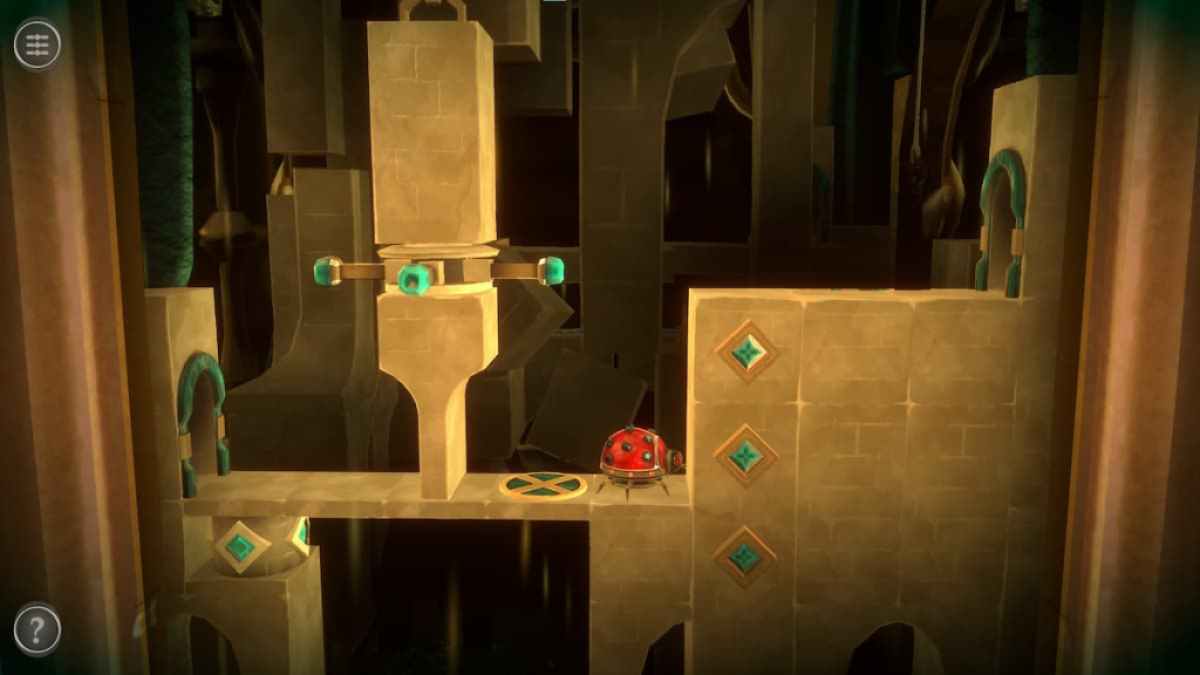
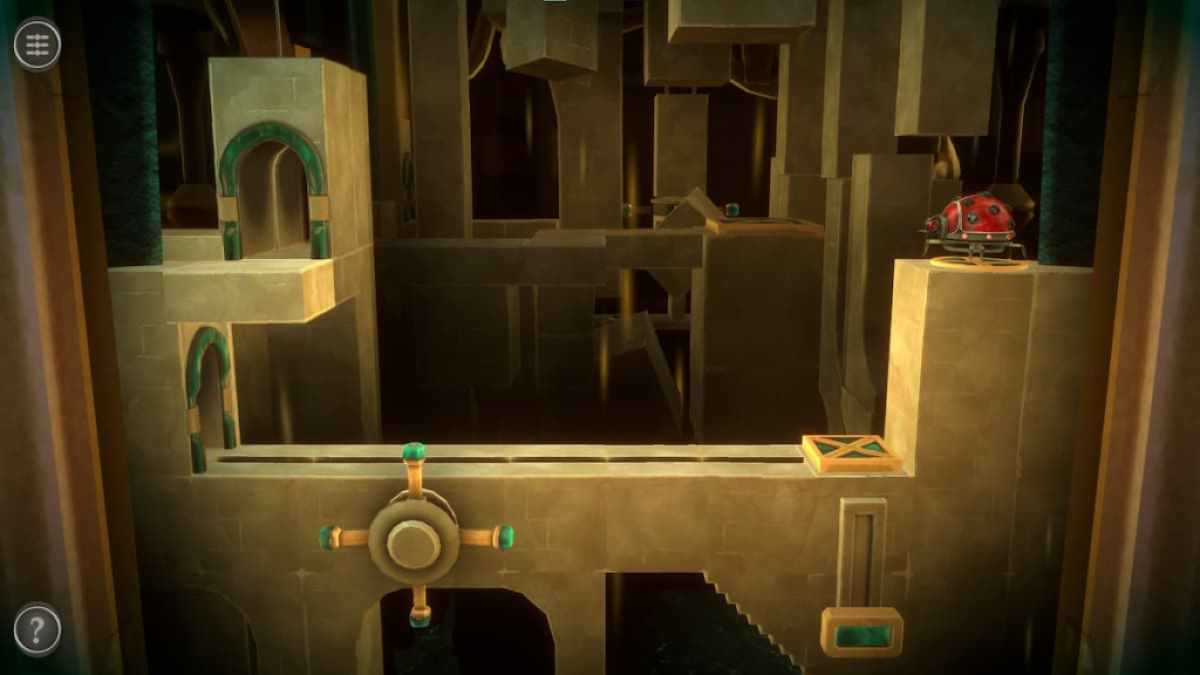
revolve the mechanism beneath the ladybeetle to connect the two side and flip out the right-hand part upside down to reveal a set of stairs .
spread out the original chemical mechanism again to flip the right side back to its original state .
Screenshot by Pro Game Guides
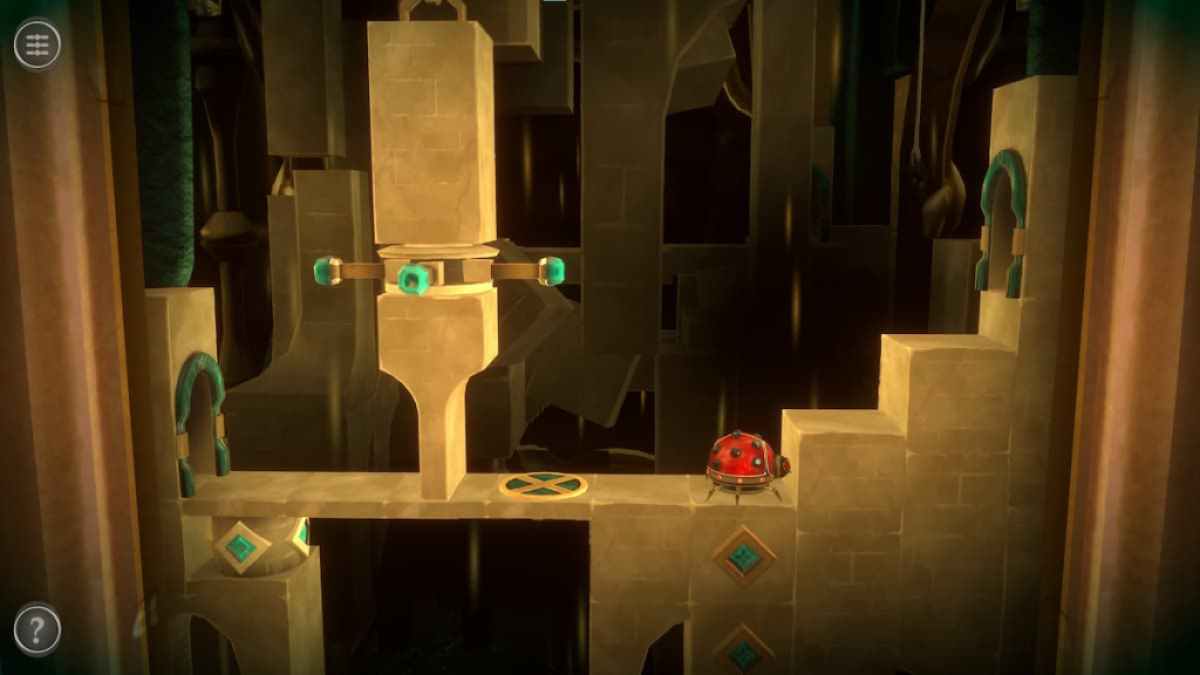
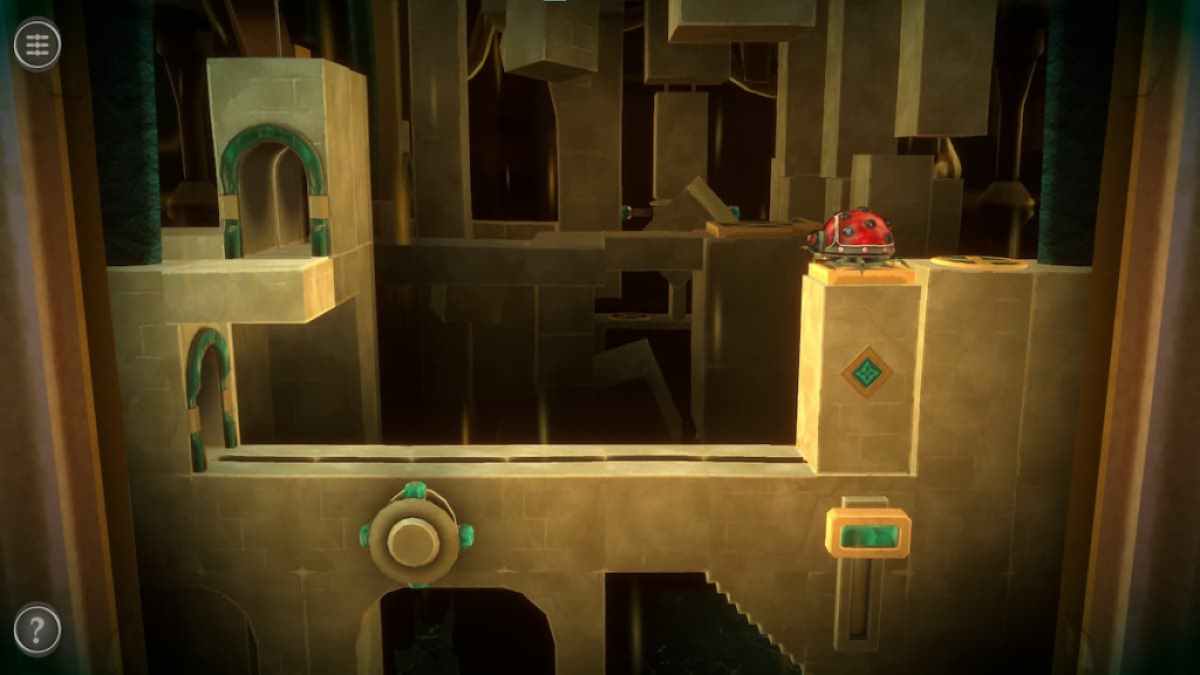
Pull the yellow-bellied terrapin up to unlock a moving editorial , which the ladybug will climb onto .
tap the center of the column and slide it over to the left side .
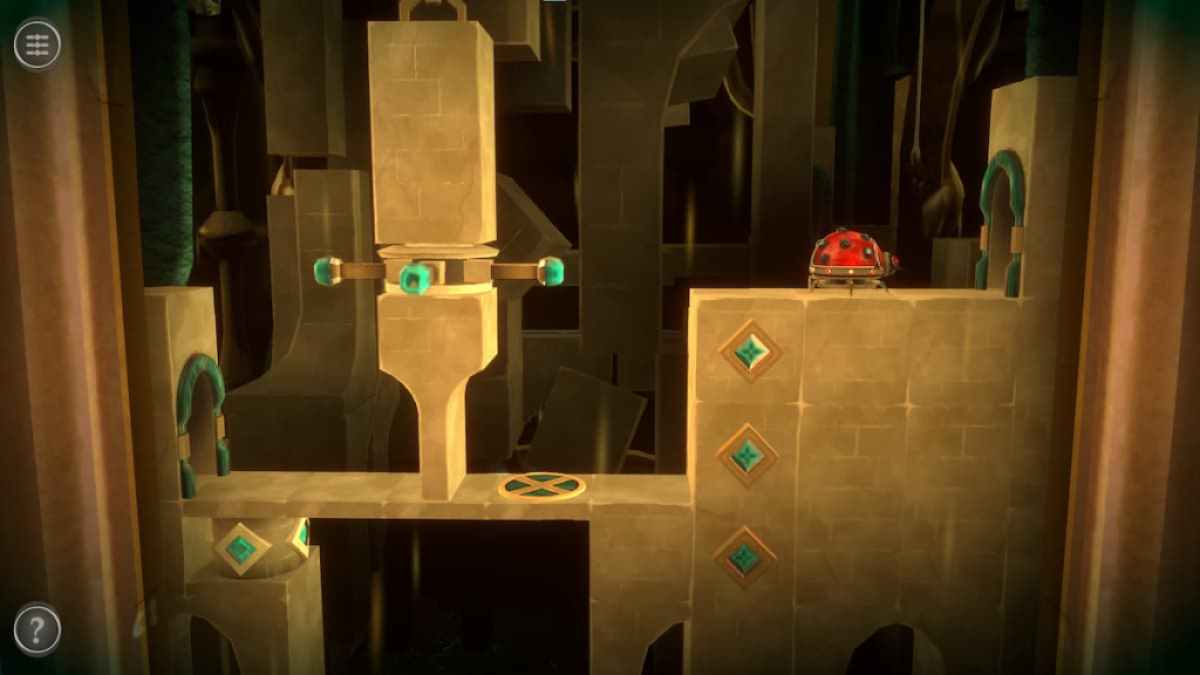
The ladybug will exit the clock , giving you the Owl Figure .
Screenshot by Pro Game Guides
Grabbing the Owl Figure removes you from the third room , unlock the final room in Chapter 1 .
Room 4 puzzles
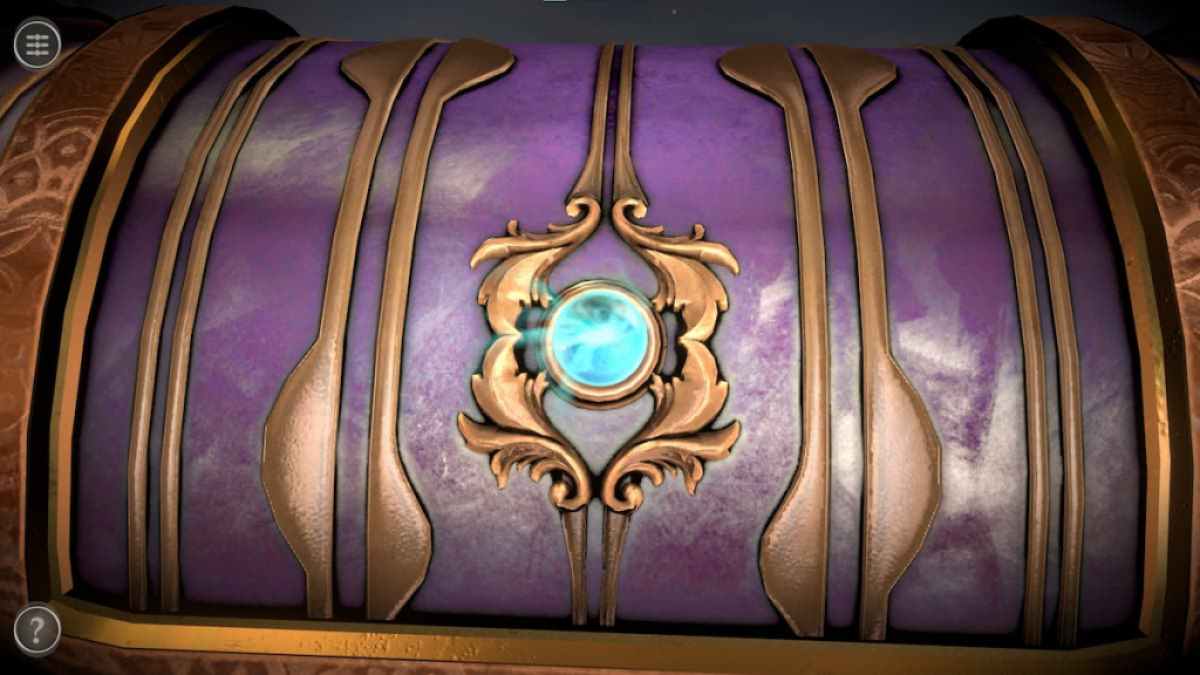
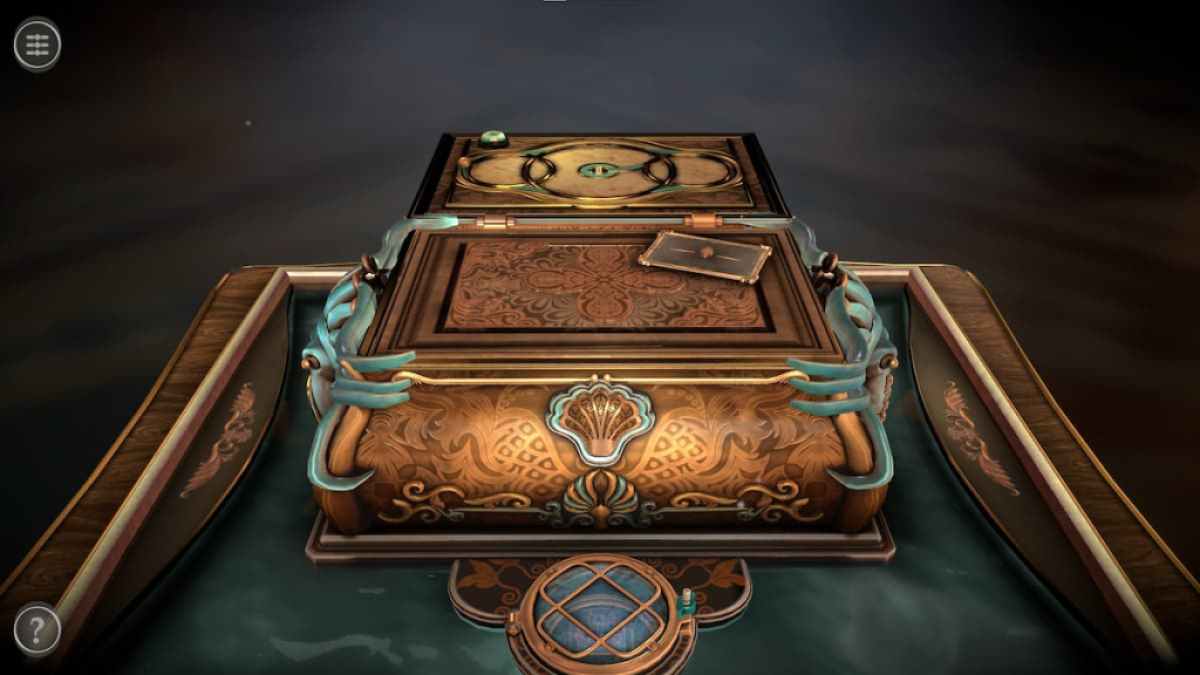
The fourth room feature a hoarded wealth thorax float atop a pool of water .
start the chest puzzles by circumvolve the television camera and viewing the compartment at the back of the chest .
Flip each extension up and pull up the compartment down to get a Clam Shell .
Screenshot by Pro Game Guides
grade the Clam Shell into the matching maw at the front of the chest . The Clam Shell will open up , giving you a Pearl .
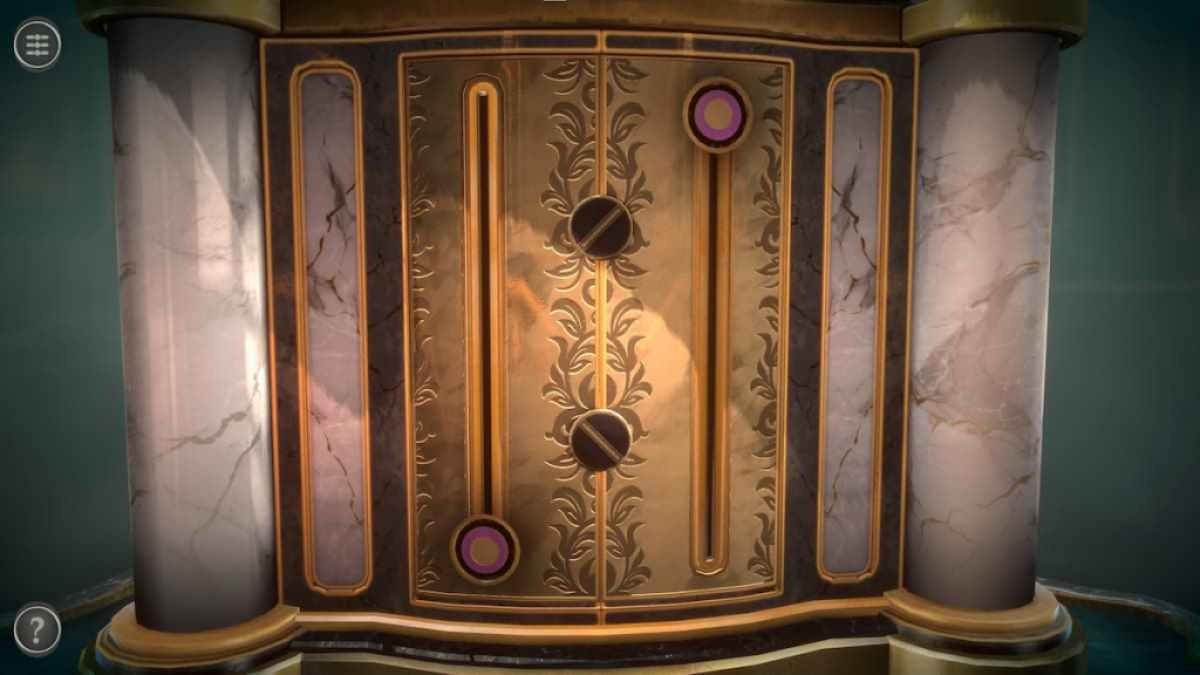
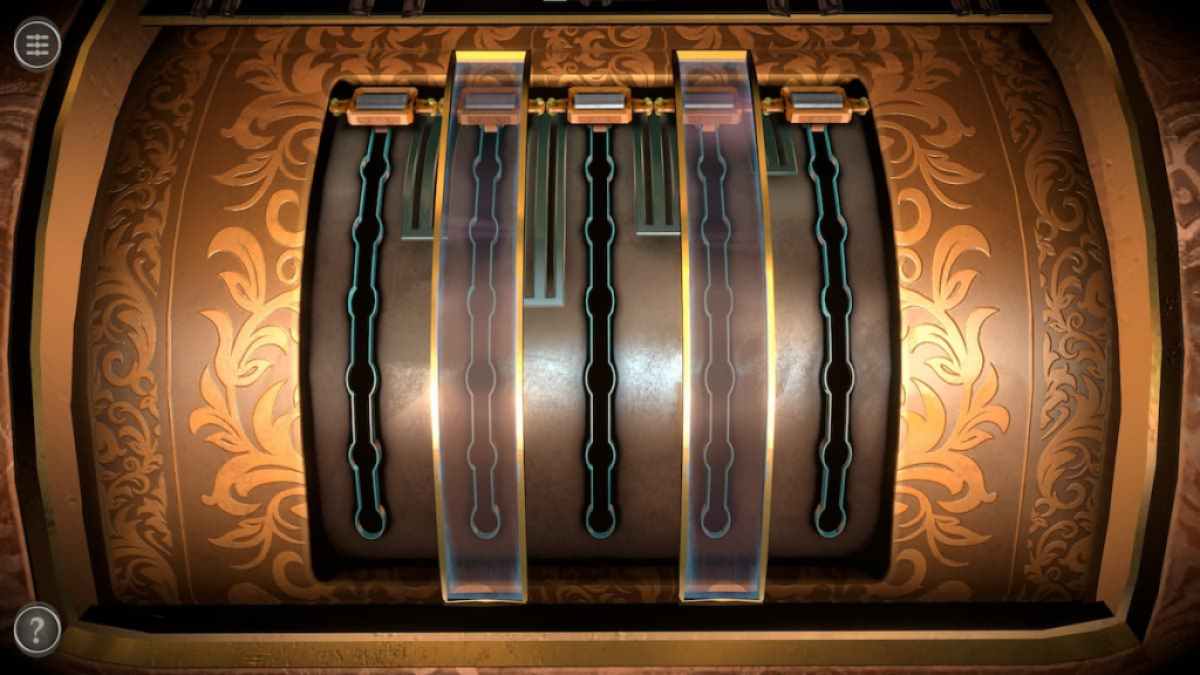
Place the Pearl in the round pickle at the top of the chest to unlock a slider puzzle .
identify the Pearl unlocks a skidder puzzler on top of the chest .
Screenshot by Pro Game Guides
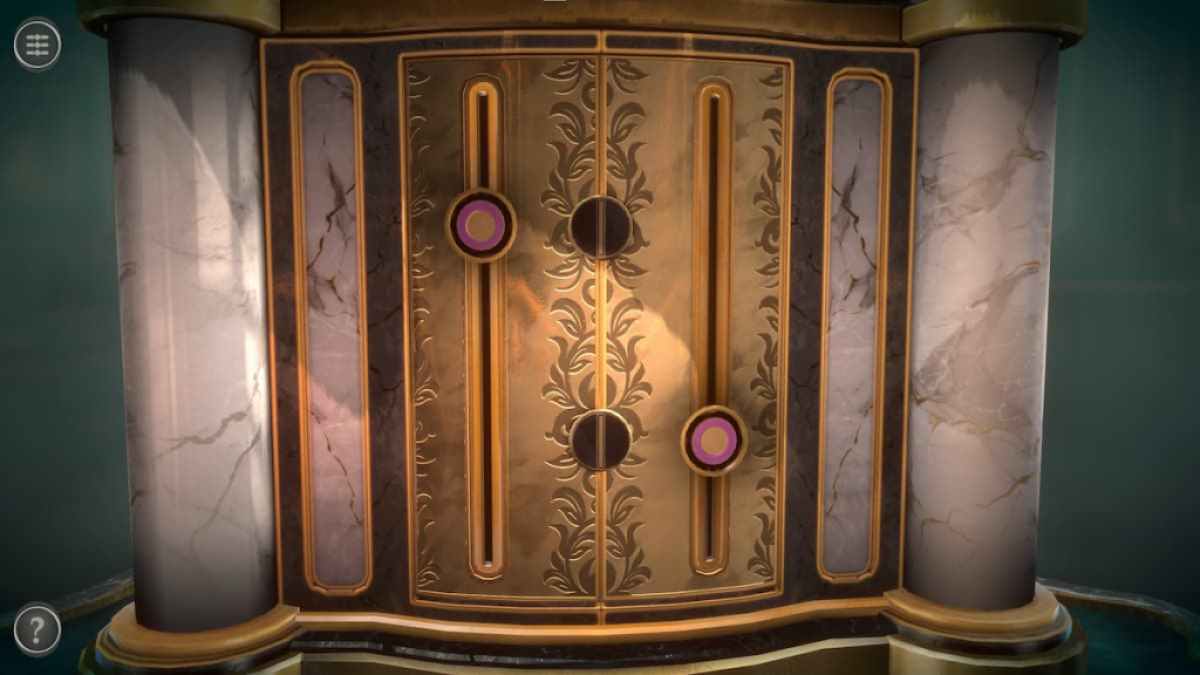
When a yellow-bellied terrapin is in the correct locating , it will light up up blue . The three exposed sliders are attach to the two covered I by metallic element strips . They will move the uncovered one when they move past the bottom or top of the metallic element strip .
When all of the switch are disconsolate , the puzzle is arrant .
finish the mystifier moves the octopus ’s tentacle on either side of the chest , unlock it and opening the top . The minuscule chocolate-brown poster with an simulacrum of the mask provide a hint about the story of the game .

Screenshot by Pro Game Guides
Look at the devilfish on the left of the bureau . Push its right eye into place to get a Metal Figure .
Look at the devilfish on the right . Push in its leftover eye to receive an Anchor .
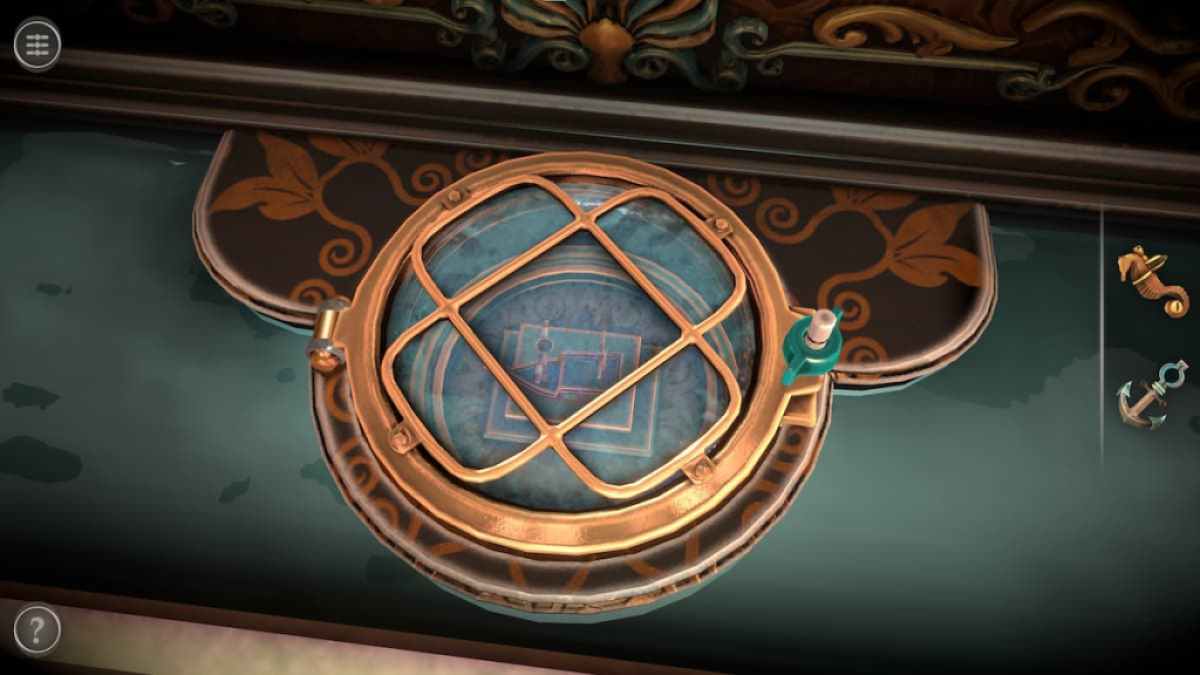
Focus on the compartment in front of the chest .
Screenshot by Pro Game Guides
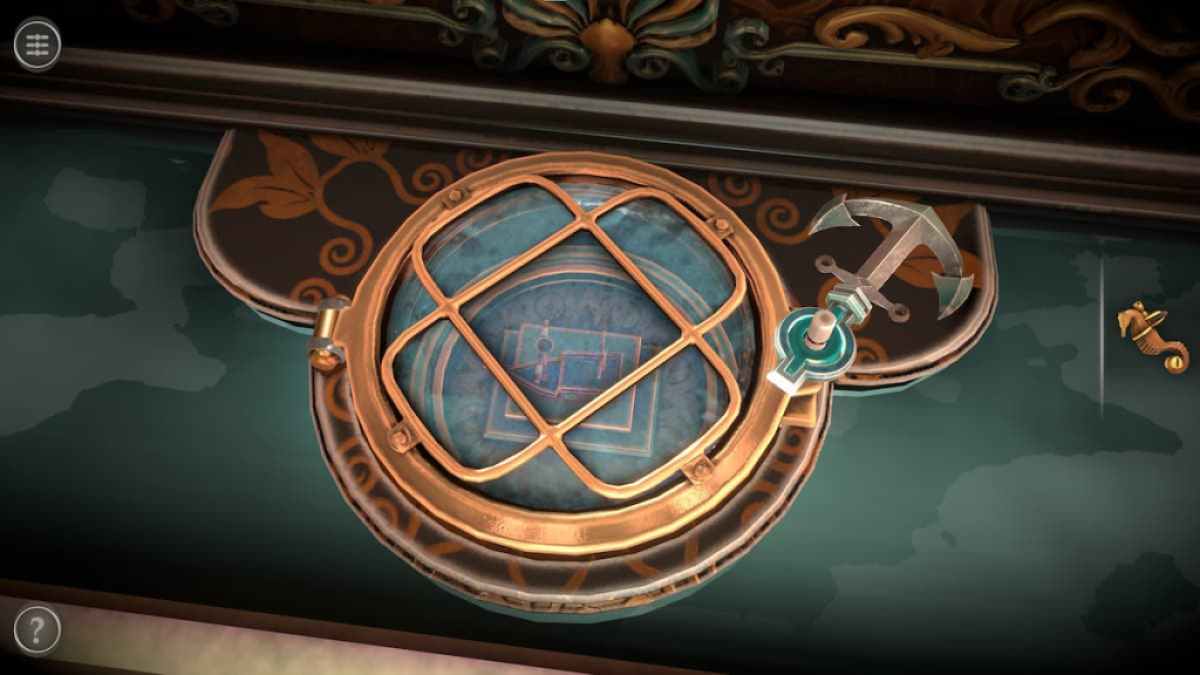
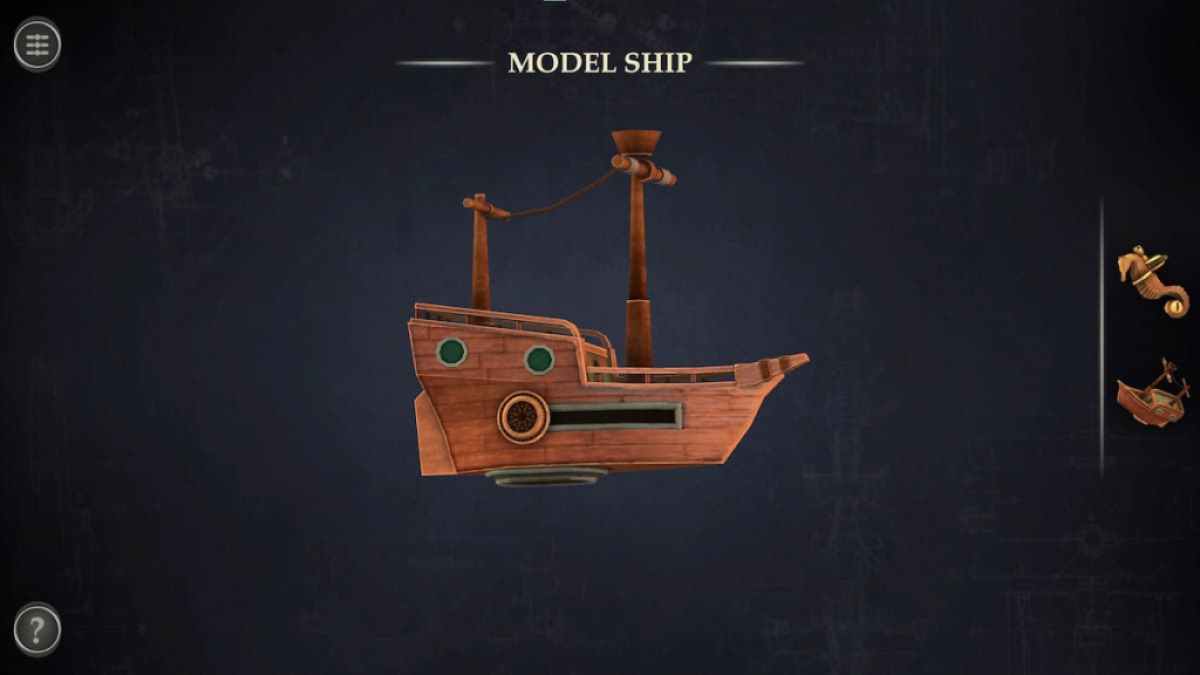
localize the linchpin on the peg to the right , rotate it , and open up the compartment to get a Model Ship .
The tract puzzle at the top of the box is the next , but you ’ll point out that part of the slider is missing .
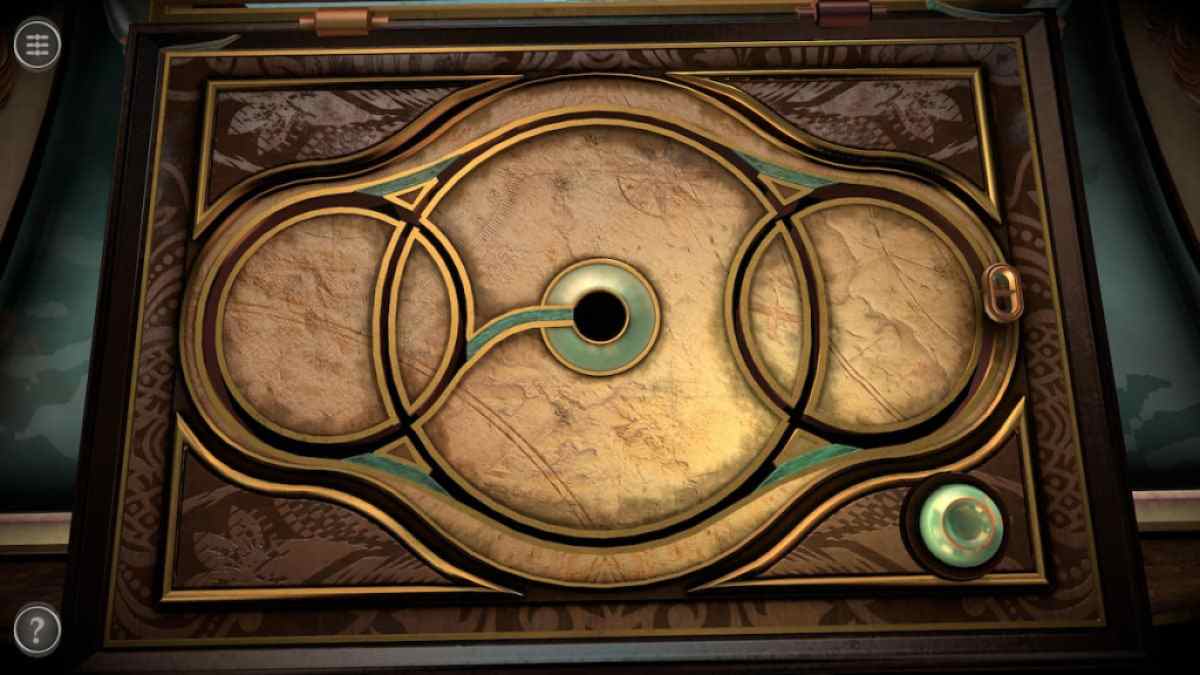
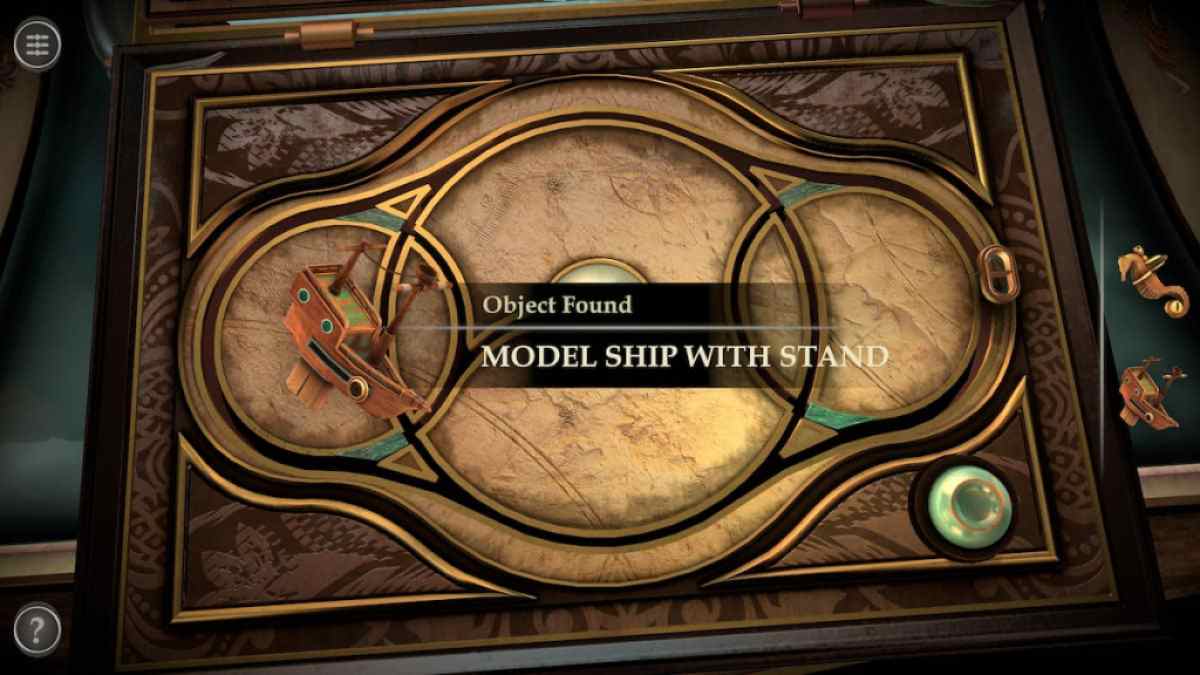
unfold the Model Ship in your inventory and rotate it to unwrap a hidden slider .
Screenshot by Pro Game Guides
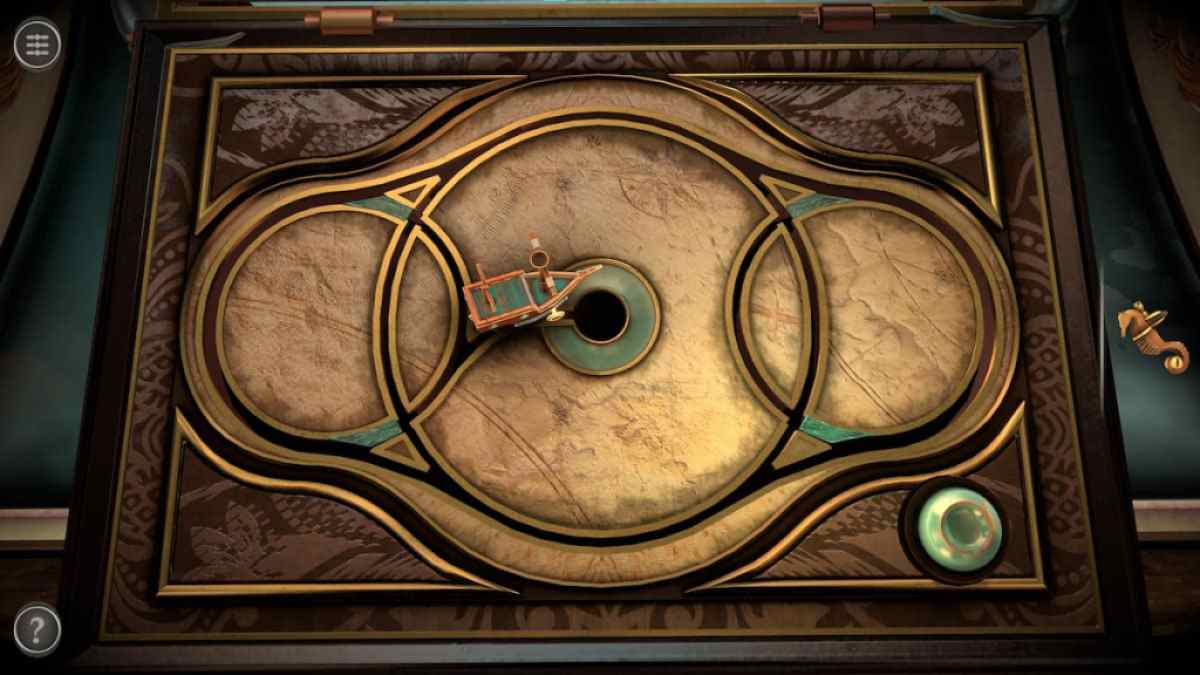
move the Pseudemys scripta extends a bit from the bottom of the ship .
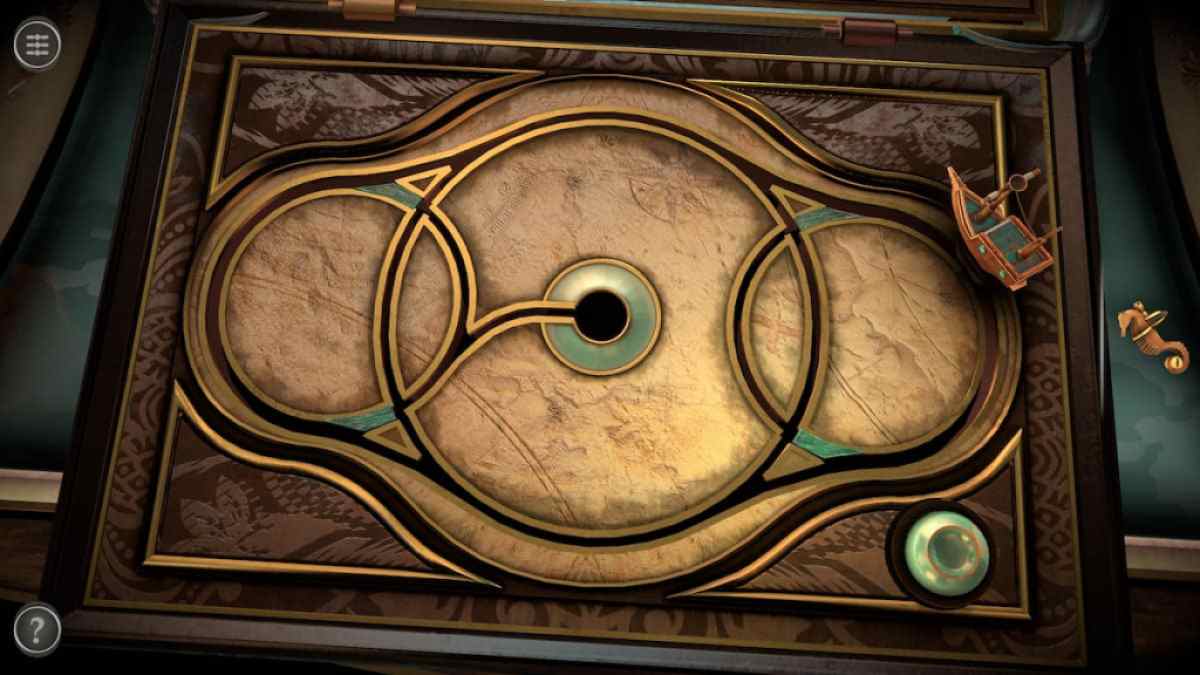
The ship can be placed on the slider , causing it to start moving around the nerve tract .
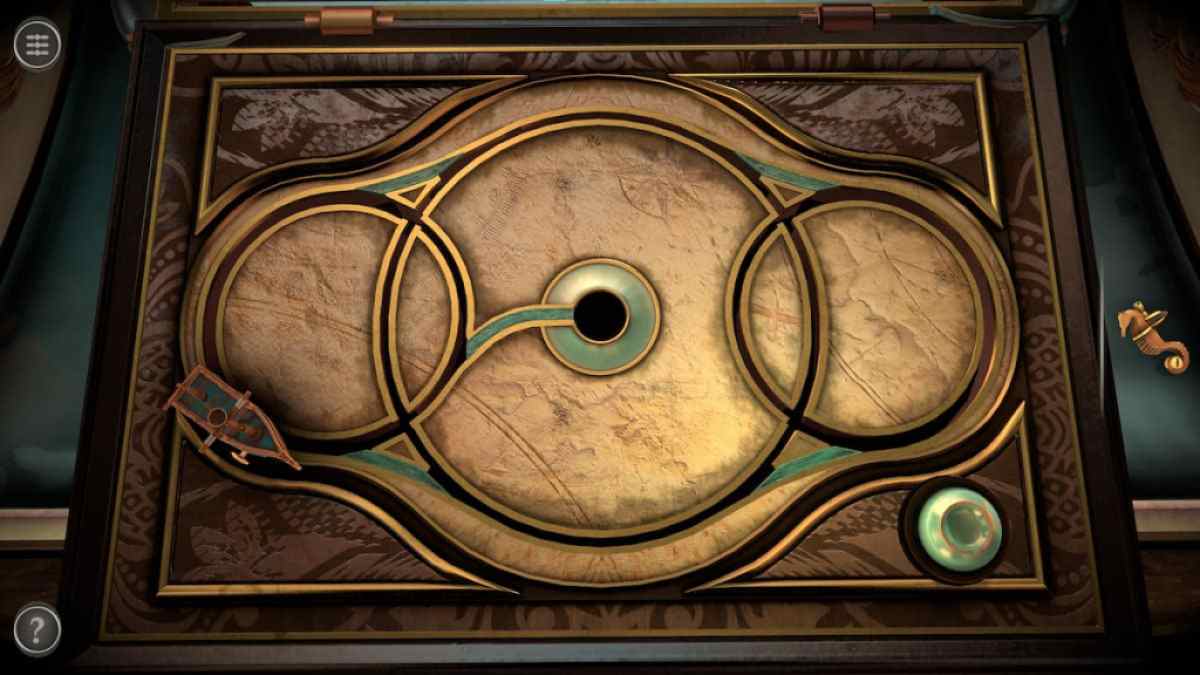
The button on the lower left can be tapped to block different nerve tract . To get the ship to the centerfield , you ’ll first need to get it in the circle on the left side .
Screenshot by Pro Game Guides
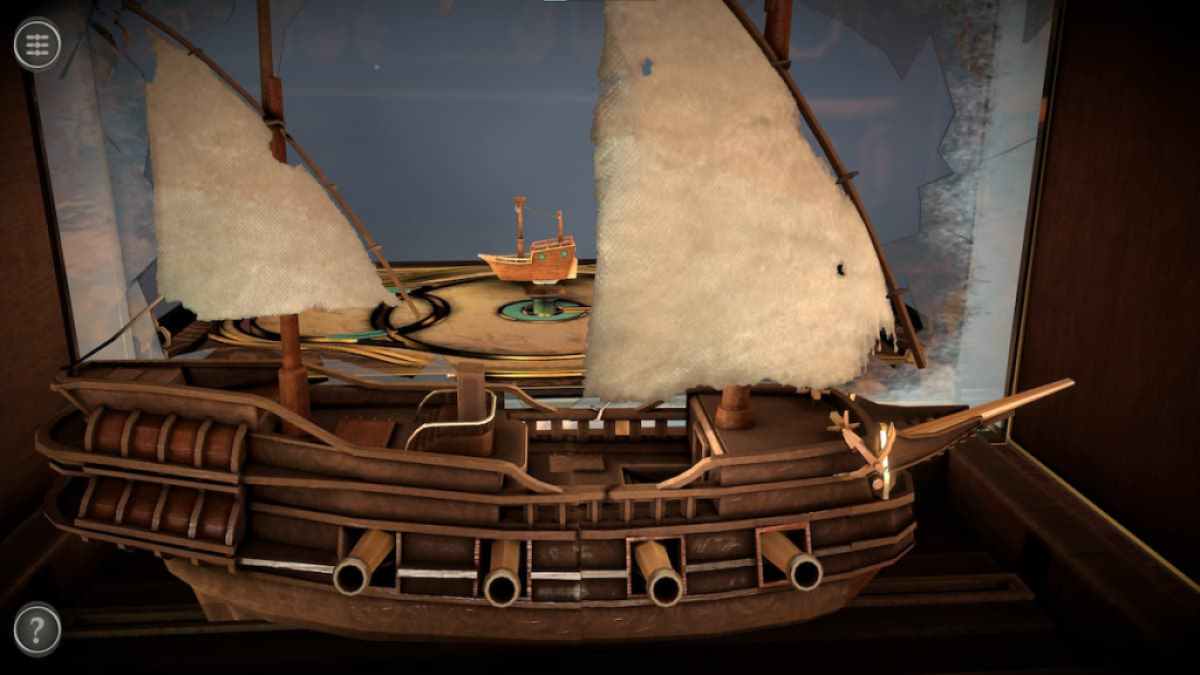
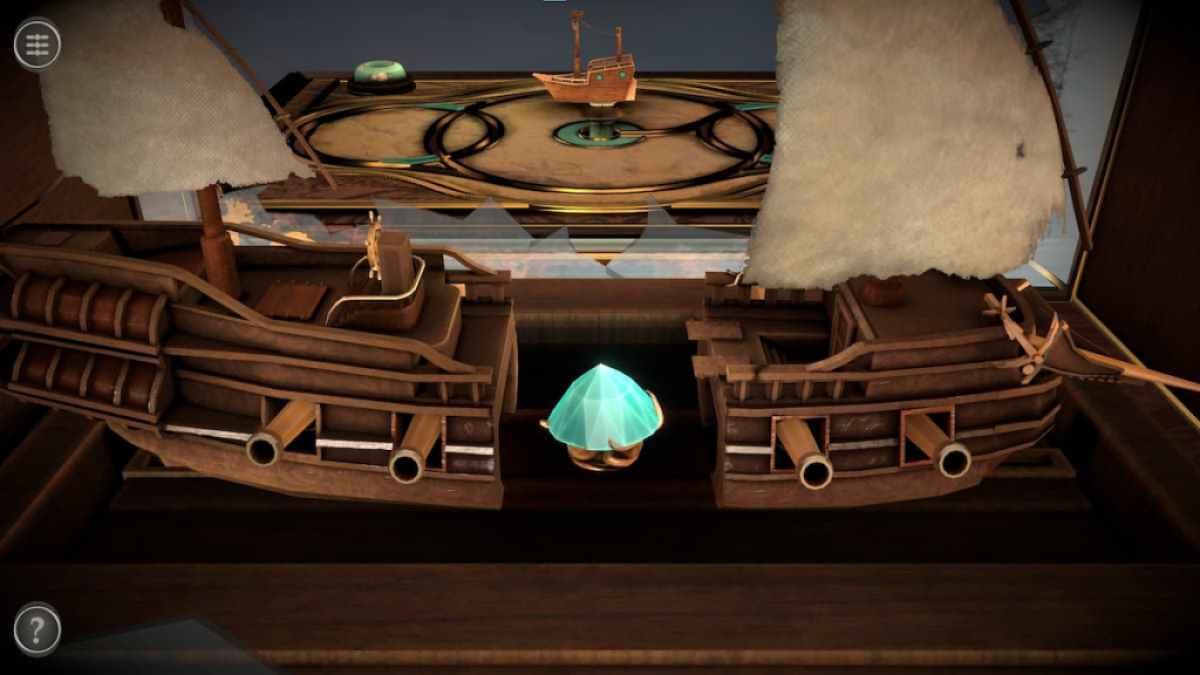
You ’ll then require to use the button to halt the other paths , force the ship into the gist . dispatch this will have a Sir Henry Joseph Wood and glass case contain a prominent model ship to rise from the other side of the thorax .
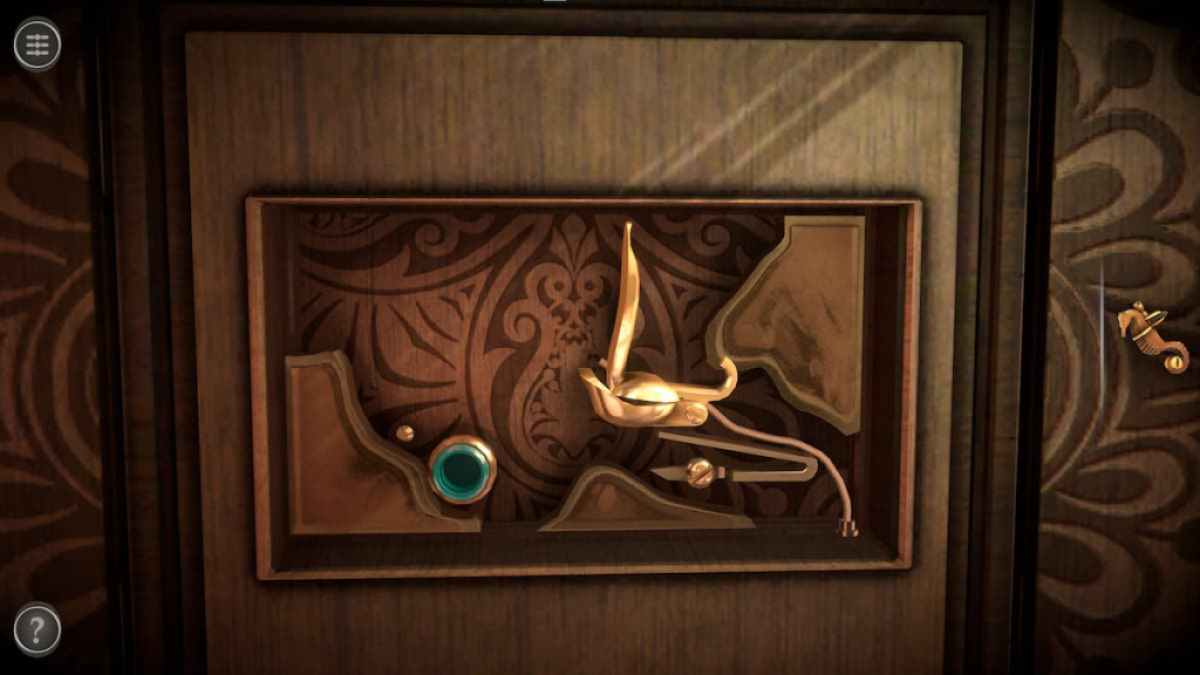
When count at the larger example ship in the woods and glass example , look at the side of the box near the back of the ship .
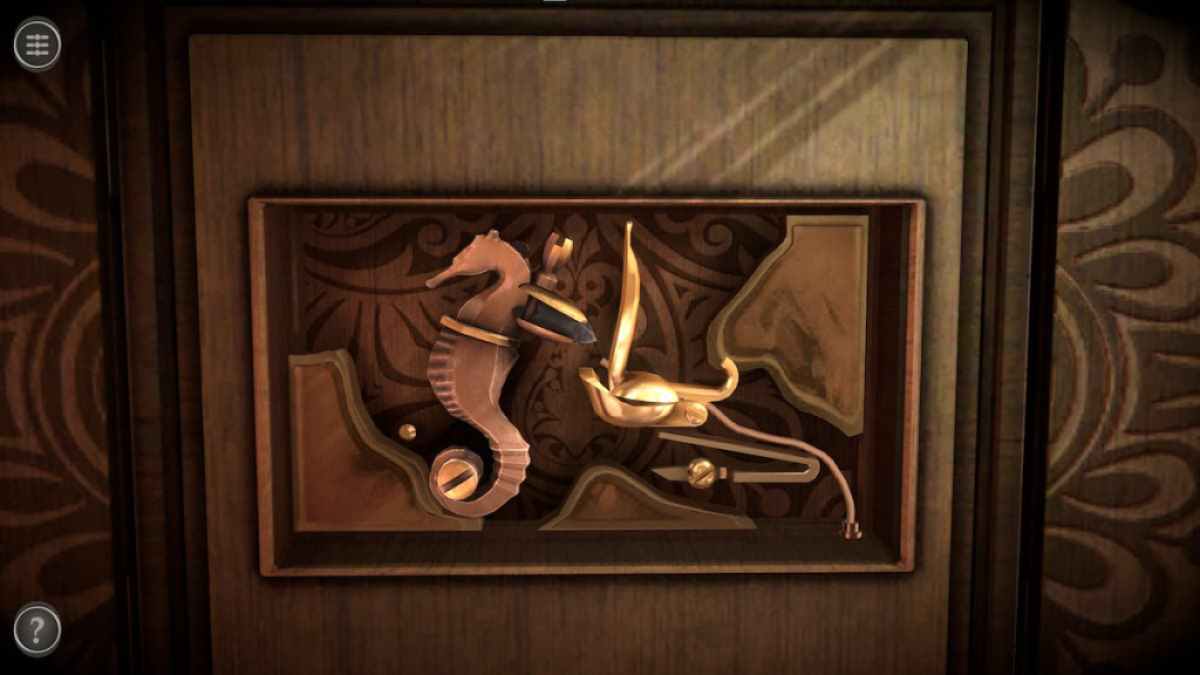
identify the Metal Figure on the blue - light-green peg .
Screenshot by Pro Game Guides
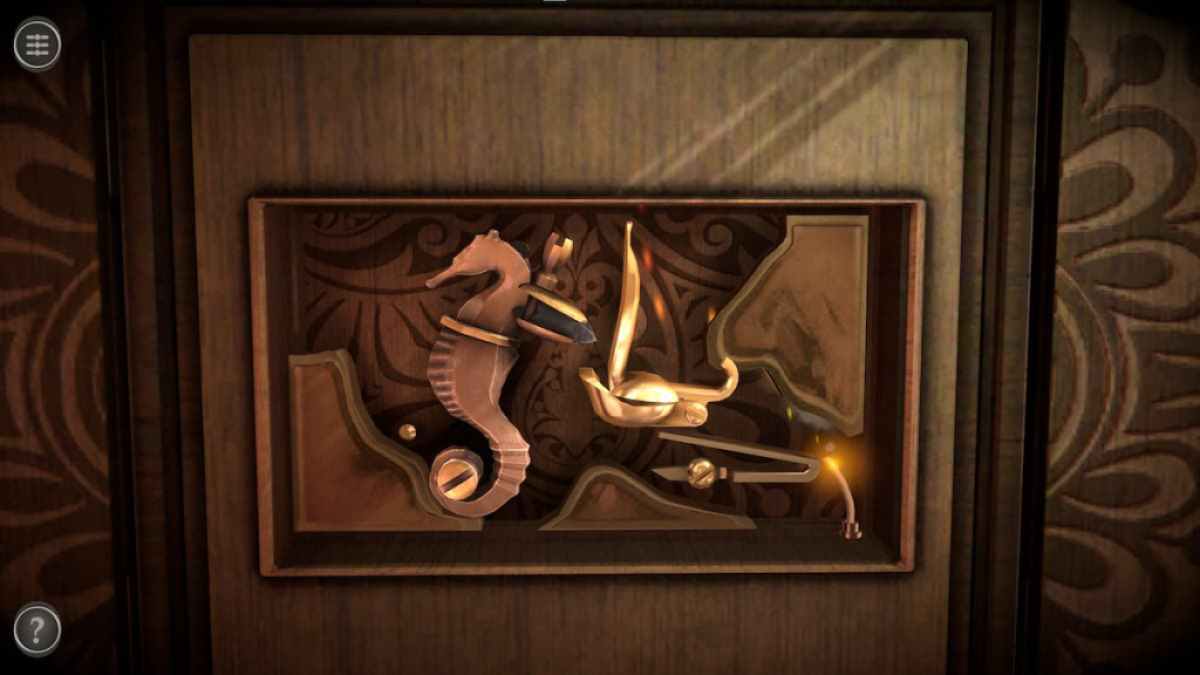
Pull the seahorse to the leftfield , get it swing back to hit the fortunate figure . This will alight the string to the right of the figure , which leads towards the ship . It will mark the shank off , breaking the glass around the ship .
Related : Complete 50 Tiny Room Escape walkthrough
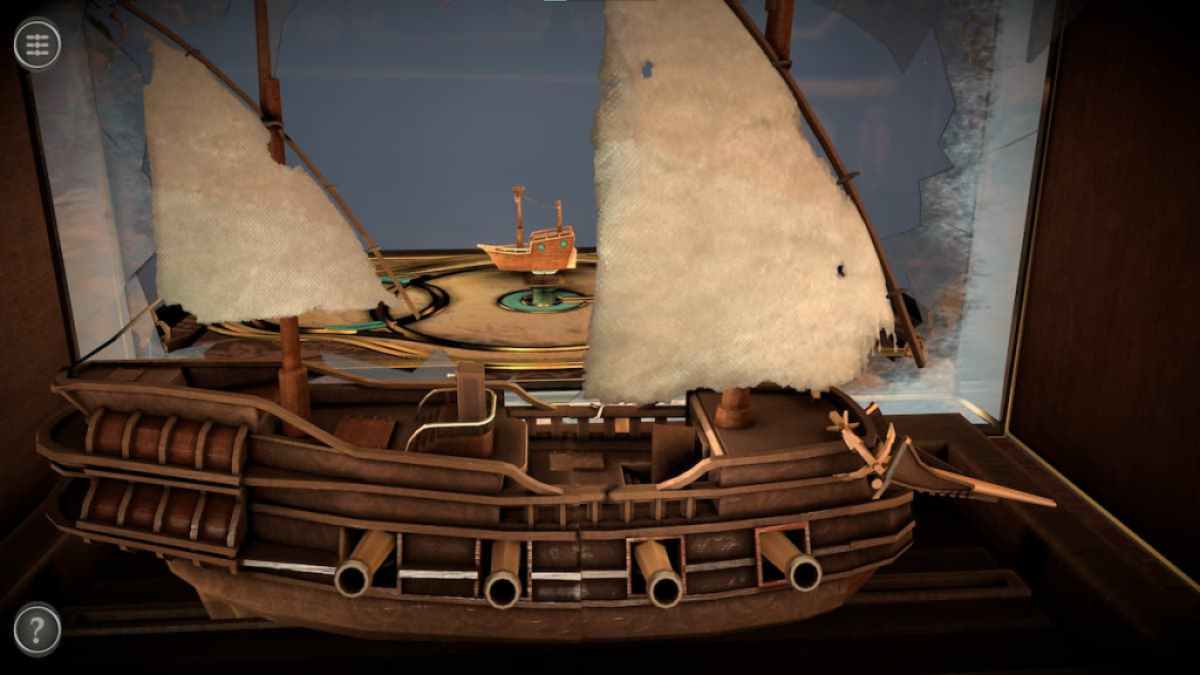
Tapping on the heavy ship model allows you to zoom in on it .
Screenshot by Pro Game Guides
displume the front of the ship down to open up the door beneath the front mast .
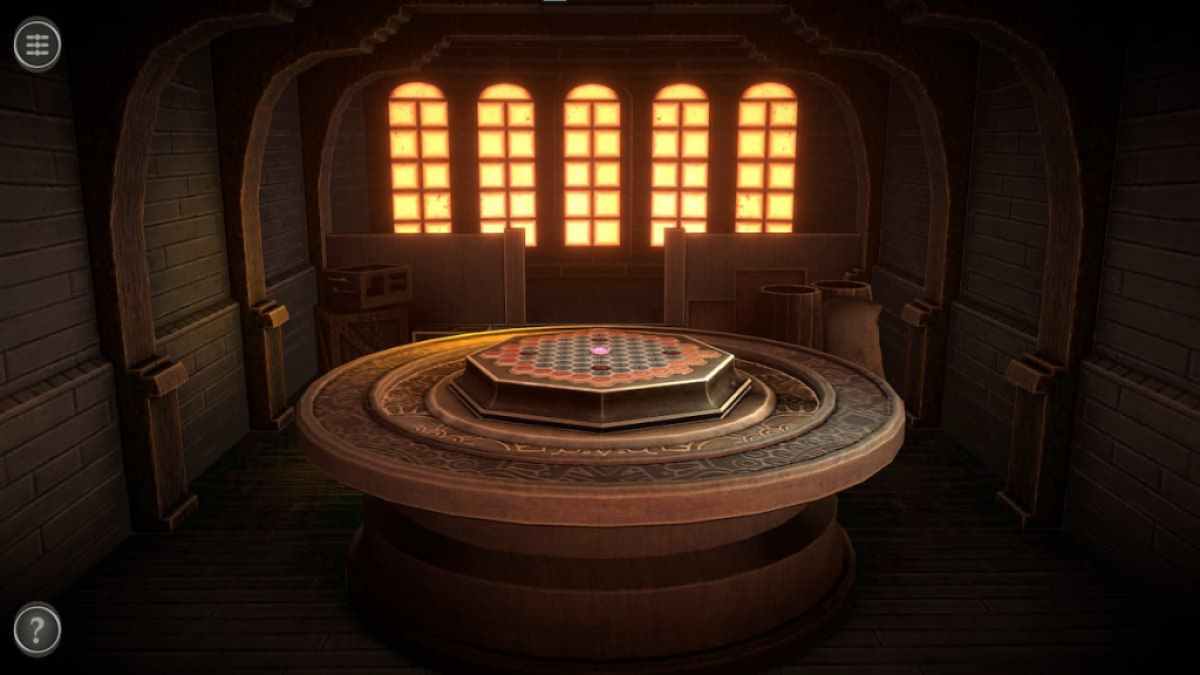
Entering the door divulge a minuscule room with a table in the nub .
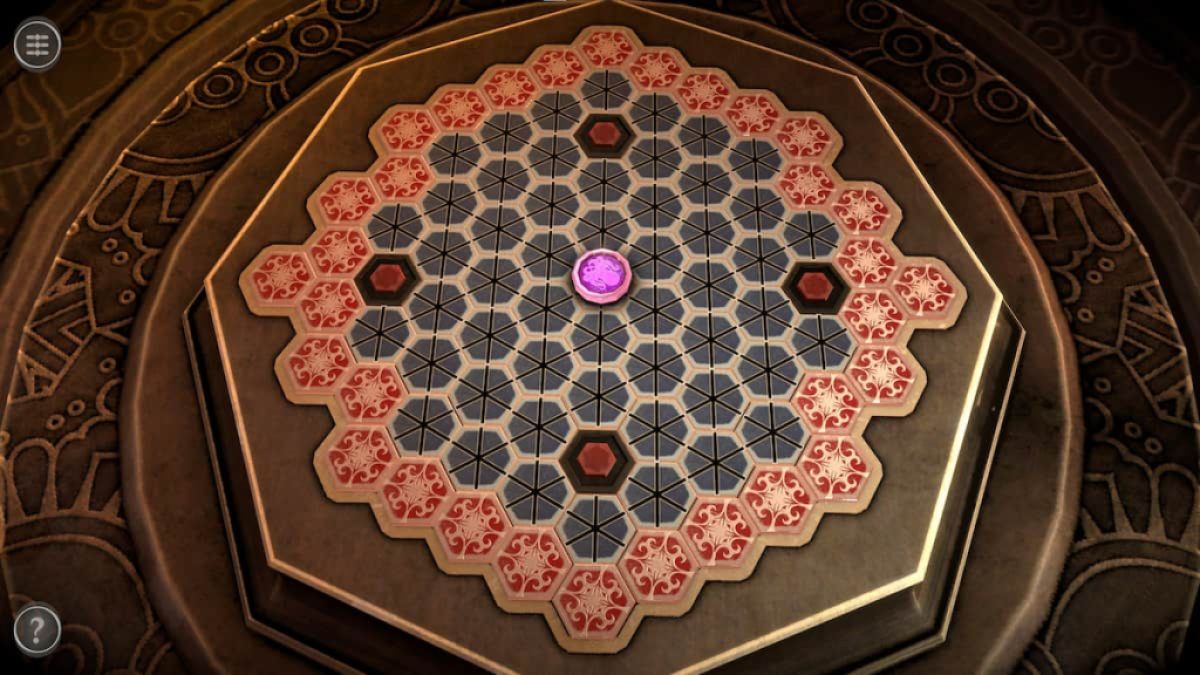
The table has one pinkish token in the center of attention surrounded by grey second power with red and gold square on the edge . tip on a grey square flip it over , reverse it into one of the dark squares with red hexagon on top . The goal of the puzzler is to trap the pinkish token in a ring of sinister and red squares to prevent it from escaping onto one of the flushed and Au tile .
Screenshot by Pro Game Guides
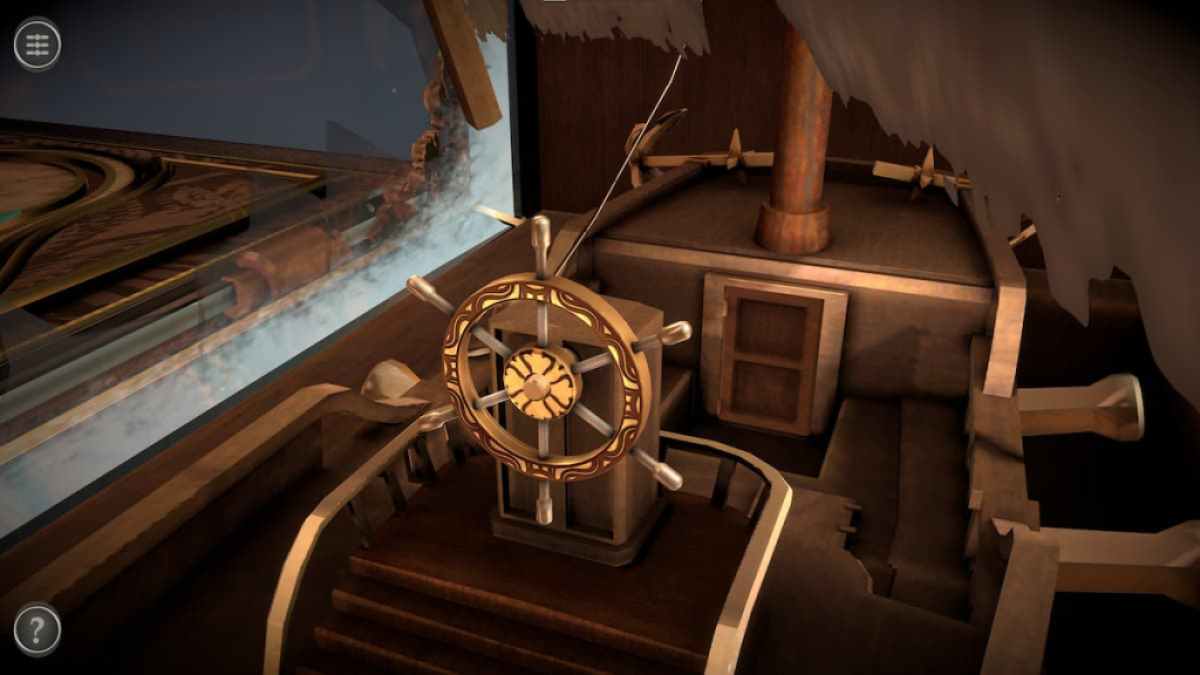
Trapping the pink token flips the table , giving you a Steering Wheel .
The Steering Wheel can be placed on the post on the back of the ship .
Spin it to get a Prism and return to the main room .
Screenshot by Pro Game Guides
Finishing main room
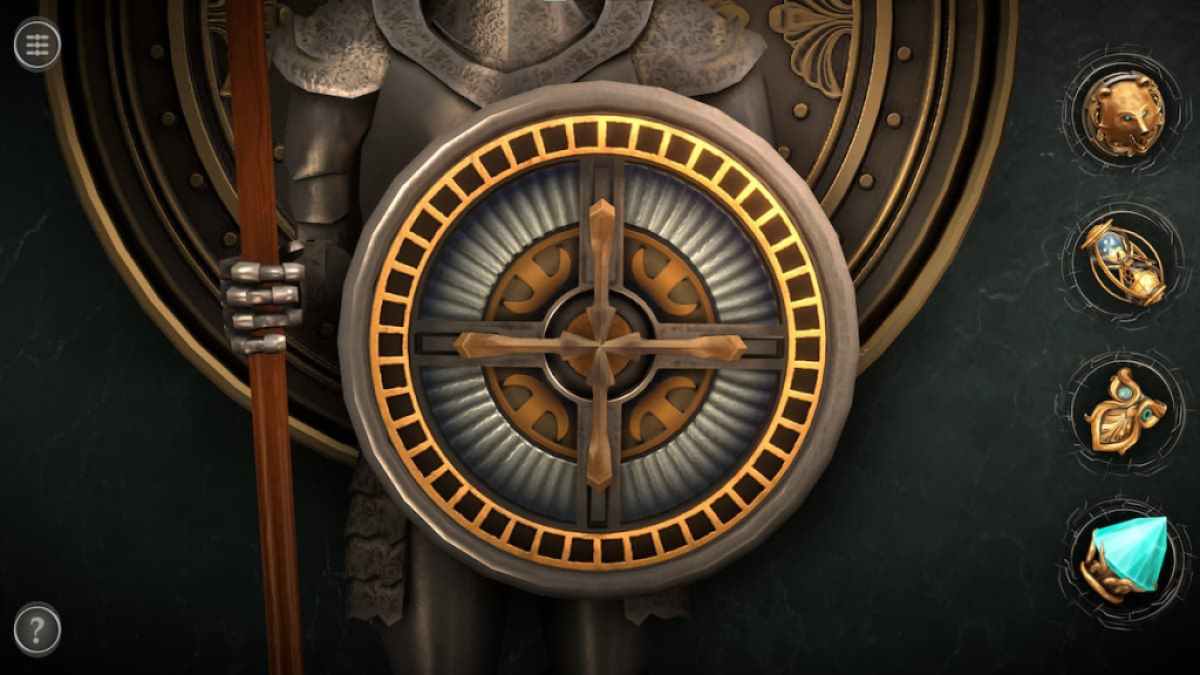
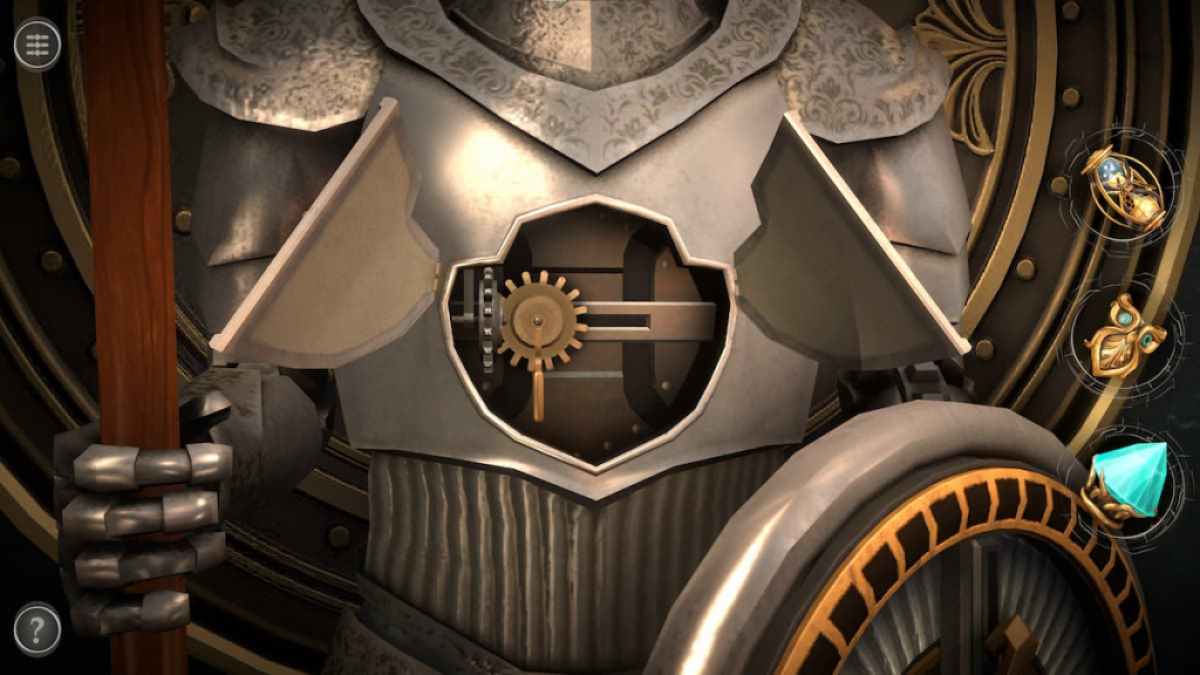
manoeuvre to the side room and soar up in on the suit of armour ’s shield .
Rotate the gear around it to reveal a circular space .
Place the target shaped like a bear psyche here .
Screenshot by Pro Game Guides
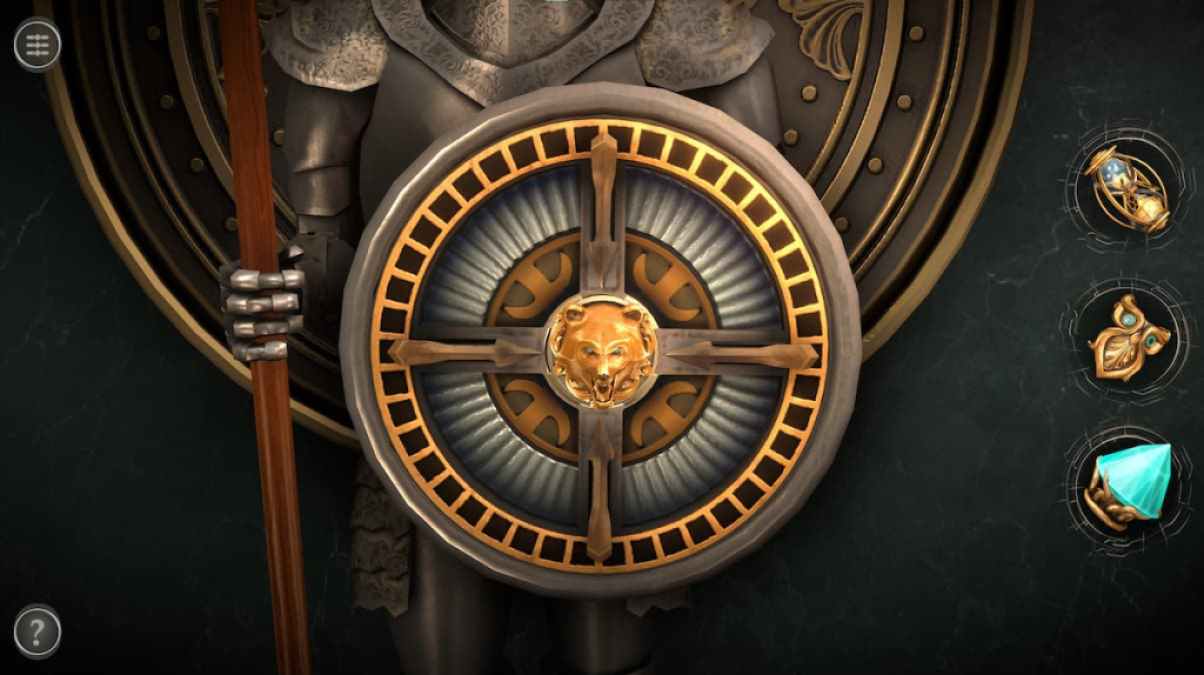
Doing so will reveal a compartment on the armour itself . open up the two doors and slide the gear over to dispatch the suit of armor . This will cause it to move its weapon down , rotating the wall to put a painting in its place .
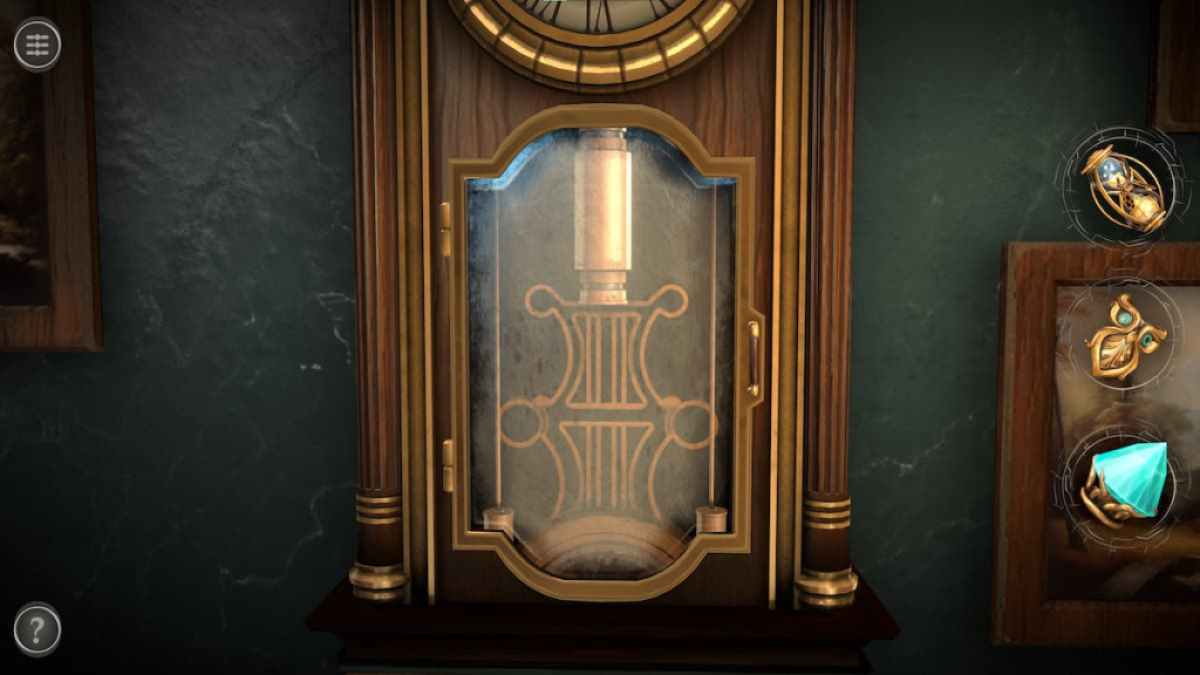
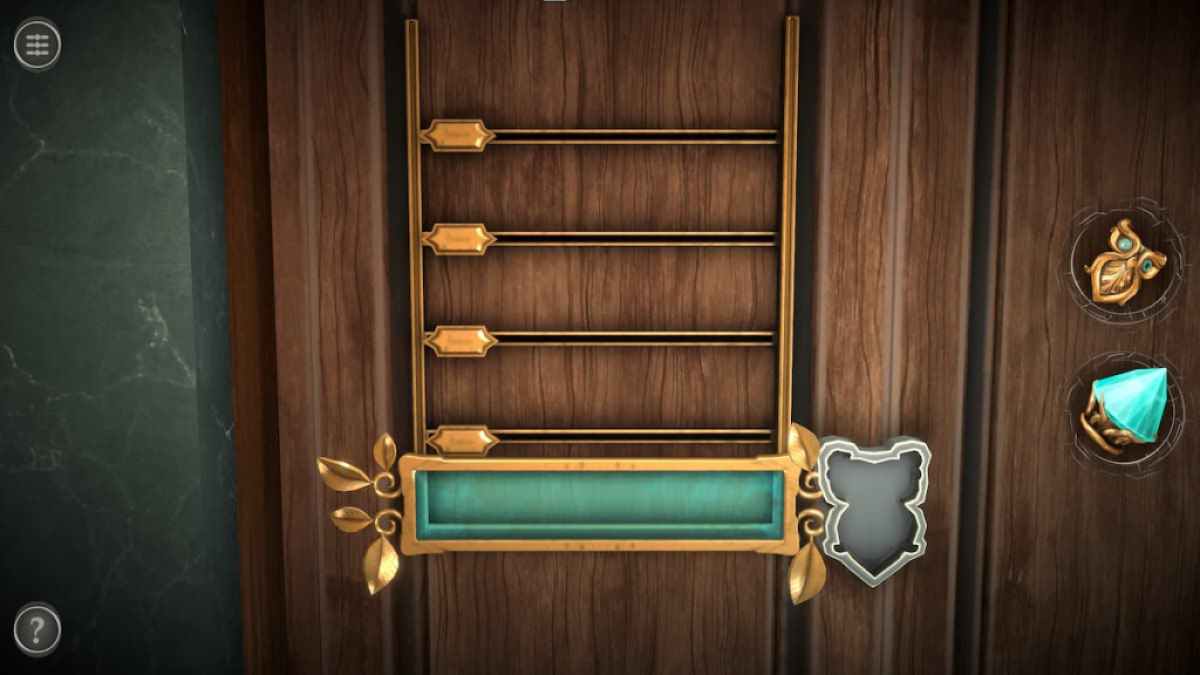
Look at the clock on the left field .
Pull the door open and rip the golden cylinder in the heart to the bottom .
Screenshot by Pro Game Guides
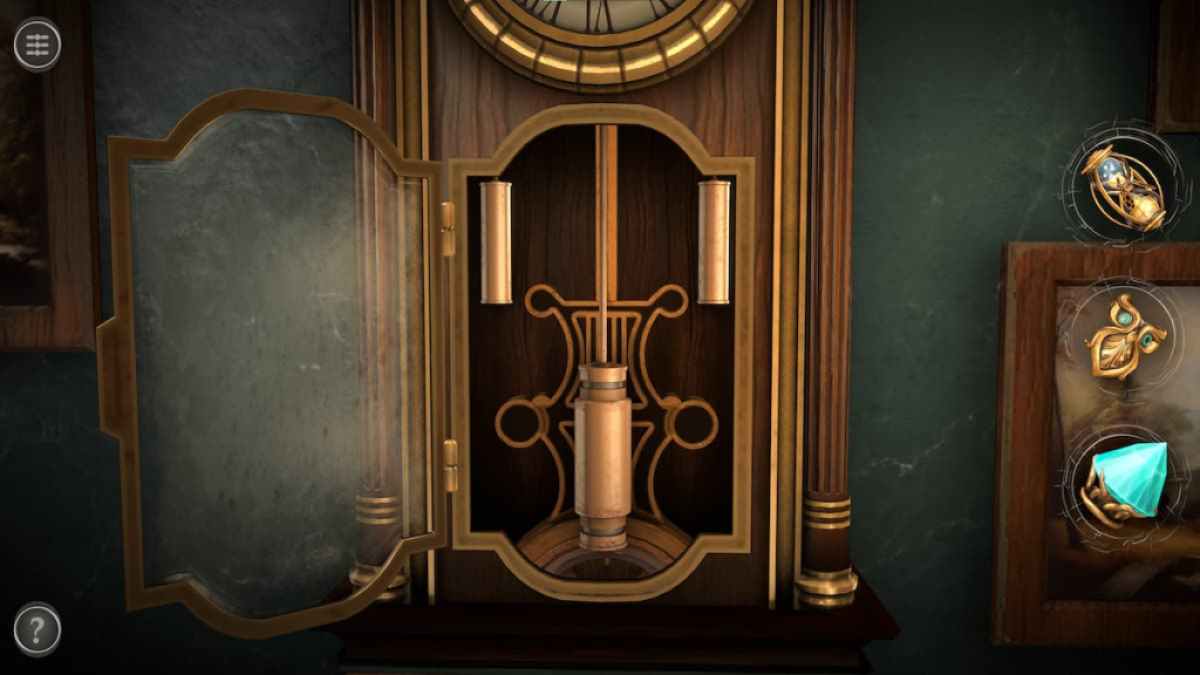
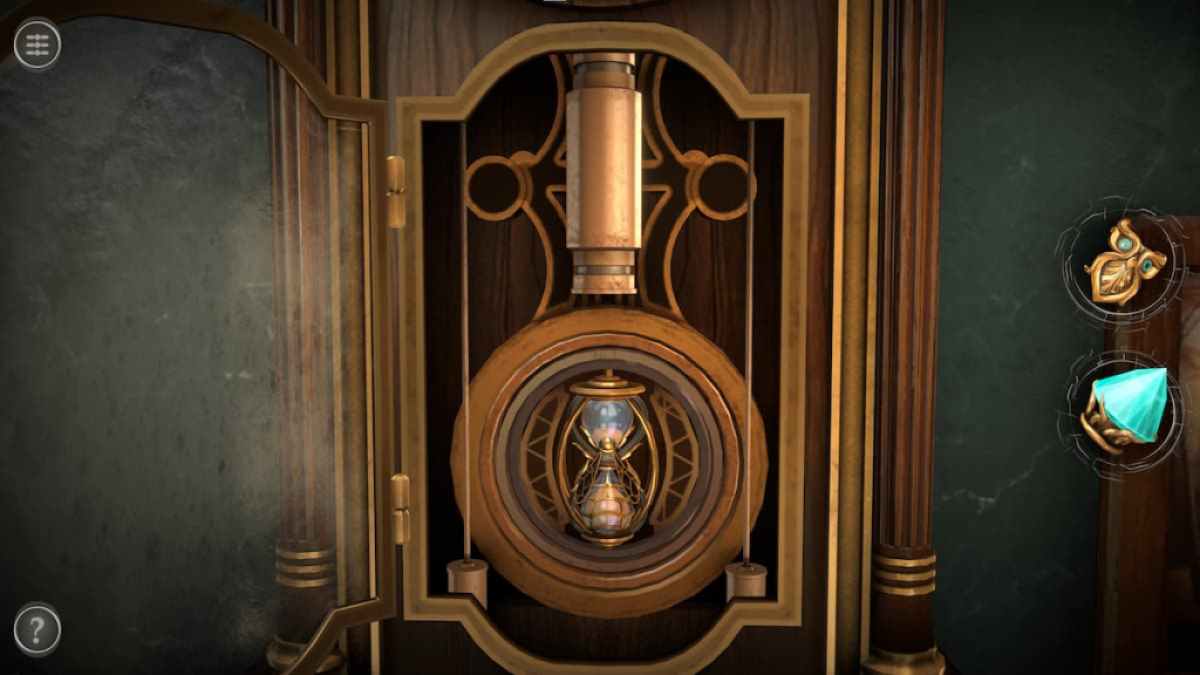
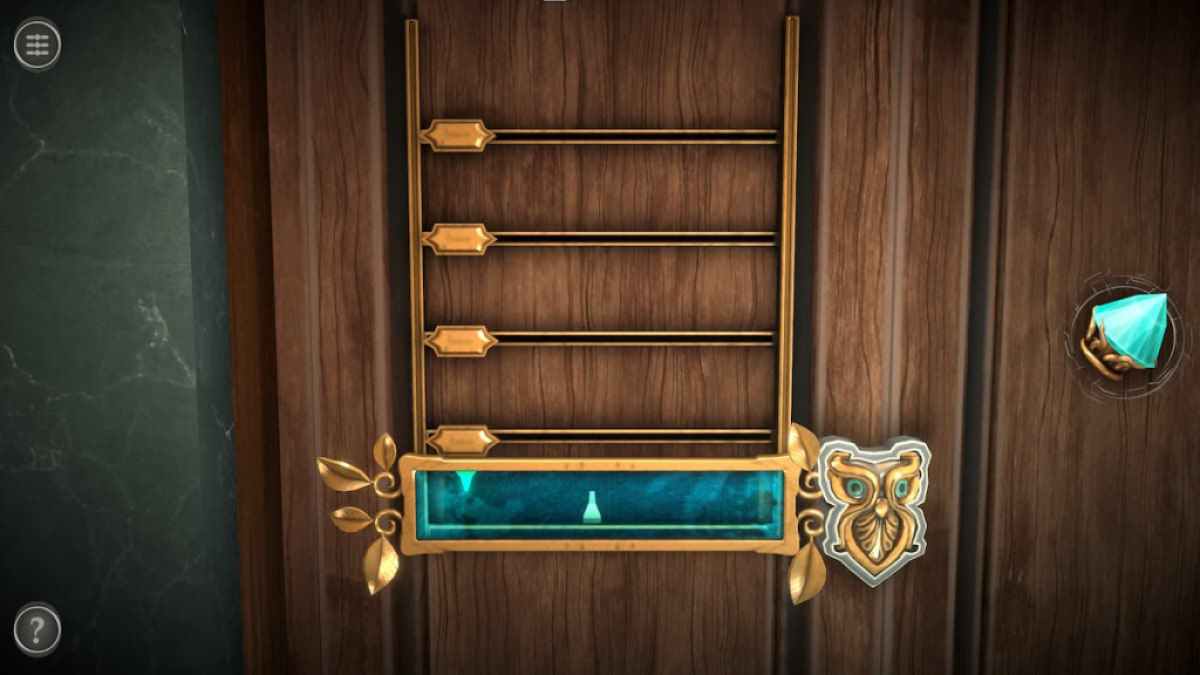
This will unlock a cylindrical quad . site the hourglass into it to turn the clock on , which will make a newfangled puzzle appear to the right of the painting .
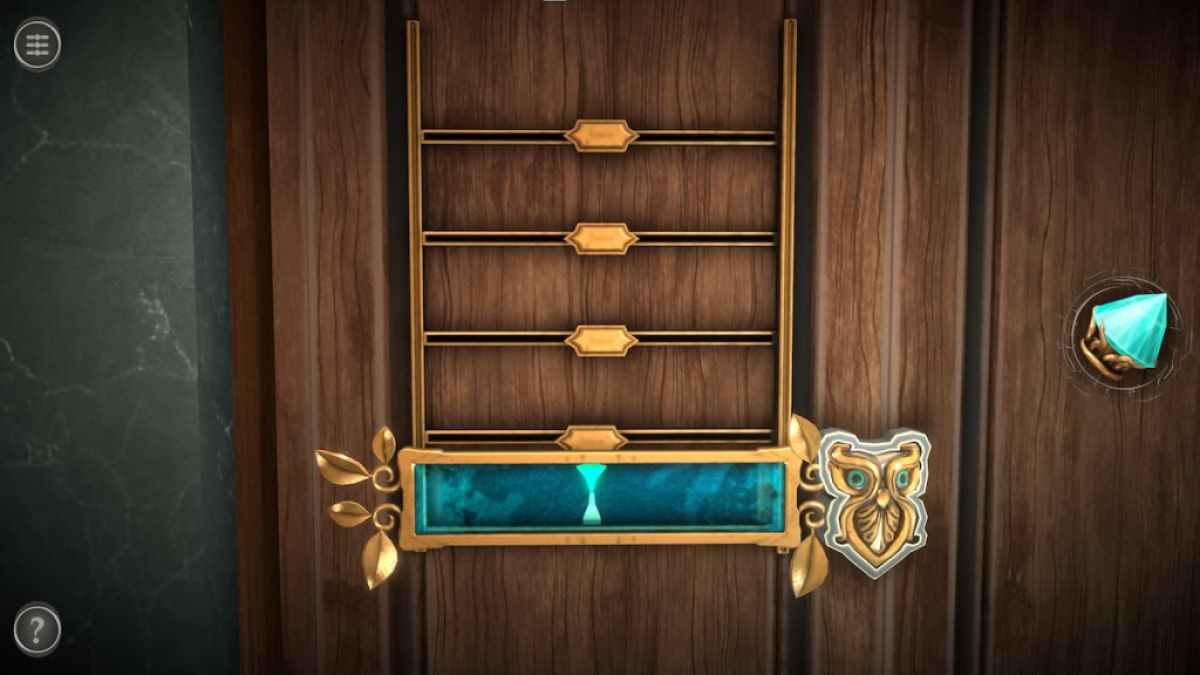
The puzzle unlock by the clock has an bird of night - shape maw in the bottom recess .
Place the bird of Minerva - shaped piece in the hole . This will make the gloomy cake to its left show where each slipper needs to be position .
Screenshot by Pro Game Guides
Line up the pointer connected to the luger with the pointer on the disconsolate bar .
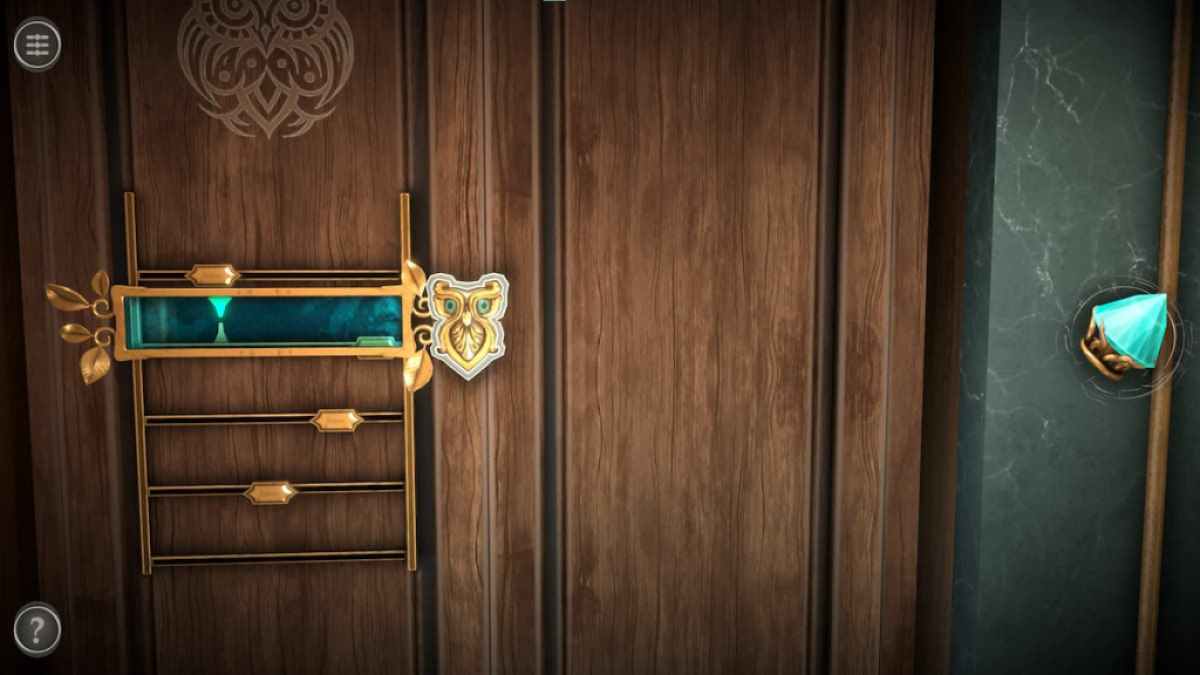
Move the blue bar up and ingeminate the procedure to complete the teaser .
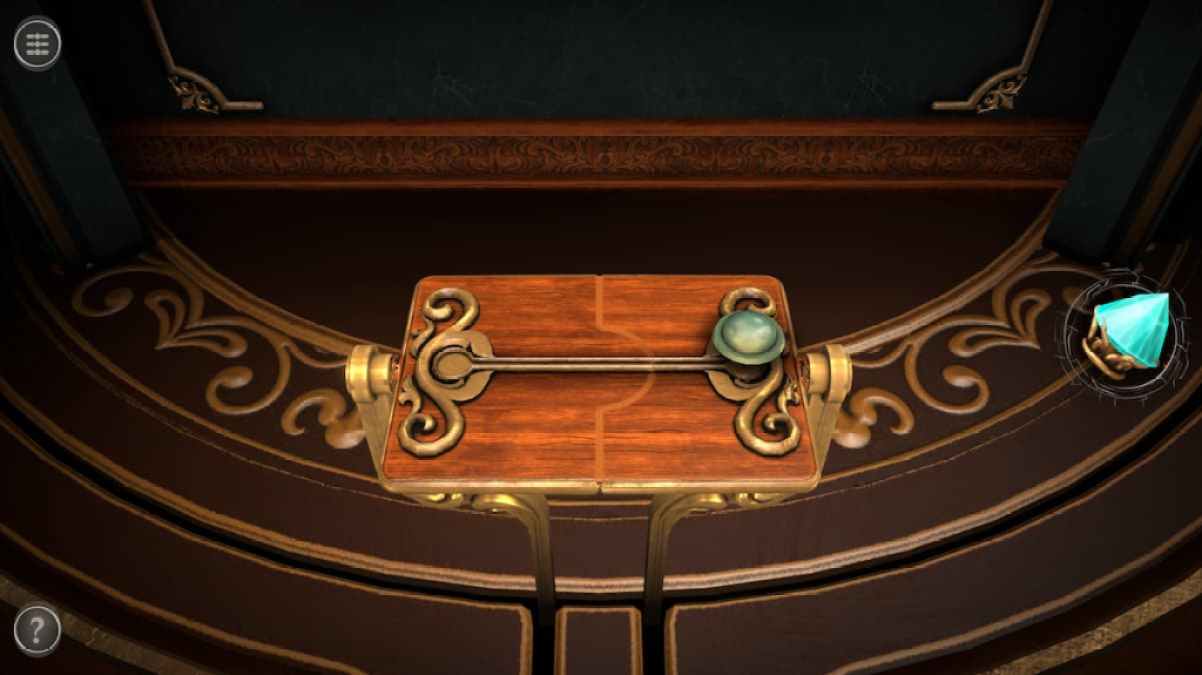
Completing the Owl Puzzle reveals a small table in front of the picture , slip the object on the right to the left side of the table to flip it over .
Screenshot by Pro Game Guides
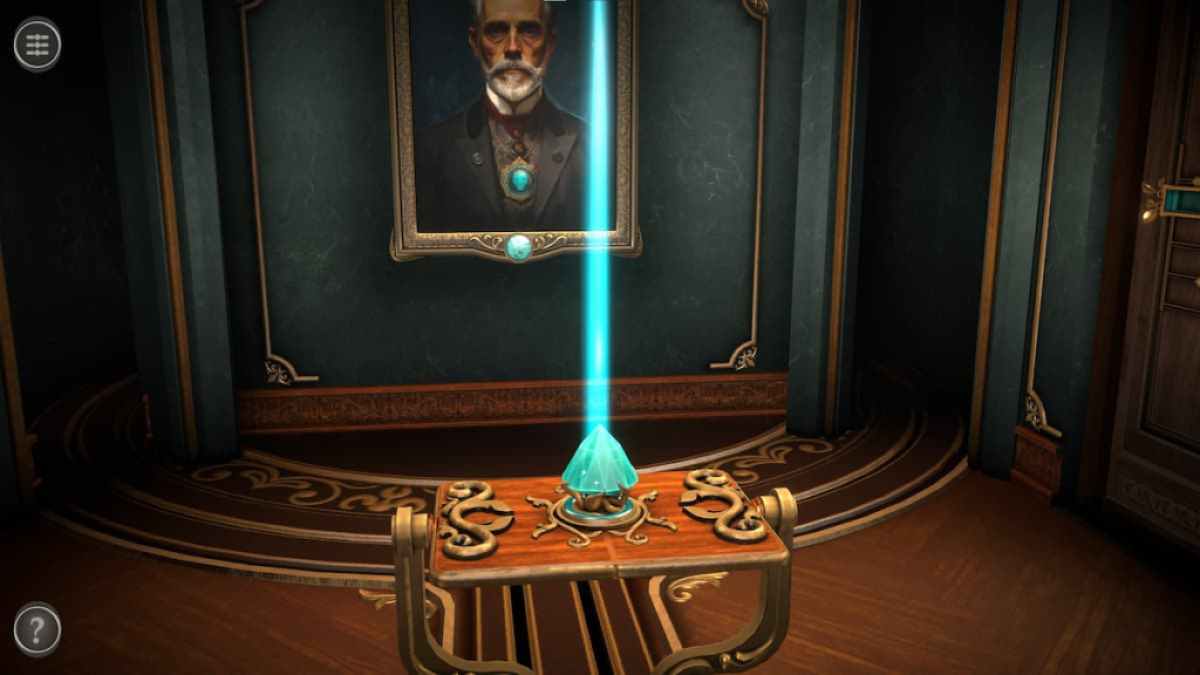
Place the prism into the center of the newly switch mesa .
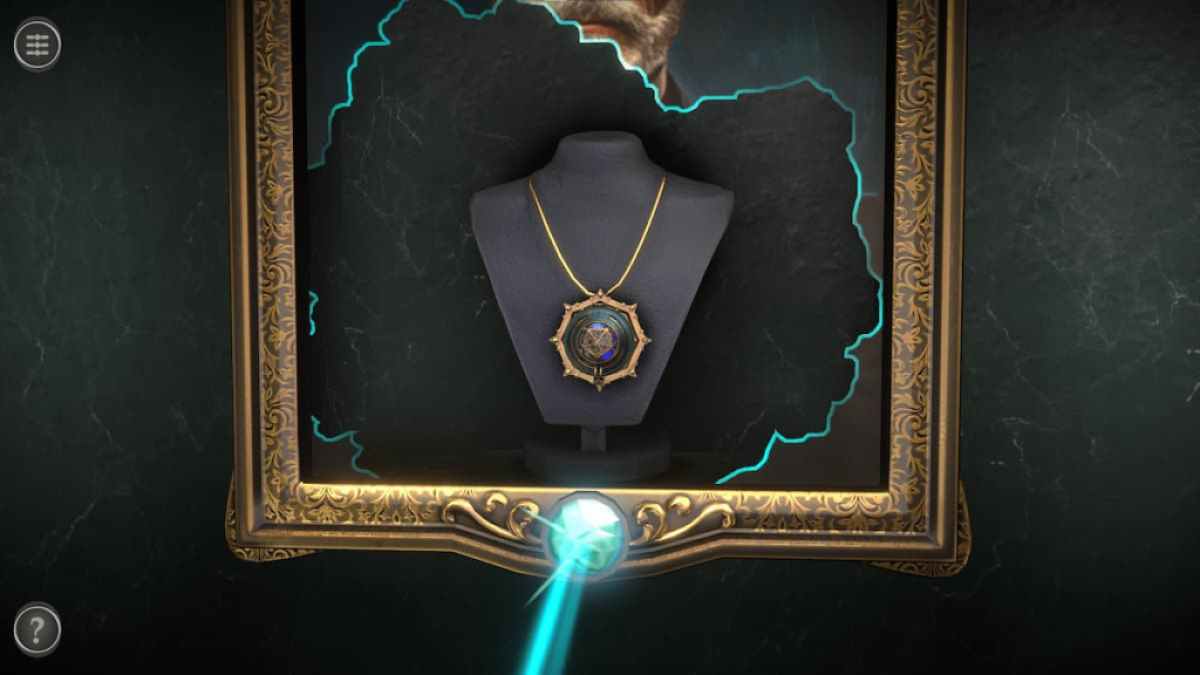
This shoots a beam into the picture , revealing a large locket .
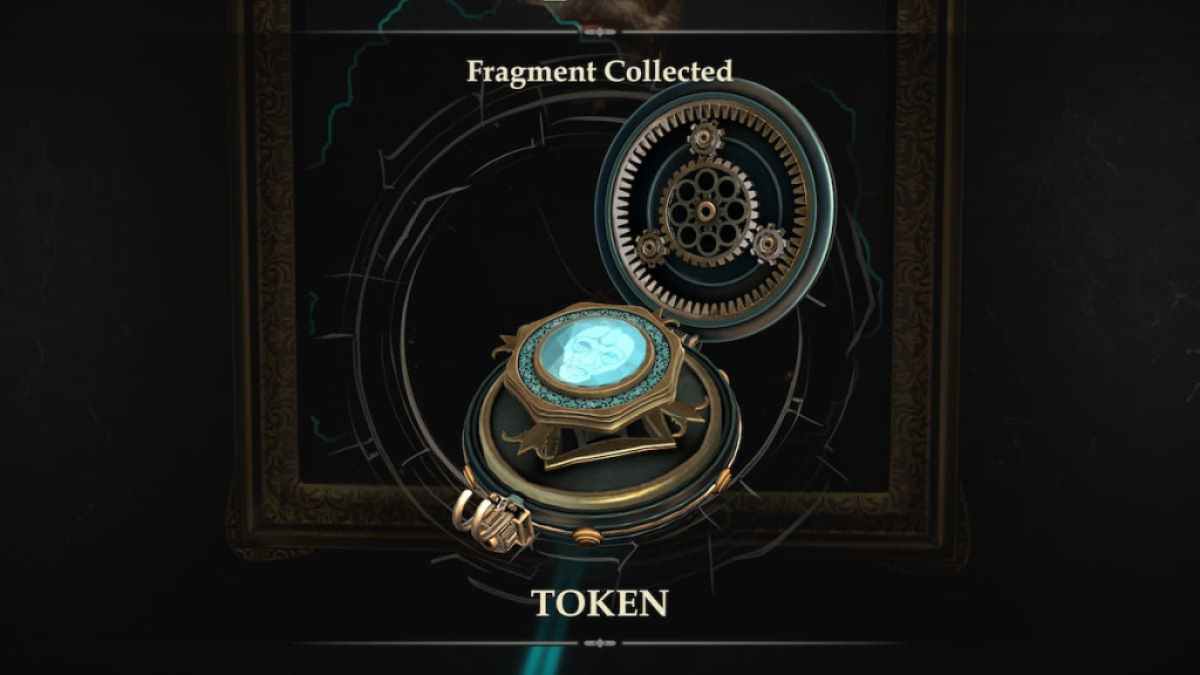
The locket will open , revealing a second Token .
Screenshot by Pro Game Guides
grade the Token into the base to begin Chapter 2 .
Want to essay out a illusion - theme escape valve elbow room game ? curb out ourHaunted Hunt Walkthroughhere on Pro Game Guides .
Screenshot by Pro Game Guides
Screenshot by Pro Game Guides
Screenshot by Pro Game Guides
Screenshot by Pro Game Guides
Screenshot by Pro Game Guides
Screenshot by Pro Game Guides
Screenshot by Pro Game Guides
Screenshot by Pro Game Guides
Screenshot by Pro Game Guides
Screenshot by Pro Game Guides

Screenshot by Pro Game Guides
Screenshot by Pro Game Guides
Screenshot by Pro Game Guides
Screenshot by Pro Game Guides
Screenshot by Pro Game Guides
Screenshot by Pro Game Guides
Screenshot by Pro Game Guides
Screenshot by Pro Game Guides
Screenshot by Pro Game Guides
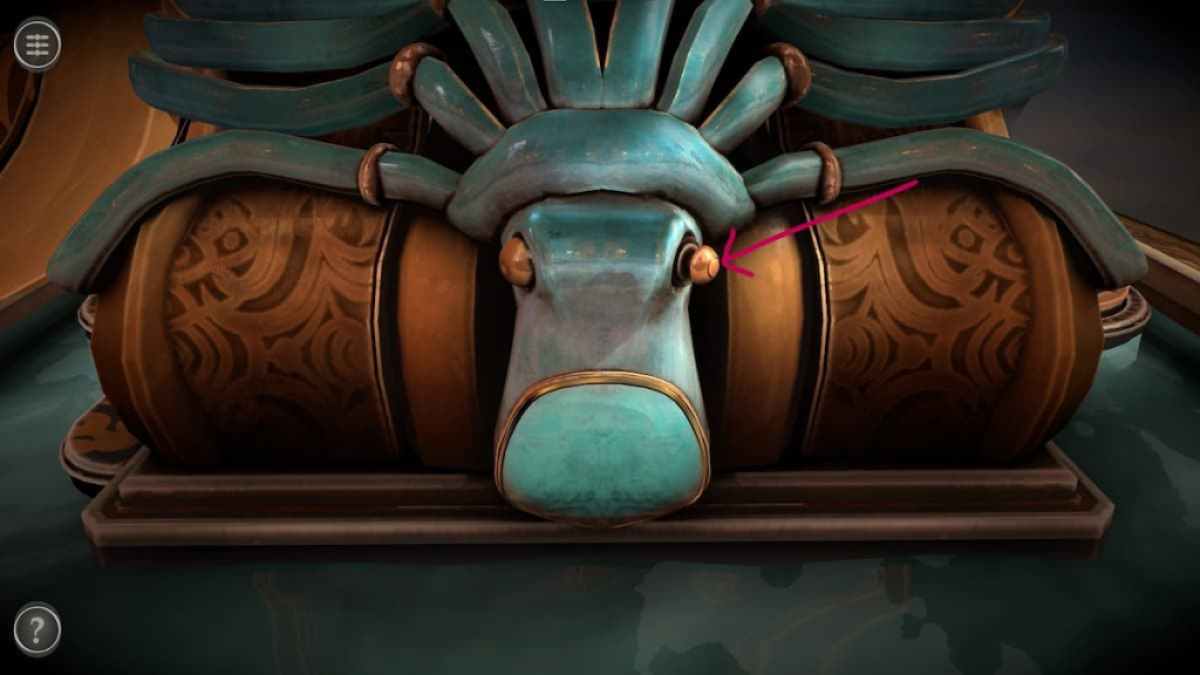
Image by Pro Game Guides
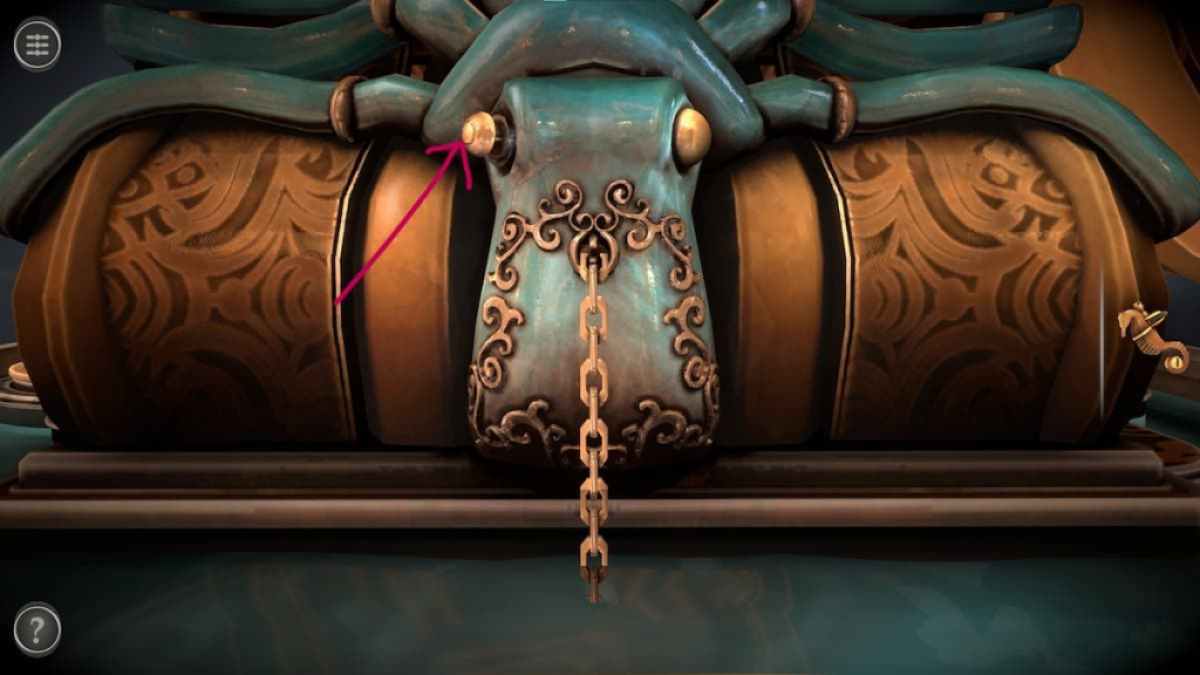
Image by Pro Game Guides
Screenshot by Pro Game Guides
Screenshot by Pro Game Guides
Screenshot by Pro Game Guides
Screenshot by Pro Game Guides
Screenshot by Pro Game Guides
Screenshot by Pro Game Guides
Screenshot by Pro Game Guides
Screenshot by Pro Game Guides
Screenshot by Pro Game Guides
Screenshot by Pro Game Guides
Screenshot by Pro Game Guides
Screenshot by Pro Game Guides
Screenshot by Pro Game Guides
Screenshot by Pro Game Guides
Screenshot by Pro Game Guides

Screenshot by Pro Game Guides
Screenshot by Pro Game Guides
Screenshot by Pro Game Guides
Screenshot by Pro Game Guides

Screenshot by Pro Game Guides
Screenshot by Pro Game Guides
Screenshot by Pro Game Guides
Screenshot by Pro Game Guides
Screenshot by Pro Game Guides
Screenshot by Pro Game Guides
Screenshot by Pro Game Guides
Screenshot by Pro Game Guides
Screenshot by Pro Game Guides
Screenshot by Pro Game Guides
Screenshot by Pro Game Guides
Screenshot by Pro Game Guides
Screenshot by Pro Game Guides
Screenshot by Pro Game Guides
Screenshot by Pro Game Guides
