Congrats to FromSoft on making the first boss to utilize non - Euclidian geometry as a agency of attack !
The first major sphere you ’re likely to venture into in FromSoftware ’s new smacking in the boldness of a DLC does n’t pull any biff , get right back to that intense difficultness and strange navigation we all fuck and have it away .
Here we ’ll be guiding you through Belurat , Tower Settlement , with some handy items , boss tips , and even a foreign little NPC interaction in our walkthrough .

Belurat, Tower Settlement Walkthrough Guide - Items and Boss Tips
To get to Belurat , you ’ll want to take the left path at theThree Path Cross Site of Grace(1 ) . There ’ll be two NPCs you may chat to here , one of whom will even help you in the upcoming boss fight . There ’s also aScadutree Fragmenthere , which play as the unexampled ' levelling ' scheme .
Continue on the path , and just before you reach Belurat , there ’ll be two more Nonproliferation Center you could shoot the breeze to , theMain Gate Cross Site of Grace(2 ) , and anotherScadutree Fragment . One of the NPCs is even a merchandiser , and he has mass of resistance buffing consumables on go . I suggest break up up hisLightning - Proof Pickled Livershere , as the boss does a whole batch of lightning damage in its 2nd phase .
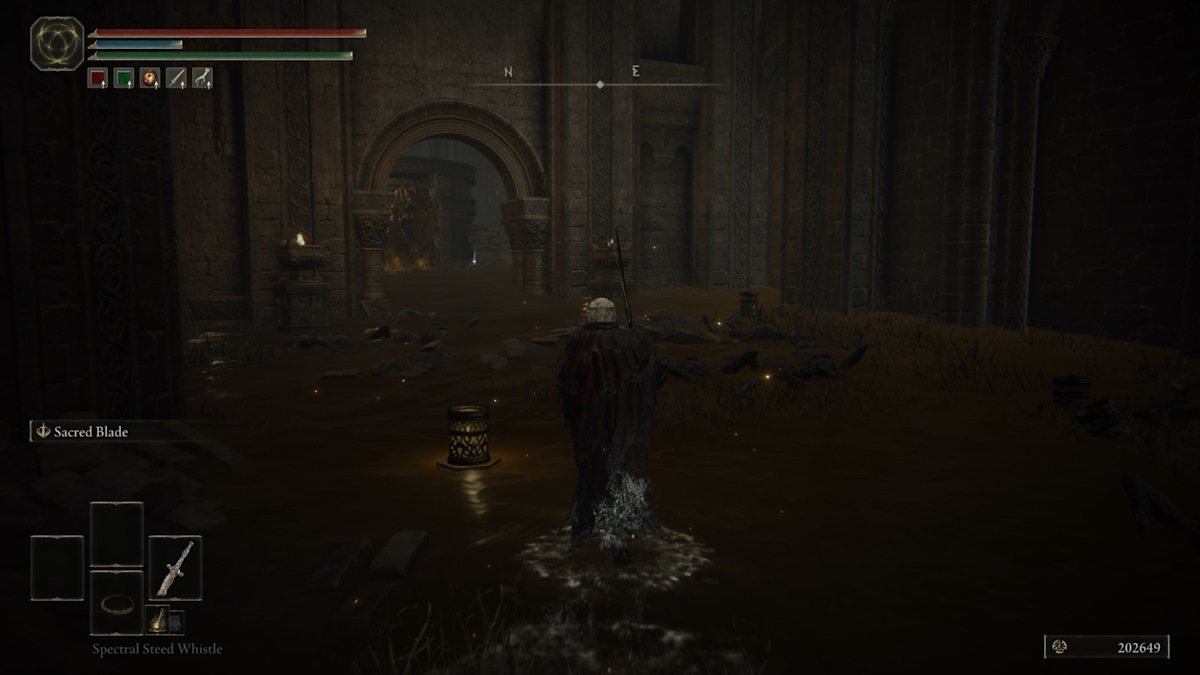
Continue up the stairs to enter Belurat , Tower Settlement proper . Be careful though , as there ’s some … ' spider ' on the path immediately after you enter the main gate . They ’re fast-growing and nasty , but thankfully not too tanky . keep on on until you strain a room with two sets of stairs . There ’s some of the lowly spiders here , but they go down quick enough . Carry on up the stairs and into the Settlement , being sure to grab theSite of Grace(1)on the left of the big metal doors . You ca n’t get through these yet , but they ’ll act as a shortcut later on . You ’ll want to goright from the stairs(2)to continue on , so you could ignore the way straightaway next to the Site of Grace as it ’s a dead remnant .
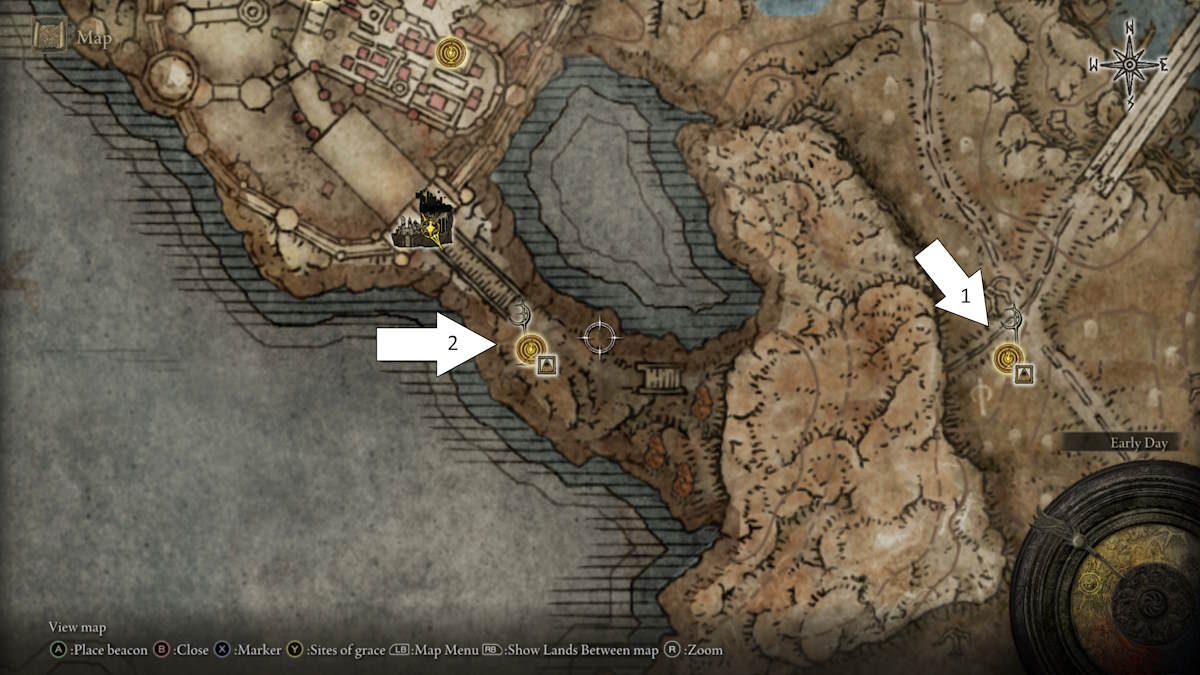
Image by Pro Game Guides
Continuing on you ’ll come across a Plaza with a waterfall and fountain . There ’s an item in the waterfall , but be careful as a rather large ' tincture humans ' will be laying in delay for you , and whilst slow , these guys pack a serious punch . Continue right up the stairs from the Fountain to progress . You ’ll get in a thoroughfare , and if you head aright you ’ll see a well . manoeuver down that well ( by taking the run ) will grant you a ' Messmerfire Grease ' , which is an raise rendering of the fire soil you may be conversant with from the groundwork game .
guide back out the well andcontinue down the thoroughfare(1 ) , being careful of the two very nettlesome spellcasters perched on a bridge above the road . There ’s asmall area on the right(2)of this route that holds anotherMessmerfire Grease , but has yet another large shadow guy guarding it .
Upon get through the oddment of the thoroughfare , you ’ll see an archway on the left . channelise on in and up the stair to get theSmall Private Altar Site of Grace . lie up , and head out . There ’ll be two arch in the conjoining room here , and you ’ll need to take the one on the right . The one on the left field is a dead conclusion for now , but we ’ll be coming back to this after we defeat the boss .
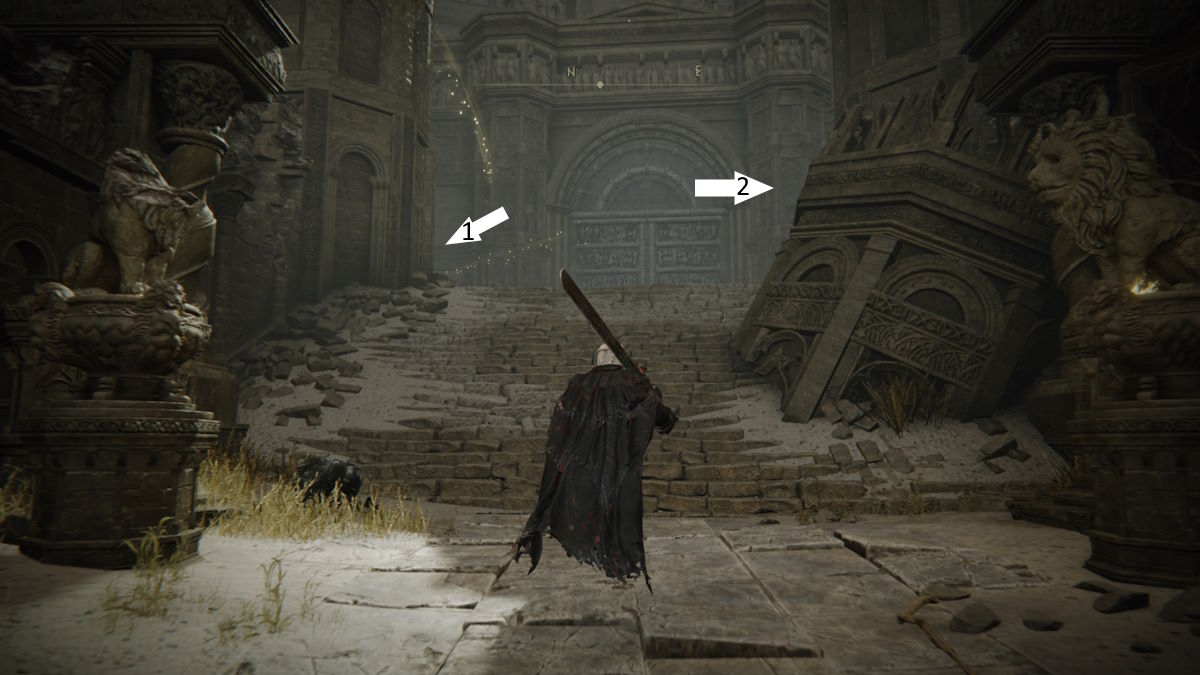
Image by Pro Game Guides
There ’ll be a ' horn Soldier ' enemy on the road as you continue , and these guys have in mind patronage . They have very prospicient combo chains and are difficult to lurch , so you ’ll have to get your dodge timing down . It ’s safe to play it safe and contrivance / hightail it back as much as you’re able to , taking any breaks in their combos to deal some damage .
You ’ll have two ways to go from here , with theright path(2)leading to an unfastened area with a tree and anNPC Invasion . This guy rope is n’t too terribly hard , but he does cover brawny damage and he does use a spear so be careful of his range . He ’ll drop the ' Crusade Insignia ' upon death ( a new amulet that raises your attack power upon defeat an enemy ) . Theleft path(1)is your route onward towards the area political boss .
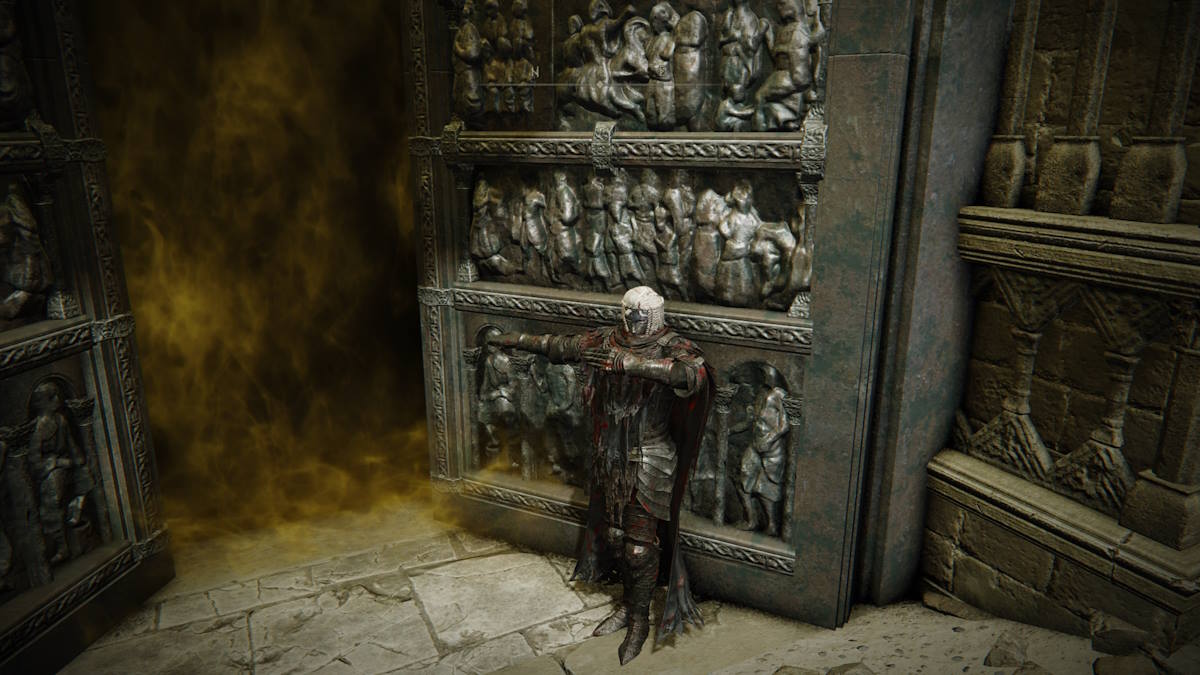
Continue up the stairs and take a right to enter the alleyway , then a left field to enter the top of the waterfall we saw in the first place . There ’s a bunch of the big shadow bozo here , so be heedful not to get flood or back into a nook . come in the room on the right at the destruction of the waterfall basin to find a ladder , and climb up it . Once you get to the top , verify toloot the stagnant bodyas you get there , as he holds akeywe’ll necessitate once we get the better of the field boss .
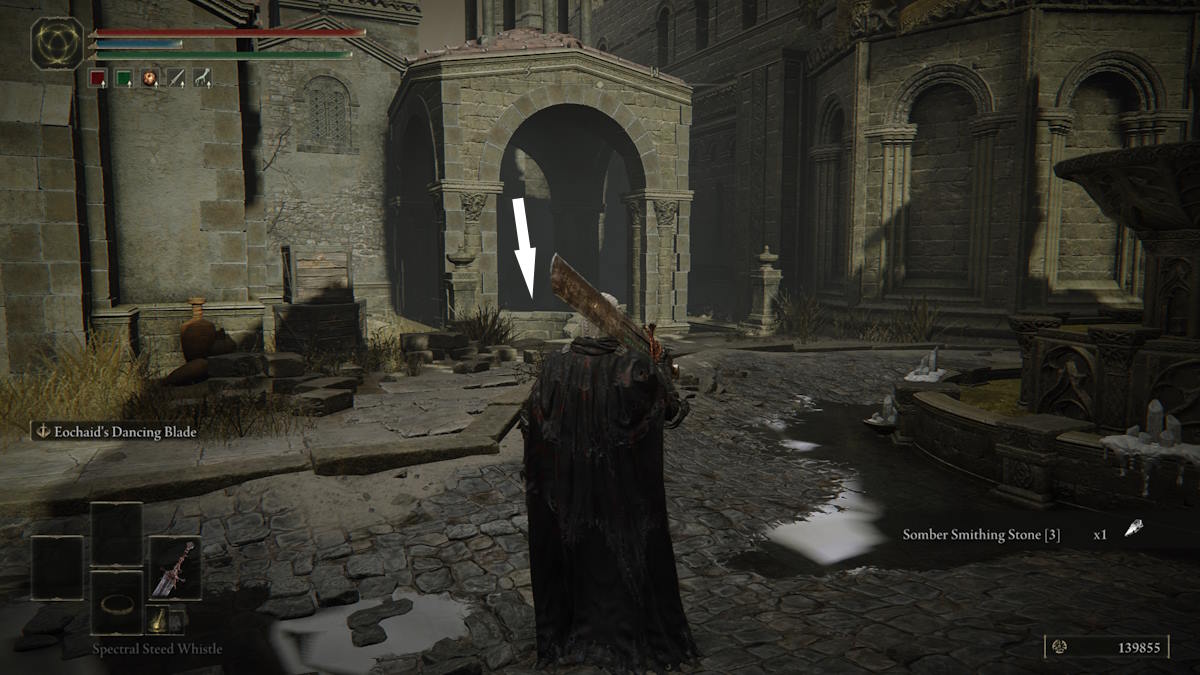
Image by Pro Game Guides
Once you reach the top of the ladder and reach the next area , you ’ve drive two choices on where you may head . you’re able to head left , in which case you ’ll have to care with some very , very icky bug people , or you’re able to head right and go along the rooftop , in which type you ’ll have to deal with some very , very grumpy snort . I suggest you take theleft path , as whilst gross , the bug people are far squishier than the shuttlecock , and you could even net yourself anotherScadutree FragmentandTalismanif you take this way .
accept you head provide , continue on until you reach some more Scorpions . There ’ll be some junk on your right hand , a large way directly ahead , and ashortcut back to a Site of Grace behind you . The cutoff can be accessed by take the stairs down , heading down the elevator , and then using the lever to give the large alloy door we saw in the beginning but could n’t unfold . The magnanimous room contains two fittingly big Scorpio the Scorpion , but also aBone Bow(1 ) . One of the Scorpions is far tankier than the other , so only take this on if you really want that obeisance . In ordination to build up you ’ll need to jumpover the rubble(2)and take the arch .
When you lead into the arch , be very measured , as one of the bug people will straight off rush out to try and take hold of you . This can do some nasty damage if you ’re lower on Vigor , and in a flash vote out you if you ’re already wound . Either way , manage with the bug people , and press on . You ’ll come across the aforementionedScadutree fragmentin the next room , and then theDried Bouquet Talisman(1)(which resurrect your fire power once your summon feel fail ) directly on the leftfield as you die that way . To continue on you ’ll need todrop down from the shelf you ’re on(2 ) , but do n’t chafe : it ’s not high-pitched enough to do any drop damage .
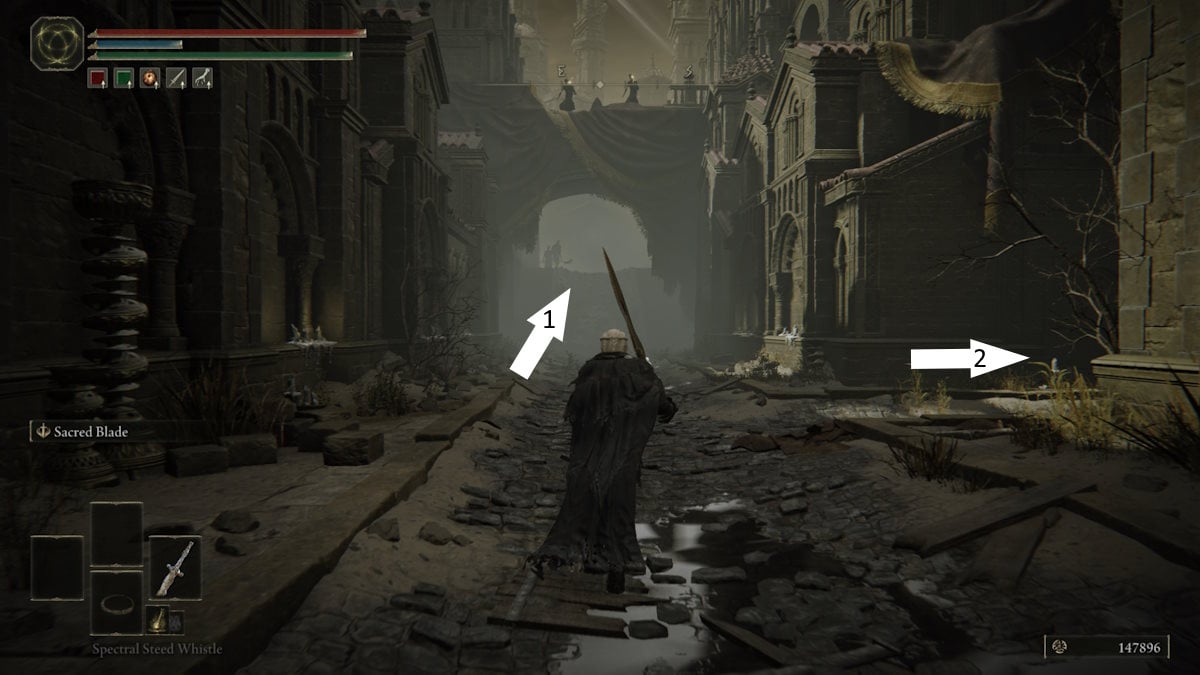
Image by Pro Game Guides
Head allow when you drop down , dealing with any bug masses in your way . You ’ll find an arch at the end which has a ladder back up , but be careful as there ’s yet another ambush bug expect behind the big stone pillar in the elbow room with the run .
go forward on , being careful of all the vestige cat nearby and heading for the elbow room with the large volute staircase ahead . There ’s another nasty enemy on these steps , theCurseblade , which is also highly mobile and belligerent . Killing it has a chance of give you itsCirquethough , which might be fun for all you Dex actor out there .
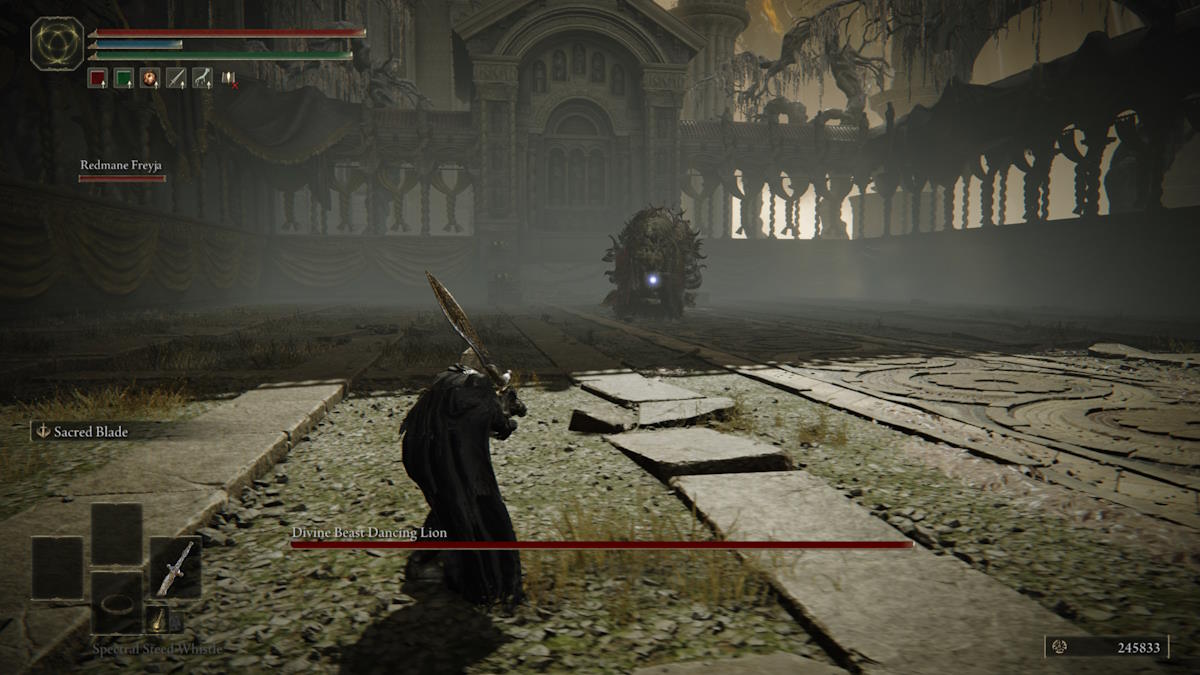
Continue up the stairs to be face with thegate to the sphere boss . There’ll be an NPC summon sign here for anyone toy solo ( Redmane Freyja , the NPC we saw at the Three - Path Cross earlier ) . Please note that any process willincrease the amount of HP the boss has , but Redmane Freyja ( and a mess of the summons in the DLC ) have substantially higher stats than any in the base secret plan , so the decision is yours .
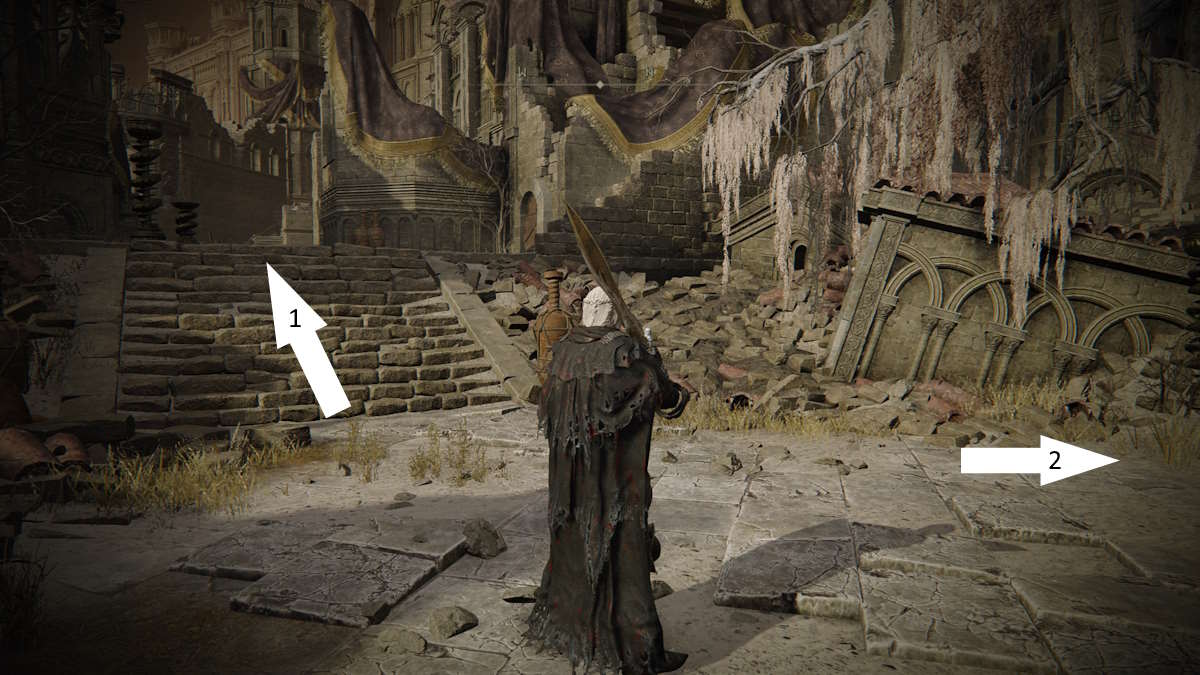
Image by Pro Game Guides
Divine Beast Boss Guide - Tips & Tricks
And here we have it , the first boss of the DLC . To say this sheer nut is a ' skill chip ' is putting it far too lightly , as frankly it ’s near incomprehensible your first few attempts . This abhorrence will twist , spin , feint , bite , summon lightning , and summon icing . Finding a moment to get a safe hit in is half the battle , and its tremendous health legal profession is the other .
Your best bet for this one is go to be to forge on until you get most of the dodge timing for its onset down , and using either a eminent bleed , or gamey poise damage weapon . I found theBackhand Bladefrom the DLC with a blood affinity to be quite good , as the speedy onset mean I did n’t have to take chances my pelt every time I wanted to set down a exclusive strike , and the bleed procs ( although infrequent ) did gravid ball off his gargantuan health cake .
ThoseLightning Proof Liverswe nonplus from that merchandiser in the beginning do in really handy in the 2d phase , in which the angry blackguard will come up plenty of lightning ( almost the same was as Lichdragon Fortissax does ) to keep you on your toes . fight back on , cry a moment , and work like hell until it last keels over and dies .

Image by Pro Game Guides
The big sweeping dust attack ( 1:39 in the video above ) is one to be very mistrustful of ; you ’ll see it cast this out in its first phase . Note itcan be dodged through . If you ’ve got some distance you’re able to melt down forth from this , but if you ’re up close you should rolltowardthe boss . Getting the timing down is tricky , especially since it ’ll throw out multiple waves at once .
As you ’ll see in the telecasting ( 1:54 ) , adhere to thesides of the bossis crucial for being able to do damage , and being able to invalidate a mickle of fire . As a upright bulk of the attack get along from the psyche of the gaffer , have it off where it is at all time is utterly crucial to being able to learn telegraphy of upcoming attacks . stick to the sides and behind gives you a good view , whilst also keep the flanks open for attack .
This chief penalise a less aggressive playstyle , as its range and speed will cut you down if you endeavor to go anywhere other than directly next to it . In the second form , you ’ve perplex to be wary of its lightning and frost attack . When it goes up in the air and volute in on itself ( 2:58 ) , it ’s commove up for one of these elemental burst attacks . length is your friend in these situations , especiallyif it ’s coiling up for a Robert Lee Frost attack . However , you ’ll require to close that aloofness as soon as the flare-up is over , and it’llveryaggressively penalise you if you remain away for too long .

Image by Pro Game Guides
Belurat, Tower Settlement - Where to Use the Storeroom Key
Once the dust has settled , catch one’s breath at the new Site of Grace that ’ll have pop up in the bowl , and snap up the item it dropped . This item is the head of the unearthly hombre you just vote out , which can be equipped and used to get a hidden NPC fundamental interaction in the area and nett yourself a dainty novel turn ( Watchful Spirit , which muster up a shielder spirit over your head ) .
To get this interaction , head back to the Small individual Altar Site of Grace , and take the left arch as you snuff it which you saw earlier . Kill those spellcasters on the bridge , and head for thedoor at the far death . Use theStoreroom keythat you picked up off that corpse to begin with , and head on in . Equip theDivine Beast Headyou picked up , and talk to the NPC on the right of the room . Being blind , she ’ll assume the what I can only imagine is ill-scented smell come from you mean you must be one of the Divine Beasts , and she ’ll be more than happy to talk to you and lavish you with kudos . She ’ll ask that you take her son with you to dispense some hard fought judge , and she ’ll grant you theWatchful Spiritspell .
And with that , you ’ve completed Belurat , taken out your first major boss , and likely realized the DLC is going to be far hard than you first thought by now .

Image by Pro Game Guides
If you ’ve found this guide helpful and are looking for some more Elden Ring message from us here at Pro Game Guides , check out our guide onWhere to find a Light Greatsword earlyor our guide onHow to get the adept early plot weapon system and armour in Elden Ring Shadow of the Erdtree .
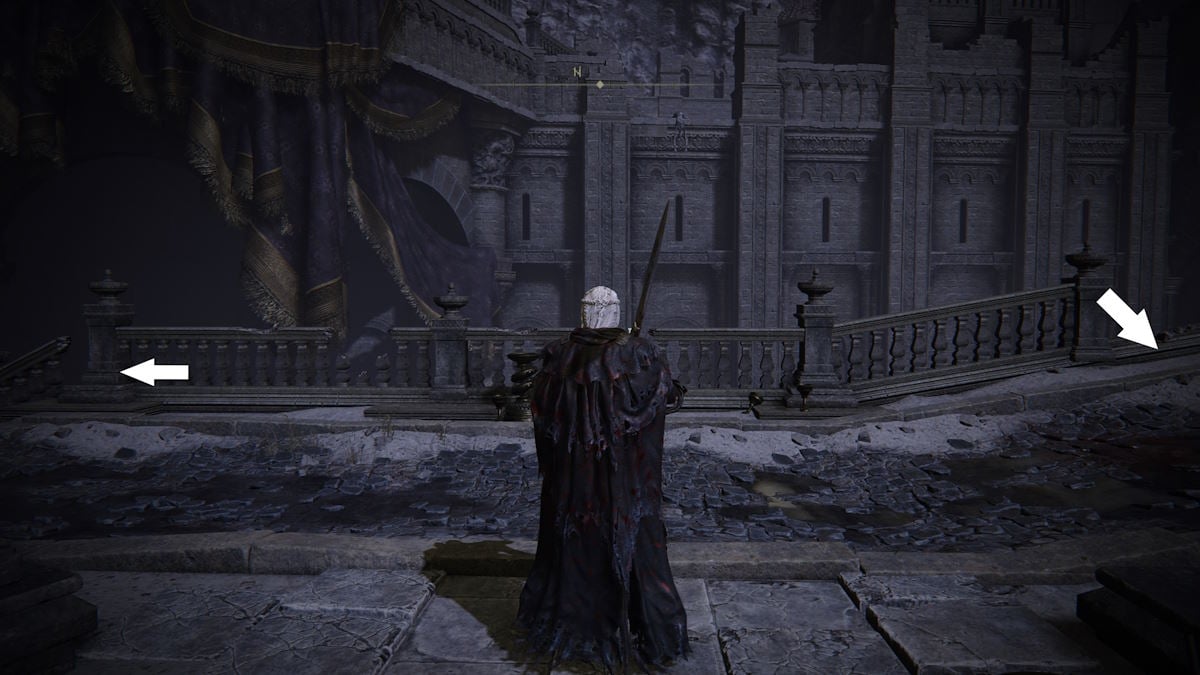
Image by Pro Game Guides
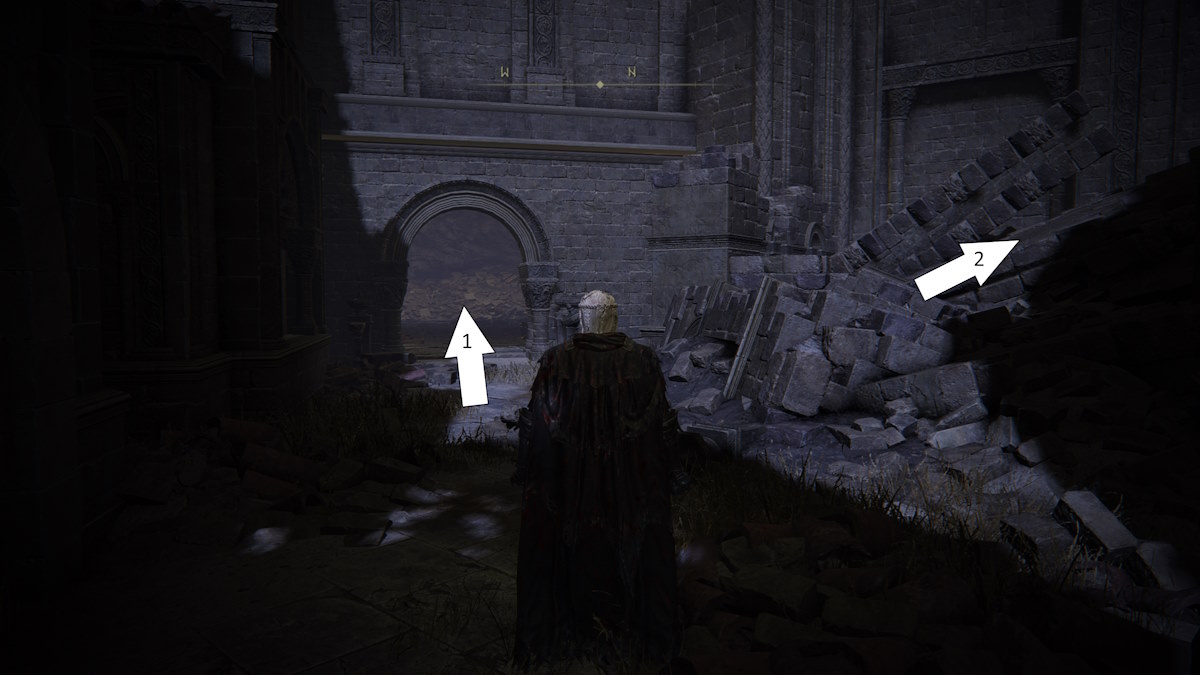
Image by Pro Game Guides
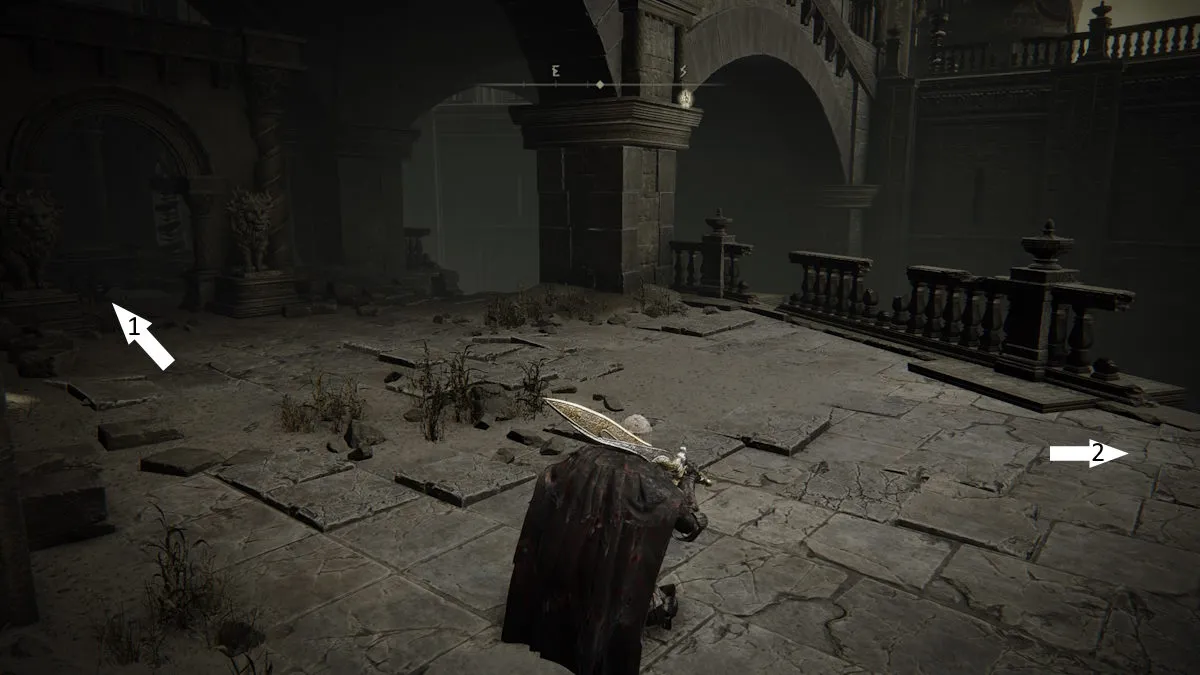
Image by Pro Game Guides
Screenshot by Pro Game Guides

Screenshot by Pro Game Guides
Screenshot by Pro Game Guides
Screenshot by Pro Game Guides

Image by Pro Game Guides

Screenshot by Pro Game Guides
