We ’re finally costless from yanking razz out of the odd station in Penacony … for now .
you’re able to exact wages by regain all 20 Origami Birds in The Reverie ( Dreamscape ) , one of the more complex Dreamscapes in Honkai : Star Rail ’s Penacony . Go through hidden rooms in the snarl - corresponding area to force the naughty birds back to Lady Vermillion .
Origami Birds always encounter themselves stuck in the funny places . If you desire to find oneself everyone in the nest , we ’ve come you cover .

All Vermillion Origami Bird locations in The Reverie (Dreamscape) in Honkai Star Rail
Vermillion Birds are spread out across The Reverie ( Dreamscape ) , an area that unlock as you shape up in Penacony ’s Trailblaze Missions . I powerfully recommend finish up the story before beginning your hunt , as the rooms will unlock step by step . Like the former area , you could find oneself the Origami Birds in any order .
#1: Worried Bird
Head to the sphere circulate above in the northeastern room in The Reverie ( Dreamscape ) F3 to incur an Origami Bird bewilder in the fireplace . Yank it off to economise the Worried Bird .
#2: Tea-Tasting Bird
Head to the area circle above in The Reverie ( Dreamscape ) F3 . At the nub of the room , you ’ll find the Dream Bubble Fountain . Look up to find the Origami Bird . Investigate to zoom in , then yank it off .
#3: Trendy Bird
Head to the area circled in the picture above , locate in The Reverie ( Dreamscape ) F3 . You ’ll feel an Origami Bird adhere in a magazine . Yank it off to preserve the Trendy Bird .
#4: Lost Bird
To find the Lost Bird , you need to enter the three - dimensional space Orient of The Reverie ( Dreamscape ) F3 . I commend enter through the northern entrance , circled above . Once in spite of appearance , interact with the Bubble Charger , then rise the rampart to the left field .
Once you ’ve climb the bulwark , twist left and climb another paries .
You ’ll find yourself in a messy way . just guide toward the double door on the opposite end , where the arrow is pointing above . There ’s a house of cards Charger inside , which you could refer to as a turning point . From there , go through the corridor to record another elbow room .
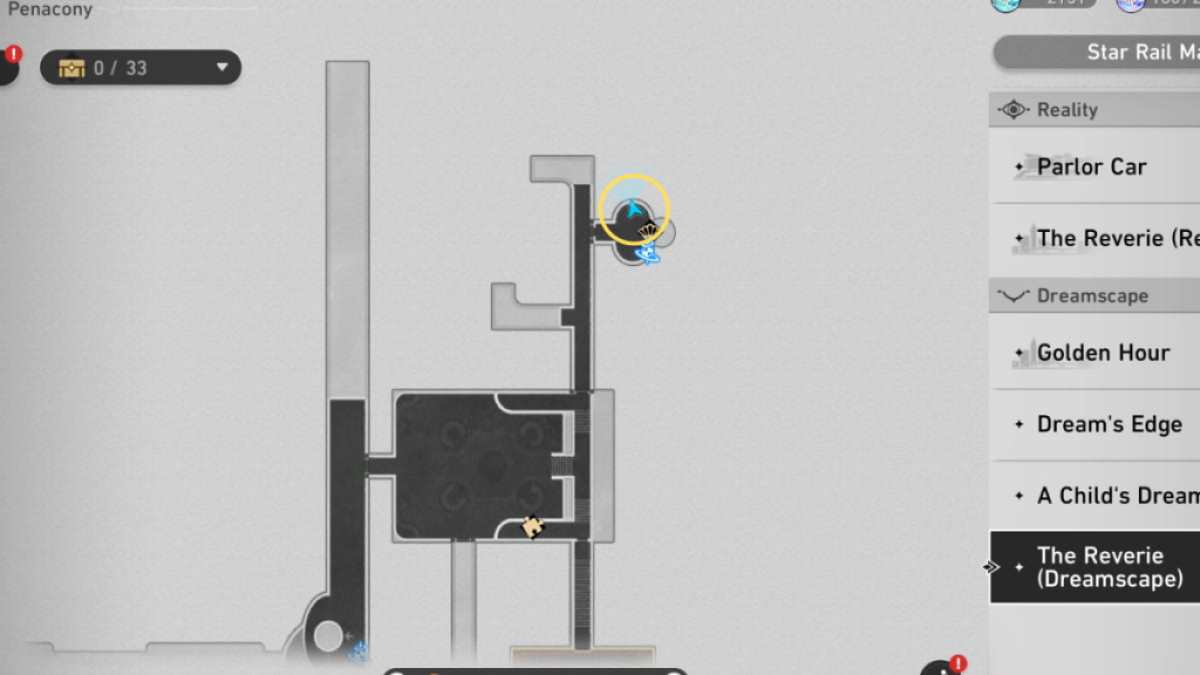
Image by Pro Game Guides
In this elbow room , you ’ll find the Lost Bird stuck inside a holographic blind , as pictured above . Investigate to zoom in , then yank it off to make unnecessary it .
Related : All Penacony Dream ’s Edge Treasure Chest Locations ( Map ) in Honkai Star Rail
#5: Playful Bird
direct to the area circle above in the easterly part of The Reverie ( Dreamscape ) F3 to find an Origami Bird stick in a billiards table . jerk it off to save the Playful Bird .
#6: Amiable Bird
You do n’t have to wait far to find the Amiable Bird . capitulum to the sofa by Lady Vermillion ’s Great Tree in The Reverie ( Dreamscape ) F1 and jerk it out of the couch . While it ’s been chatting with the rest of the razz for a while now , it was somehow invisible to Lady Vermillion ’s not - so - insomniac eyes .
#7: Time-Telling Bird
Head to the area circle above in The Reverie ( Dreamscape ) F3 . If you have n’t unlock it yet , you’re able to well get there through the lift beside the Great Tree . Yankee-Doodle the Time - Telling Bird out of the postal service to complete the objective .
#8: Lazy Bird
Head to the seating region in The Reverie ( Dreamscape ) F1 , in the exact area encircle above . You ’ll find an Origami Bird stuck inside a Dream house of cards . Yank it off to force the Lazy Bird to return to Lady Vermillion .
#9: Passionate Bird
Head to the sphere circled above in The Reverie ( Dreamscape ) F1 to find an Origami Bird stuck in a telephone on the legal profession counter . Yank it off to save the Passionate Bird .
#10: Pondering Bird
channelise to the orbit circle above in the northwest part of The Reverie ( Dreamscape ) F1 . You ’ll find an Origami Bird stuck on a table lamp . jerk it off three prison term to pull through the Pondering Bird .
Related : All Lordly Trashcan Locations ( Map ) in Honkai Star Rail
#11: Serious BIrd
Head to the Monitoring Room in The Reverie ( Dreamscape ) F1 , in the exact area marked above . You ’ll incur an Origami Bird stick in a monitor , which you must yank off to run across the Serious Bird .
#12: Drunkard Bird
Head to the northernmost part of The Reverie ( Dreamscape ) F3 . If you ’re struggling to unlock this part of the mapping , merely head to the Dream Ticker Supervisor north of the Monitoring Room in F1 , then use the elevator in front of it to go to the banquet hall . Once you ’ve unlock it , head to the sphere circled above and jerk the Drunkard Bird out of hiding .
#13: Egotistical Bird
Start by heading to the three - dimensional space in the westerly part of The Reverie ( Dreamscape ) F3 via the southerly entrance , as pictured above . As soon as you enter , you ’ll spot the Origami Bird sticking out of the top of the bird statue down the left staircase . look into it , then yank it off to free the Egotistical Bird .
#14: Gluttonous Bird
Head to the area circle above in the westerly part of The Reverie ( Dreamscape ) F2 . The easiest manner to get here is via the doorway west of the three - dimensional space in the western part of F3 . Once you reach the destination circulate above , you ’ll witness an Origami Bird stuck in a Dream house of cards . Yank it three time to free the Gluttonous Bird .
#15: Tough Bird
Head to the three - dimensional space in the southwest part of The Reverie ( Dreamscape ) F3 . As soon as you get into , right away turn right to see the Origami Bird pose in a pile of luggage . jerk it off to free the Tough Bird .
#16: Elusive Bird
Head to the three - dimensional infinite in the southwestern part of The Reverie ( Dreamscape ) F3 , as pictured above . Once inside , immediately interact with the Bubble Charger .
Next , head to the right side of the single-valued function to ascertain a down incline . look up to the effigy above for the accurate location . You must go down the slope to enter another part of the map .
Once you ’re down the slope , you ’ll tell apart a small corridor to the left . move into it to detect the Origami Bird cohere inside a balloon . Yank it off to free the Elusive Bird .
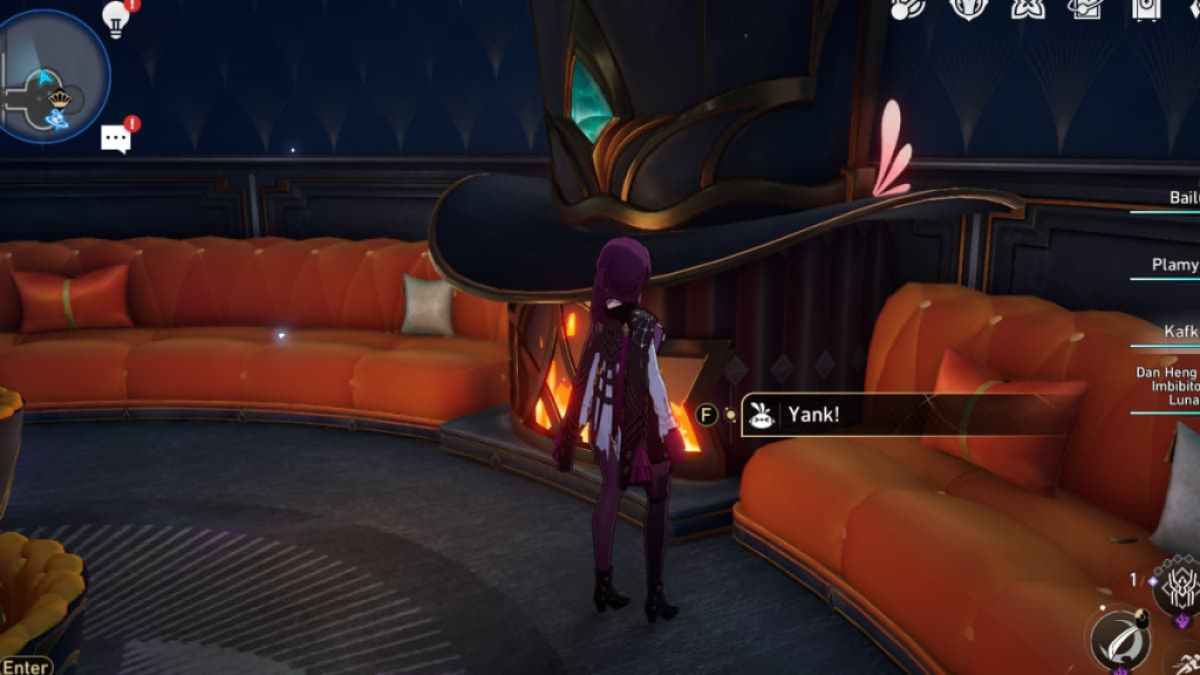
Image by Pro Game Guides
#17: Scared Bird
Head to the surface area circled above in The Reverie ( Dreamscape ) F3 to find a busted picture . Interact with it to enter a Dreamscape . Once inside , follow the path to the destruction of the corridor , then interact with a similar break house painting to enter yet another space .
Once inside the young space , go down the steps to the leftfield to find an Origami Bird stuck in a poster . Yank it off to free the Scared Bird .
#18: Guide Bird (Hanu’s Adventure)
In thesame room where the Scared Bird is located , head to the Hanu ’s Adventure icon on the mathematical function to start the challenge . Your finish is to outwit Boss Stone ’s minions without getting discover , so be careful to avoid all enemies .
As presently as you come in the challenge , gostraight aheadwhile avert the enemies ' gazes . Interact with the blue skyrocket to propel Hanu upward .
You ’ll immediately find an Origami Bird stuck in a be adrift box . Yank it off to free the Guide Bird .
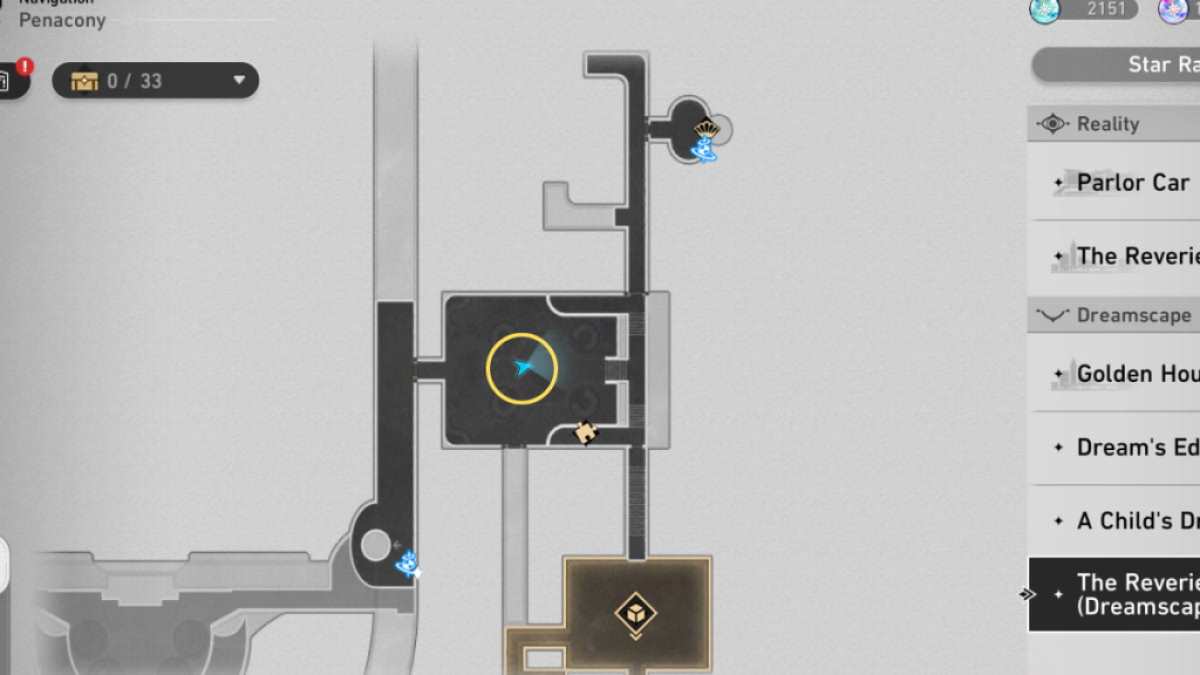
Image by Pro Game Guides
#19: Fan Bird (Hanu’s Adventure)
As soon as you free the Guide Bird , interact with the blue rocket to propel Hanu downward . Then , point toward the other side of the room while fend off enemies . You must go to theblue rocket salad in front of the Bubble Charger , and apply it to propel Hanu toward another area .
Once the enemy has been knock down , interact with the blue skyrocket at the destruction of the way to propel Hanu downward . Once downstairs , do the following in society :
Next , enter the small path that just open up up , where you ’ll find the enemy that you just knocked over with the vase .
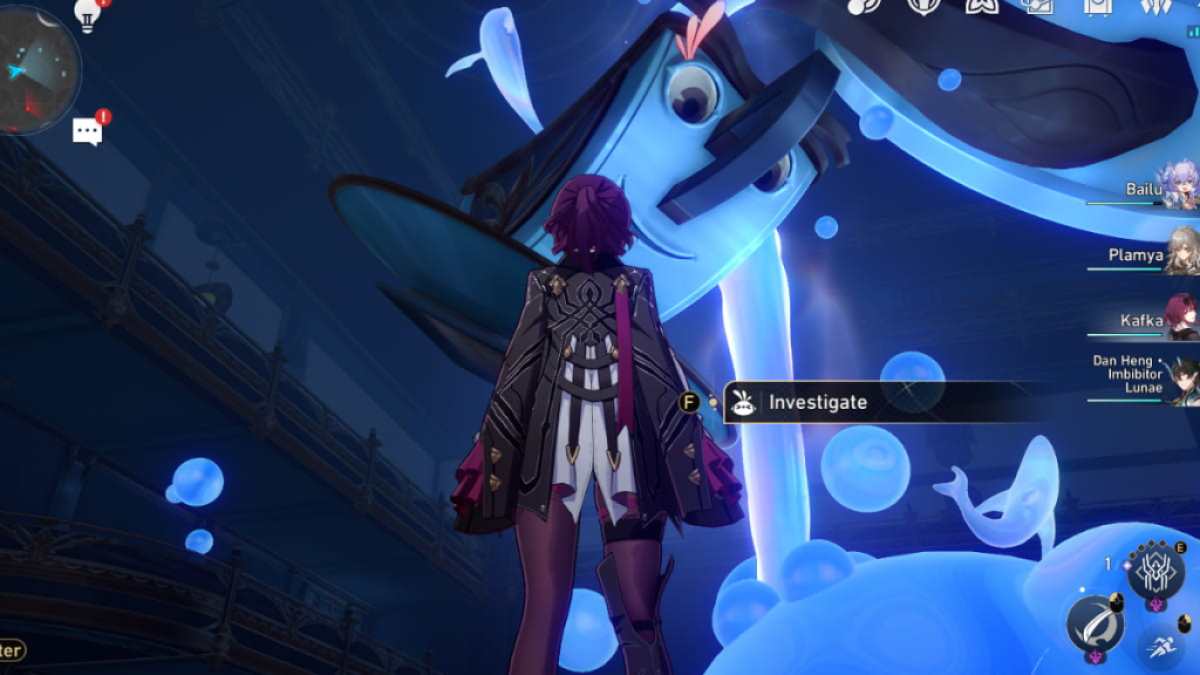
Image by Pro Game Guides
Turnrightand head toward the blue skyrocket . I suggest obscure either at heart or behind the loge ( also pictured above ) andwaiting for the flying foe to passbefore run toward the rocket to void getting catch .
When the projectile propel Hanu upward , only head toward the close of the path to ascertain the Origami Bird . Yank it off to meet the Fan Bird .
#20: Brave Bird (Hanu’s Adventure)
lead to the sphere circled above in The Reverie ( Dreamscape ) F2 to initiate Hanu ’s Adventure . If you ’re shy of how to get to the surface area , you’re able to lead to F3 and go down the stairs to reach it .
While dressed to the nines as Hanu , you need to head to the field circled above to see the Origami Bird stick in a ledger . You ca n’t run toward it without a game design — wait until the flying enemy is flying in the opposite directionbefore lay down your move . You require to jerk the bird three times to save the Brave Bird .
How to claim Origami Bird rewards in The Reverie (Dreamscape) in HSR
To take rewards for finding all 20 Vermillion Origami Birds , head to The Reverie ( Dreamscape ) F1 to recover Lady Vermillion ’s Great Tree , marked by the bird ikon on the map . you could take two sets of rewards : x30 Stellar Jade and x180 Clock Credits after finding 10 Origami Birds , and an additional four - whizz Light Cone called Final Victor after finding all 20 .
If you have n’t already used Clock Credits , you may use it to take down up the Clockie Statue in Golden Hour for even more rewards !
To find even more collectibles in the dizzying Penacony , ascertain out our guide onAll Dreamscape Pass sticker localization ( Map ) in Honkai Star Railhere on Pro Game Guides .
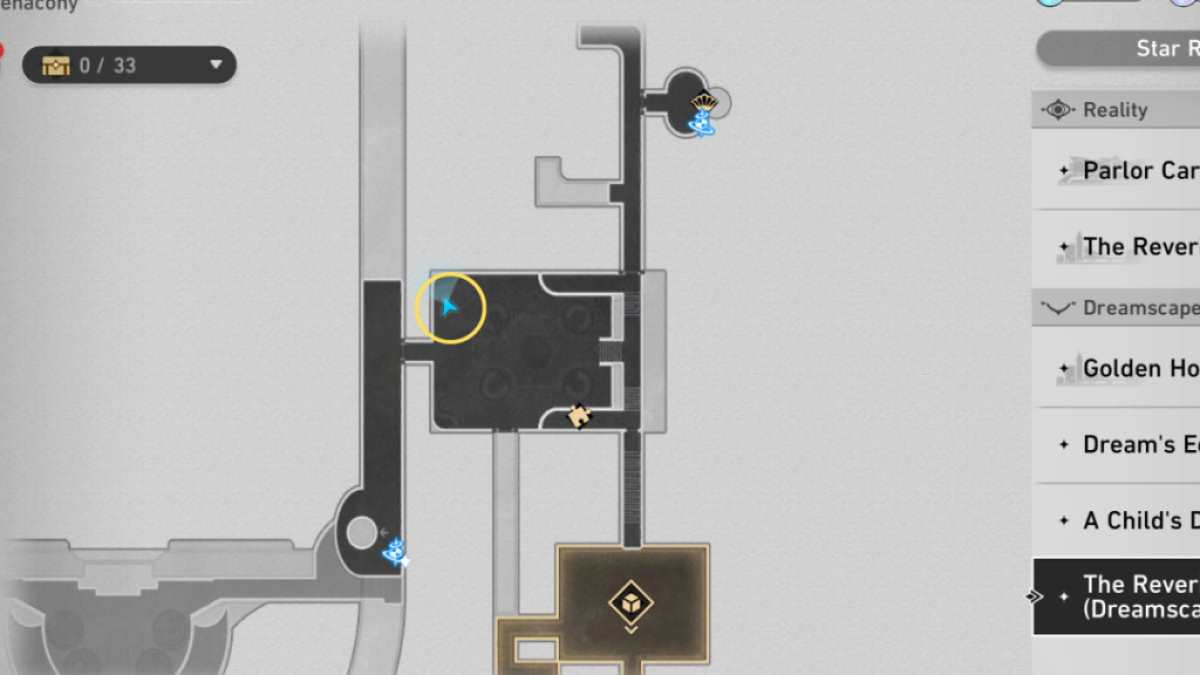
Image by Pro Game Guides
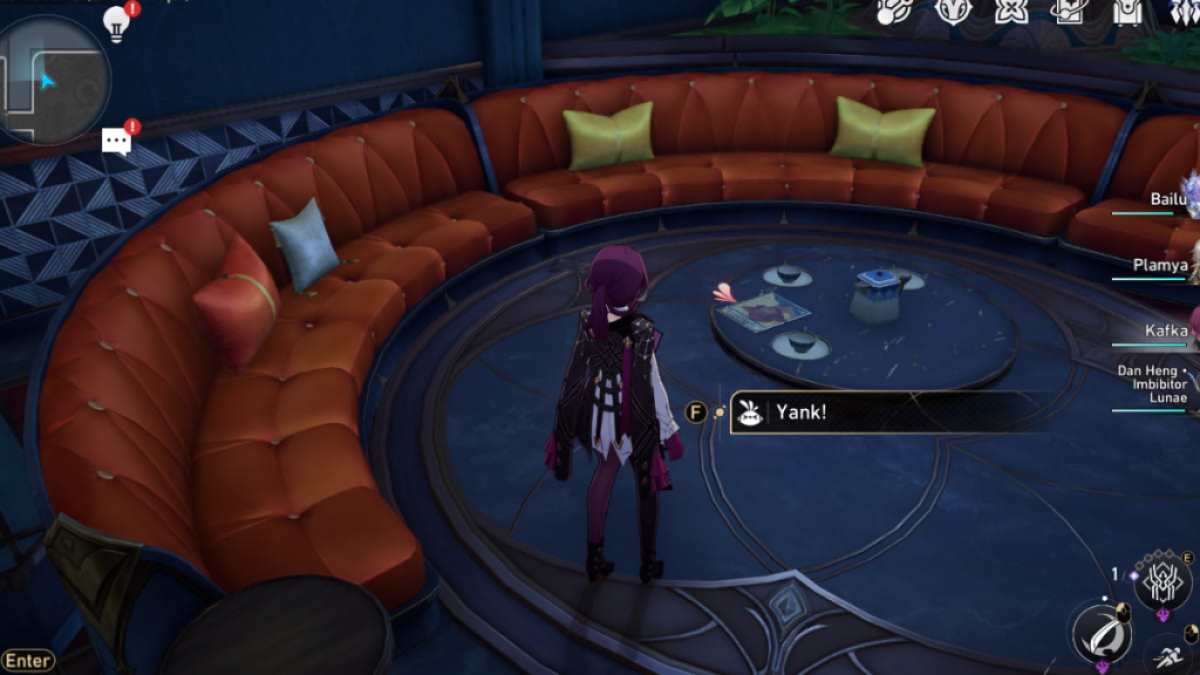
Image by Pro Game Guides
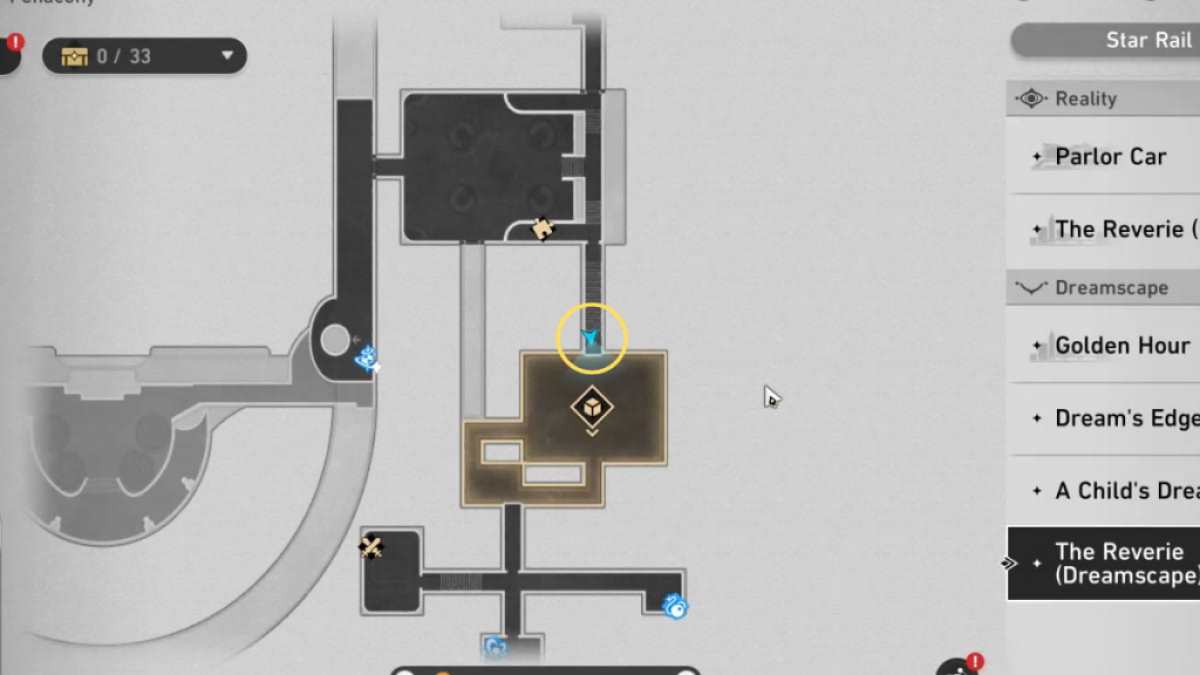
Image by Pro Game Guides
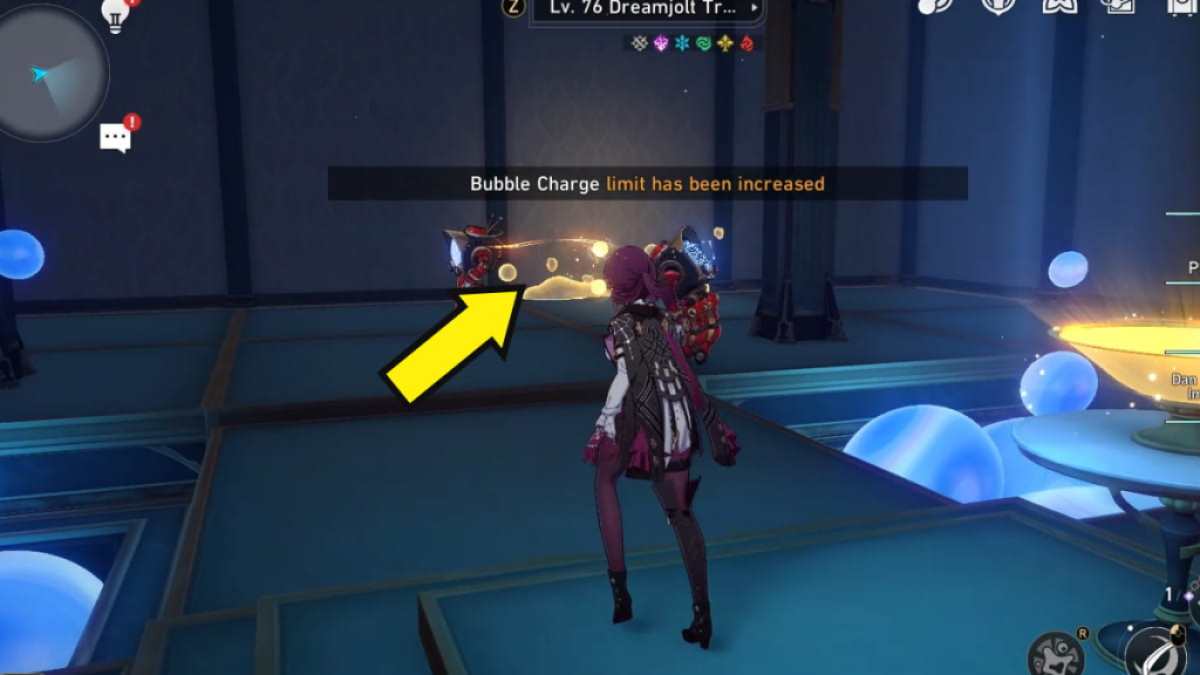
Image by Pro Game Guides
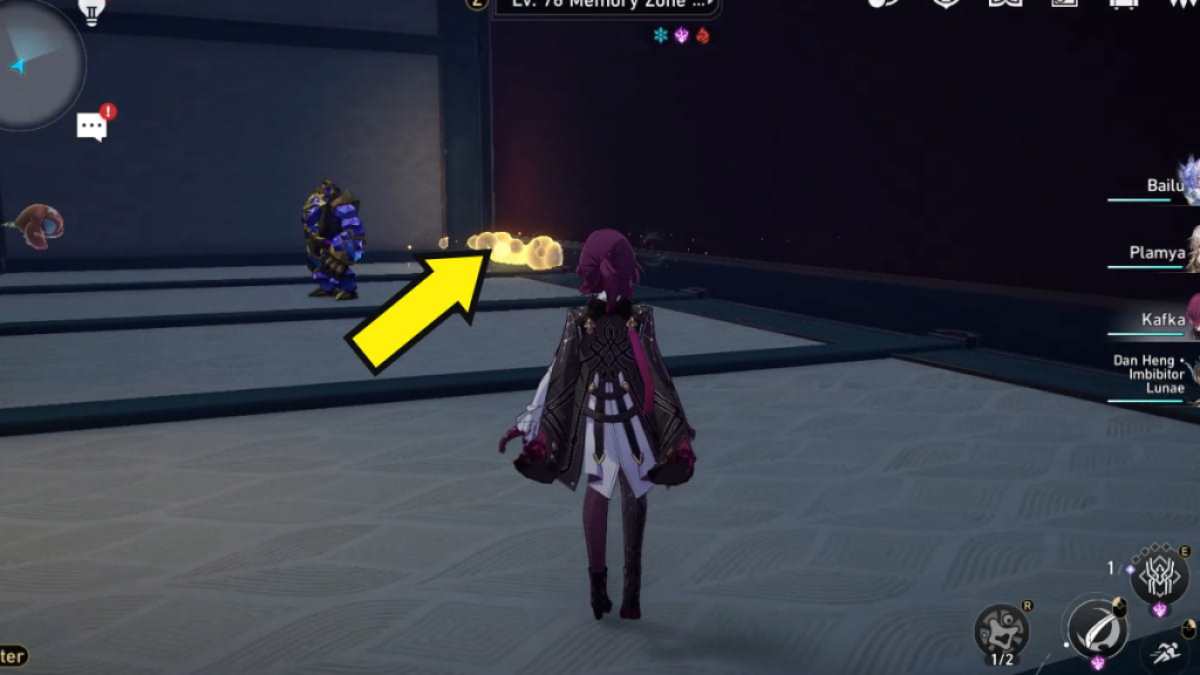
Image by Pro Game Guides
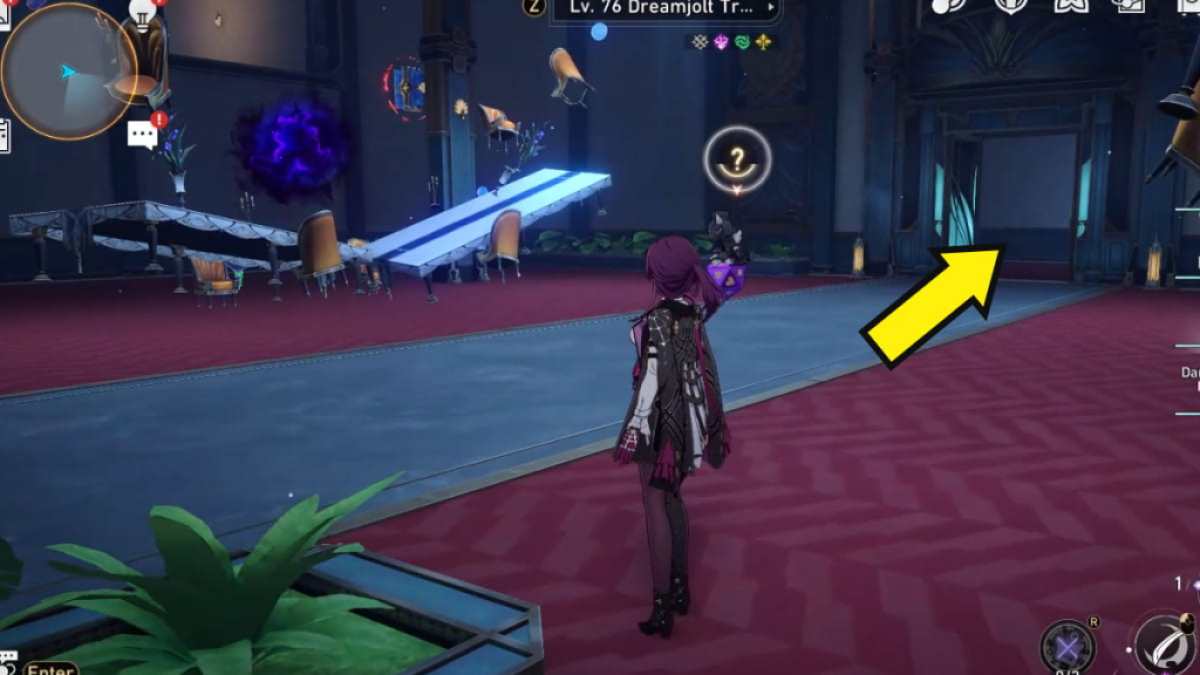
Image by Pro Game Guides
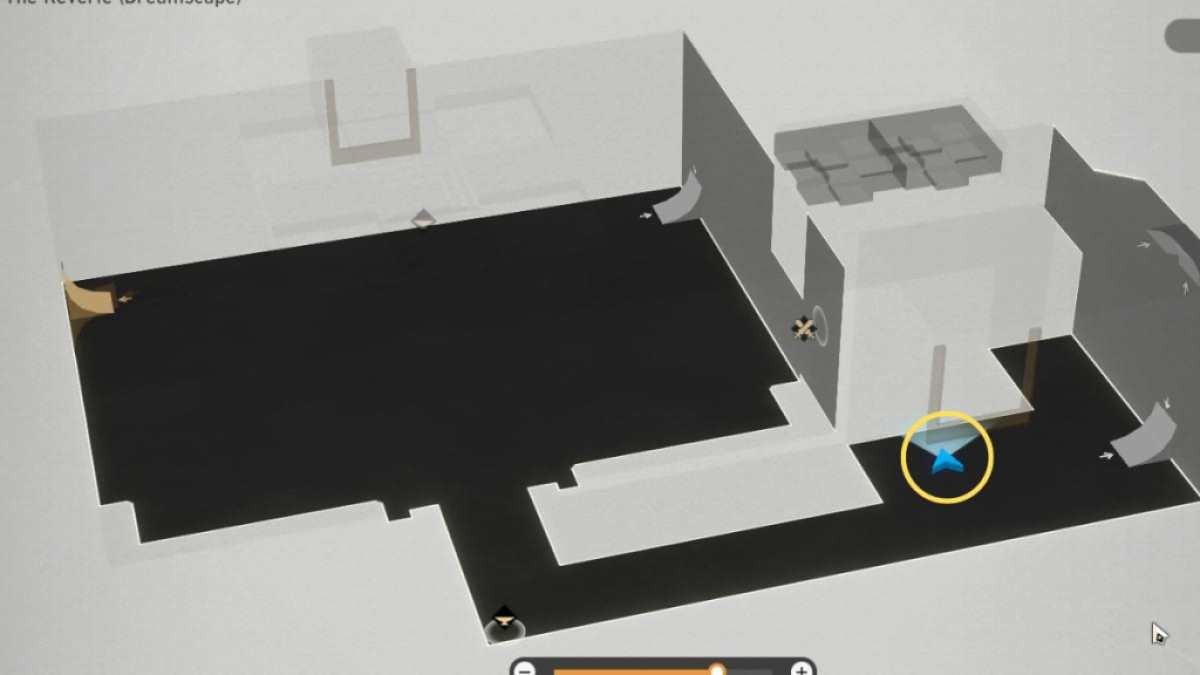
Image by Pro Game Guides
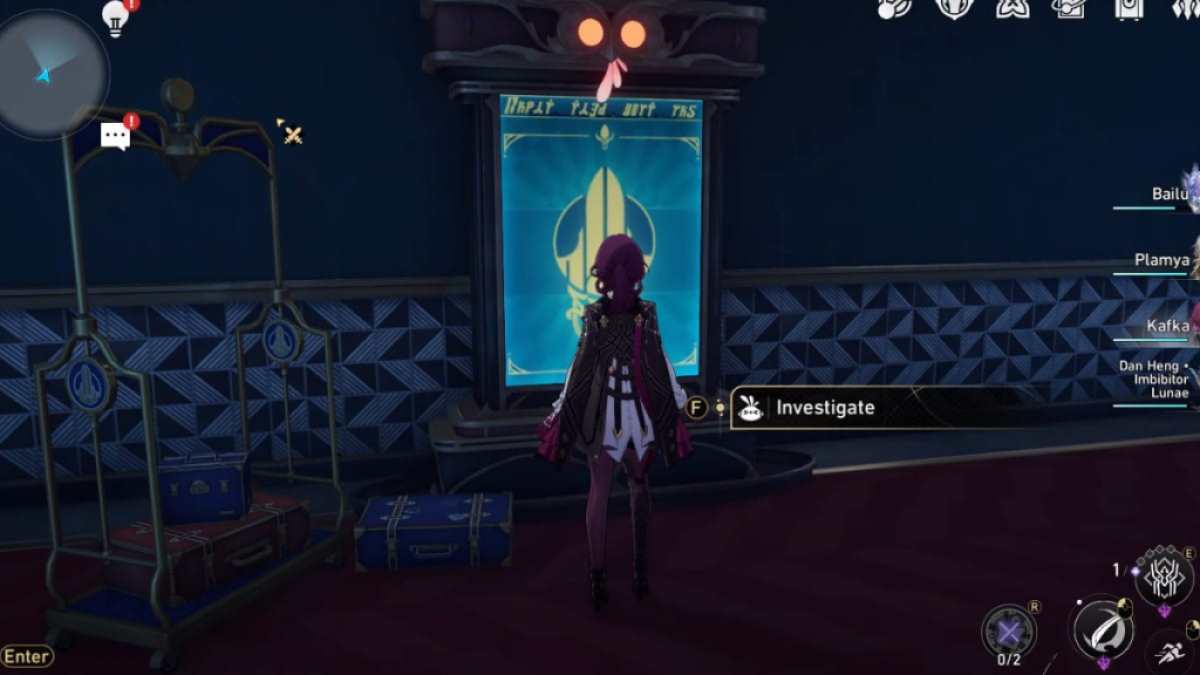
Image by Pro Game Guides
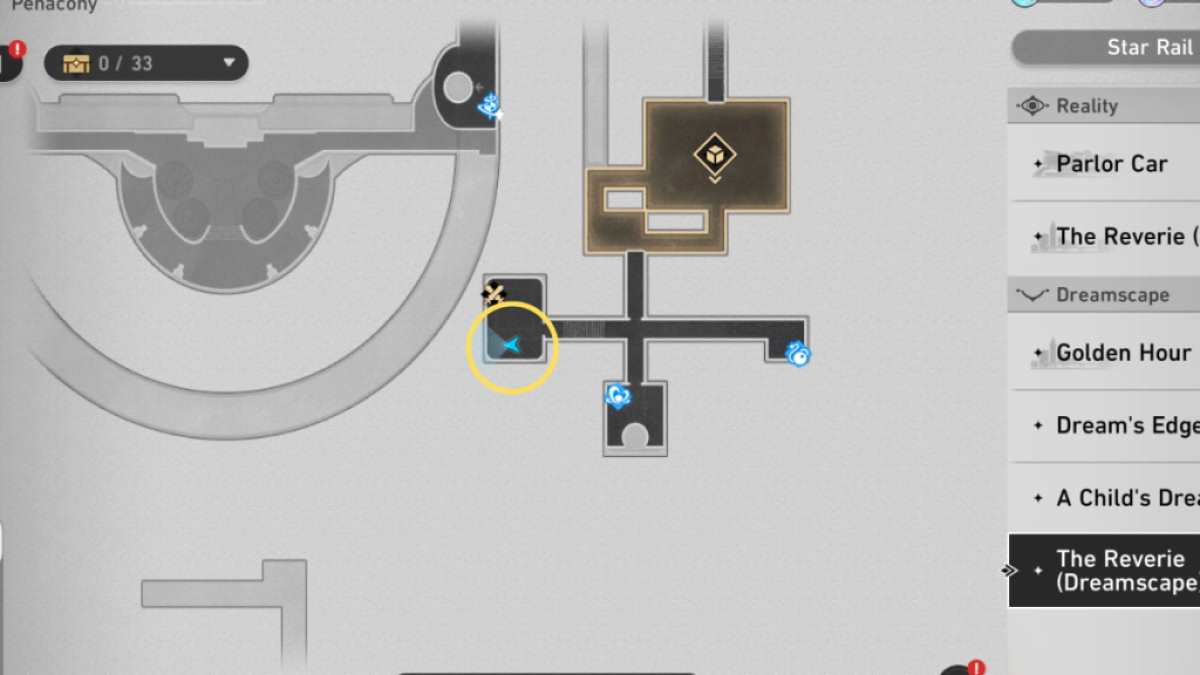
Image by Pro Game Guides
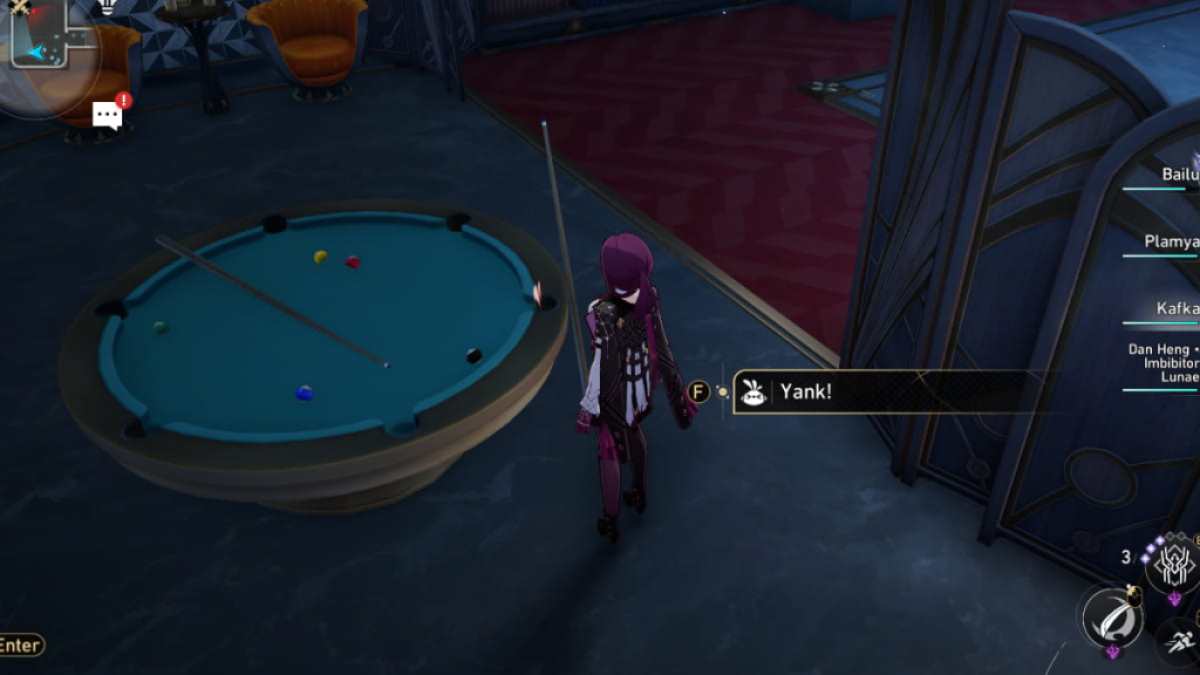
Image by Pro Game Guides
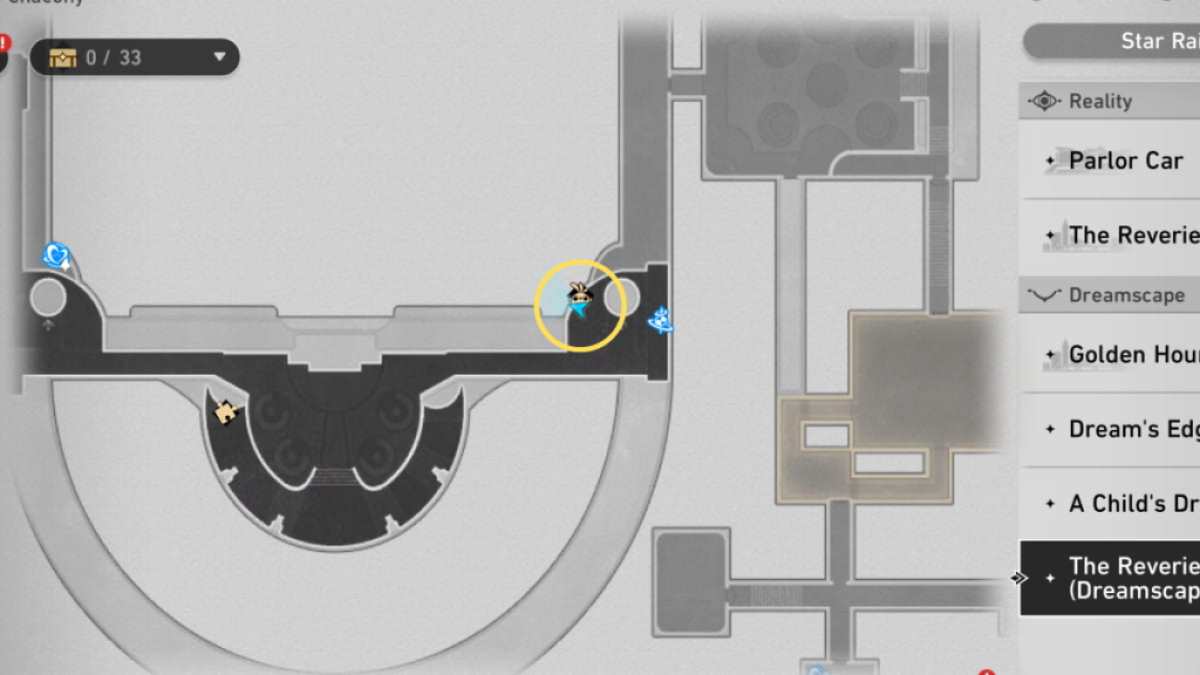
Image by Pro Game Guides
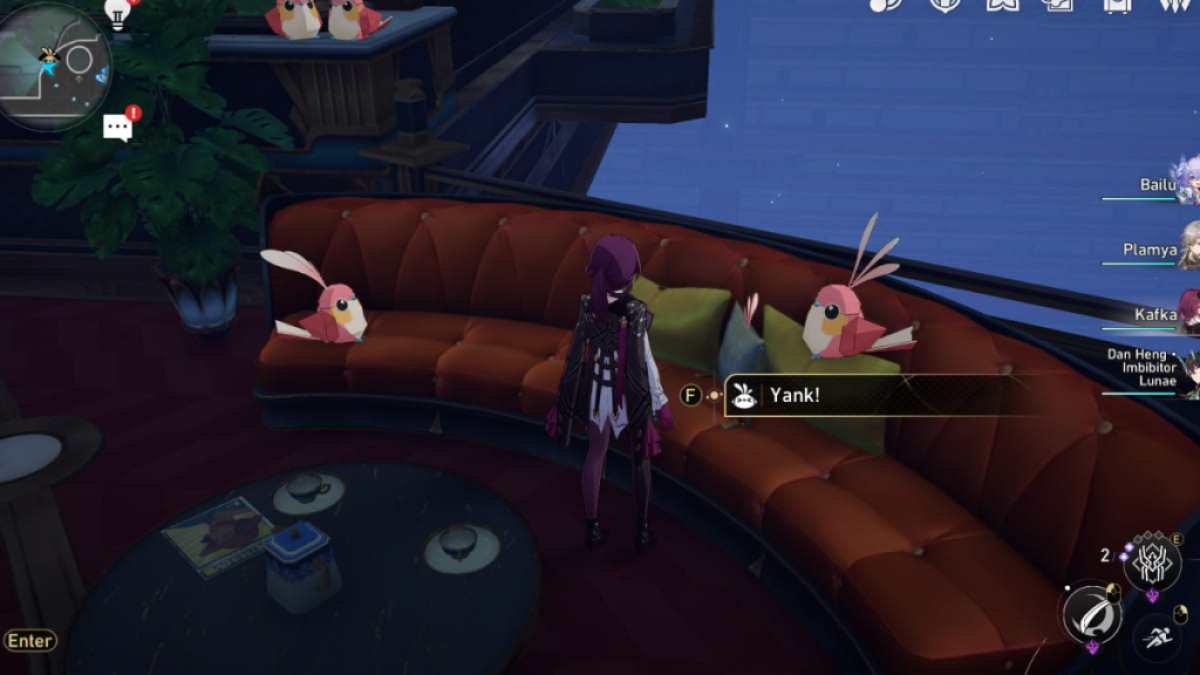
Image by Pro Game Guides
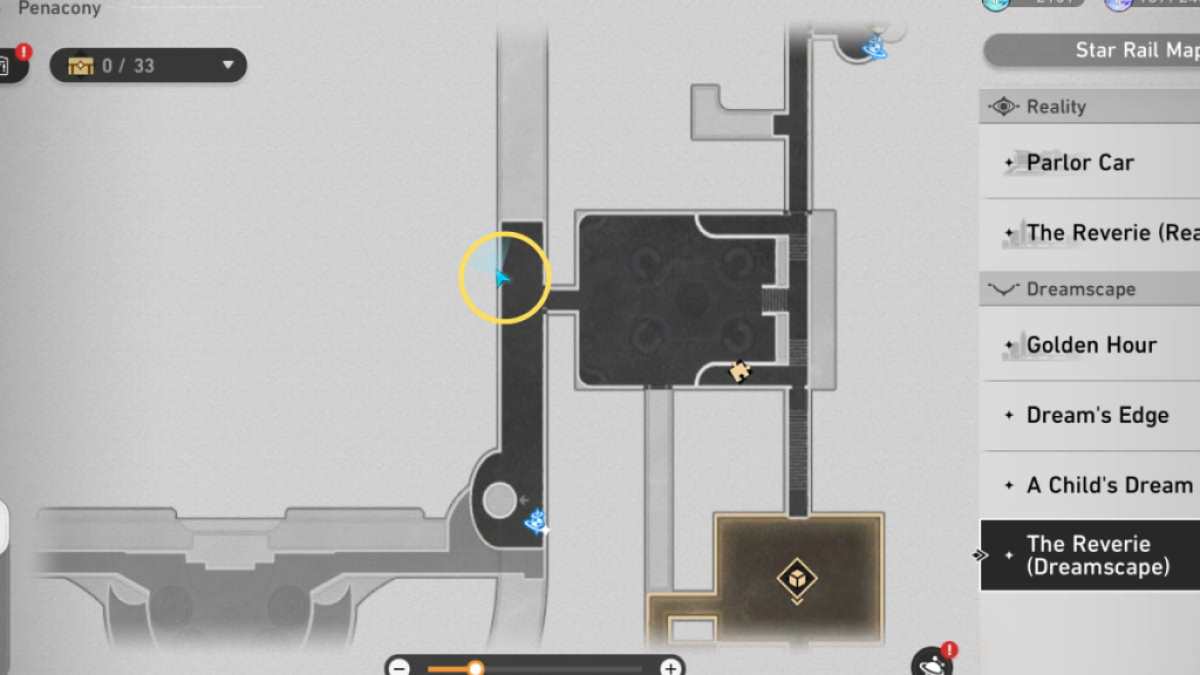
Image by Pro Game Guides
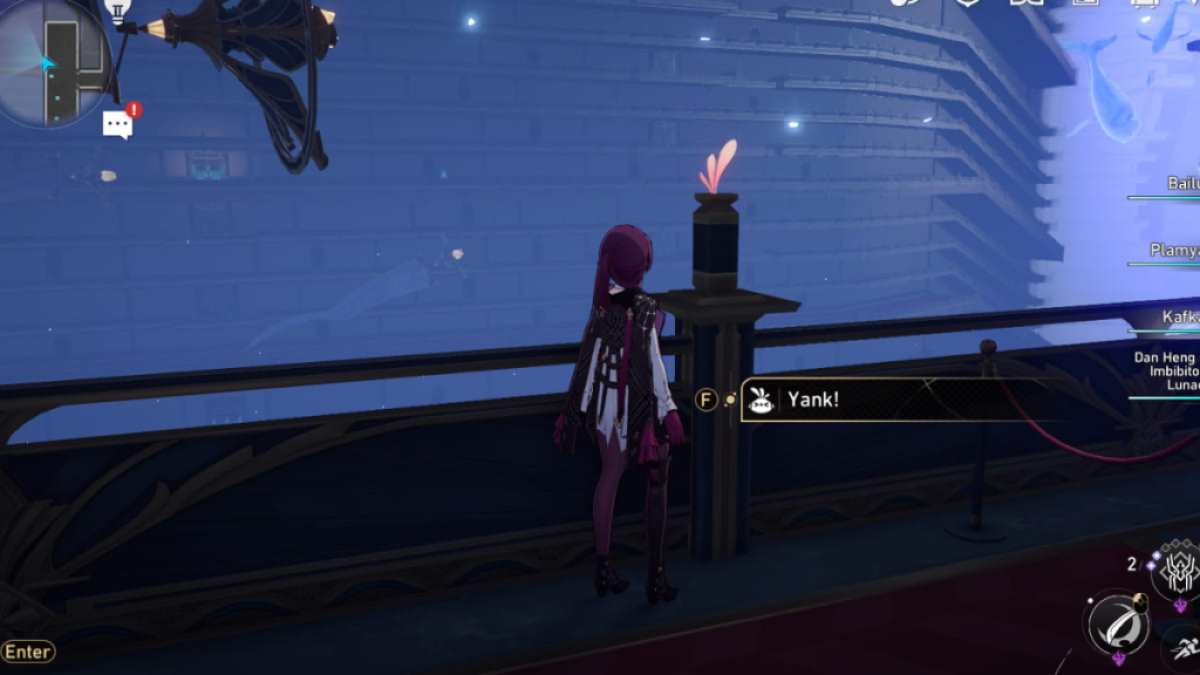
Image by Pro Game Guides
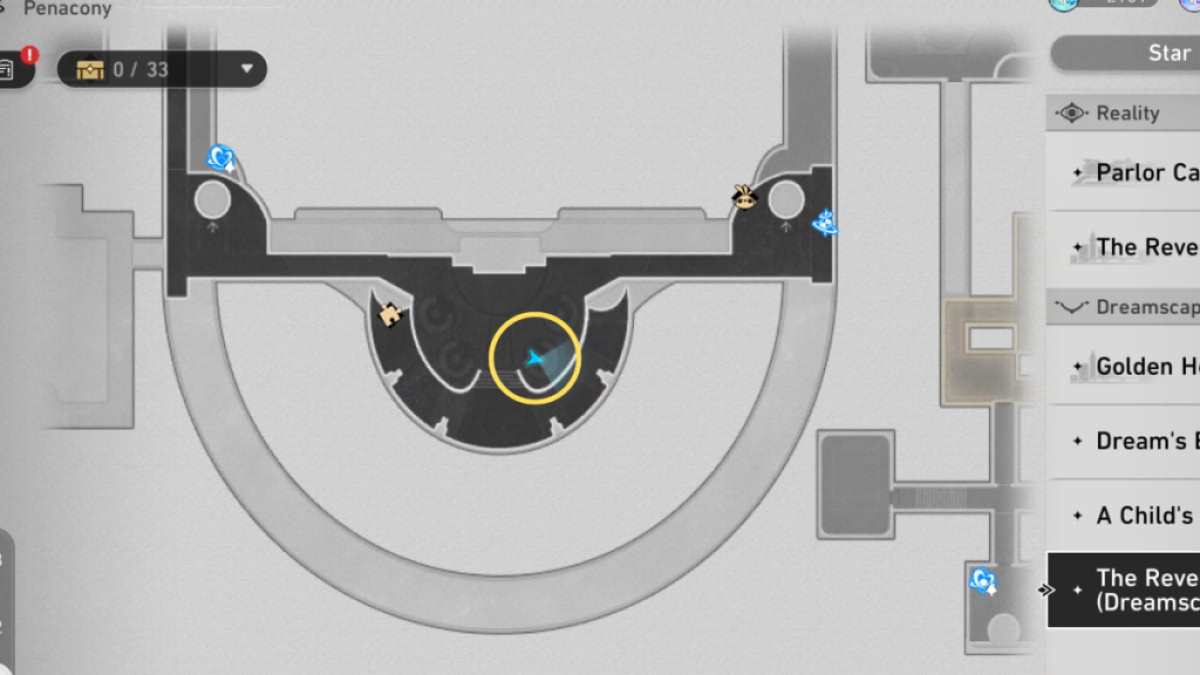
Image by Pro Game Guides
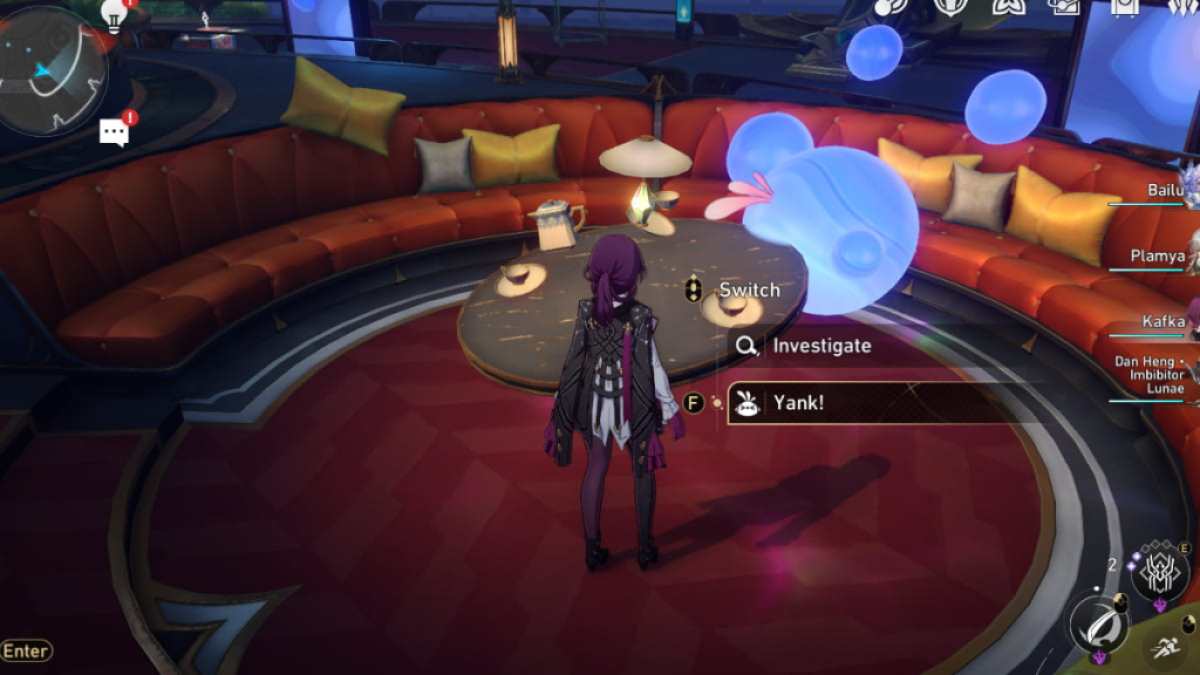
Image by Pro Game Guides
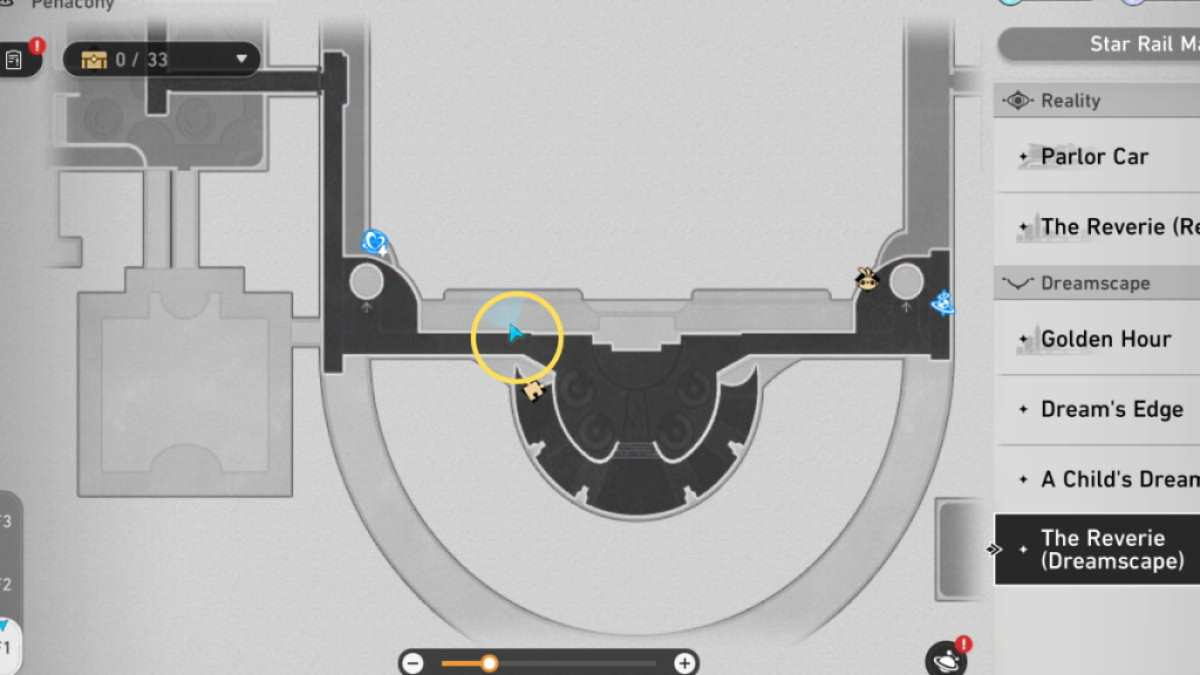
Image by Pro Game Guides
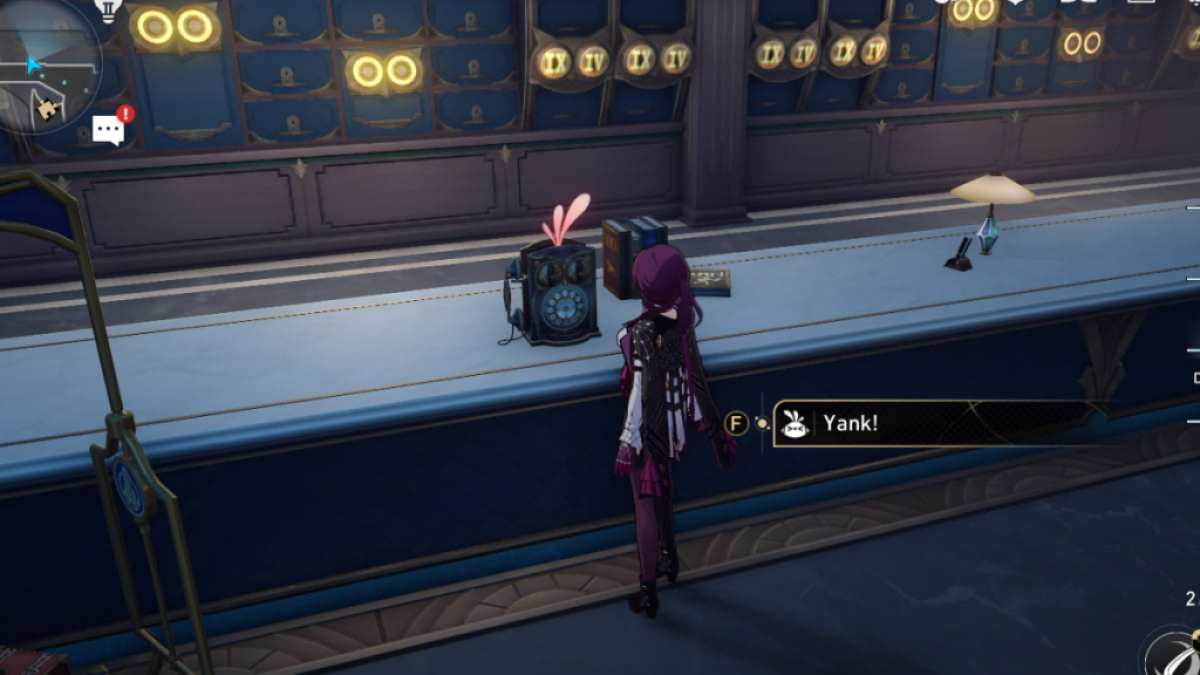
Image by Pro Game Guides
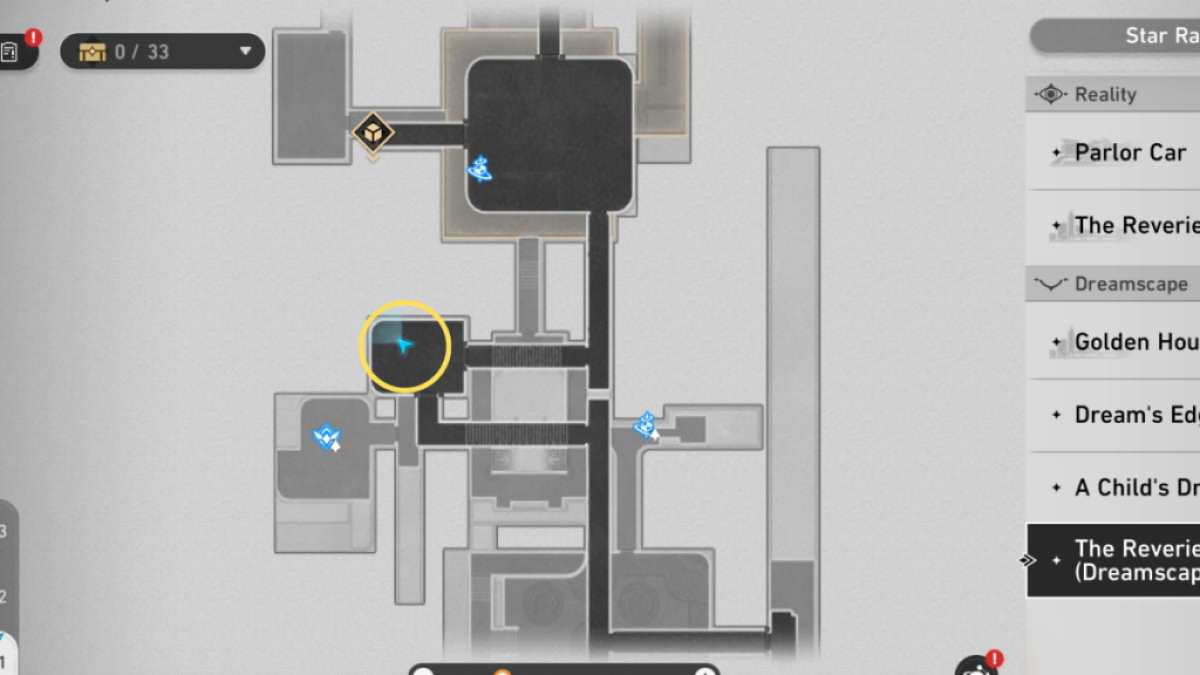
Image by Pro Game Guides
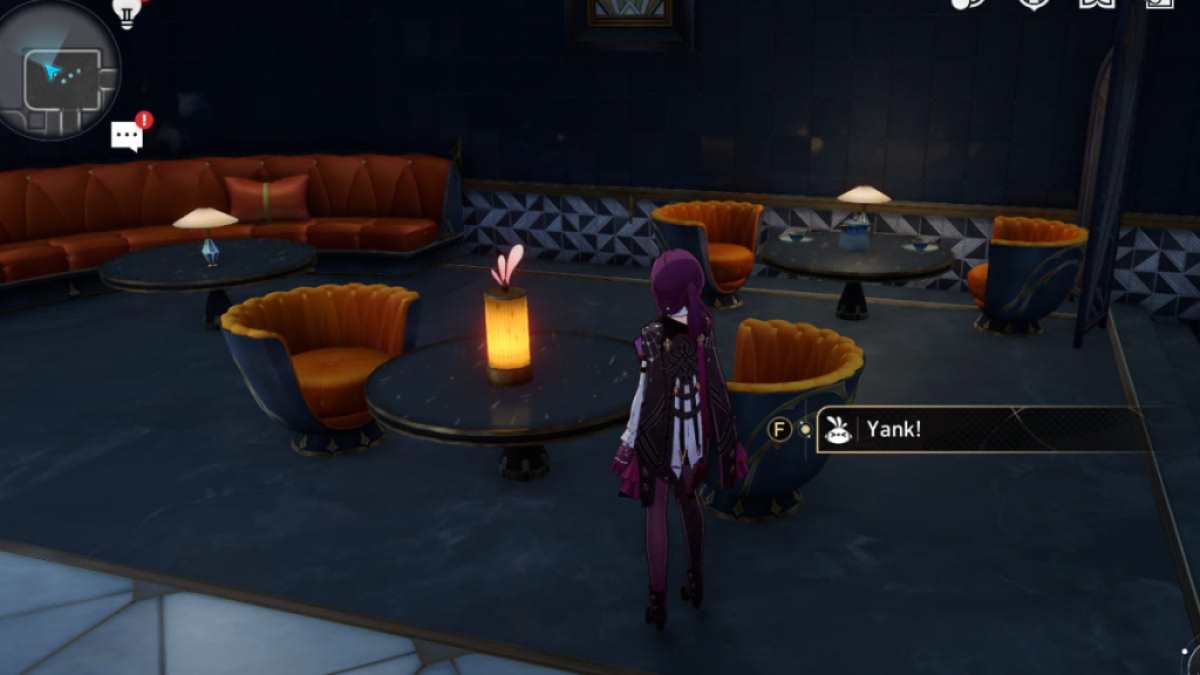
Image by Pro Game Guides
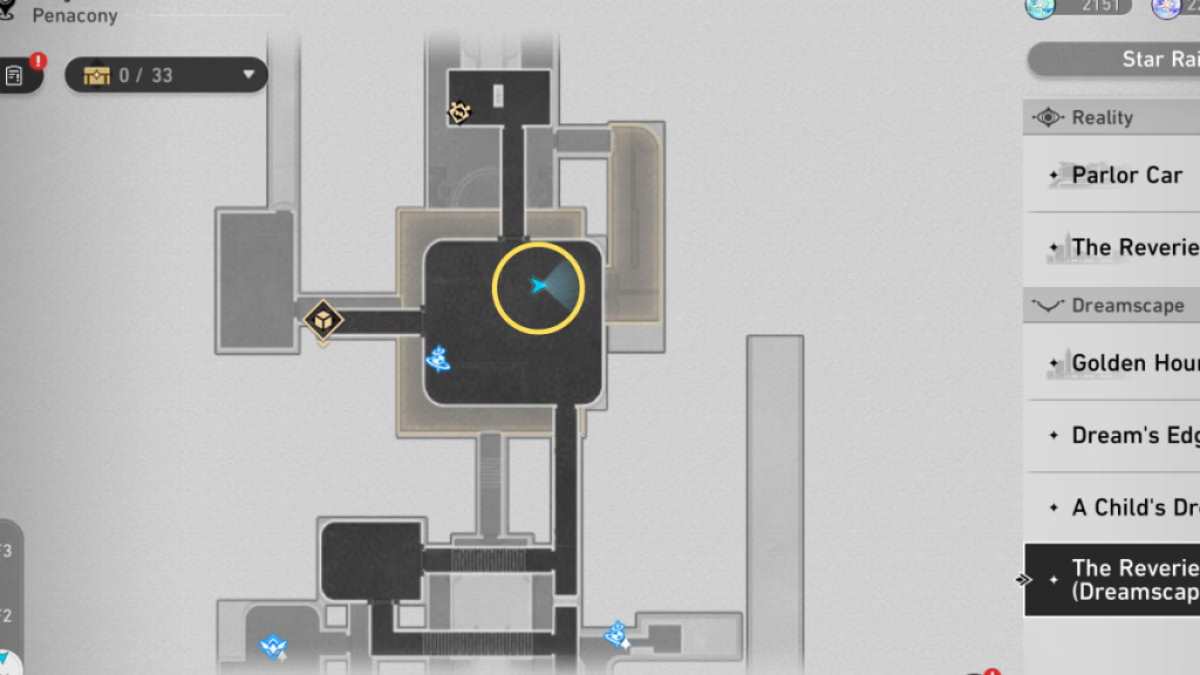
Image by Pro Game Guides

Image by Pro Game Guides
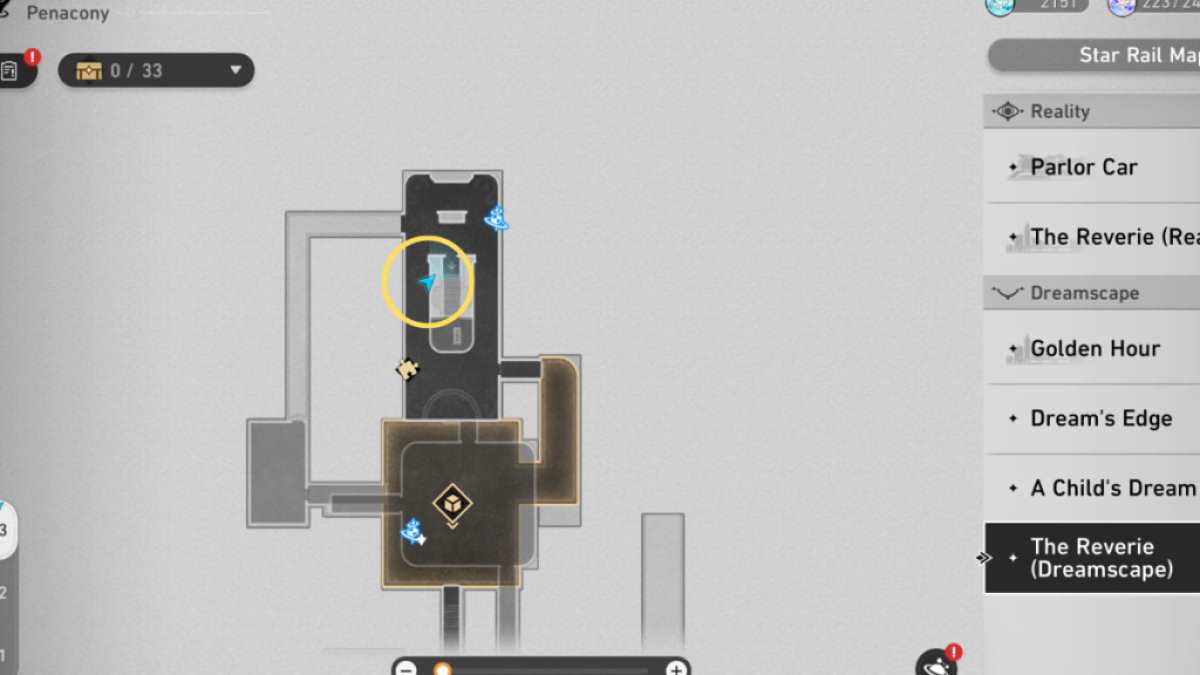
Image by Pro Game Guides
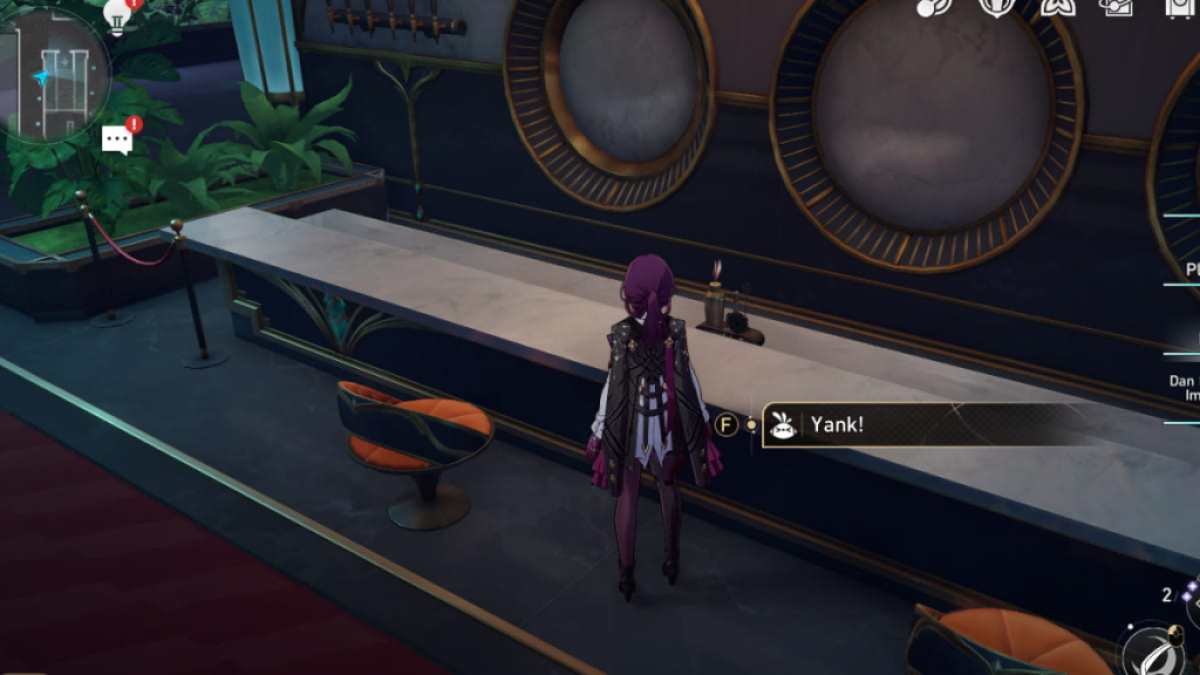
Image by Pro Game Guides

Image by Pro Game Guides
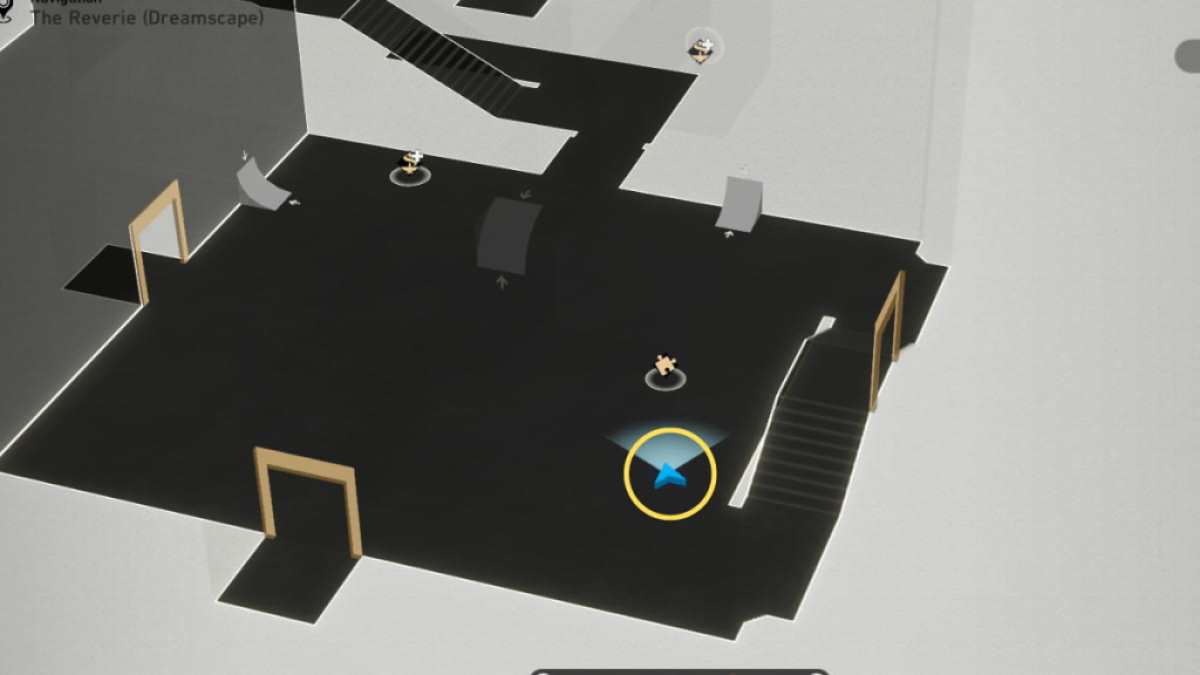
Image by Pro Game Guides
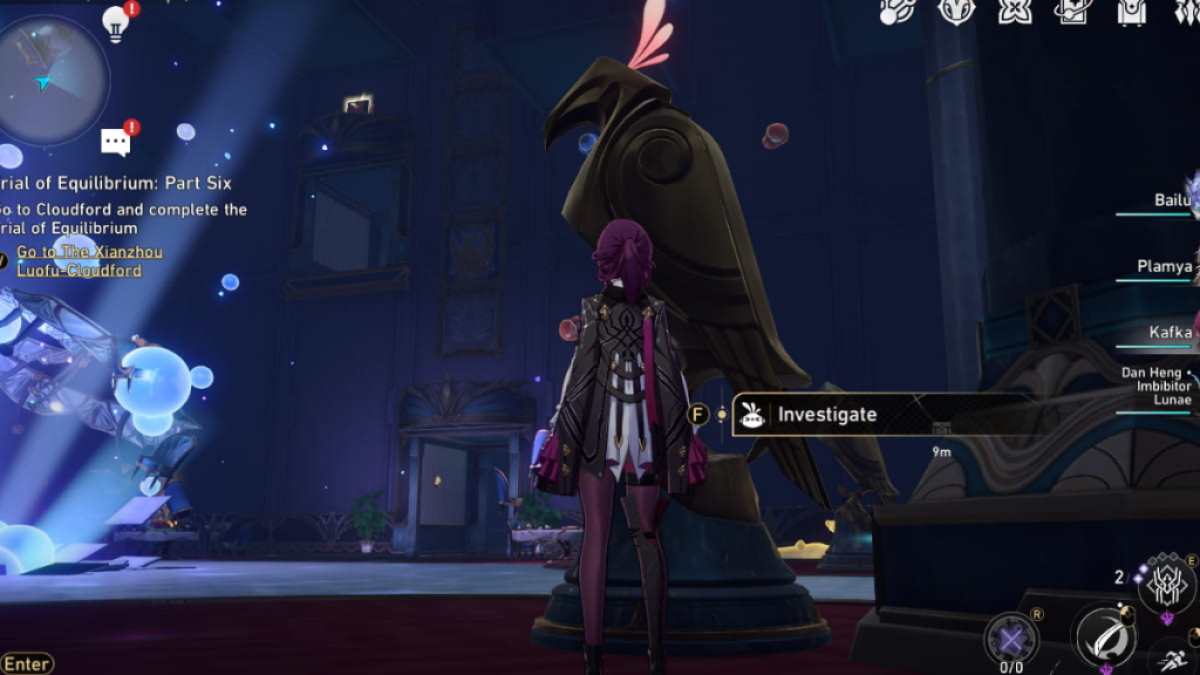
Image by Pro Game Guides
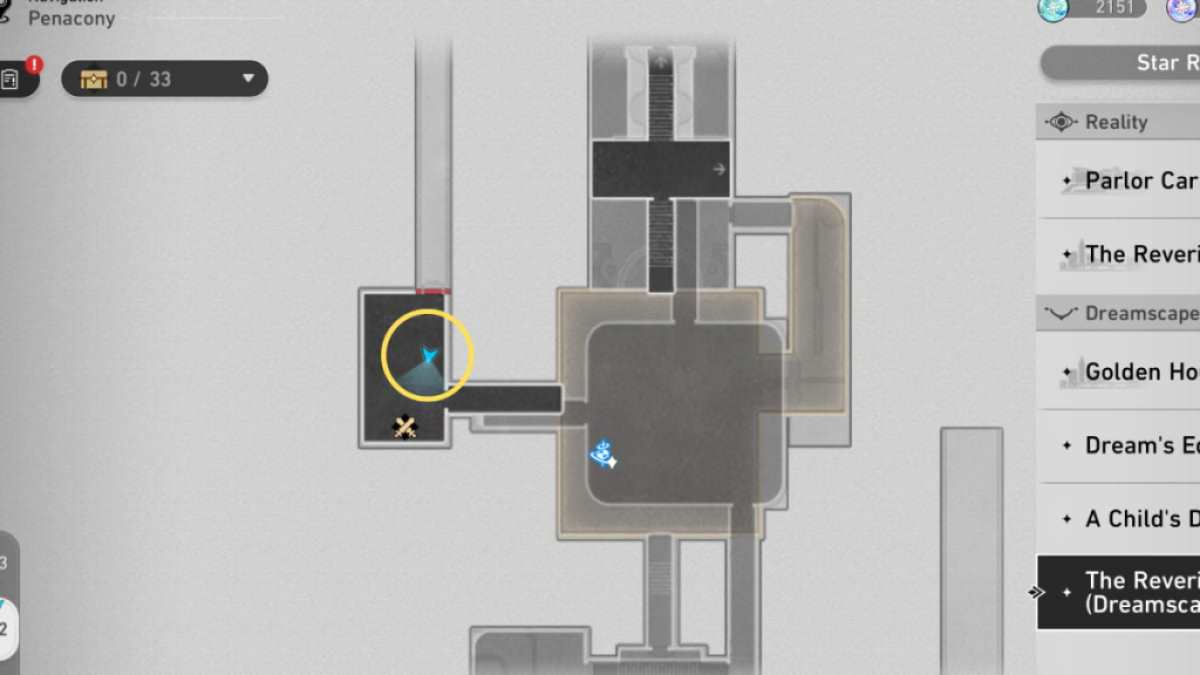
Image by Pro Game Guides
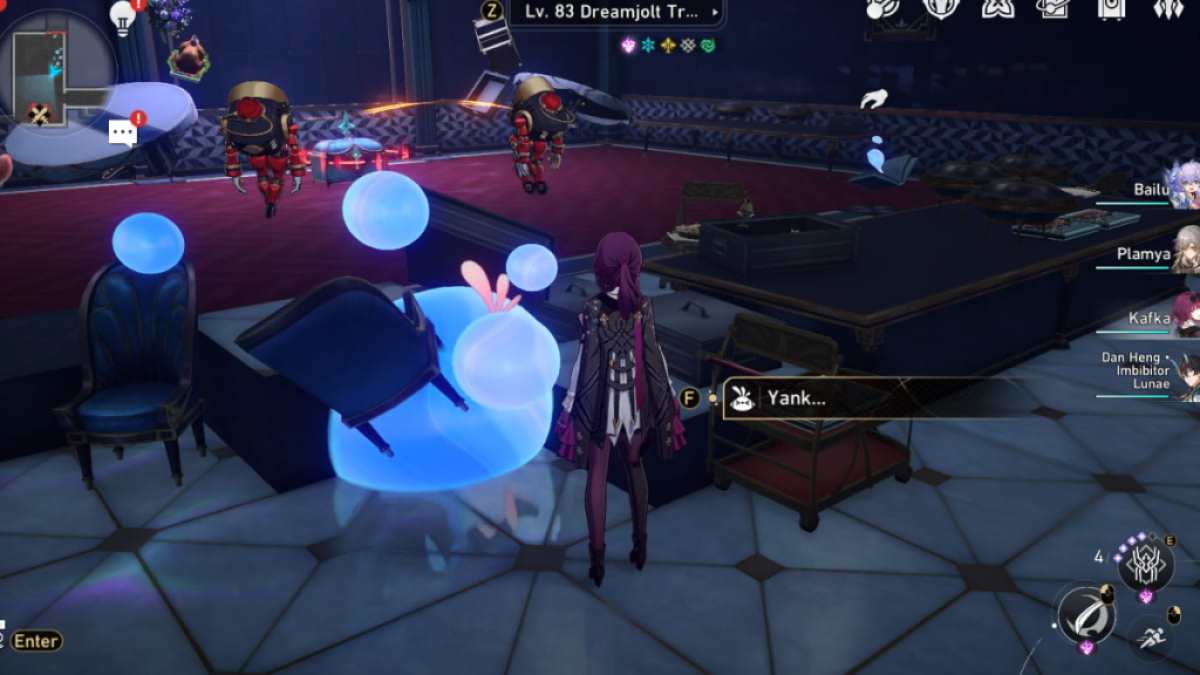
Image by Pro Game Guides
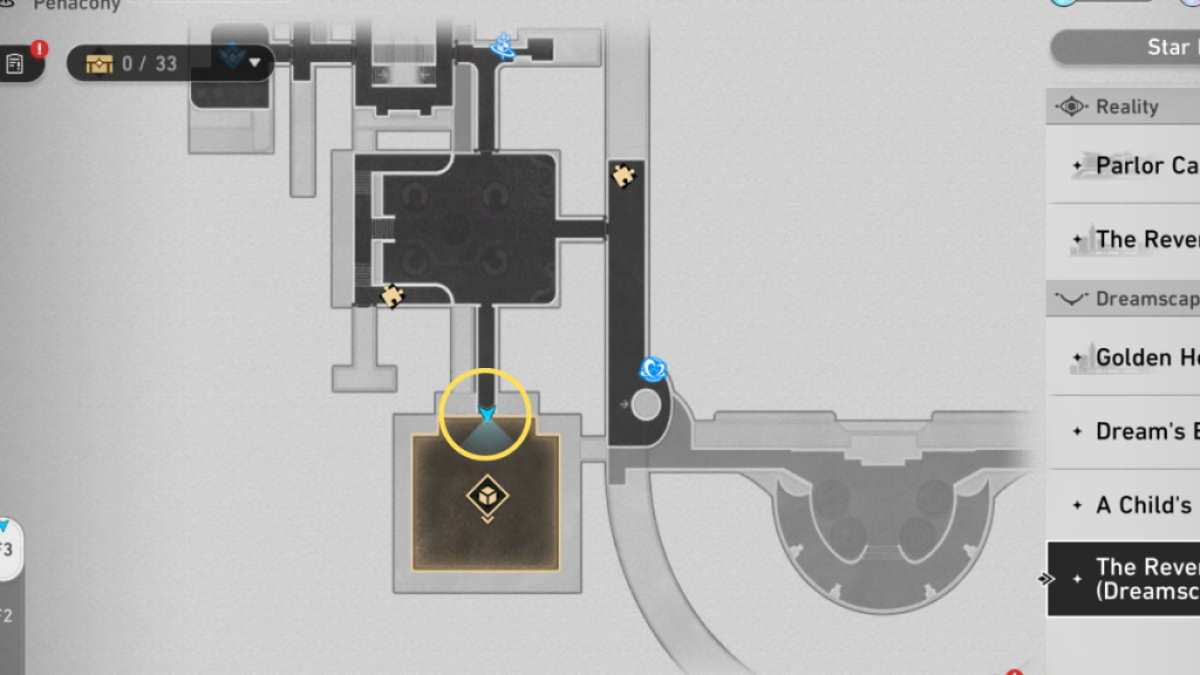
Image by Pro Game Guides
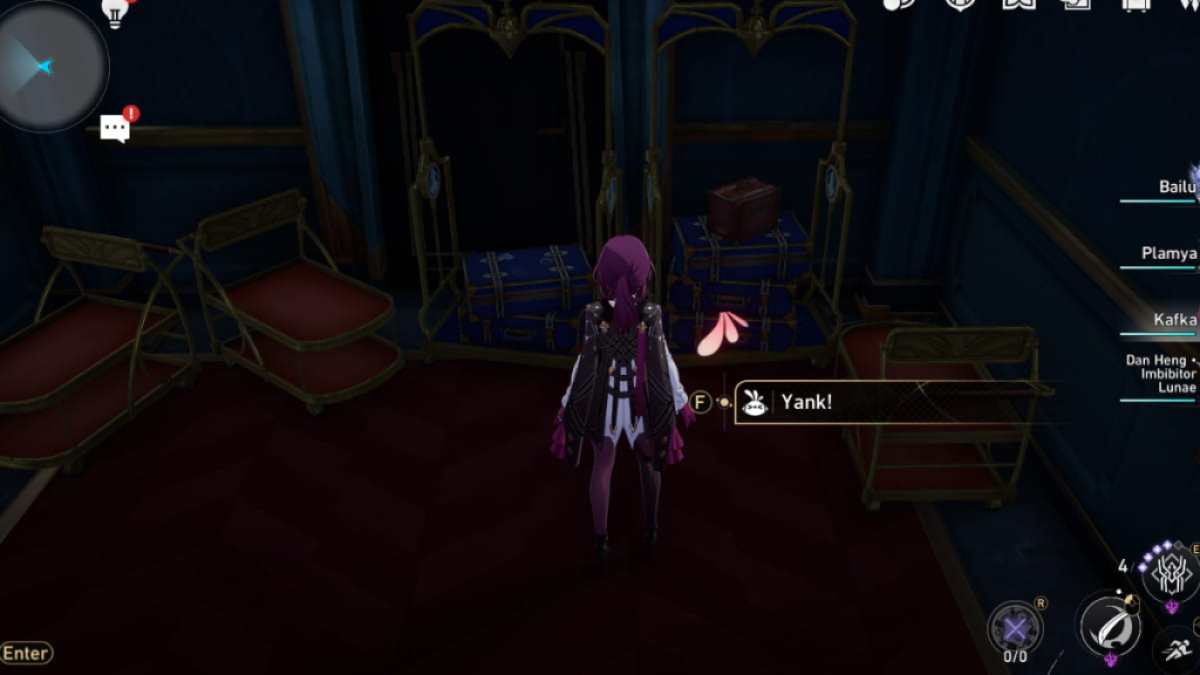
Image by Pro Game Guides
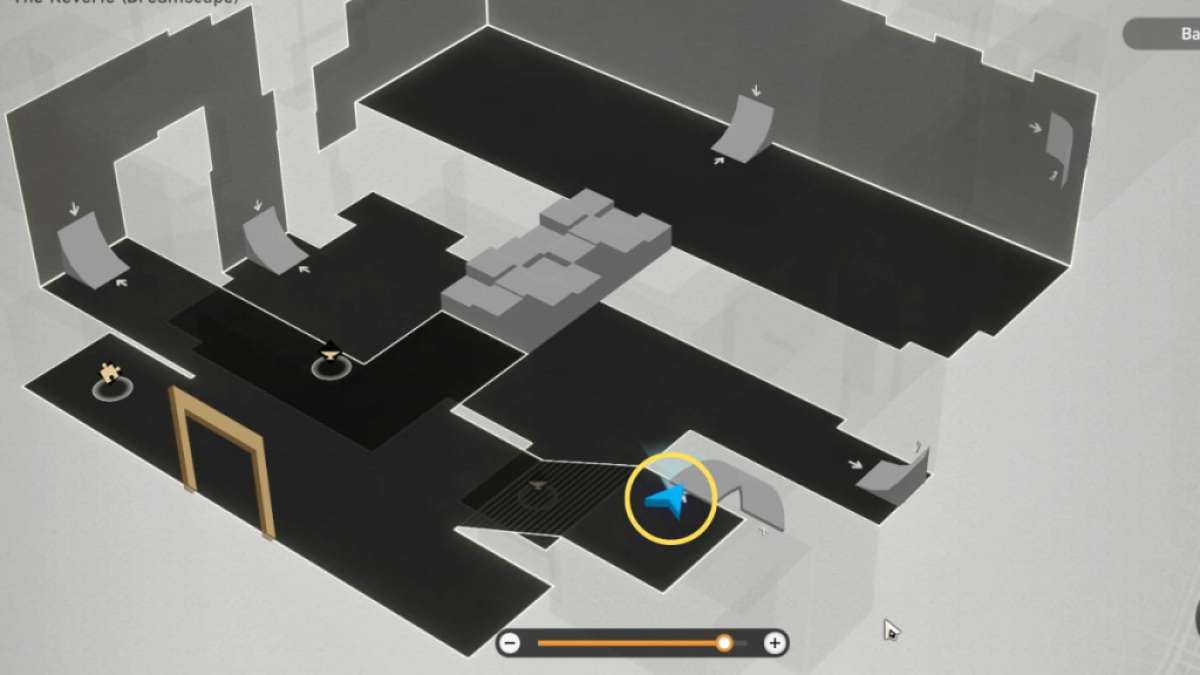
Image by Pro Game Guides
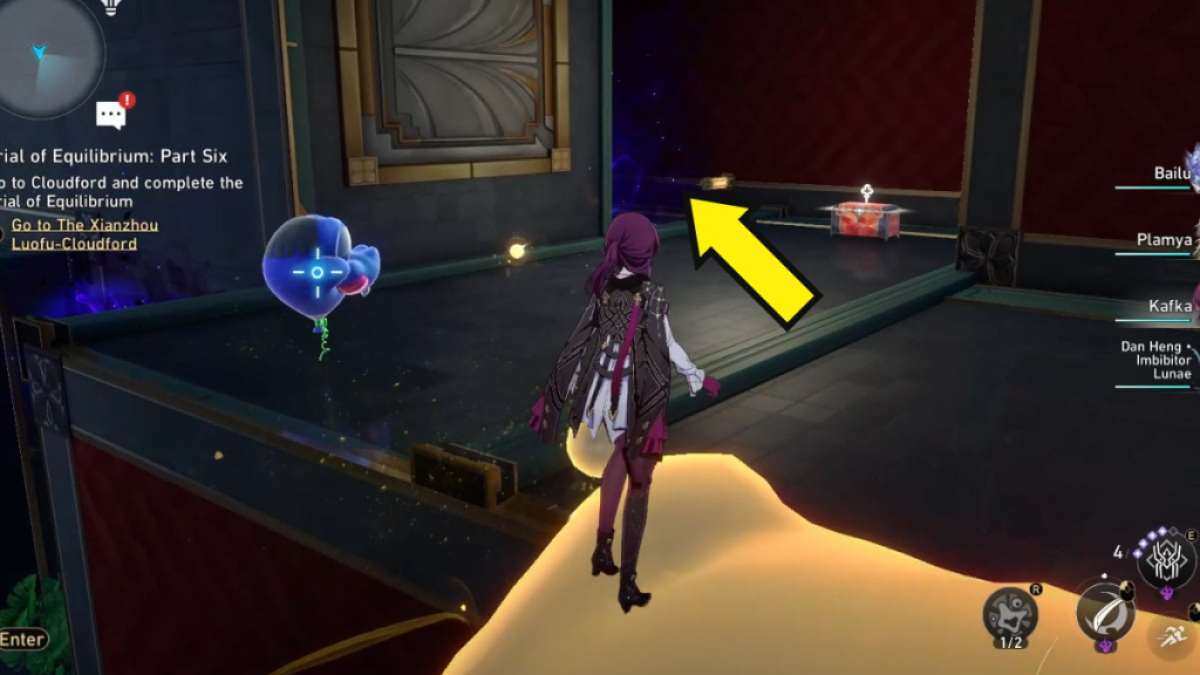
Image by Pro Game Guides
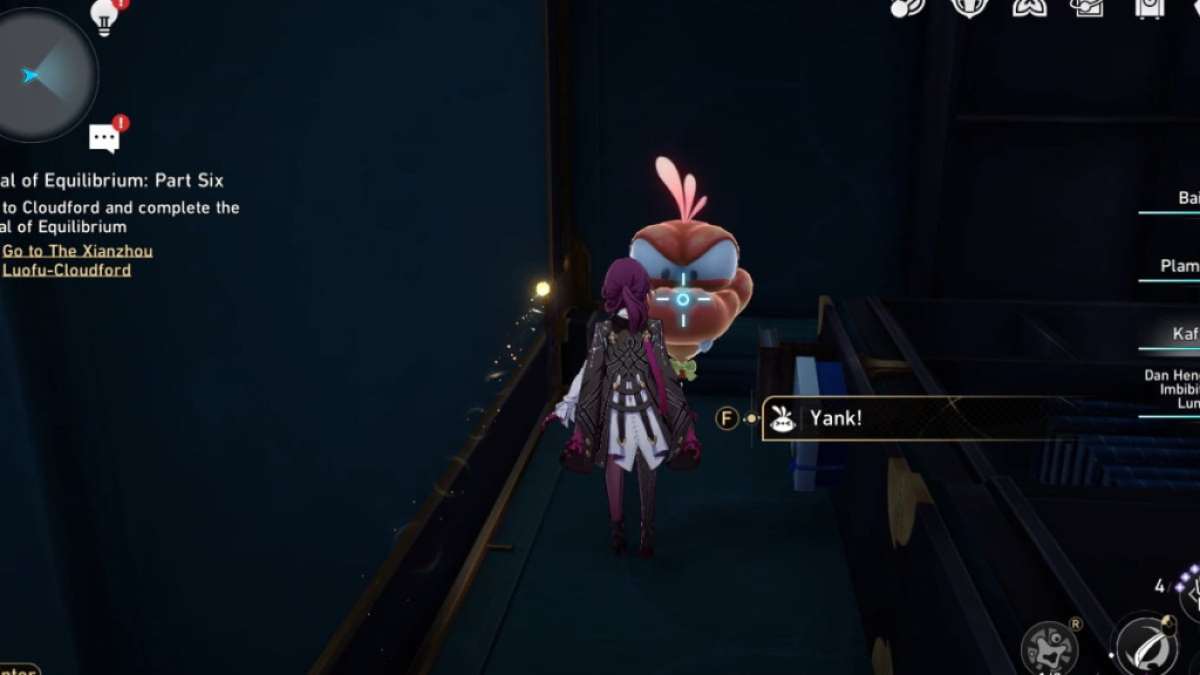
Image by Pro Game Guides
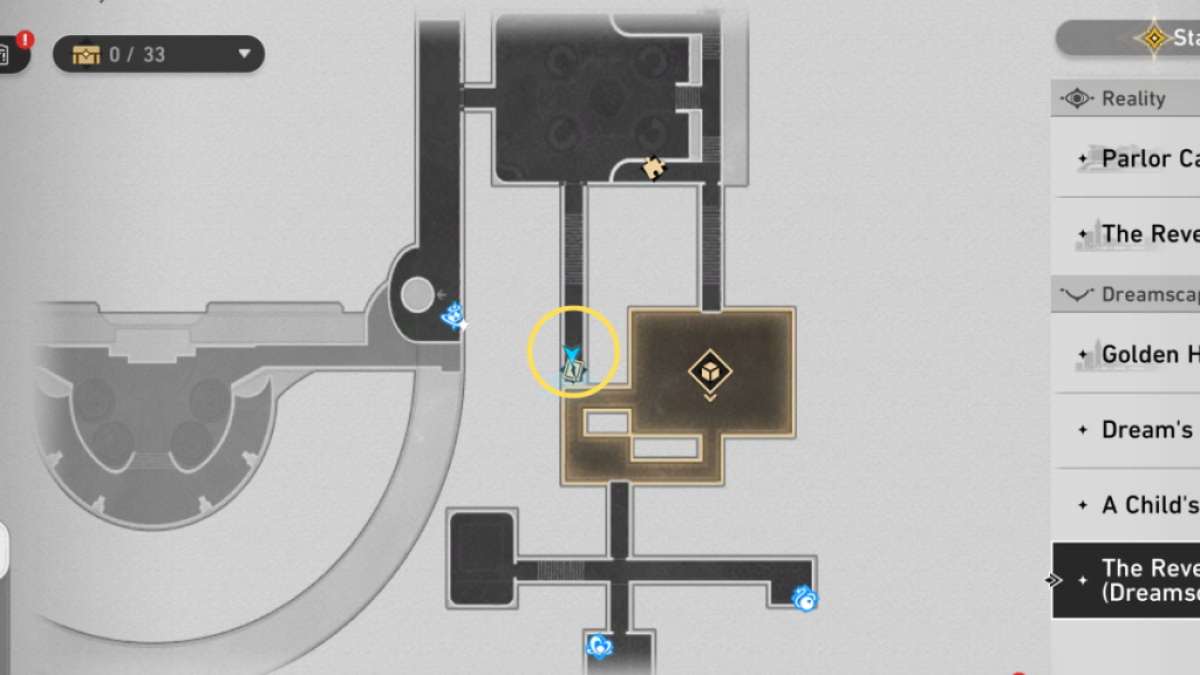
Image by Pro Game Guides
Image by Pro Game Guides
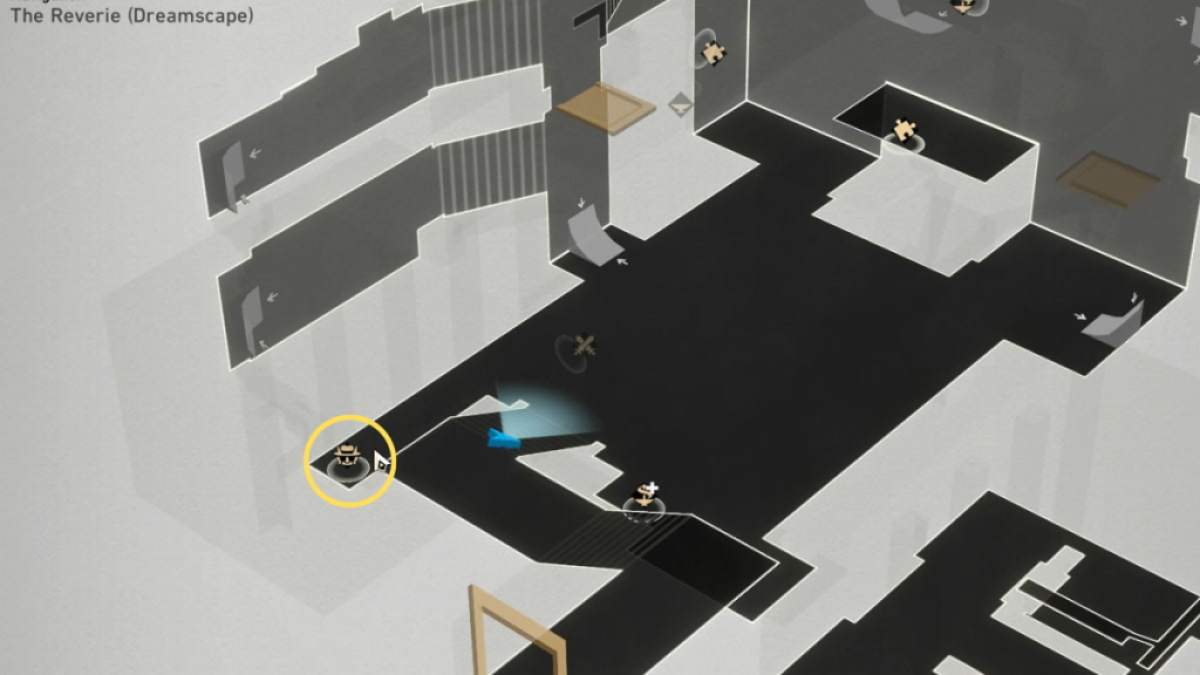
Image by Pro Game Guides
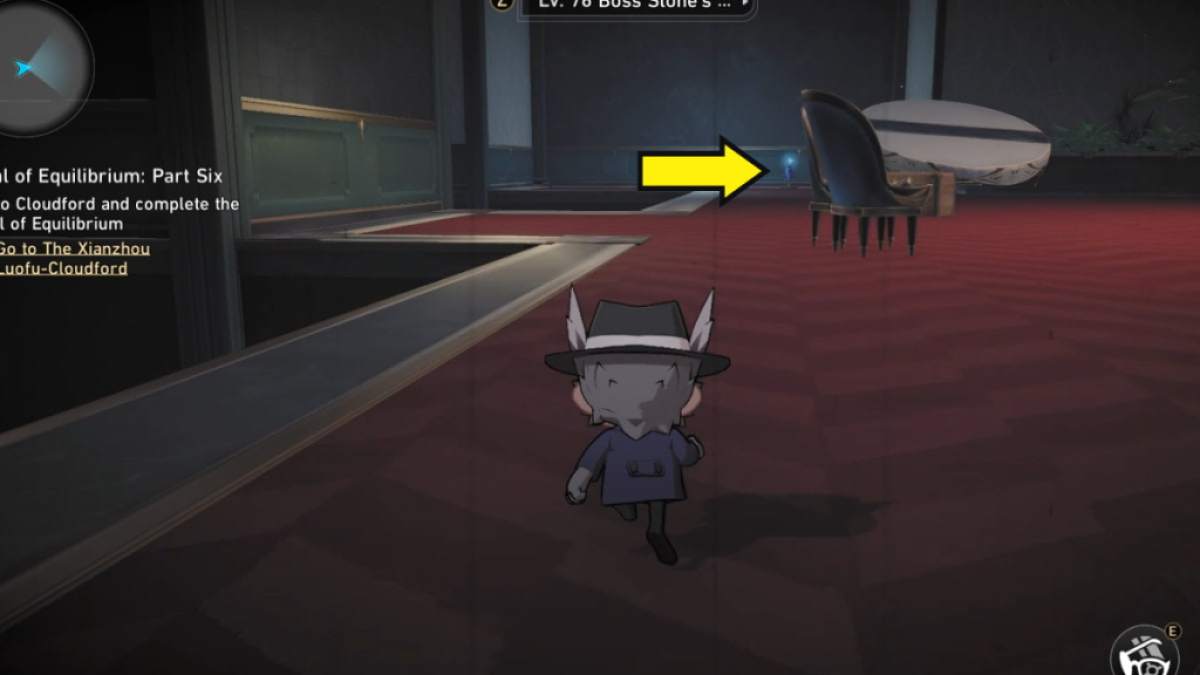
Image by Pro Game Guides
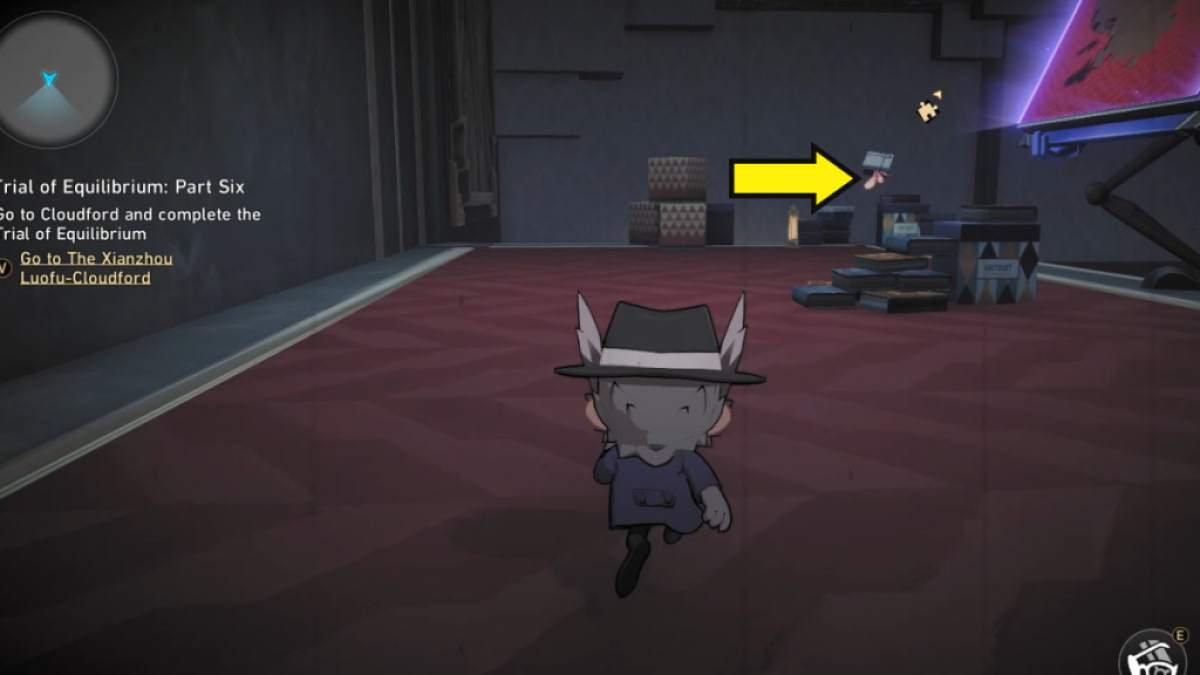
Image by Pro Game Guides

Image by Pro Game Guides
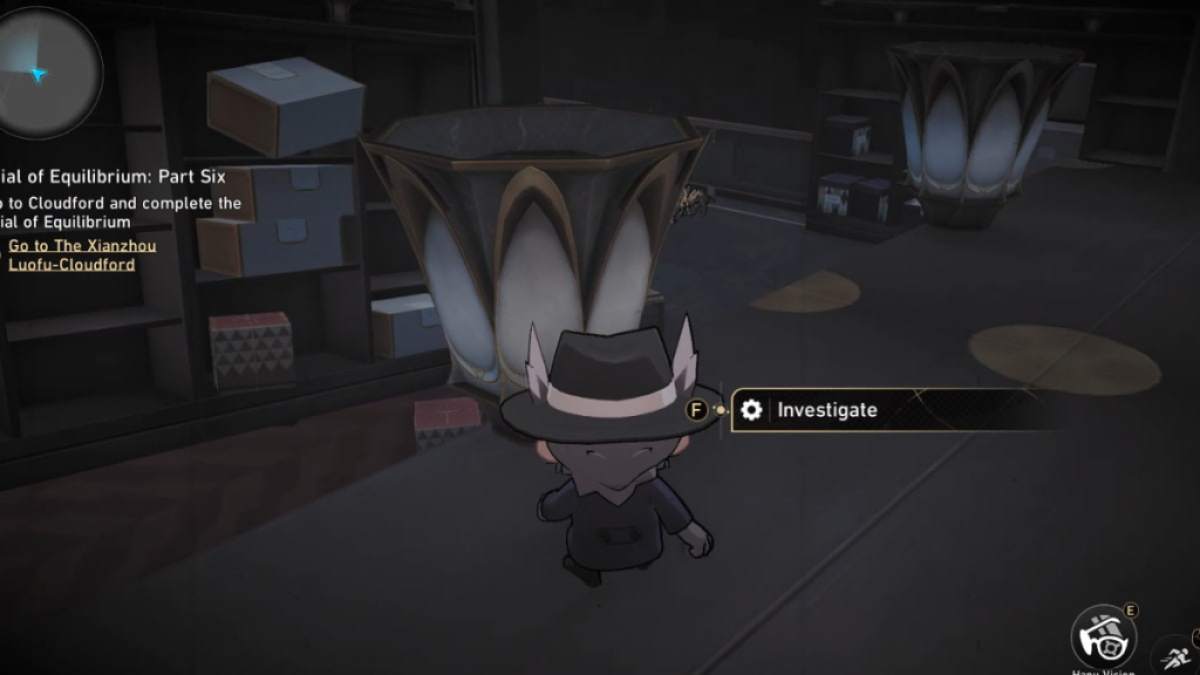
Image by Pro Game Guides
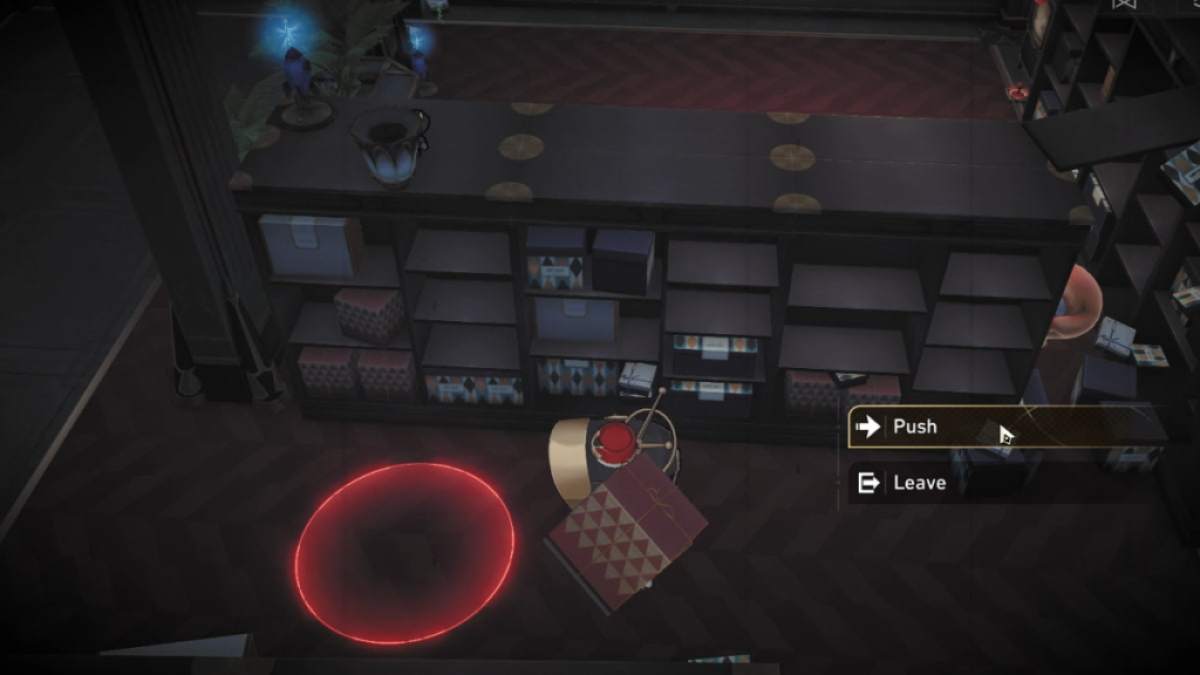
Image by Pro Game Guides
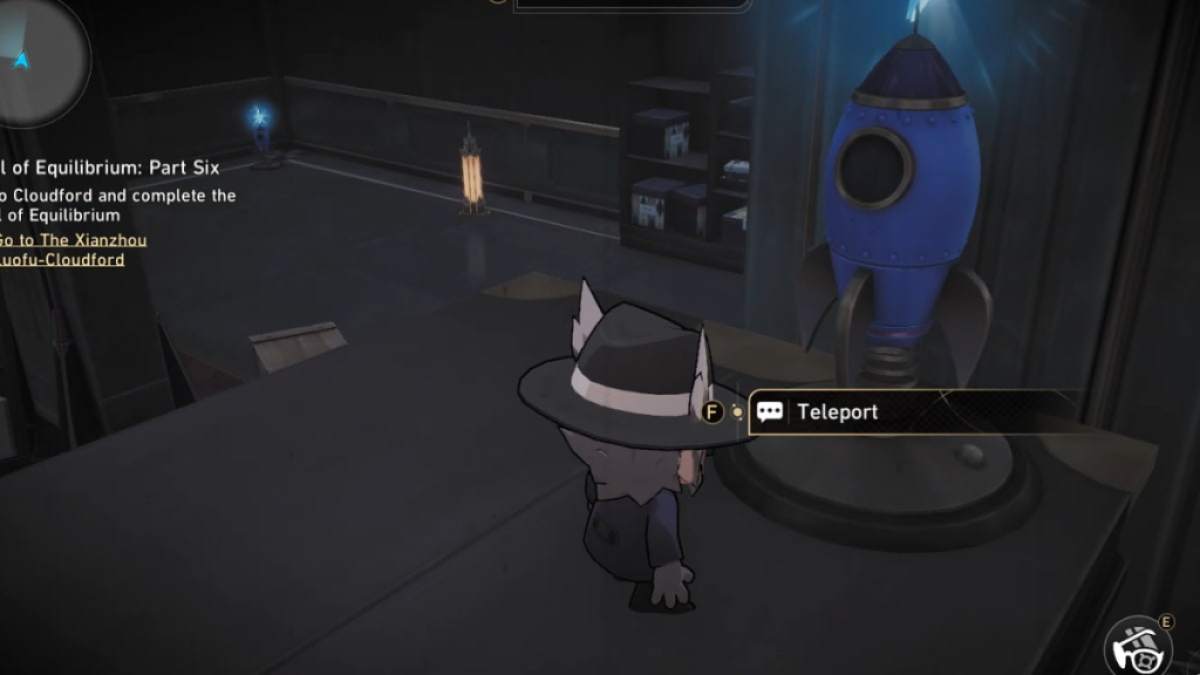
Image by Pro Game Guides
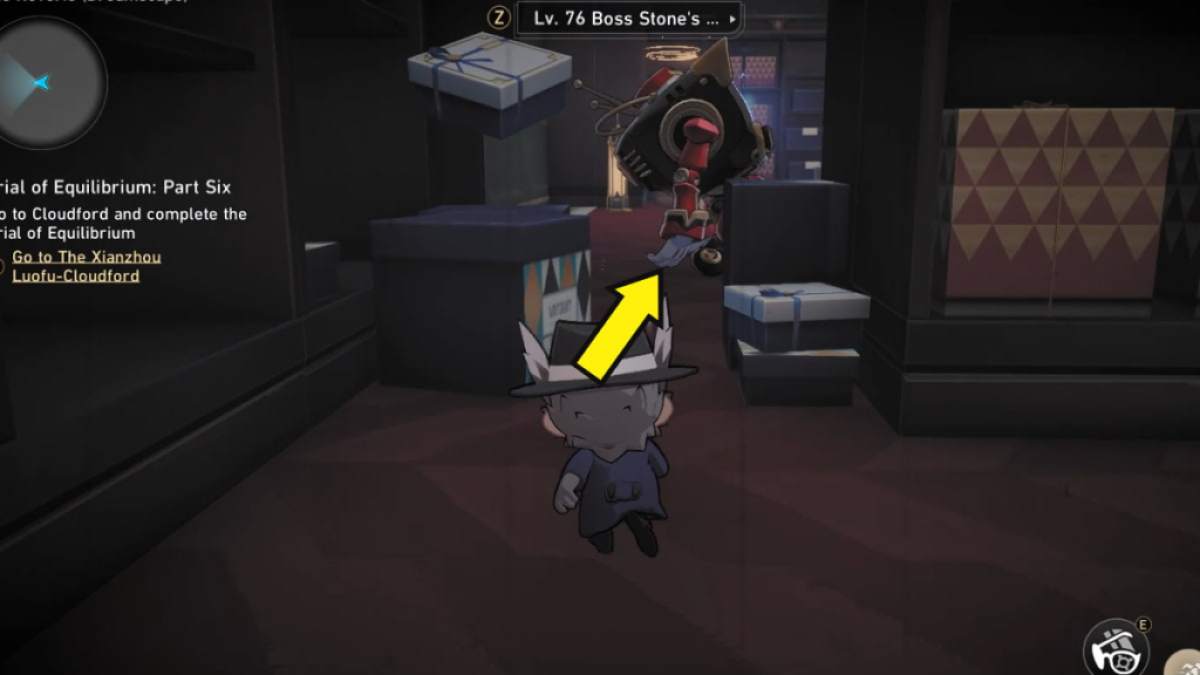
Image by Pro Game Guides
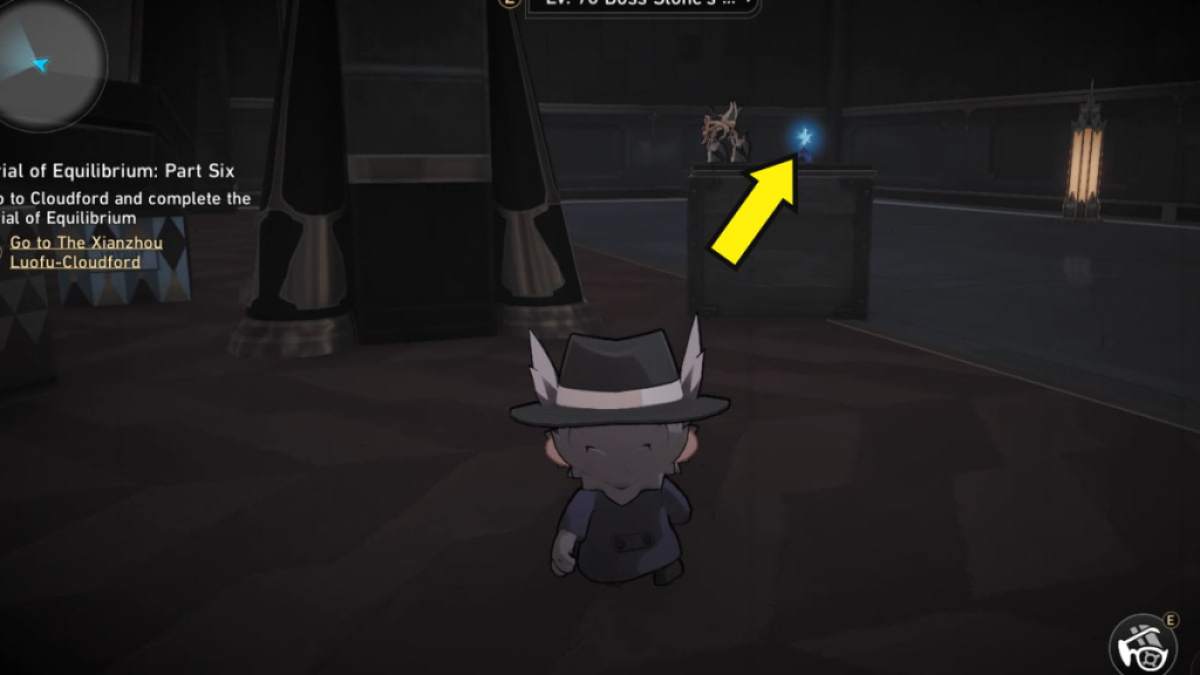
Image by Pro Game Guides
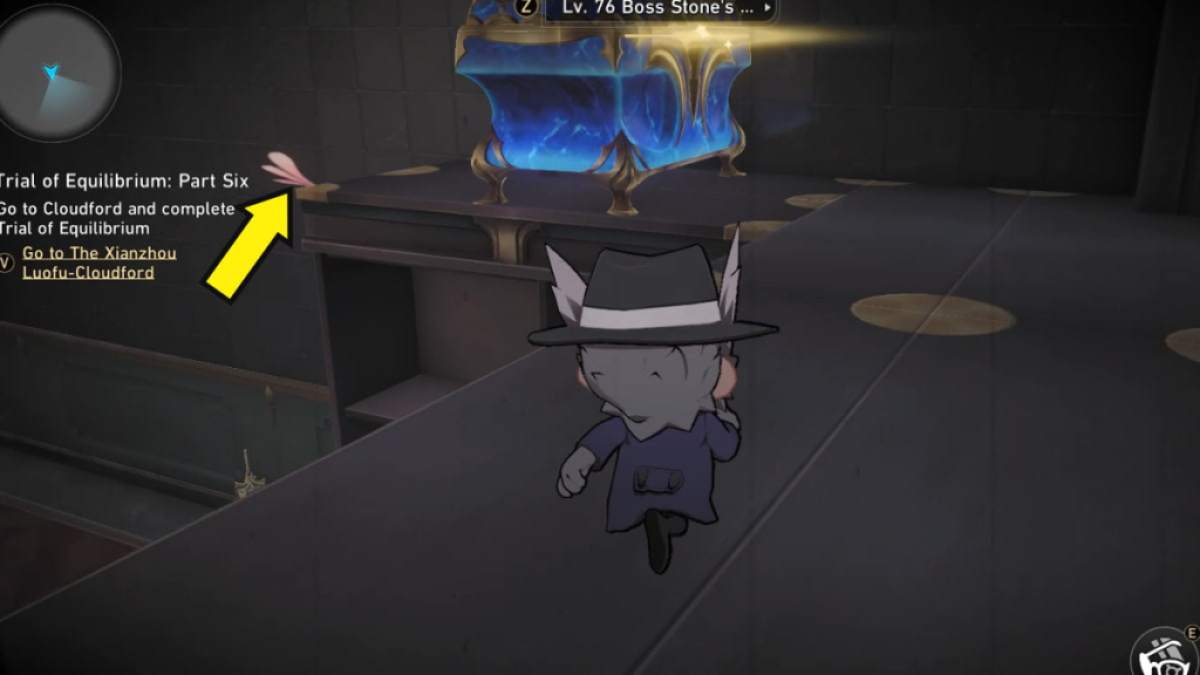
Image by Pro Game Guides
Image by Pro Game Guides
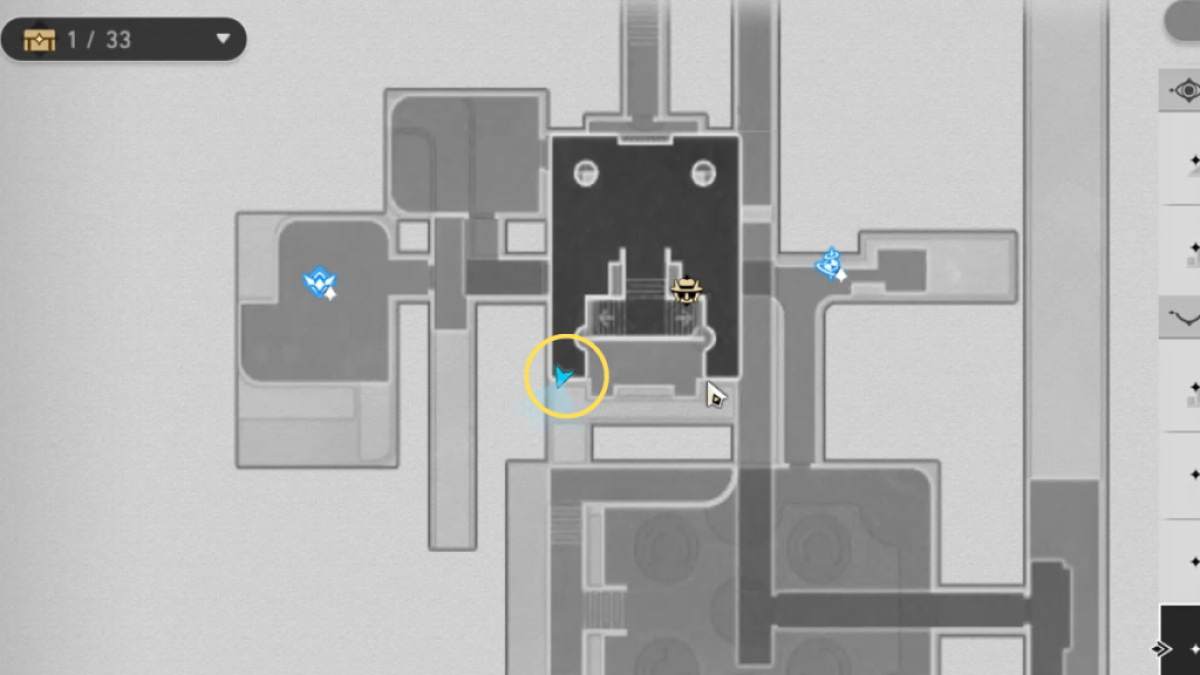
Image by Pro Game Guides
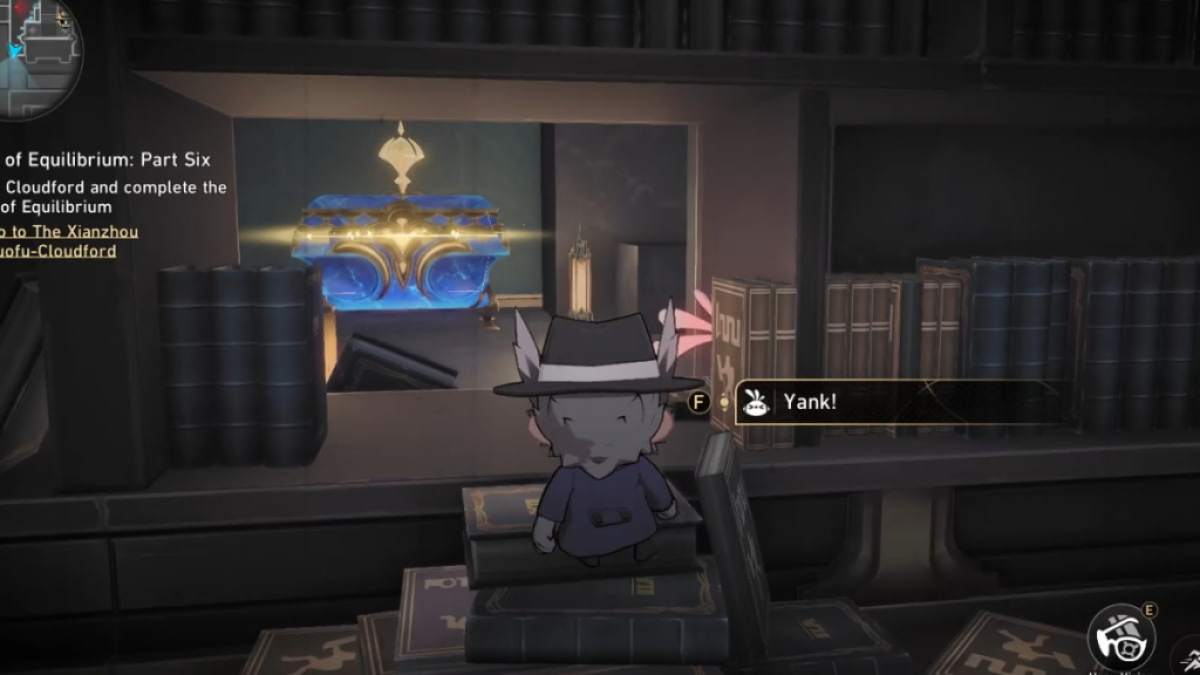
Image by Pro Game Guides
