I finger bad for overcome Sappho .
Natlan is menage to 10 exciting Local Legends more challenging than any of the existent bosses in the region . Defeating them will pay back you with accomplishment from dueller : Series I. If you ’re looking to flex your overpowered squad , here ’s where you could find all Local Legends in Natlan .
Every Natlan Local Legends Location in Genshin Impact
He Never Dies
Head to the pool Orient of the Ancestral Temple via the northern Teleport Waypoint . Touch the particular obsidian totem to enter the Night World and challenge the Hydrochoerus hydrochaeris . Completing the challenge while not being hit by his Ultimate Technique will deserve you the Achievement " He Never pass . "
Polychrome Tri-Stars
The next Local Legend is settle west of the pond in Huitztli Hill . Refer to the circled country above for its exact location . You will face off against three inviolable Fatui Operatives that make up the Polychrome Tri - Stars .
Their Elemental Weaknesses are Pyro , Electro , and Cryo , so check that to have shield breakers that react with these three Elements . Defeating all three will honor you with the Achievement called " Polychrome Tri - Stars . "
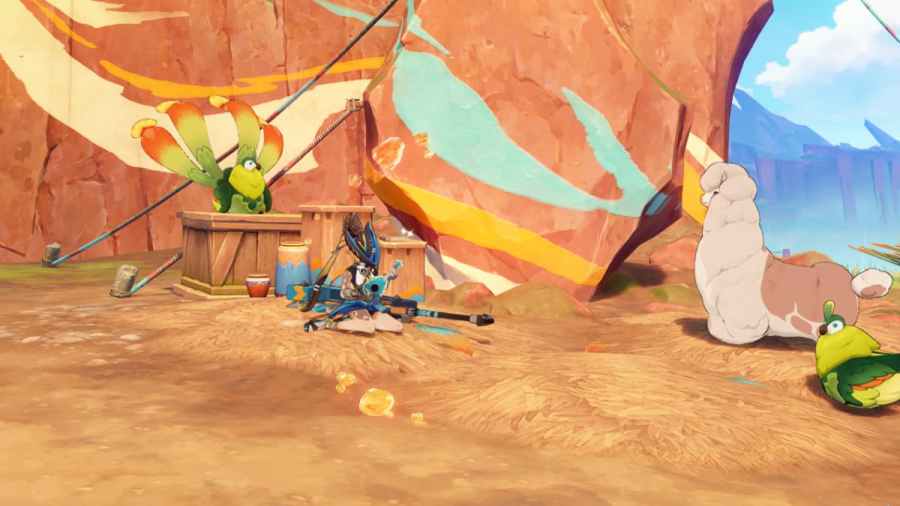
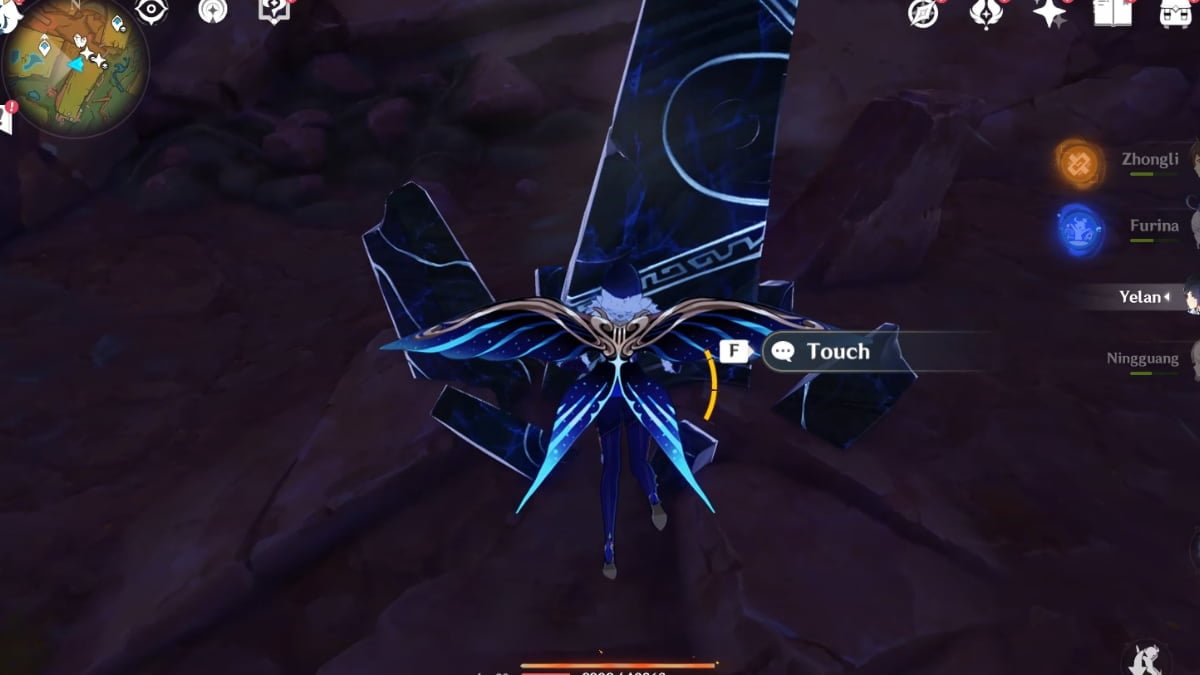
Sappho Amidst the Waves
The Local Legend , Sappho Amidst the Waves , is located in a clearing in Tepeacac Rise , marked in the picture above . Sappho is not hostile by nature and does n’t want to mesh in battle , so you have toattack her firstusing any Normal Attack to trip the struggle . Defeating her will honor you with the Achievement called " Sappho Amidst the wave . "
Balachko
Head to the arena circle in the image above , which is a small cave now in front of the Sanctum of Rainbow Spirits Domain . Enter the locked gate by supply x2 Key to Somewhere to the mechanism in front of it . Once inside , follow the red trail to come up the Local Legend , Balachko .
During the struggle , the foeman may summon fake versions of his body . If you make out to vote down only his original soundbox , you ’ll be rewarded with the Achievement " Balachko . "
Cocijo
point to the area circled above in Ameyalco Waters to find a expectant clearing . demolish all the Electro Crystalssurrounding the clearingby apply Pyroto summon the Local Legend . I strongly urge have a strong shielder when attempting this battle . vote down it will pay back you with an Achievement shout out " Cocijo . "
Chimalli’s Shade
guide to the area circle above , northwest of the Ancestral Temple . You ’ll find an obsidian totem , which you must interact with to move into the Night World . Once indoors , approach the Local Legend to commence the challenge , which favors you having a Pyro applicator in the team . Defeat it to get the Achievement called " Chimalli ’s Shade . "
Cihacoatl of Chimeric Bone
Head to the mountaintop circle above , situate between the Scions of the Canopy and Teticpac Peak . Interact with the obsidian totem to enrol the Night World and initiate the battle against the Local Legend .
I recommend using a ranged lineament , such as a arc or catalyst user , that can deal Charged Elemental Damage that reacts with Dendro . Defeating the enemy will reward you with the Achievement called " Cihacoatl of Chimeric Bone . "
Tlatzacuilotl
Go to the border of the western drop-off in Sulfurous Veins via the nearby Teleport Waypoint . Look down to find a rocky path . Glide down and go straight until you find a Tepetlisauri dig at a dead end . Do n’t attack it — you must use it to transform into the Tepetlisauri to make out a challenge .
While transformed into a Tepetlisauri , lash out the glow red rock to initiate the challenge .
Next , use the Tepetlisauri ’s Elemental Skill to sweep underground , then head toward the guidance of the two fissures marked by arrows above . set on the bottom one first , then attack the one on top . Another sway will appear ; attack it as well .
The last two rocks will appear on the wall . The Tepetlisauri ’s attainment can traverse through walls , so use it to extend to the rock and attack them to complete the challenge .
After nail the challenge , a cave will open below . Enter the cave to find an obsidian totem , which you must interact with to enter the Night World and engage in struggle against the Local Legend . vote down it will reward you with the Achievement , " Tlatzacuilotl . "
Atlatl’s Blessing
Atlatl ’s Blessing is located in the magma - satiate underground area in Coatepec Mountain . If you ’re unsure how to get there , keep up the whole tone below .
To get to the area , start by point to the cliff circulate above in Tepeacac Rise . you may easily get there from the Blazing Ruins Domain . The cliff overlooks a cave , which you must glide into . concern to the area the pointer is pointing to for the exact position of the cave .
Once inside the cave , keep going straight forwards until you reach the end of the wooden span . Glide down to another cave entrance to discover an area filled with magma .
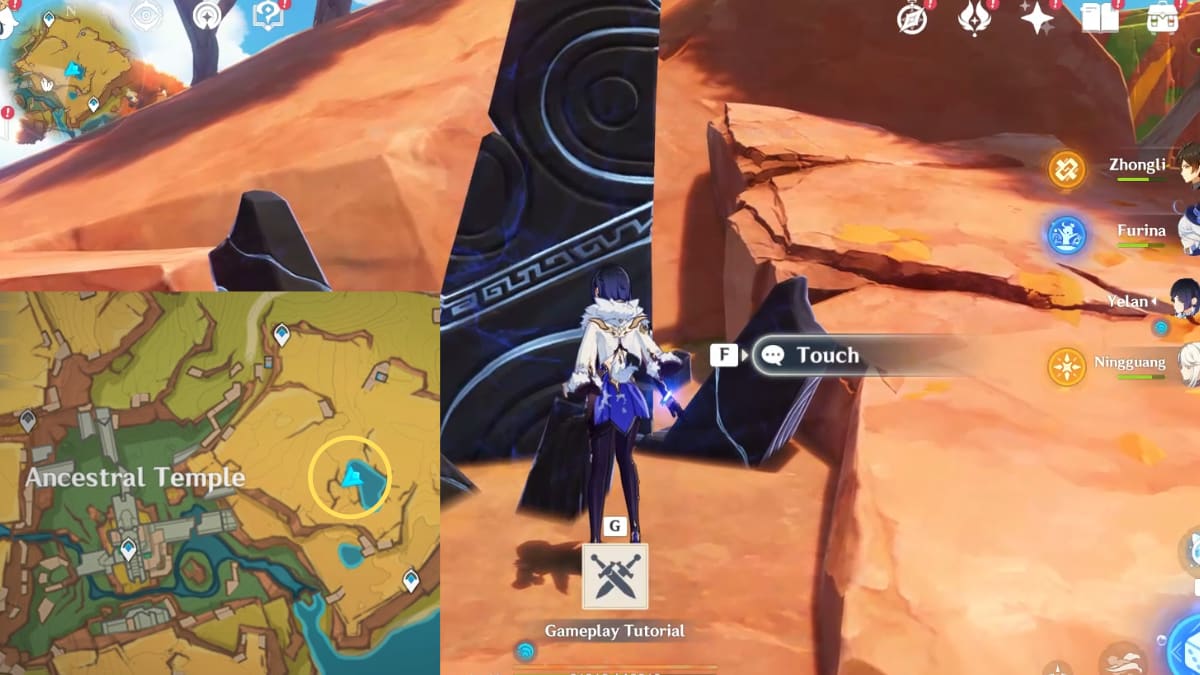
Image by Pro Game Guides
The magma will apace drain your HP , sotransform into a Tepetlisauriand use its skill totraverse through the wall on the right . The Tepetlisauri will also die when attacked by the magma .
Keep following the path forrader by traveling through the bulwark on the right as a Tepetlisauri . You ’ll eventually find the dim totem pictured above , which you necessitate to interact with to start the challenge against the Local Legend .
The battle is a challenge - ground instance where you must defeat the opposition using parries . Defeating it will reward you with the Achievement called " Atlatl ’s Blessing . "
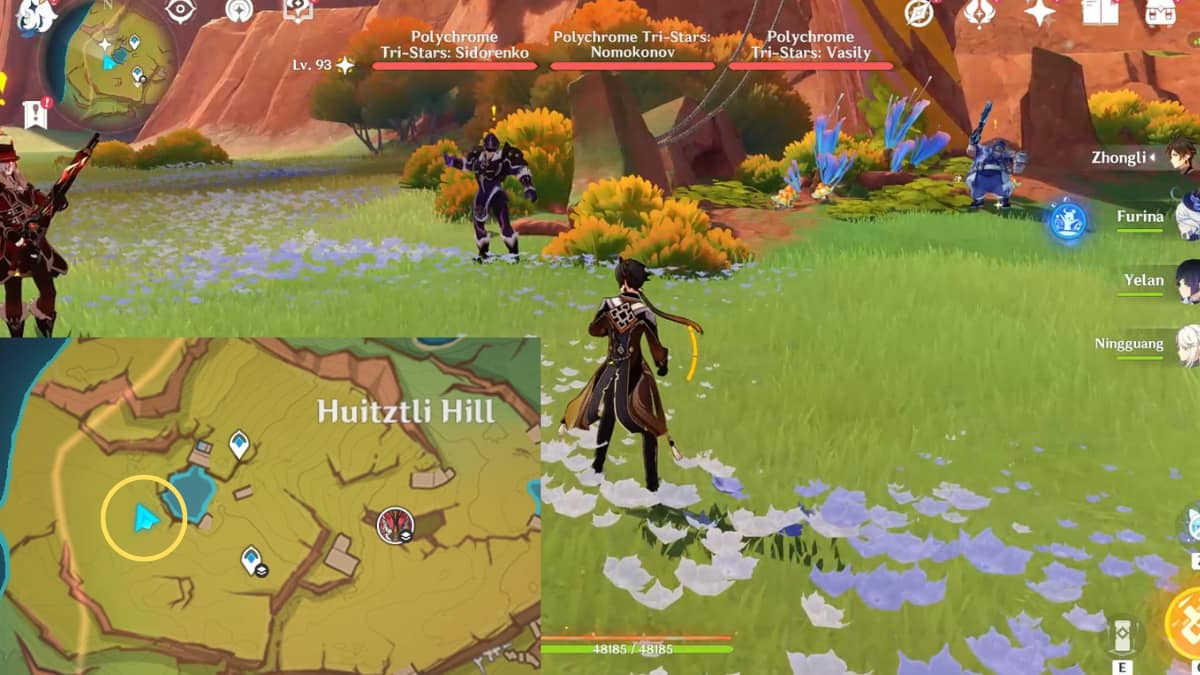
Image by Pro Game Guides
Ichcahuipilli’s Aegis
To find the Ichcahuipilli ’s Aegis , you need to solve a puzzle with the help of a Yumkasauri transformation . take off by heading to the area circle above in Huitztli Hill , where you ’ll determine a giant tree structure . You need toclimbto the top .
Once you ’re on top , you ’ll find an opening leave to the inside of the tree . stand out down to accede a small elbow room .
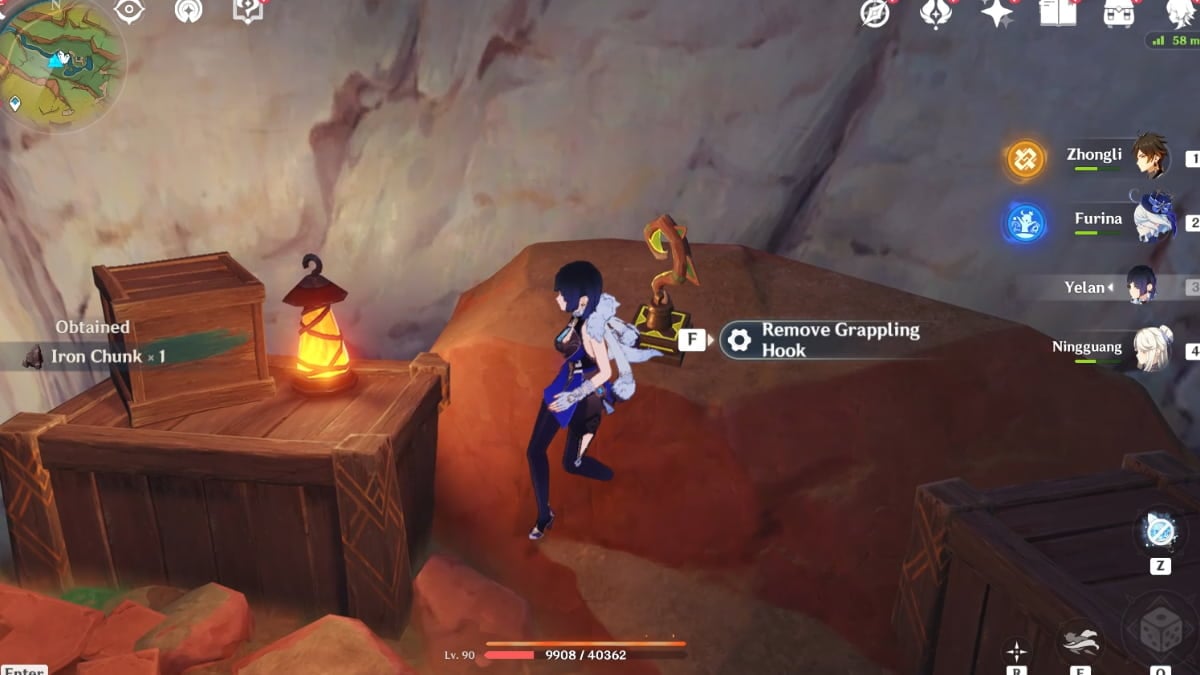
deep down , pay attention to the small object on the makeshift rock table . Interact with it toremove Grappling Hook . After removing it , climb the treehouse to kick the bucket it .
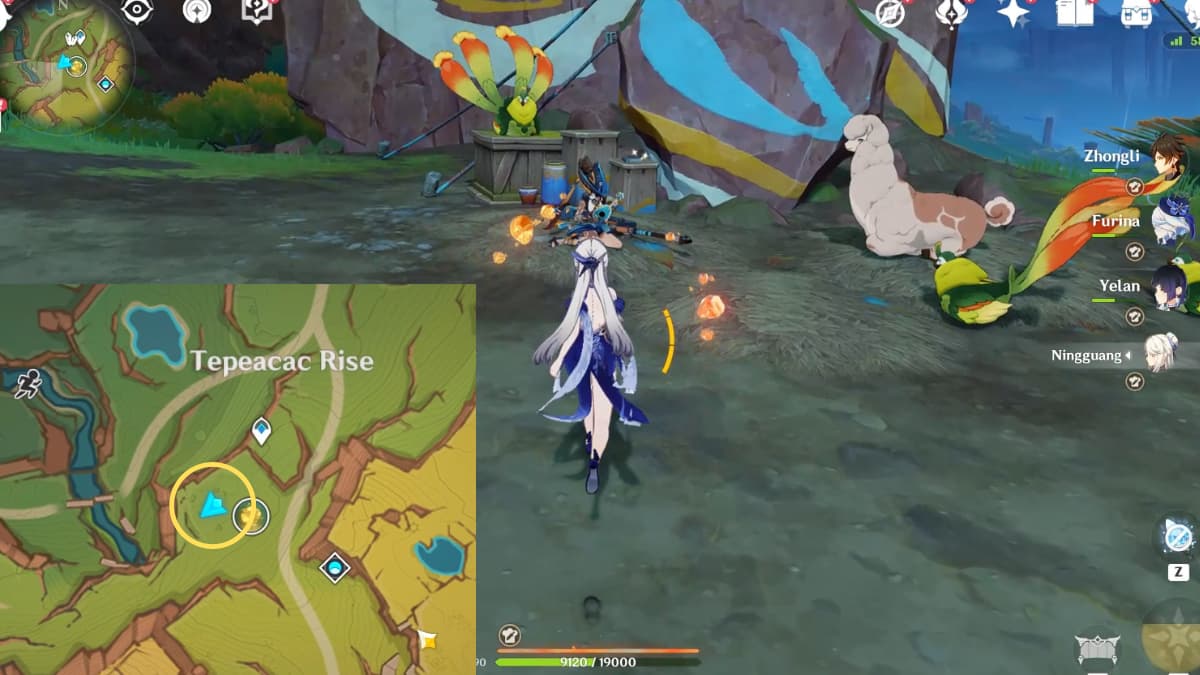
Image by Pro Game Guides
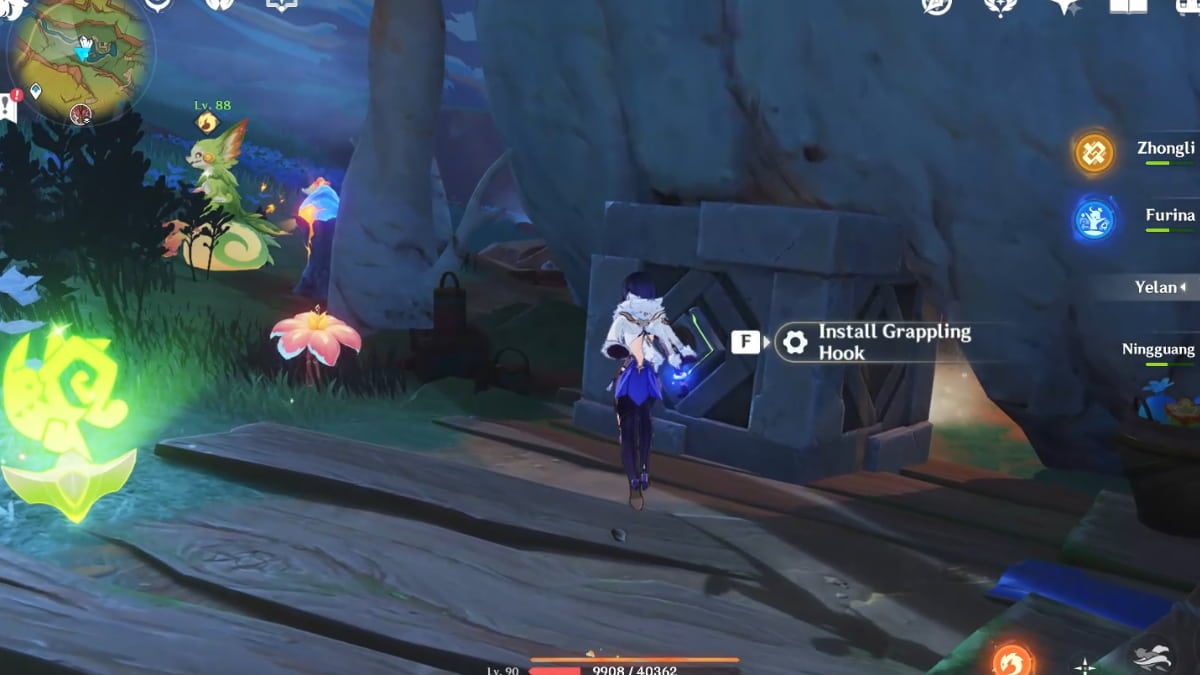
Outside , return to the side of the treehouse blocked by a I. F. Stone crateful . Interact with it toinstall Grappling Hook .
There are a ton of Yumkasauri in the area , so indwell with any of them to transmute into one . Then , use the Elemental Skill clitoris on the grappling hookto pull the crate forward . Doing so will make a small track of dust to croak and make a nearby stone glow .
Next , rightin front of the treehouse , you ’ll chance a rock full of crystal . Switch to any Geo character or claymore drug user , thenbreak all of the crystalsto summon a glow billet on the undercoat .
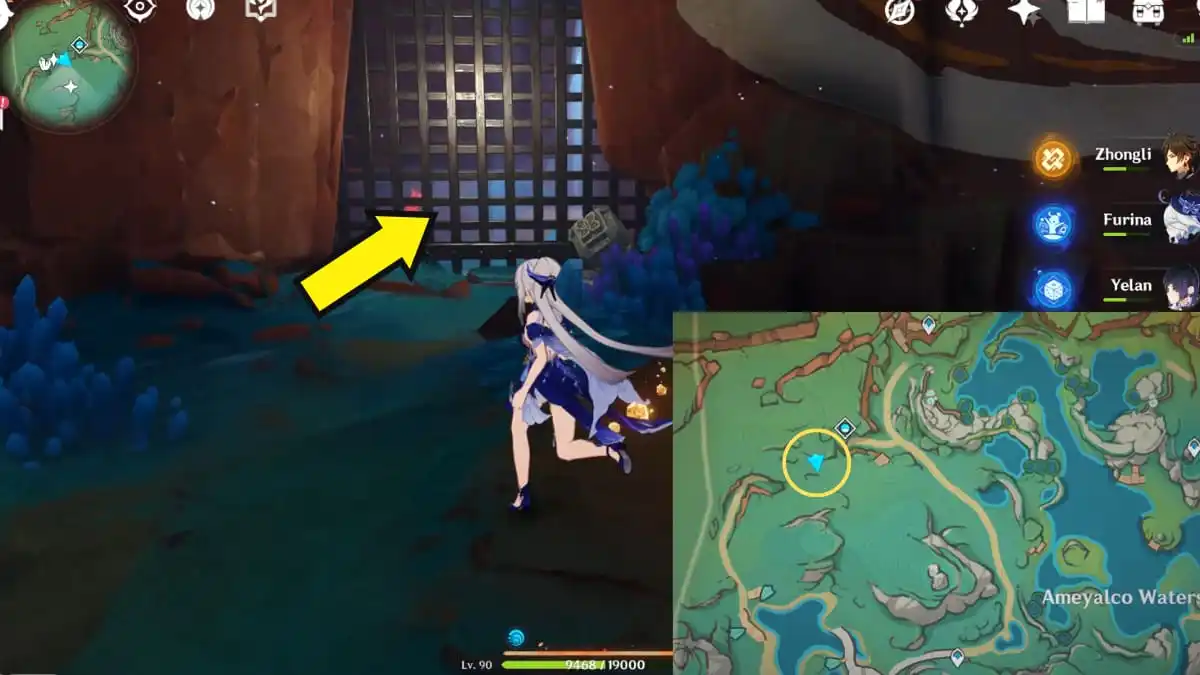
Image by Pro Game Guides
The shine bit will breed in front of the rock , tightlipped to the Saurian warriors . Interact with it to trigger another shine dapple to appear nearby . Interact with it as well to prompt another trail of dust to light up another stone .
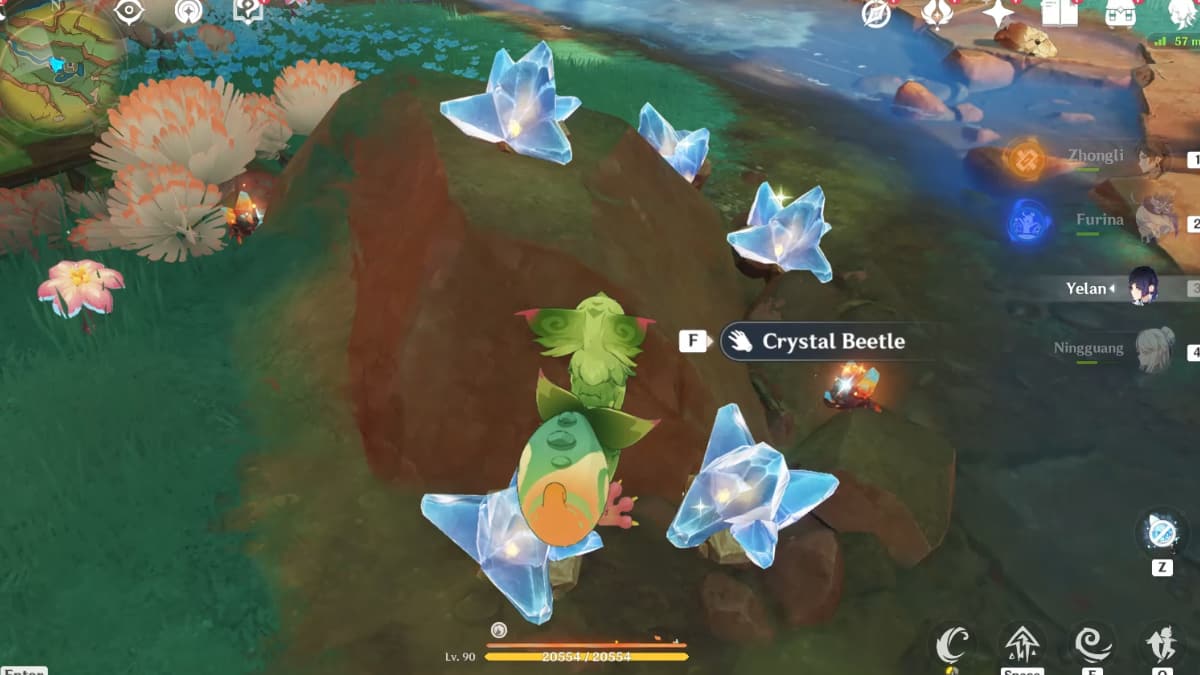
in conclusion , translate into a Yumkasauri again , then head to shallow water where the Capybaras are rest nearby . Use your Elemental Skill to draw out the red stonethat the pointer is pointing to above . Doing so will trigger the last trail of junk to light up the third Harlan F. Stone .
When all three stones have been light up up , the boulder at the center of the clearing will break , revealing a Luxurious Chest and an obsidian totem . Interact with the totem to enter the Night World and face the Local Legend . vote out it will reward you with the Achievement call " Ichcahuipilli ’s Aegis . "
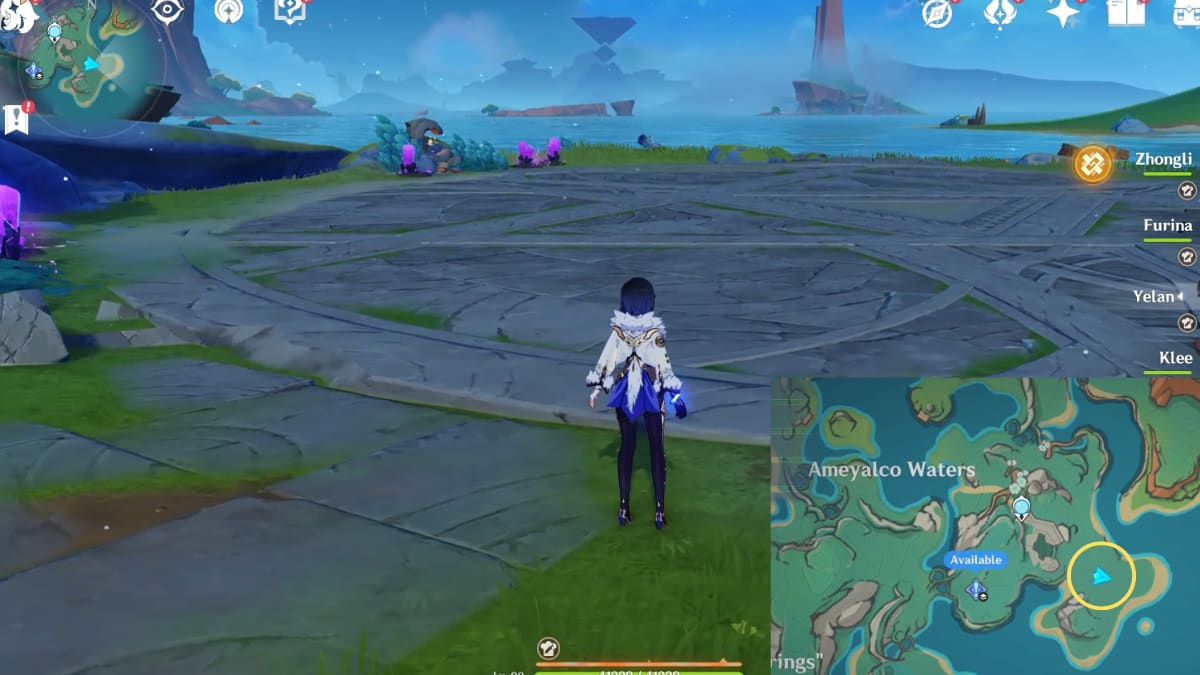
Image by Pro Game Guides
For more on Natlan , check out ourGenshin Impact Mualani land pathfinder – All Talent & Ascension materialshere on Pro Game Guides .
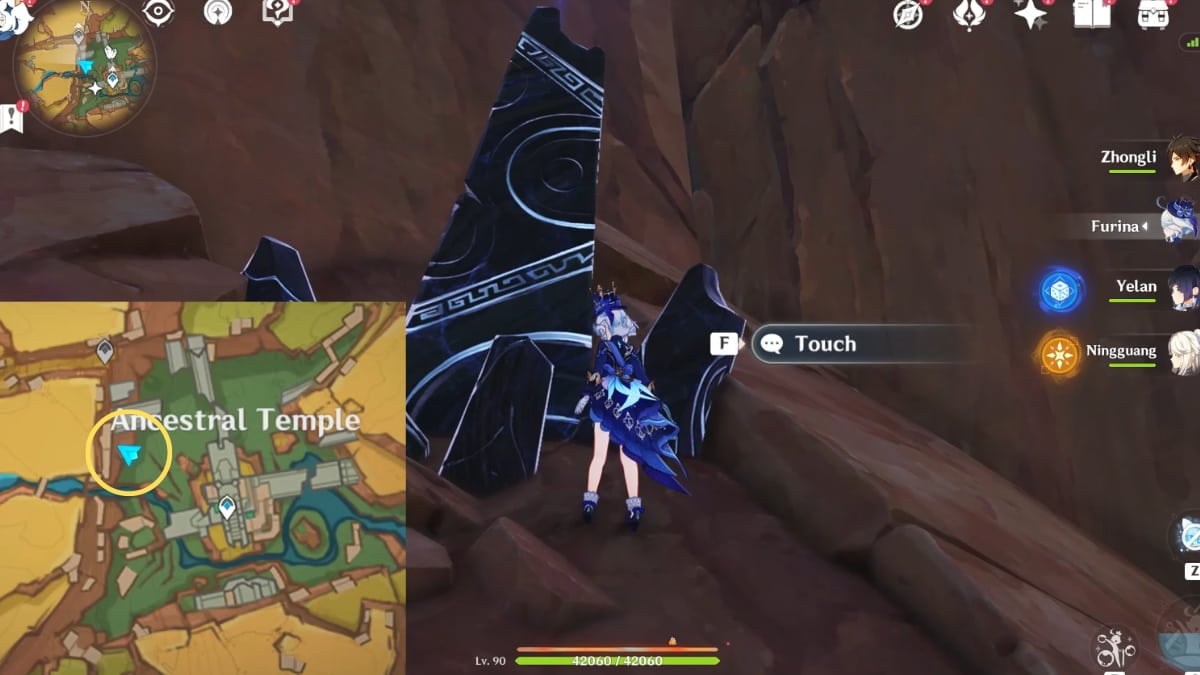
Image by Pro Game Guides
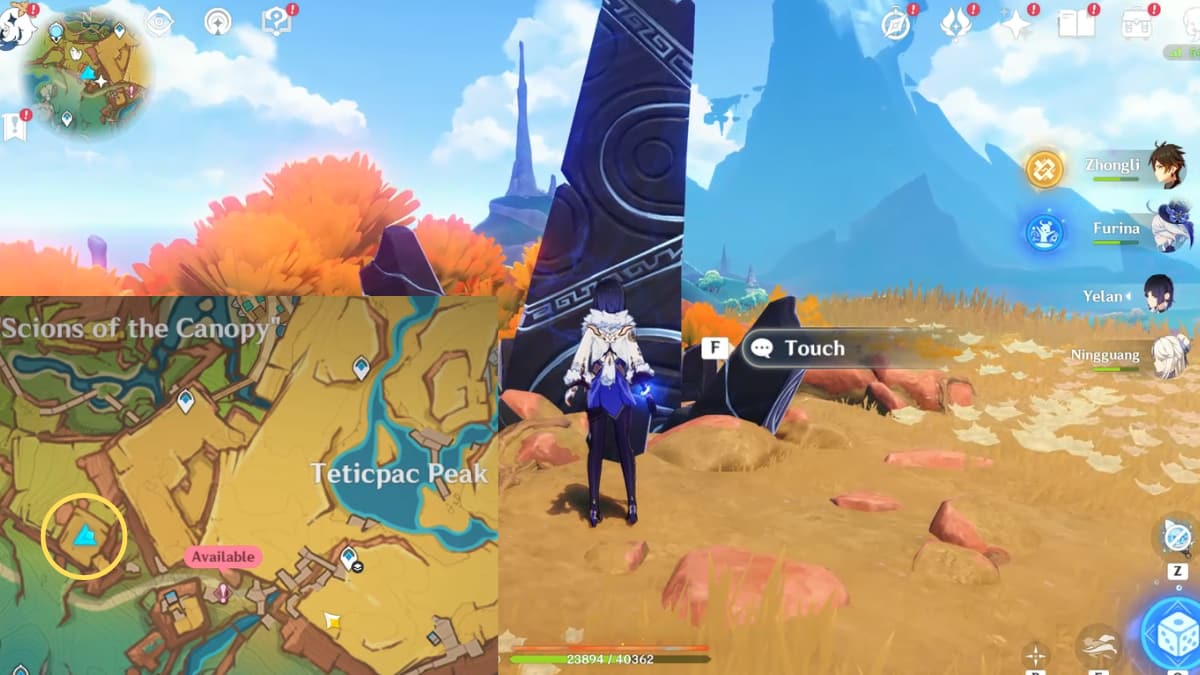
Image by Pro Game Guides
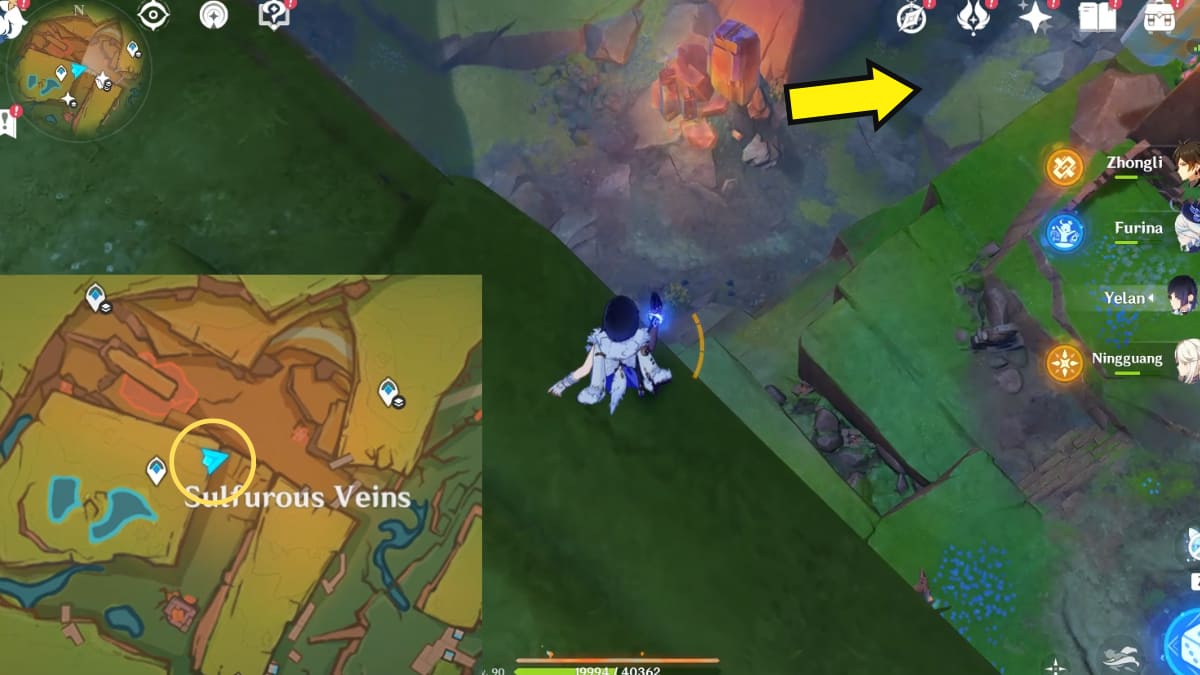
Image by Pro Game Guides
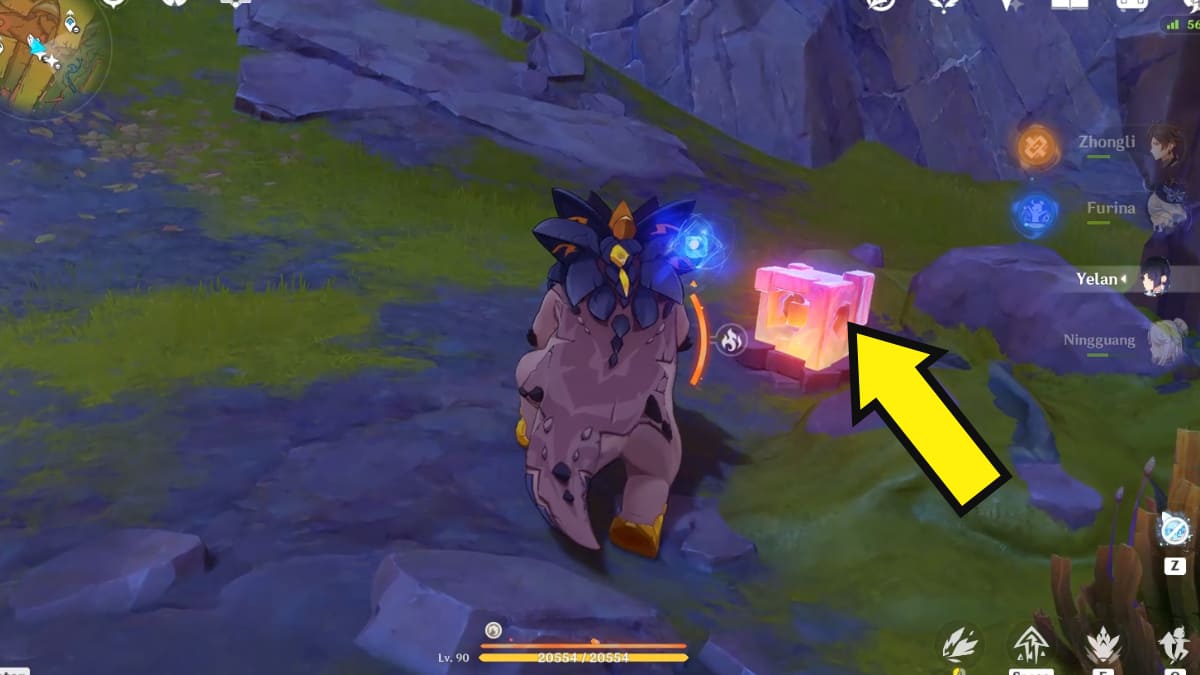
Image by Pro Game Guides
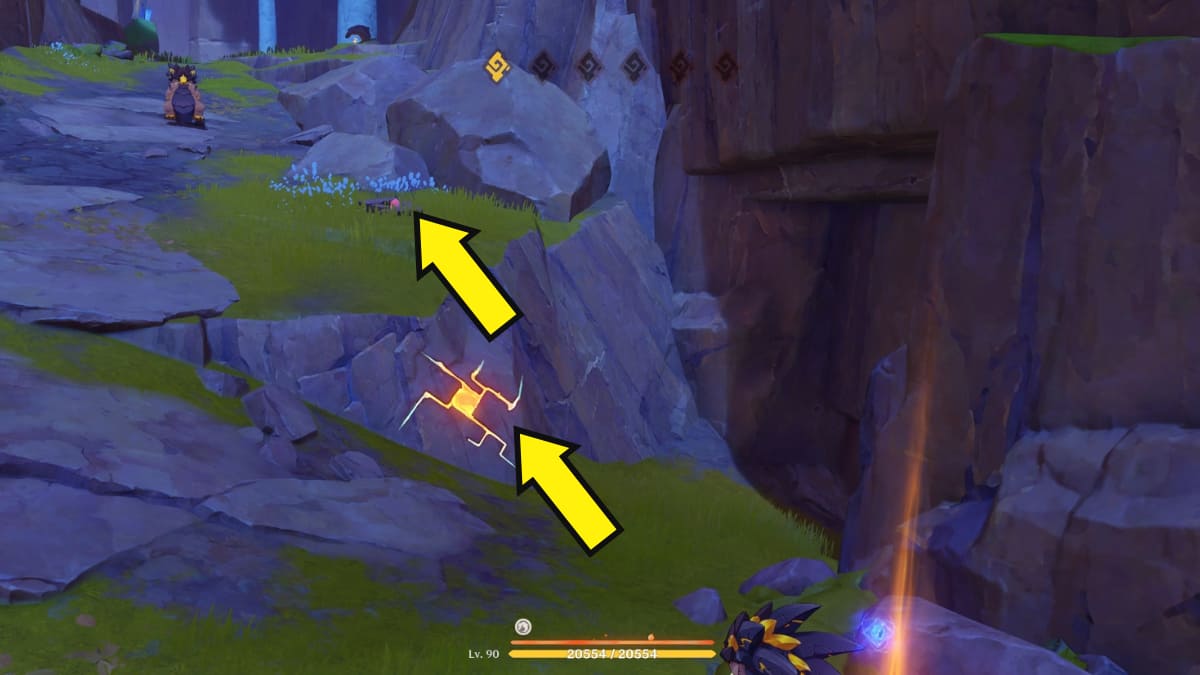
Image by Pro Game Guides
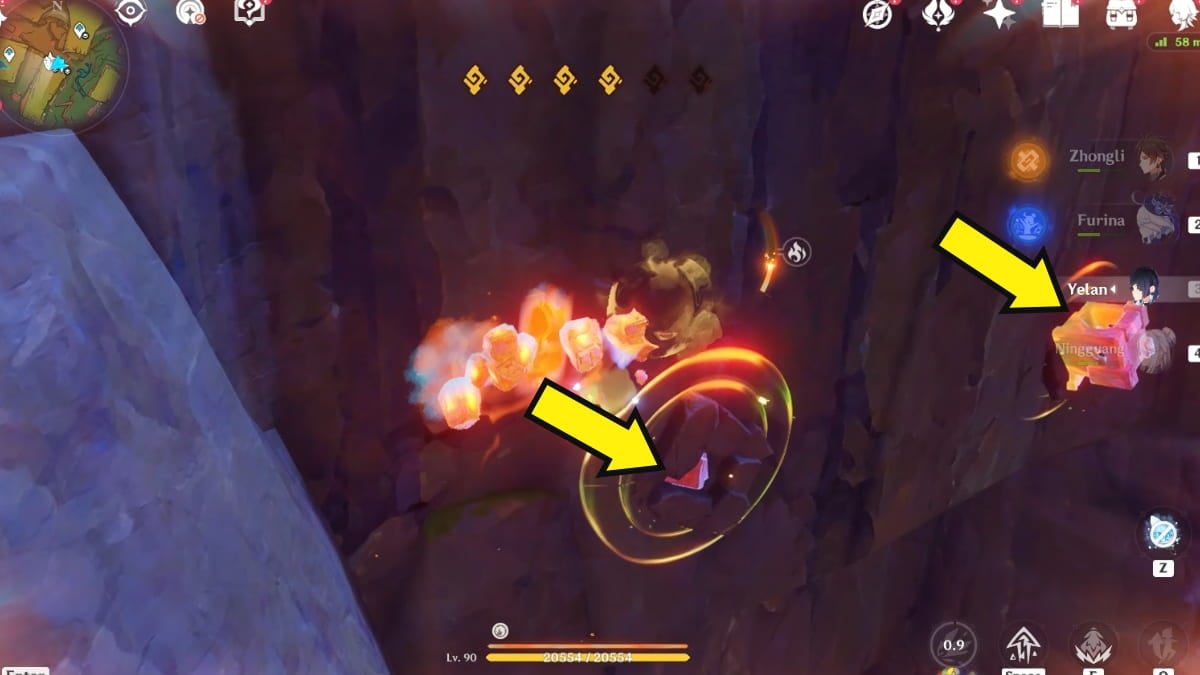
Image by Pro Game Guides
Screenshot by Pro Game Guides
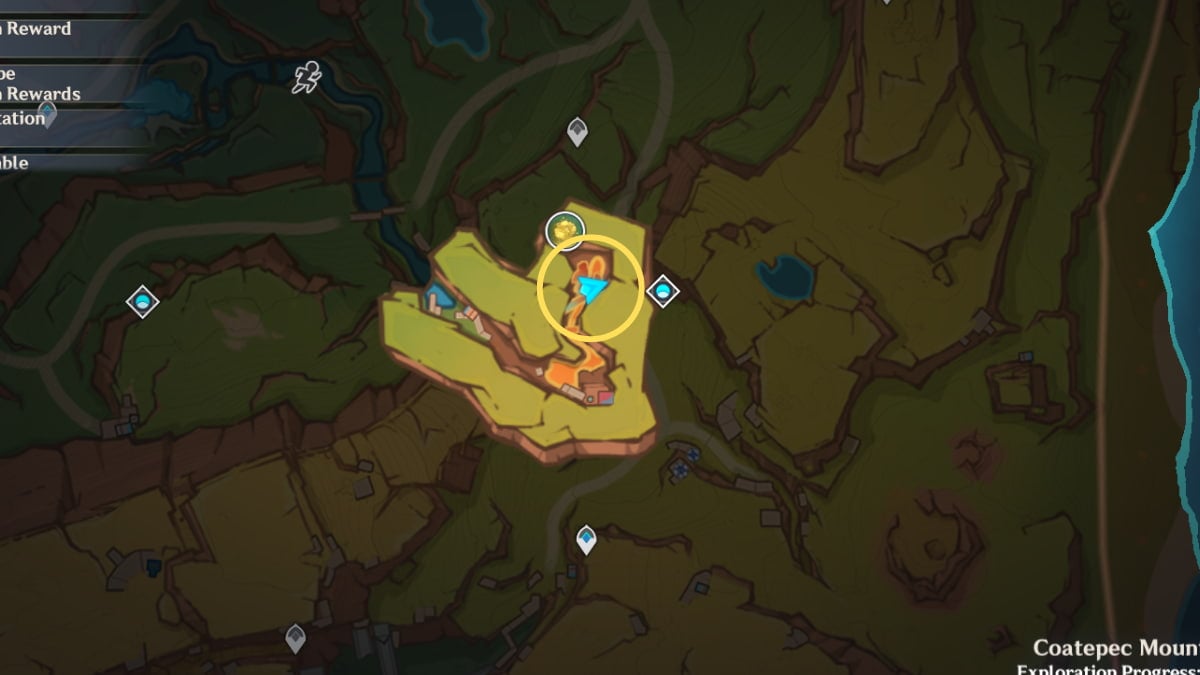
Image by Pro Game Guides
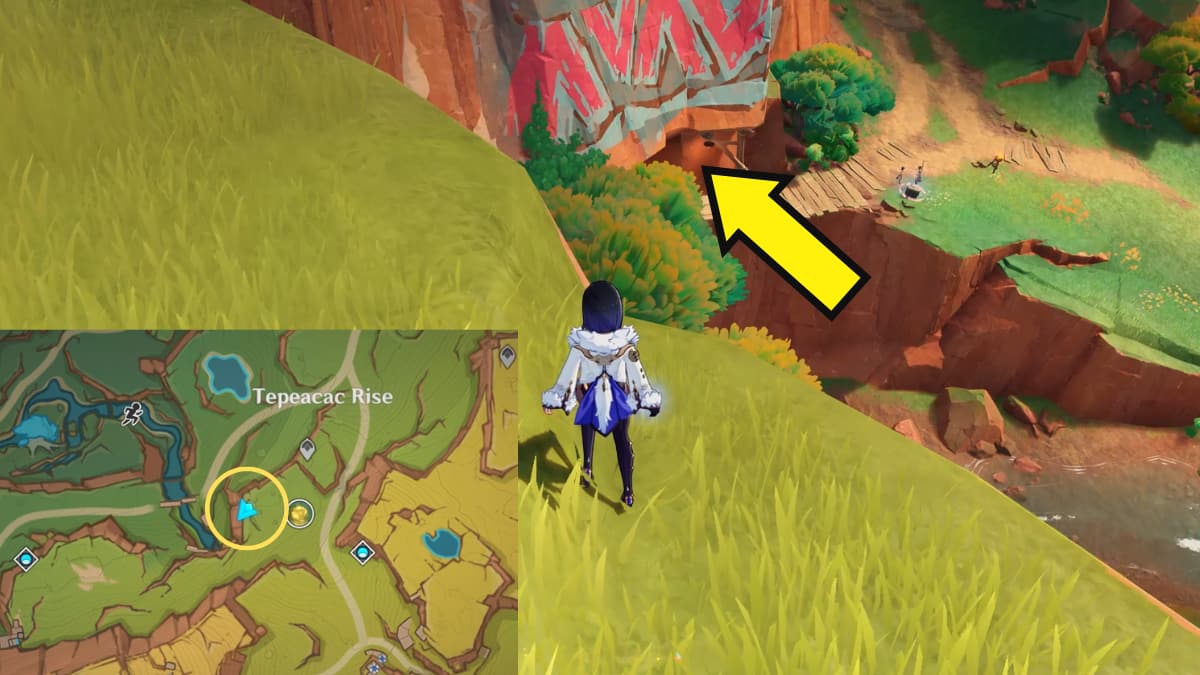
Image by Pro Game Guides
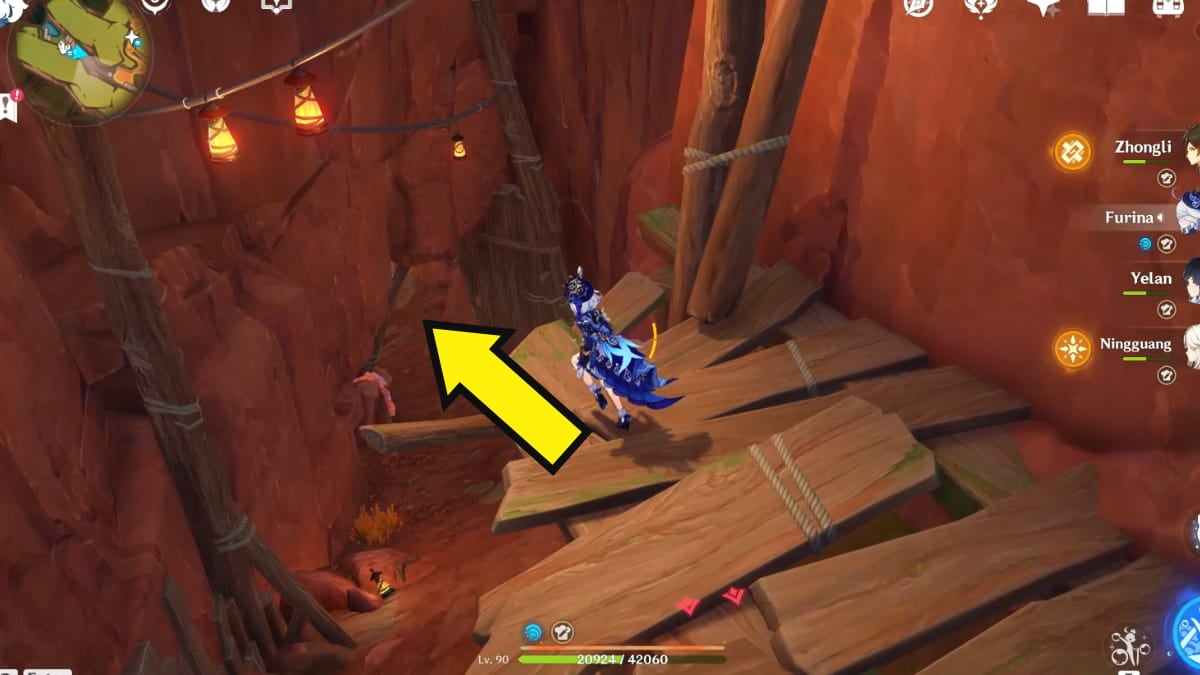
Image by Pro Game Guides
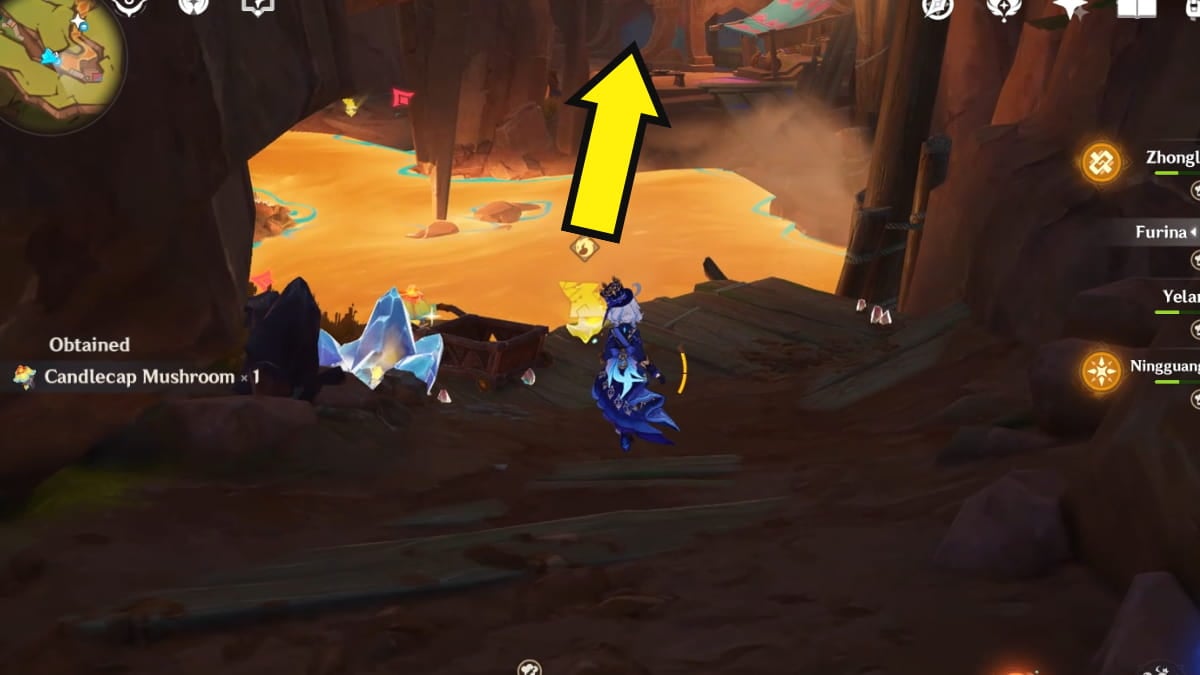
Image by Pro Game Guides
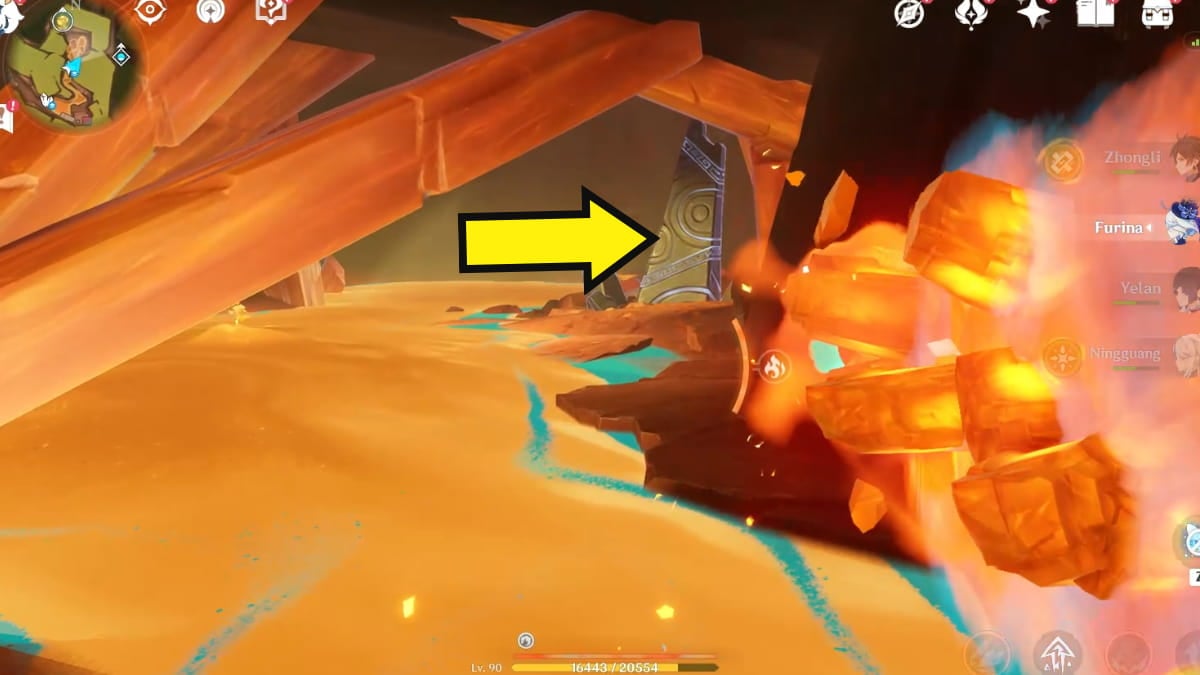
Image by Pro Game Guides
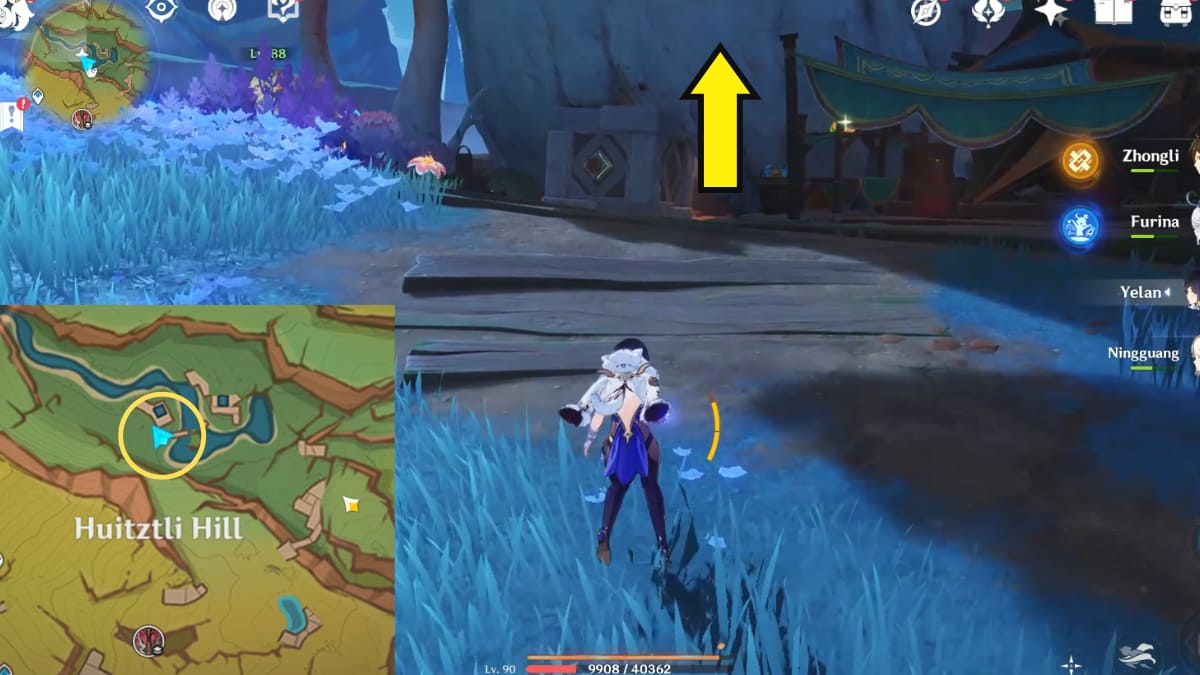
Image by Pro Game Guides
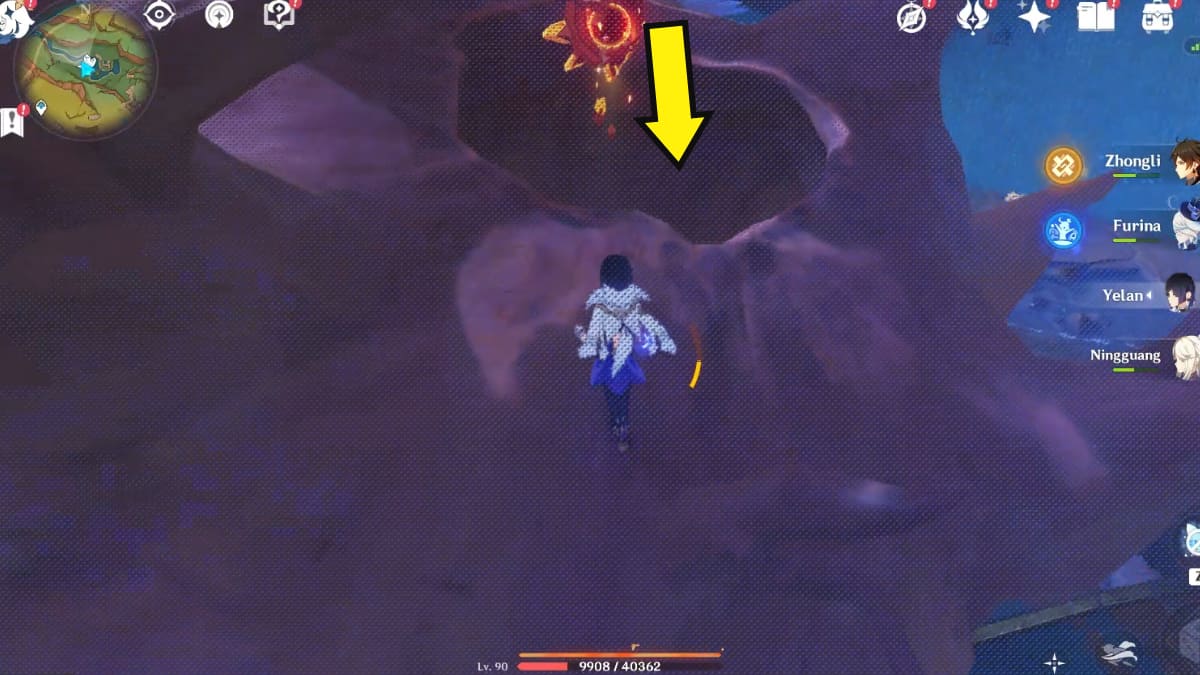
Image by Pro Game Guides
Screenshot by Pro Game Guides
Screenshot by Pro Game Guides
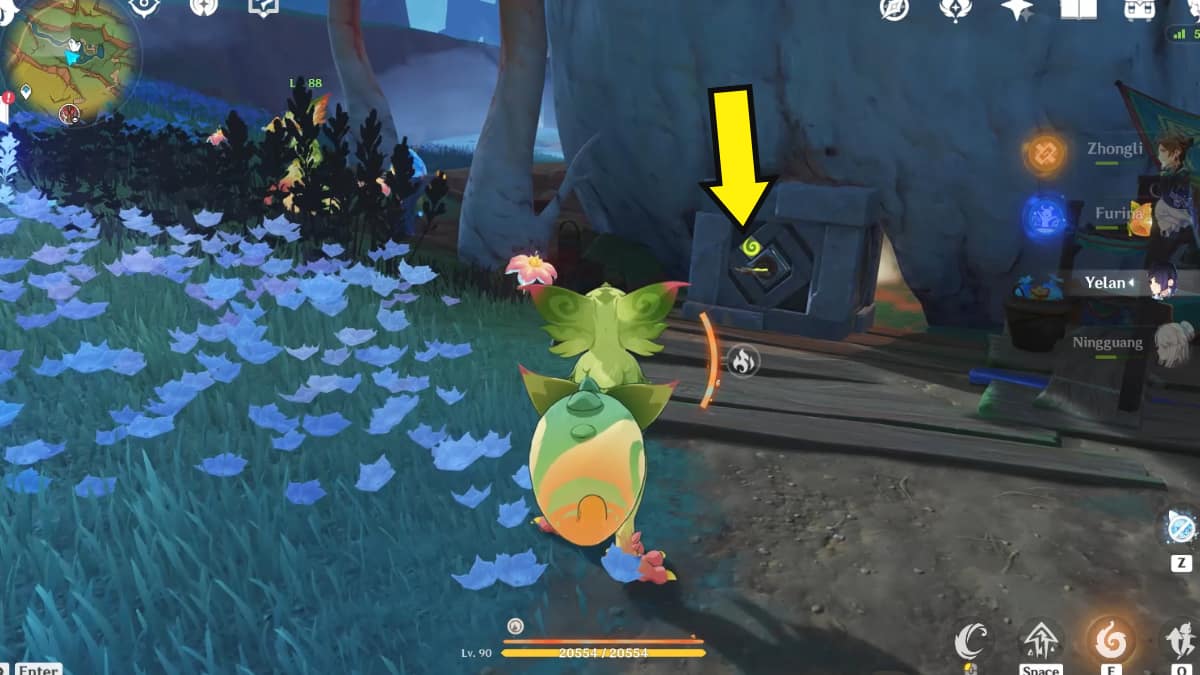
Image by Pro Game Guides
Screenshot by Pro Game Guides
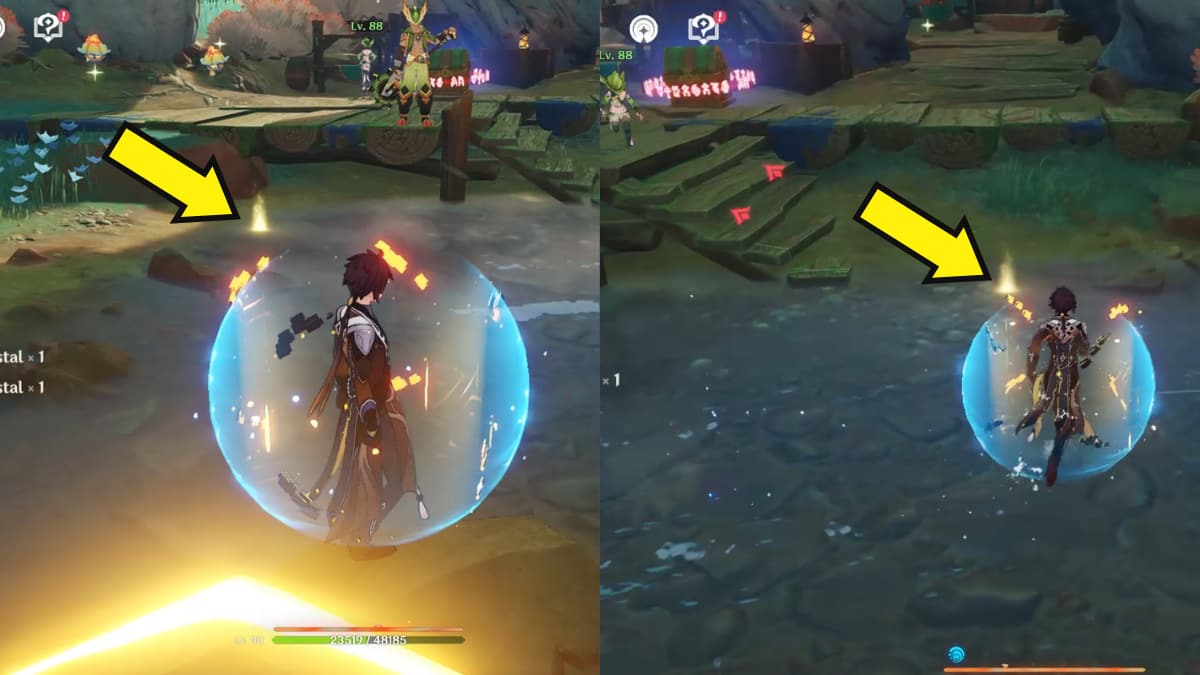
Image by Pro Game Guides
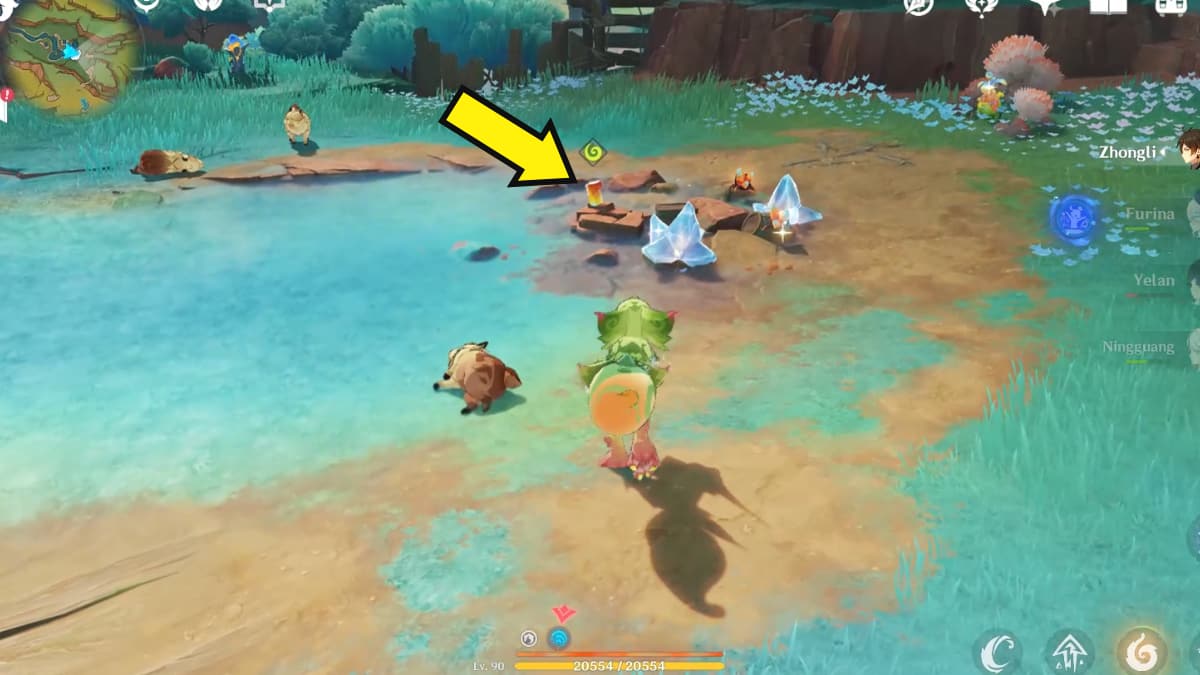
Image by Pro Game Guides
