As you continue your mythical journey through the mount in Black Myth Wukong , one of the most important aspects of that journeying is locating and unlocking Keeper ’s Shrines . If you ’re enquire where to find them , here ’s our handy guide to all Keeper ’s Shrine locations in Black Myth Wukong .
How to use Keeper’s Shrines in Black Myth Wukong
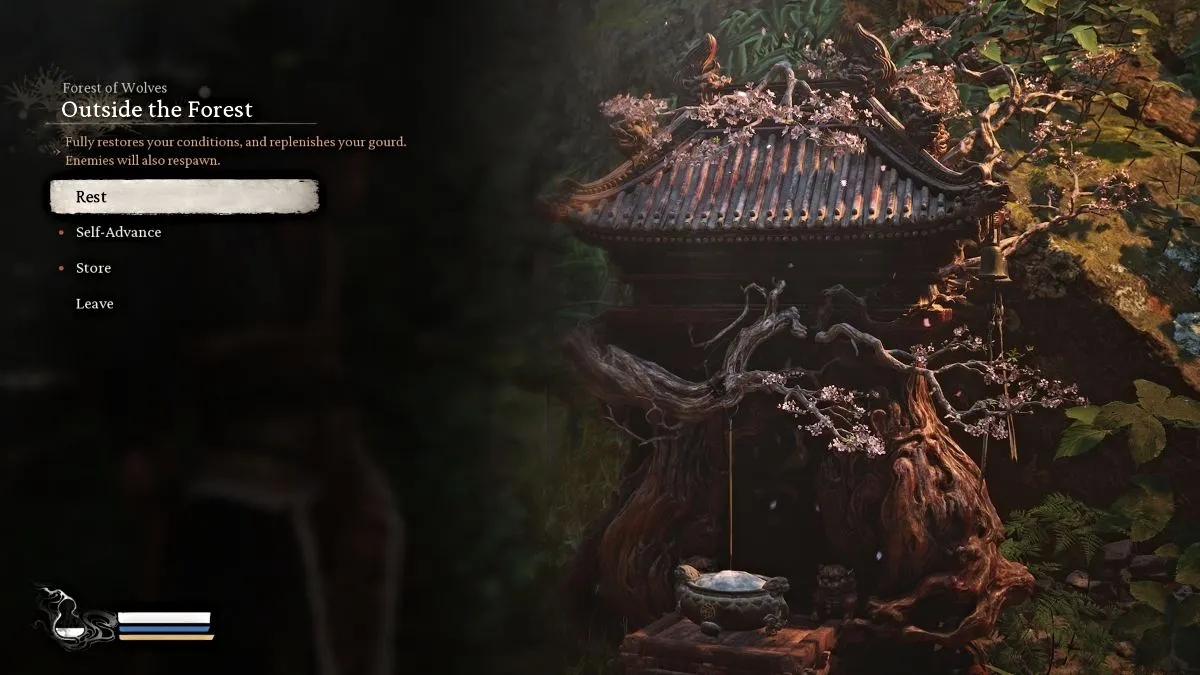
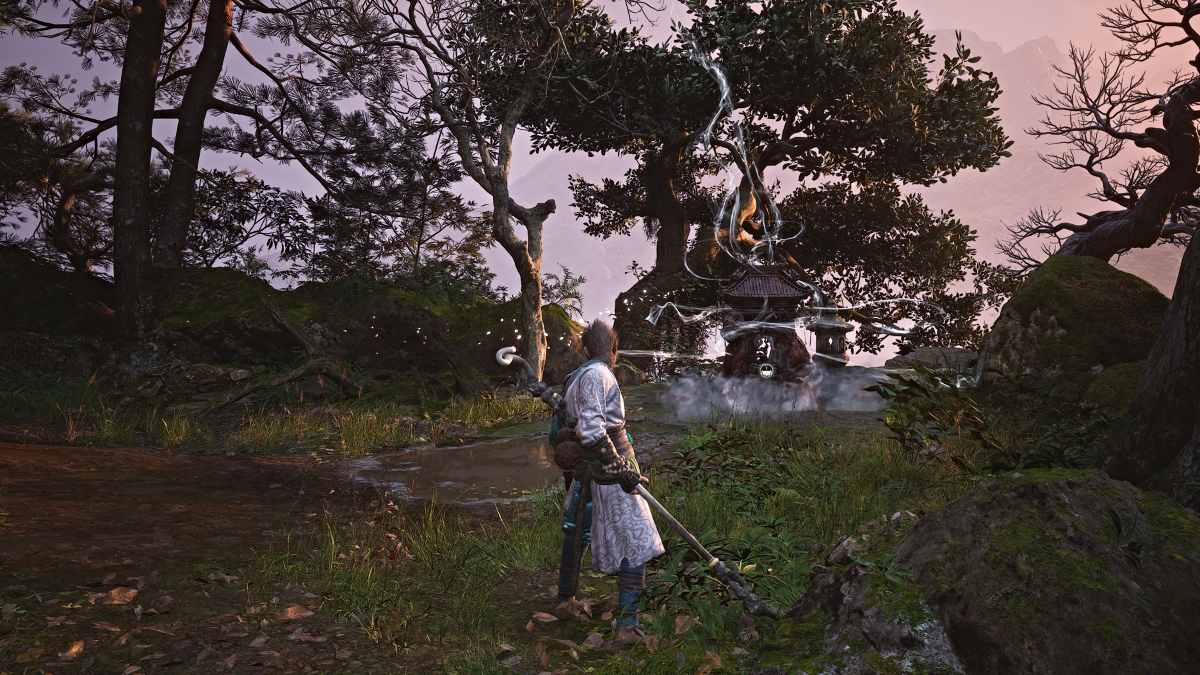
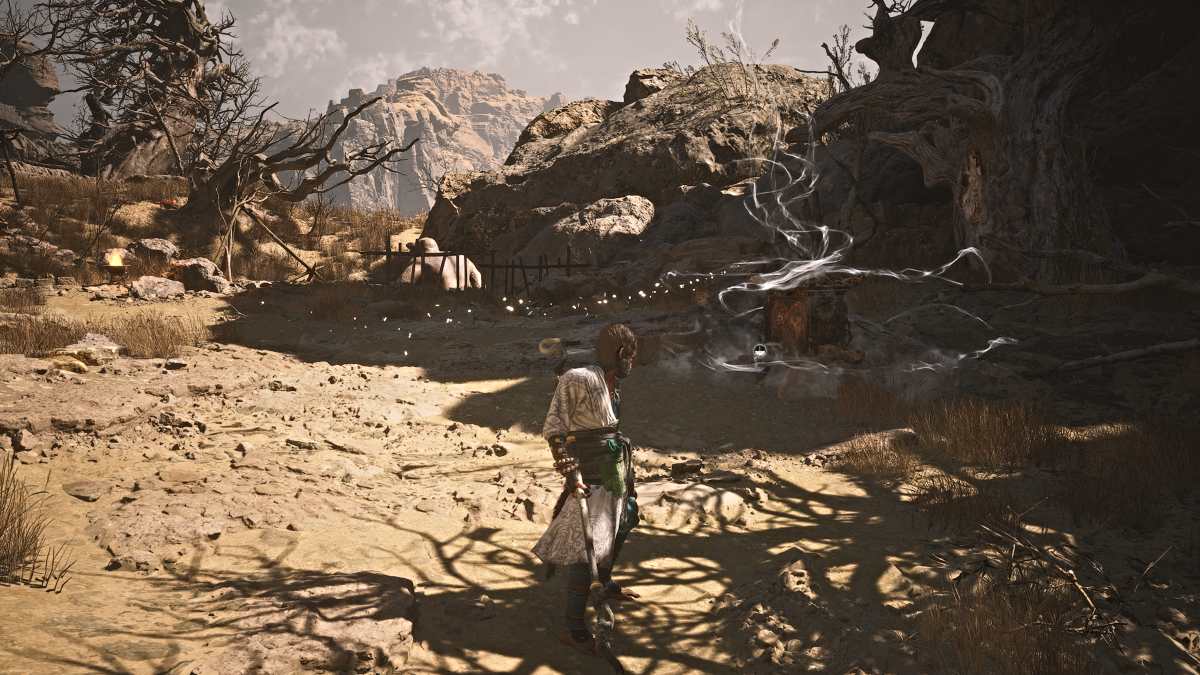
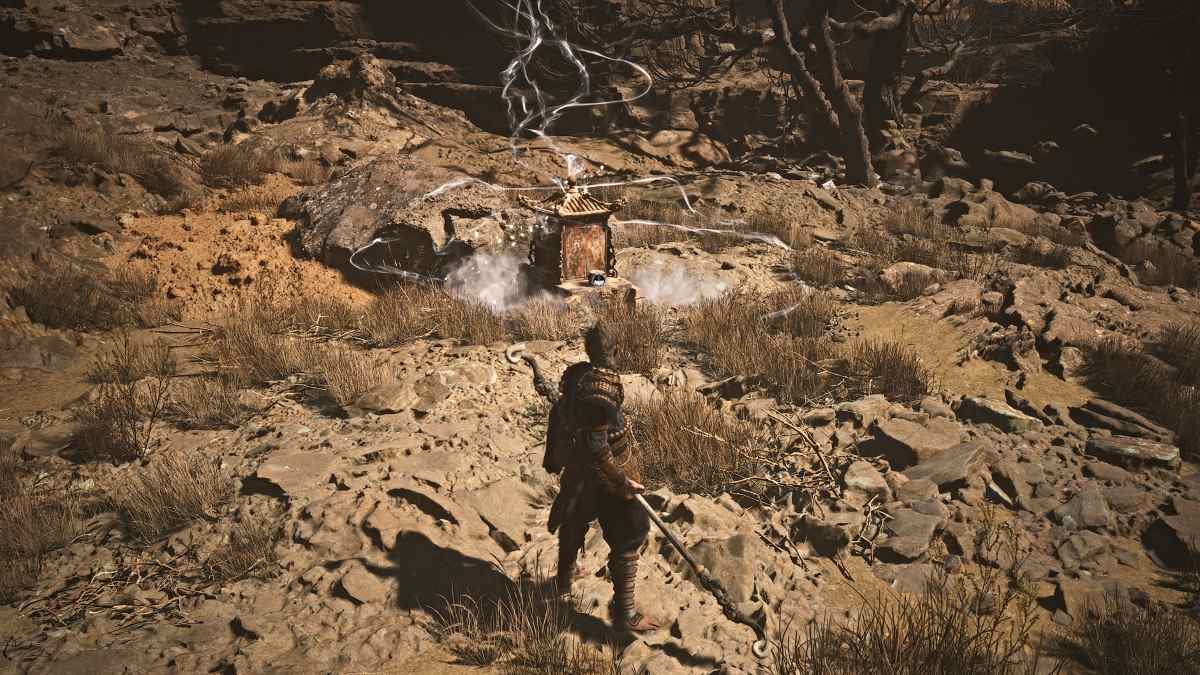
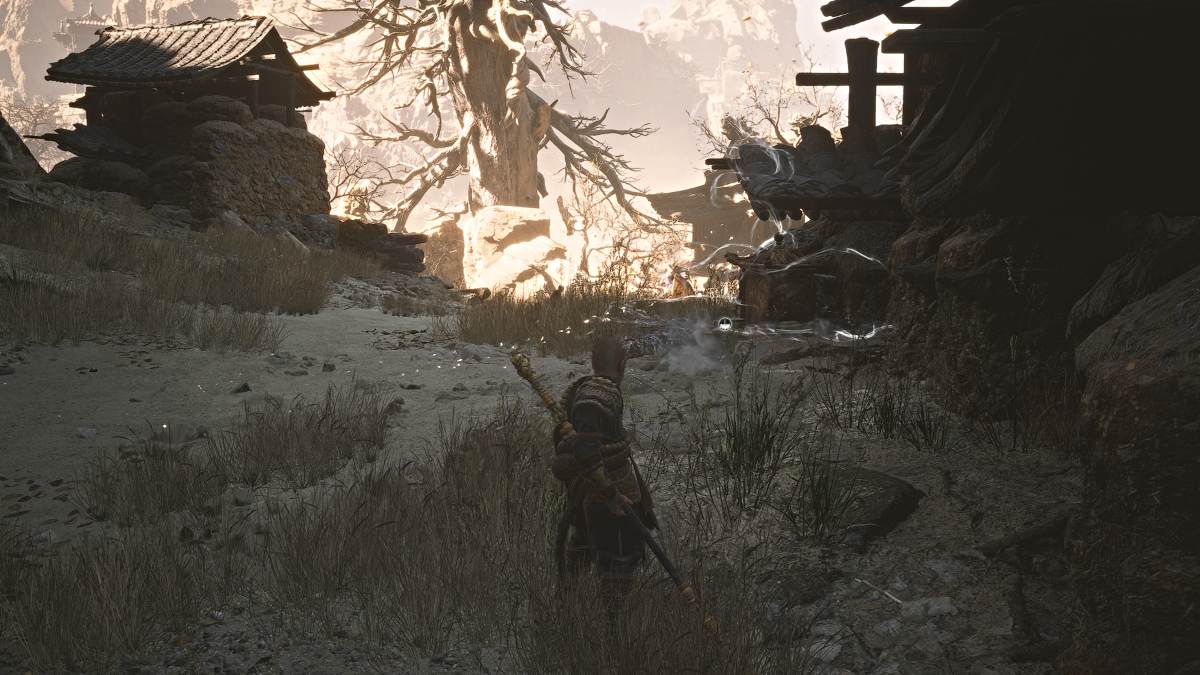
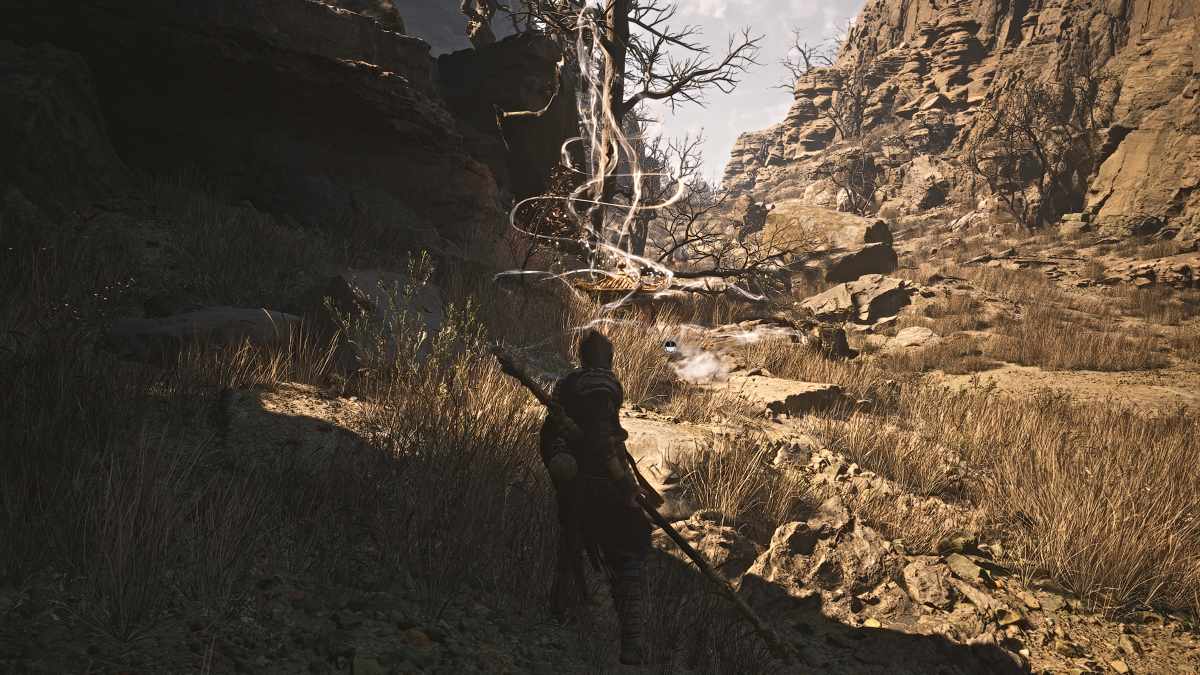
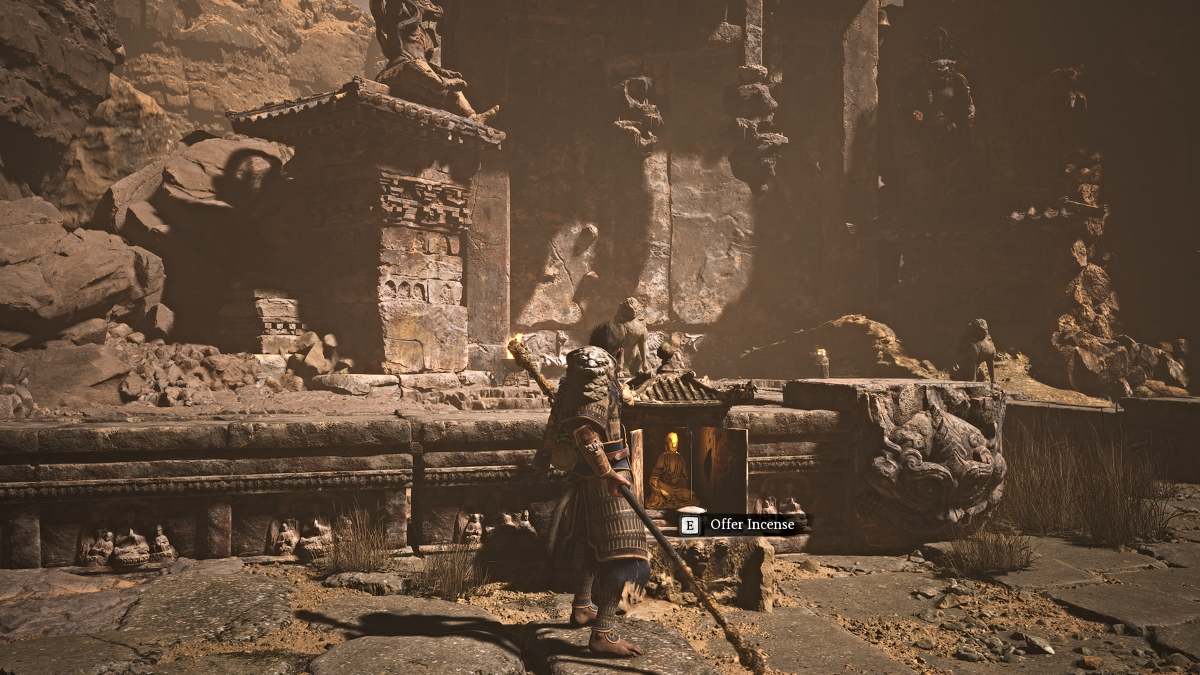
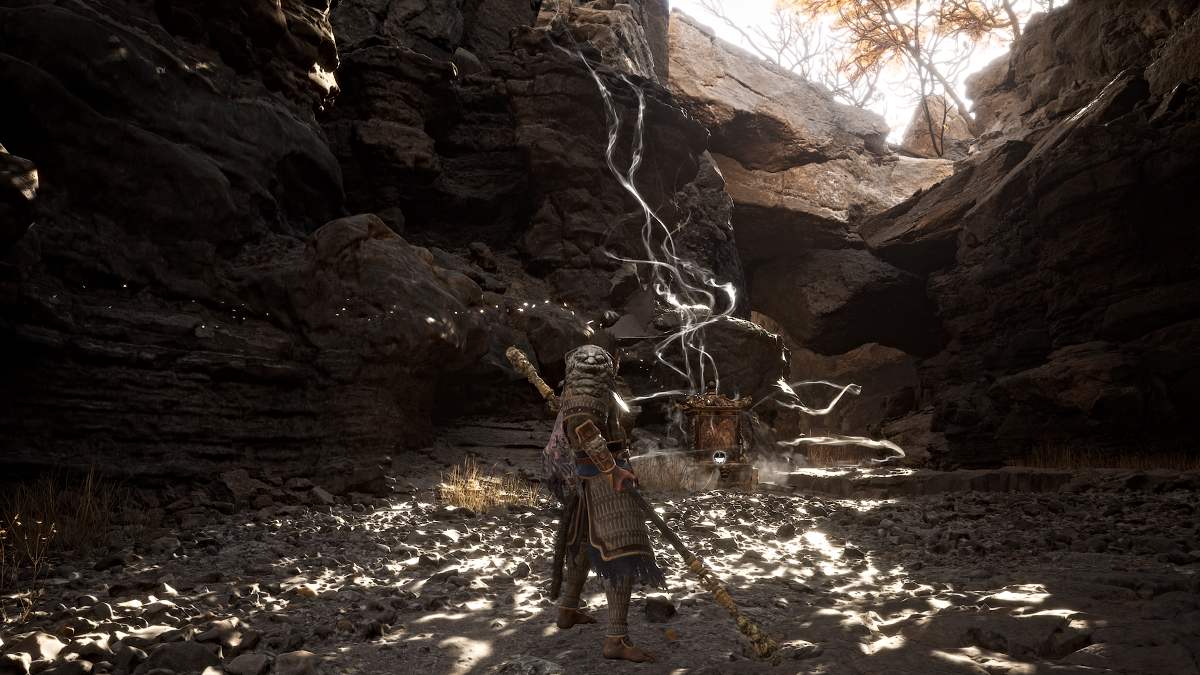
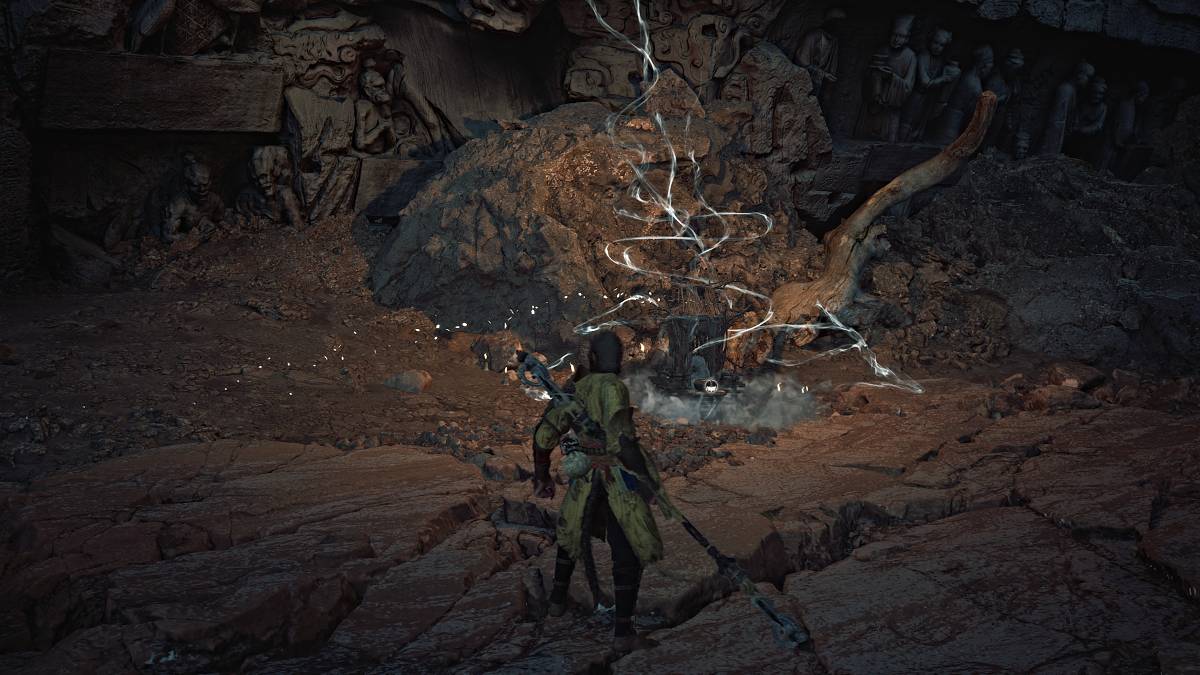
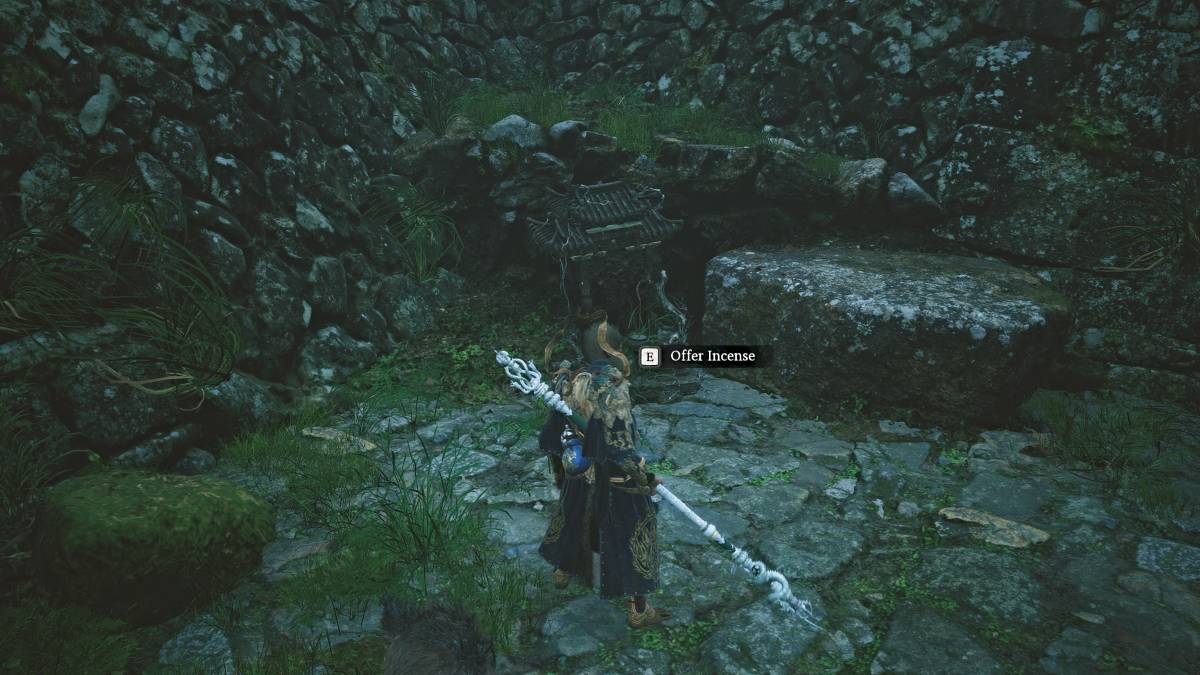
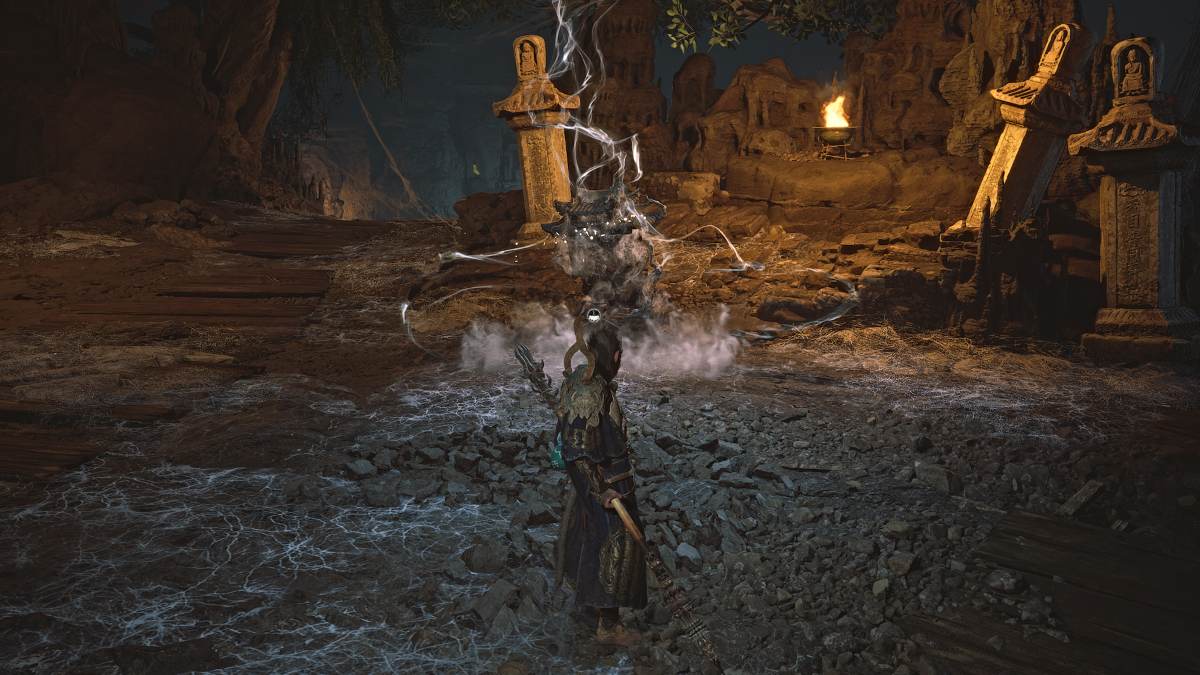
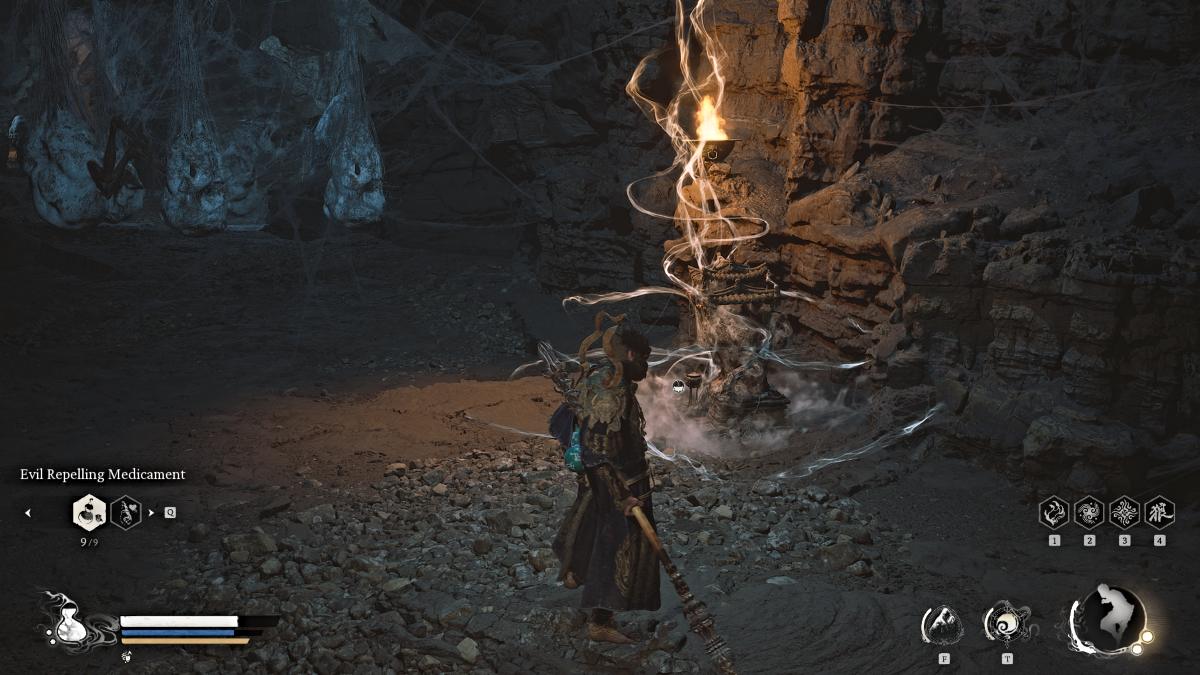
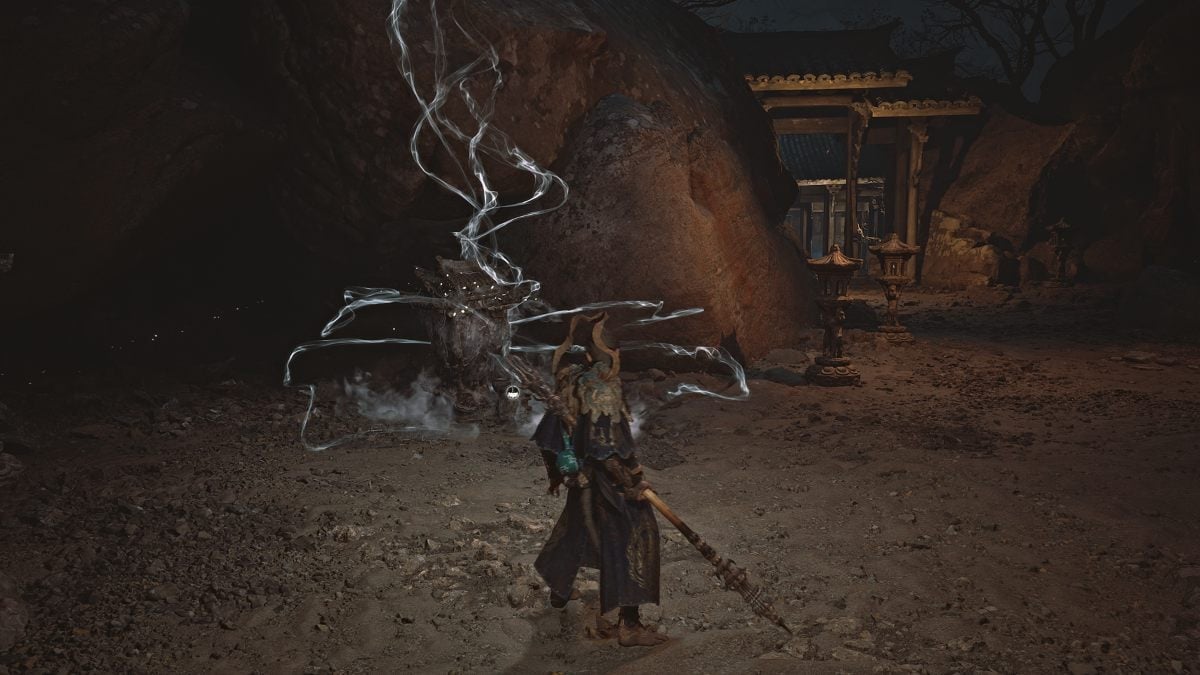
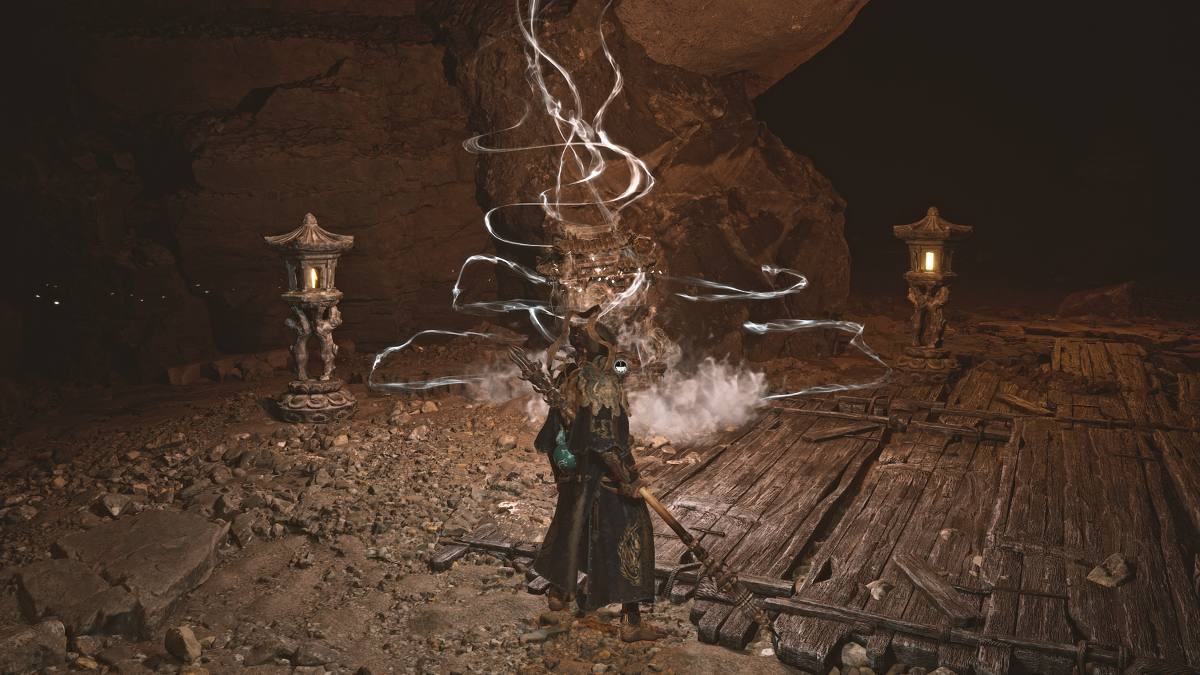
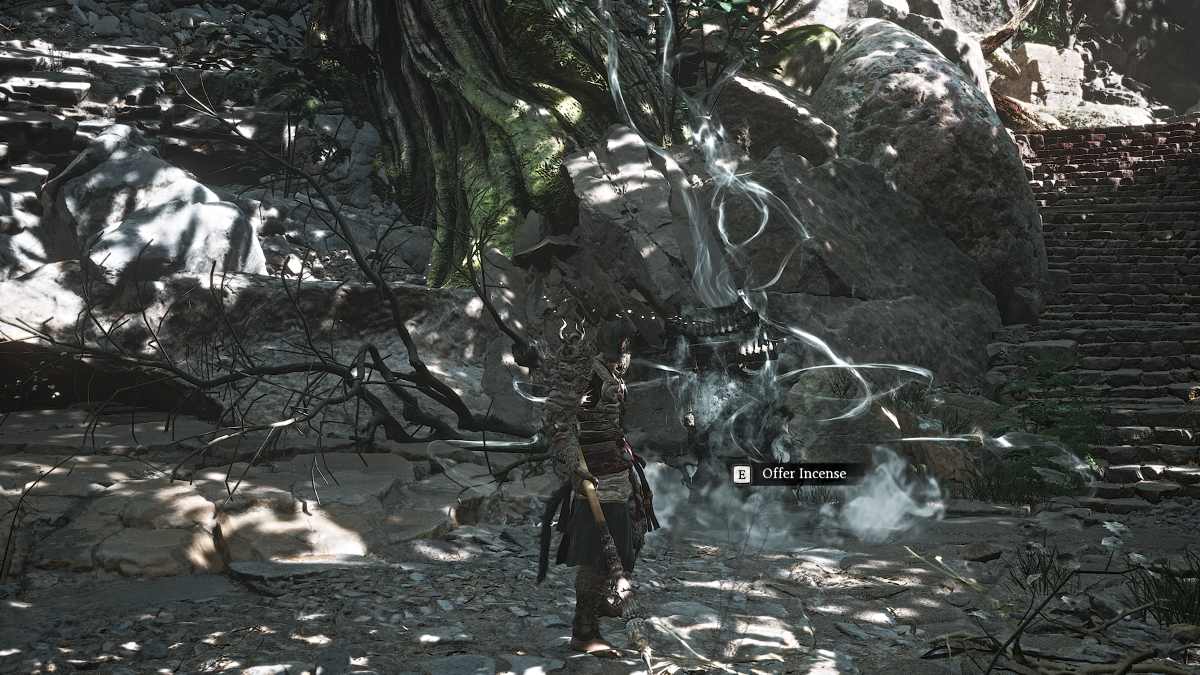
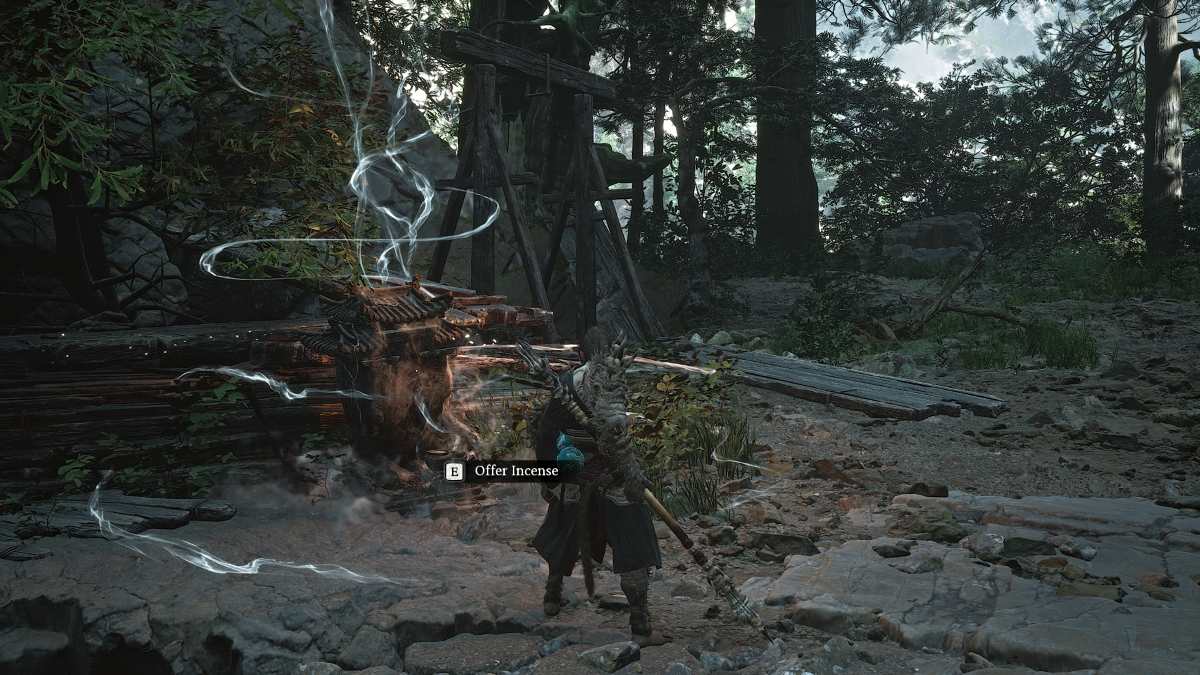
Keeper ’s Shrinesare loose to fleck while traveling through the various regions of Black Myth Wukong , as they resemble asmall shrine twirl with incense smoke(as seen above ) . A glimmeringIncense Trailwill lead you to the nigh one that has n’t been unlatched .
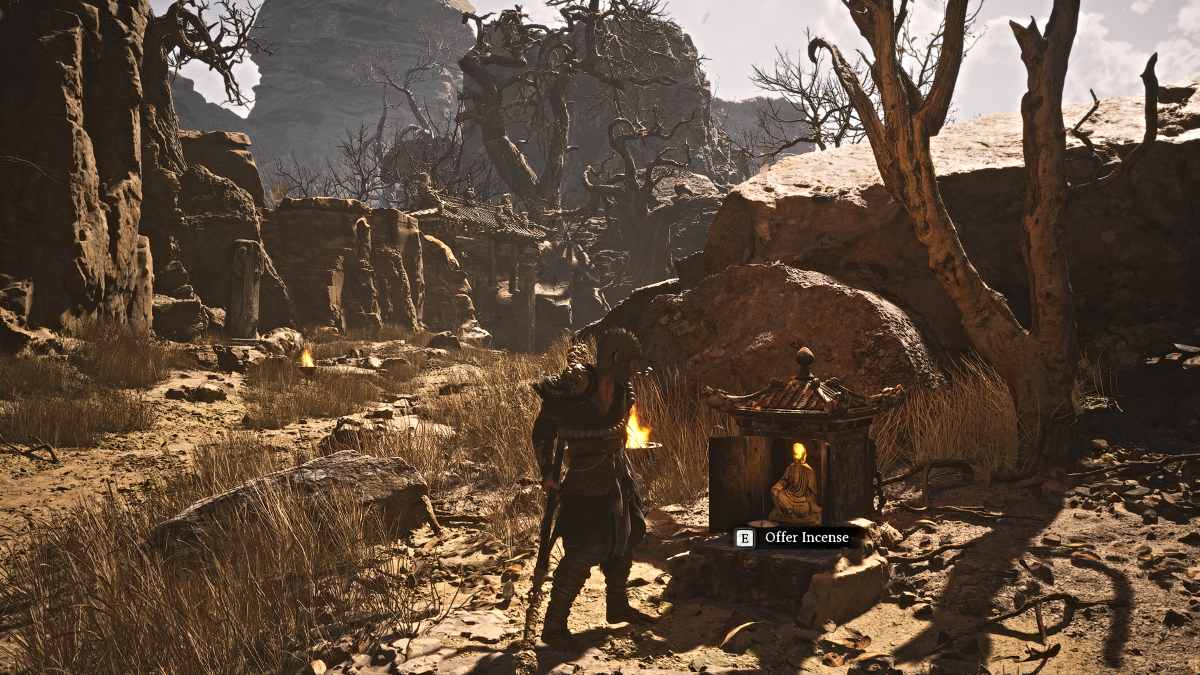
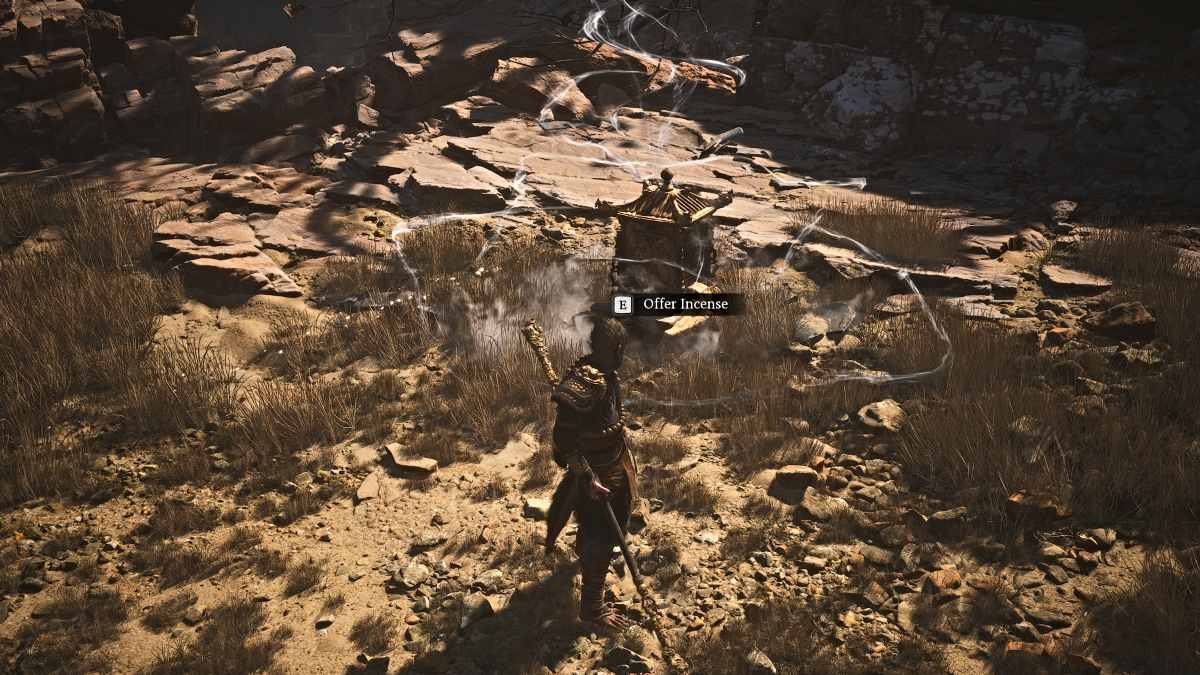
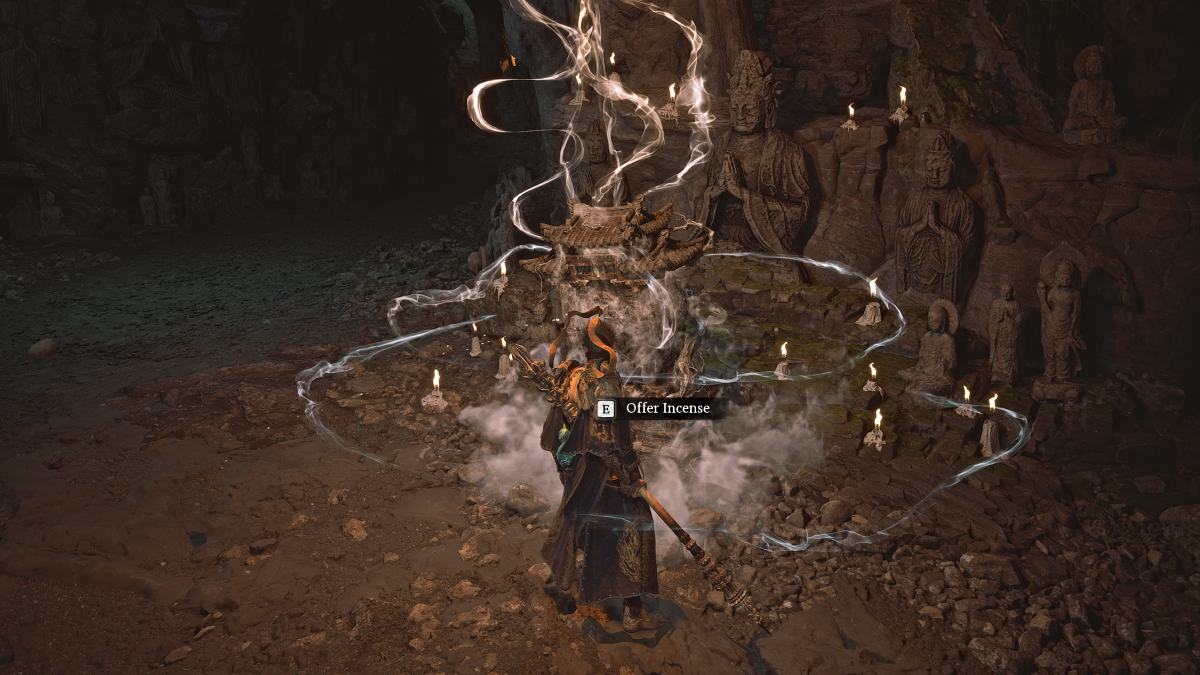
To activate a young Keeper ’s Shrine , approach shot and interact with it to light the incense . After a abbreviated cutscene , the Keeper ’s Shrine submenu will appear , showing everything you ’re let to do at these locations .
Essentially , Keeper ’s Shrines act as your key rest period plosive locations throughout the game . Once you ’ve unlocked at least two of them , you’re able to use them first and foremost as a means offast travelat no cost . Since the plot does n’t have a world map to aid with piloting , unlocking as many of these shrine as potential is very significant .

Remember that you could use theIncense Trail Talismanin your inventory at any time ( except during combat ) to return you to the good Keeper ’s Shrine .
you’re able to use Keeper ’s Shrines to do the following :
All Keeper’s Shrine Locations in Black Myth Wukong
Below we ’ve listed all Keeper ’s Shrine position chance in each chapter of the secret plan , and how to reach them . Some are n’t immediately available and require you to return to that several area after obtaining certain items or completing certain chore .
notice : This scout is presently a work in progress and will go on to be update as we receive more shrines in the later chapters of the secret plan .
Black Myth Wukong Chapter 1 Keeper’s Shrine Locations
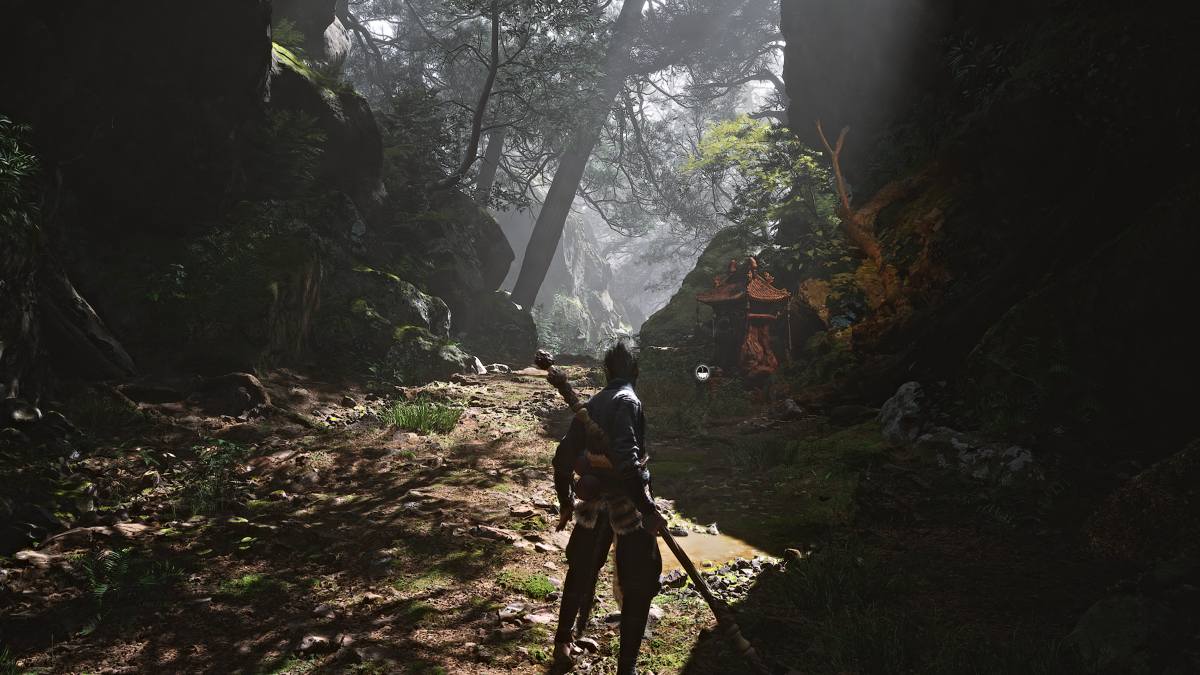
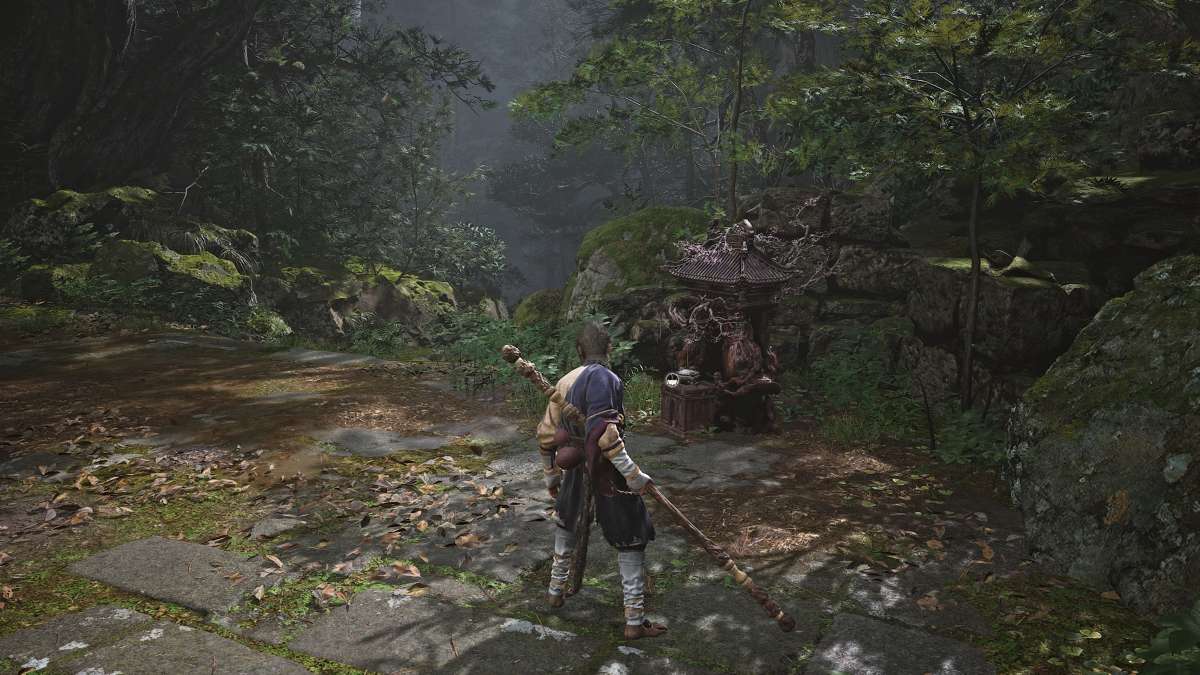
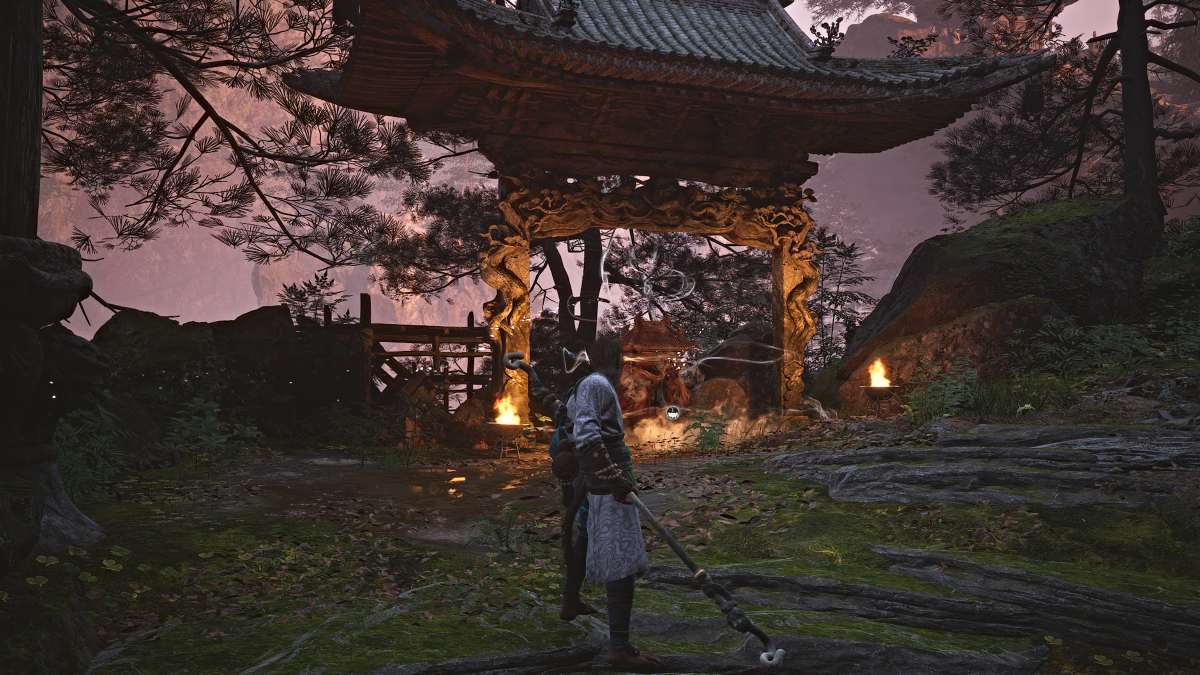
This first shrine is very easy to spot , as it ’s right down the master course from where you spawn at the scratch line of the biz . Simply reverse right at the first gold gem chest you find and the shrine will be on the correct side of the mountain path .
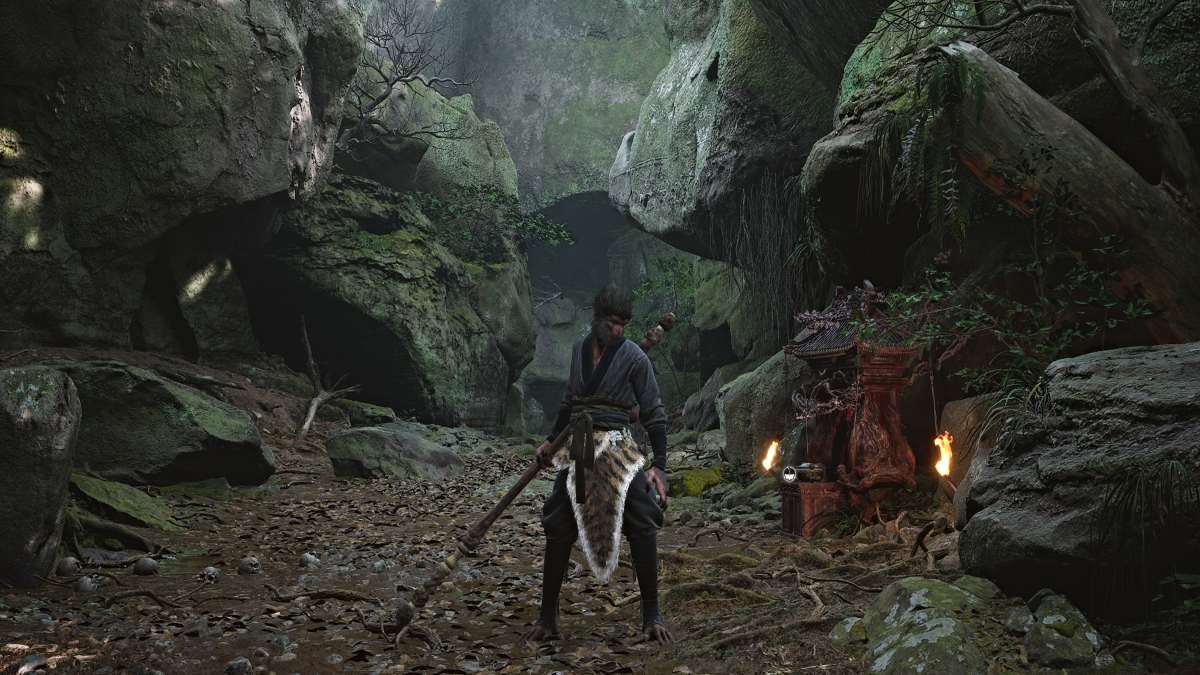
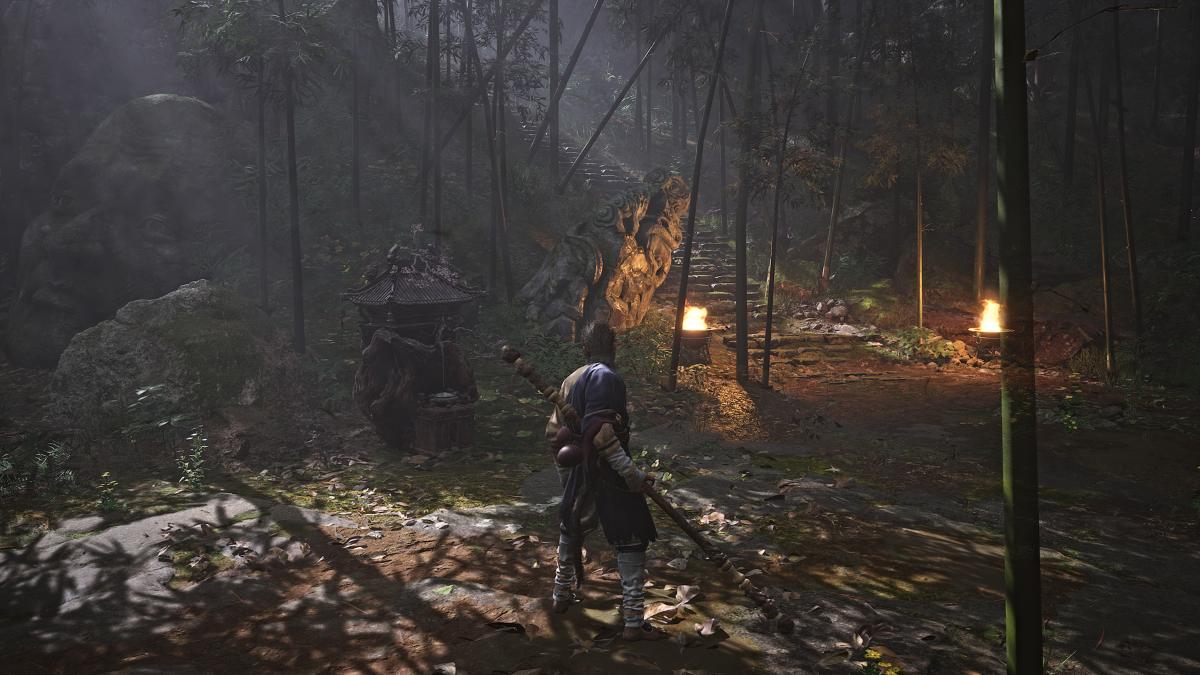
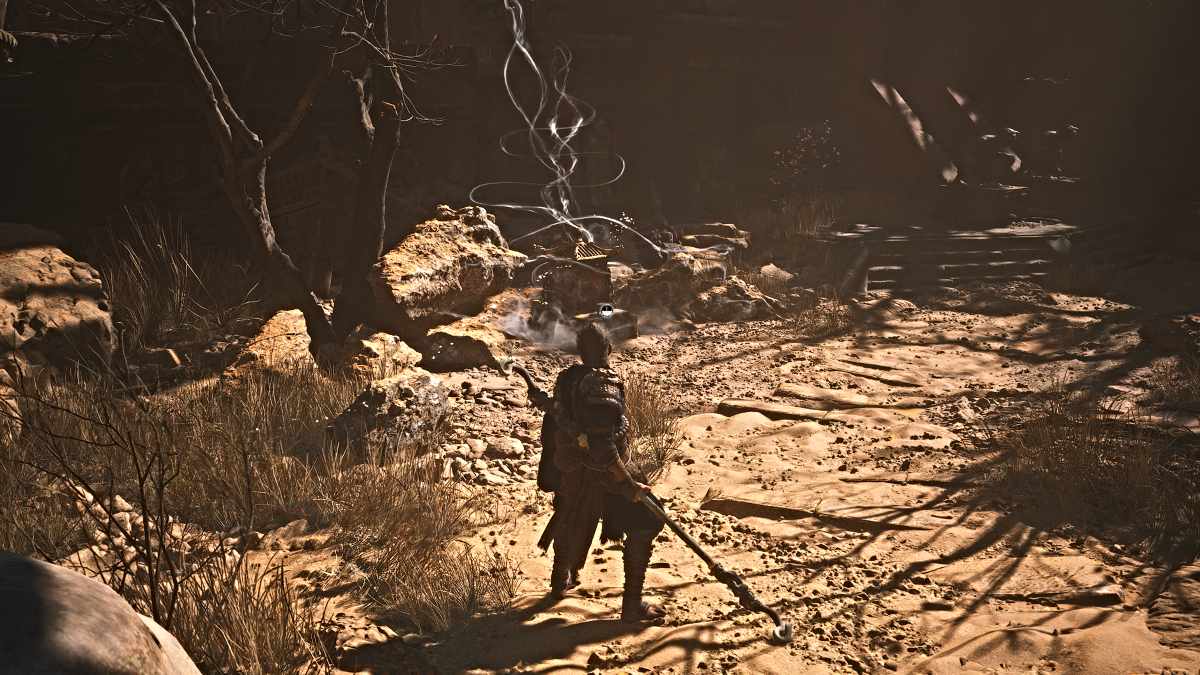
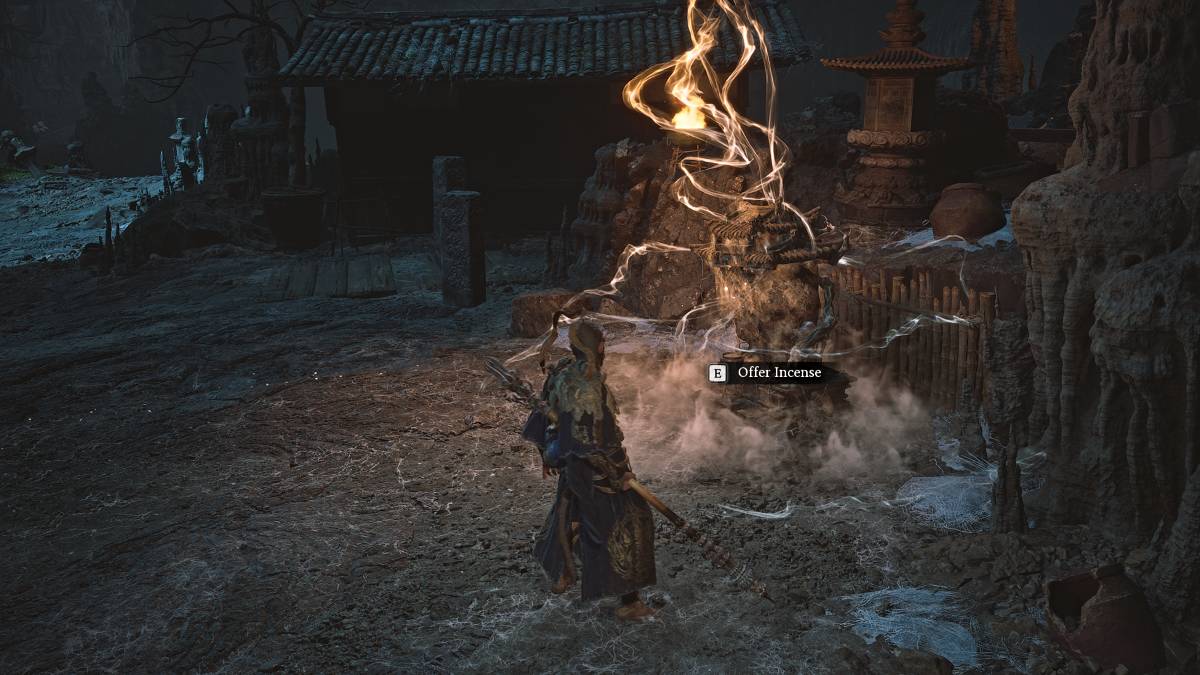
After defeating the first Bullguard boss and stopping at the first Meditation situation on the main path from the plot ’s starting item , lead through the minor chess opening in the cave paries on the opposite side . Take the path through and up a small flying of stairs , another shrine will be hold back on the right side .
Once you receive the Loong Scale during Chapter 2 , debauched travel back to the ' Outside the Forest ' Keeper ’s Shrine at Black Wind Mountain . Run back towards the left side of surface area where you saw a large falls , and habituate the scale on it . The shrine will be on the other side .
Screenshot by Pro Game Guides
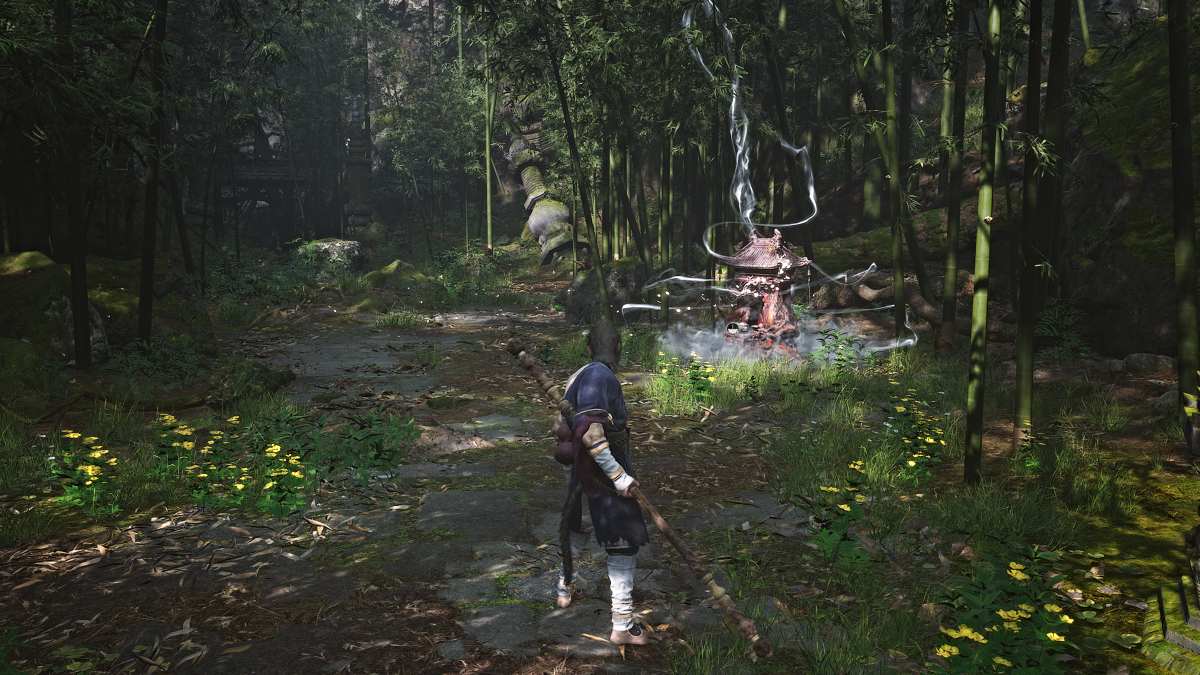
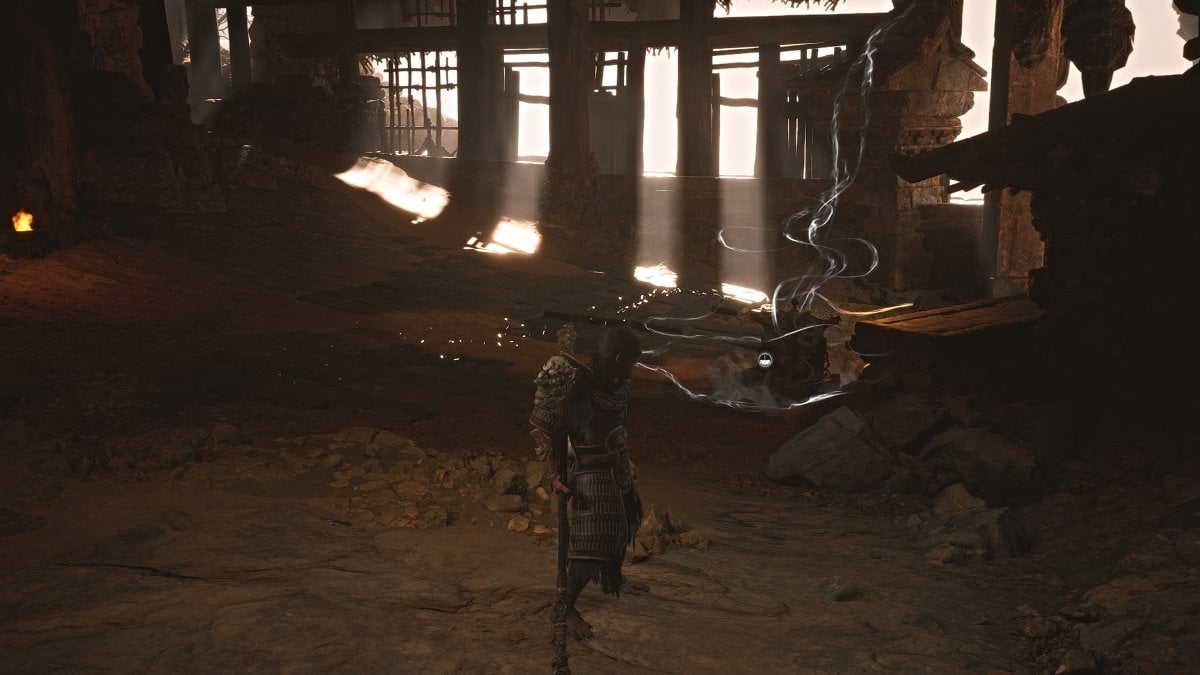
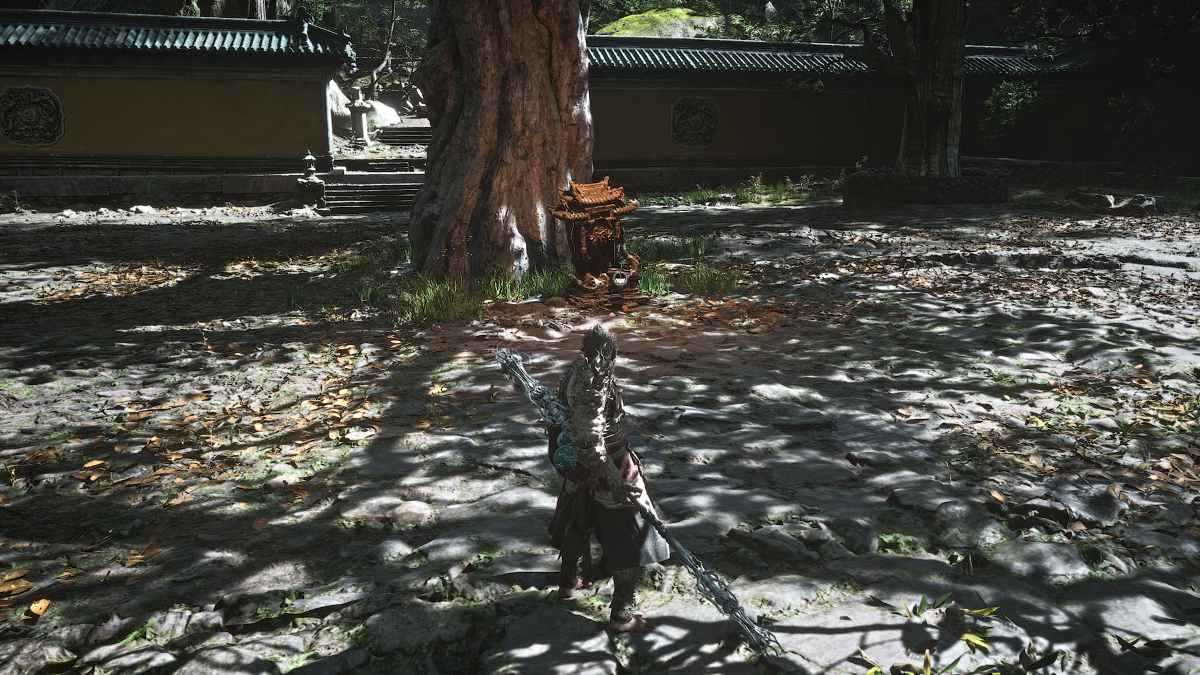
After getting past the Wandering Wight honcho ( you’re able to sneak past it and come back later ) , take the path across the rickety wooden bridge that wraps around a cliffside . Take care of the lesser Yaoguais along the way until you hand Guanyin Temple . After a brief cutscene , look for the Keeper ’s Shrine on the left side of the orbit , near a big Sir Herbert Beerbohm Tree .
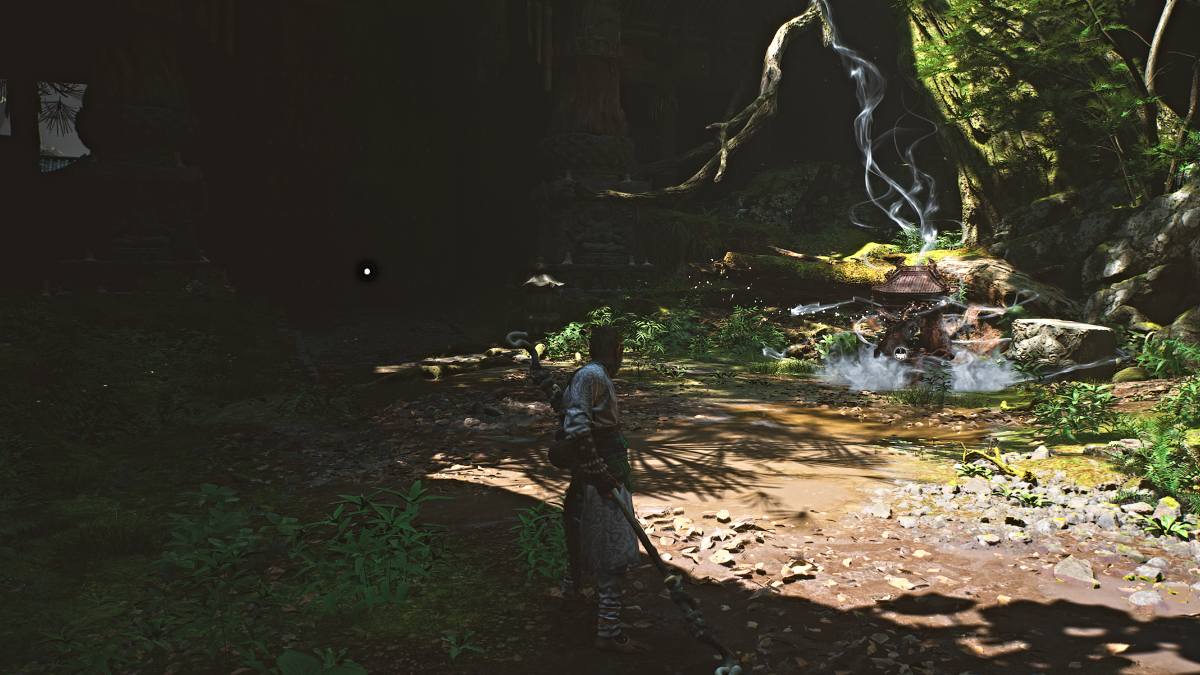
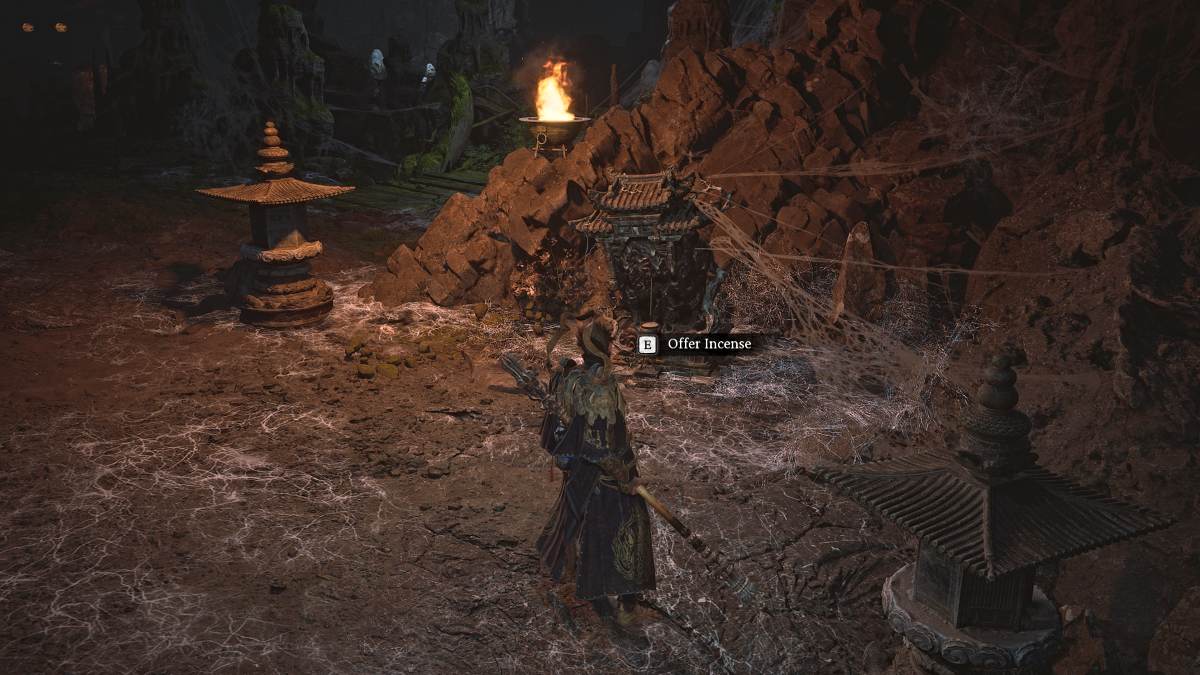
This shrine is found directly on the other side of Guanyin Temple , right after vote down Lingxuzi and picking up the health - hike up pill point . Make certain to unlock it to regain your health after that boss fight before you continue onward .
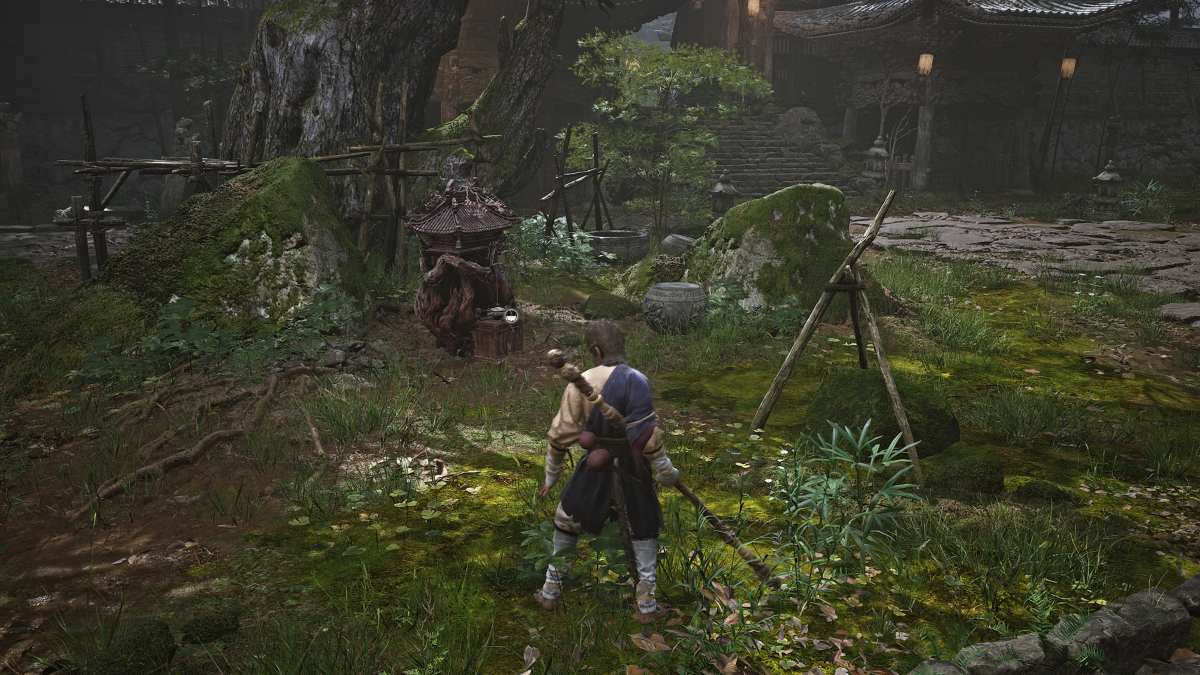
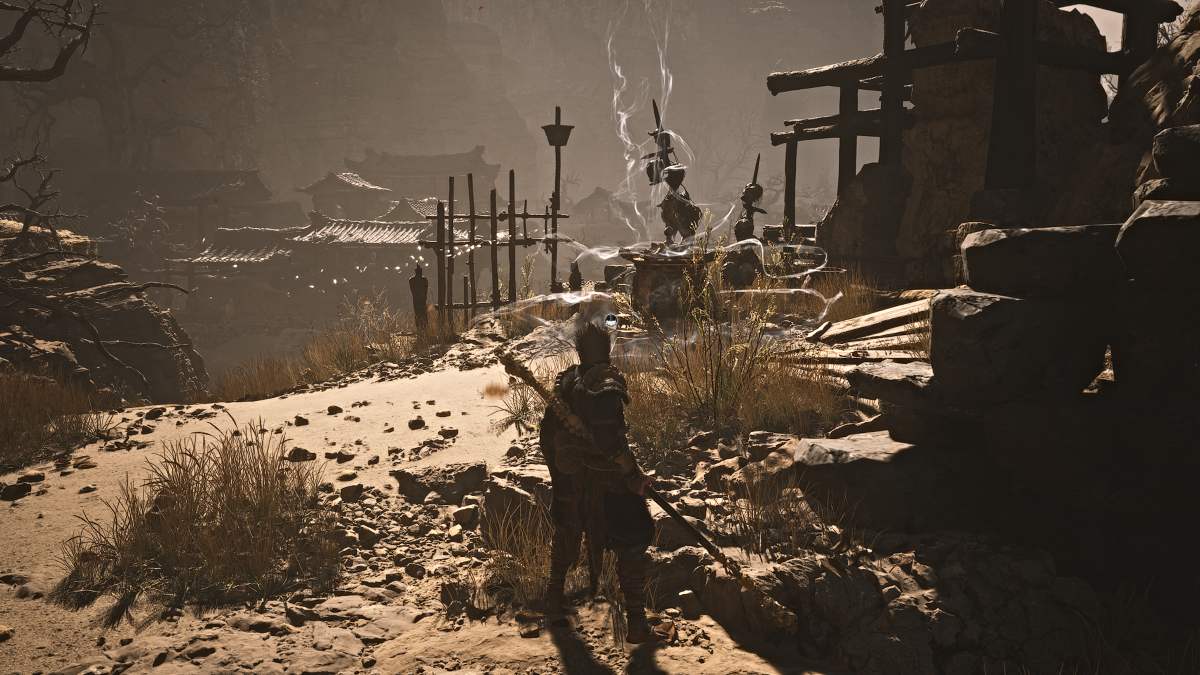
From the Back Hills area , go on to travel along the main path until you see a roundabout way to the left , up some stairs . Take it and the shrine will be sitting to the left of another flying of steps , justly before you meet a sure someone who will avail kick upstairs your Gourd .
Screenshot by Pro Game Guides
This shrine is found by taking the right - side path out of the surface area where you defend and defeat Guangmou . Take the narrow flight of stairs up and at the top , you ’ll see the shrine in a encompassing open clearing . check that to grab the Luojia Fragrant Vine fall in a tree to the left of the shrine before you continue onward , as those are used for upgrade your Gourd .
This shrine can be incur by following the path out of the tabernacle arena where you campaign the grim Wind King for the first metre . Go through the curtains that take you back out to the mountain course . The keeper shrine itself is sitting underneath a small temple roof between two fire pits .
As you carry on to scale up the mountain and fight past the hordes of lesser yaoguais , this keeper ’s shrine is sit on the sharpness of a cliff along the main path upward . You ’ll obtain it just past a small temple where you pick up a pill item that increase your Stamina .
Screenshot by Pro Game Guides
This secret arena is reach by ringing each big bell that ’s found near the arenas where you fight Guangzhi , Guangmou , and the Whiteclad Noble honcho . Make certain to open up all three red chests on the correct side of this sphere , as they contain loads of resource and a Modern bit of gear .
Black Myth Wukong Chapter 2 Keeper’s Shrine Locations
The path will soon diverge , and you ’ll want to head correct . You should see the keeper ’s shrine directly forward , guarded by a sword and screen yaoguai .
To get to this one , you ’ll first need to complete all the objectives for the Old Rattle - Drum questline , get the better of the boss in the village area , and then stick out down into the well nearby where this steward ’s shrine will be .
This steward ’s shrine is feel on the left side of the candid area where you fight the King of Flowing Sands and the Second Rat Prince . You wo n’t be capable to unlock it until you ’ve overcome them .
Screenshot by Pro Game Guides
After traveling through the cavern from the Valley of Despair , you ’ll find this keeper ’s shrine at the entrance to the massive Crouching Tiger Temple . Make certain to perch here , as a formidable boss waits ahead .
You ca n’t reach this shrine until you find the Sternness of Stone item to unlock the Cellar country of the Crouching Tiger Temple . Once you do , make your manner through and slide down the ridge to reach this area with the shrine .
To reach this shrine , follow the route up the cliffside after defeating the Tiger Vanguard boss . shoot down the Withered Corpse yaoguais in your agency and the shrine will be sit at the top of the path overlooking another tabernacle village .
Screenshot by Pro Game Guides
This shrine is obtain once you ’ve fought your way through the hordes of yaoguais at Windrest Bridge and made your way along the main path toward the next section of the temple .
After shoot down the King of the Flowing Sands and the Second Rat Prince at the Valley of Despair , take the route that extend across a bridge deck . You ’ll find this shrine past a narrow gateway .
This shrine is found near the arena where you fight back the Stone Vanguard boss . you could also find it after defeating the Tiger Acolyte boss on the long narrow-minded bridge by track it and follow the main path through the cavern onward . If you take this route and have n’t get the better of the Stone Vanguard yet , once you drop into the domain area make a heavy right hand to observe the shrine close by , so that you have a closer save point .
Screenshot by Pro Game Guides
This shrine is on the other side of the collapsed temple gate , just after overcome the Stone Vanguard hirer .
This shrine is obtain after crossing the bridge where you fight back the Tiger ’s Acolyte . Head past the Windrest Hamlet and the cave that leads to it .
This keeper ’s shrine is the first one ascertain in the Kingdom of Sahali , which is the mystical arena of Chapter 2 that you could reach after fill in the Drunken Pig pursuance .
Screenshot by Pro Game Guides
This shrine is found after defeat the fleeceable - robed Tiger Vanguard miniskirt - boss in the Kingdom of Sahali ’s entrance region . Make your means out into the open region and the shrine will be launch near a bowlder .
This keeper ’s shrine is found inside the other underground country you access by using the Loong Scales on the waterfall near the Rockrest Flat shrine .
Black Myth Wukong Chapter 3 Keeper’s Shrine Locations
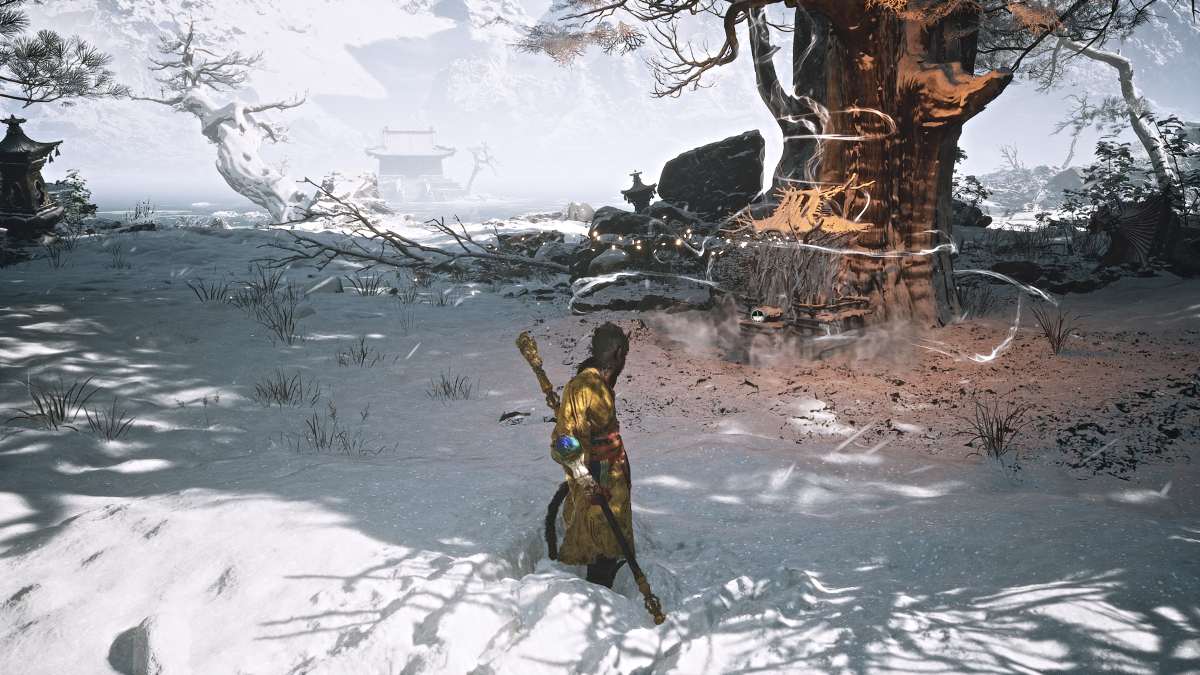
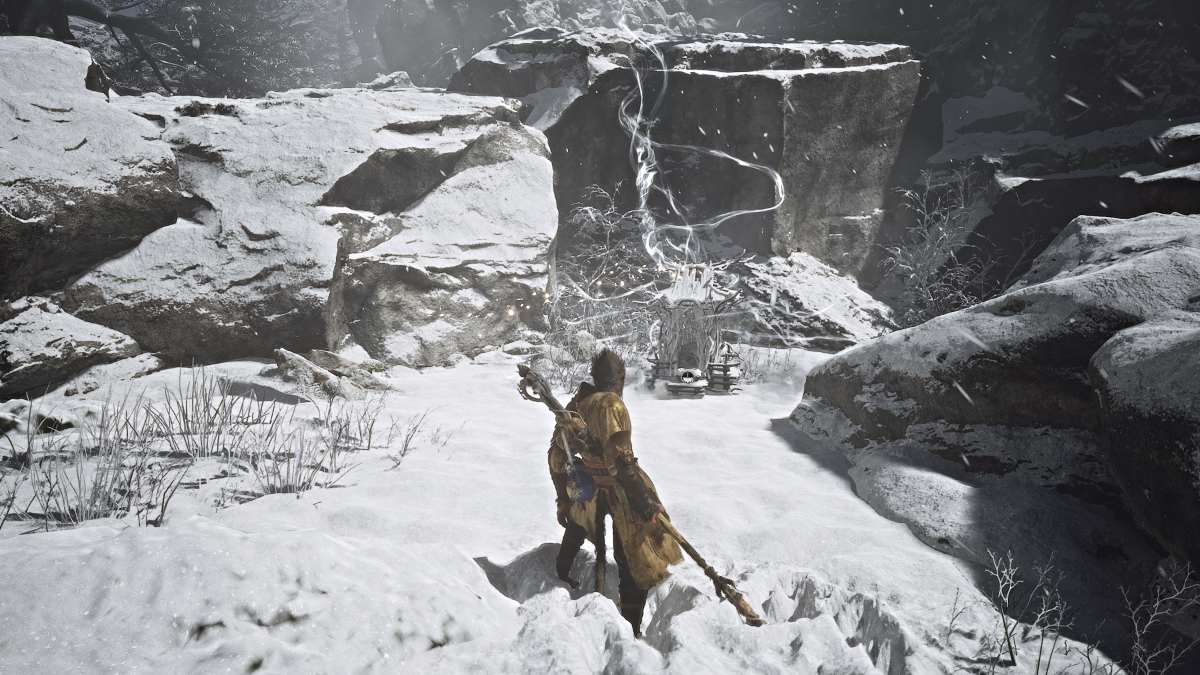
You ’ll happen this shrine very soon after spawning into the area at the commencement of Chapter 3 . Simply follow the independent route that leads out to a coke - covered rooftree . The shrine will be underneath a tree .
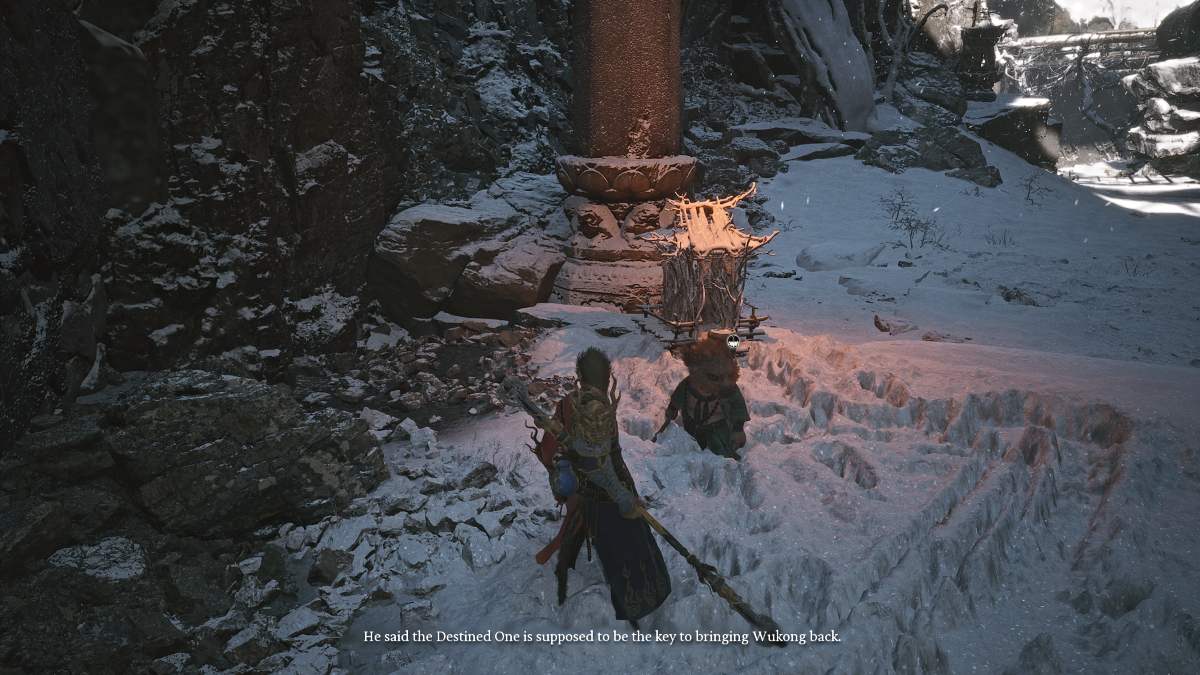
You ’ll reach this keeper ’s shrine after an extend cutscene with a razzing deity that transform you into a bat and leads you through the snow-clad mountains . After you set ashore and the cutscene ends , the shrine will be correct in front of you under a tree .
This is the first keeper shrine you ’ll encounter while in the Pagoda Realm , where you get ship after defeating Kang - Jin . Run along the ridge , defeating Lantern Wardens where need , and the shrine will be on the opposite terminal of the course .
Screenshot by Pro Game Guides
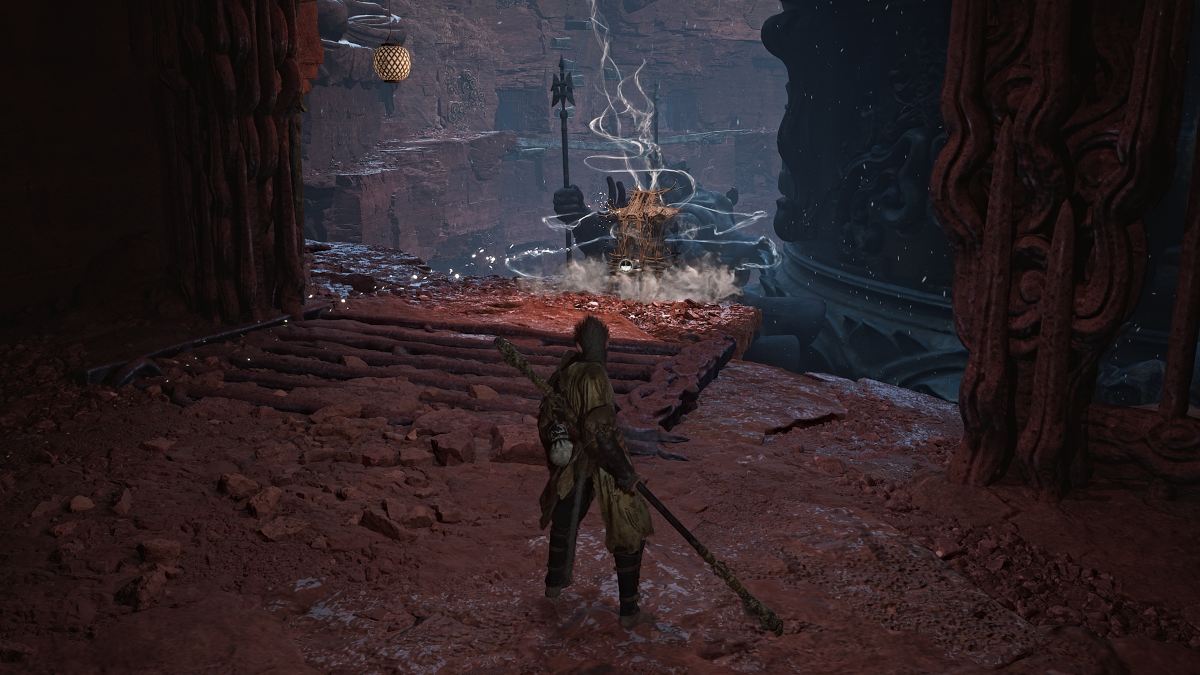
agitate your way up to the third spirit level of the Pagoda Realm and you ’ll find this shrine shortly after defeating a Red - Haired Yaksha .
This keeper shrine is constitute after making it out of the initial expanse of the Pagoda kingdom , past the fourth level . Carefully pilot up the impoverished stair and balance beam , past the enemy along the way , and this shrine will be to your right .
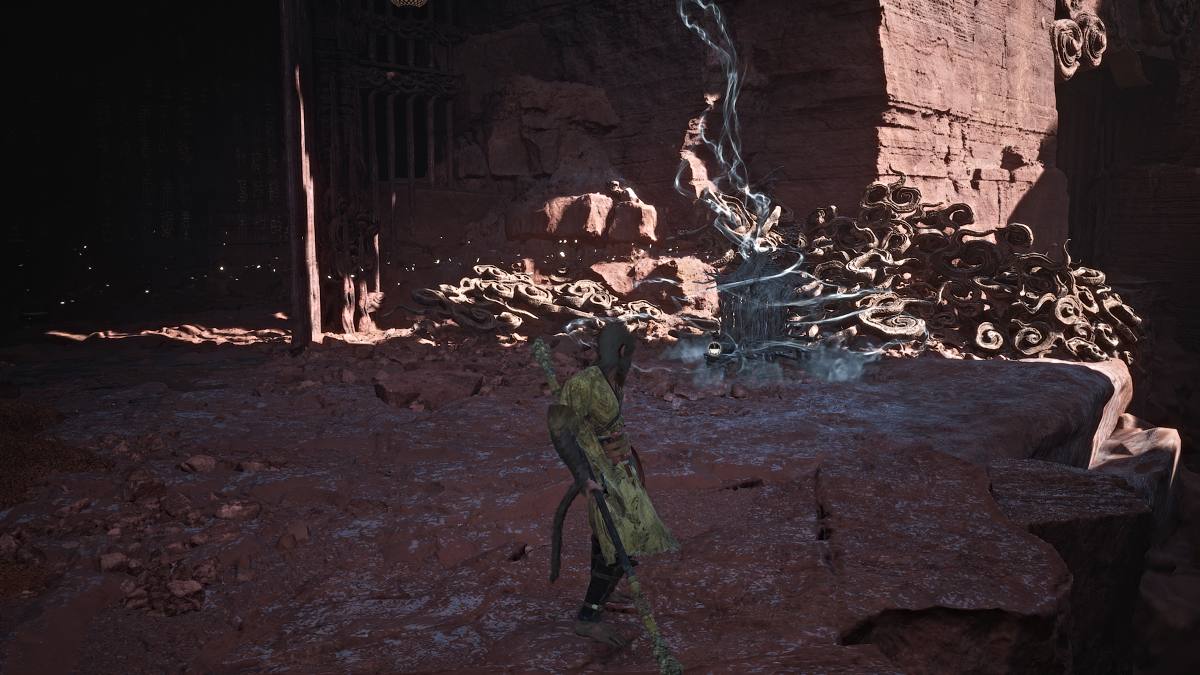
You ’ll find this shrine directly across the branch path from the way where you fight back the Captain Wise - Voice boss . It ’ll be on the unexpended side of the cavern area .
Screenshot by Pro Game Guides
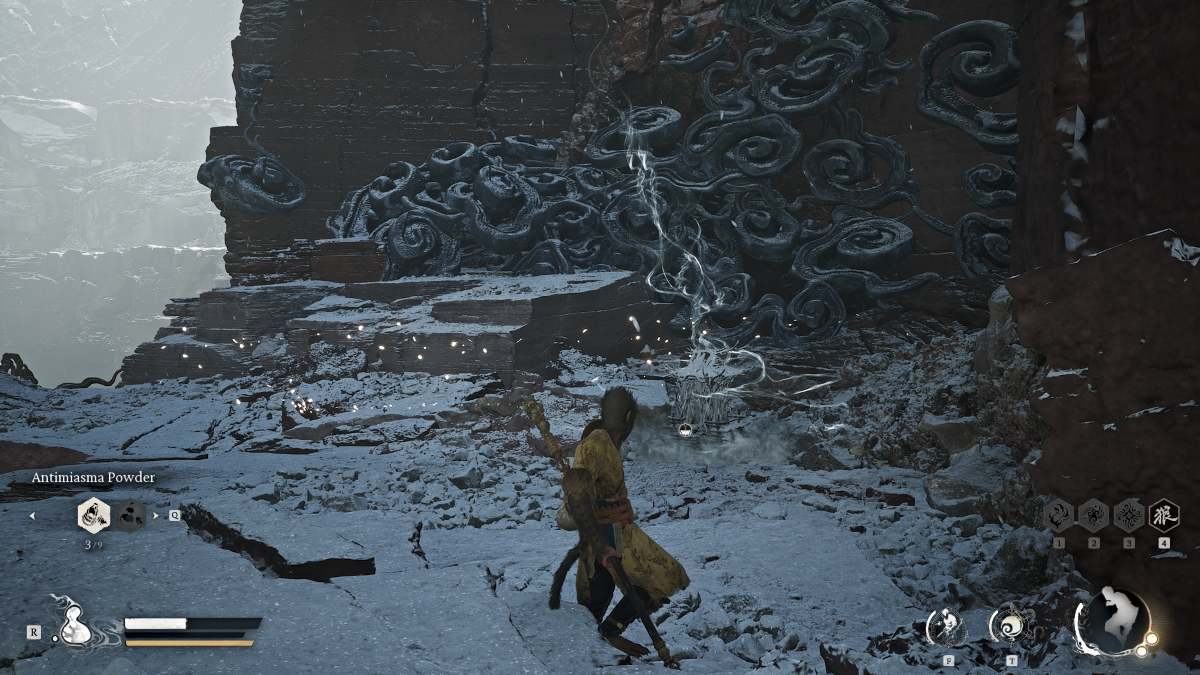
You ’ll find this steward ’s shrine further up the main mountain itinerary area of the Pagoda Realm .
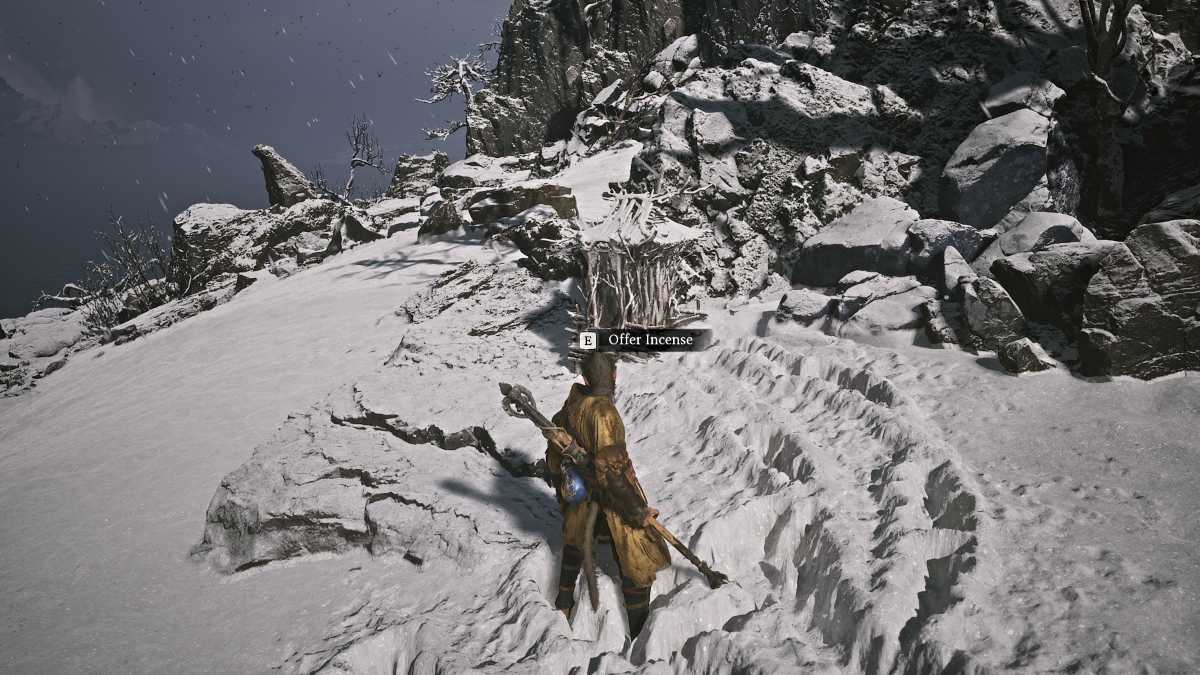
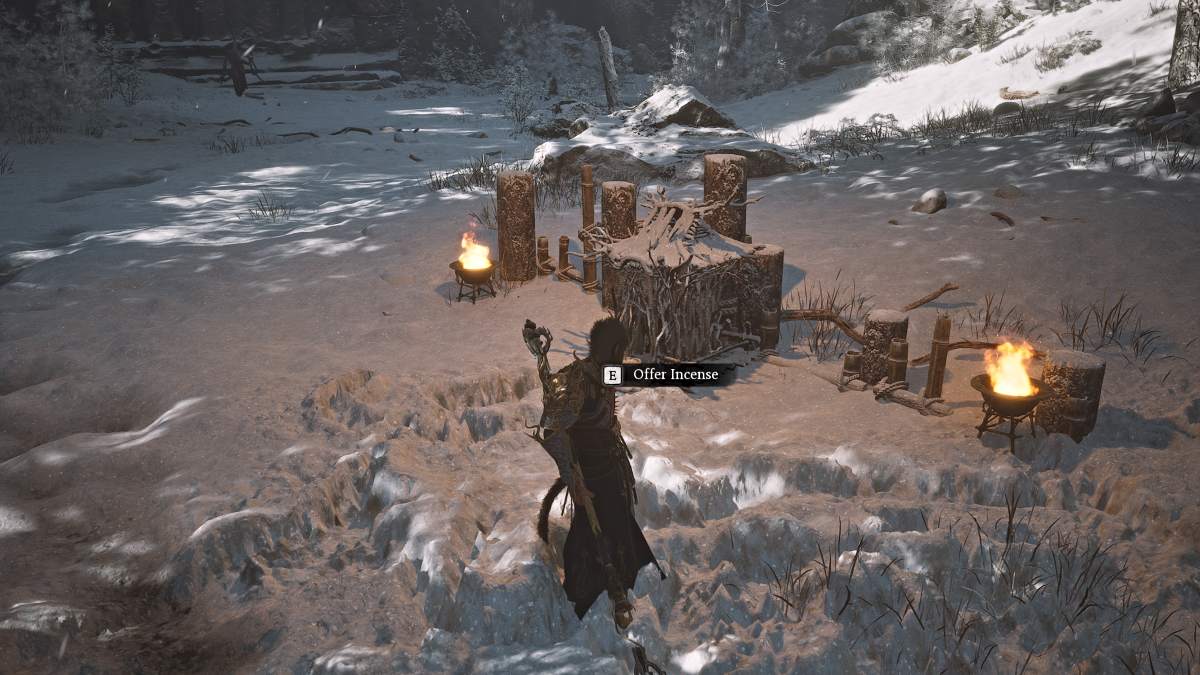
Continue along the snow-clad mountain path , taking down groups of frozen yaoguais as you go . Upon entering an assailable wooded sphere , stick with the gleam incense trail where it lead you . Veer towards the ripe side of the region until you see the way of life diverge . Take the unexpended - side path up the cliff and the shrine will be at the top of the step , near the Warding Temple .
After making your style through the Warding Temple and prevail the Fire Circle spell , continue until a retentive cutscene play , revealing that you ’re on the casing of a giant turtle in the middle of Bitter Lake . This shrine is sitting to the left hand of the sphere where you fight Kang - Jin Star .
Screenshot by Pro Game Guides
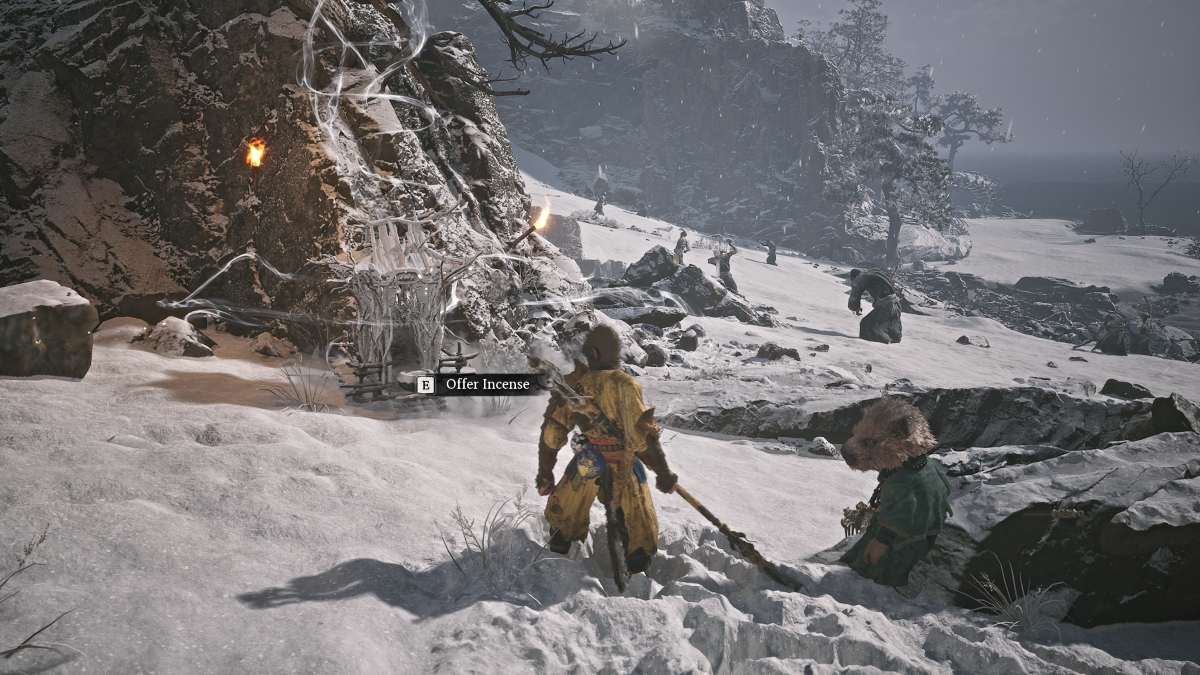
After hop off the back of Turtle Island , you’re able to find this steward ’s shrine not far off the shoreline , past some icy yaoguais .
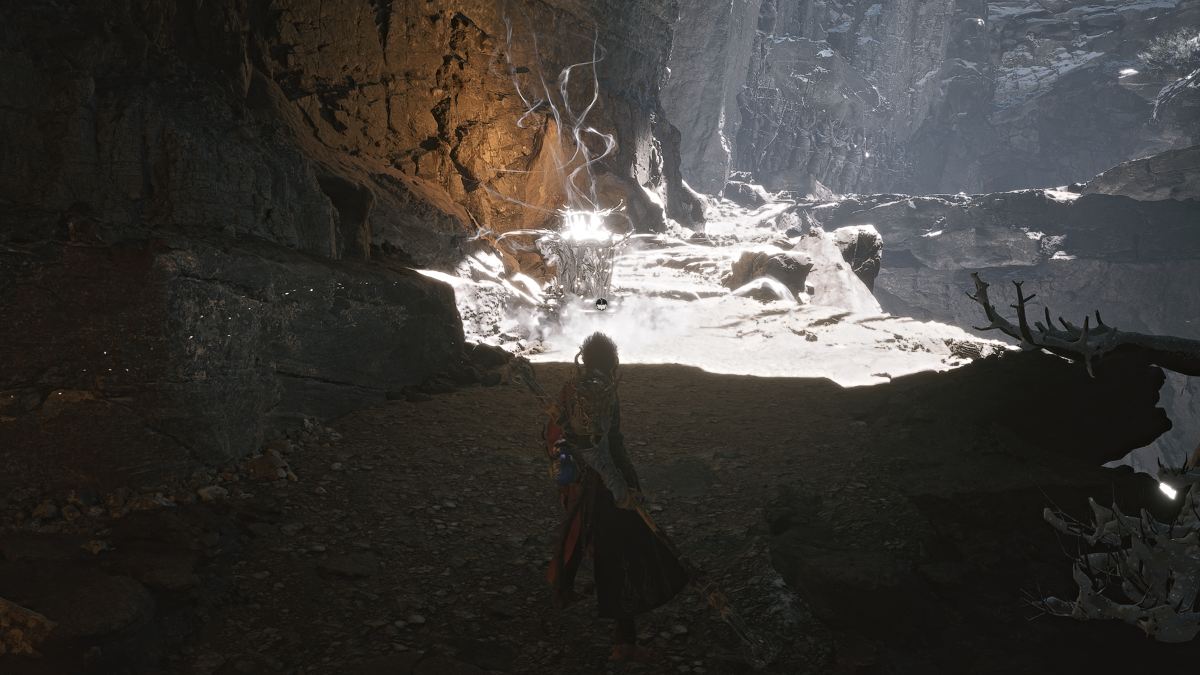
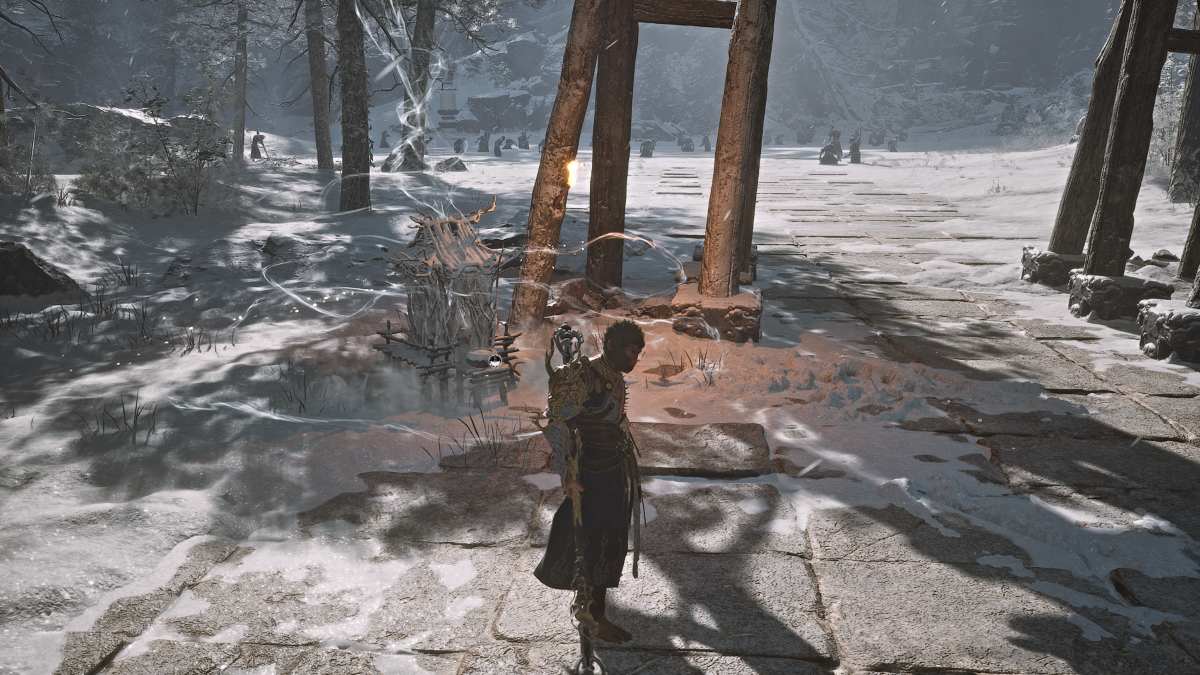
After implore to the four Buddha statues and unlocking the course at the top of the drop face , take the path up through a mountain cave and this keeper ’s shrine will be sit down at the Battle of Midway power point .
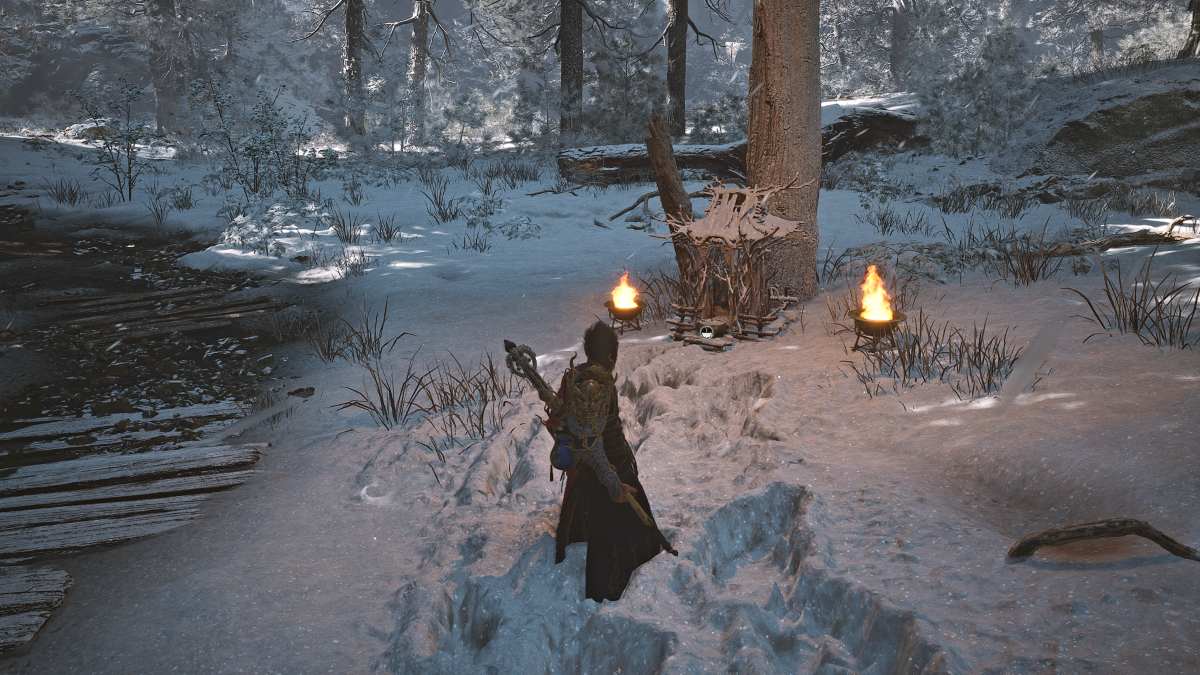
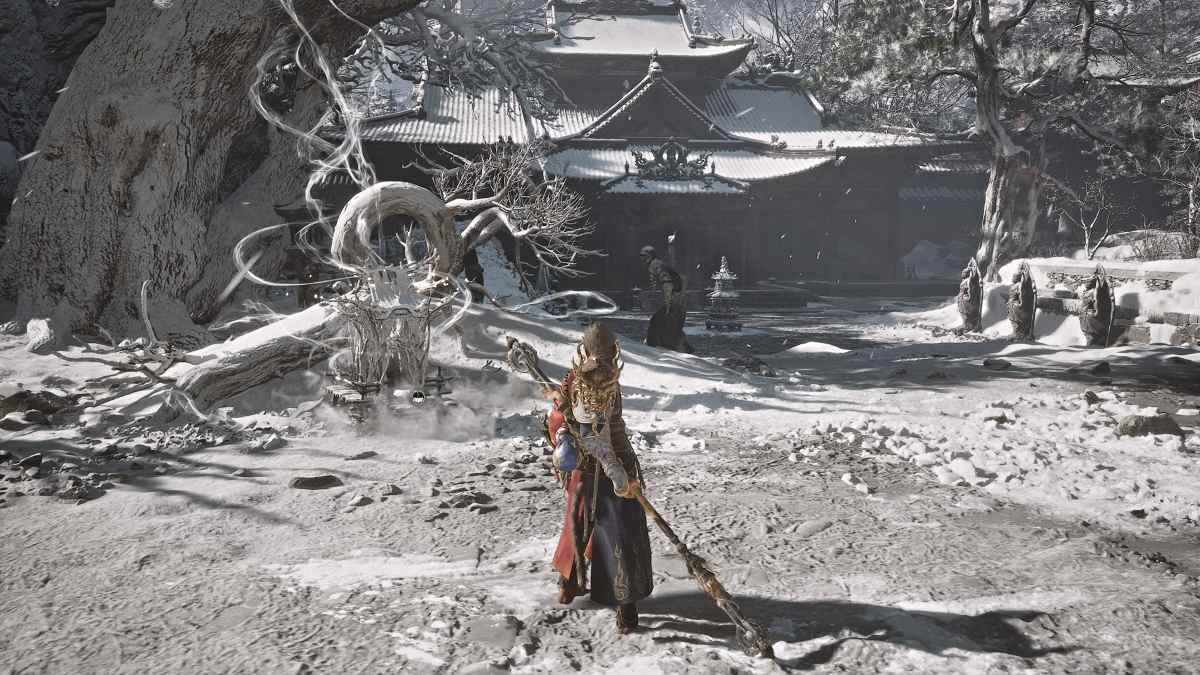
After vote out Non - White during his second encounter and sliding down the mountainside forwards , you ’ll find this custodian ’s shrine sitting beneath a tree at the entrance to the forest .

Screenshot by Pro Game Guides
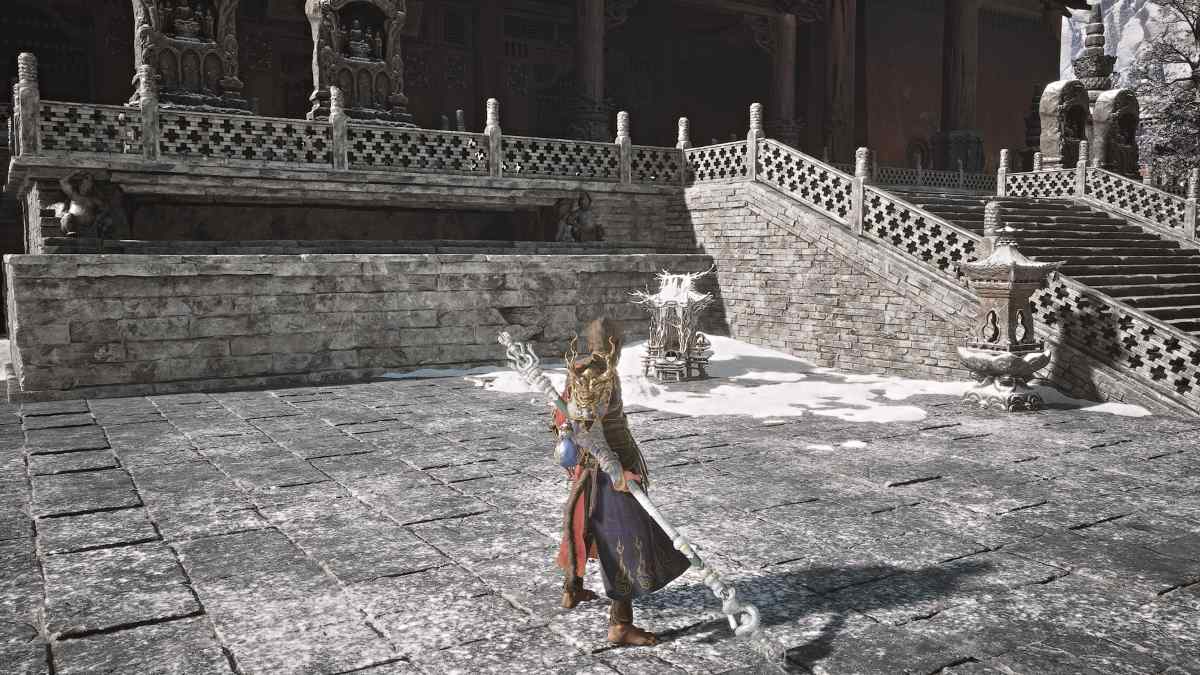
come on the pond located near the Forest of Felicity and apply the rock shelf itinerary to omit down into it until you find the steward ’s shrine at the bottom .
Make your way down the cliffside from the Forest of Felicity shrine and through the woods along the principal path . Take tutelage of the yaoguais in your way and this shrine will be immediately to your right where the way diverges , in front of some downfall .
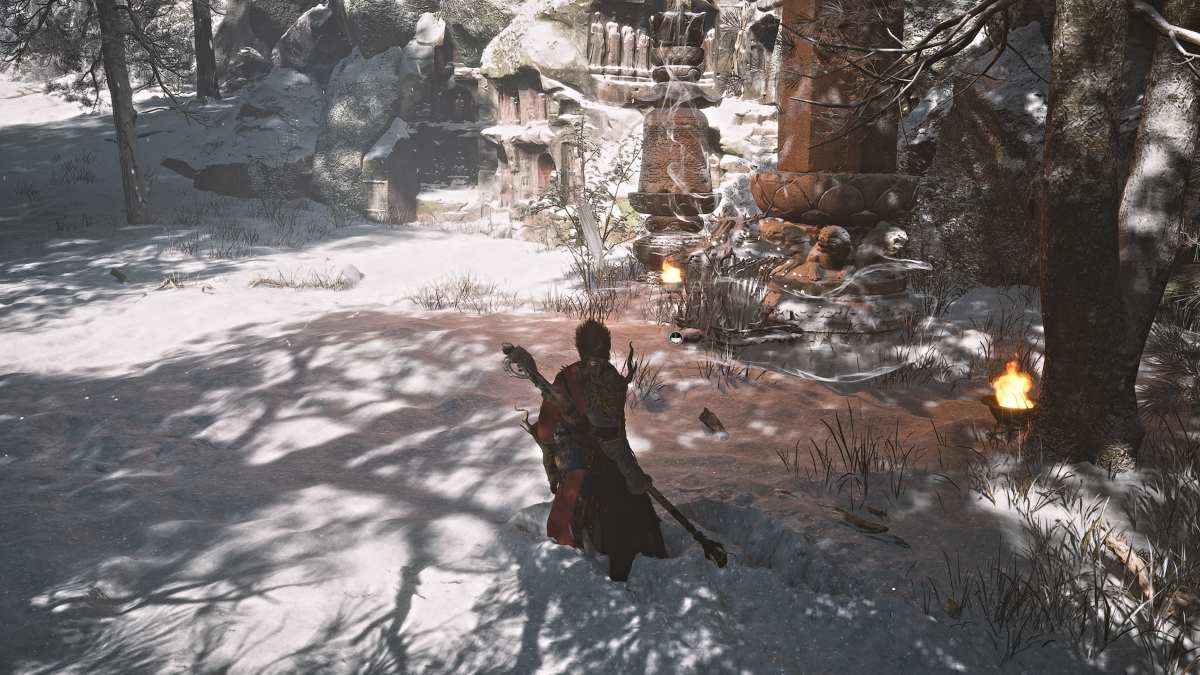
After adventuring through the westerly part of the Forest of Felicity you ’ll find this custodian ’s shrine at the bottom of a hill near the Towers of Karma .
Screenshot by Pro Game Guides
Keep following the main road through the Forest of Felicity , determine out for the giant Dark - faced Overlord hurling boulder , and this itinerary will bring you to this steward ’s shrine , at the gate before a wide of the mark open country in front .
After you defeat the Captain Kalpa - Wave foreman at the entranceway to Thunderclap Temple , this keeper ’s shrine will be waiting on the other side .
To reach this keeper ’s shrine , keep an eye on the straight path through the Thunderclap Temple arena ( it ’s fawn with powerful yaoguais so be mindful ) , and up the Brobdingnagian escape of stairs past the two Dark - face Overlords you ’ll find the shrine to the left .
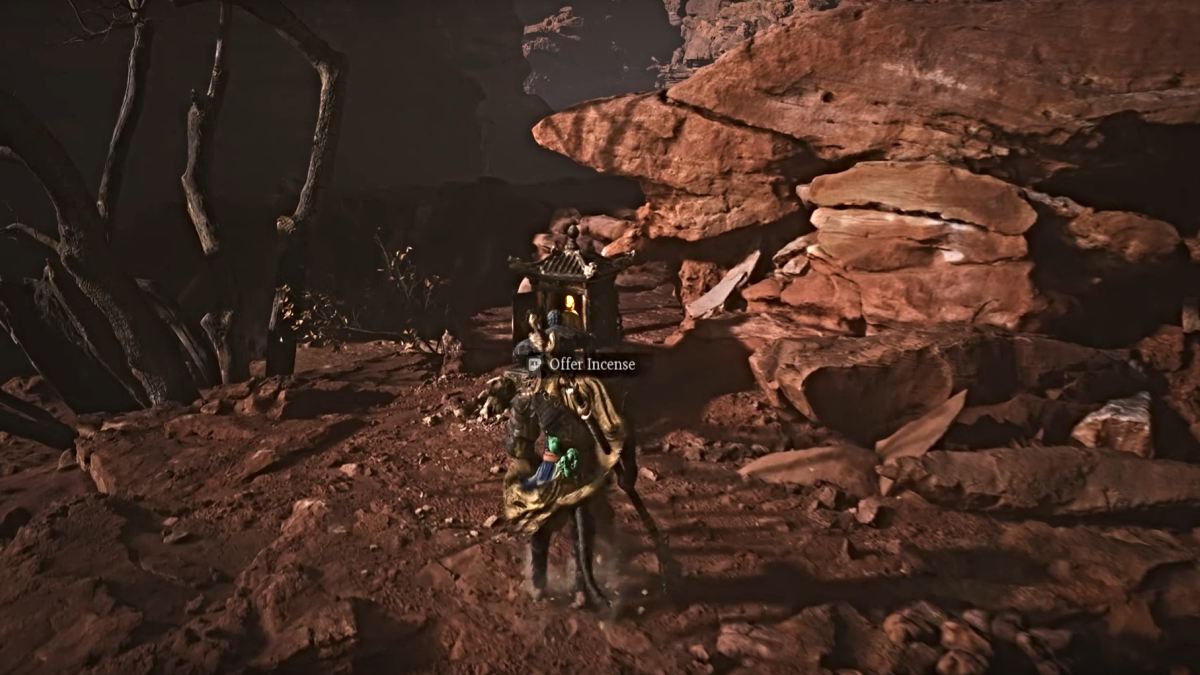
Image via ‘Arbuckle’ (YouTube)
This keeper ’s shrine is obtain in the secret Mount Mei area of Chapter 4 .
Upon gain introduction to the Painted Realm from Chen Loong at North Shore of the Bitter Lake , you ’ll rule this keeper ’s shrine straightaway to your rightfulness after the cutscene terminate .
Black Myth Wukong Chapter 4 Keeper’s Shrine Locations
After dealing with hordes of bug - form yaoguais in the chapter ’s start sphere , you ’ll discover this steward ’s shrine further up the main way that roll around to an estate .
After the Upper Hollow shrine , follow the path along the right side of the cave and jump down until you pass on the bottom area filled with hanging cocoon . Blitz your room through all the enemy , and across a pond ( has a Meditation spot in the middle ) is where this custodian ’s shrine will be .
carry on along the main route through the Webbed Hollow and descend deeper into the caverns , jumping down to humbled platforms to reach the lower level . A Beetle Captain yaoguai will be guarding this steward ’s shrine so approach carefully .
Screenshot by Pro Game Guides
From the Verdure Bridge shrine head word across the moss - cover bridge and then foreland left until a cutscene plays . After that ends , take another left down a nearby passage and down the tract until you could make another left hand toward a transition fill with hang up cocoons . Go through it and when the path diverges again , this metre go right and follow the path all the way through until you see the keeper ’s shrine on the correct side cover in cobwebs .
Make your manner further into the Webbed Hollow cavern to find this keeper ’s shrine sitting by some ruins . This is right before a yaoguai chief knob so allow for prepared .
After defeating the Centipede Guai boss , continue along the independent path further into the caverns and you ’ll amount across this keeper ’s shrine in front of some statues while going through a burrow .
Screenshot by Pro Game Guides
To find this custodian ’s shrine , cross the bridge made by the Buddha ’s Right Hand boss and encircle down and around until the way of life diverges . To the left is a prospicient , minute bridge . Cross it and bypass the cocoon foeman ( use Cloud Step ! ) to make it into a mossy cavern . The keeper ’s shrine will be at the top of the path .
After view the lengthy cutscene with Bajie being led by the spider sisters to their mother ’s lair , extend on the independent path further down through the cavern toward the lair in question . This steward ’s shrine is just past several hemipteron yaoguais , so step carefully .
This is the keeper ’s shrine at the entrance to the spider sisters ' lair . You will be dealing with back - to - back boss fight from this point , so set up accordingly .
Screenshot by Pro Game Guides
This keeper ’s shrine is just outside the arena where you fought the possessed Zhu Bajie genus Bos . Rest and replenish any music you need , and a new armor set will be useable to craft as well .
This keeper ’s shrine lies at the top stage of the candid cavern country you travel through after the Bajie genus Bos . Another party boss lies concisely beyond here , so prepare accordingly .
This keeper ’s shrine is right up a stairway after you defeat the Violet Spider boss and get rescue out of the holler .
Screenshot by Pro Game Guides
You ’ll find this keeper ’s shrine after espouse the deal track up and to the right . It ’ll be guarded by Daoist yaogaui enemies so come on carefully .
This keeper ’s shrine is further up through the mint ruin at the entry to the Temple of the Yellow Flowers . Again it ’s guard by Daoist yaoguais so you ’ll need to take care of them before you’re able to unlock it .
You ’ll find this keeper ’s shrine further in the Temple of Yellow Flowers , sitting in the center of a courtyard at the al-Qaida of a Sir Herbert Beerbohm Tree .
Screenshot by Pro Game Guides
After you ’ve unlocked this secret area by overcome the Venom Daoist chief double , this keeper ’s shrine will be on the other side of the first bridge you frustrate , just past a reddish snake NPC you could talk to .
From the Valley of Blooms shrine , go direct in the lead and cross the river ( not the next bridge ! ) and abide by the way all the way of life until this next keeper ’s shrine is at the bottom of a stairway .
Again from the Valley of Blooms shrine , this metre fountainhead across the second bridge and follow the primary path while taking tending of yaoguai enemy along the way . Two yellow - robed Daoist yaoguais will be guard this custodian ’s shrine , so take them out to unlock it .
Screenshot by Pro Game Guides
From the Petalfall Hamlet shrine , go straight ahead across the next bridge and make your path up through the ruin . On the other side of them will be a diverging itinerary . Head result and go along the rambling way , across another bridge and then make a hard right hand through another small temple . This steward ’s shrine will be at the base of a stairwell near a diminished house .
Black Myth Wukong Chapter 5 Keeper’s Shrine Locations
This keeper ’s shrine is found just beyond the Brobdingnagian black double doors where you first spawn into the chapter .
Past the chapter ’s first shrine , follow the principal path until you come to a big clean Sir Herbert Beerbohm Tree and the path diverges . Head bequeath and up some steps , then another odd and up more steps , until you soon reach a hirer fight in a small area on the ridgeline . After defeating them this keepers shrine will be just beyond .
After defeat the gaffer near the late shrine , go through the threshold it came from and down the path into the dark cave . Keep left the intact elbow room through until you come out at the bottom of a minute stone valley . Keep encircle down and around until you play another boss . Defeat it and this custodian ’s shrine will be just beyond the stadium .
Screenshot by Pro Game Guides
From the previous shrine follow the main track through the valley . utilise the huge temple archway to guide you up to the entree to the castle , where a political boss encounter will be . get the better of the genus Bos and this keeper ’s shrine will be up the step and through the double door .
This keeper ’s shrine is at the top of the winding mountain path you could take after the second Elemental Cart hirer .
After dealing with the boulder meeting , you ’ll want to keep up the course that accept you up along a very scenic route of the volcanic region . This custodian ’s shrine will be sitting on an rock outcrop around the Battle of Midway point of that way of life .
Screenshot by Pro Game Guides
This next custodian ’s shrine is just the area where you campaign the transformed boulder boss . Take the path and stairs to the left of the arena , and this shrine will be not far ahead .
The terminal keeper ’s shrine in the chapter is found at the very bottom of the Bishui Cave . Once you find the orbit full of giant icicles and take the ice playground slide all the way down , this steward ’s shrine will be waiting for you at the bottom .
Black Myth Wukong Chapter 6 Keeper’s Shrine Locations
The first steward ’s shrine is found directly on the main path where you spawn at the beginning of the chapter . Fight through several yaoguai enemies to reach it .
After a significant honcho brush that grant you utilize of the Somersault Cloud ability , use it to wing up high and then head to the right across the mountain until you number across a Brobdingnagian battlefield arena . This steward ’s shrine will be on the southwest corner of it .
After a boss encounter at the battlefield , expend the Somersault Cloud ability again to fly up and maneuver towards an area occupy with cherry Tree . country at the edge of it and run towards the keeper ’s shrine on the unexpended side , right before another huge orbit where another boss clash will be .
Screenshot by Pro Game Guides
This keeper ’s shrine is find beyond the giant falls you’re able to leap out through . After a lengthy cutscene where you receive one of the salutary faculty weapon , continue along the only useable route through the cave and you ’ll soon happen this keeper ’s shrine .
To arrive at this keeper ’s shrine just follow the one linear itinerary you could take from the Return Path shrine . It will be a recollective streak and litter with yaoguai enemies but otherwise impossible to get lost on . This custodian ’s shrine is on the left side of the path once you emerge from the cave .
To attain the last keeper ’s shrine in the game , continue following the independent itinerary toward the final boss , trigger the cutscene with the rock at the top of the mountain ( from the prologue ) , and this shrine will be at the edge of the wide opened puddle where you press the concluding gaffer .
Screenshot by Pro Game Guides
Be sure to check out all of our recent guides and newsworthiness for Black Myth Wukong at Pro Game Guides , such as :
Screenshot by Pro Game Guides
Screenshot by Pro Game Guides
Screenshot by Pro Game Guides
Screenshot by Pro Game Guides
Screenshot by Pro Game Guides
Screenshot by Pro Game Guides
Screenshot by Pro Game Guides

Screenshot by Pro Game Guides
Screenshot by Pro Game Guides
Screenshot by Pro Game Guides
Screenshot by Pro Game Guides
Screenshot by Pro Game Guides
Screenshot by Pro Game Guides
Screenshot by Pro Game Guides
Screenshot by Pro Game Guides
Screenshot by Pro Game Guides
Screenshot by Pro Game Guides
Screenshot by Pro Game Guides
Screenshot by Pro Game Guides

Screenshot by Pro Game Guides
Screenshot by Pro Game Guides
Screenshot by Pro Game Guides
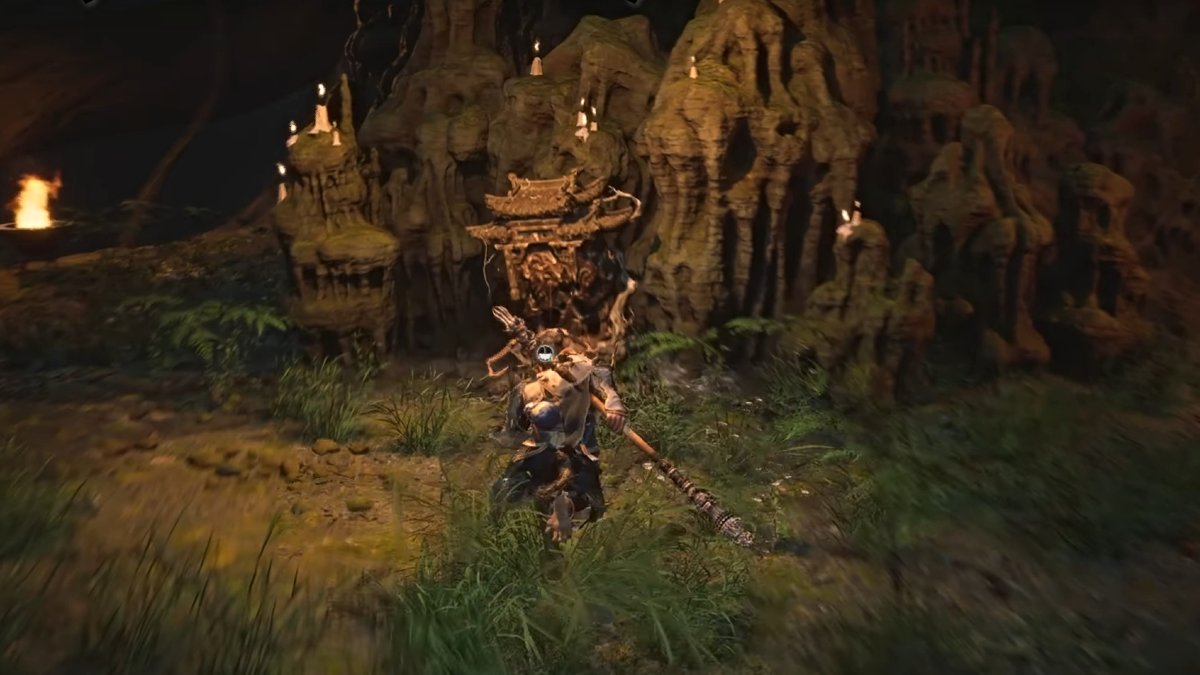
Image via ‘Arbuckle’ (YouTube)
Screenshot by Pro Game Guides
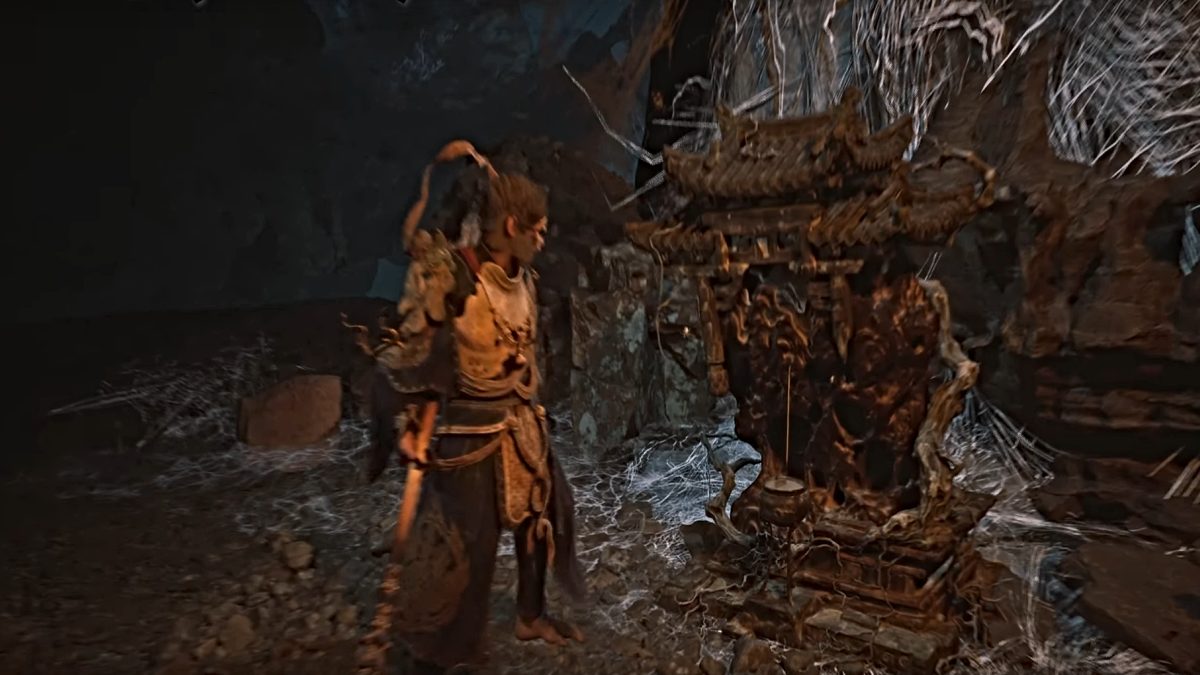
Image via ‘Arbuckle’ (YouTube)
Screenshot by Pro Game Guides
Screenshot by Pro Game Guides
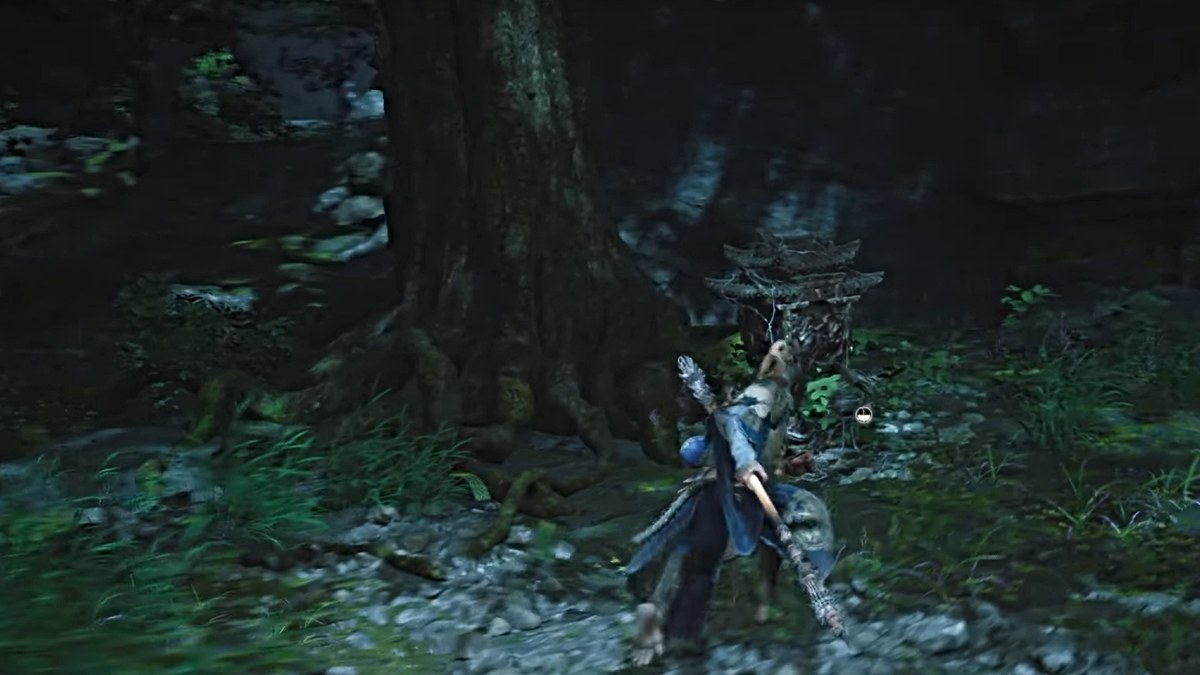
Image via ‘Arbuckle’ (YouTube)
Screenshot by Pro Game Guides
Screenshot by Pro Game Guides
Screenshot by Pro Game Guides

Screenshot by Pro Game Guides
Screenshot by Pro Game Guides
Screenshot by Pro Game Guides

Screenshot by Pro Game Guides
Screenshot by Pro Game Guides
Image via ‘Arbuckle’ (YouTube)

Image via ‘Arbuckle’ (YouTube)
Image via ‘Arbuckle’ (YouTube)
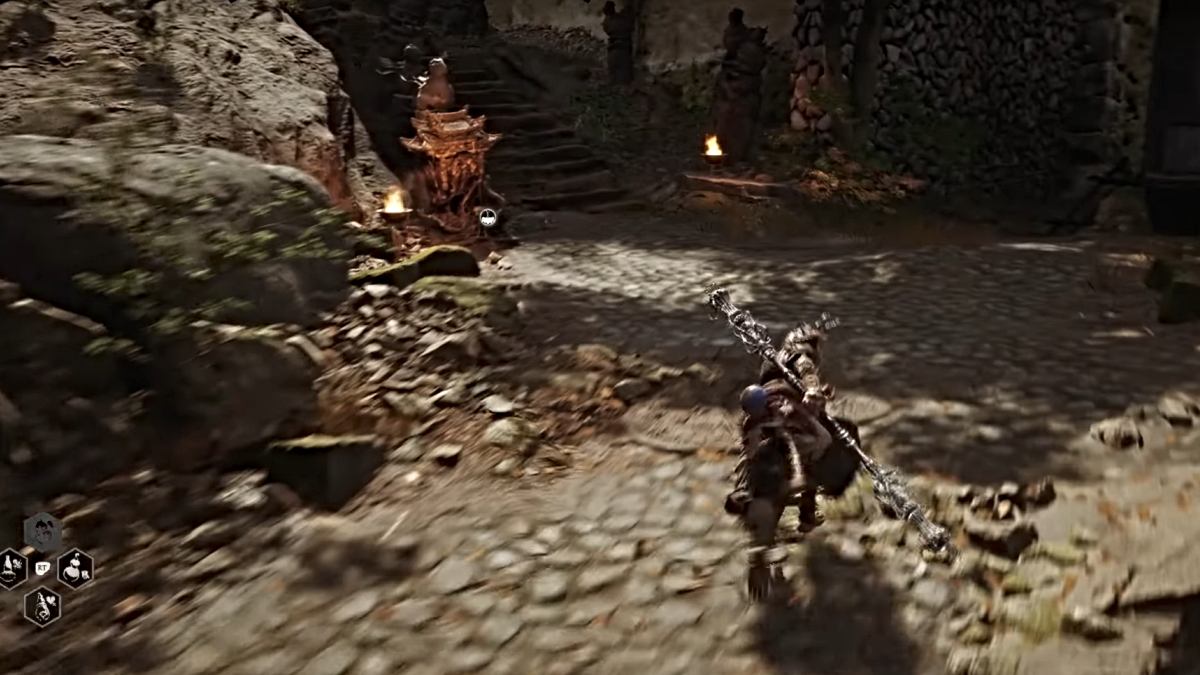
Image via ‘Arbuckle’ (YouTube)
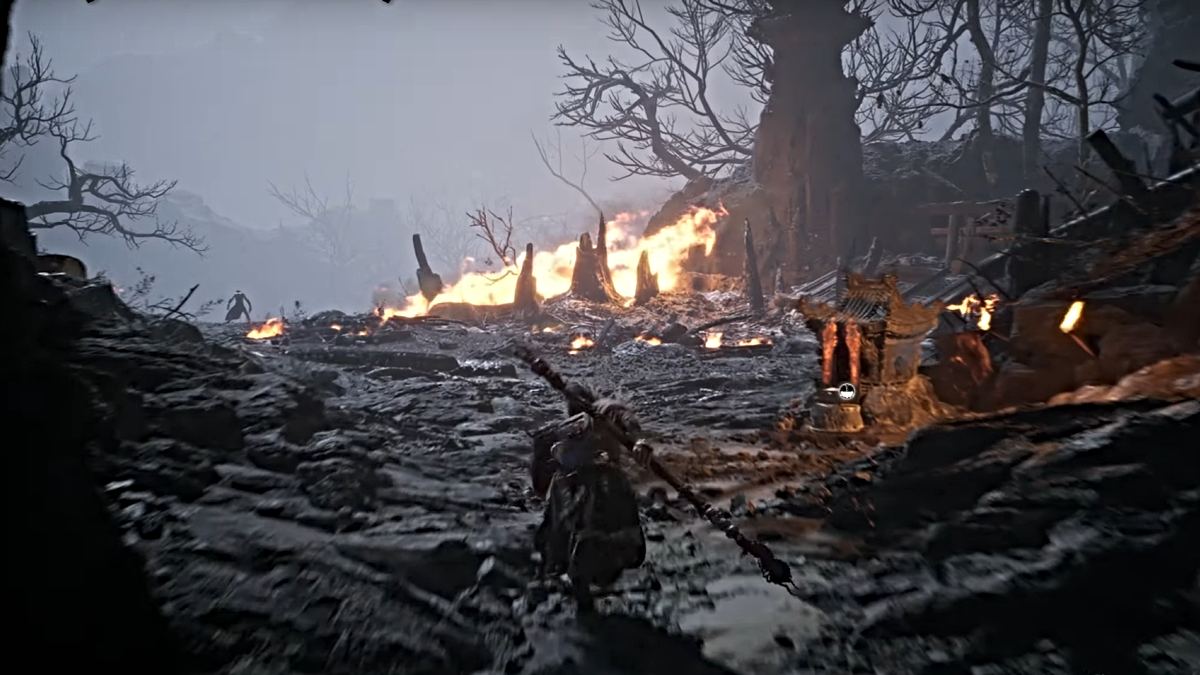
Image via ‘Arbuckle’ (YouTube)
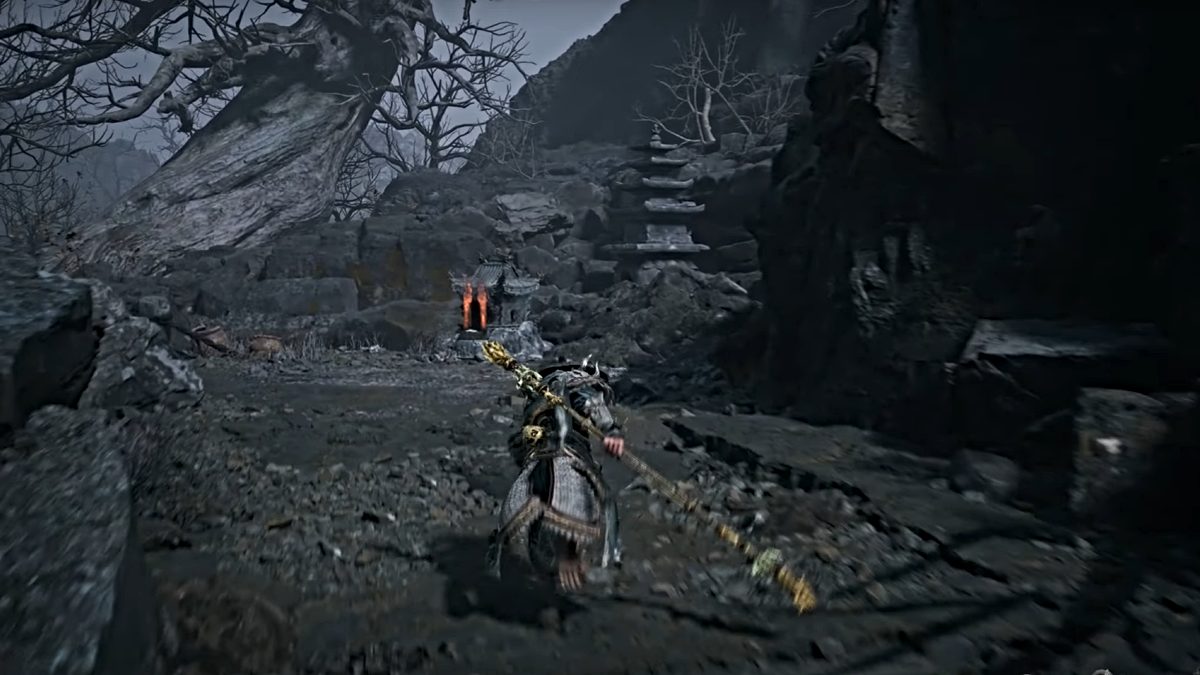
Image via ‘Arbuckle’ (YouTube)
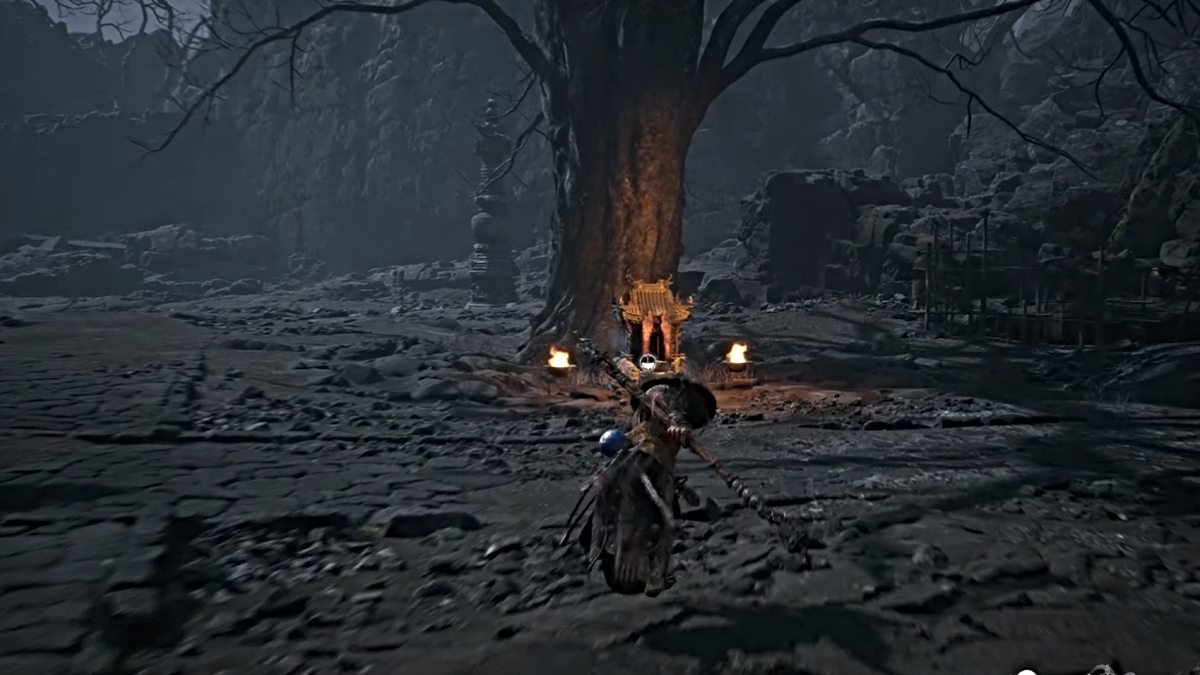
Image via ‘Arbuckle’ (YouTube)
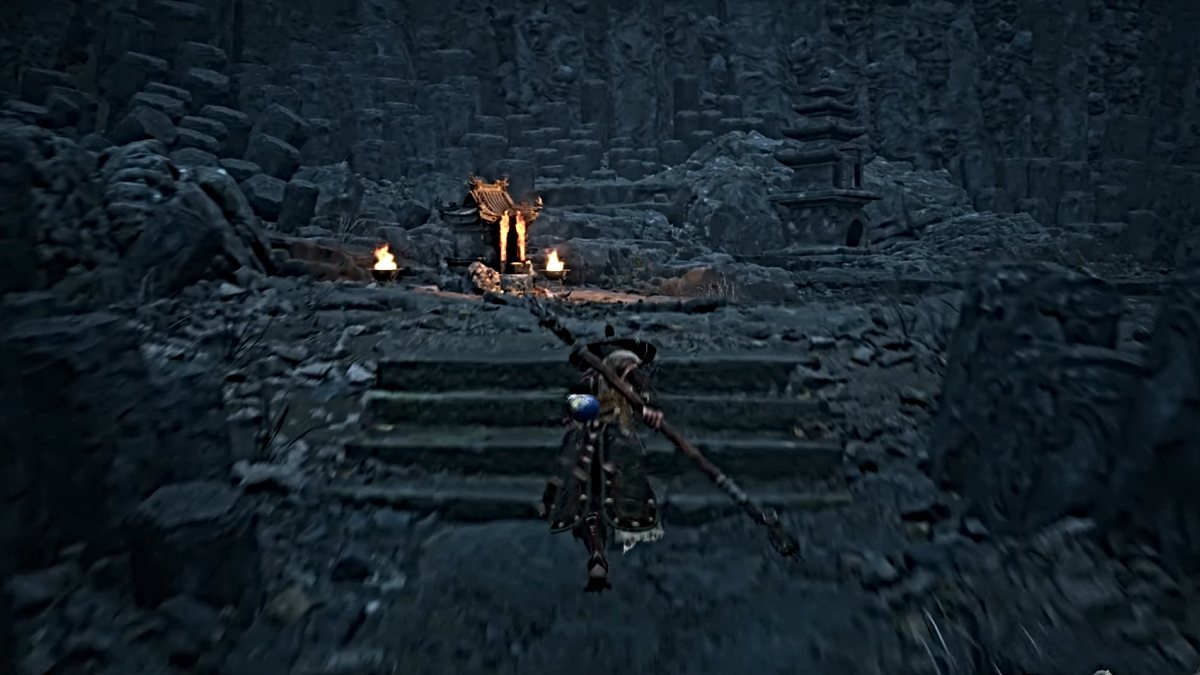
Image via ‘Arbuckle’ (YouTube)
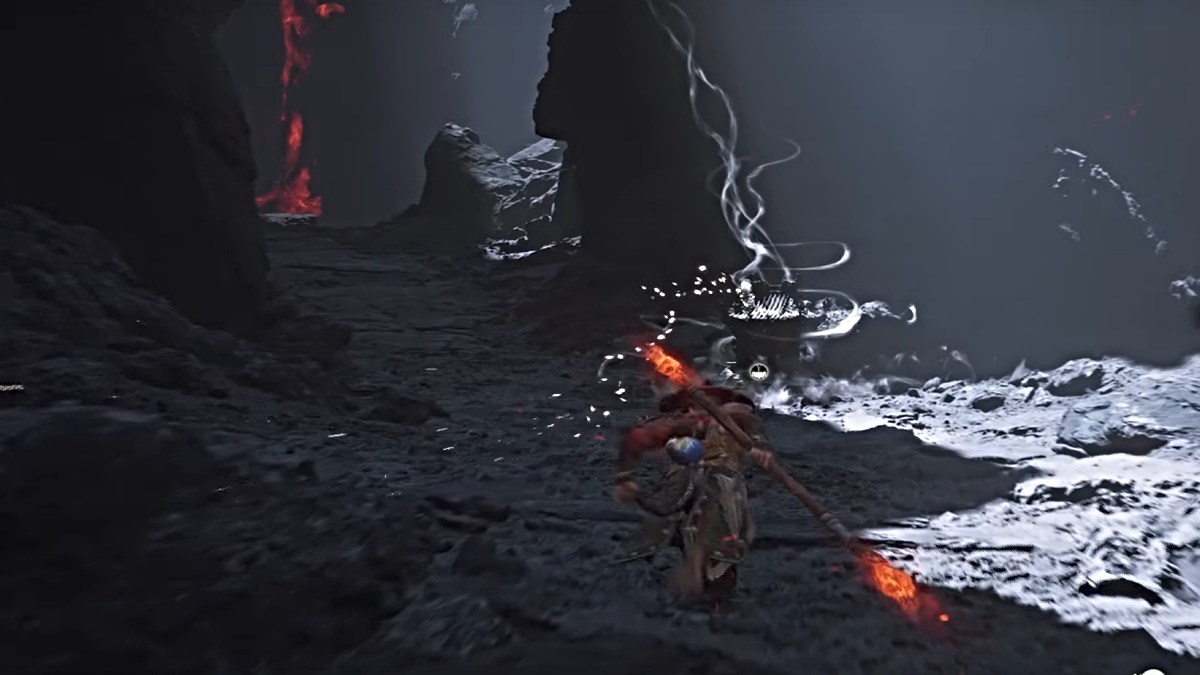
Image via ‘Arbuckle’ (YouTube)
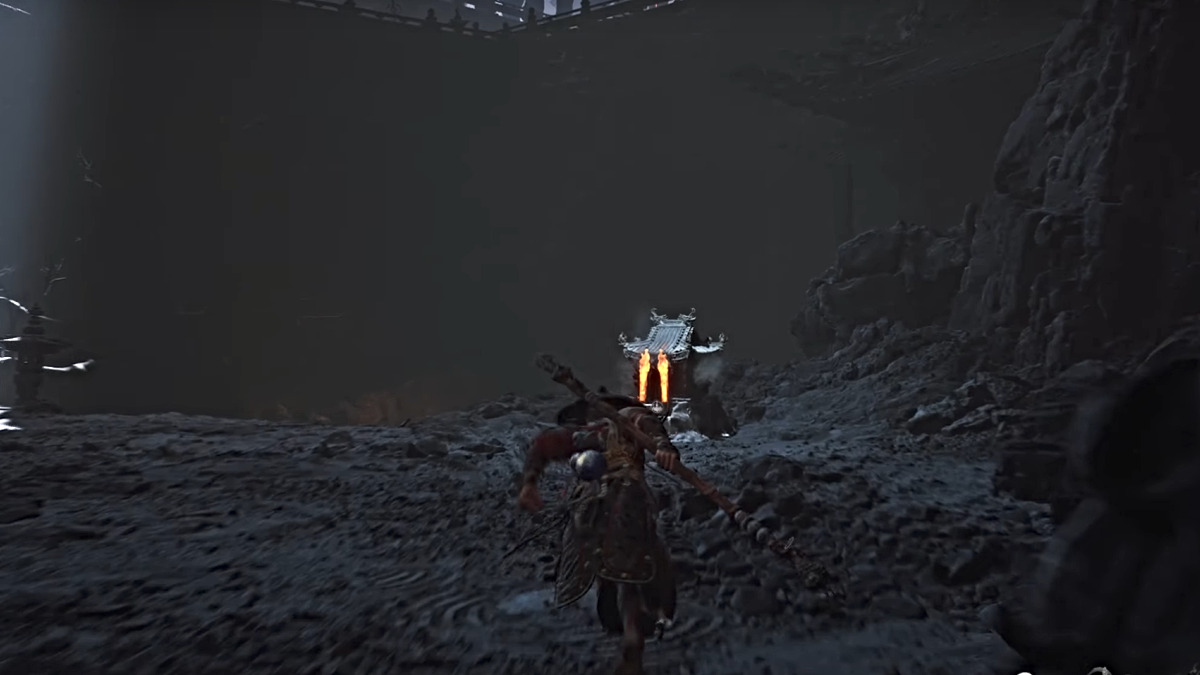
Image via ‘Arbuckle’ (YouTube)
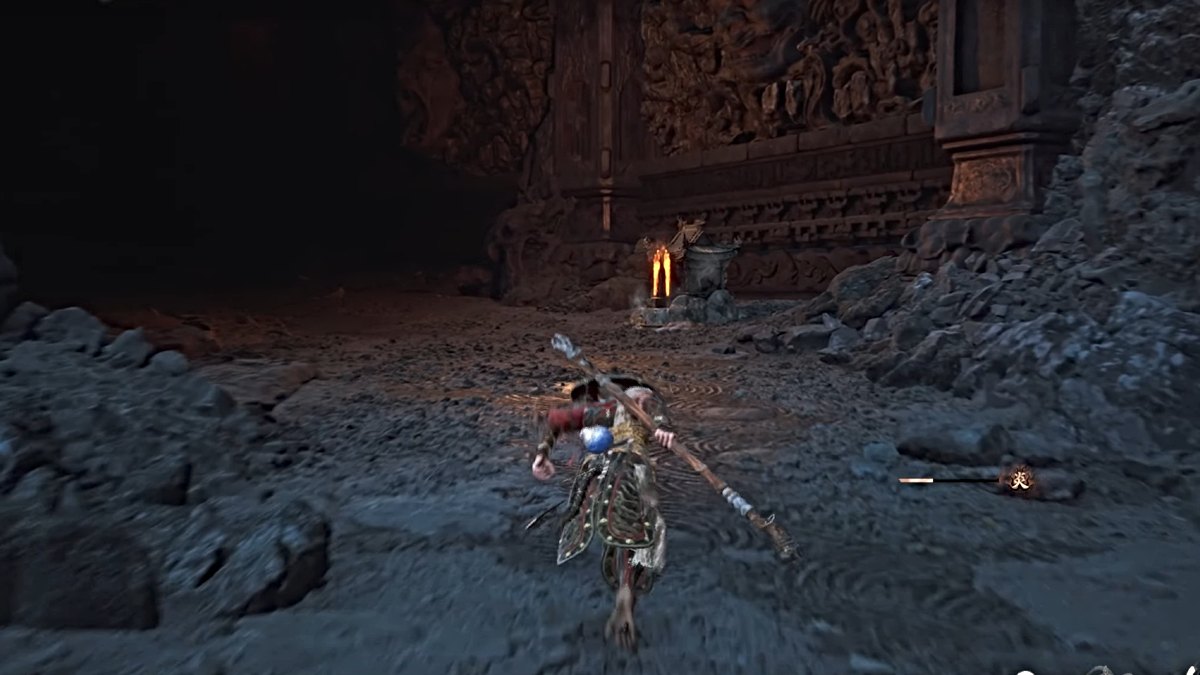
Image via ‘Arbuckle’ (YouTube)
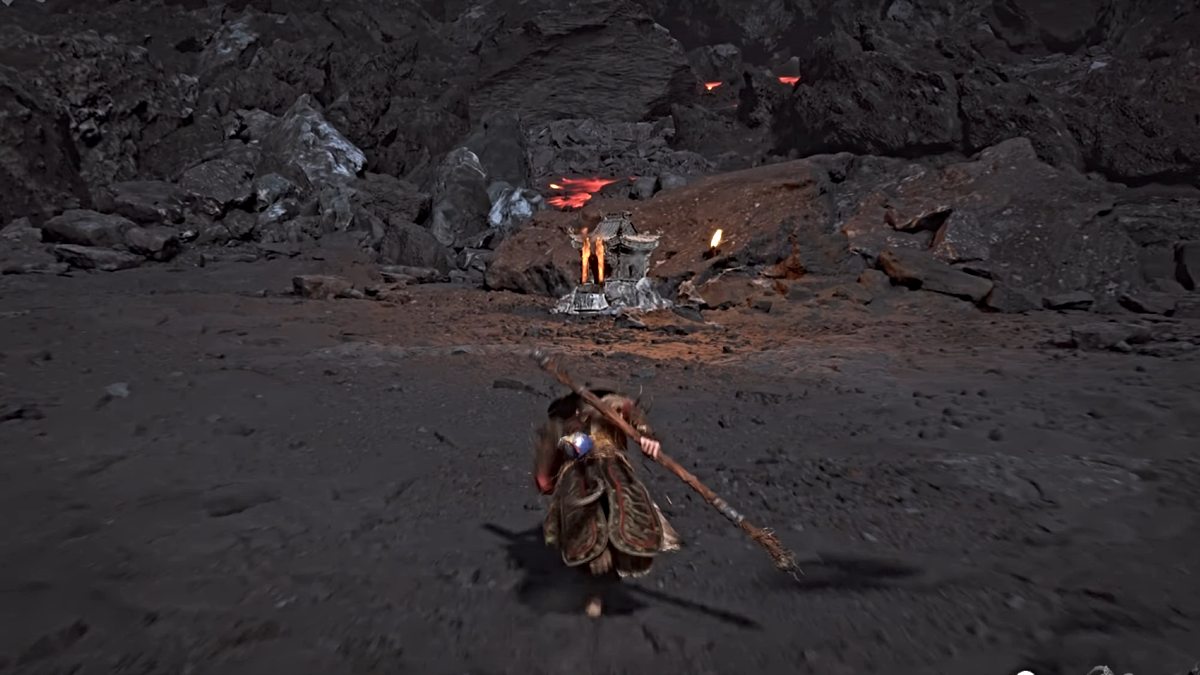
Image via ‘Arbuckle’ (YouTube)
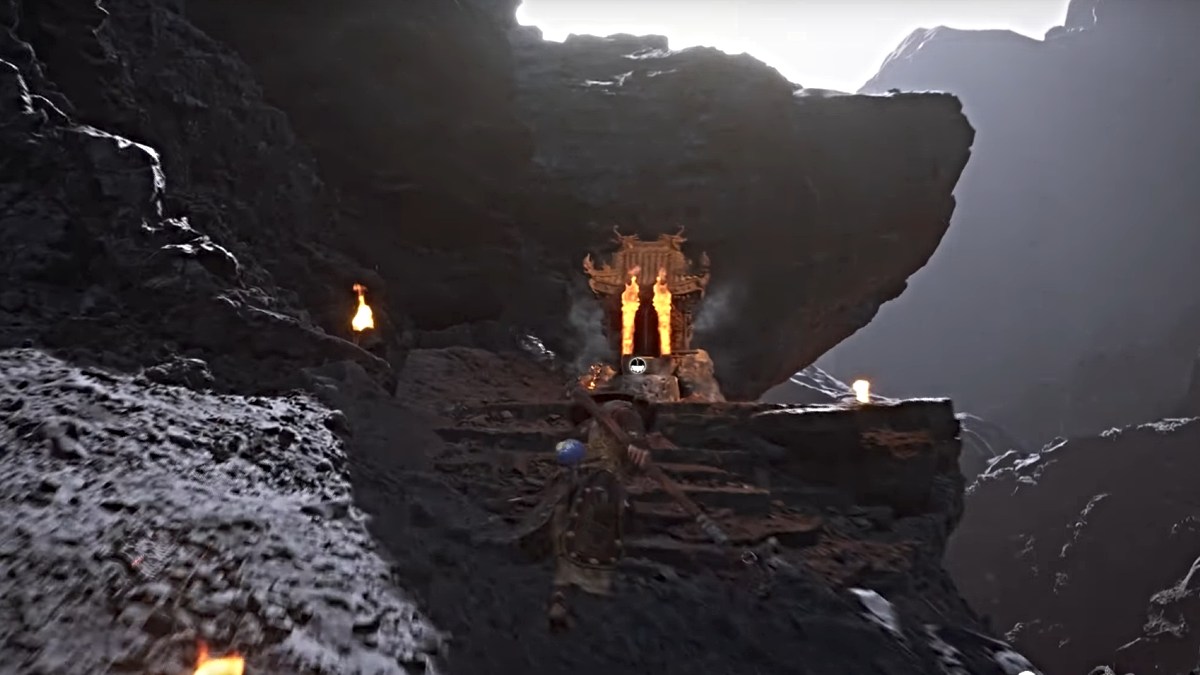
Image via ‘Arbuckle’ (YouTube)
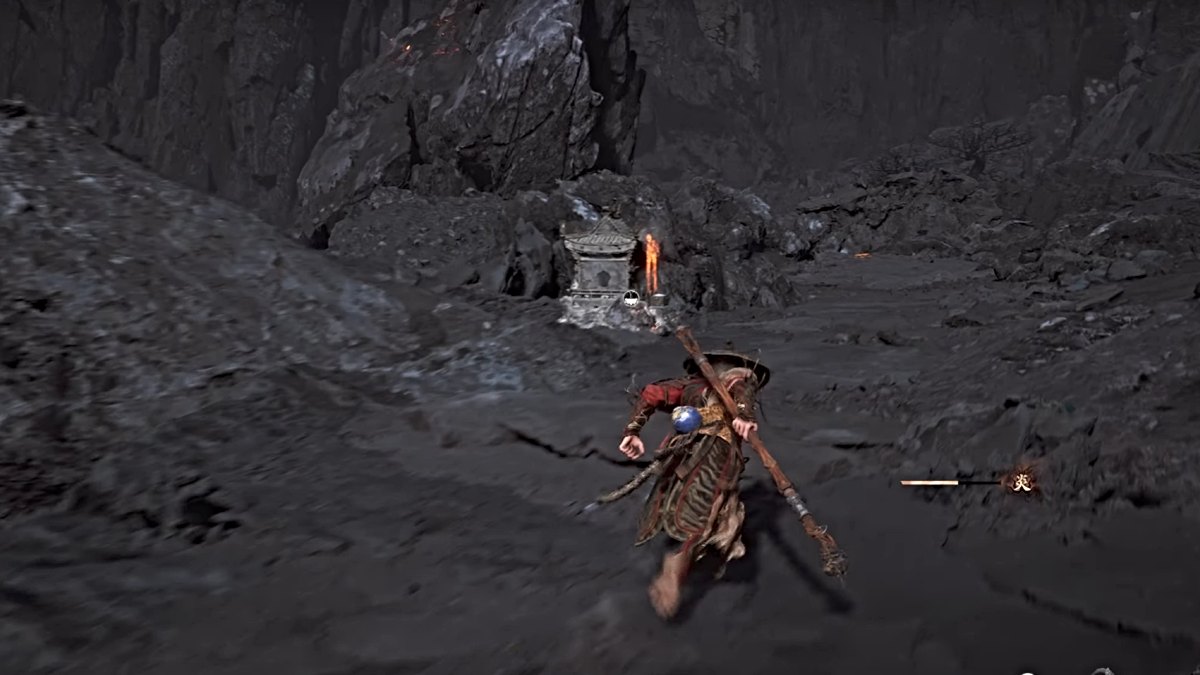
Image via ‘Arbuckle’ (YouTube)

Image via ‘Arbuckle’ (YouTube)

Image via ‘Arbuckle’ (YouTube)
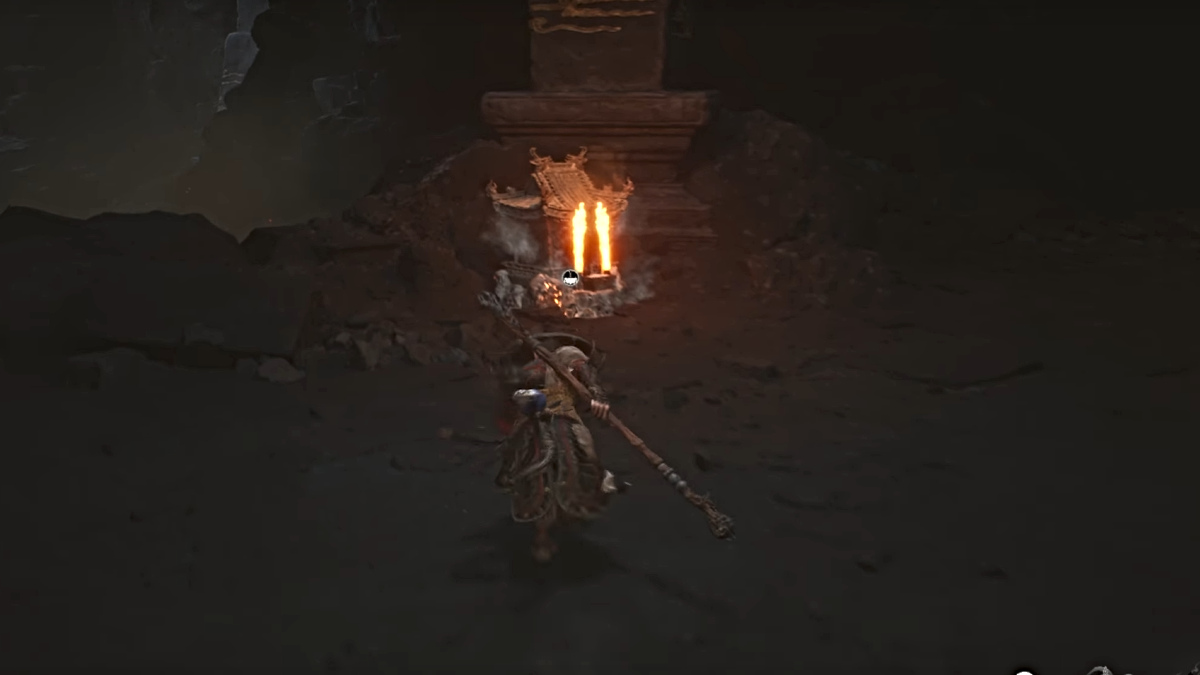
Image via ‘Arbuckle’ (YouTube)
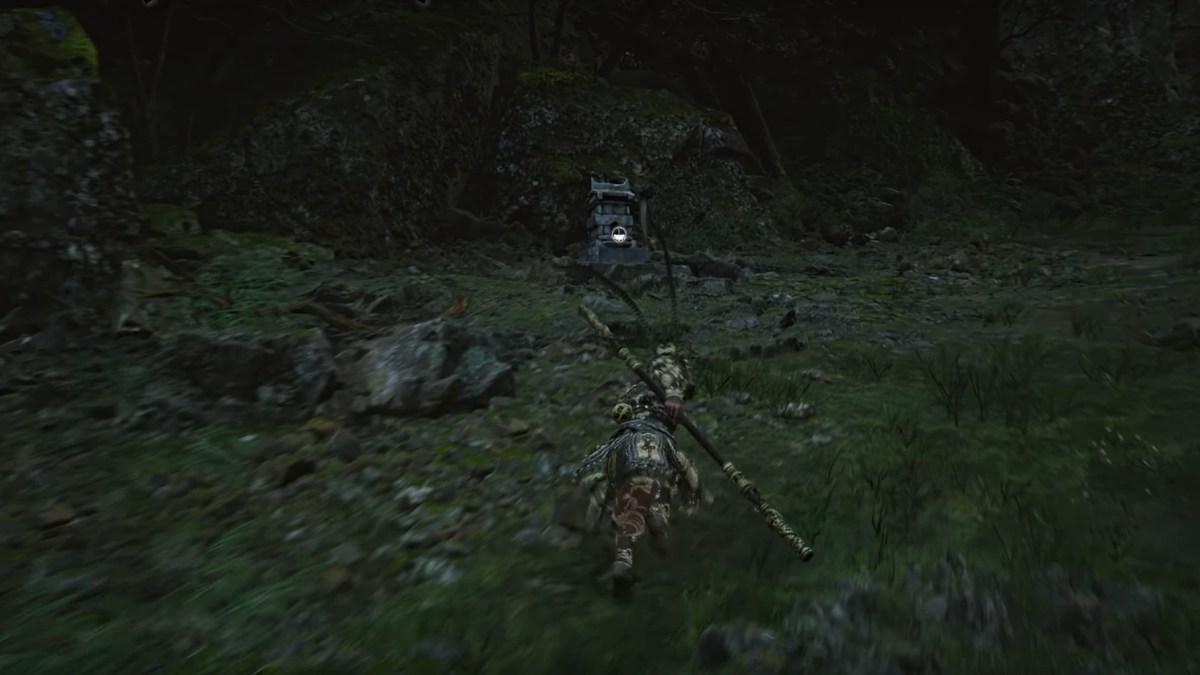
Image via ‘Arbuckle’ (YouTube)
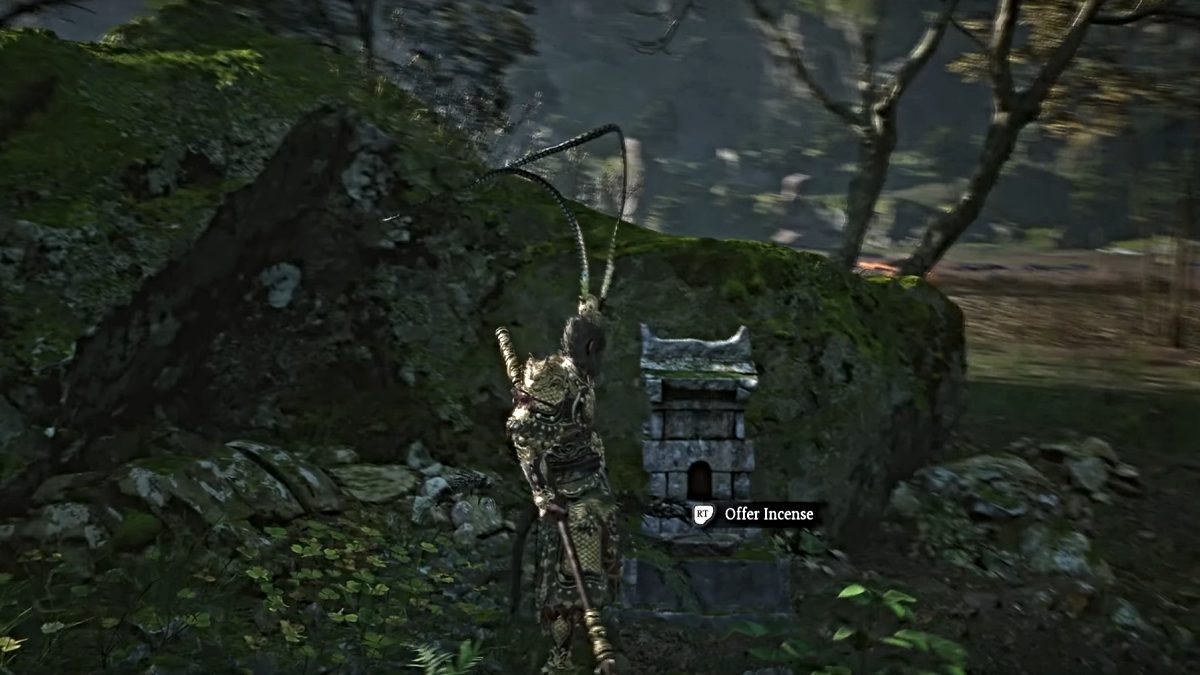
Image via ‘Arbuckle’ (YouTube)

Image via ‘Arbuckle’ (YouTube)
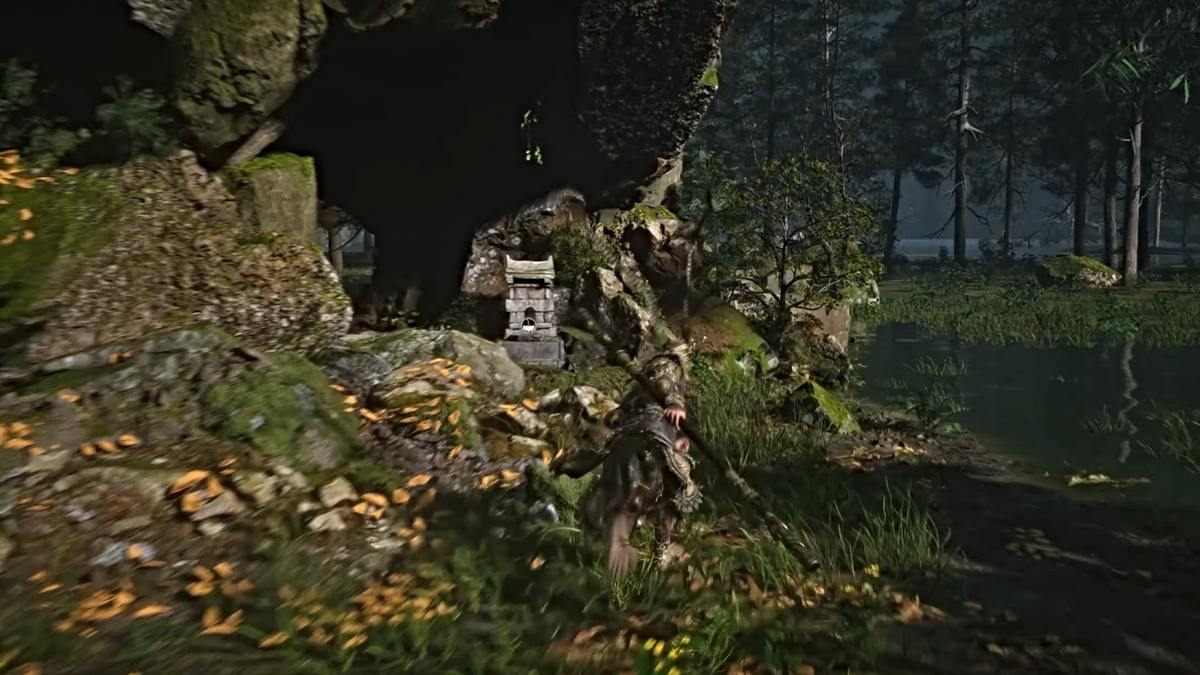
Image via ‘Arbuckle’ (YouTube)
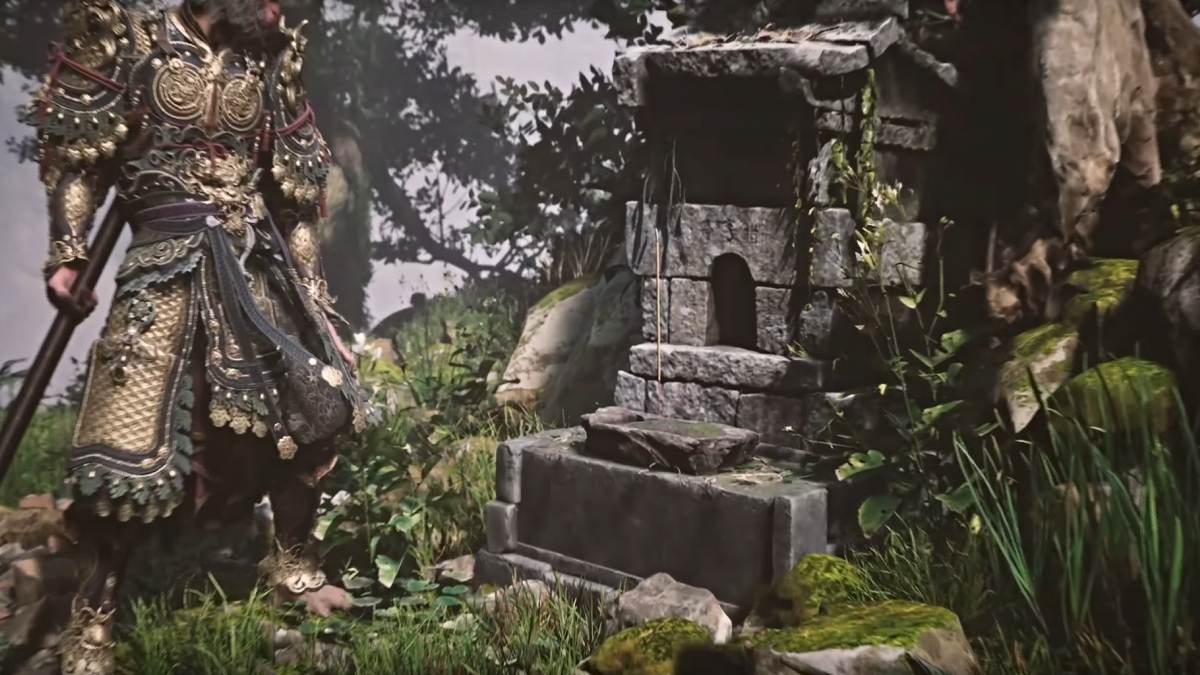
Image via ‘Arbuckle’ (YouTube)
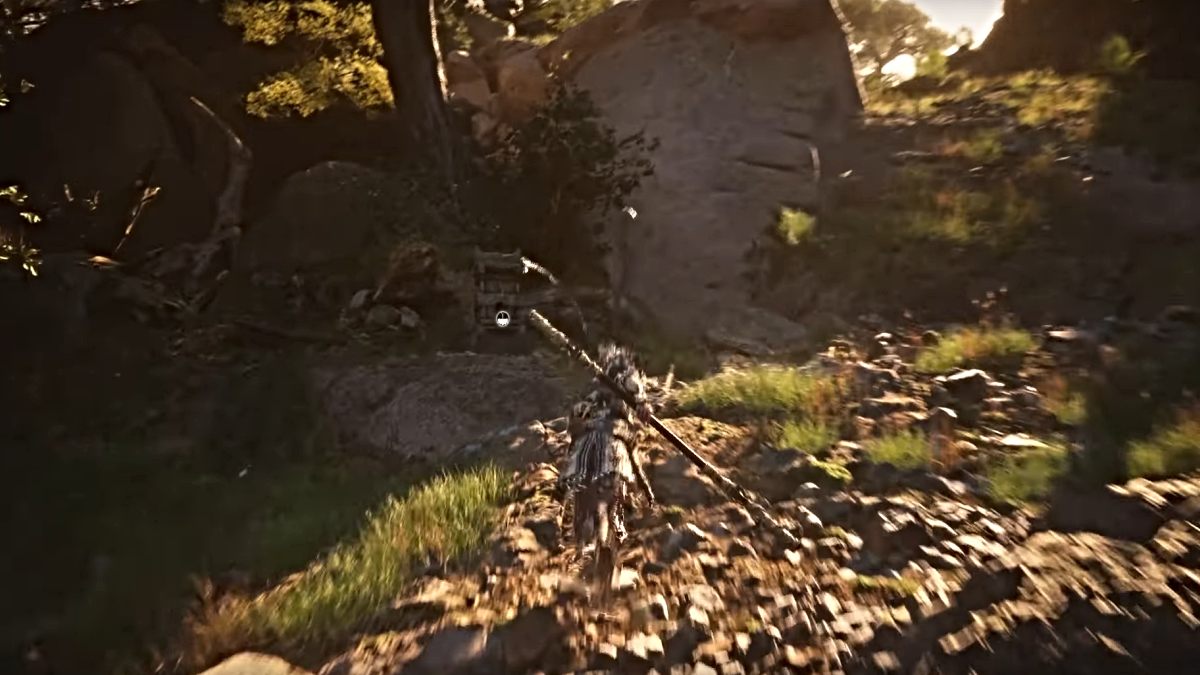
Image via ‘Arbuckle’ (YouTube)

Image via ‘Arbuckle’ (YouTube)
