Chirp !
Finding all 20 Golden Hour Origami Birds in Honkai : Star Rail will deserve you rewards that can be claimed from the Young Master Gold ’s " Great Tree " Occident of Golden Hour F2 . From getting stuck between door to drink automobile and on Clockie ’s eyelash , I ’ll show you all the places you may find these naughty chick around Golden Hour .
Origami Birds always observe themselves stuck in the oddest topographic point . If you want to get everyone in the nest , we ’ve got you covered .

All Gold Origami Bird locations in Honkai Star Rail
There are 20 Origami Birds hidden around Golden Hour , and you may search for them in any rescript , except for the first one , which unlocks the objective in the secret plan . Refer to each slideshow below for the exact location of the Origami Birds . Since they ’re camouflaged in the environment , cite the second image in each slideshow so you know exactly where to find them .
#1: Origami Bird
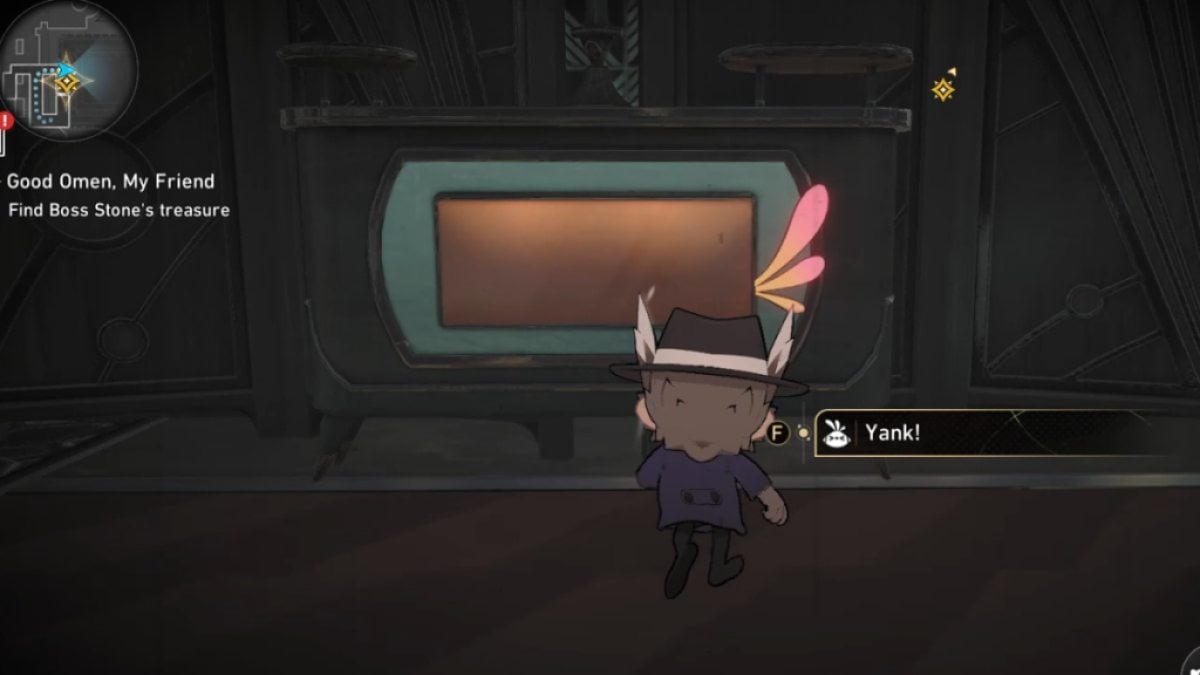
The first Origami Bird mechanically unlocks while completing theTales from the Golden Age Trailblaze Mission , where you must pluck the suspicious eyelash from the Clockie statue . It also unlocks the Young Master Gold ’s " Great Tree " in Golden Hour F2 , earmark you to claim rewards for call for razzing .
#2: Resilient Bird
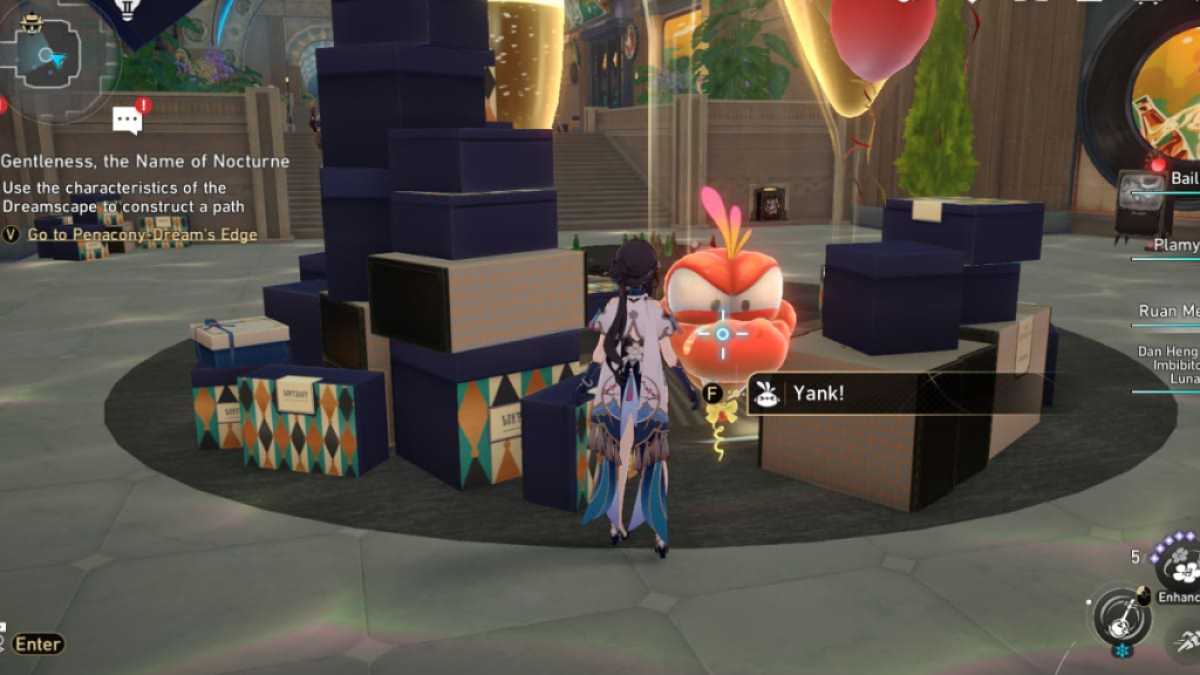
you’re able to come up an Origami Bird by head to the region marked above inGolden Hour F1 , but thearea is only approachable by entering the F1 Hanu ’s Adventure challenge . You ’ll be push to clear it during the Trailblaze Missions , but you may re - enter if you forget to salvage the bird .
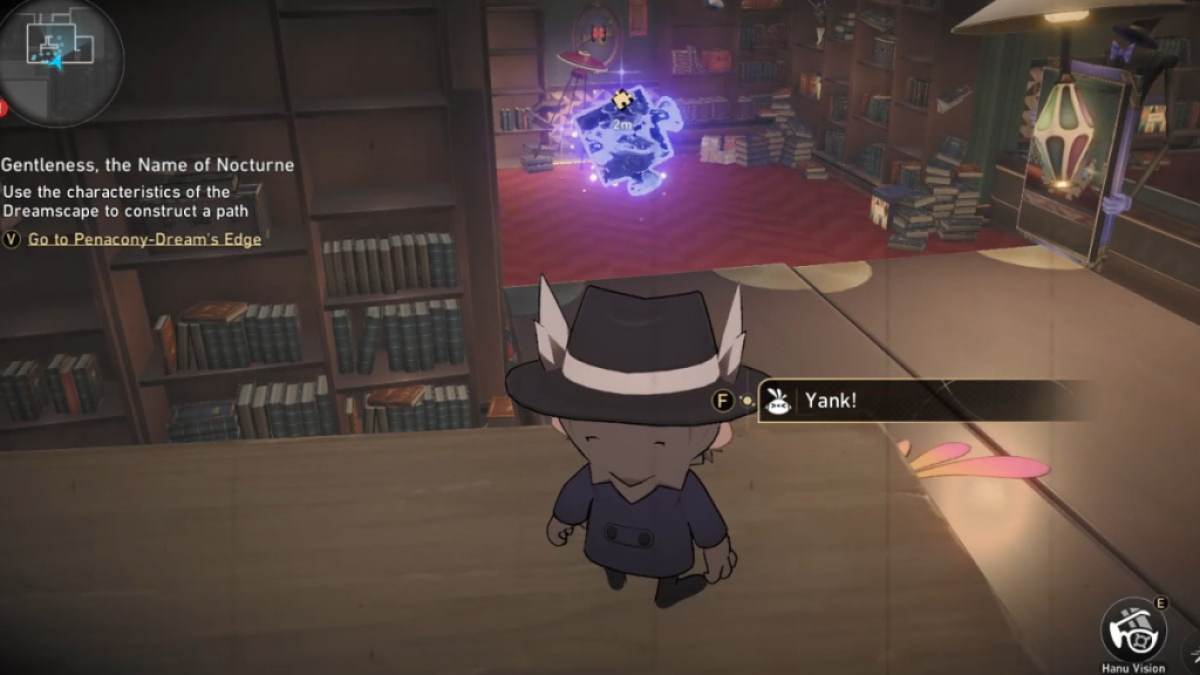
#3: Soaring Bird
The area mark above is located inGolden Hour F1 . Upon getting there , reckon for the Origami Bird camouflage as a Chubbie , then jerk it off to free it .
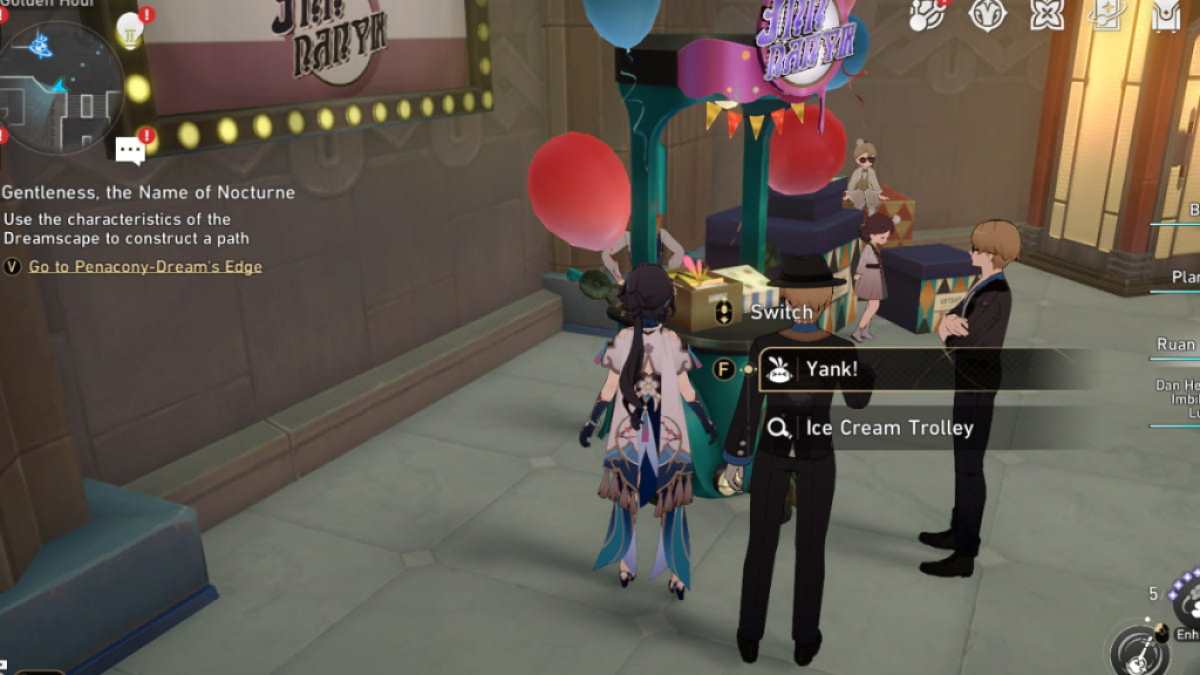
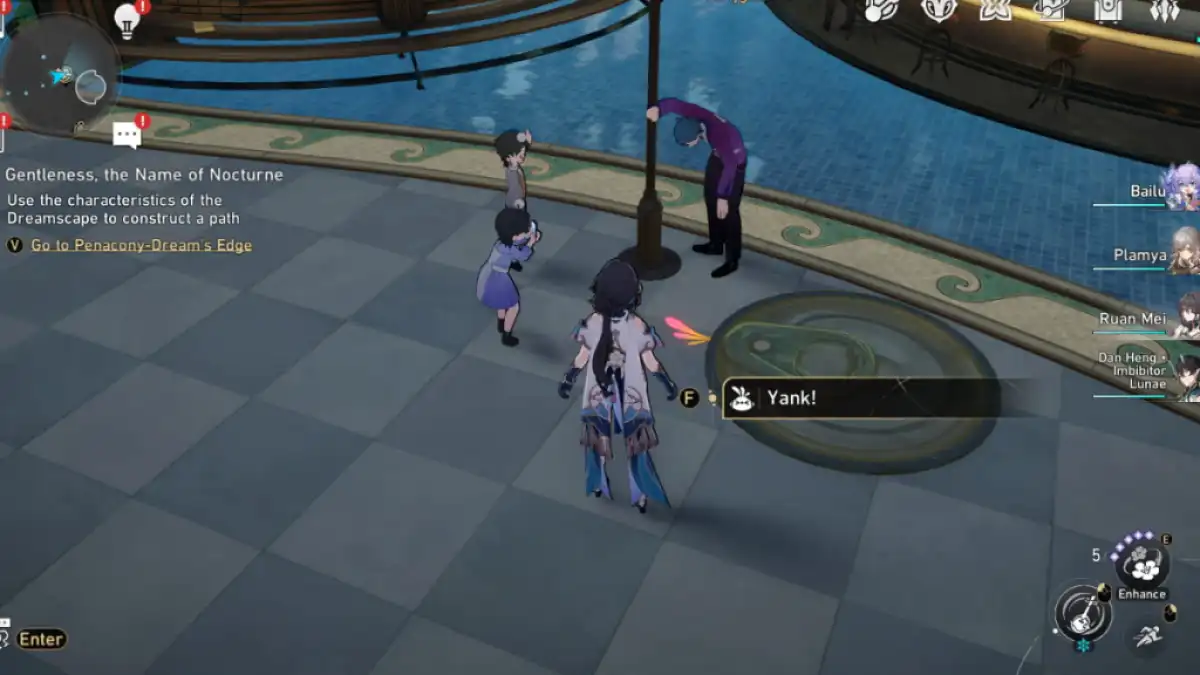
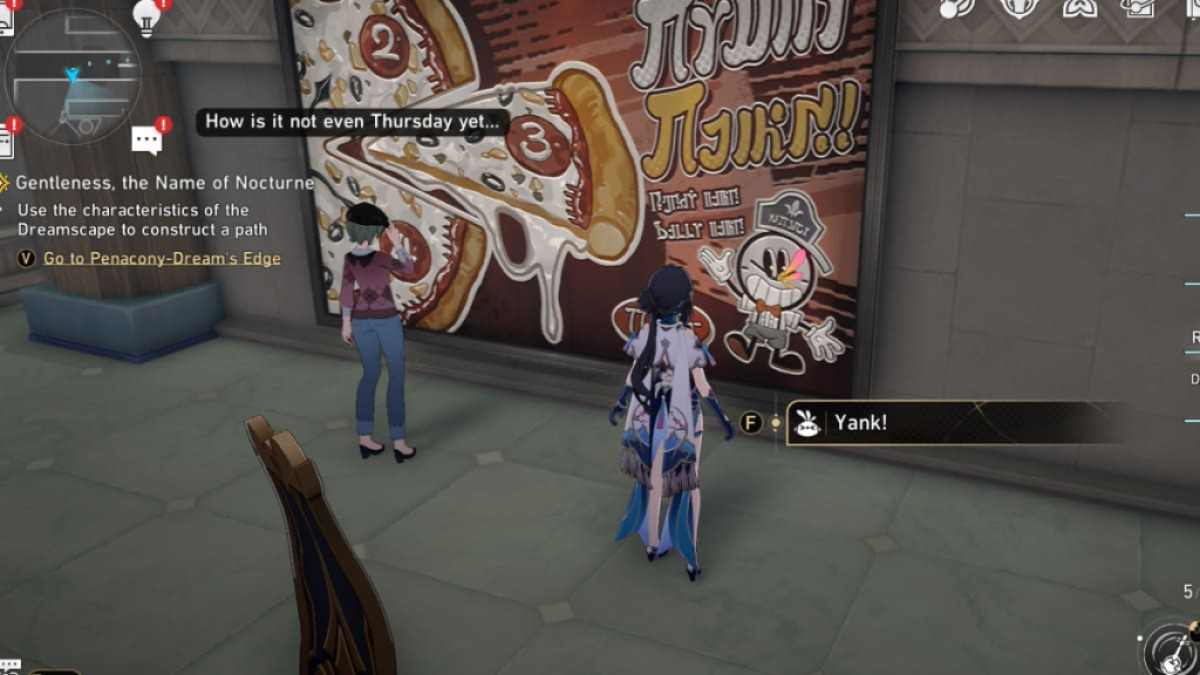
#4: Fan-Spoiling Bird
Head to the clearing in the westerly part ofGolden Hour F2 , as marked in the paradigm above . You ’ll notice an Ice Cream Trolley , where you’re able to yank an Origami Bird .
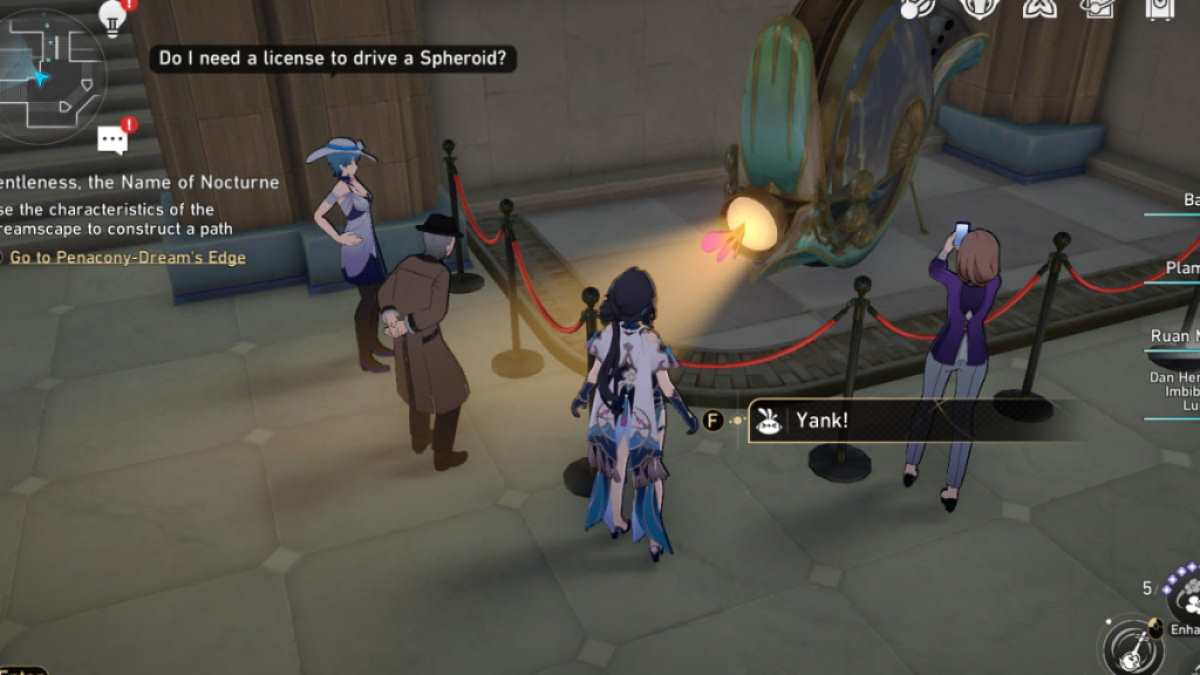
#5: Cold-Fearing Bird
point to the area circled above inGolden Hour F1 , where you ’ll find a vehicle on video display . An Origami Bird is enshroud inside the headlight — yank it off !
relate : All Penacony Golden Hour Treasure Chest Locations ( Map ) in Honkai Star Rail
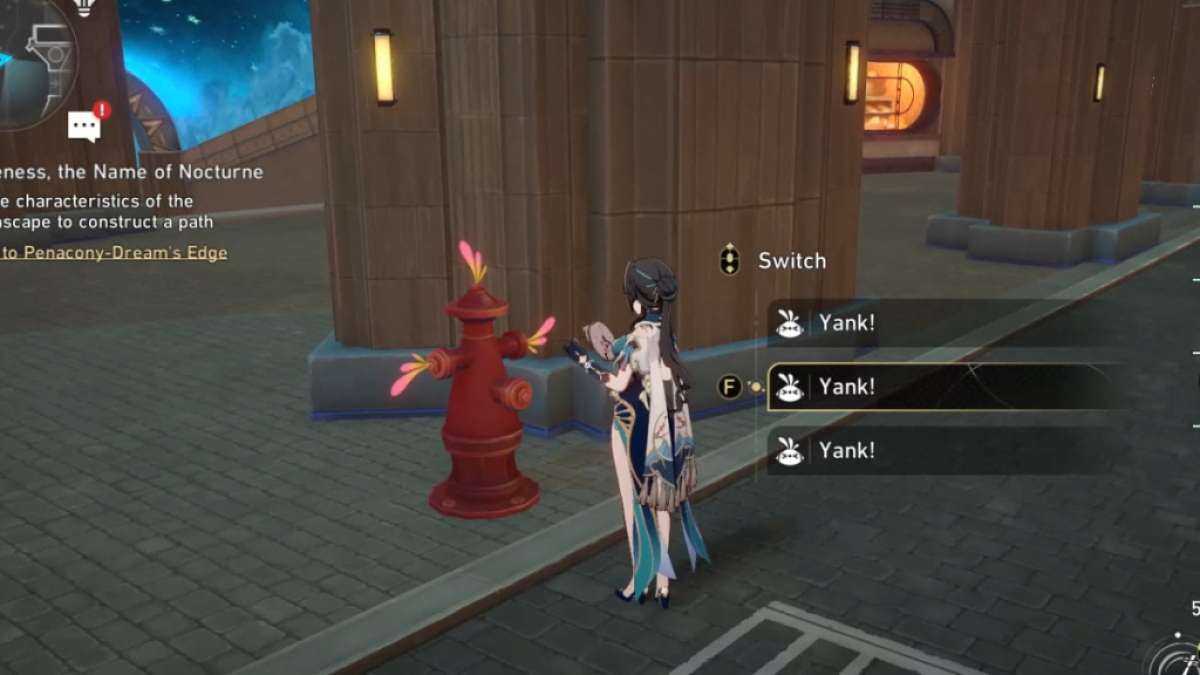
#6: Naughty Bird
InGolden Hour F2 , head to the accurate area circled in the image above to find a fire hydrant , where you may seemingly yank three Origami Birds . Yank all three of them to fill the Naughty Bird , who unfortunately only counts as one .
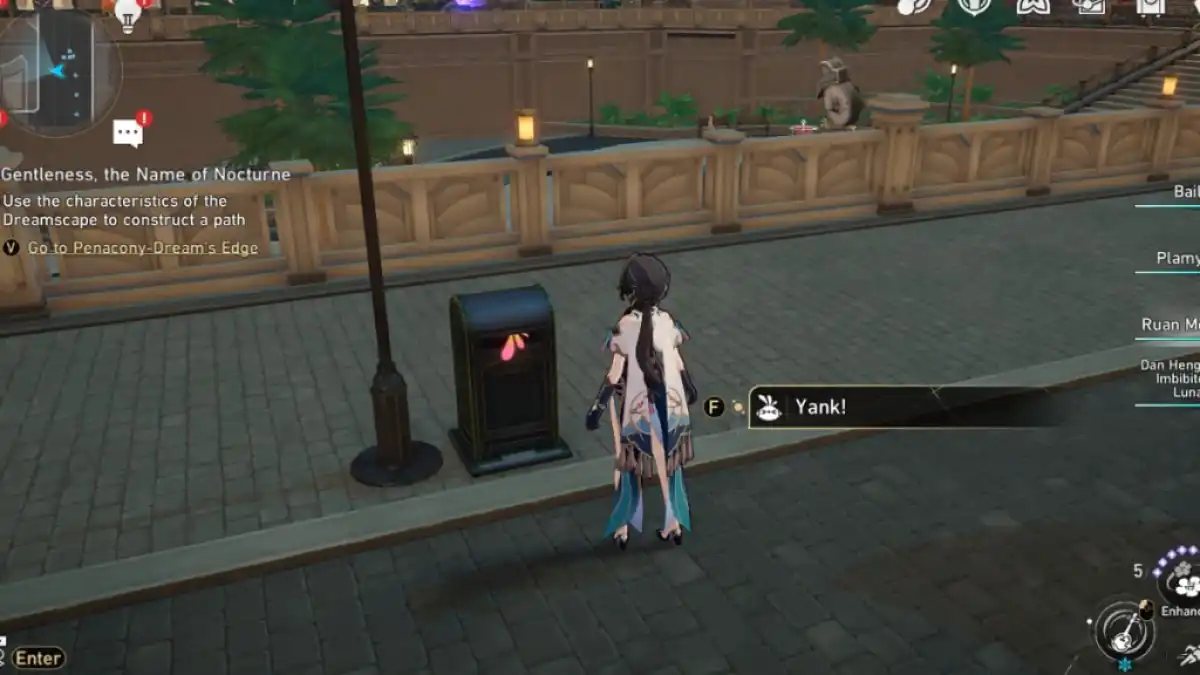
#7: Treasure Bird
Head to the area circle above inGolden Hour F2to find an Origami Bird trapped inside a trashcan . Yank it off to collect .
#8: Cowardly Bird
Head to the area circled above inGolden Hour F2 , thenlook upat the palm trees to happen an Origami Bird . look into it to zoom in closer , then yank it off .
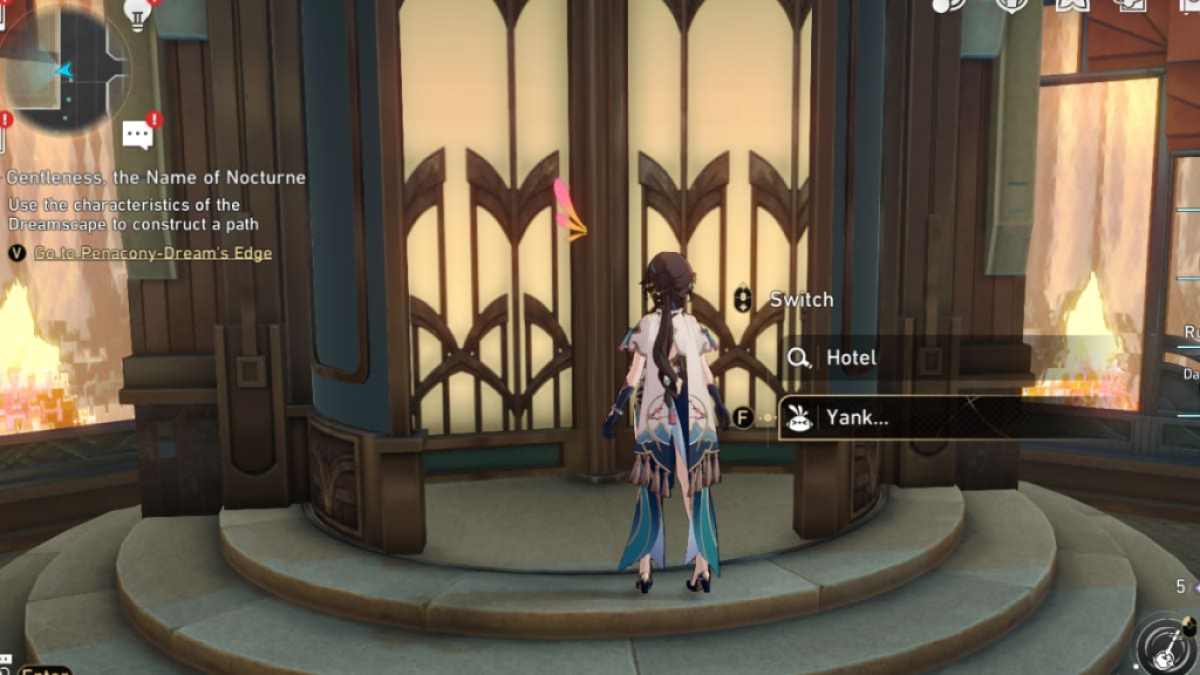
#9: Classy Bird
Head to the country circle in the image above , located inGolden Hour F2 . You ’ll find an Origami Bird stand by between the hotel door . The threshold are quite strong , so you need toyank three timesto free the bird .
Related : All The Reverie Treasure Chest Locations ( Map ) in Honkai Star Rail – Penacony realism
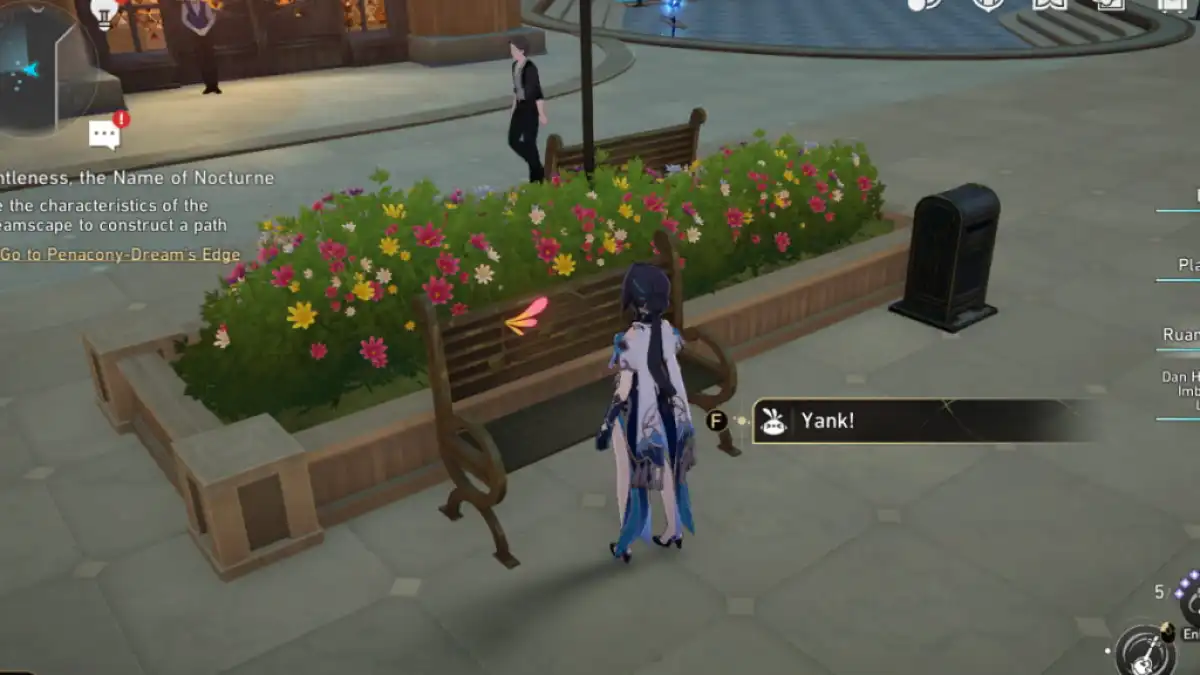
#10: Prudent Bird
steer to the area circulate in the image above inGolden Hour F2to find an Origami Bird stuck in a bench . There arefour similar - looking benchesin the neighborhood , so make certain to check all of them if you do n’t see the bird mighty aside . jerk the Origami Bird to fill out the objective lens .
#11: Mischievous Bird
channelise to the area pock above in the western part ofGolden Hour F2to receive an Origami Bird stuck on a shock . You take toyank it three times , as it will keep trying to lead forth from you .
#12: Foodie Bird
you’re able to determine the next Origami Bird stick in a manhole cover in front of Dancy , the regurgitation partygoer located west ofGolden Hour F2 . jerk it off to justify it .
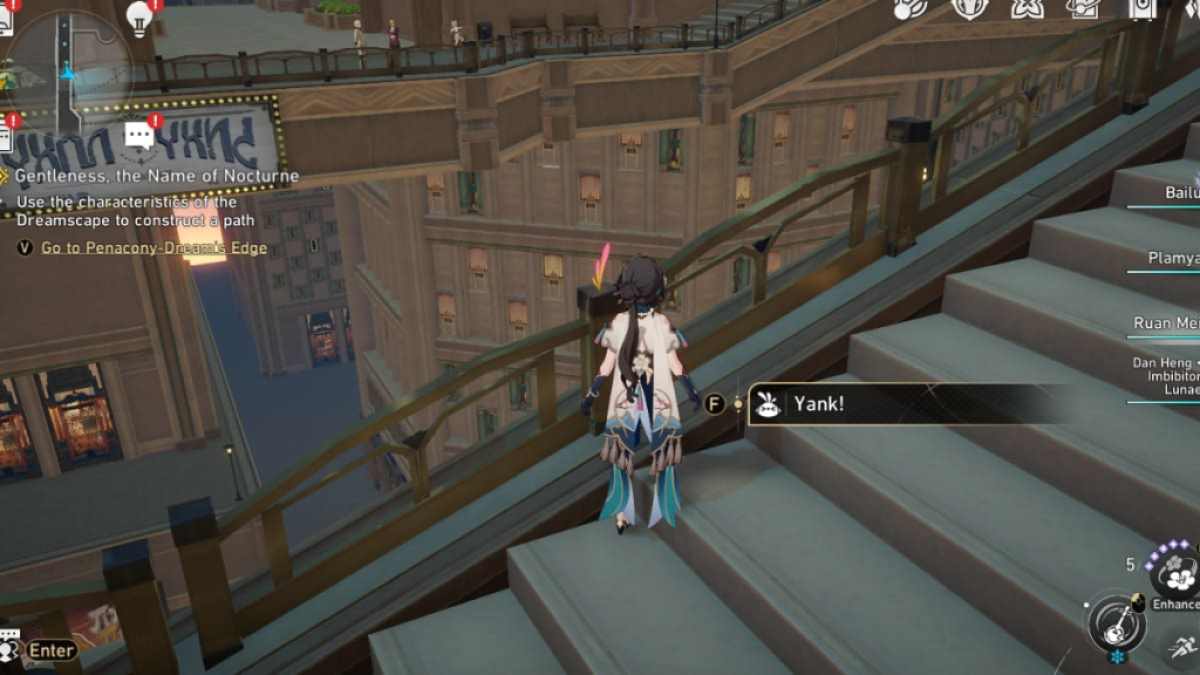
#13: Fast Bird
Head toGolden time of day F1and go to the exact area circle in the simulacrum above . You ’ll find an Origami Bird stick on the staircase ’s railing . You call for toyank it three timesas it will keep trying to get away .
#14: Groupie Bird
channelize to the area marked above inGolden Hour F1to find an Origami Bird surreptitiously camouflage as Clockie ’s nose . jerk it off to send it back to the Great Tree .
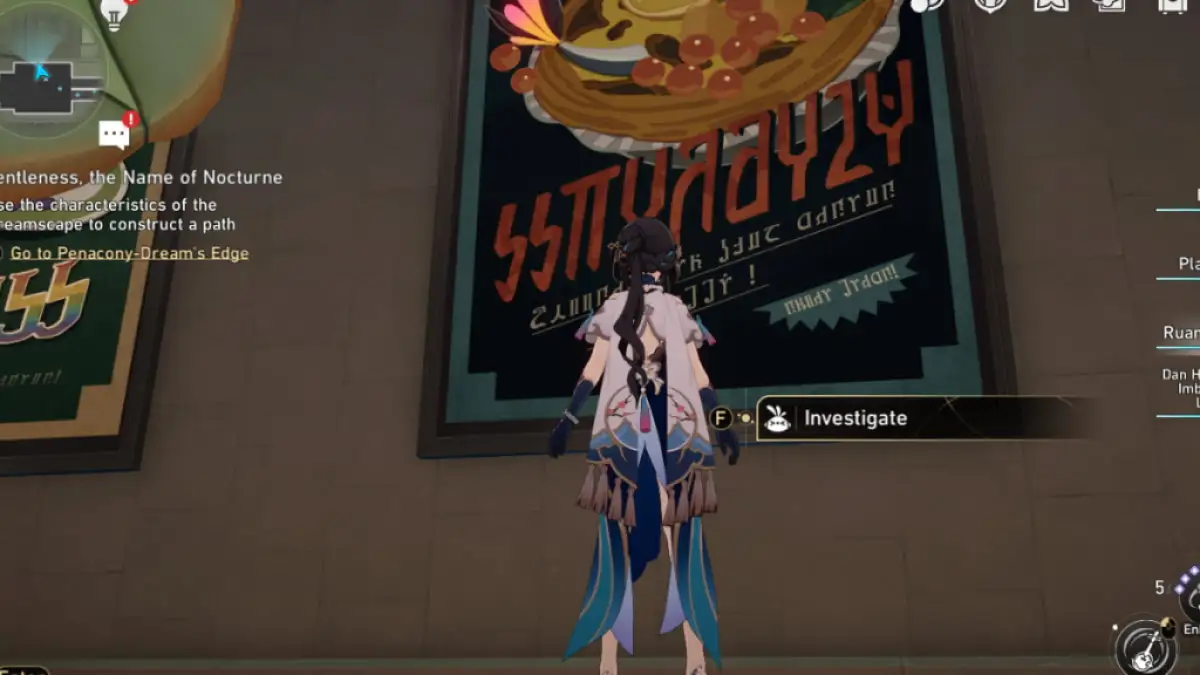
#15: Fish-Loving Bird
Head to the area circled above inGolden Hour F2to find an Origami Bird puzzle in a poster . Investigate it to zoom in , then yank it off to proceed .
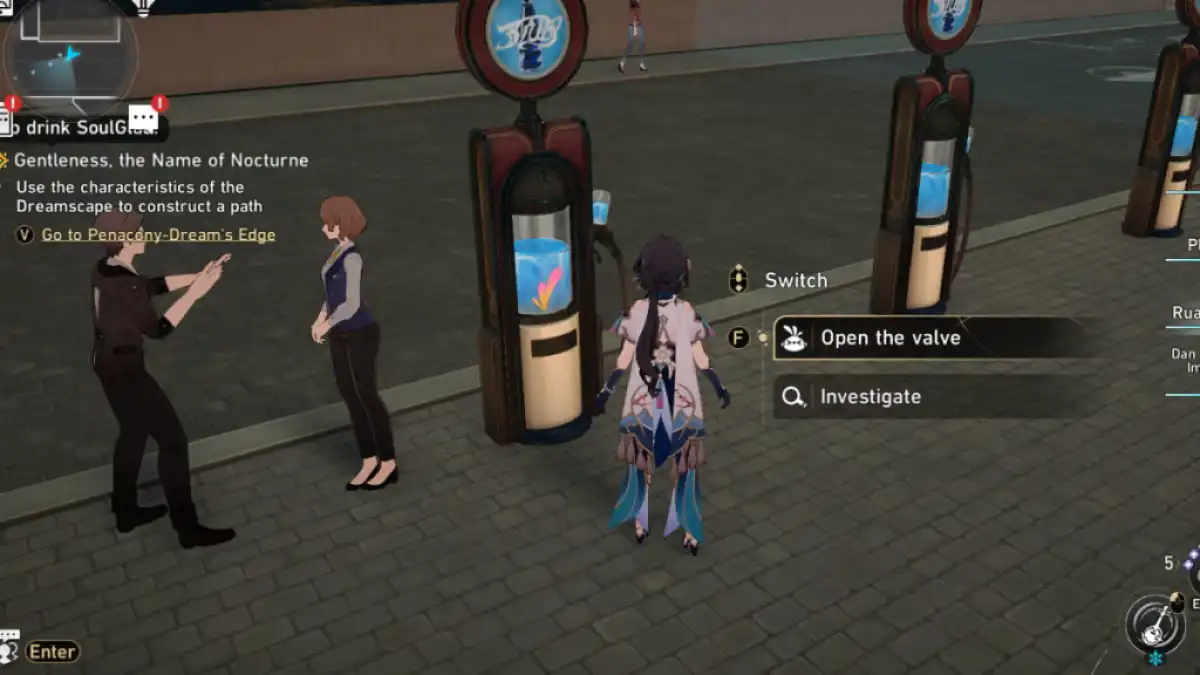
#16: Curious Bird
Head to the area circle above inGolden Hour F2to find out a row of drink dispensers . The Origami Bird is vex inside one of them . merely open up the valve to free it .
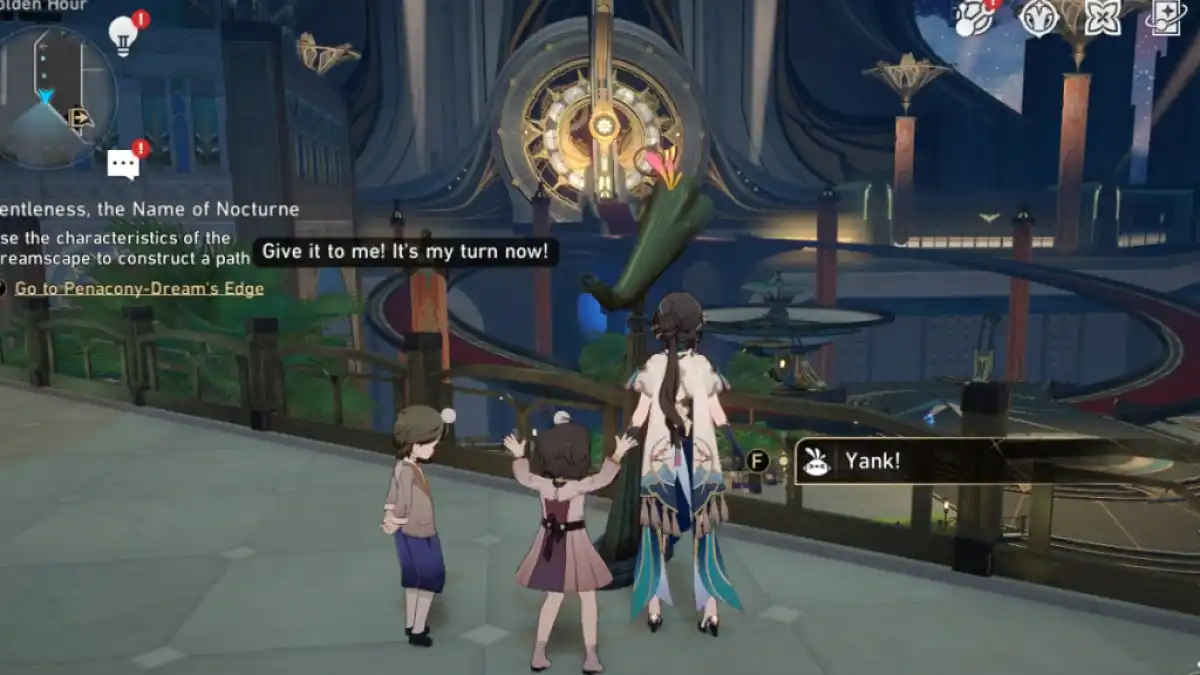
#17: Artistic Bird
There ’s one Origami Bird chilling inGolden Hour F3 , which you may get to by riding the lower Pinball Machine in F2 . Head to the area circulate above to find the bird stuck inside a scope . Yank it off to free it .
#18: Unlucky Bird
While the image above showcases the single-valued function in Golden Hour F1 , you may only get at the orbit byenteringHanu ’s Adventure on the bottom left hand of Golden Hour F2 . While collecting puzzler pieces , you’re able to utilize the teleporter to teleport upward and find an Origami Bird sting under the floorboard .
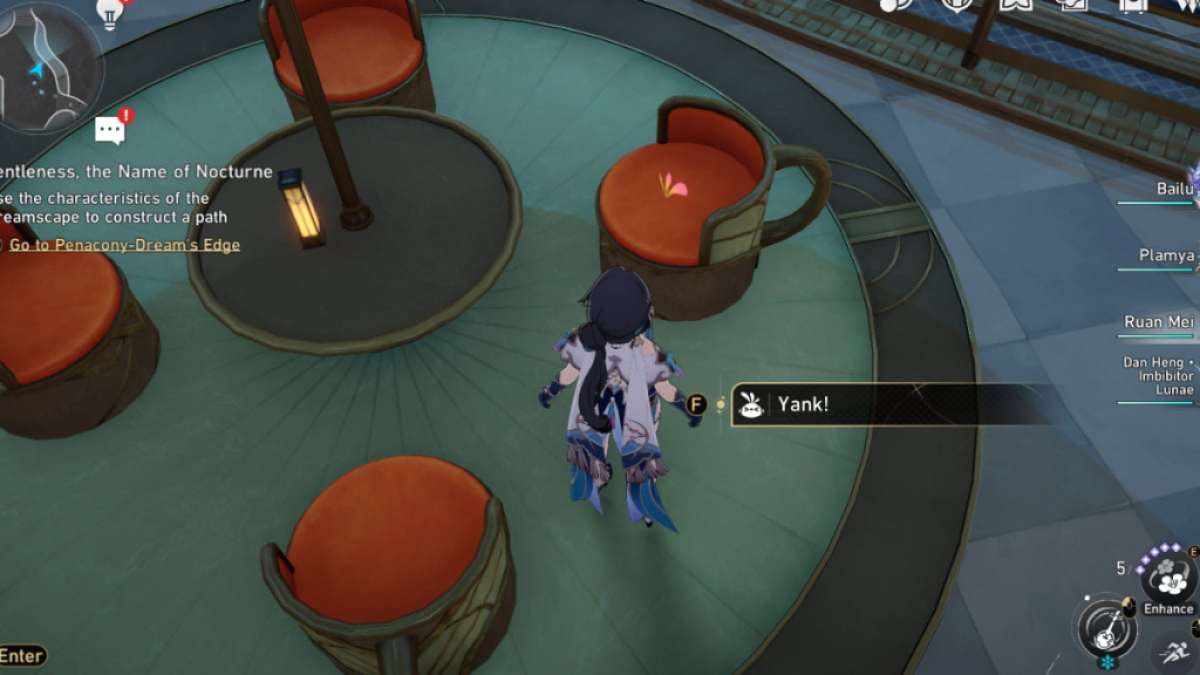
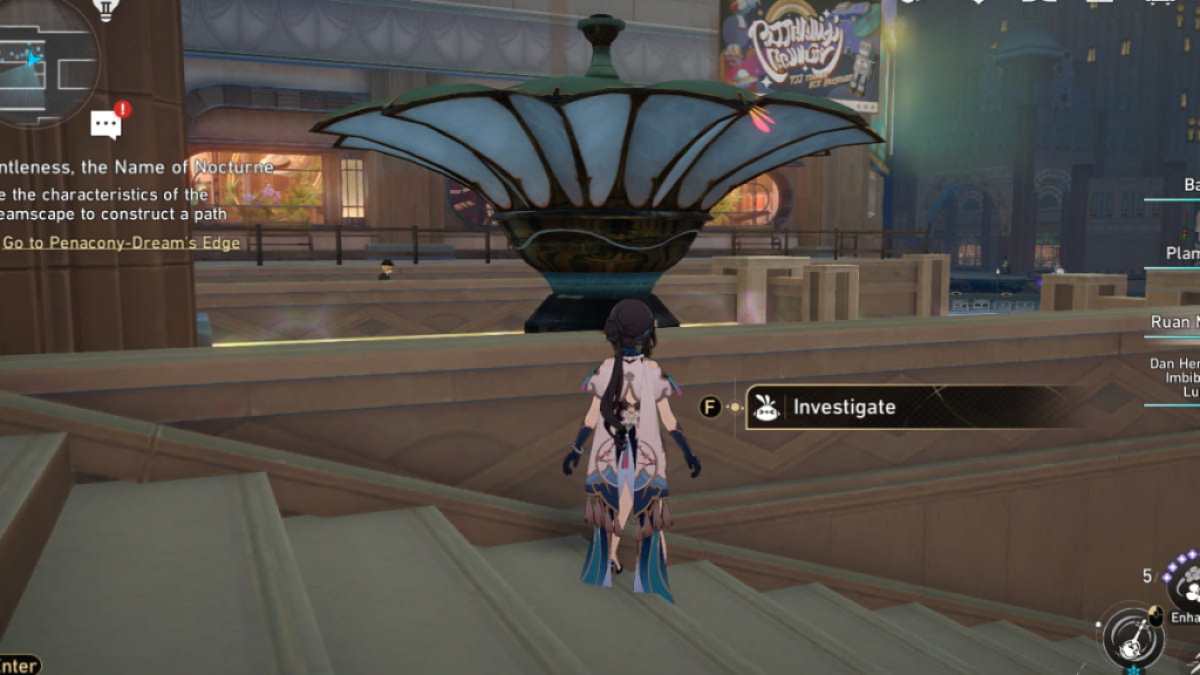
#19: Cool Bird
you’re able to bump the coolheaded Origami Bird among the clump inGolden Hour F2 . Head to the area circle above and enquire the fountain to surge in , then yank the doll off for salutary measure .
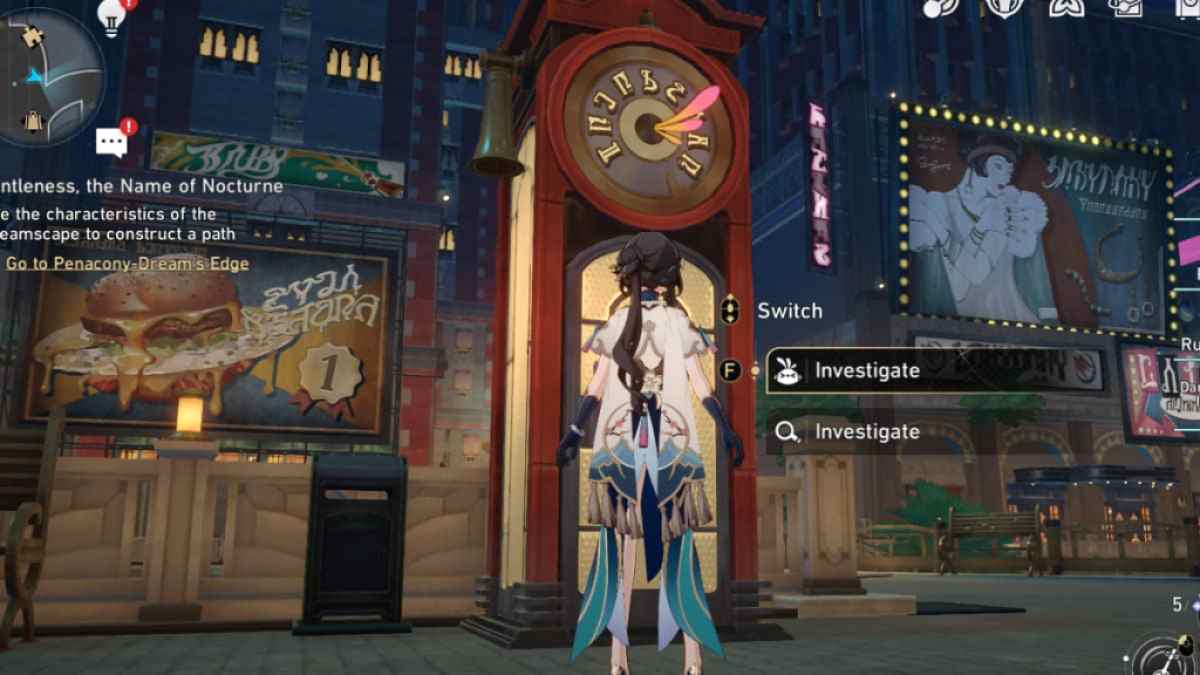
#20: Careless Bird
Head to the northern part ofGolden Hour F2to line up an Origami Bird stick in the speech sound booth ’s clock . Investigate it to zoom in , then yank it off to send off it back to Young Master Gold .
To discover more thing in Penacony , check out our templet onAll Dreamscape Pass sticker locations ( Map ) in Honkai Star Railhere on Pro Game Guides .
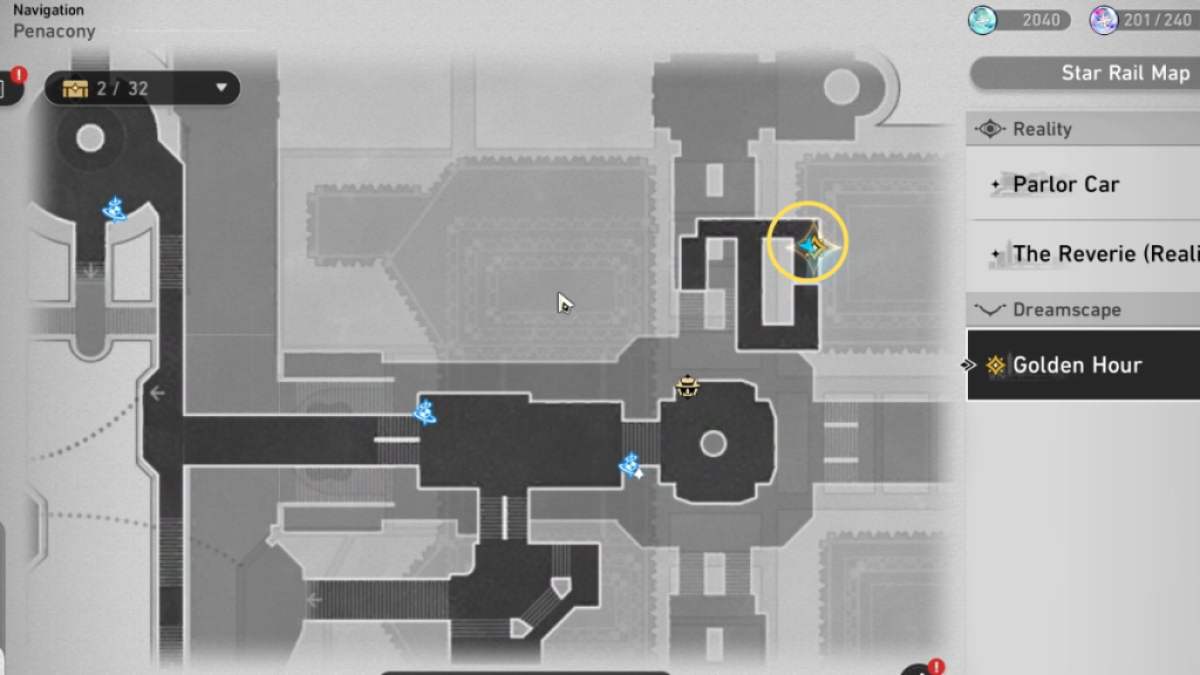
Image by Pro Game Guides
Screenshot by Pro Game Guides
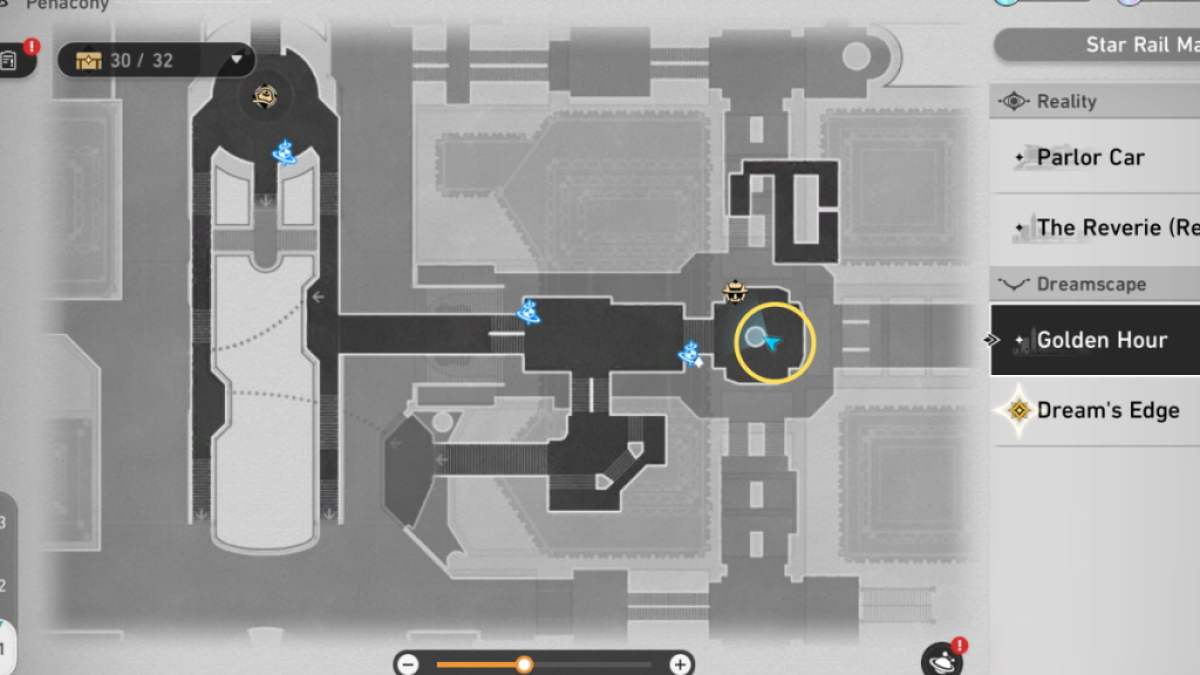
Image by Pro Game Guides
Screenshot by Pro Game Guides
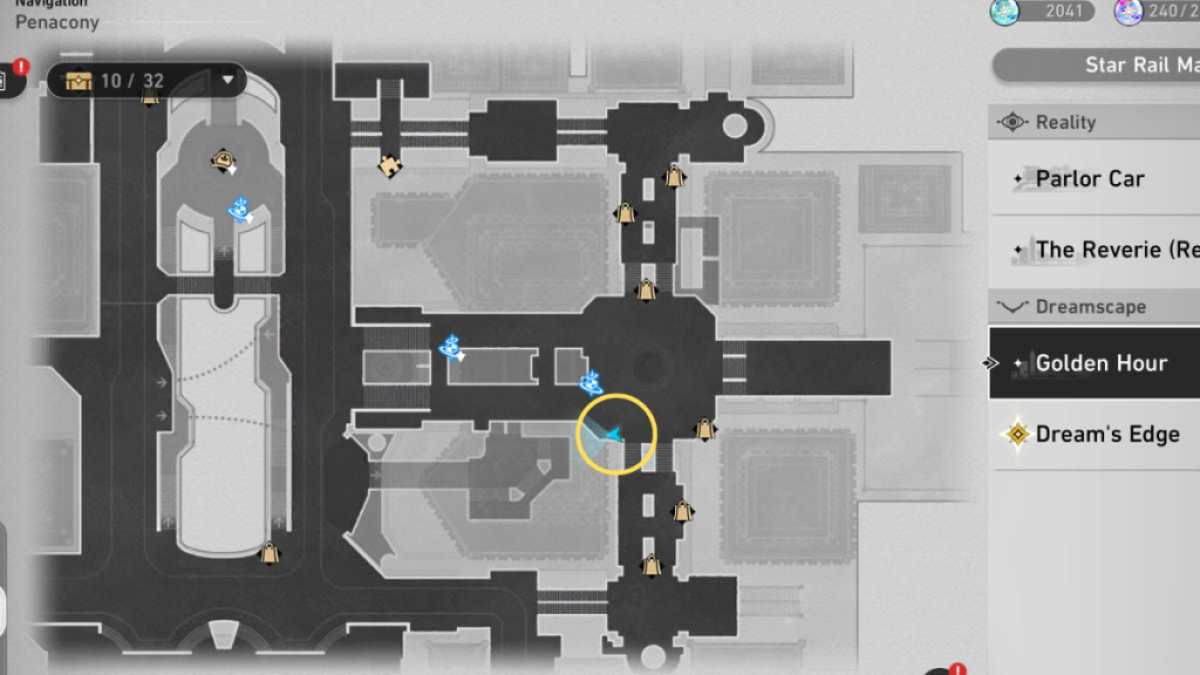
Image by Pro Game Guides
Screenshot by Pro Game Guides
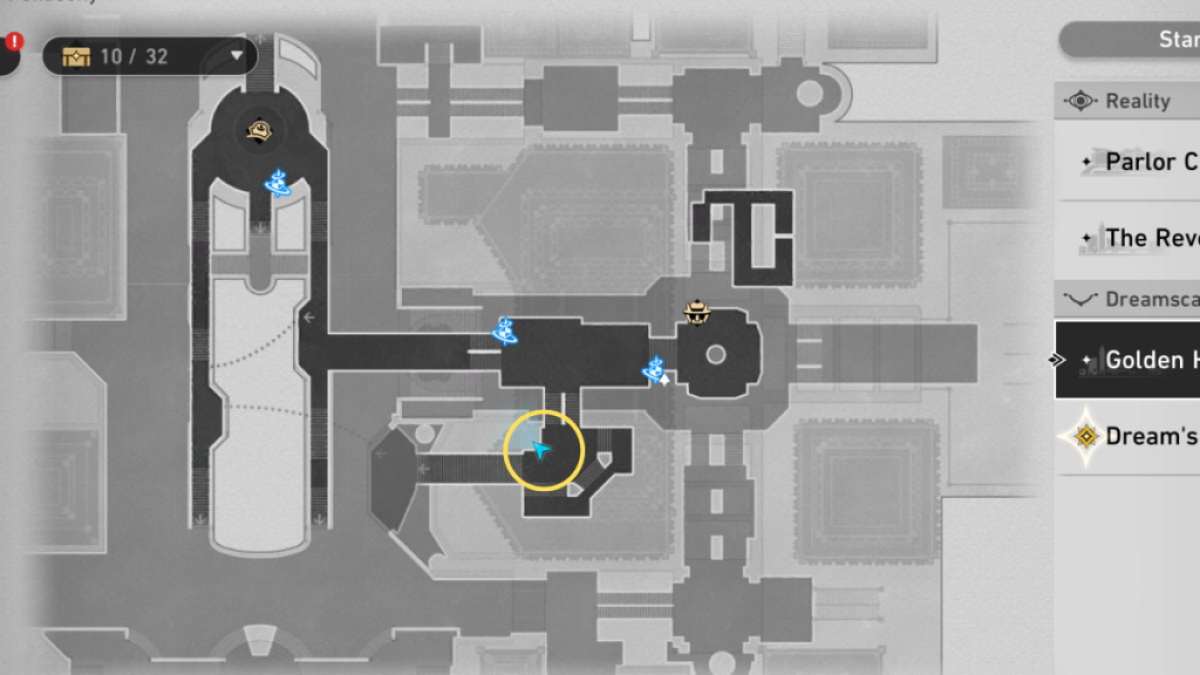
Image by Pro Game Guides
Screenshot by Pro Game Guides
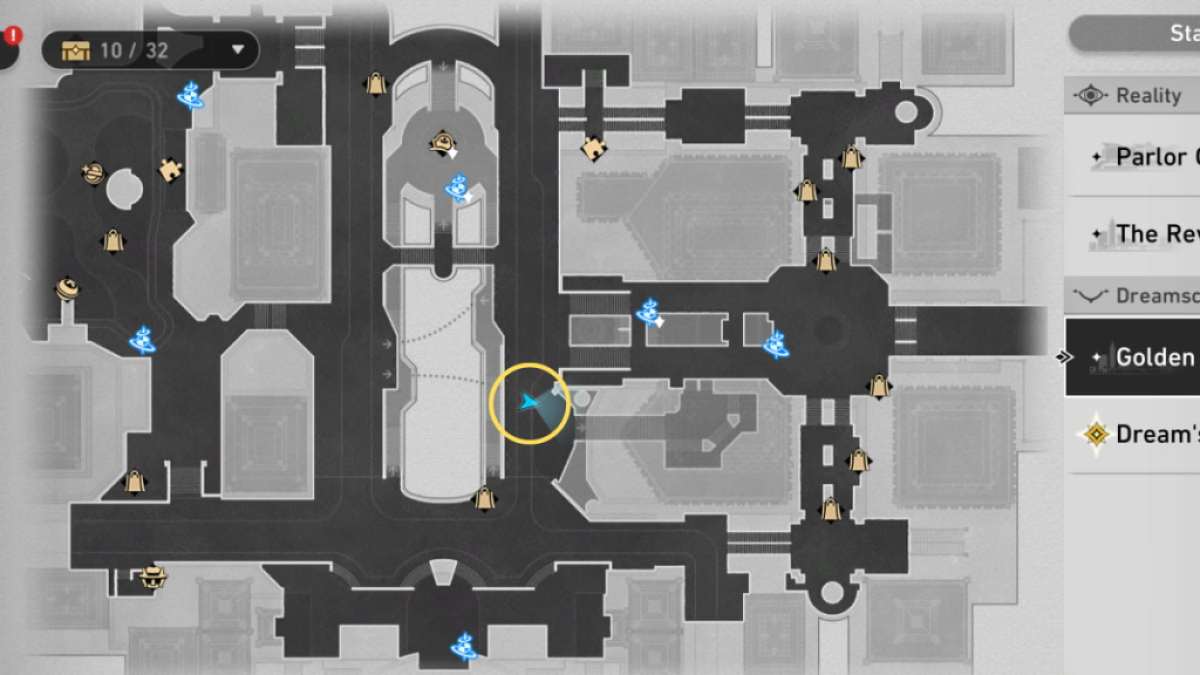
Image by Pro Game Guides
Screenshot by Pro Game Guides
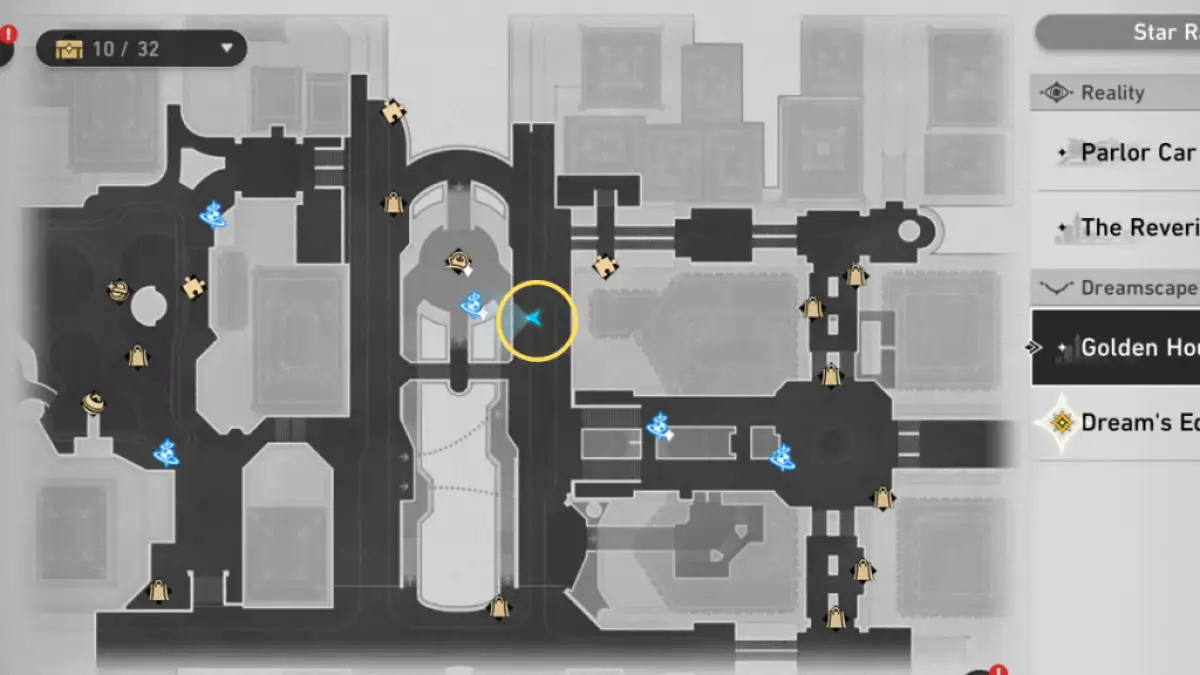
Image by Pro Game Guides
Screenshot by Pro Game Guides
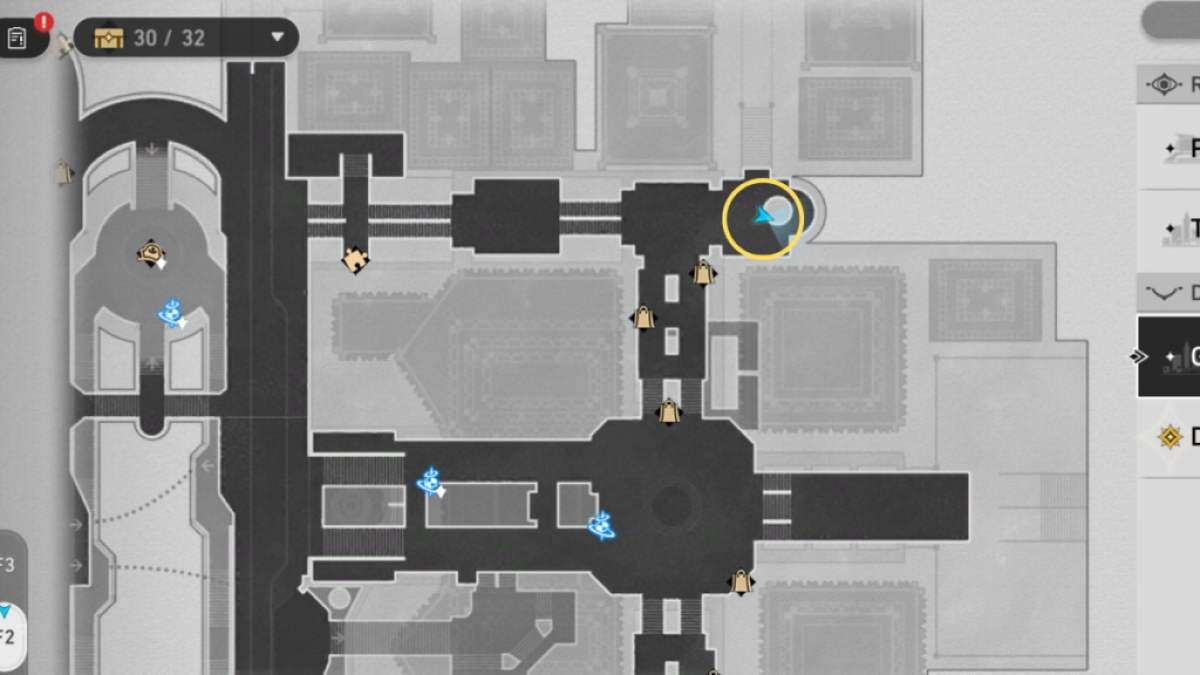
Image by Pro Game Guides
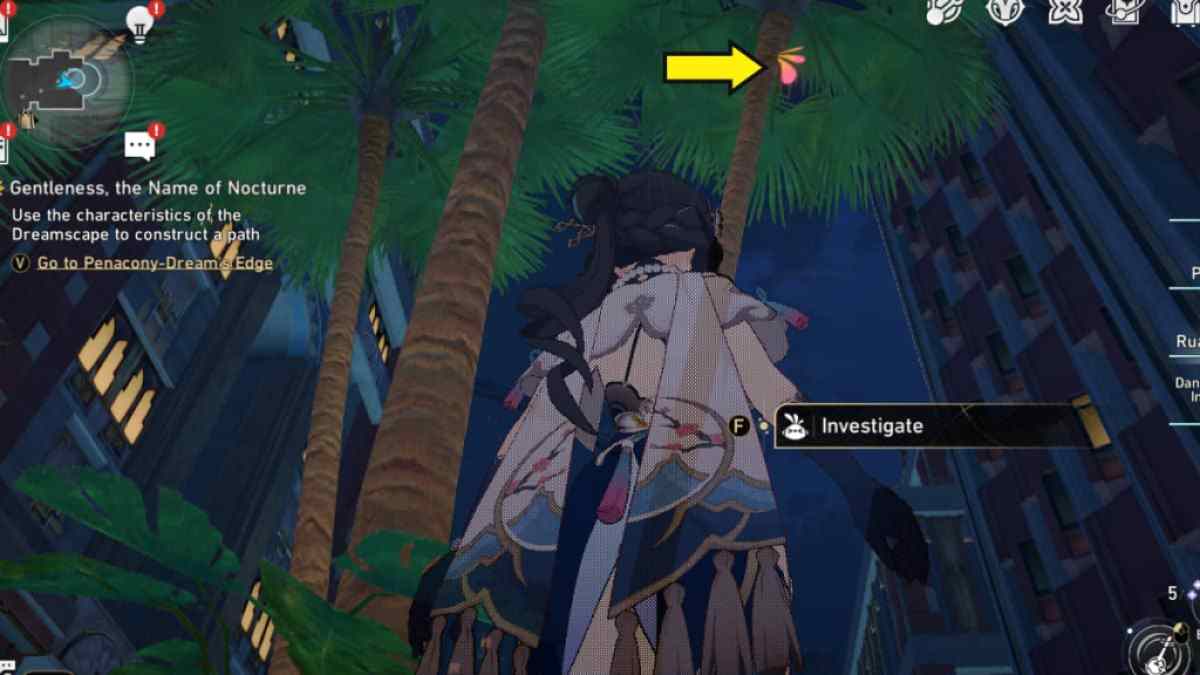
Image by Pro Game Guides
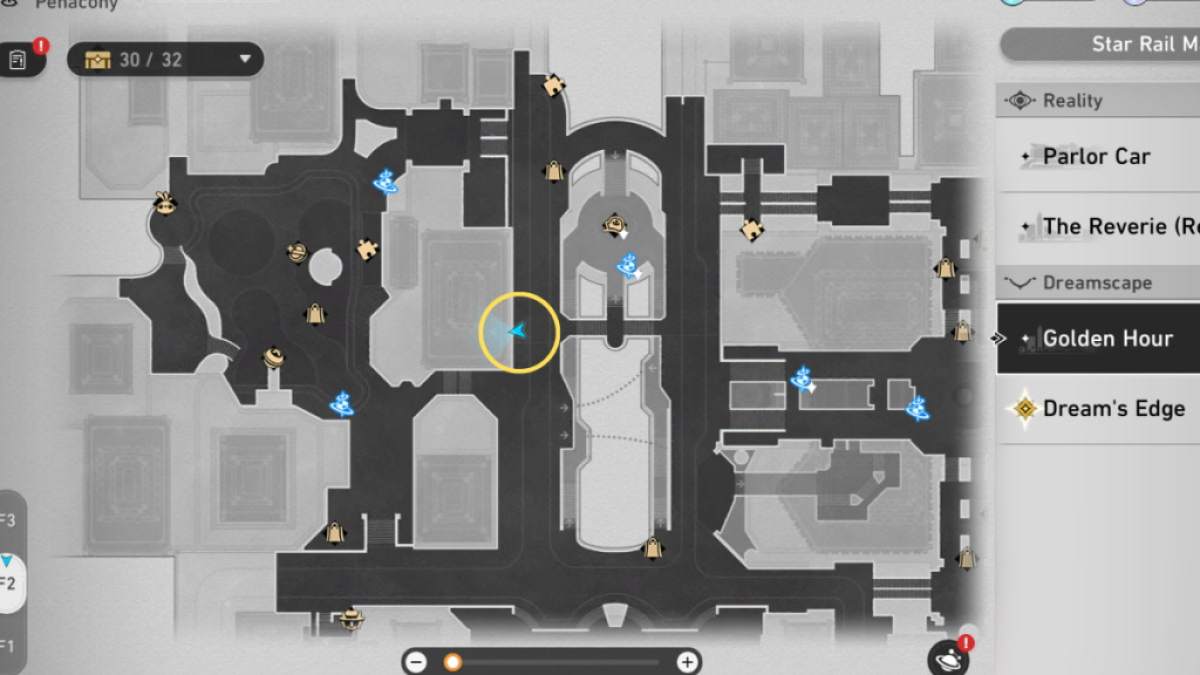
Image by Pro Game Guides
Screenshot by Pro Game Guides
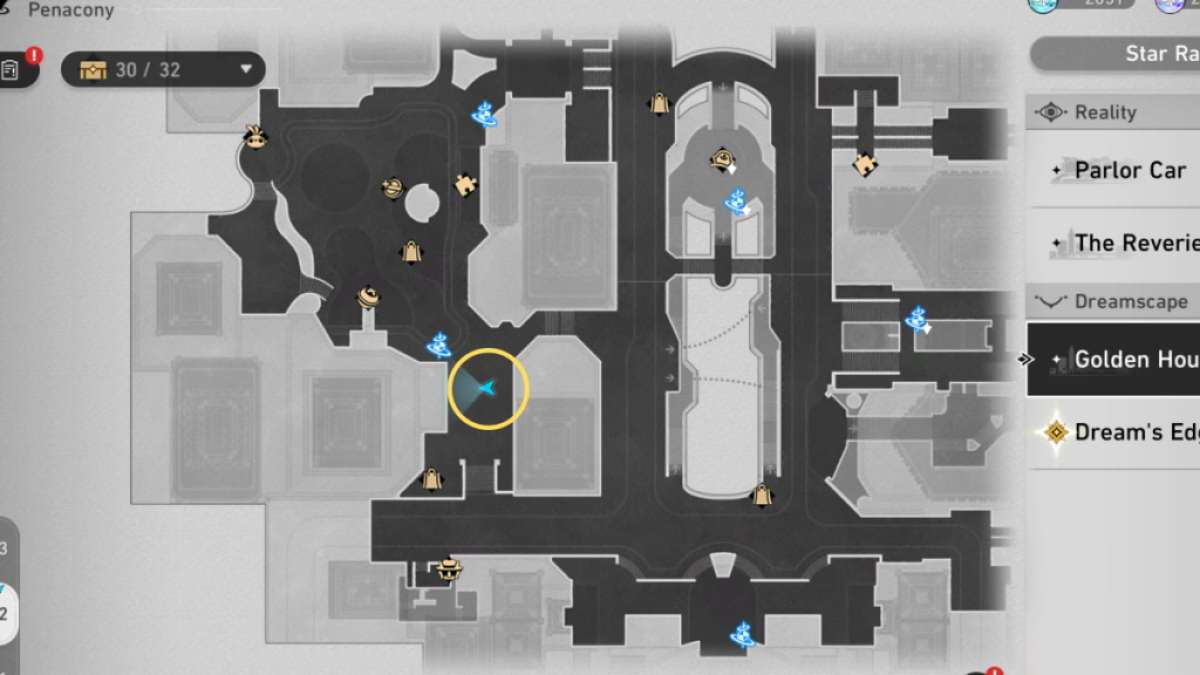
Image by Pro Game Guides
Screenshot by Pro Game Guides
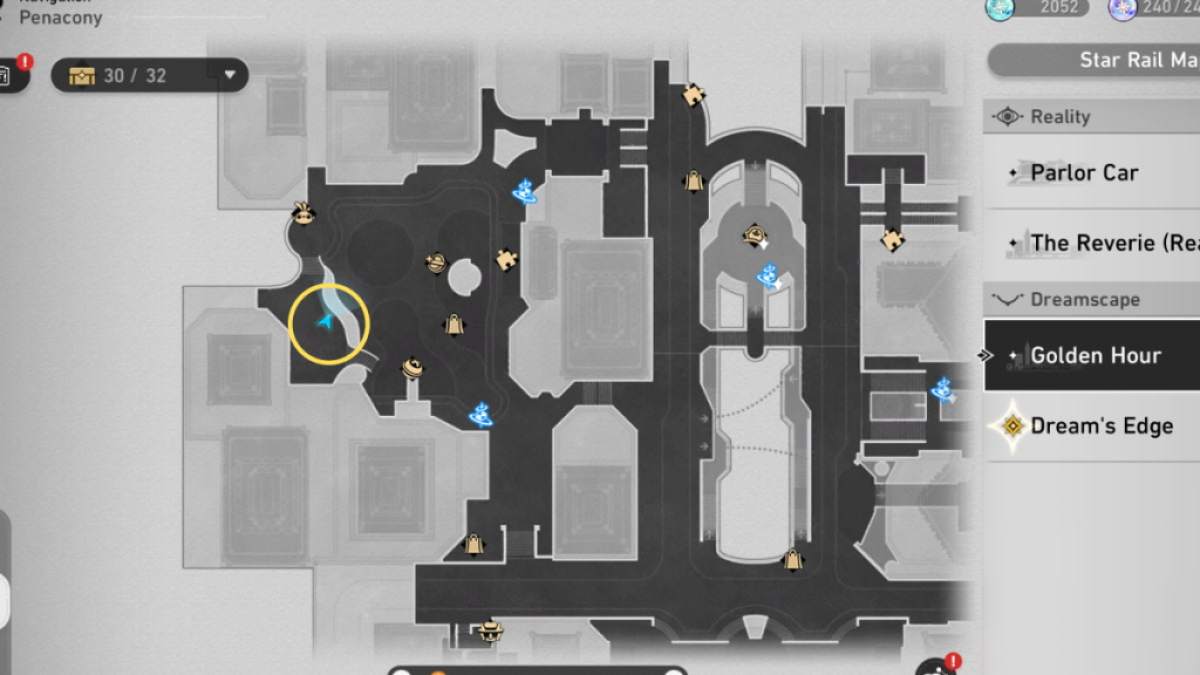
Image by Pro Game Guides
Screenshot by Pro Game Guides
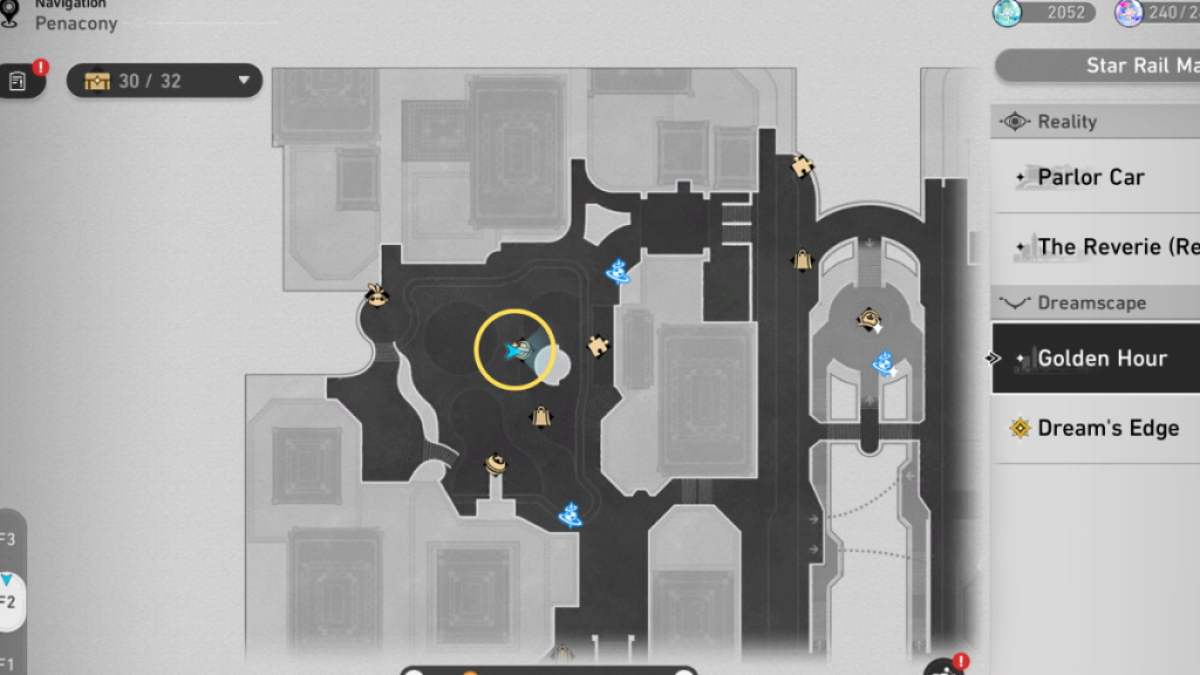
Image by Pro Game Guides
Screenshot by Pro Game Guides
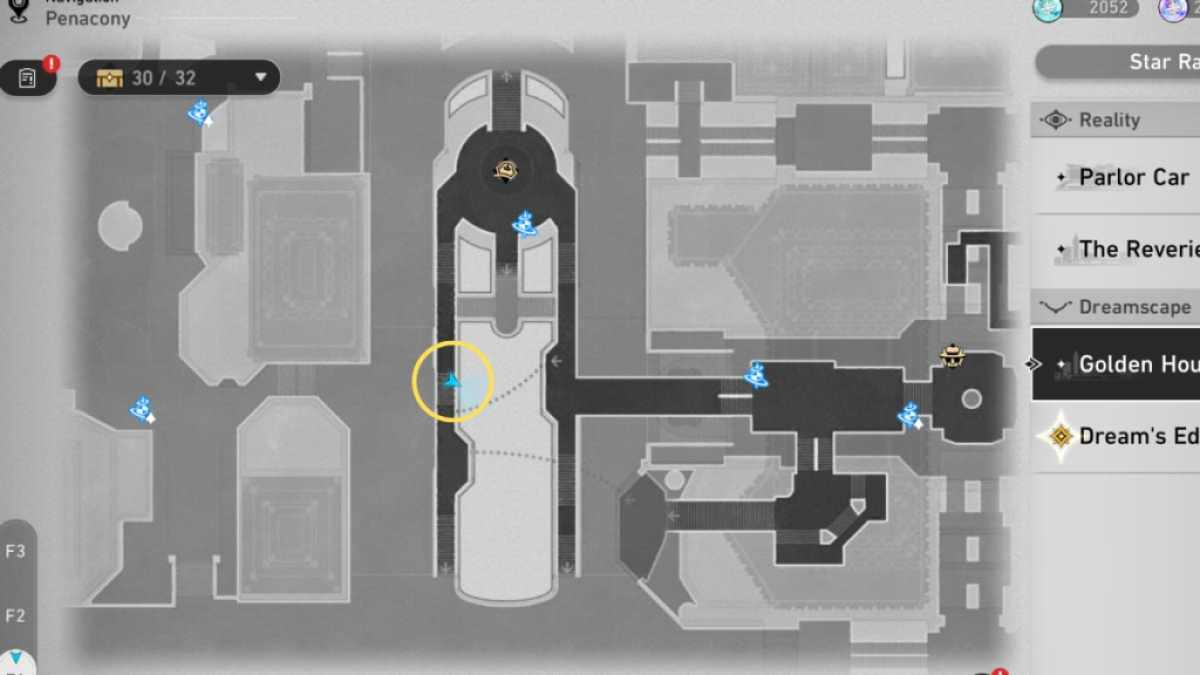
Image by Pro Game Guides
Screenshot by Pro Game Guides
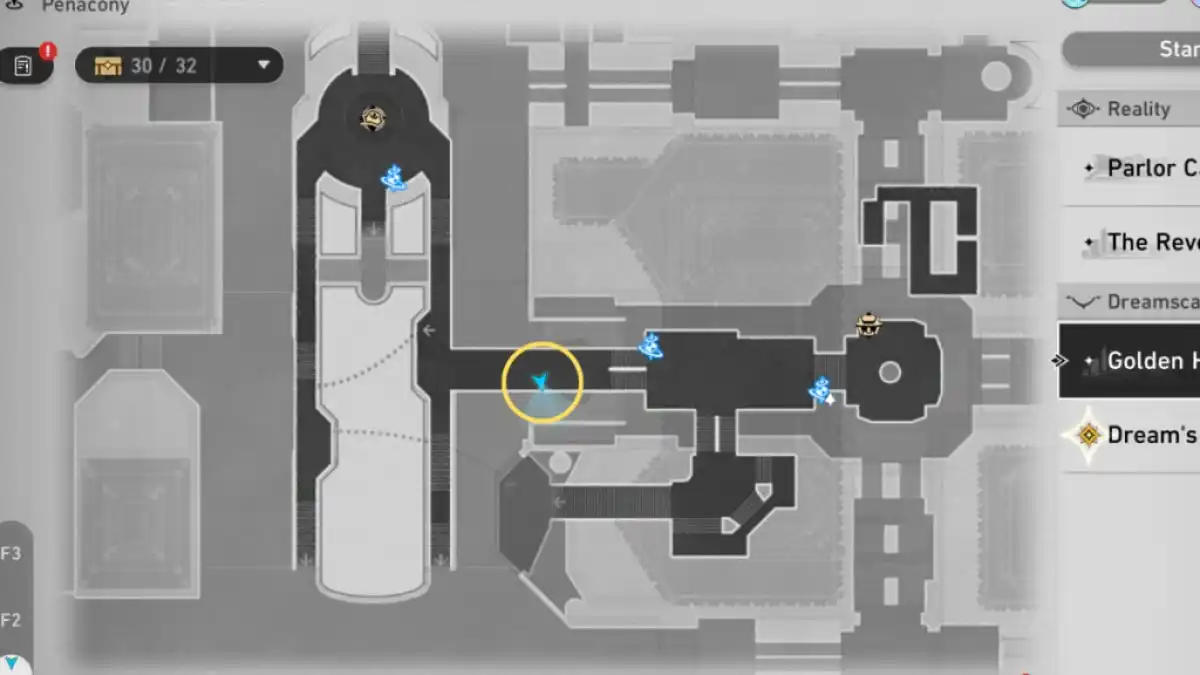
Image by Pro Game Guides
Screenshot by Pro Game Guides
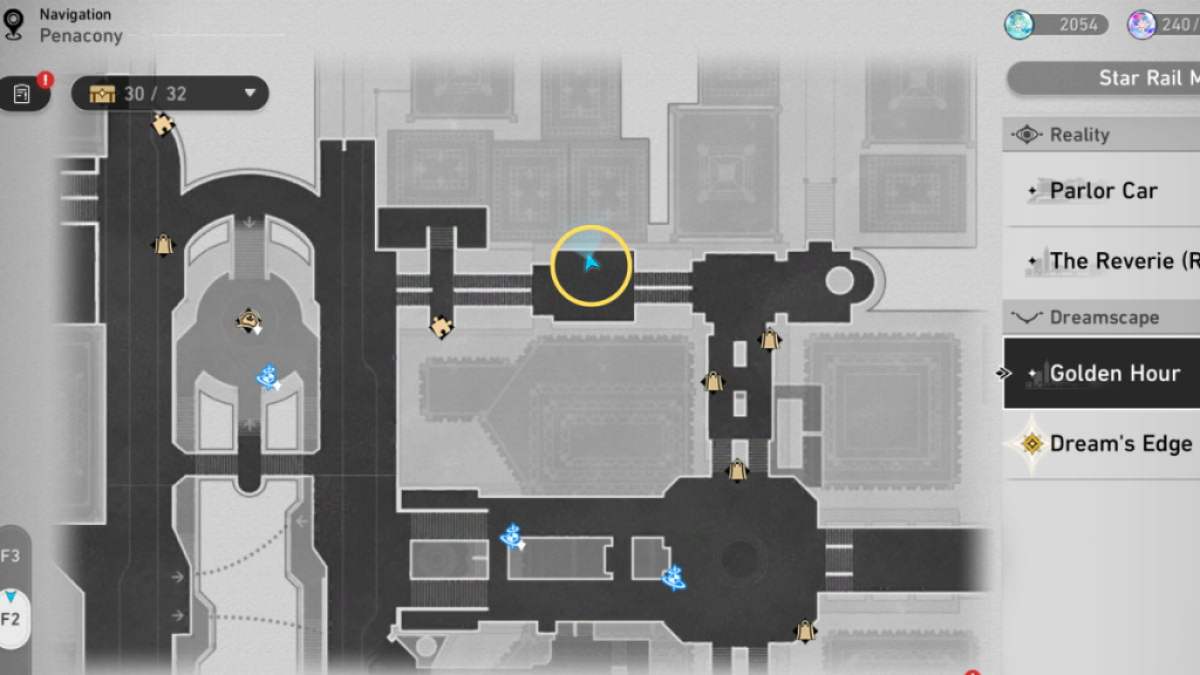
Image by Pro Game Guides
Screenshot by Pro Game Guides
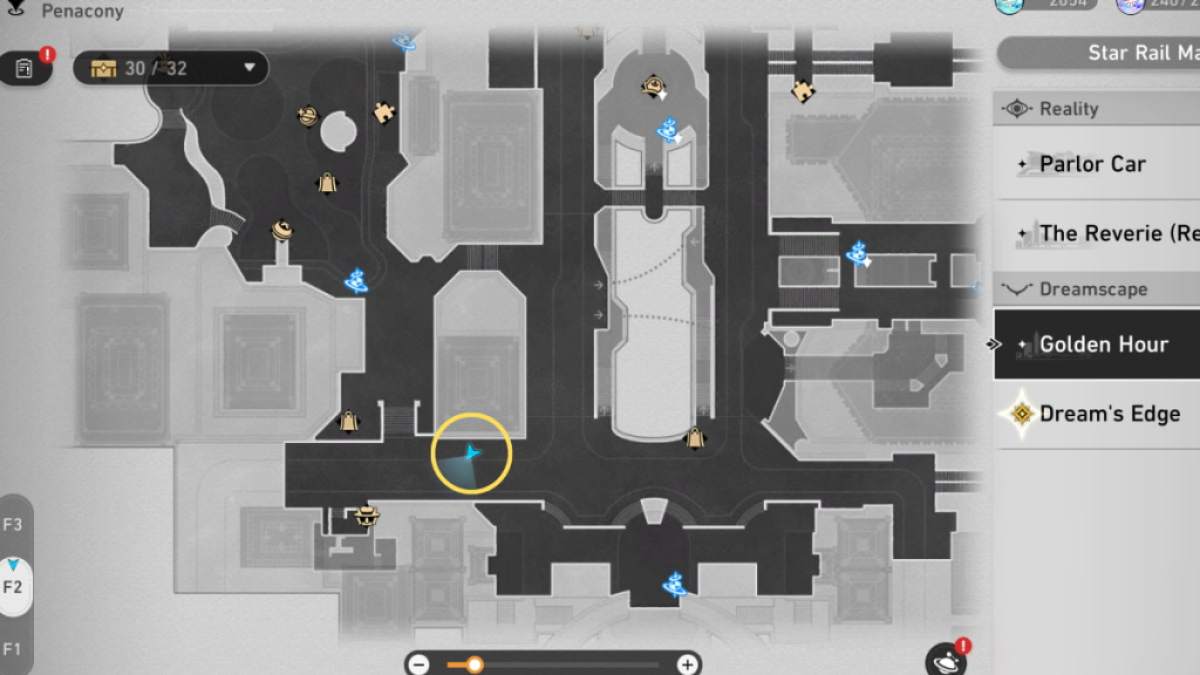
Image by Pro Game Guides
Screenshot by Pro Game Guides
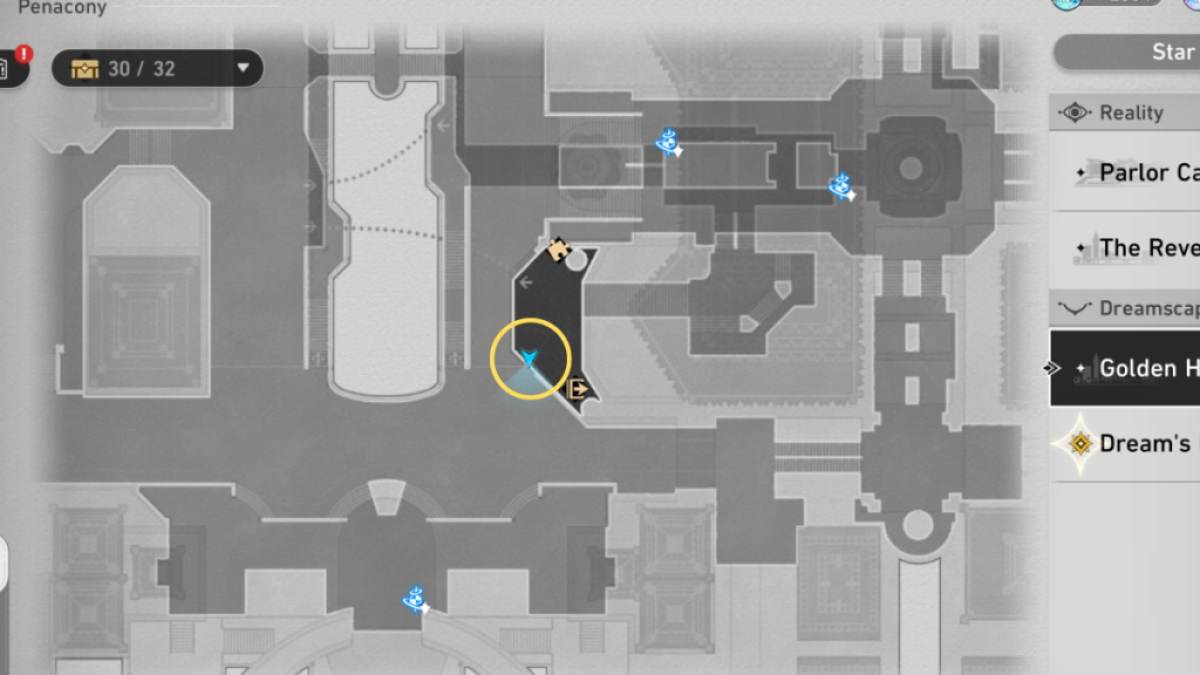
Image by Pro Game Guides
Screenshot by Pro Game Guides
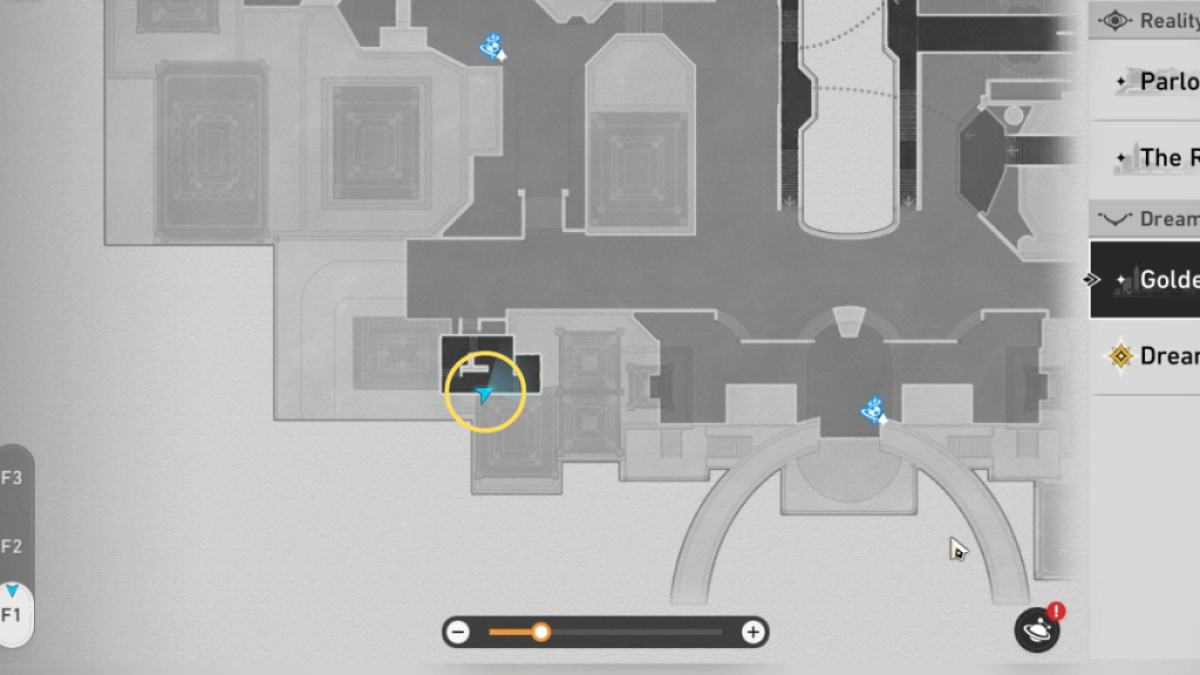
Image by Pro Game Guides
Screenshot by Pro Game Guides
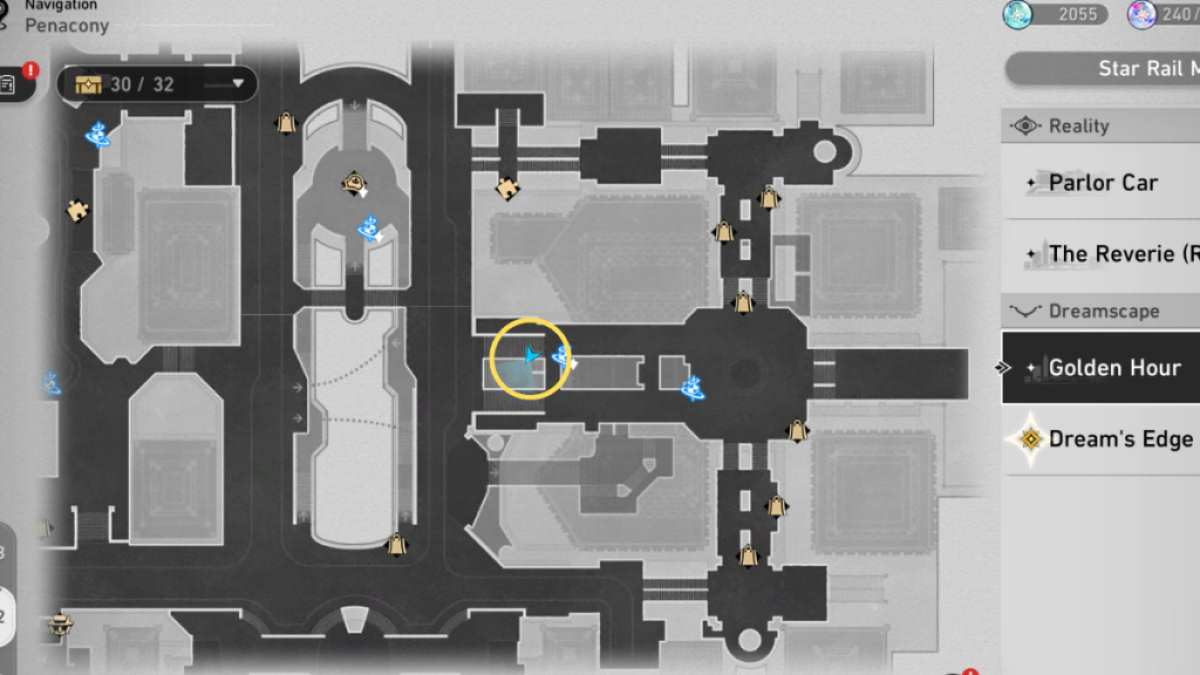
Image by Pro Game Guides
Screenshot by Pro Game Guides
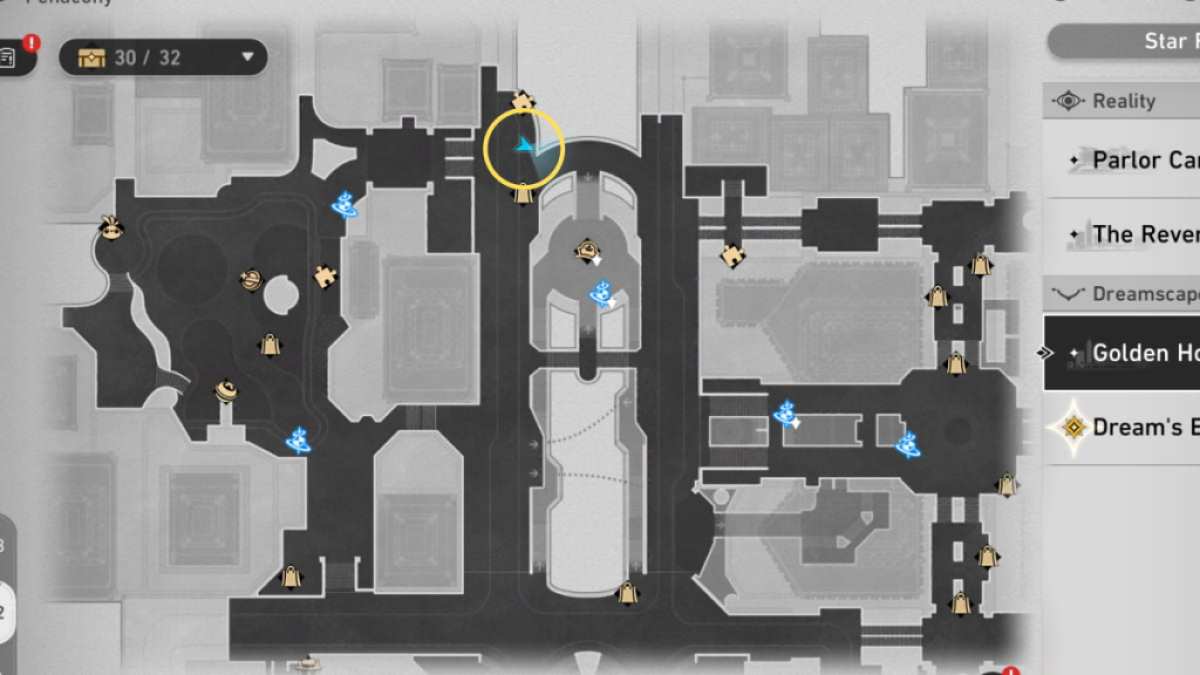
Image by Pro Game Guides
Screenshot by Pro Game Guides
