puzzle out this dare murder mystery !
3D Escape Room Detective Story is an challenging point - and - come home mystery game that put you at the head of a train of murder guinea pig . If you ’re fight with any of the puzzle in the secret plan , I ’ve adumbrate them all below to give you a jog in the correct counsel .
Since this game has five puzzle - fill chapters , I ’ve split it into five separate guides . Once you ’ve complete Chapter 1 , check out the walkthroughs for the other four chapters to continue locomote forward in the game .

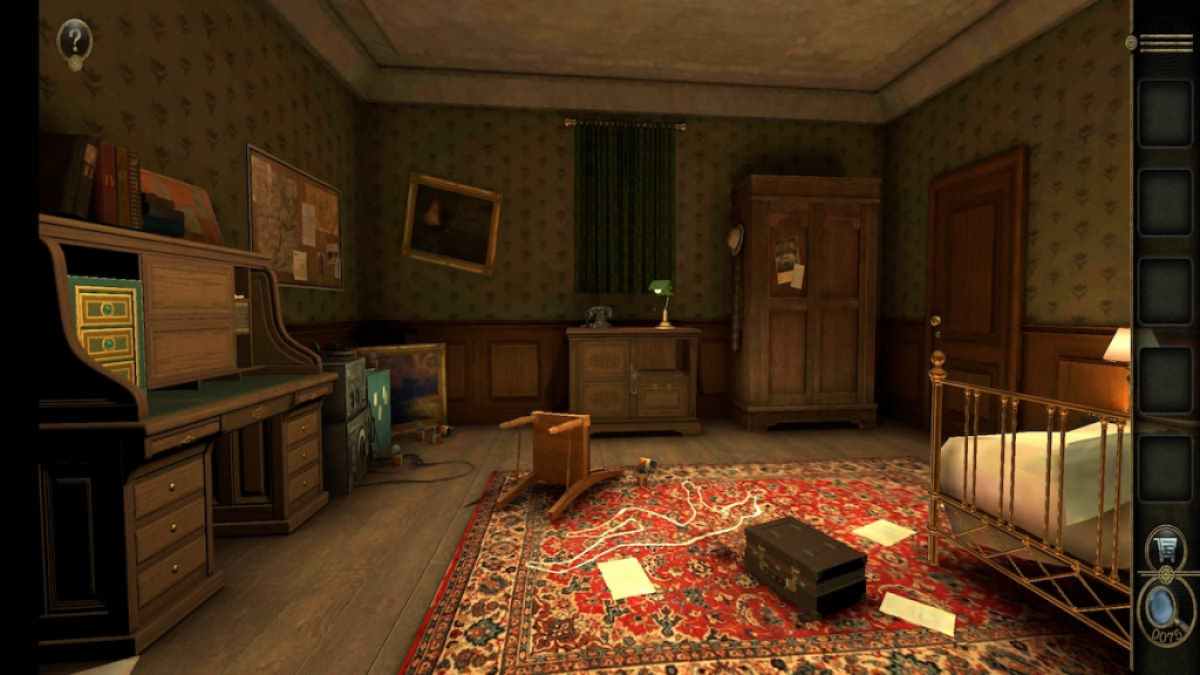
Chapter 1 set about with a phone call from Sheriff Claude asking for your help with a font . Once the interaction end , the sieve fade to disastrous , and you are taken to a mussy hotel elbow room .
3D Escape Room Detective Story walkthrough - Chapter 1
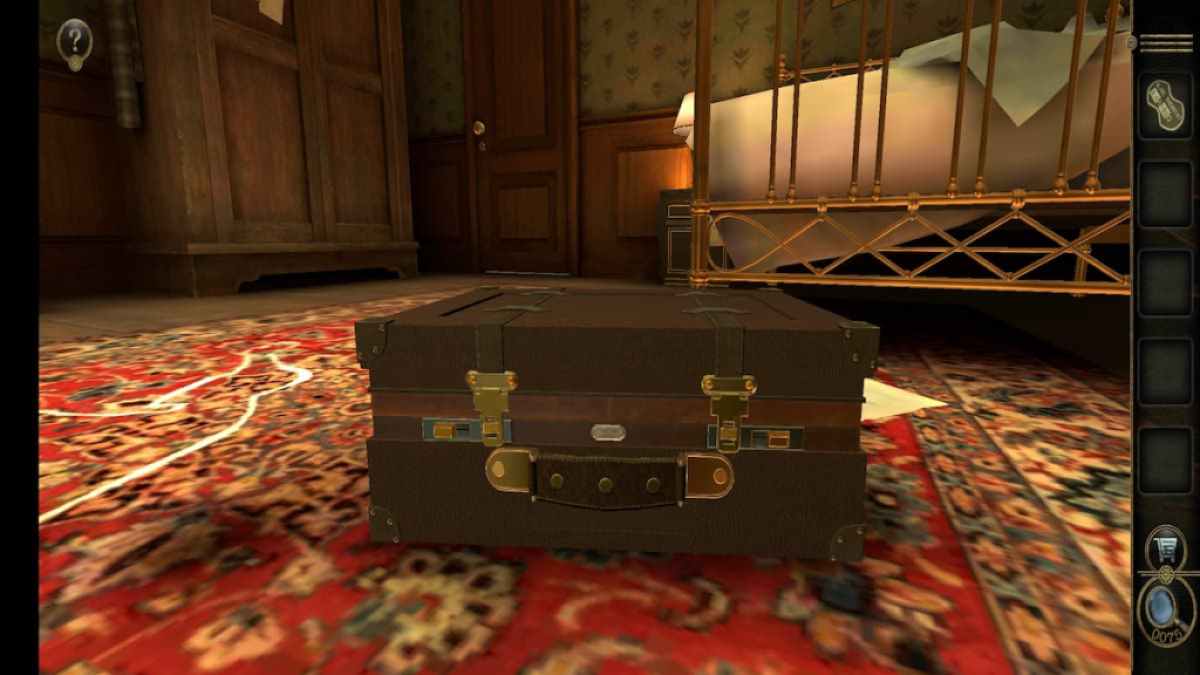
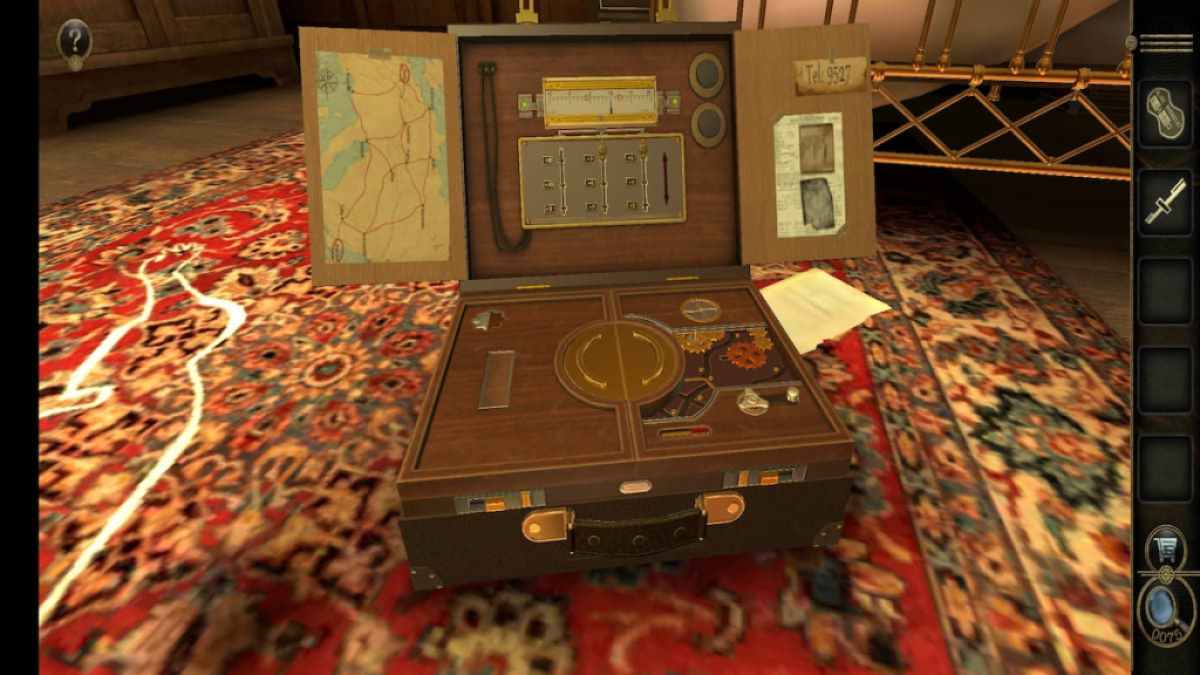
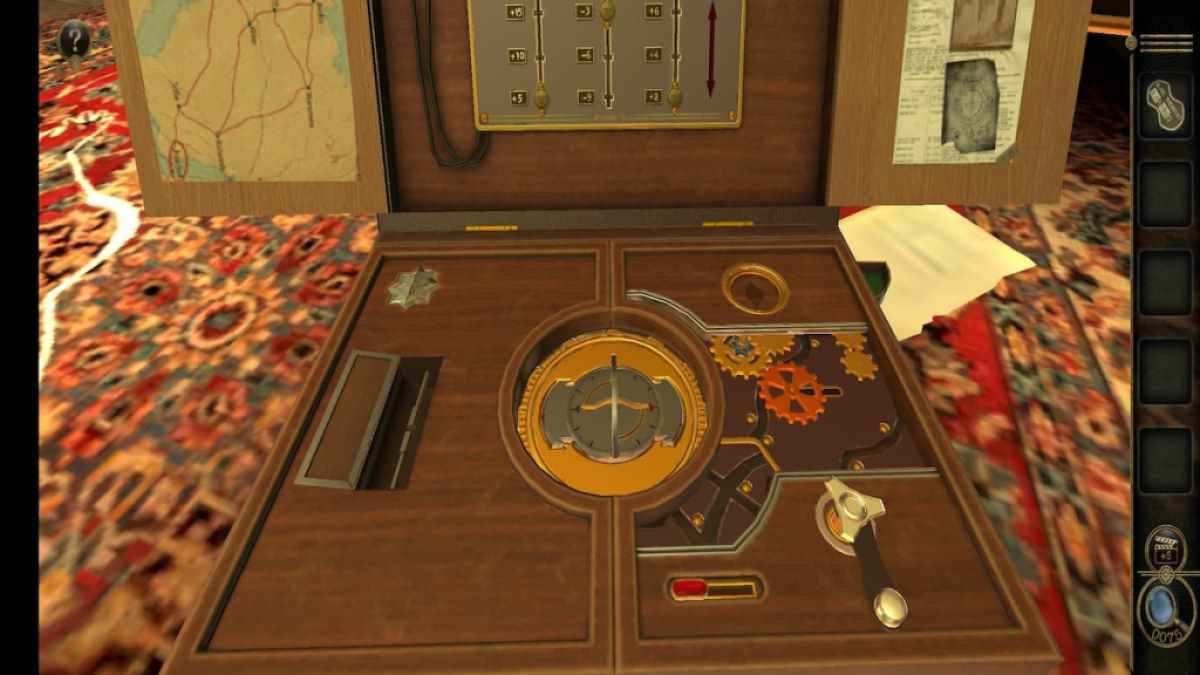
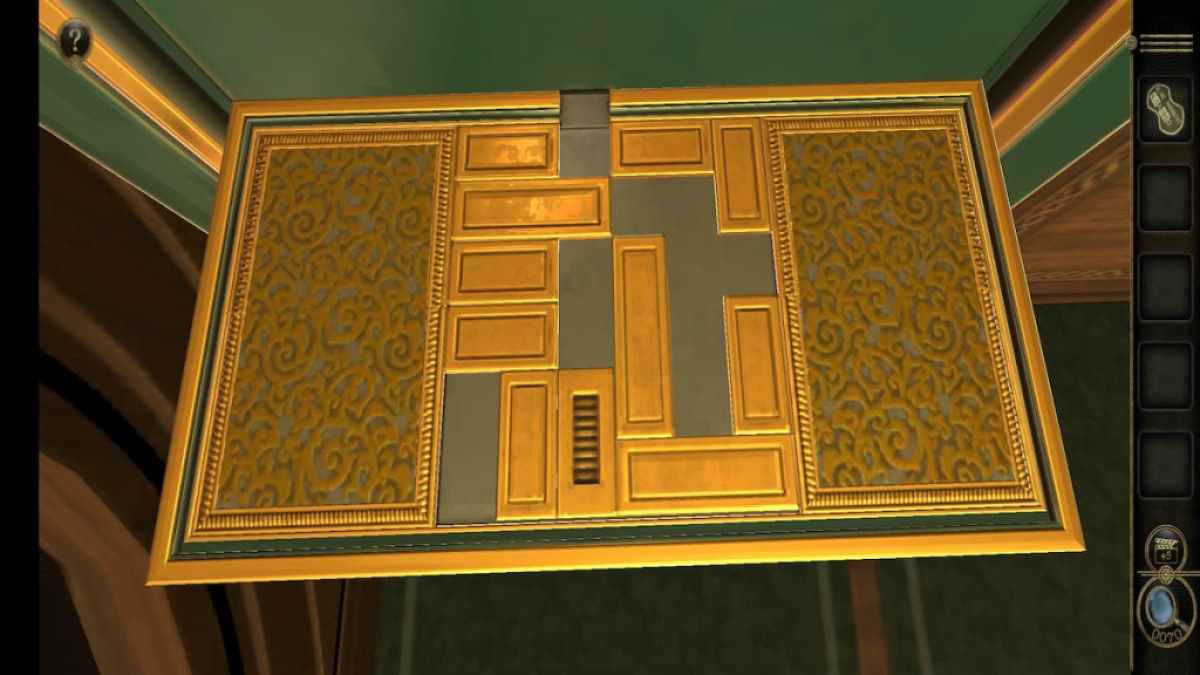
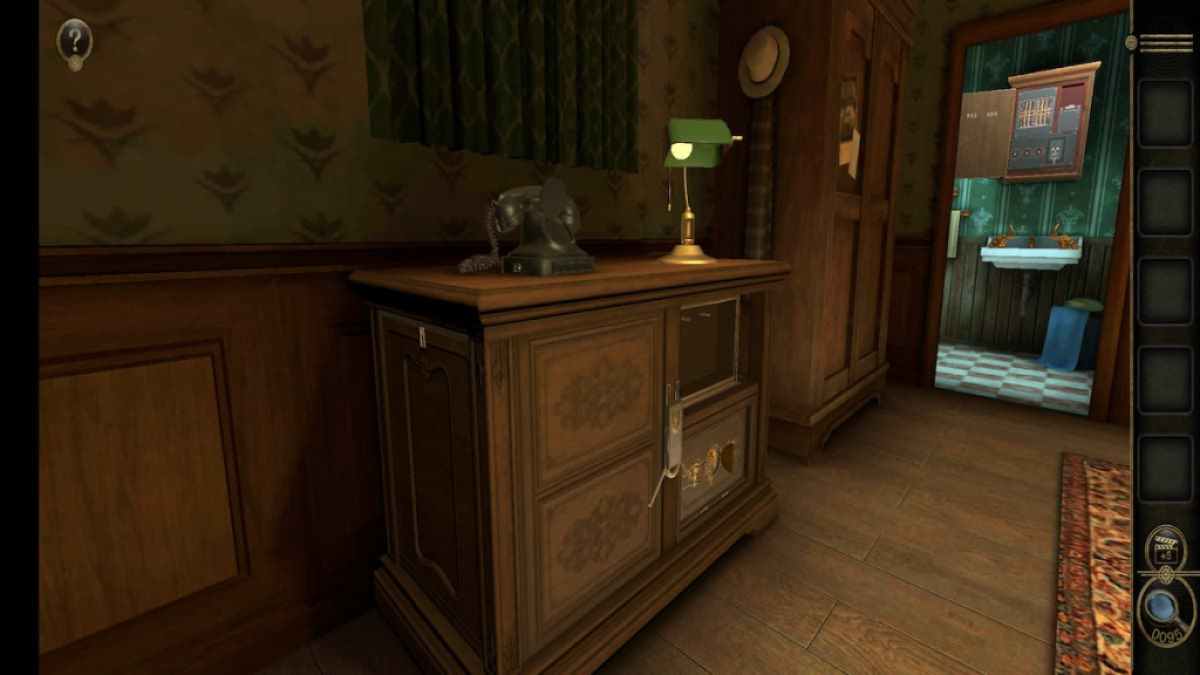
From a glance over the elbow room , the key areas of interest are the desk on the left field , the console holding the lamp , and the briefcase in the nub .
Tutorial and lamp puzzle
zoom in on the correct side of the desk reveals a slider puzzler with a hold resting on top of it .
Ignore the puzzle for now and snaffle the Handle .
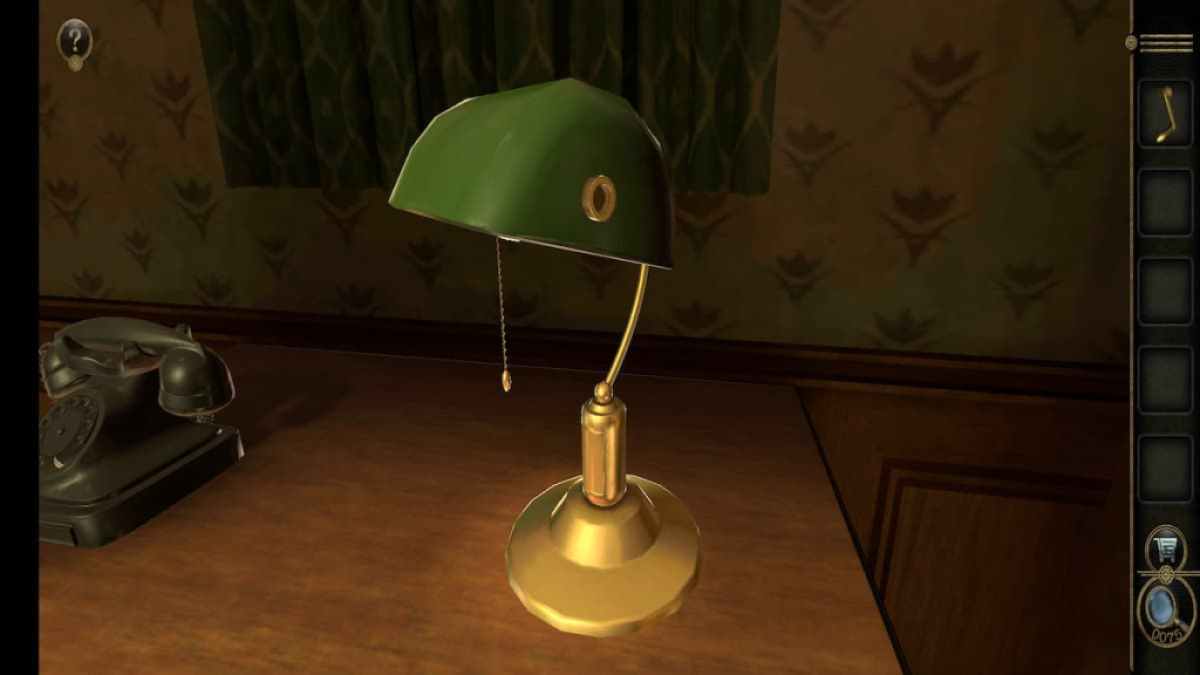
go out the desk and move towards the cabinet against the back wall . Focus on the lamp to see that it is omit a part on its right side .
Screenshot by Pro Game Guides
Attach the Handle to the hole and rotate clockwise to open up a secret compartment in the base of the lamp . The compartment sustain the Variable Resistor , which will be used in a puzzle afterward on .
Opening briefcase
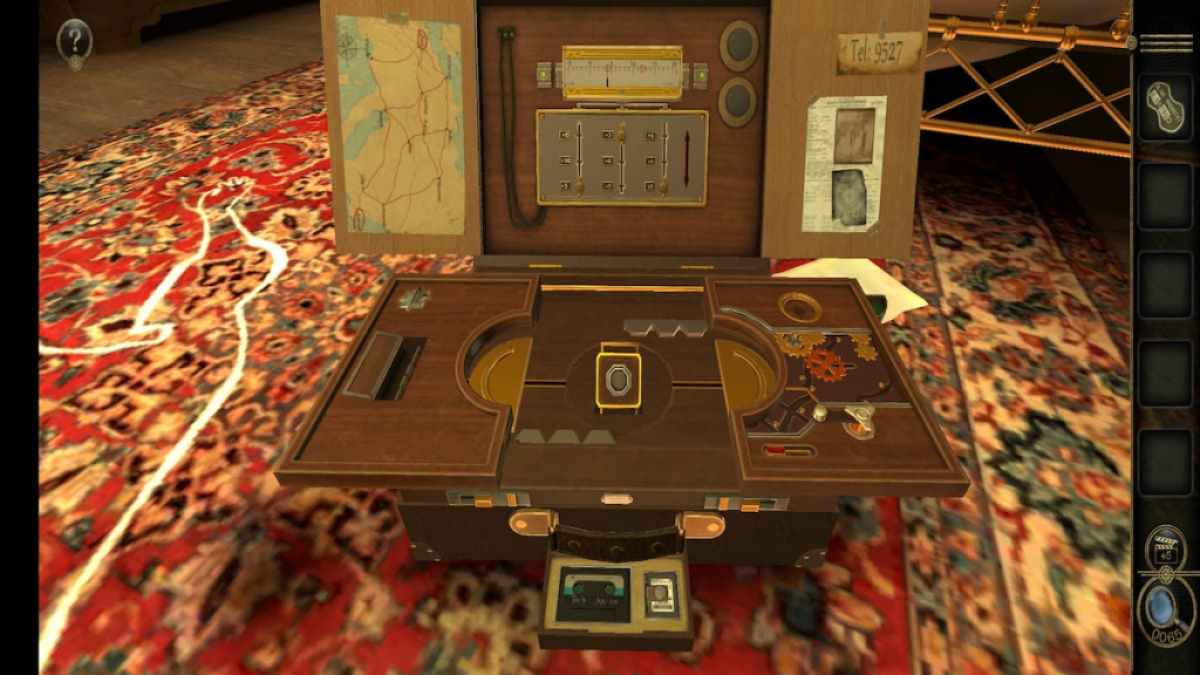
The next country to focus on is the briefcase .
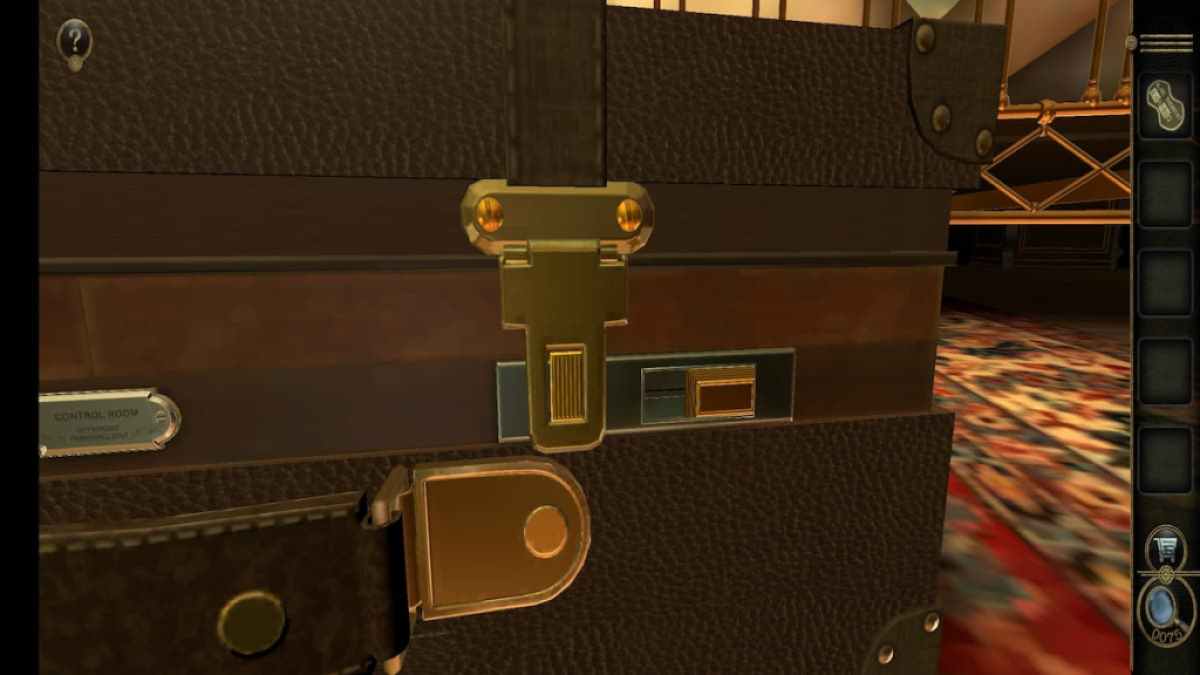
Each side of the briefcase has a whorl sport two golden musical composition . start up by flipping the lucky patch on the inside so that it is vertical .
After doing that , you ’ll be capable to move the slider on the outside towards the inside .
Screenshot by Pro Game Guides
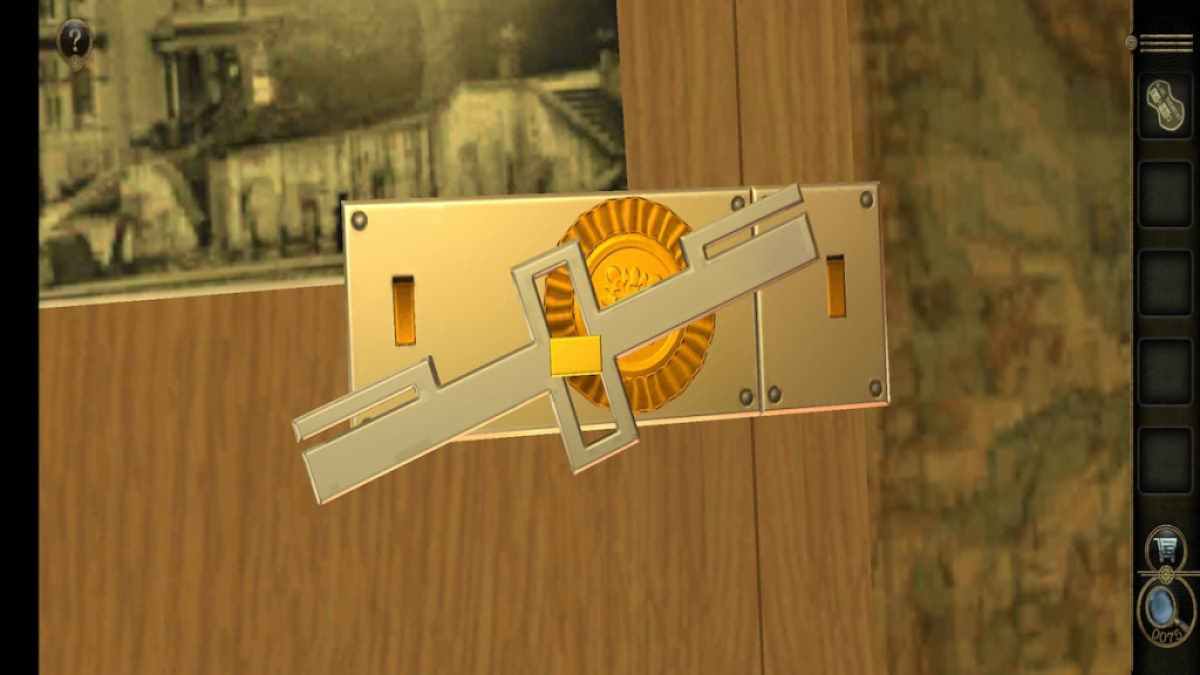
The briefcase unlock after doing this on both sides , revealing several different puzzle .
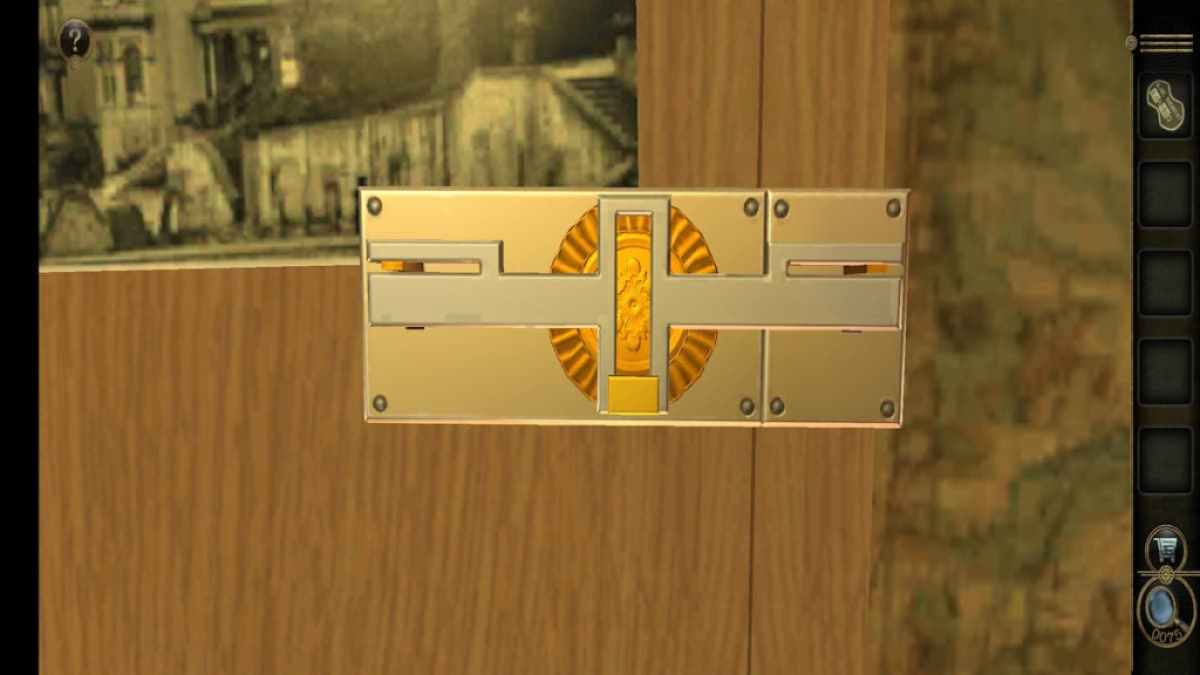
Go to the puzzle between the photos at the top of the briefcase .
Spin the gold medal in the center counterclockwise until the cardinal golden piece eternal rest where 4 o’clock would be on a standard clock . This will remove the peg on the left side .
Screenshot by Pro Game Guides
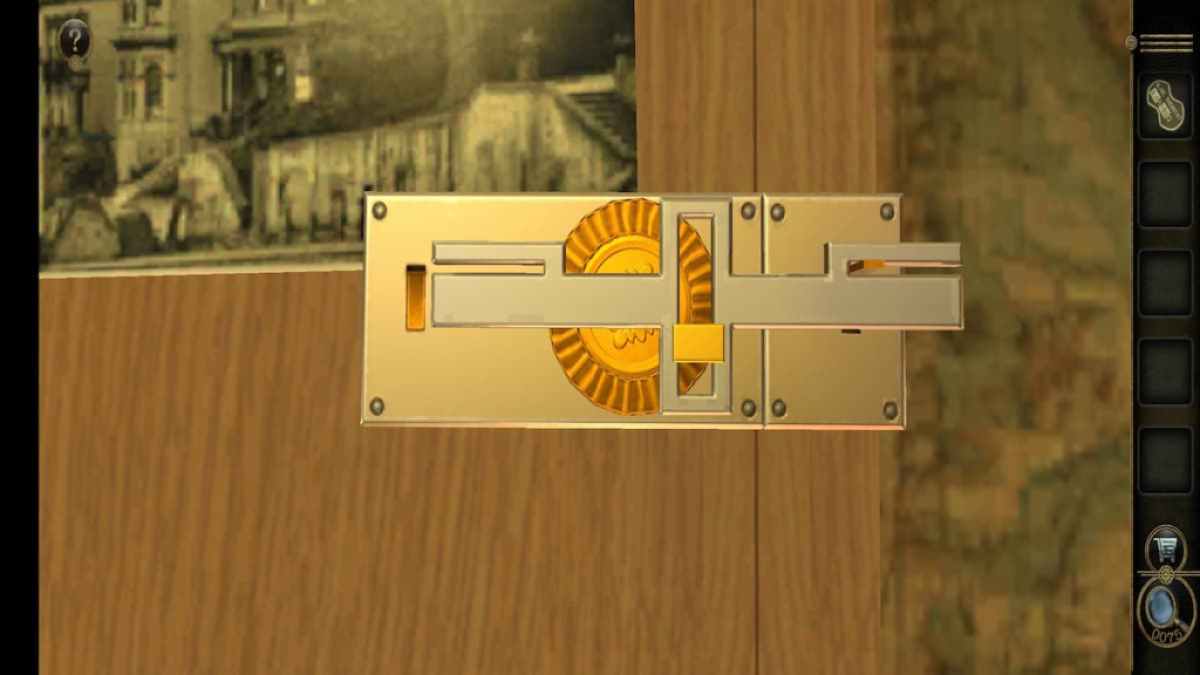
Now whirl the palm clockwise so the gold objet d’art rests at 8 o’clock . This will remove the right wooden leg and give you a Metal Strip .
With both pegs removed , the top of the bag will open up up . Take note of the phone number " 9527 " at the top right and head over to the phone .
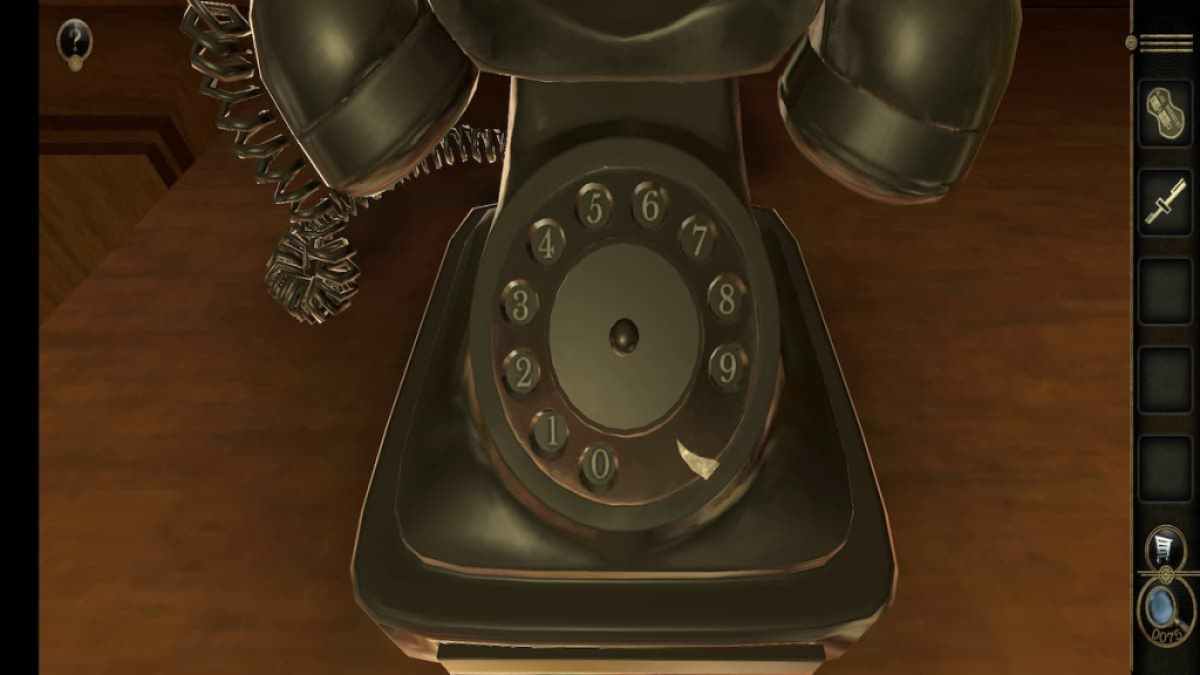
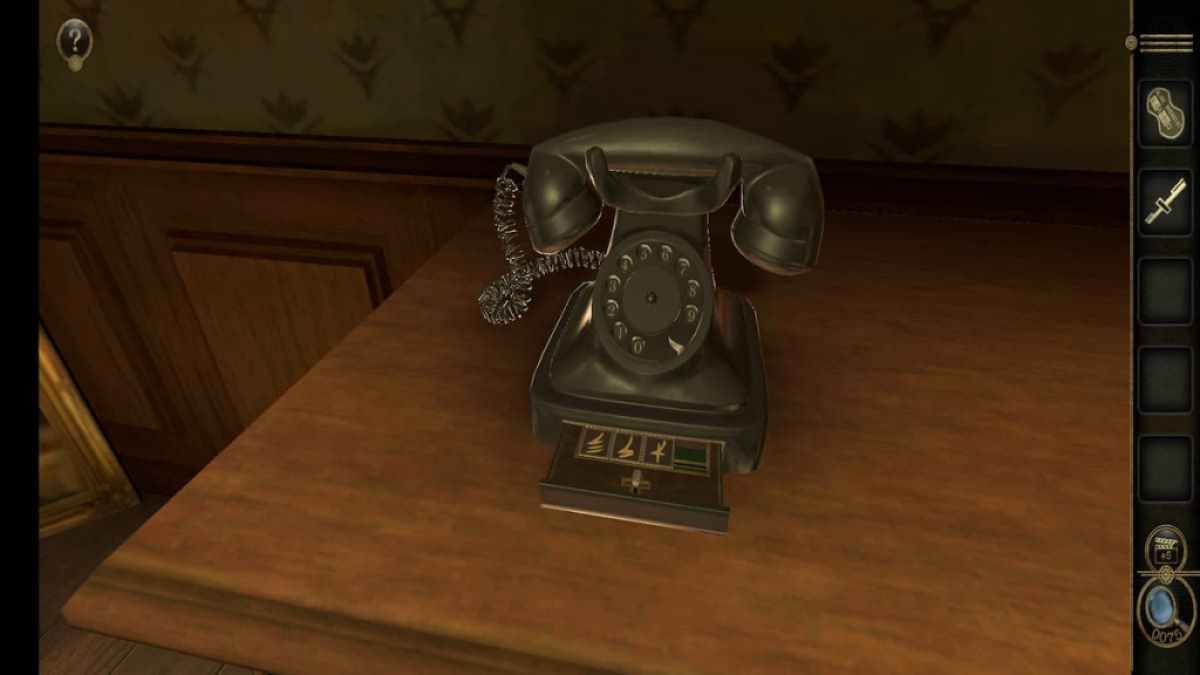
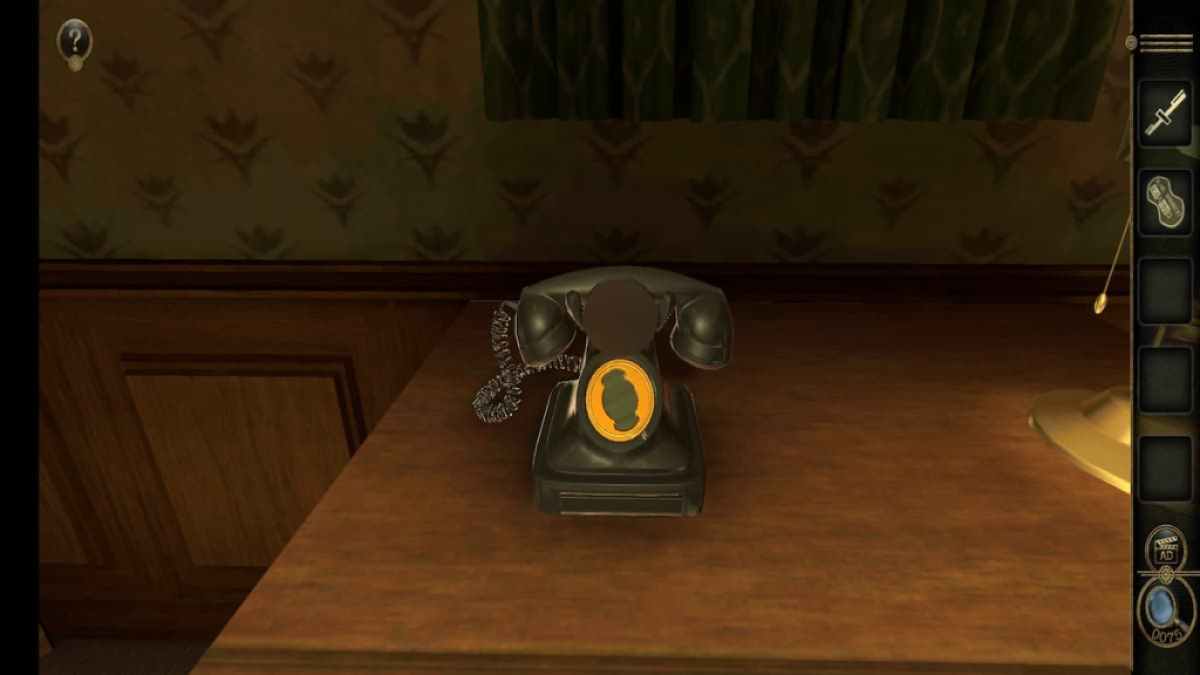
Phone puzzle
The phone can be find oneself on the same cabinet as the lamp .
The phone identification number from the briefcase is the solution to this puzzle . To input the phone phone number , you ’ll need to tap the bit you ’re inputting and get behind the circular hollow on top of it towards the fingerbreadth conversation stopper on the humble right of the dial . Since the first number is " 9 " , tap the 9 and drag so that its hole touches the finger conversation stopper .
You ’ll do the same affair with " 5 " like a shot afterward , tap it on the dial and dragging the hole to the fingerstopper .
Screenshot by Pro Game Guides
retell this process for " 2 " and " 7 " to unlock the puzzle at the bottom of the phone .
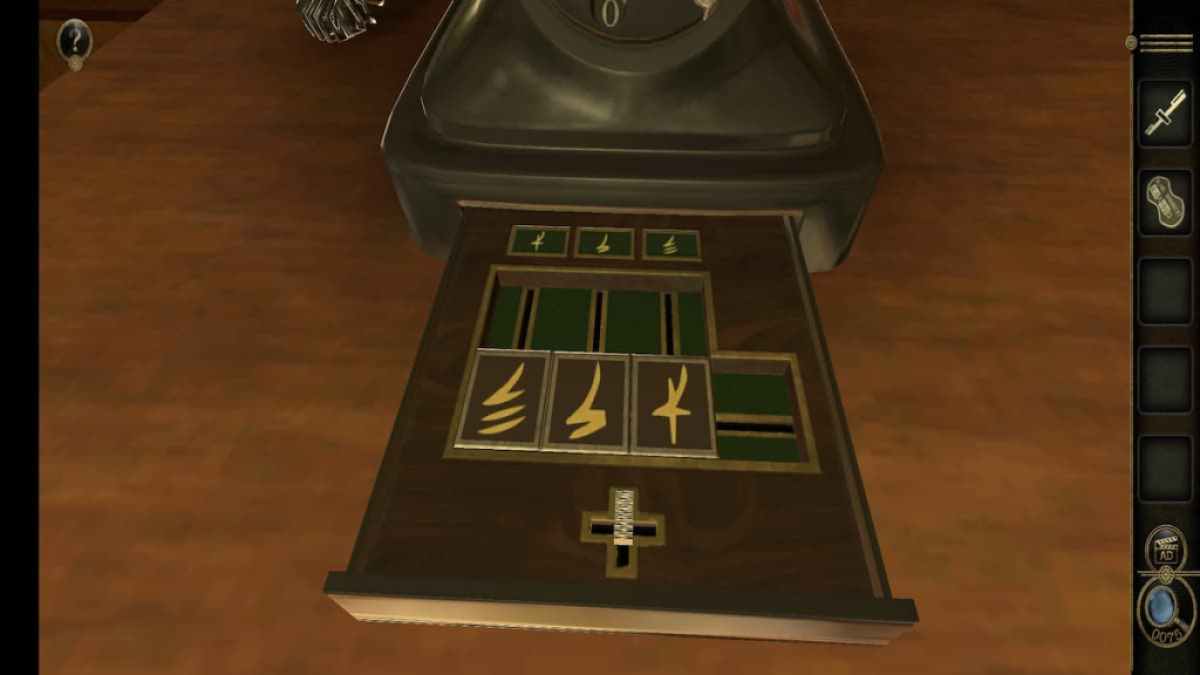
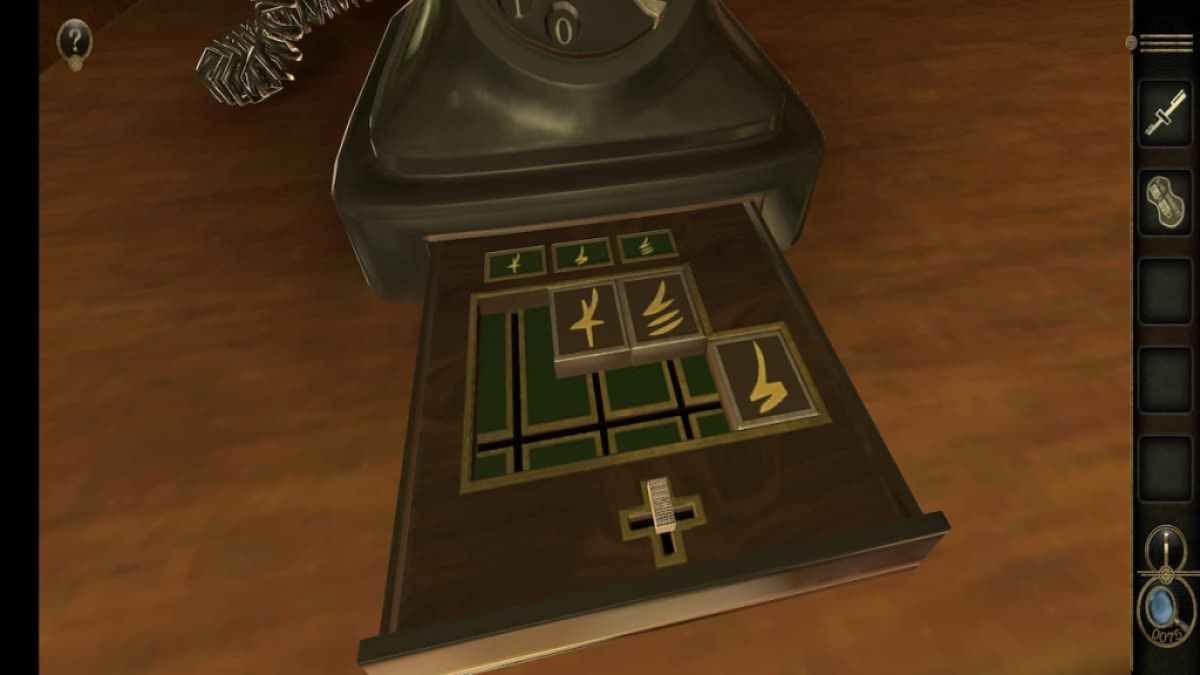
The goal of this puzzle is to place each piece immediately beneath the matching symbol on top . To solve it , you need to use the slipper at the bottom to move the three pieces around .
get by move the slider to the right .
Screenshot by Pro Game Guides
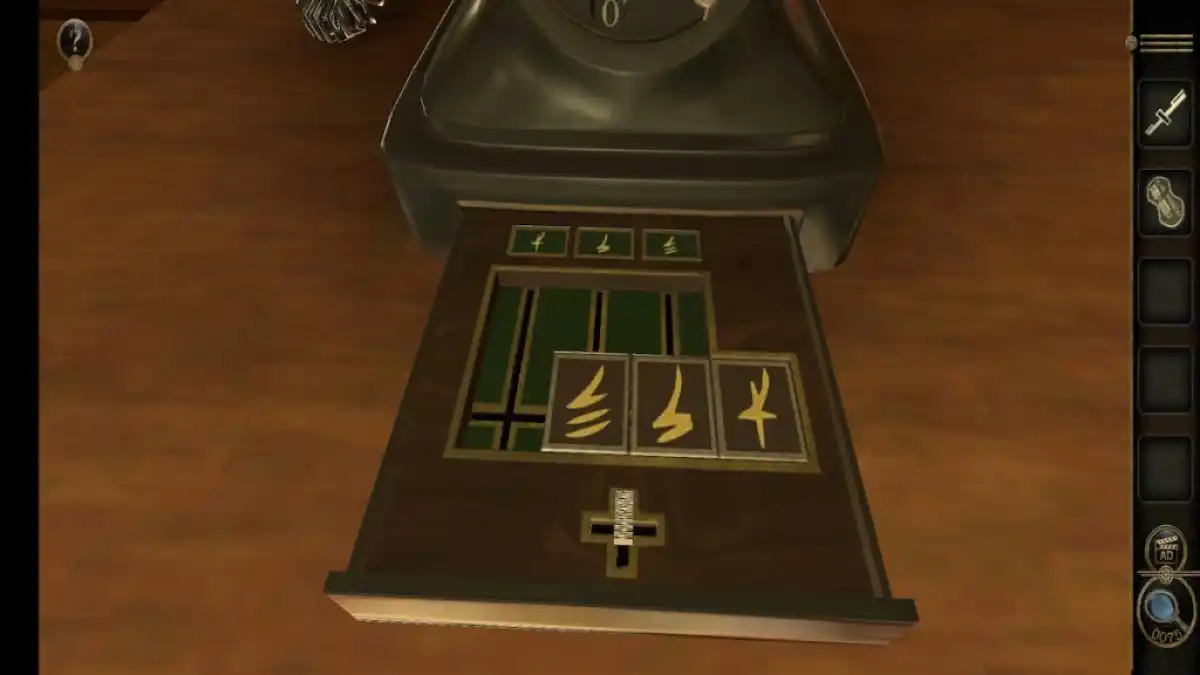
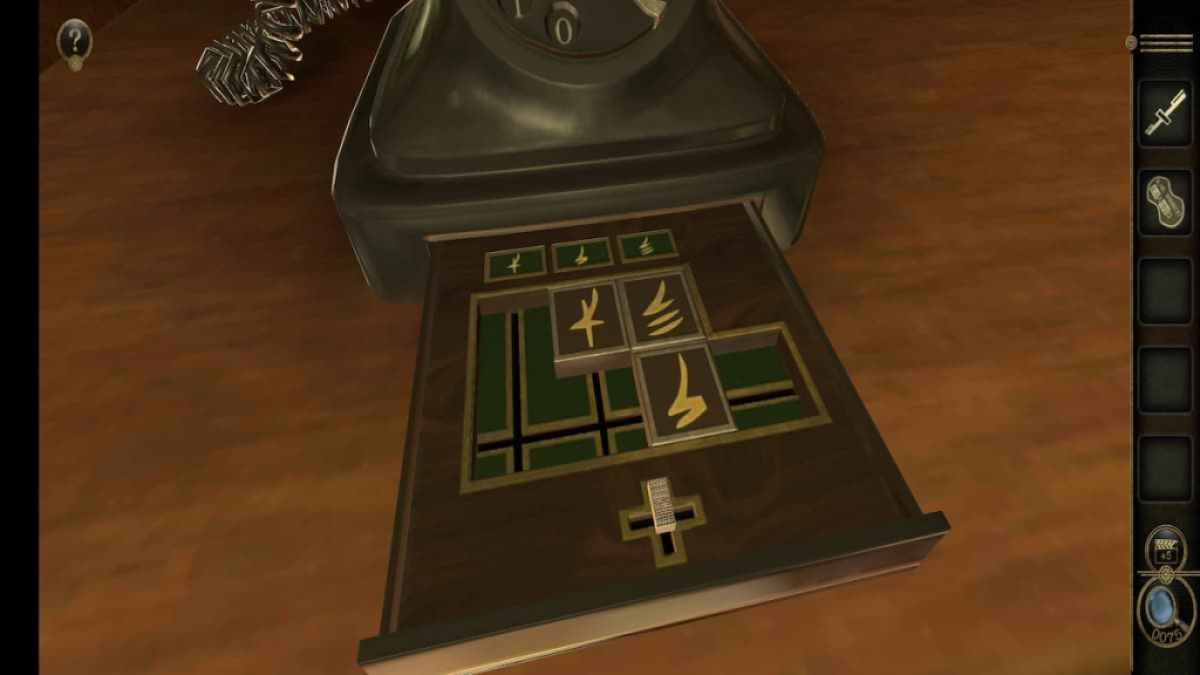
Move the slider up so that only the rightmost piece remains on the bottom .
Move the skidder left three times to put the low piece on the left side .
Then drag on the skidder down so all three piece are on the bottom .

Screenshot by Pro Game Guides
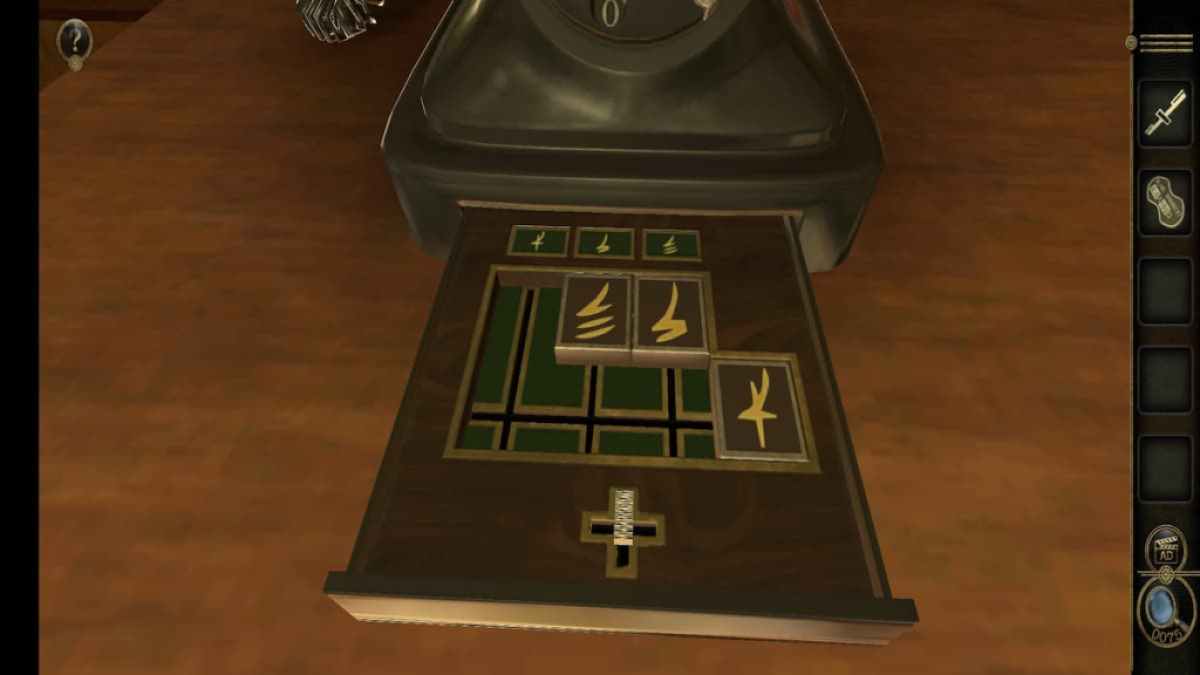
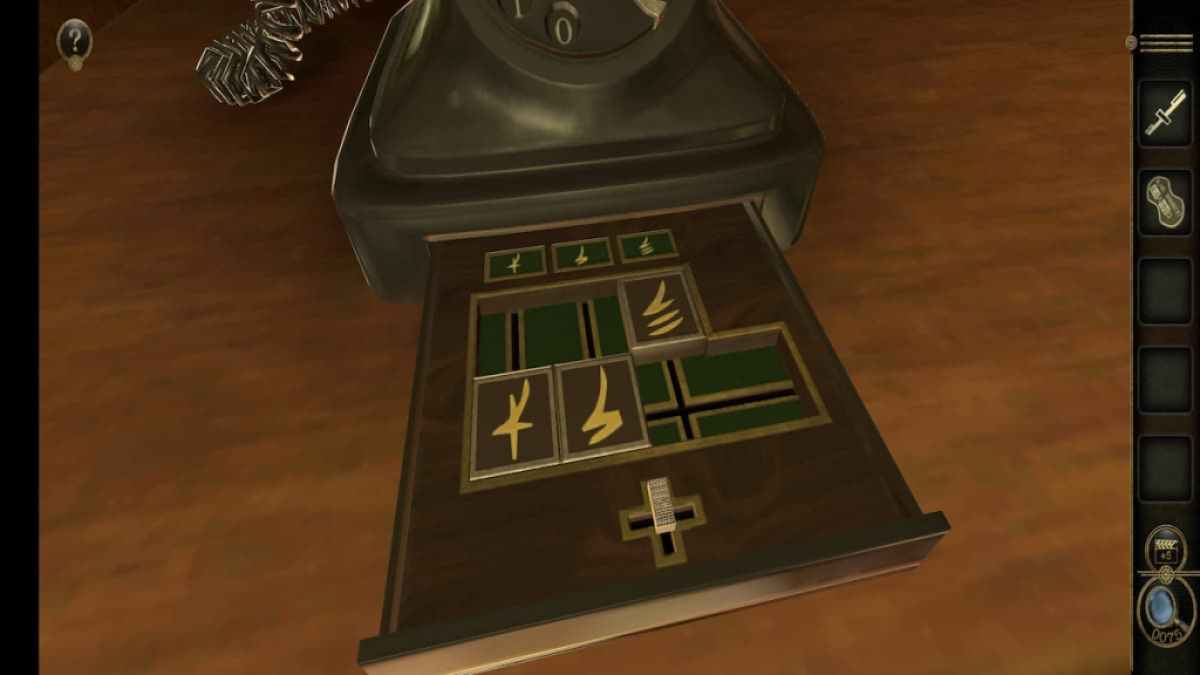
Move the slipper to the right .
advertize the yellow-bellied terrapin upwardly so that the new rightmost piece is alone on the bottom .
Move the slipper to the left one meter . The piece in the top rightfulness is already in place , so you ’ll allow for the man beneath it to forbid it from travel .
Screenshot by Pro Game Guides
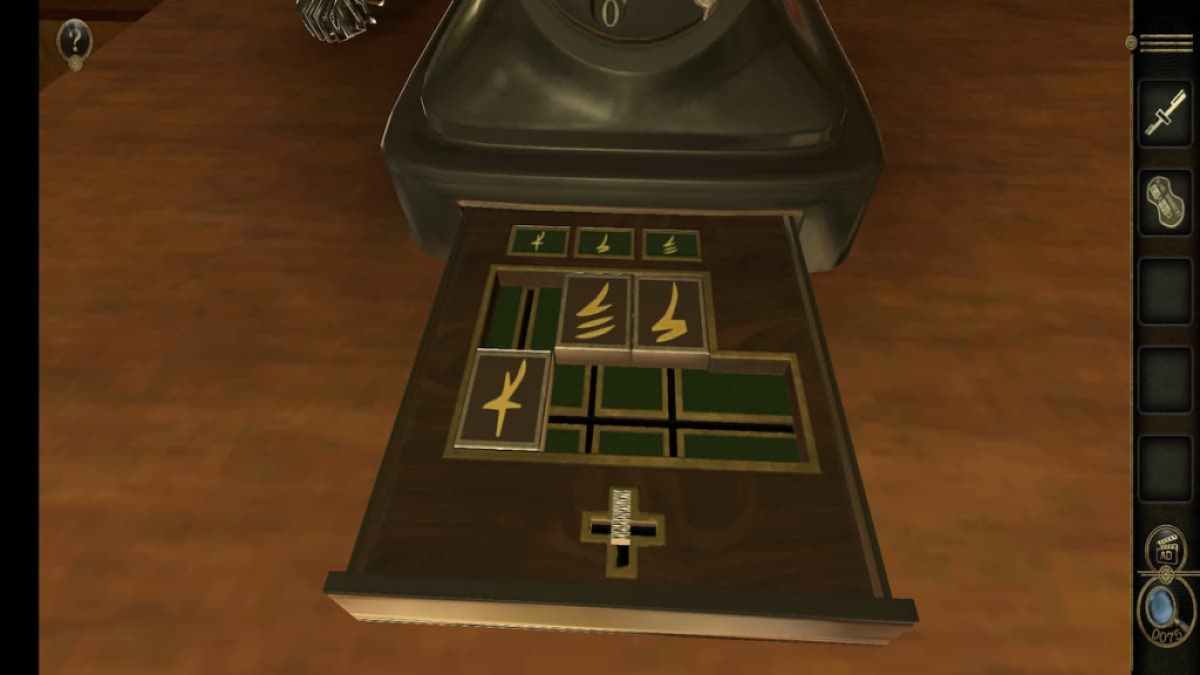
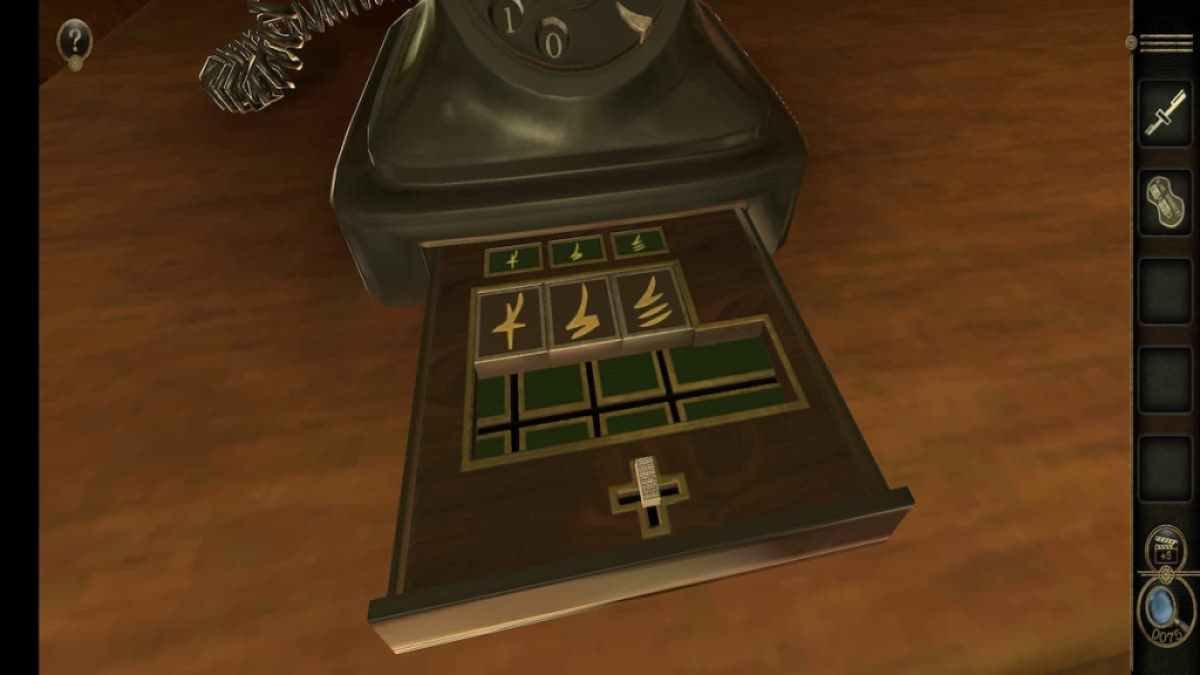
Now push the slider down .
slue the slipper to the left . The two pieces on the bottom should be in the right columns .
tug the luger up one final clip to complete the puzzle .
Screenshot by Pro Game Guides
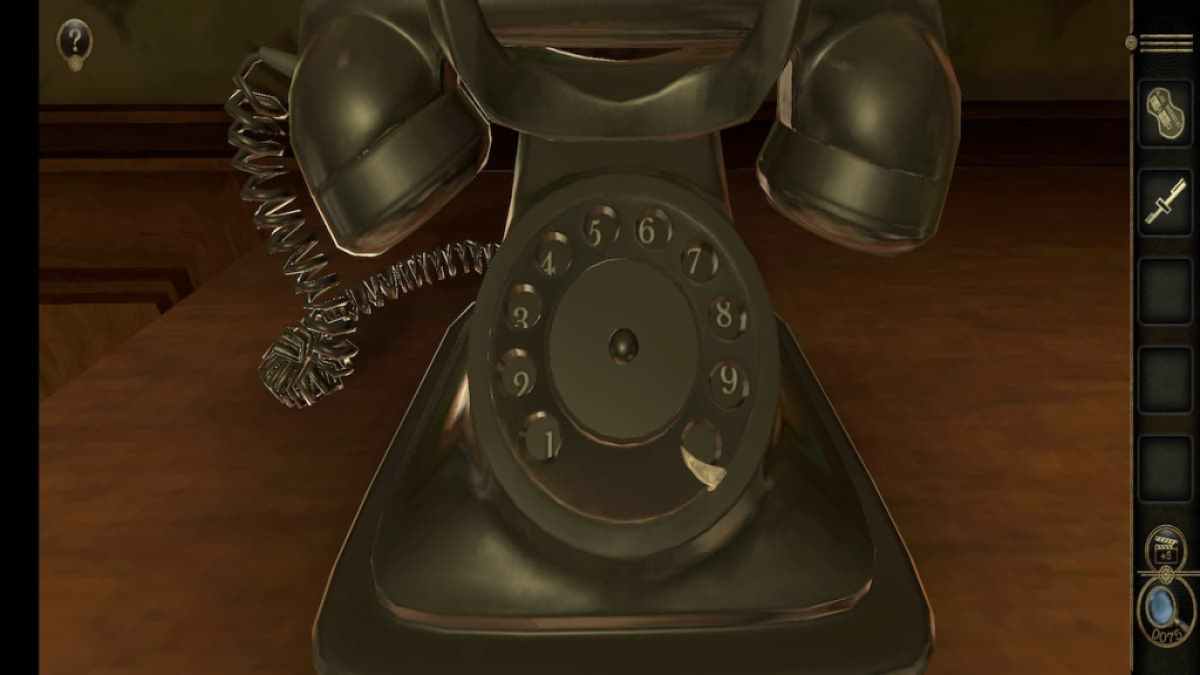
This will conduct you to a small substitution on the telephone set ’s left side . Flip it to fill out the telephone set .
The telephone dial will open up up , give away a Metal Tray for your inventory .
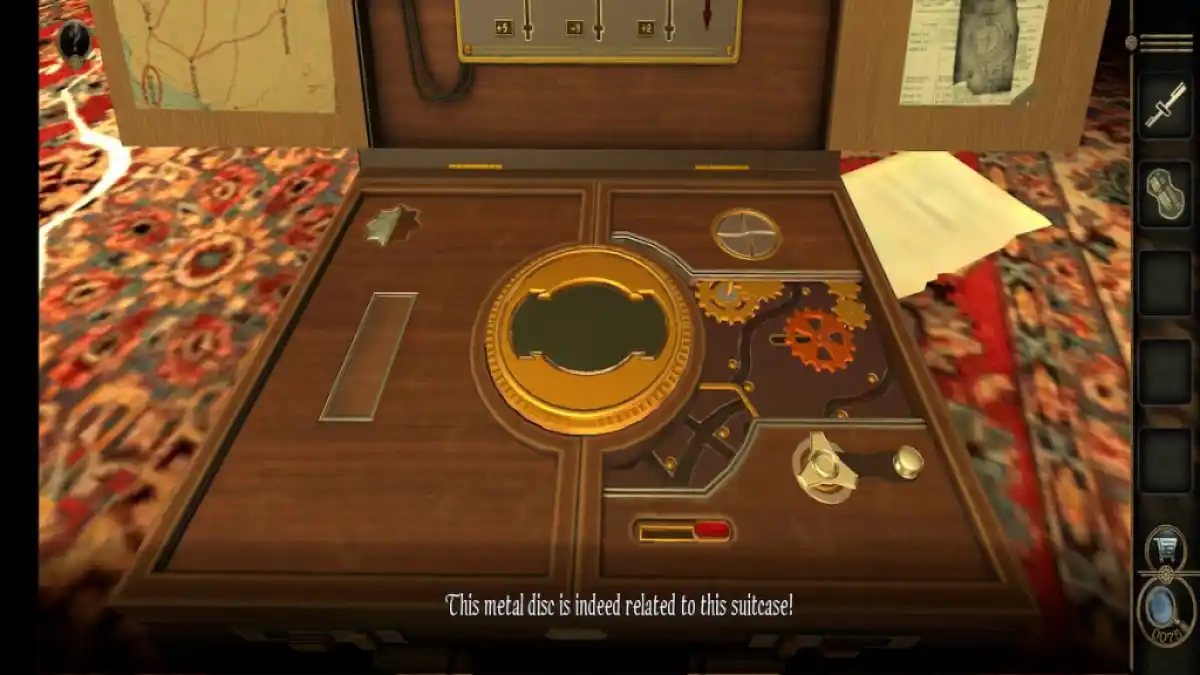
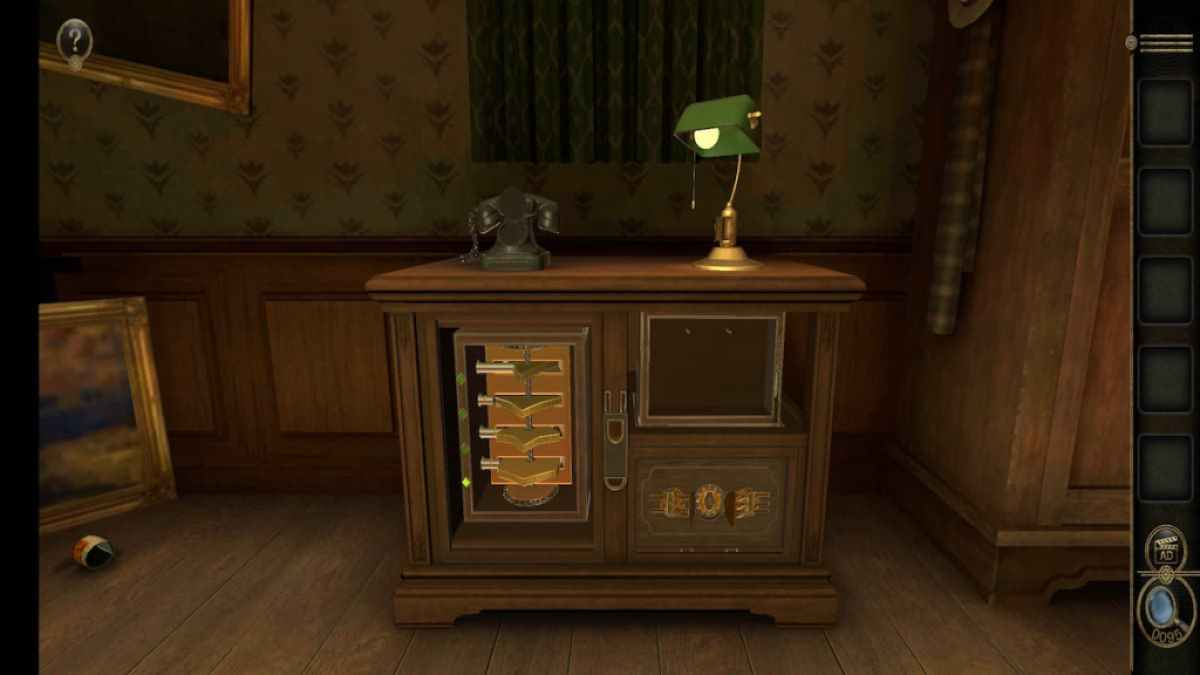
Briefcase puzzles part 2
Return to the briefcase and place the Metal Tray in its shopping mall .
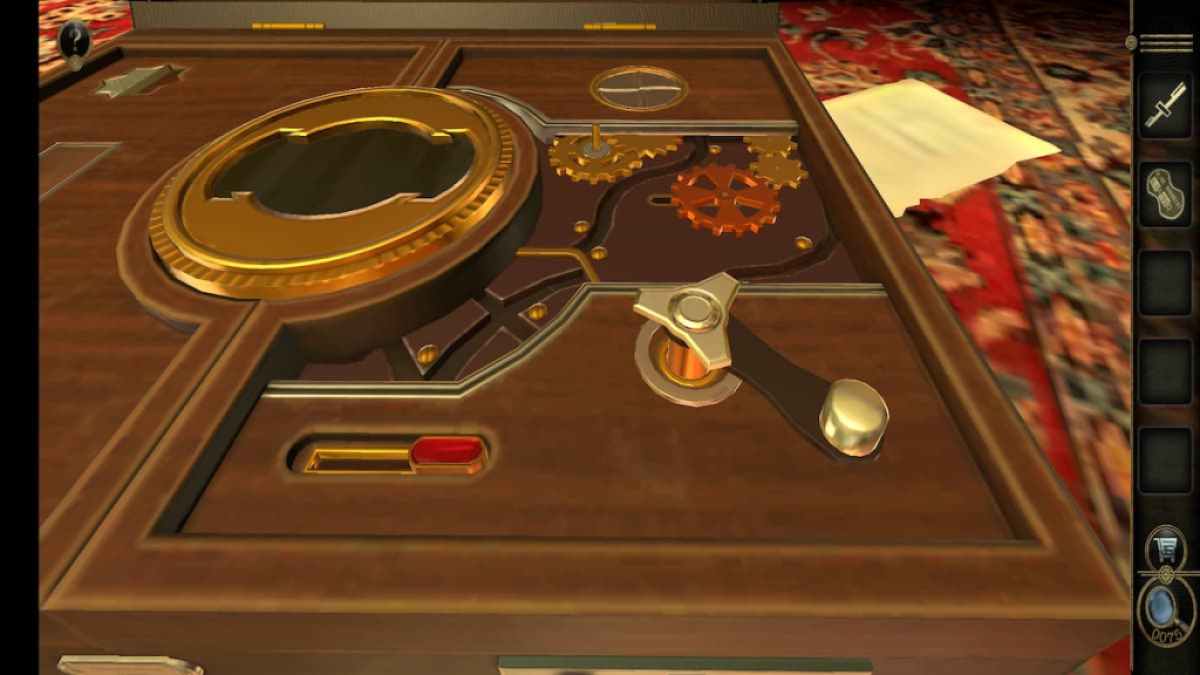
This allows you to turn the gears on the correct side by rotating the handle .
Rotating the gears give you this metal musical composition .
Screenshot by Pro Game Guides
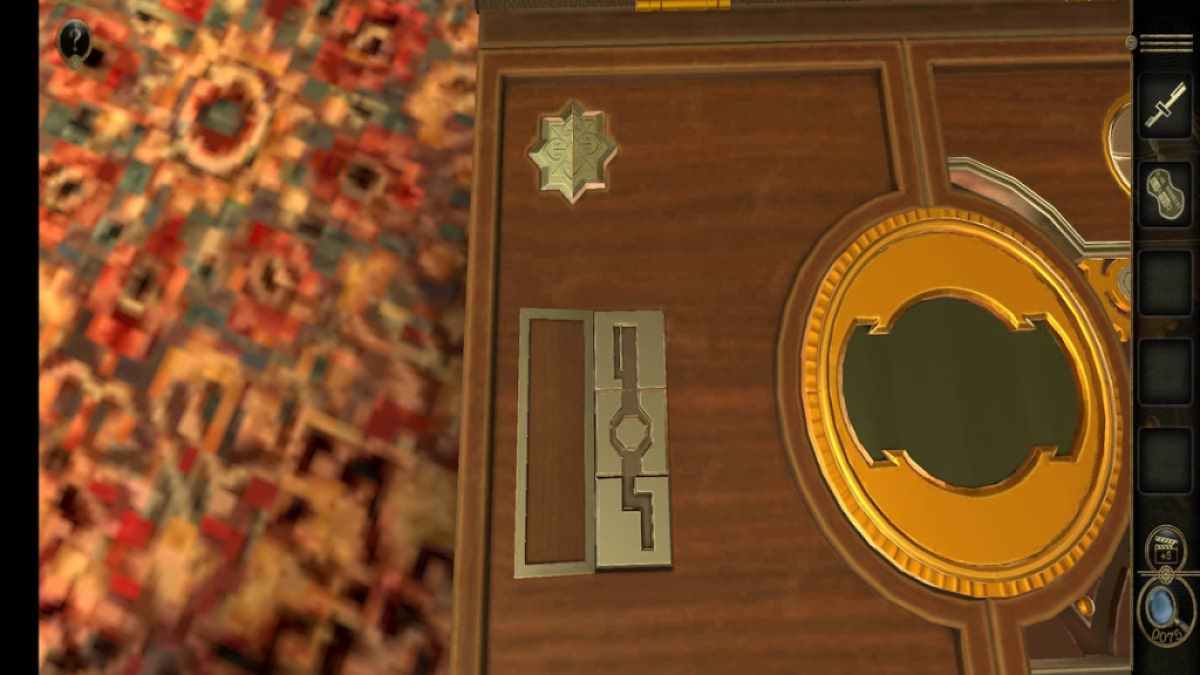
The metal small-arm equal an identical musical composition on the left-hand side .
Place it next to the matching piece to unlock another puzzle .
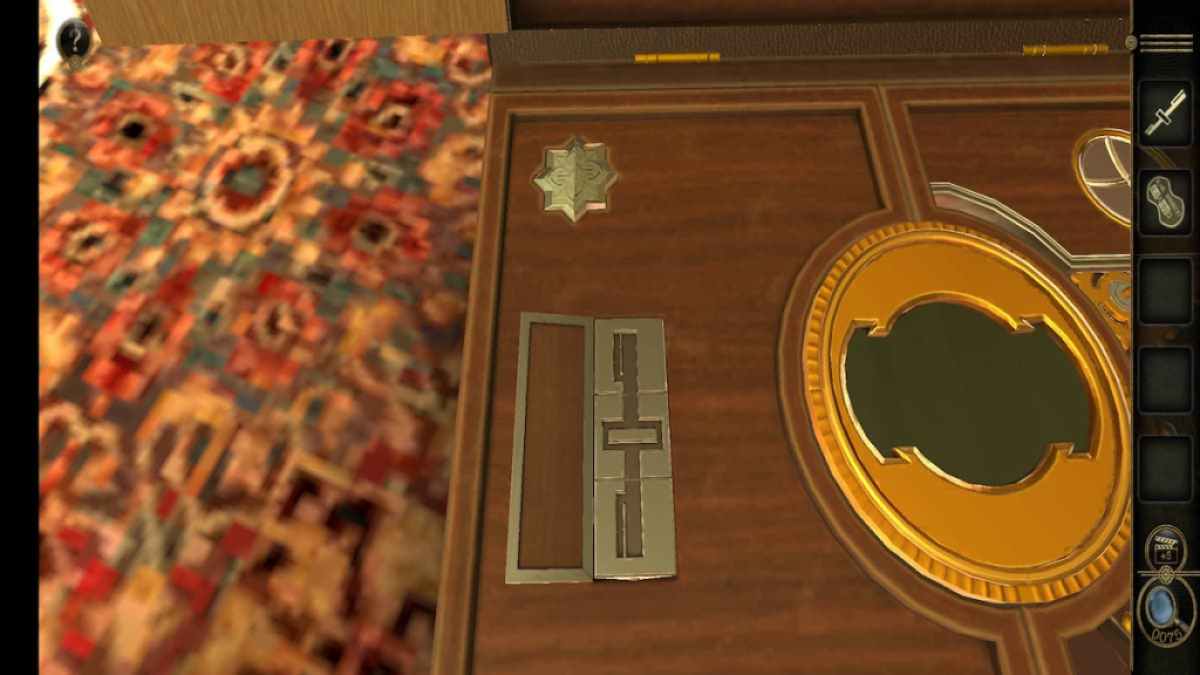
To solve this mystifier , you ’ll need to flip-flop the sections so that they match the Metal Strip in your inventory .

Screenshot by Pro Game Guides
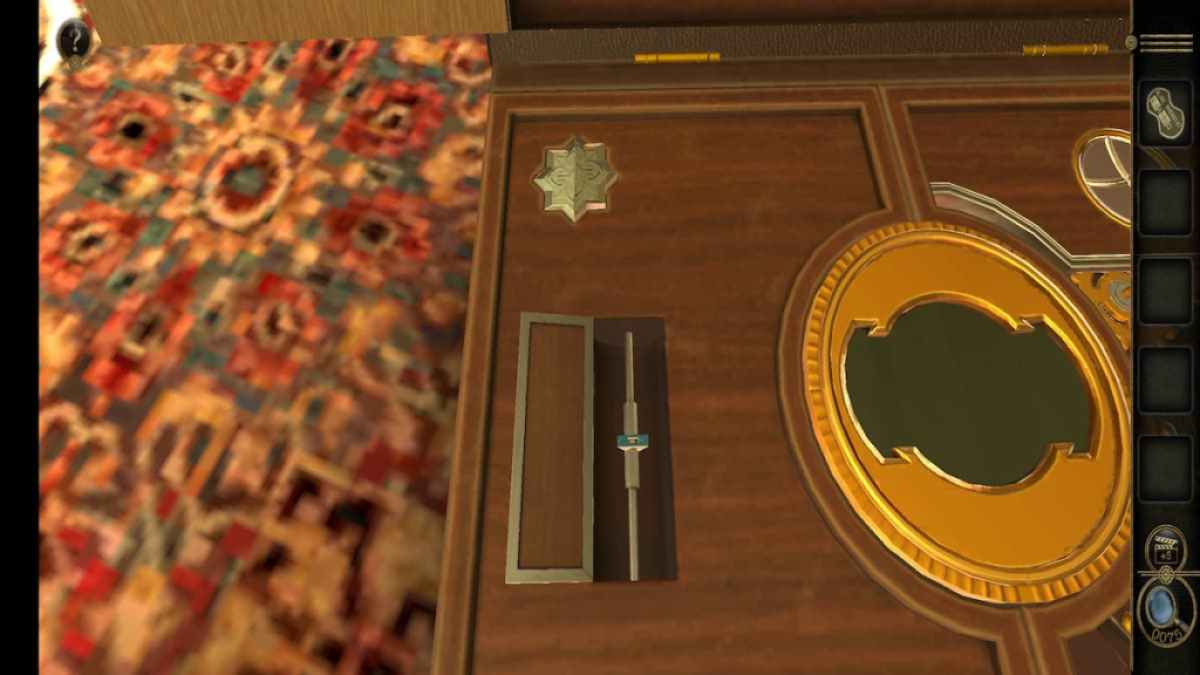
Once they match , drag the Metal Strip into the puzzle to complete the puzzle . The reinforcement for this teaser is a Triangle Metal Block .
colligate : Must Escape the Wizard ’s Castle Walkthrough
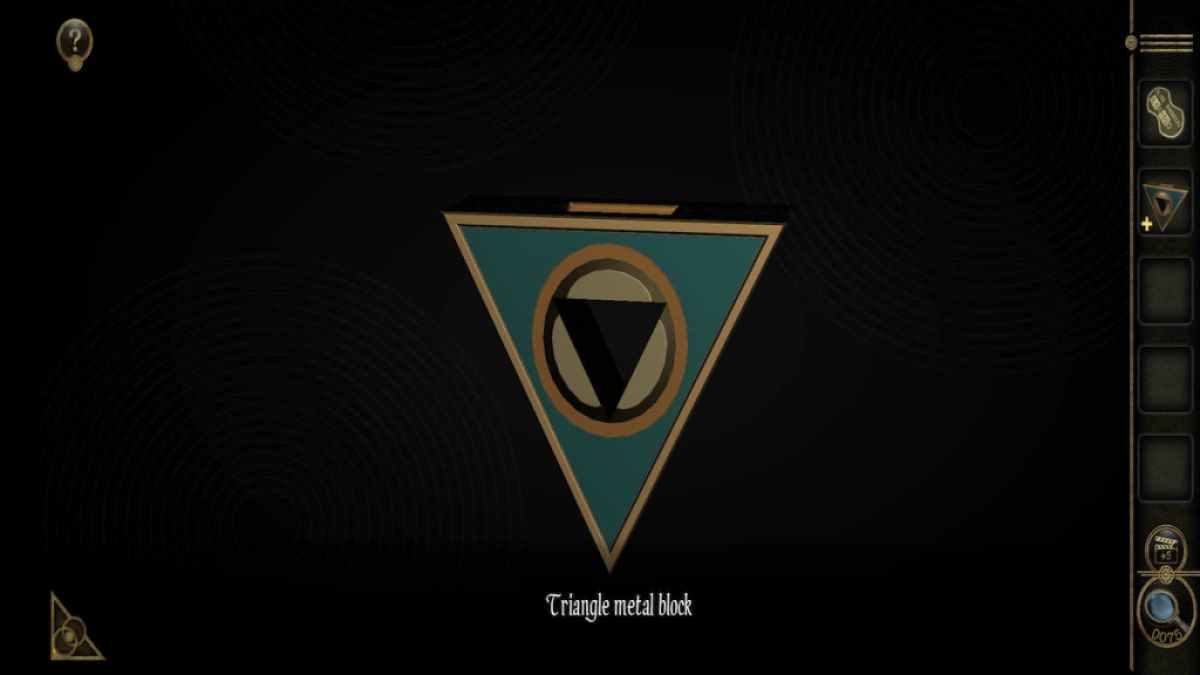
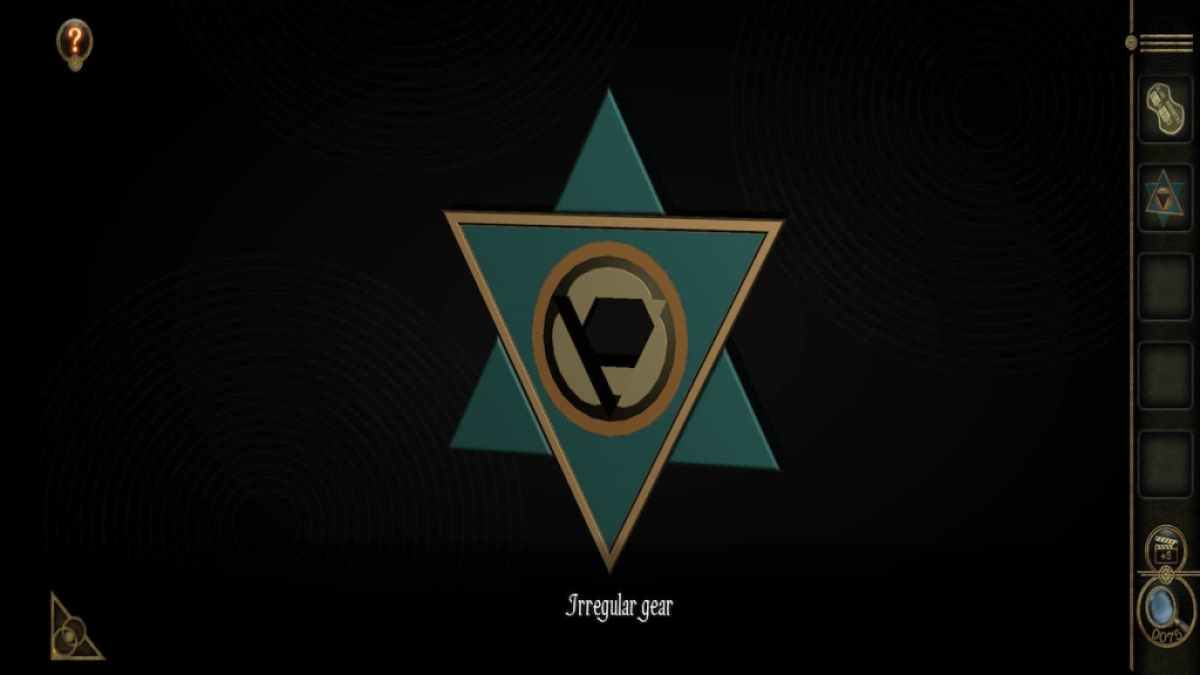
Open up your inventory with the Triangle Metal Block selected .
Screenshot by Pro Game Guides
Twist its two halves and drive them together to release it into an Irregular Gear .
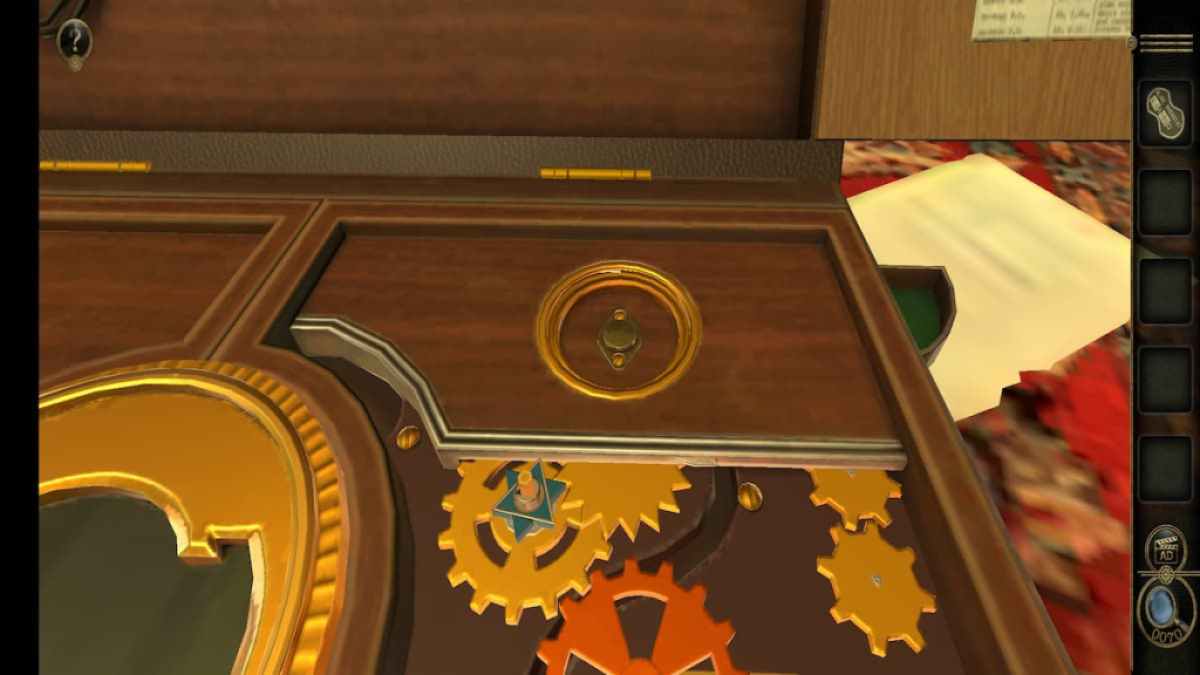
Upon return to the correct side of the briefcase , you ’ll remark that the top left power train has a slim column stick out of it . put the Irregular Gear onto this column and use the red luger at the bottom to place the orange gear against the same top left-hand gear mechanism .
Now rotate the appurtenance the same way you did previously to open up the compartment behind the puzzle , which hold in an Electronic Prop .
Screenshot by Pro Game Guides
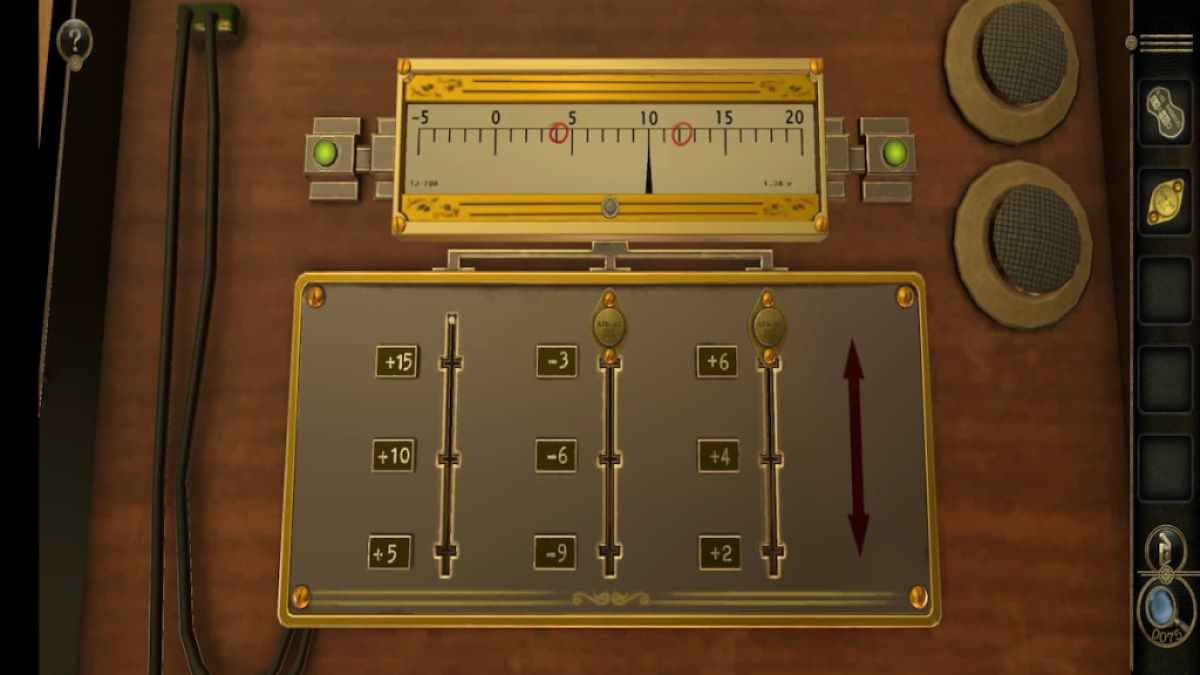
Move to view the mystifier at the top of the briefcase .
The Electronic Prop can be add to the left over column .
To complete the puzzle , the heart of the switch demand to match the two areas circle in red . Solve the right side by impress the shift in the centre to the bottom .
Screenshot by Pro Game Guides
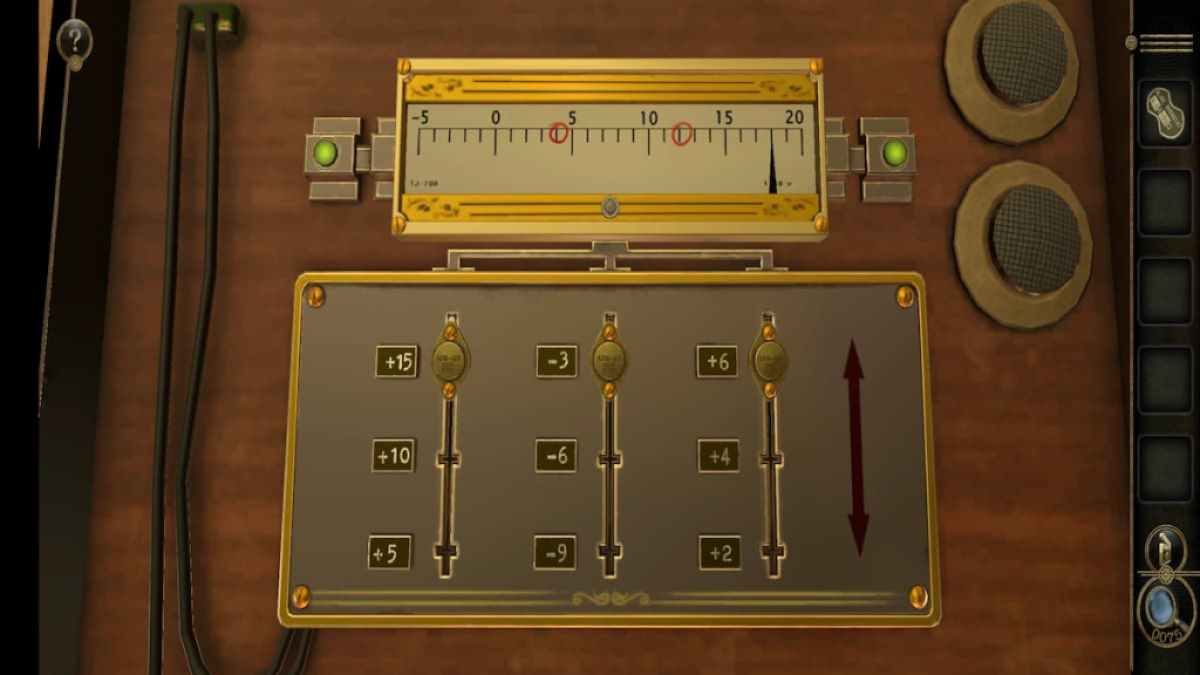
Solve the left-hand side by turn back the switches so that the remaining and correct switches are at the bottom of their row while the central electrical switch is at the top .
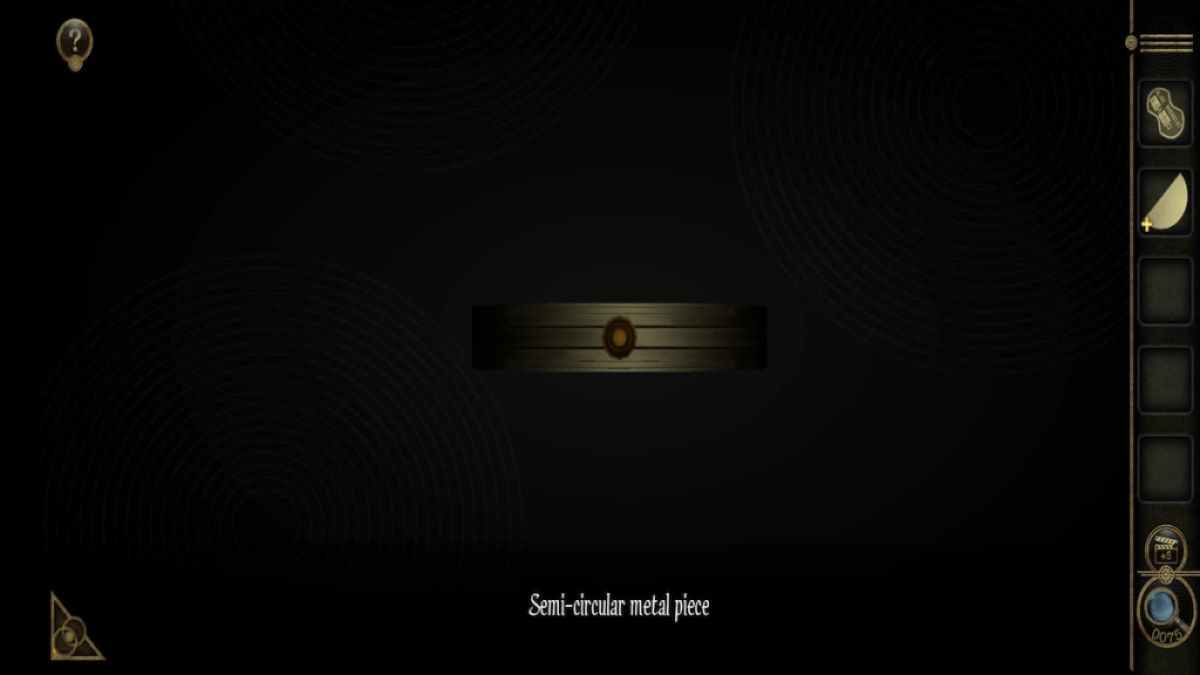
This puzzle chip in you a Semi - Circular Metal Piece .
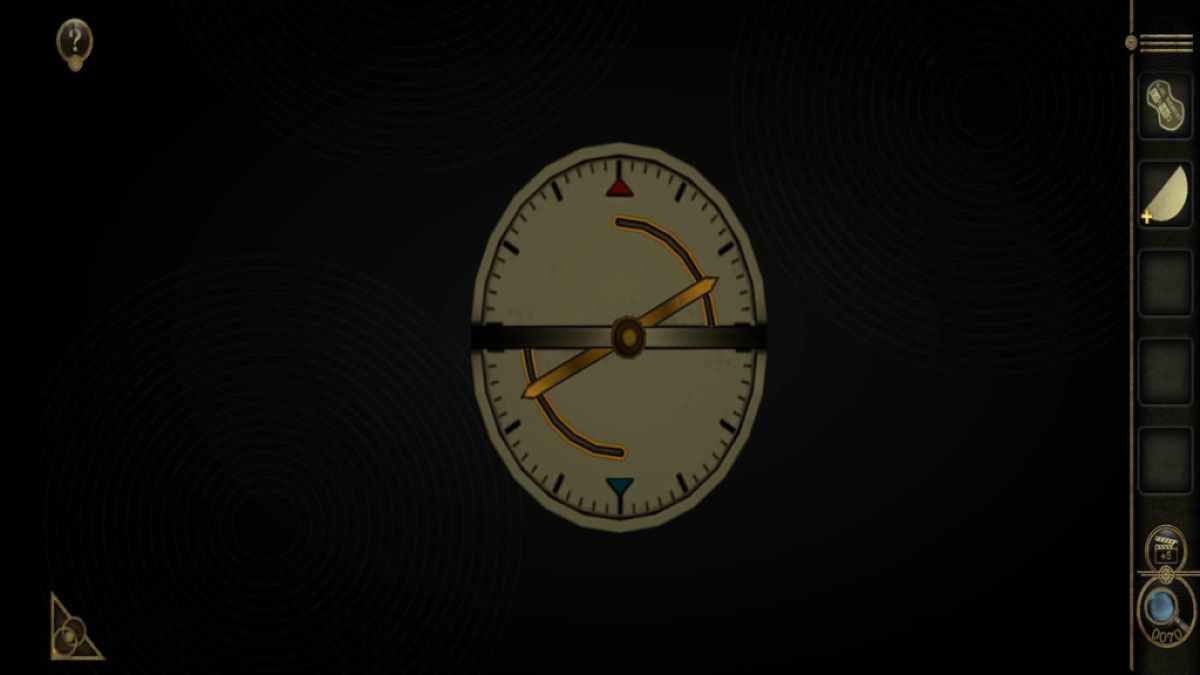
pick out the Semi - round Metal Piece in your armory . Rotate the gold - colored dot sticking out to open it up .
Screenshot by Pro Game Guides
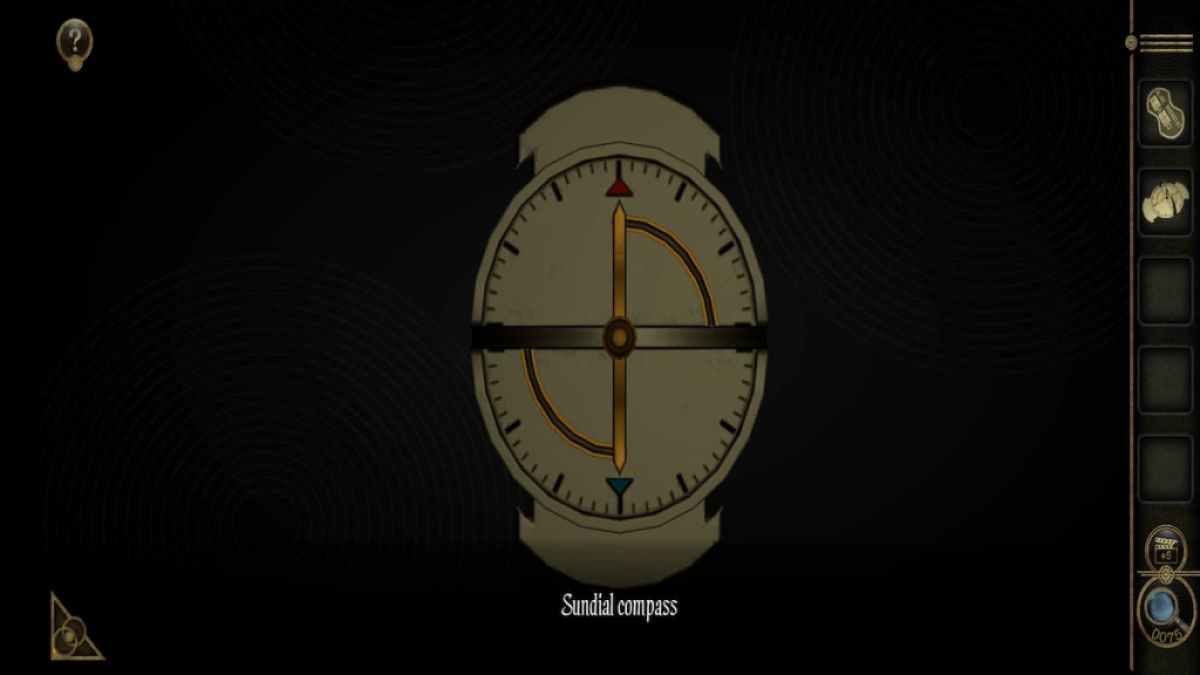
Once open up , spin the needles so that they are pointing right away at the reddened and blue Triangulum of the slice to turn it into a Sundial Compass .
This can be point into the heart of the briefcase where the Metal Tray is .
After position the Sundial Compass on the Metal Tray , a new segment will spread at the bottom of the eccentric . press the compass to place it into your inventory . A box - mould mystifier will appear from the bottom of the briefcase , but it can not be solved yet .
Screenshot by Pro Game Guides
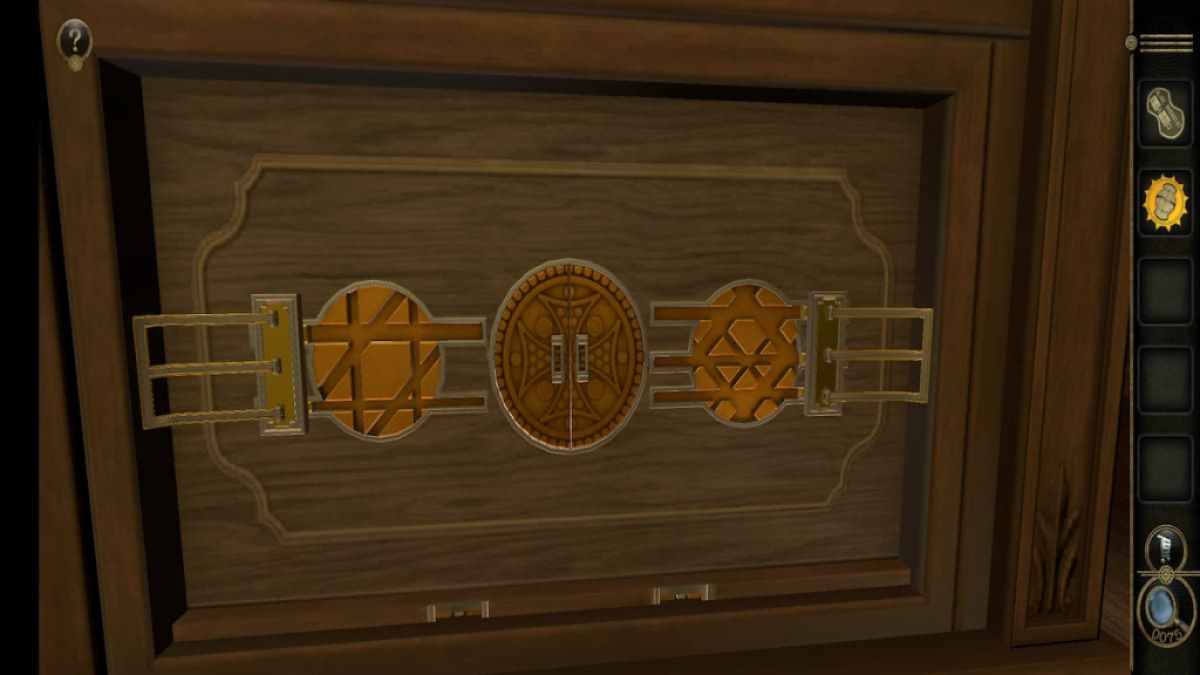
Right cabinet door puzzle
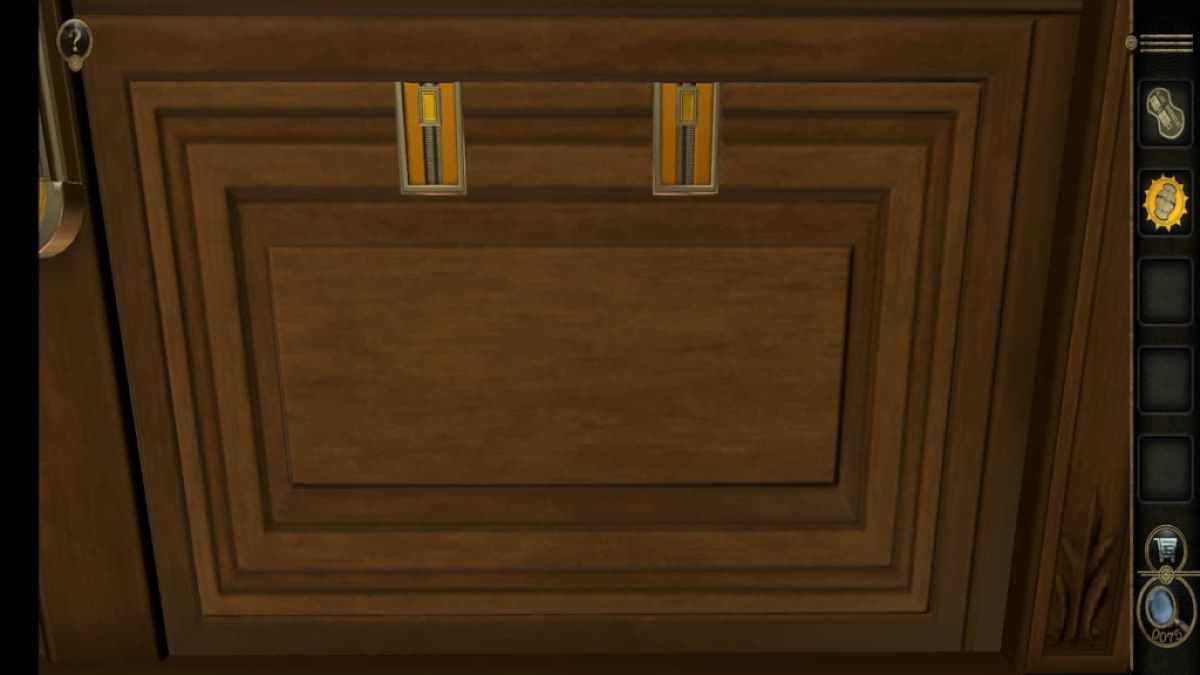
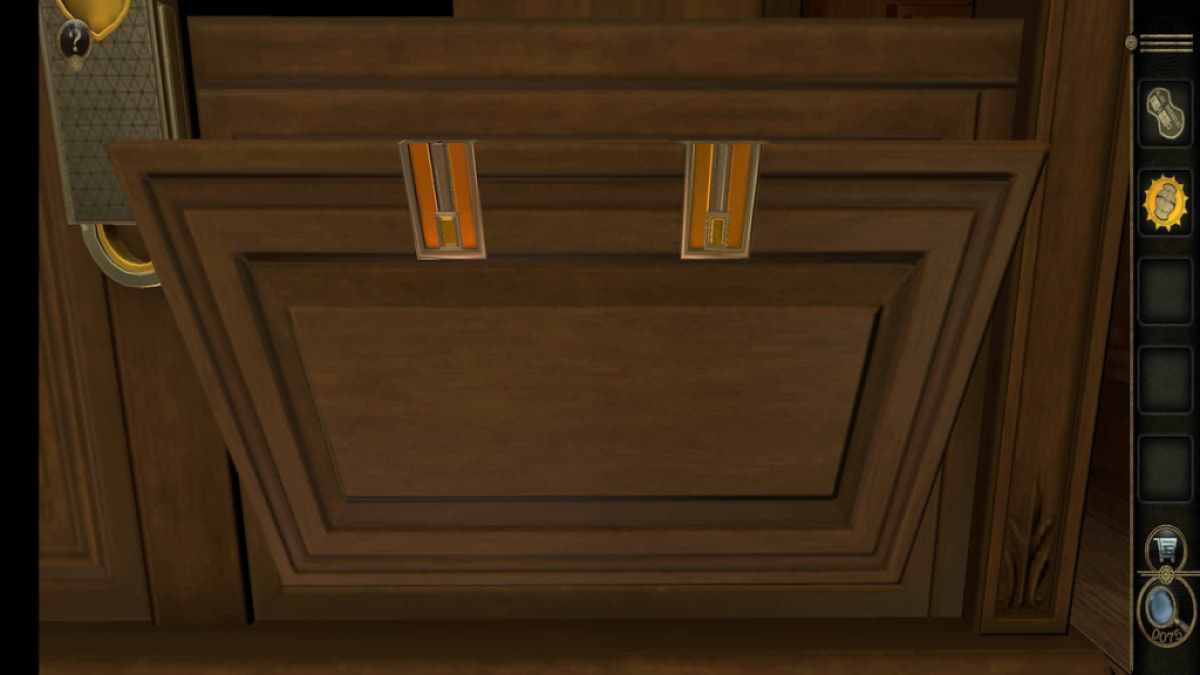
Now return to the cabinet holding the lamp and centre on the right storage locker door .
displume each of the golden permutation down to enter the cabinet .
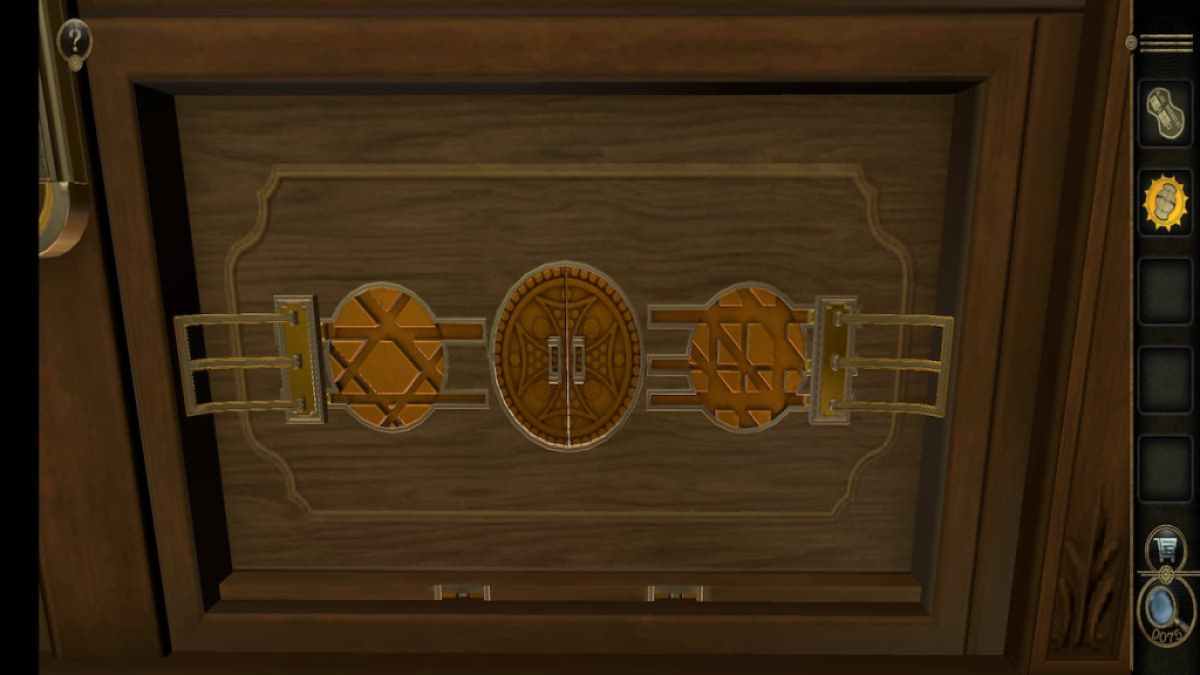
This reveals a 2d mystifier comprise of two three - prong tab , two turn out carved - out circles , and a small central door .
Screenshot by Pro Game Guides
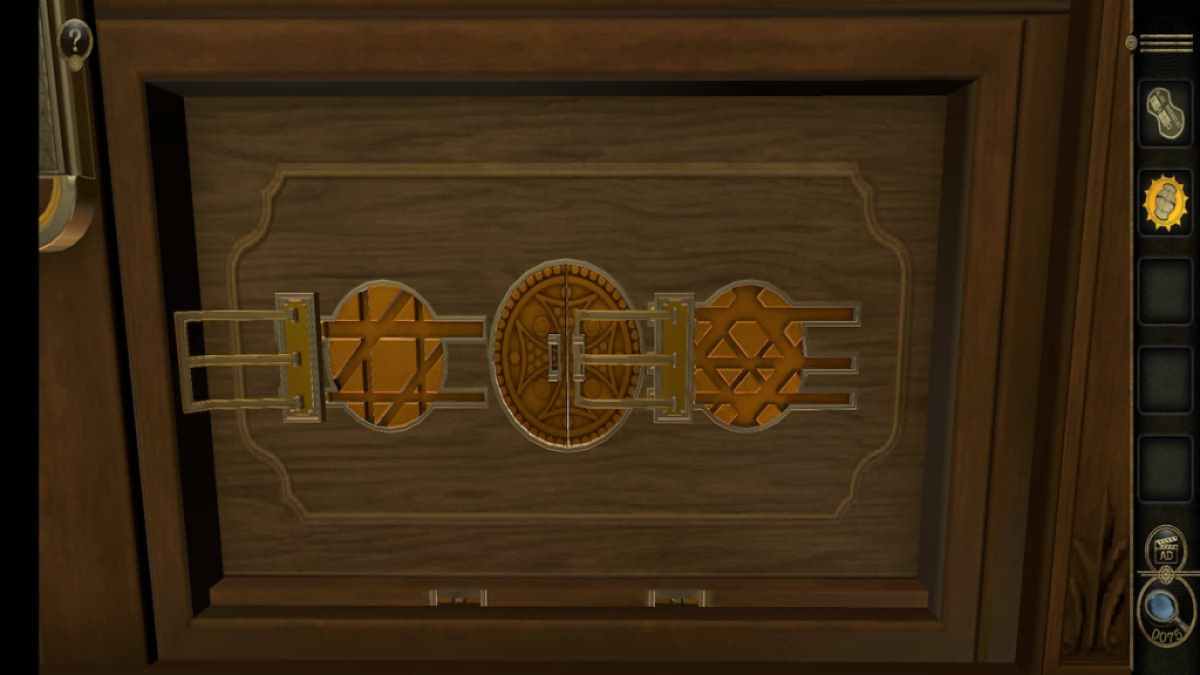
You ’ll take to splay each circle so that there is a readable , straight itinerary for the prong to follow to the center .
Then rip each prong through the itinerary to take the center threshold .
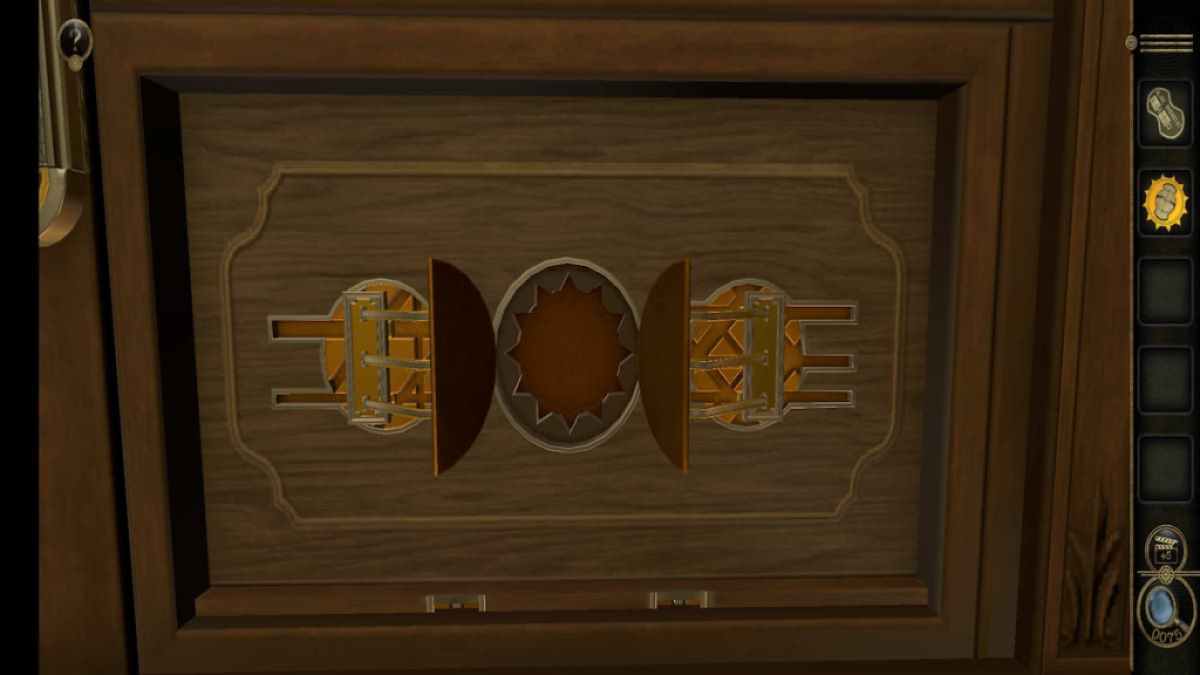
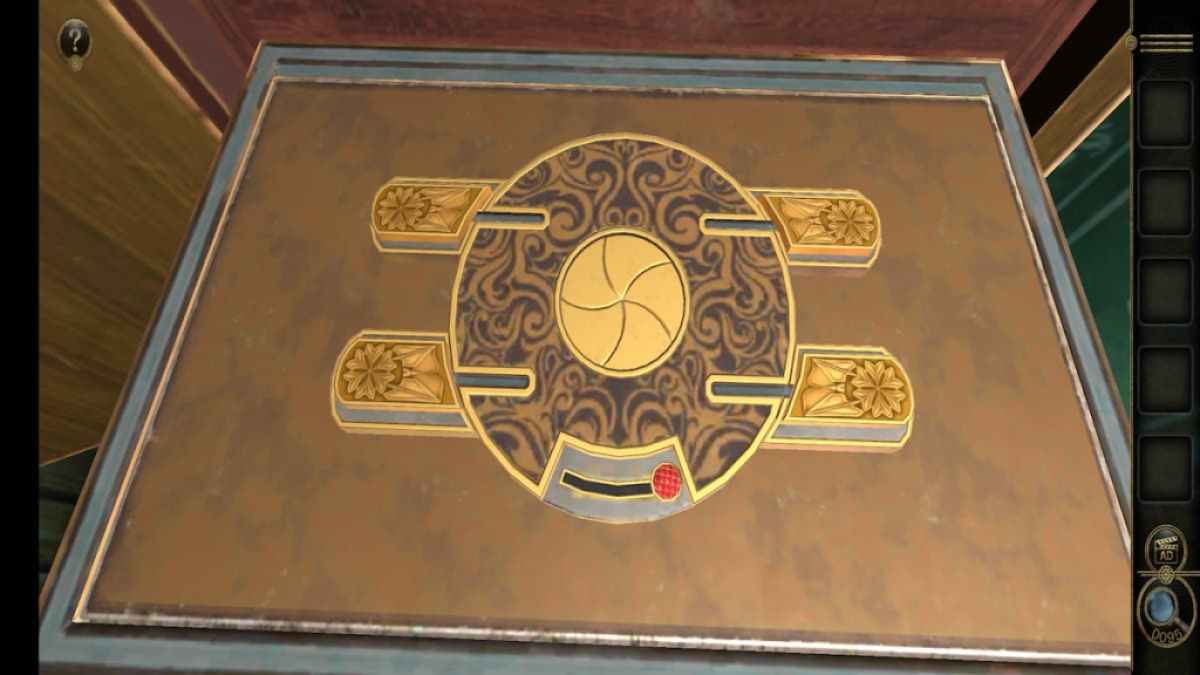
The center door opens to unveil a sun - shaped hole .
Screenshot by Pro Game Guides
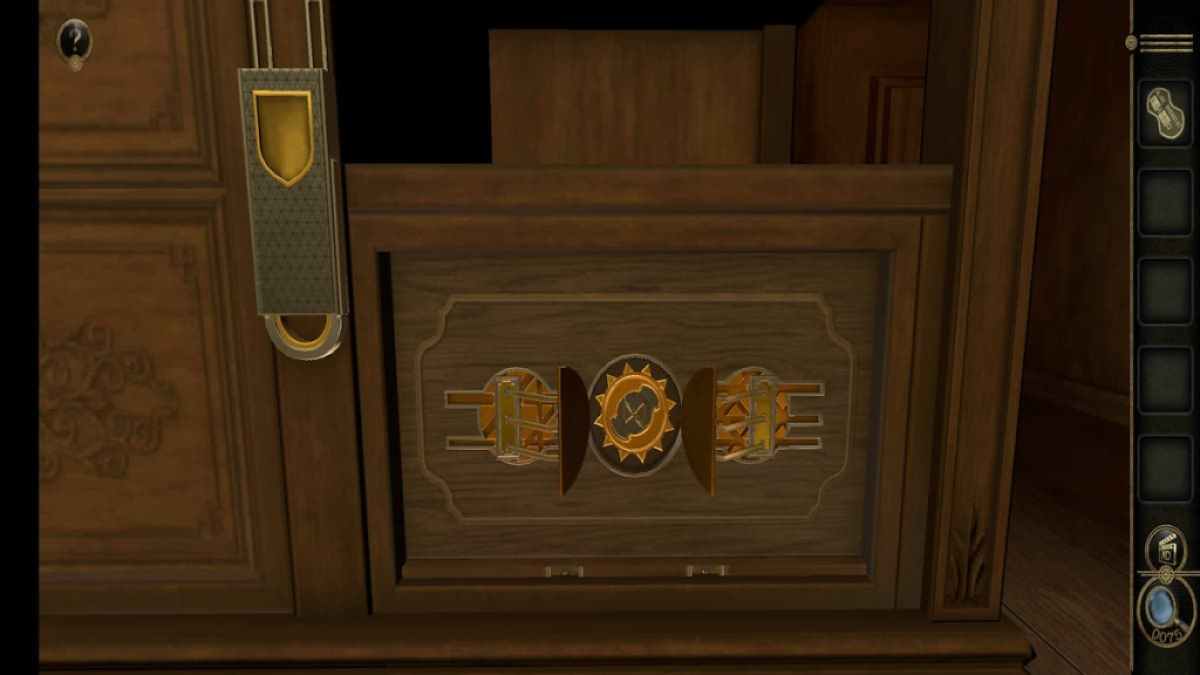
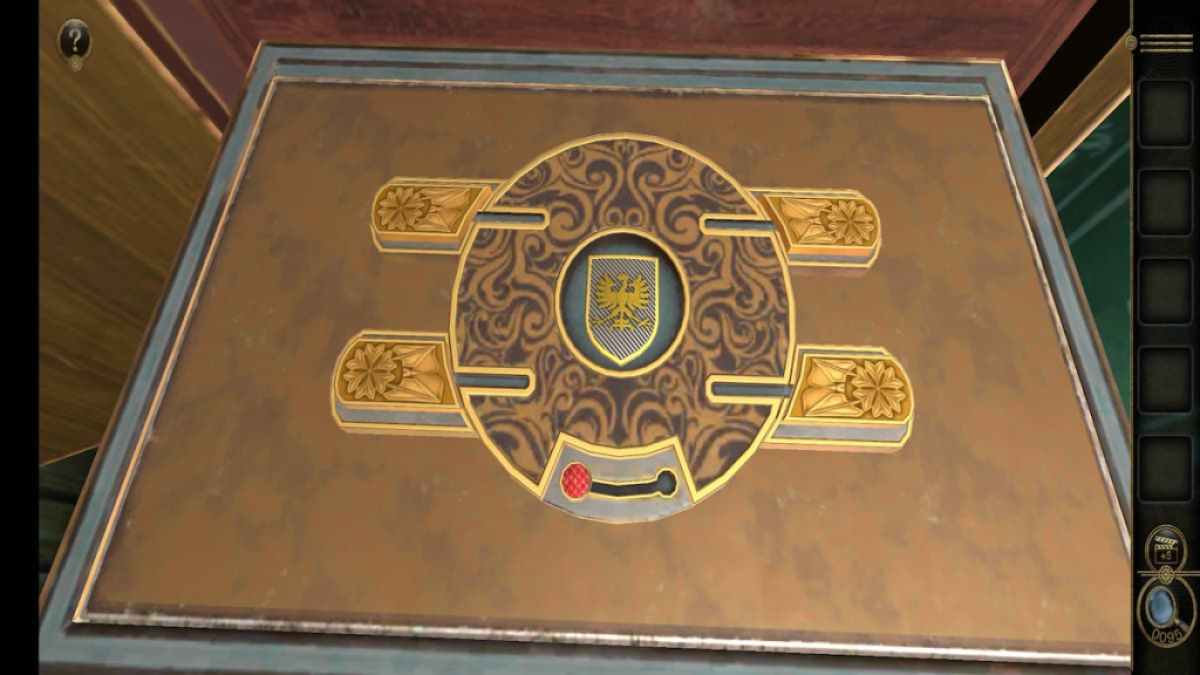
To complete the teaser , place the Sundial Compass into the fix .
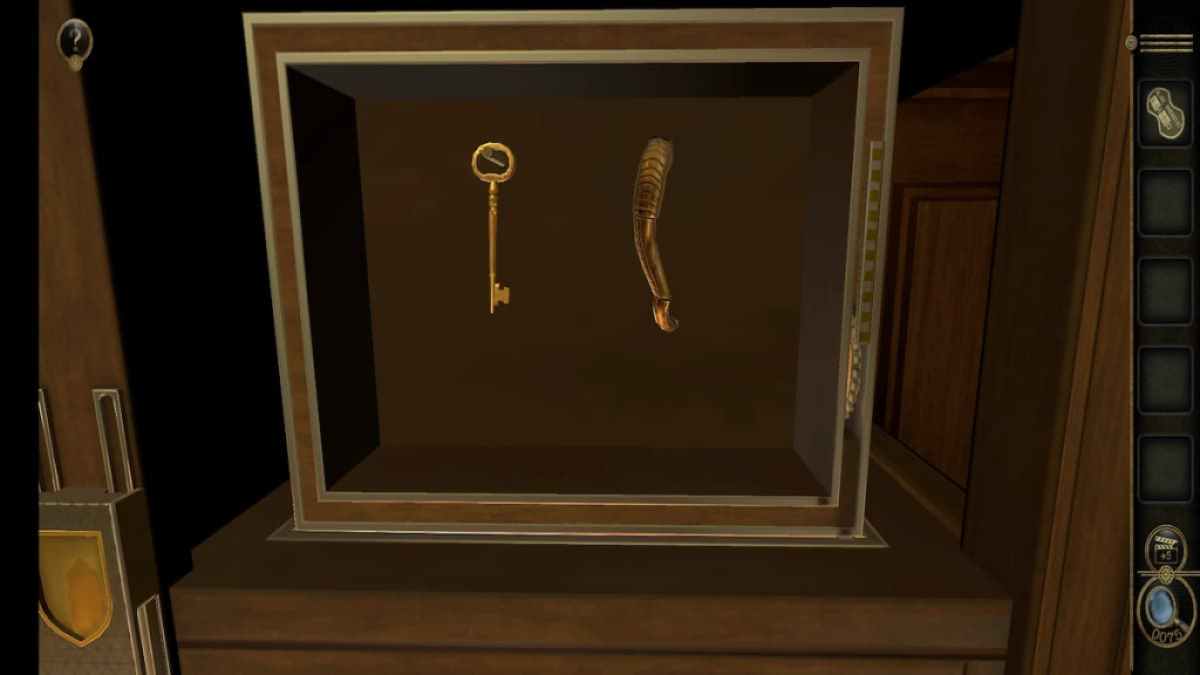
The outer space above the puzzle open up , revealing a proboscis and a Key .
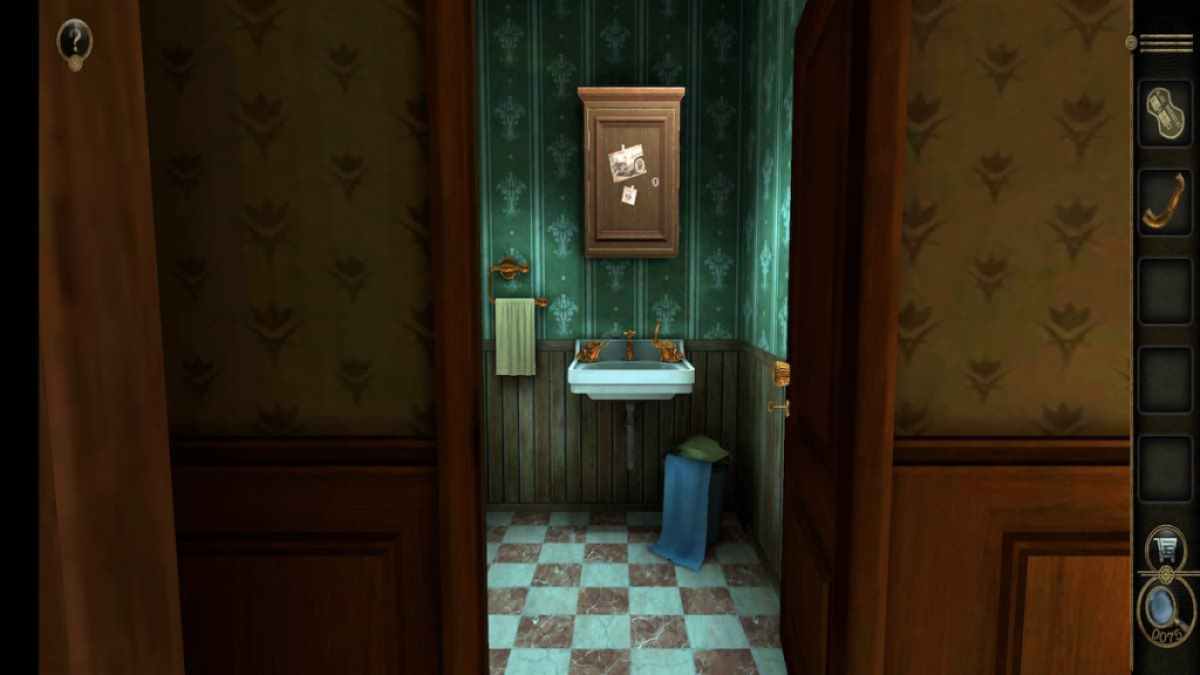
Bathroom puzzles part 1
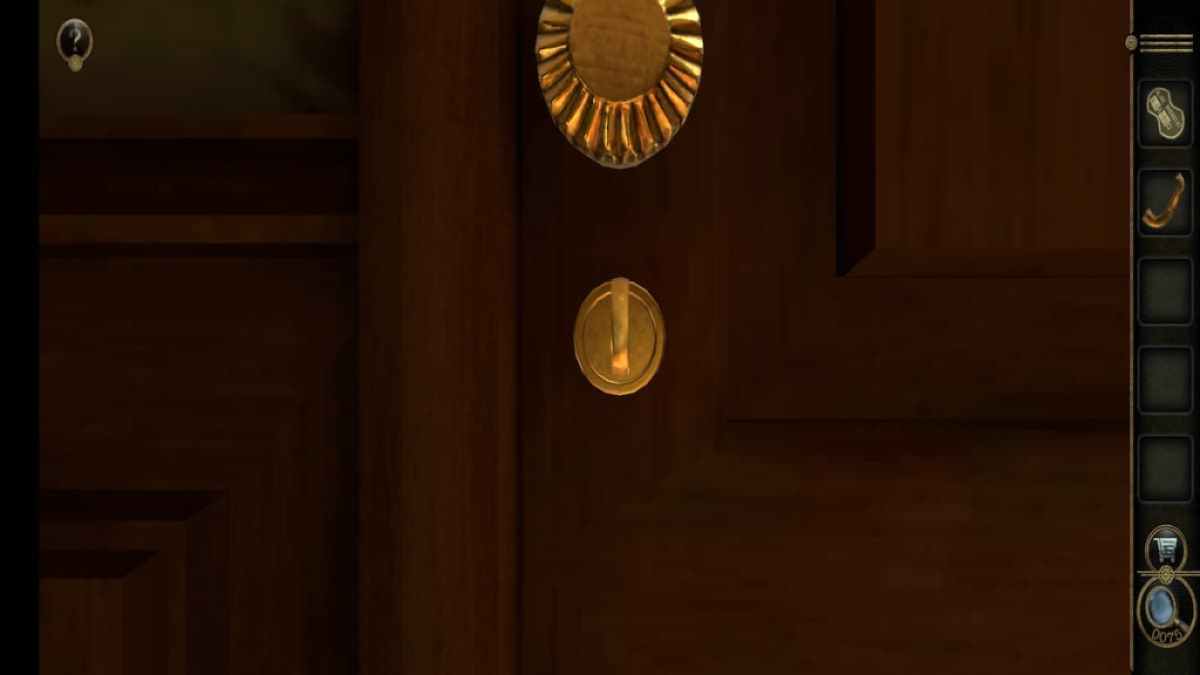
After retrieving the Key from the storage locker , it can be used on the door on the good side of the room . drop back the Key to the lock on the door to insert it .
grow the key 360 degrees to unlock the bathroom .
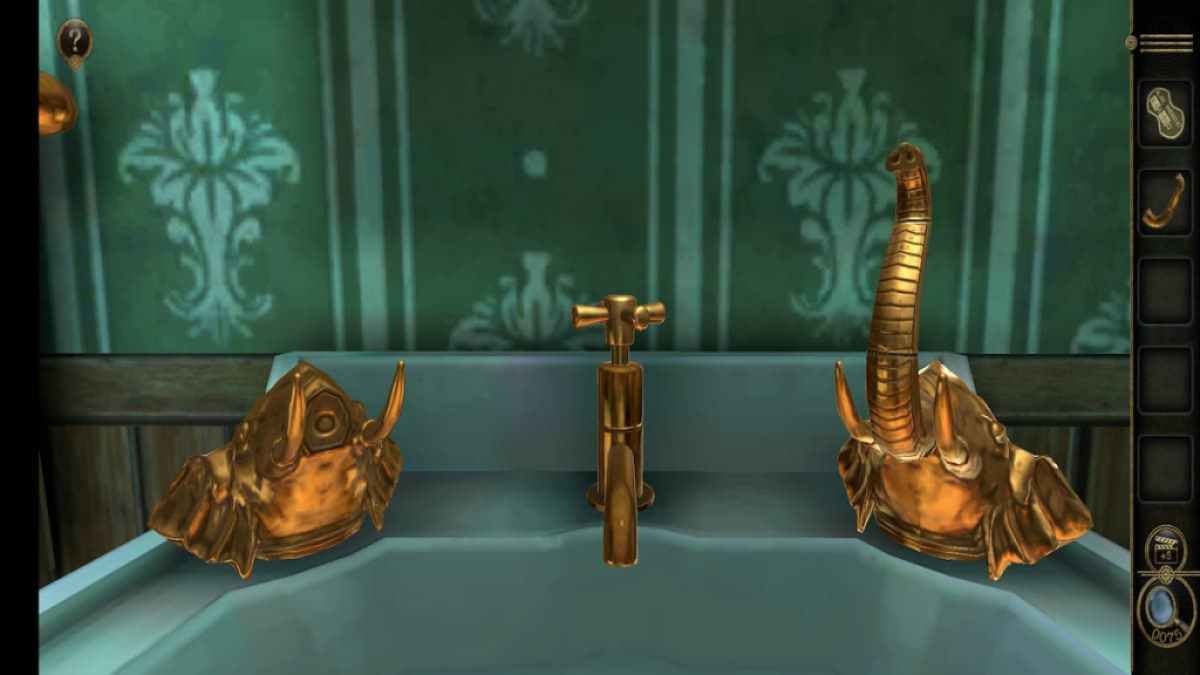
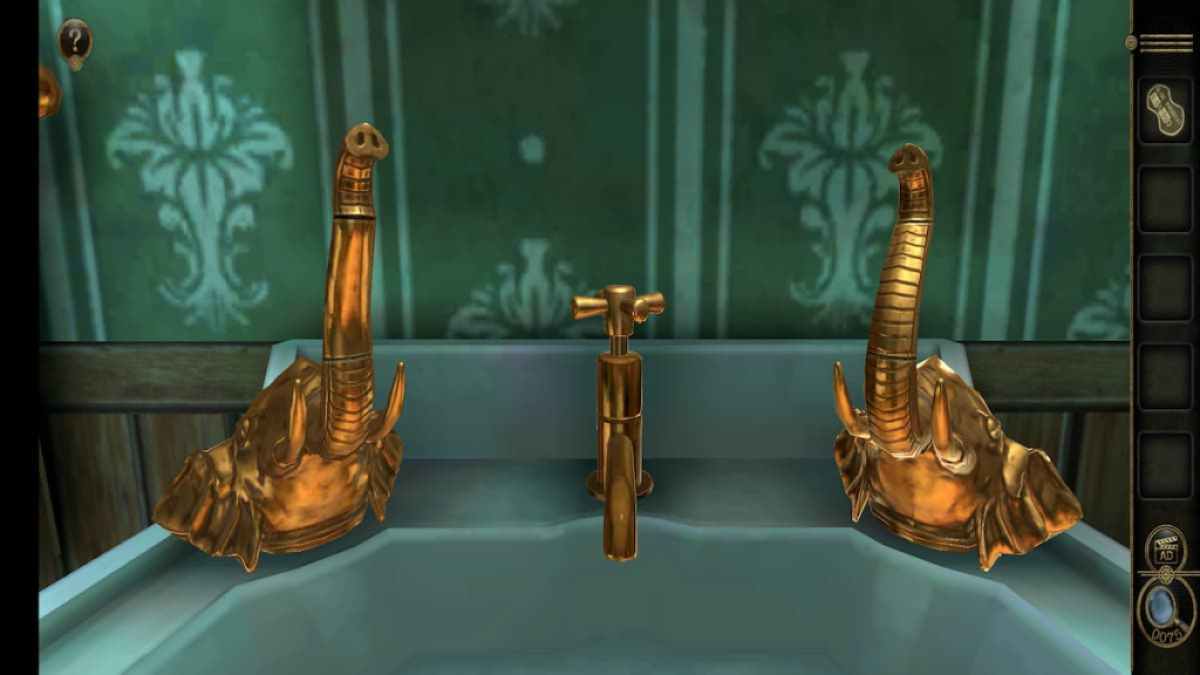
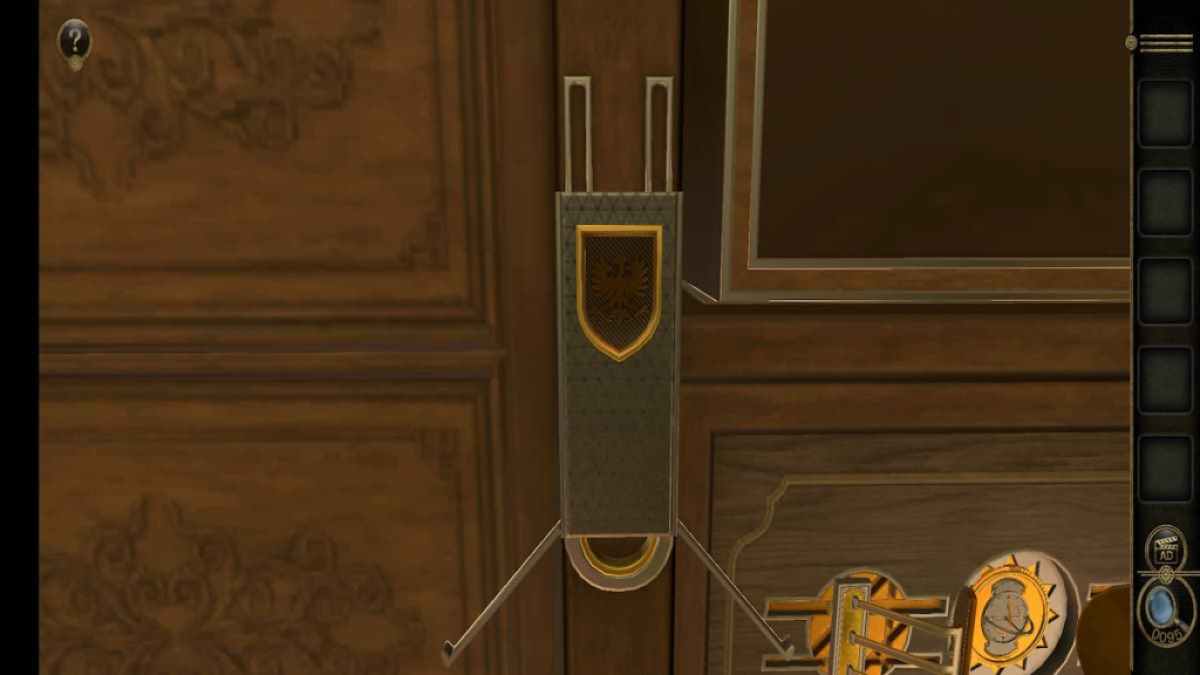
When look at the bathroom drop , you ’ll notice the left over elephant missing a luggage compartment .
Screenshot by Pro Game Guides
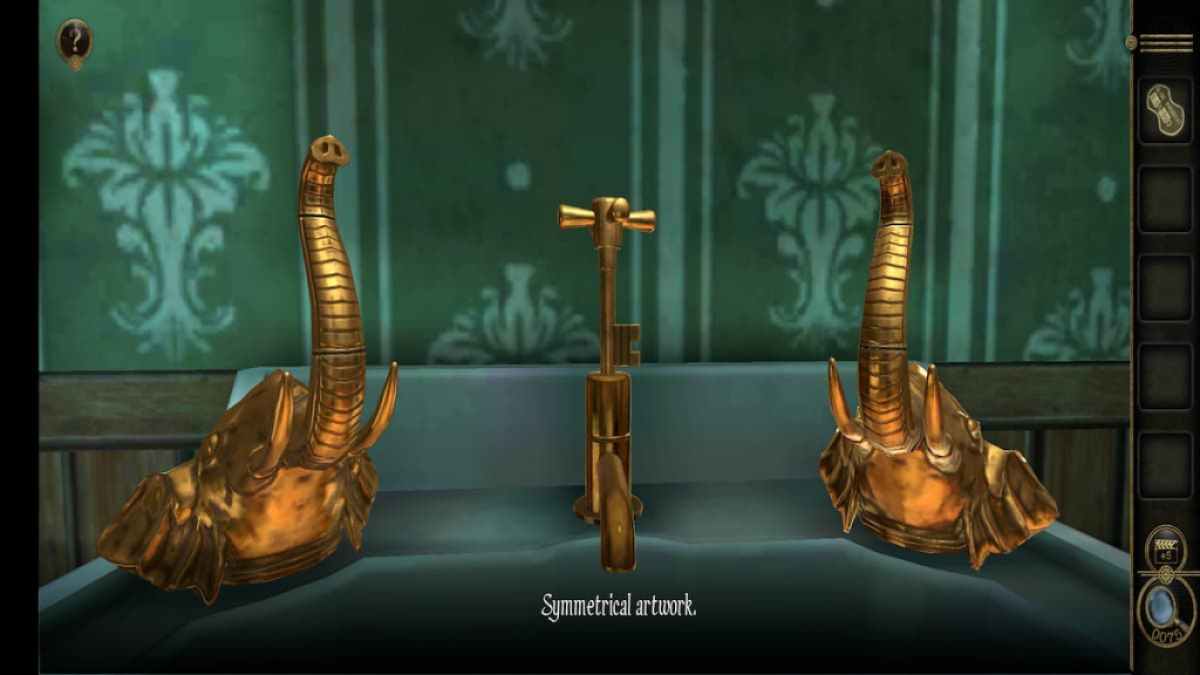
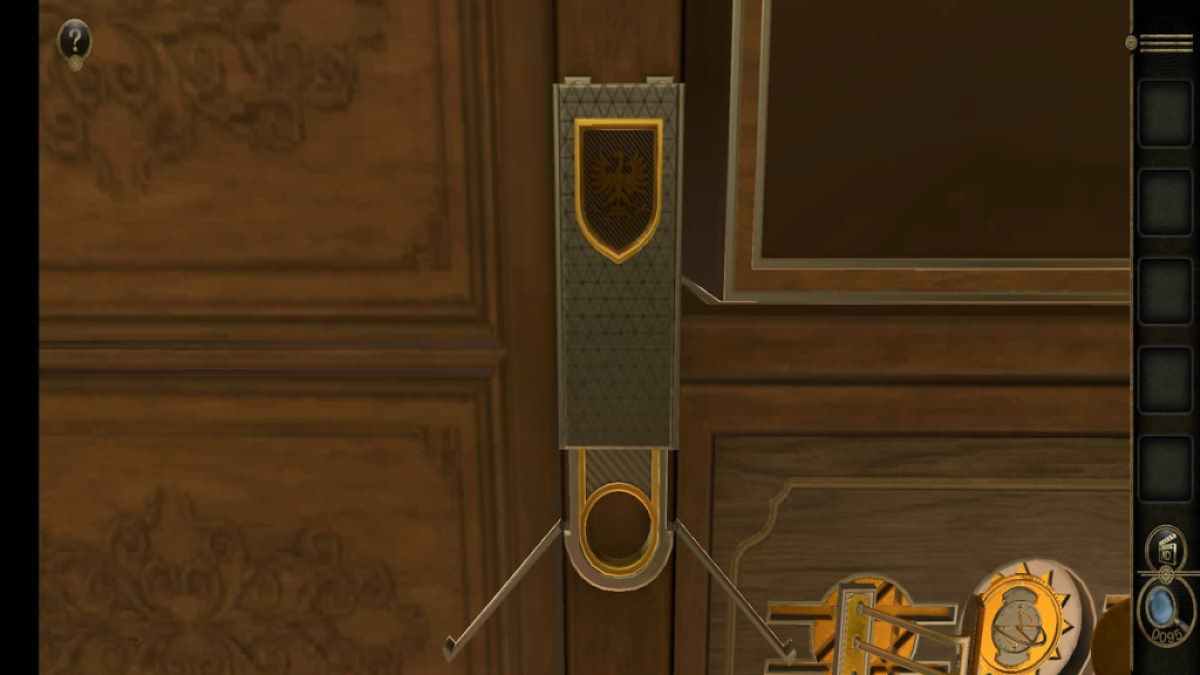
hale the body to the elephant to connect the two .
After the Trunk is lend to the elephant , it is divided into three sections . Each section must be spread out until it is identical to the elephant on the right field . I recommend correct the centre discussion section first , then the top section . Once the elephant is correct , the top of the spigot will climb to reveal a Key .
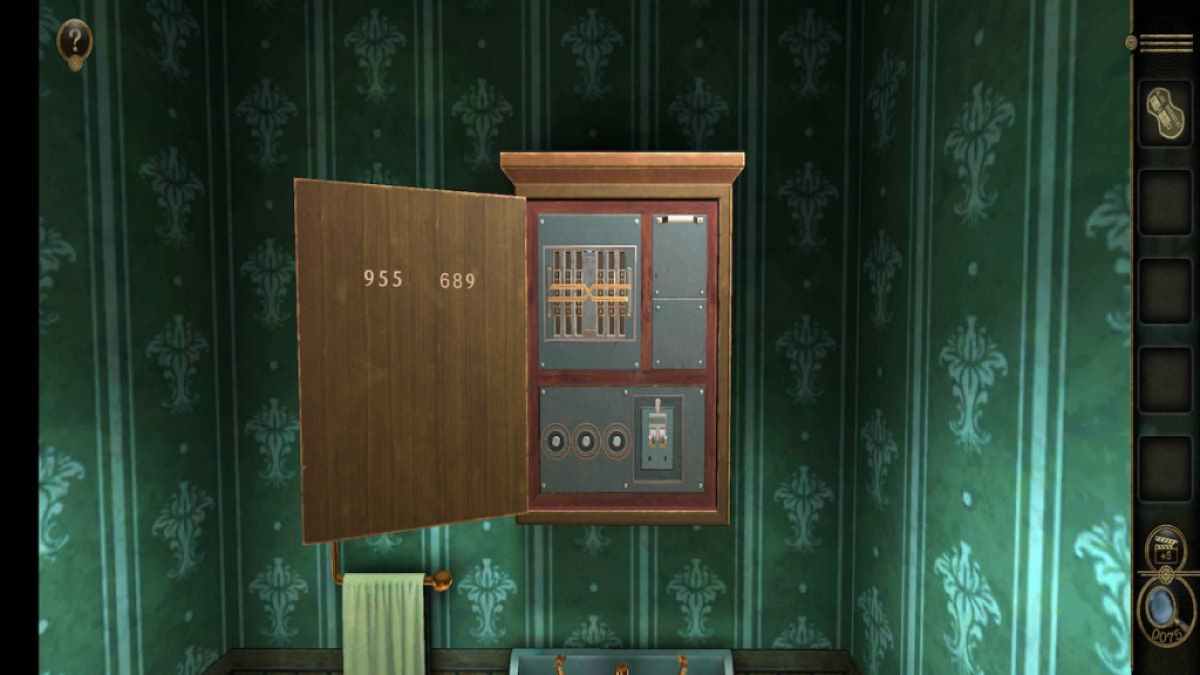
Insert that Key into the bathroom cabinet to unlock it . Take annotation of the numbers on the cabinet doorway , as you ’ll involve them to solve the last puzzle .
Screenshot by Pro Game Guides
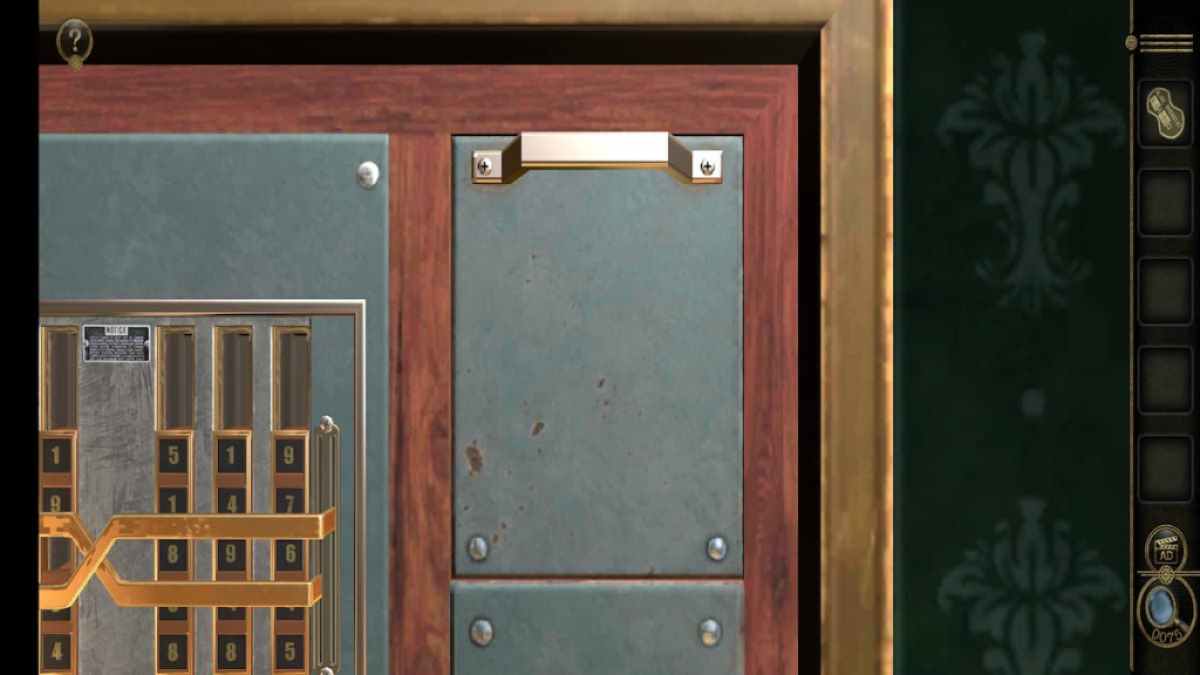
Ignore the mystifier for now and focalize on the compartment at the top right .
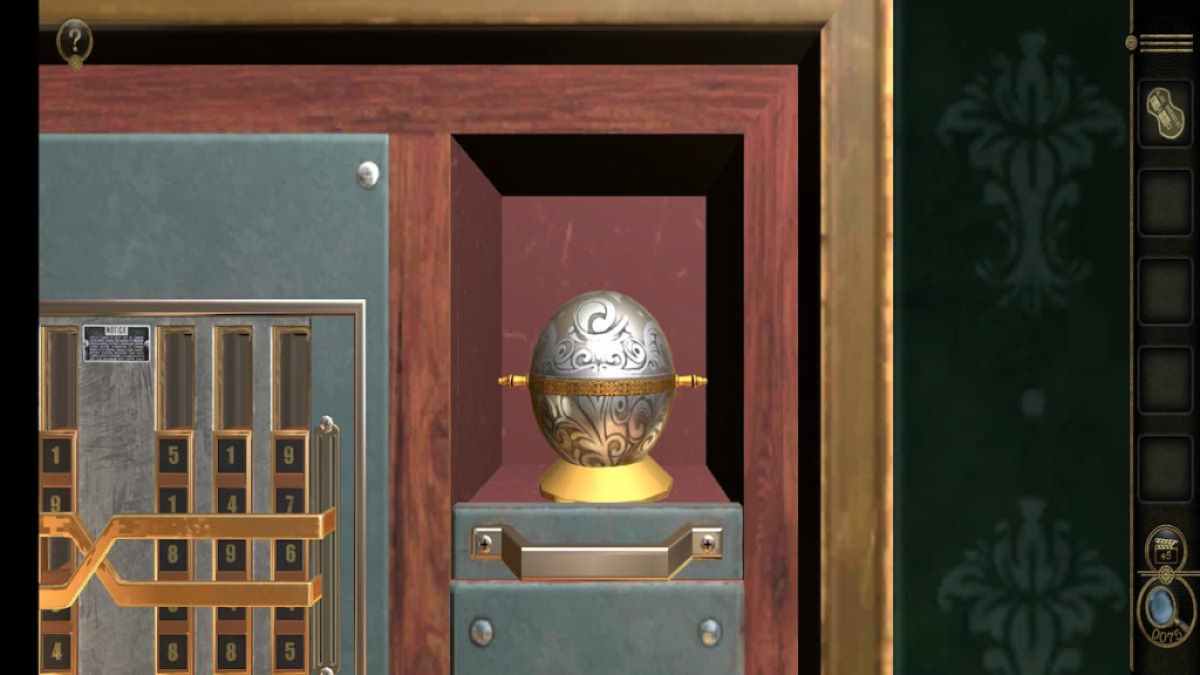
catch the metallic element handle at the top and pull it down to reveal a metal sphere .
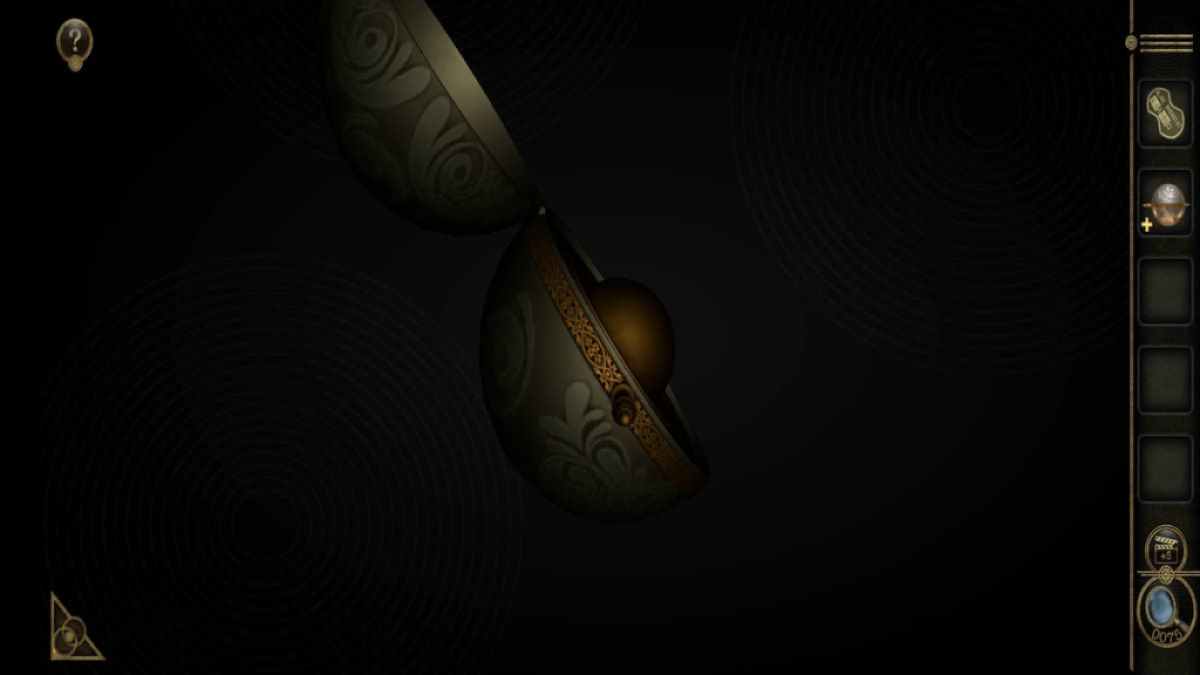
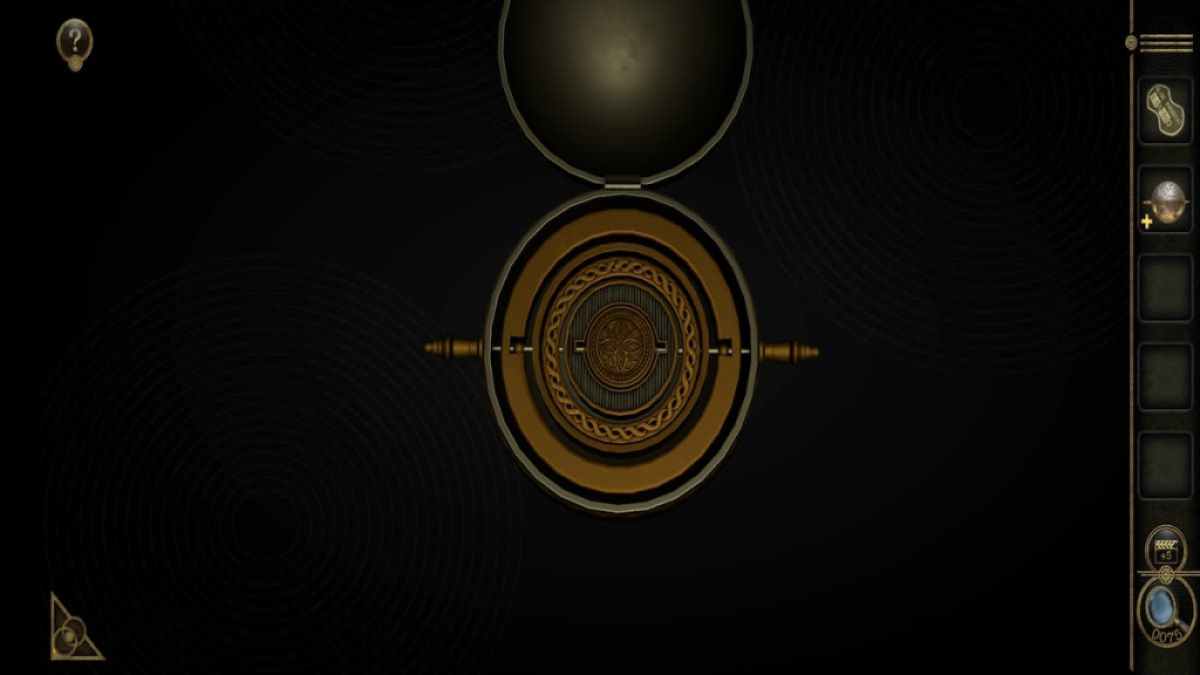
start the sphere up in your inventory and twist the golden piece jut out out to unfold the ball .
Screenshot by Pro Game Guides
Rotate the ball in the inwardness to reveal a small coin . tip it to localize it in your armory .
Safe puzzle
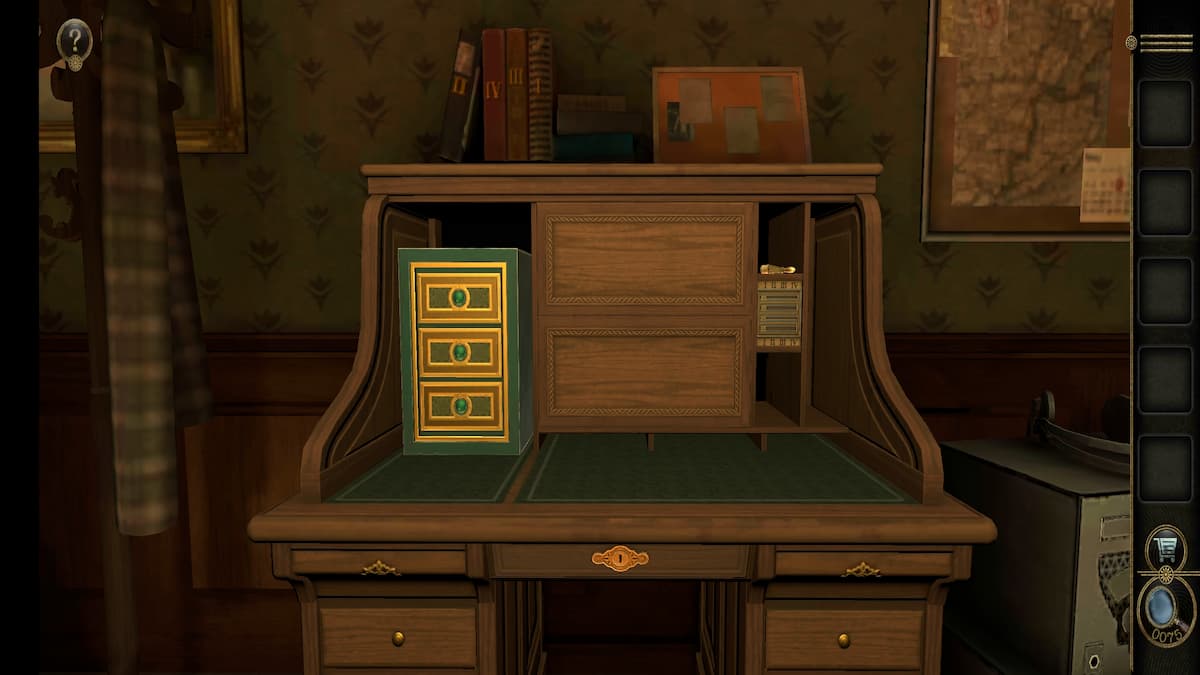
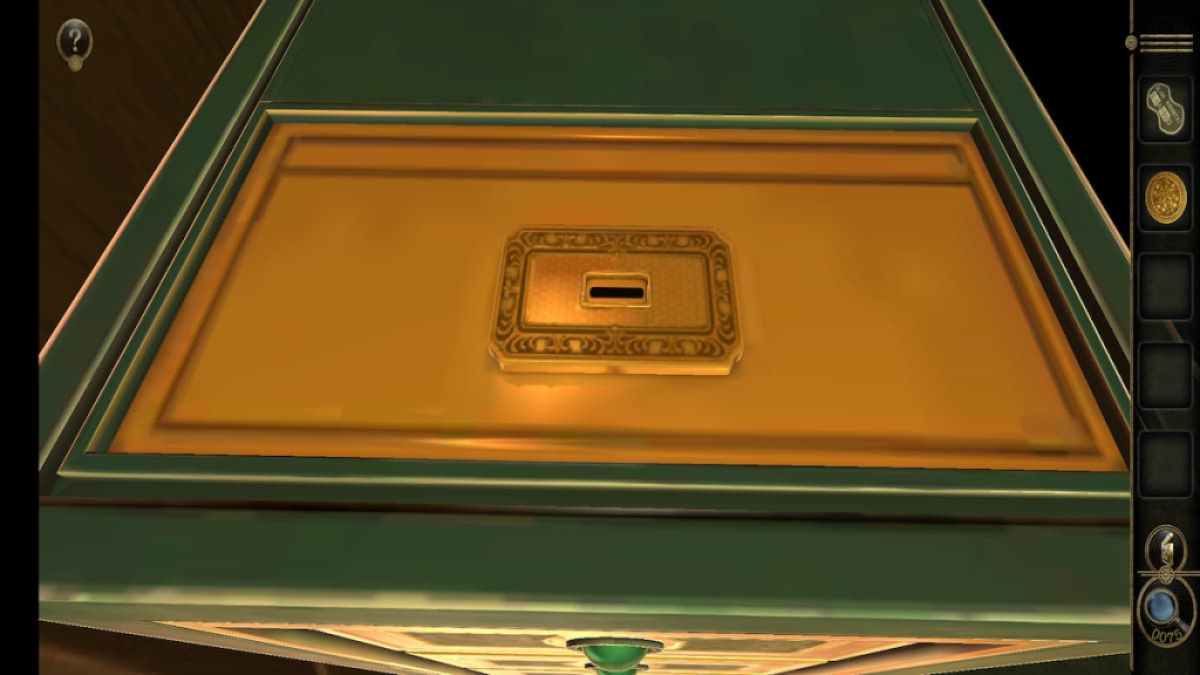
head up over to the safe on the desk .
wiretap on the top of the safe to disclose a coin one-armed bandit .
tuck the Coin from the bathroom to unlock the safety ’s mystifier . The goal of this puzzler is to get the slotted metal slice into the interruption at the top of the puzzle .
Screenshot by Pro Game Guides
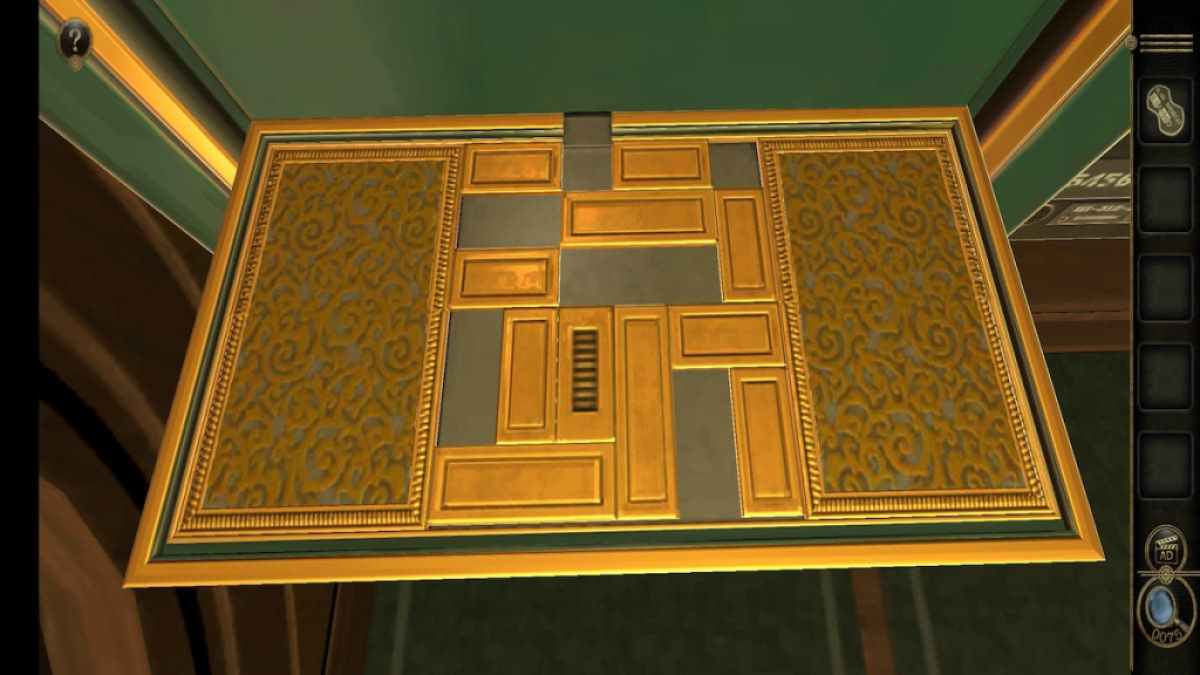
Slide the block two spaces above the slot blockage to the left hand .
Slide the top correct blockage into the corner .
Slide the long upright block to the right of the slot one toward the top of the puzzle .
Screenshot by Pro Game Guides
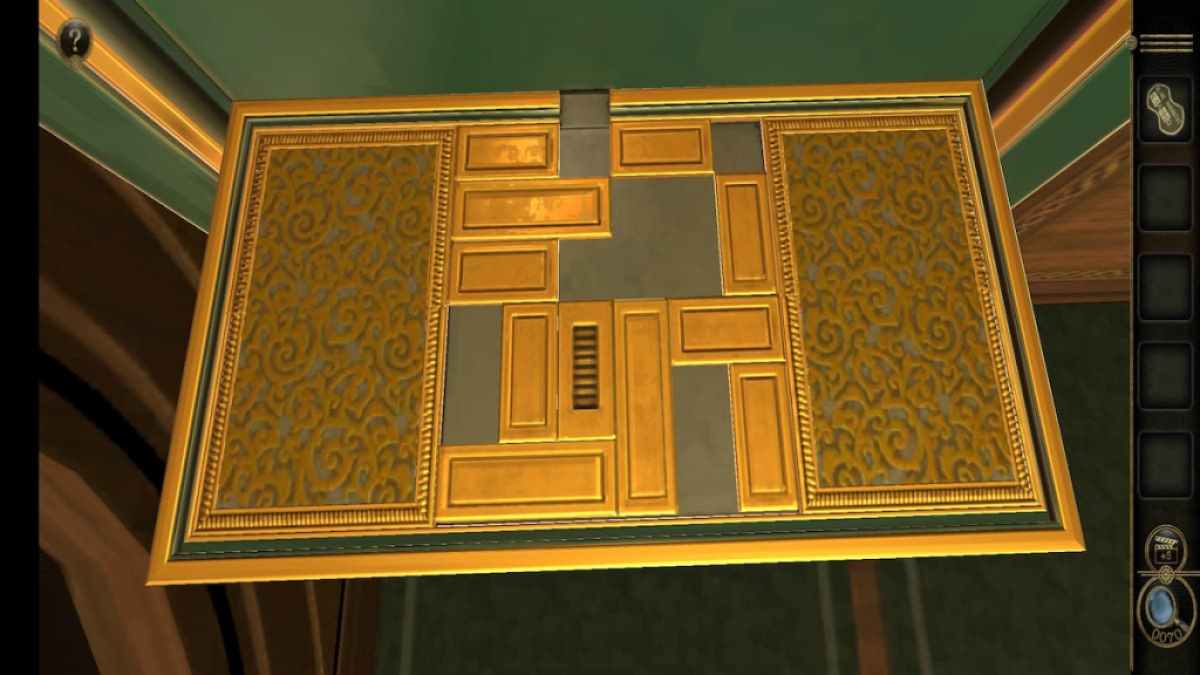
skid the bottom result part to the right .
slew the horizontal piece on the right against the slotted composition .
Slide the right bottom corner art object up .

Screenshot by Pro Game Guides
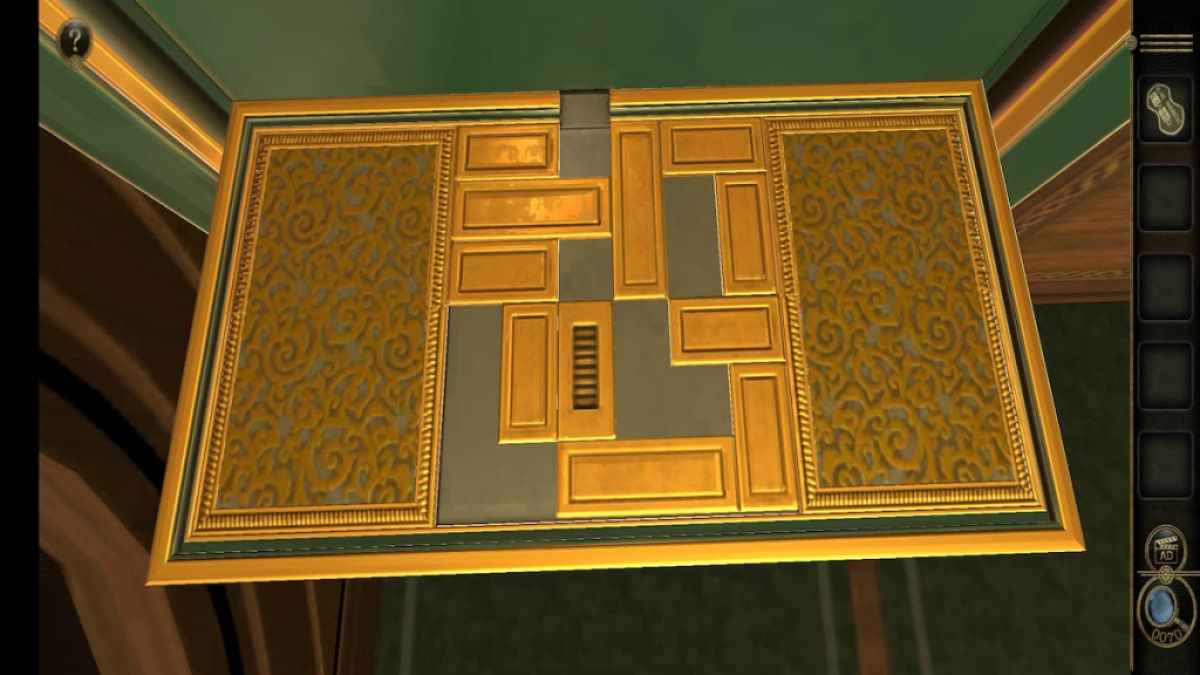
slither the bottom piece right .
slither the slotted piece and the side by side one down .
slew the right horizontal piece to the left .

Screenshot by Pro Game Guides
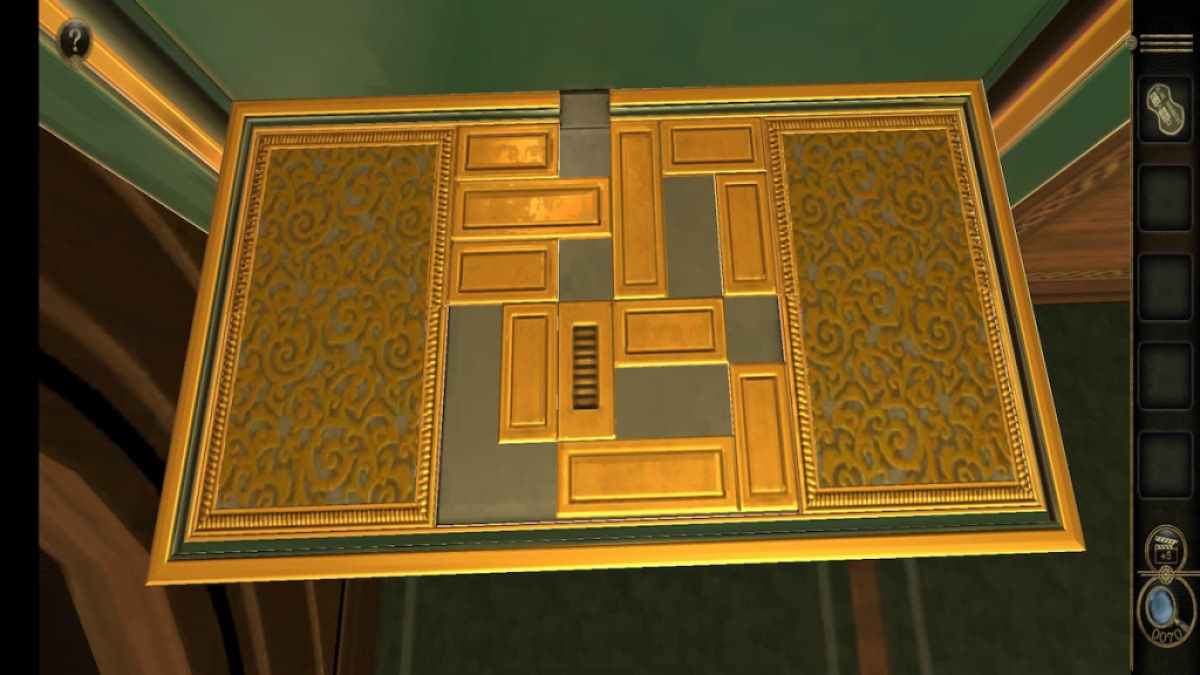
Move the longest upright spell down .
Move the right corner piece to the left once .
Slide the top vertical piece on the right upwardly .
Screenshot by Pro Game Guides
Move the second horizontal piece from the top on the left over side to the rightfield .
crusade the slotted piece up .
Move the piece in the bottom right niche to the left .
Screenshot by Pro Game Guides
Slide the low upright firearm on the right into the corner .
Slide the piece in the top right corner down .
Now move the horizontal firearm above the slot one to the rightfield .

Screenshot by Pro Game Guides
Slide the slot metal man to the top to get an ocular .
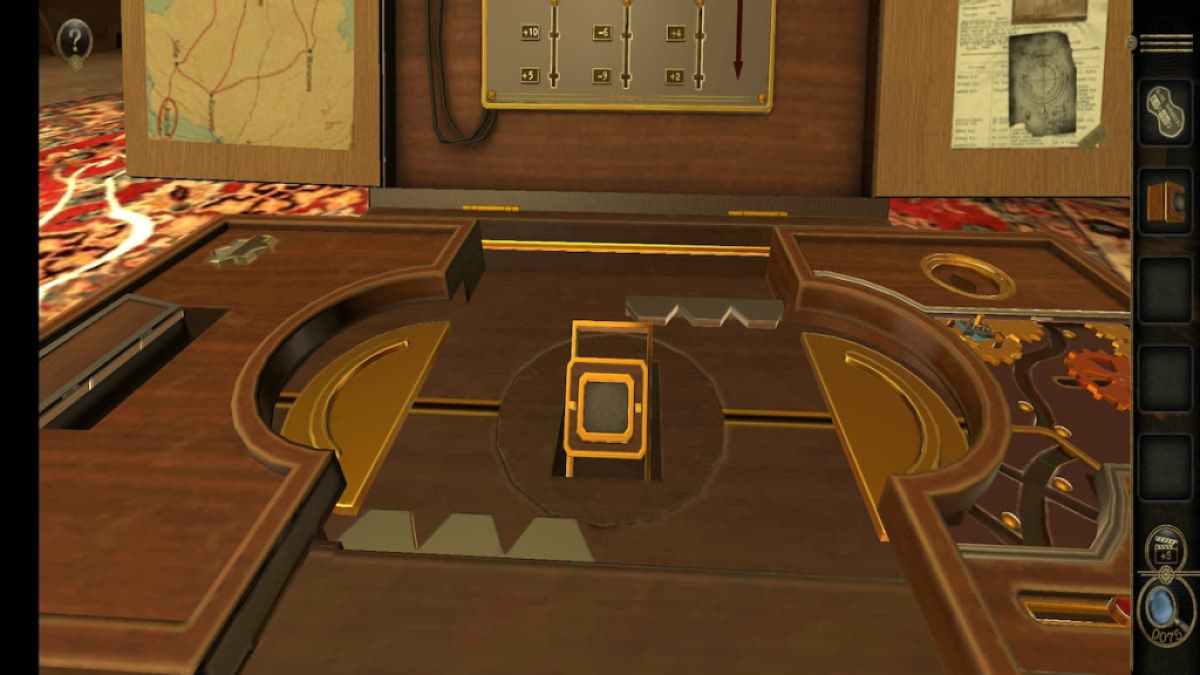
Briefcase box puzzle
come back to the boxwood - work mystifier in the briefcase .
localize the Eyepiece on top of the teaser . This unlocks a undercover compartment containing a Magnetic Tape and a Resistor .
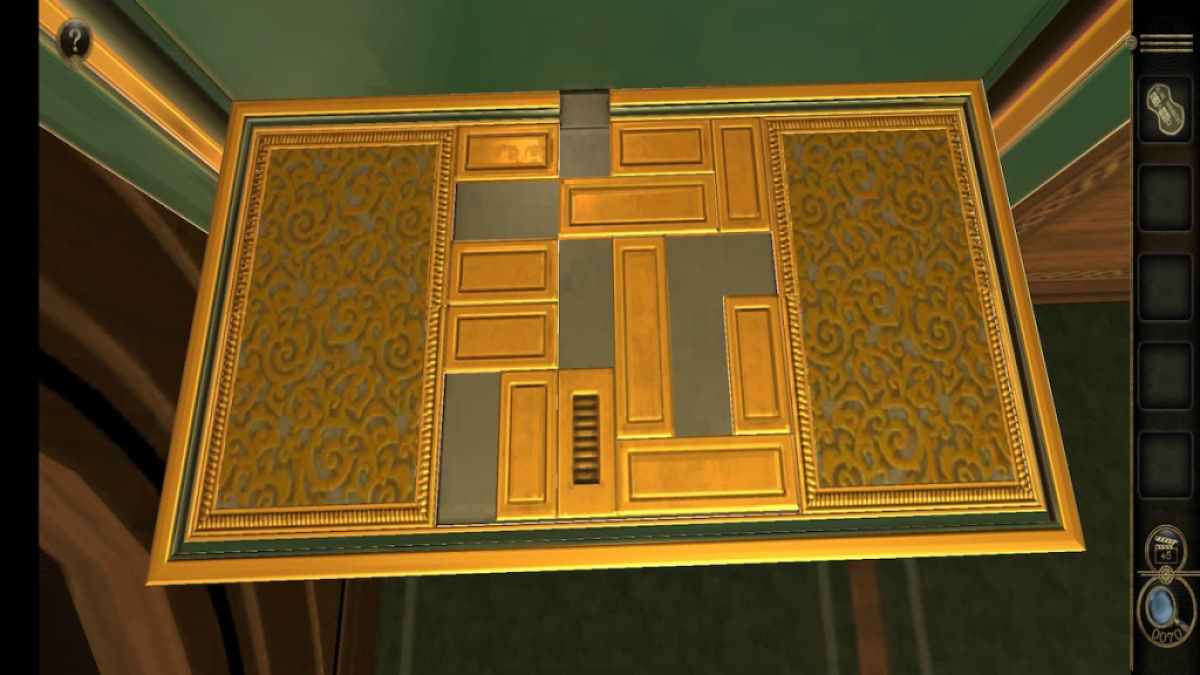
Desk puzzles
This section cover the remaining desk teaser , let in the books , ampere , oscilloscope , and wireless puzzle .
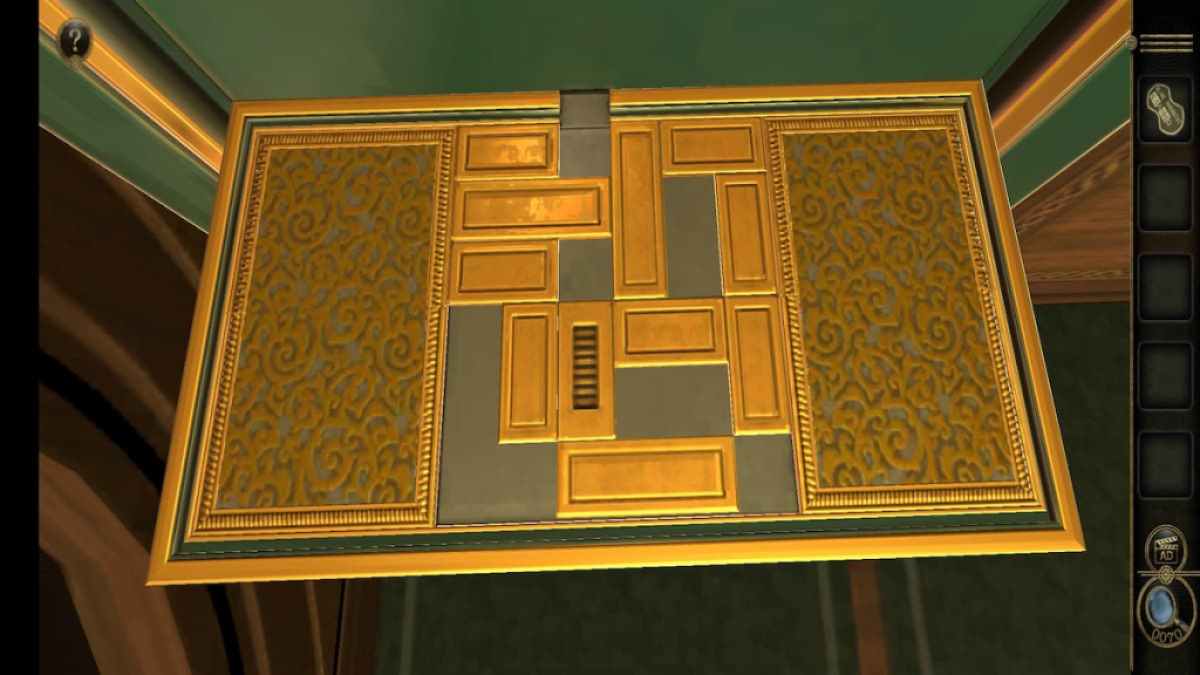
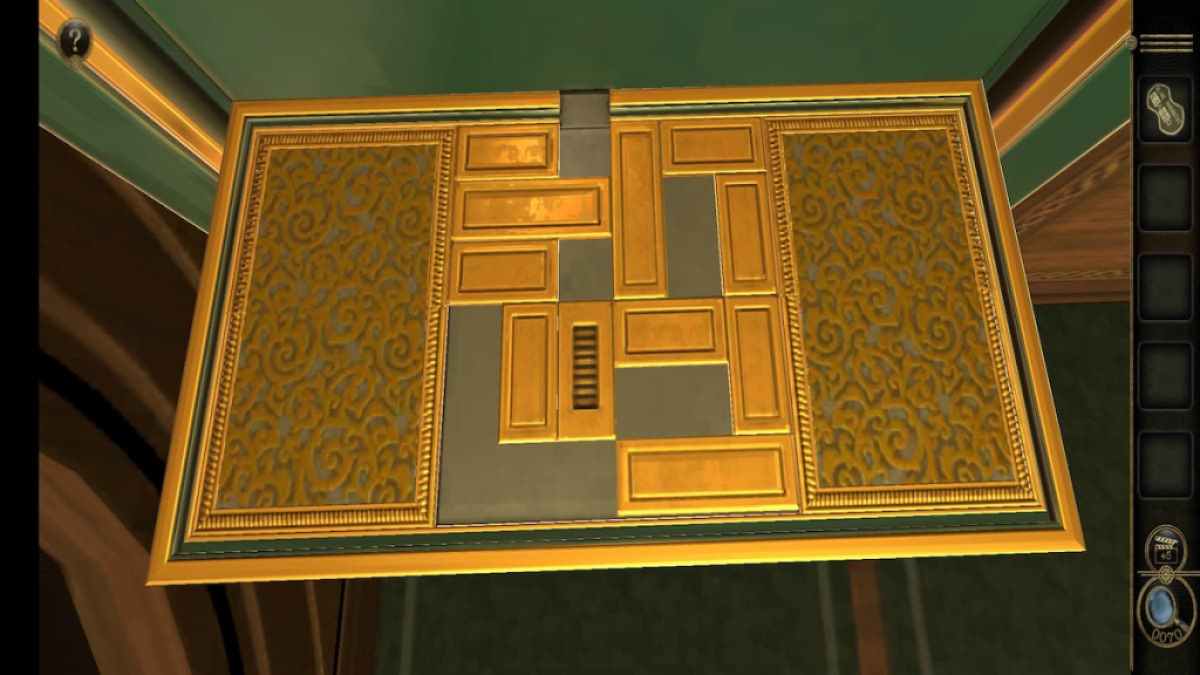
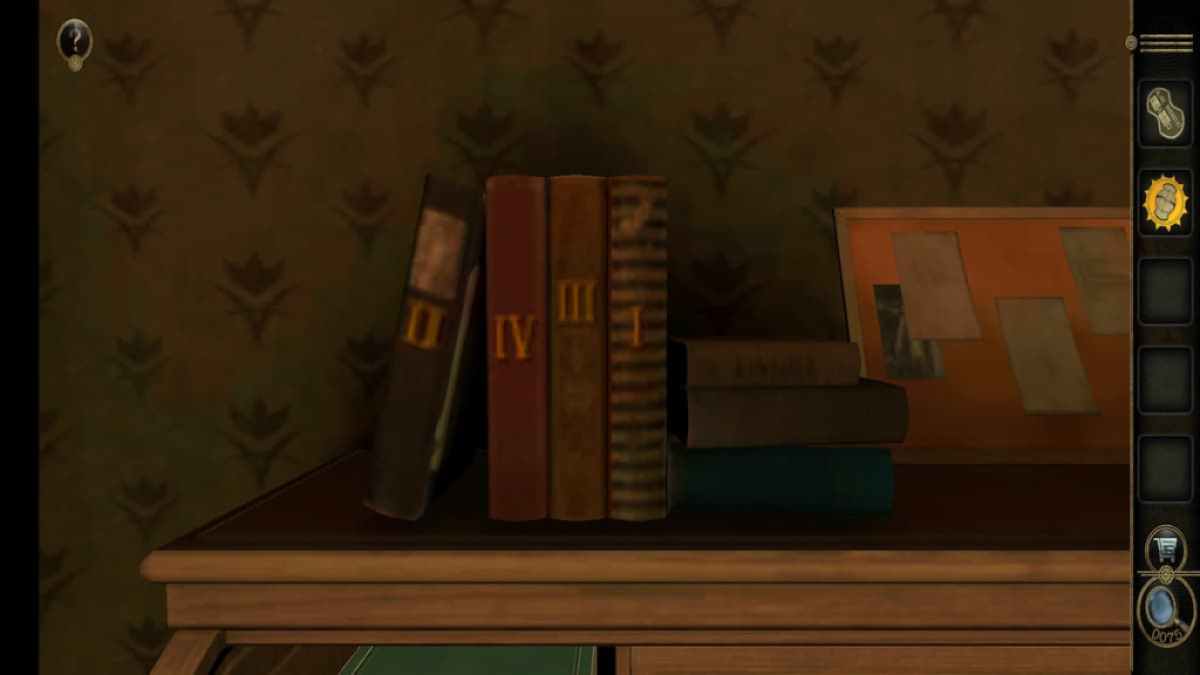
set out by looking at the ordering of the books on top of it . The order here is II , IV , III , I.
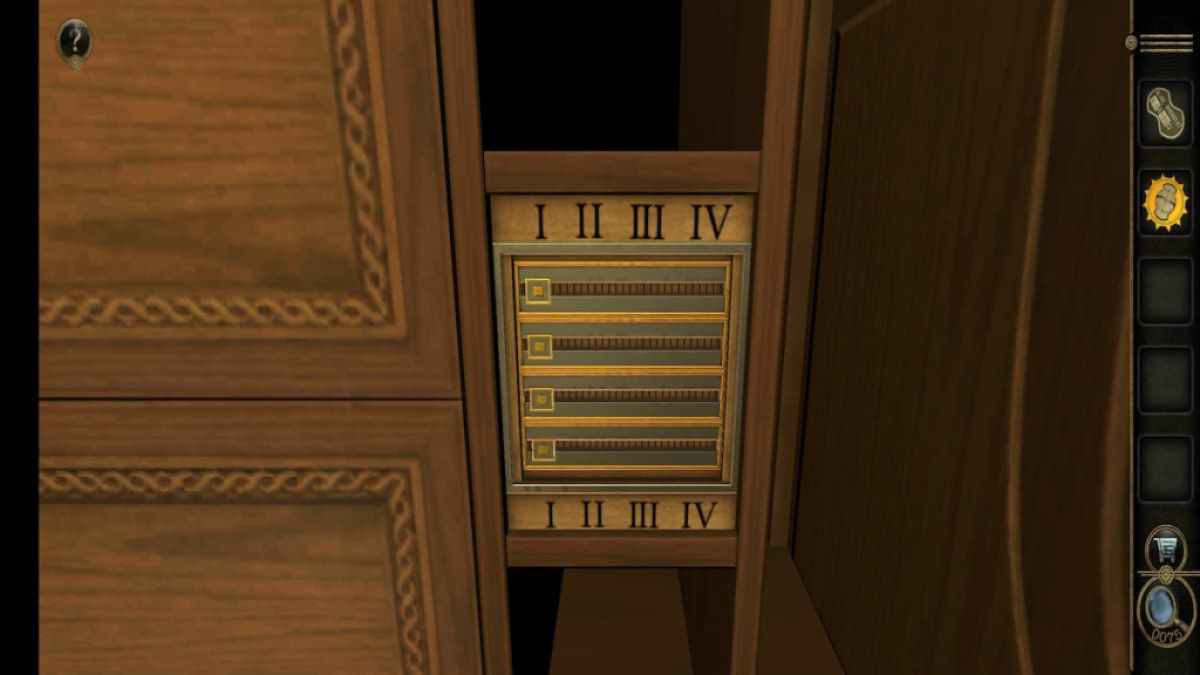
Head over to the right side of the desk to view the teaser .
Screenshot by Pro Game Guides
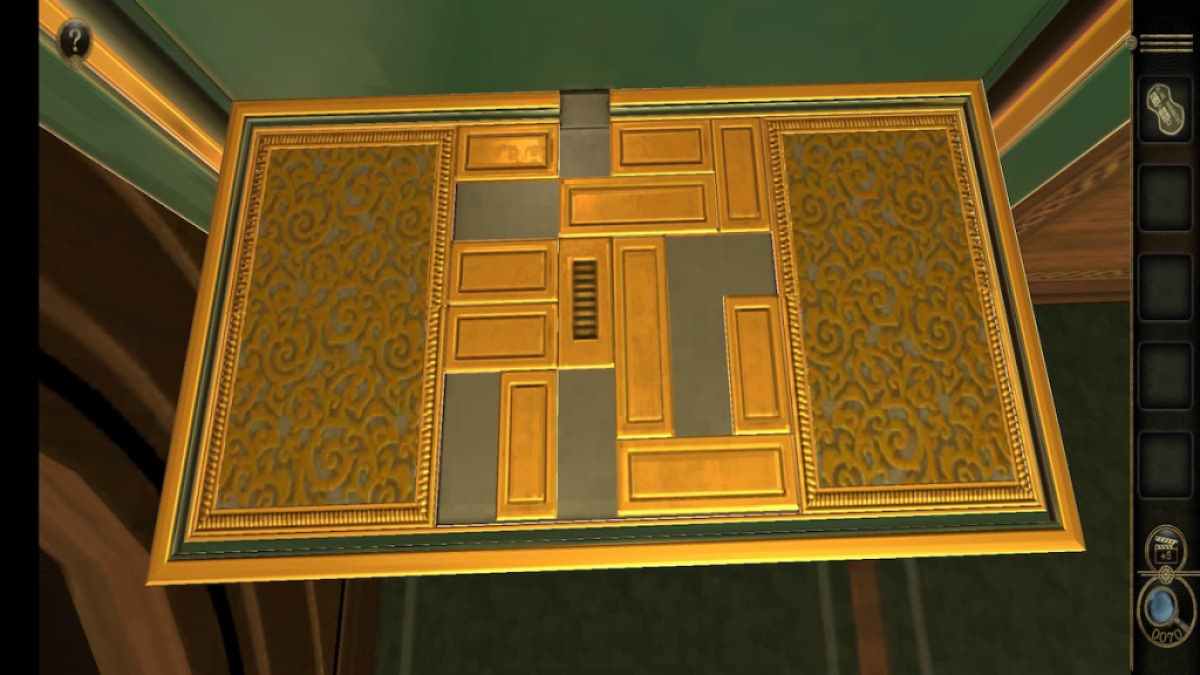
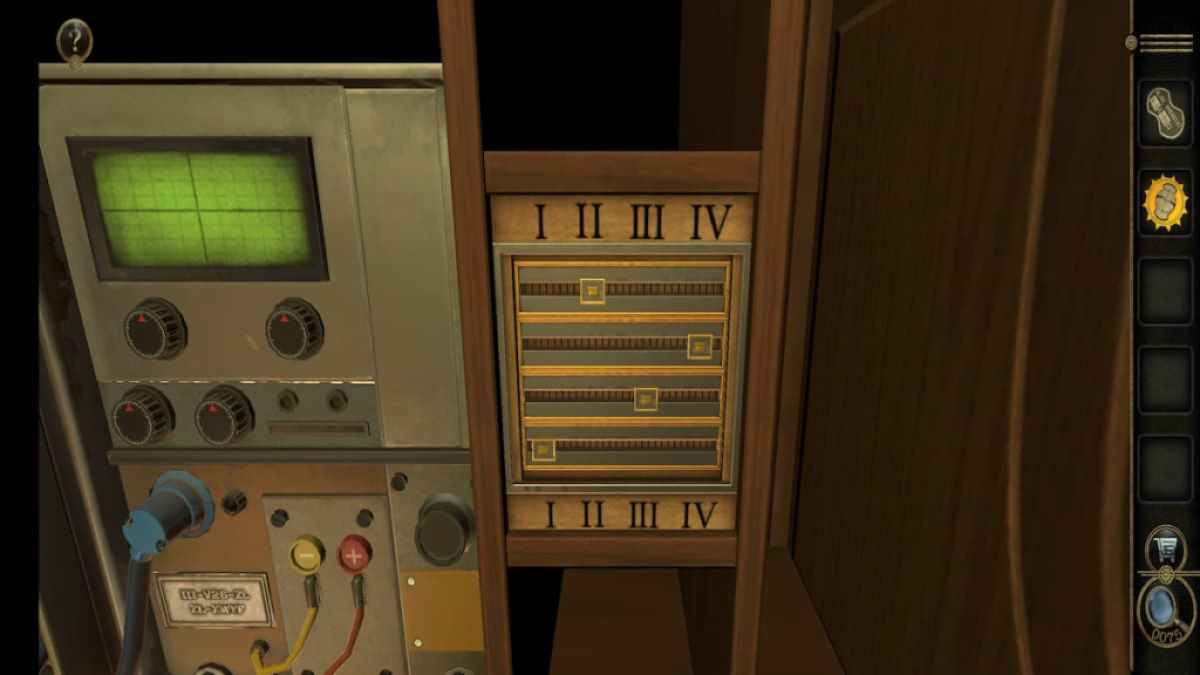
The yellow-bellied terrapin at the top represent the first , book with the yellow-bellied terrapin at the bottom being the last . Push each slider so that it lands on the numbers of the Christian Bible in the edict they can be institute on top of the desk .
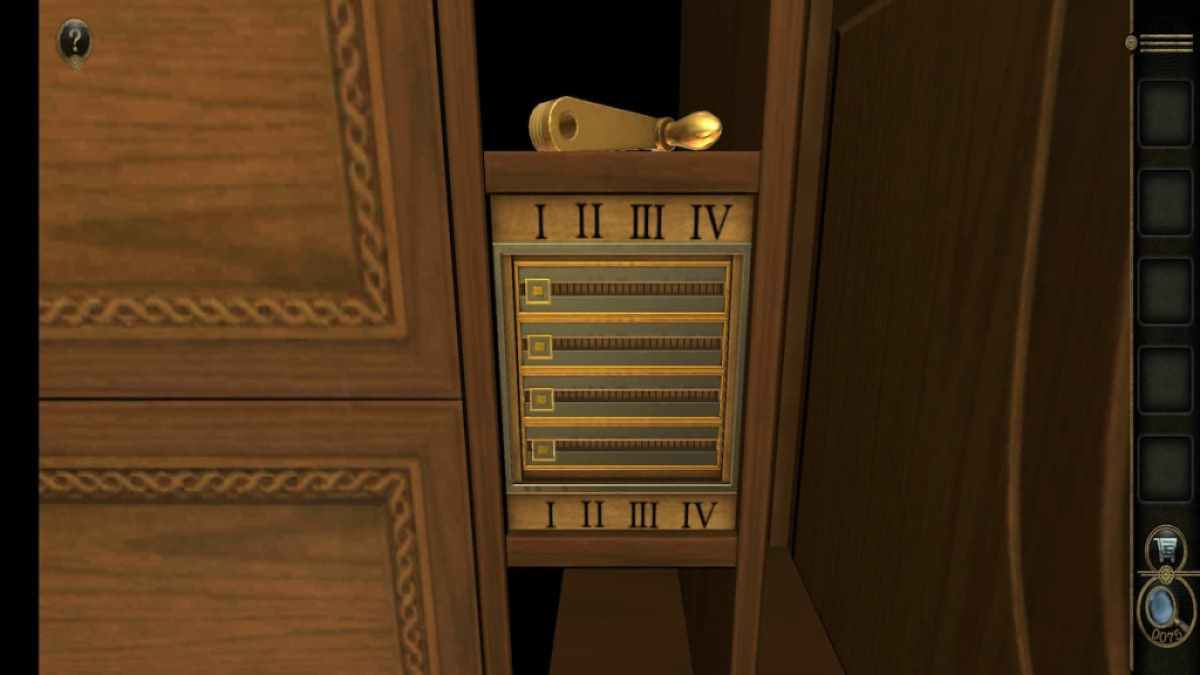
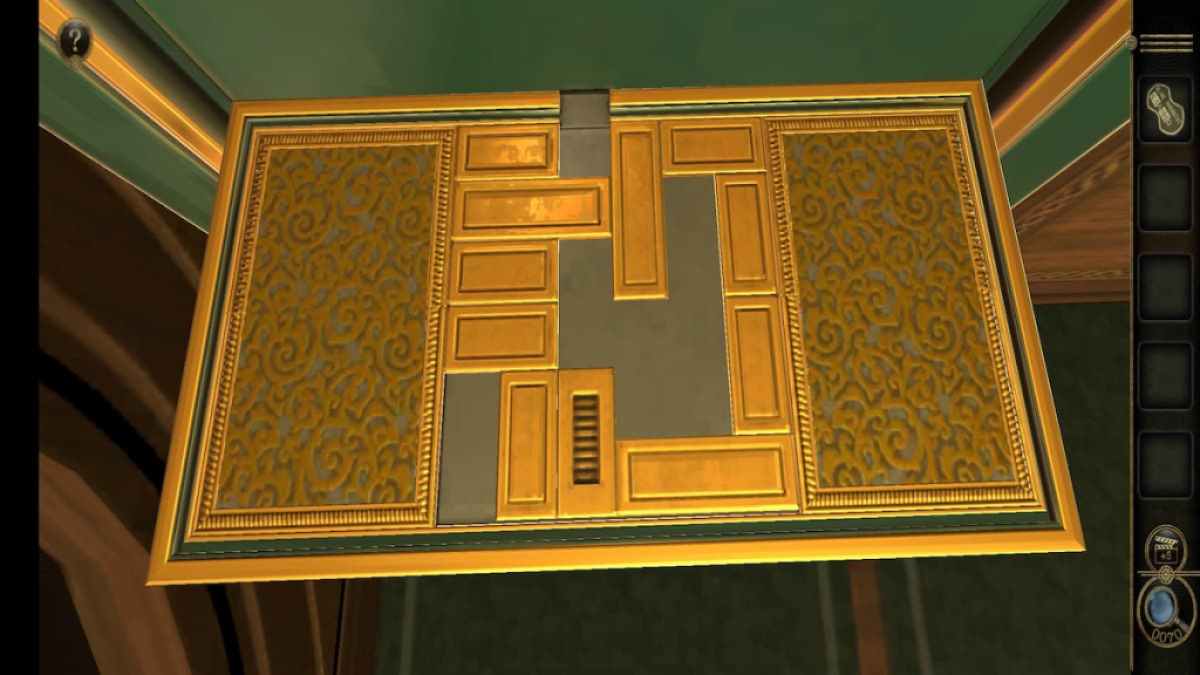
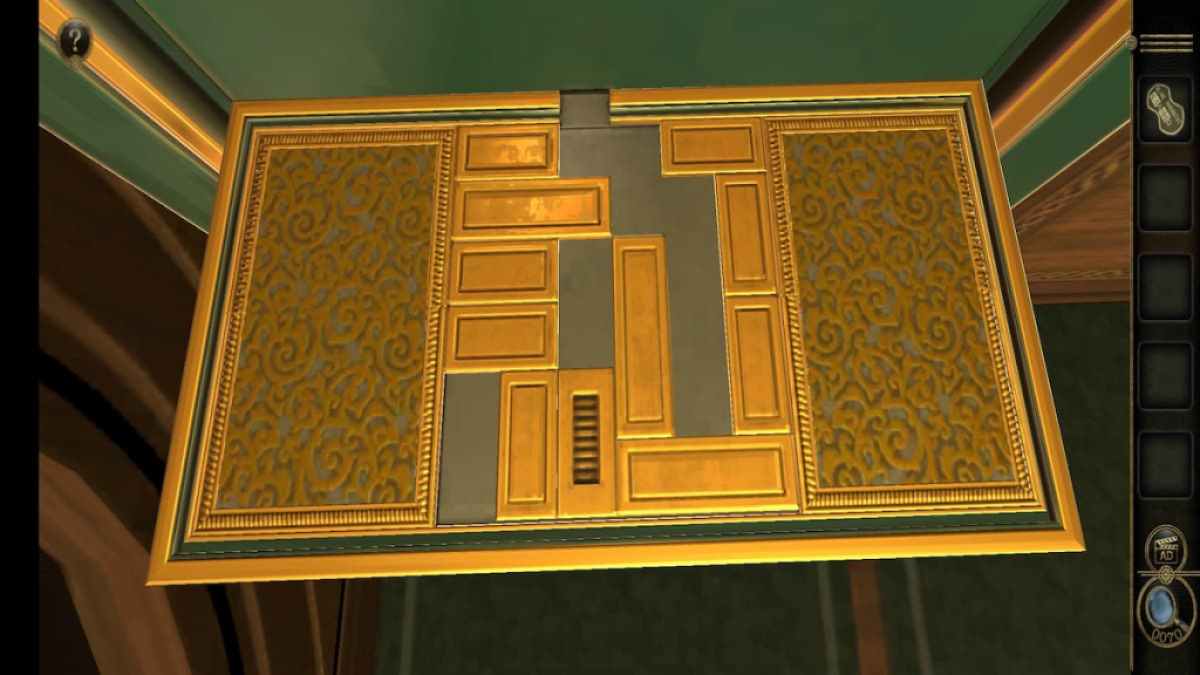
Solving this reveals an ampere puzzle within the desk .
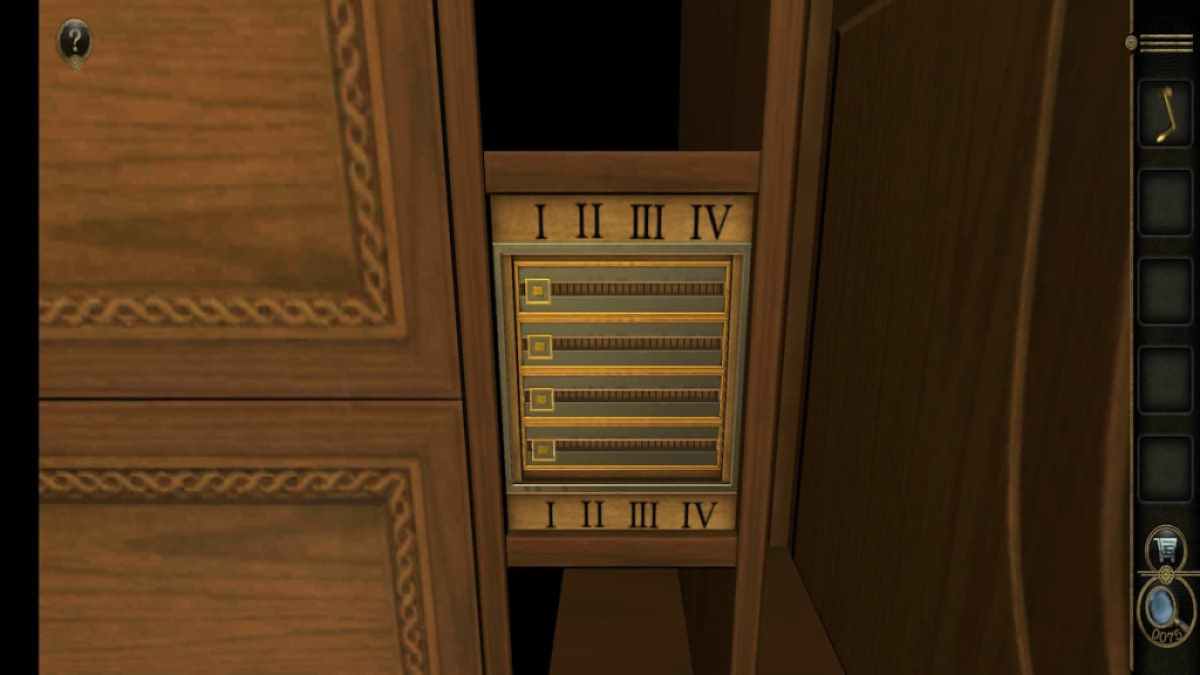
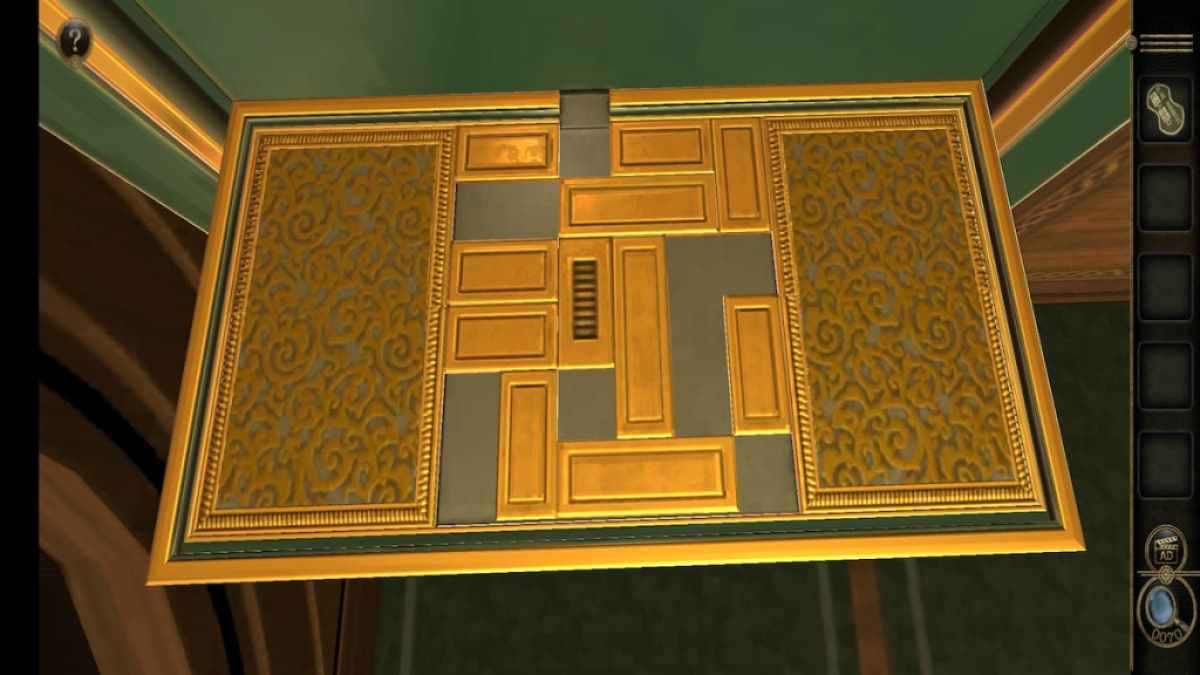
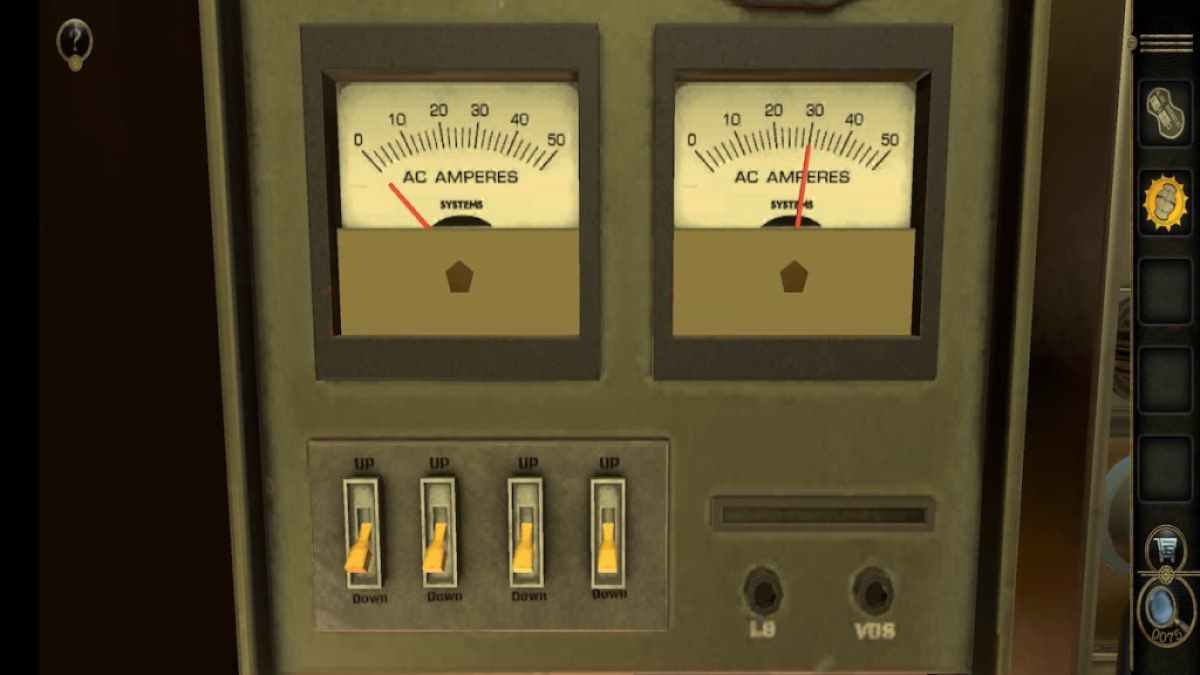
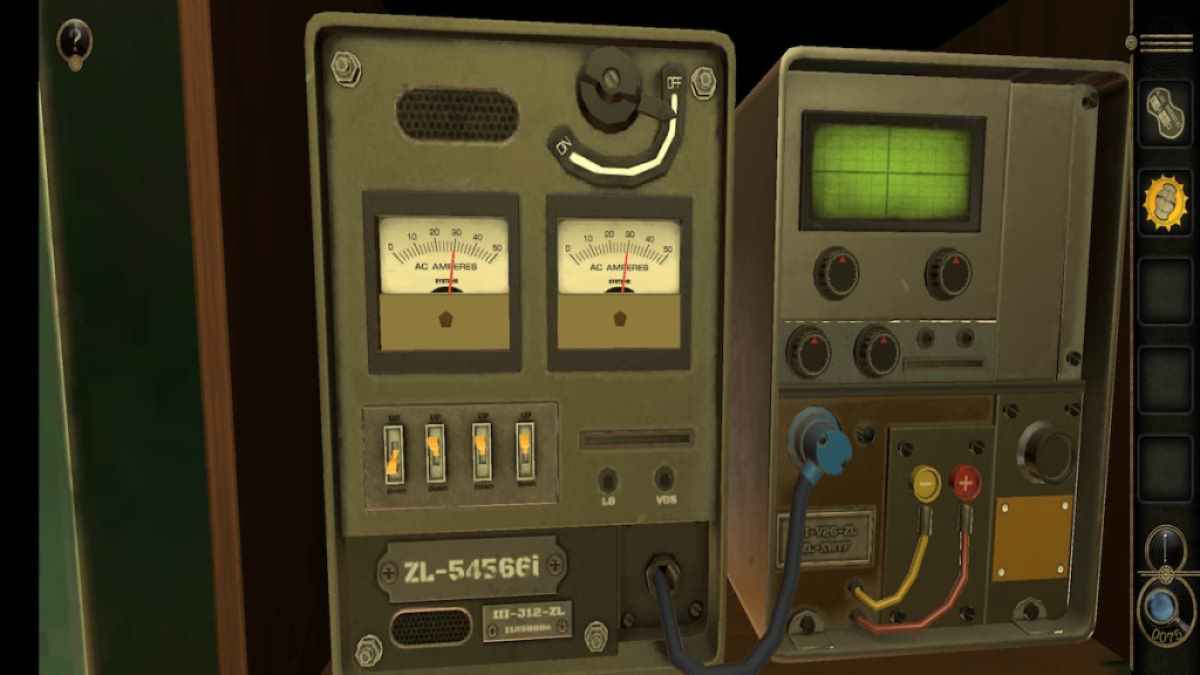
You ’ll need to riff the switches on the remaining side so that the ampere beat on the odd matches the ampere meter on the right wing . The orderliness will change , but in my playthrough , it was the second , third , and fourth switches .
Screenshot by Pro Game Guides
pertain : Viking Ship Escape Walkthrough – Cool Math Games
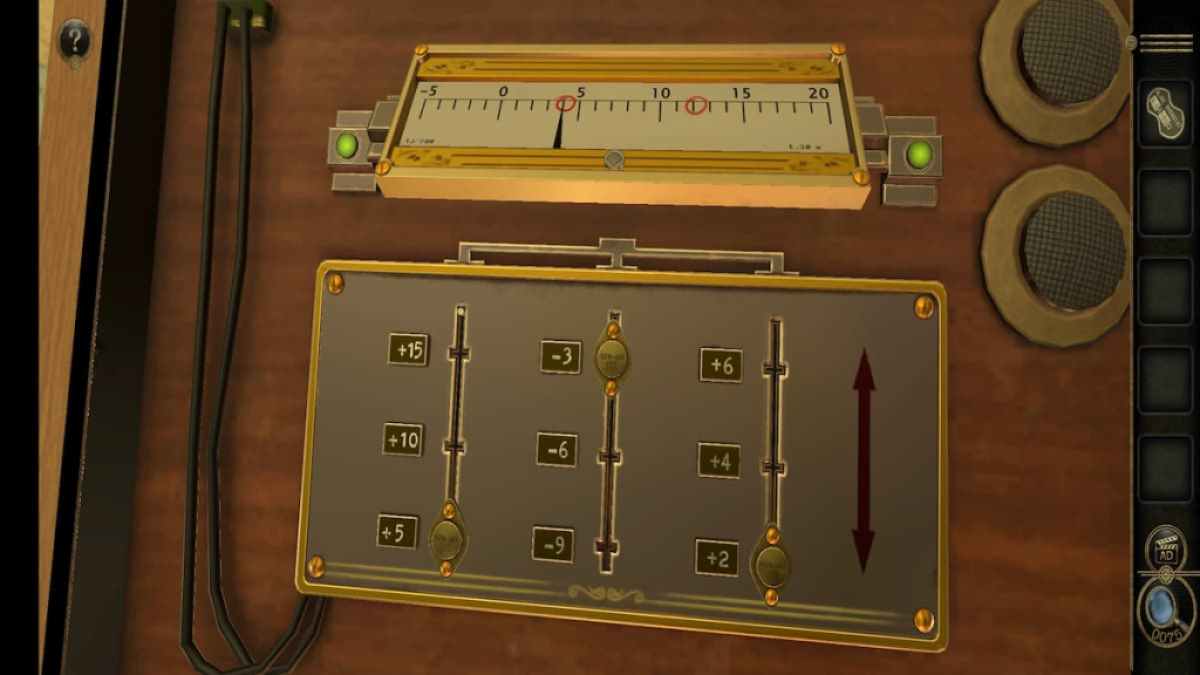
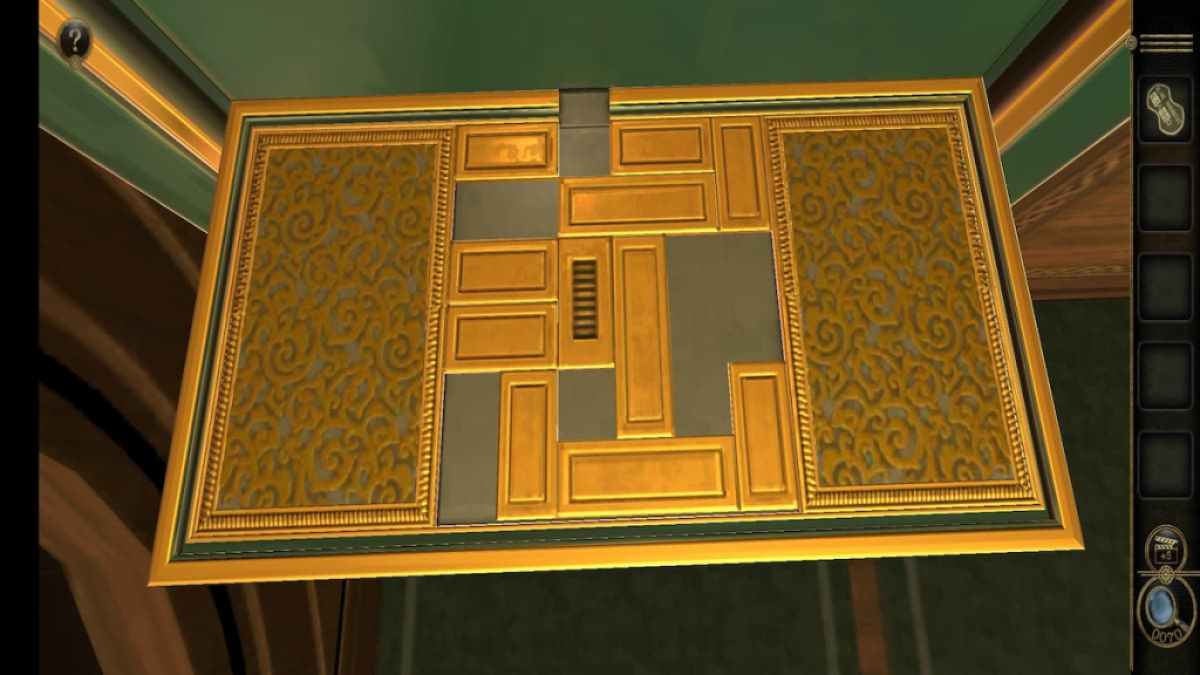
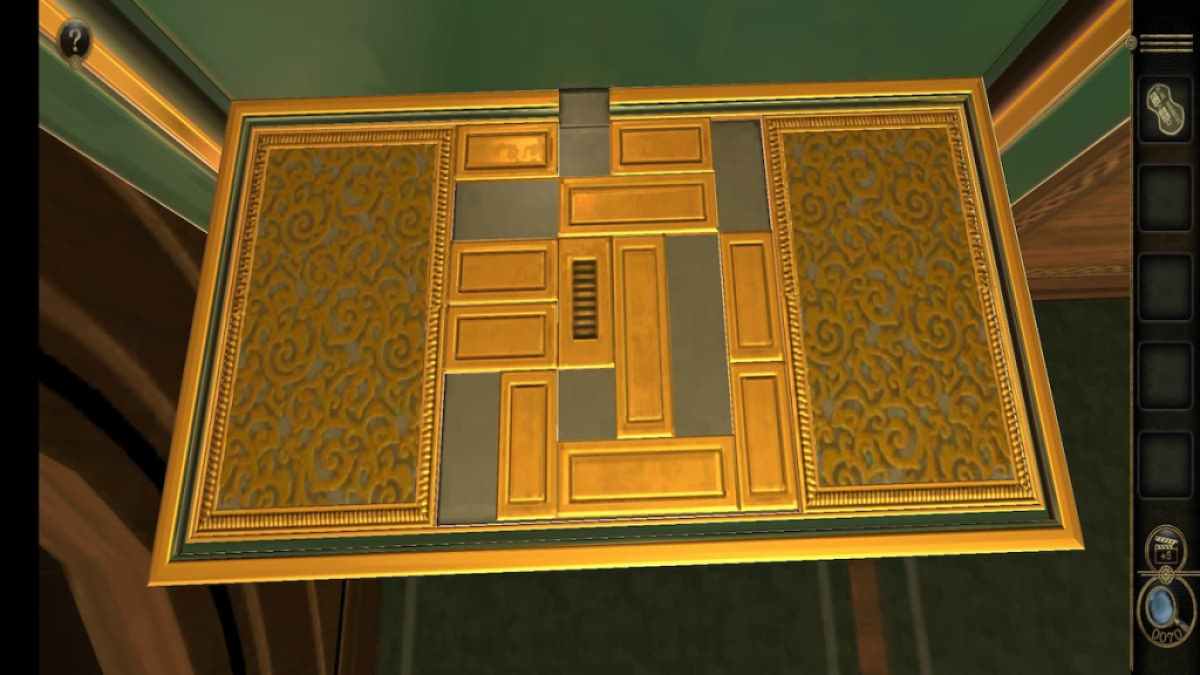
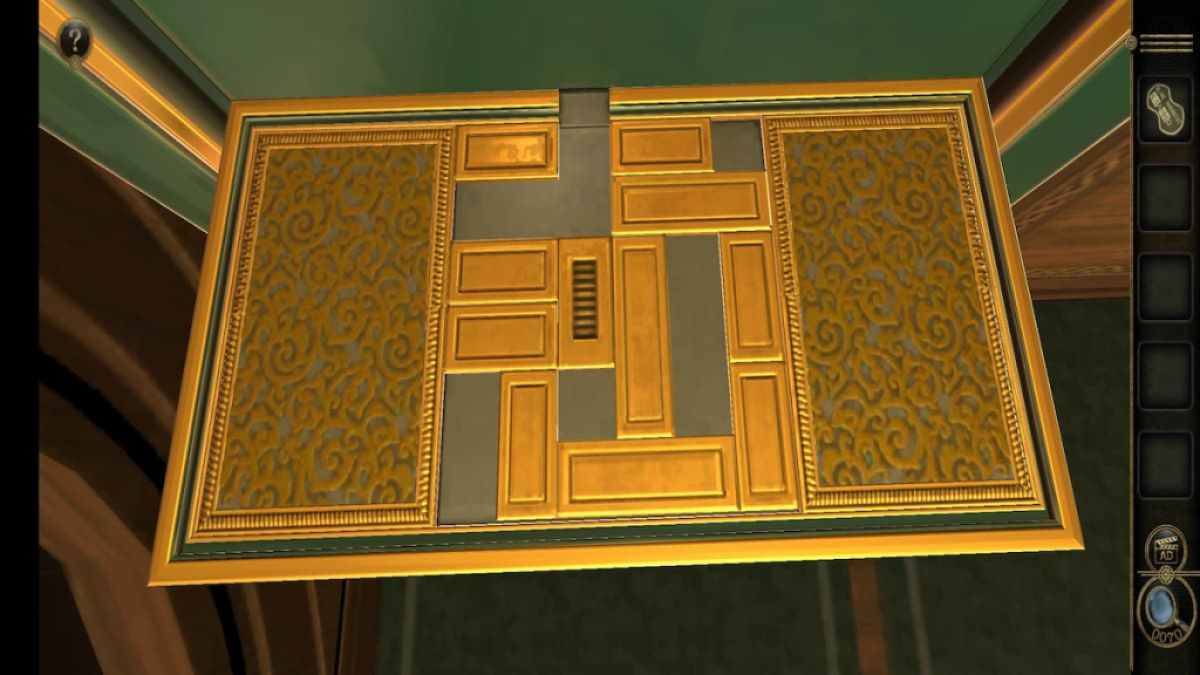
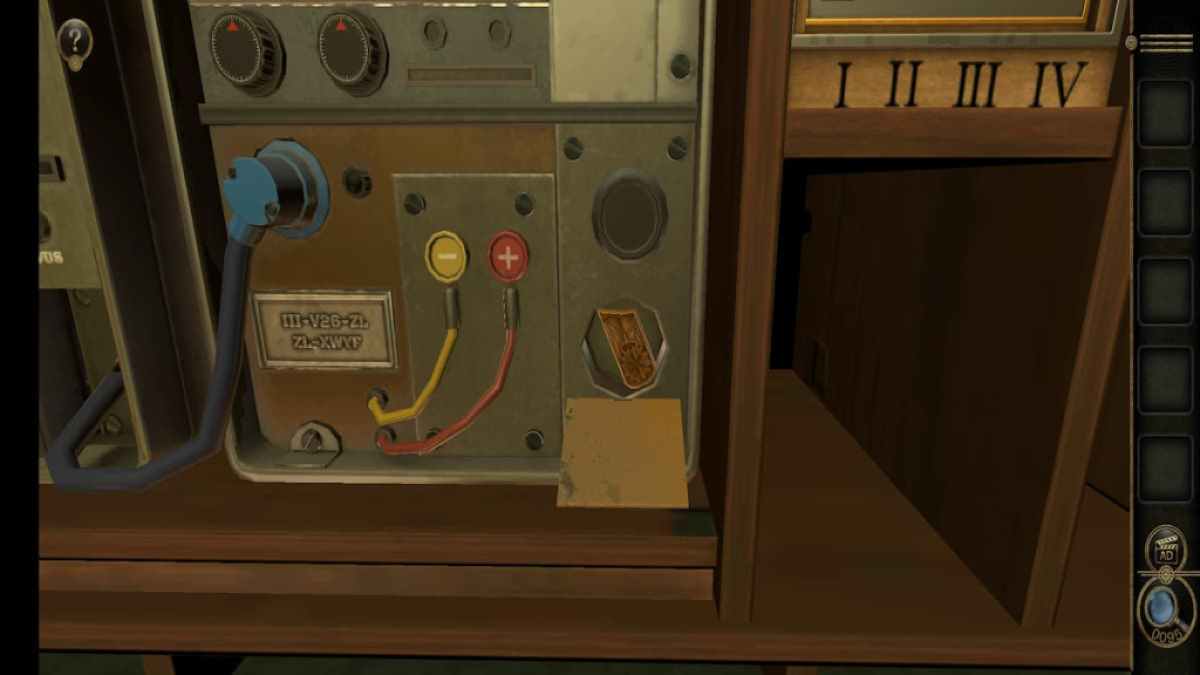
The next puzzle is much more complex , consisting of a series of rotating electric pathways .
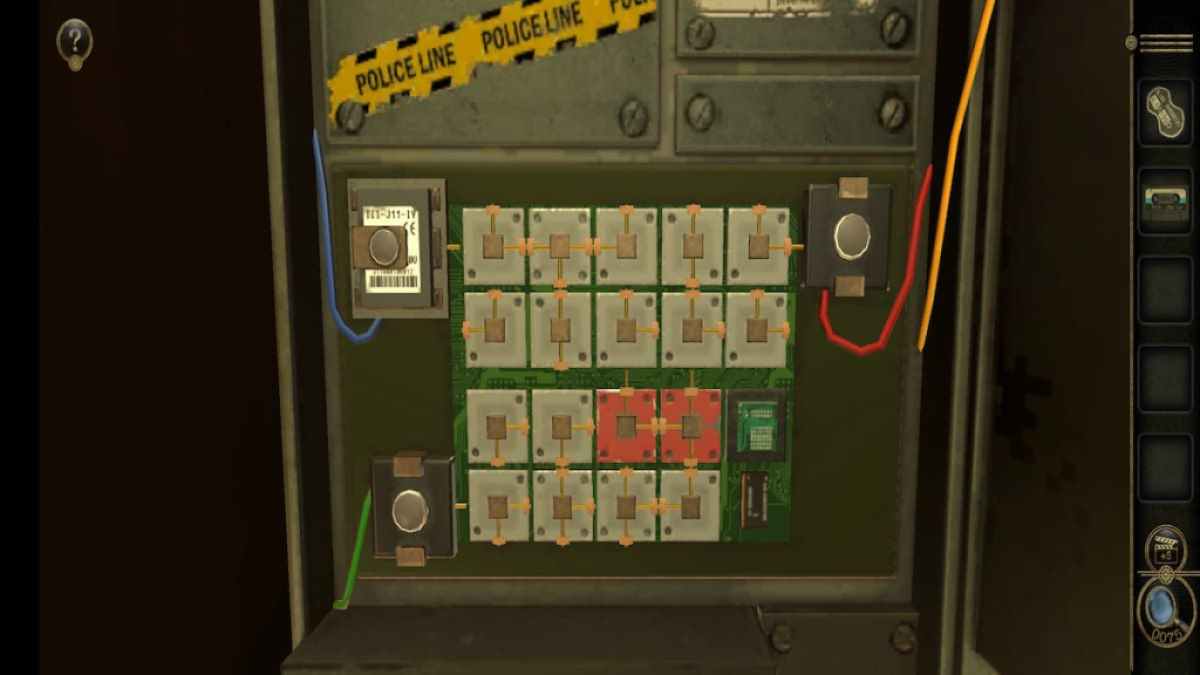
Unlock the pathways by bestow the Resistor to the rectangular compartment in the top impart .

Screenshot by Pro Game Guides
You need to connect all three block using the electronic paths in this puzzle . Start by join the Resistor to the block beneath it , then make a connecting path from the block on the right field . The pulley block in the image below are not connected properly , but flipping them to watch the outlined path will solve the puzzle .
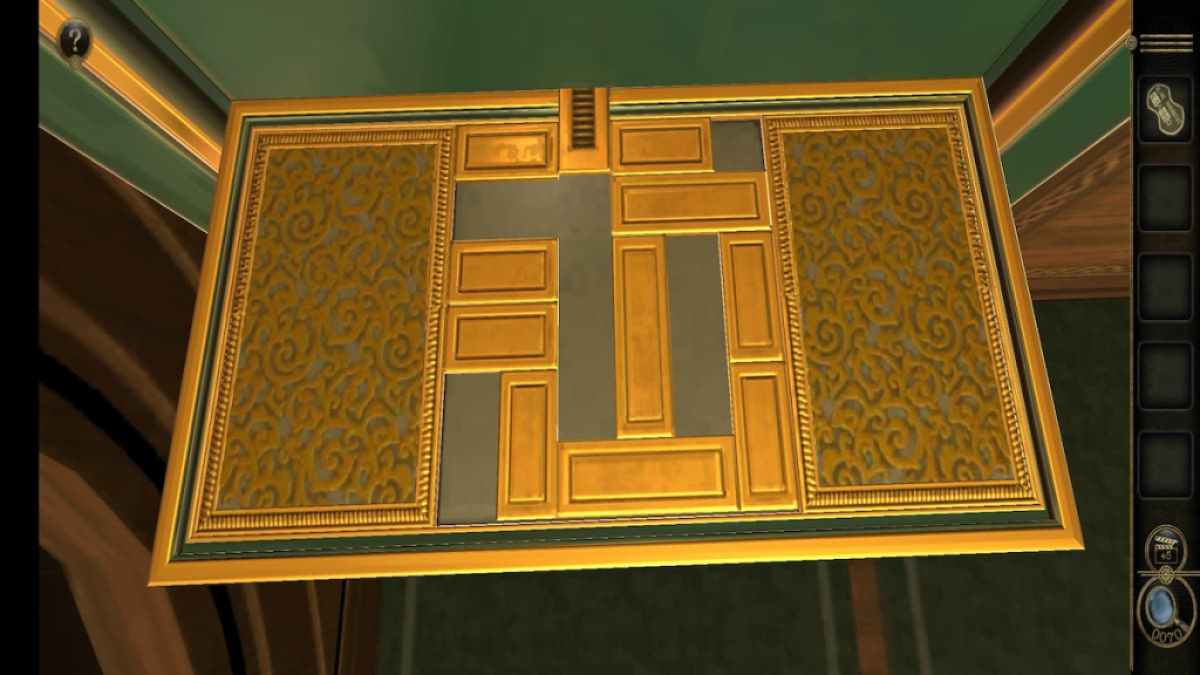
This will unlock a new section behind the puzzle .
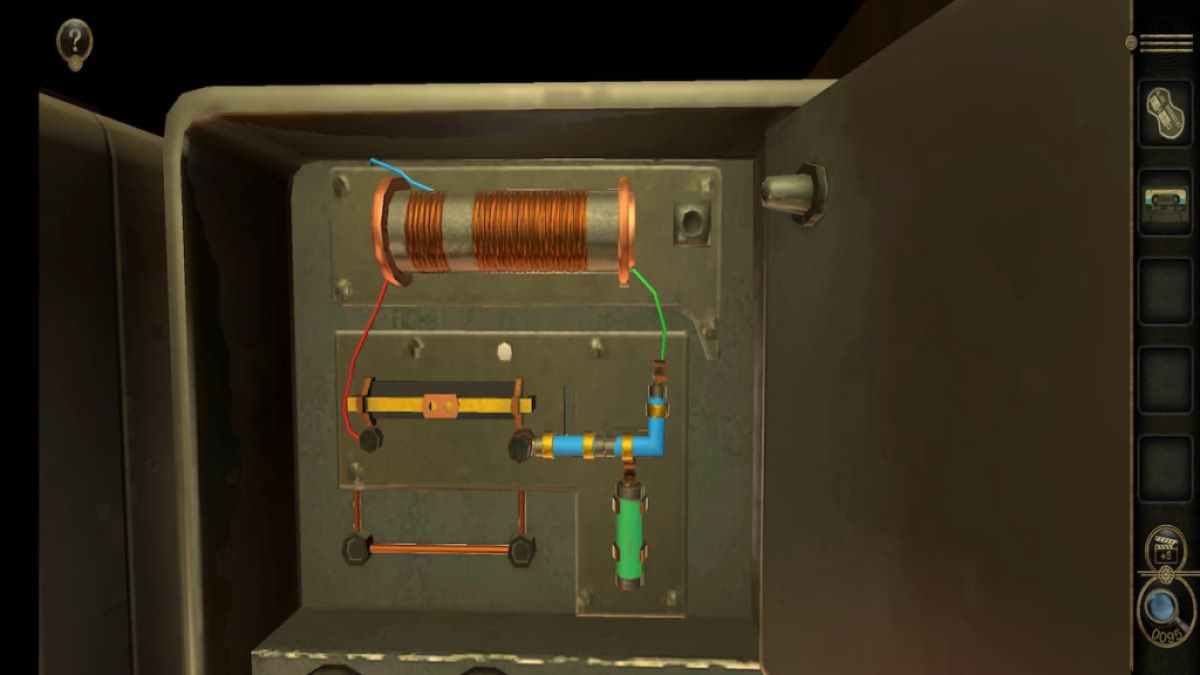
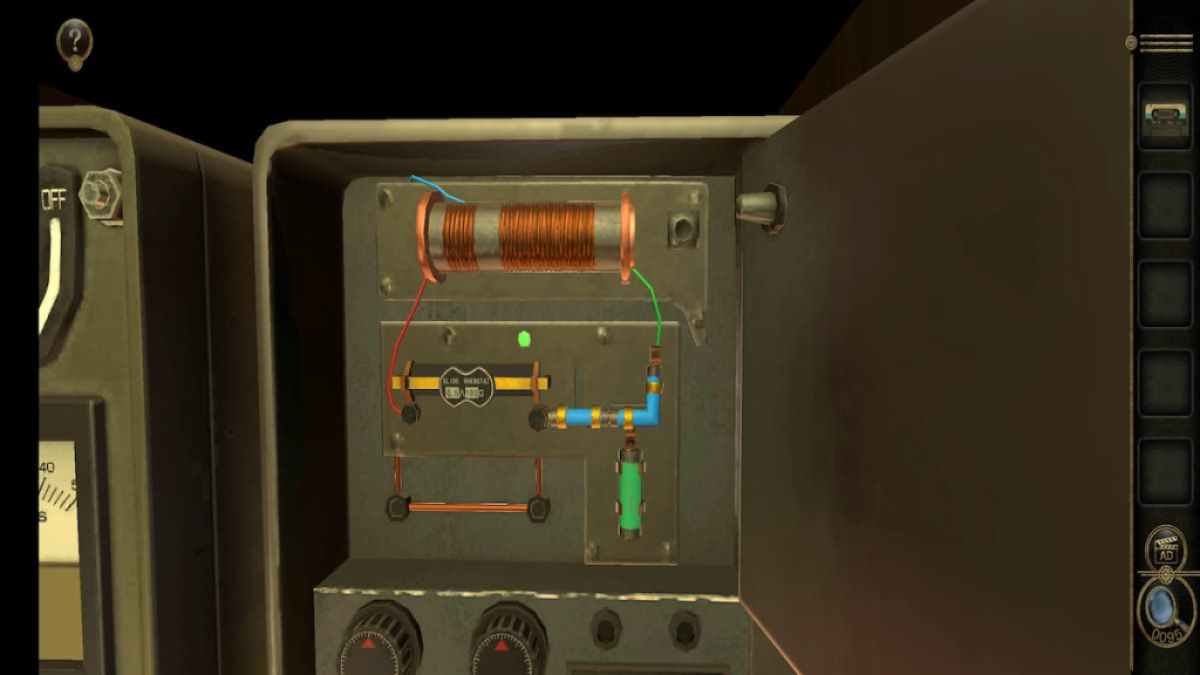
post the Variable Resistor into the open expansion slot on the chicken bar to finish this section .
Screenshot by Pro Game Guides
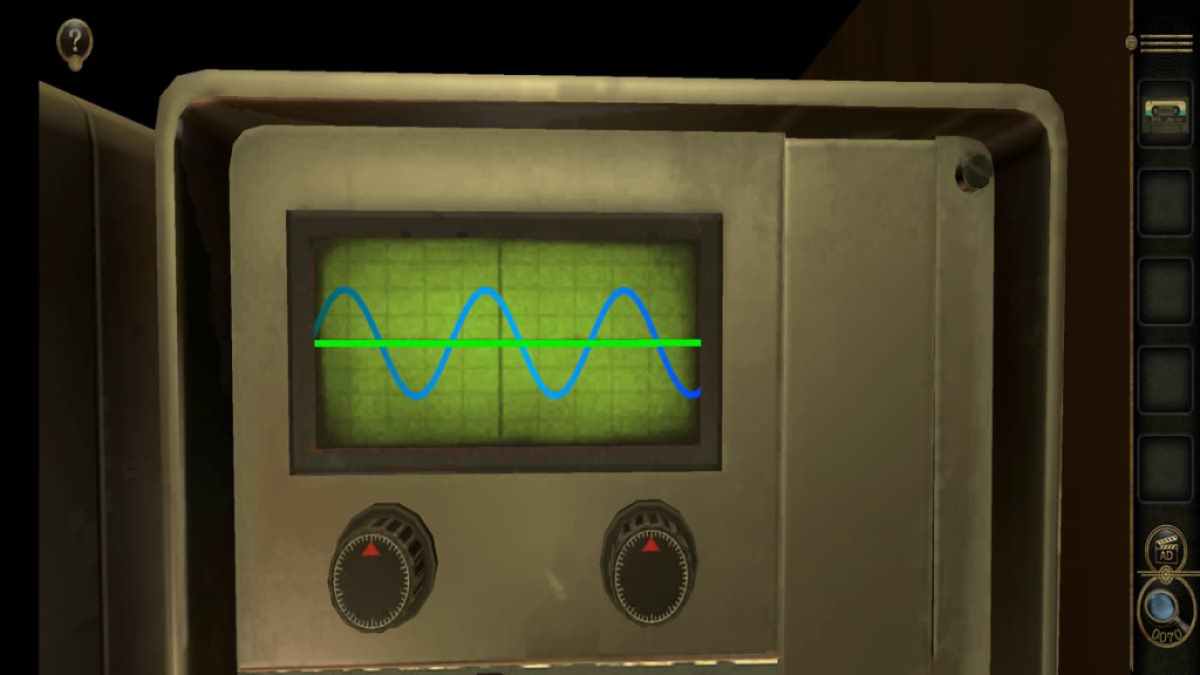
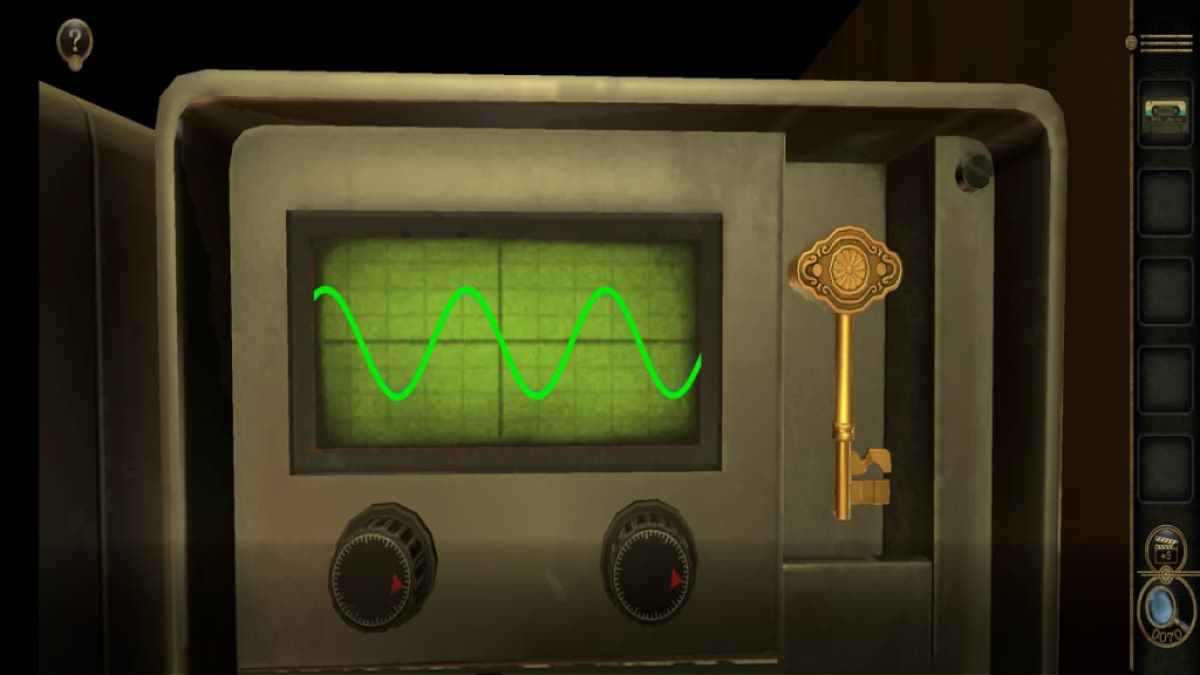
While the oscilloscope puzzle looks daunting , it ’s pretty simple to solve .
begin by rotate the right dial , which controls the height of the waves .
Then rotate the unexpended telephone dial , which controls how wide the waves are .
Screenshot by Pro Game Guides
Spin the right telephone dial until the acme of the green waves matches the top of the aristocratical undulation .
Finish the puzzler by rotating the left telephone dial until the waves oppose . This gives you a key fruit .
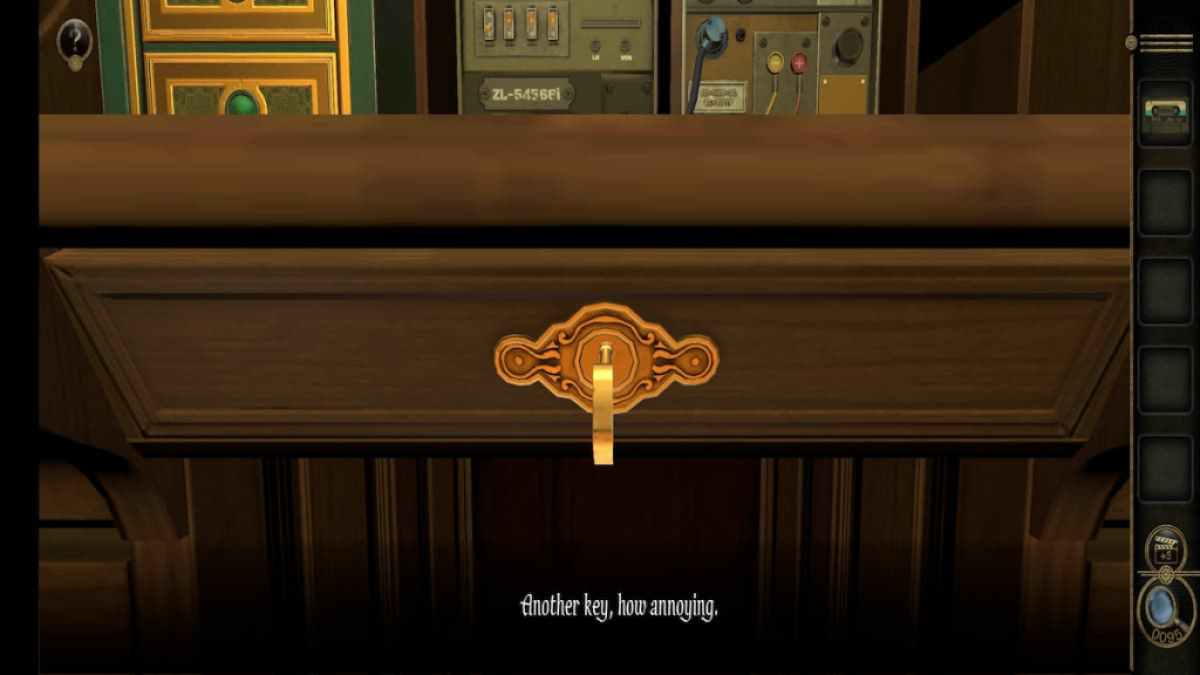
introduce the key into the desk ’s locked drawer to unlock the two-channel teaser .
Screenshot by Pro Game Guides
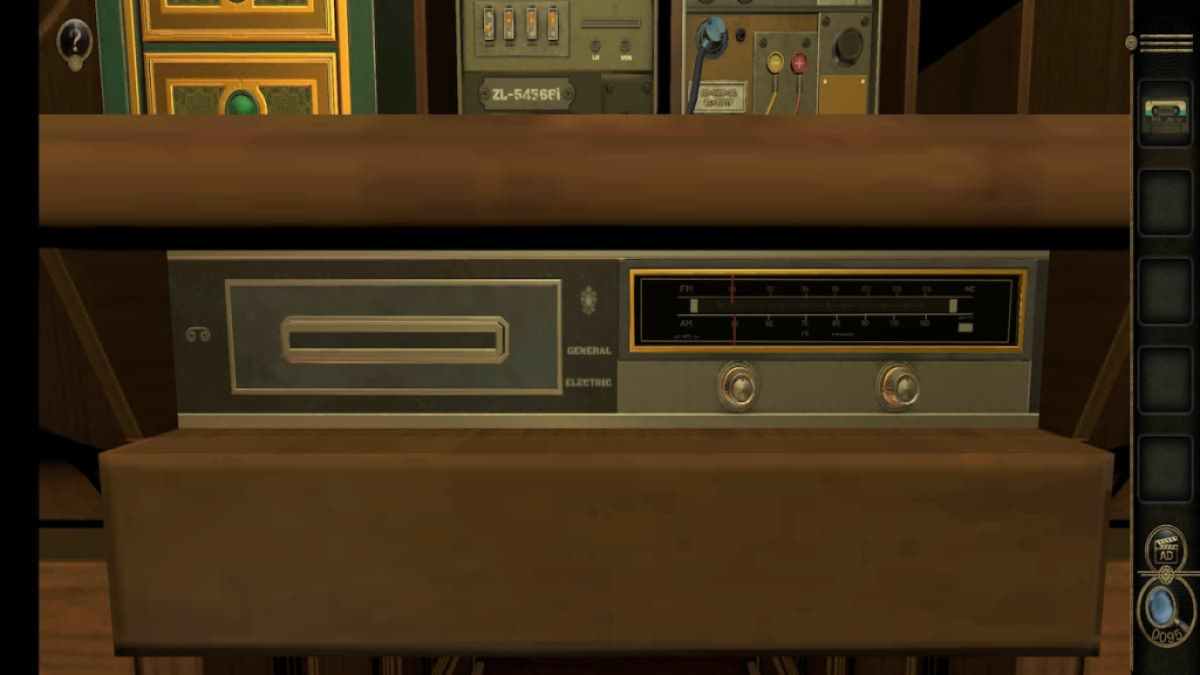
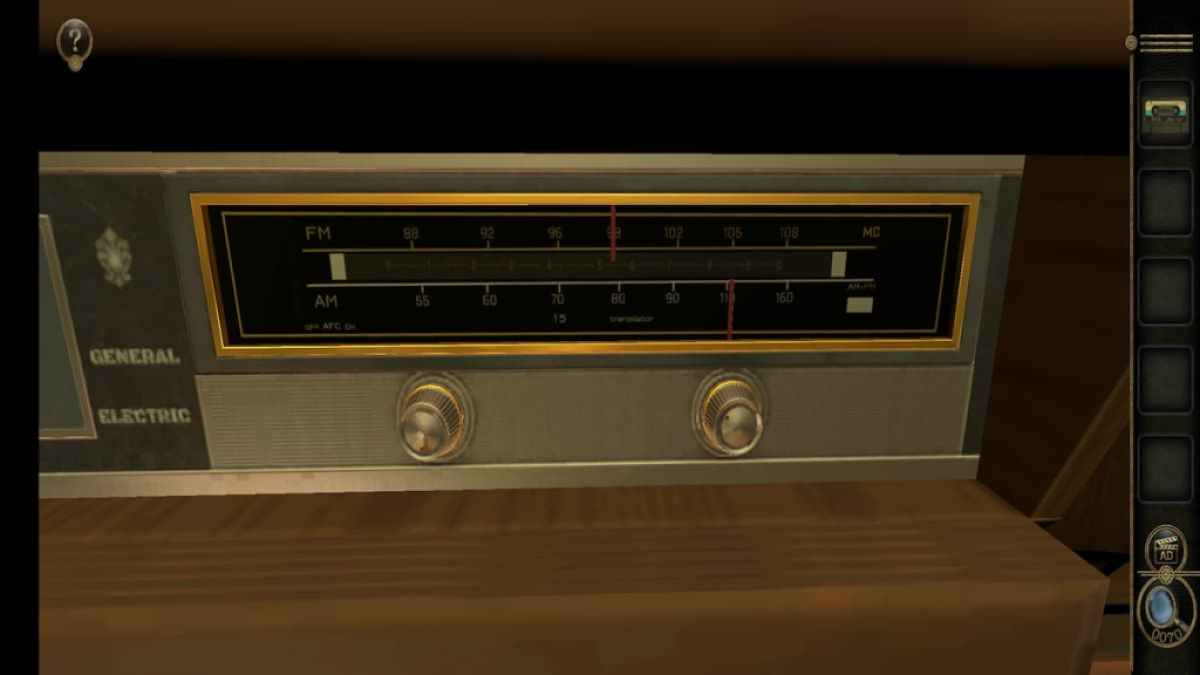
The stereoscopic photograph puzzle has two sections , the first of them consisting of two dial and AM and FM frequencies .
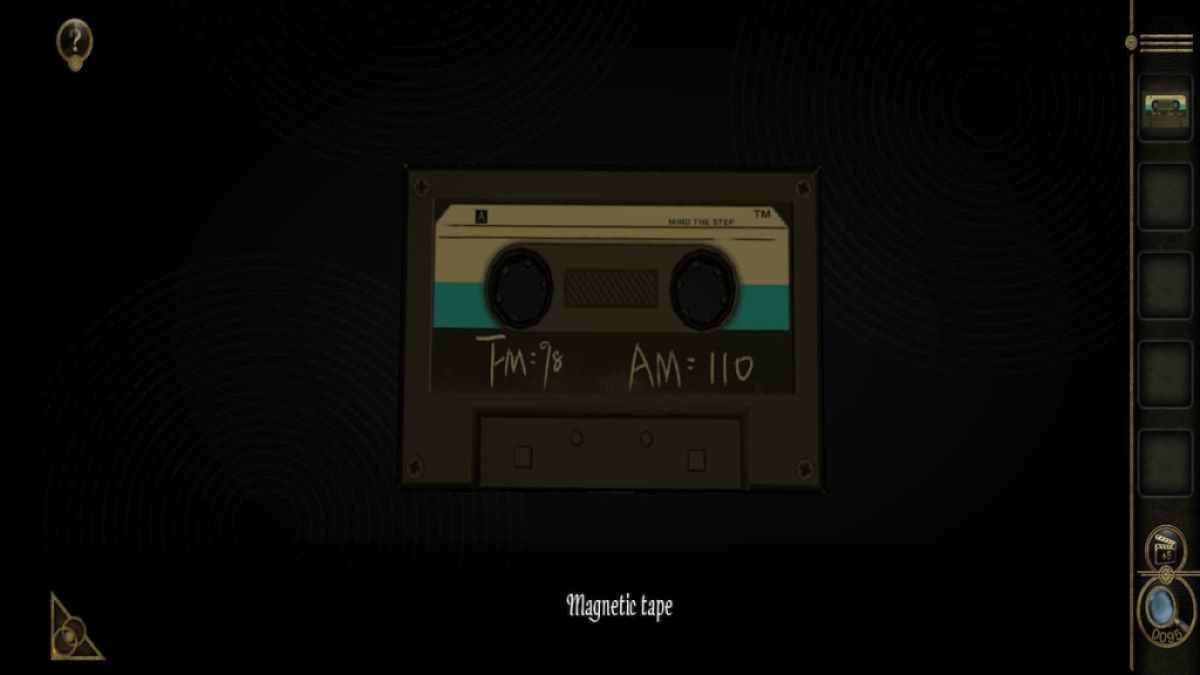
You ’ll need to use the two dial to adjust the FM and AM frequencies to the numbers listed on the magnetic tape .
The unexpended dial controls the FM slider while the correct dial controls the AM slider . release the left slider until the FM slider bear upon 98 and the right telephone dial until the AM slipper reaches 110 to fix the puzzle .
Screenshot by Pro Game Guides
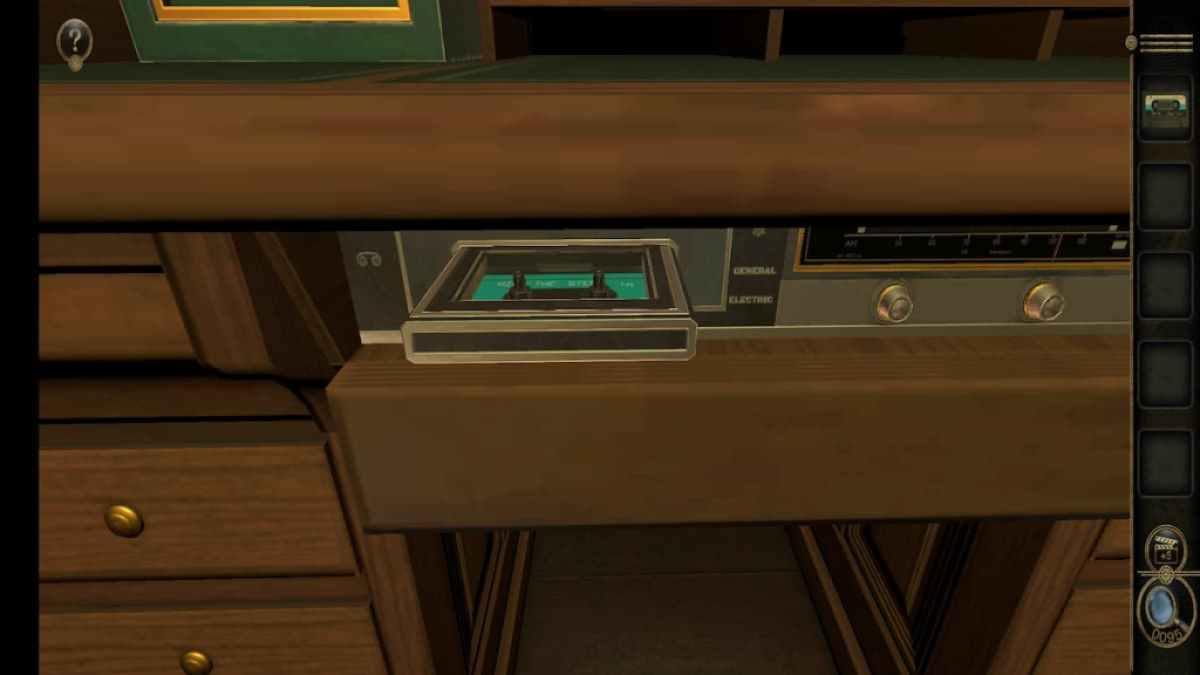
Completing the stereophony reveals a small compartment .
Place the magnetic magnetic tape into the compartment to unlock a Decorative Slider .
Bathroom cabinet puzzles part 2
Return to the bathroom console .
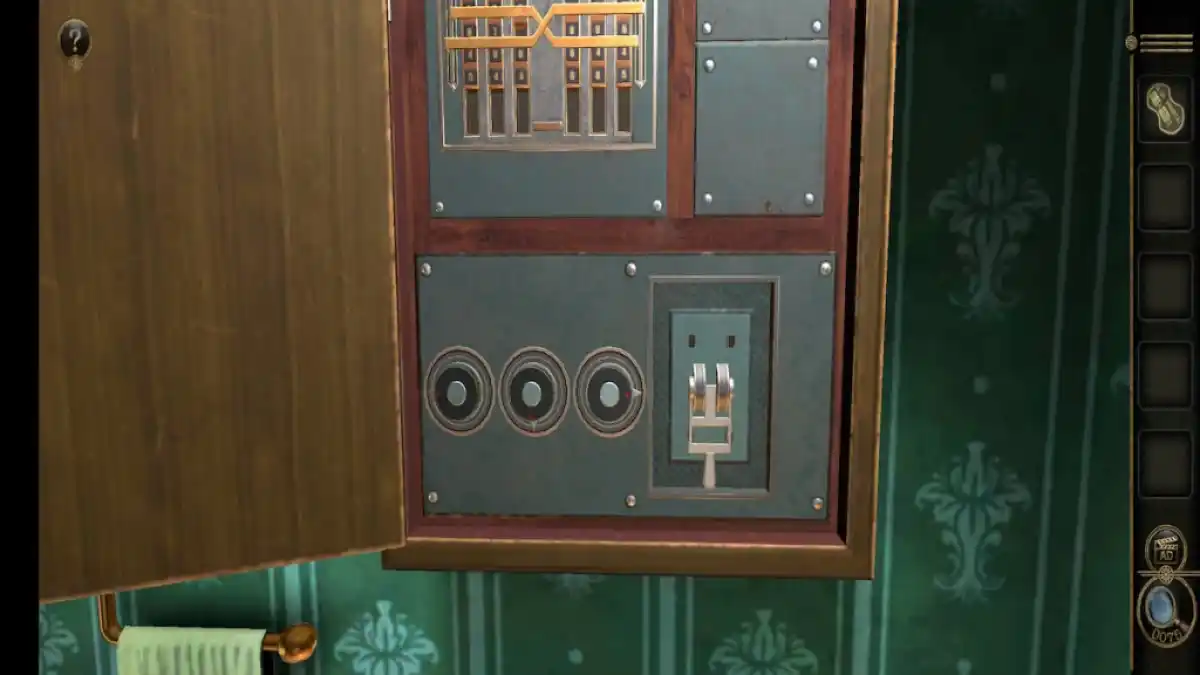
Focus on the bottom puzzle and pull the lever tumbler on the right hand to commence .
The destination of this teaser is to get the arrows on each dial to luff toward the reddened dots . An easy way to do this is by experience one of the side dial two turn away from the loony toons , the center dial three turns aside , and the last dial one turn away . Turning each of the side dials towards their dots will bring the center telephone dial to its dot in this frame-up .

Screenshot by Pro Game Guides
discharge the telephone dial puzzle will unlock a Au puzzle missing a single luger .
Add the Decorated Slider from your inventorying into the empty slot .
You ’ll need to move the sliders to solve the first part of this puzzler . For me , it was the top left first , then the top right , the bottom right , and the bottom allow for .
Screenshot by Pro Game Guides
After successfully moving all four sliders , rotate the rope so that the gap at the top is at the bottom of the circle , revealing a red slider .
tug the new ruby slider to the left to obtain the shield .
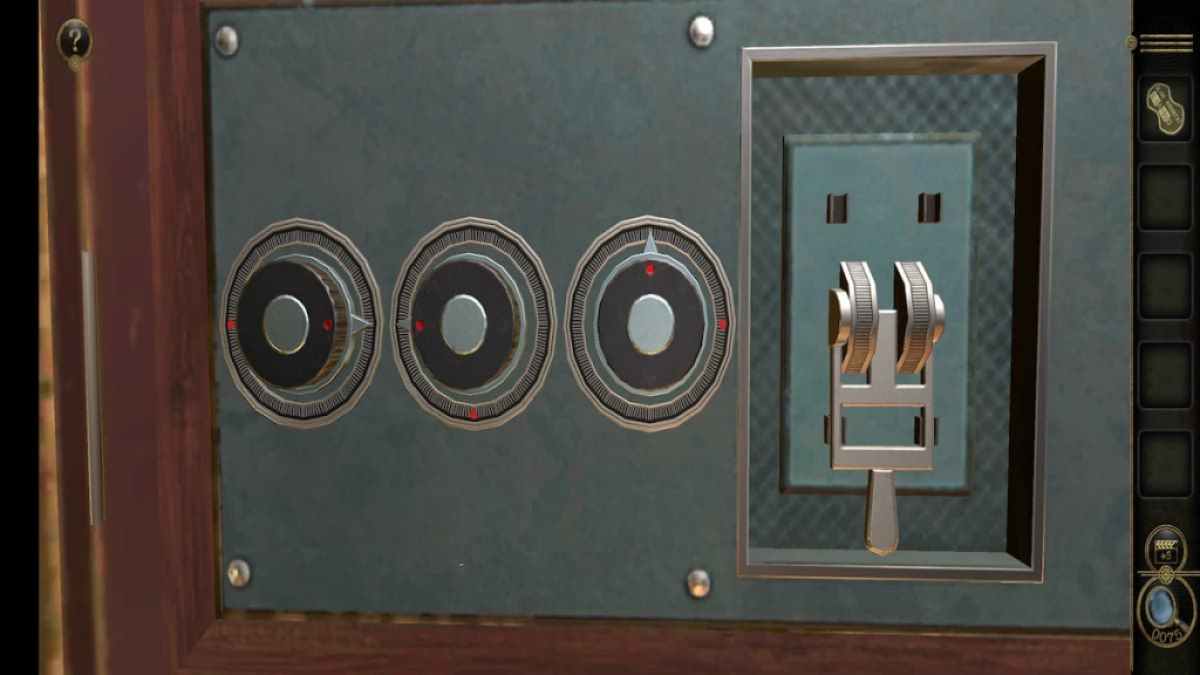
Central cabinet puzzle
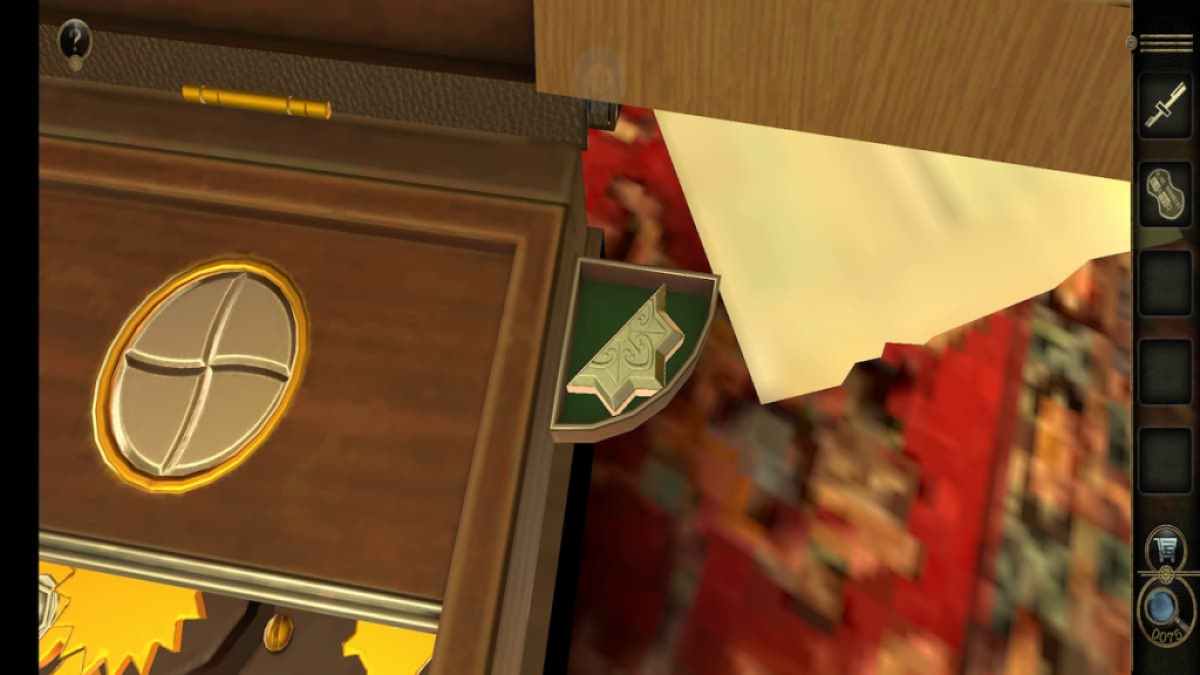
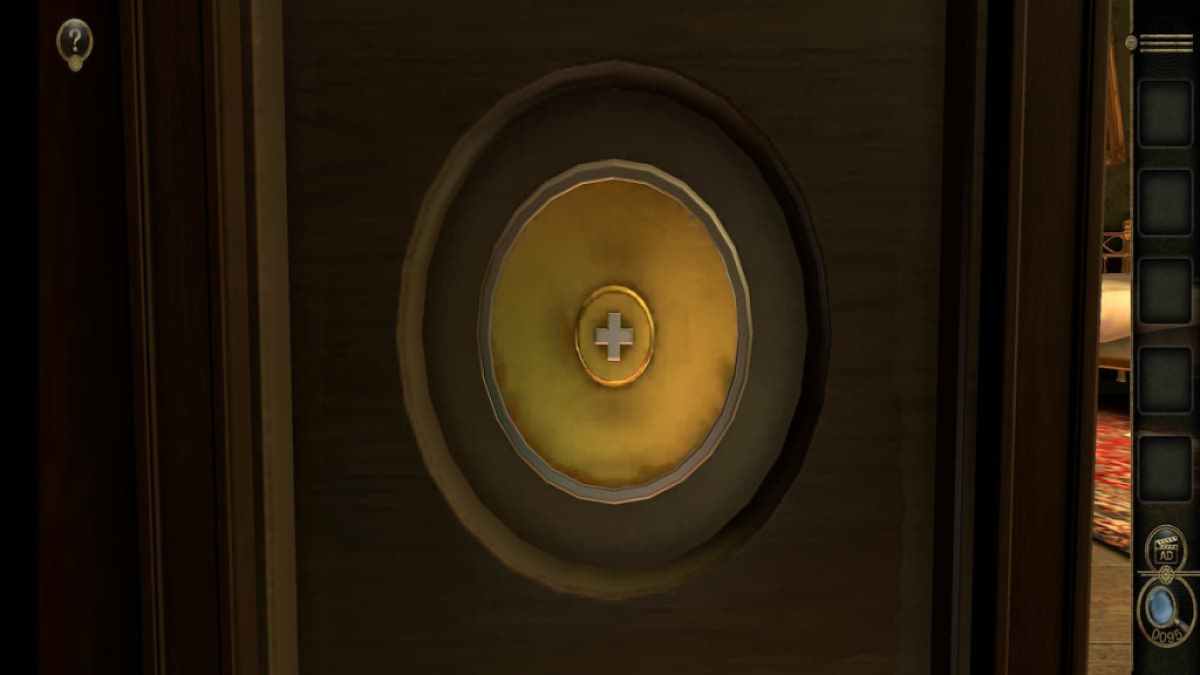
Return to the first room . You ’ll observe that the locker hold up the lamp has a curl with a hole the same size of it and shape as the Shield .
tuck the Shield and slide the lock up to obtain a Wrench for the next puzzle .
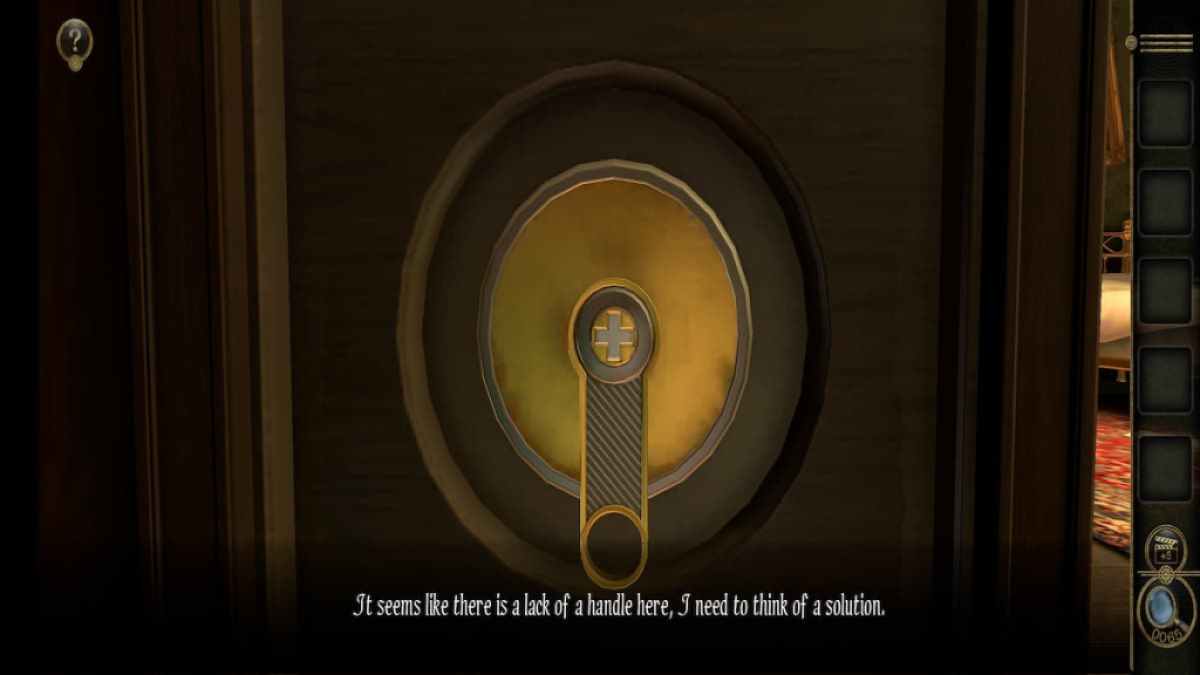
If you back away from the lock and rotate the screen , you ’ll see a slider on the left side of the cabinet .
Screenshot by Pro Game Guides
Opening that slider reveals an intricately mold lock .
Attach the Wrench to it and twist it counterclockwise to unlock the next mystifier .
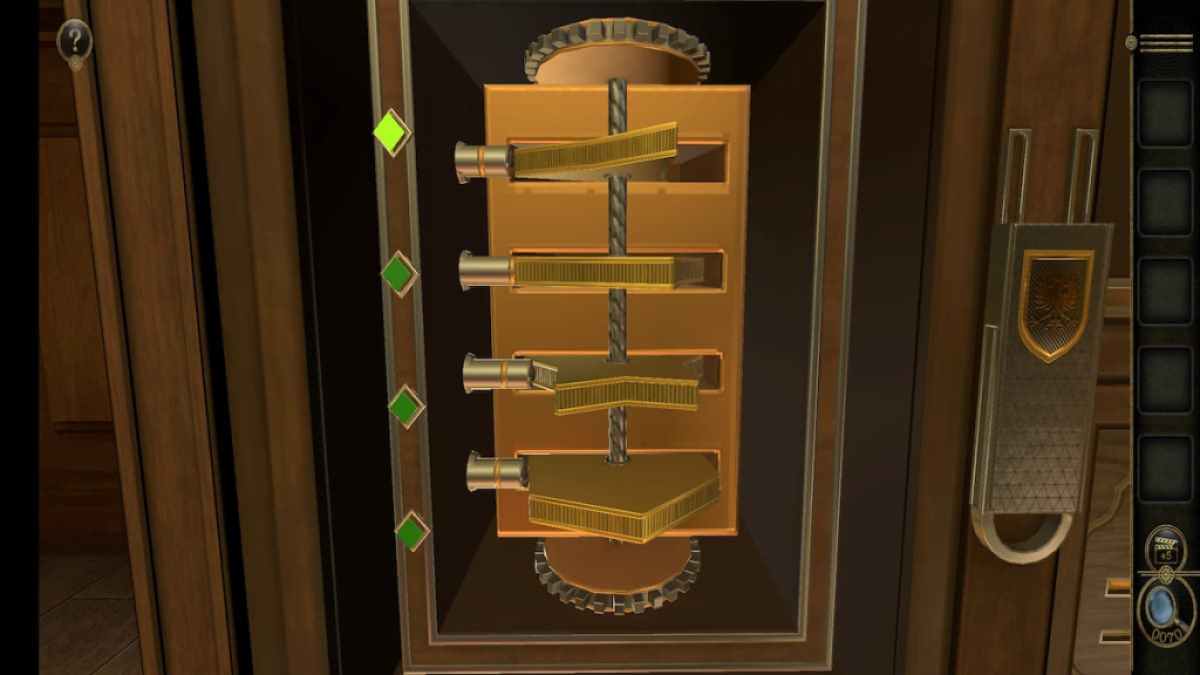
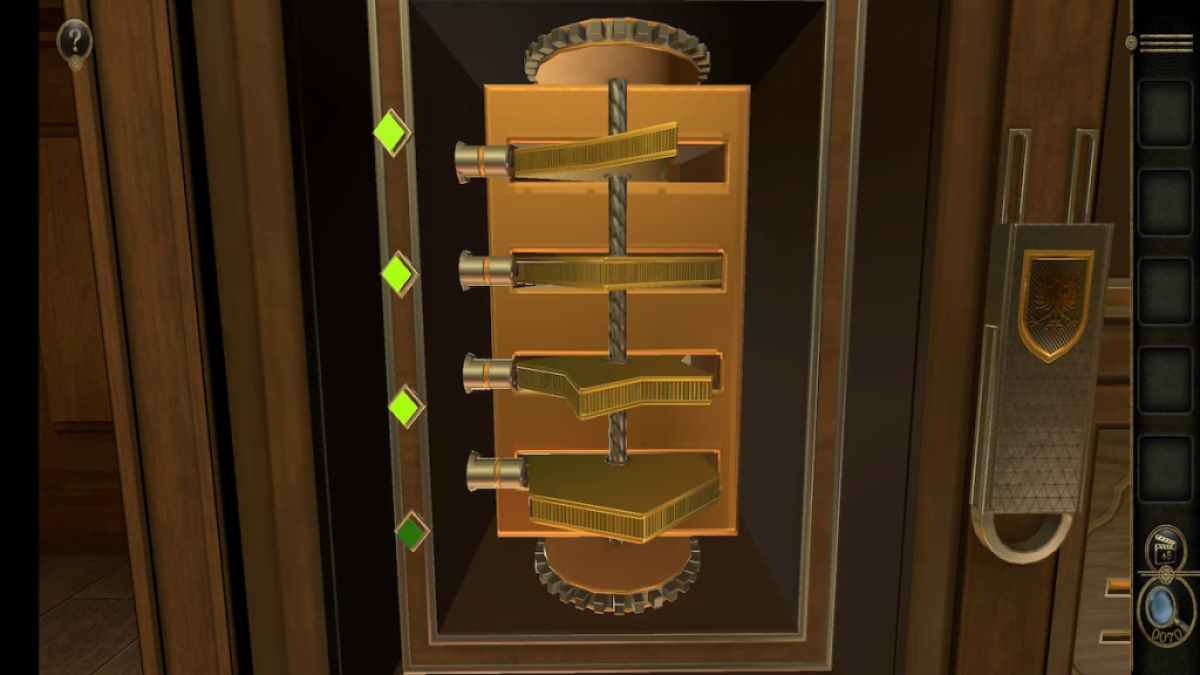
This puzzle involve rotating four geometrical platforms so that they iron out against the poles on the right , turn their luminousness gullible . Rotating the top one also rotates the one beneath it and the bottom one , rotating the 2d one rotates the top and third one , turn out the third also revolve the third and final ones , and rotating the one on the bottom only rotate itself .
Screenshot by Pro Game Guides
Rotate the first and second ones until the first light turns green .
Then circumvolve the third gear until the 2nd and third Light turn greenish .
Finish the puzzler by spinning the last tier up until the light turn fleeceable to obtain a number Cube .
Screenshot by Pro Game Guides
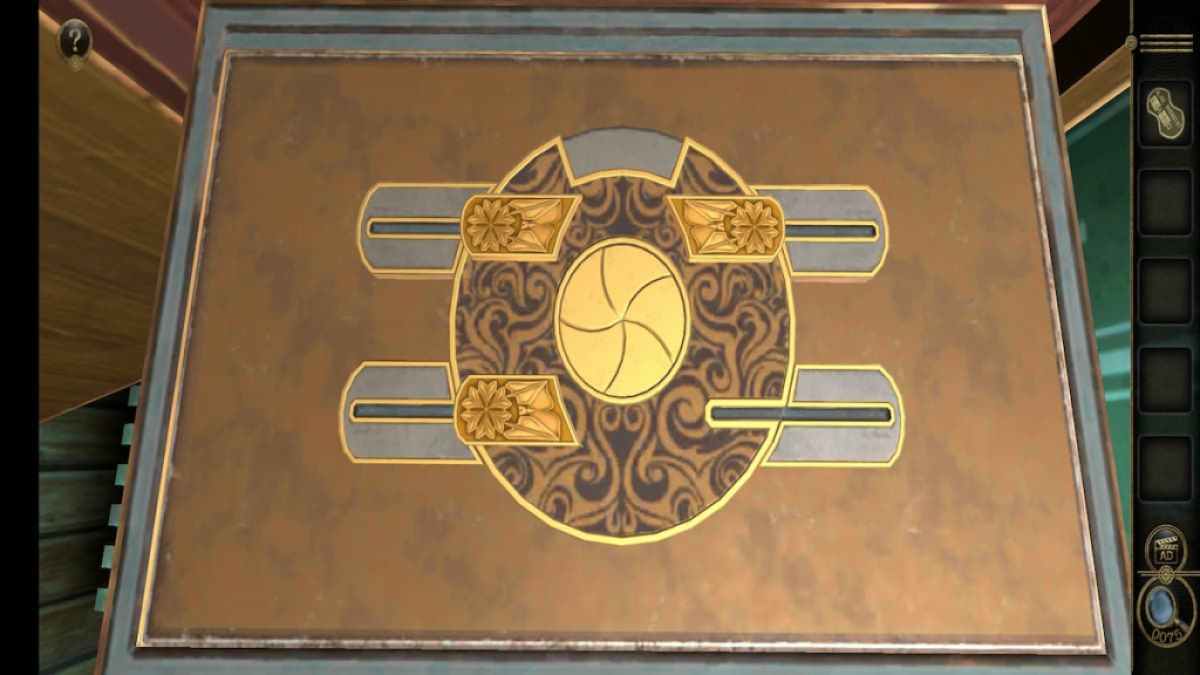
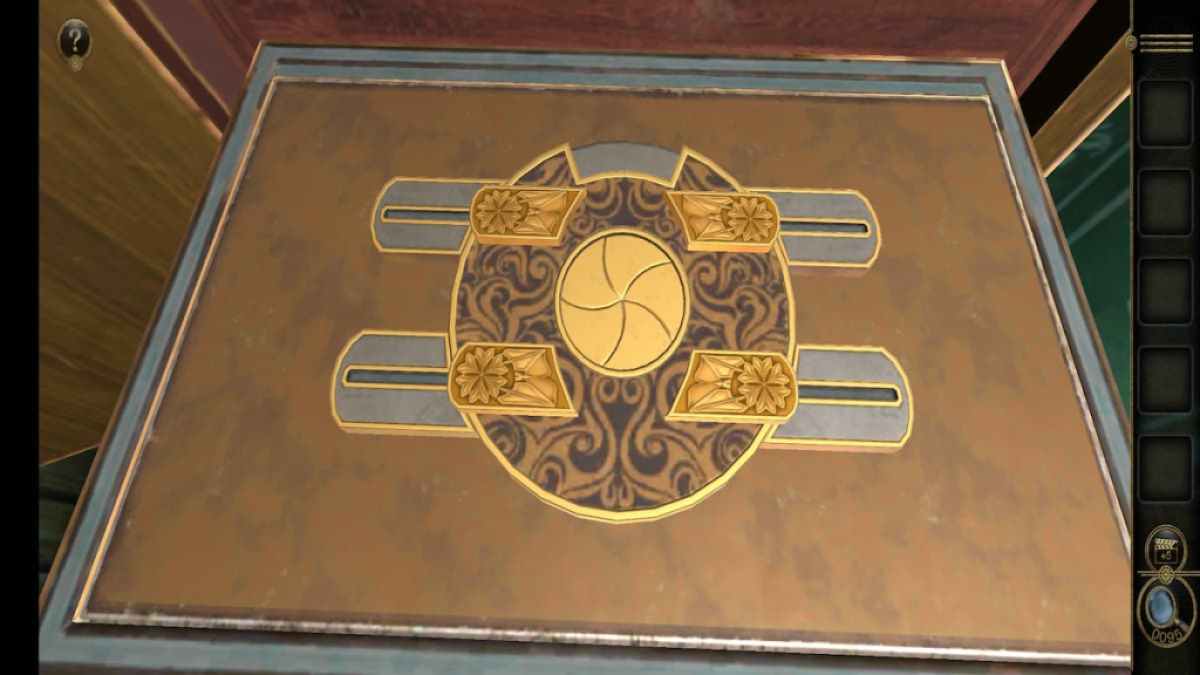
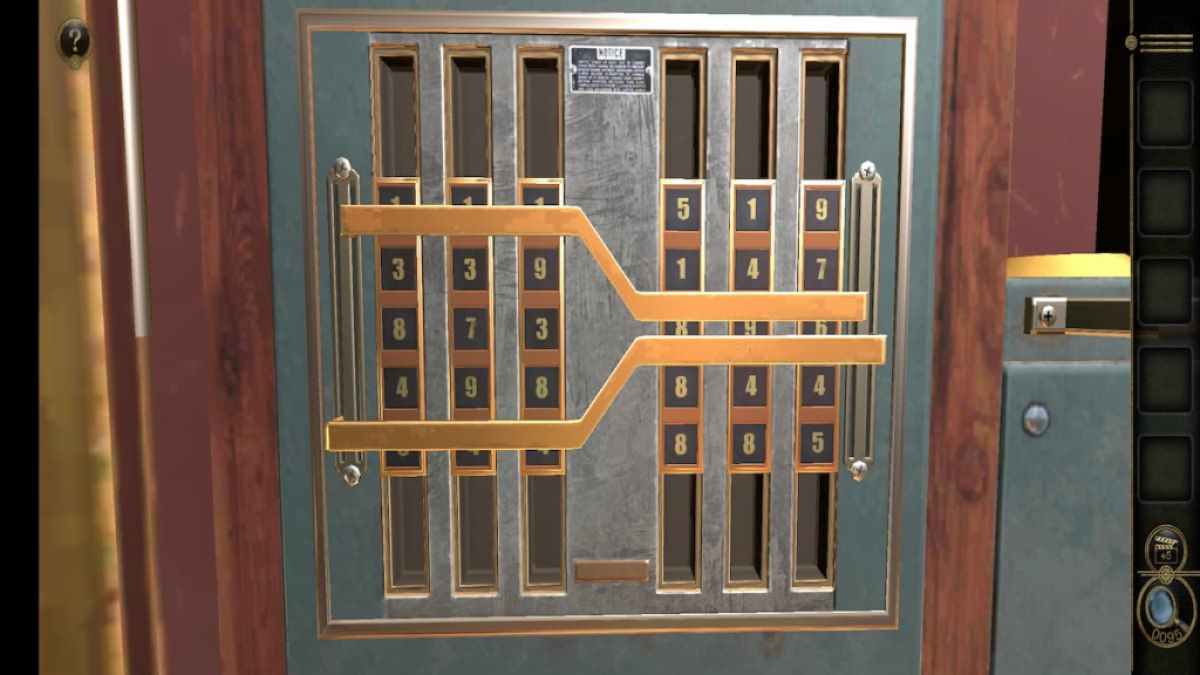
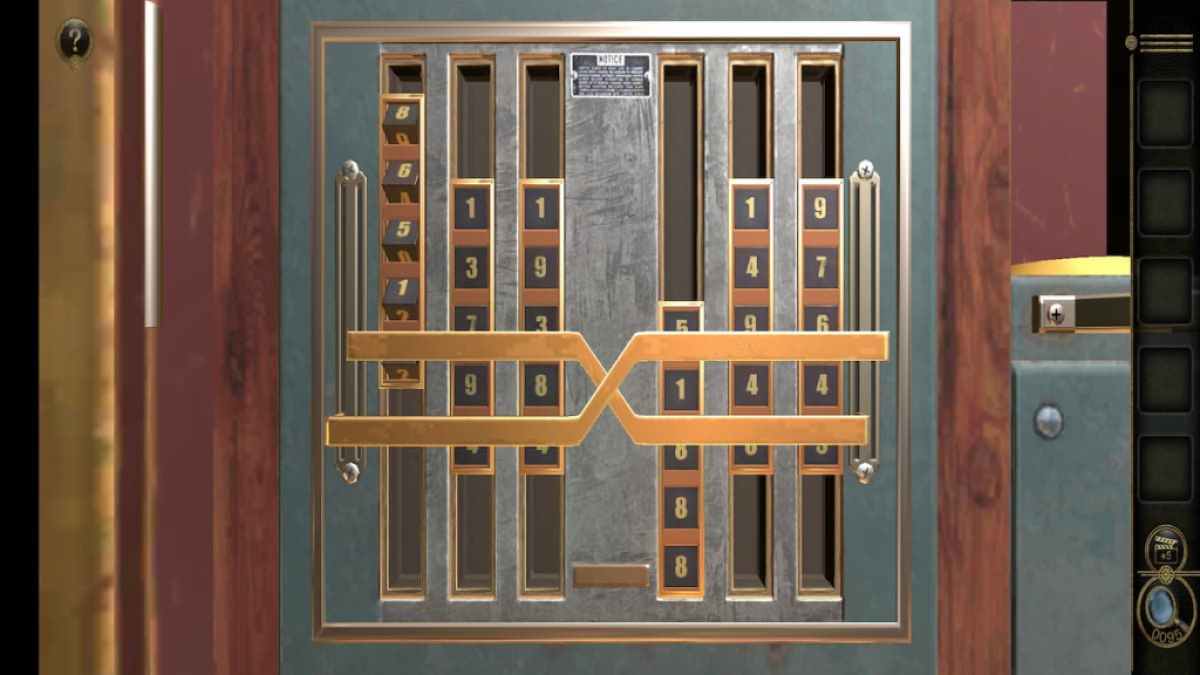
Bathroom cabinet number puzzle
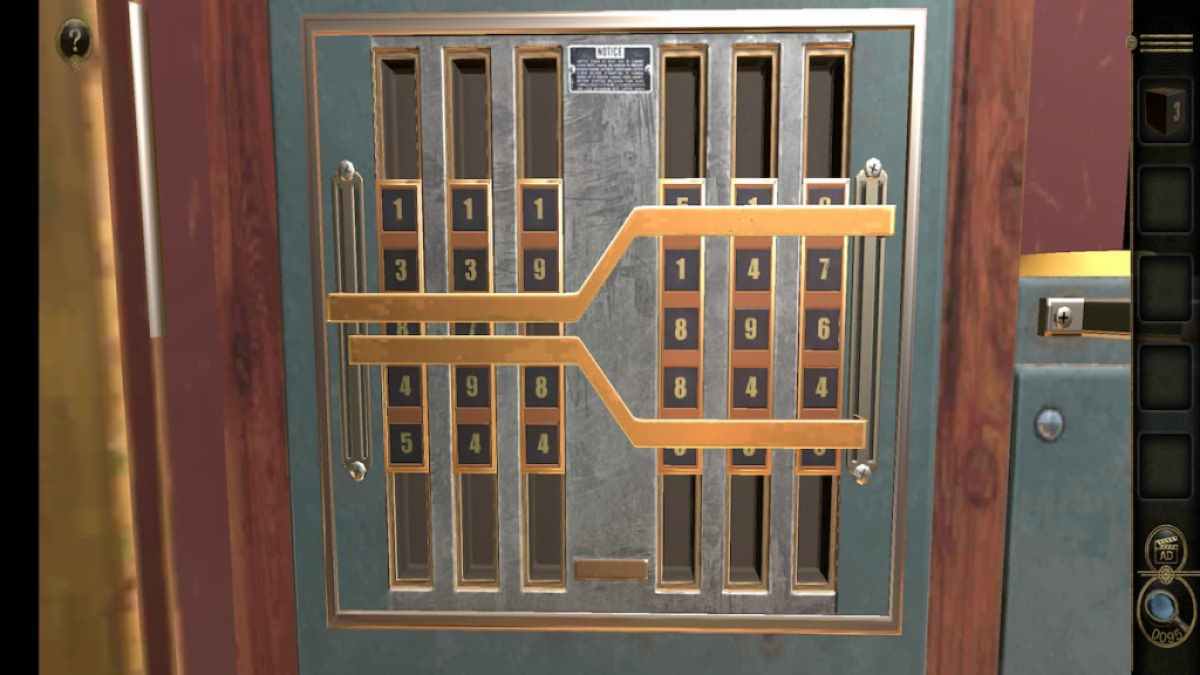
channelize to the john cabinet for the final puzzle . It ’s made up of two Set of three numbers pool , plus two zigzagging poles .
Begin the puzzle by placing the Cube in the third newspaper column ’s empty spot .
This puzzle ’s goal is to roll the dice up and down to check the numbers game compose on the cabinet door , which can easy be viewed by exiting the puzzle . drag in the dice up and down changes their bit .
Screenshot by Pro Game Guides
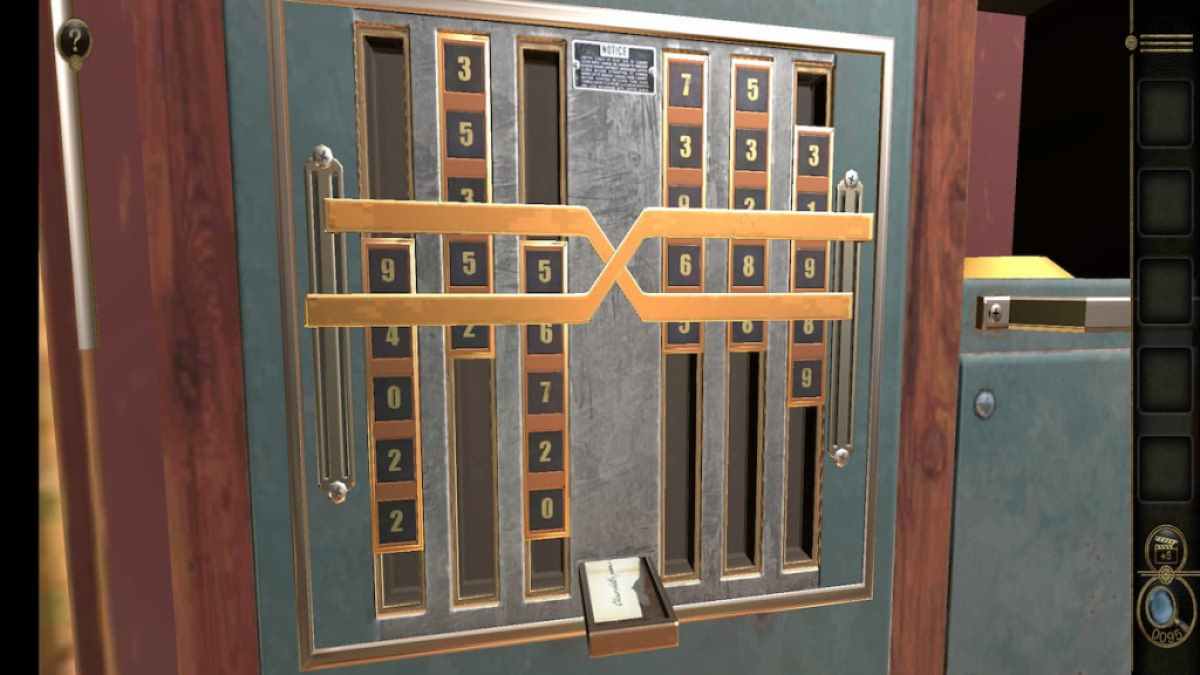
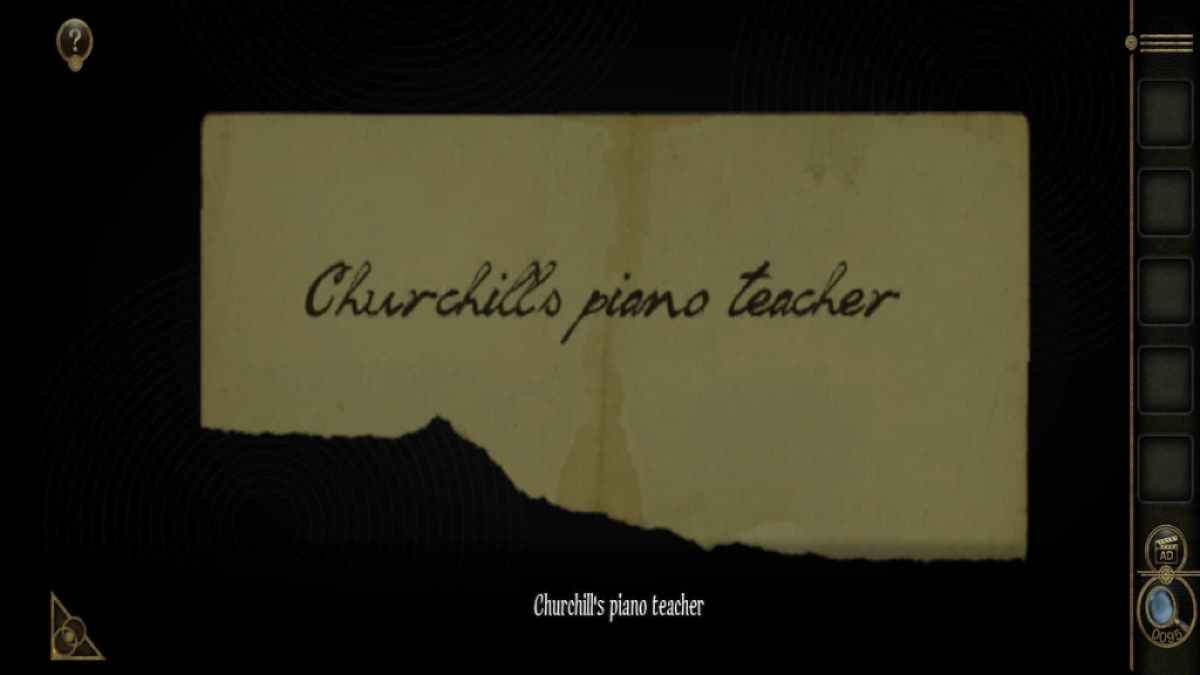
Once you ’ve completed the first Seth , it ’s sluttish to match the second set on the same row . After completing both sets , slide the two Au pieces so that they border the numbers .
You ’ll obtain the last clue , a little piece of report reading " Churchill ’s piano teacher . "
With that , the first chapter add up to an end .

Screenshot by Pro Game Guides
For more exciting escape room game , check out our list of the25 Best Free Virtual Escape Roomshere on Pro Game Guides .
Screenshot by Pro Game Guides
Screenshot by Pro Game Guides
Screenshot by Pro Game Guides

Screenshot by Pro Game Guides
Screenshot by Pro Game Guides
Screenshot by Pro Game Guides
Screenshot by Pro Game Guides
Screenshot by Pro Game Guides
Screenshot by Pro Game Guides

Screenshot by Pro Game Guides
Screenshot by Pro Game Guides
Screenshot by Pro Game Guides
Screenshot by Pro Game Guides
Screenshot by Pro Game Guides
Screenshot by Pro Game Guides
Screenshot by Pro Game Guides
Screenshot by Pro Game Guides
Screenshot by Pro Game Guides
Screenshot by Pro Game Guides
Screenshot by Pro Game Guides
Screenshot by Pro Game Guides
Screenshot by Pro Game Guides
Screenshot by Pro Game Guides
Screenshot by Pro Game Guides
Screenshot by Pro Game Guides
Screenshot by Pro Game Guides
Screenshot by Pro Game Guides
Screenshot by Pro Game Guides

Screenshot by Pro Game Guides
Screenshot by Pro Game Guides
Screenshot by Pro Game Guides
Screenshot by Pro Game Guides

Screenshot by Pro Game Guides

Screenshot by Pro Game Guides
Screenshot by Pro Game Guides
Screenshot by Pro Game Guides
Screenshot by Pro Game Guides
Screenshot by Pro Game Guides

Screenshot by Pro Game Guides
Screenshot by Pro Game Guides
Screenshot by Pro Game Guides

Screenshot by Pro Game Guides
Screenshot by Pro Game Guides
Screenshot by Pro Game Guides
Screenshot by Pro Game Guides
Screenshot by Pro Game Guides
Screenshot by Pro Game Guides
Screenshot by Pro Game Guides
Screenshot by Pro Game Guides
Screenshot by Pro Game Guides
Screenshot by Pro Game Guides
Screenshot by Pro Game Guides
Screenshot by Pro Game Guides
Screenshot by Pro Game Guides
Screenshot by Pro Game Guides
Screenshot by Pro Game Guides
Screenshot by Pro Game Guides

Screenshot by Pro Game Guides
Screenshot by Pro Game Guides
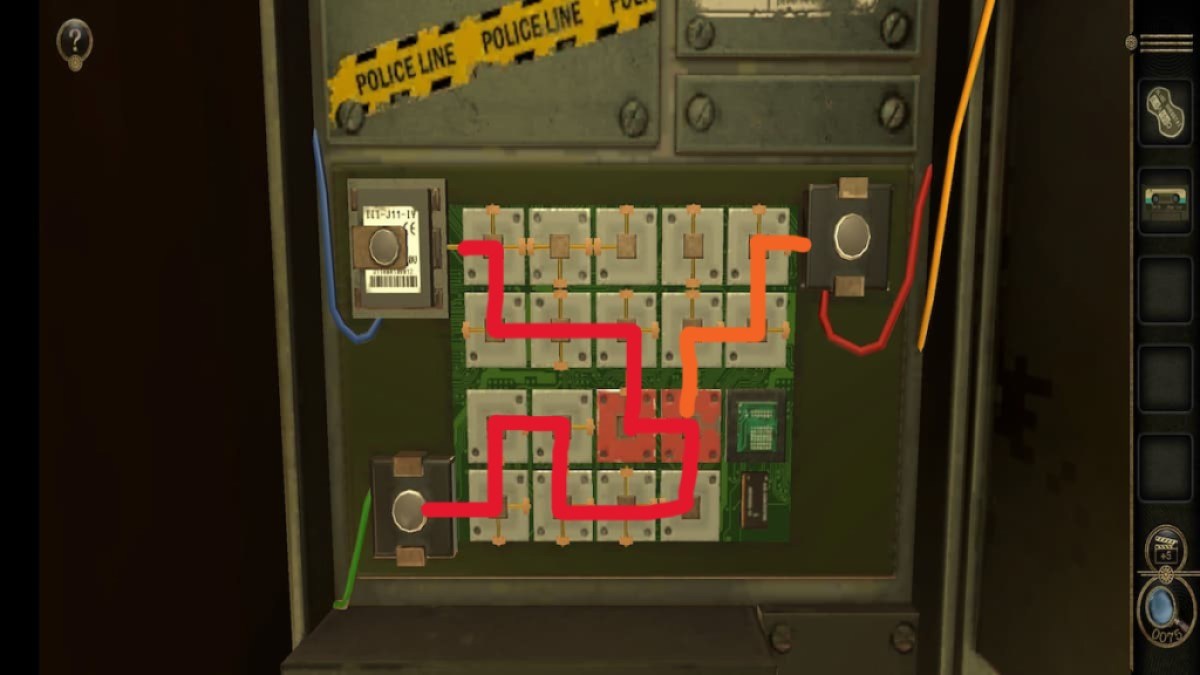
Image by Pro Game Guides
Screenshot by Pro Game Guides
Screenshot by Pro Game Guides
Screenshot by Pro Game Guides

Screenshot by Pro Game Guides

Screenshot by Pro Game Guides

Screenshot by Pro Game Guides
Screenshot by Pro Game Guides
Screenshot by Pro Game Guides
Screenshot by Pro Game Guides
Screenshot by Pro Game Guides
Screenshot by Pro Game Guides
Screenshot by Pro Game Guides
Screenshot by Pro Game Guides
Screenshot by Pro Game Guides
Screenshot by Pro Game Guides
Screenshot by Pro Game Guides
Screenshot by Pro Game Guides
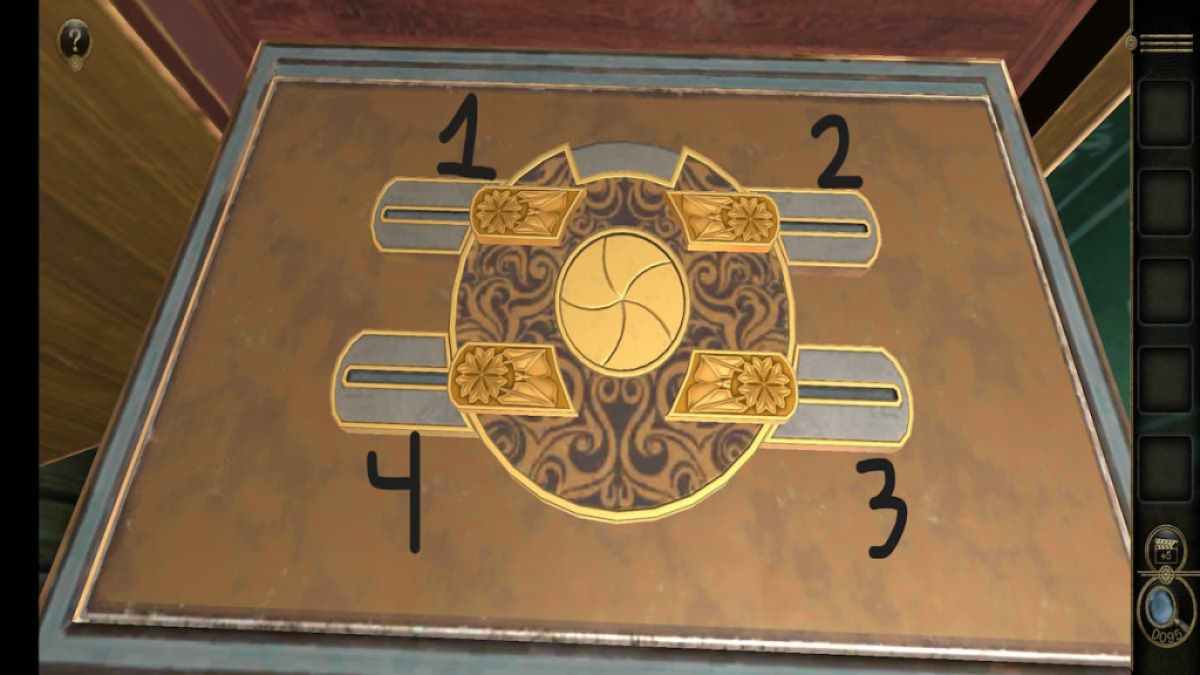
Image by Pro Game Guides
Screenshot by Pro Game Guides
Screenshot by Pro Game Guides
Screenshot by Pro Game Guides
Screenshot by Pro Game Guides
Screenshot by Pro Game Guides
Screenshot by Pro Game Guides
Screenshot by Pro Game Guides
Screenshot by Pro Game Guides
Screenshot by Pro Game Guides
Screenshot by Pro Game Guides
Screenshot by Pro Game Guides
Screenshot by Pro Game Guides
Screenshot by Pro Game Guides
Screenshot by Pro Game Guides
Screenshot by Pro Game Guides
Screenshot by Pro Game Guides
