unveil the truth behind all five mysteries with relaxation .
For instrumentalist want to experiment with the point - and - click mystery story musical style , 3D Escape Room Detective Story is a swell biz due to its accessibility as a complimentary roving game . In this usher , I ’ll walk you through all of the puzzles in Chapter 5 of 3D Escape Room Detective Story .
Each chapter of the plot has a freestanding guide since each contains many puzzles of varying difficulty . If you have n’t made your path to the final chapter yet , check out our guides on the premature chapters to help you move in the right direction .
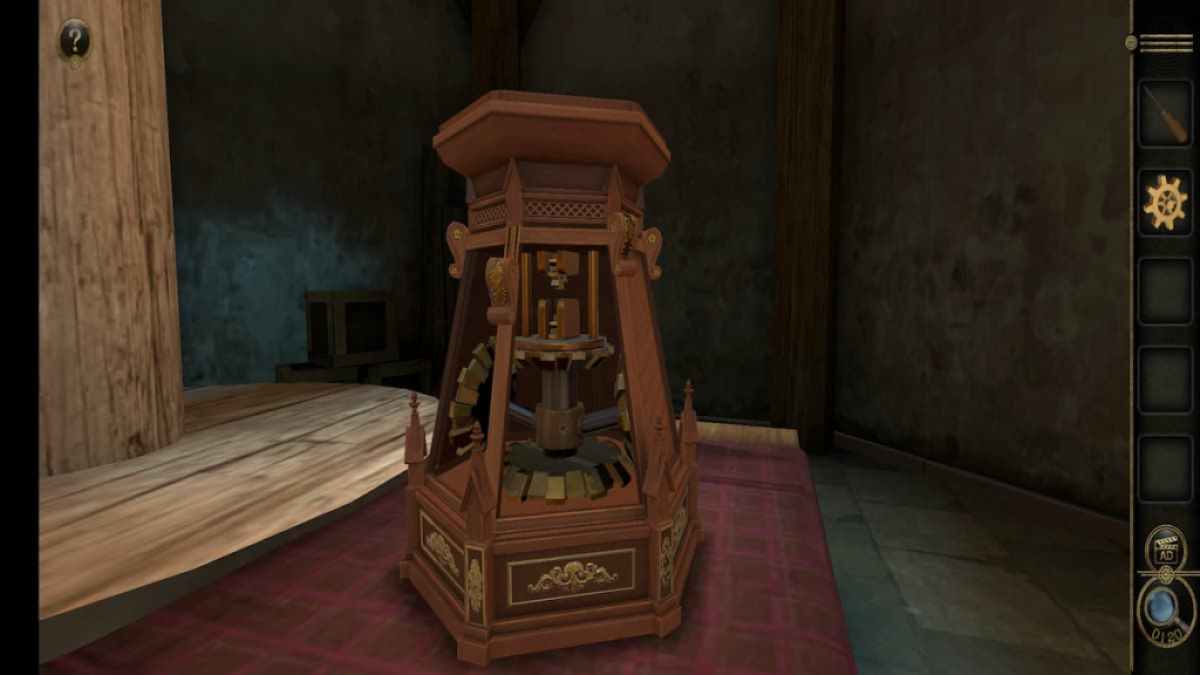
The terminal chapter begins with another phone call from the unidentified someone . They refer to the railroad train as the fourth test and discourse how Pete and Claude have become immortal beingness . They tell you to go to a beacon to take the final test , which will help you uncover the verity behind all of these unlawful cases .
3D Escape Room Detective Story Chapter 5 guide
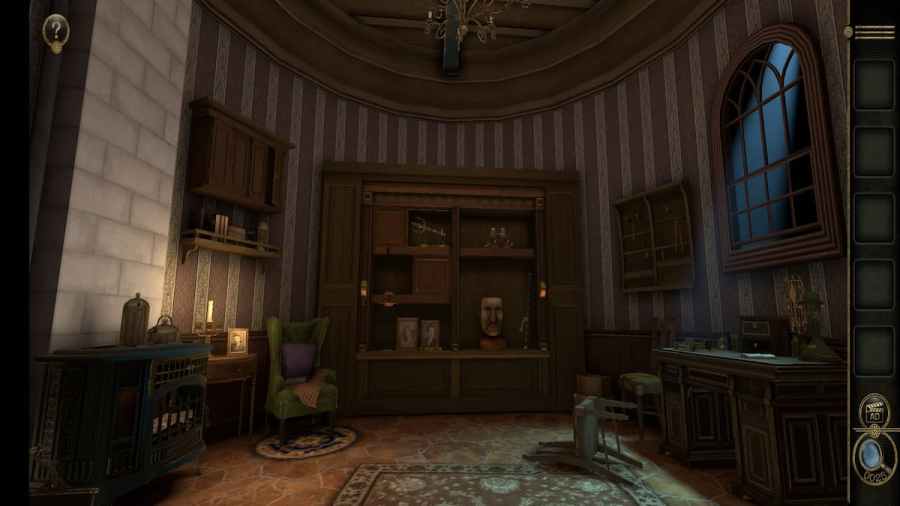
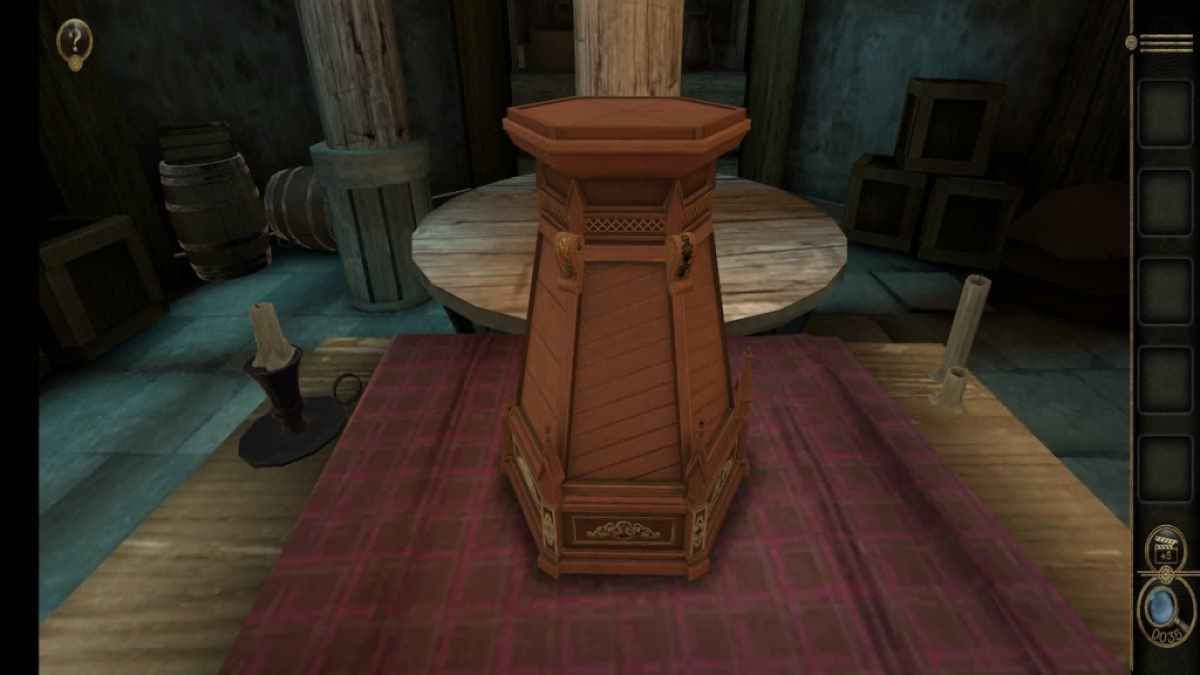
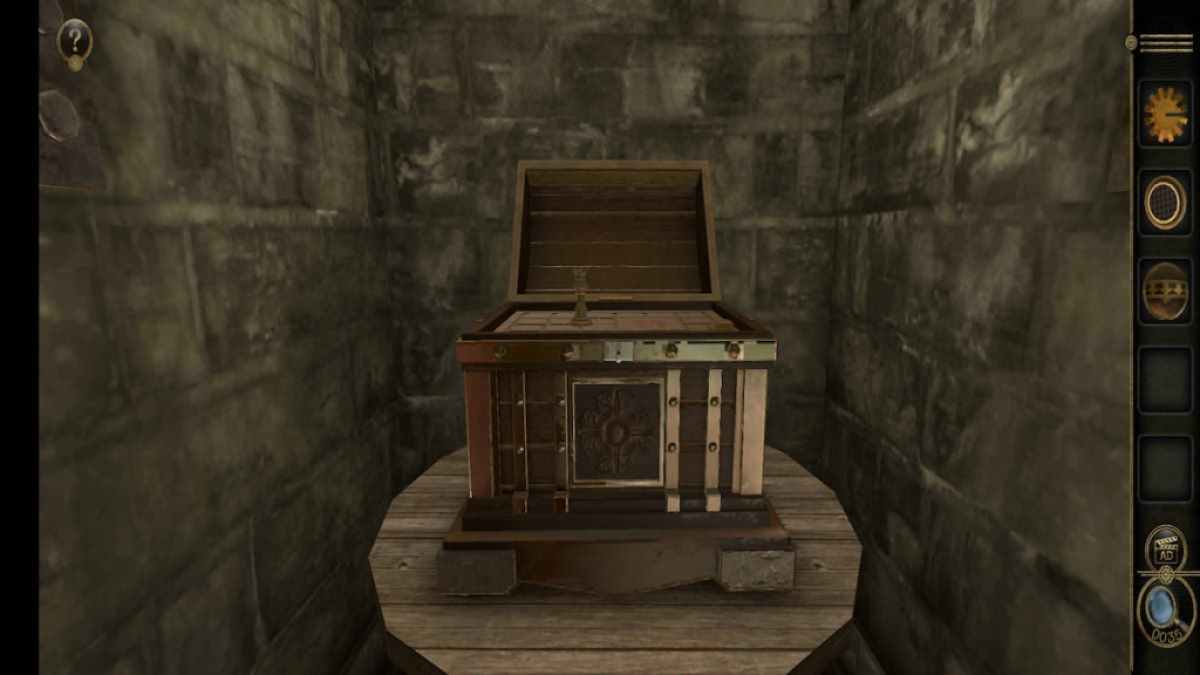
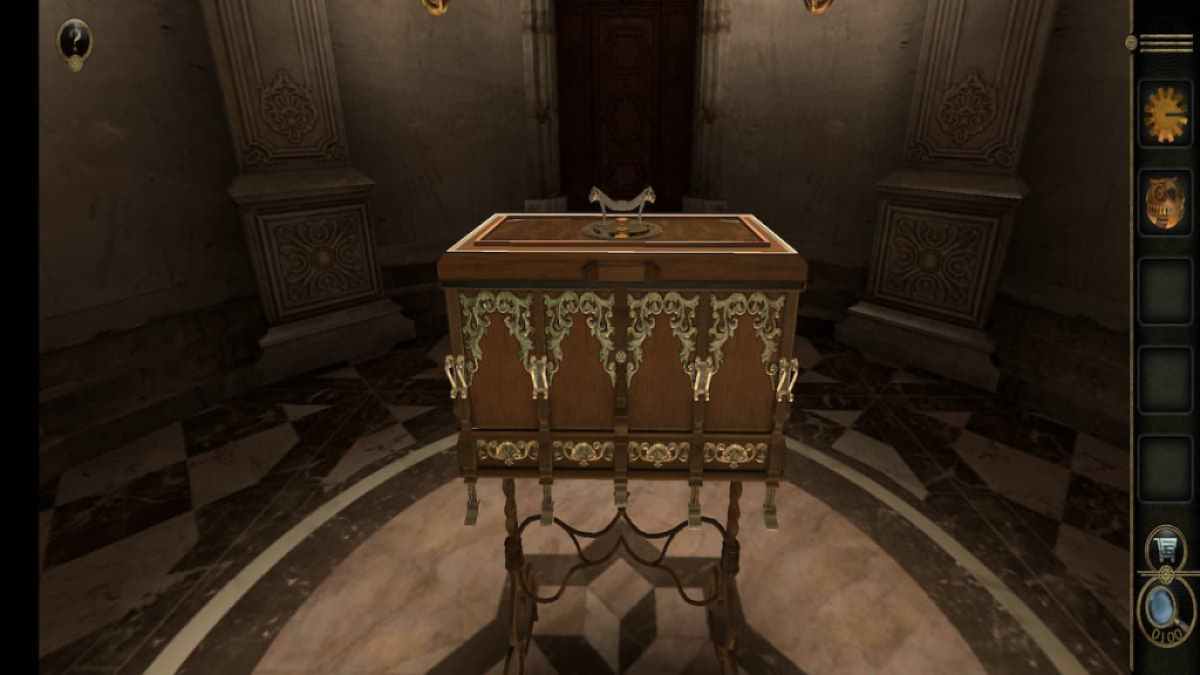
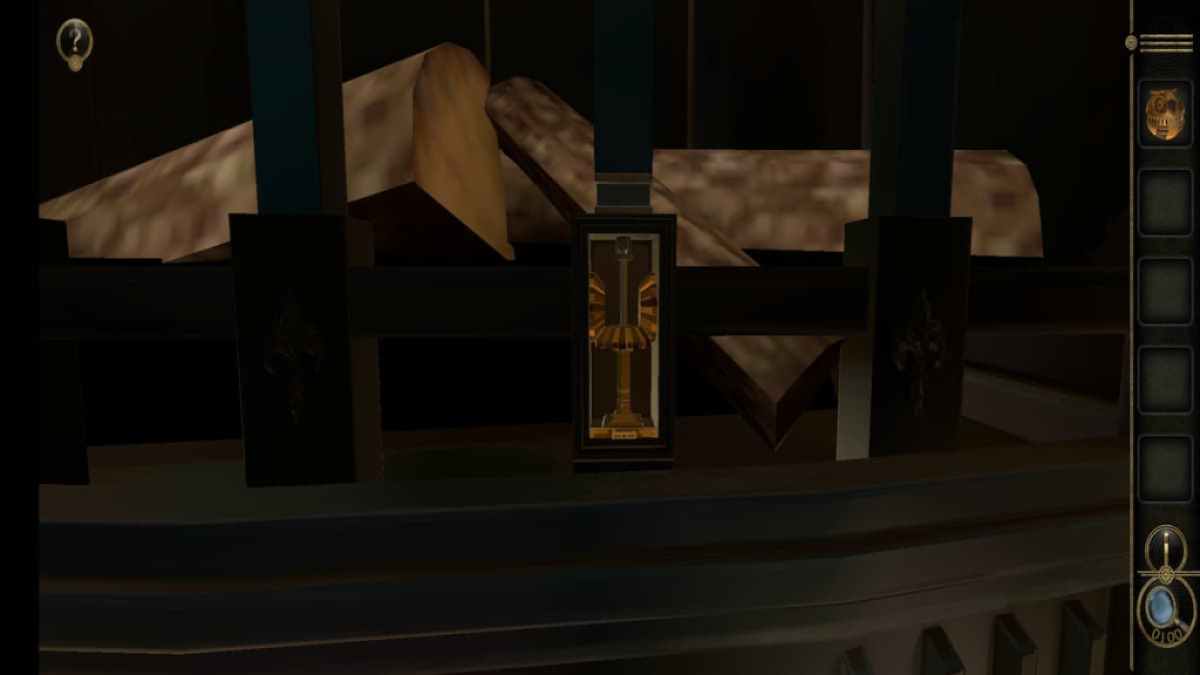
The key features of this room are the downhearted kitchen stove on the left hand , the bookcase in the back , and the desk on the right field .
Beginning bookcase puzzles
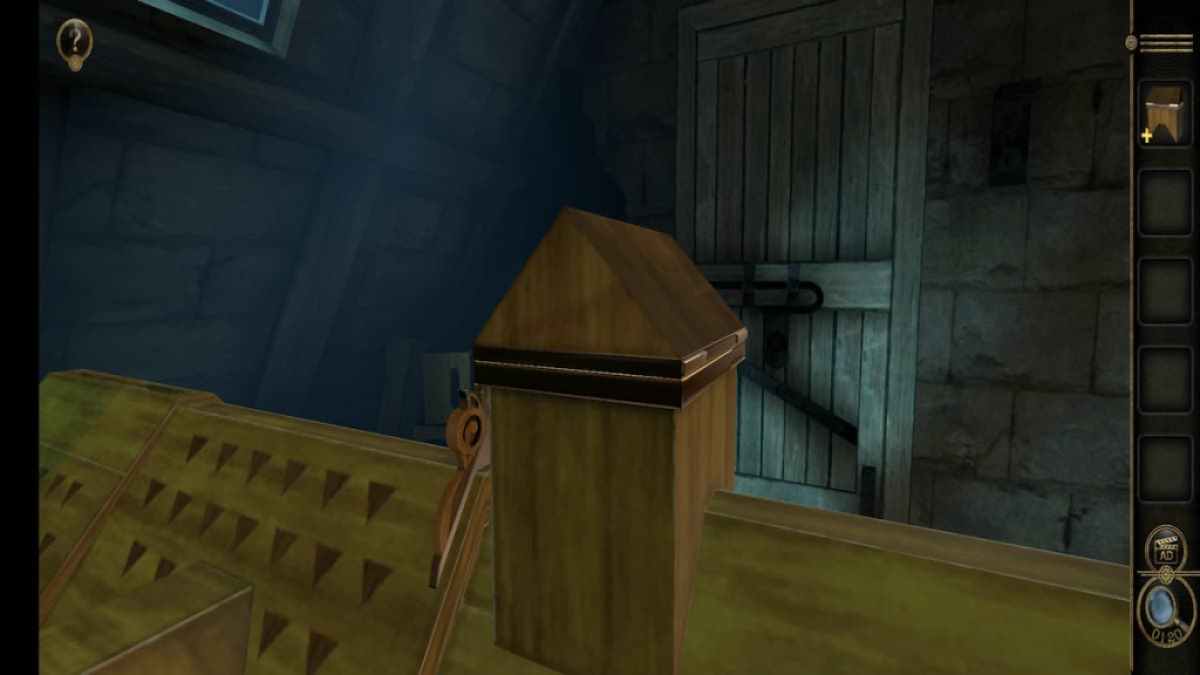
Start at the bookcase in the back .
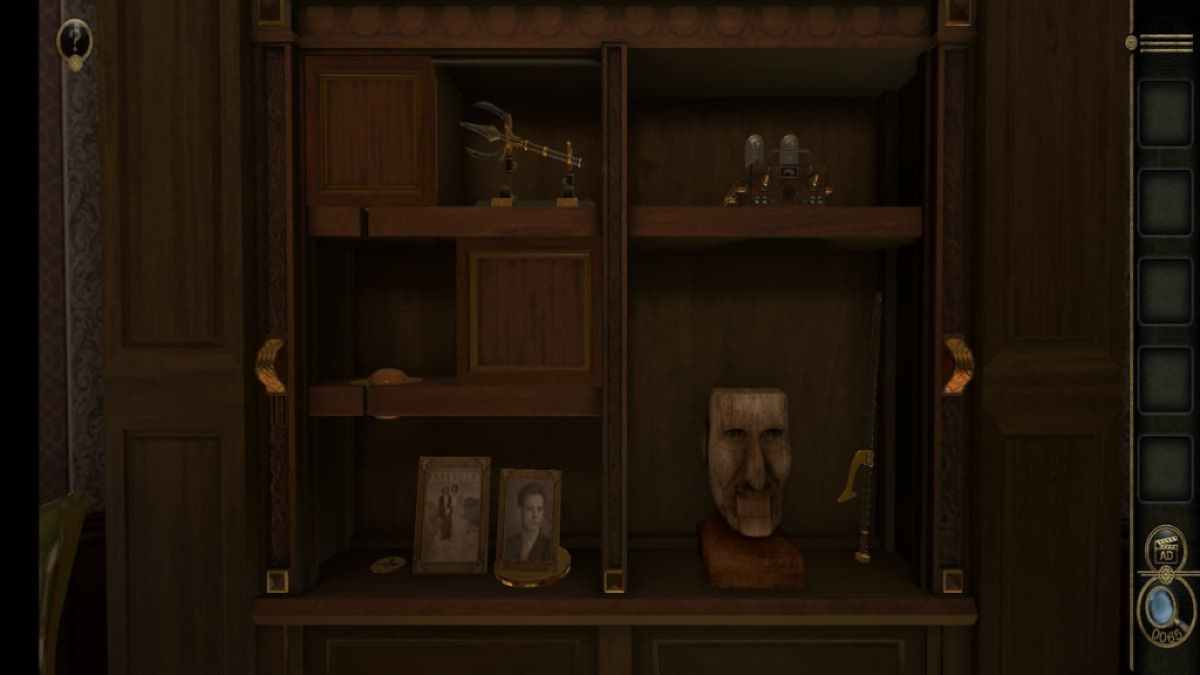
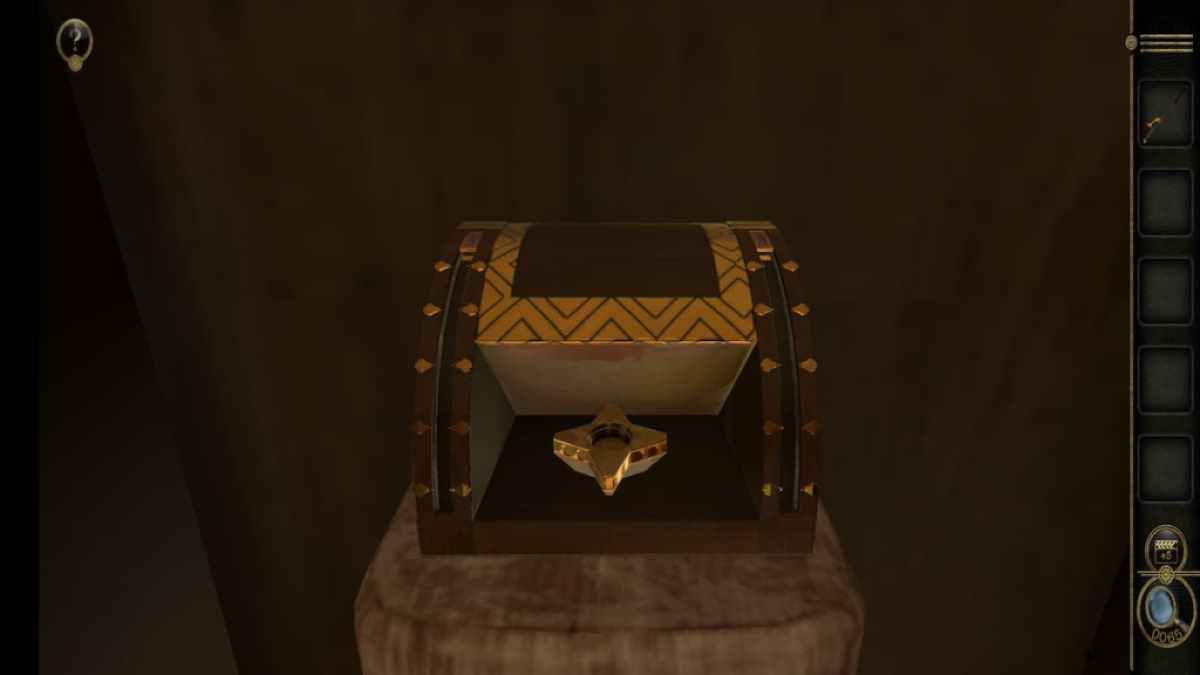
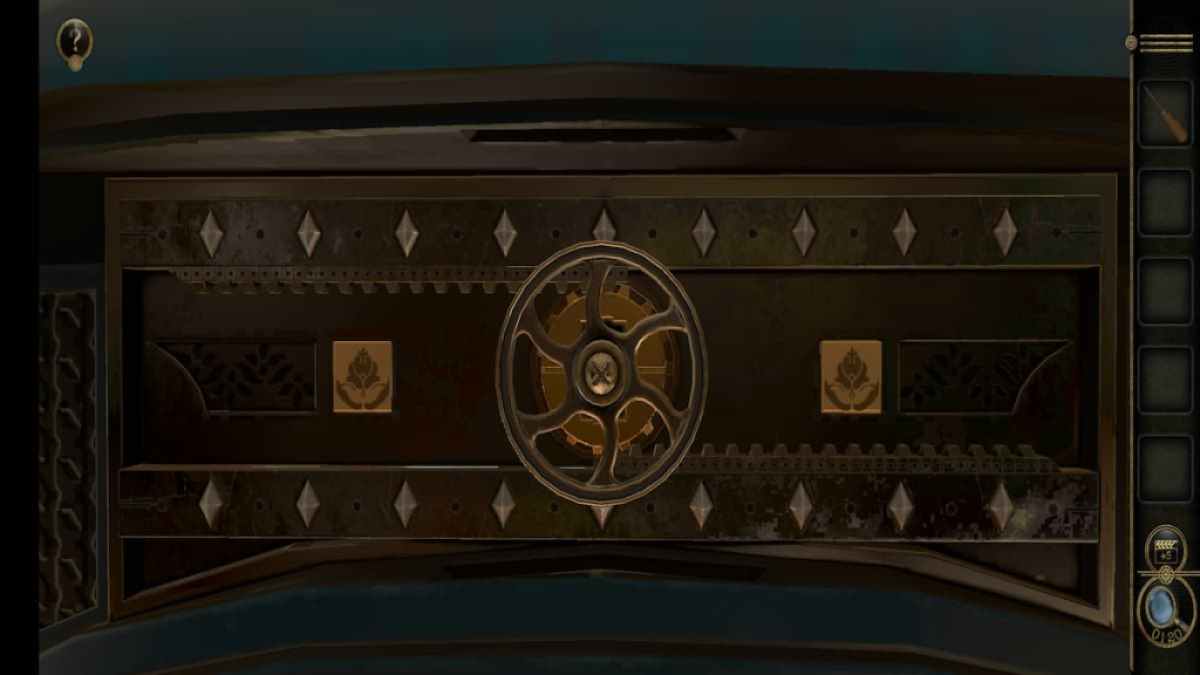
In this horizon , seize the Sword catch one’s breath to the right of the creepy-crawly head statue .
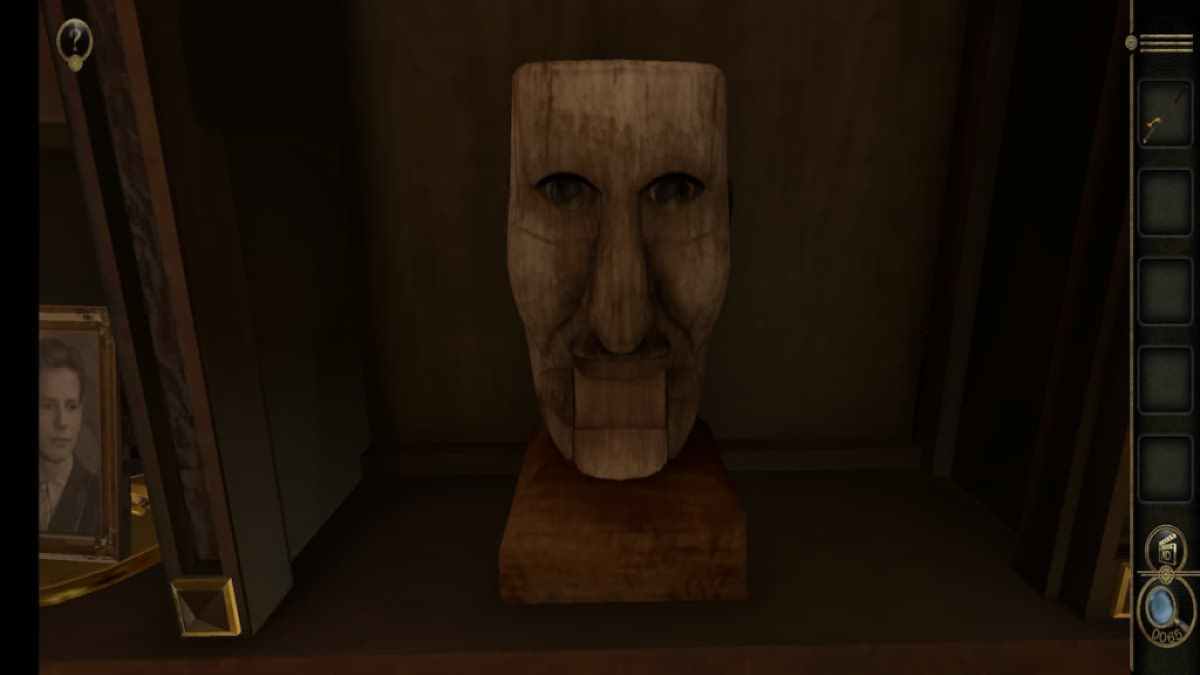
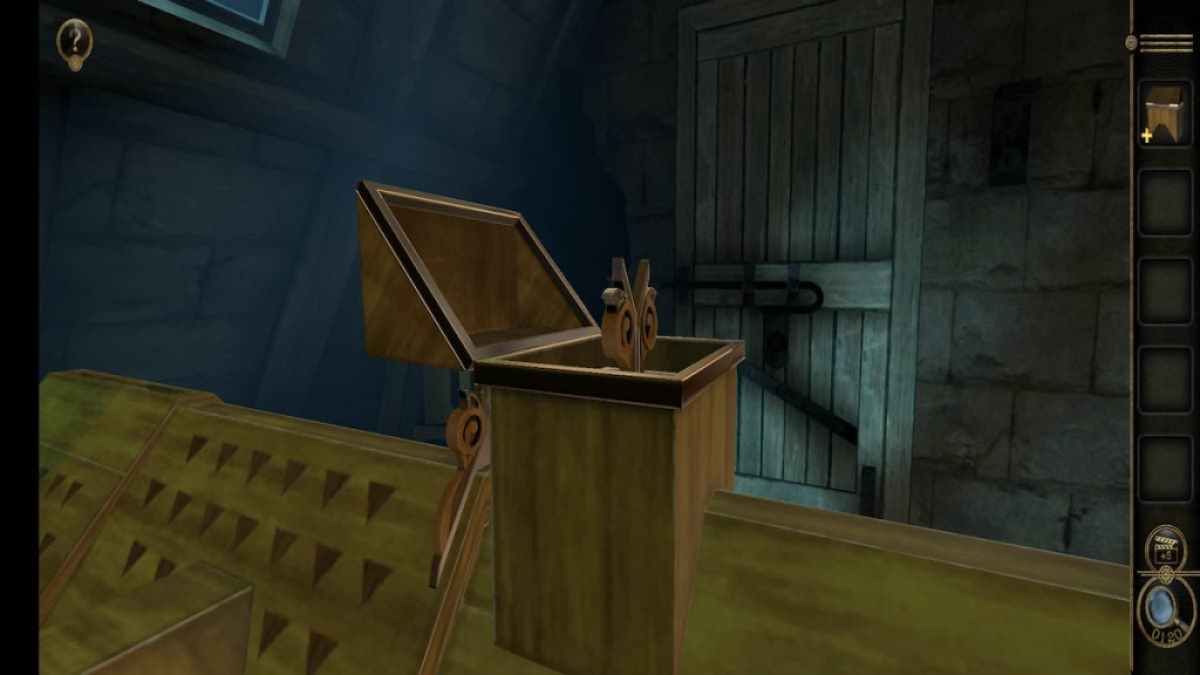
Focus on the creepy-crawly header in the bottom rightfulness .

Screenshot by Pro Game Guides
slew its mouth down will divulge a breast with two skidder on its oral sex .
To unlock the first compartment , draw both permutation to the bottom . Let them climb back to the top , then embroil both down to the bottom . This open compartment contains a Star - Shaped gimmick .
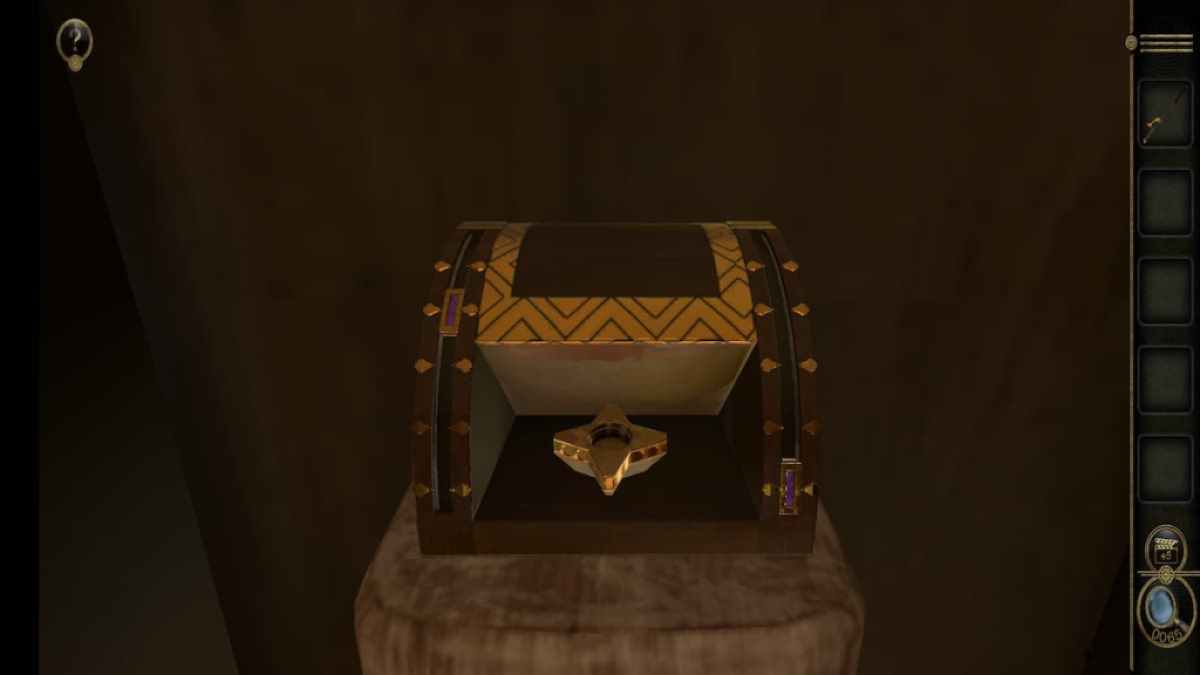
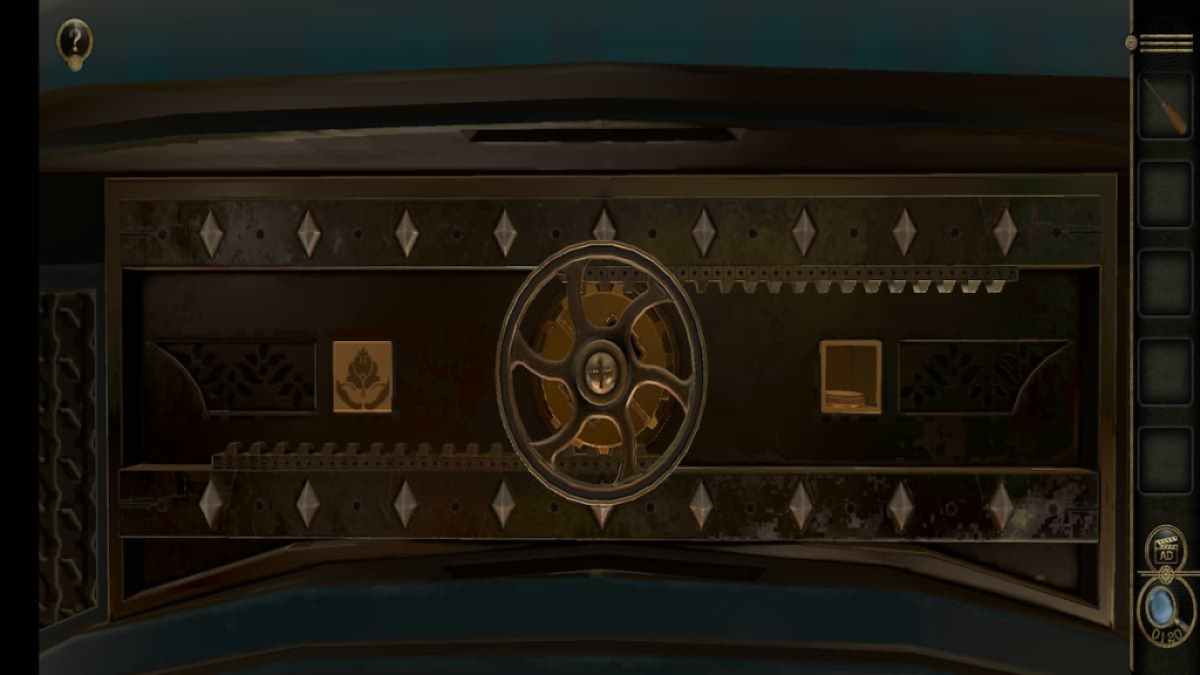
To start the top compartment , slip the odd yellow-bellied terrapin down to the 2nd distance and the right-hand slider to the bottom .
Screenshot by Pro Game Guides
This will unlock a Mermaid Statue .
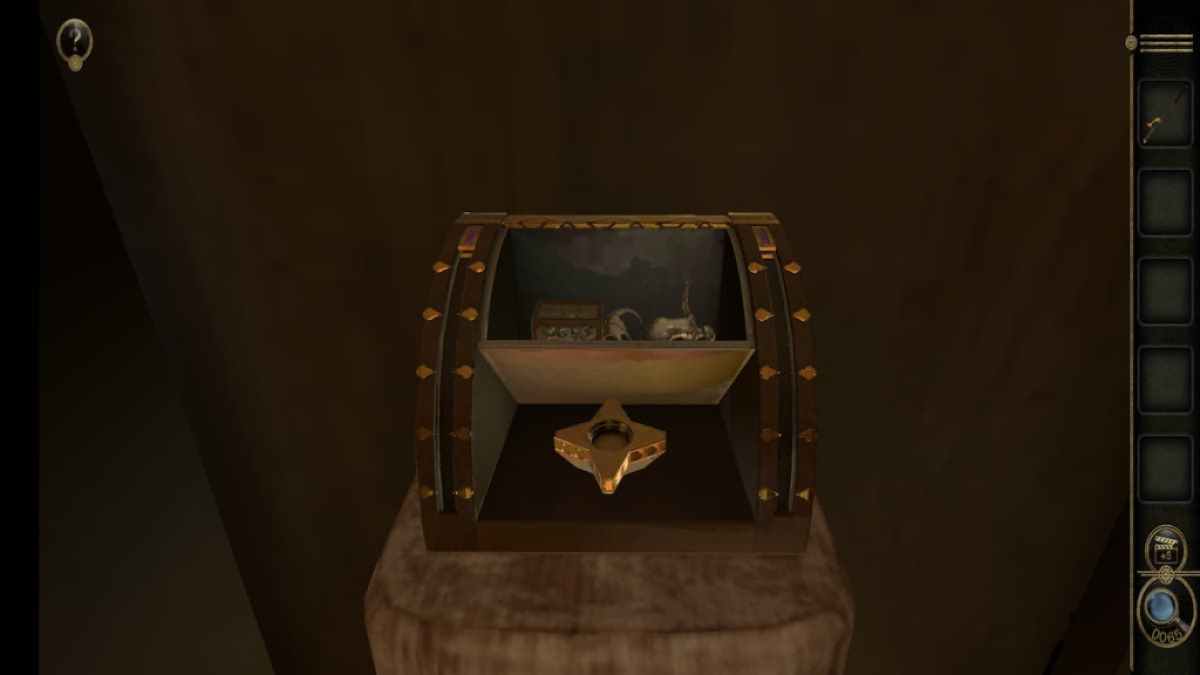
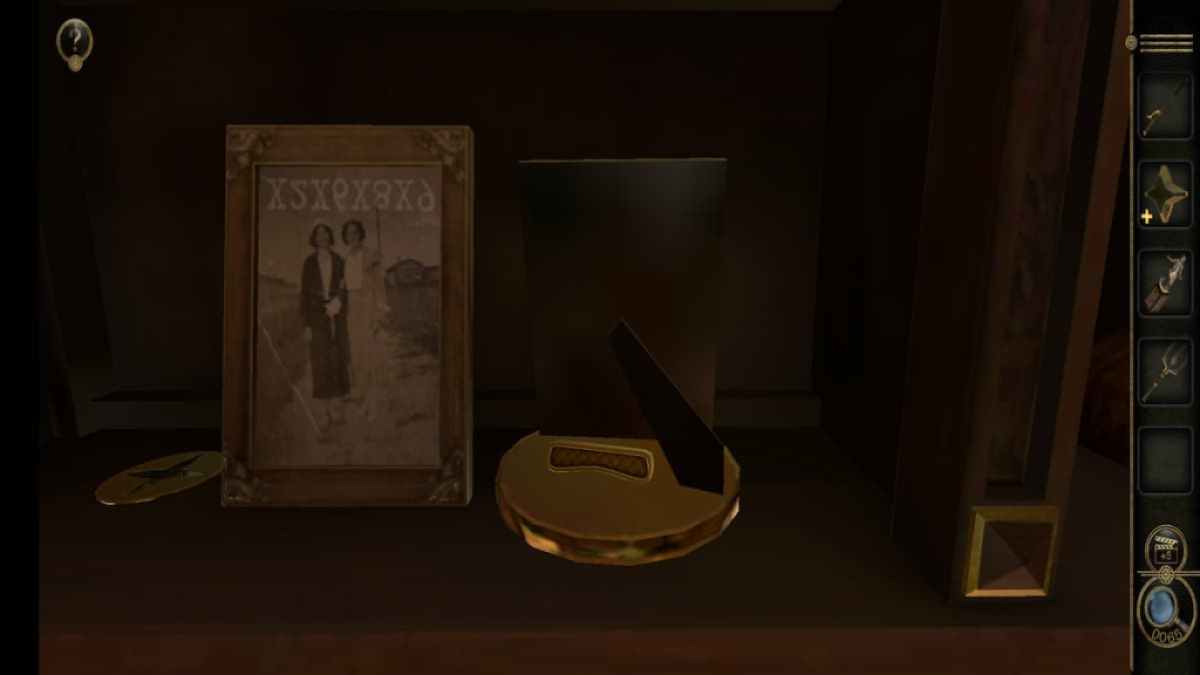
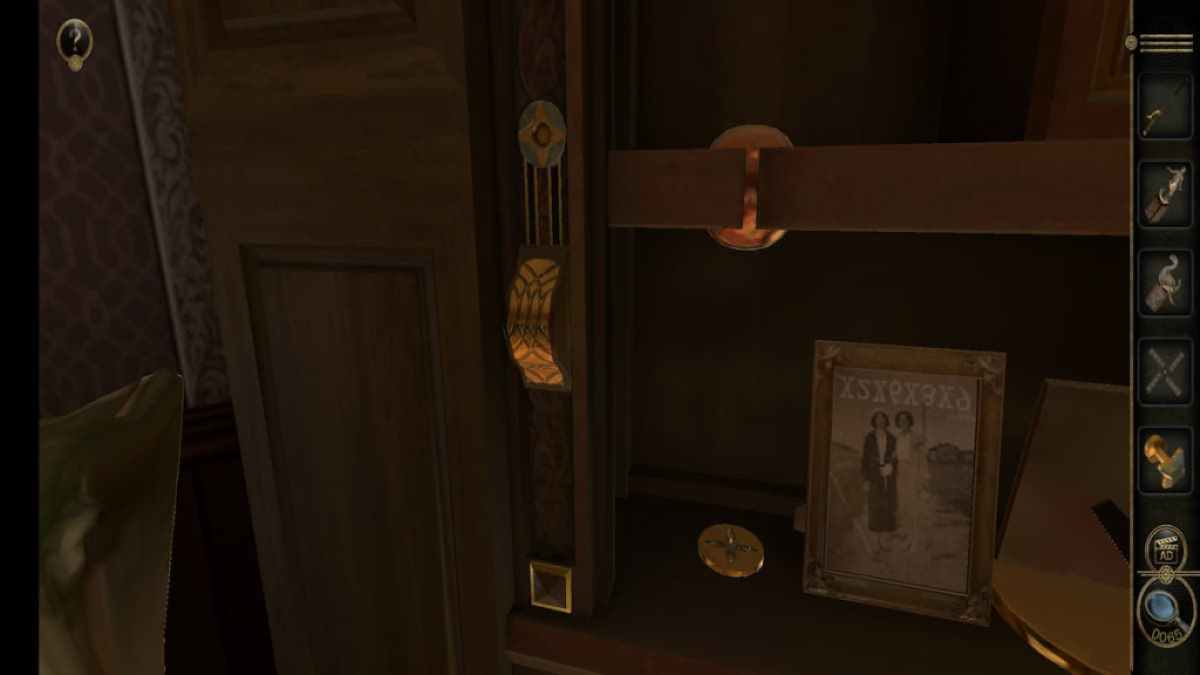
contain out the delineation material body on the shelf to the left .
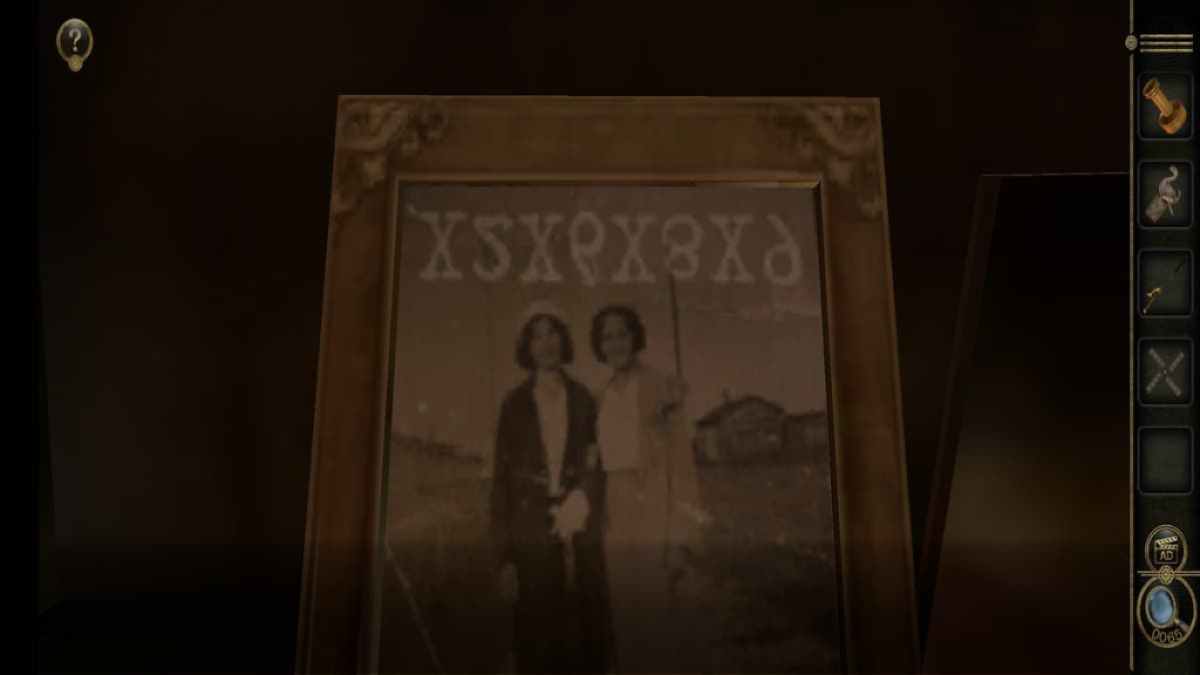
Take note of the piece of writing on the left-hand frame . It is both upside down and backward , so the code is right take as " x2x6x8x9 " .

Screenshot by Pro Game Guides
rotate the basis of the proper photo reveals a Slider hidden behind it .
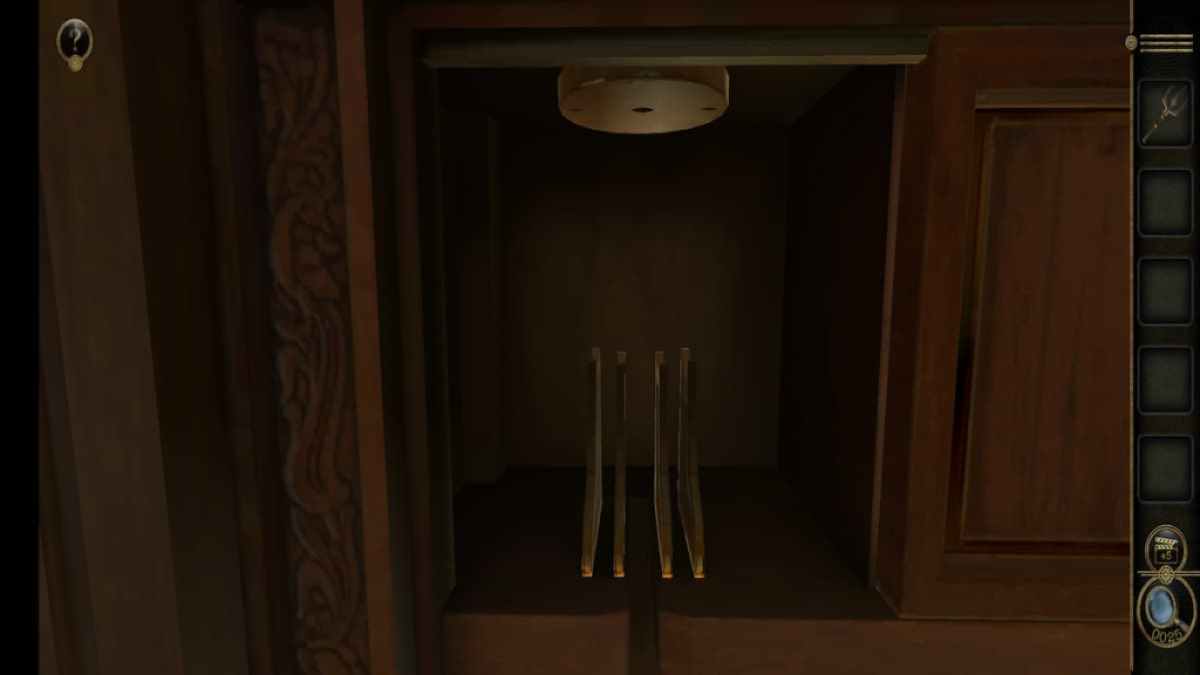
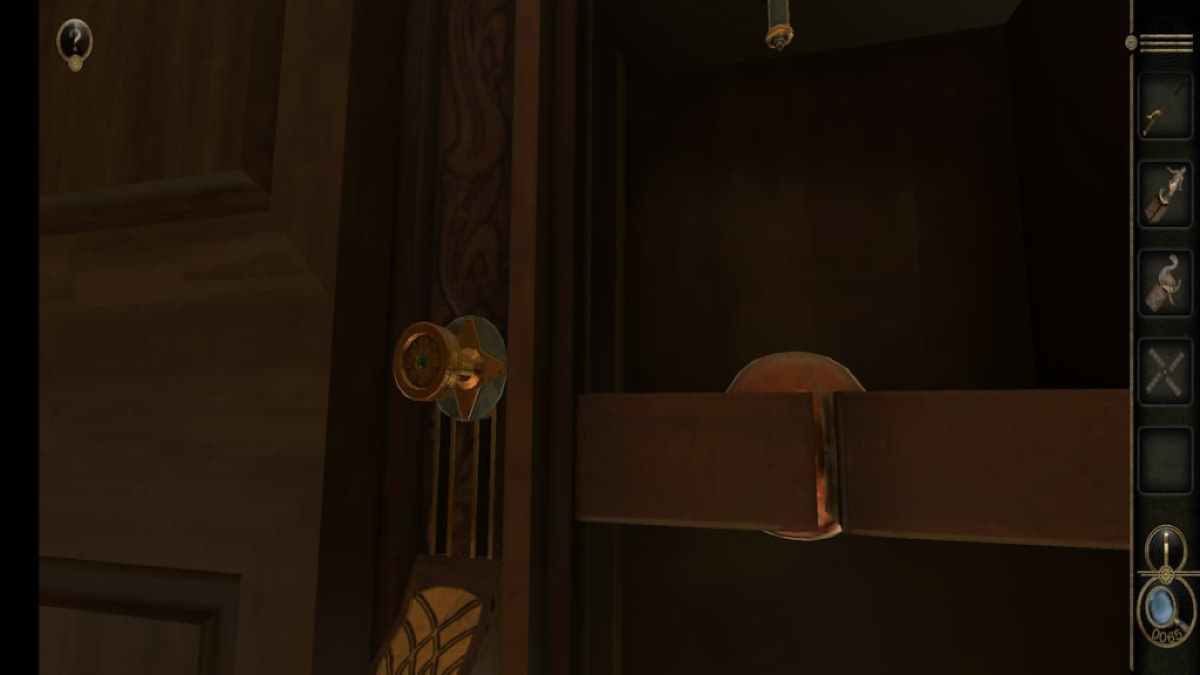
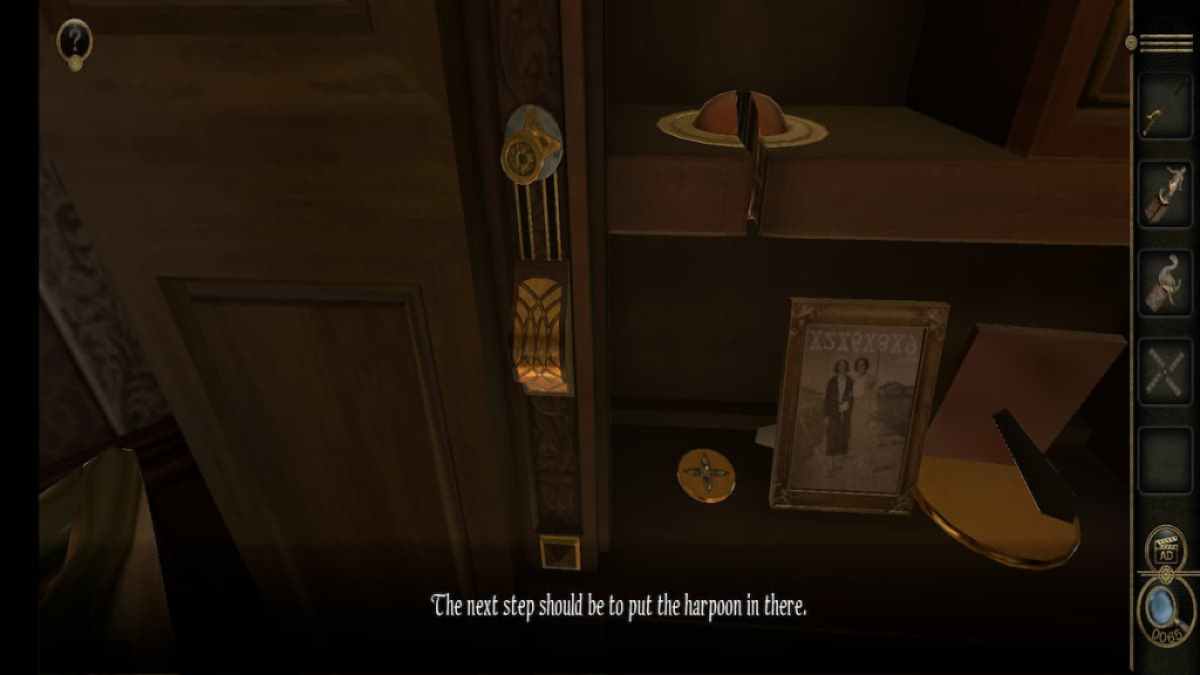
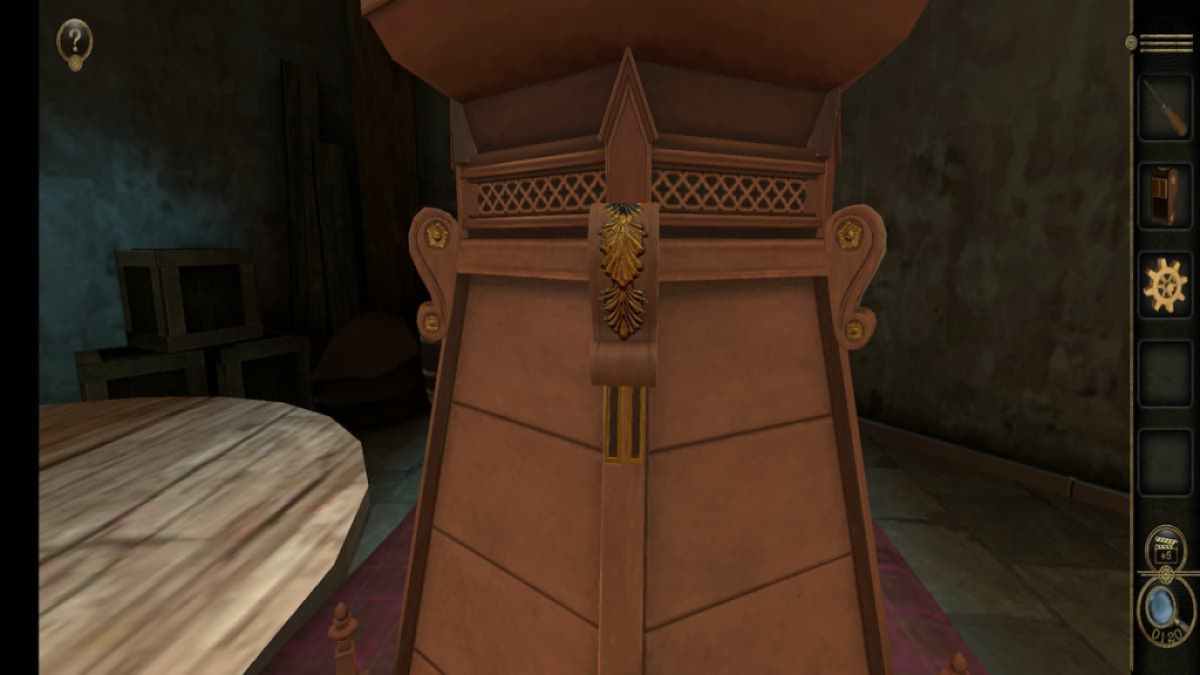
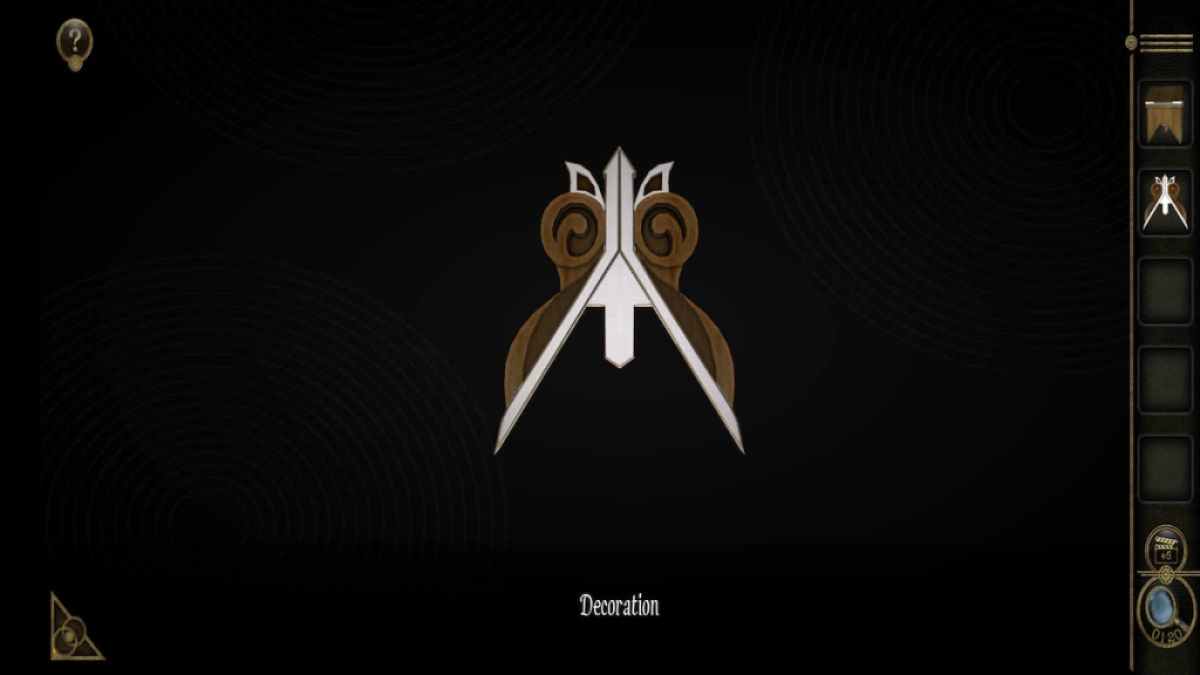
Look at the Trident displayed on the top left .
snap up it causes the leftover grip to agitate .
Screenshot by Pro Game Guides
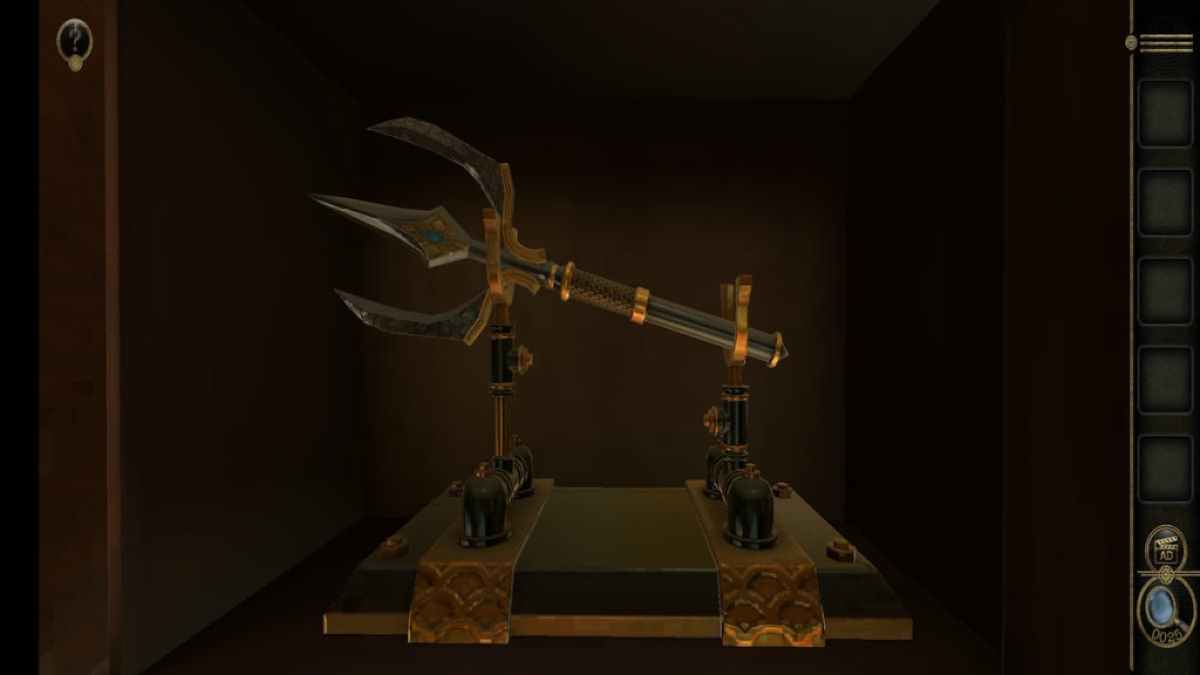
Rotate the right handle to match the left .
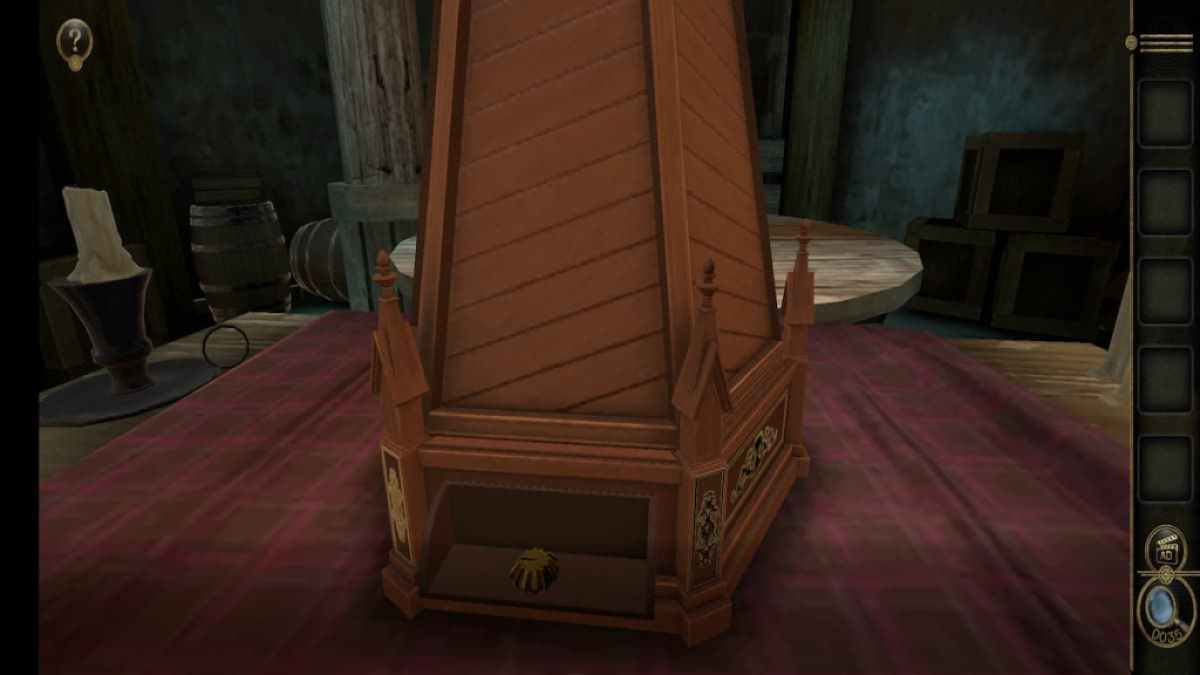
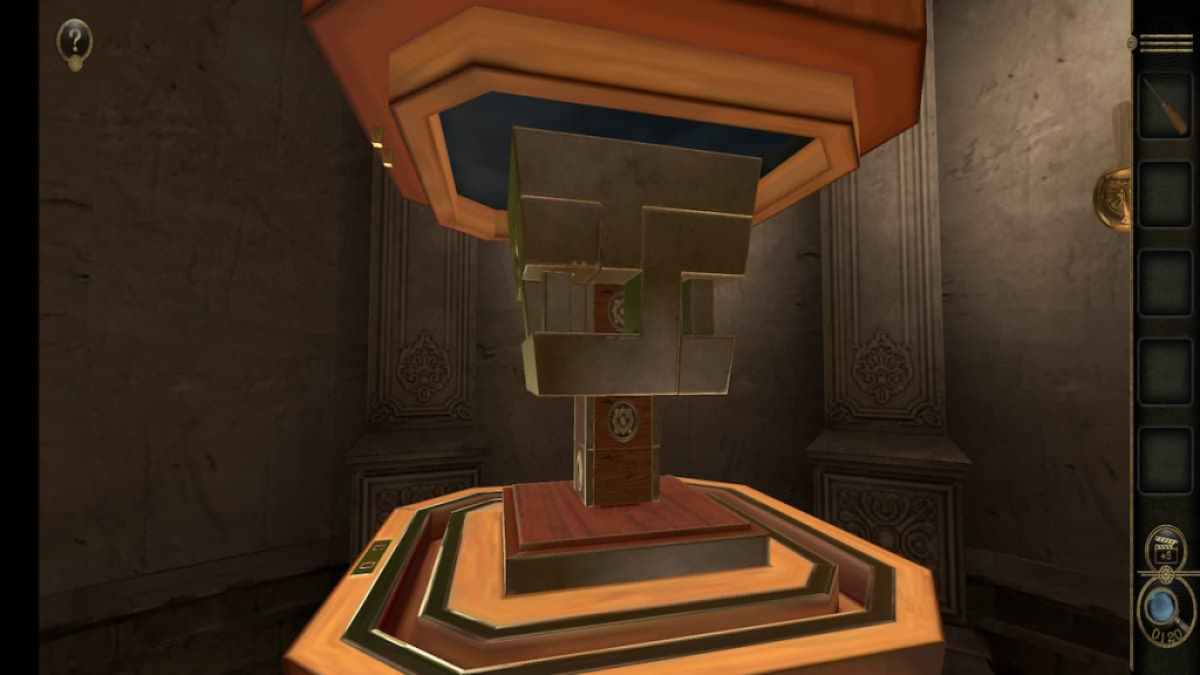
Doing this cause the cabinet threshold on the leftfield to slew right , revealing a new teaser .
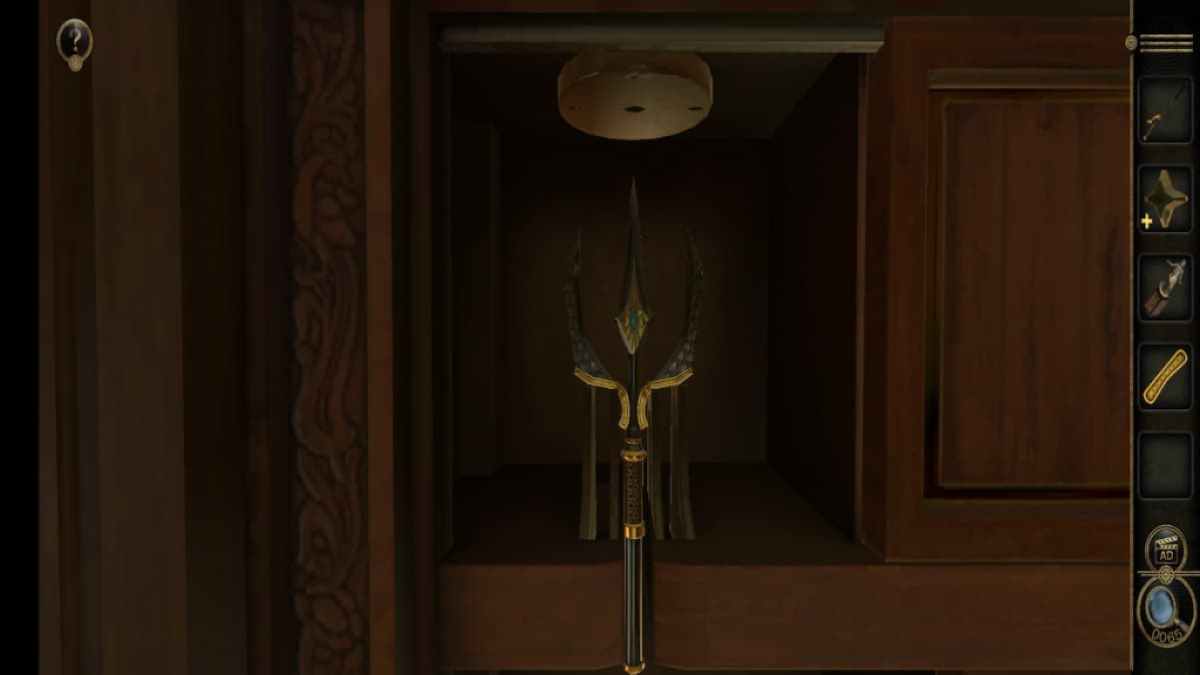
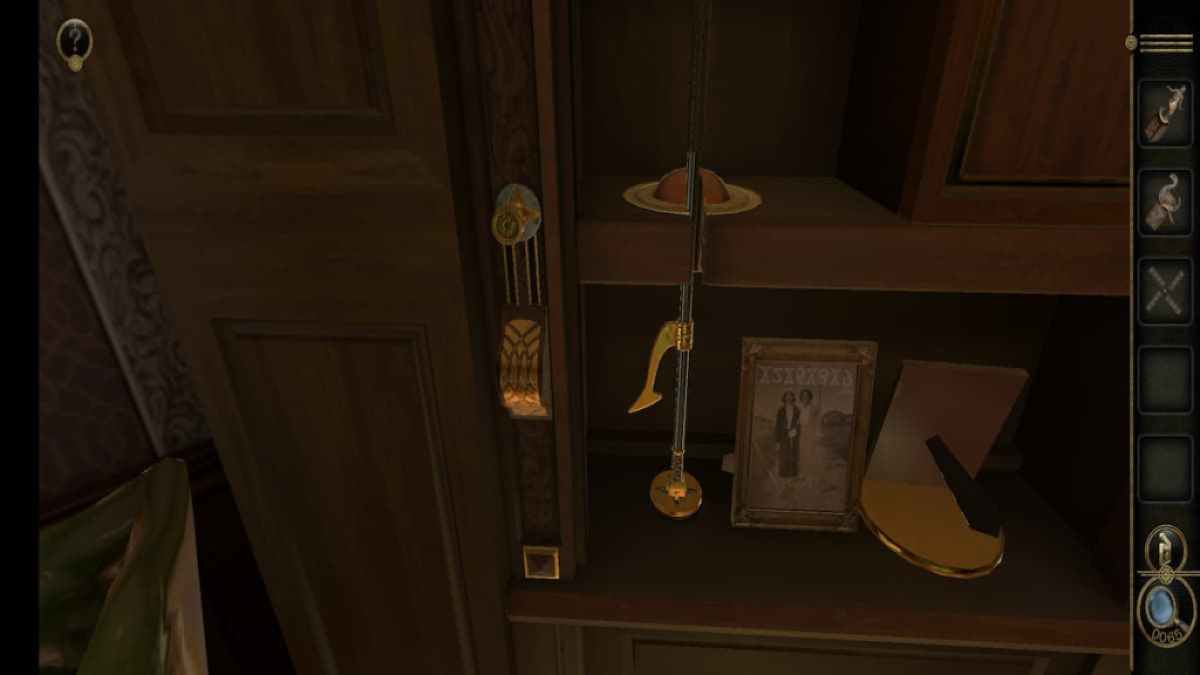
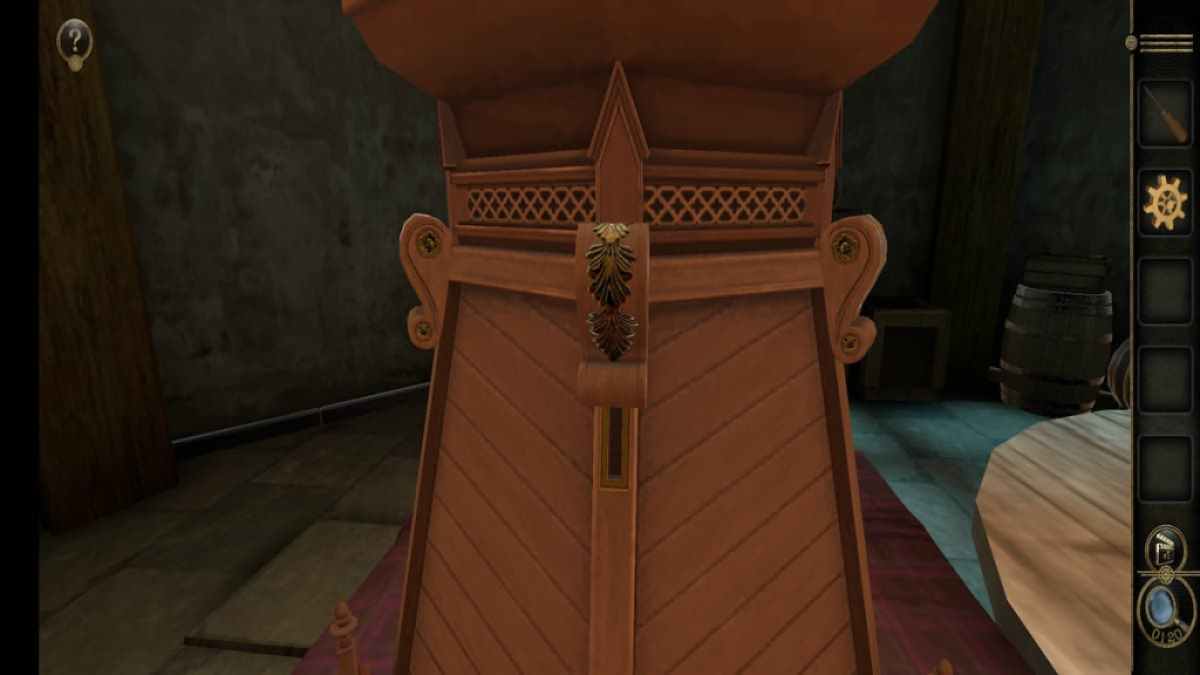
Place the Trident into the marrow .
Screenshot by Pro Game Guides
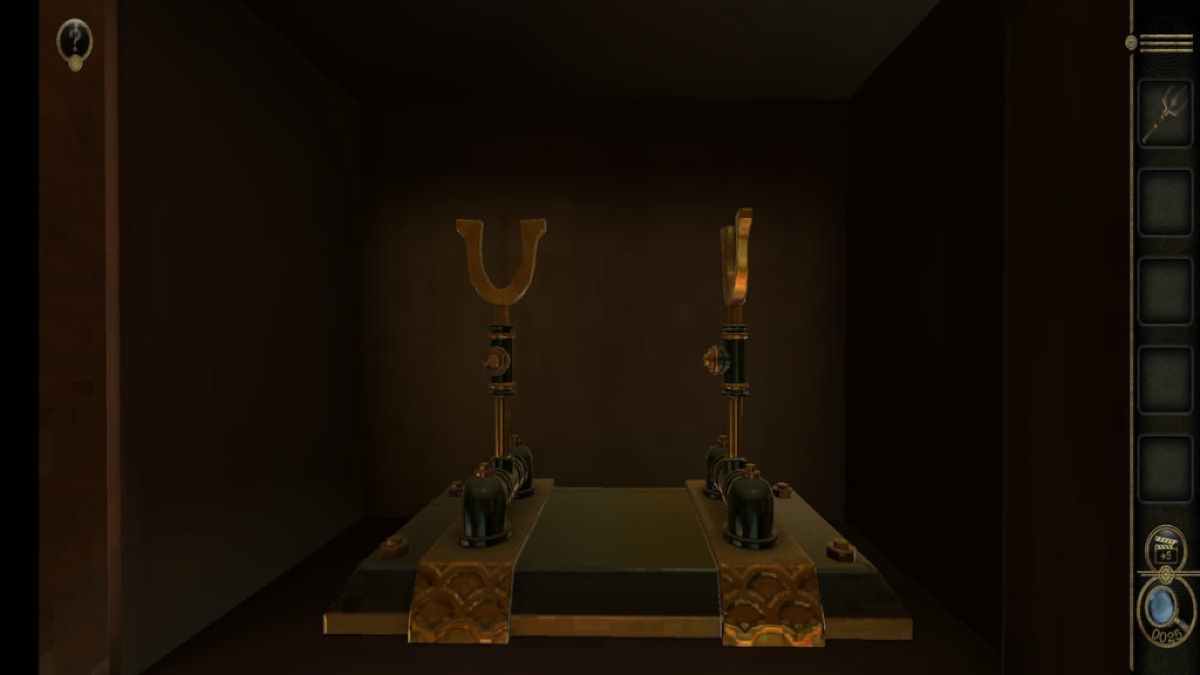
This reveals a foreign mechanism on the left room access , which can not be used yet .
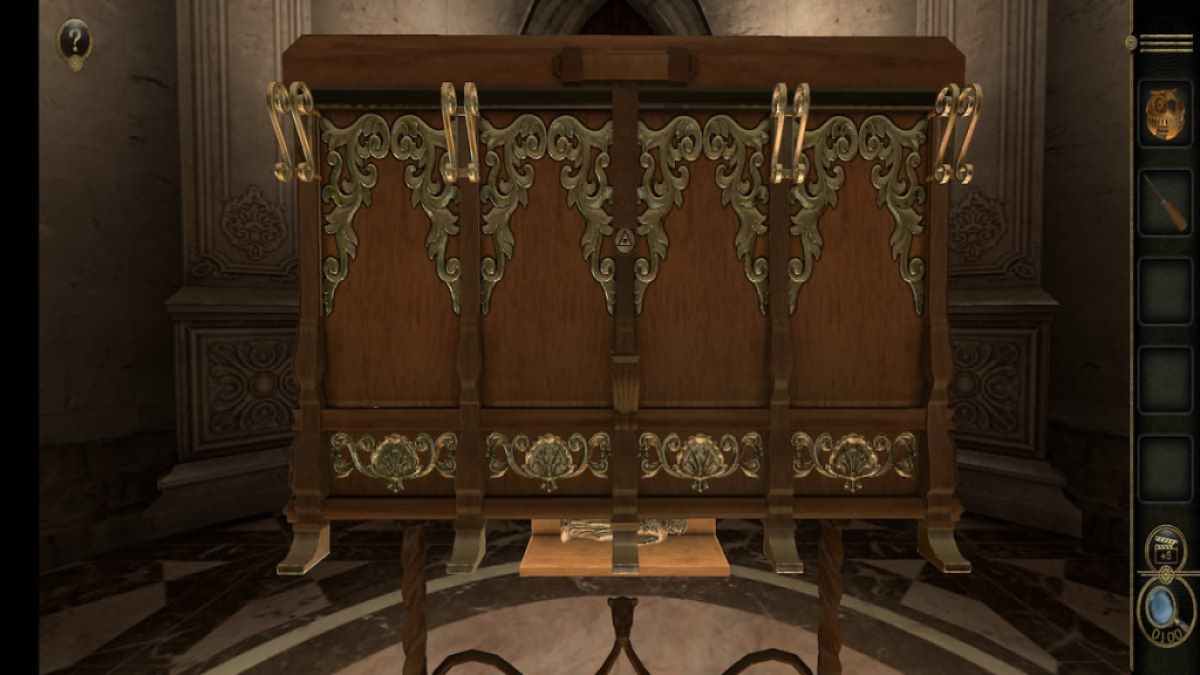
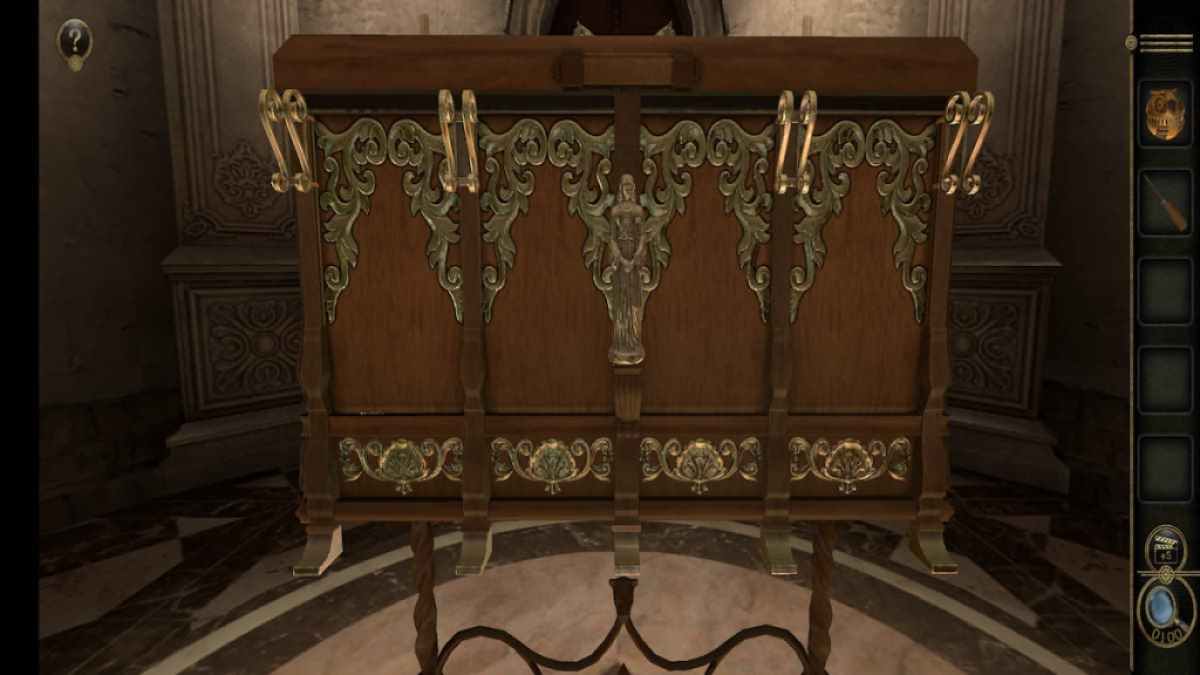
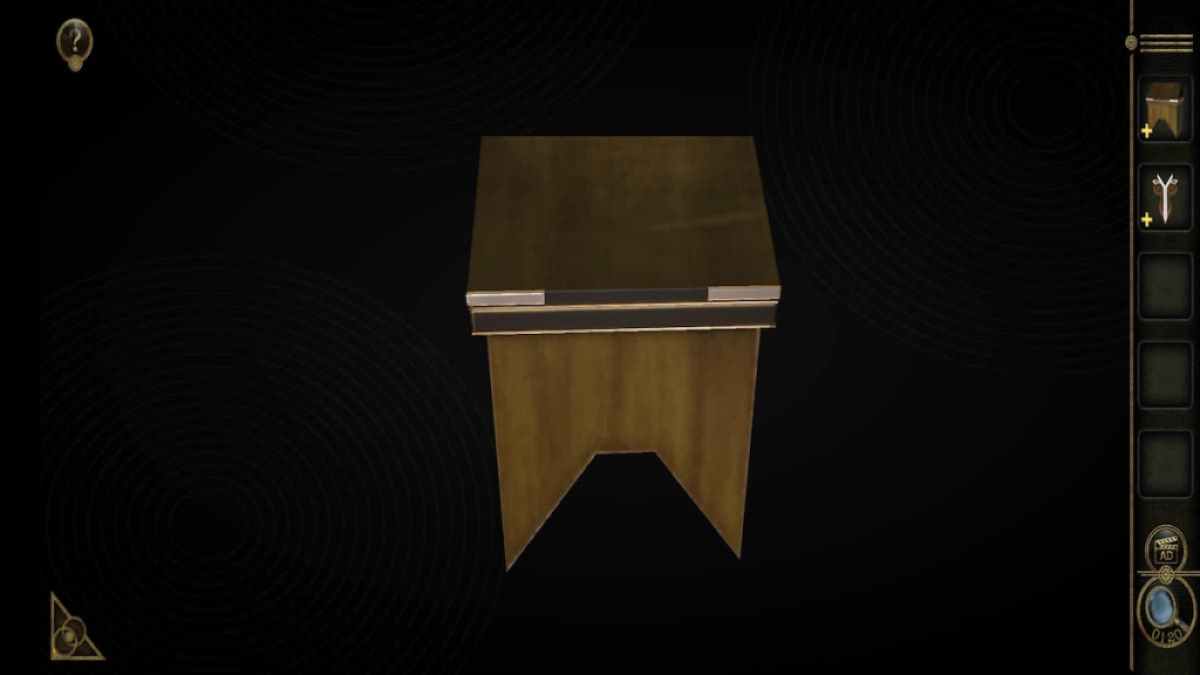
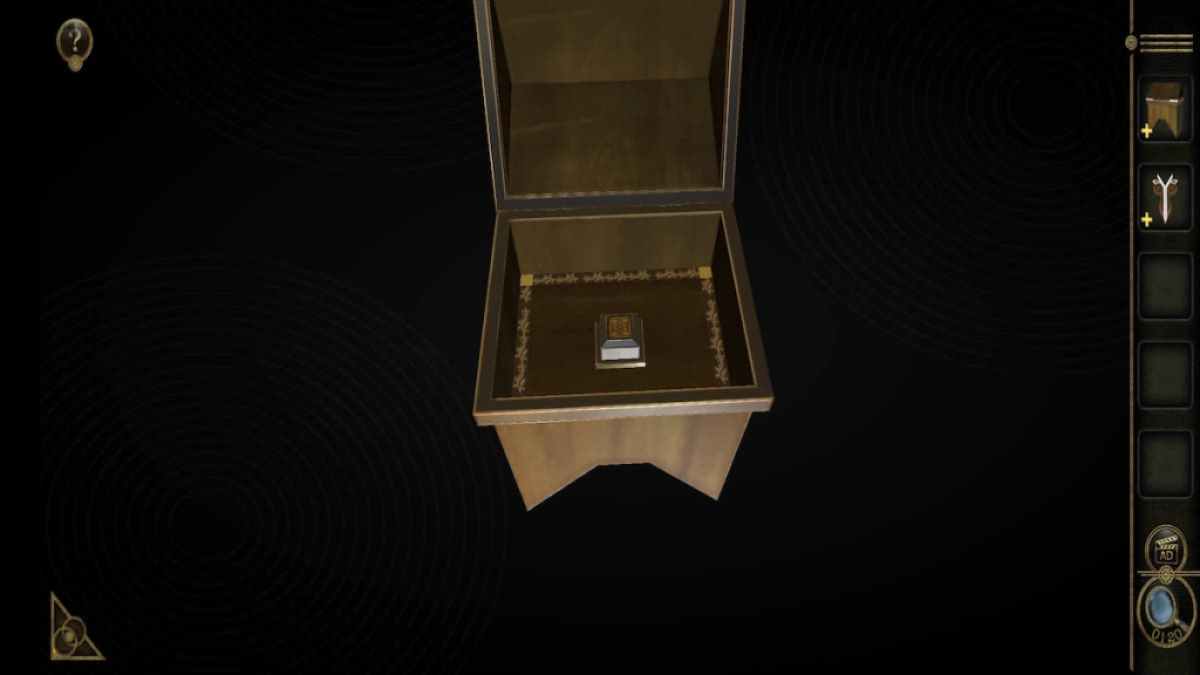
Desk puzzles
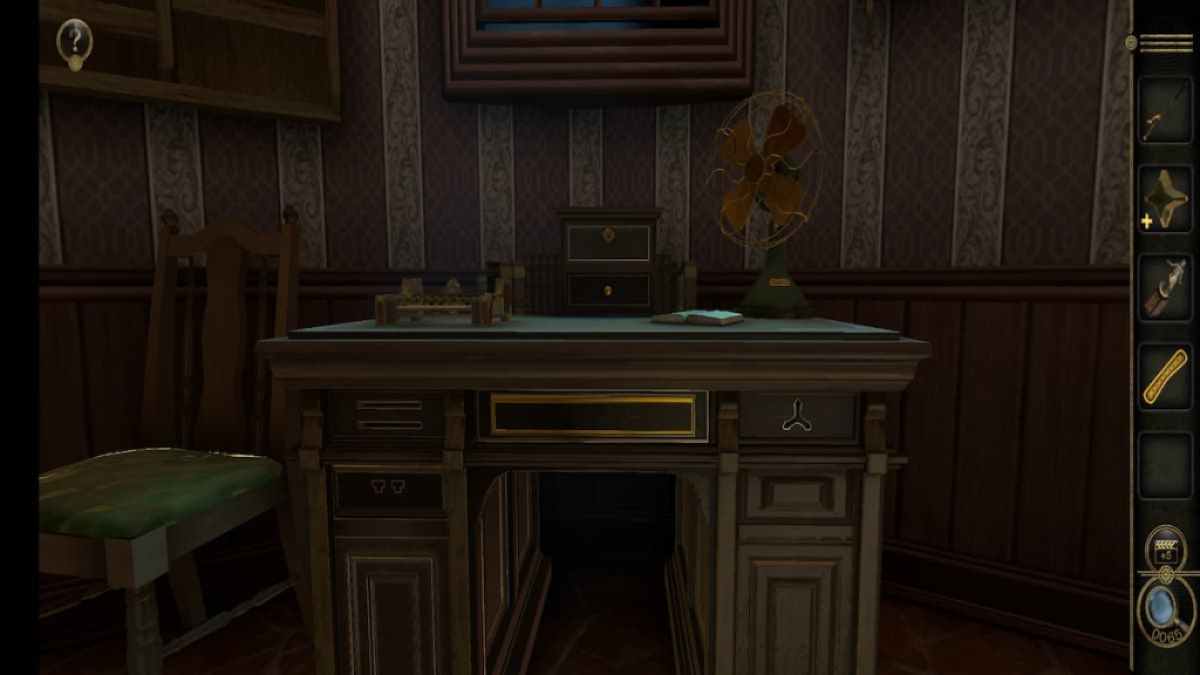
Head over to the desk .
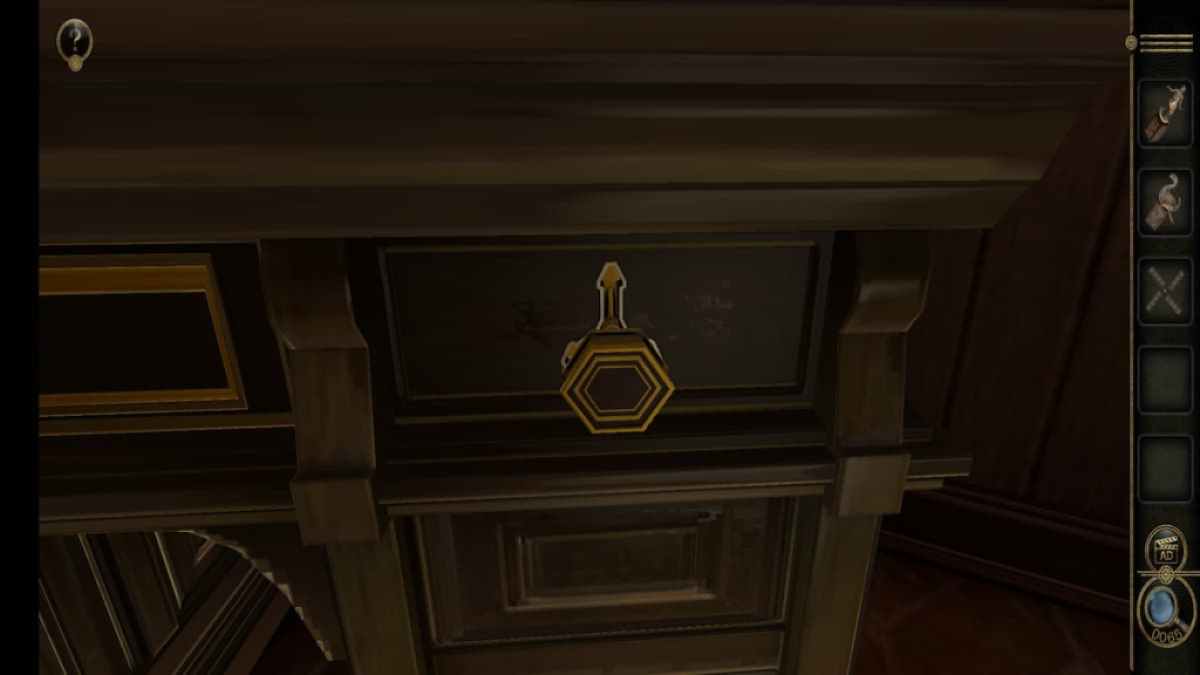
Take note of the code on the front leftfield of the desk , " 4x7x3x5x " .
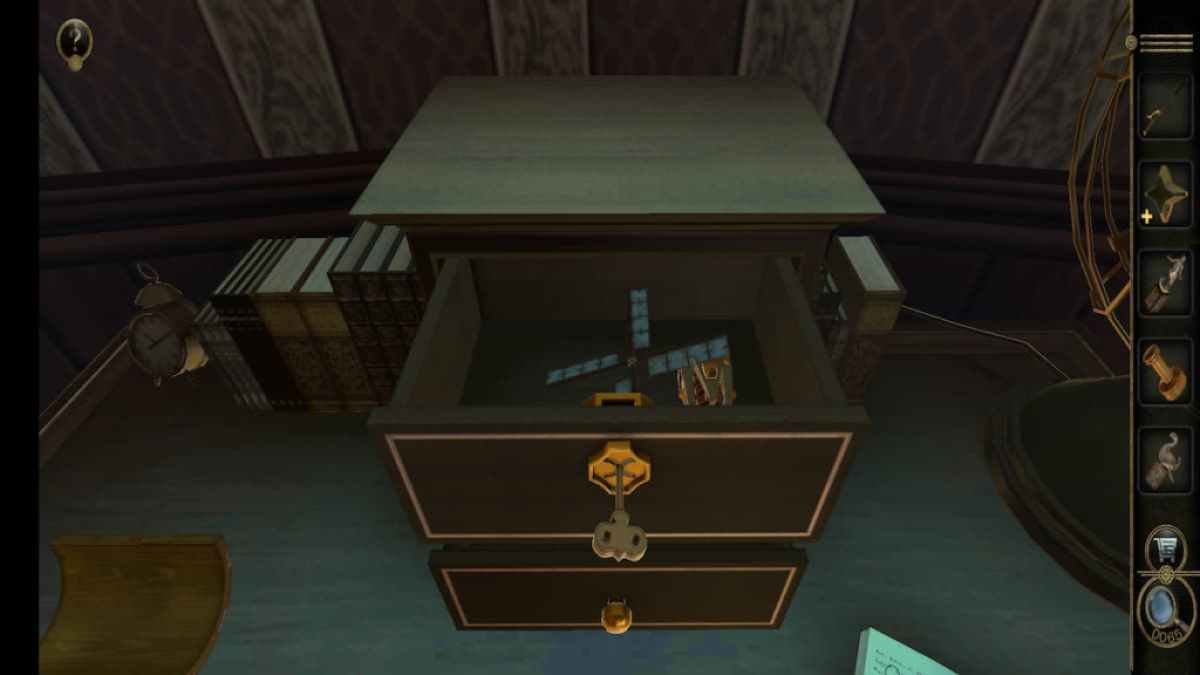
Look at the set of drawers on top of the desk .
Screenshot by Pro Game Guides
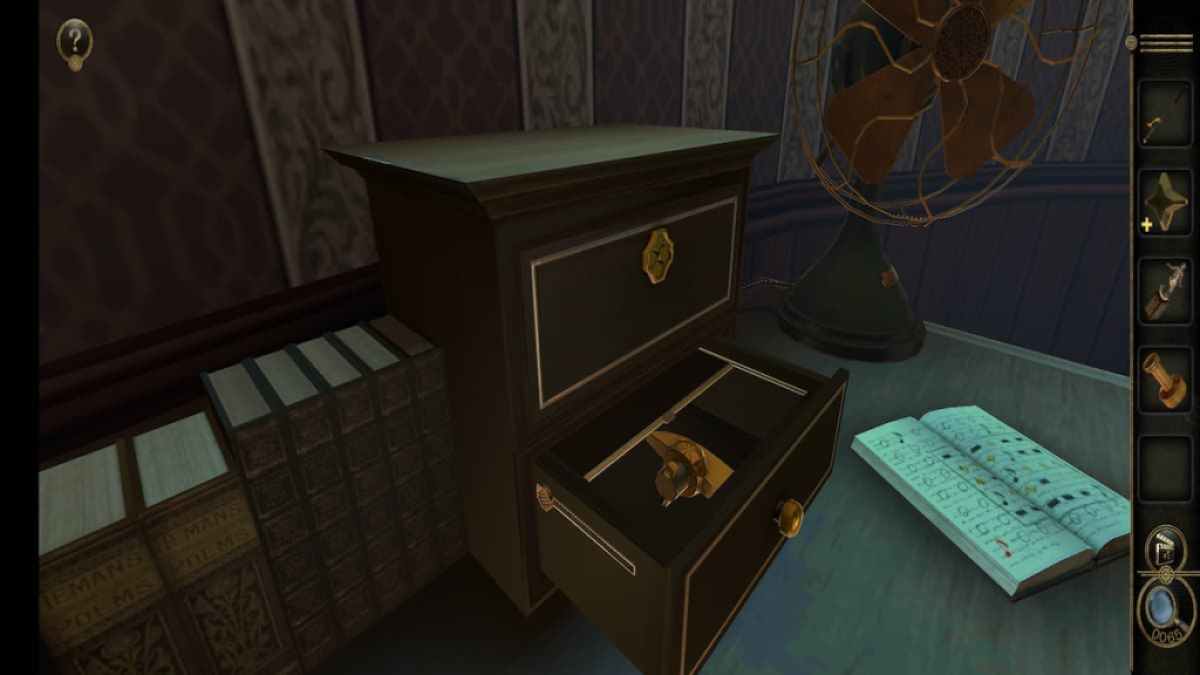
Pull the bottom draftsman out and catch it from the left hand to find a hidden slider .
Pulling the slider reveals a secret compartment in the drawer containing a Knob .
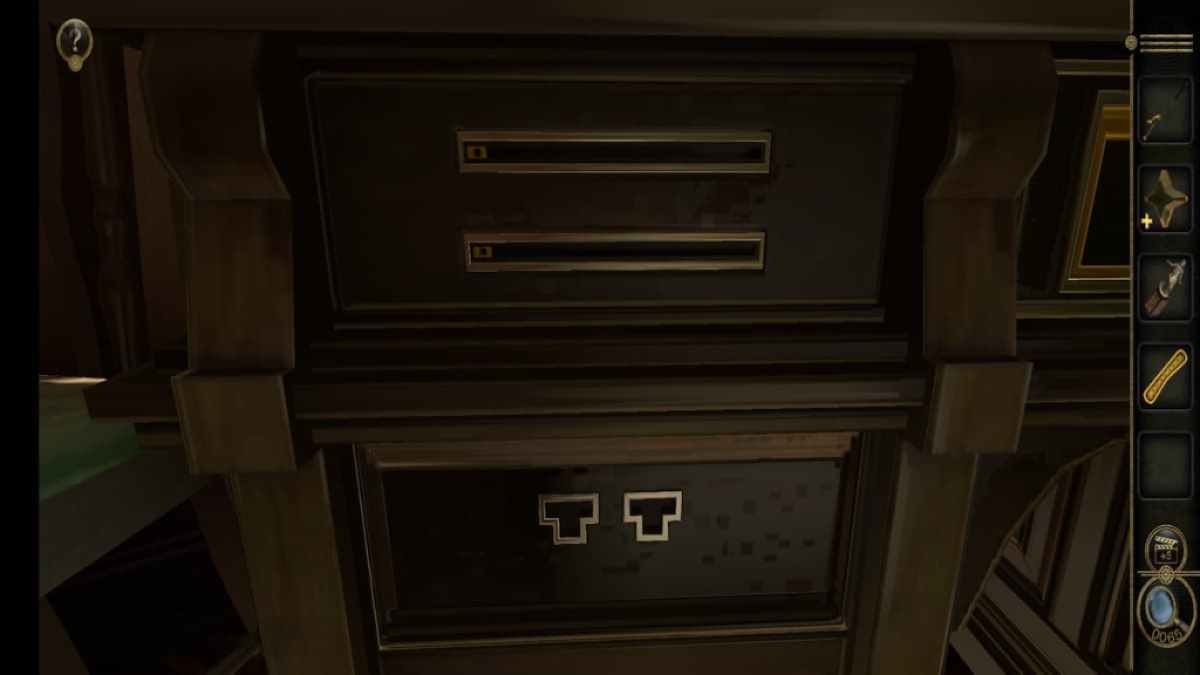
Now look at the two locked pants on the left .
Screenshot by Pro Game Guides
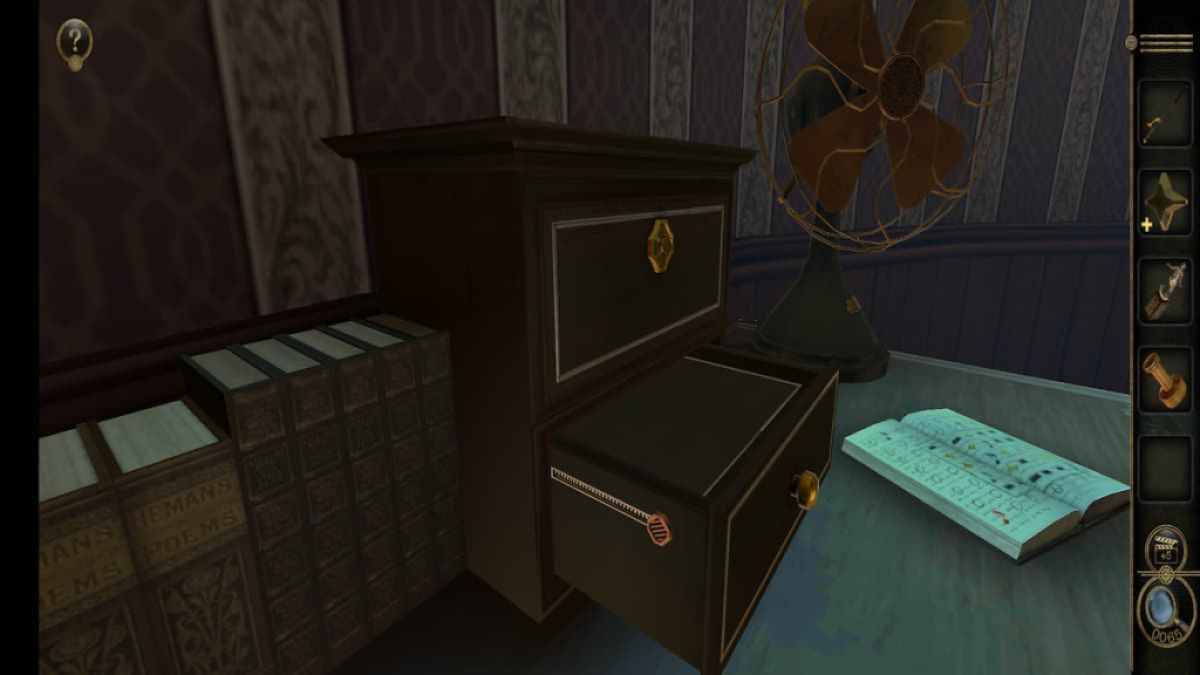
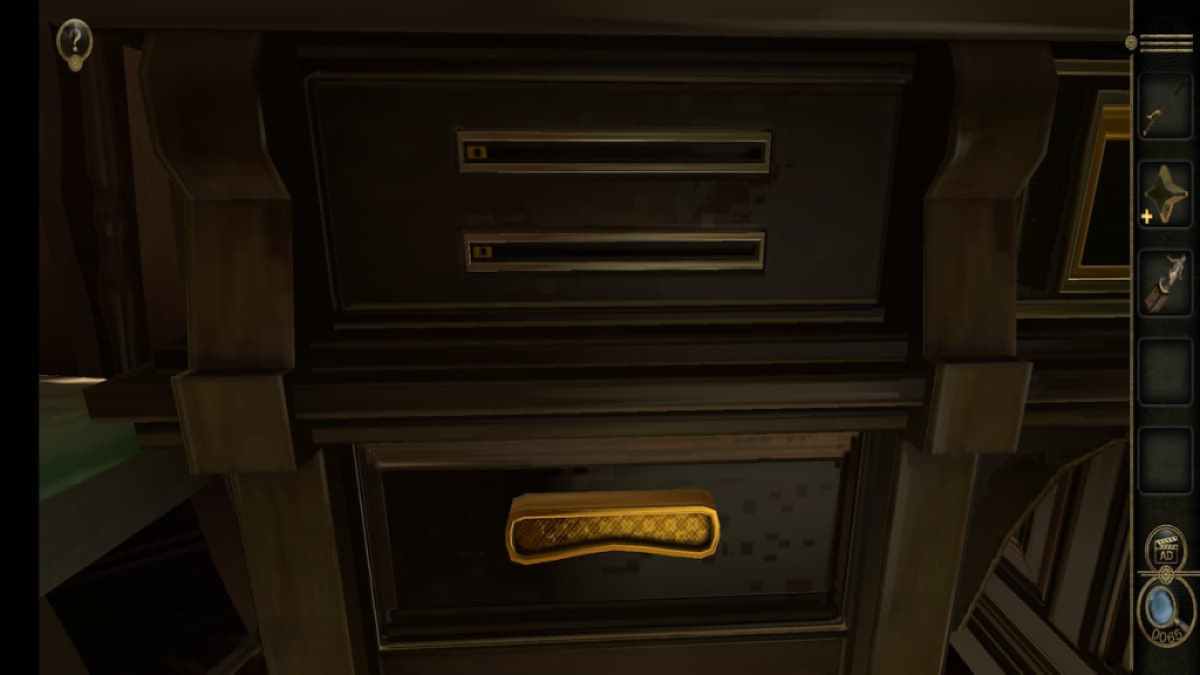
Place the Slider onto the bottom drawer .
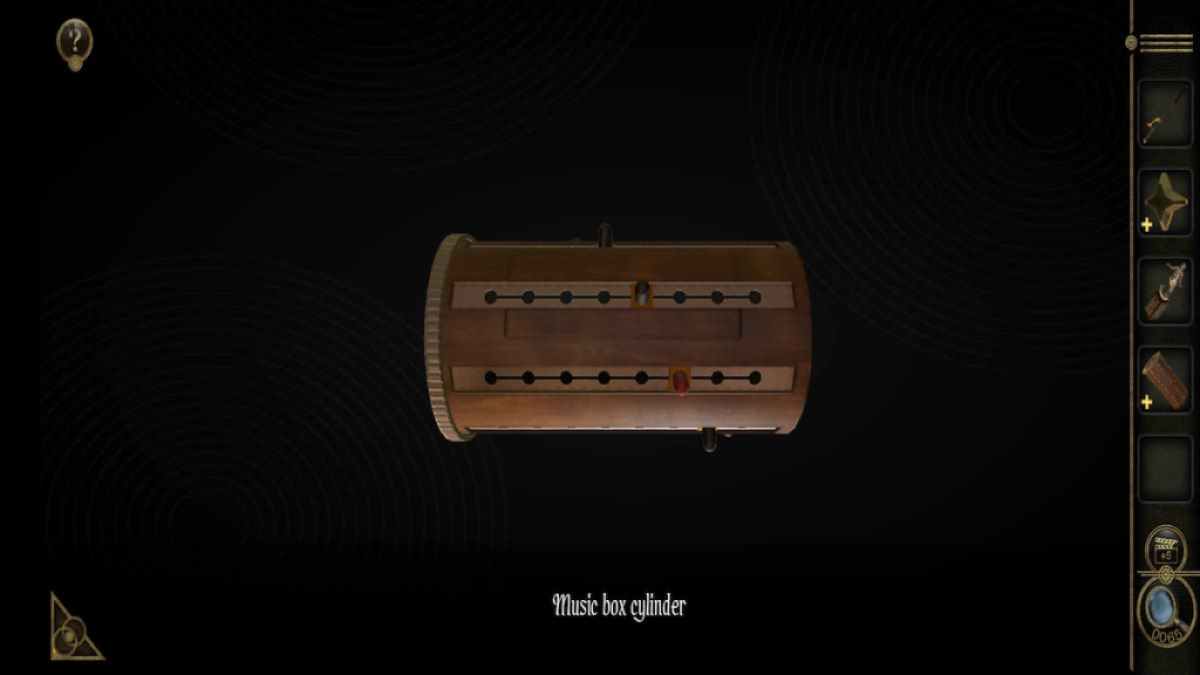
Open it to get a Music Box Cylinder .
launch the Music Box Cylinder in your armory .
Screenshot by Pro Game Guides
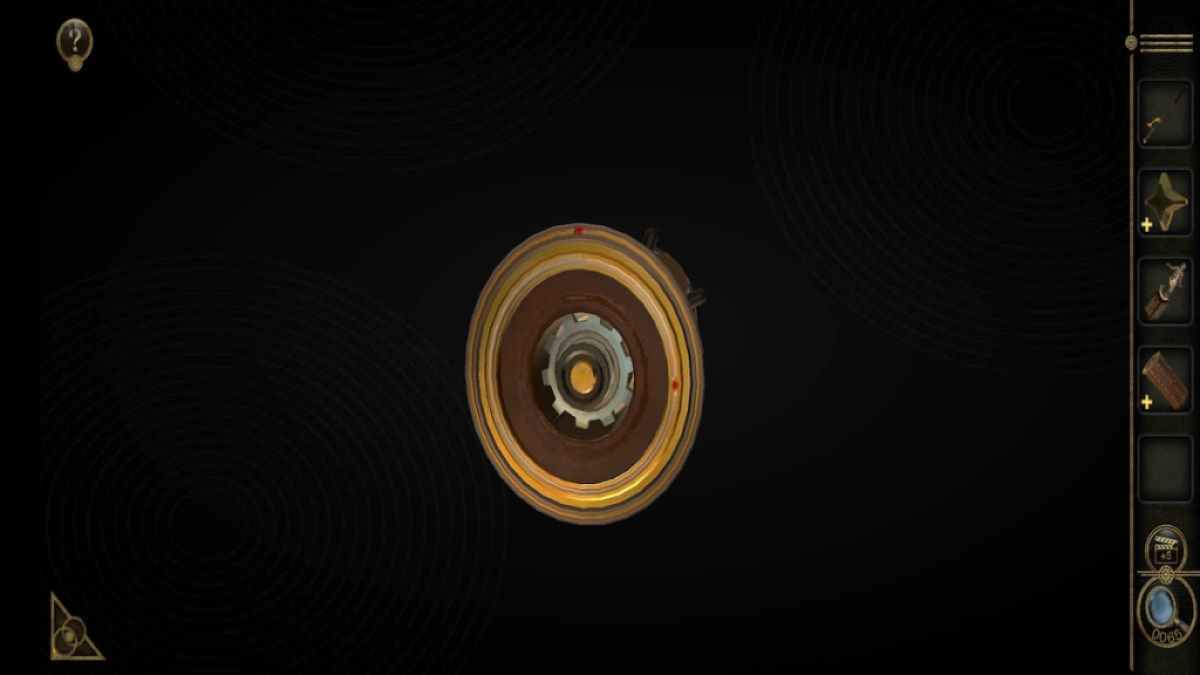
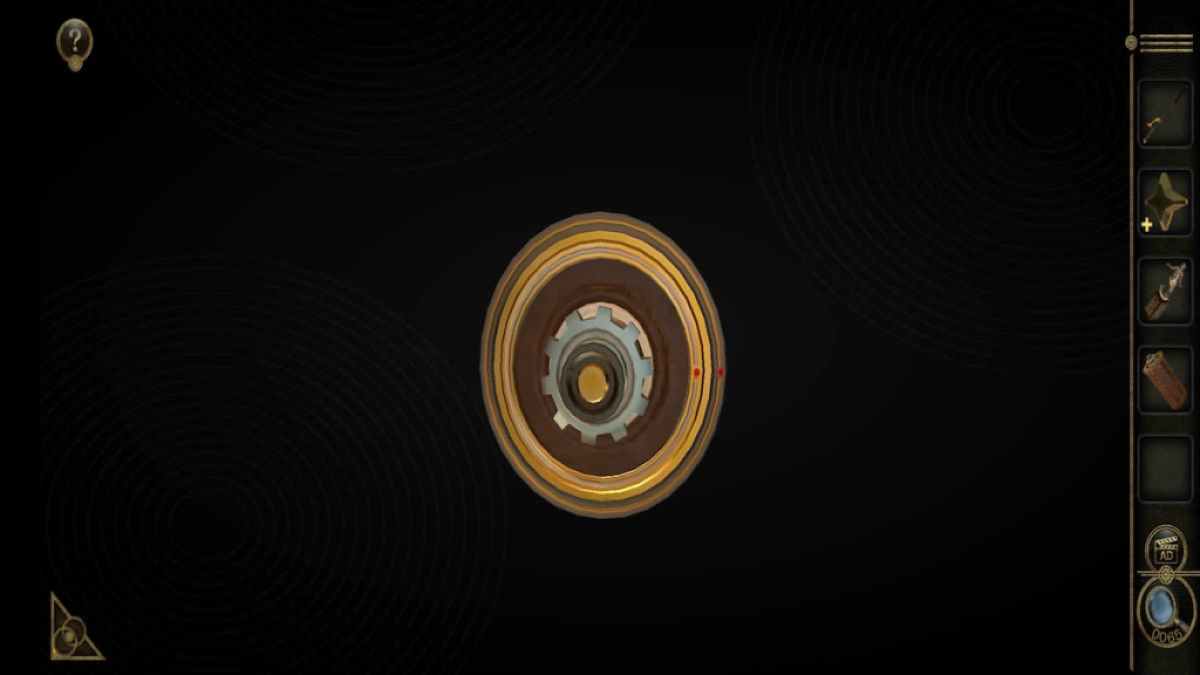
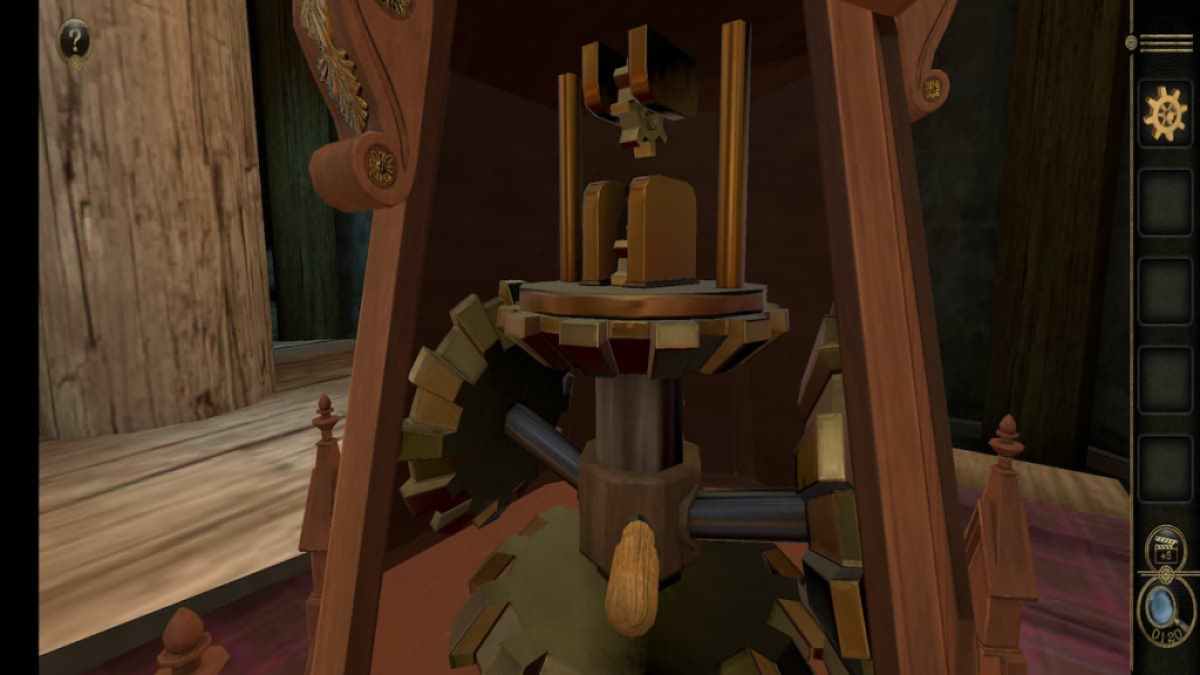
circumvolve to the remaining boundary , which has a gearing on it .
whirl the gear until the two red dots align .
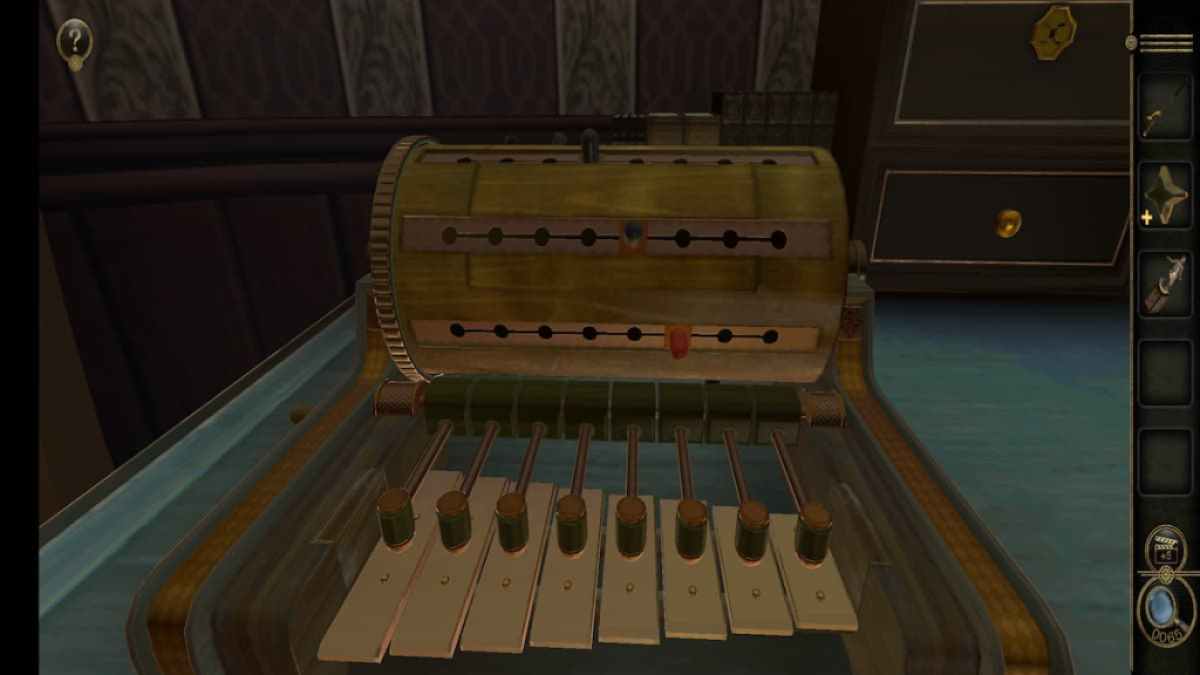
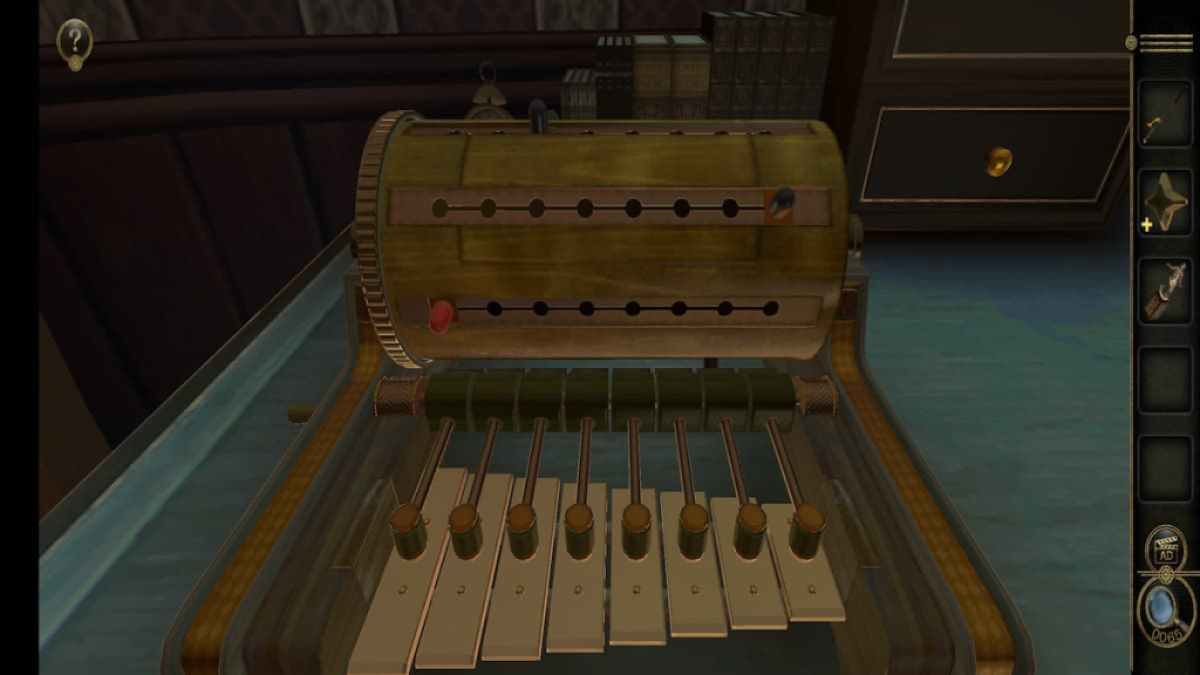
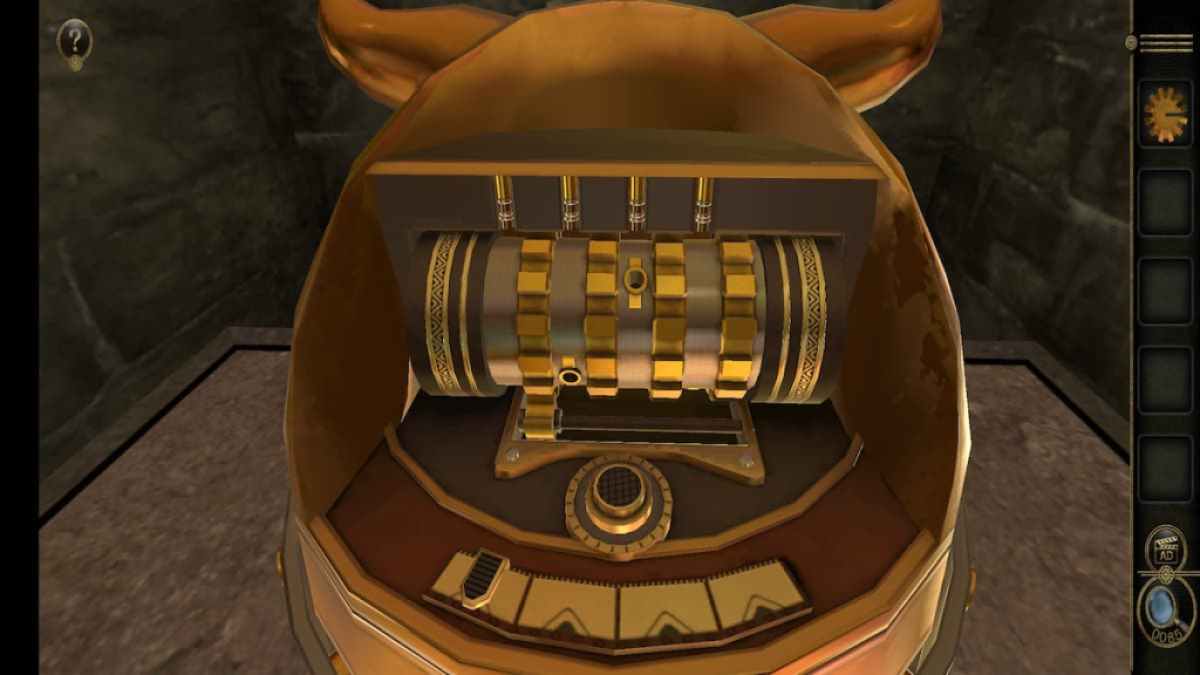
Attach the Music Box Cylinder to the instrument on the left of the desk .

Screenshot by Pro Game Guides
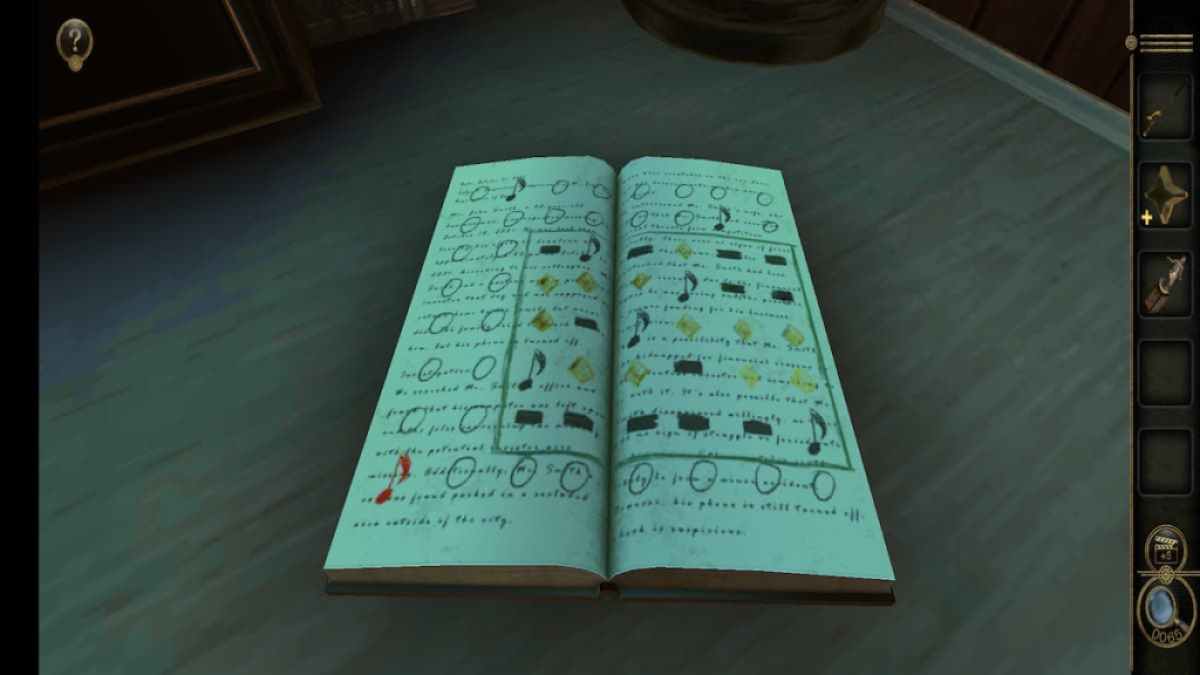
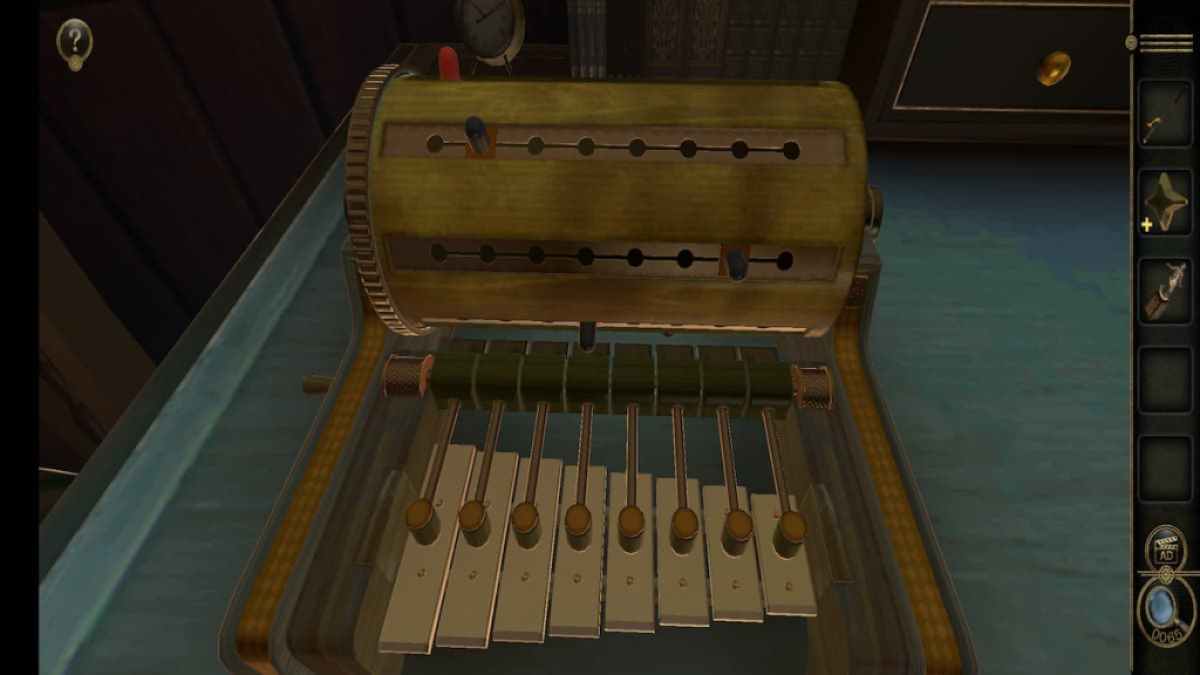
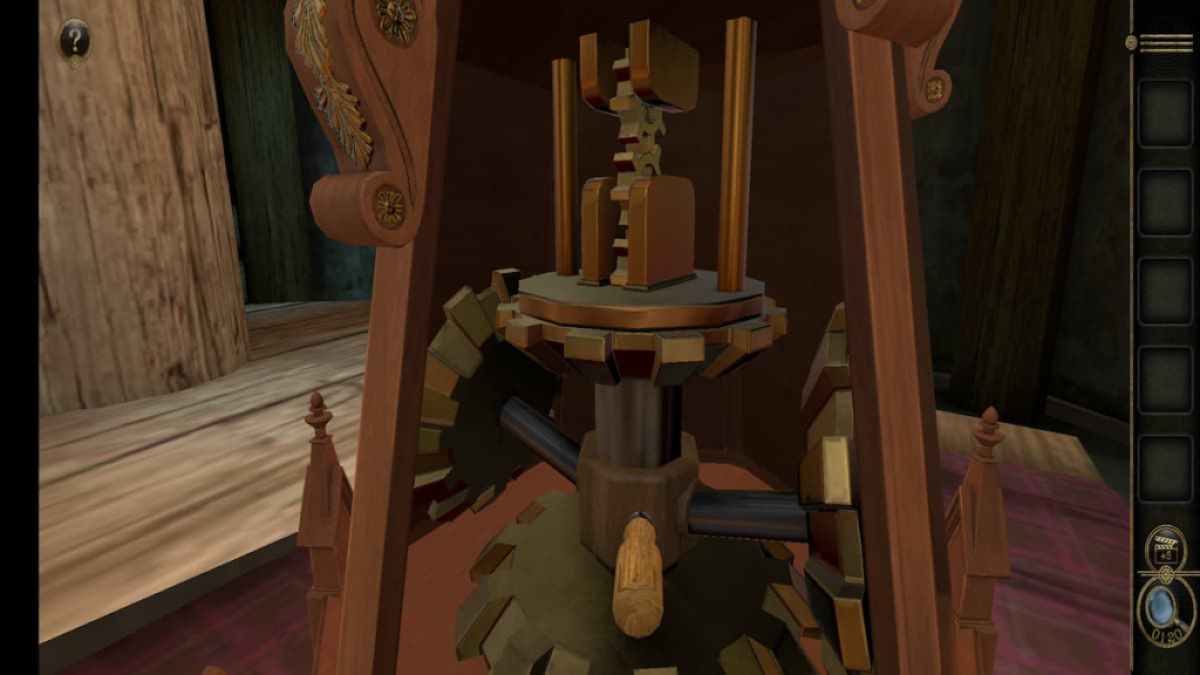
Before start the mystifier , see at the music book on the right side of the desk . The placements of the music bill correspond to the correct placements of the pegs on the cylinder .
bug out by placing the red pin in the leftmost hole , the peg above it in the rightmost golf hole , and the rowlock above that in the third hole from the left .
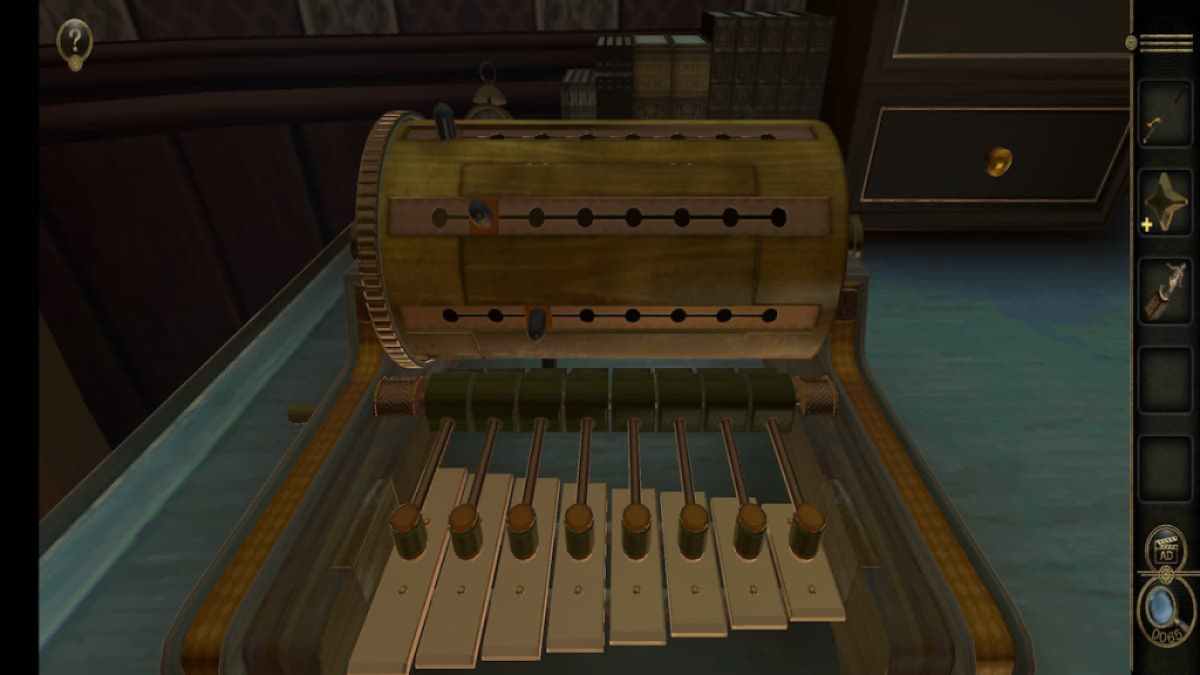
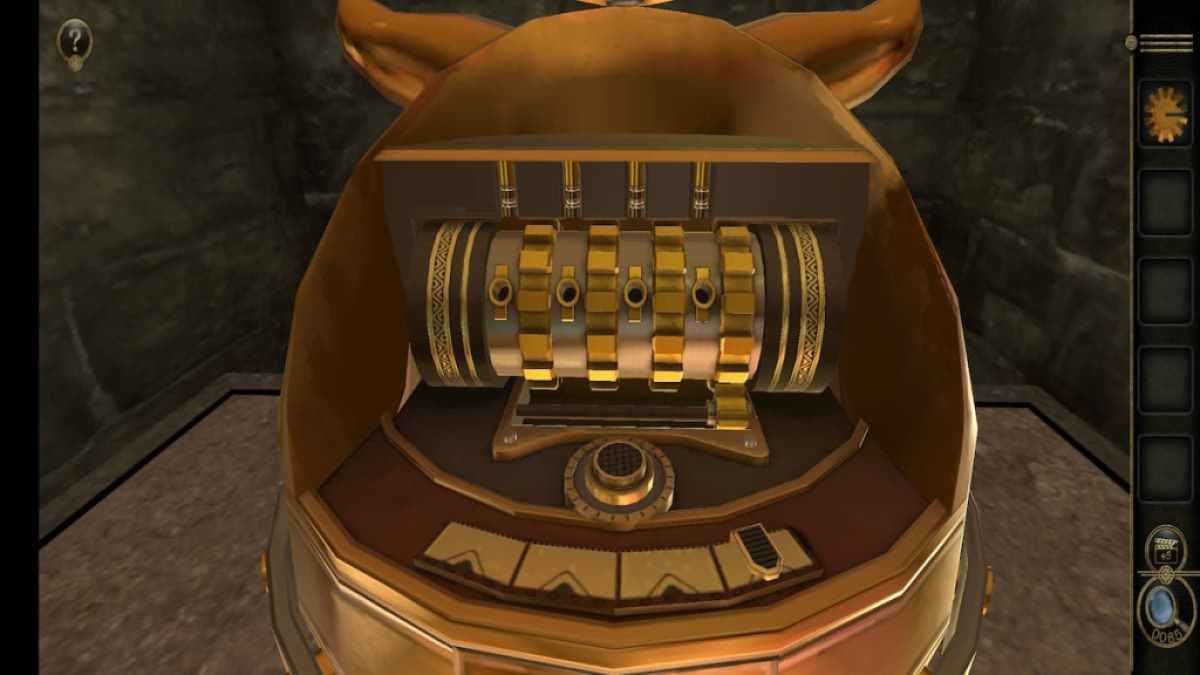
Rotate the piston chamber so that the next three pegs are seeable .
Screenshot by Pro Game Guides
Put the first pin of these three on the 4th hole from the right , the second on the third yap from the right , and the third on the quaternary kettle of fish from the left .
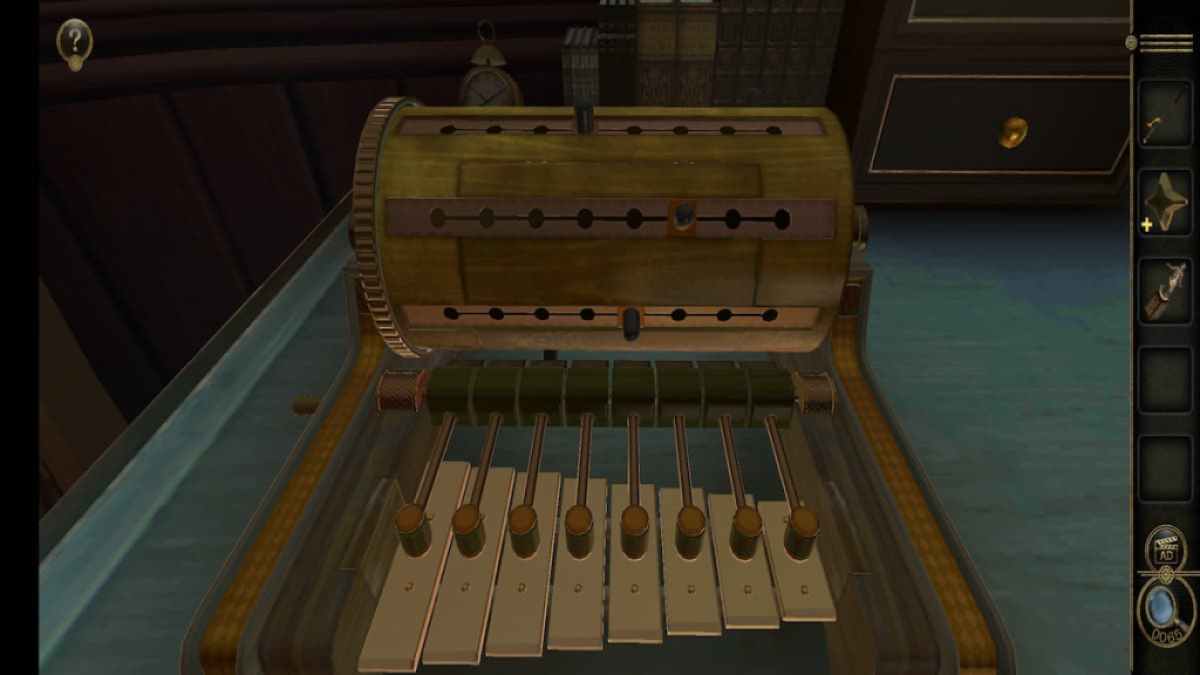
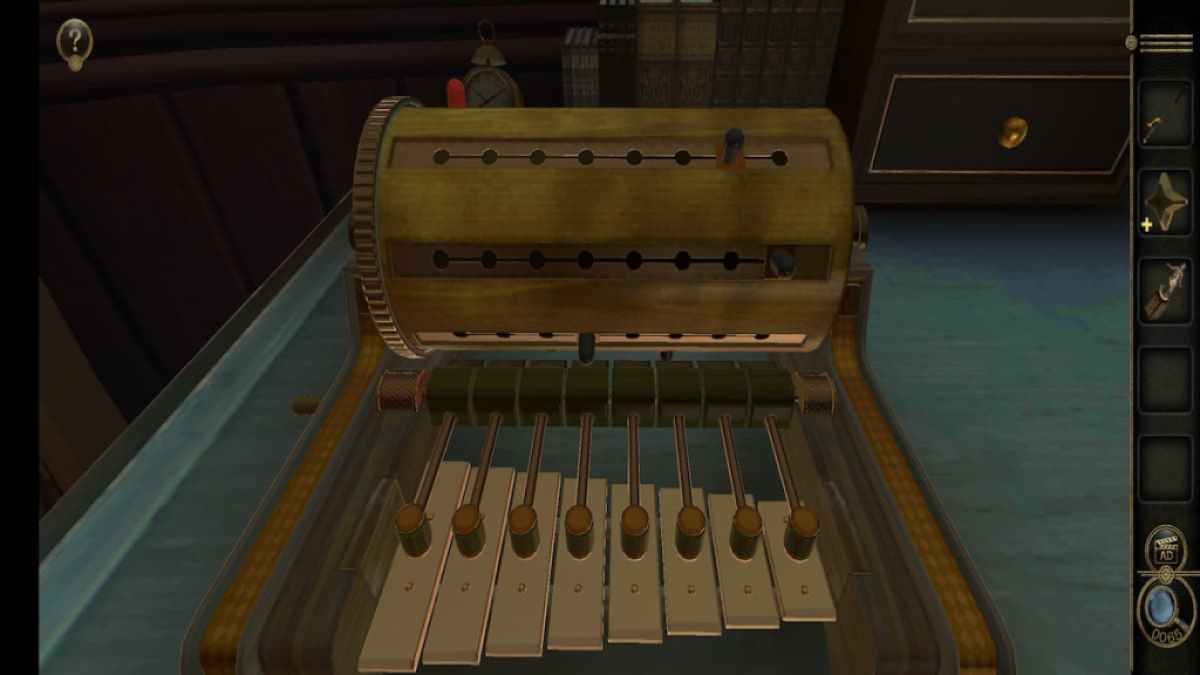
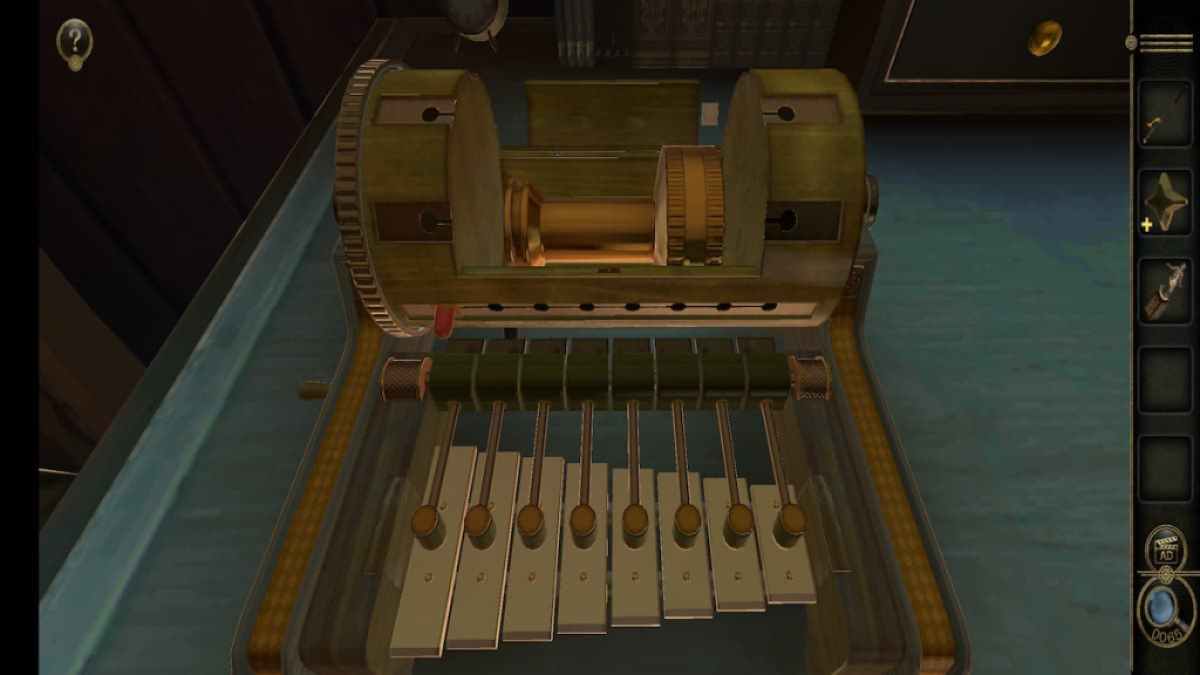
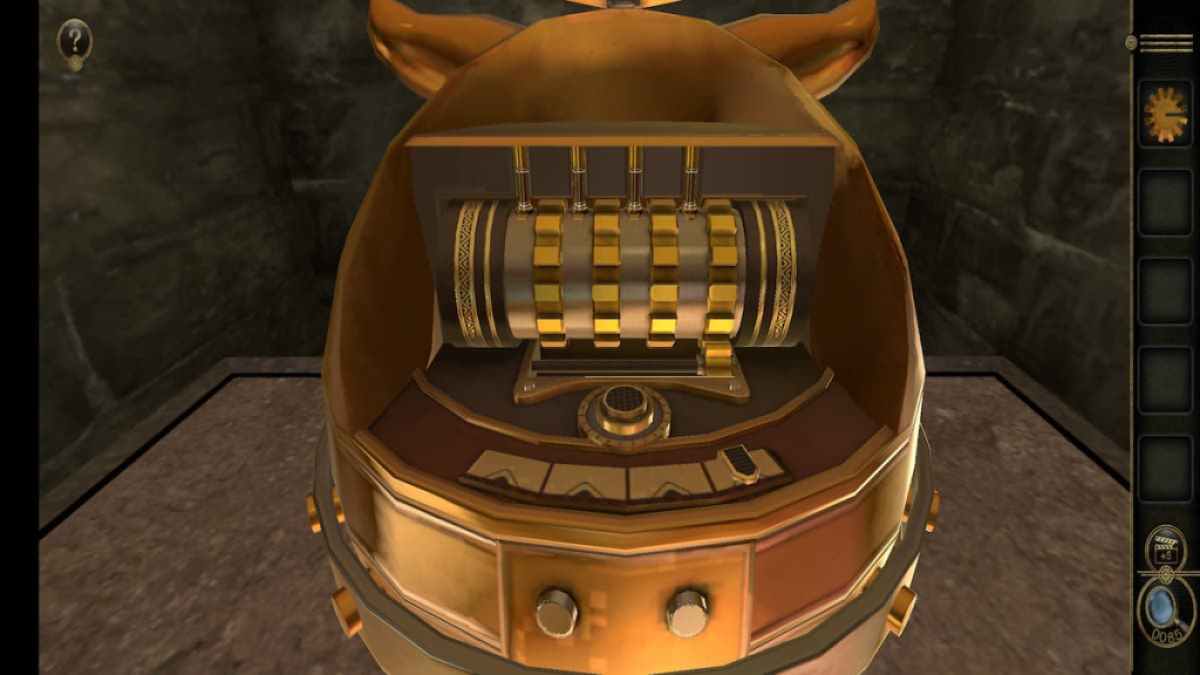
turn out the piston chamber so the last two pegs are visible , with the flushed peg peeking out of the top .
Slide the first tholepin to the second hole from the right and the second peg to the second hole from the left .
Screenshot by Pro Game Guides
This will spread the Music Box Cylinder , which contains a small-scale Handle .
Bookshelf puzzles part 2
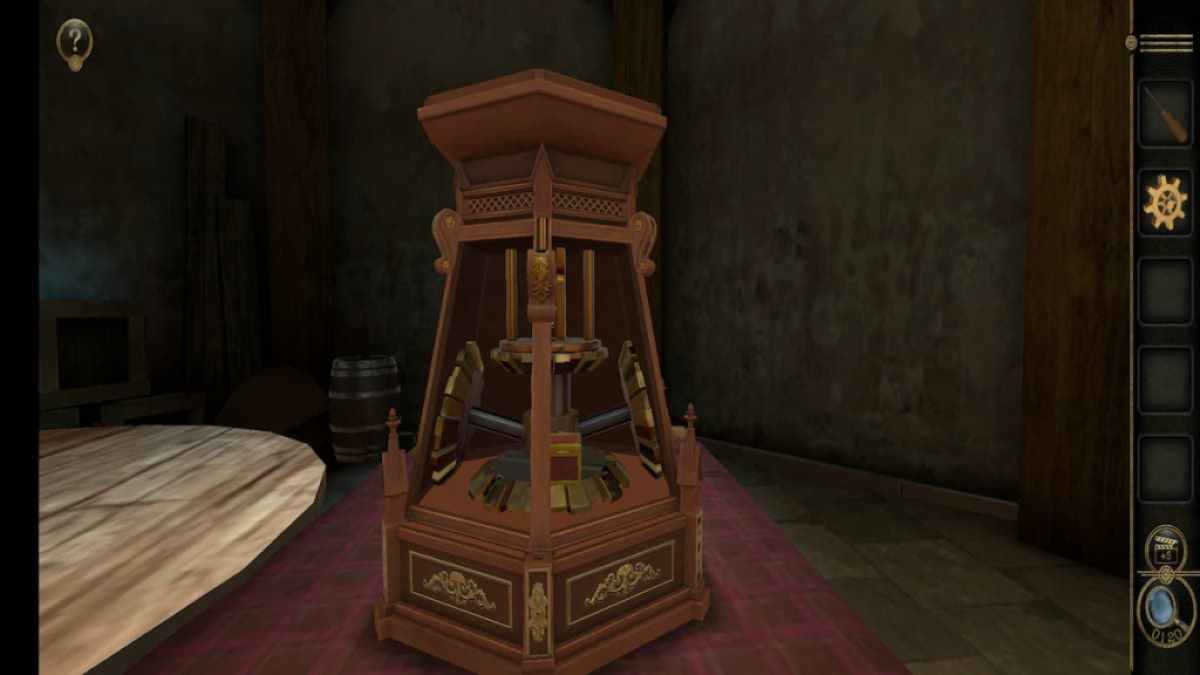
The next puzzle available on the bookshelf are the scientific motorcar and the star - shaped curl from the trident teaser .
The scientific motorcar is on the top leave shelf .
target the pommel between the two gold switches .
Screenshot by Pro Game Guides
Rotate the switch to face the right .
Flip the outer switches to confront downwards to launch the two drawer on the sides of the machine .
The unexpended draftsman contains a Key and the right drawer contains a Dinosaur Statue .
Screenshot by Pro Game Guides
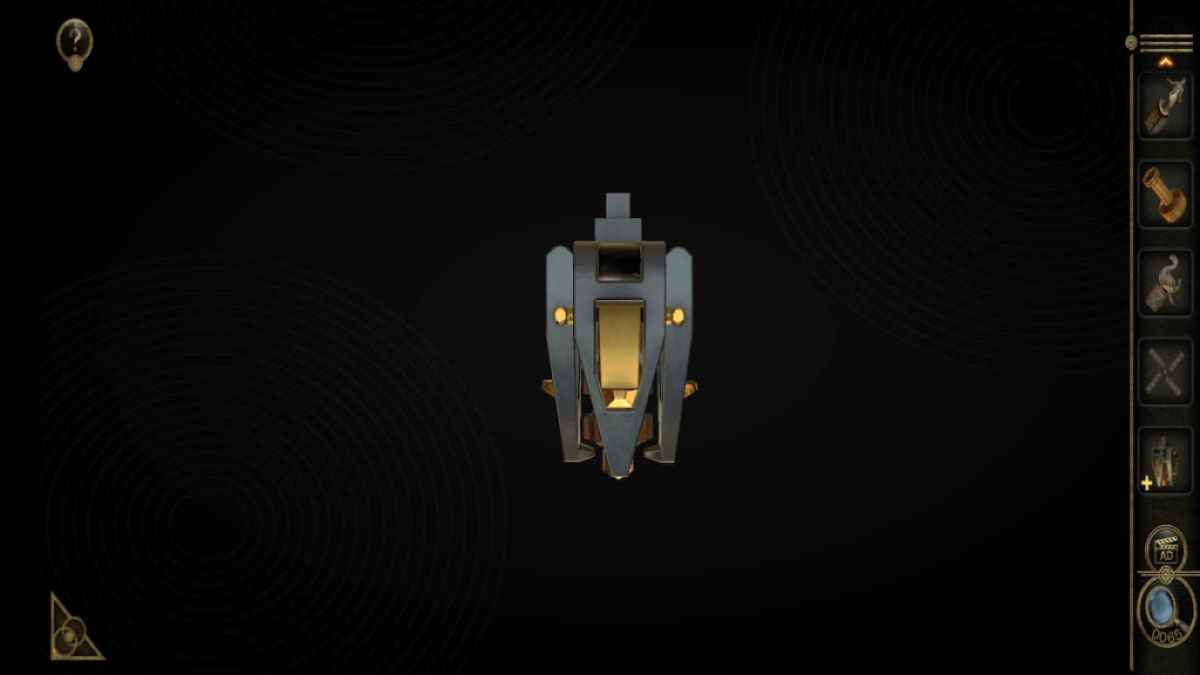
Before heading to the trident teaser , return to the stage set of underdrawers on top of the desk . employ the Key from the scientific machine in the top drawer to get a Windmill Blade and a Strange machine .
spread out up the Strange equipment in your inventory .
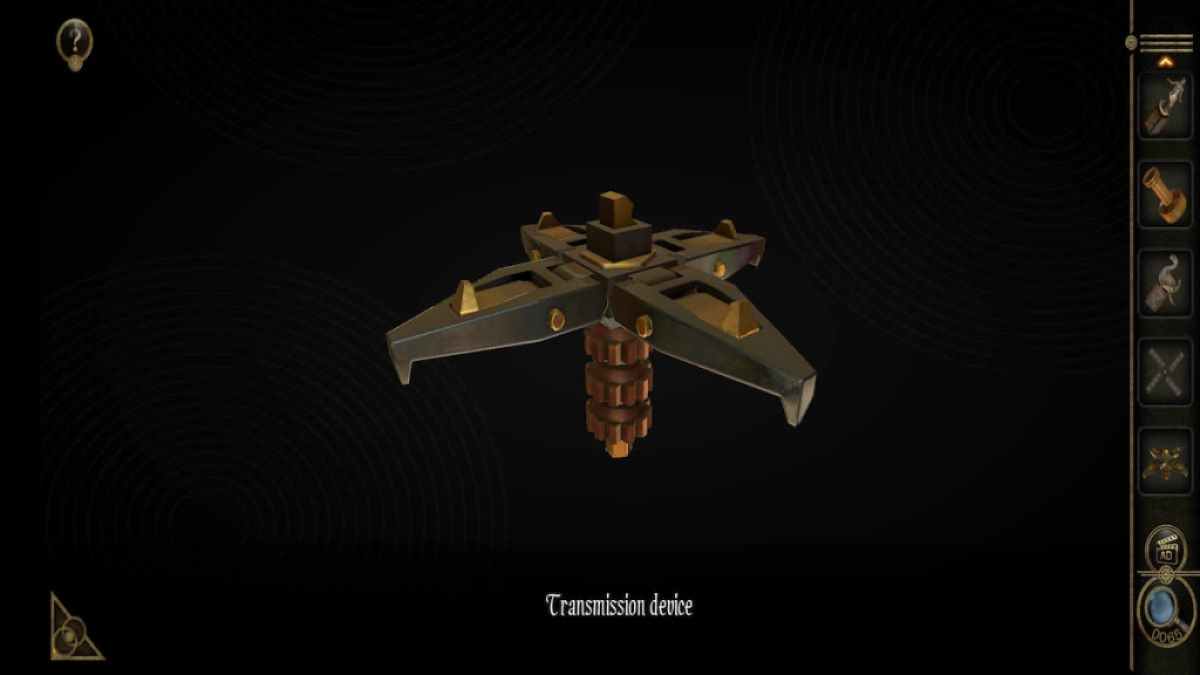
Lift all four sides of the Strange gadget to turn it into a Transmission gadget .
Screenshot by Pro Game Guides
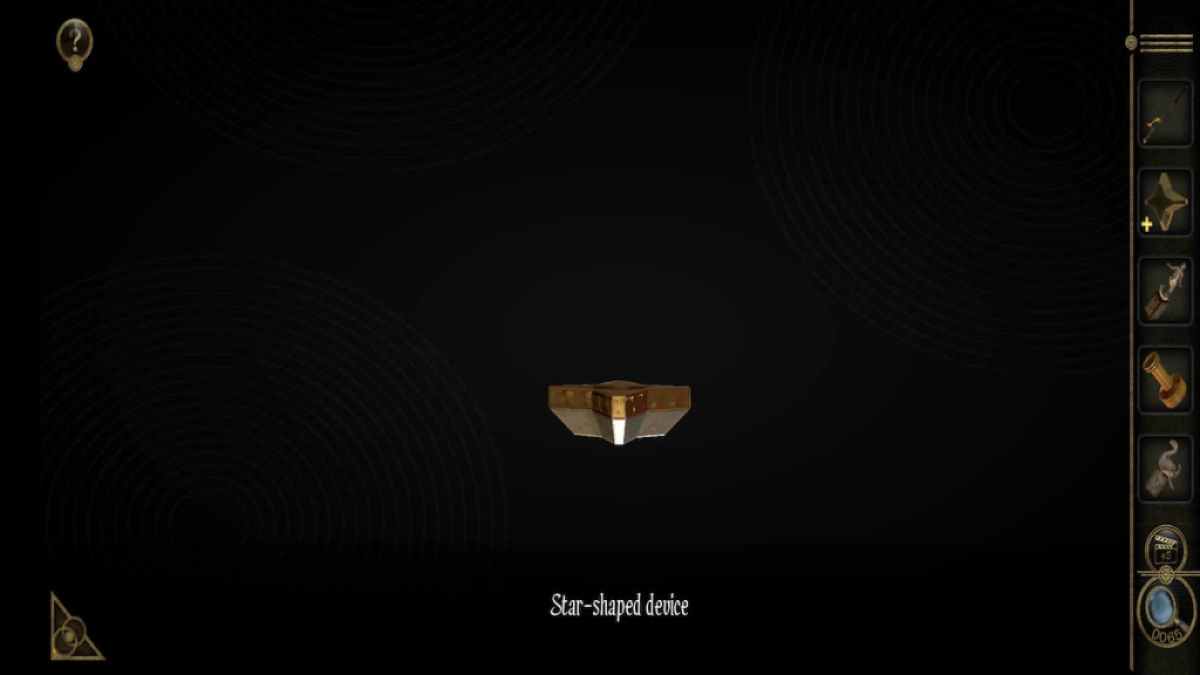
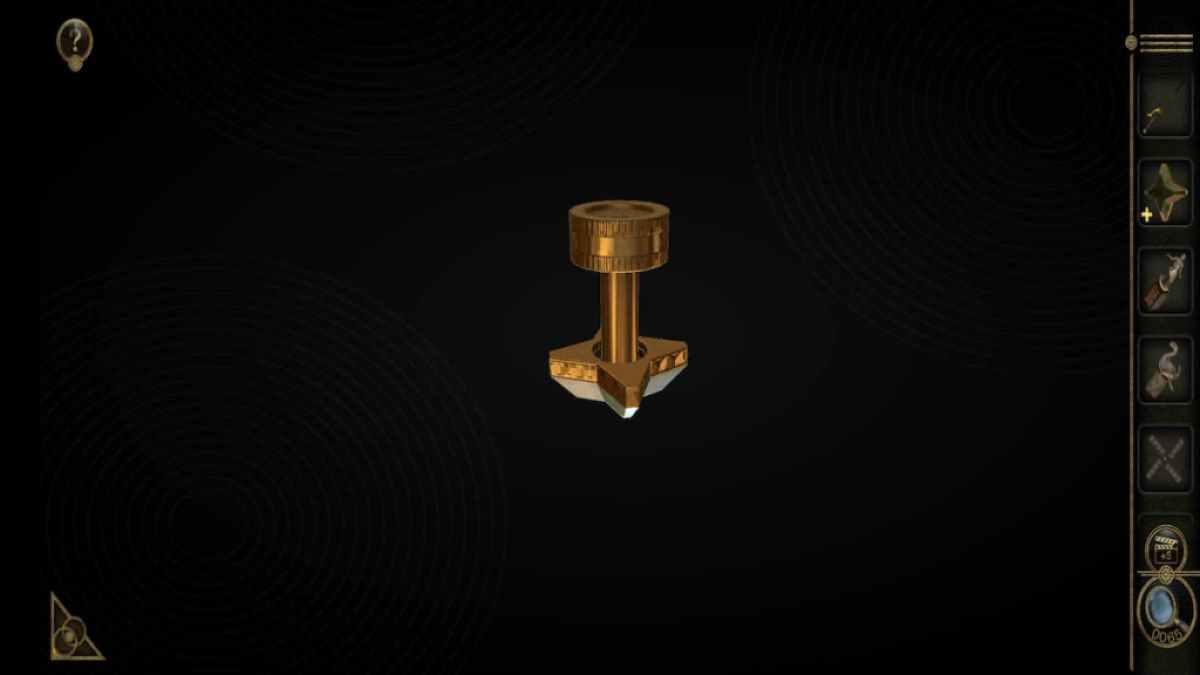
start the Star - regulate gadget in your inventory .
Place the Handle in the twist ’s golf hole to create a Star - Shaped Handle .
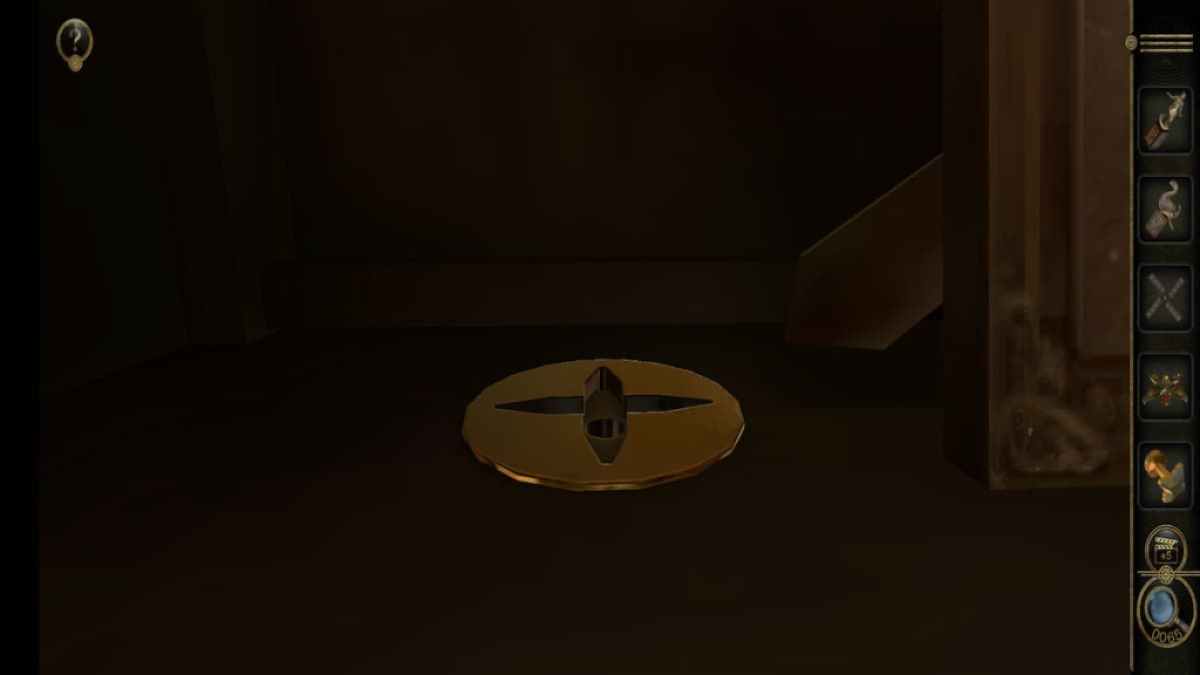
A hole with four points can be found on the left side of the bookshelf near the photos .
Screenshot by Pro Game Guides
Place the Transmission gadget into it .
Place the Star Handle into the hole above the room access hold .
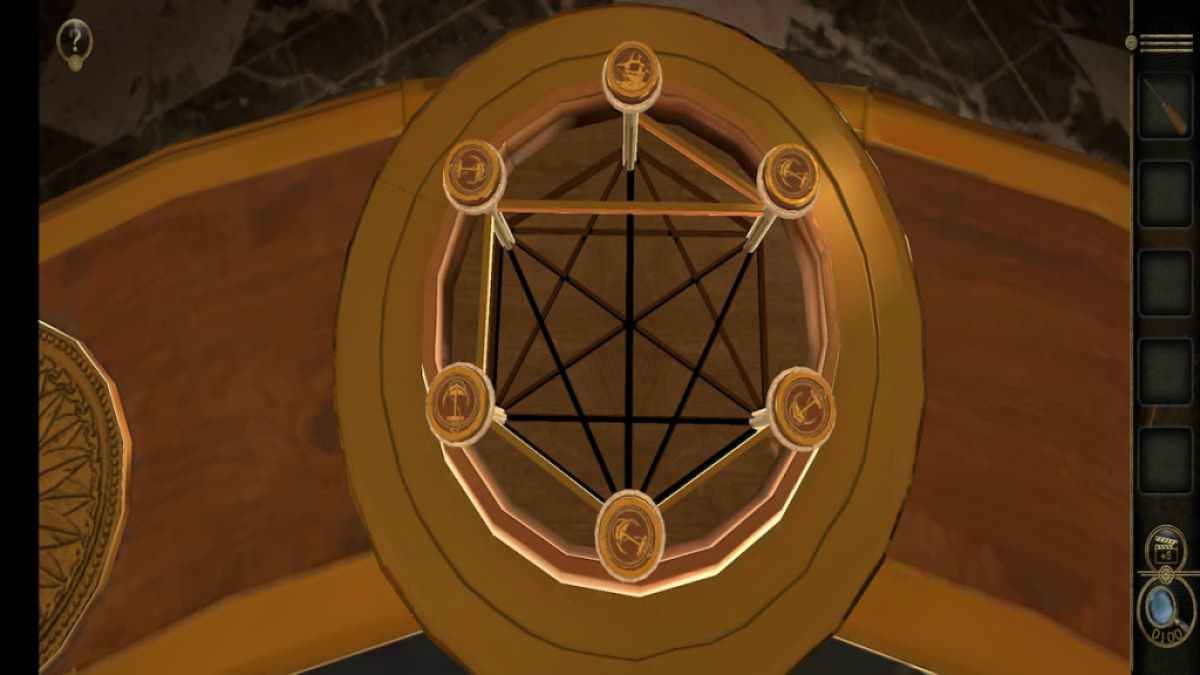
utilise the Star Handle to rotate the orb until the gap on all three section air up , clearing a path between the Transmission gadget and the Trident .
Screenshot by Pro Game Guides
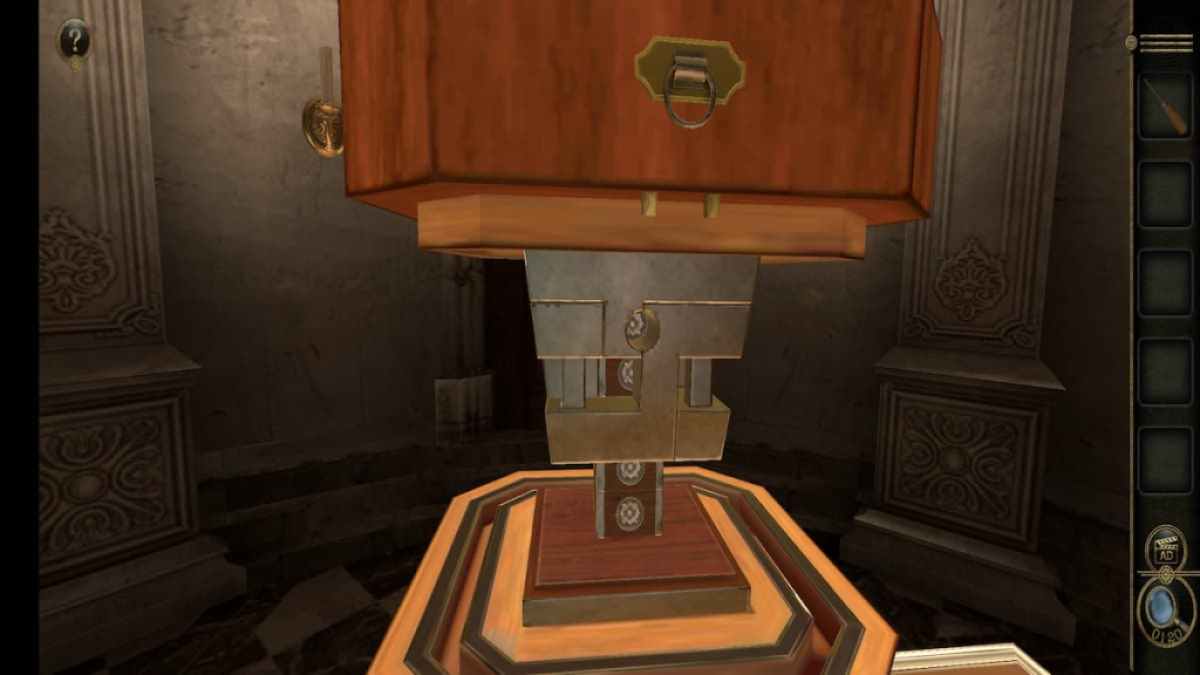
Then add the Metal Rod to the gap .
This causes the Trident to constrict into the top shelf and circumvolve , moving the storage locker door on the 2d ledge .
Focusing in on the castling gives you a Strange Key . Nothing else can be done here , so leave it behind for now .

Screenshot by Pro Game Guides
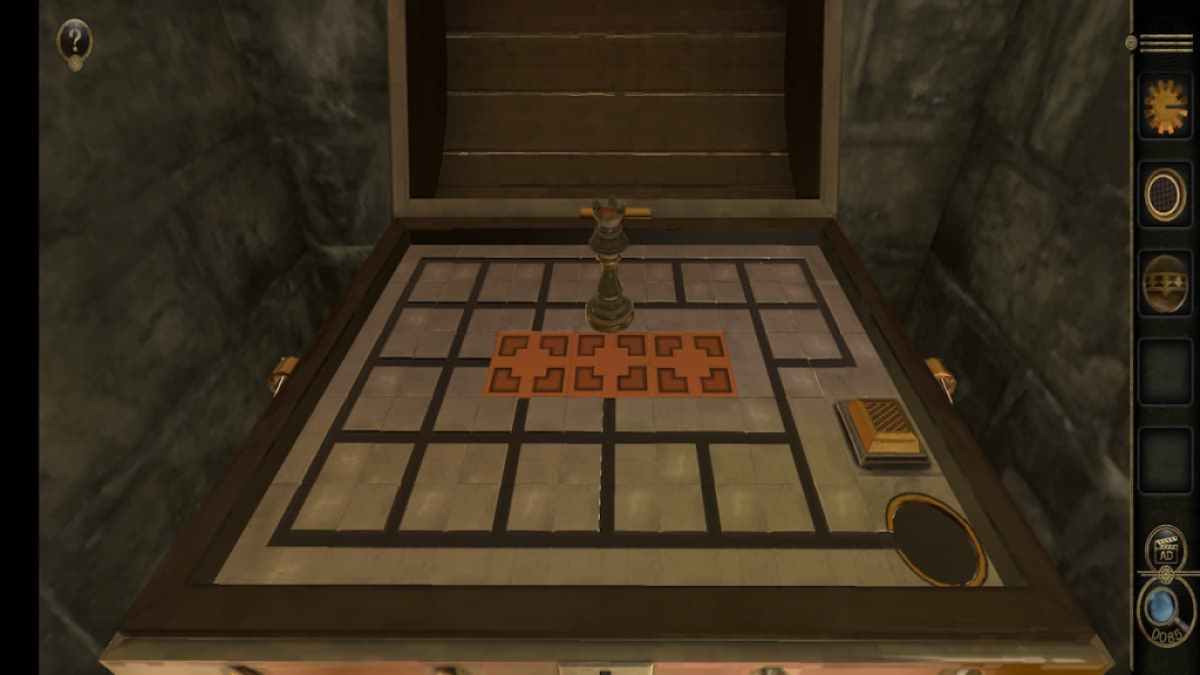
Desk eight-digit code puzzle
The Strange Key can be placed into the keyhole in the desk ’s proper drawer .
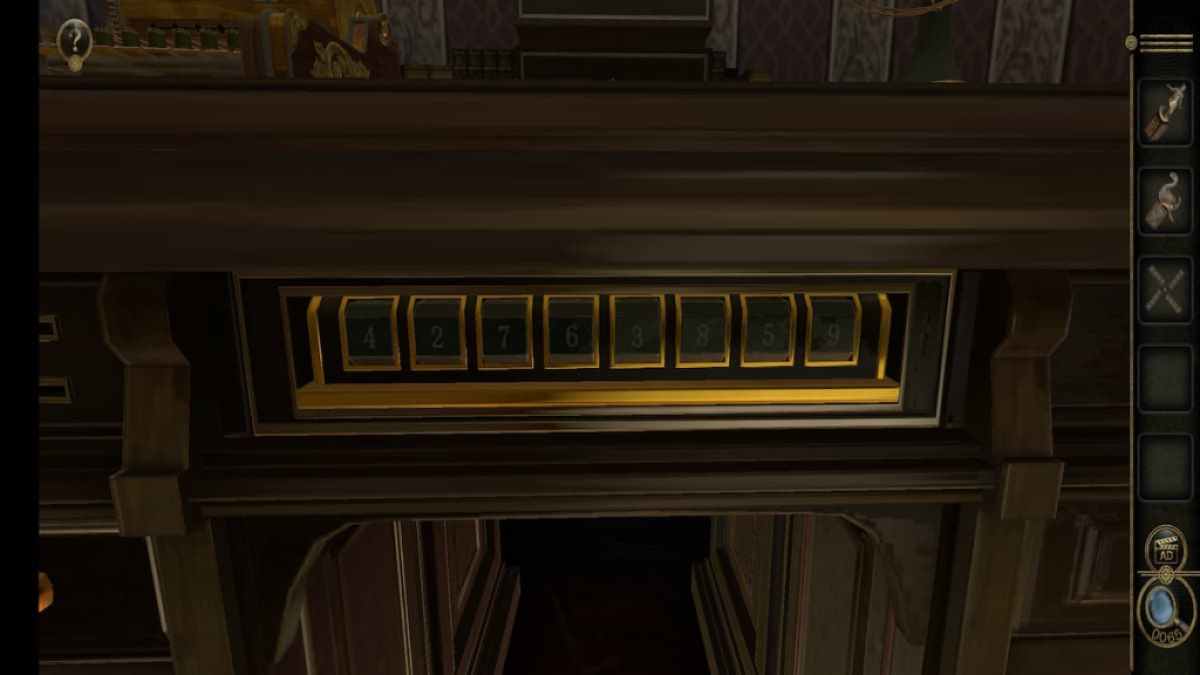
splay the Strange Key reveal an eight - finger number ringlet at the front of the desk .
To solve it , you ask to mix the set of numbers from the desk with the curing of number from the picture . The numbers in the second code take the office of the X ’s in the first , create the terminal code " 42763859 " . Entering this code flips the draftsman to reveal a chessboard .
Screenshot by Pro Game Guides
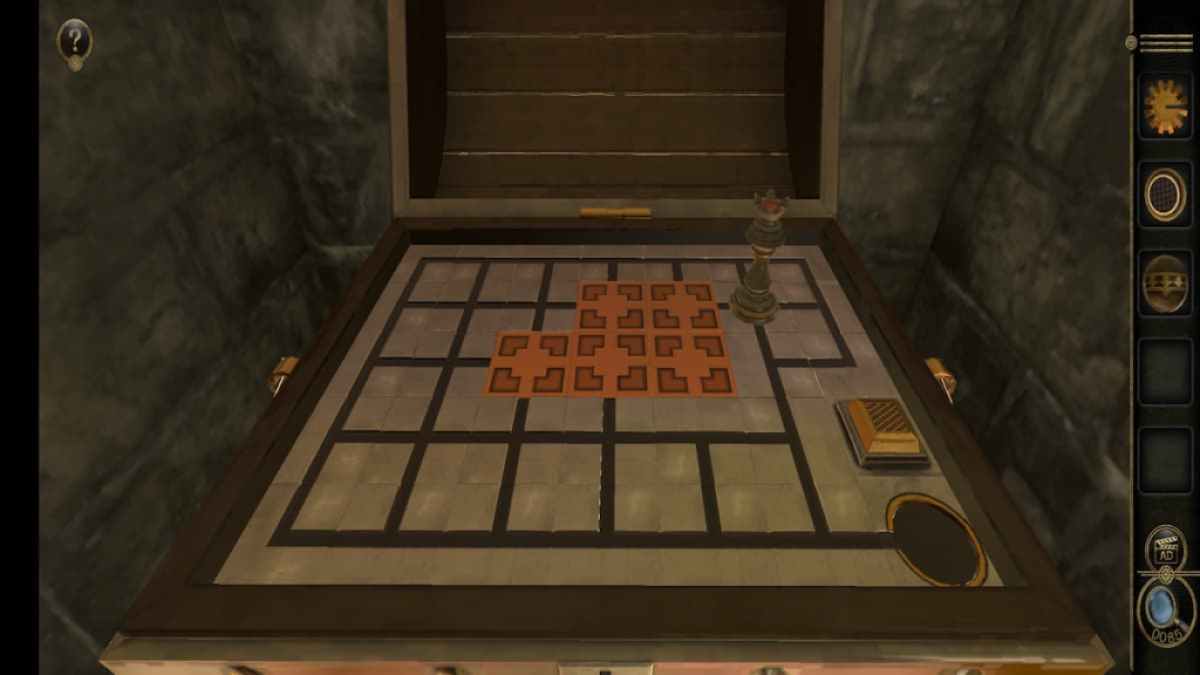
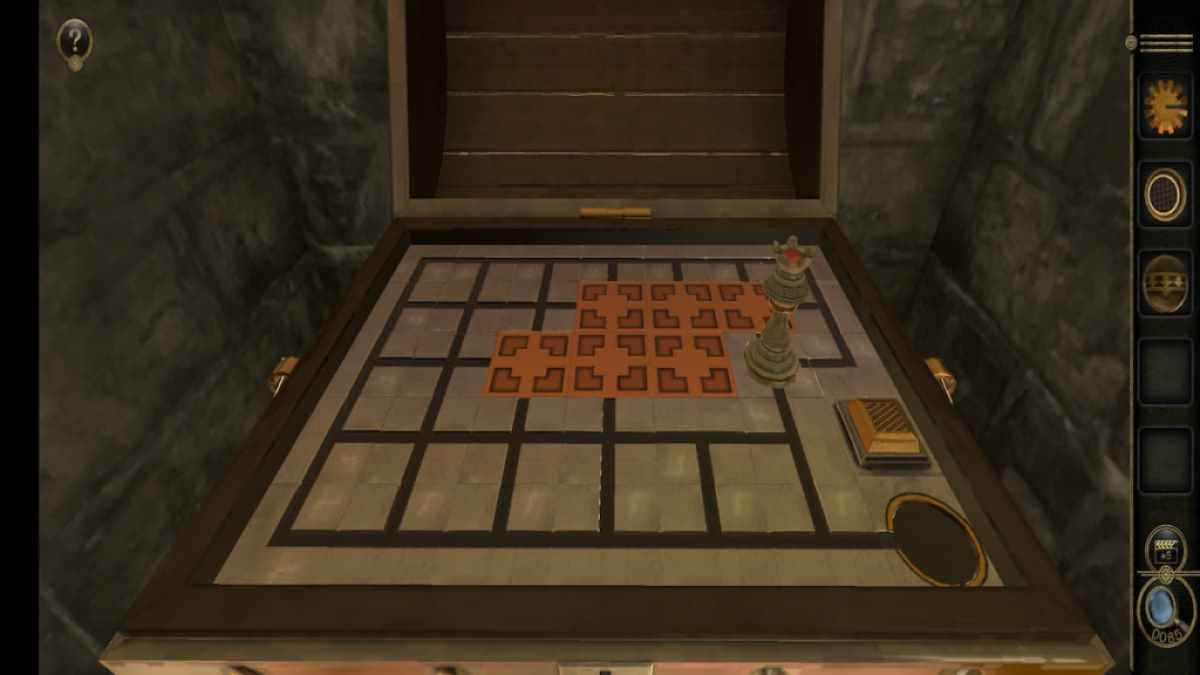
Chess puzzle
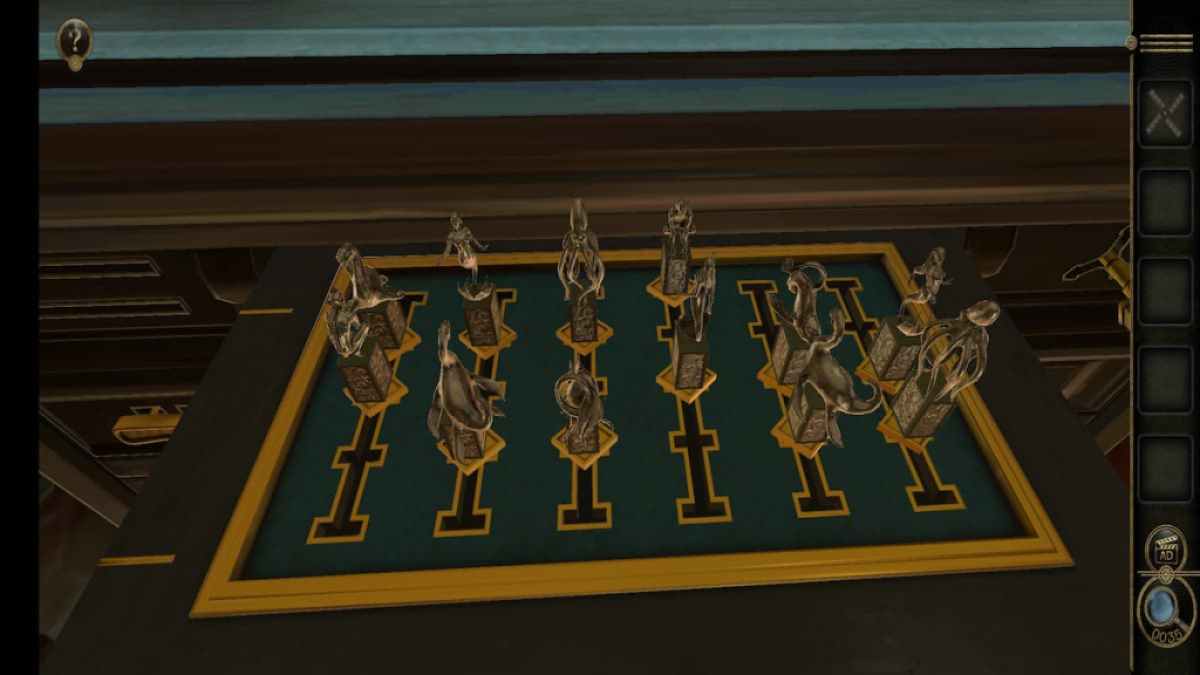
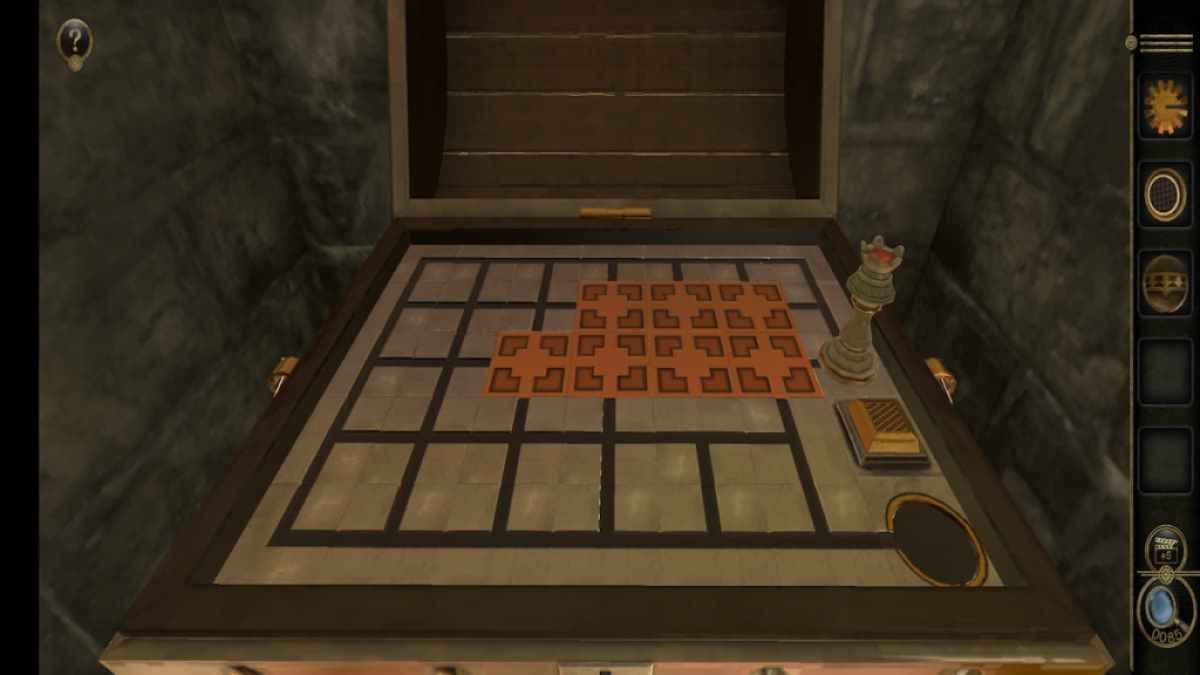
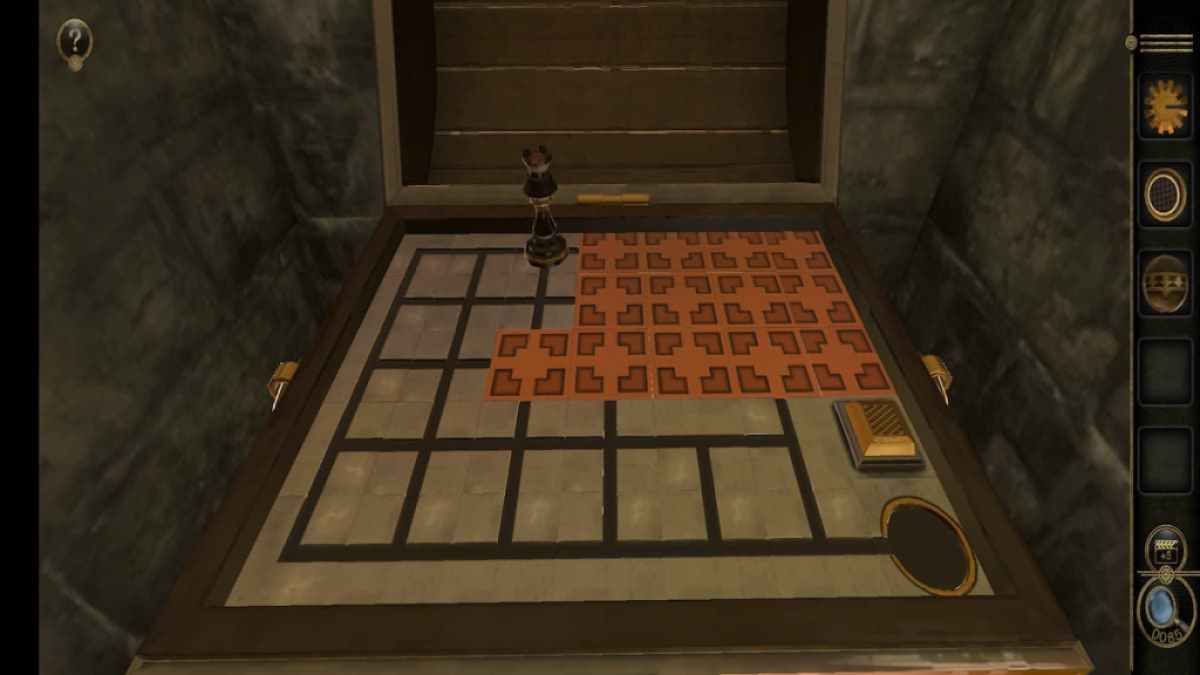
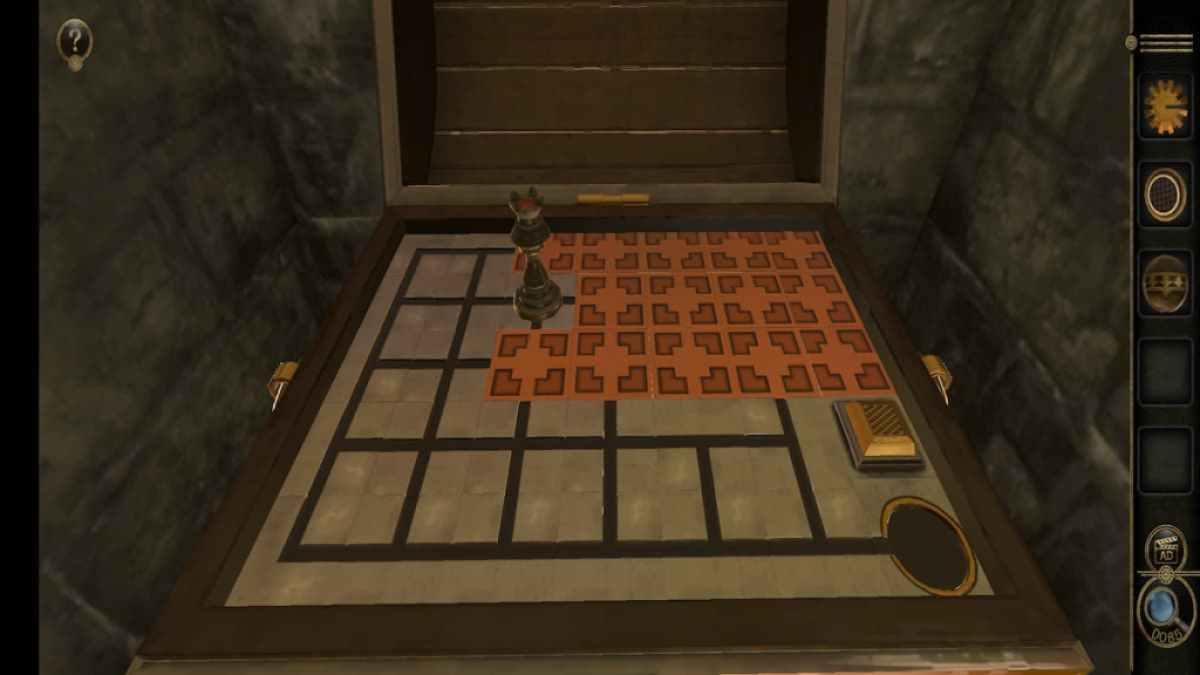
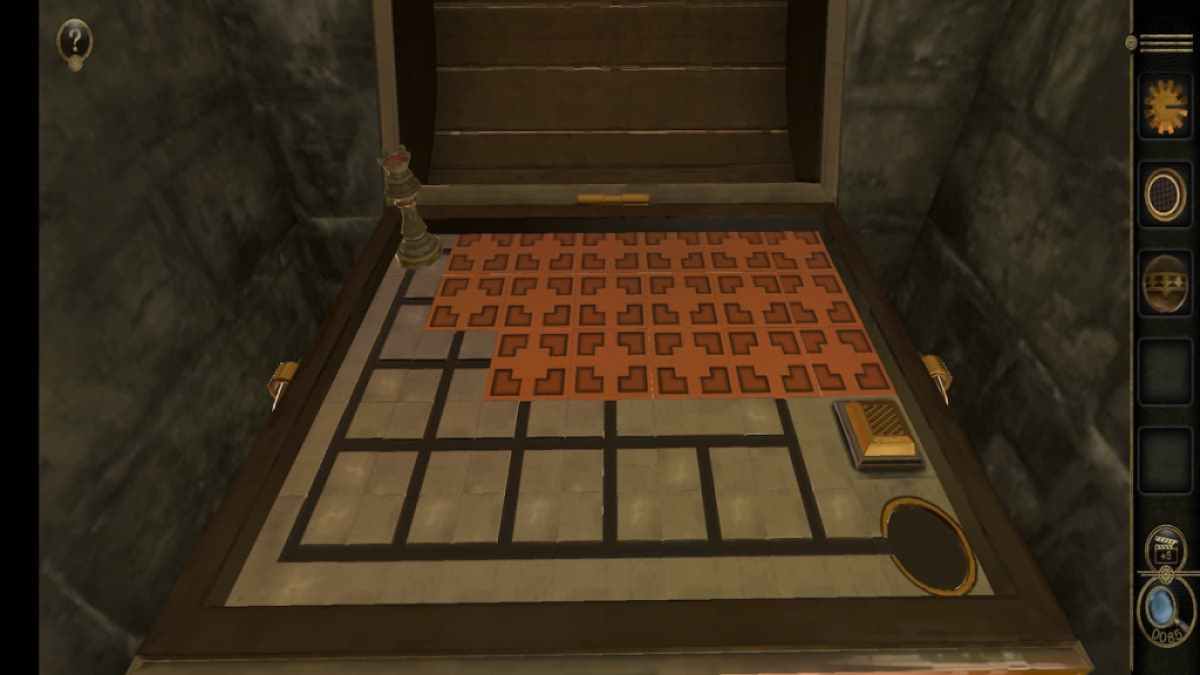
The chessboard bear a salmagundi of aquatic animate being as chess game pieces .
The Dinosaur Statue is sum to the empty one-armed bandit on the left while the Mermaid Statue is sum to the empty slot on the right .
Solving this teaser ask move each mystifier bit until they ’re in the proper place . Moving one puzzle piece will move one or two other pieces on the board . The image below read what the board looks like when the puzzle is clear .

Screenshot by Pro Game Guides
This pass on you a Clock Dial .
colligate : How to beat Trace Escape Room – Walkthrough
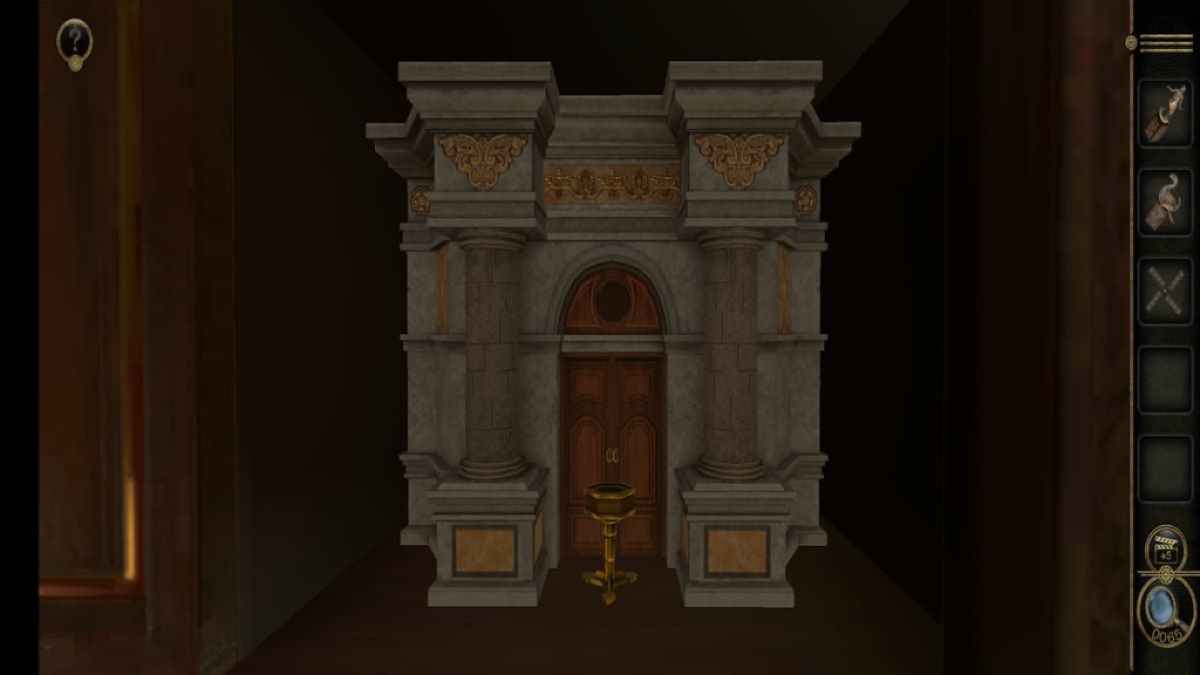
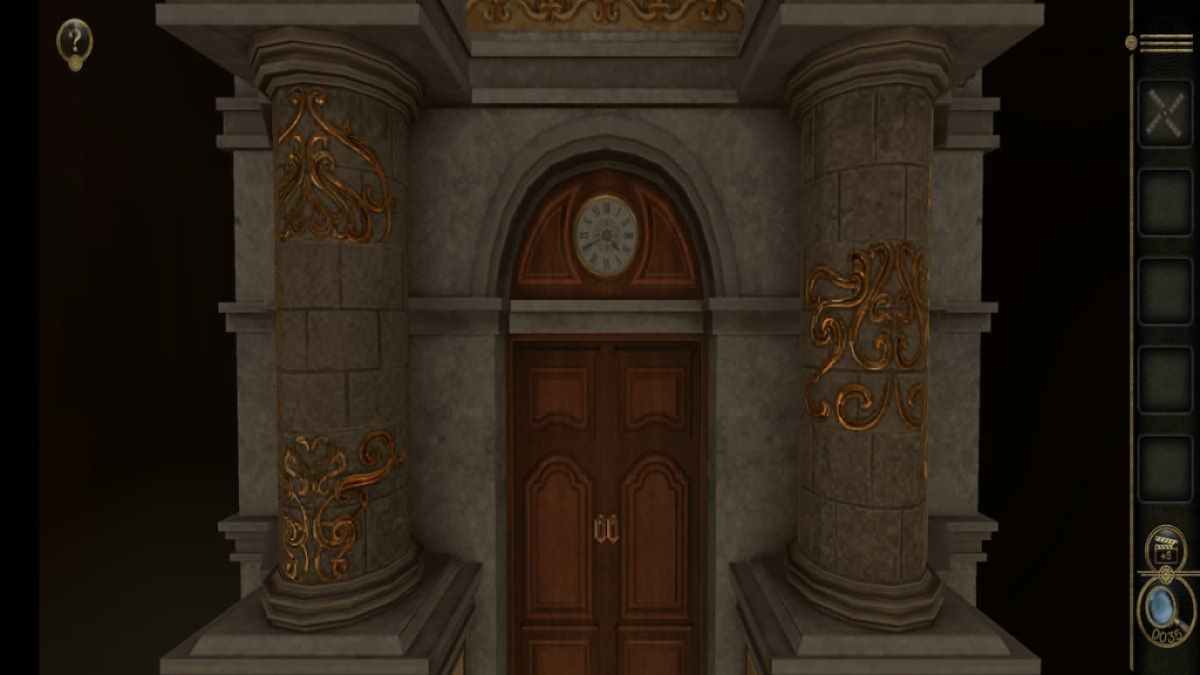
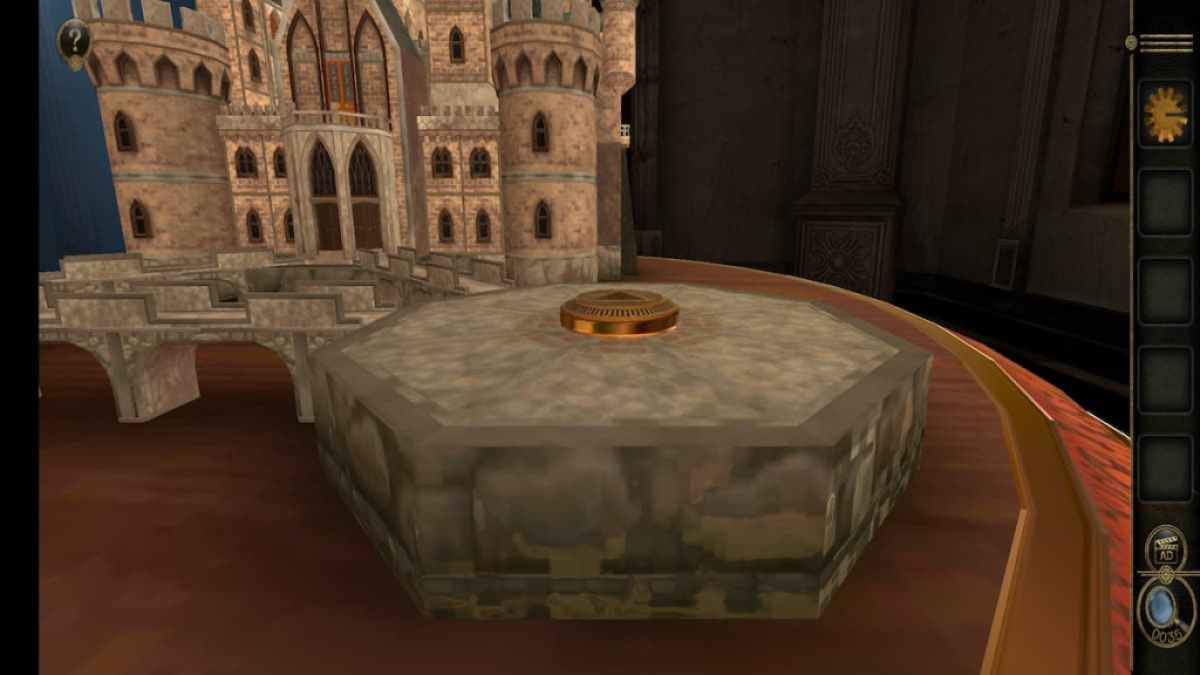
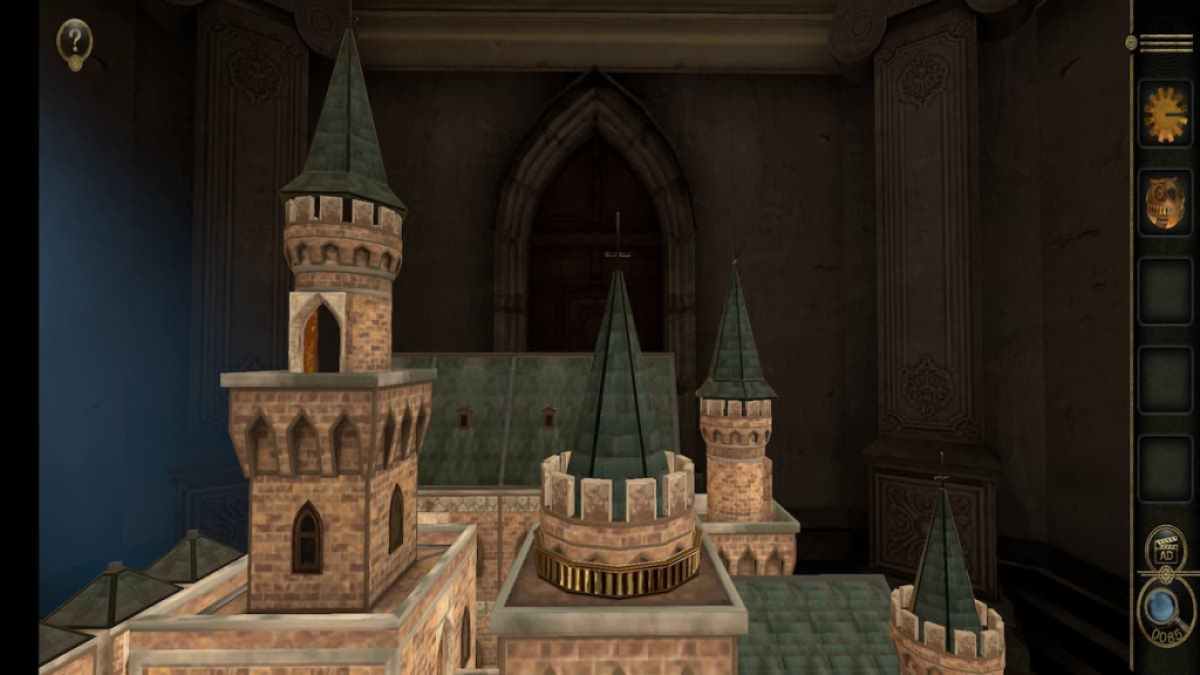
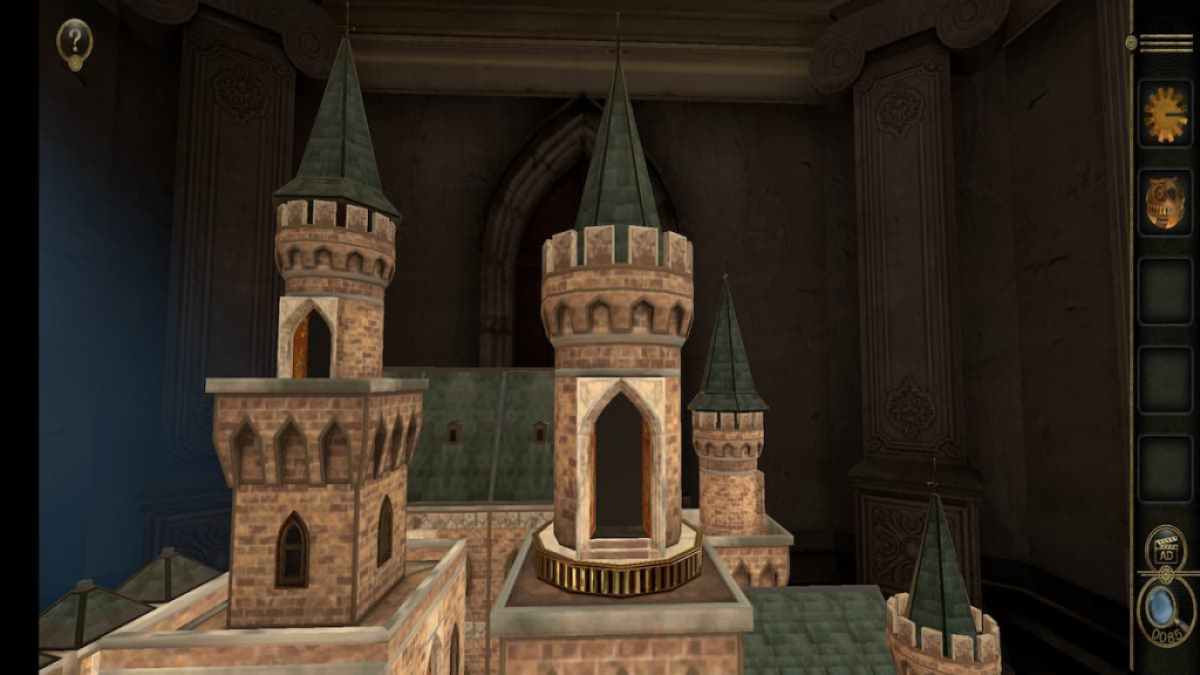
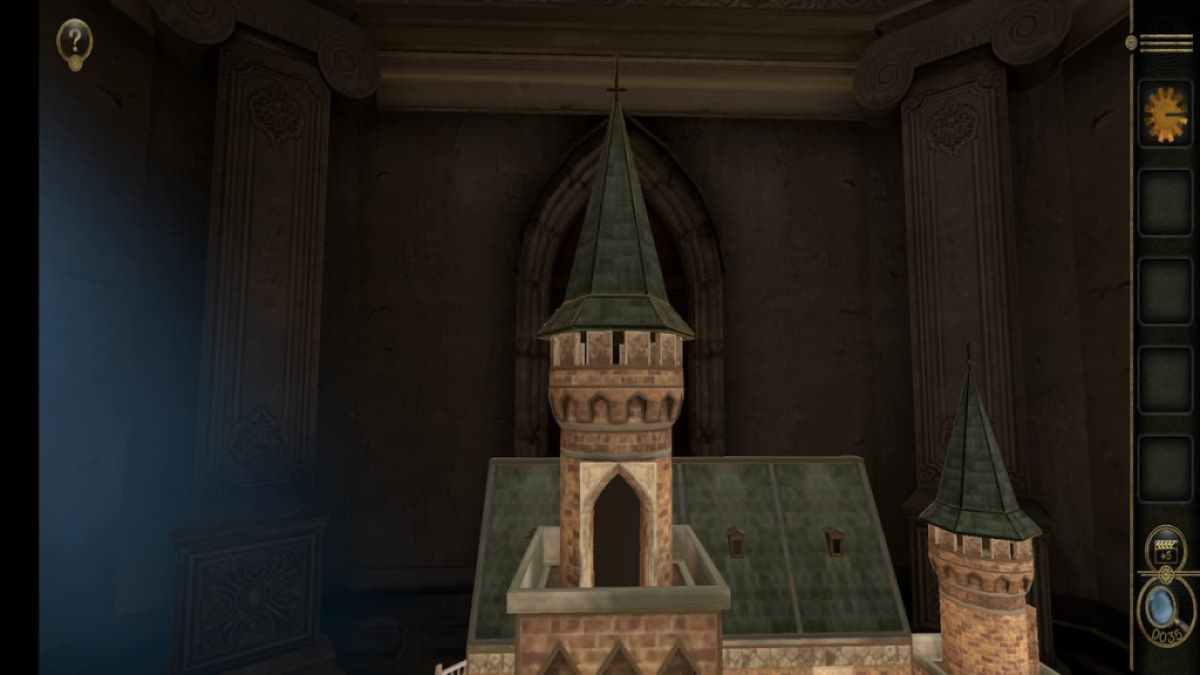
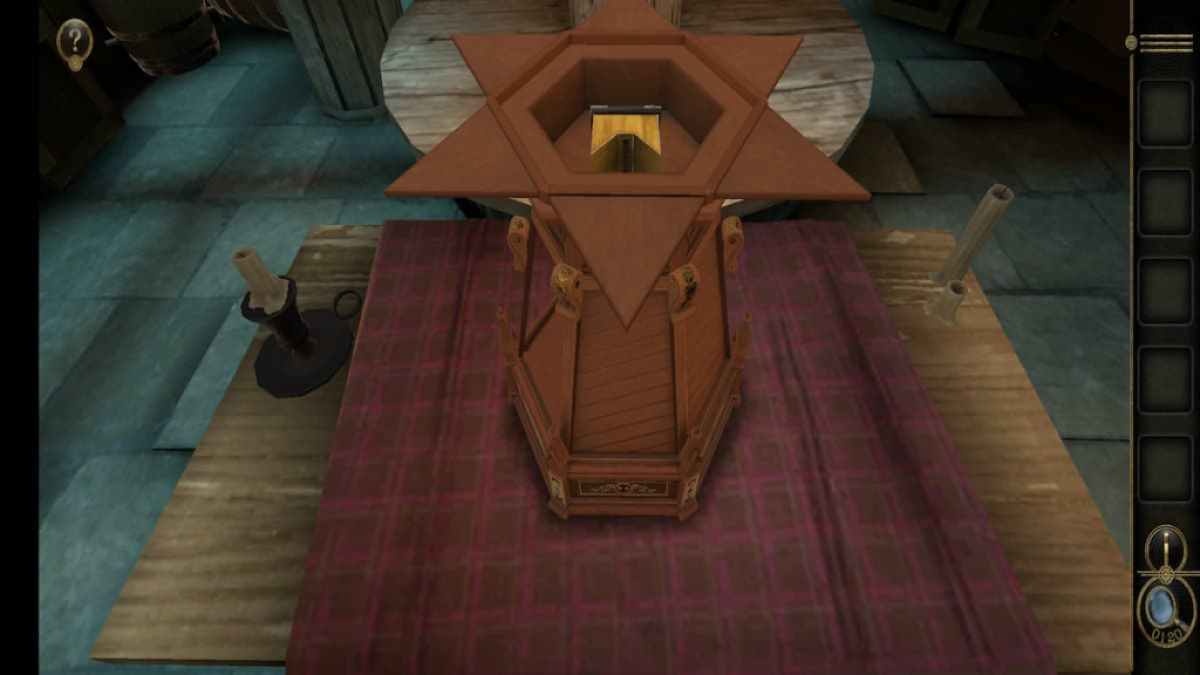
Castle puzzle
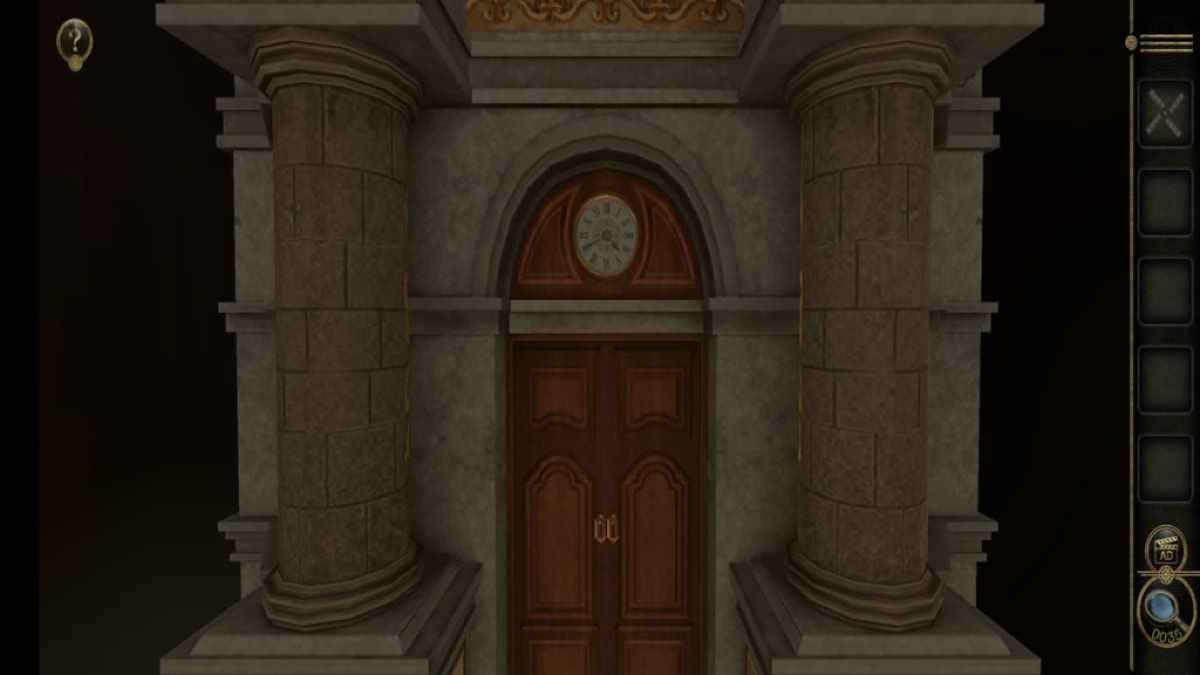
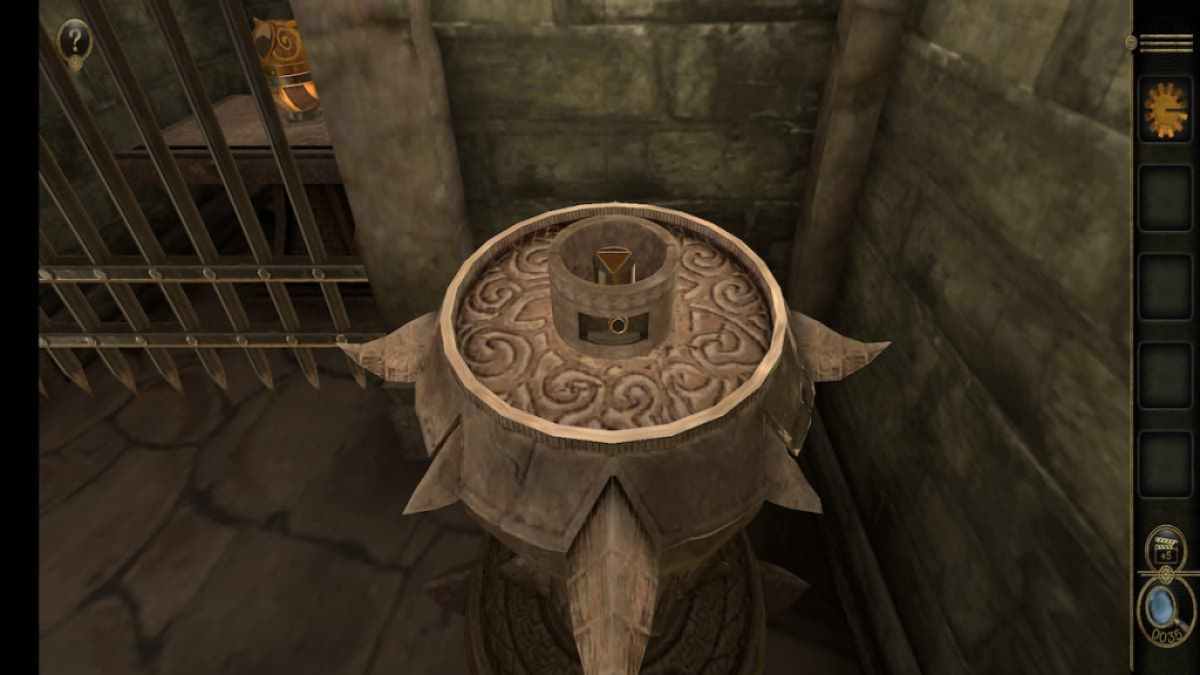
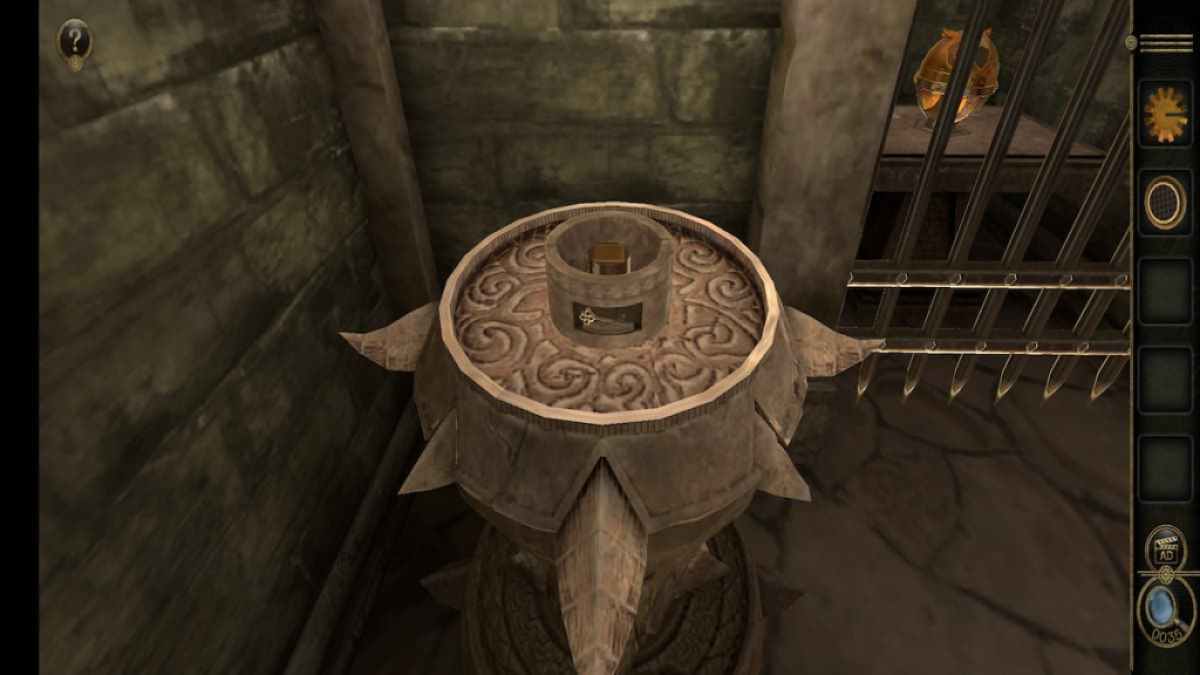
bestow the Clock Dial to the front of the castle .
This reserve you to rotate the castle pillars .
Rotating all sections of the pillar to grade the gold side in the front opens up the castle threshold .

Screenshot by Pro Game Guides
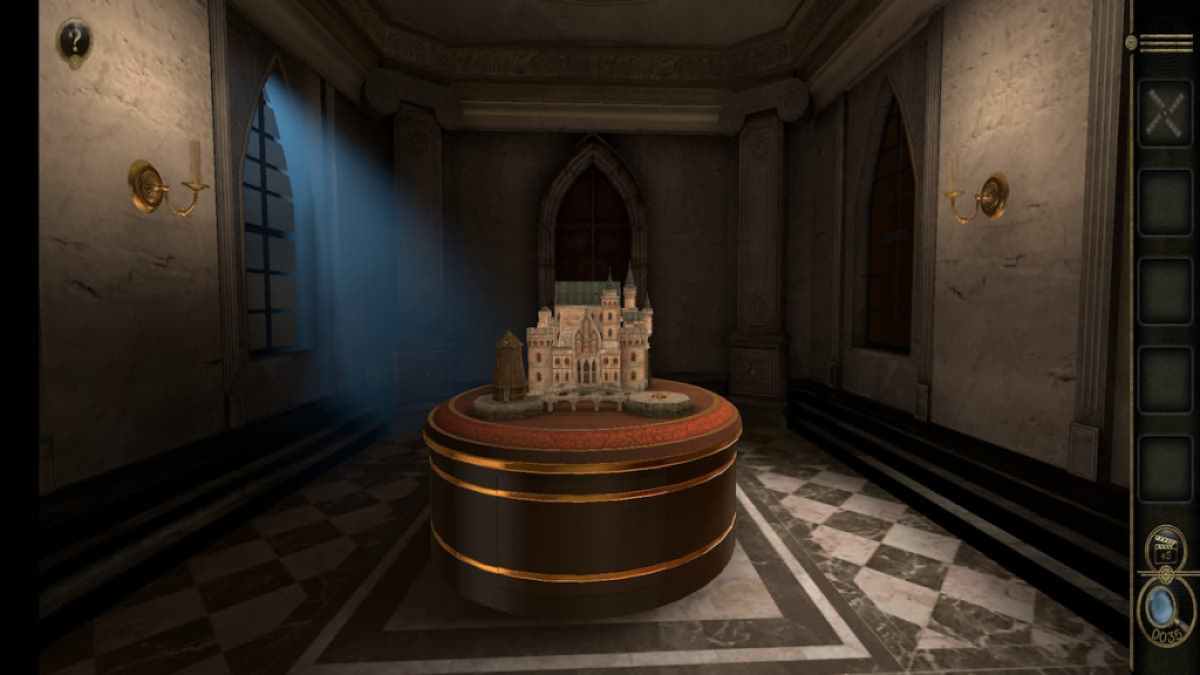
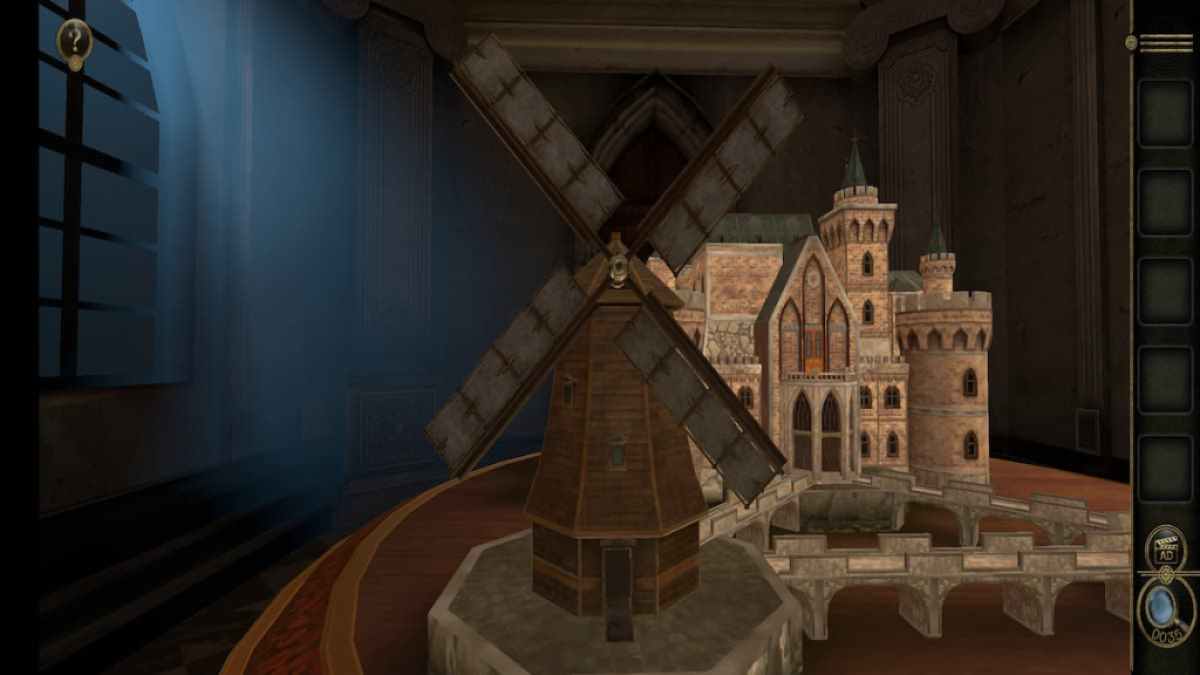
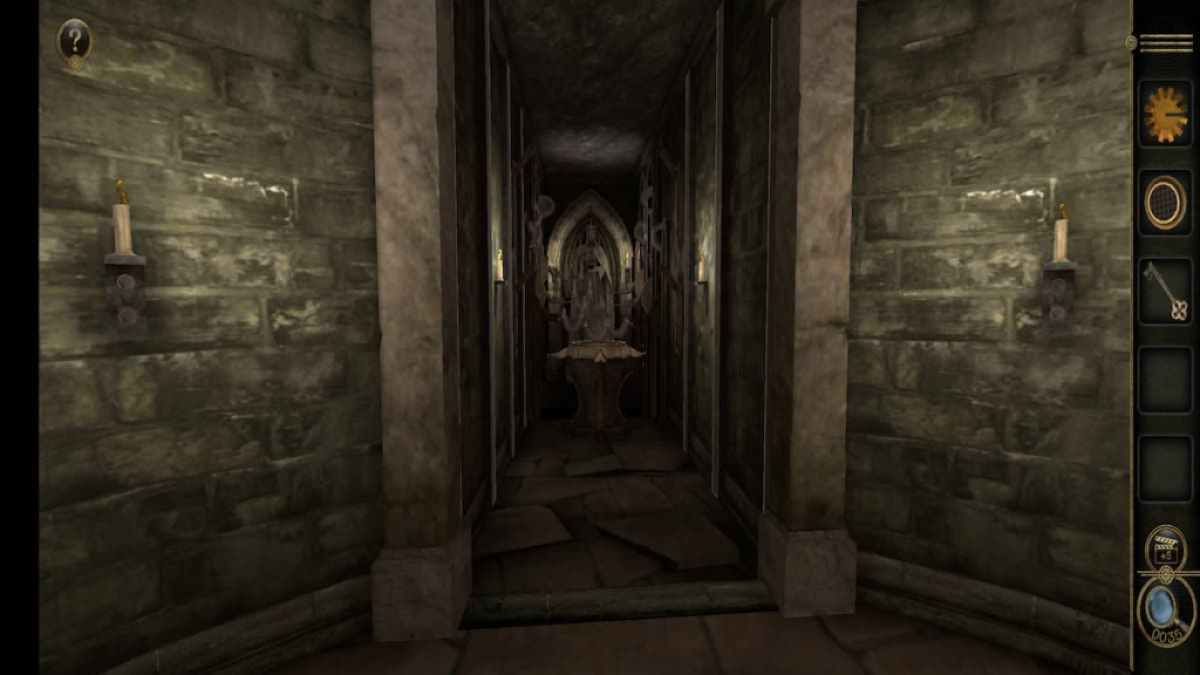
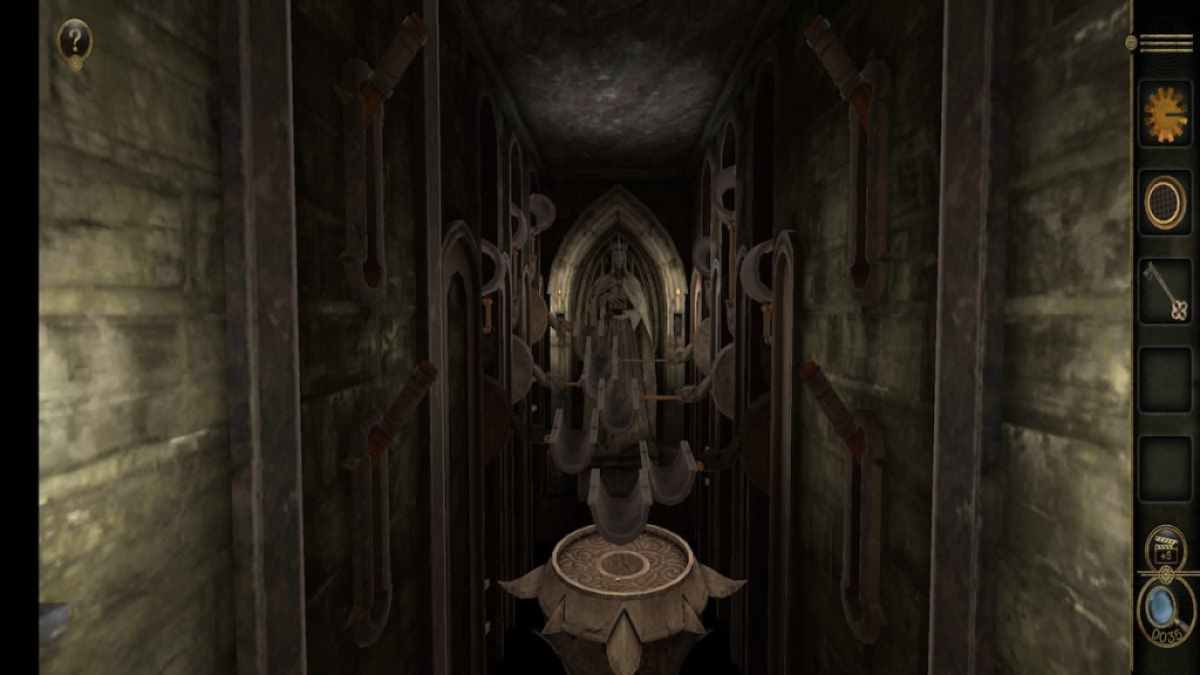
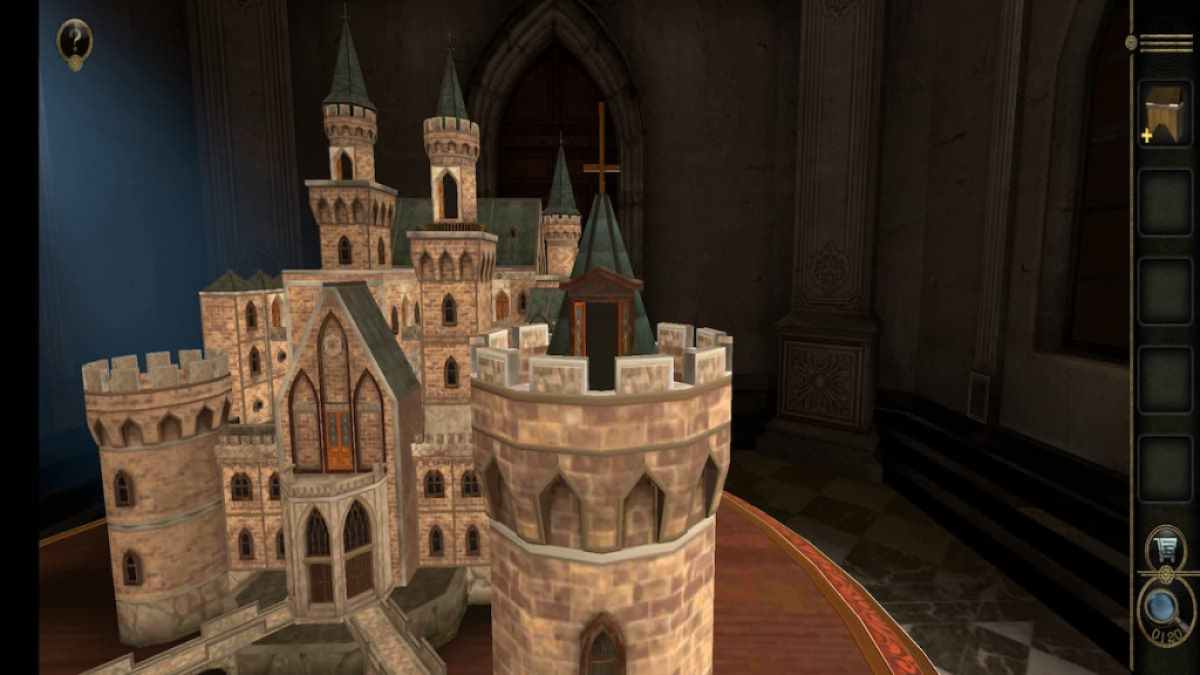
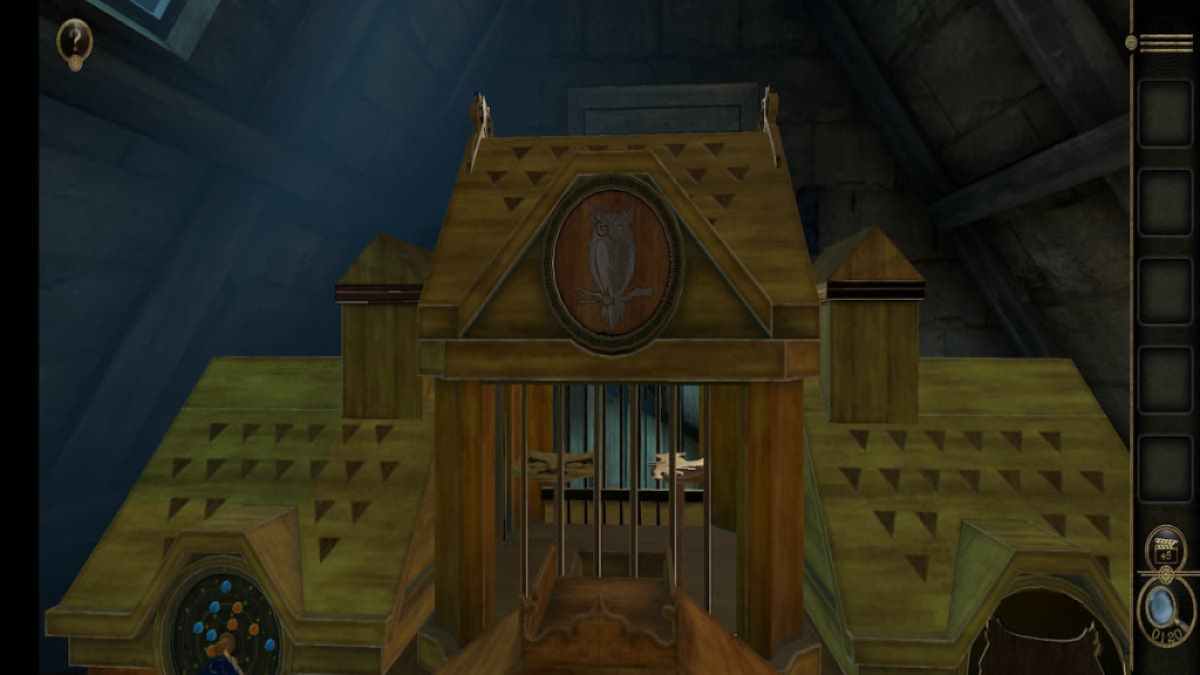
Entering the castle
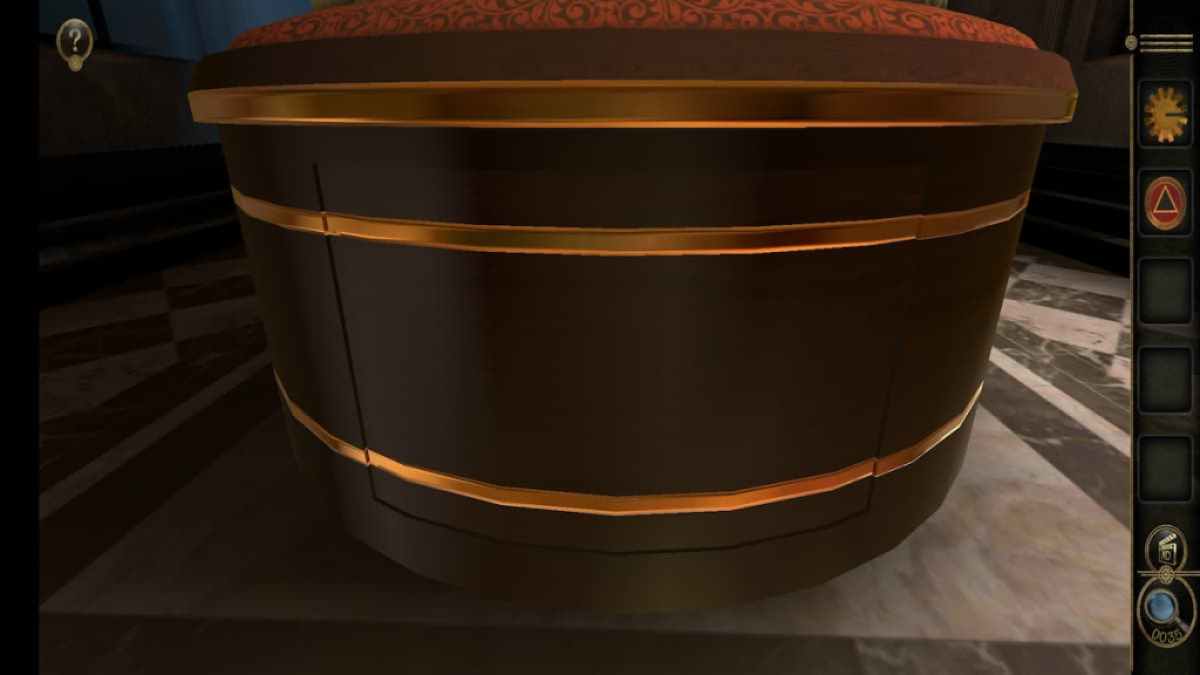
enter the castle reveals a large room with a table in the pith .
The table comprise a castle leave out slice , a crushed aerogenerator , and an empty smudge .
The Windmill Blades can be locate on the windmill to open up up the door at its base .
Screenshot by Pro Game Guides
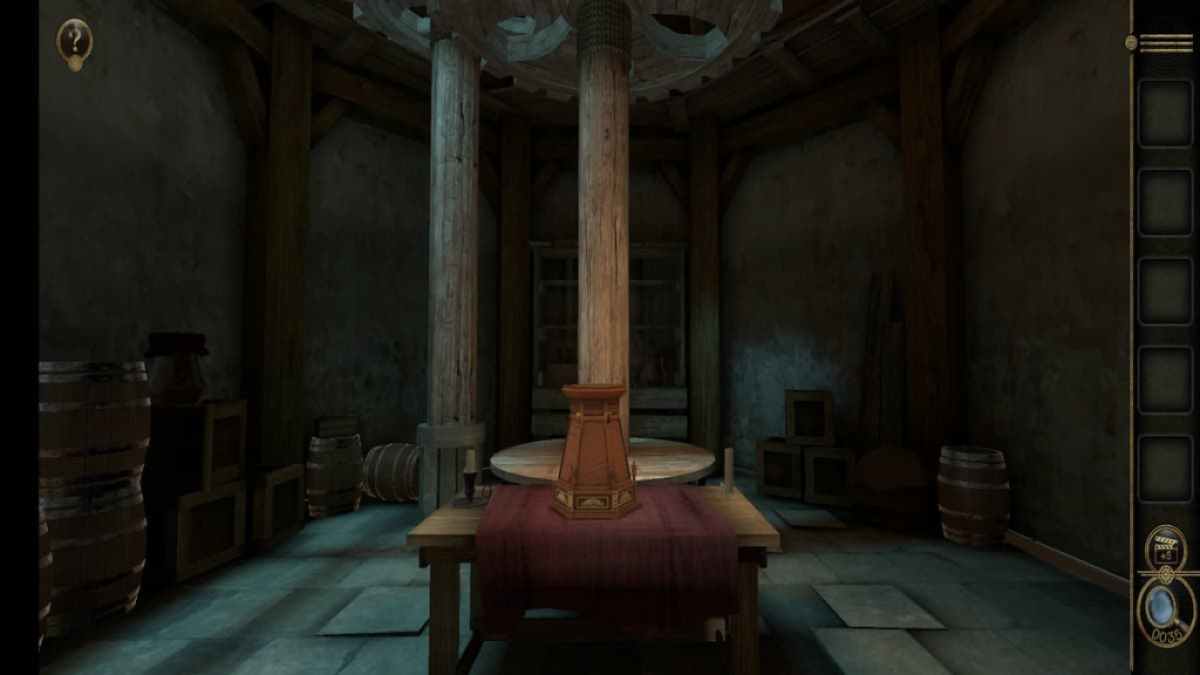
Windmill part 1
The interior of the windmill contains a pocket-sized wooden structure on the front table .
Looking at the front of the structure reveals that the front correct pin is loose .
stiffen it to get a Strange Gear .
Screenshot by Pro Game Guides
Opening the castle doors
Slide over to the empty base and snaffle the turgid Metal Disc on top of it .
Take a footprint back to catch the base of the table .
slue the panel in the front to the right to view a set of gears and a space for the big Metal Disc .
Screenshot by Pro Game Guides
Place the Metal Disc and rotate it .
This reveals a tower in the sum of the rook and lead you to a puzzler on the left-hand side .
Move the crimson skidder to the bottom to open up the door .
Screenshot by Pro Game Guides
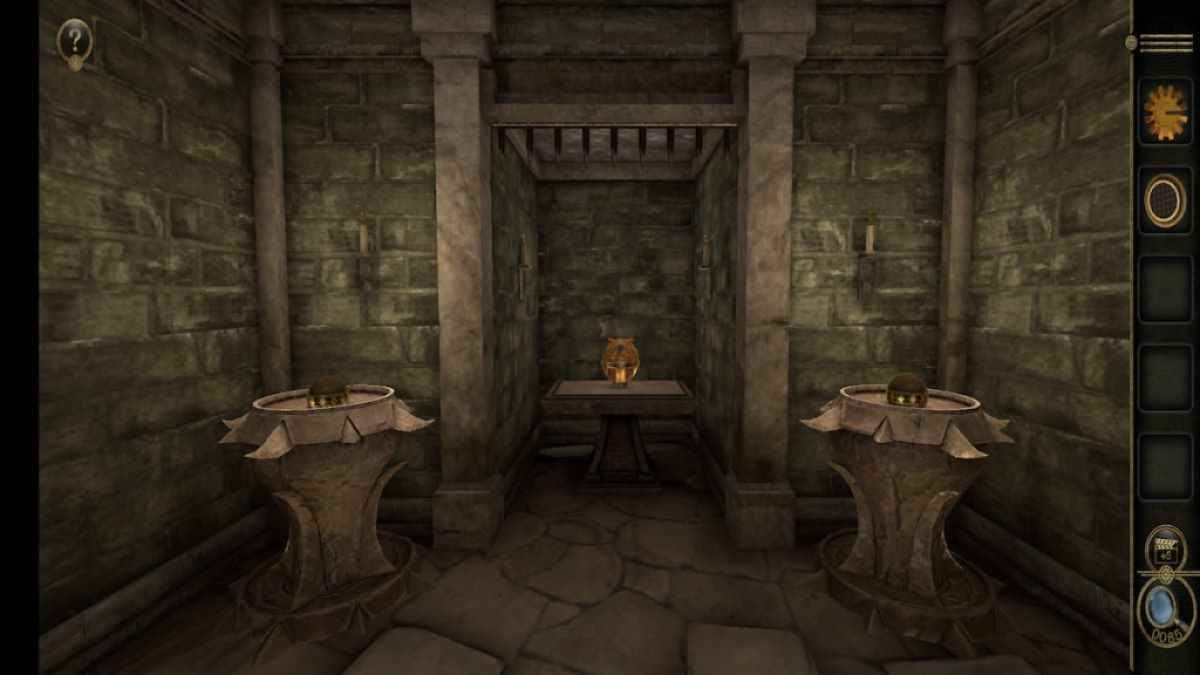
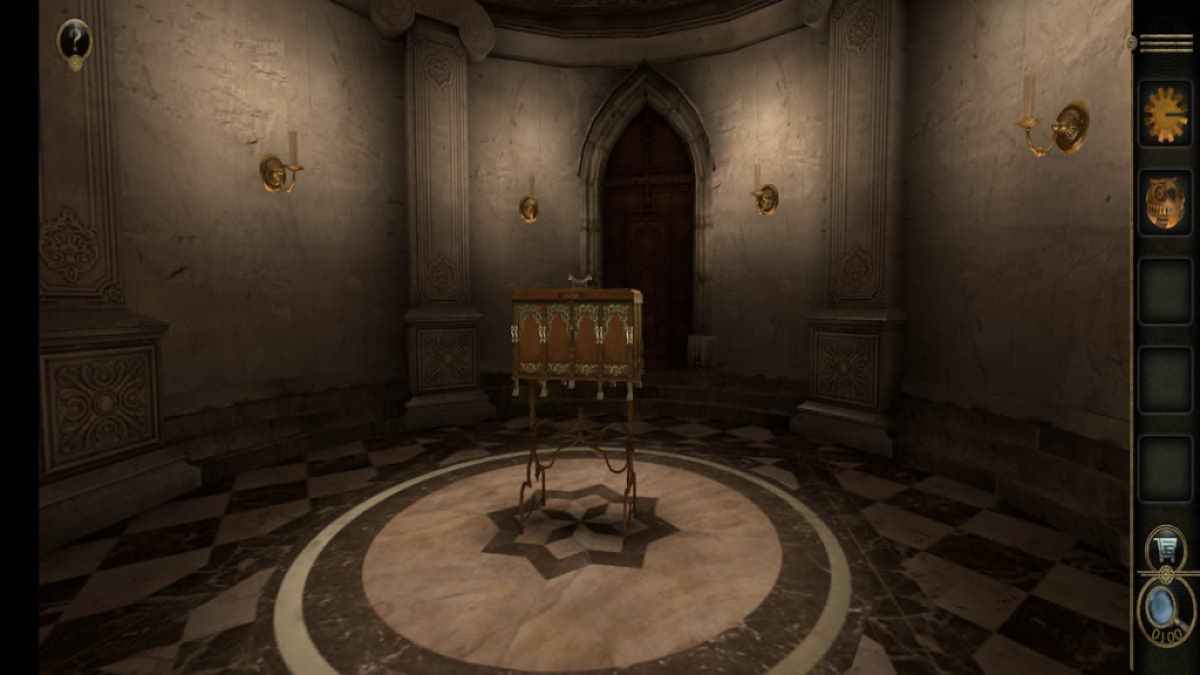
Pedestal room puzzle
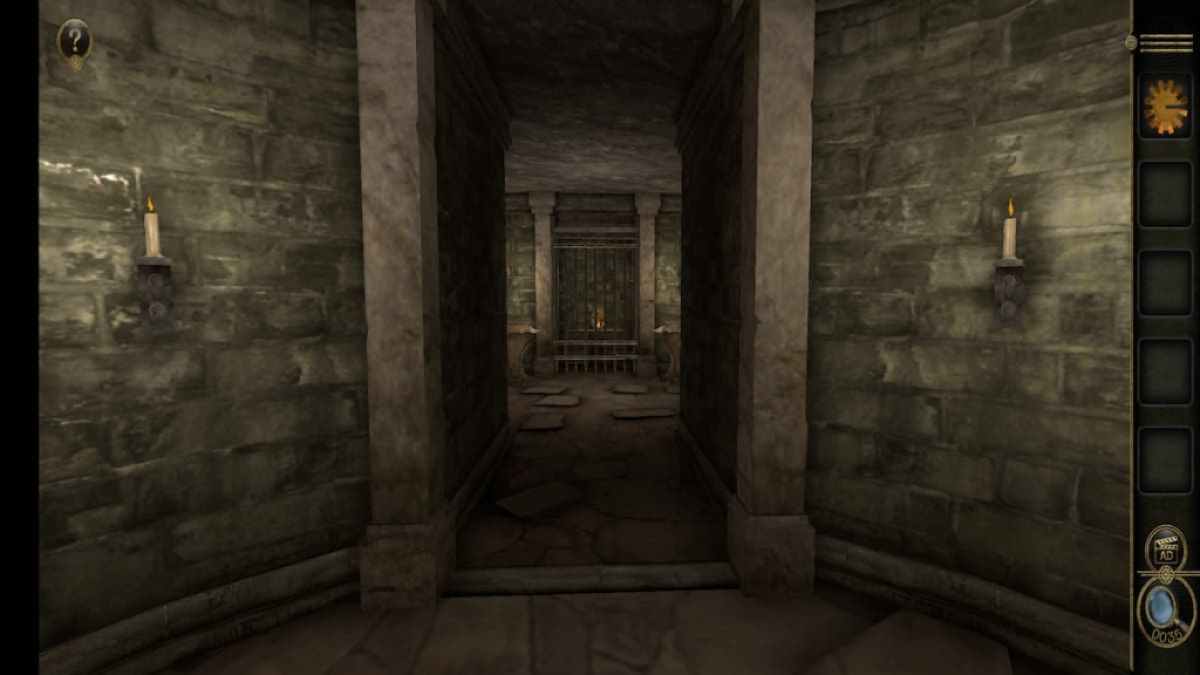
participate the doors has you face a hallway with a closed in room access obliterate on the right bulwark and an open corridor on the left .
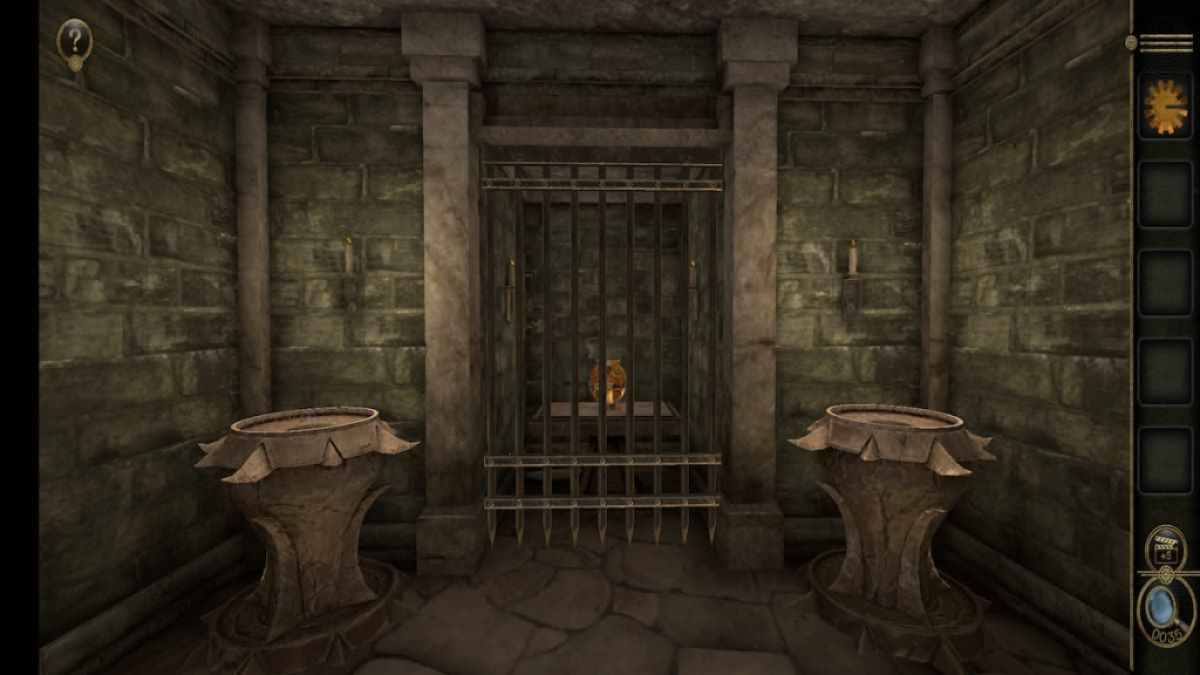
manoeuver straight into the next elbow room , which has two I. F. Stone footstall on either side of a cell .
Spin the correct pedestal clockwise to get a Metal Button .

Screenshot by Pro Game Guides
Spin the remaining pedestal clockwise to get a Small Key . Leave this puzzler for now and return to the master way .
In the main room , turn to the left to view a room with a statue .
enrol the room to approach the puzzle .
Screenshot by Pro Game Guides
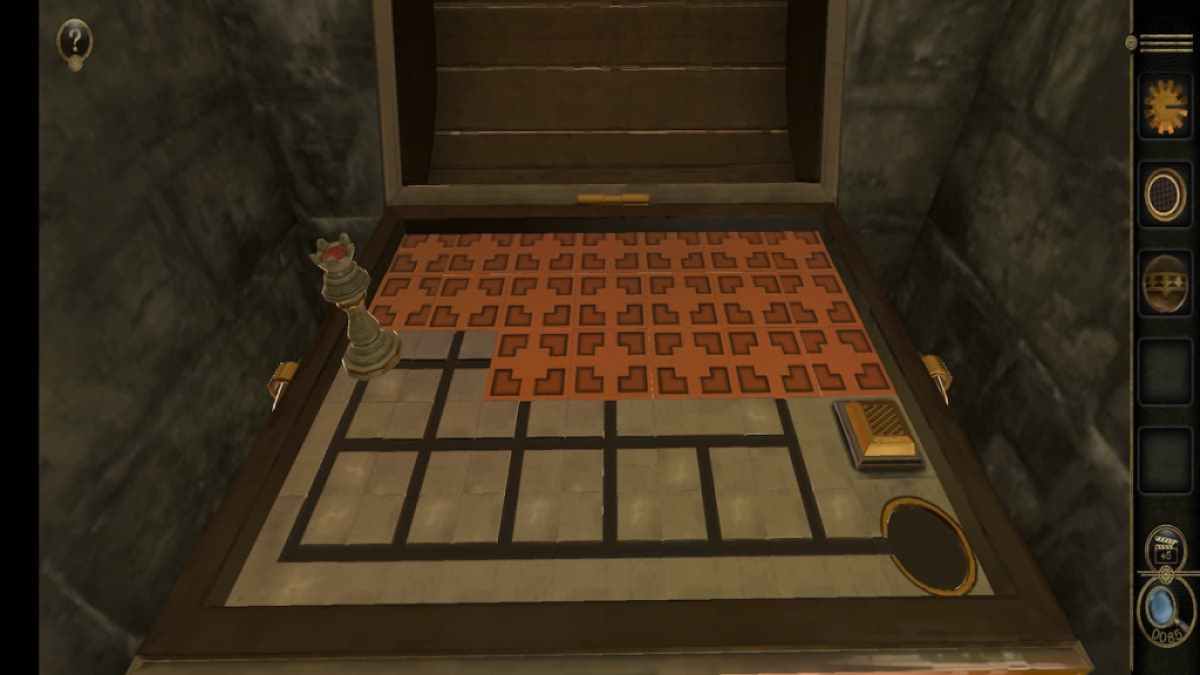
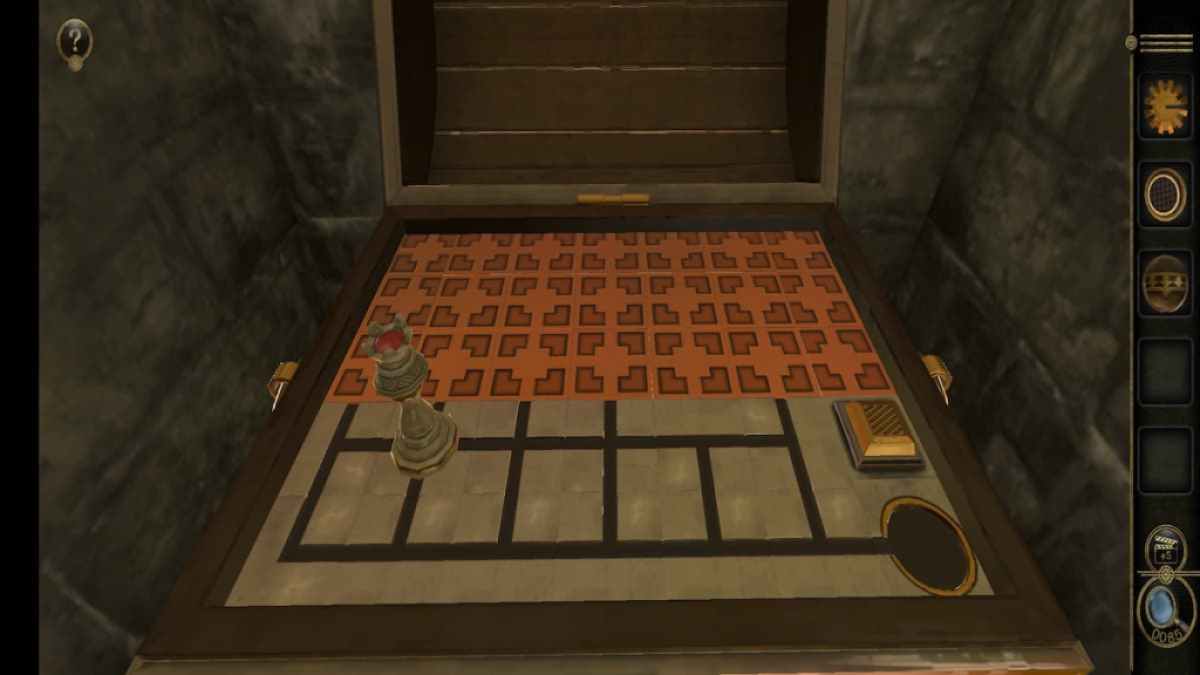
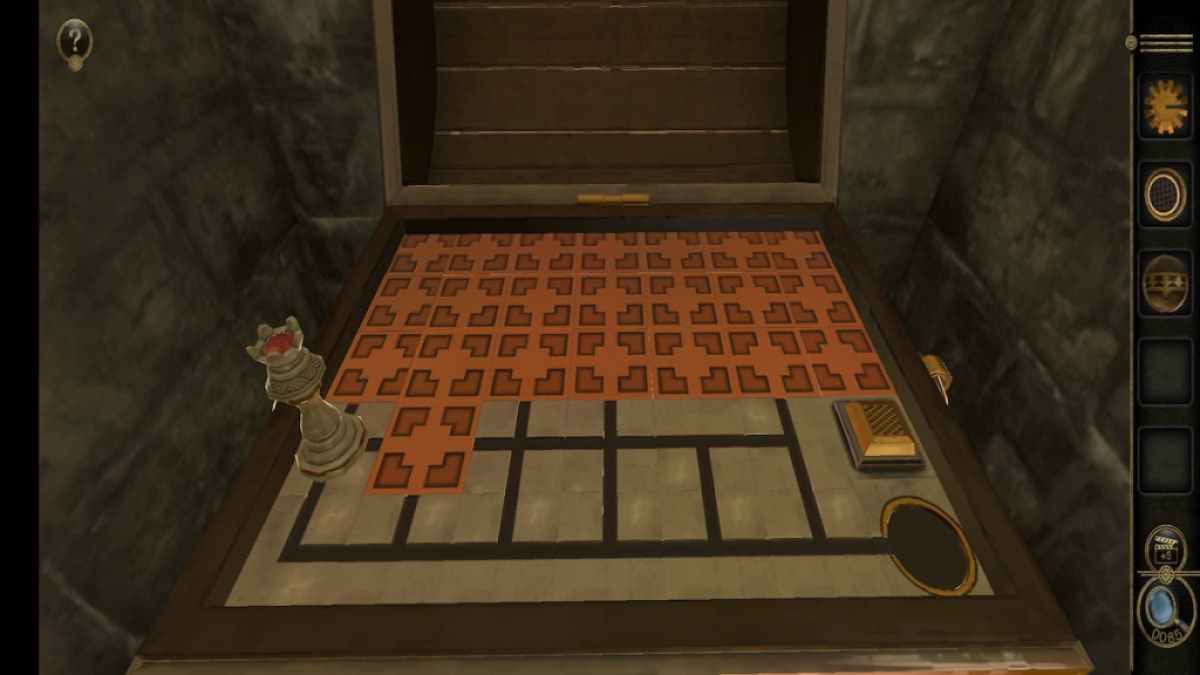
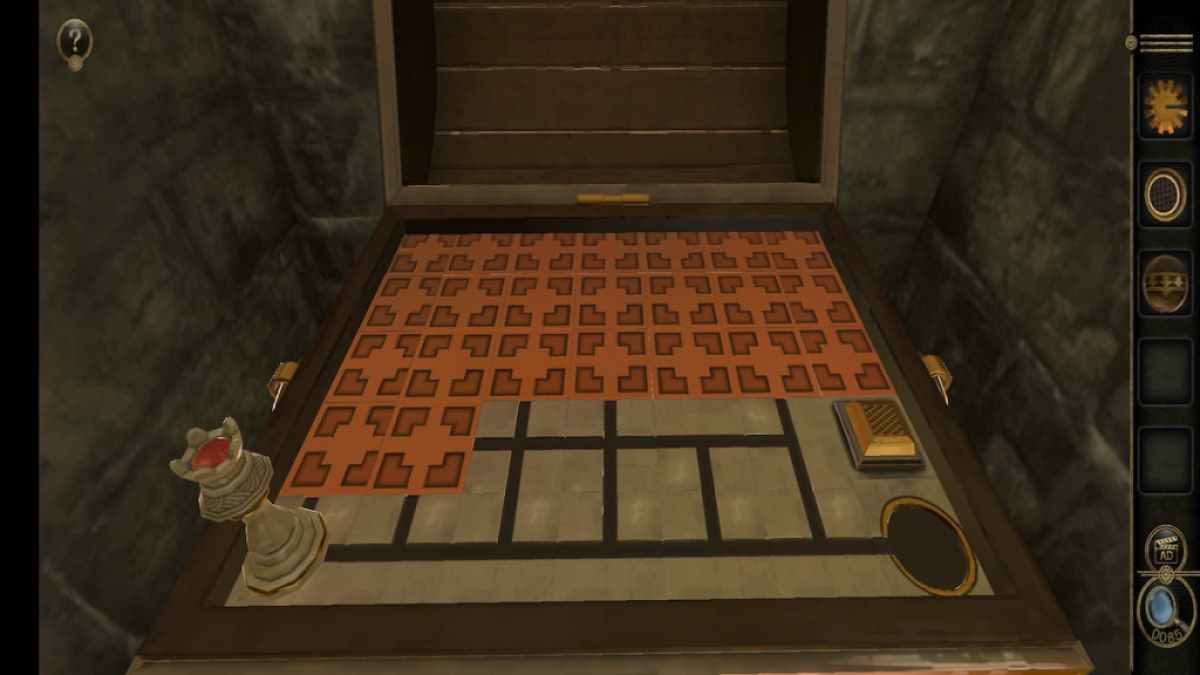
rip the four lever on the left and proper walls to move the small-arm of the chute around .
The puzzle is completed when every slice of the chute lines up in the centre .
This collapse you the first Heavy Metal Ball .
Screenshot by Pro Game Guides
Insert the Key into the locked door and go around it to reveal a tiny way with a locked thorax .
Opening the thorax reveals a chessboard .
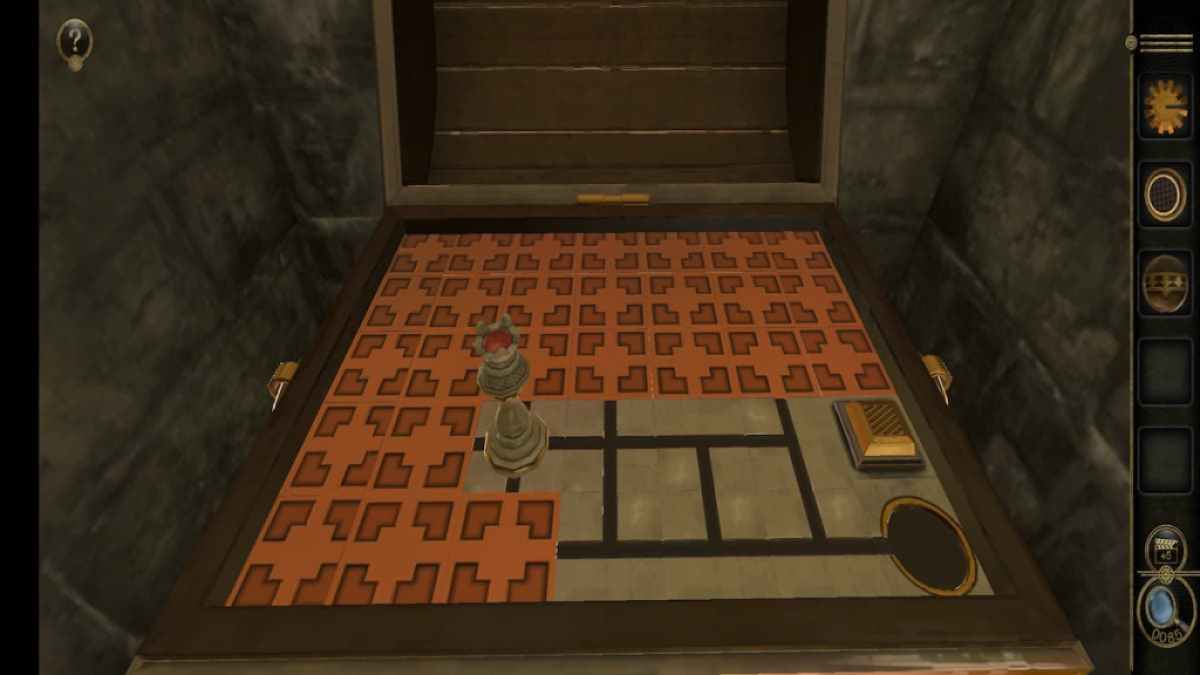
The goal of this mystifier is to make the faggot perish over every square and end up at the round platform in the bottom left .
Screenshot by Pro Game Guides
Move the queen regnant right one space .
Move the queen up one space .
slither the queen right two spaces .
Screenshot by Pro Game Guides
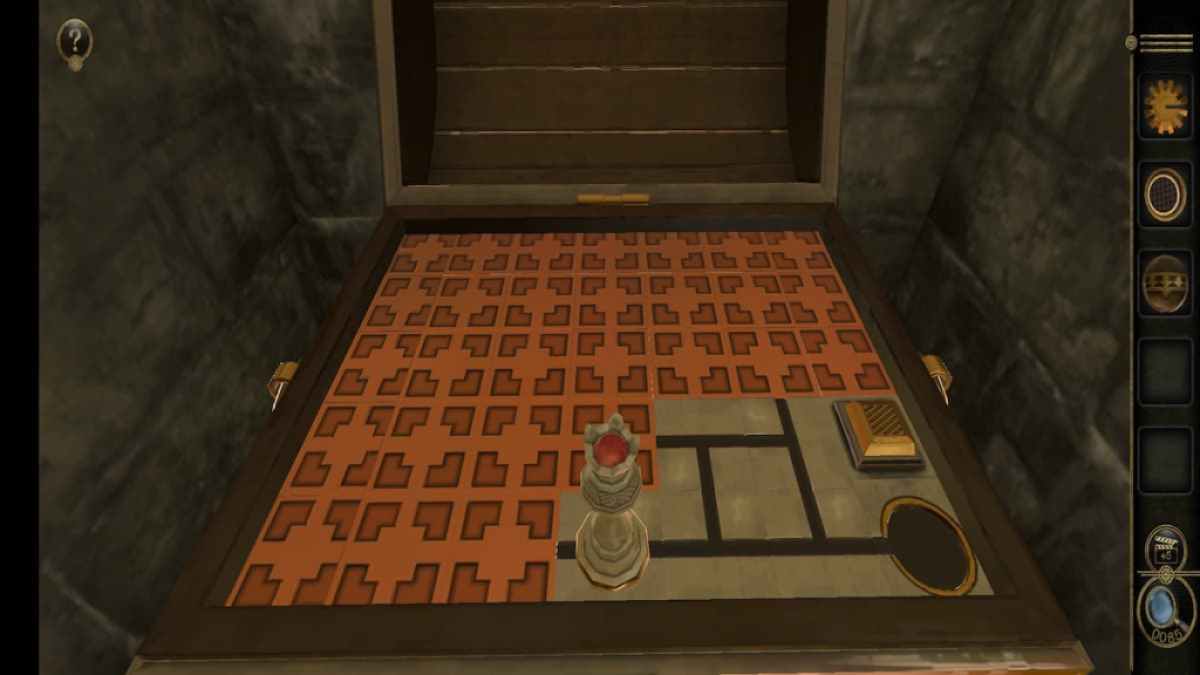
Move the queen down one quad .
Push the queen one space to the right .
slither the queen regnant up two spaces .
Screenshot by Pro Game Guides
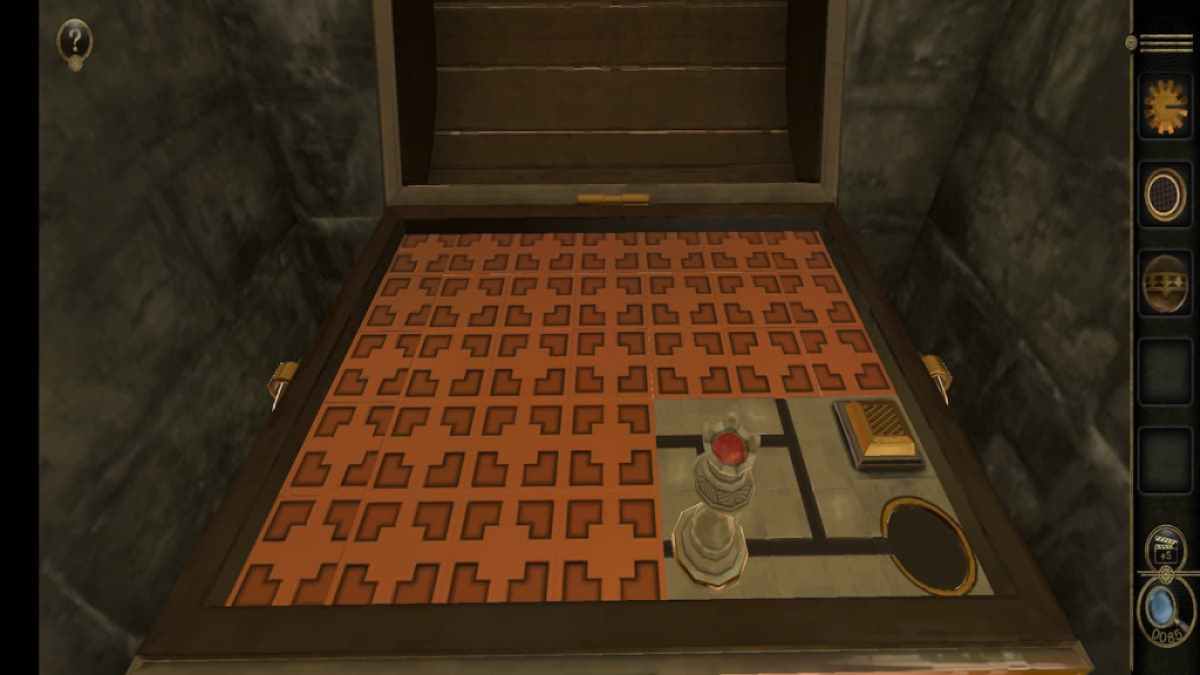
Move the queen to the left four spaces .
labour the queen mole rat down one block .
Push the fairy forget one cylinder block .
Screenshot by Pro Game Guides
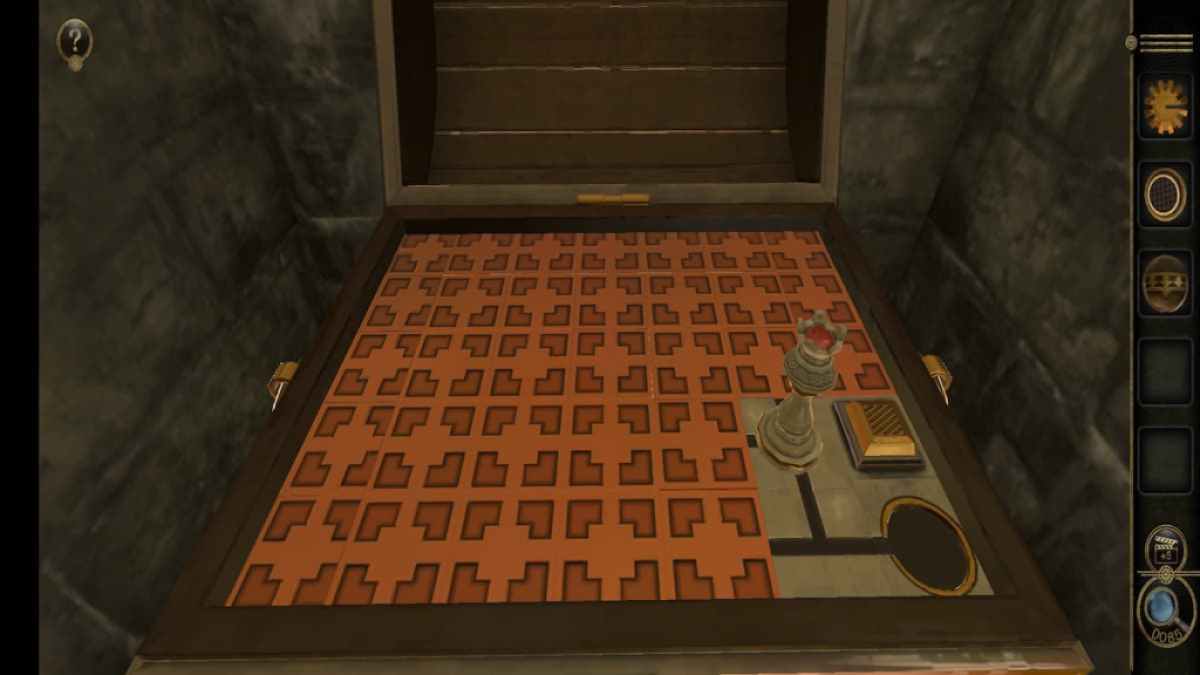
Move the queen up one city block .
Move the tabby left one pulley-block .
slip the queen down two spaces .
Screenshot by Pro Game Guides
promote the queen ripe one space .
Slide the queen one space to the left .
Move the queen one space down .
Screenshot by Pro Game Guides
Move the queen right two spaces .
Slide the queen up one move .
Slide the queen one space to the right .
Screenshot by Pro Game Guides
slip the faggot proper one space .
press the queen down one space .
Solving this puzzle establish you the 2nd Heavy Metal Ball .
Screenshot by Pro Game Guides
Completing the pedestal puzzle
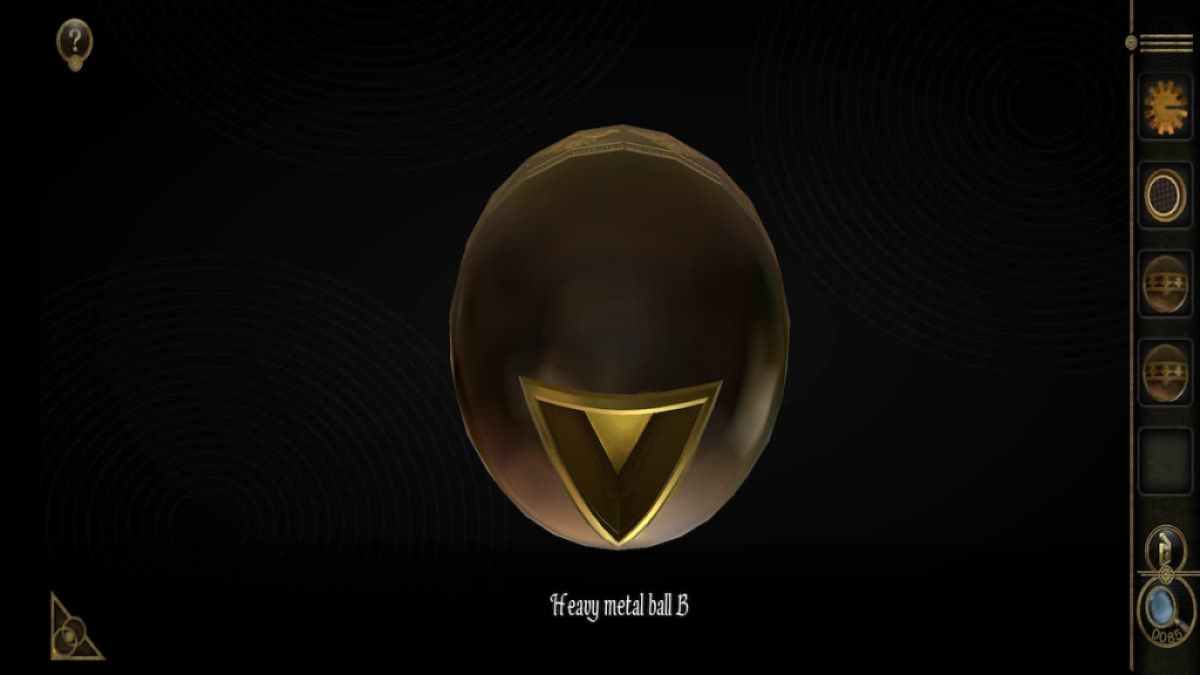
Open up Heavy Metal Ball A in your inventory and spread out it to view the square hole in the bottom .
Open Heavy Metal Ball B in your inventory and rotate it to regard the triangular hole in the bottom .
Place Heavy Metal Ball B on the right pedestal .
Screenshot by Pro Game Guides
Place Heavy Metal Ball A on the left over plinth to unlock the gates to look at the owl puzzle .
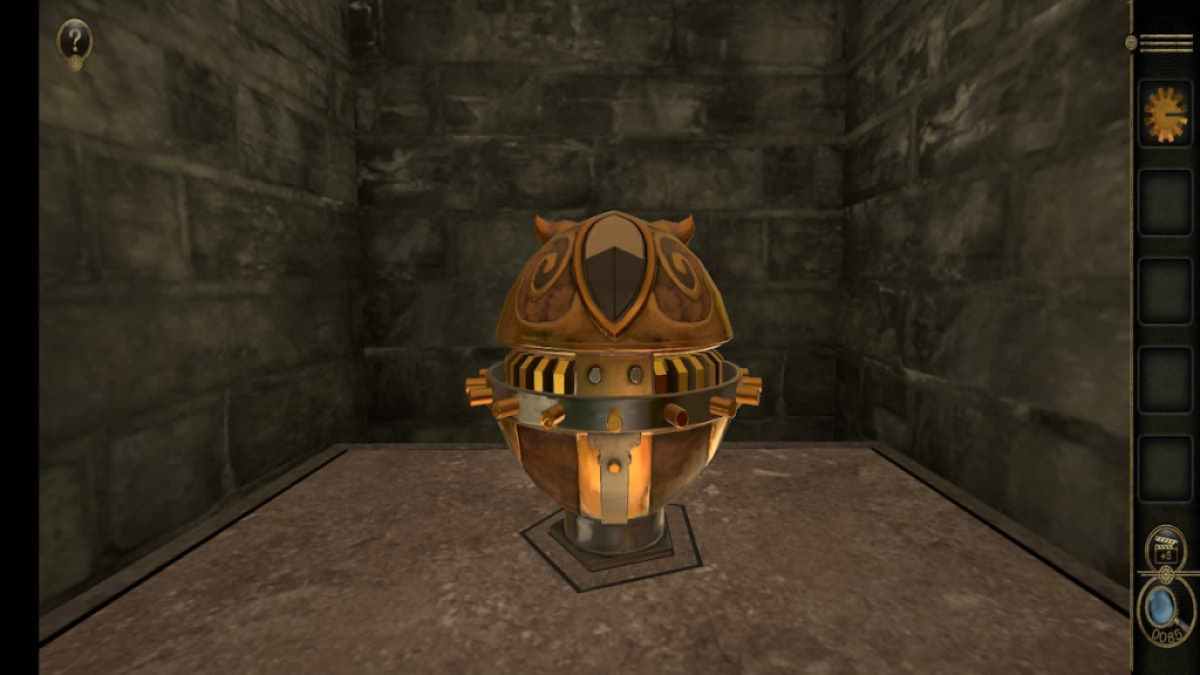
Owl puzzle
tapdance the owl ’s beak to unlock a puzzle at the back of its head .
set the Metal Button in the center .
The sliders are used to promote the smaller gear between the four great power train . Pressing the button stops the larger gear for a moment so all four of the holes between the gear can be line up .

Screenshot by Pro Game Guides
Let the paraphernalia go around until the hole reach the top , completing the first part of the puzzle .
This unlock the owl , give you the Extremely Heavy Mechanical Ball item .
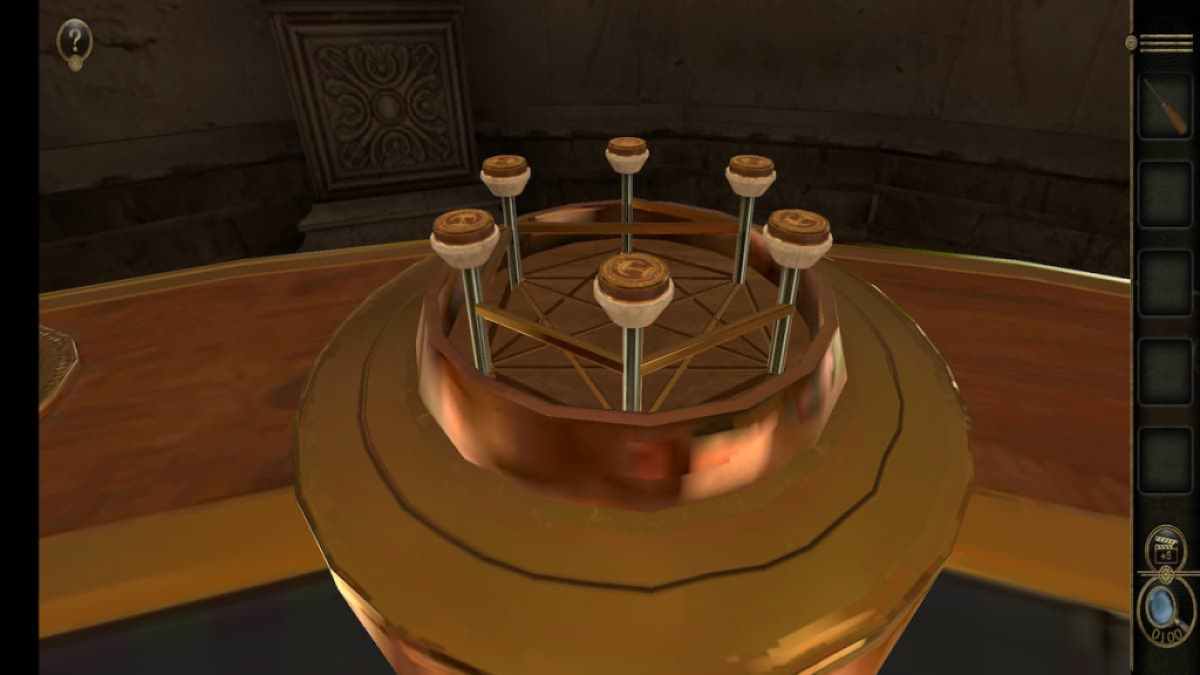
Lever box puzzle
Completing the pedestal room make one of the castle ’s towers to shrink into the building , with a gear sticking out .
spin the geared wheel makes the tug ascend to reveal a door .
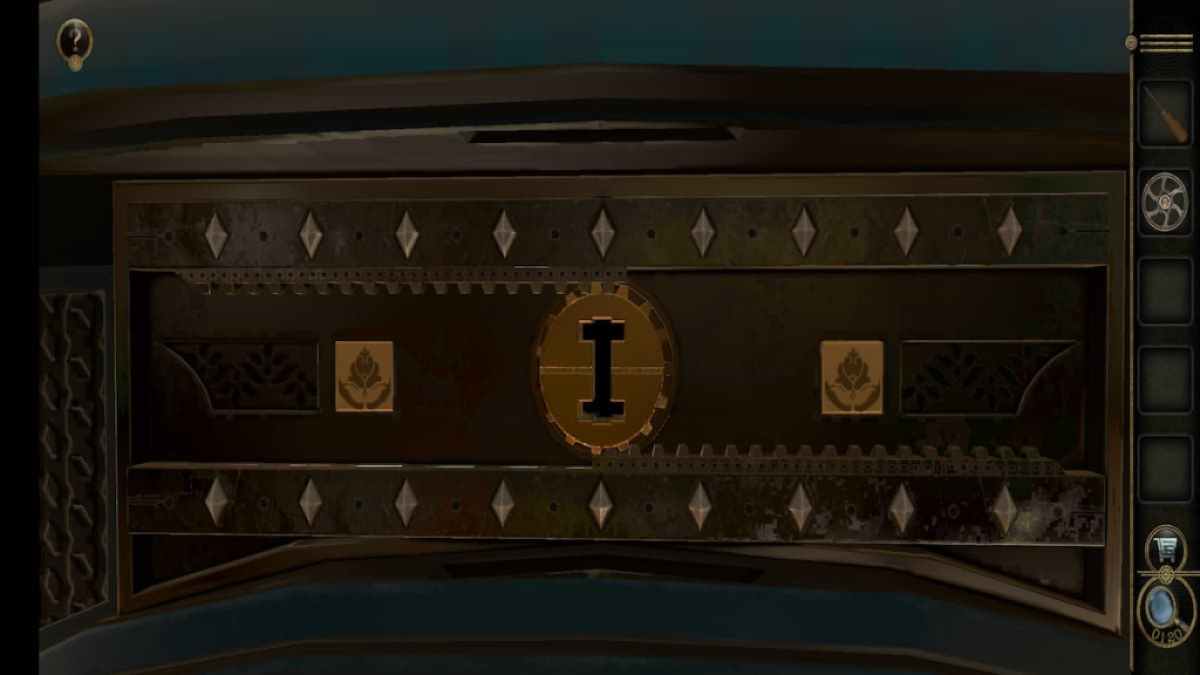
This room has a box with eight handles , plus a space in the front for an item .

Screenshot by Pro Game Guides
The box ’s first puzzler involves slip all of the handles so they are at the top of their row at the same time . However , each of the sliders falls after a set menstruum of sentence .
I found it prosperous to move the two handles on the right side of the front first . Then slide the back handles up from right to left and finish by move the two handles on the left-hand side of the front . Solving this teaser gives you a Wooden Statue .
Add the Wooden Statue to the front of the box to unlock the hold on the top .

Screenshot by Pro Game Guides
spread out the grip 360 degree to open up the top of the box .
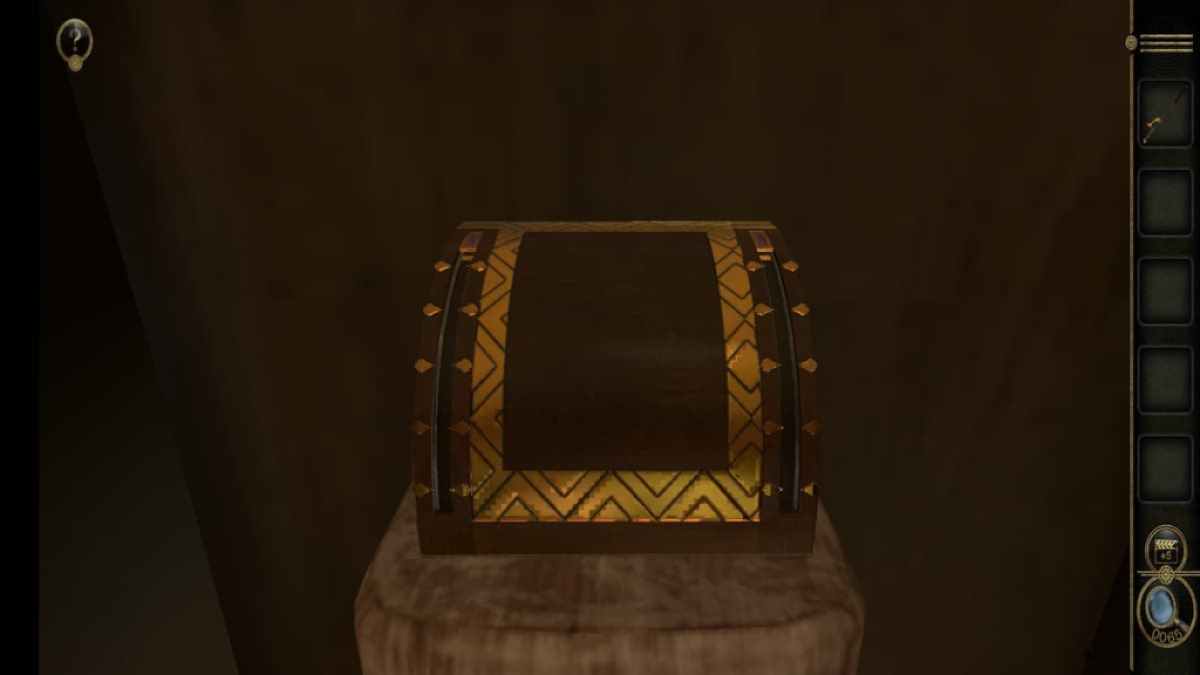
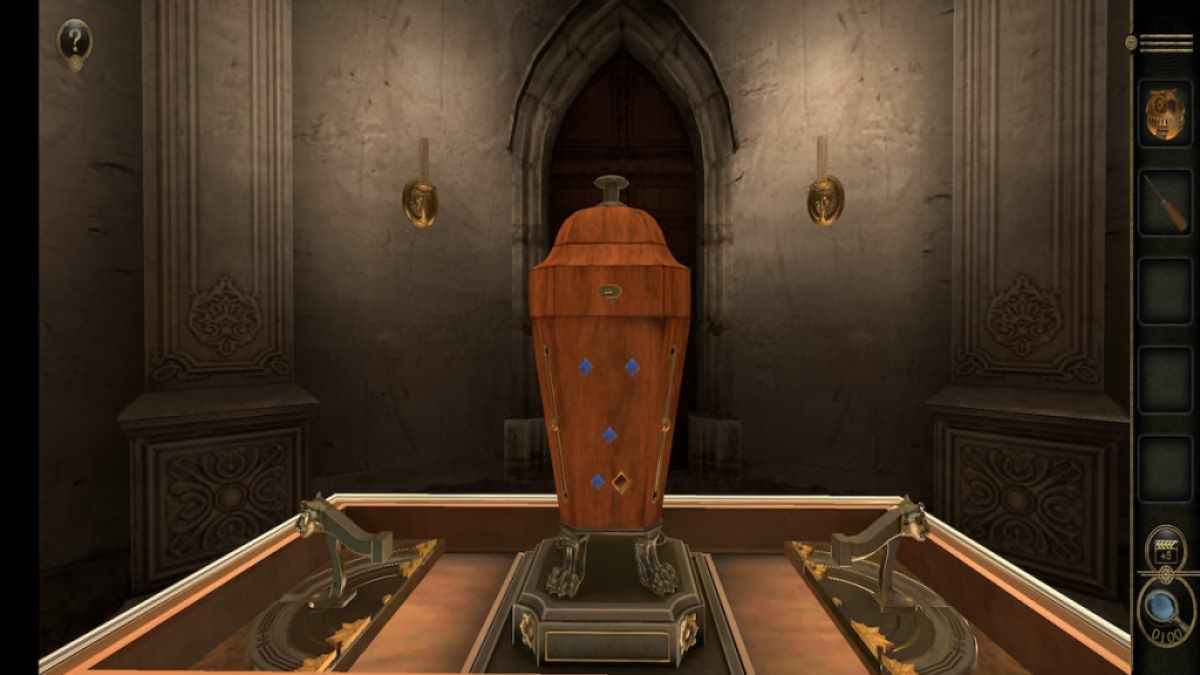
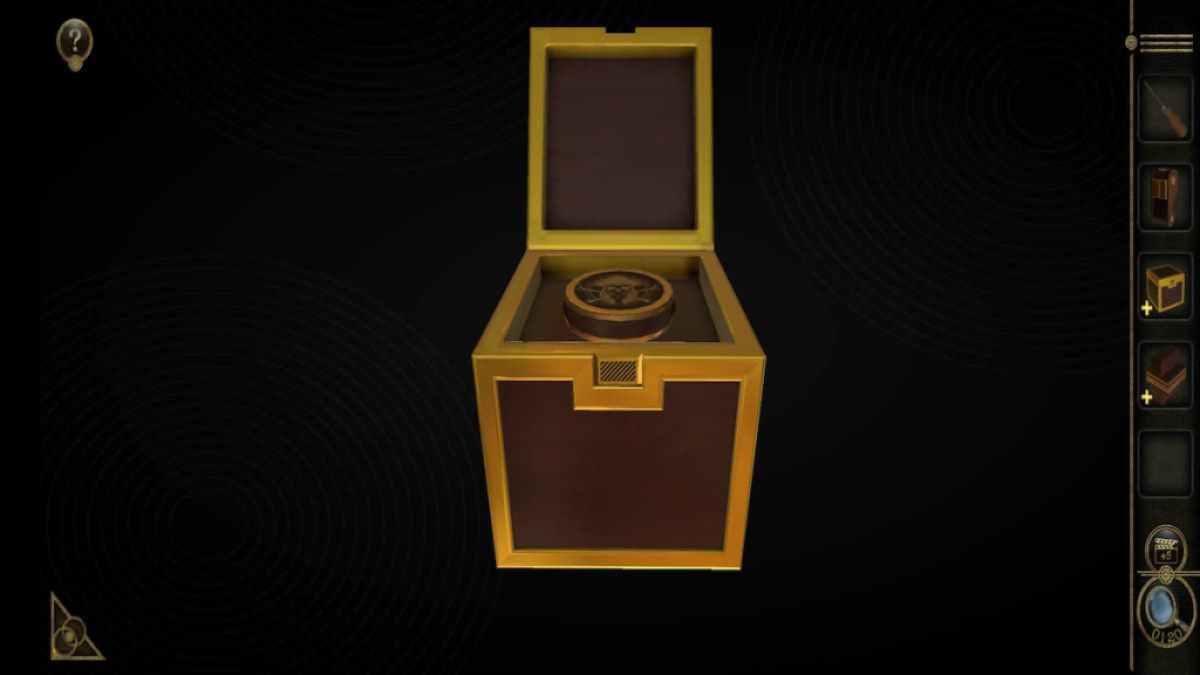
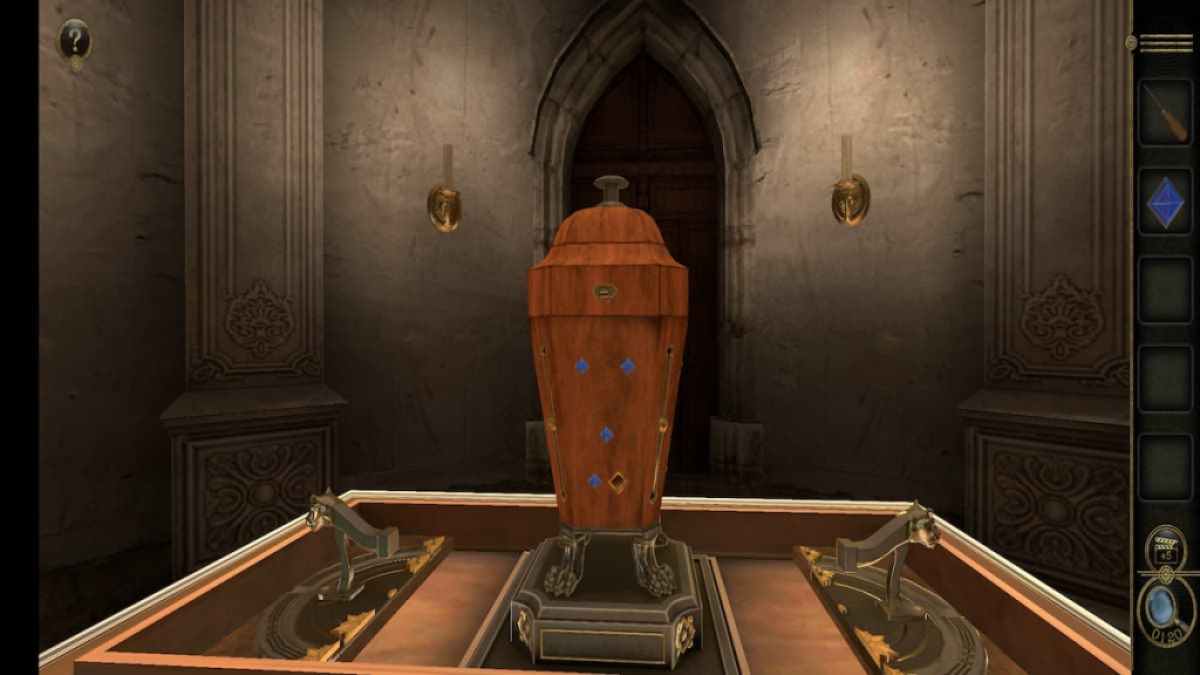
This uncover a wooden urn with azure embed in it . We do n’t have the piece for this puzzle yet , so we ’ll leave it behind for now .
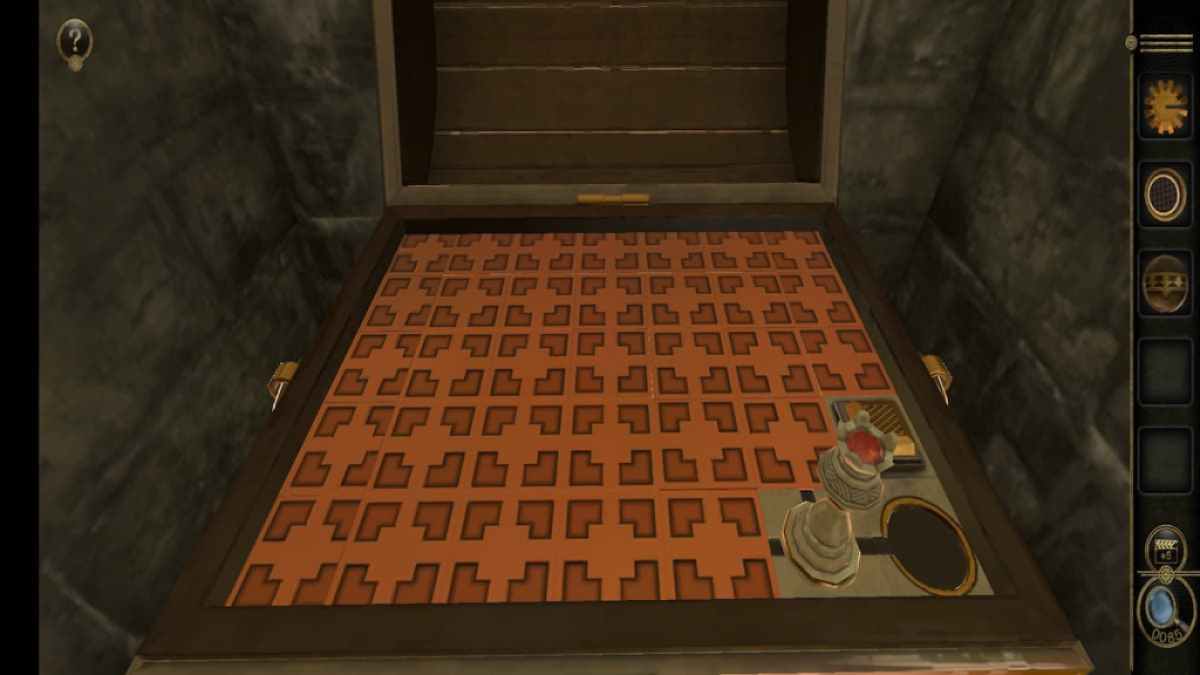
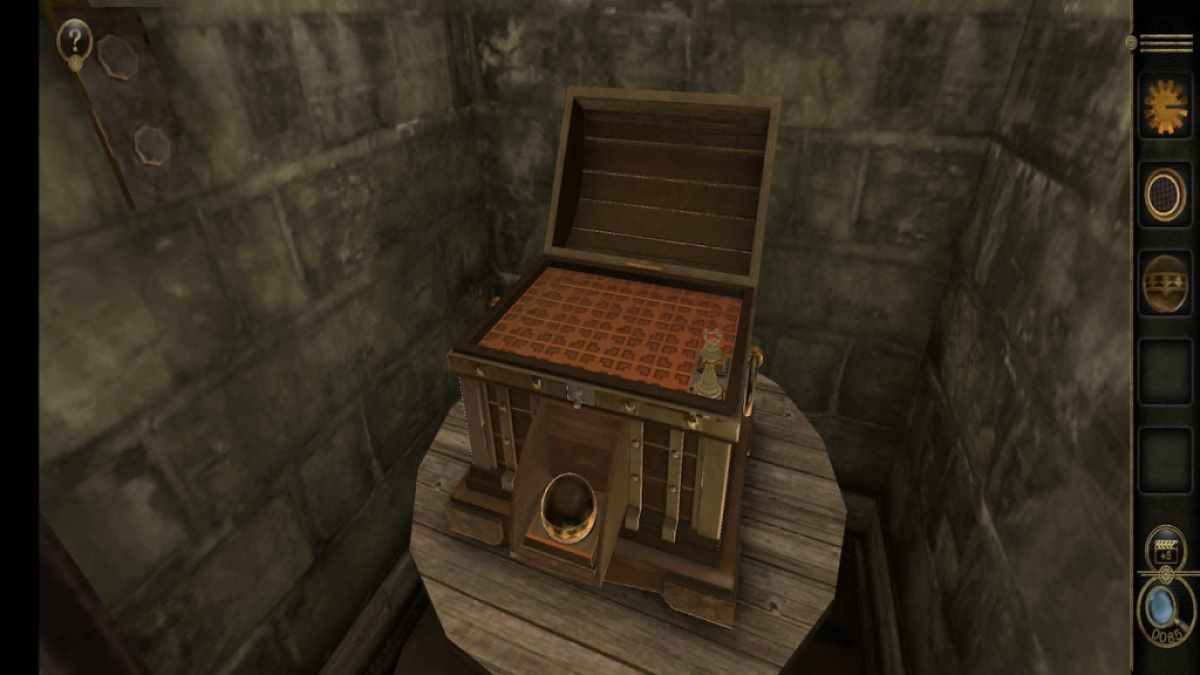
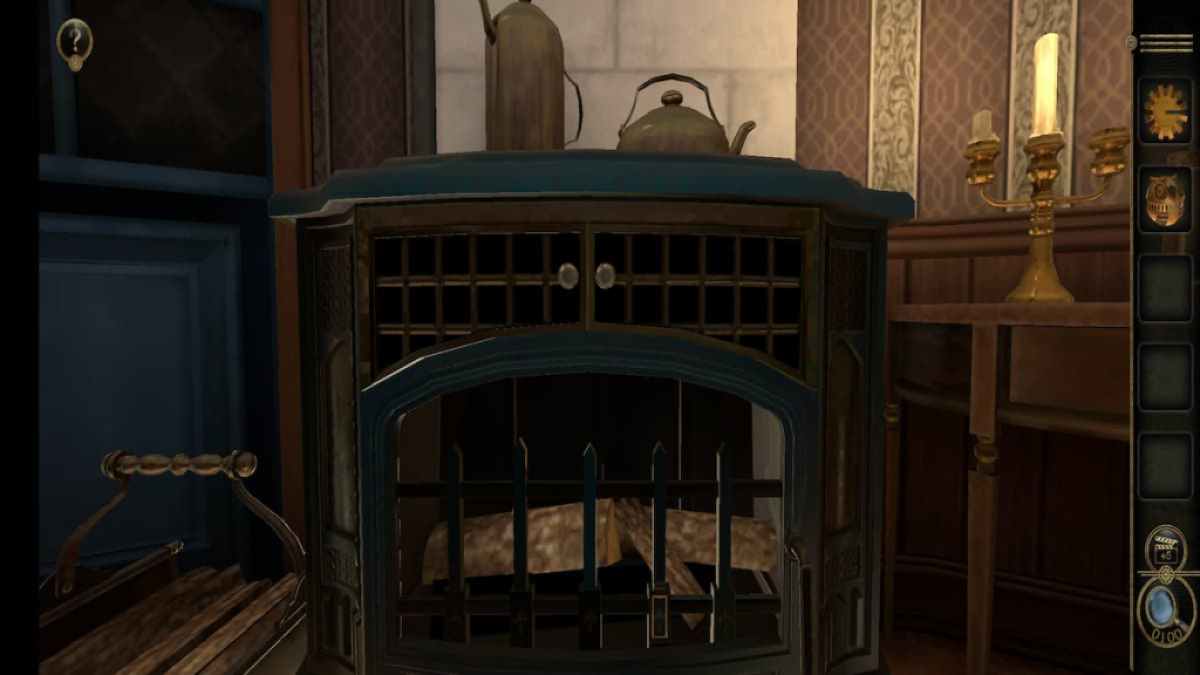
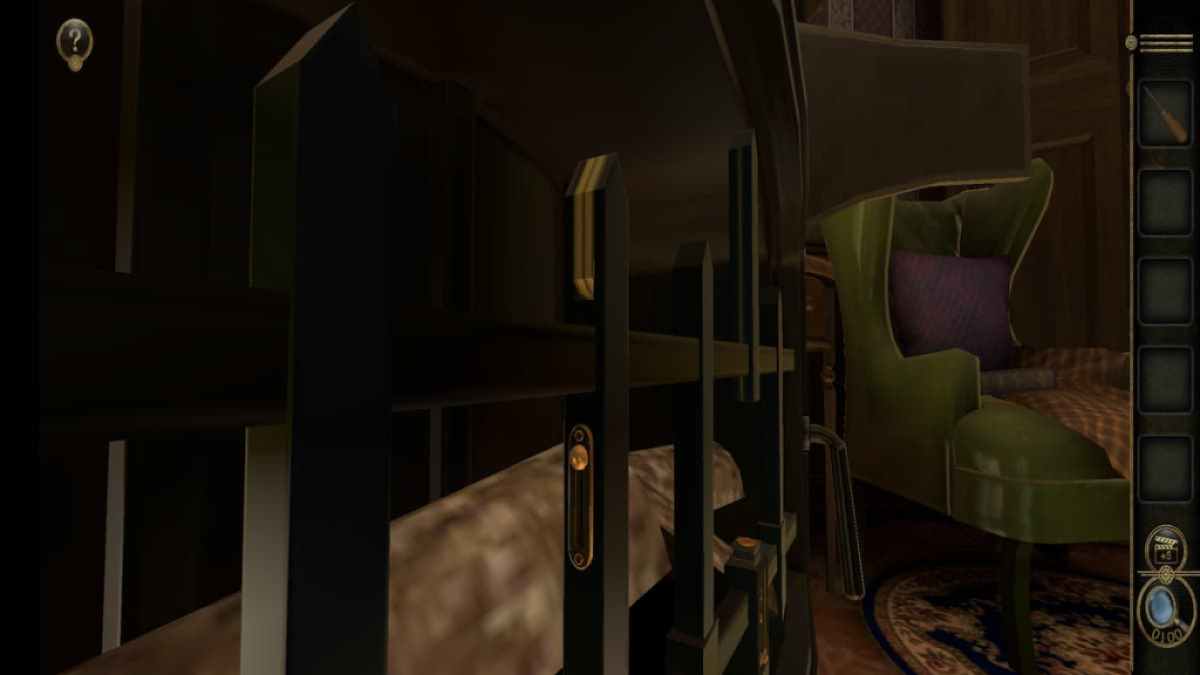
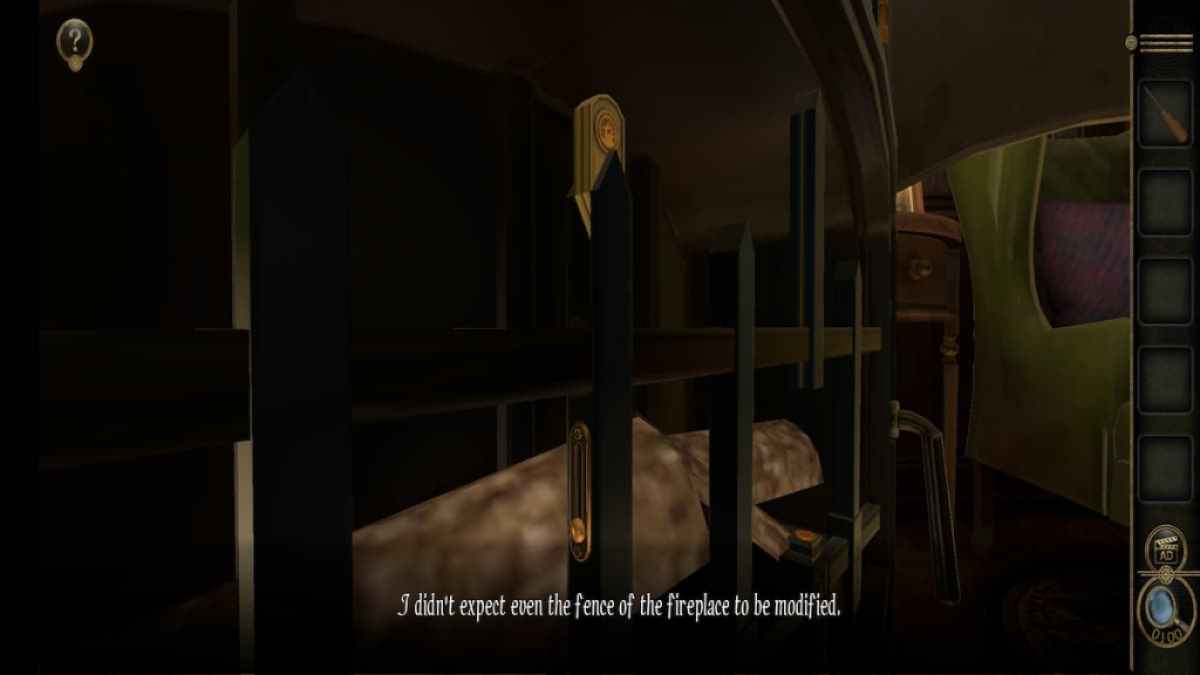
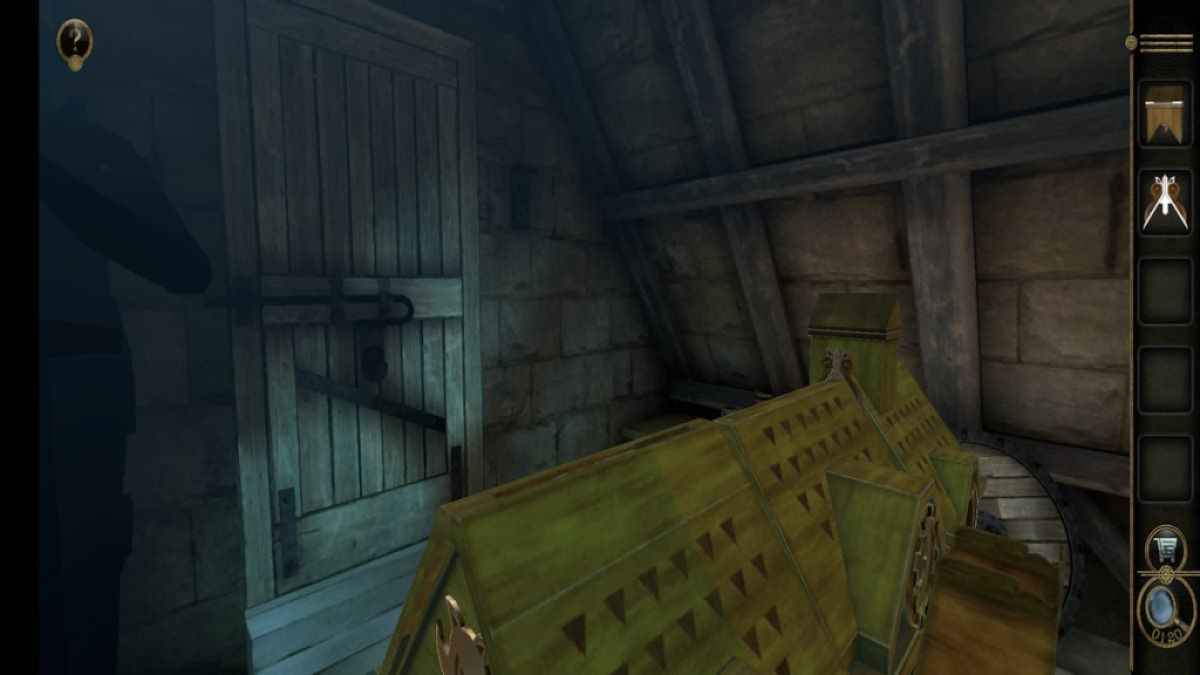
Oven slider puzzle
Exit the castle and regress to the oven in the first elbow room .
The front drawers spread up to reveal a puzzle , which we ’ll pass to later .
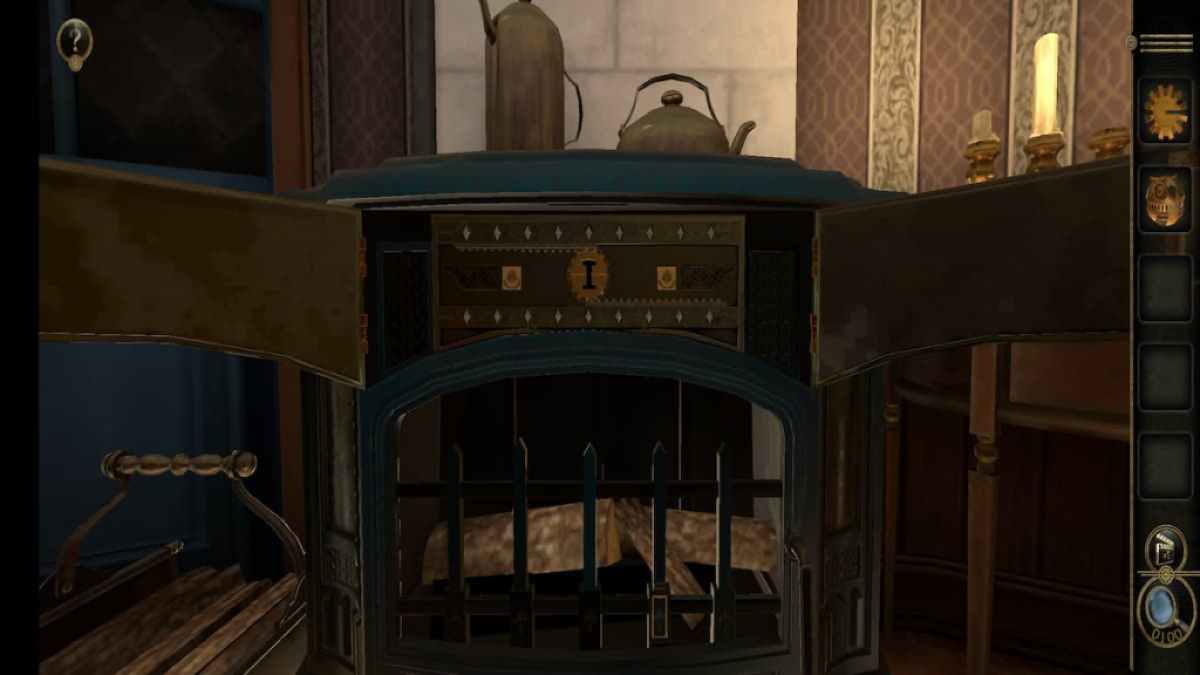
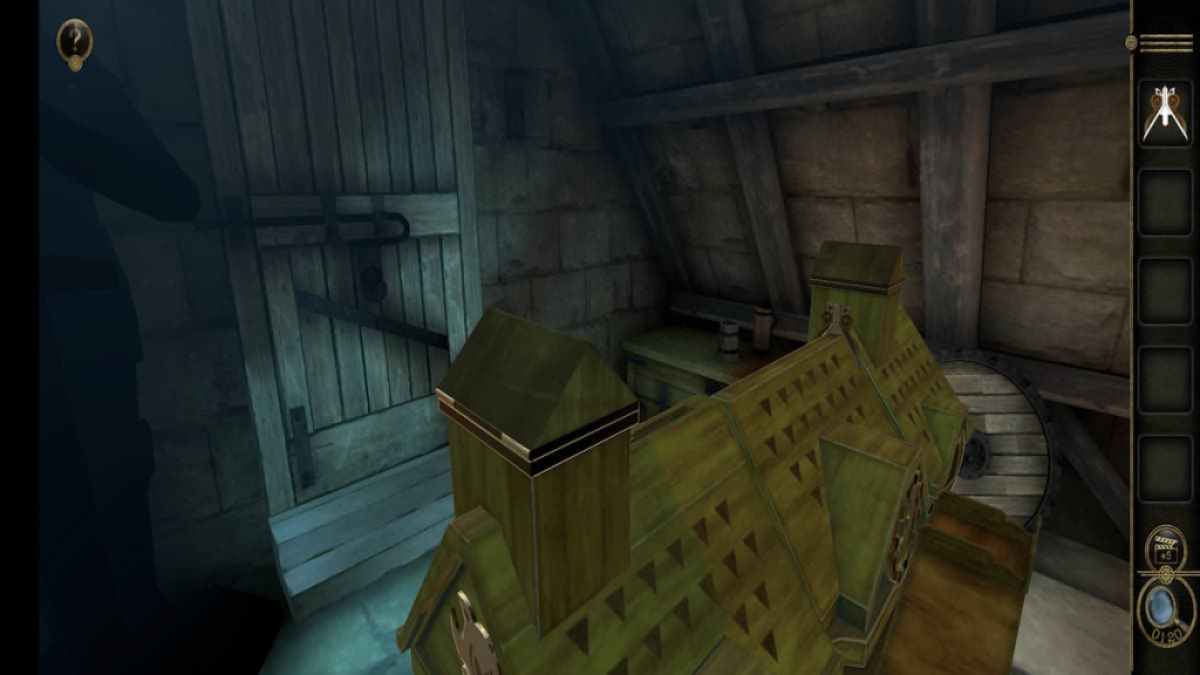
center on the lilliputian orthogonal compartment on the lower right hand of the oven .
Screenshot by Pro Game Guides
Slide it undefended to bring out a mechanism with two gear .
Insert the unusual Gear into the compartment .
This will give you a Screwdriver .
Screenshot by Pro Game Guides
While looking at the oven ’s barroom , rotate the camera to the left to look at a secret slider .
advertize the slider down to unlock a small compartment contain the Metal Badge A.
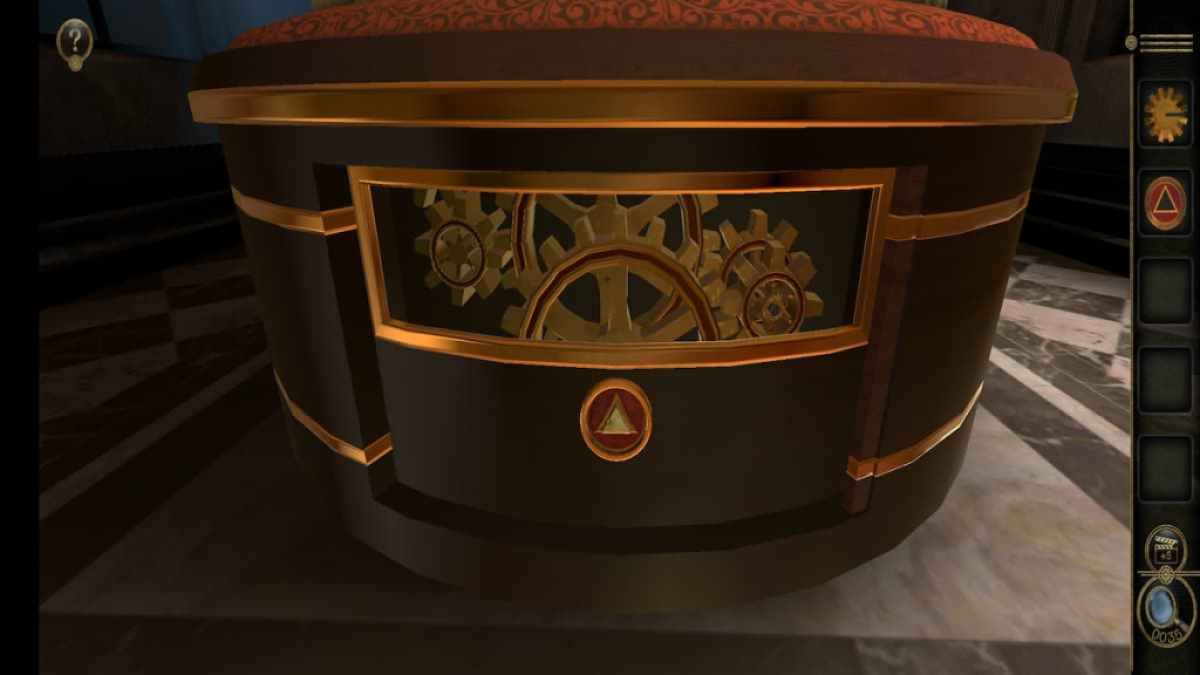
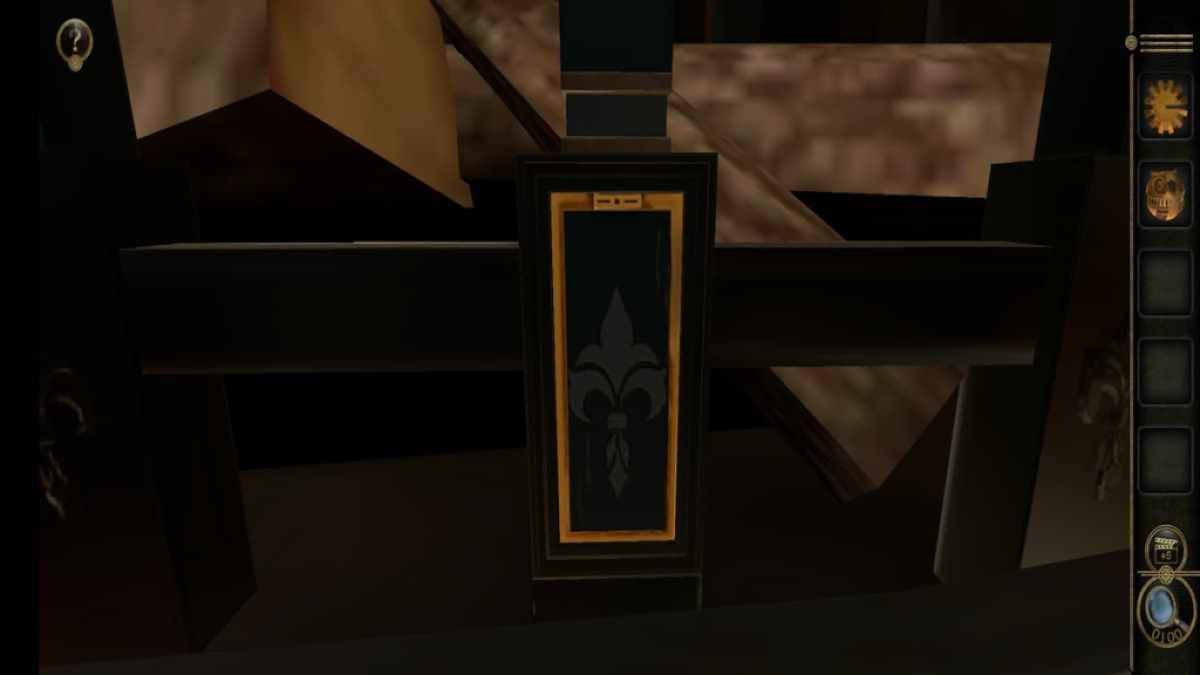
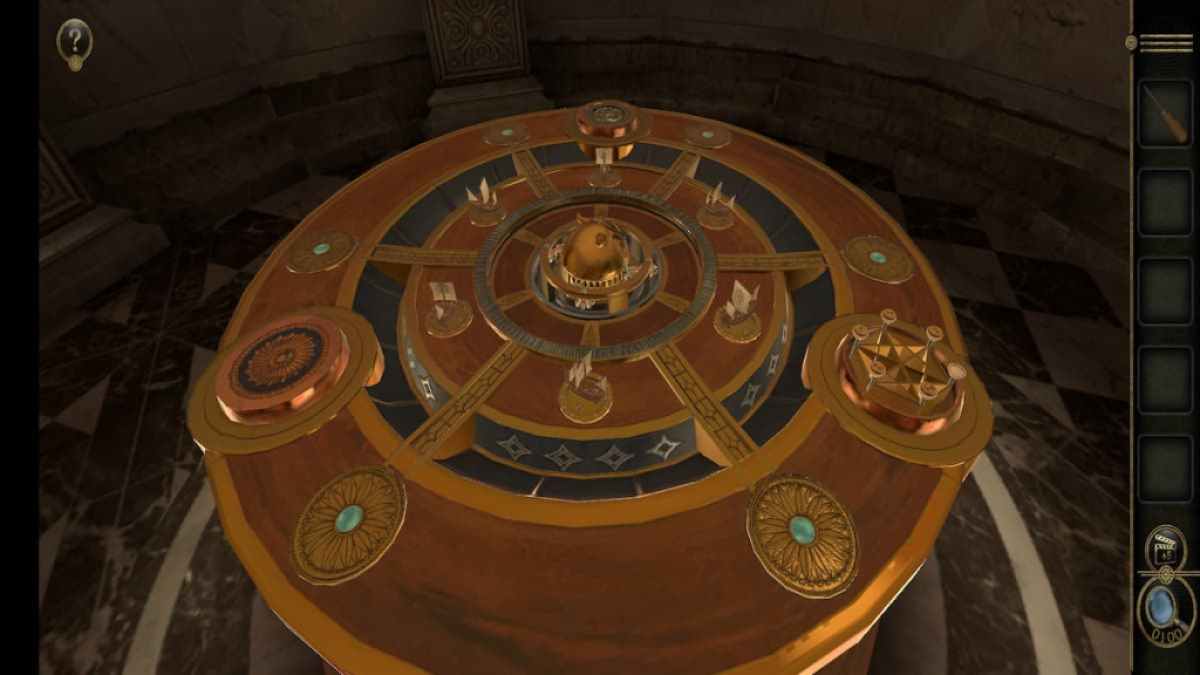
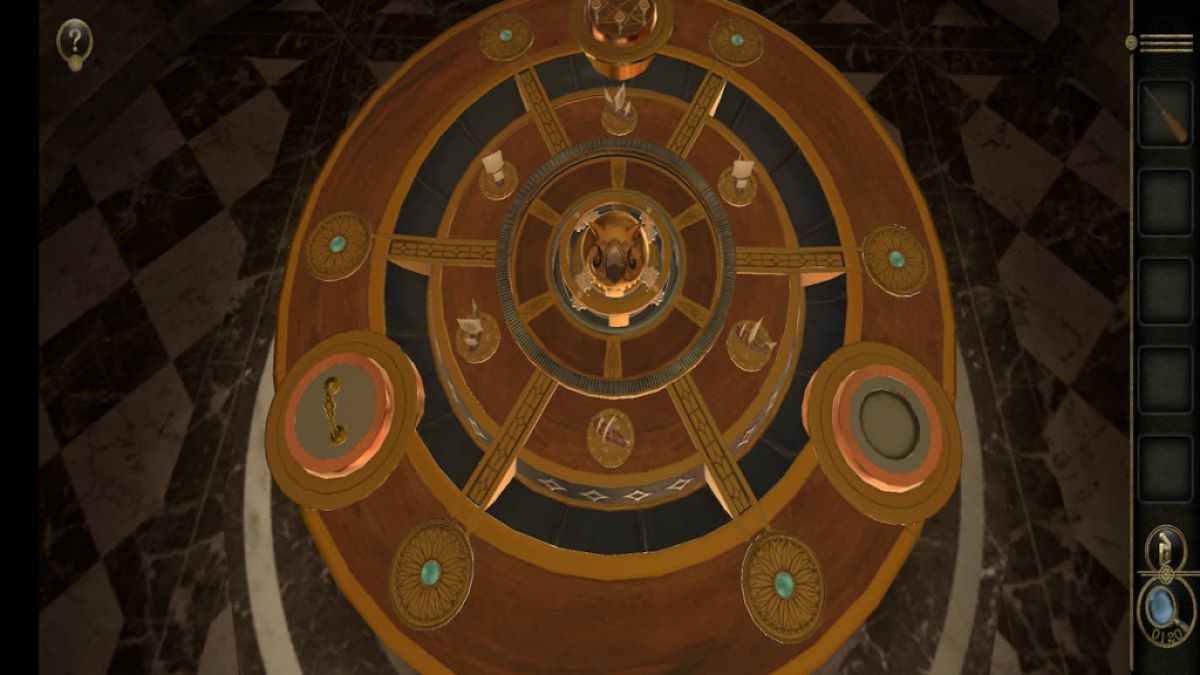
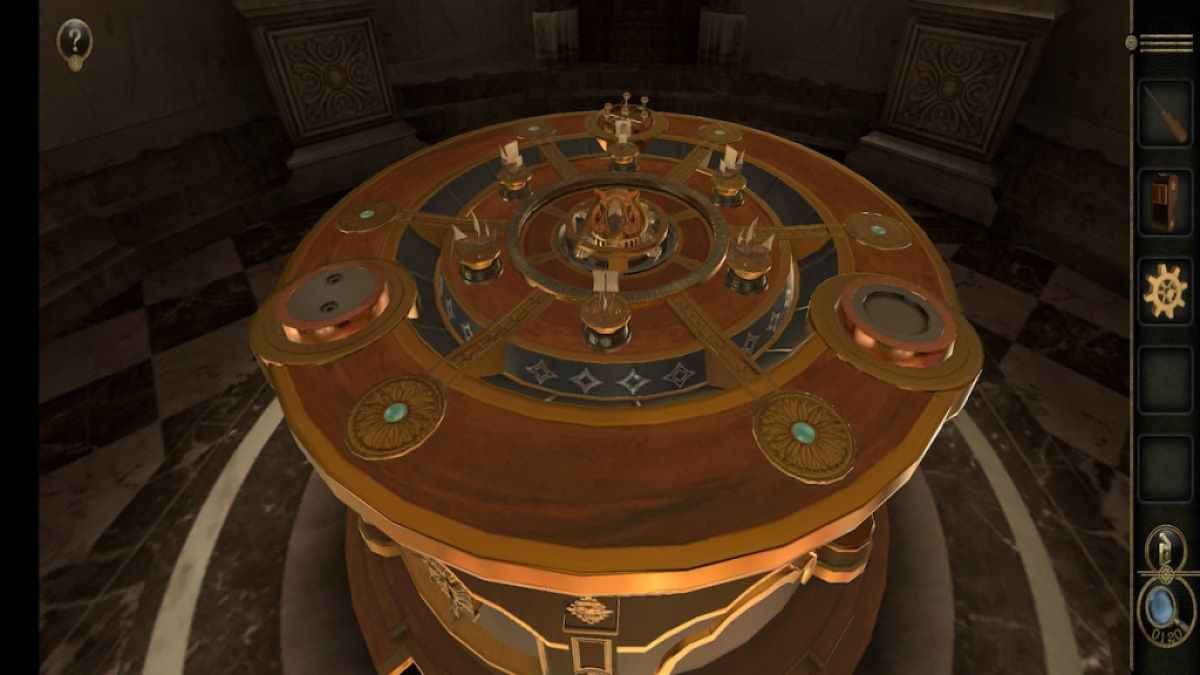
Golden table puzzle part 1
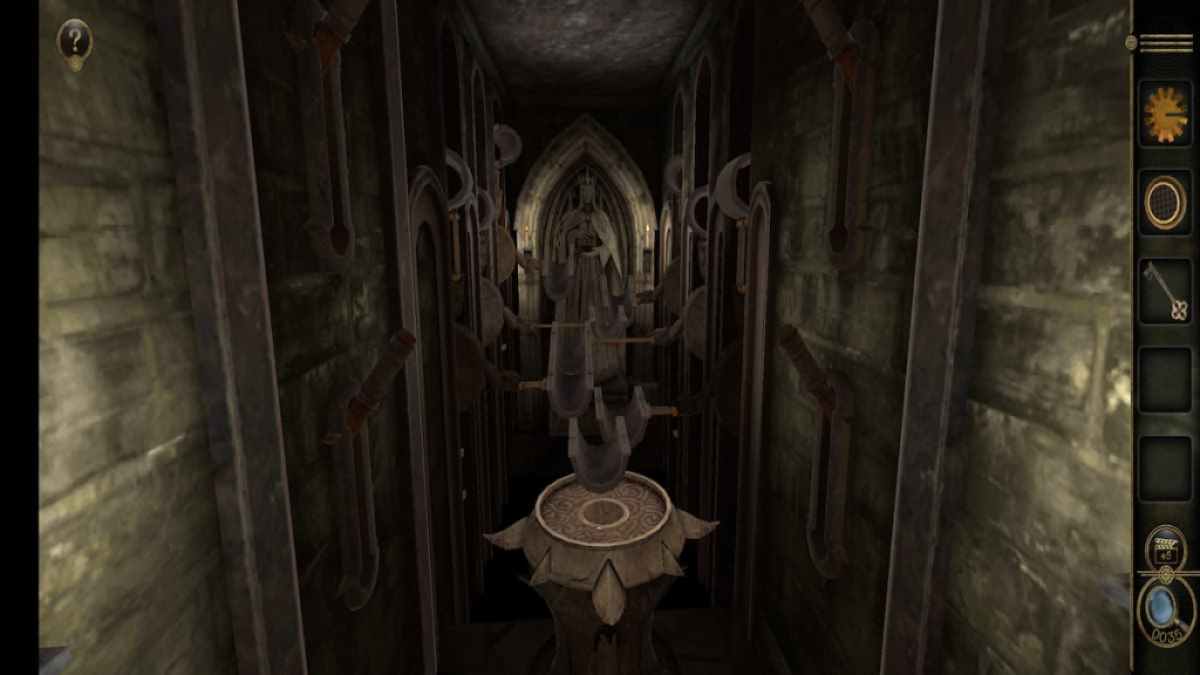
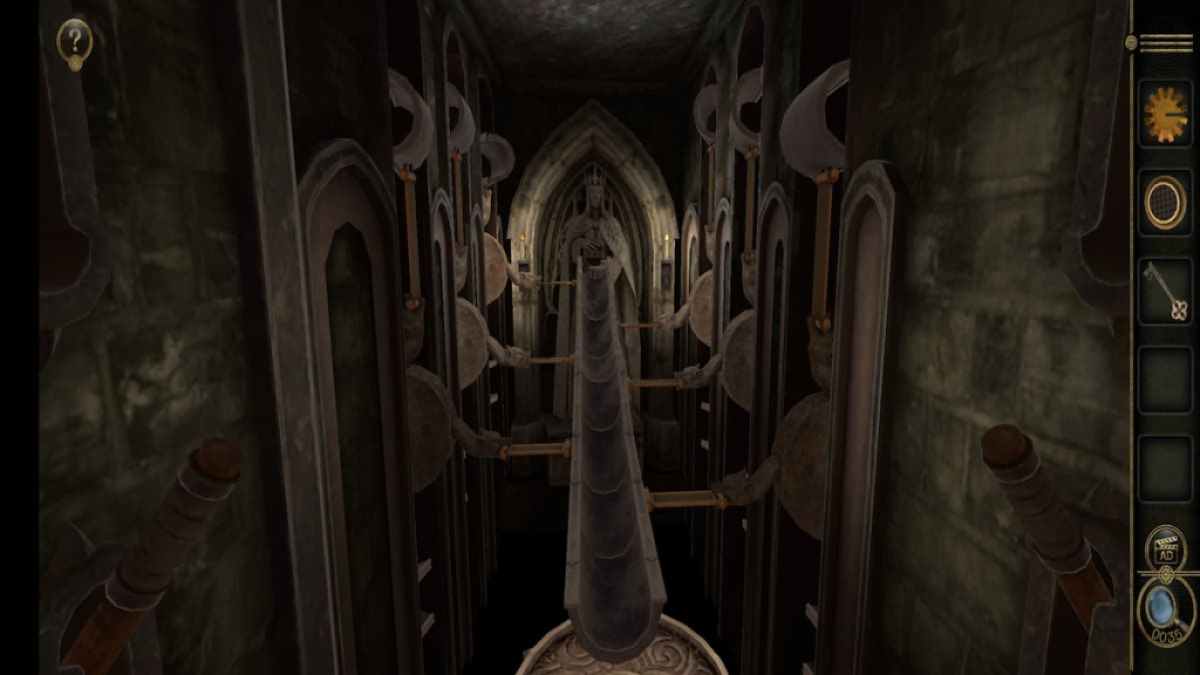
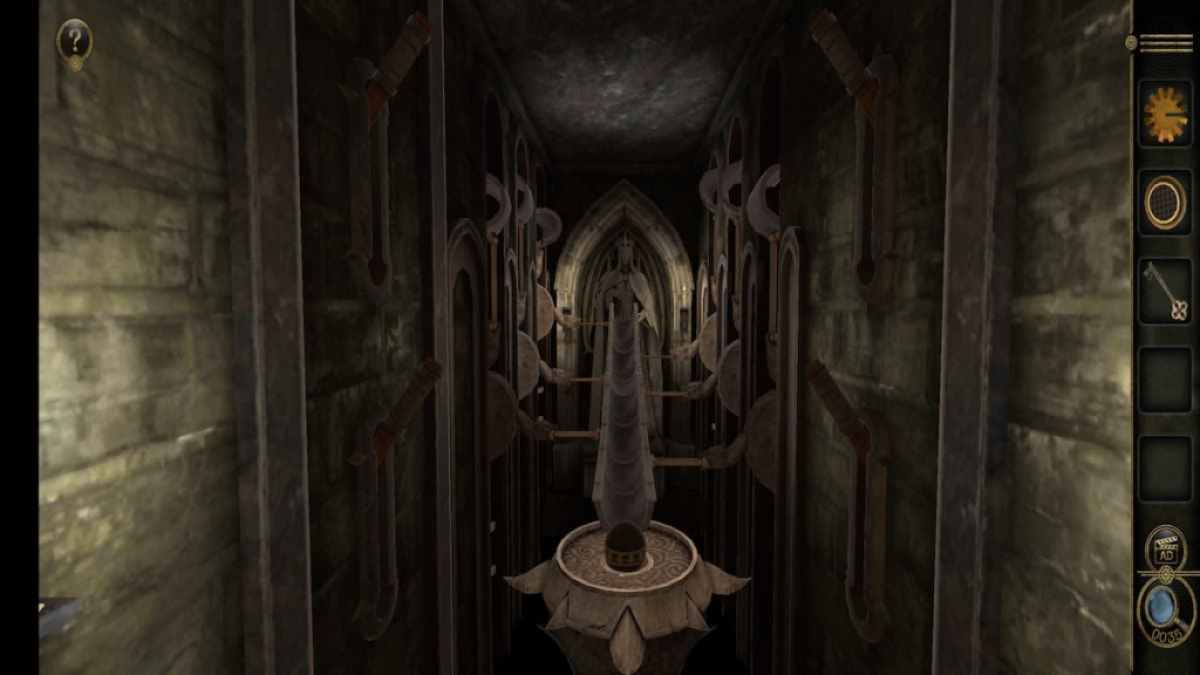
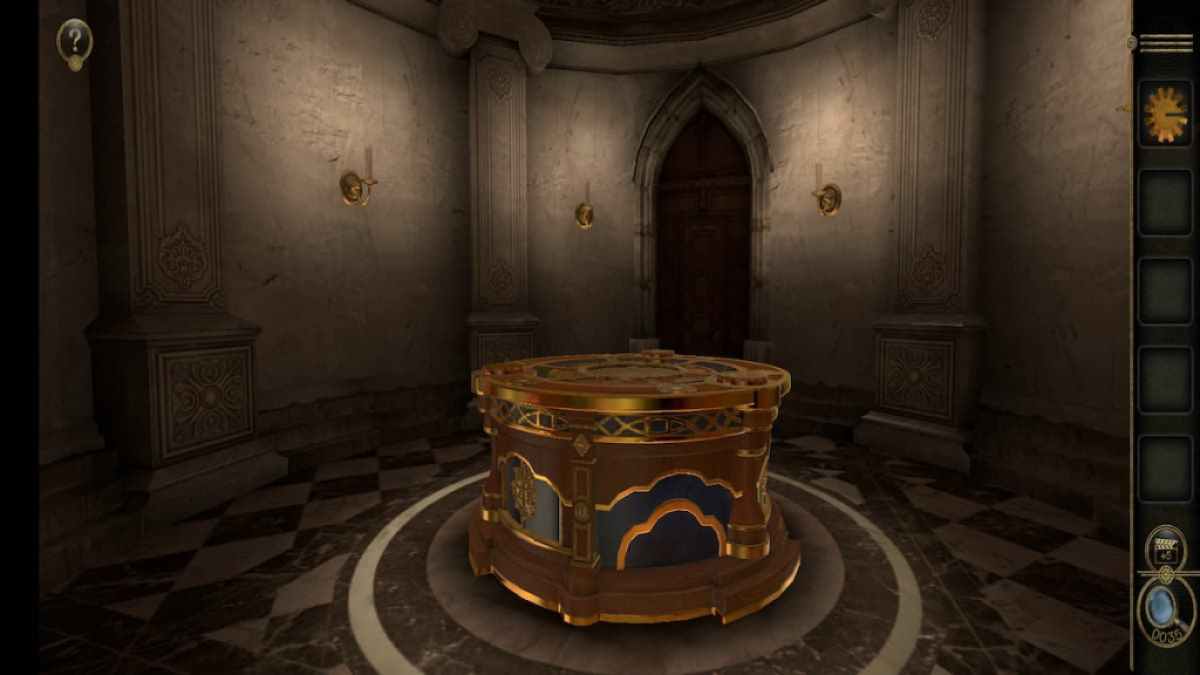
Head to the tall castle tower on the left field .
The elbow room inside the tower has a golden tabular array in the center and a unsympathetic door in the screen background .
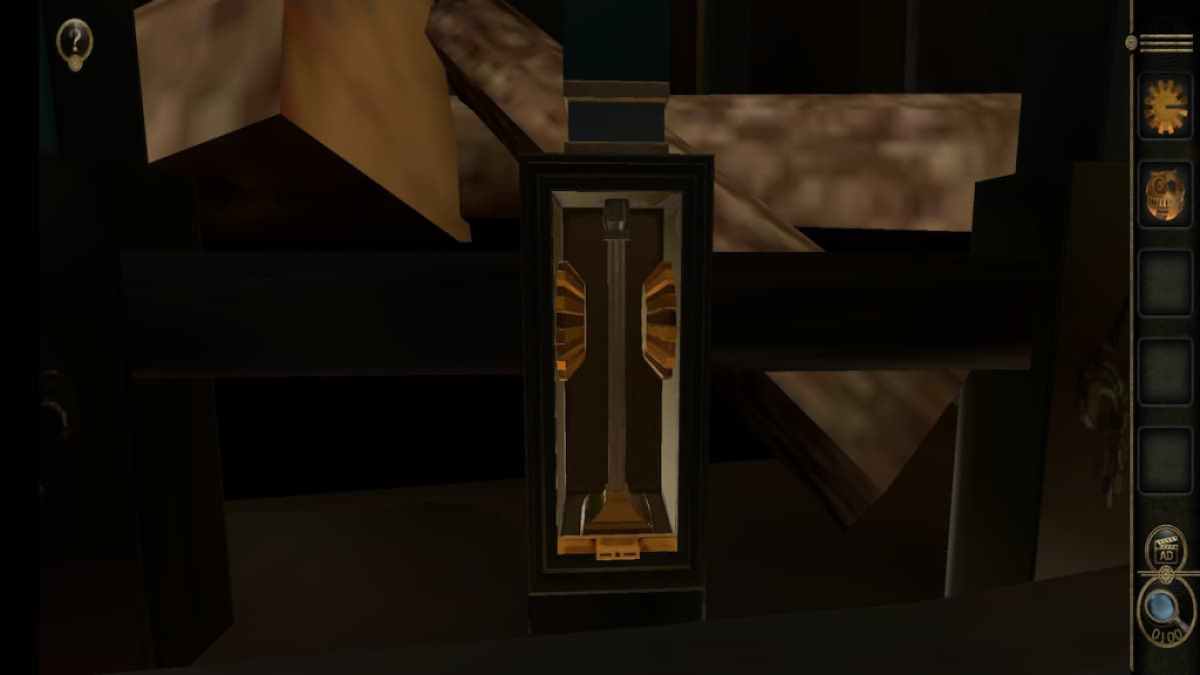
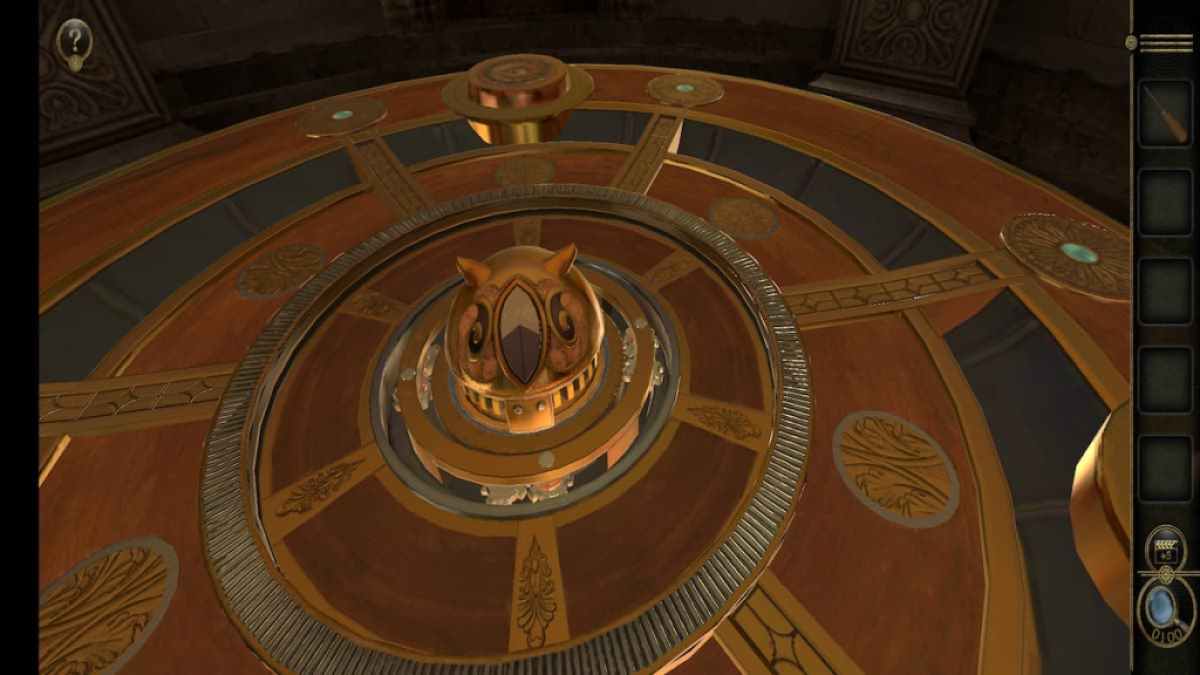
search at the mesa let on a gear in the center .
Screenshot by Pro Game Guides
Spin it to reveal a disconsolate circuit in the sum .
Place the passing Heavy Mechanical Ball into this blue circle .
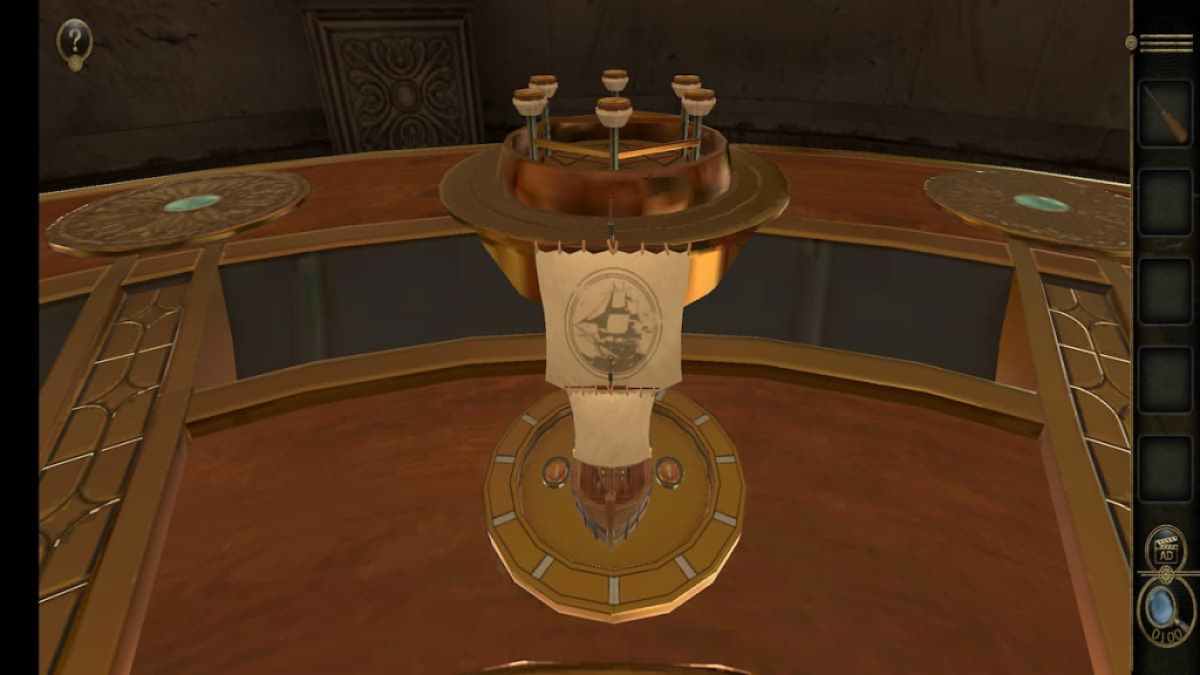
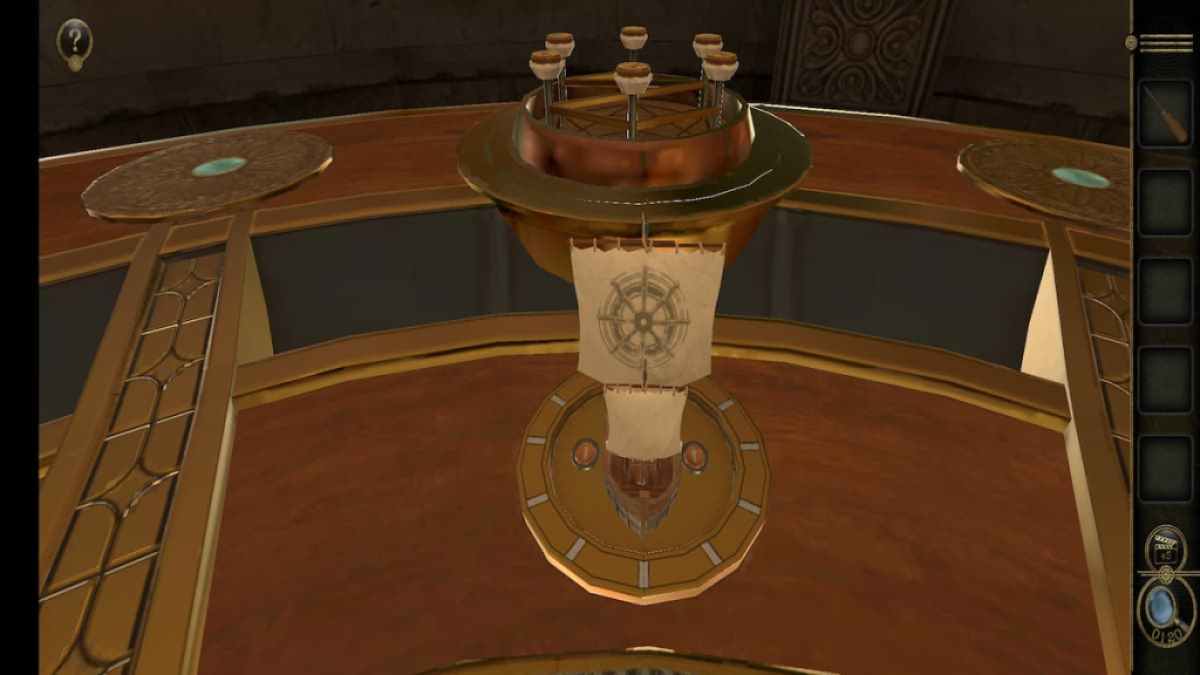
This reveals a fleet of ships in the heart and lift one of the chopine .
Screenshot by Pro Game Guides
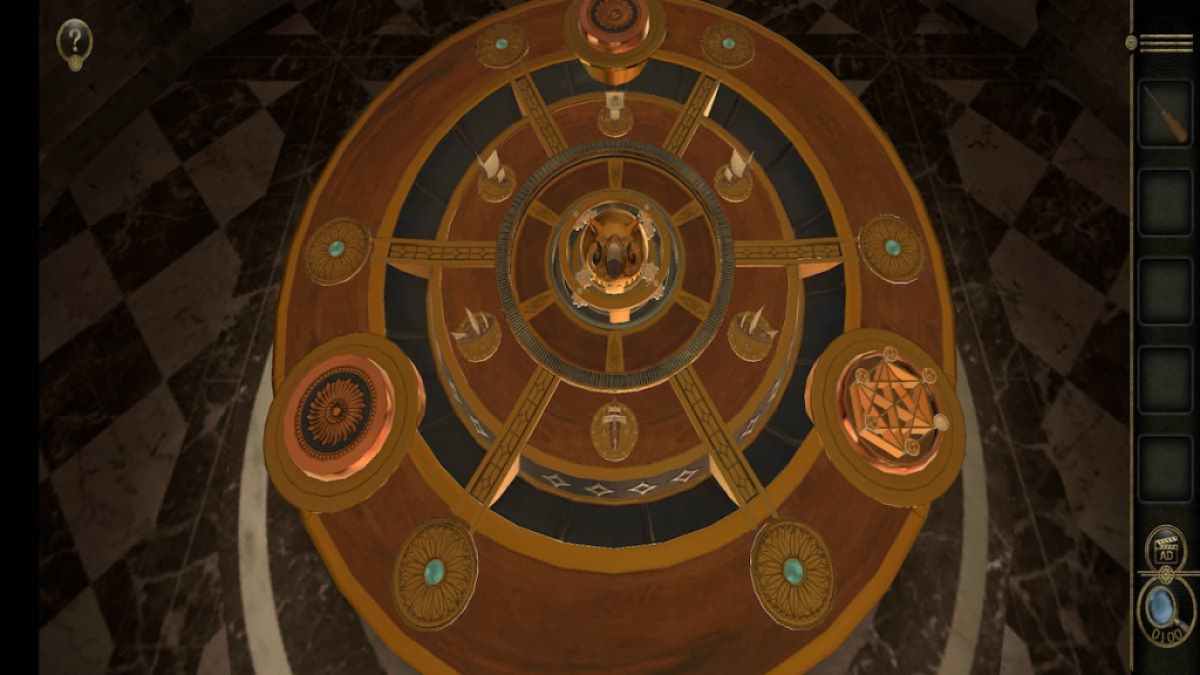
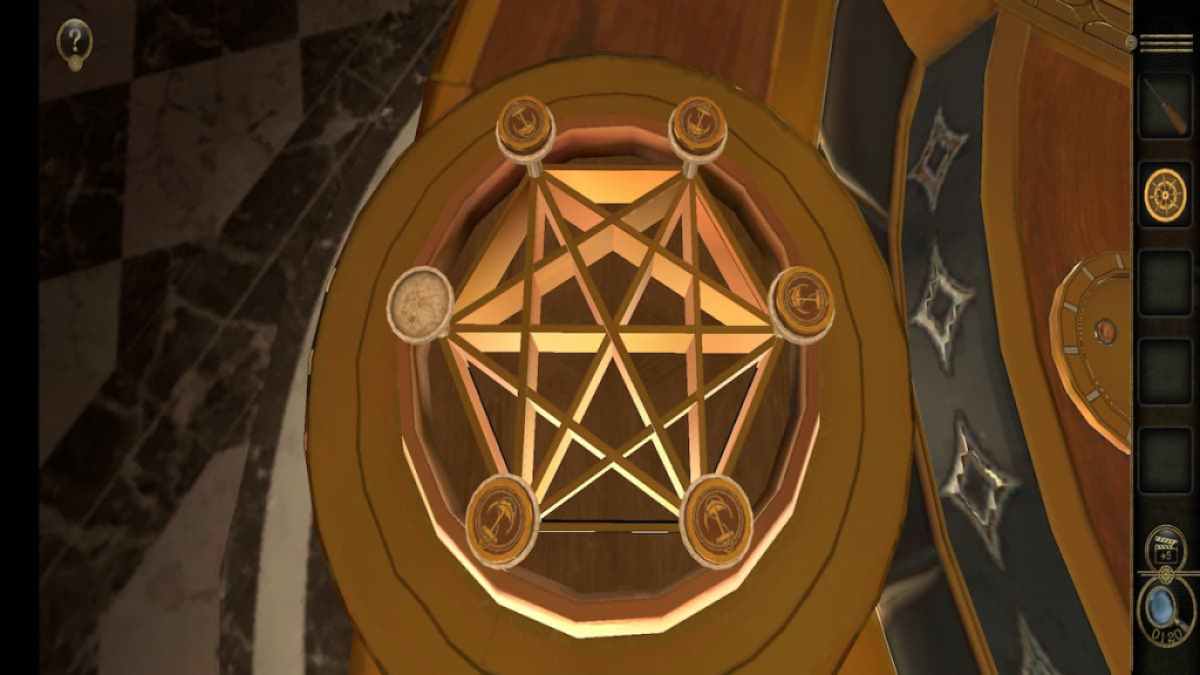
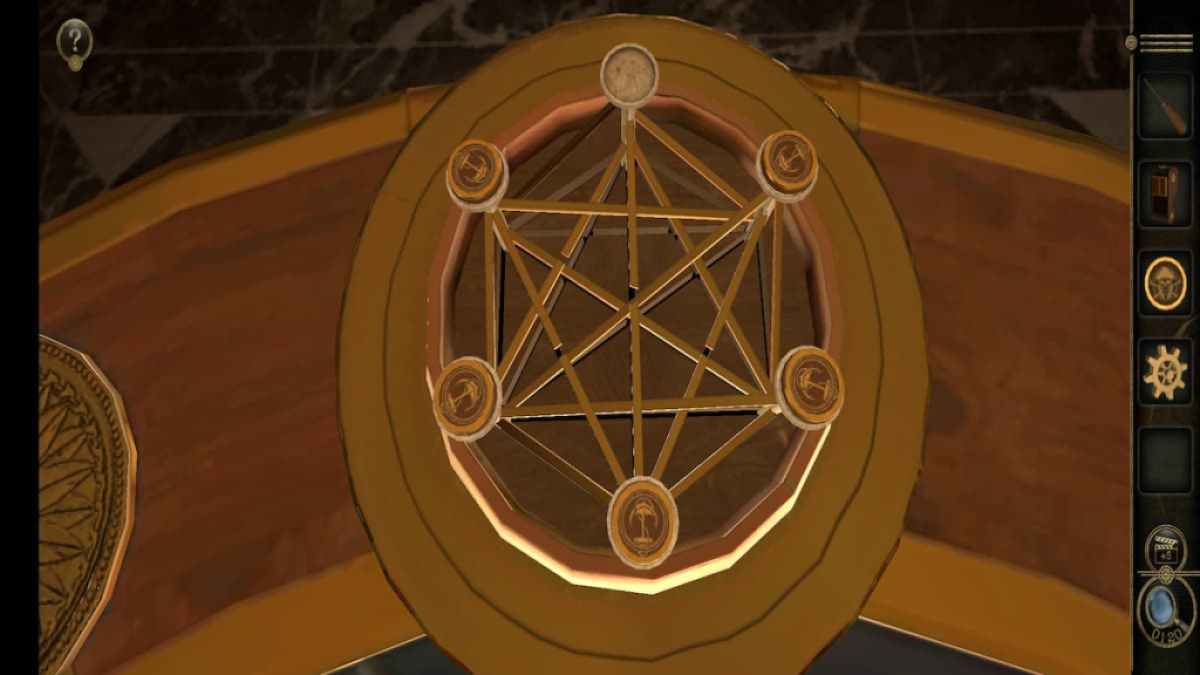
The raised chopine has a geometric embodiment with badges at five of its edges , with the 6th sharpness being empty .
set the Metal Badge A into the empty berth .
The direction of the badges indicates which agency the boats should be face .
Screenshot by Pro Game Guides
set out with the ship that has the same boat symbolization as the bottom on the top of the geometric form .
Arranging all of the piece of music correctly will flip over the program , giving you a Rotary Handle . It will also unlock a second program missing a metal badge .
Oven top lock
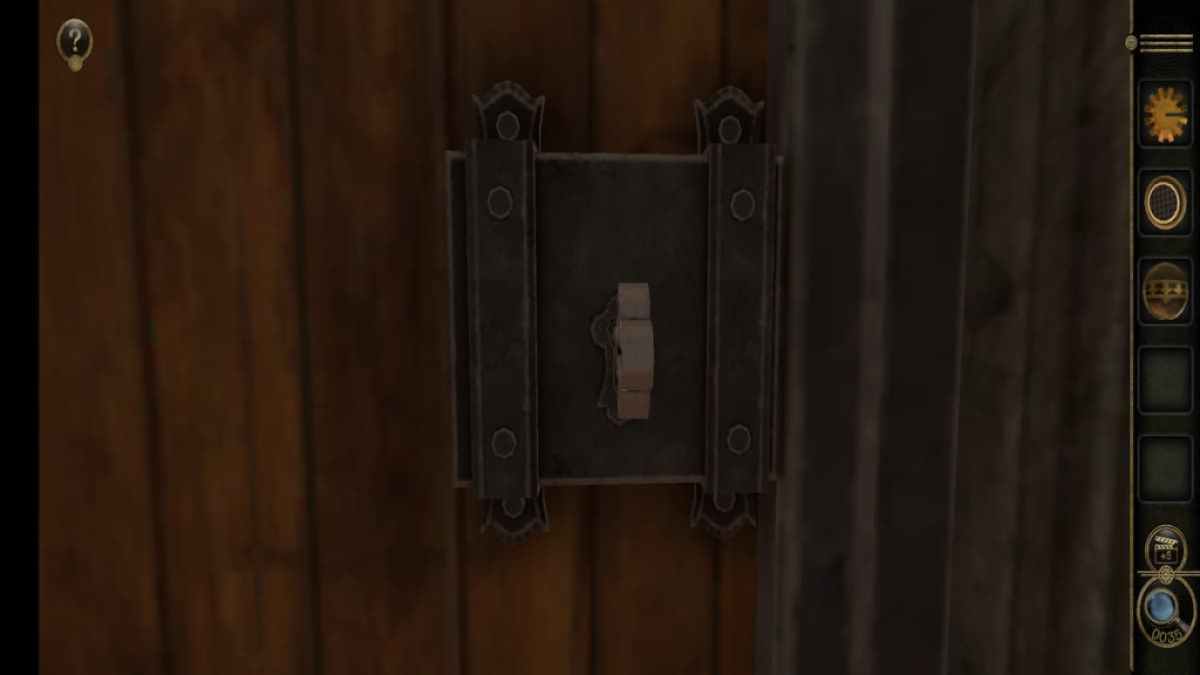
yield to the lock at the top of the oven .
Place the Rotary Handle on top of the lock .
rotate the Rotary Handle will unlock the square compartment on the rightfulness containing the Metal Badge B.
Screenshot by Pro Game Guides
Golden table puzzle part 2
hark back to the way containing the prosperous table and focus on the new platform missing a badge .
Place the Metal Badge B into the empty spot .
come out at the ship with the matching direction wheel symbol on the flag .
Screenshot by Pro Game Guides
Completing the second part of the puzzle give you a Drawer Handle .
Desk drawer and small box
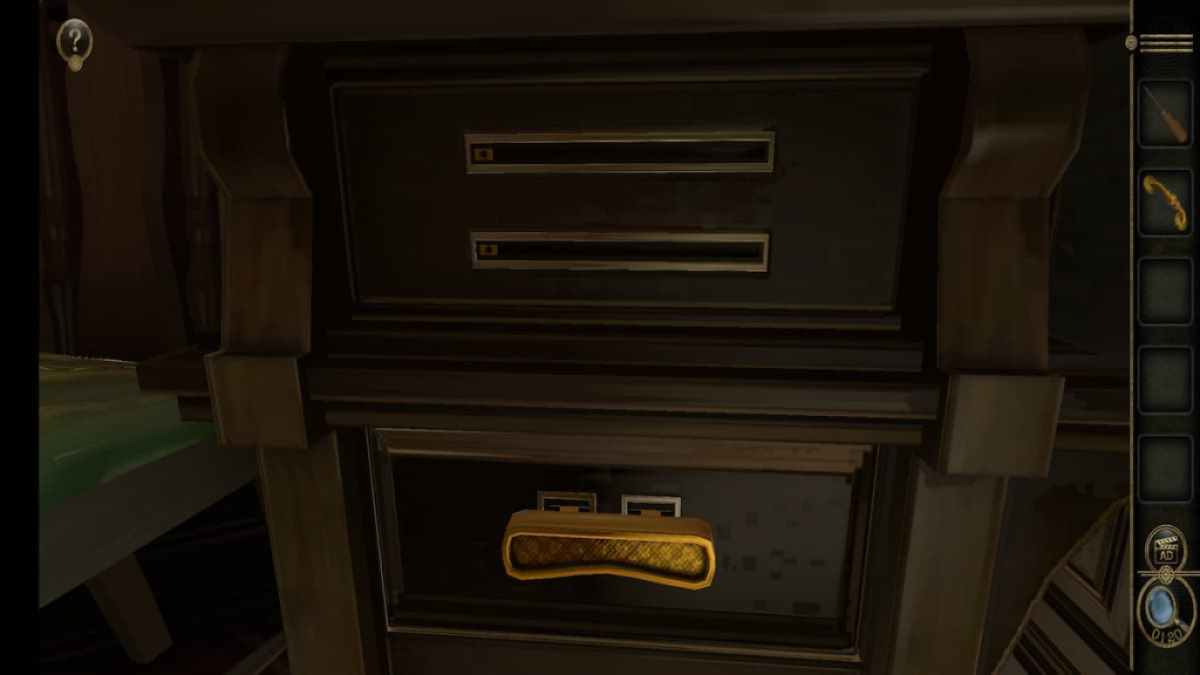
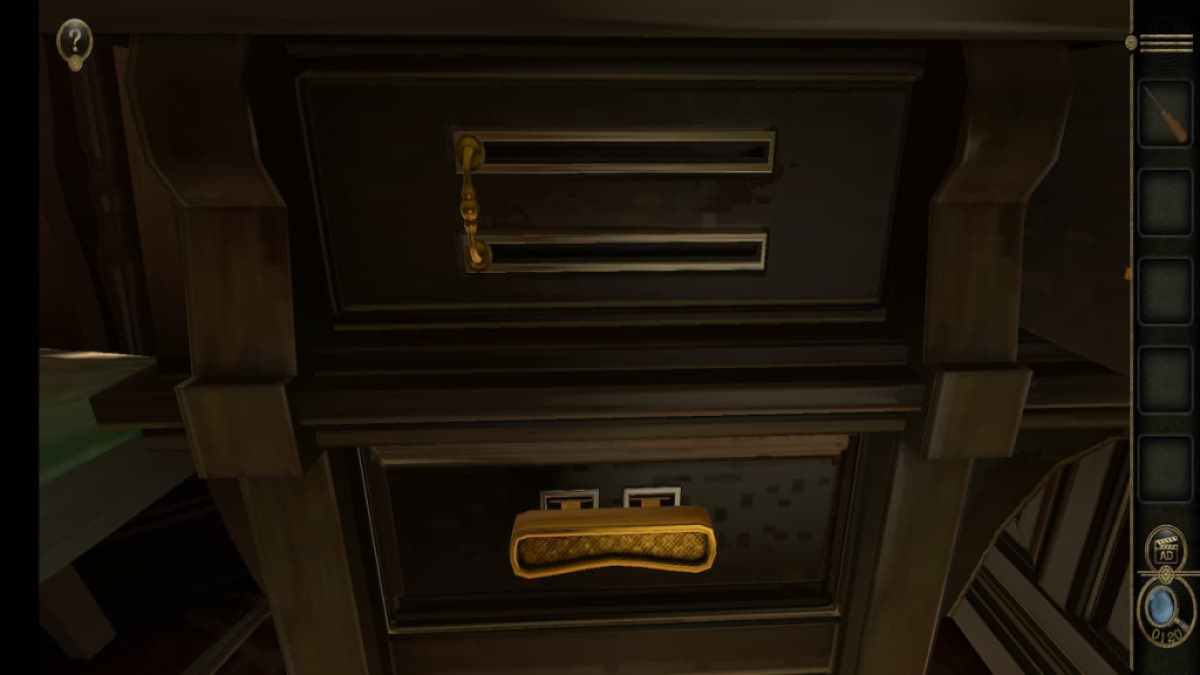
Return to the desk in the main elbow room .
localize the Drawer Handle on the drawer above the Slider draftsman .
perpetrate the handle to the rightfield to unlock a teaser on top of the desk .
Screenshot by Pro Game Guides
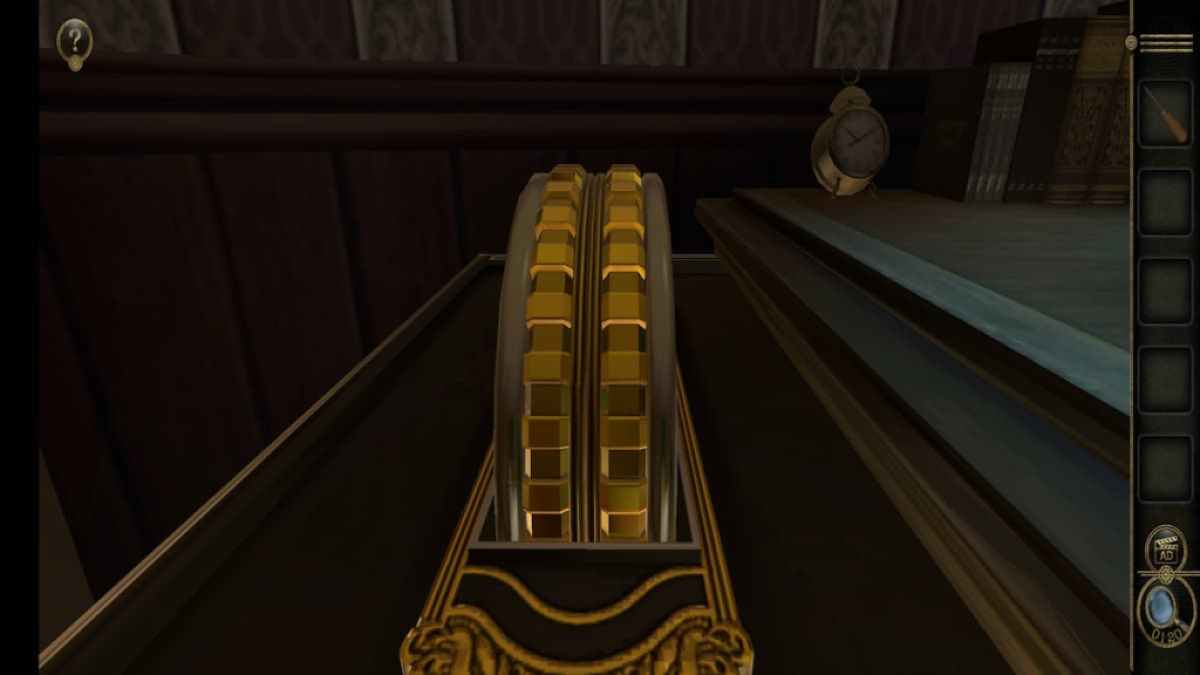
Rotate both sides of the wheel until the squares are seeable to get Small Box A , until plus - signboard are visible to get Small Box B , and until hexagon are visible to get Small Box C.
give Small Box A in your inventory .
Slide the slider in the center down to get the Metal Badge C.
Screenshot by Pro Game Guides
open up Small Box B in your armory .
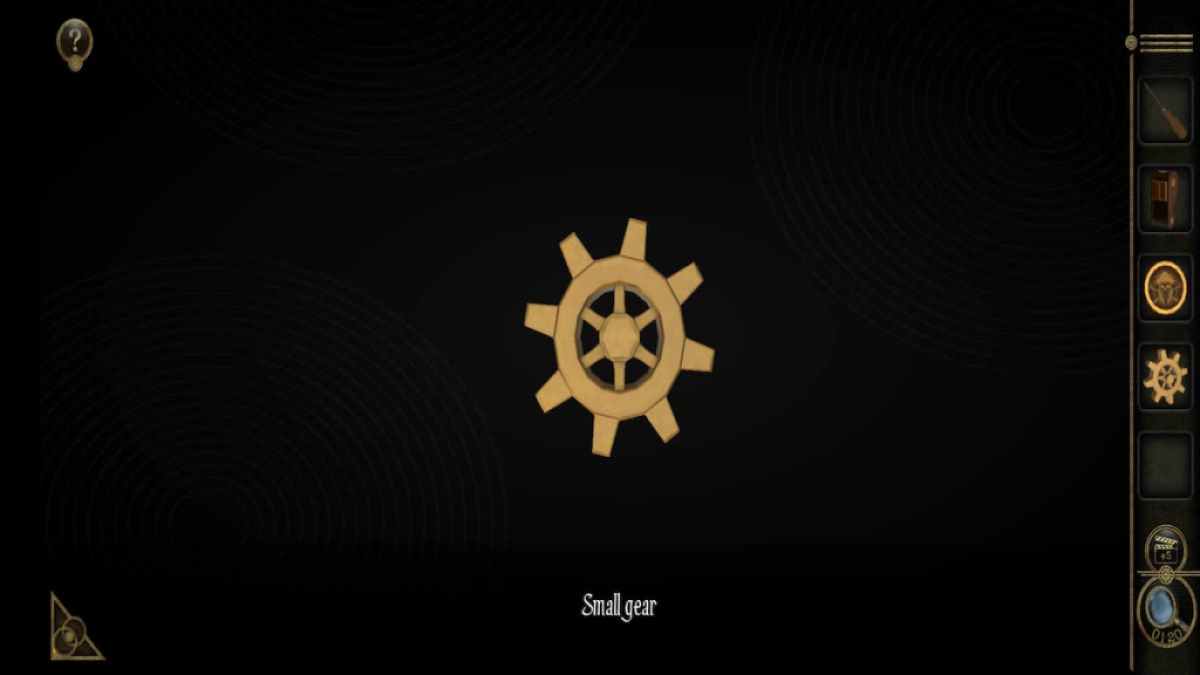
Rotate the mechanism in the centre to get a Small Gear .
launch the Small Box C in your inventory .
Screenshot by Pro Game Guides
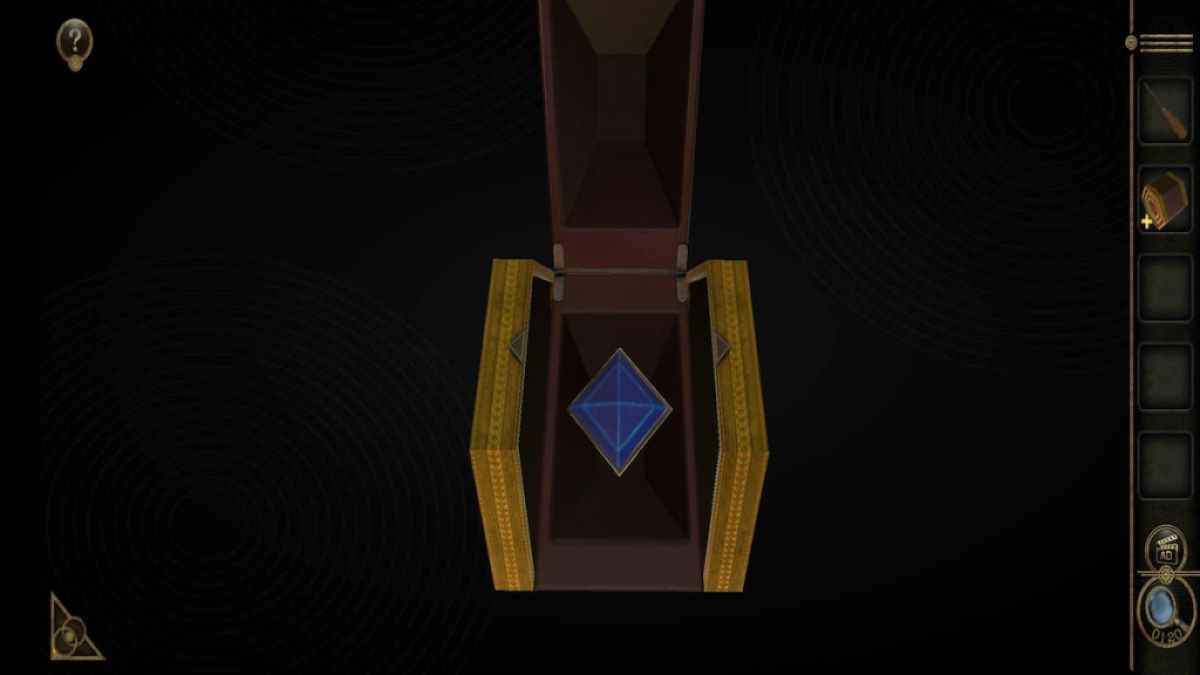
Rotate the side of the box so that the triangles line up to get a Sapphire .
Sapphire puzzle
Return to the urn - regulate mystifier .
Add the Sapphire to the empty space on the puzzle .
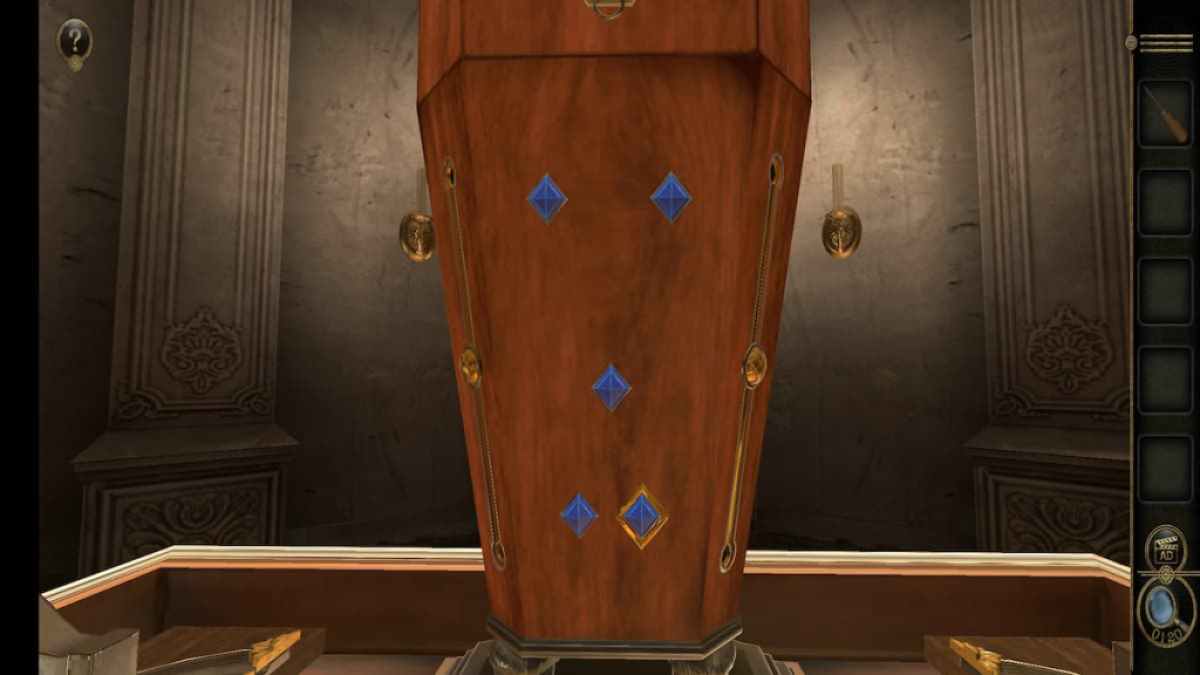
This unlock the sliders , which can be moved up and down to shift the colors of the sapphires between blue and cerise .
Screenshot by Pro Game Guides
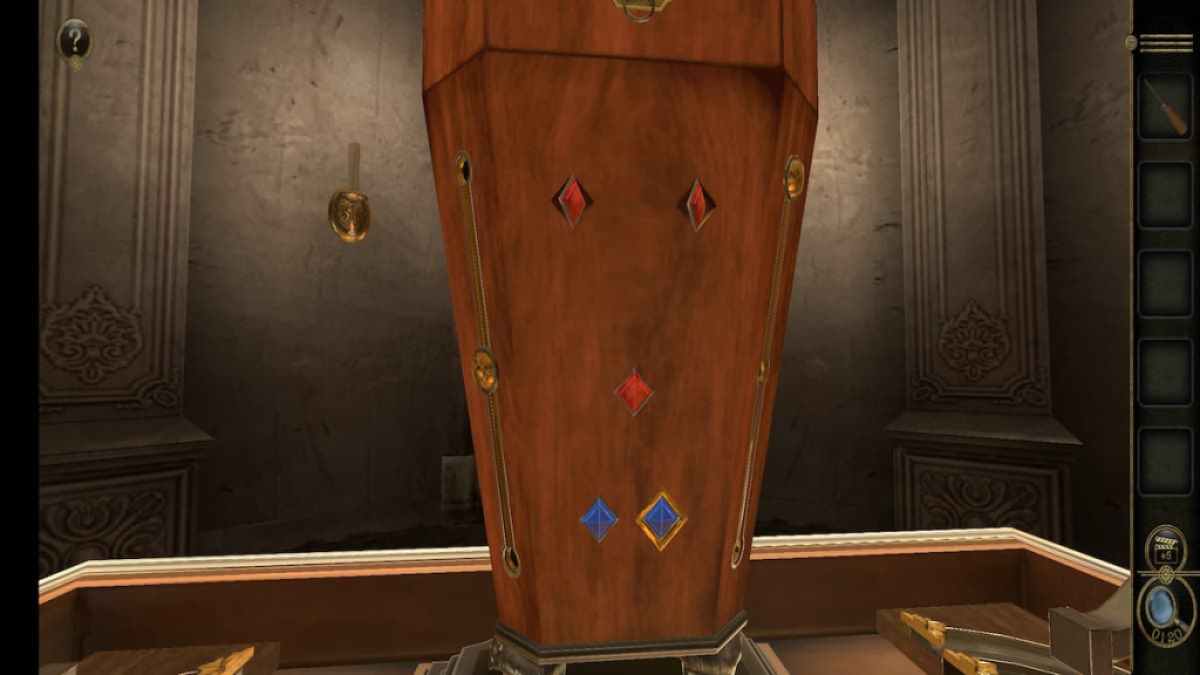
turn all of the cerulean blue conjure the palpebra of the urn , unlocking a 2d puzzle .
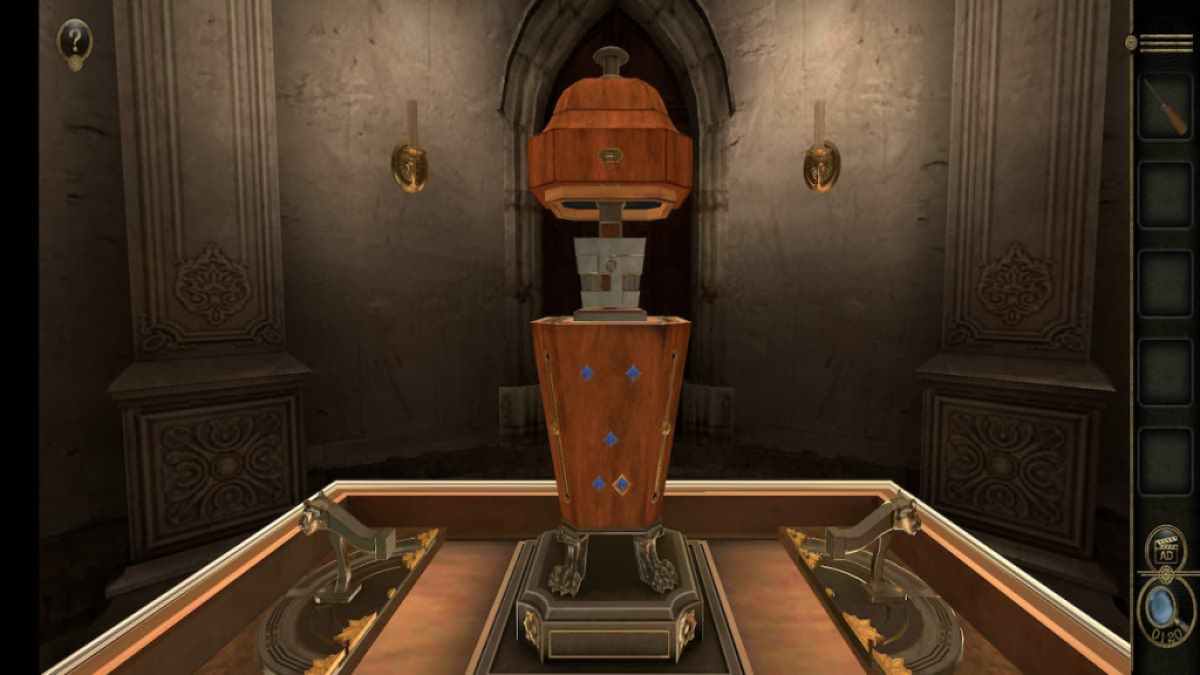
The metal puzzler piece are moved up and down to allow the wooden auction block in the center to be rotated .
Rotate the top and bottom two blocks so they all align in the same direction as the center block . This will give you the Slider B item .
Screenshot by Pro Game Guides
Golden table puzzle part 3
Head to the favorable table in the tall odd tower and focus on the newest program missing a badge .
tote up the Metal Badge C to the empty spot .
Unlike the previous two puzzles , this one involves both rotating and lean the ship .
Screenshot by Pro Game Guides
complete it feed you the Slider A item .
Windmill slider puzzle
When looking at the object in the windmill , there is an empty slot for a slipper on the left side .
Place Slider A into this spot .
There is a second empty stain on the right side .
Screenshot by Pro Game Guides
Place Slider B here .
Moving Slider A will open up up the sides of the structure , permit a small box to be grab from the center .
Opening this small boxful give you an Inconspicious Small Iron Piece .
Screenshot by Pro Game Guides
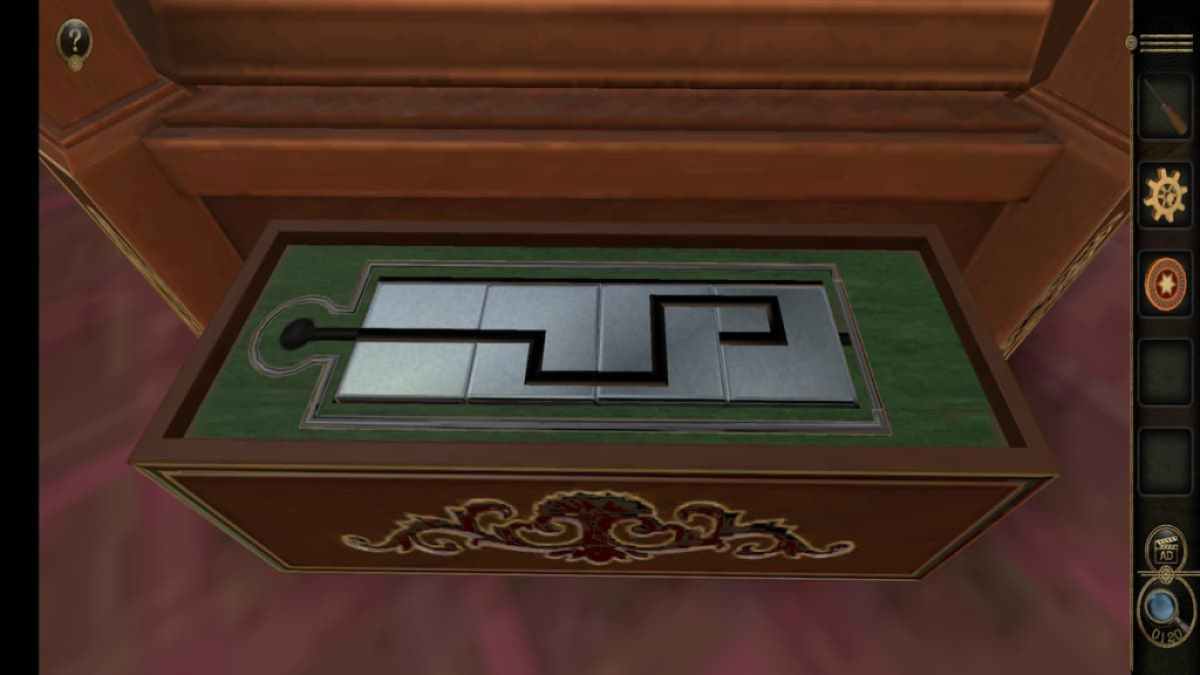
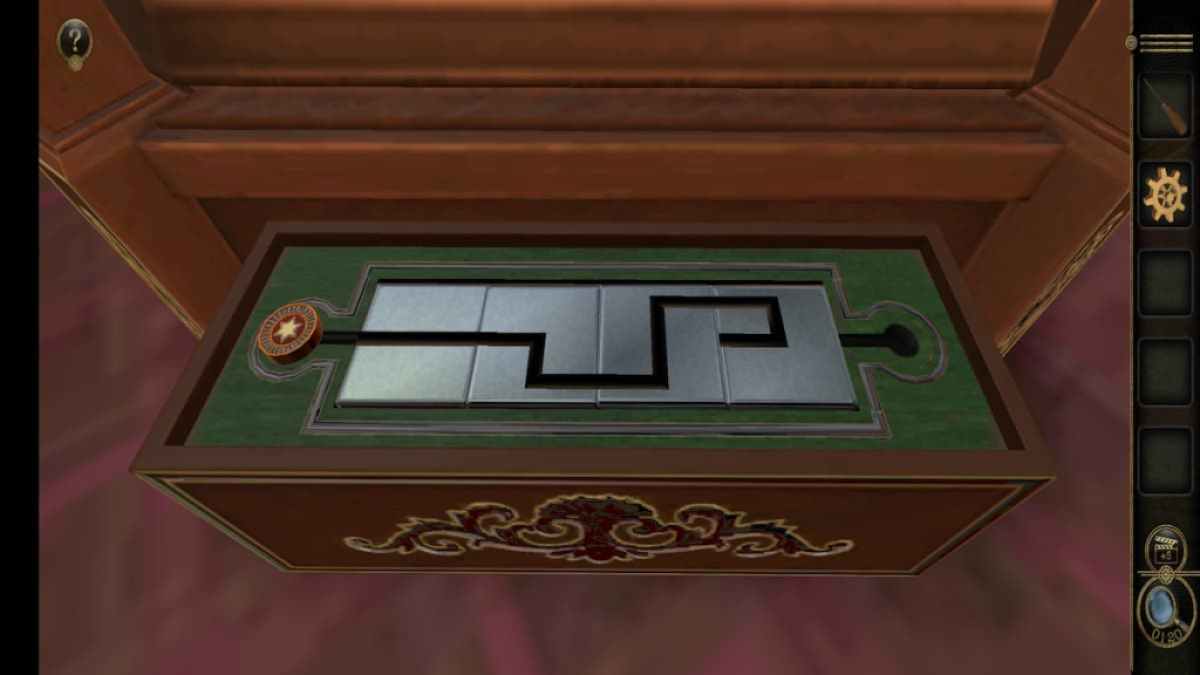
move Slider B unlocks a modest puzzle .
add together the Inconspicious Small Iron art object on the left side .
Rotate the pieces to exchange the path and move the slipper back and off to travel between all of the section . Completing the puzzler gives you a Roof Component part .

Screenshot by Pro Game Guides
Related : Cafe Bacon Escape Room Walkthrough
Place the Roof Component art object into the empty spot to activate the final puzzler .
look at the puzzle reveals a space for a gear mechanism and a yap for another piece .
Screenshot by Pro Game Guides
localise the Screwdriver into the hole .
Place the Small Gear between the top two gears .
turn out the Screwdriver to unlock a Birdcage Decoration .

Screenshot by Pro Game Guides
Birdcage room
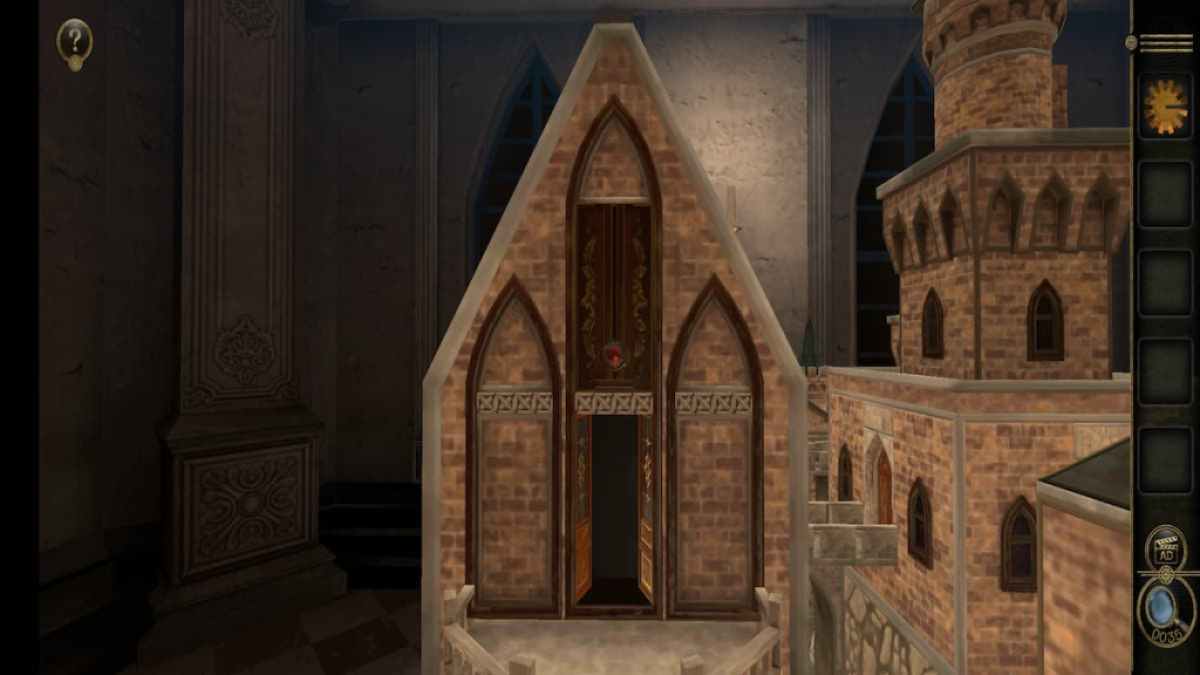
Completing the windmill unlocks a third tower with an upside - down crossbreed on its roof .
enroll the tower leads you to a elbow room with a birdcage in the snapper .
Head to the chimney at the top right of the birdcage .

Screenshot by Pro Game Guides
open up it up to get a Decoration .
start the Birdcage Decoration in your stocktaking .
switch the lid to divulge a alloy push button . entreat it to work out the Birdcage Decoration and return it to your inventory .
Screenshot by Pro Game Guides
start the Decoration detail in your inventory .
launch the bottom two sections of the Decoration , which will return it to your inventorying .
front at the roof reveals miss medal on the left-hand terminal .

Screenshot by Pro Game Guides
Place the Birdcage Decoration on the edge of the ceiling .
Place the Decoration on the inner part of the roof to unlock a raised compartment .
Slide the left lamp chimney toward the center to get an Owl Disc .
Screenshot by Pro Game Guides
direct the Owl Disc in the center of the lift portion of the birdcage .
Rotate it to open up the cage , which contains the Owl Board and Broken Decoration A particular .
On the ripe side of the birdcage , there is a gap the same shape and size as the Owl Board .
Screenshot by Pro Game Guides
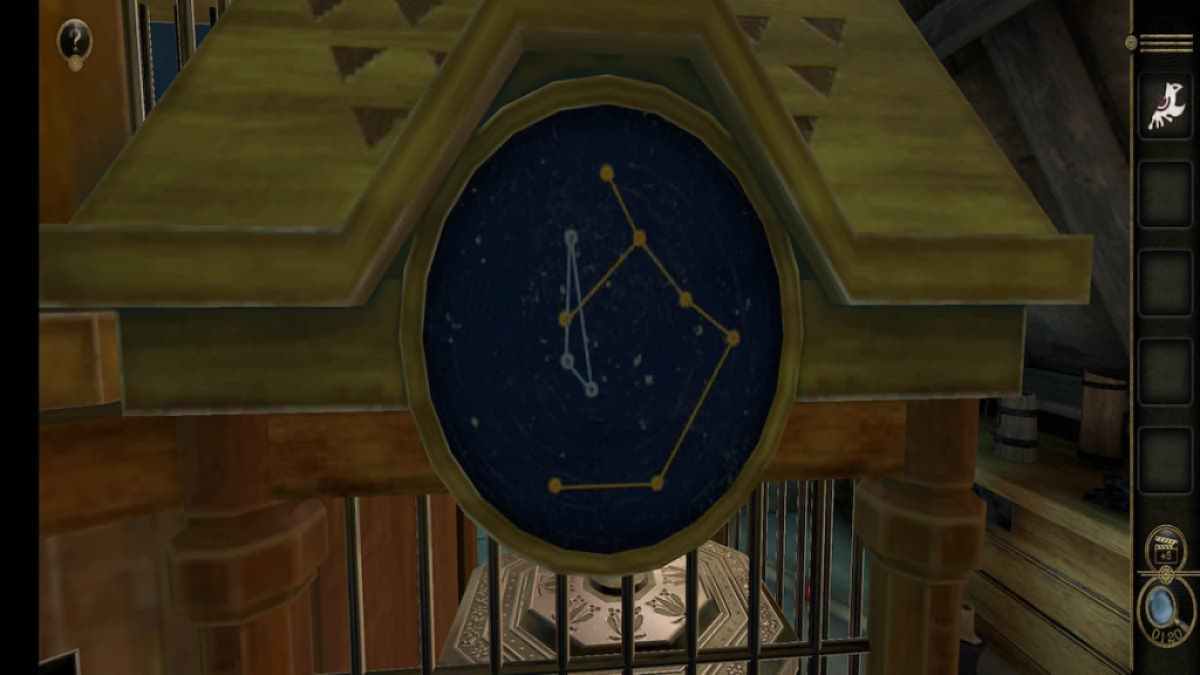
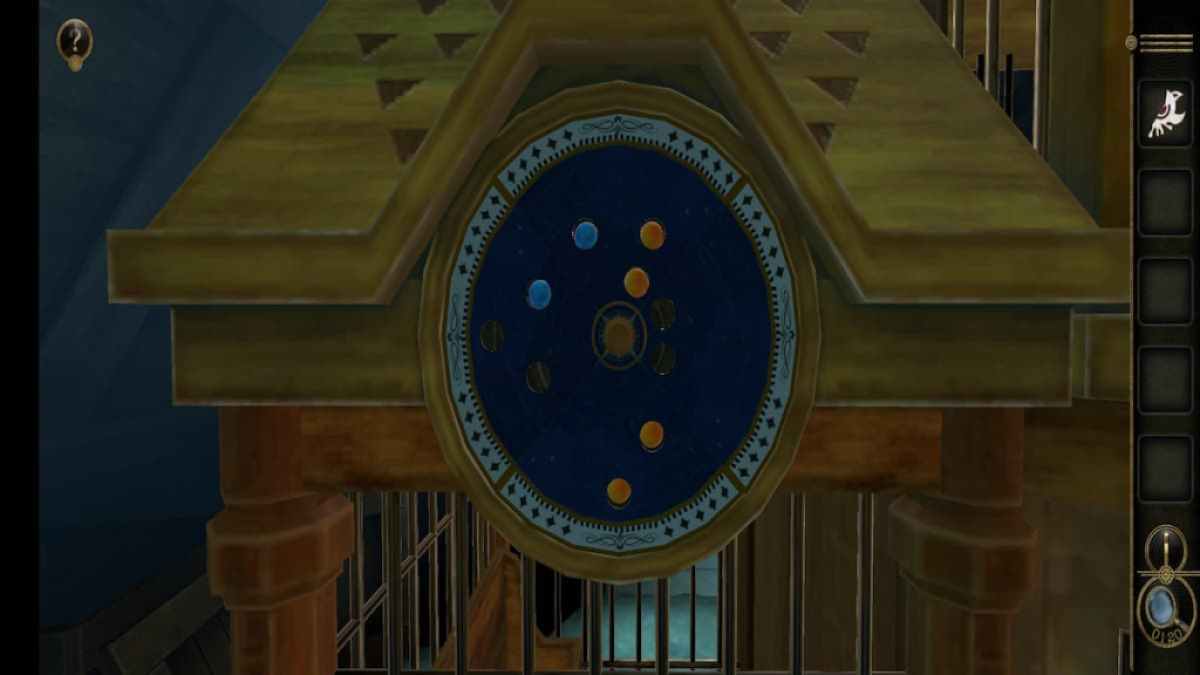
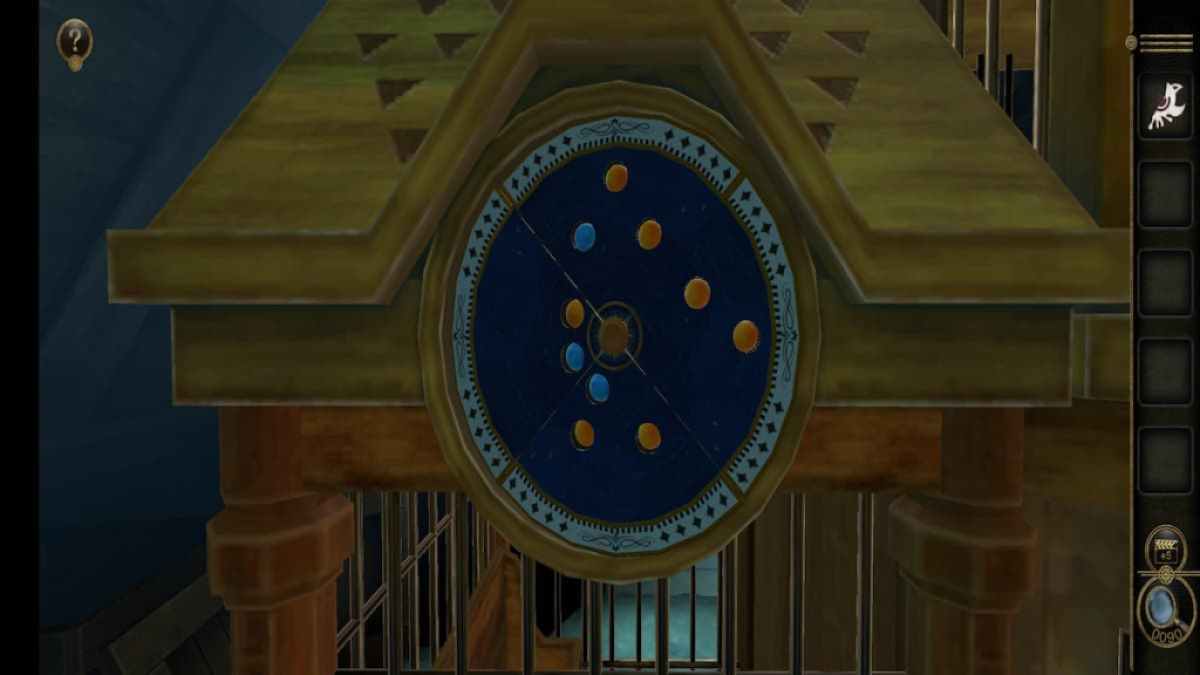
The Owl Board riff over , turning into a cue for the configuration teaser .
This unlocks the constellation puzzler on the left side of the cage .
To solve the puzzle , rotate each department until the constellation bear witness matches the one in the clew .

Screenshot by Pro Game Guides
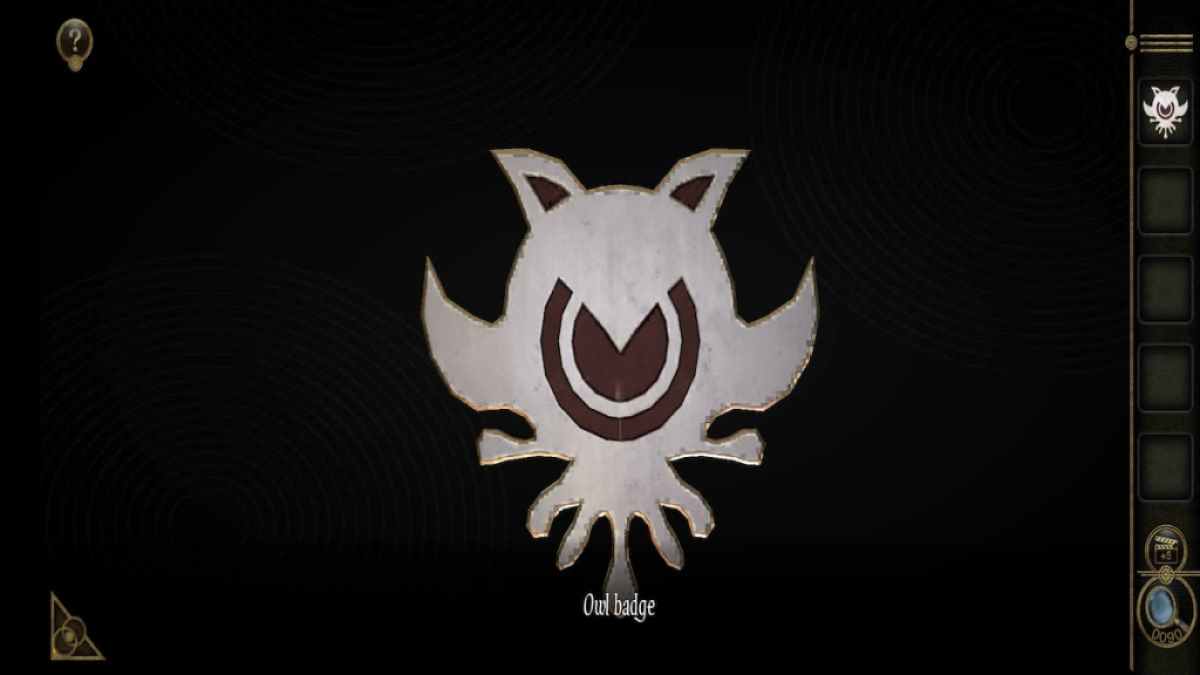
This will give you the Broken Decoration B.
Combining Broken Decoration A with Broken Decoration B creates an Owl Badge .
Looking at the right side of the cage unveil an empty time slot for the Owl Badge .
Screenshot by Pro Game Guides
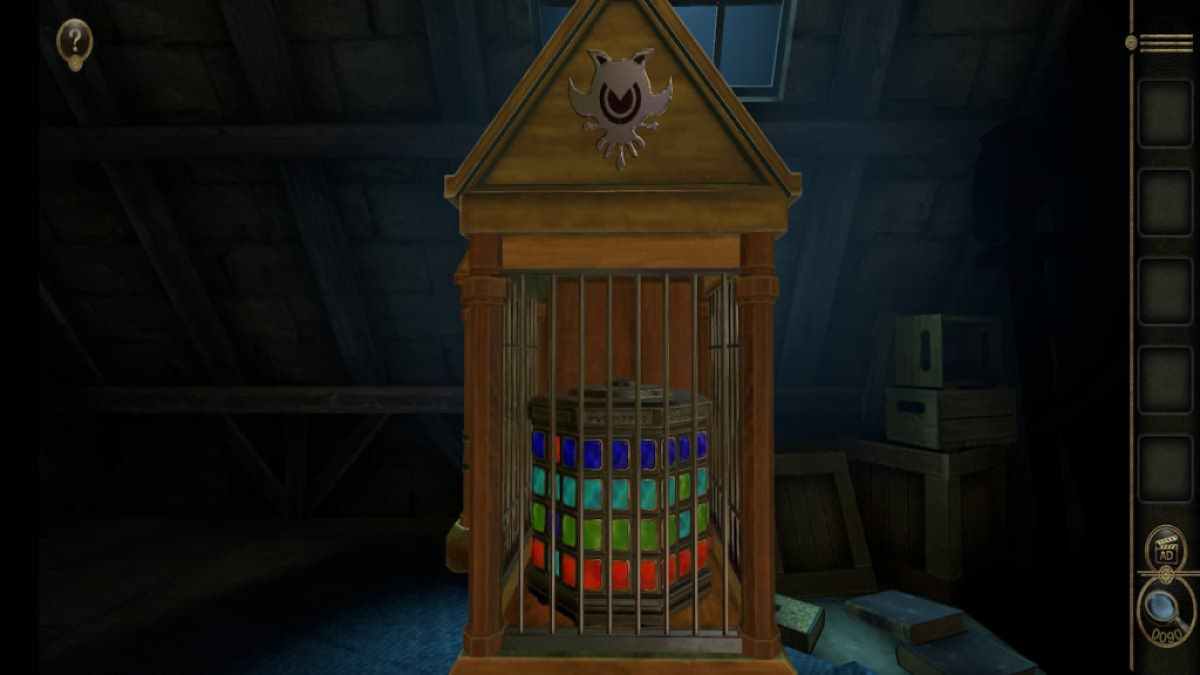
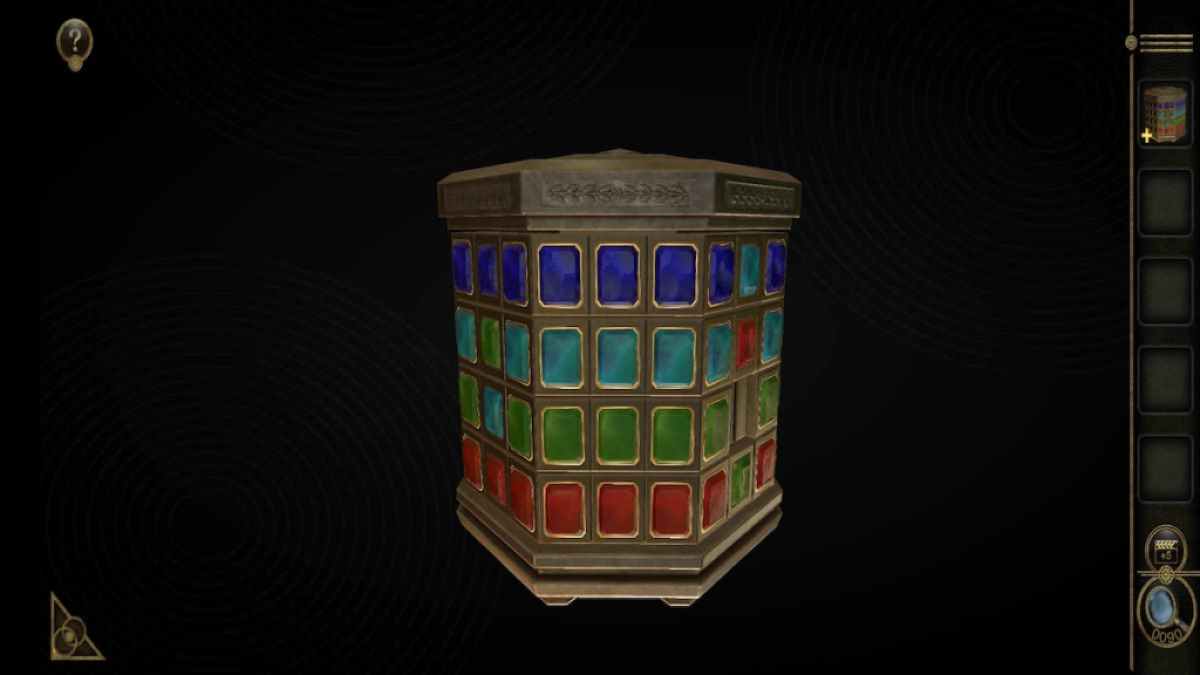
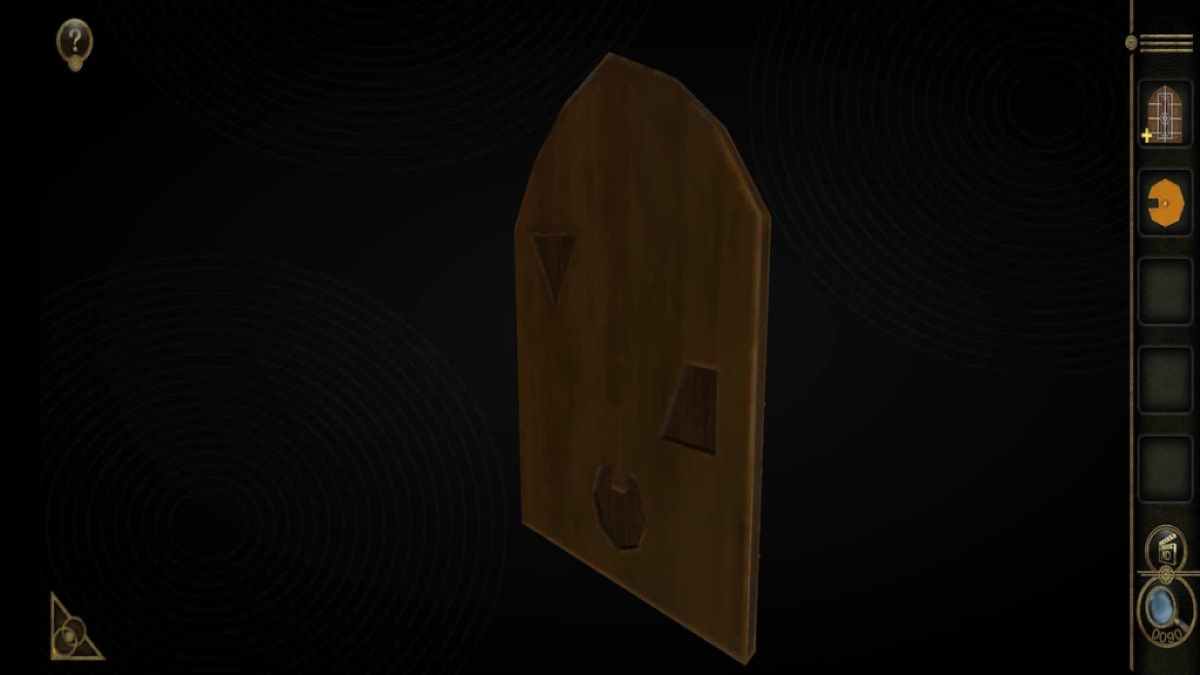
Place the Owl Badge there to unlock the legal community beleaguer the Colorful Metal Box .
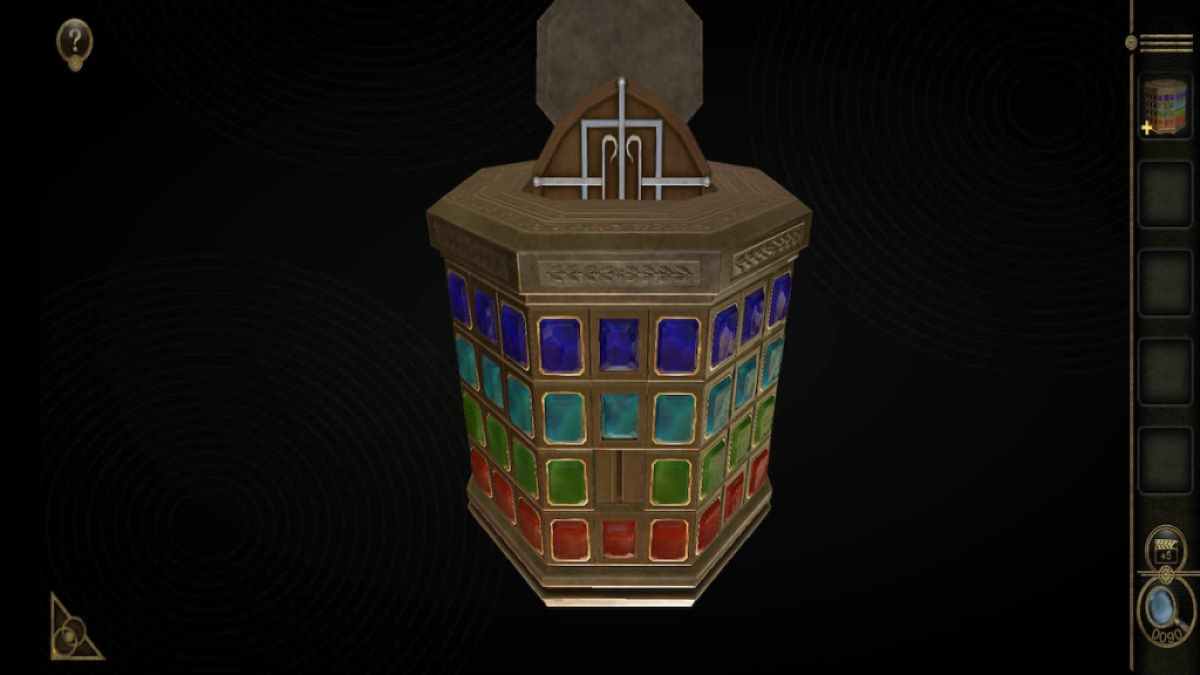
launch the Colorful Metal Box in your inventory . The goal of the puzzle is to circumvolve the four row and move the colourful sliders so that each course only contains its color .
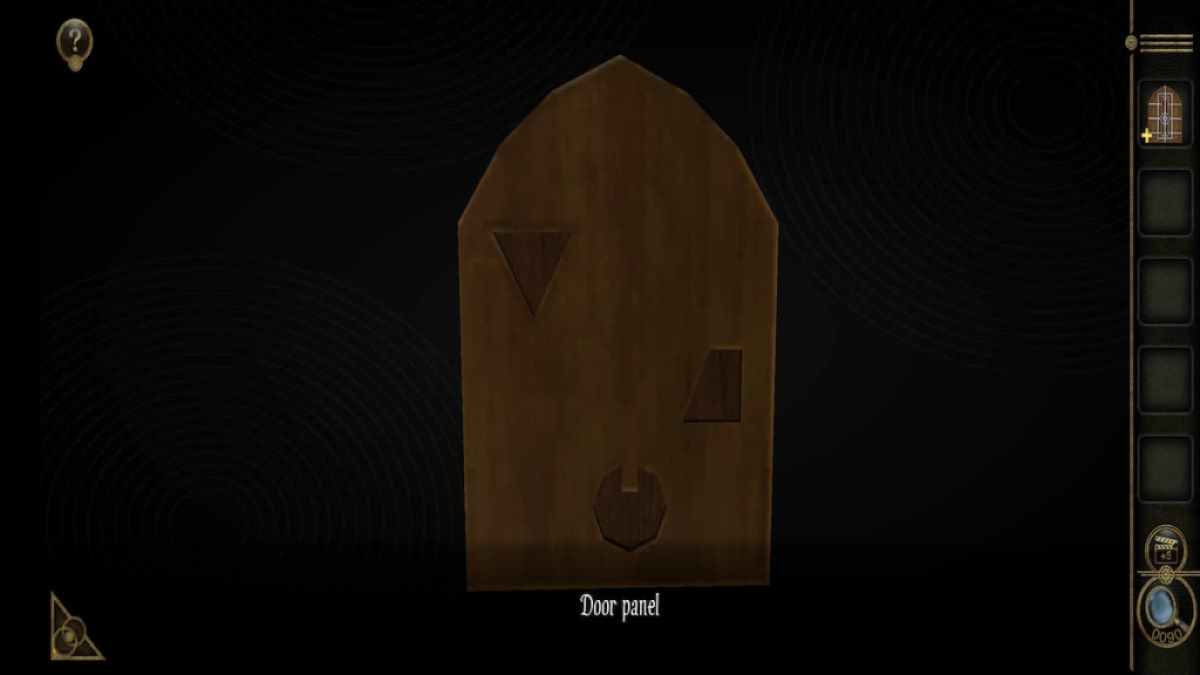
complete the teaser dedicate you a Door Panel .

Screenshot by Pro Game Guides
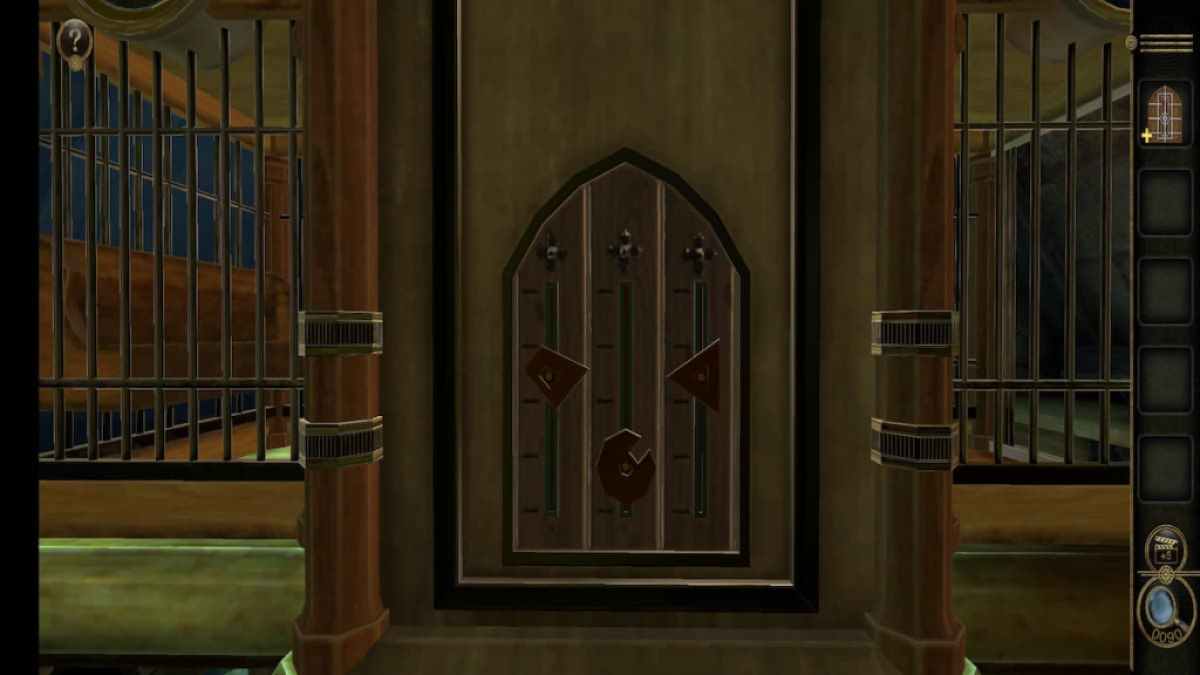
launch the Door Panel in your inventory and consider the back to get a gold slice .
Move to see the front door .
The Au musical composition can be added to the front door . append it countenance the three piece to be move up around using the gears on either side of the threshold .
Screenshot by Pro Game Guides
The end finish of the puzzle is to move the gears to match the vallecula on the back of the Door Panel .
When completed , the triangle is upside - down at the top right , the semi - circle is correct - side up at the bottom center , and the leftmost form is facing the correct side one space higher than the center round .
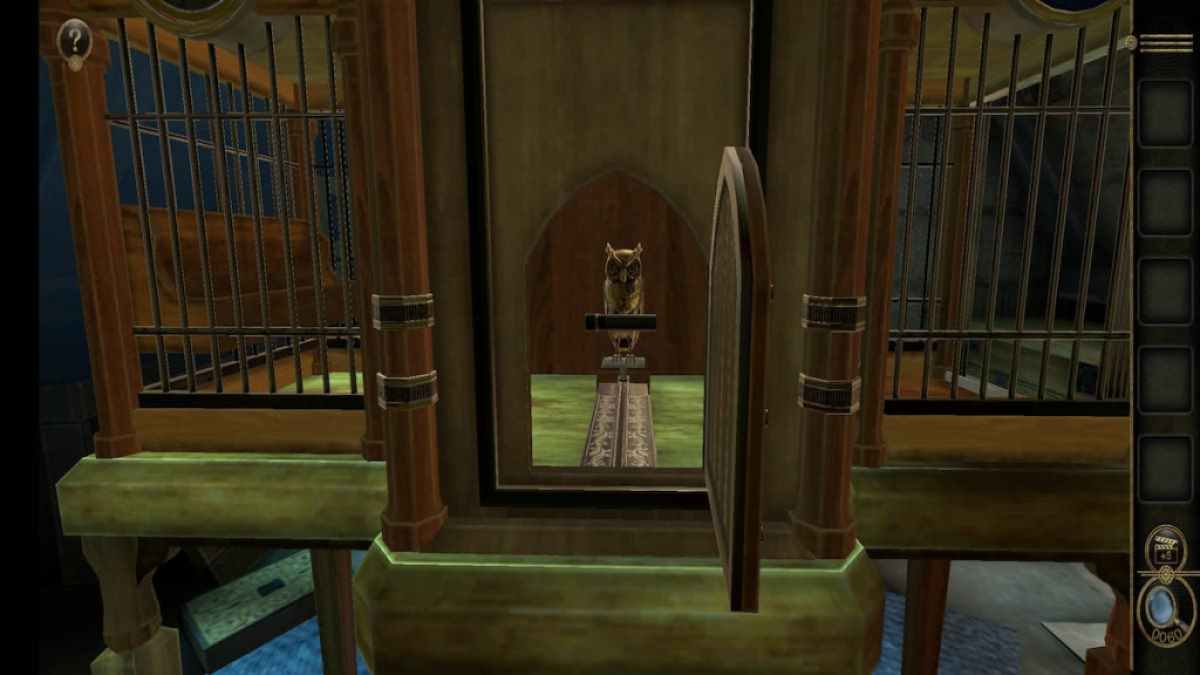
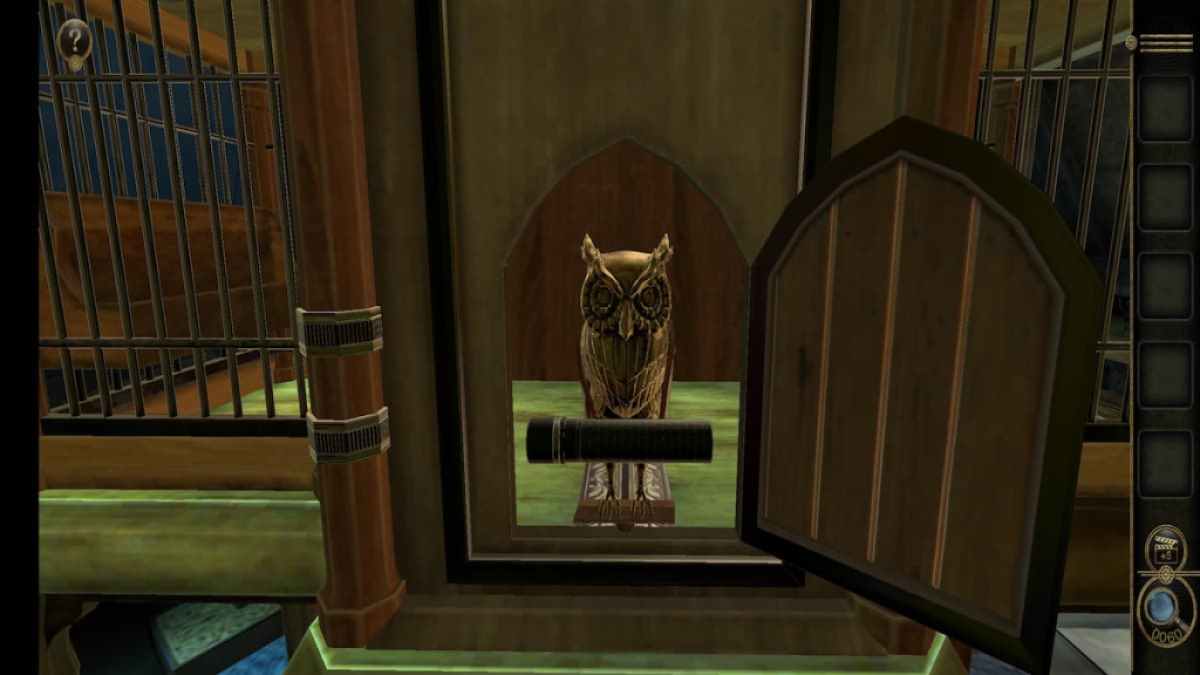
Place the Door Panel onto the doorway to open up the front of the cage .
Screenshot by Pro Game Guides
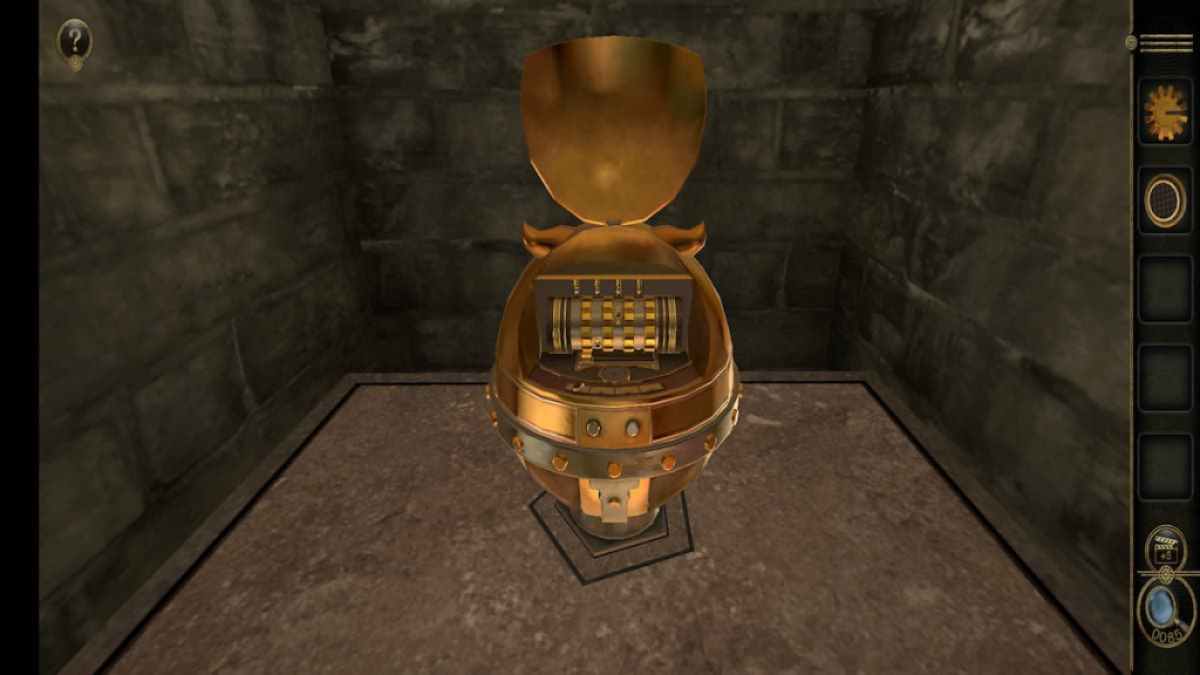
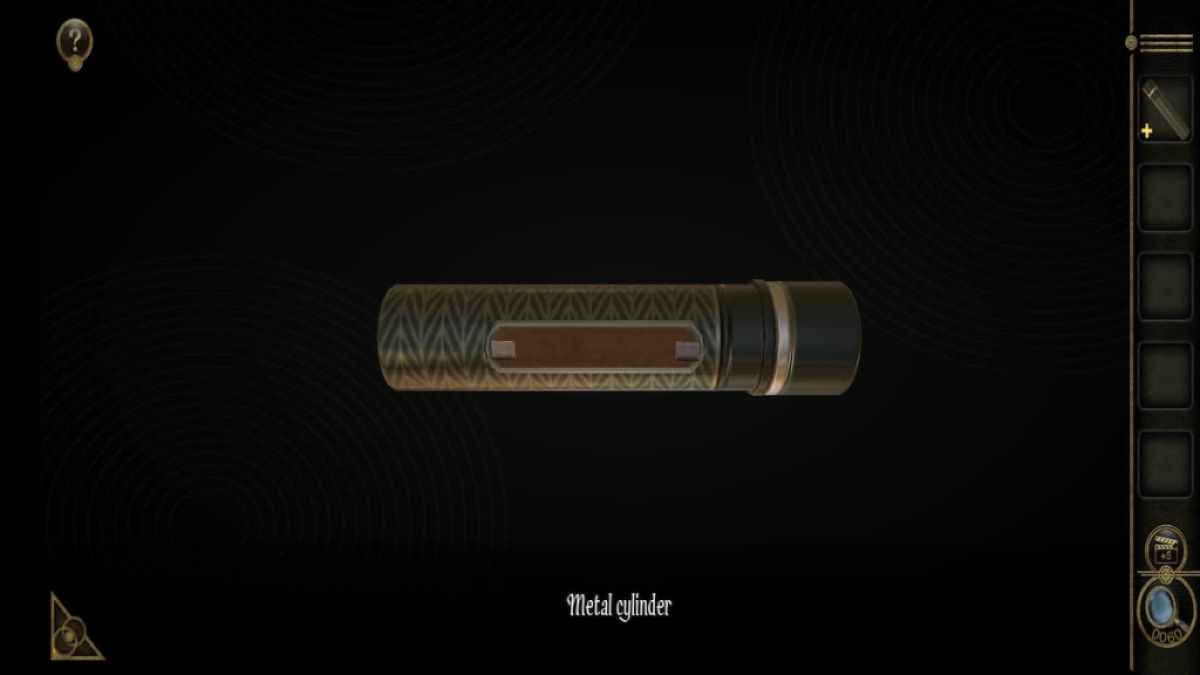
The owl statue will slide frontwards , give you a Metal Cylinder .
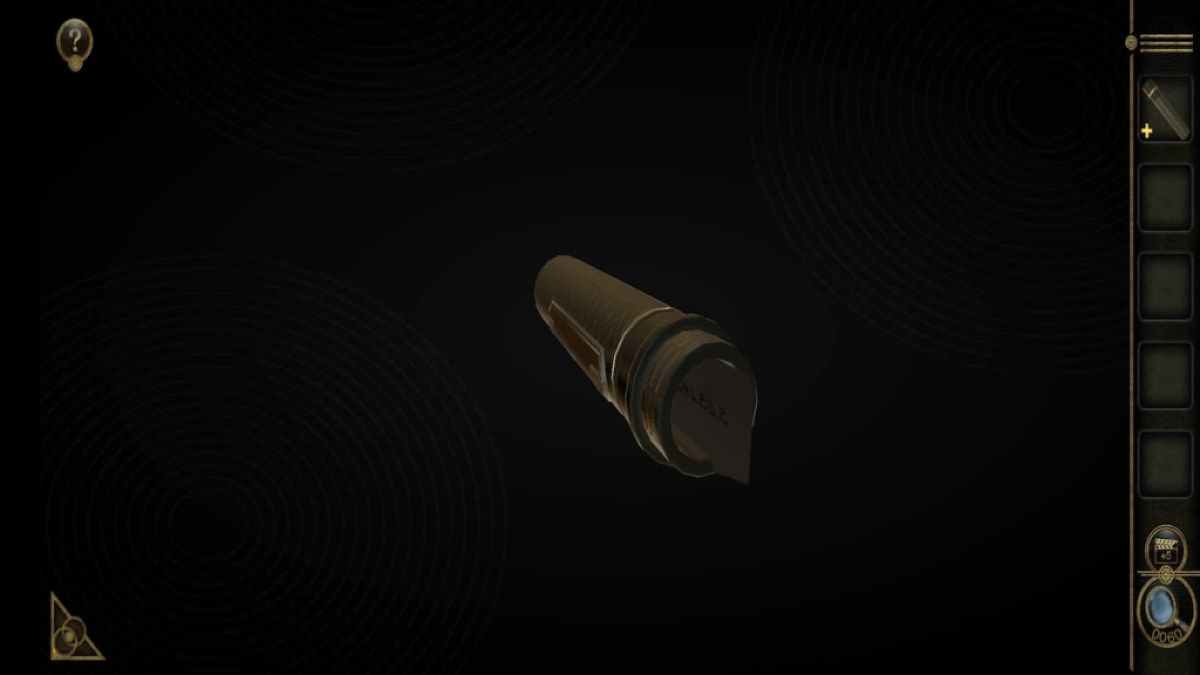
inspect the Metal Cylinder reveals that the correct side can be twisted off .
Twisting the cap off let out a secret firearm of newspaper .
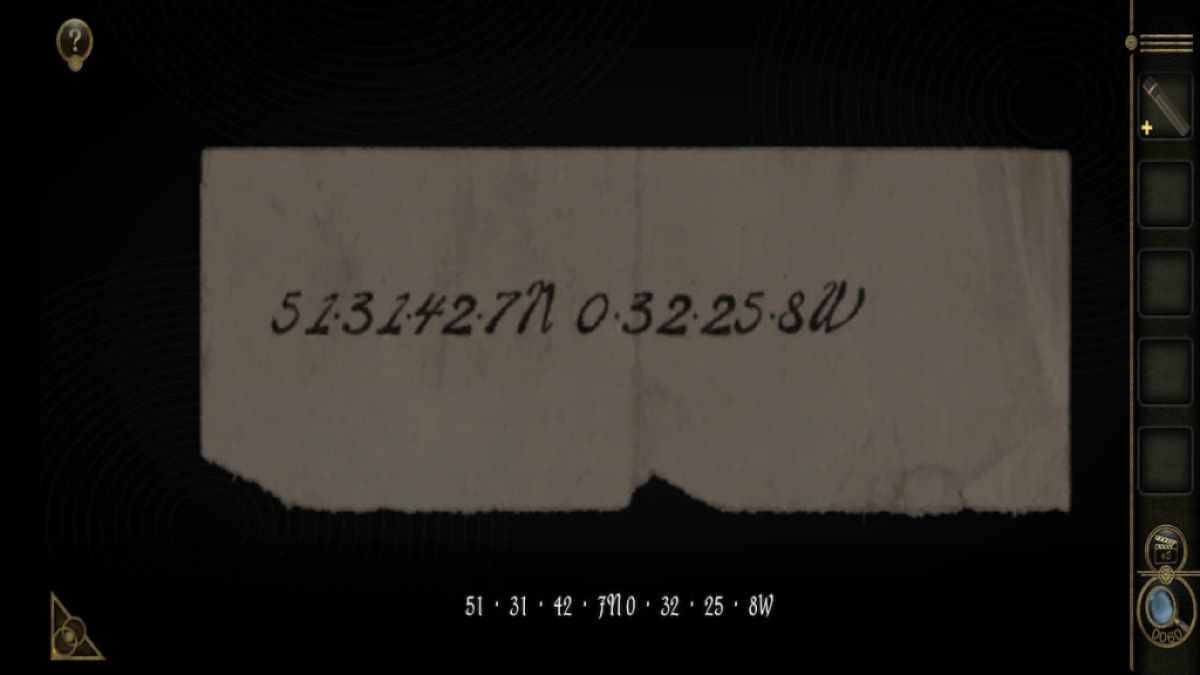
Screenshot by Pro Game Guides
write on the paper are a series of numbers and symbol . After this , the game will display a brusk scene before ending .
Ca n’t get enough of escape room mysteries ? go over out ourHaunted Hunt Walkthroughhere on Pro Game Guides for a grotesque take on the literary genre .
Screenshot by Pro Game Guides
Screenshot by Pro Game Guides
Screenshot by Pro Game Guides
Screenshot by Pro Game Guides

Screenshot by Pro Game Guides

Screenshot by Pro Game Guides
Screenshot by Pro Game Guides
Screenshot by Pro Game Guides
Screenshot by Pro Game Guides
Screenshot by Pro Game Guides
Screenshot by Pro Game Guides
Screenshot by Pro Game Guides
Screenshot by Pro Game Guides
Screenshot by Pro Game Guides
Screenshot by Pro Game Guides
Screenshot by Pro Game Guides
Screenshot by Pro Game Guides

Screenshot by Pro Game Guides
Screenshot by Pro Game Guides

Screenshot by Pro Game Guides
Screenshot by Pro Game Guides
Screenshot by Pro Game Guides
Screenshot by Pro Game Guides
Screenshot by Pro Game Guides

Screenshot by Pro Game Guides
Screenshot by Pro Game Guides
Screenshot by Pro Game Guides

Screenshot by Pro Game Guides

Screenshot by Pro Game Guides
Screenshot by Pro Game Guides
Screenshot by Pro Game Guides

Screenshot by Pro Game Guides
Screenshot by Pro Game Guides
Screenshot by Pro Game Guides
Screenshot by Pro Game Guides

Screenshot by Pro Game Guides
Screenshot by Pro Game Guides

Screenshot by Pro Game Guides
Screenshot by Pro Game Guides
Screenshot by Pro Game Guides

Screenshot by Pro Game Guides
Screenshot by Pro Game Guides
Screenshot by Pro Game Guides
Screenshot by Pro Game Guides

Screenshot by Pro Game Guides
Screenshot by Pro Game Guides

Screenshot by Pro Game Guides
Screenshot by Pro Game Guides
Screenshot by Pro Game Guides
Screenshot by Pro Game Guides
Screenshot by Pro Game Guides
Screenshot by Pro Game Guides
Screenshot by Pro Game Guides
Screenshot by Pro Game Guides
Screenshot by Pro Game Guides
Screenshot by Pro Game Guides
Screenshot by Pro Game Guides
Screenshot by Pro Game Guides
Screenshot by Pro Game Guides

Screenshot by Pro Game Guides
Screenshot by Pro Game Guides
Screenshot by Pro Game Guides
Screenshot by Pro Game Guides
Screenshot by Pro Game Guides
Screenshot by Pro Game Guides
Screenshot by Pro Game Guides

Screenshot by Pro Game Guides
Screenshot by Pro Game Guides
Screenshot by Pro Game Guides
Screenshot by Pro Game Guides
Screenshot by Pro Game Guides

Screenshot by Pro Game Guides

Screenshot by Pro Game Guides
Screenshot by Pro Game Guides
Screenshot by Pro Game Guides

Screenshot by Pro Game Guides
Screenshot by Pro Game Guides
Screenshot by Pro Game Guides
Screenshot by Pro Game Guides
Screenshot by Pro Game Guides
Screenshot by Pro Game Guides
Screenshot by Pro Game Guides
Screenshot by Pro Game Guides
Screenshot by Pro Game Guides

Screenshot by Pro Game Guides
Screenshot by Pro Game Guides
Screenshot by Pro Game Guides
Screenshot by Pro Game Guides
Screenshot by Pro Game Guides
Screenshot by Pro Game Guides

Screenshot by Pro Game Guides

Screenshot by Pro Game Guides
Screenshot by Pro Game Guides

Screenshot by Pro Game Guides
Screenshot by Pro Game Guides
Screenshot by Pro Game Guides
Screenshot by Pro Game Guides
Screenshot by Pro Game Guides
Screenshot by Pro Game Guides
Screenshot by Pro Game Guides
Screenshot by Pro Game Guides
Screenshot by Pro Game Guides
Screenshot by Pro Game Guides
Screenshot by Pro Game Guides

Screenshot by Pro Game Guides
Screenshot by Pro Game Guides

Screenshot by Pro Game Guides

Screenshot by Pro Game Guides
Screenshot by Pro Game Guides

Screenshot by Pro Game Guides
Screenshot by Pro Game Guides
Screenshot by Pro Game Guides

Screenshot by Pro Game Guides
Screenshot by Pro Game Guides
Screenshot by Pro Game Guides
Screenshot by Pro Game Guides
Screenshot by Pro Game Guides
Screenshot by Pro Game Guides
Screenshot by Pro Game Guides
Screenshot by Pro Game Guides
Screenshot by Pro Game Guides
Screenshot by Pro Game Guides

Screenshot by Pro Game Guides
Screenshot by Pro Game Guides
Screenshot by Pro Game Guides
Screenshot by Pro Game Guides
Screenshot by Pro Game Guides

Screenshot by Pro Game Guides
Screenshot by Pro Game Guides
Screenshot by Pro Game Guides
Screenshot by Pro Game Guides

Screenshot by Pro Game Guides

Screenshot by Pro Game Guides
Screenshot by Pro Game Guides

Screenshot by Pro Game Guides

Screenshot by Pro Game Guides
Screenshot by Pro Game Guides
Screenshot by Pro Game Guides
Screenshot by Pro Game Guides
Screenshot by Pro Game Guides
Screenshot by Pro Game Guides

Screenshot by Pro Game Guides
Screenshot by Pro Game Guides
Screenshot by Pro Game Guides
Screenshot by Pro Game Guides
Screenshot by Pro Game Guides

Screenshot by Pro Game Guides
Screenshot by Pro Game Guides
Screenshot by Pro Game Guides

Screenshot by Pro Game Guides
Screenshot by Pro Game Guides
Screenshot by Pro Game Guides
Screenshot by Pro Game Guides
Screenshot by Pro Game Guides
Screenshot by Pro Game Guides
