Glide through these puzzles with simplicity .
3D Escape Room Detective Story is a five - chapter mystery biz focused on a mysterious serial of execution and disappearances . In this templet , I ’ll walk you through all of the puzzles found in the 2nd chapter of 3D Escape Room Detective Story .
Due to the length of the game and the amount of mystifier , I ’ve fall in each chapter its own guide . The other four are list below to help you navigate them well .

Chapter two begins with a call from Reporter Owen discussing the former case ’s success as well as their investigation into Churchill ’s piano teacher . After receiving the address of the instructor , you head out to investigate his home for redundant clues .
3D Escape Room Detective Story Chapter 2 guide
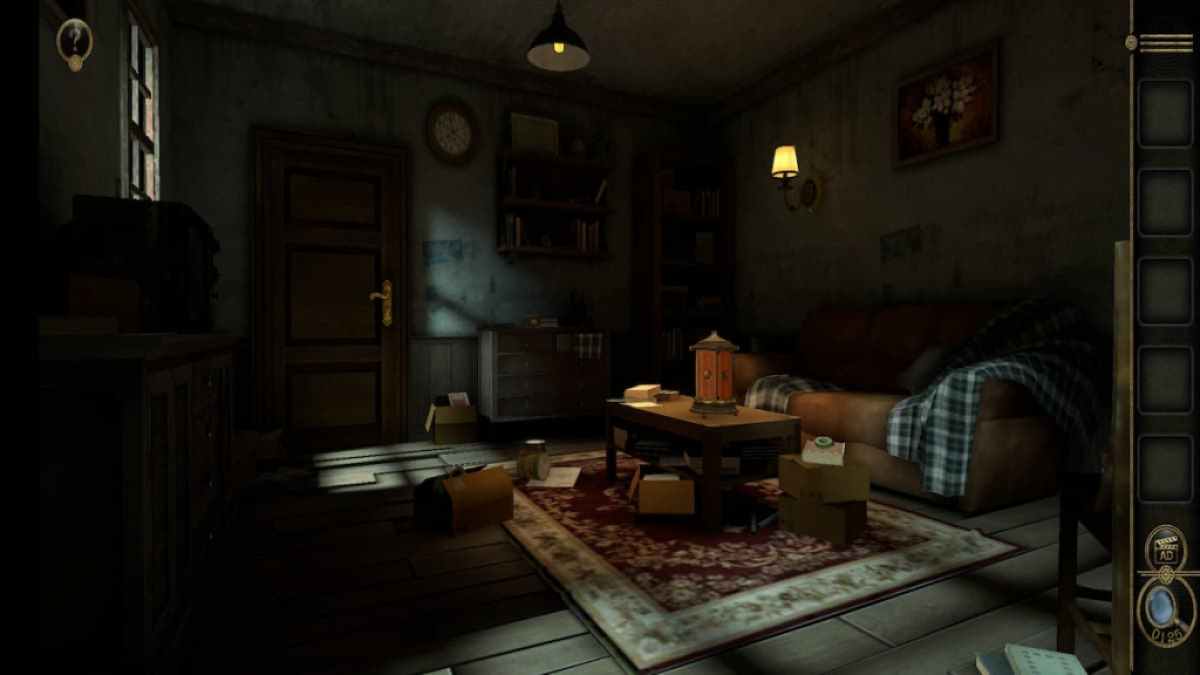
Chapter 2 begins in a dimly lit living elbow room . A small box can be seen on the back comeback while an intricate cigar box adorn the coffee bean mesa .
Box puzzle
Head over to the box seat first . Press the orthogonal button and lift the lid to open up it and obtain a Metal Spiral Decoration .
Living room cigar box puzzles
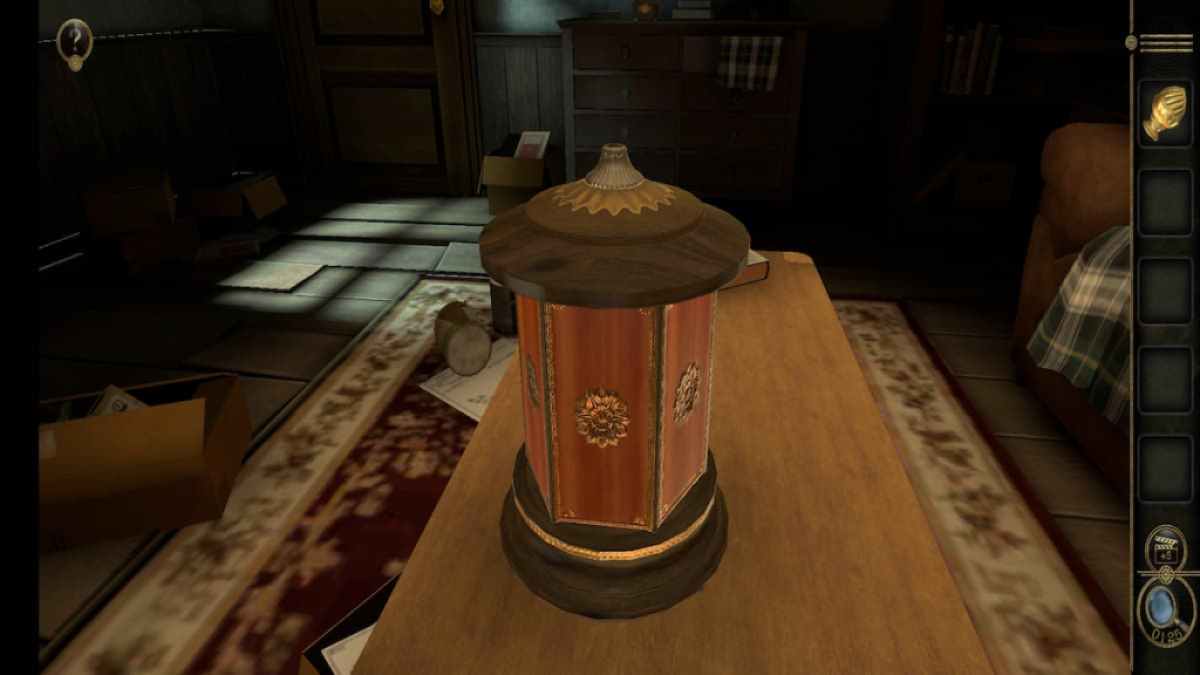
Leave behind the empty box and look at the cigar box . If you look at its top , you ’ll notice that a man of it is missing .
add together the Metal Spiral Decoration to the top of the box to transform it into a set of three butterfly - themed puzzles . Take musical note of the colors of the butterfly wings between the puzzles — the color of the wing penny-pinching to each puzzler indicates what color that teaser should be .
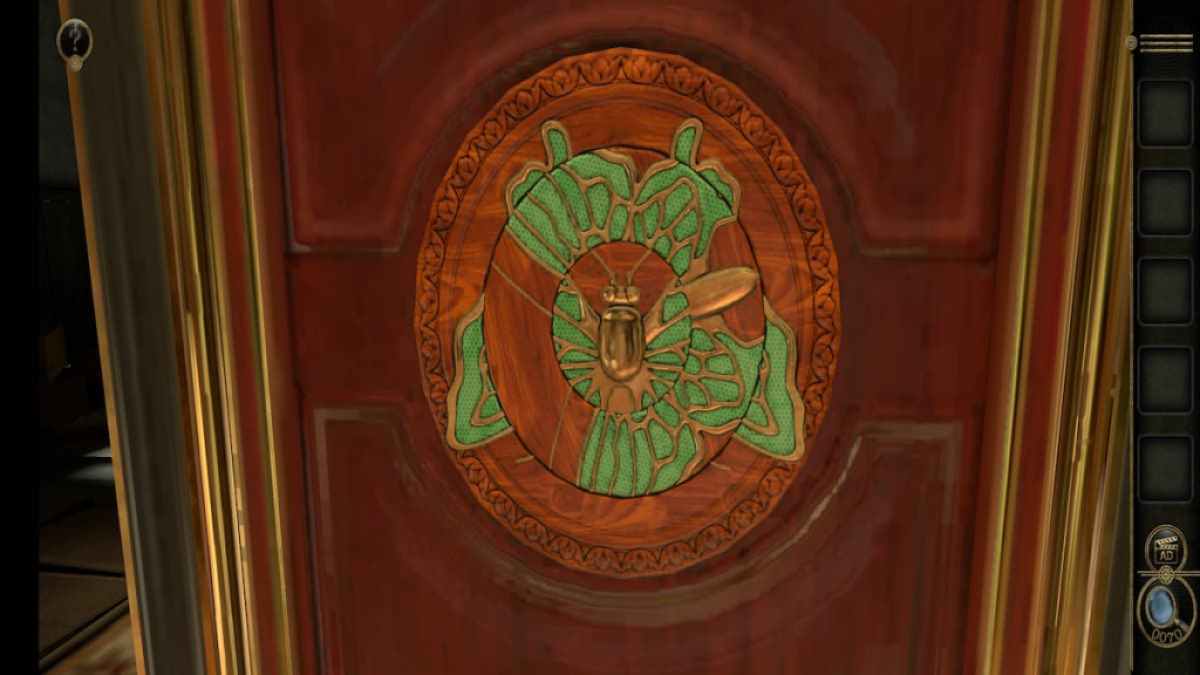
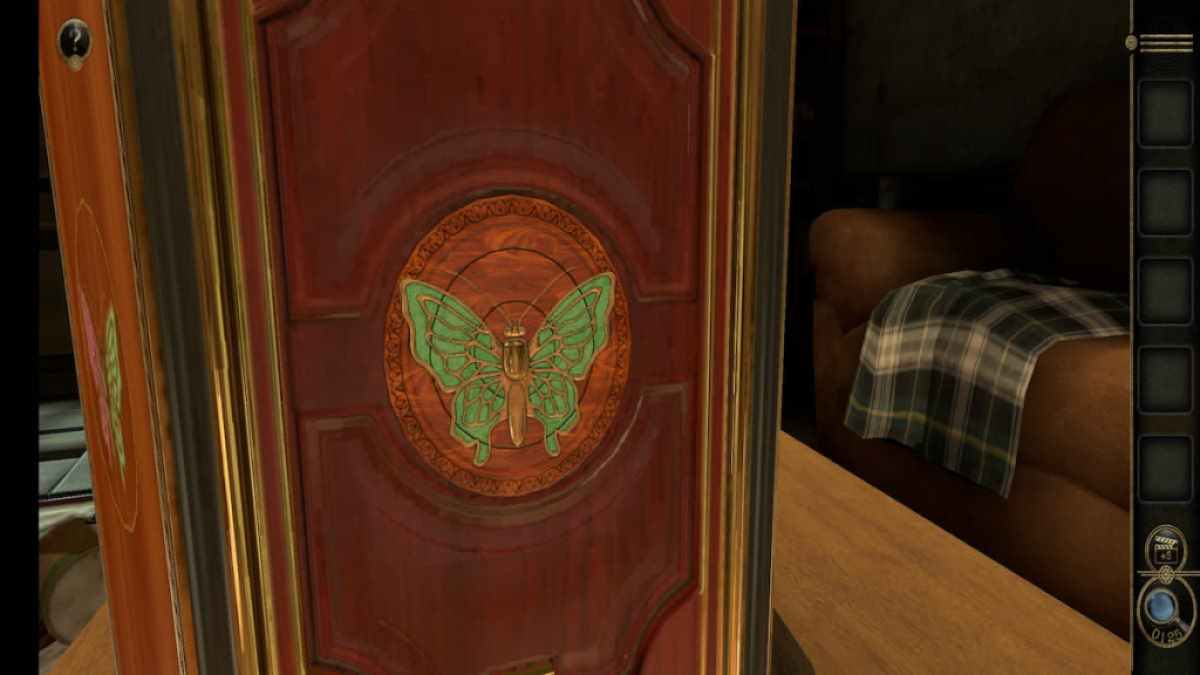
The first puzzle involves go around three forget me drug to make an image of a light-green butterfly .
Screenshot by Pro Game Guides
Rotate the inner circle first , then the outer one to complete the image .
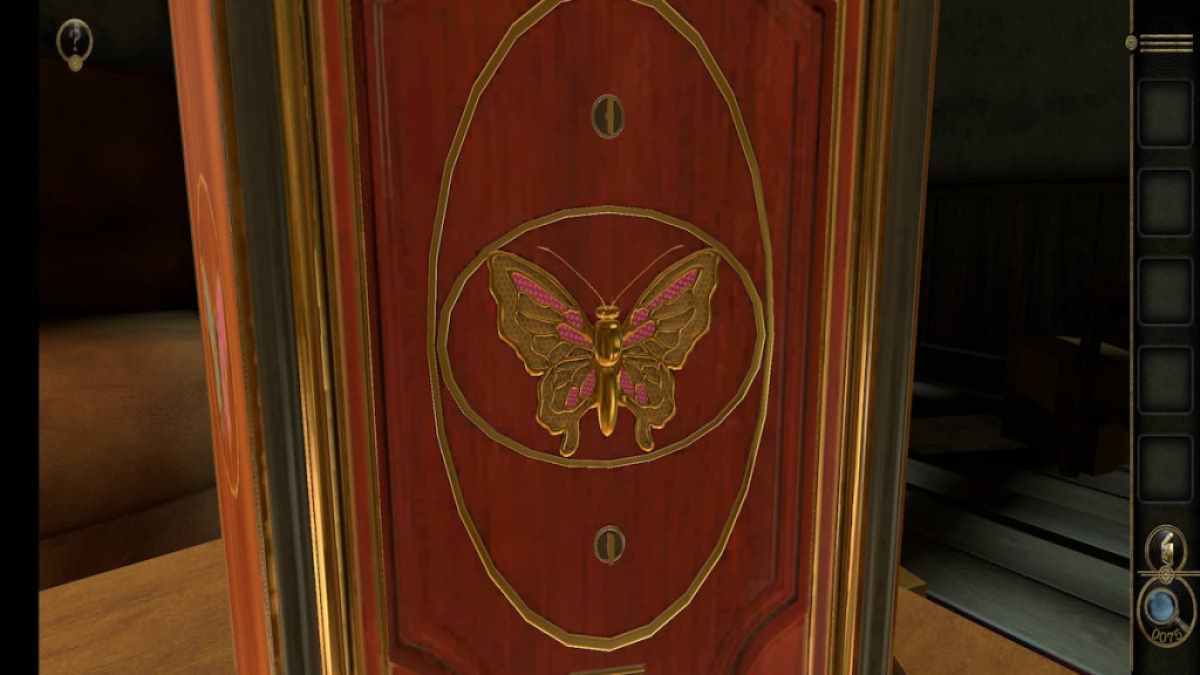
The next puzzle involves spread out two shift to change the color of the butterfly stroke in the heart . Note that the wings closest to this puzzle are pinkish in colouring , so this butterfly stroke should be as well .
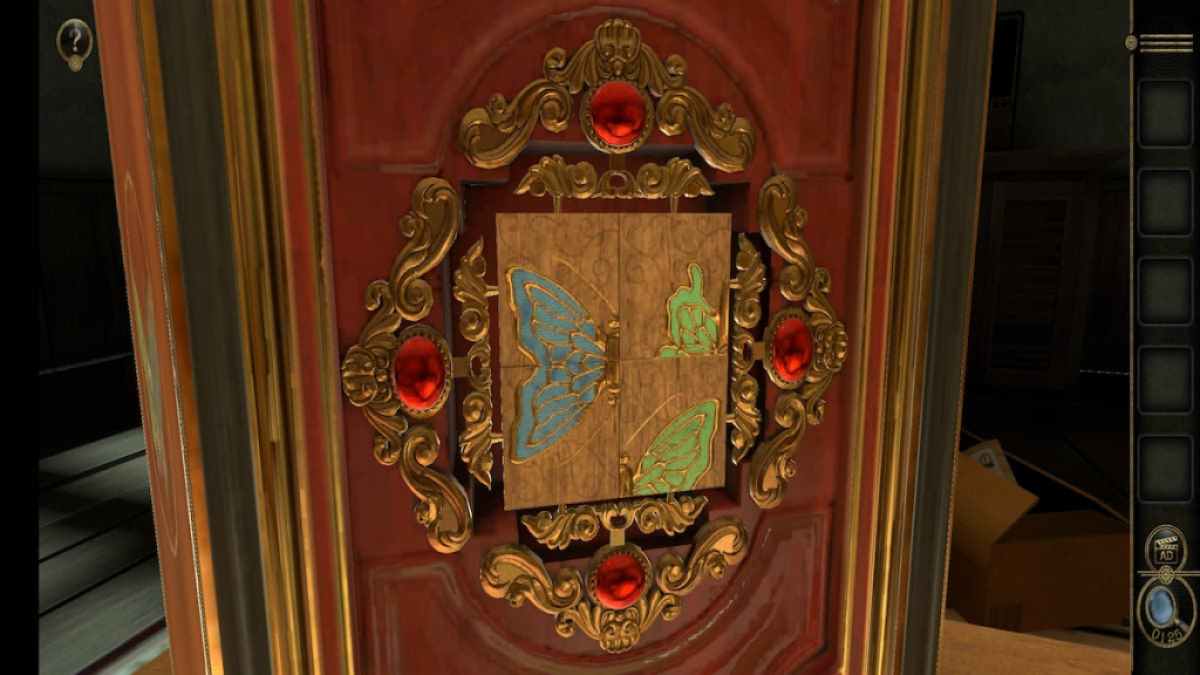
The final puzzle involve pressing four button to leaf tiles between green and naughty butterfly stroke fender . Each clit flips the two tiles close to it . The nearby butterfly wings are blue , so sharpen on putting the down in the mouth wing in the proper spot .
Screenshot by Pro Game Guides
Completing this puzzler will wind up the cigar boxwood , giving you a key to the next room .
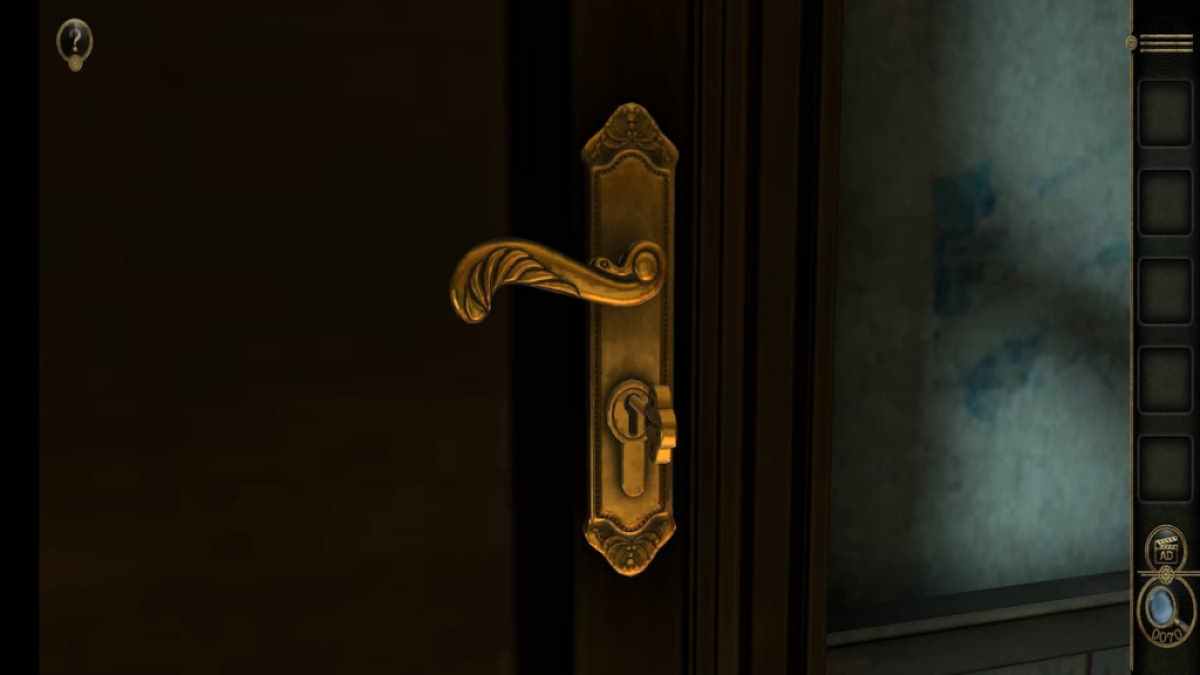
rate the key fruit into the door ’s keyhole and turn out it clockwise to enter the second room .
Entering second room
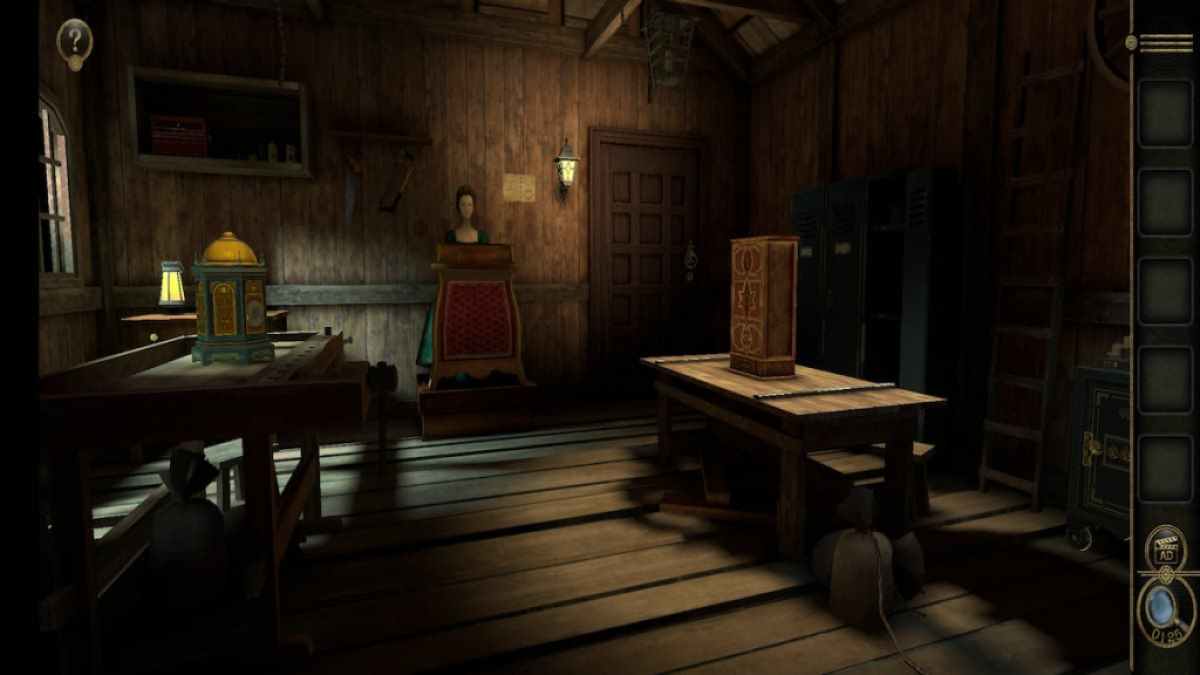
The 2d elbow room is a shop filled with carpentry projects . The key sections of the elbow room are a 2nd decorative cigar box , a music stand with a form , a tall wooden box , and a safe .
Opening safe
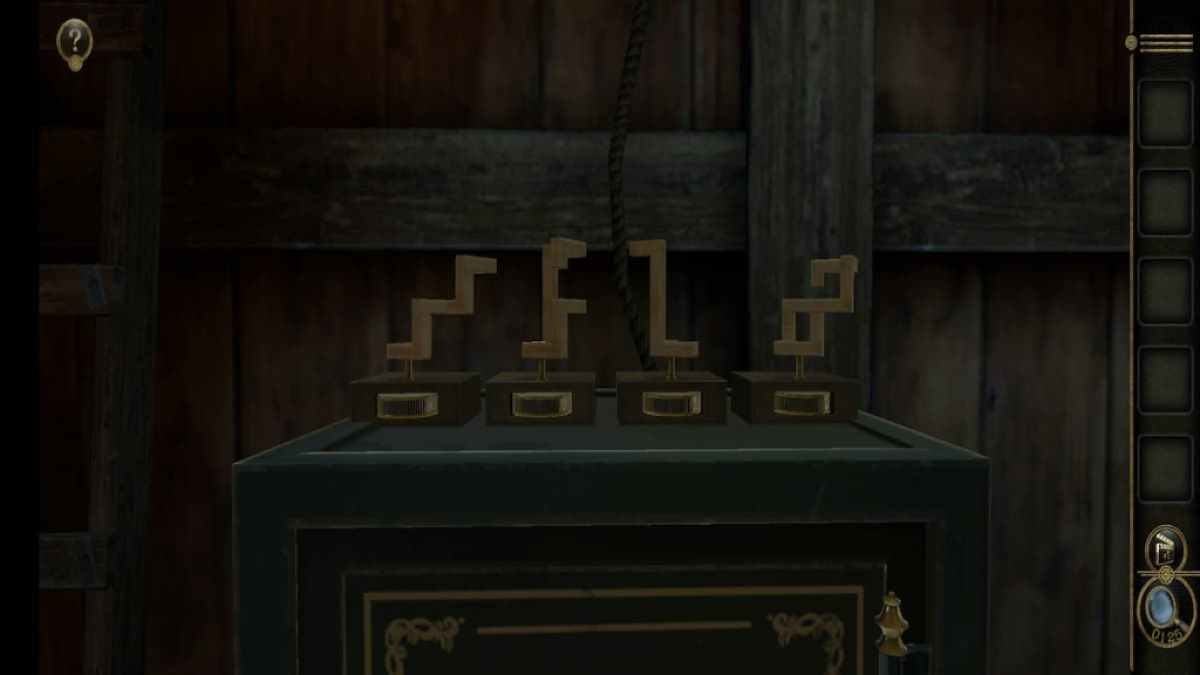
Head over to the safe first , look at the wooden pieces on top of it .
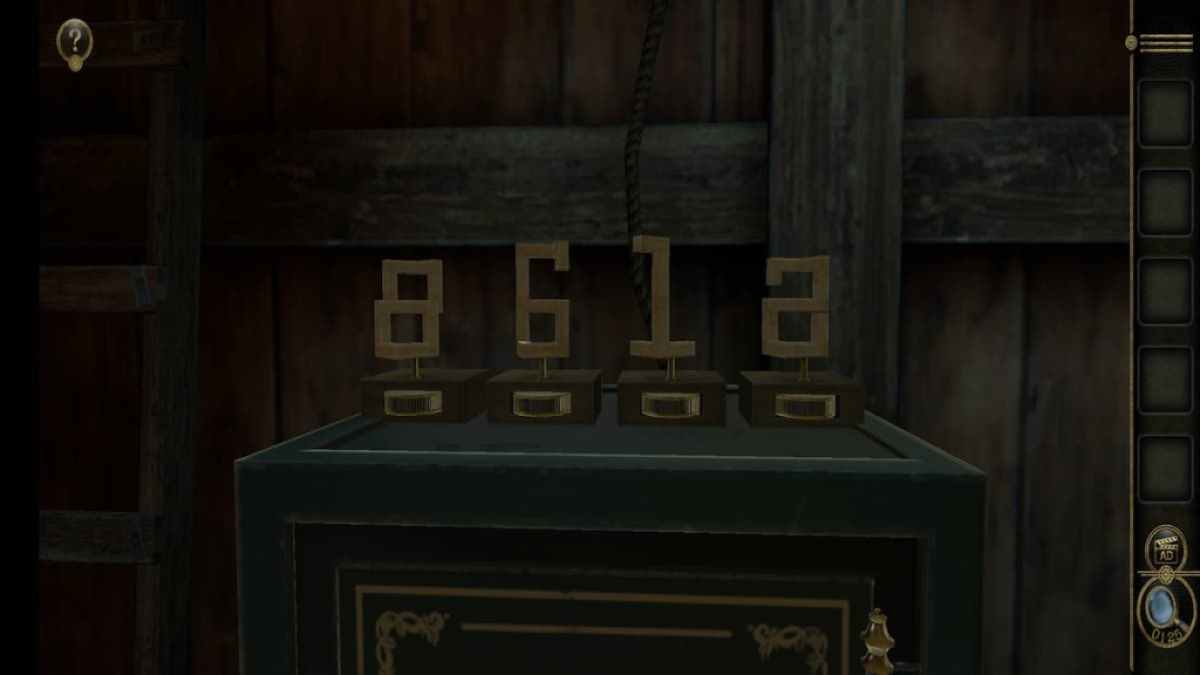
splay these wooden blocks gives you the password to the dependable .
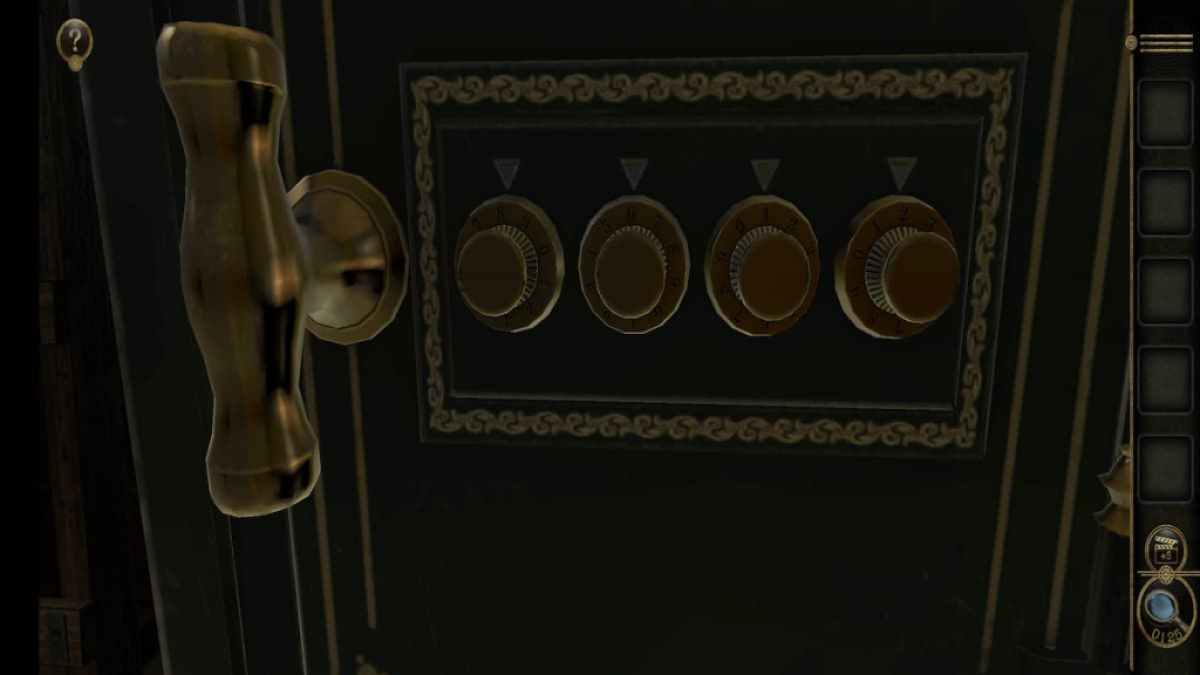
Use the dials towards the bottom of the secure to enter the number . afford the safe will give you a Metal Decoration and a Password Cylinder . There is a locked door as well , which can not be opened yet .
Screenshot by Pro Game Guides
Second cigar box
look at the cigar box on the worktable . Like with the previous one , this one is missing its top .
Place the Metal Decoration from the safety onto the cigar box .
go around the top so that the two red triangles point at each other .

Screenshot by Pro Game Guides
This will give you a grim Small Decorative Symbol with " VI " grave on it . You ’ll also detect a small round crustal plate contain the astrological symbol for Aries in this compartment .
There is a blank with a red nookie hanging out of it between two of the other gamy decorations .
Screw the Small Decorative Symbol onto this reddened foundation . Take note of the " VI " numerical on the symbol and the semblance of the base , as you ’ll need it for a puzzle subsequently on .
Screenshot by Pro Game Guides
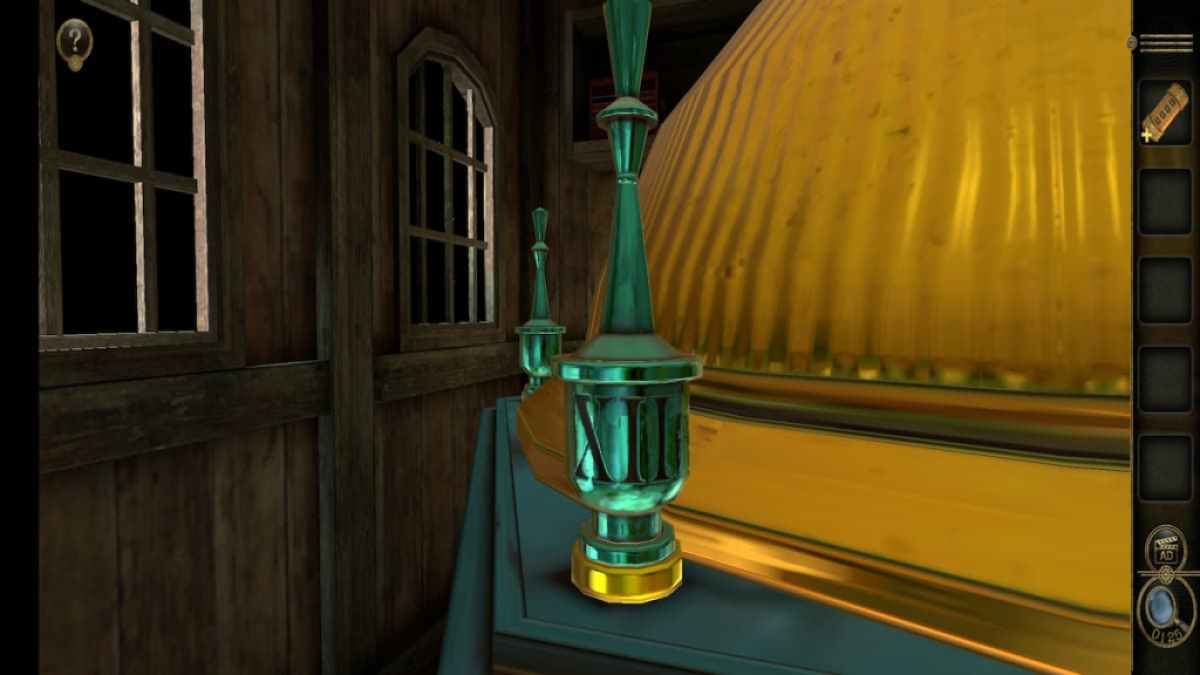
If you look around the other profane ornamentation , you ’ll mark another laurel wreath with the lettering " XII " . Write the number and the yellow-bellied color of its base down alongside the premature numerical and colour .
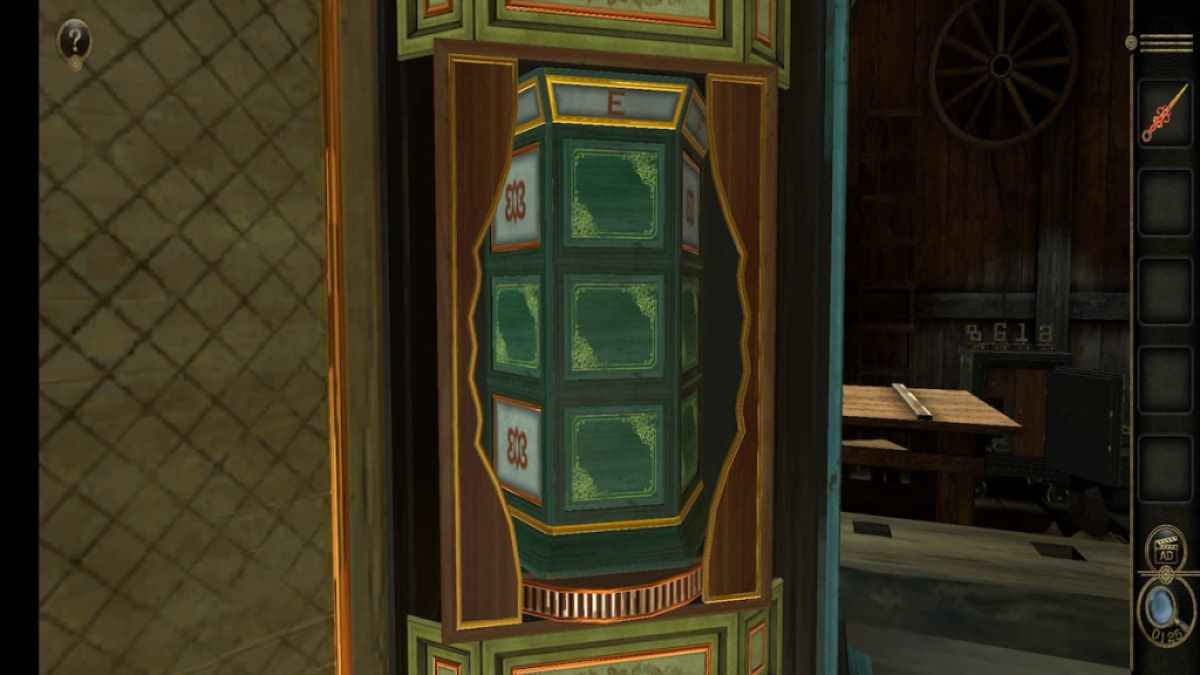
Once the blue-blooded decoration has been screwed on top of the cigar box , a slipper puzzle will unlock on the side .
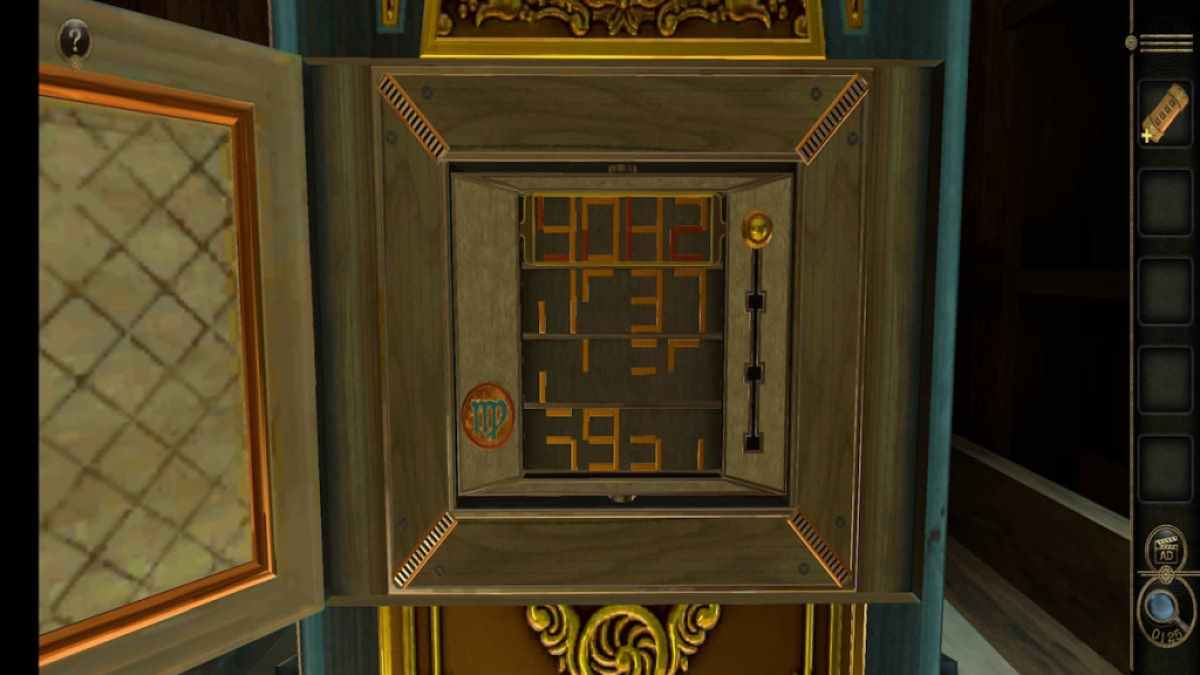
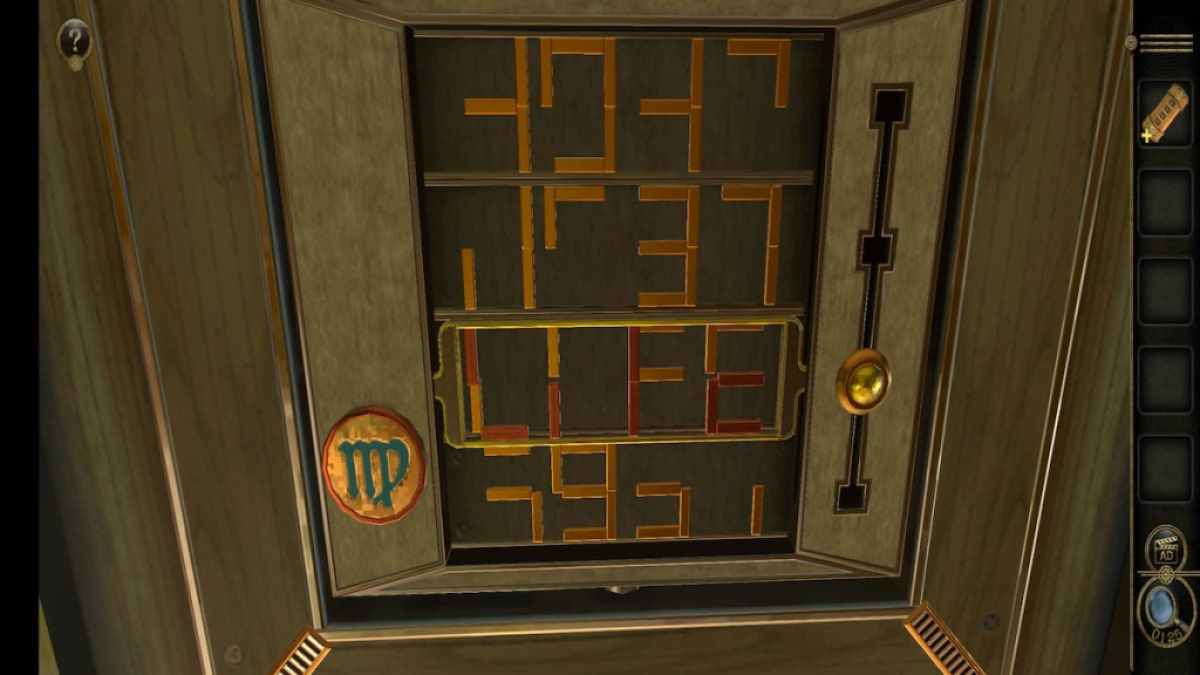
tangle each luger into their respective corner reveals a 2d slider puzzle . Take note of the Virgo symbol at the bottom left .
Screenshot by Pro Game Guides
drag the chute down to the third time slot causes the symbols to spell out the word " Life " .
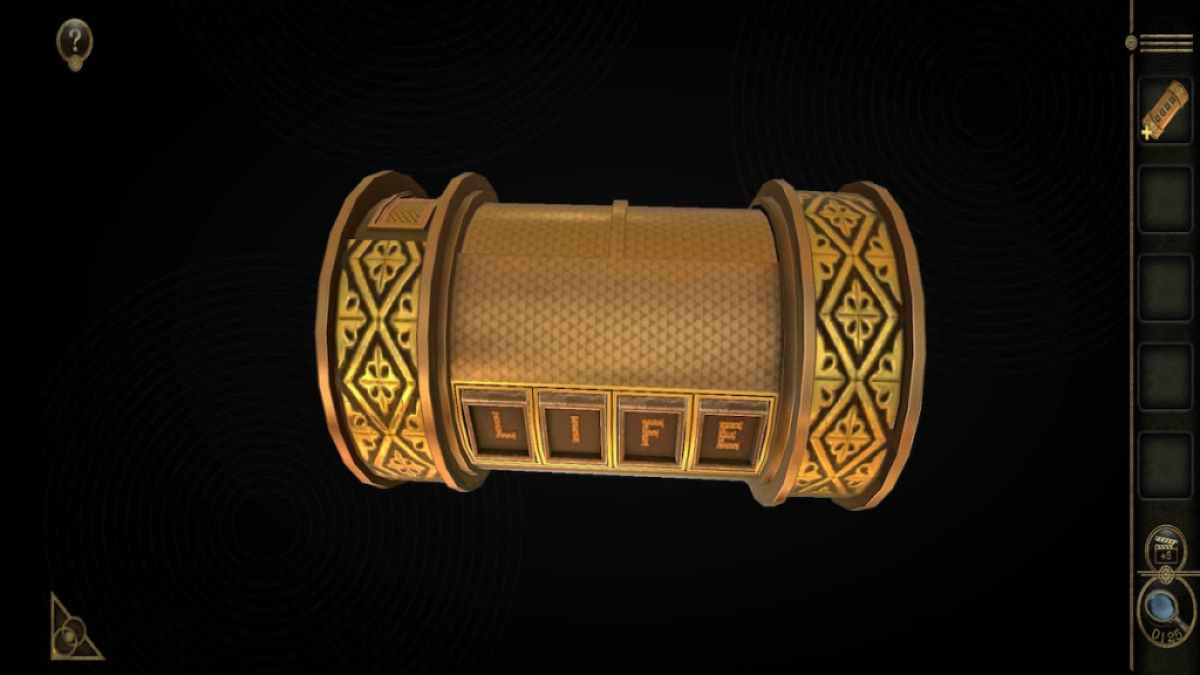
Pull out the Password Cylinder and go into the discussion " living " by rotating the four slots .
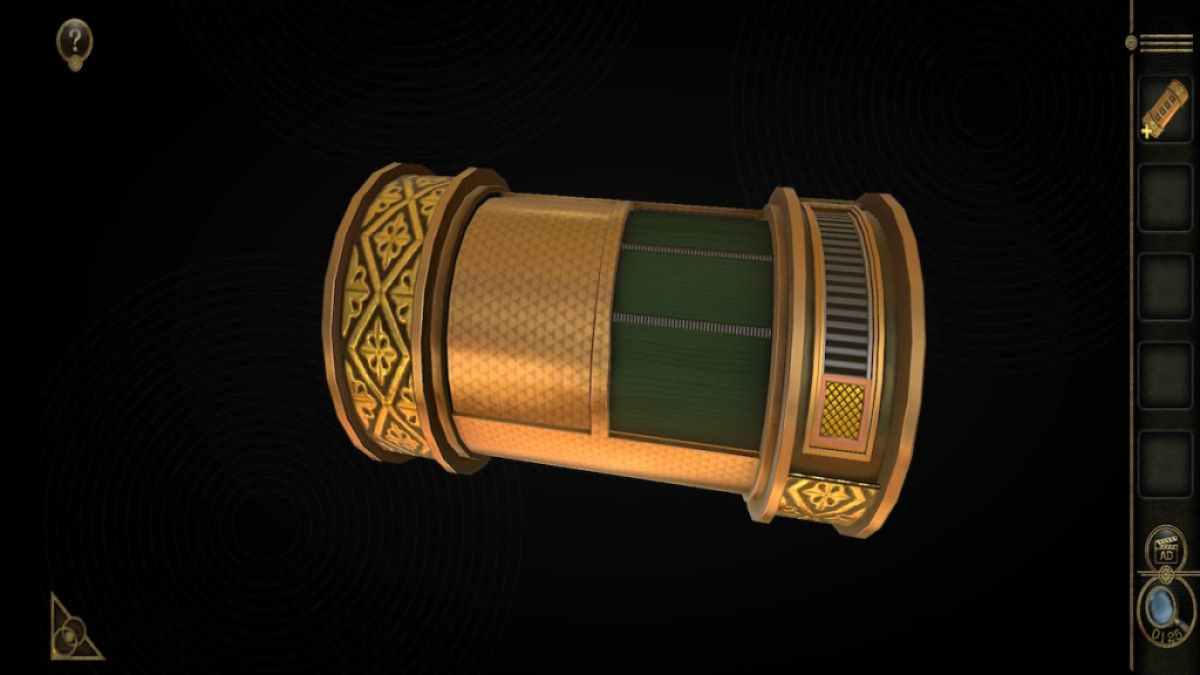
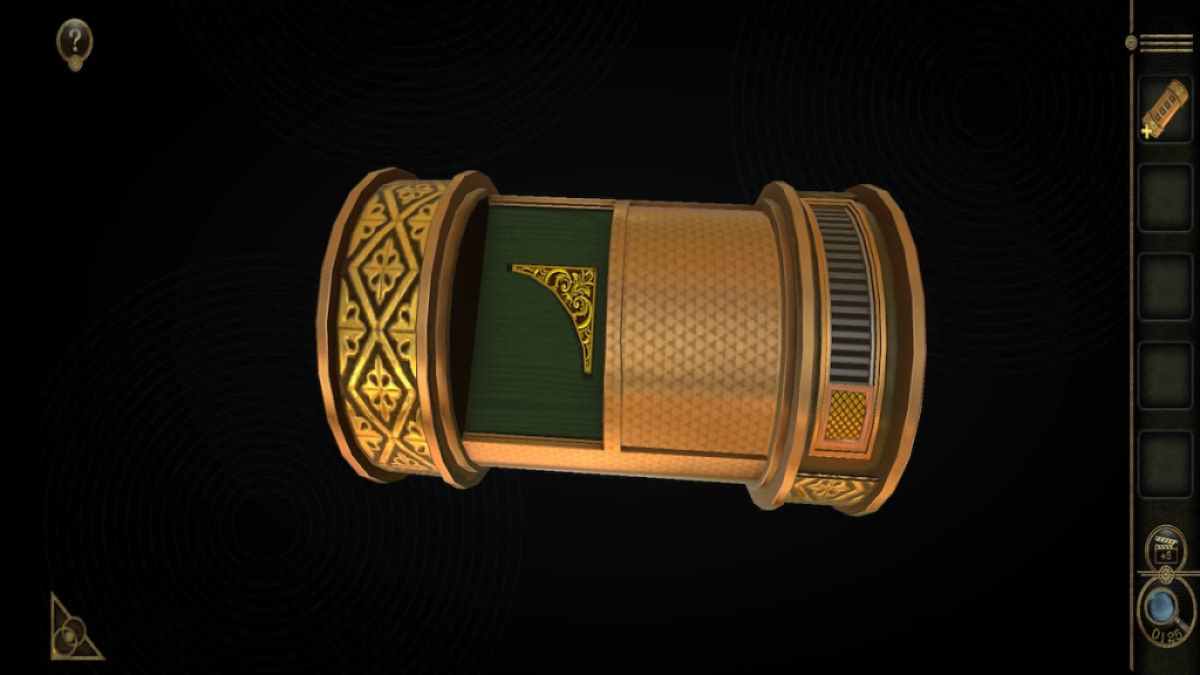
A slider will look on the border of the piston chamber . Sliding it removes part of the center of the piston chamber .
Screenshot by Pro Game Guides
Sliding the remaining part of the piston chamber to the other side reveals a Gold Carving .
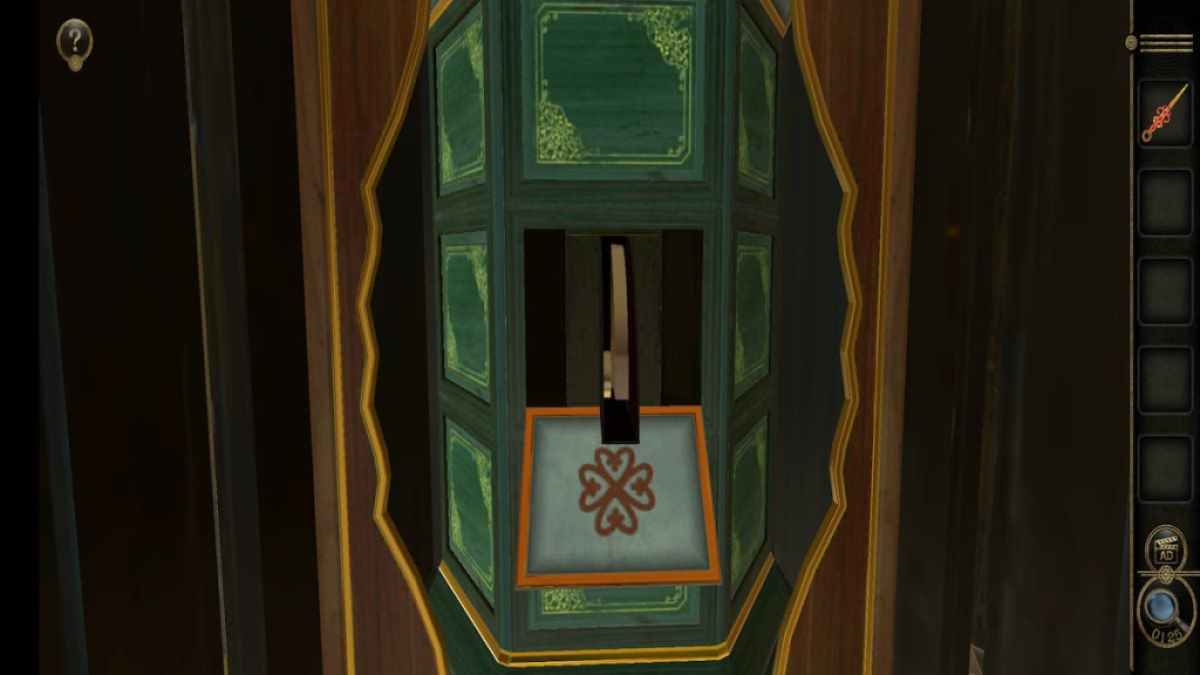
analyse the sides of the cigar box to find that one side is miss a piece .
Place the Gold Carving into the missing part to unlock the star divination puzzle .
Screenshot by Pro Game Guides
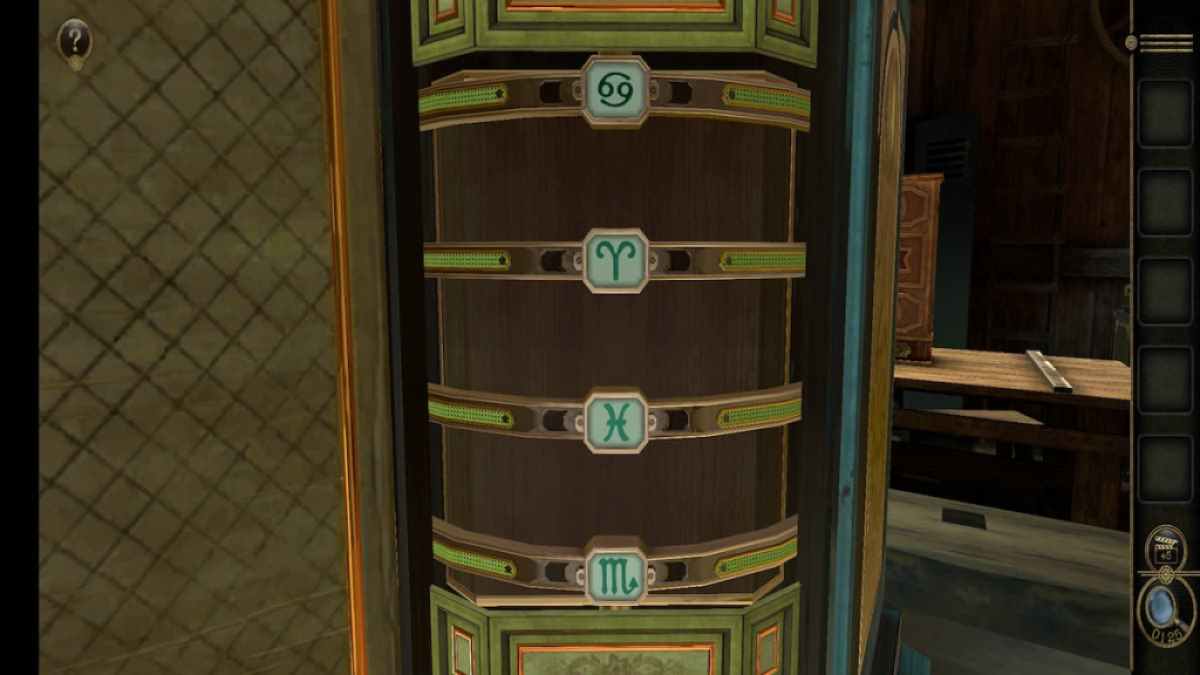
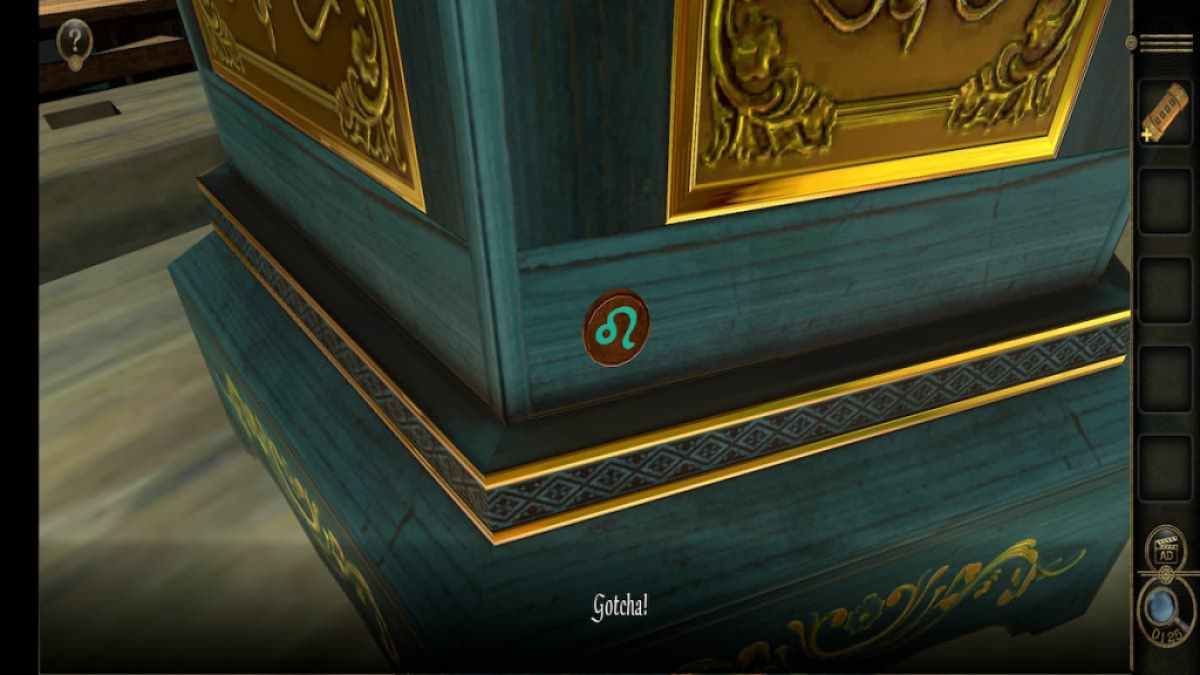
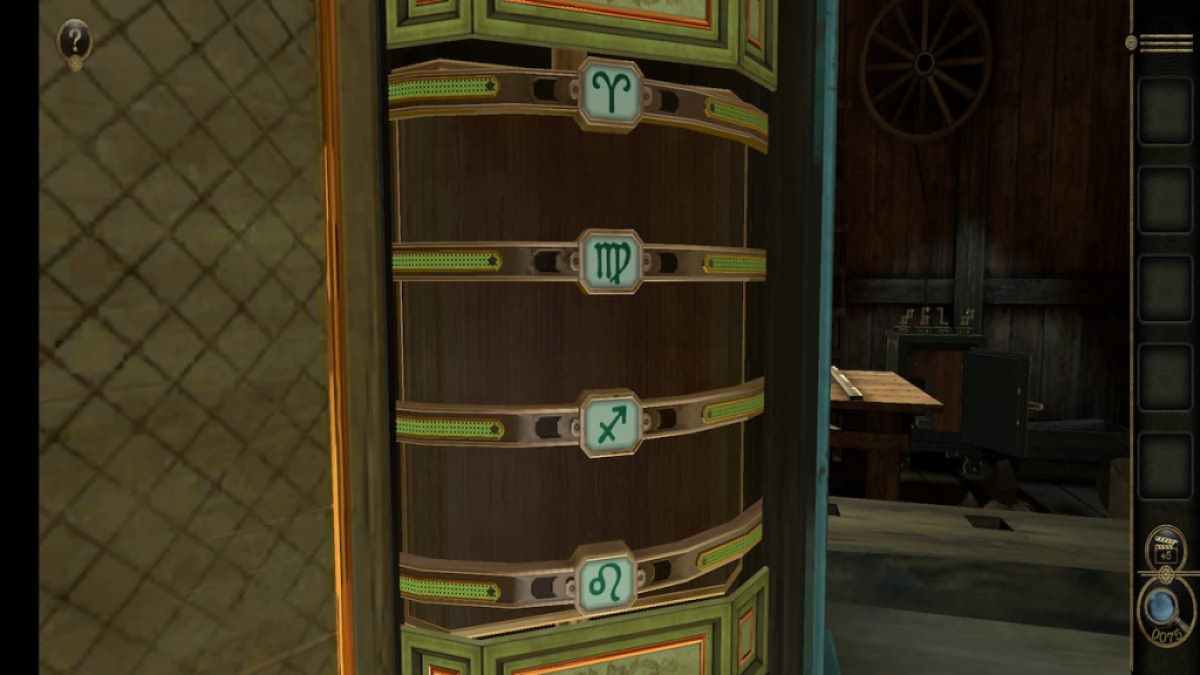
By this point , you ’ve already learn the symbolization for Aries and the symbolization for Virgo . The mark for Leo can be found on the side of the cigar box .
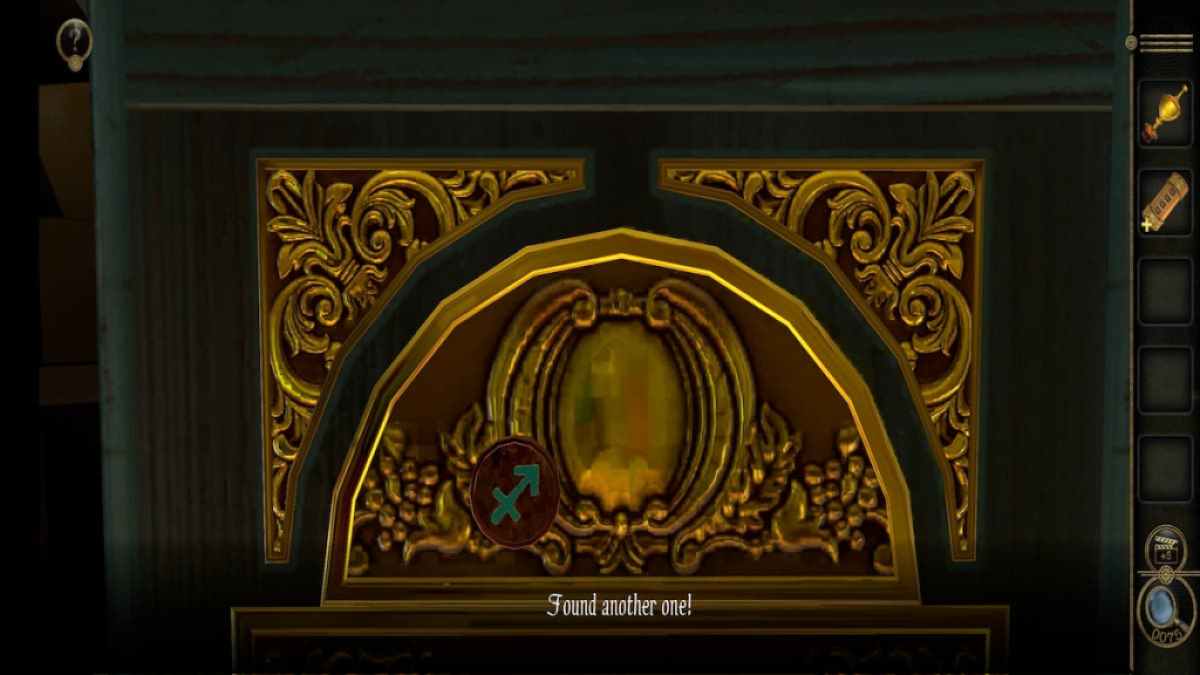
The sign for Sagittarius can be found above the clock on the cigar box .
From top to bottom , the signs ' edict in the puzzle are Aries , Virgo , Sagittarius , and Leo .

Screenshot by Pro Game Guides
Entering them correctly will let out a readiness of doorway .
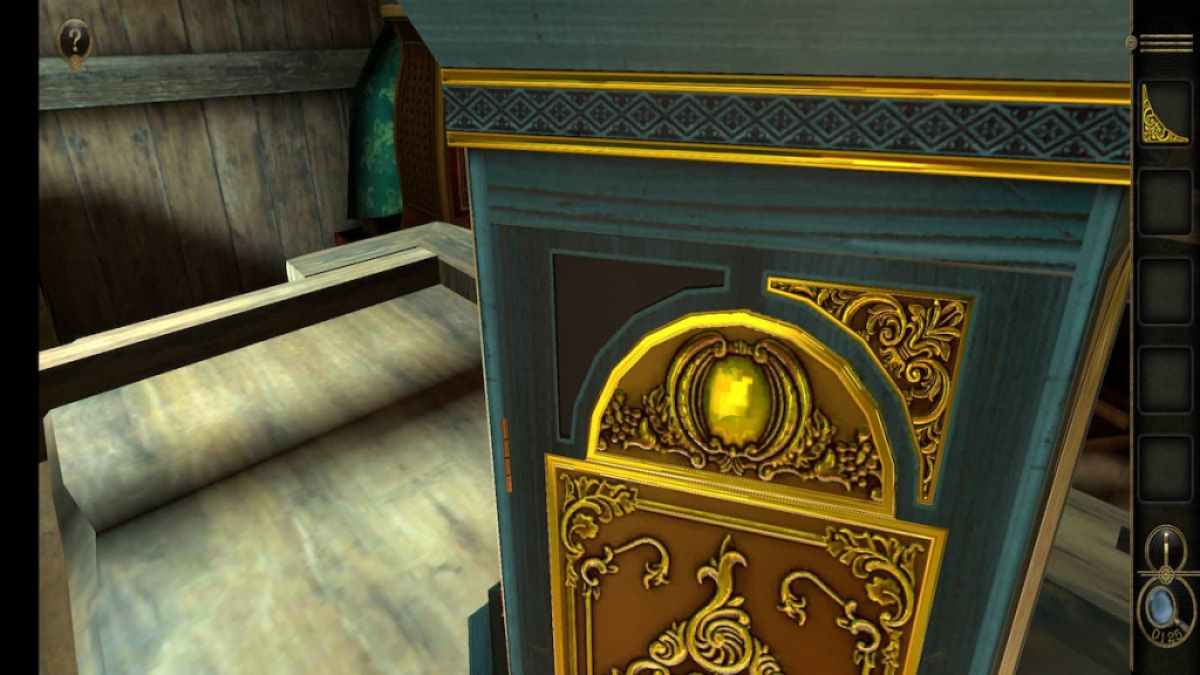
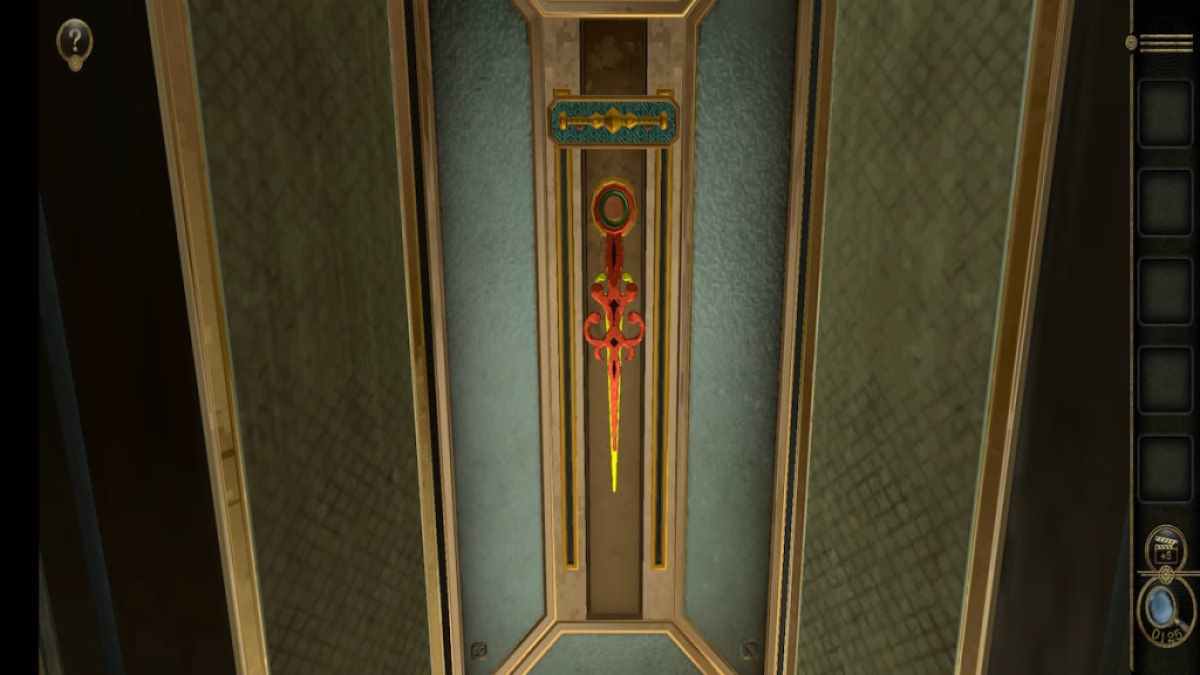
These doorway can be pulled open to display a set of Clock Pointers .
Take the Clock Pointers and skid the blue slider hidden behind them to exit the doors and unwrap a unexampled puzzle .
Screenshot by Pro Game Guides
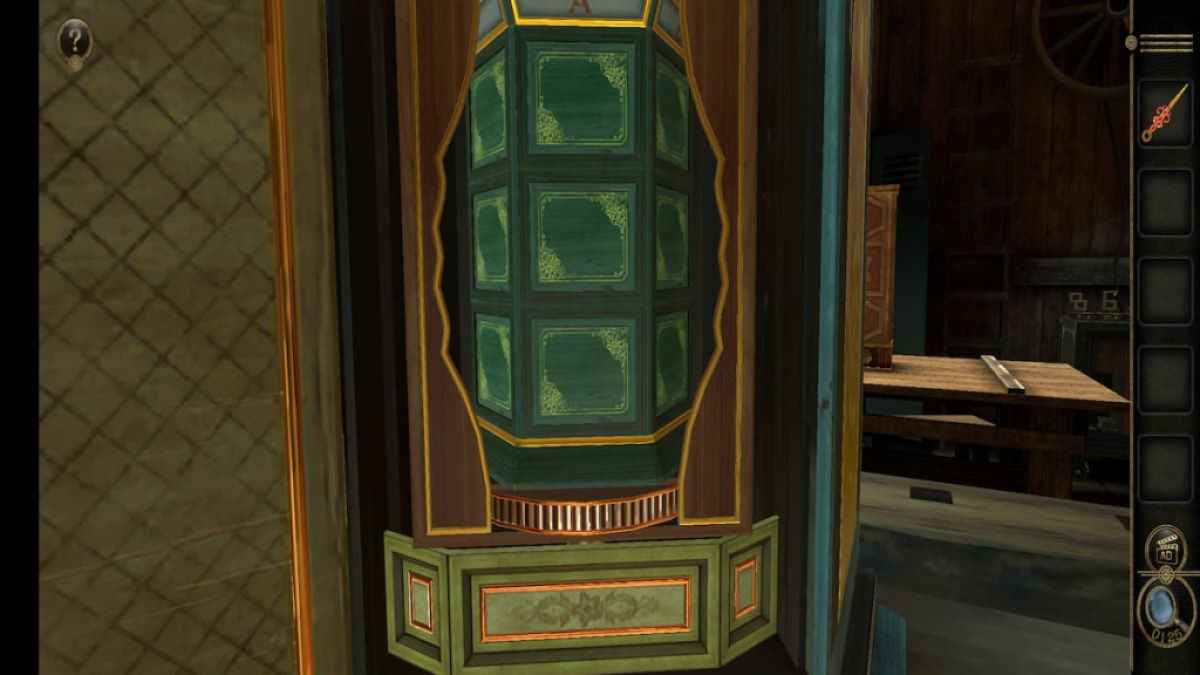
This puzzle requires pair plug-in to be chosen in sets of three . The puzzle can be rotated unendingly and matching cards can be found both next to each other and far aside .
Solving this puzzler throw you a Fan - Shaped Metal Piece .
take the Fan - Shaped Metal Piece from your stock list . Tap the top of the while and drag it counterclockwise to turn the small-arm into a Circular Metal Piece .
Screenshot by Pro Game Guides
Related : get out from Castle Claymount Walkthrough
Clock puzzle
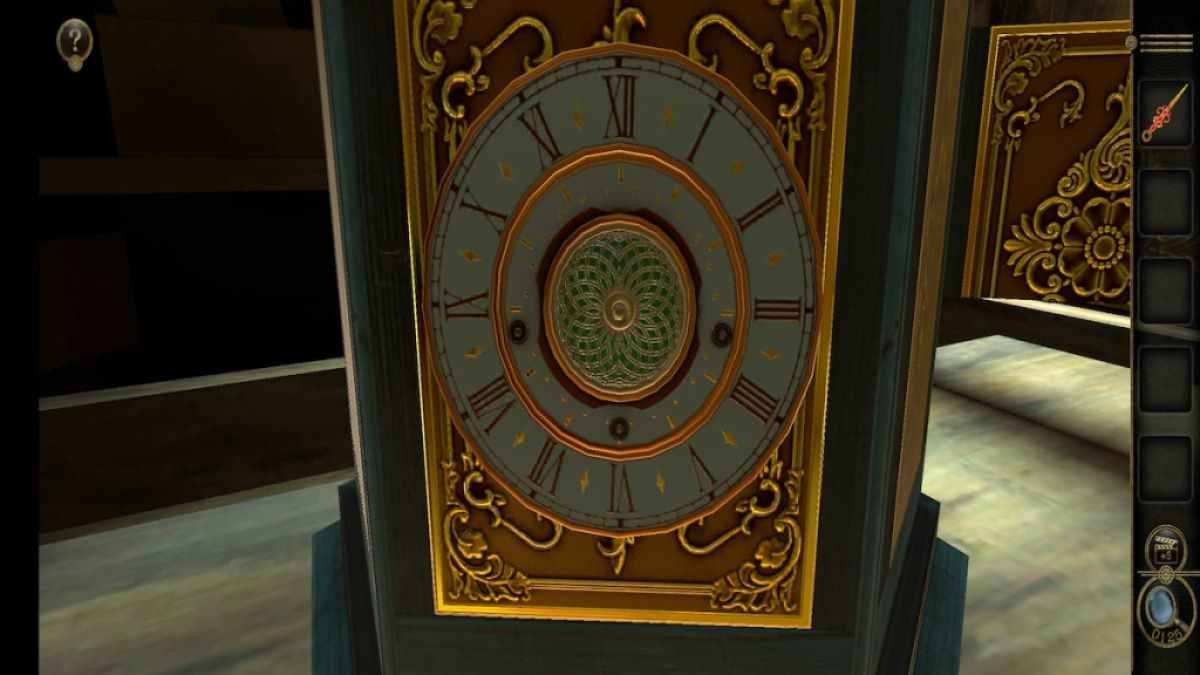
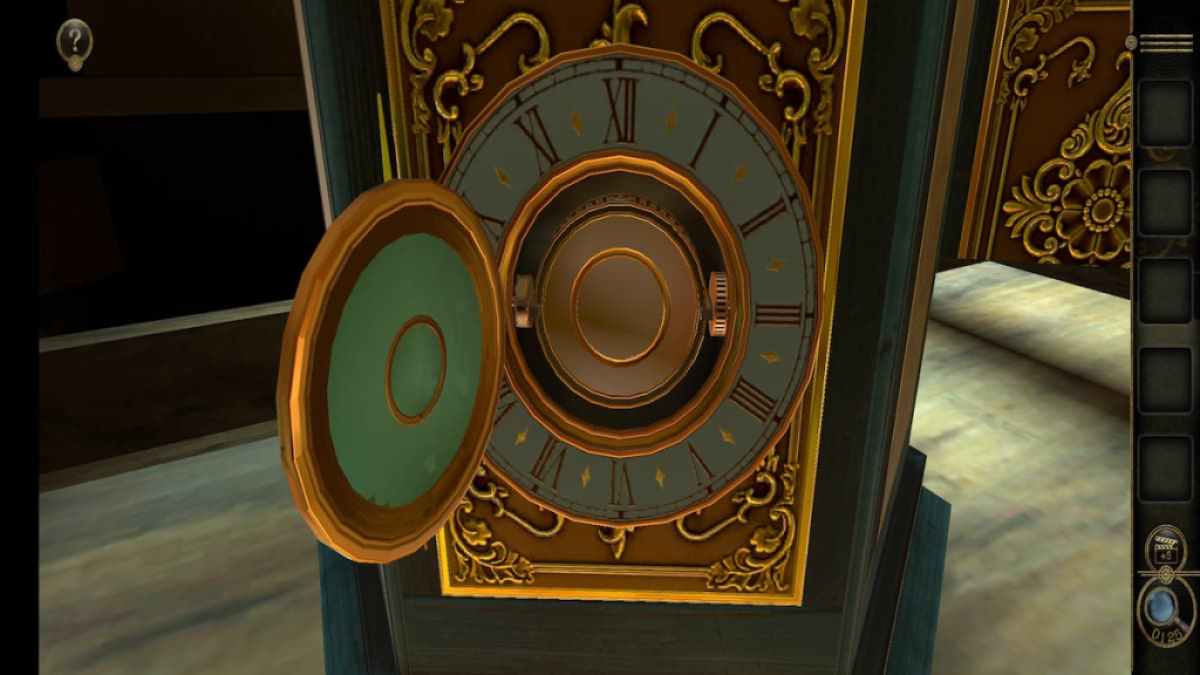
To start the concluding cigar box puzzle , add the Circular Metal Piece to the center of the clock .
tot up the Clock Pointers on top of the circular metal objet d’art .
The larger clock bridge player is cerise while the smaller one is yellow . This is where the clues from the blue decorations come in ready to hand . The one with the yellow base was " XII " , so move the yellow hand to point at " XII " on the clock . also , point the red hand to the " VI " numerical on the clock . Once they ’re in the proper topographic point , the clock will open to disclose a prominent metallic circle . Rotate the circle to unwrap the next puzzle .
Screenshot by Pro Game Guides
Butterfly disc puzzle
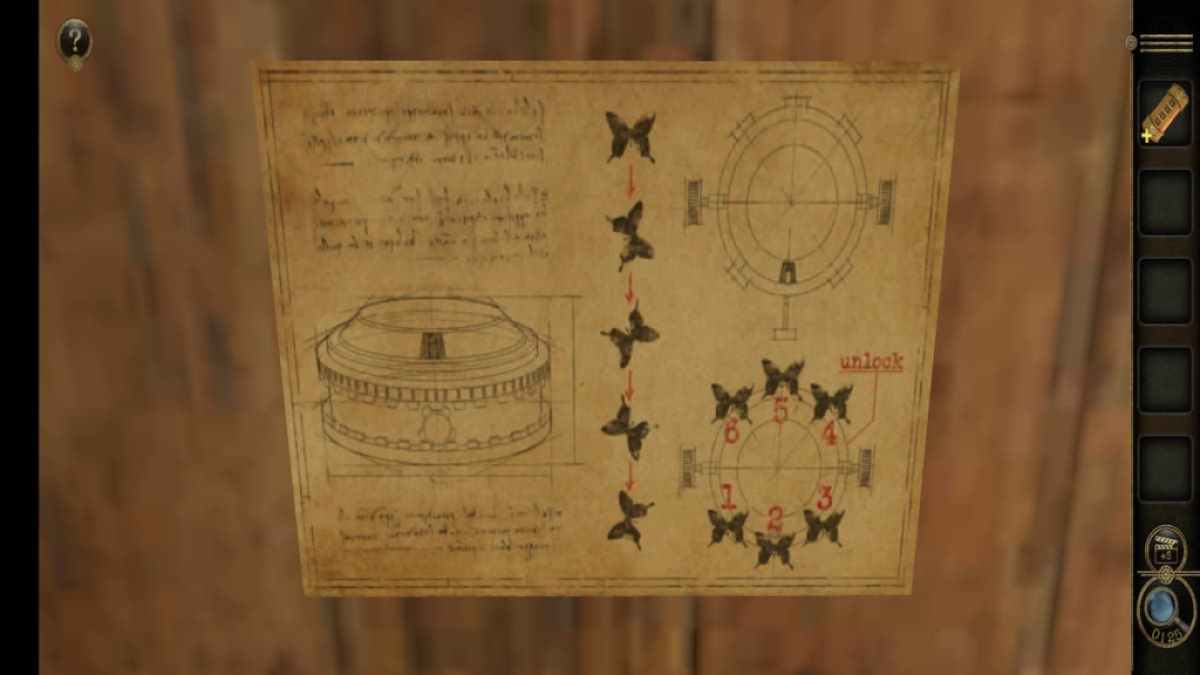
Before pop out this next puzzle , you ’ll want to take a flavor at the butterfly pic on the wall . It demonstrates how the butterflies rotate as well as where they need to be face in the puzzle .
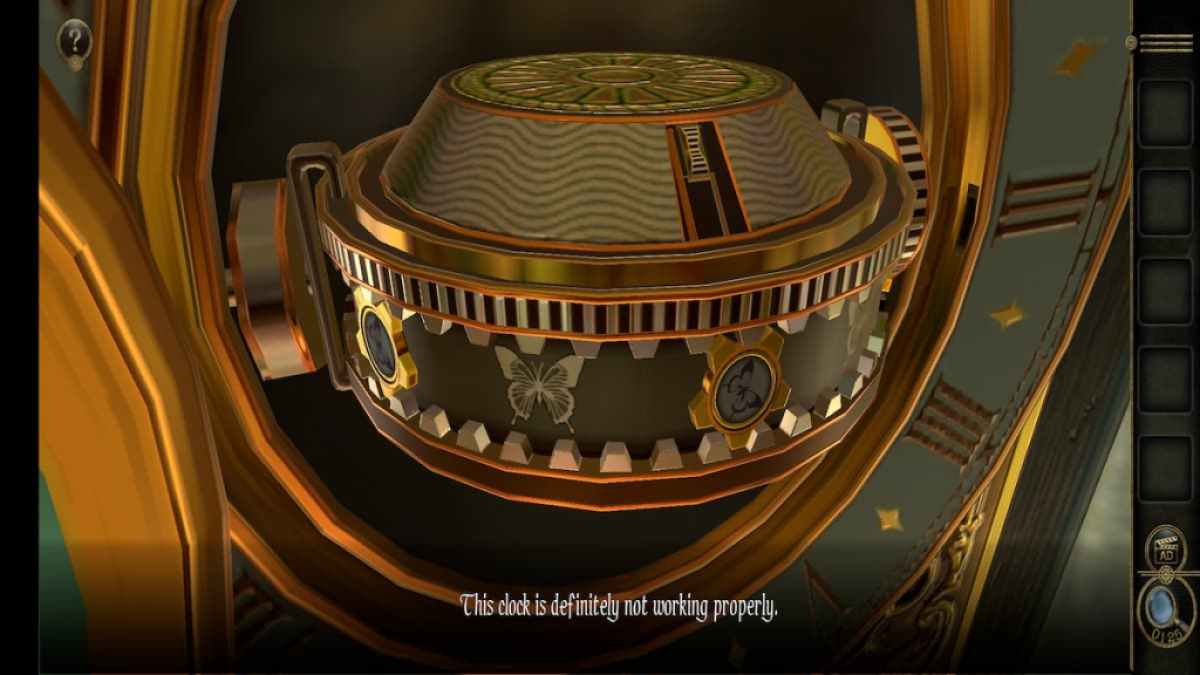
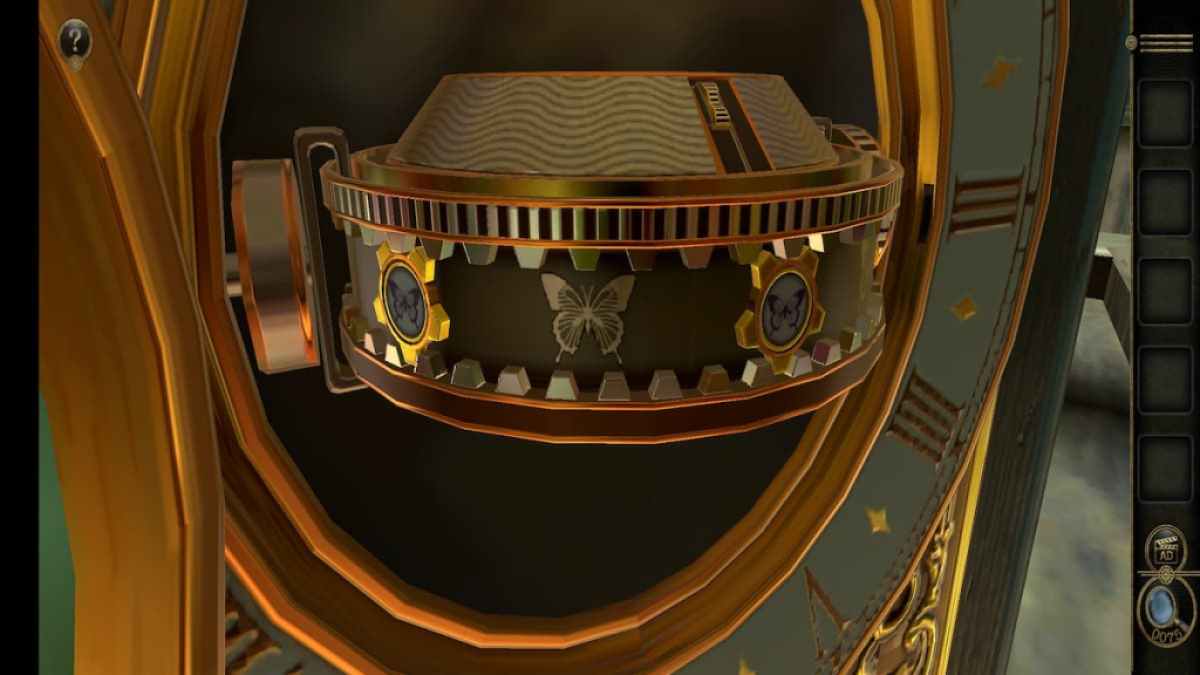
Return to the puzzle behind the clock . The puzzle can be rotate to the left and right , and the butterfly stroke appurtenance in the centre of attention can be rotated using the slider above it .
Rotating the puzzle changes the butterfly in the essence . puzzle out the puzzler by placing each butterfly in the center and turning them to confront upwards like in the bill poster .
Screenshot by Pro Game Guides
Solving this mystifier gives you the key to the locked draftsman in the good . Opening it give you a folder of Sheet Music .
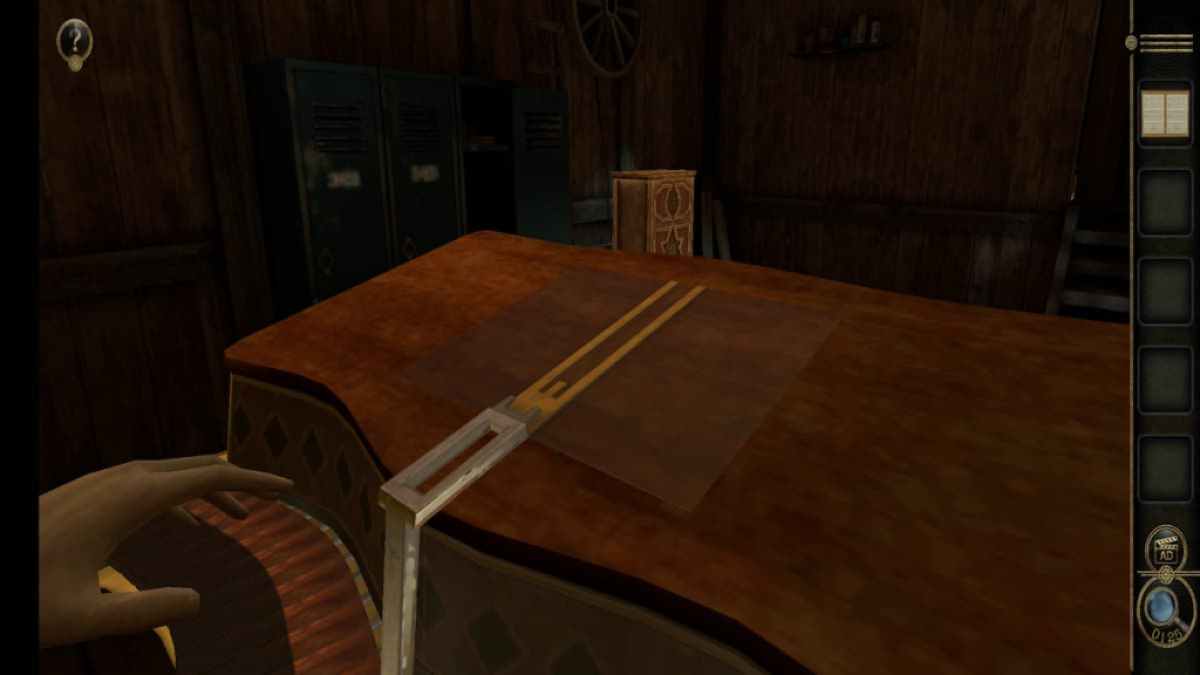
Mannequin arm puzzles
With the Sheet Music in hand , manoeuvre to the medicine fend .
After clicking on the stand and rotating your screenland , you ’ll notice an empty situation on the stand .
rate the Sheet Music here and slue it into place to unlock the puzzles on the manikin ’s branch .
Screenshot by Pro Game Guides
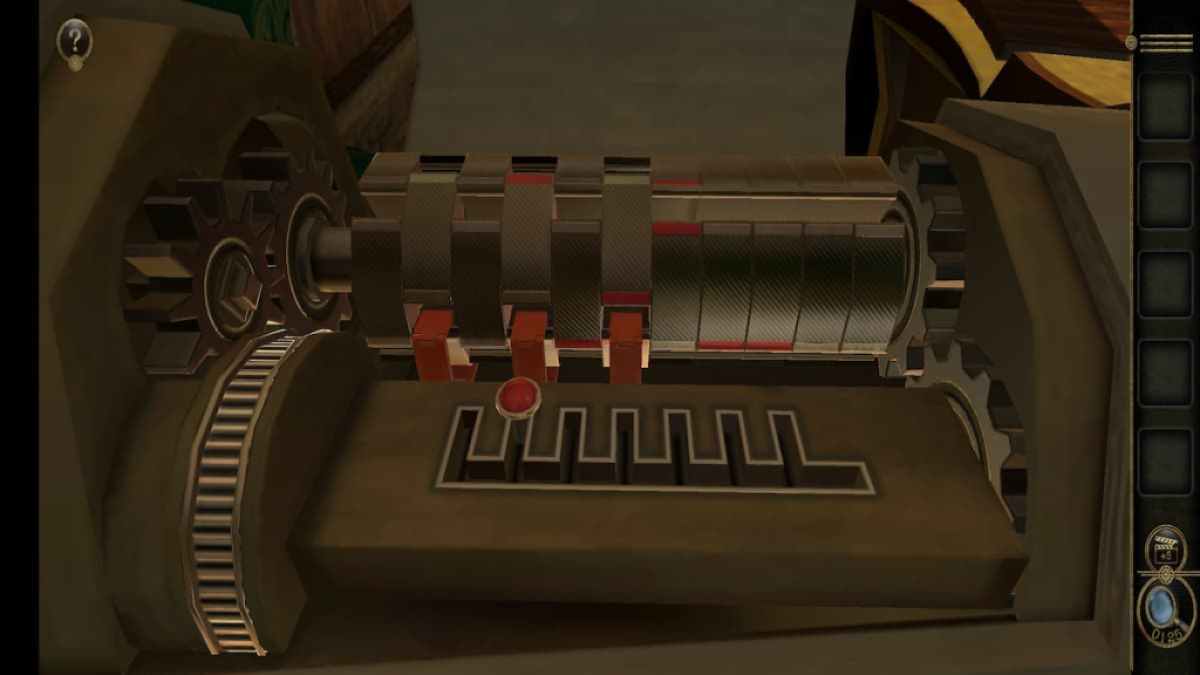
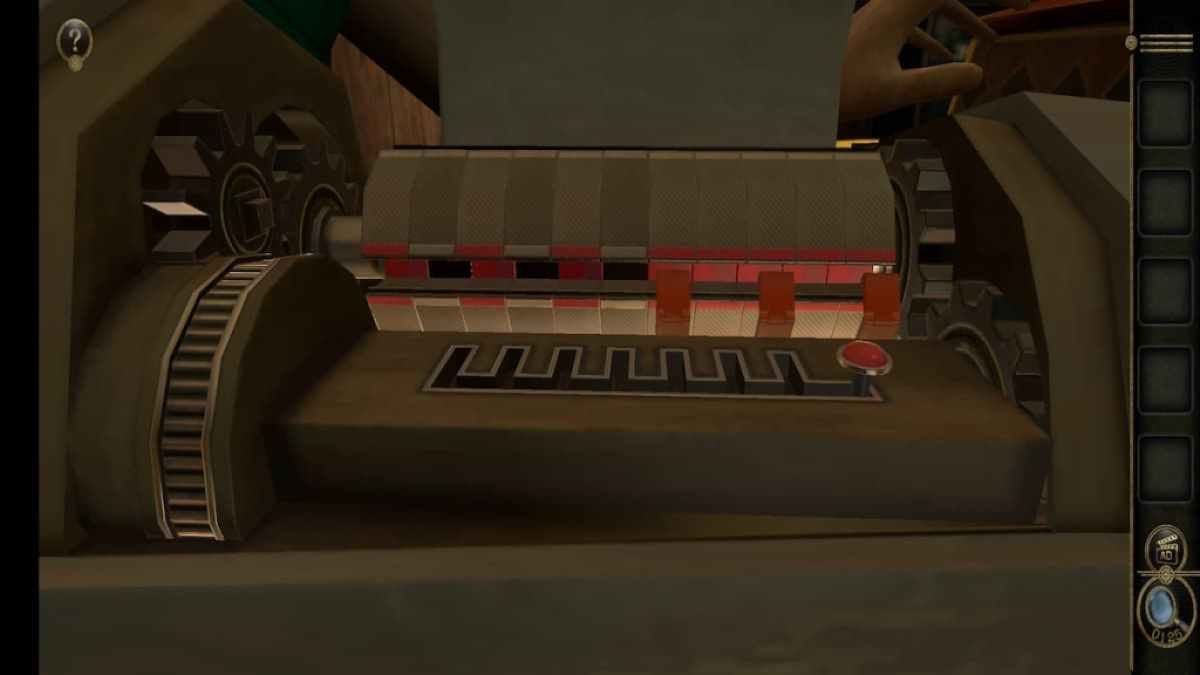
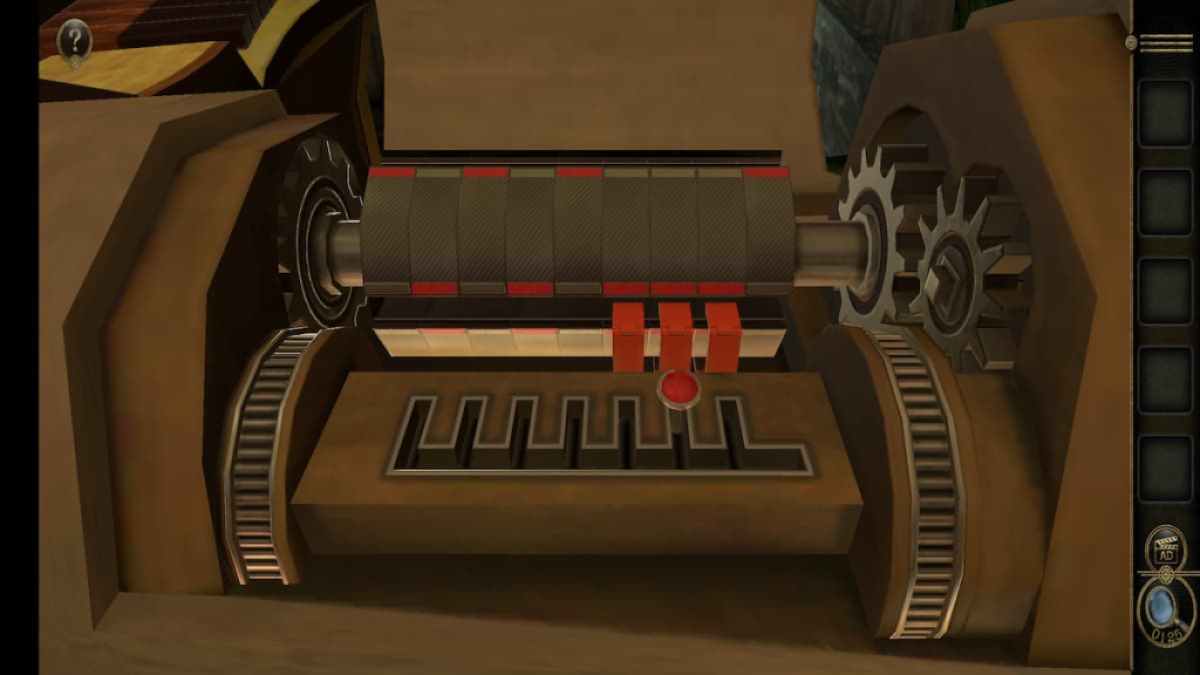
This teaser involves rotating a geared wheel with unmarked and red - marked segment . The button at the bottom can be slide around to move the three cherry mechanisms . When the chemical mechanism are placed against the gear , the three segments they cover will not move .
The easy style to solve this puzzle is by getting six of the ruddy marks on one dustup and the other five on a second row .
Use the red mechanisms to cover three of the smear on the row contain six .
Screenshot by Pro Game Guides
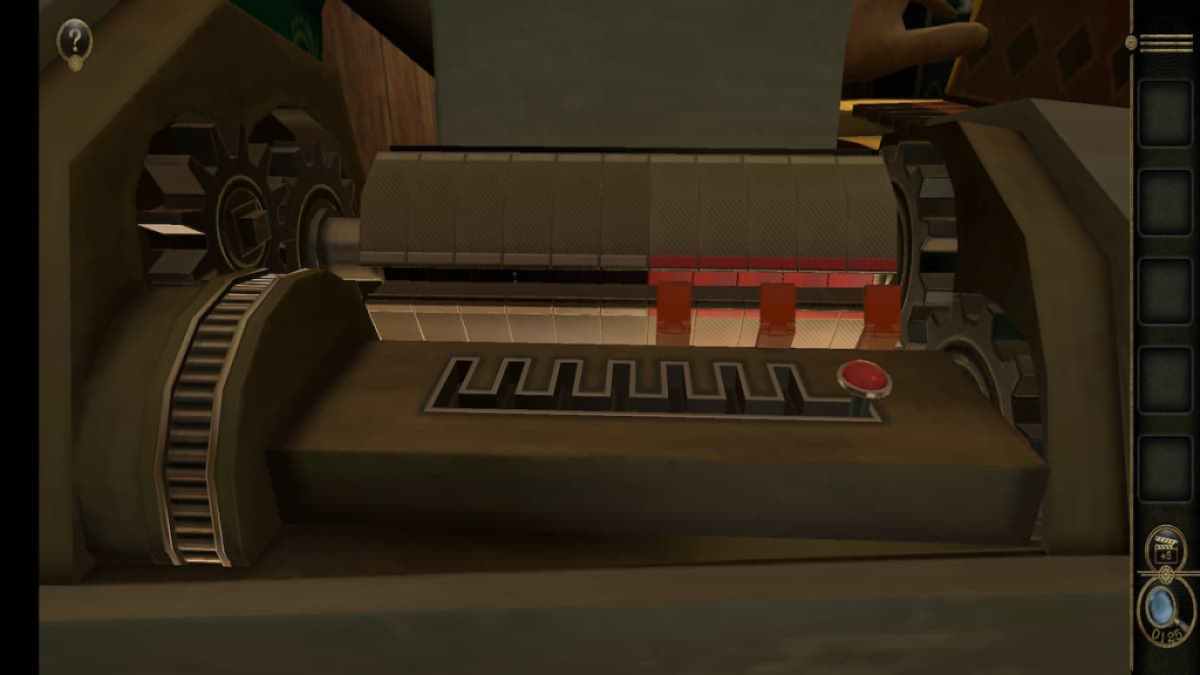
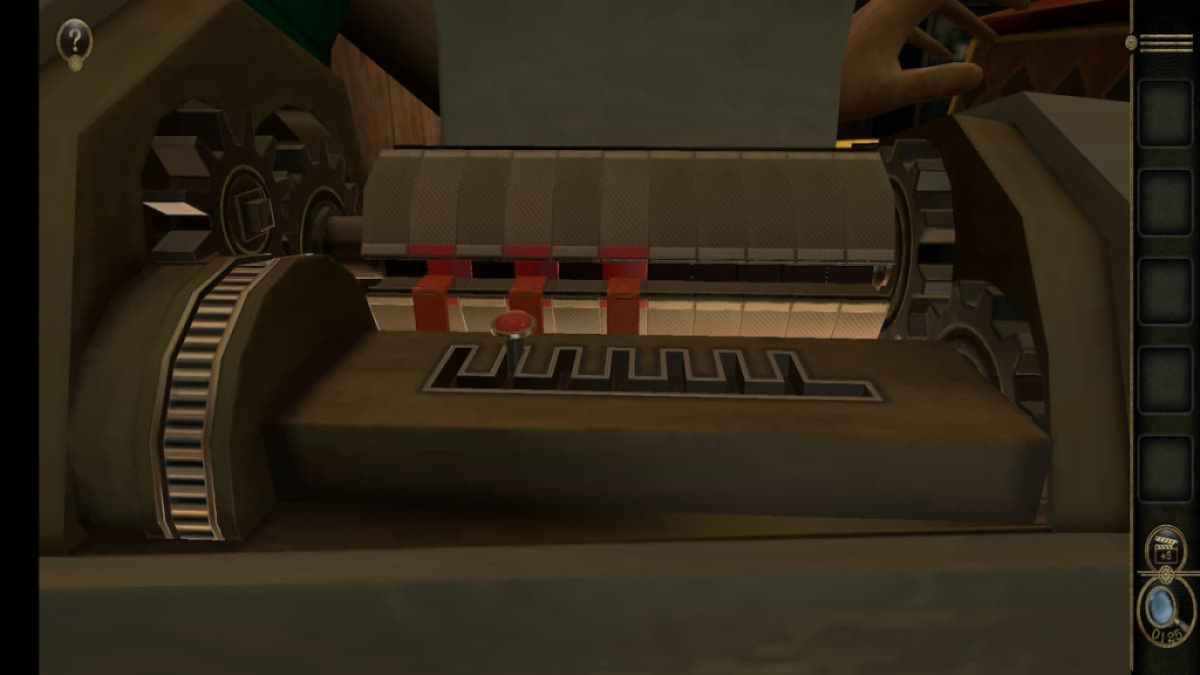
Rotate the gear mechanism to blend the covered department with the five untasted red - marked segments . later on , move the cease mechanisms out of the elbow room and rotate the gear to rule the last three pronounced segments .
Place the red stopple mechanisms against these last three pronounced sections and splay the gear until they are combined with the rest of the ruddy marks to unlock a similar mystifier on the mannequin ’s other arm .
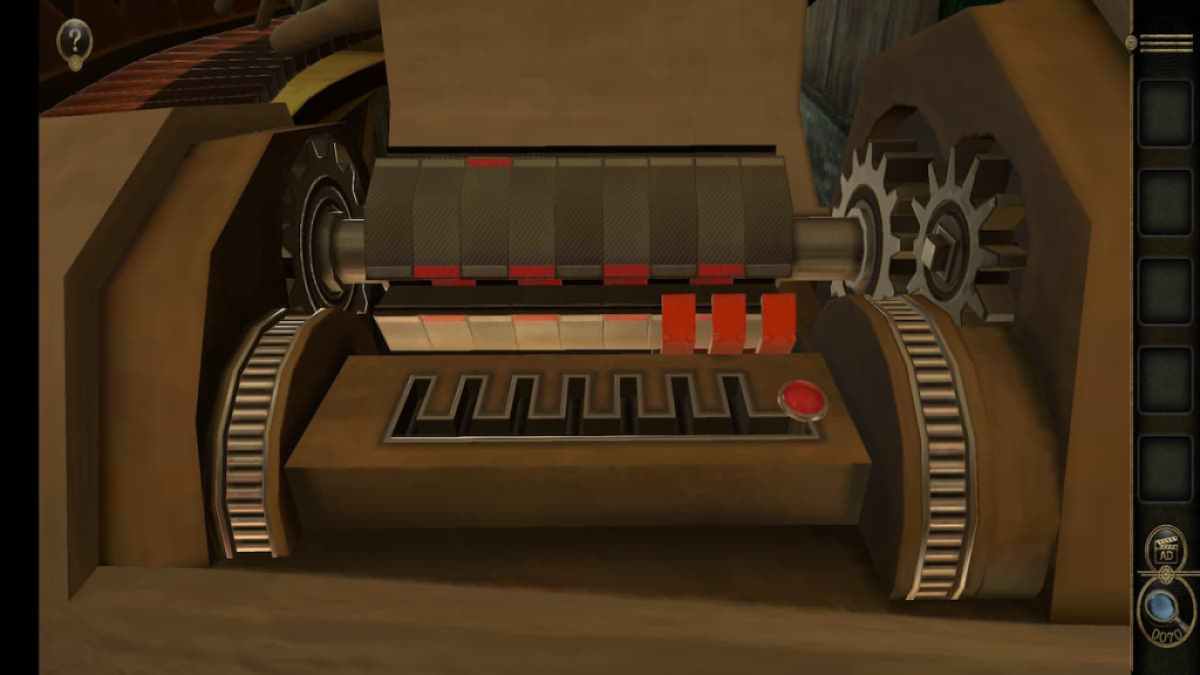
This arm is more difficult than the other , as it contains two power train for rotation and has the three mechanisms right next to each other . Start by completing the leftover gear , which rotate four of the central pieces .
Screenshot by Pro Game Guides
Now work on the correct gear , which rotates the two prohibited pieces as well as the stay three intimate segments . First , get two of the red-faced - marked segments for that gearing on the top row .
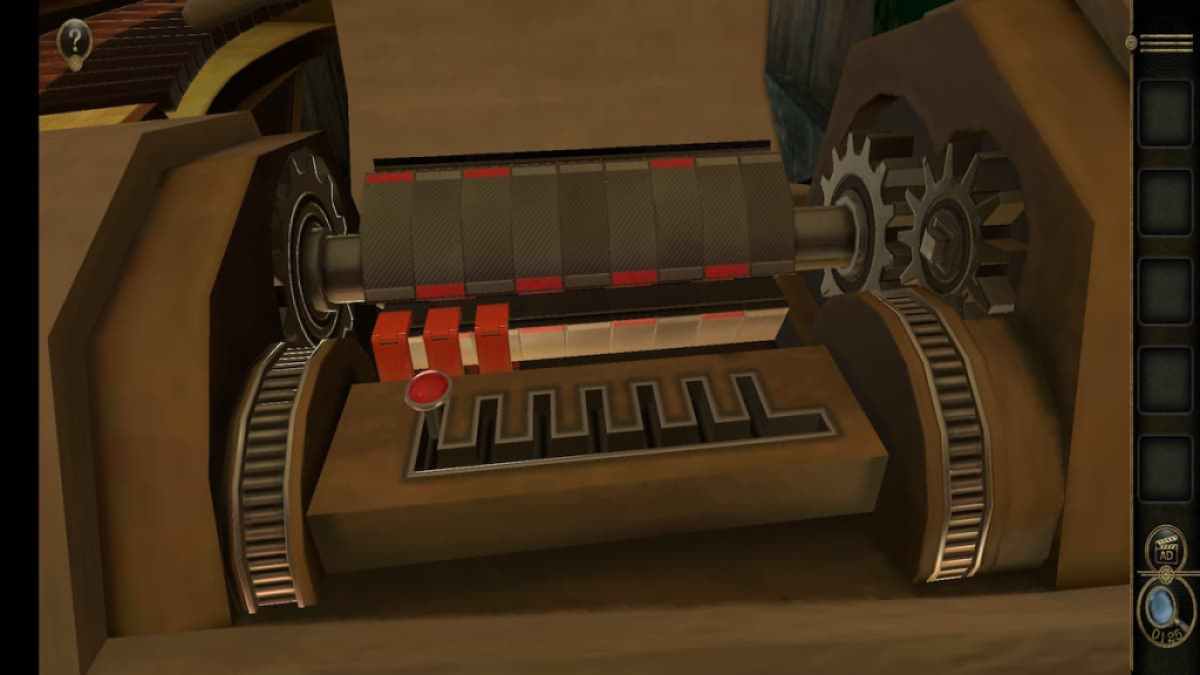
Hold them into place while rotating the same cogwheel until one of the other two central crimson - mark part appears on the same quarrel .
Continue to hold those two in place and revolve the new piece into the same row as the other four . This allows the remaining two red - marked pieces to bring together the two being hold . The stopping chemical mechanism can now be make a motion to hide the Seth of three marks .
Screenshot by Pro Game Guides
The right gear can be splay one more time to complete the teaser and unlock a novel one at the front of the stand . It can not be completed yet , so grab the Cross Star Carving to its left field and head to the next puzzle .
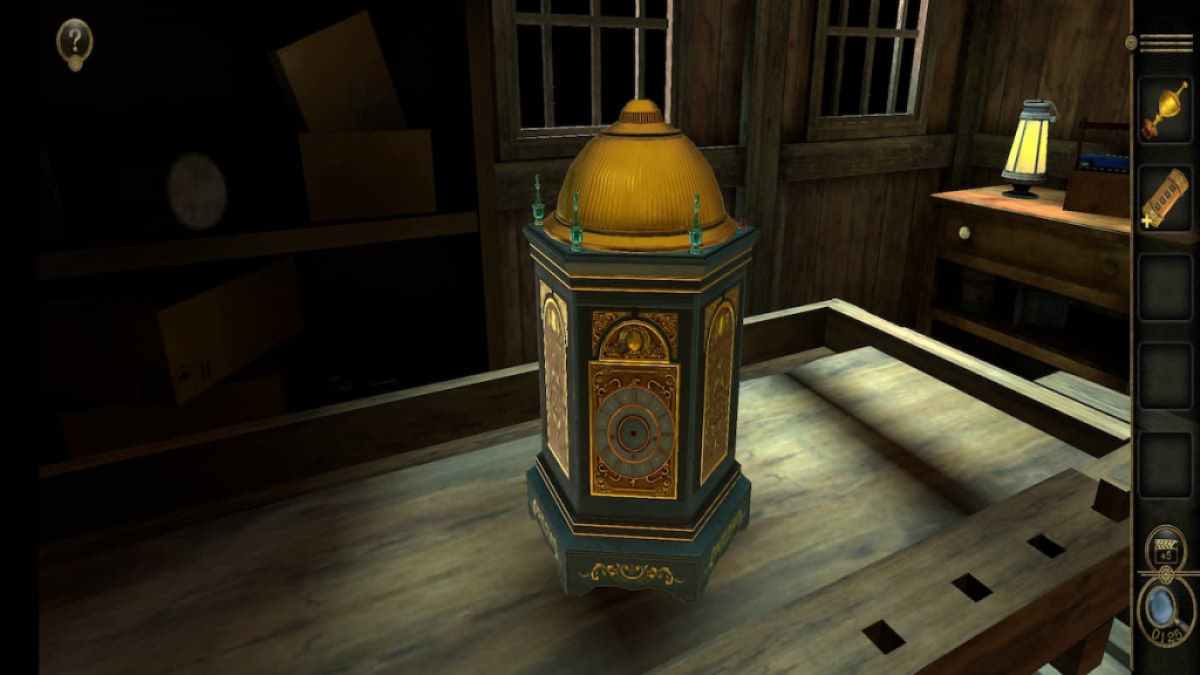
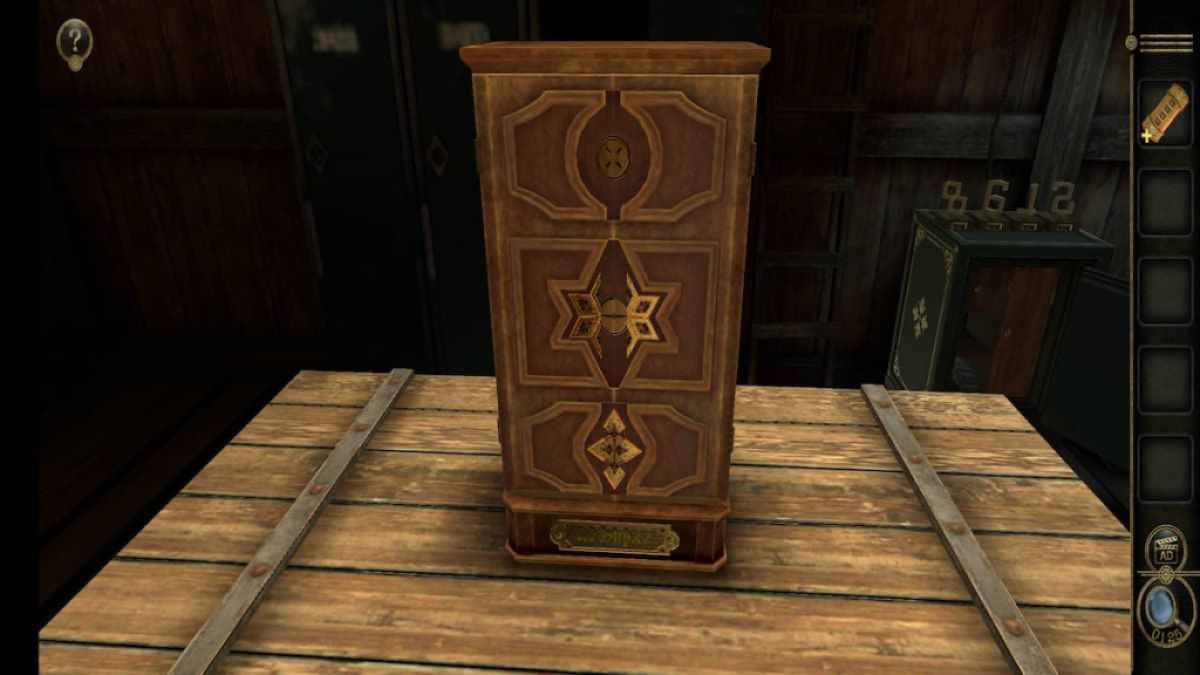
Wooden carved box puzzle
ferment your aid to the carved wooden box .
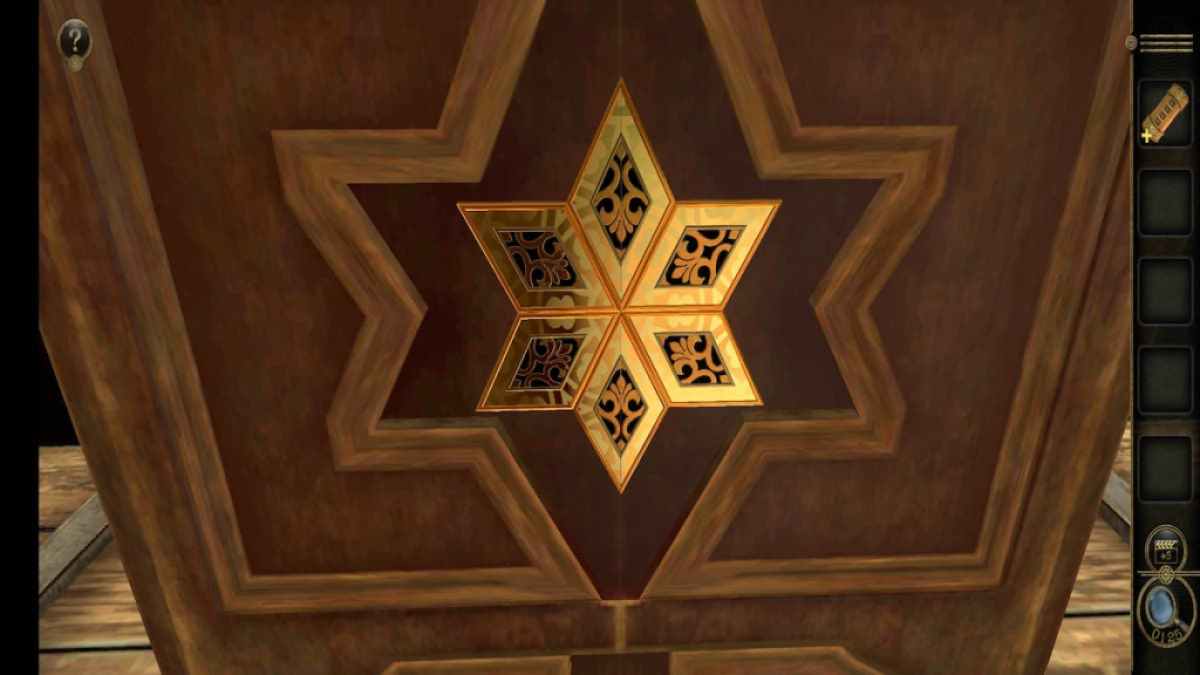
focalize on the teaser at the bottom .
slither each piece towards the center to create a rhomb shape .
Screenshot by Pro Game Guides
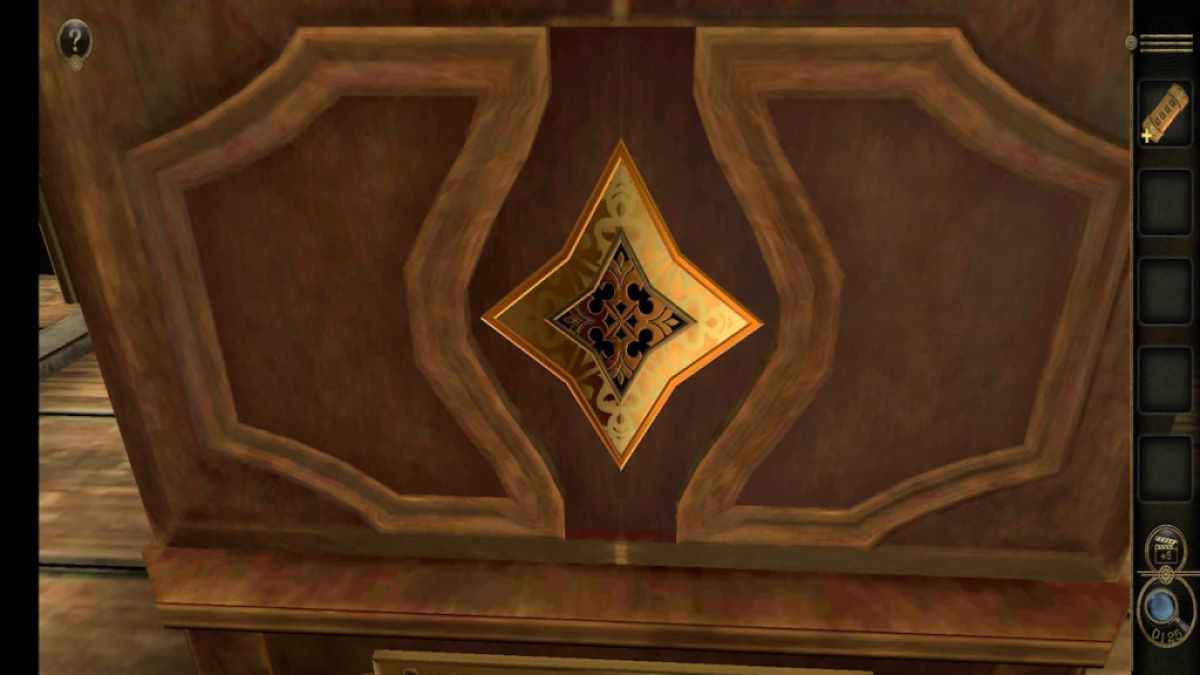
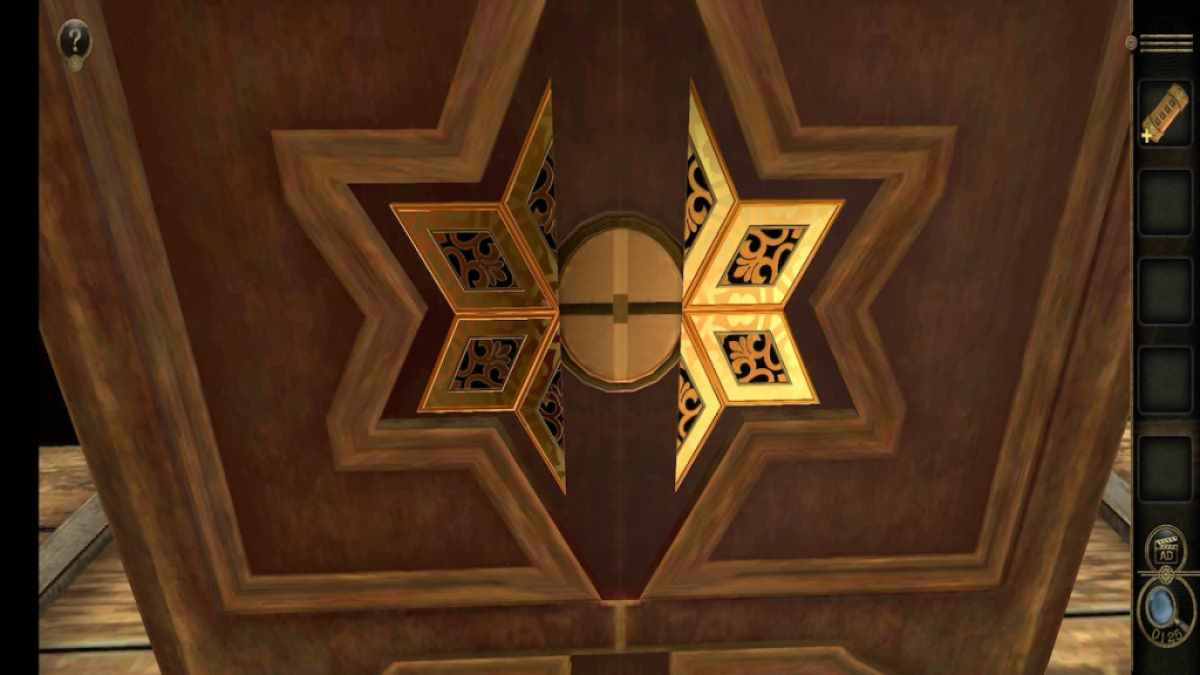
Move up to the second part of the box .
Slide the two halves together to form a snowflake .
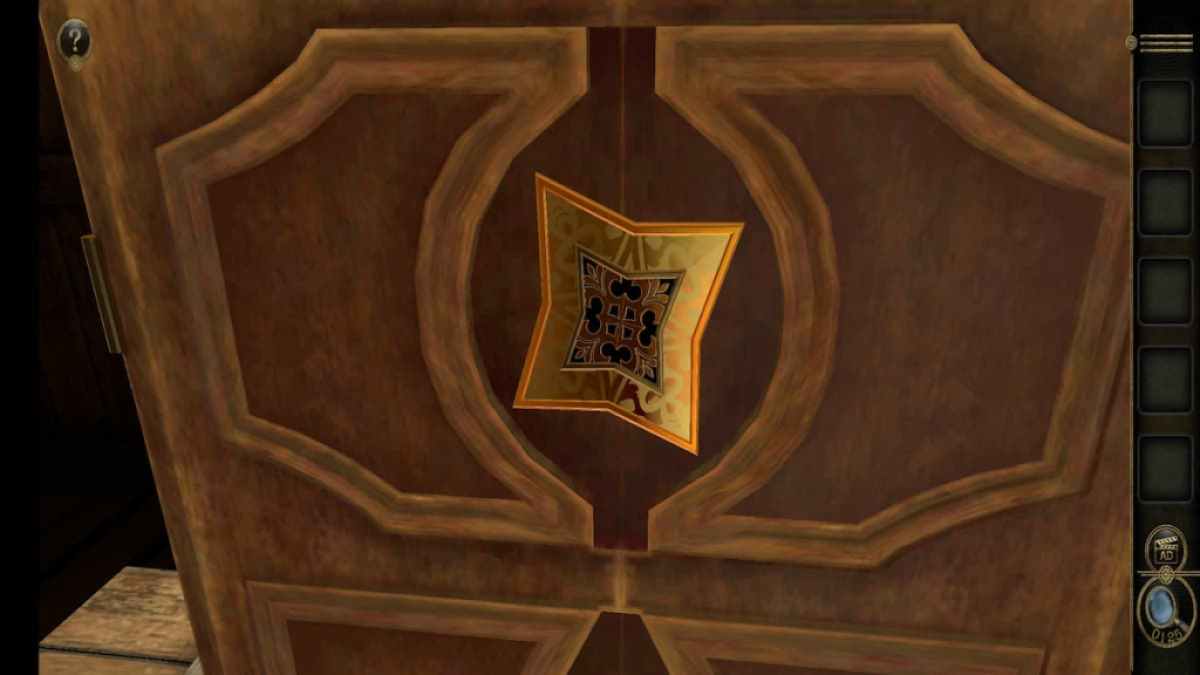
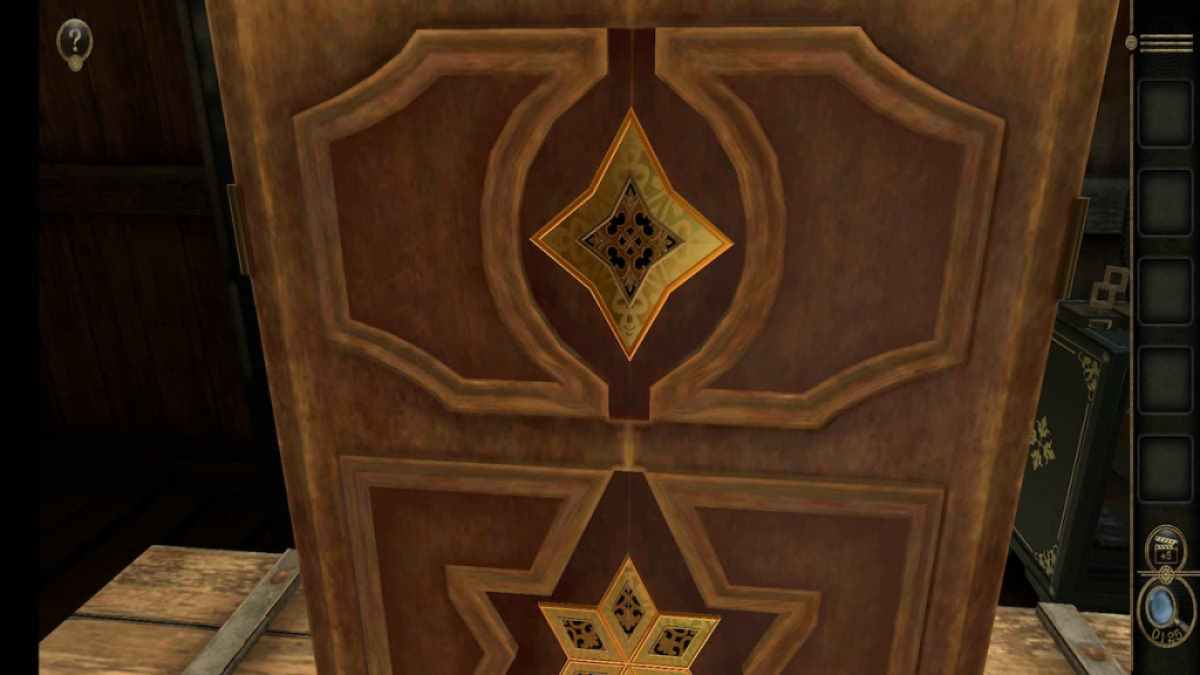
last , go to the top of the box seat and localise the Cross Star Carving on the circle in the center .
Screenshot by Pro Game Guides
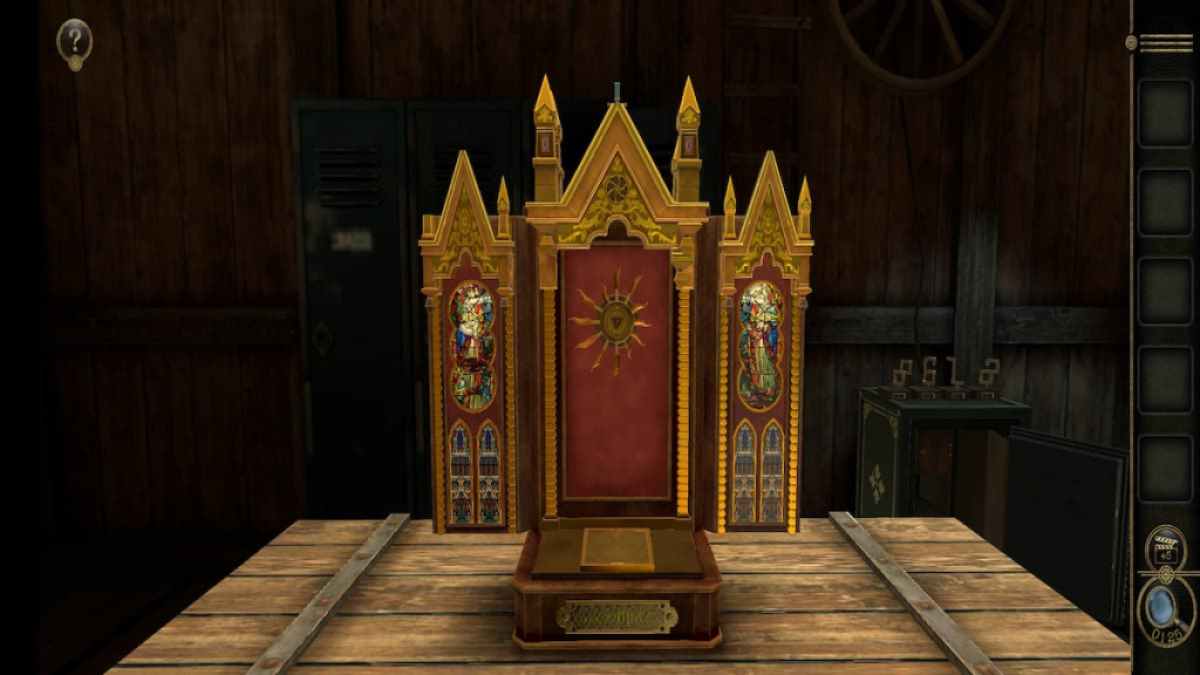
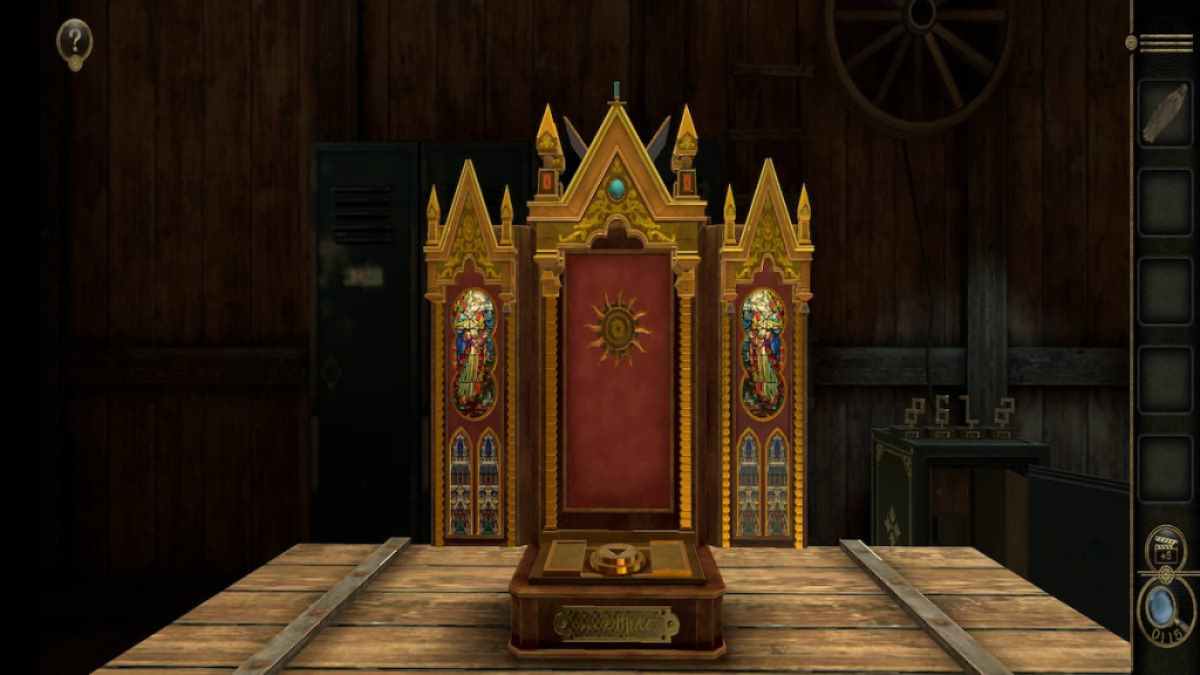
Rotate it so that it correspond the first incision of the box . This will cause the box to transform into a church - like structure .
Church puzzles
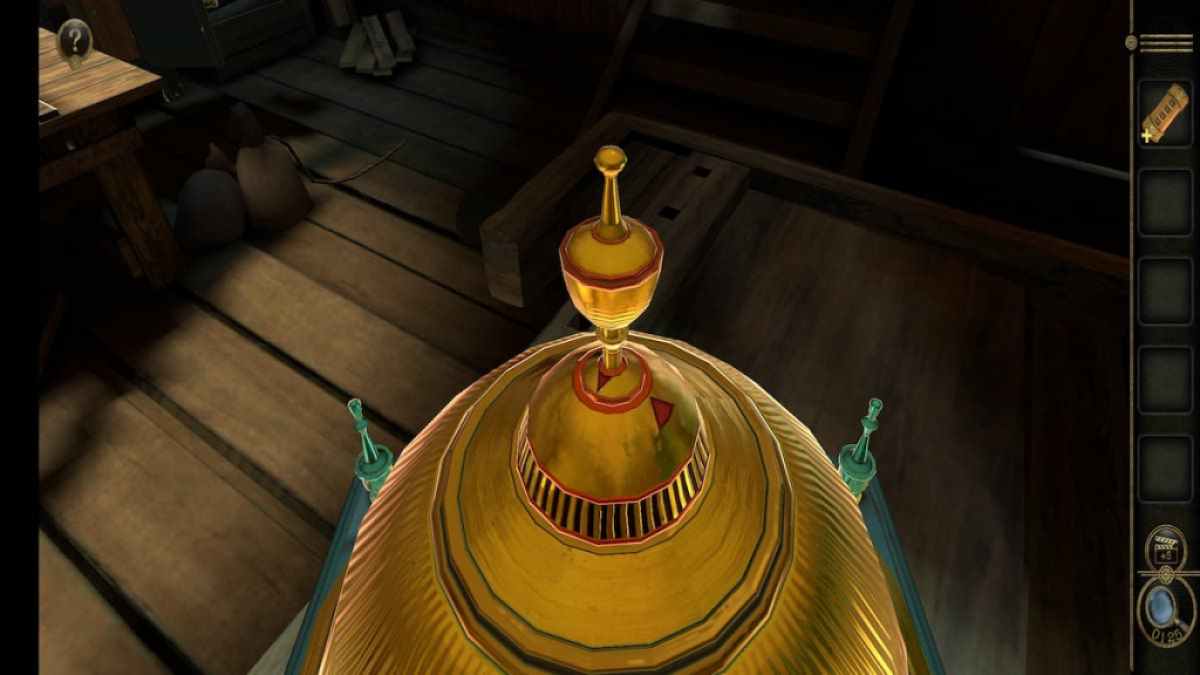
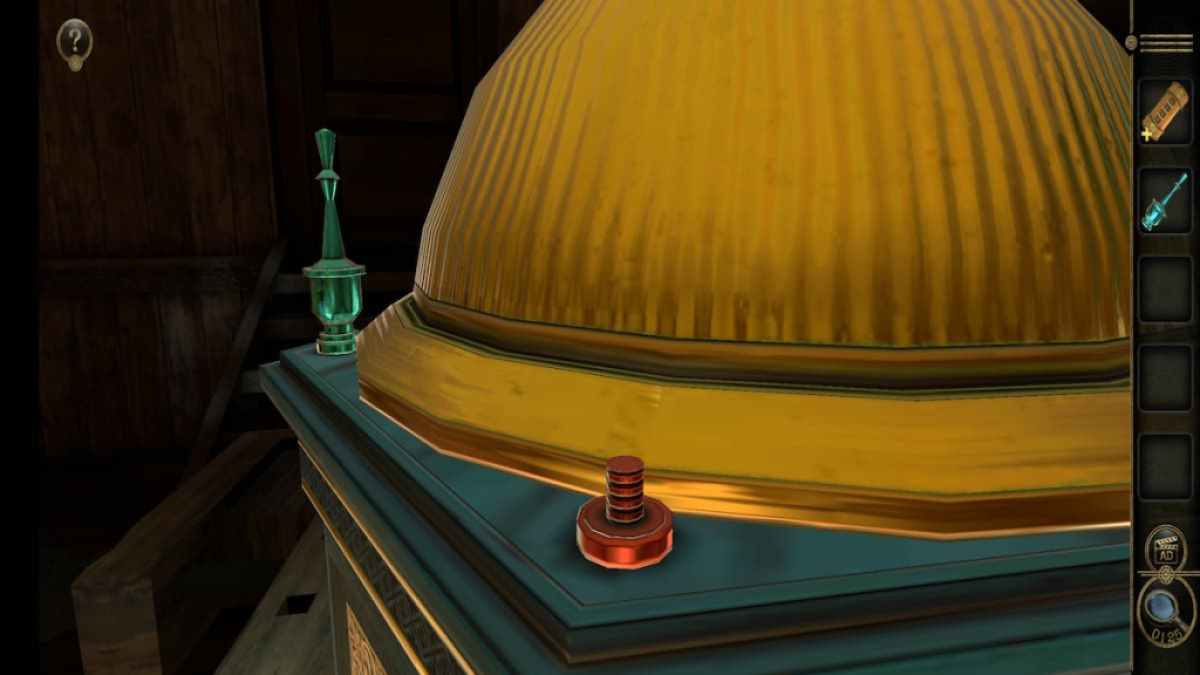
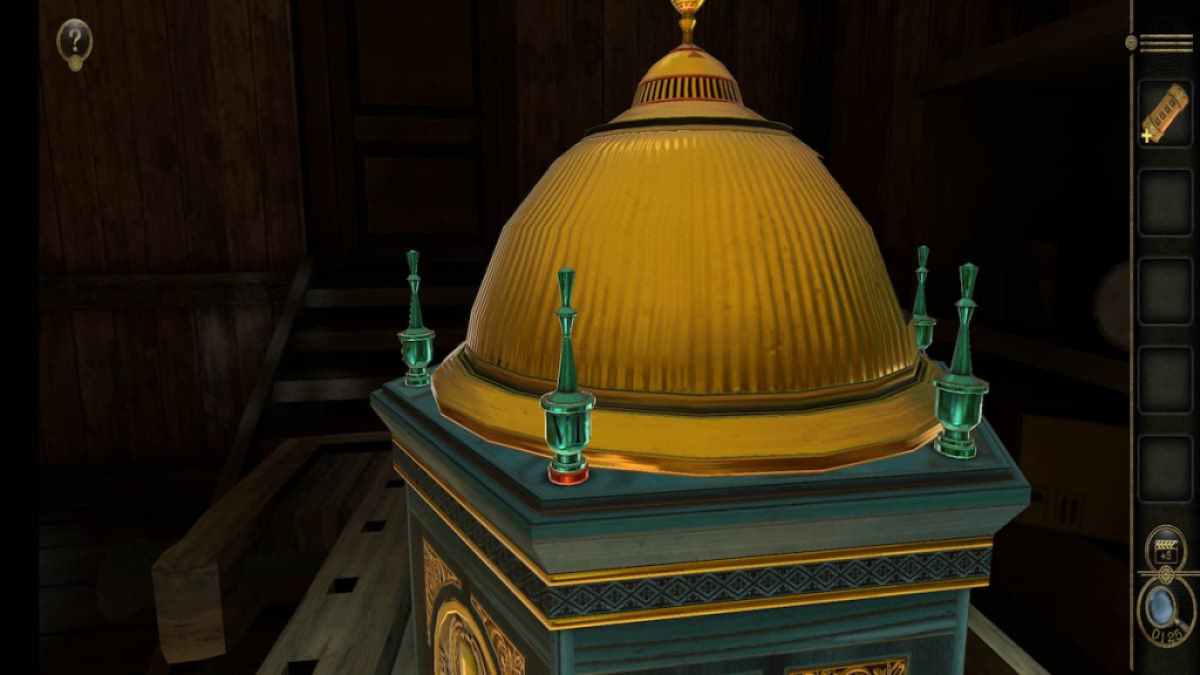
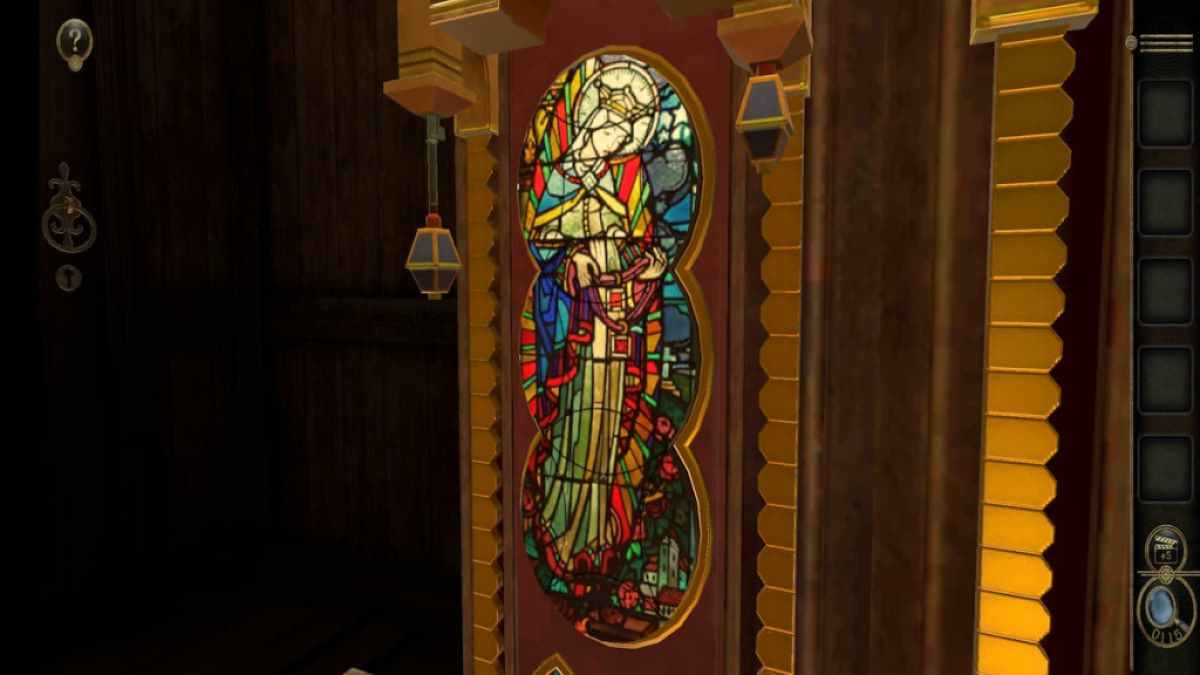
While looking at the church , take note of the missing spire on the left over side .
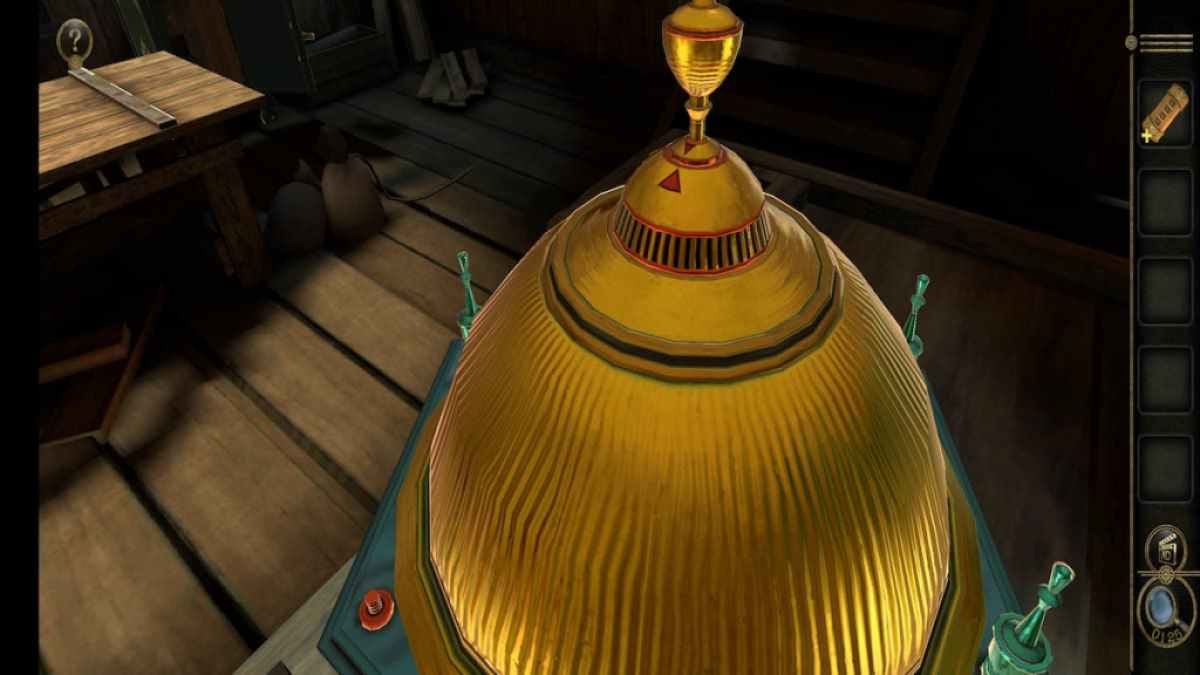
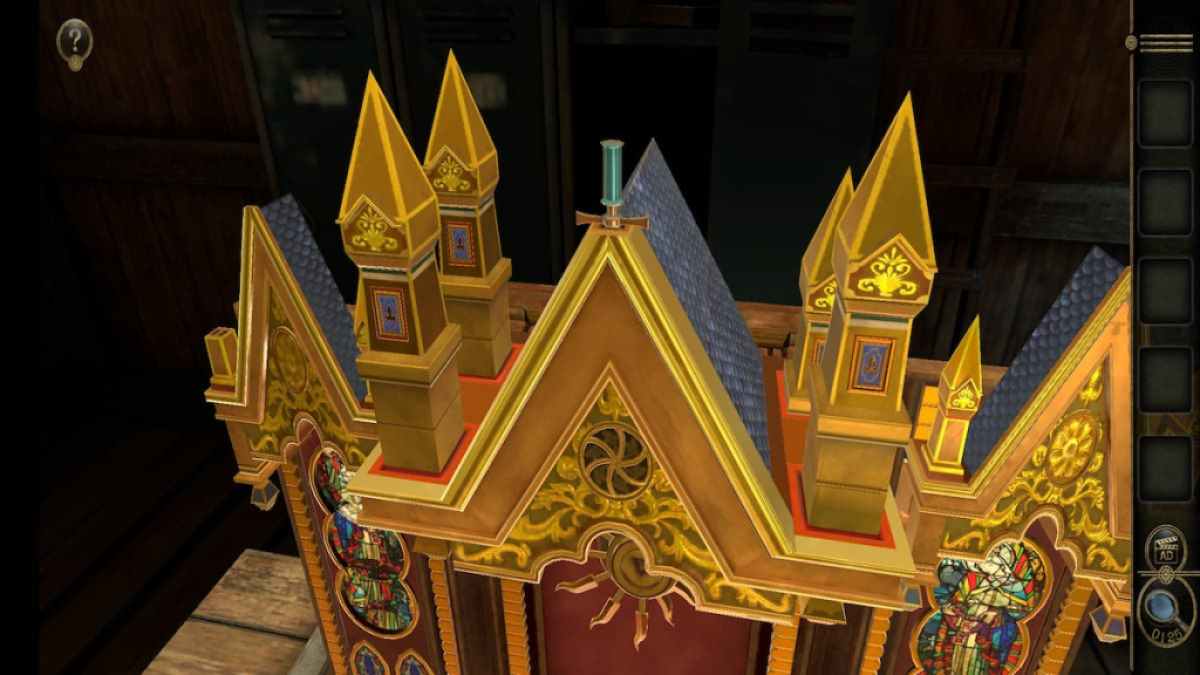
focalise on the top of the fundamental portion of the church building . Push each of the spire down so that they match the one in the back right .
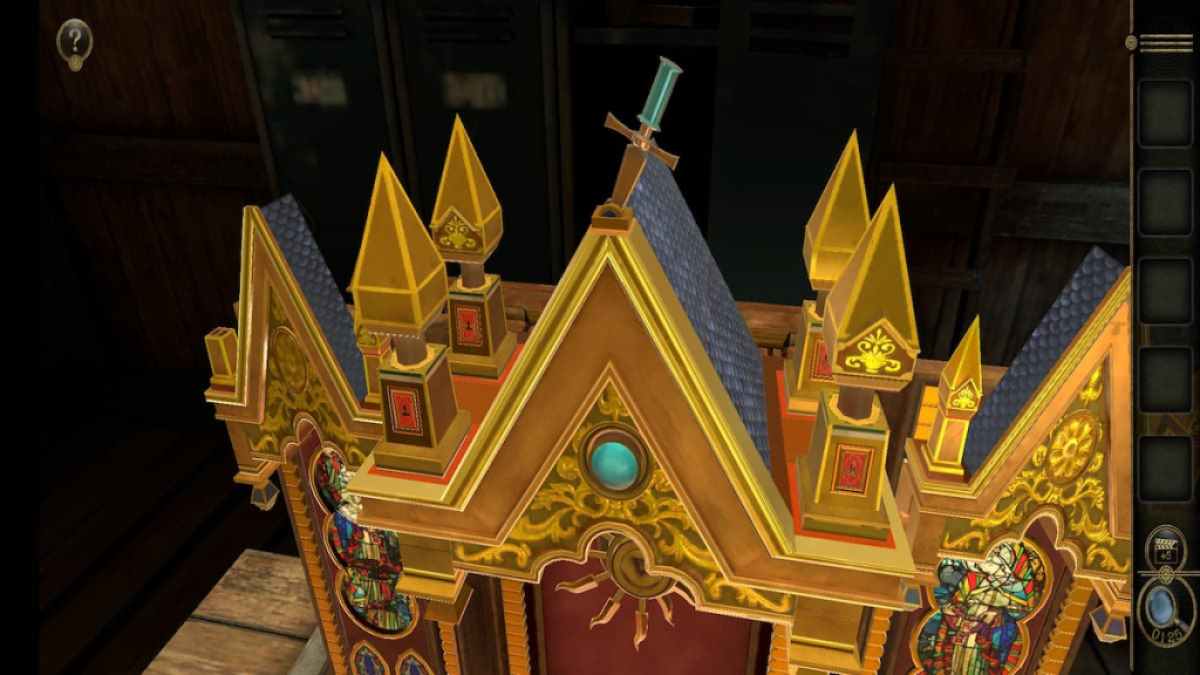
Once each spire is pressed against the church service ’s roof , the sword at the crest will rise . flip out it left and right to alter the people of color of the icon on the front of each spire , which affects how they rotate .
Screenshot by Pro Game Guides
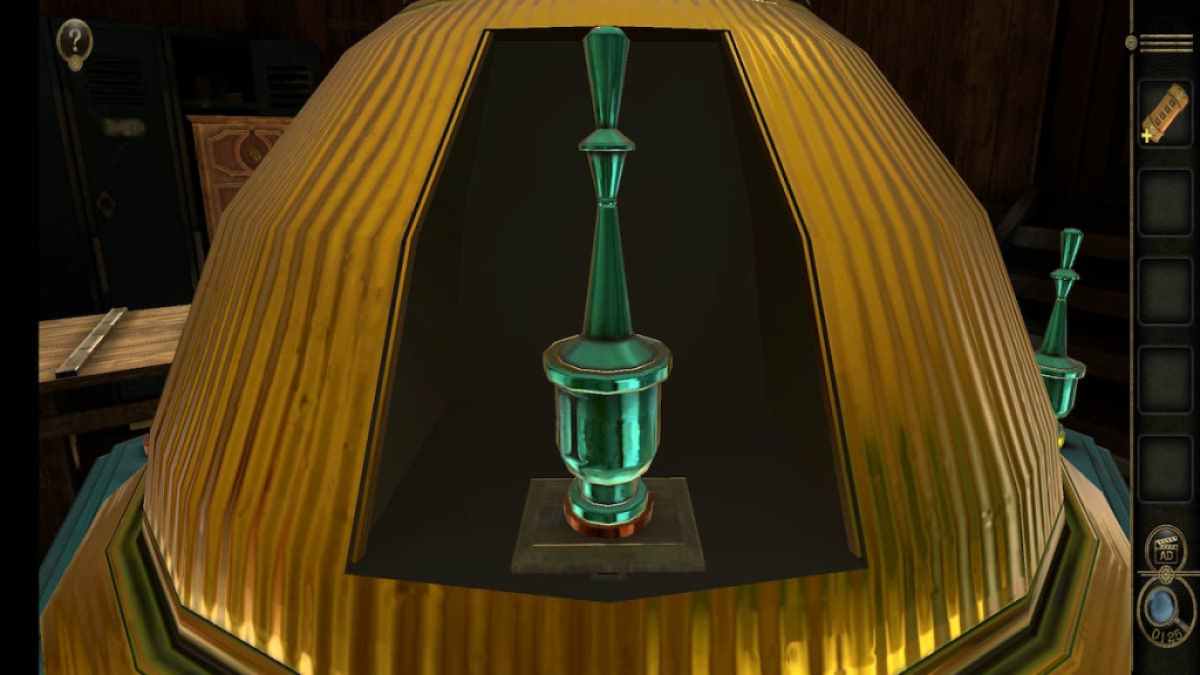
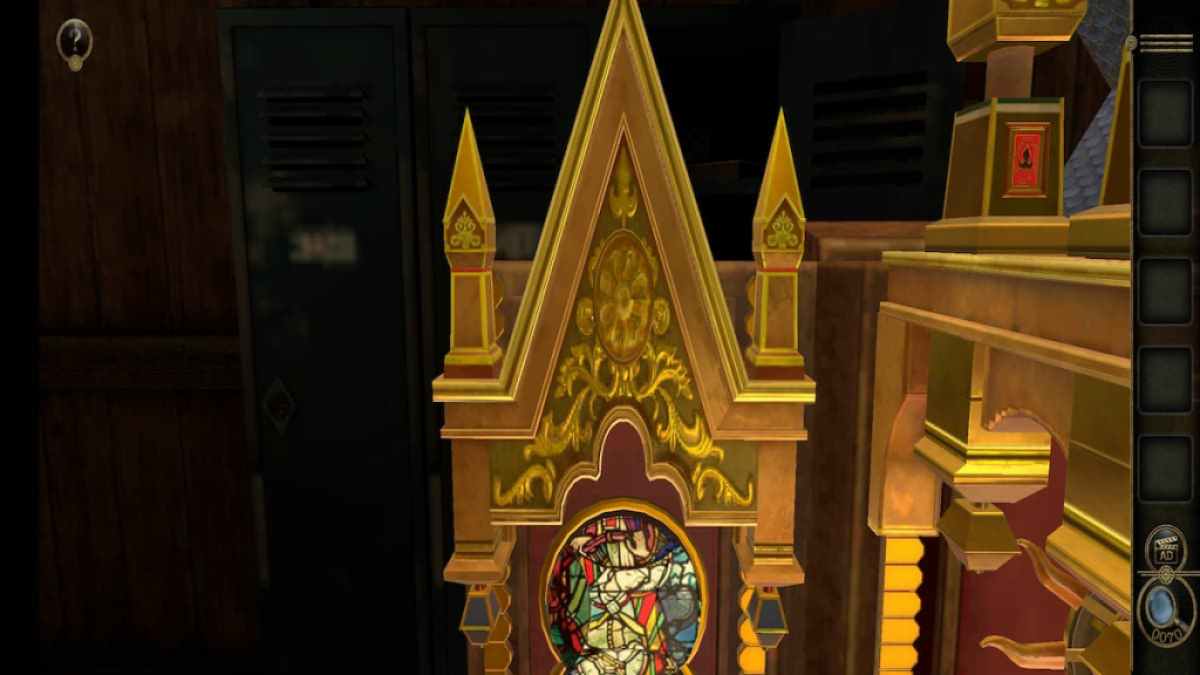
To solve this mystifier , you need to rotate the four steeples until their sculpture face the front . I found it easiest to get the right-hand two facing front , the front depart one facing lead , and the back pull up stakes one face rightfield . From there , leaf the sword to red and splay the left steeples one more time to solve the teaser . I did have an offspring with this puzzle not solving properly , but redoing the last spin fixed that issue for me .
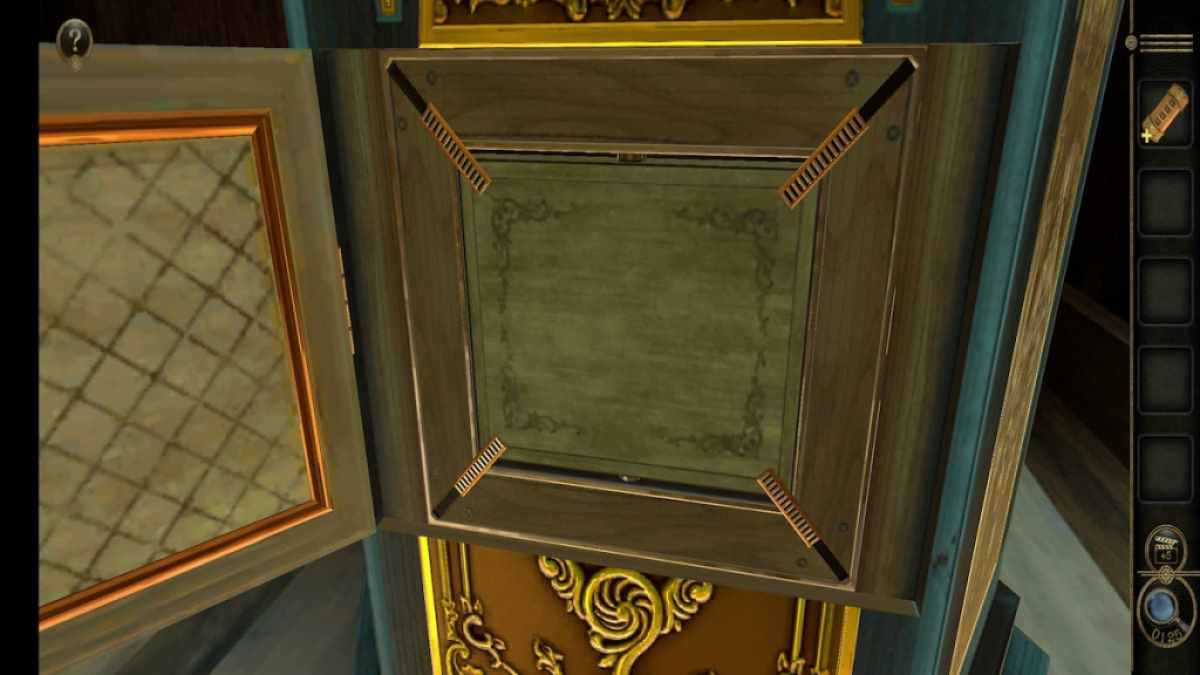
You ’ll experience a smaller rendering of the steeple . Place it onto the empty left platform to unlock the mosaic puzzler .
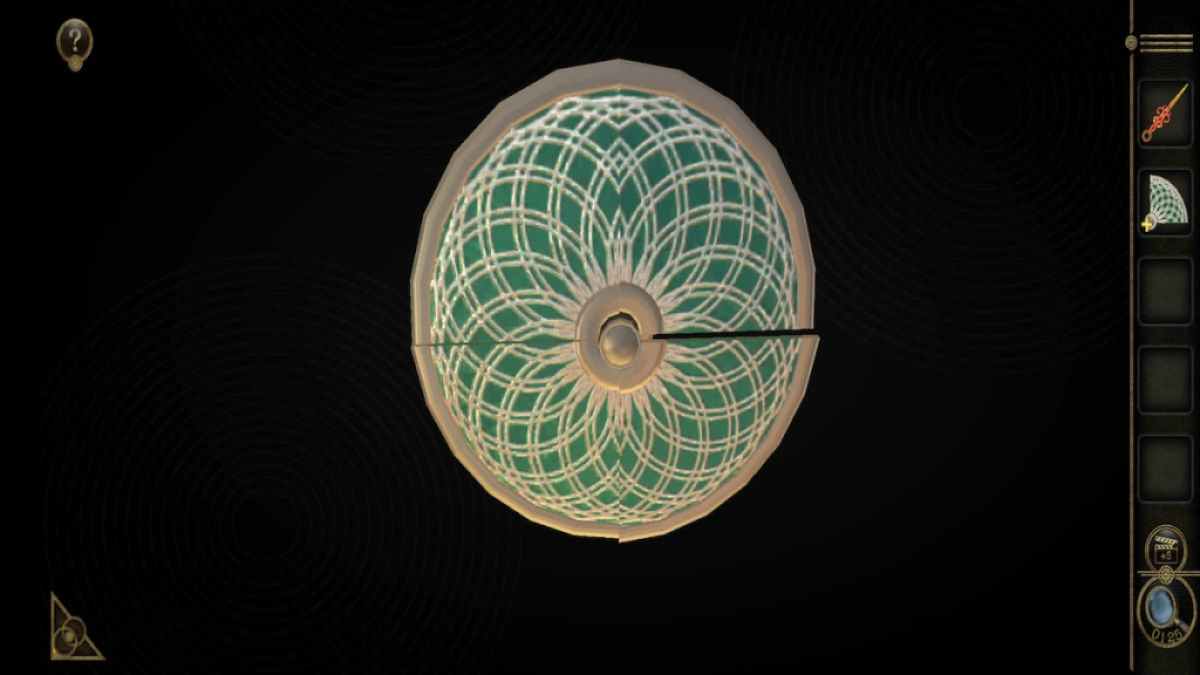
Each of the mosaic ’s three circular sections can be rotate , with the end goal being to make this mosaic twin the one on the right side .
Screenshot by Pro Game Guides
The best agency to solve this puzzle is to go from top to bottom . Upon completion , it will give you a key .
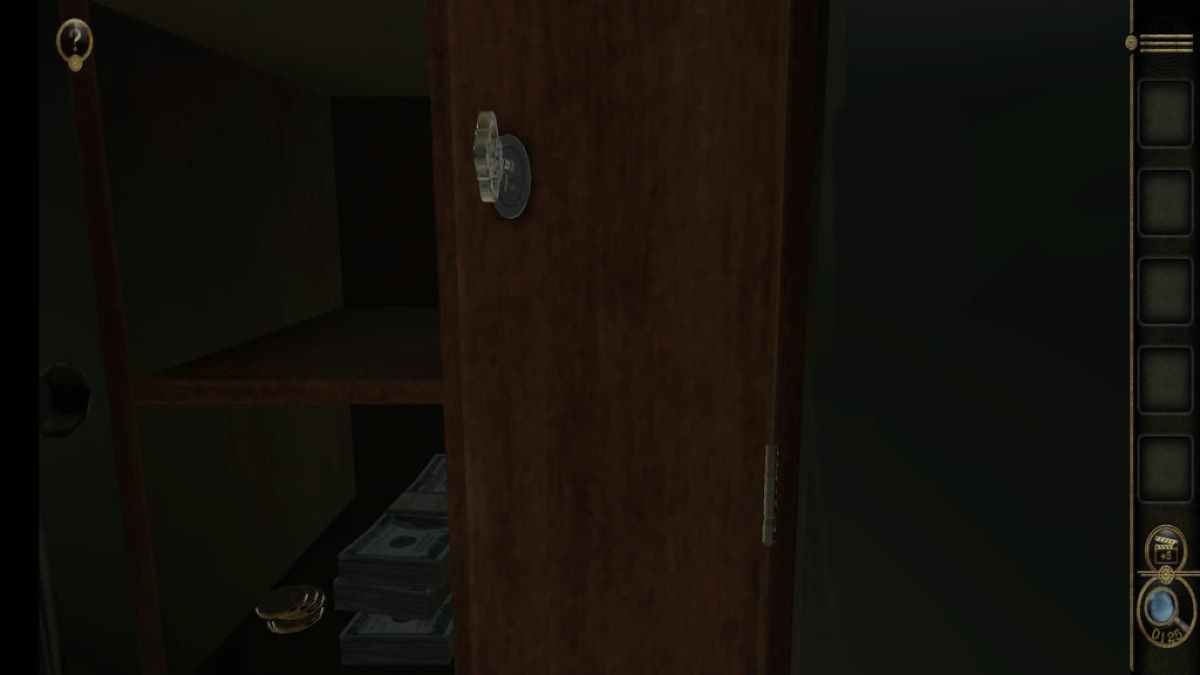
Entering the bedroom
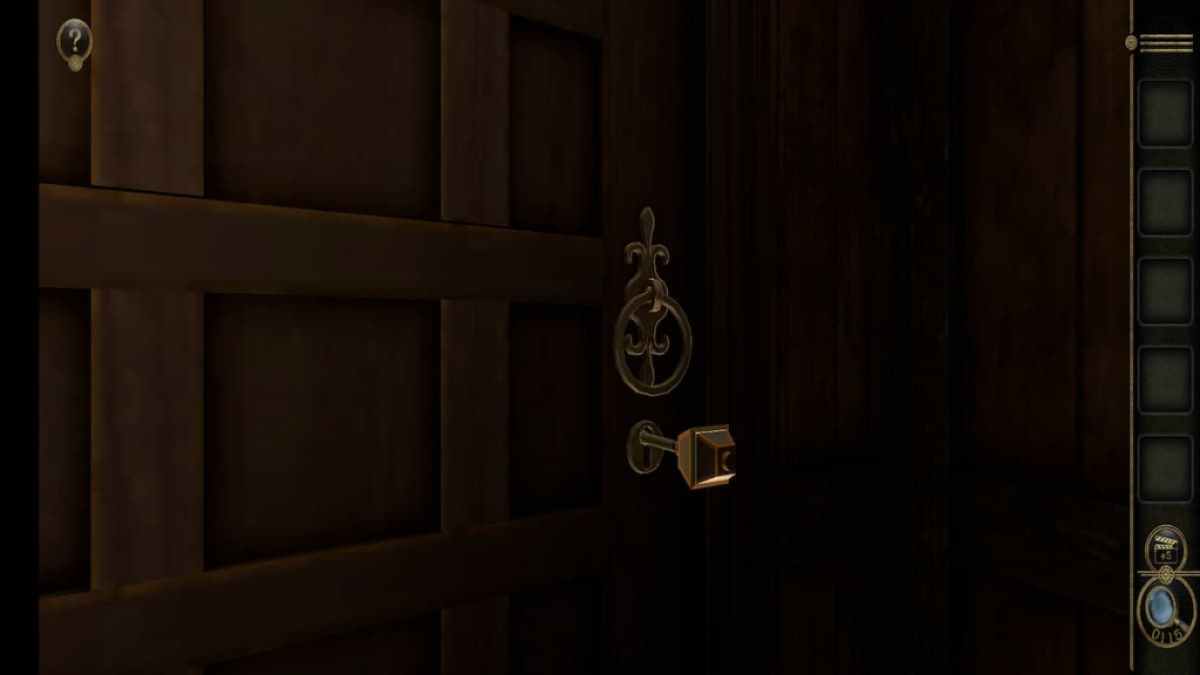
Take the key gained from the stained glass puzzle and sneak in it into the door at the back of the room .
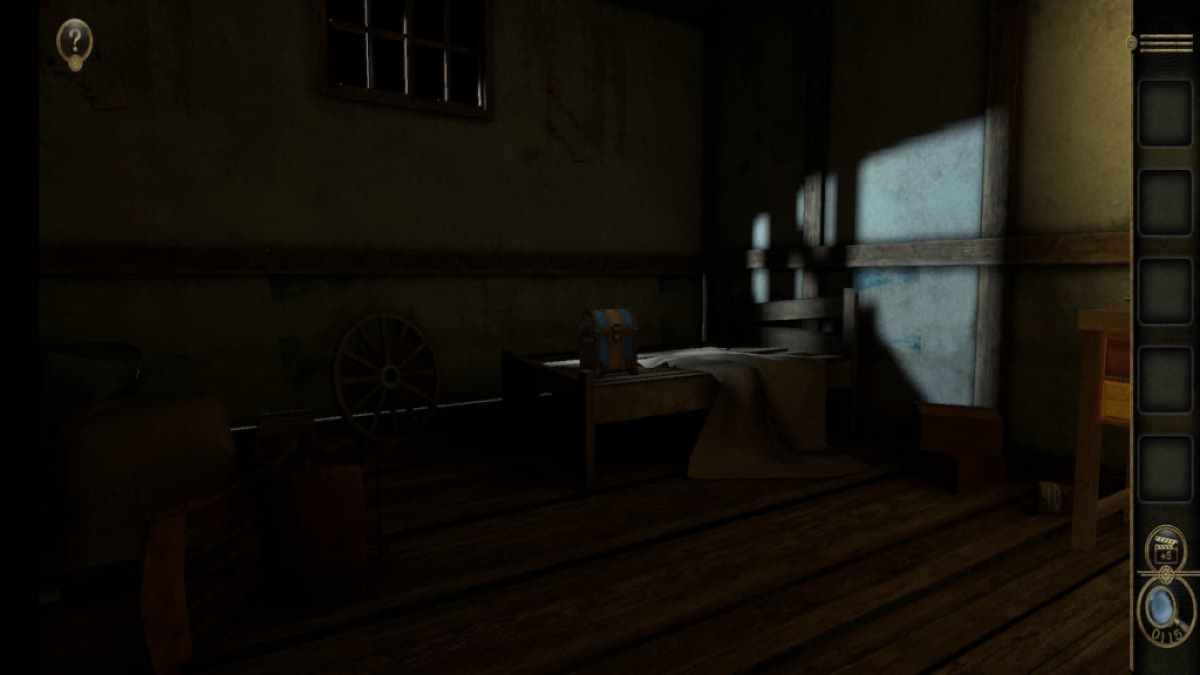
Rotate it to enter the chamber . While dingy , you ’ll notice a chest on the bed as well as a brilliantly lit desk on the right field .
head up over to the desk first to take hold of the Handle consist on top of it .
Screenshot by Pro Game Guides
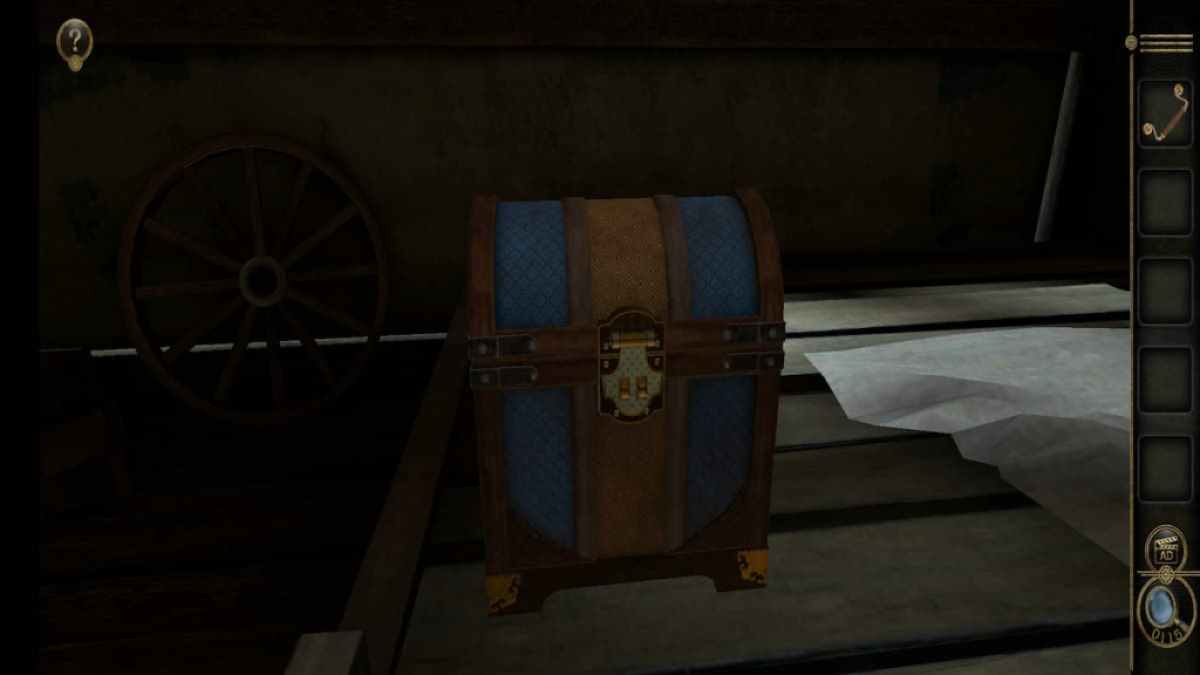
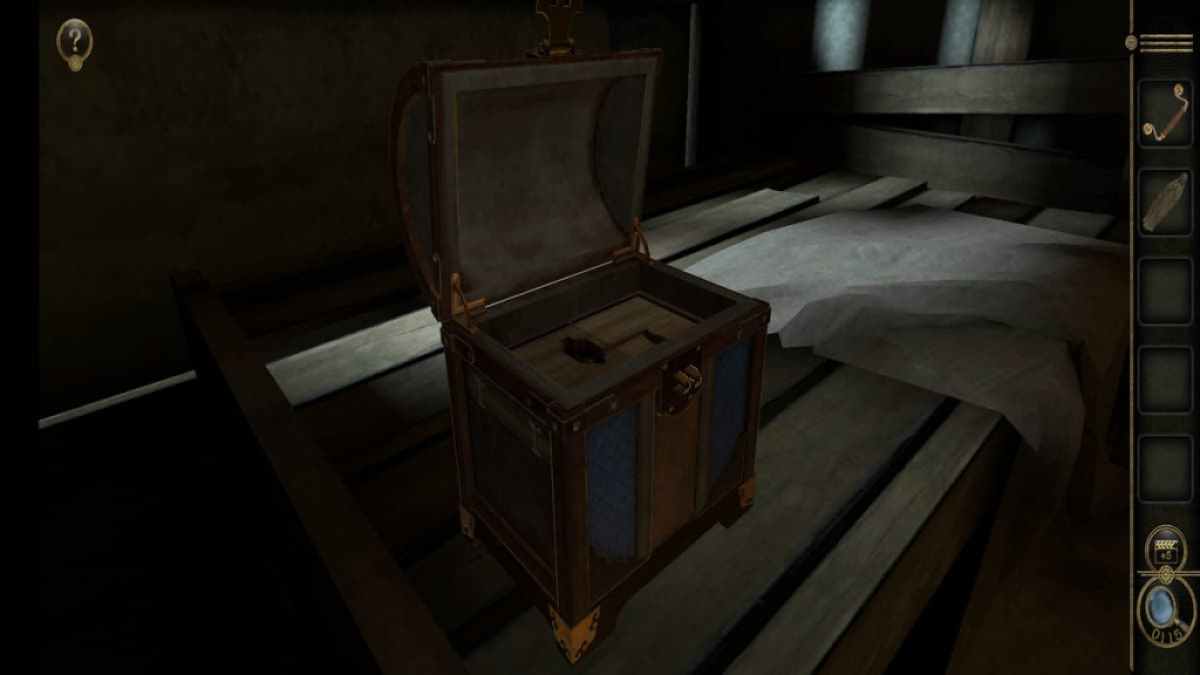
Treasure chest puzzles
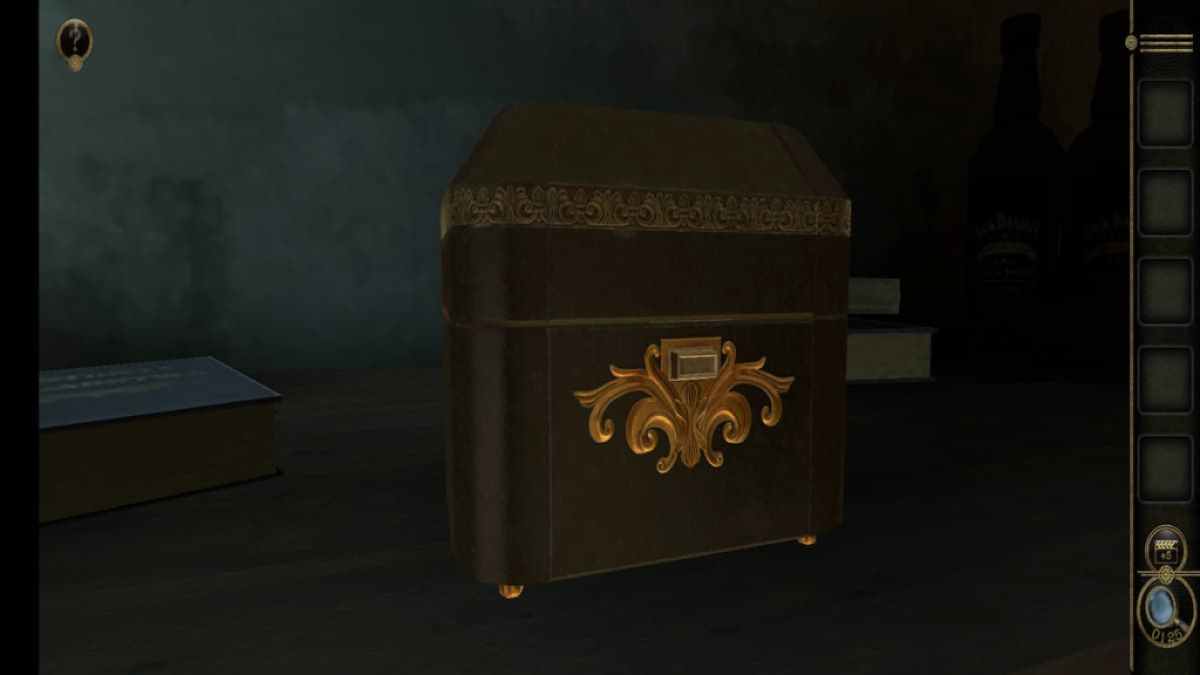
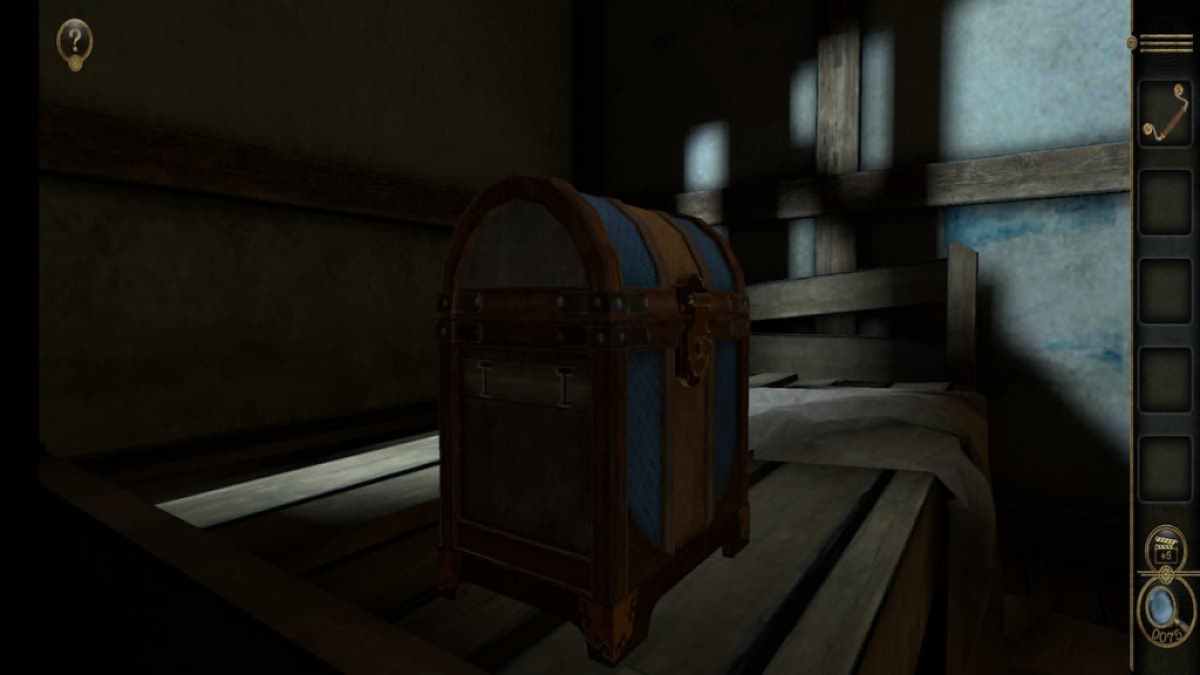
Walk over to the pectus on the bed .
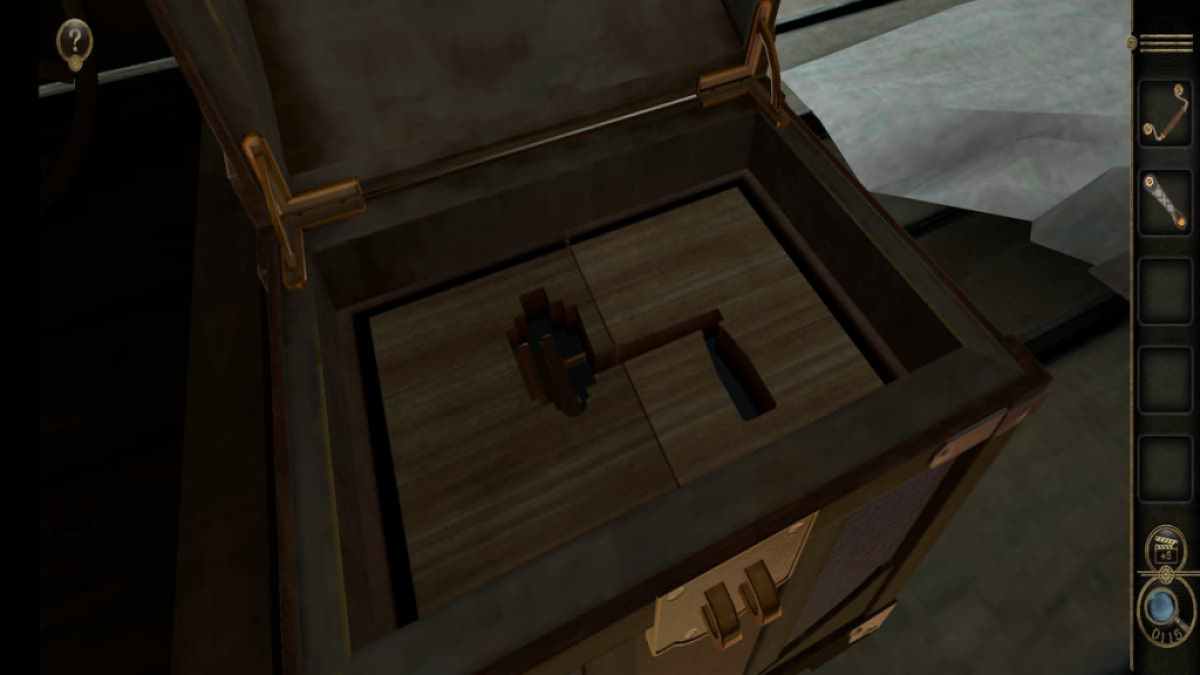
elevate both the door latch and the palpebra to open up the chest .
Inside you ’ll find a Crank Lever .
Screenshot by Pro Game Guides
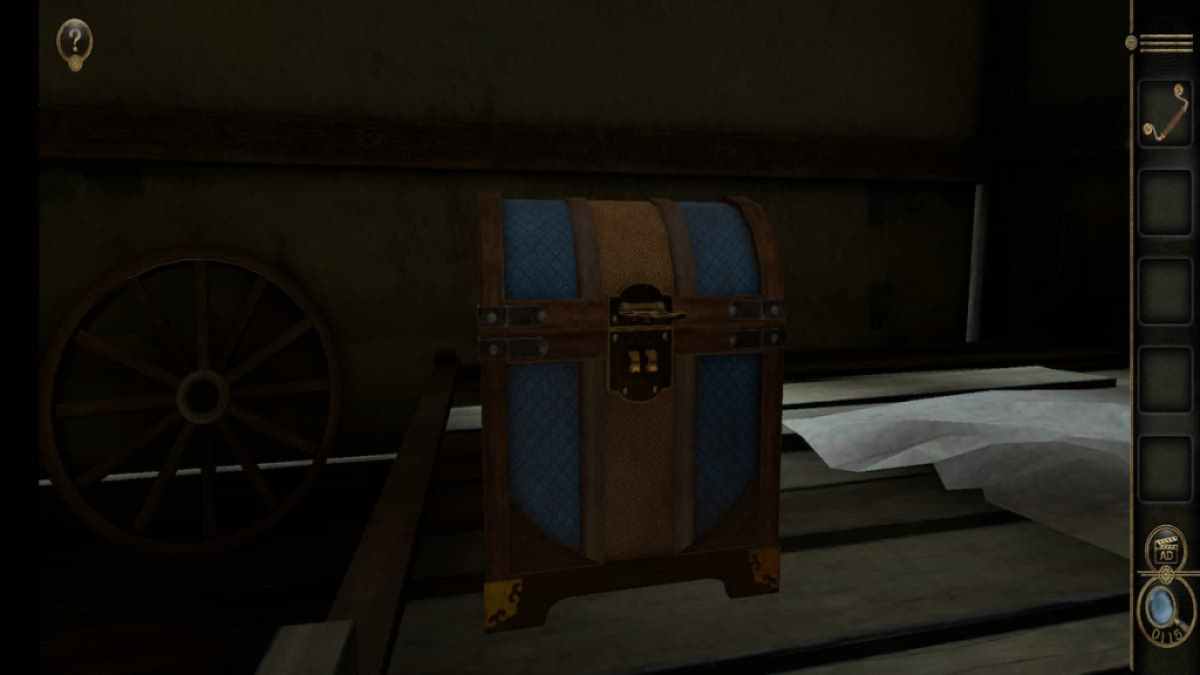
turn out the tv camera to look at the right side of the chest . You ’ll see a grip , which can be pulled down .
If you inspect the other side of the chest , you ’ll note an empty spot where the handle should be .
Place the Handle on it and slip it down . Doing this will give you a Lighthouse Model .
Screenshot by Pro Game Guides
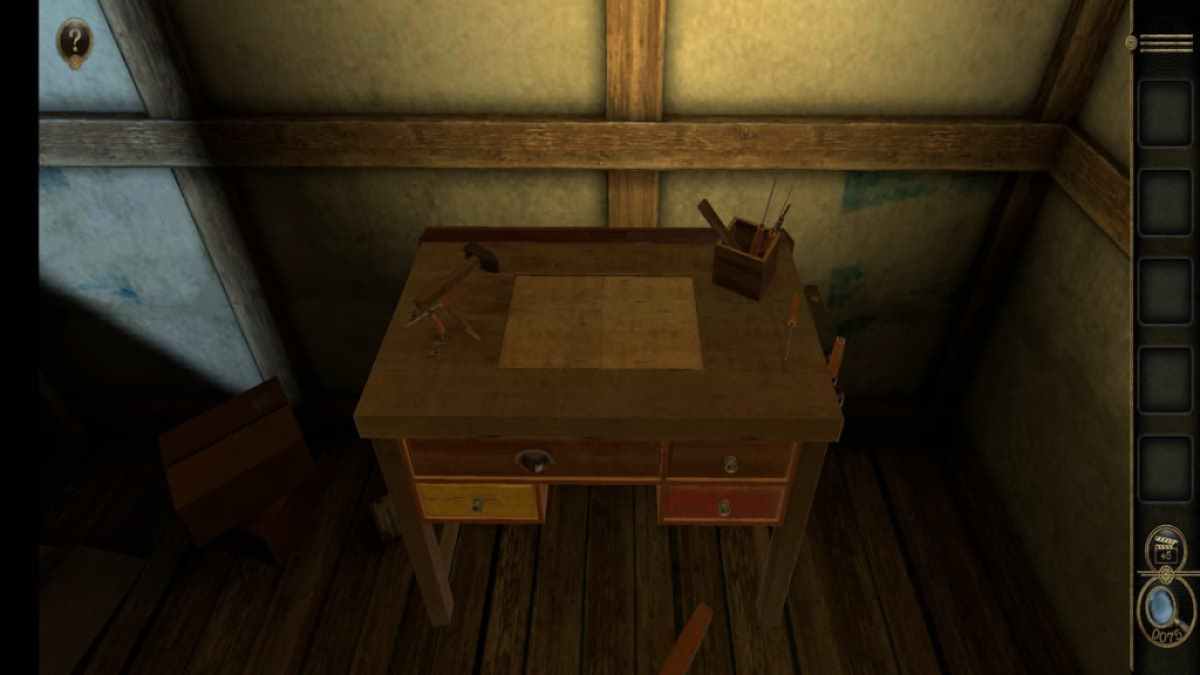
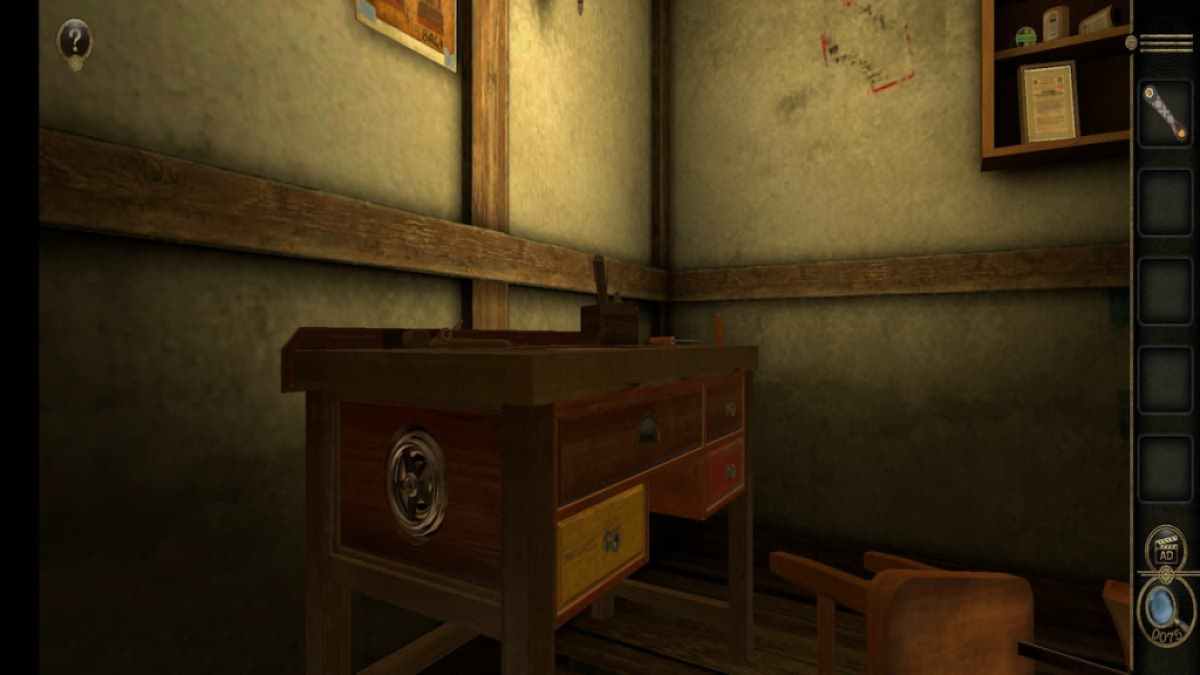
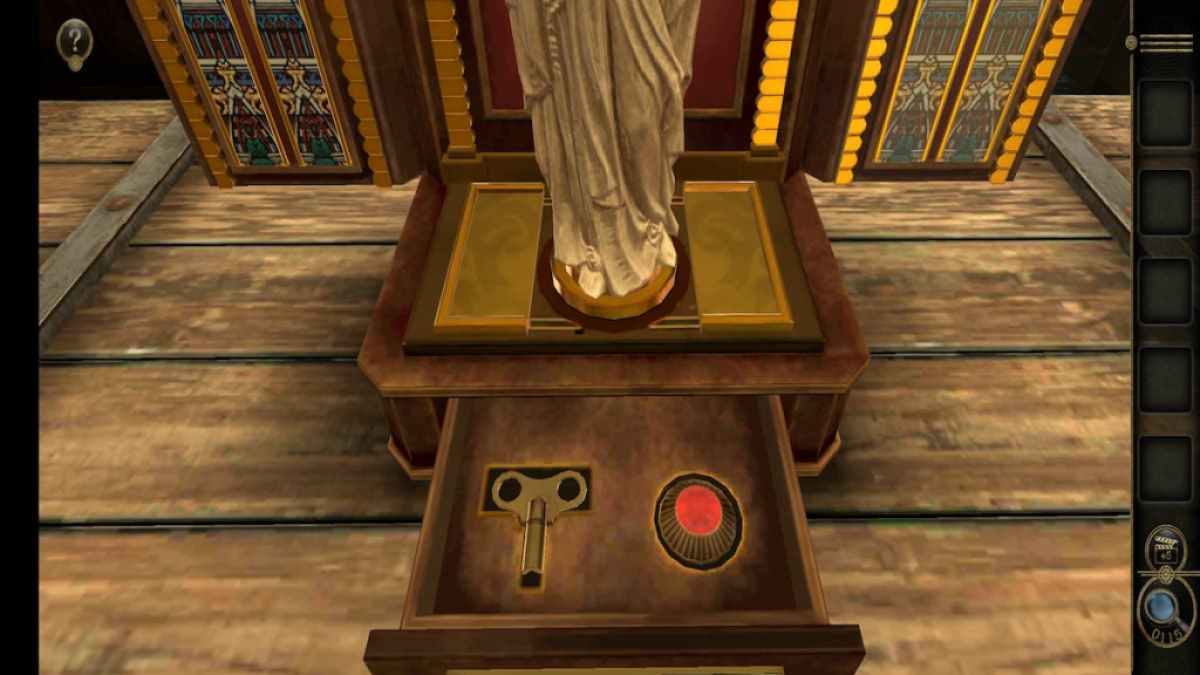
Bedroom desk puzzles
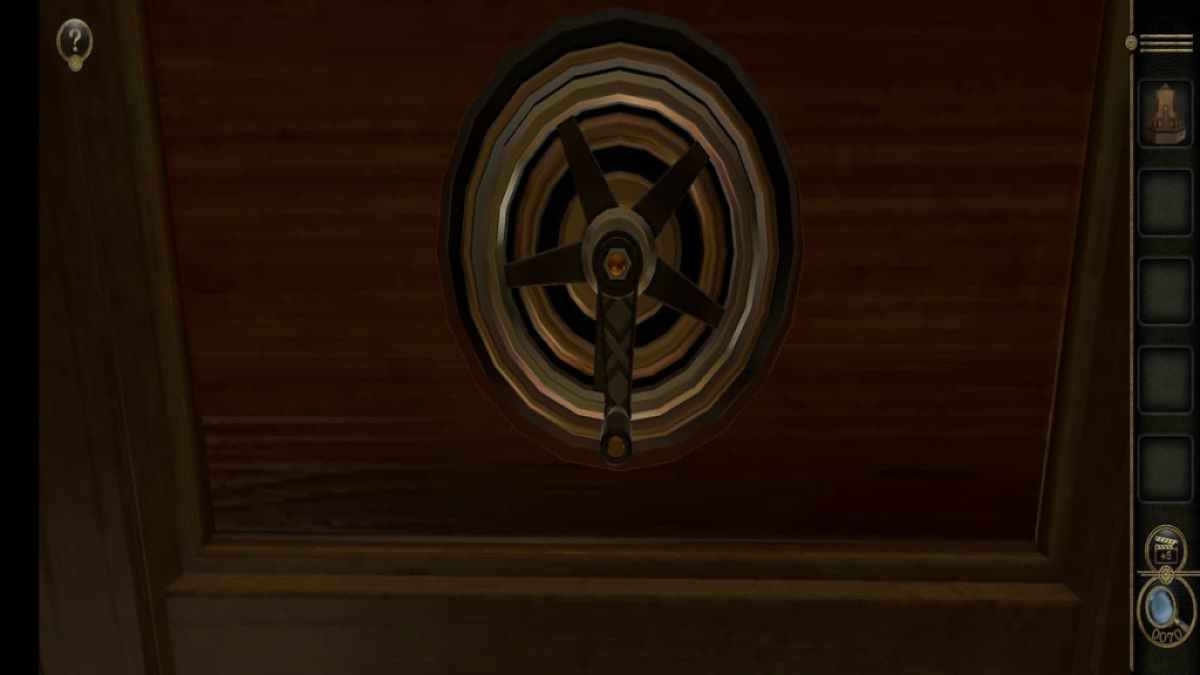
deliver to the desk . Inspecting it will break an interesting circle on its leftover side .
Place the Crank Handle on the inwardness of the circle and turn out it .
nibble up the Statue that has appear on top of the desk .
Screenshot by Pro Game Guides
After taking the Statue off of the desk , the top of it will modify to look like this .
Related : How to beat Must Escape the Haunted House
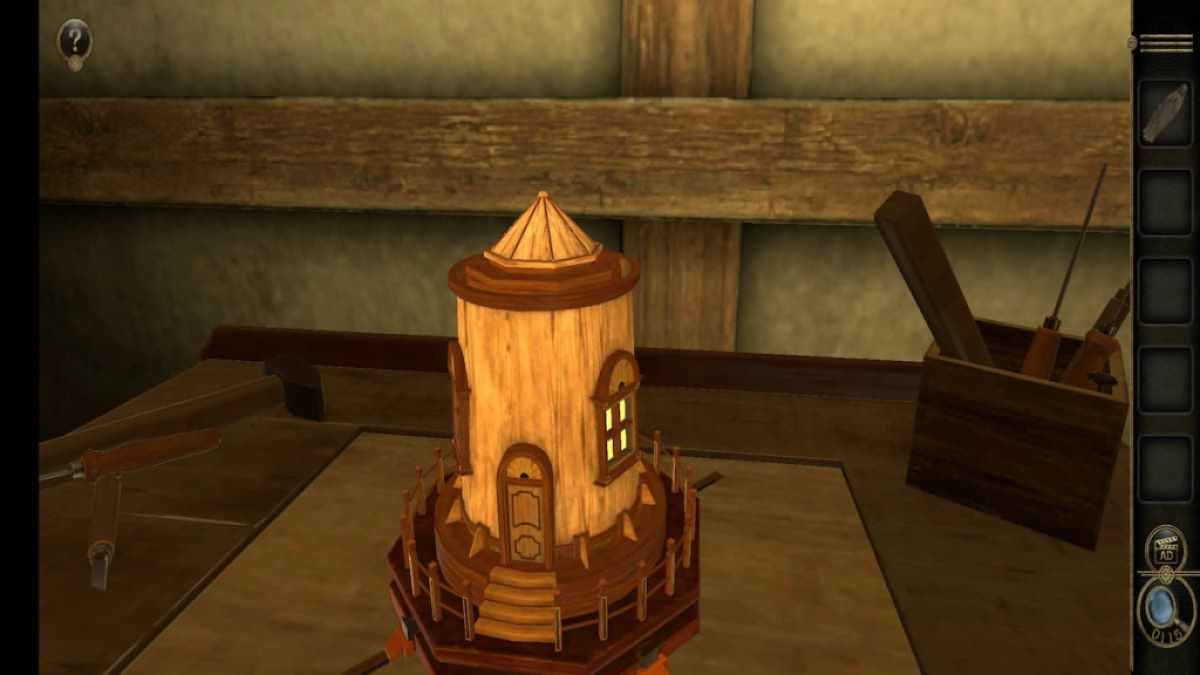
Place the Lighthouse Model on top of the desk .
Screenshot by Pro Game Guides
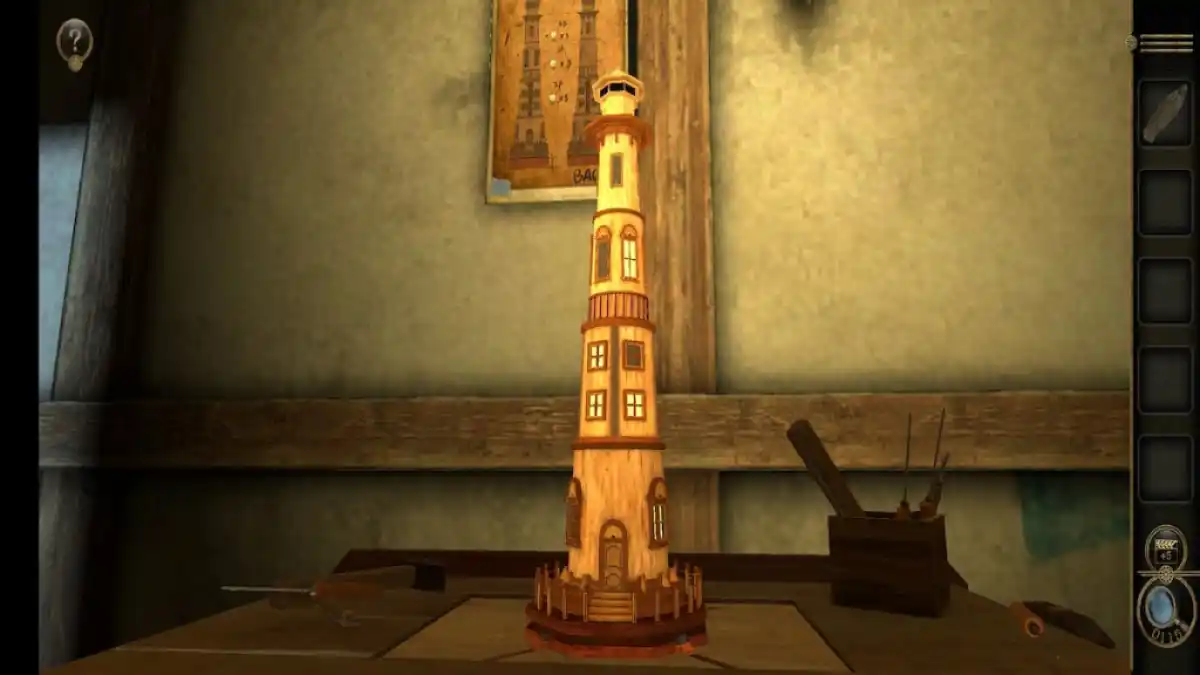
In this puzzle , you need to pay attention to the card behind the lighthouse . The numbers in the center tell you how many windows require to be get down up in all three sections . Mine ask for 5 illuminate windows on the 2d floor , 3 ignite windows on the third story , and 3 lit windows on the fourth floor .
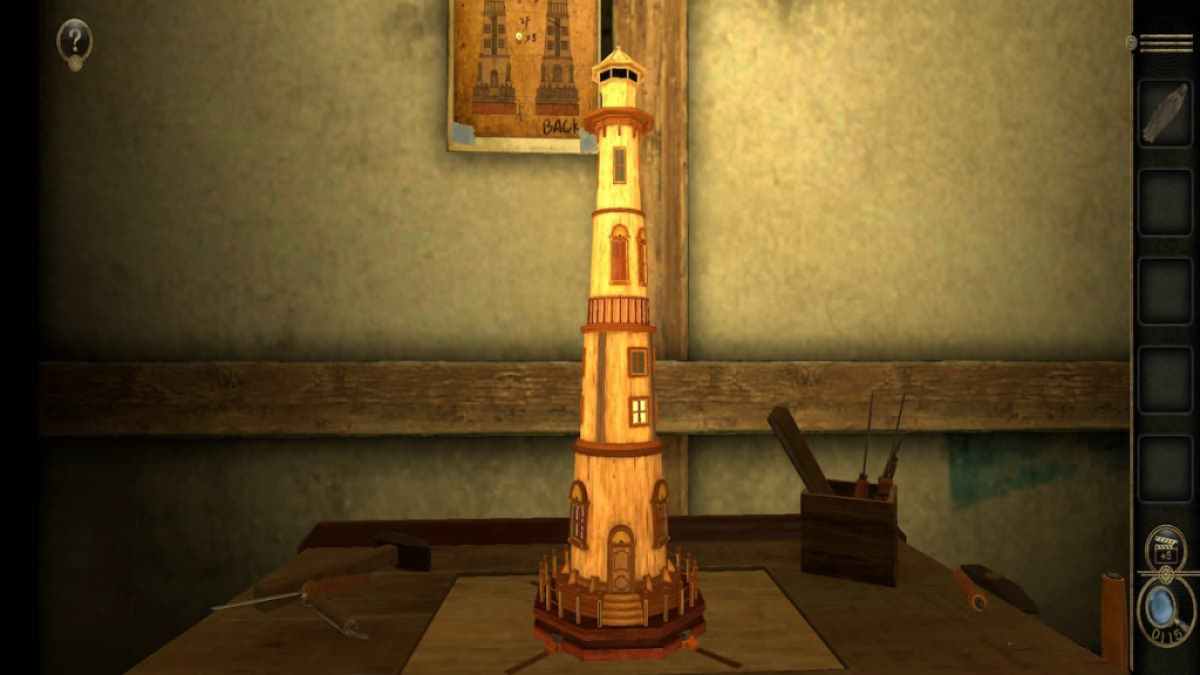
Each plane section can be rotated fully . The lights in each window change as they are rotate , so you need to go over them carefully by rotate your photographic camera around the entire section .
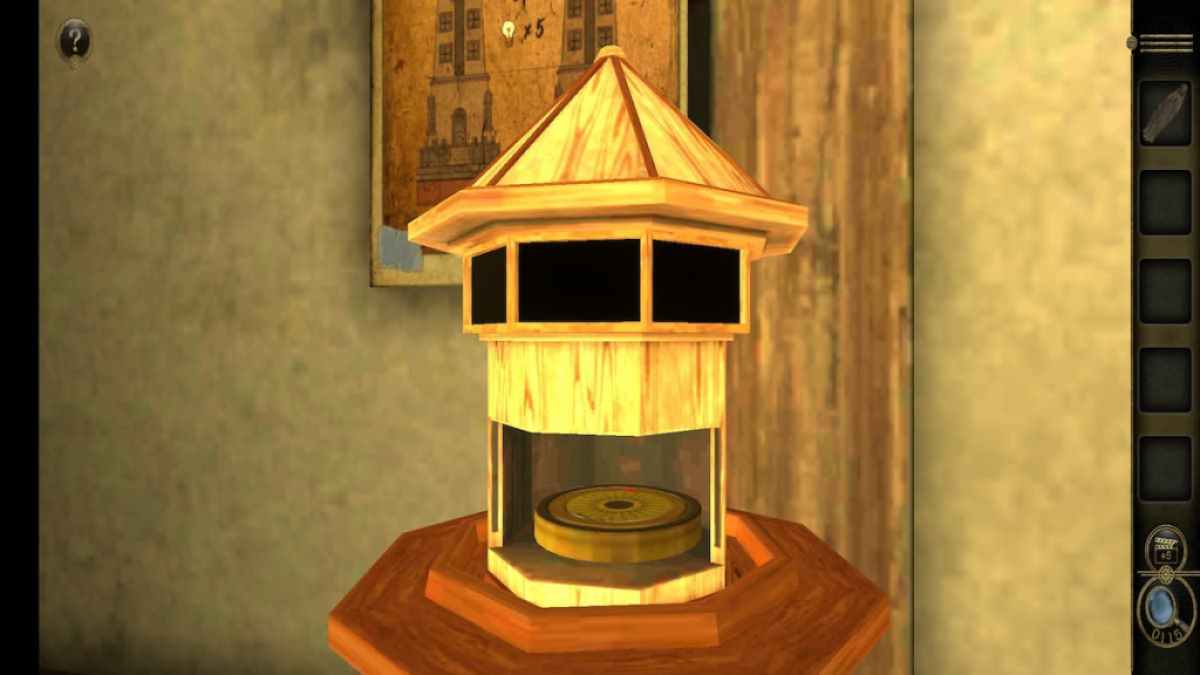
Once each floor has the right number of window , a compartment will give at the top of the lighthouse to give you a Metal Disc . you may now return to the shop since every puzzle in this room has been completed .
Screenshot by Pro Game Guides
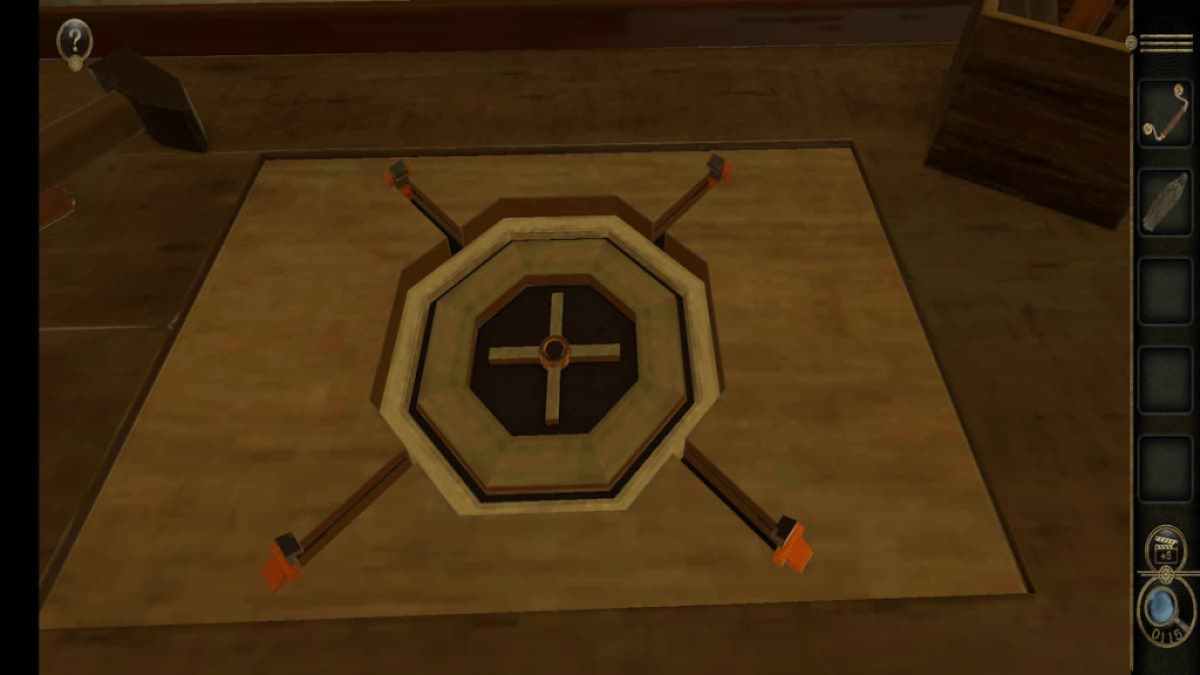
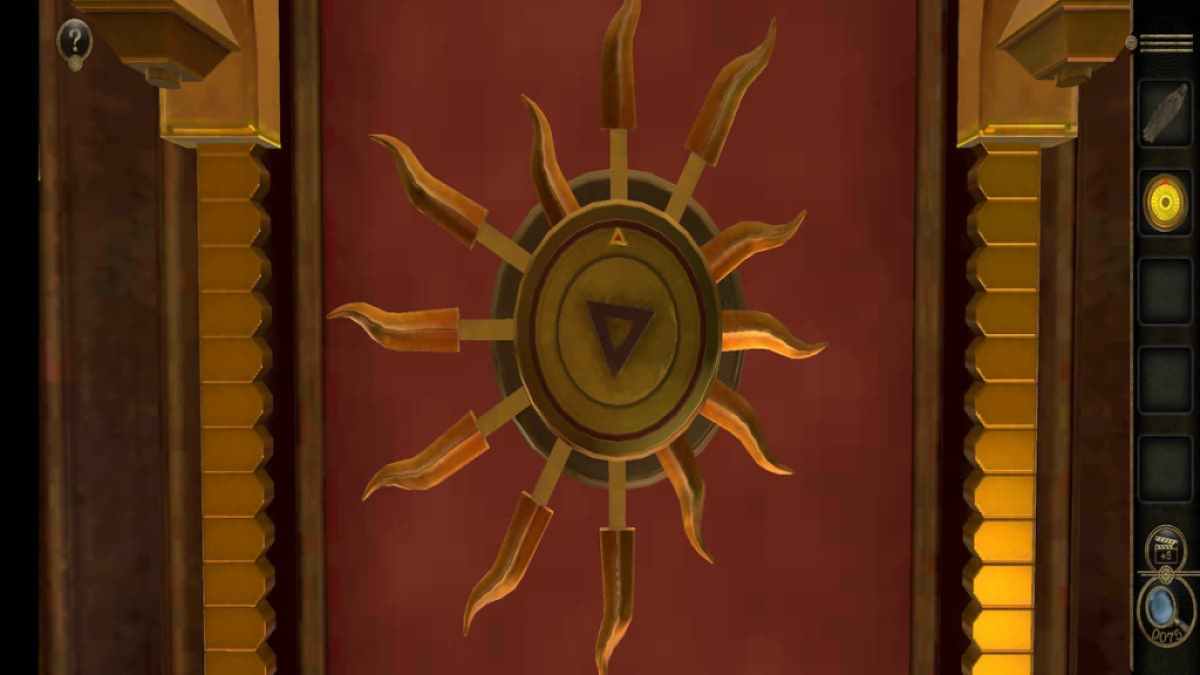
Church sun puzzle
To finish the church , you ’ll need to place the Metal Disc on the sun in the center .
You ’ll postulate to rotate the disc until all of the Dominicus ’s ray are compact tightly against the center of the sunshine . This will cause a footstall to open up at the bottom of the church .
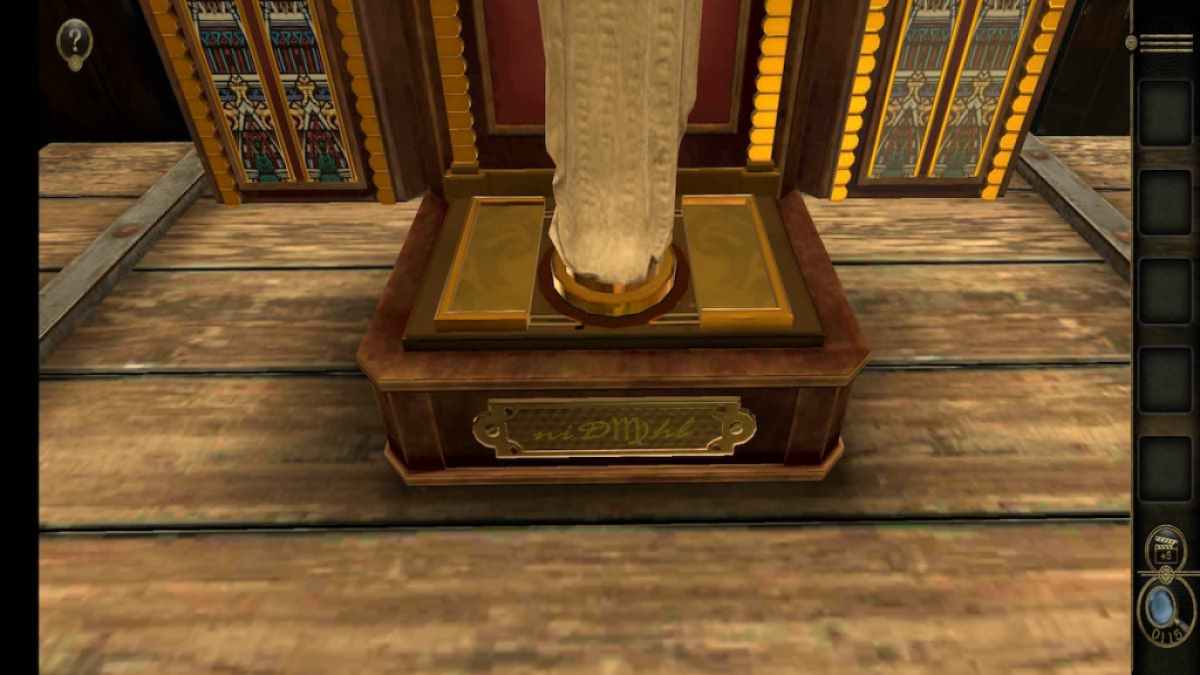
Church statue puzzle
The Statue can be placed on this stand .
Rotate the Statue to face the front to receive a Small Spring and a Gemstone Slider .
Music stand puzzles
After doing the statue , head up over to the music place upright to take on the abandoned puzzle from before .
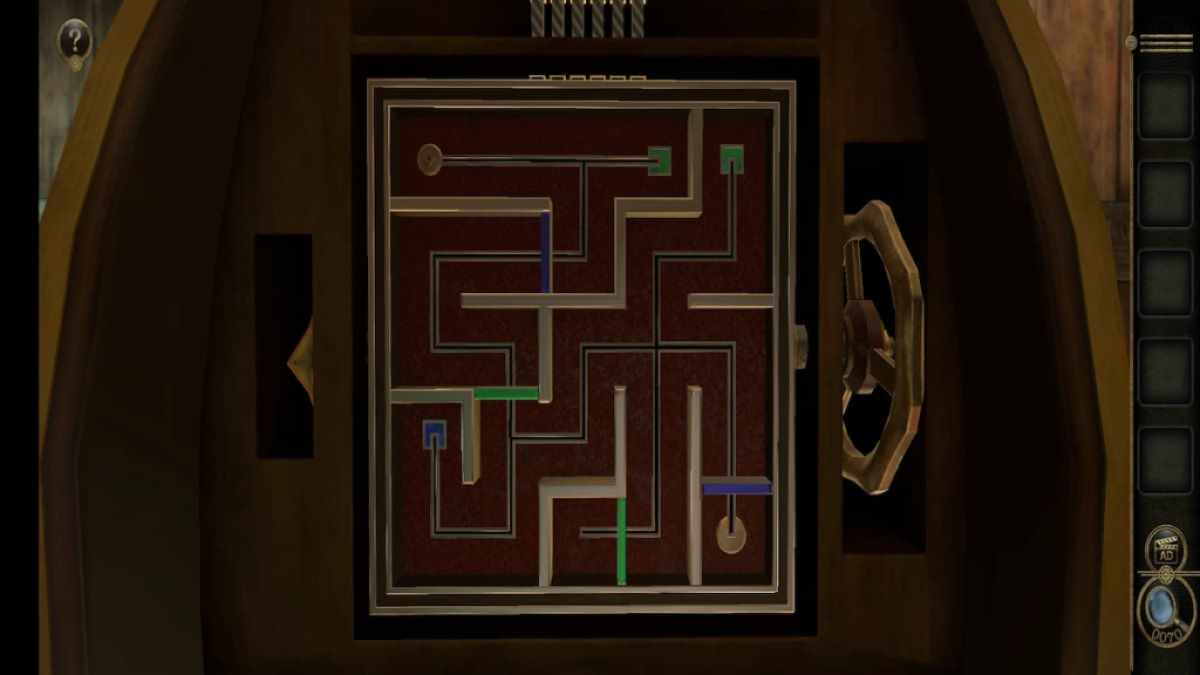
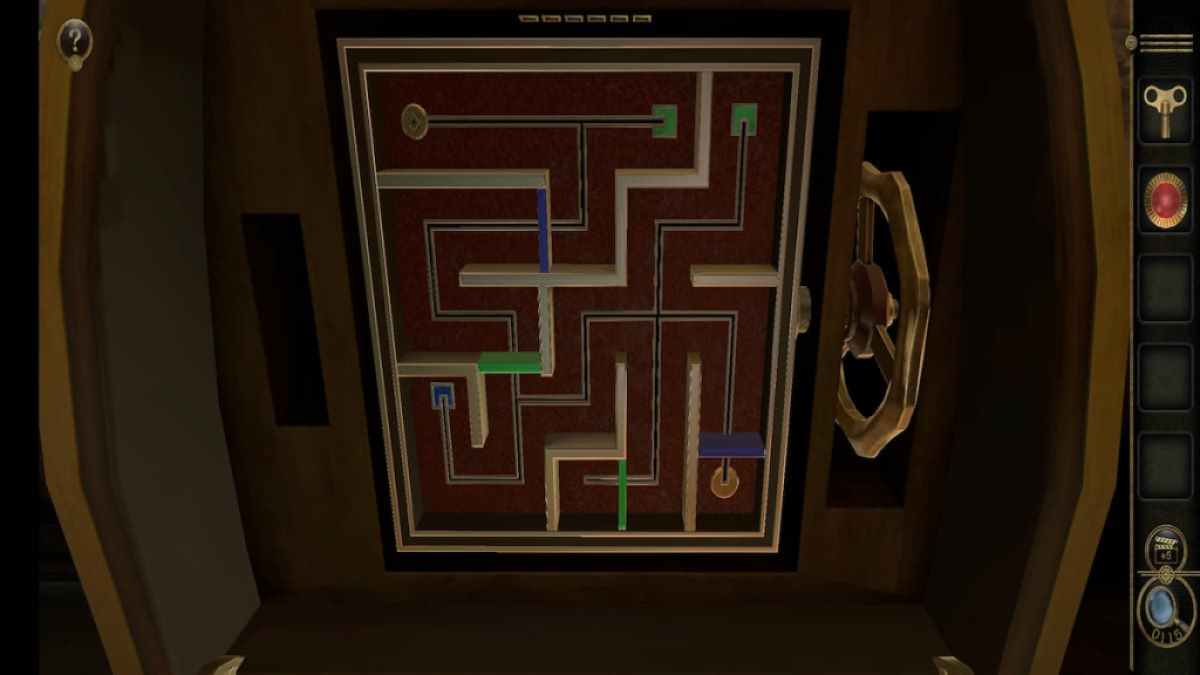
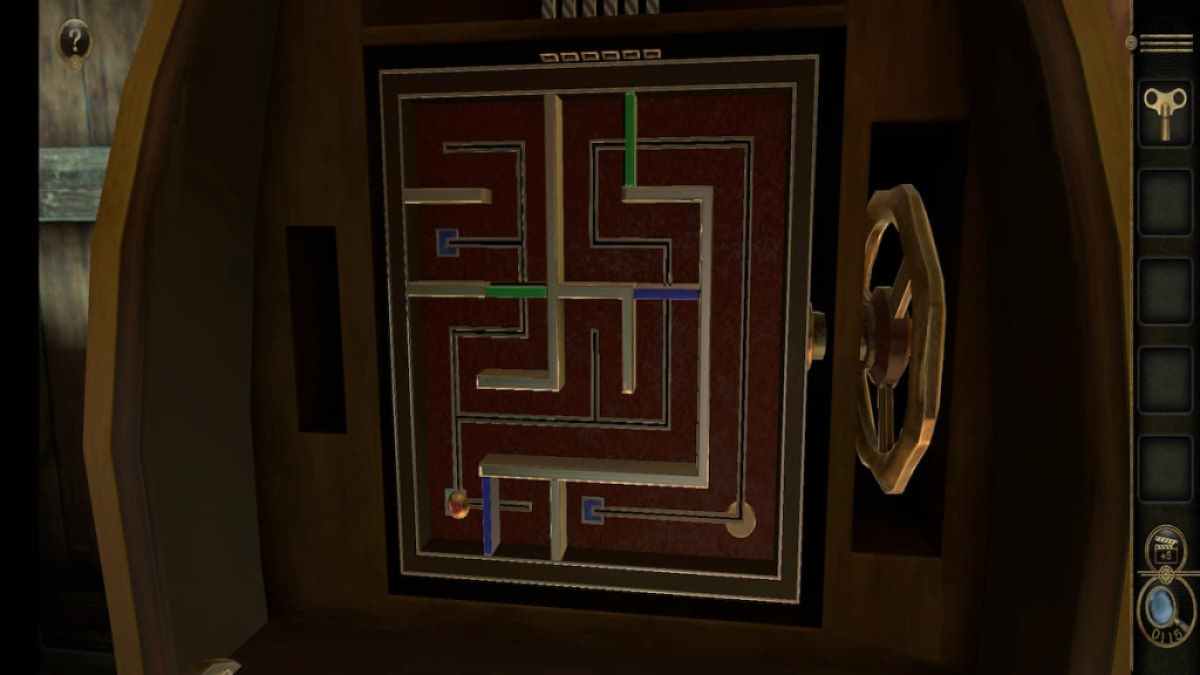
In this puzzle , place a slider onto a green or blue square will both murder roadblock of that color and add one or two more . It ’s a double - sided puzzle , so you ’ll take to take turns move the front and back sliders together to solve it .
set the Gemstone Slider in the top left of the puzzle .
Screenshot by Pro Game Guides
Move the slider over to the green box .
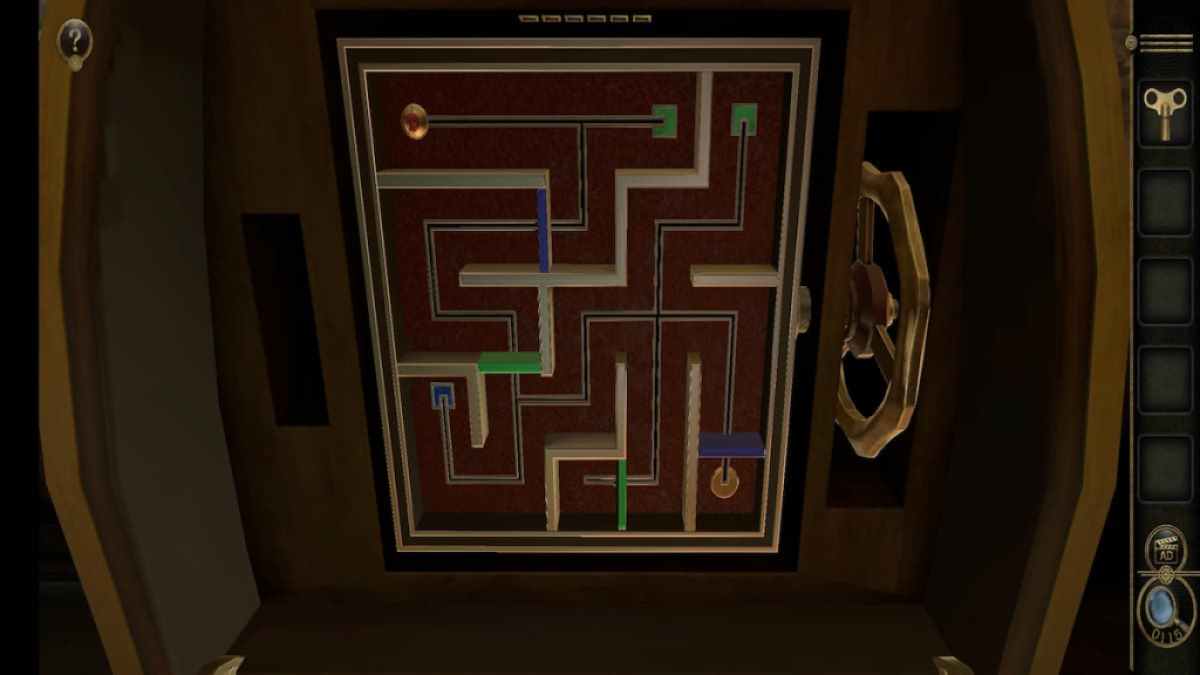
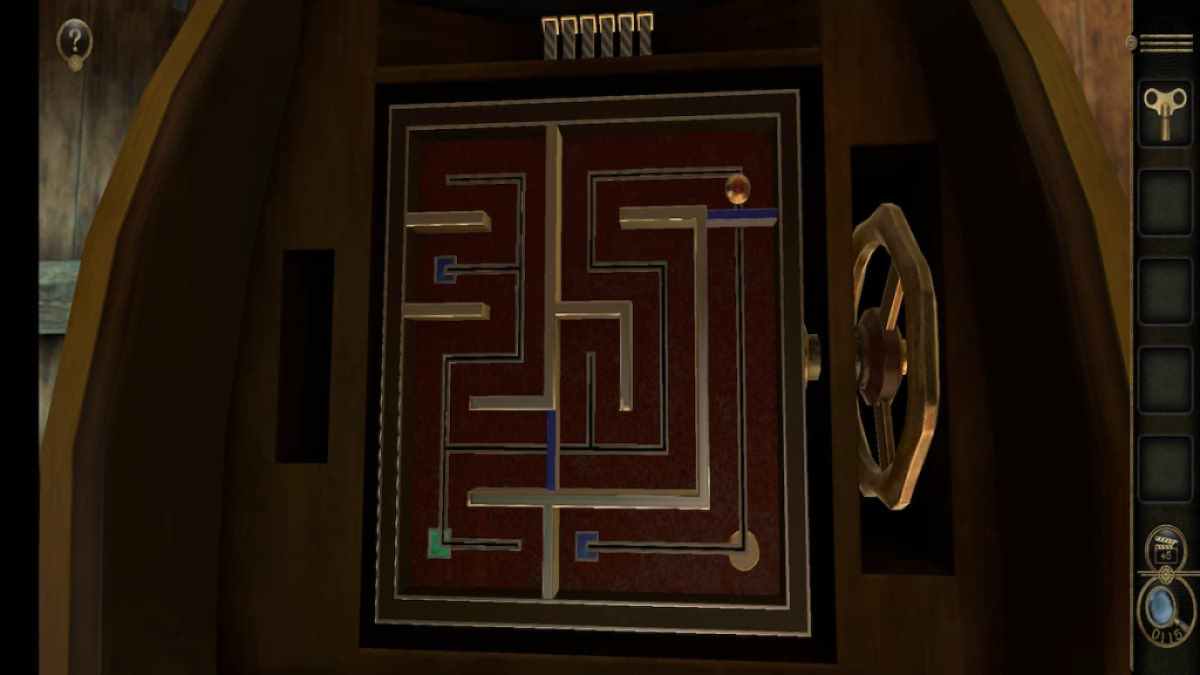
flick the board over to let out the other side . drive this yellow-bellied terrapin onto the blue square beneath it .
Return to the front slide and press the slider to the immature barrier .
Screenshot by Pro Game Guides
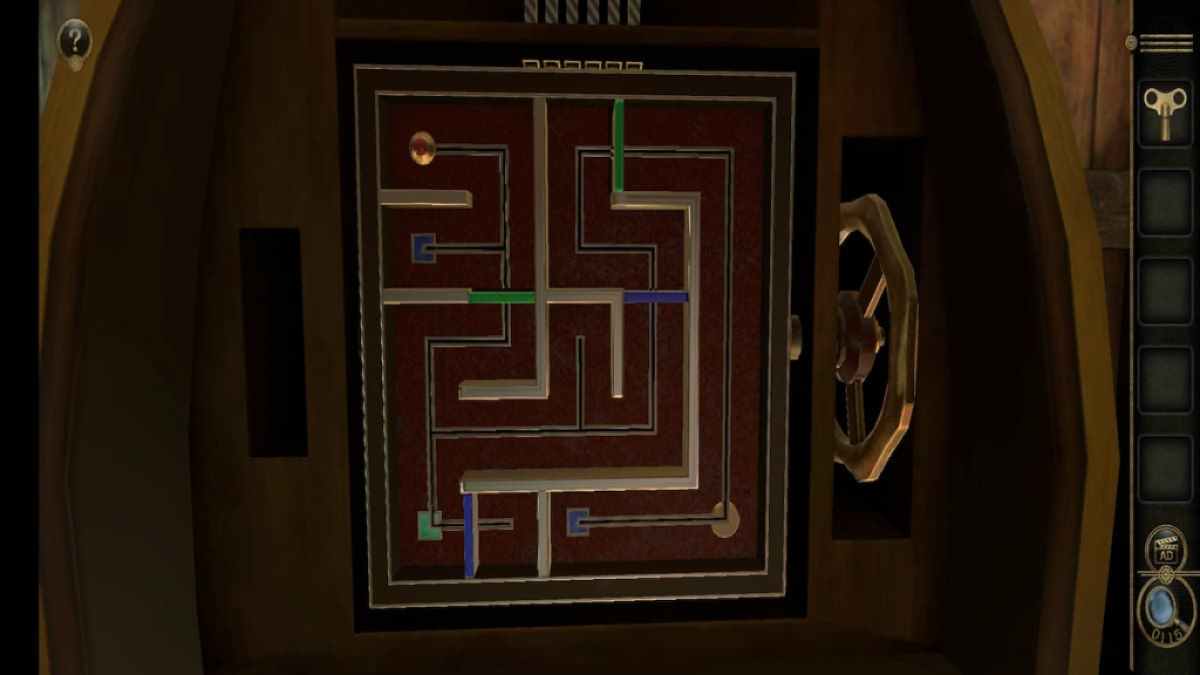
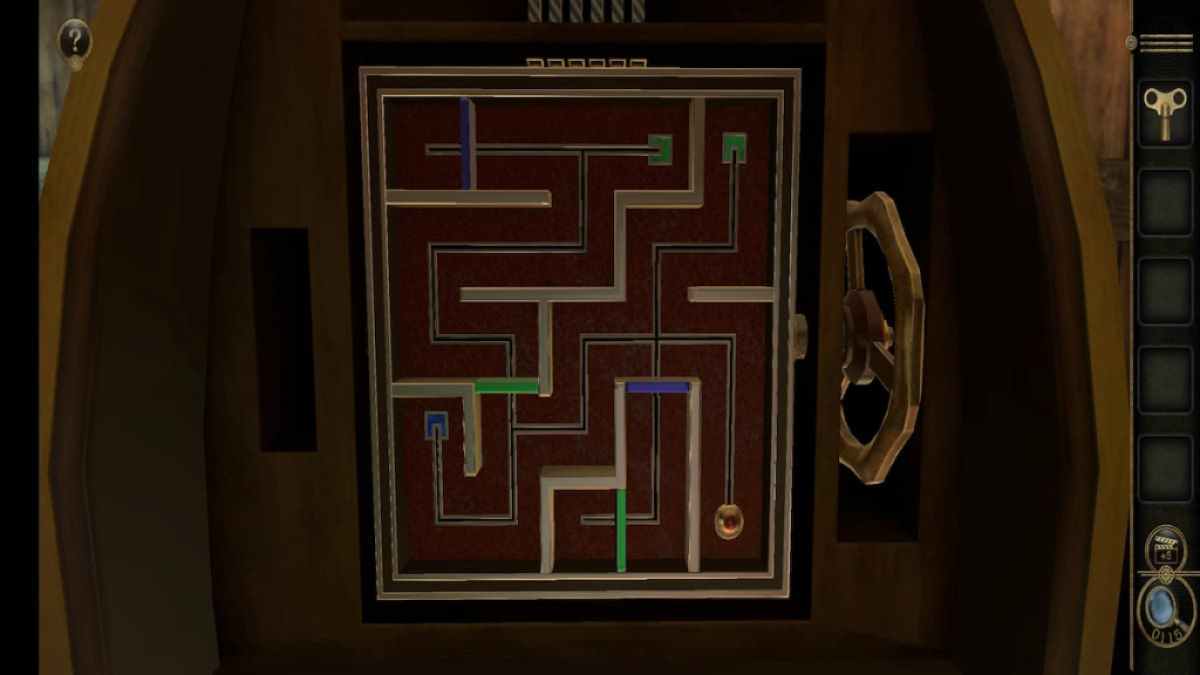
Flip the mystifier to move the back Pseudemys scripta onto the green square in the bottom right .
On the front side , push the luger to the section beneath the dark lame . On the back side , crusade the skidder up to the blue-blooded barrier in the center - right .
Push the front slider onto the blue square so that the back slipper can pass by the barrier .
Screenshot by Pro Game Guides
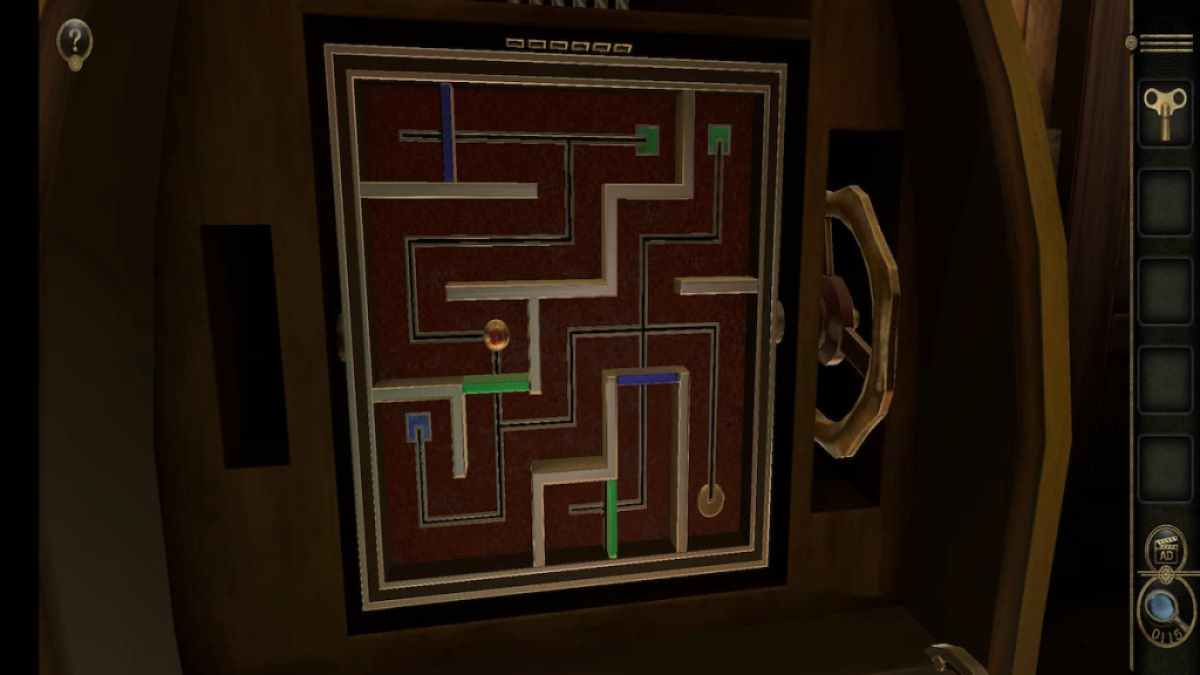
advertize the back slider up to the grim barrier at the top correct corner .
Push the front yellow-bellied terrapin onto the forget me drug in the bottom correct turning point .
Now push the back slider to the circle in the bottom right recess . This will unlock the final puzzle , the medicine boxful .
Screenshot by Pro Game Guides
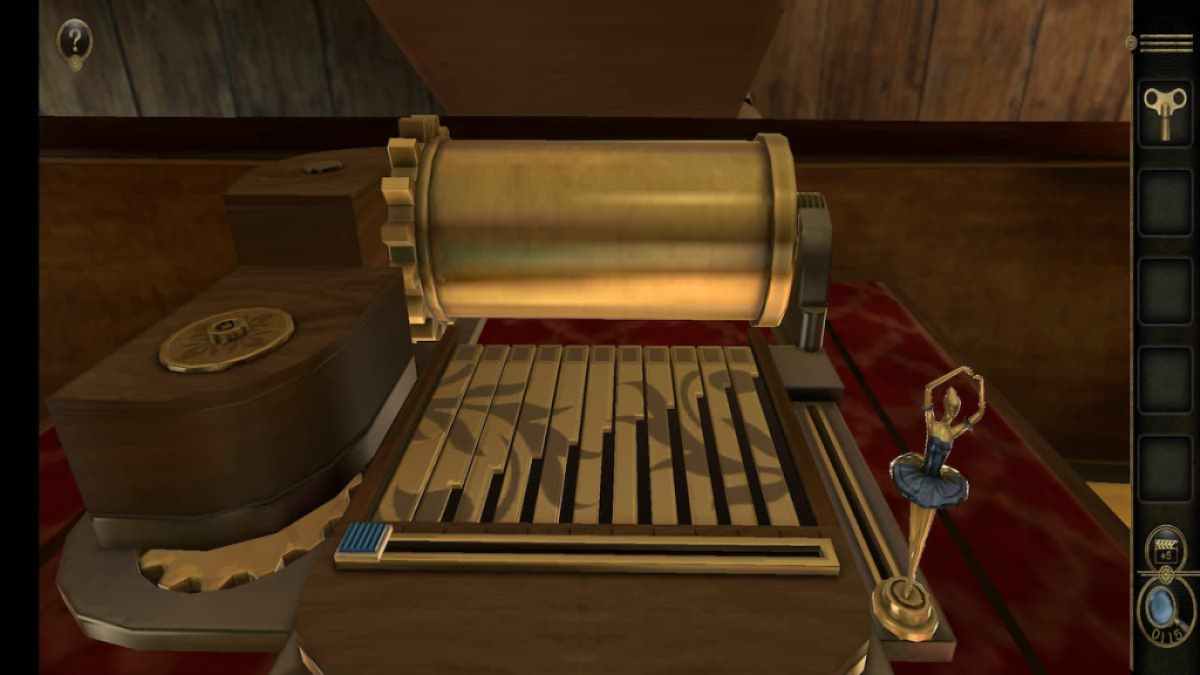
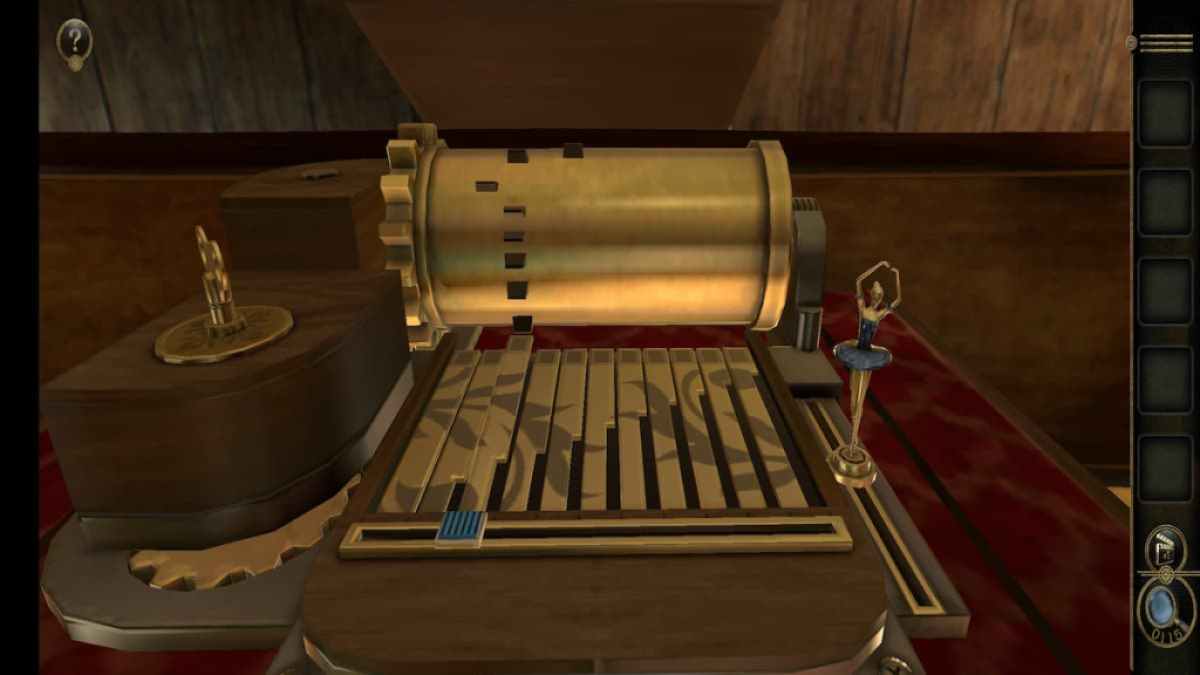
inspect the music boxwood will show you that there is a quad on the left . Place the Small Spring on it and circumvolve it to start the medicine box .
The goal of the mystifier is to get the ballerina to the remnant of the wrangle she ’s on . First , take banknote of the ridgeline on the foresighted atomic number 79 cylinder . You need to move the slider to lift the key below these ridges to make note . In the example below , there are five ridge above the third note so I place the slider onto it to make music .
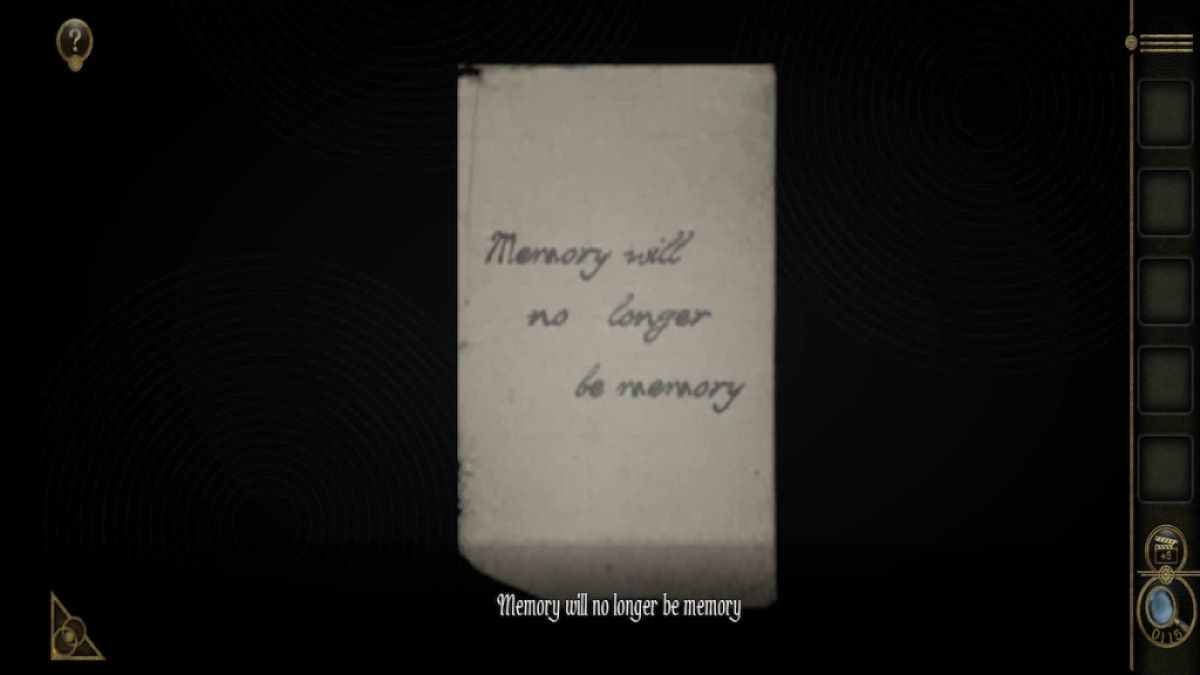
Getting the ballerina to the end will give you the last cue of chapter 2 .
Screenshot by Pro Game Guides
For more enigma escape room game , check out ourRoom Escape Strange Case Walkthroughhere on Pro Game Guides .

Screenshot by Pro Game Guides
Screenshot by Pro Game Guides
Screenshot by Pro Game Guides
Screenshot by Pro Game Guides
Screenshot by Pro Game Guides
Screenshot by Pro Game Guides
Screenshot by Pro Game Guides

Screenshot by Pro Game Guides
Screenshot by Pro Game Guides
Screenshot by Pro Game Guides
Screenshot by Pro Game Guides
Screenshot by Pro Game Guides
Screenshot by Pro Game Guides

Screenshot by Pro Game Guides
Screenshot by Pro Game Guides

Screenshot by Pro Game Guides
Screenshot by Pro Game Guides
Screenshot by Pro Game Guides

Screenshot by Pro Game Guides
Screenshot by Pro Game Guides
Screenshot by Pro Game Guides
Screenshot by Pro Game Guides

Screenshot by Pro Game Guides
Screenshot by Pro Game Guides
Screenshot by Pro Game Guides
Screenshot by Pro Game Guides
Screenshot by Pro Game Guides

Screenshot by Pro Game Guides
Screenshot by Pro Game Guides
Screenshot by Pro Game Guides
Screenshot by Pro Game Guides
Screenshot by Pro Game Guides
Screenshot by Pro Game Guides
Screenshot by Pro Game Guides
Screenshot by Pro Game Guides
Screenshot by Pro Game Guides

Screenshot by Pro Game Guides
Screenshot by Pro Game Guides

Screenshot by Pro Game Guides
Screenshot by Pro Game Guides
Screenshot by Pro Game Guides
Screenshot by Pro Game Guides
Screenshot by Pro Game Guides
Screenshot by Pro Game Guides
Screenshot by Pro Game Guides
Screenshot by Pro Game Guides

Screenshot by Pro Game Guides
Screenshot by Pro Game Guides
Screenshot by Pro Game Guides
Screenshot by Pro Game Guides
Screenshot by Pro Game Guides

Screenshot by Pro Game Guides
Screenshot by Pro Game Guides
Screenshot by Pro Game Guides
Screenshot by Pro Game Guides
Screenshot by Pro Game Guides
Screenshot by Pro Game Guides
Screenshot by Pro Game Guides
Screenshot by Pro Game Guides
Screenshot by Pro Game Guides
Screenshot by Pro Game Guides
Screenshot by Pro Game Guides
Screenshot by Pro Game Guides

Screenshot by Pro Game Guides
Screenshot by Pro Game Guides
Screenshot by Pro Game Guides
Screenshot by Pro Game Guides

Screenshot by Pro Game Guides

Screenshot by Pro Game Guides
Screenshot by Pro Game Guides
Screenshot by Pro Game Guides

Screenshot by Pro Game Guides
Screenshot by Pro Game Guides
Screenshot by Pro Game Guides
Screenshot by Pro Game Guides
